Embed Size (px)
Citation preview
Audio Check1. Wait for the support person to call your name
2. Say “Hello”. To talk, either: Click the TALK button on the screen, OR Press CTRL+F2 (COMMAND+F2 for MAC) Click TALK or press the keys again when done
speaking
3. Click the check button on the top of the screen
to put up a green check.
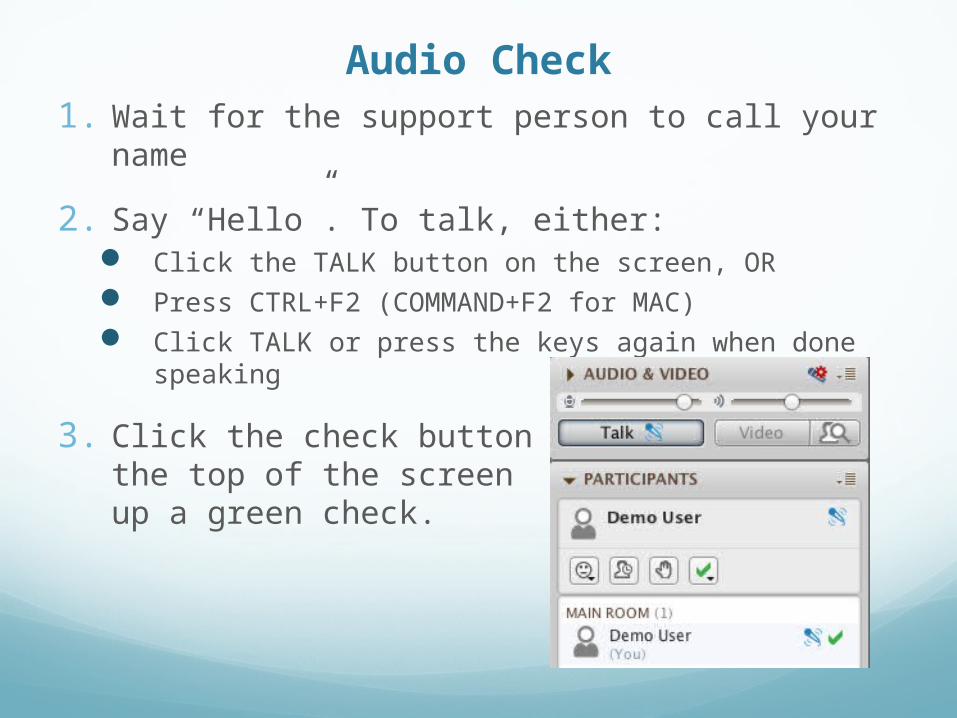
Welcome to Blackboard Collaborate!
In this orientation session you will learn:
How to install and enter Blackboard Collaborate (BbC)
Basic features of the BbC Interface
Communicating in class
Getting Help
Student Orientation updated 3/2/15

Entering from BlackboardMake sure to read all of the material on the
Blackboard Collaborate Wiki (the Student Page) to make the most of your online sessions. Access by clicking on “Read this First”.
Click on the room associated with your course.
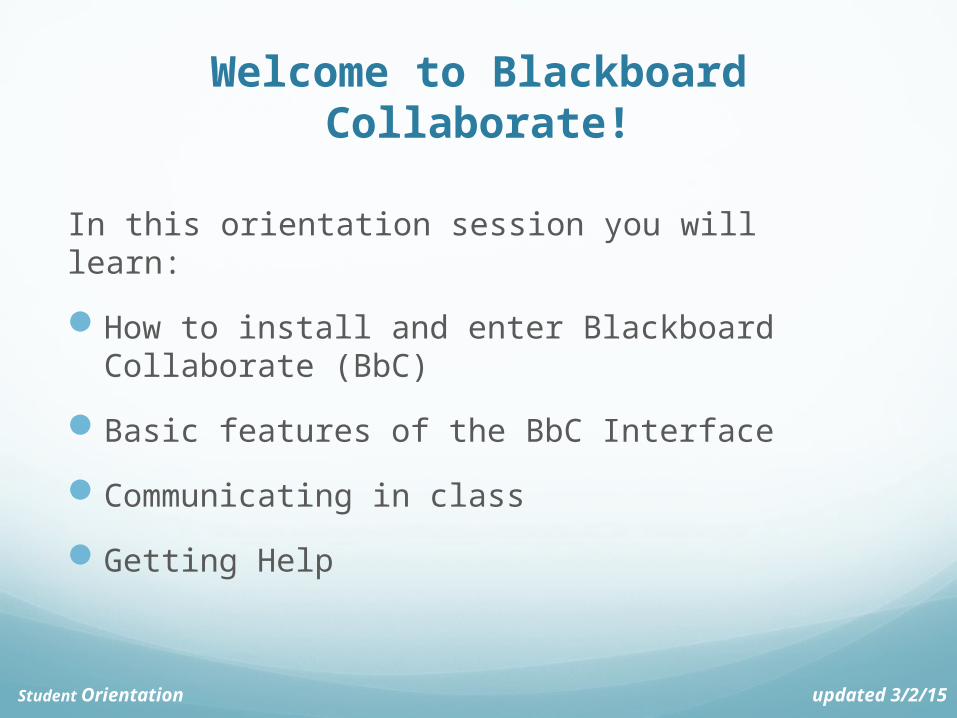
Install Blackboard Collaborate If this is the first time you are running Blackboard
Collaborate (BbC), click “Download the Blackboard Collaborate Launcher”.
You will find the file in your “Downloads” Directory.
Double-Click the file to install Blackboard Collaborate.
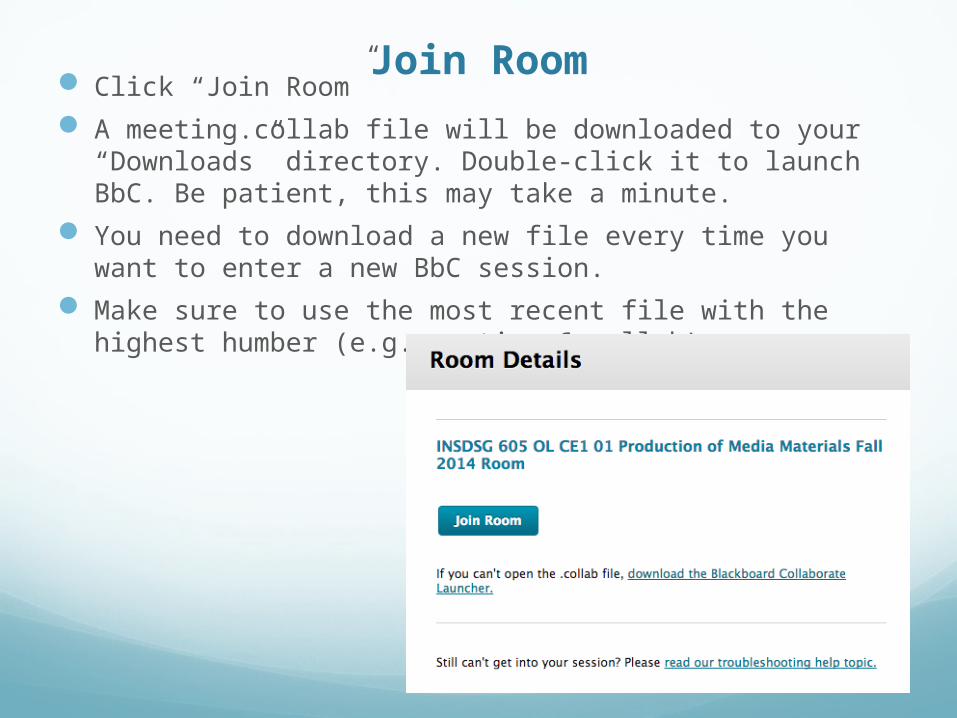
Join Room Click “Join Room”
A meeting.collab file will be downloaded to your “Downloads” directory. Double-click it to launch BbC. Be patient, this may take a minute.
You need to download a new file every time you want to enter a new BbC session.
Make sure to use the most recent file with the highest humber (e.g. meeting-6.collab).
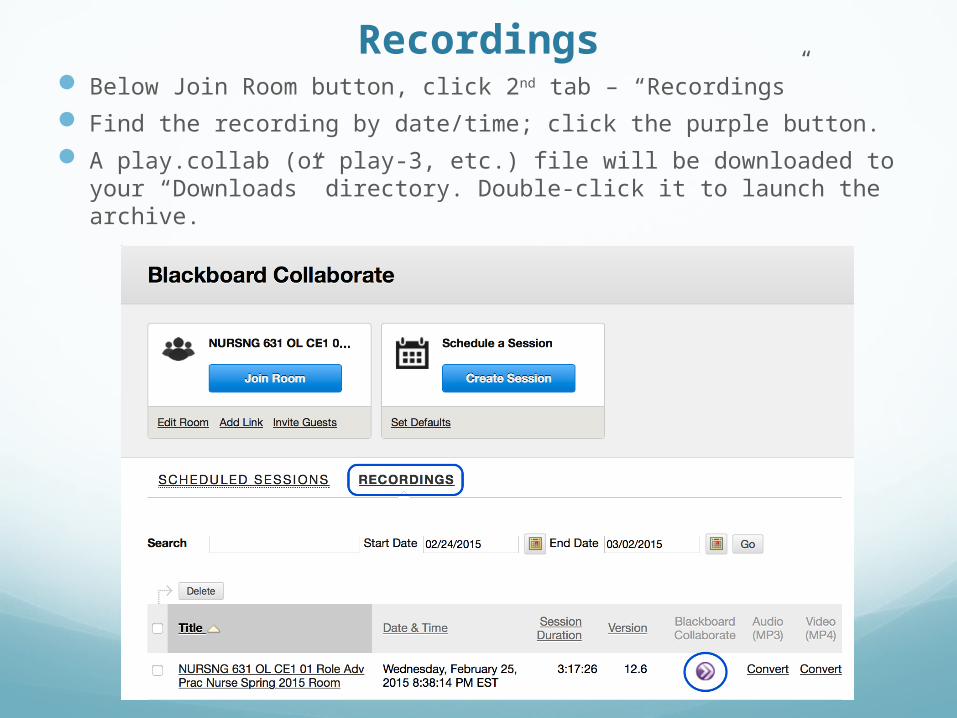
Recordings Below Join Room button, click 2nd tab – “Recordings”
Find the recording by date/time; click the purple button.
A play.collab (or play-3, etc.) file will be downloaded to your “Downloads” directory. Double-click it to launch the archive.
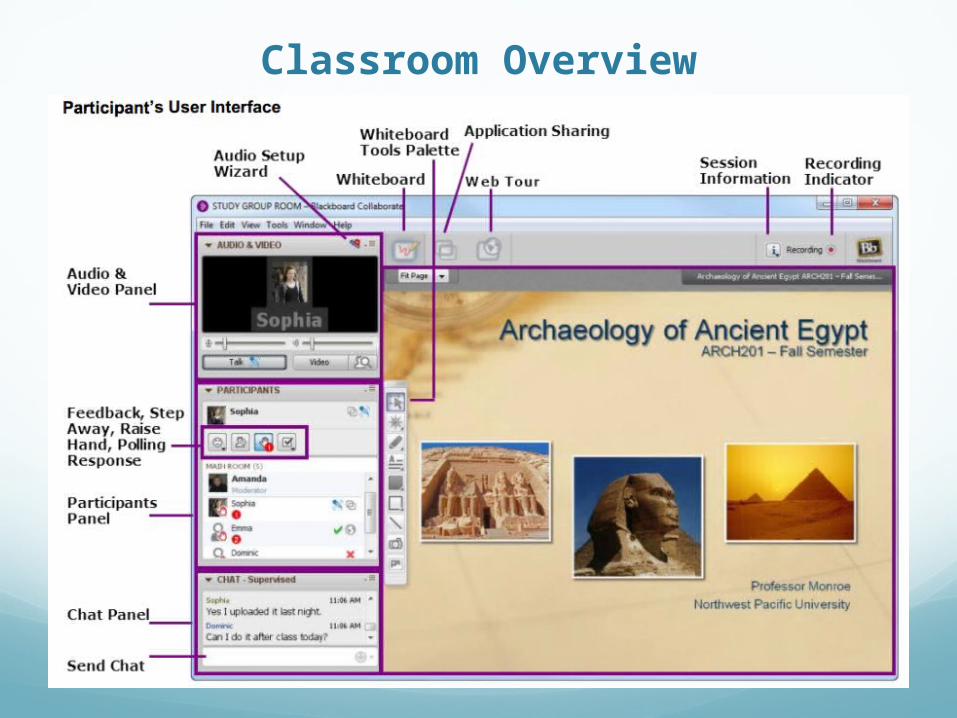
Classroom Overview
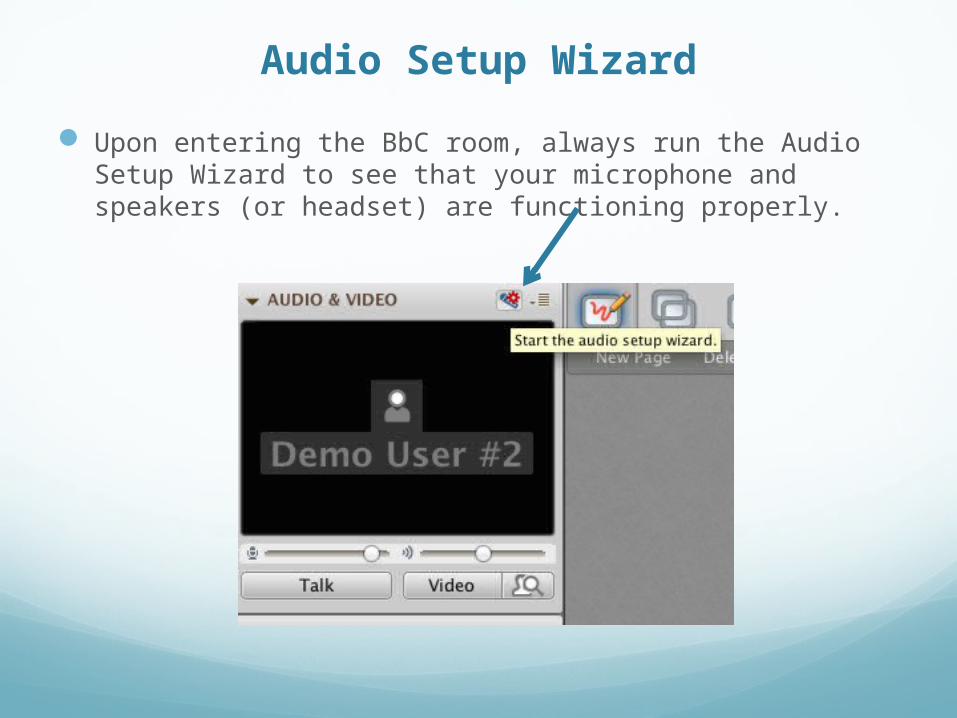
Audio Setup Wizard
Upon entering the BbC room, always run the Audio Setup Wizard to see that your microphone and speakers (or headset) are functioning properly.
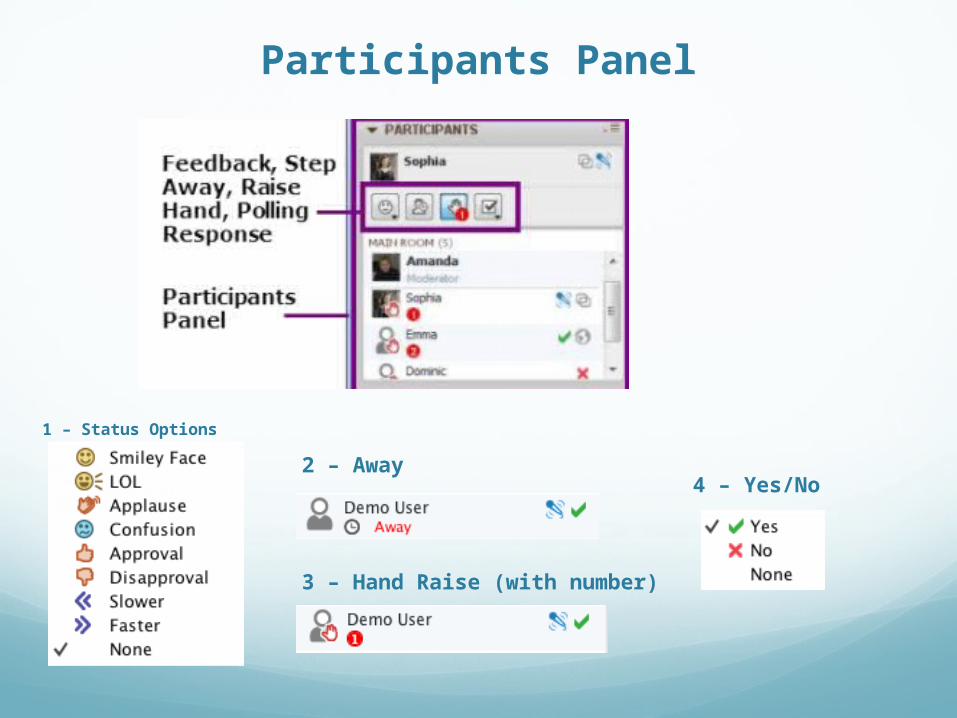
Participants Panel
1 – Status Options
2 – Away
3 – Hand Raise (with number)
4 – Yes/No
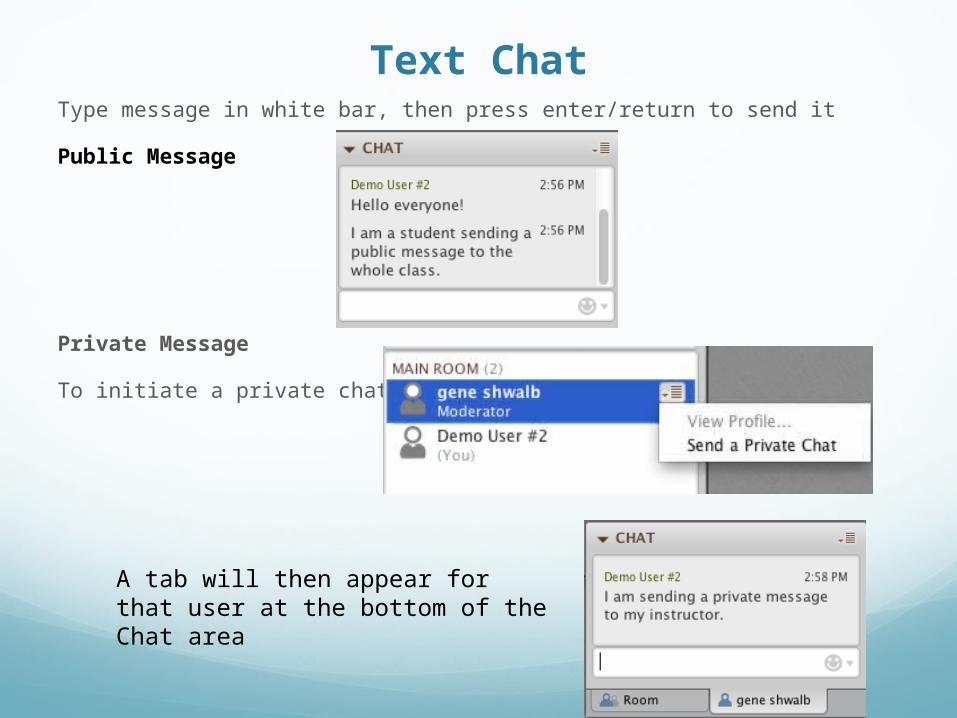
Text ChatType message in white bar, then press enter/return to send it
Public Message
Private Message
To initiate a private chat:
A tab will then appear for that user at the bottom of the Chat area

Talking
• Click the Talk button with your mouse to enable the microphone when it is your turn to speak.
• Click it again when you are done speaking.
• You can also press CTRL-F2 to turn mic on and off.
• Do not leave your Talk button down when you are done speaking.
• Use the sliders to adjust volume level for both mic
and speakers
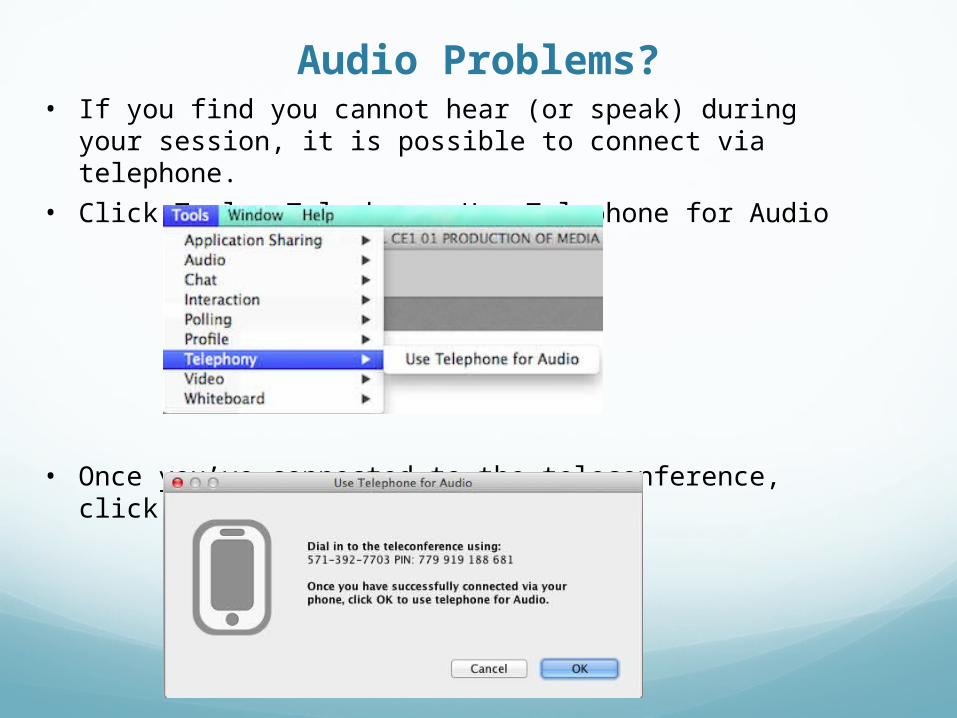
Audio Problems?• If you find you cannot hear (or speak) during your
session, it is possible to connect via telephone. • Click Tools, Telephony, Use Telephone for Audio
• Once you’ve connected to the teleconference, click OK.
Recommendations
• Arrive 10-15 minutes before class• Do audio mic check before going away
• Connect wired instead of wireless
• Master basic troubleshooting • Try to exit and re-enter the room
• Try a different browser (have 2 or 3 installed)
• Call in for audio if having problems (don’t wait)
• Check for current version of Java, clear Java cache
• Basic “etiquette”• Talking – don’t leave TALK pressed when you’re not speaking
• Status – clear status of checks, hands, etc. promptly
• Phoning – wait until called on, mute phone if not talking
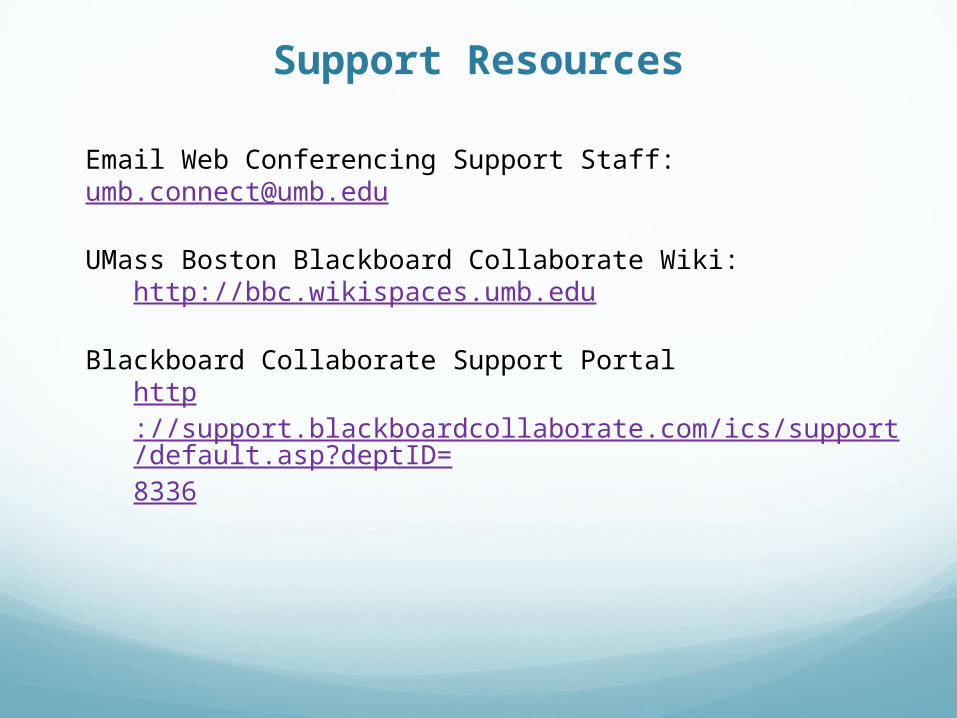
Support Resources
Email Web Conferencing Support Staff: [email protected]
UMass Boston Blackboard Collaborate Wiki:http://bbc.wikispaces.umb.edu
Blackboard Collaborate Support Portalhttp://support.blackboardcollaborate.com/ics/support/default.asp?deptID=8336