Embed Size (px)
Citation preview
Atollic TrueSTUDIO® for ARM®
Quick Start Guide Installation Guide
Document Data
ii | P a g e
COPYRIGHT © Copyright 2009-2018 STMicroelectronics. All rights reserved. No part of this document may be reproduced or distributed without prior written consent of STMicroelectronics. The software product described in this document is furnished under a license and may only be used, or copied, according to the license terms.
TRADEMARKS
Atollic, Atollic TrueSTUDIO, Atollic TrueSTORE and the Atollic logotype are trademarks, or registered trademarks, owned by STMicroelectronics. ARM, ARM7, ARM9 and Cortex are trademarks, or registered trademarks, of ARM Limited. ECLIPSE is a registered trademark of the Eclipse foundation. Microsoft, Windows, Word, Excel and PowerPoint are registered trademarks of Microsoft Corporation. Adobe and Acrobat are registered trademarks of Adobe Systems Incorporated. All other product names are trademarks, or registered trademarks, of their respective owners.
DISCLAIMER
The information in this document is subject to change without notice and does not represent a commitment of STMicroelectronics. The information contained in this document is assumed to be accurate, but STMicroelectronics assumes no responsibility for any errors or omissions. In no event shall STMicroelectronics, its employees, its contractors, or the authors of this document be liable for any type of damage, losses, costs, charges, claims, demands, claim for lost profits, fees, or expenses of any nature or kind.
DOCUMENT IDENTIFICATION
TS-IG February 2010
REVISION HISTORY
24th December 2017 – Updated for Atollic TrueSTUDIO for STM32 v9.0.0
STMicroelectronics Software AB Science Park Gjuterigatan 7 SE- 553 18 Jönköping Sweden
Email: [email protected] Web: www.atollic.com
STMicroelectronics
Web: www.st.com
Table of Contents
iii | P a g e
Contents Introduction............................................................................. 6
Intended Readers ....................................................................................... 6
Document Conventions .............................................................................. 7
Section 1. Installation ............................................................ 8
Atollic TrueSTUDIO for STM32 ................................................................... 9
System Requirements............................................................................... 10
Microsoft® Windows® ..................................................................................... 10
Linux ................................................................................................................ 10
Hardware Requirements ................................................................................. 10
Important Information ............................................................................. 11
Product Installer .............................................................................................. 11
Installing from USB Memory ........................................................................... 11
Product Upgrades ........................................................................................... 12
Start Product in Other Language ..................................................................... 12
TrueSTUDIO Installation (Windows)......................................................... 13
TrueSTUDIO Installation (Linux) ............................................................... 20
List of Figures
iv | P a g e
Figures Figure 1 – Installer Language Dialog ............................................................ 13
Figure 2 – Installer Welcome Dialog ............................................................ 14
Figure 3 – License Agreement Dialog ........................................................... 14
Figure 4 – Selection of GDB Servers ............................................................. 15
Figure 5 – STMicroelectronics Device Driver Installation ............................ 15
Figure 6 – STMicroelectronics Device Driver Installation Complete............ 16
Figure 7 – Choose Installation Location ....................................................... 16
Figure 8 – Installing Dialog ........................................................................... 17
Figure 9 – Installation Complete .................................................................. 17
Figure 10 – File Association .......................................................................... 18
Figure 11 – Upgrade Information ................................................................. 19
Figure 12 – Finishing the Installation ........................................................... 19
List of Tables
v | P a g e
Tables Table 1 – Typographic Conventions ............................................................... 7
Introduction
6 | P a g e
INTRODUCTION Welcome to the Atollic® TrueSTUDIO® for STM32 Installation guide. The purpose of this document is to give directions on how to install the Atollic TrueSTUDIO product.
The Installation guide has been updated for Atollic TrueSTUDIO for STM32 v9.0.0.
INTENDED READERS This document is primarily intended for software developers or system administrators about to install the Atollic TrueSTUDIO product.
Please note that this manual applies to users of STM32 target devices only.
Introduction
7 | P a g e
DOCUMENT CONVENTIONS The text in this document is formatted to ease understanding and provide clear and structured information on the topics covered. The following typographic conventions apply:
Table 1 – Typographic Conventions
Style Use
Command Keyboard Command or Source Code Section.
Object Name Name of a User Interface Object (Menu, Menu Command, Button, Dialog Box, etc.) that appears on the computer screen.
Cross Reference Cross reference within the document, or to an external document.
Product Name Name of Atollic product.
Identifies instructions specific to the Graphical User Interface (GUI).
Identifies instructions specific to the Command Line Interface (CLI).
Identifies Help Tips and Hints.
Identifies a Caution.
Introduction
8 | P a g e
Section 1. INSTALLATION This section provides information on how to install Atollic TrueSTUDIO for STM32. The following topics are covered:
System Requirements
Important Information
Atollic TrueSTUDIO Installation (Windows)
Atollic TrueSTUDIO Installation (Linux)
Installation
9 | P a g e
ATOLLIC TRUESTUDIO FOR STM32 Atollic TrueSTUDIO for STM32 is available for both Microsoft Windows and Linux.
TrueSTUDIO has the following key features:
Built on Open Standards (Eclipse, CDT, GCC, and GDB)
Edit, Compile & Build (No code size limitation)
Project Management
o MCUs and Board support
o CMSIS-Pack project support
o Build/Memory Analyzer
o Stack Analyzer
o Bug Tracking
o Version Control
Debug
o Hard Fault Analyzer
o Live Variable Watch
o Trace (SWV, ETM, ETB, MTB)
o Statistical Profiling
o RTOS-aware Debug
o Multi Project Debug
Installation
10 | P a g e
SYSTEM REQUIREMENTS Atollic TrueSTUDIO has been tested and verified on the following Microsoft Windows and Linux versions.
MICROSOFT® WINDOWS® Microsoft® Windows® Vista (32-bit version)
Microsoft® Windows® Vista (64-bit version)
Microsoft® Windows® 7 (32-bit version)
Microsoft® Windows® 7 (64-bit version)
Microsoft® Windows® 8 (64-bit version)
Microsoft® Windows® 10 (64-bit version)
LINUX 64-bit distribution with 32-bit C runtime libraries installed
SysV compatible Linux system
Atollic TrueSTUDIO for Linux is only available as a 64-bit application and is supported on the following distributions:
Ubuntu 16.04 LTS 64-bit (using Unity or Gnome 3 as recommended desktop)
Fedora 25 64-bit (using Xfce4 as recommended desktop)
HARDWARE REQUIREMENTS The following Hardware Requirements apply:
2 GB RAM minimum and 4 GB RAM recommended
4 GB of free hard disk space
Installation
11 | P a g e
IMPORTANT INFORMATION This section contains important information on installing the product.
PRODUCT INSTALLER The latest version of the Atollic TrueSTUDIO installer can be downloaded from the Atollic web-site www.atollic.com
INSTALLING FROM USB MEMORY Atollic does not recommend launching the Atollic TrueSTUDIO installer directly from a USB memory. Instead, please copy the executable installation file from the USB memory to the local hard disk drive of the computer. Please execute the installation from the hard disk drive.
If Installation from USB memory is still preferred, please make sure that the USB memory is not write-protected. Please also make sure that there is at least 6 GB of free memory, beyond the space the space occupied by installation executable. The extra space is required for temporary files during the installation.
Please do not remove the USB memory from the computer until the installation process is completely finished, as this will make the installation fail.
Installation
12 | P a g e
PRODUCT UPGRADES New versions of the product can be installed in parallel with older versions.
START PRODUCT IN OTHER LANGUAGE When a non-English language has been used to install Atollic TrueSTUDIO the product can run using the selected language or English. Start Atollic TrueSTUDIO from command line using following options:
English TrueSTUDIO.exe -nl en Japanese TrueSTUDIO.exe -nl ja Korean TrueSTUDIO.exe -nl ko Simplified Chinese TrueSTUDIO.exe -nl zh
It can be convenient in this case to make a shortcut to start Atollic TrueSTUDIO in the preferred language.
Installation
13 | P a g e
TRUESTUDIO INSTALLATION (WINDOWS) This section describes how to install the Atollic TrueSTUDIO product on Microsoft Windows. The product installer will install the Atollic TrueSTUDIO product.
The Atollic TrueSTUDIO product is delivered as an executable installer. Please ensure that the user account, from which the installer is launched, has administrative privileges.
1. Launch the product installer (.exe-file) E.g TrueSTUDIO_for_ARM_windows_x86_vX.Y.Z_YYYYMMDD-HHSS
2. During the installation process, Microsoft® Windows® may display a dialog, “Do you want to allow this app to make changes to your device” with info “Verified publisher: Atollic AB”. Please accept (“YES”) to let the installer continue.
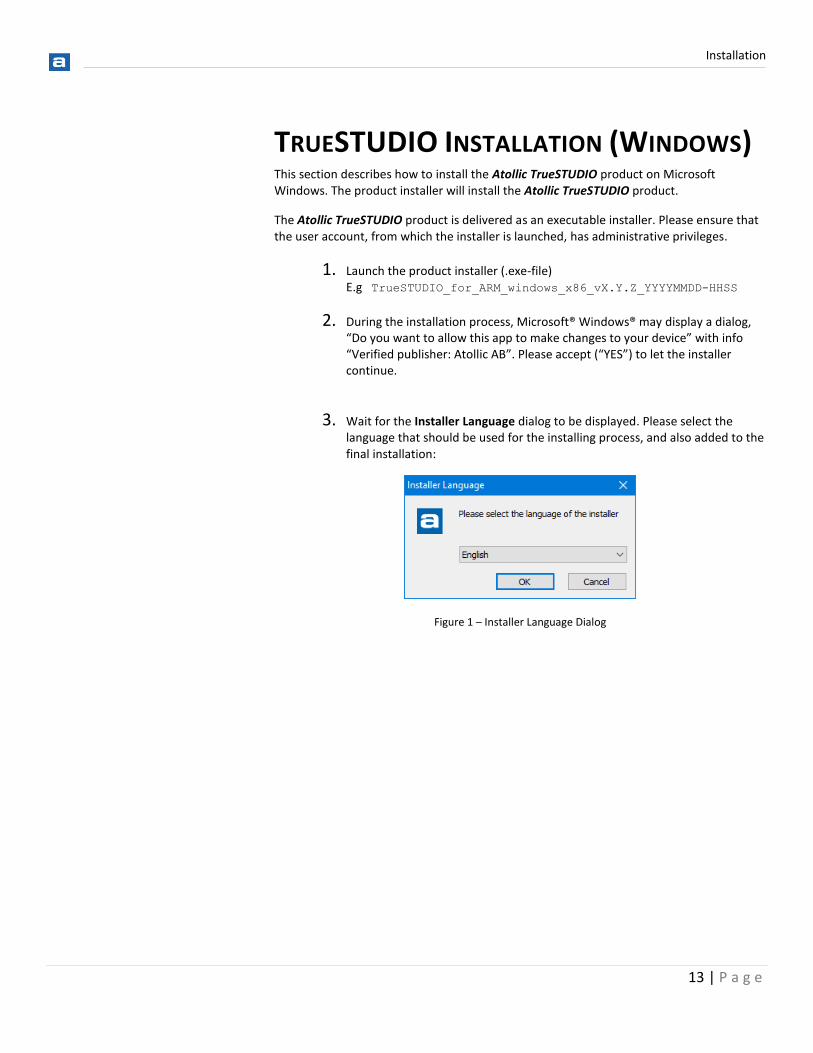
3. Wait for the Installer Language dialog to be displayed. Please select the language that should be used for the installing process, and also added to the final installation:
Figure 1 – Installer Language Dialog
Installation
14 | P a g e
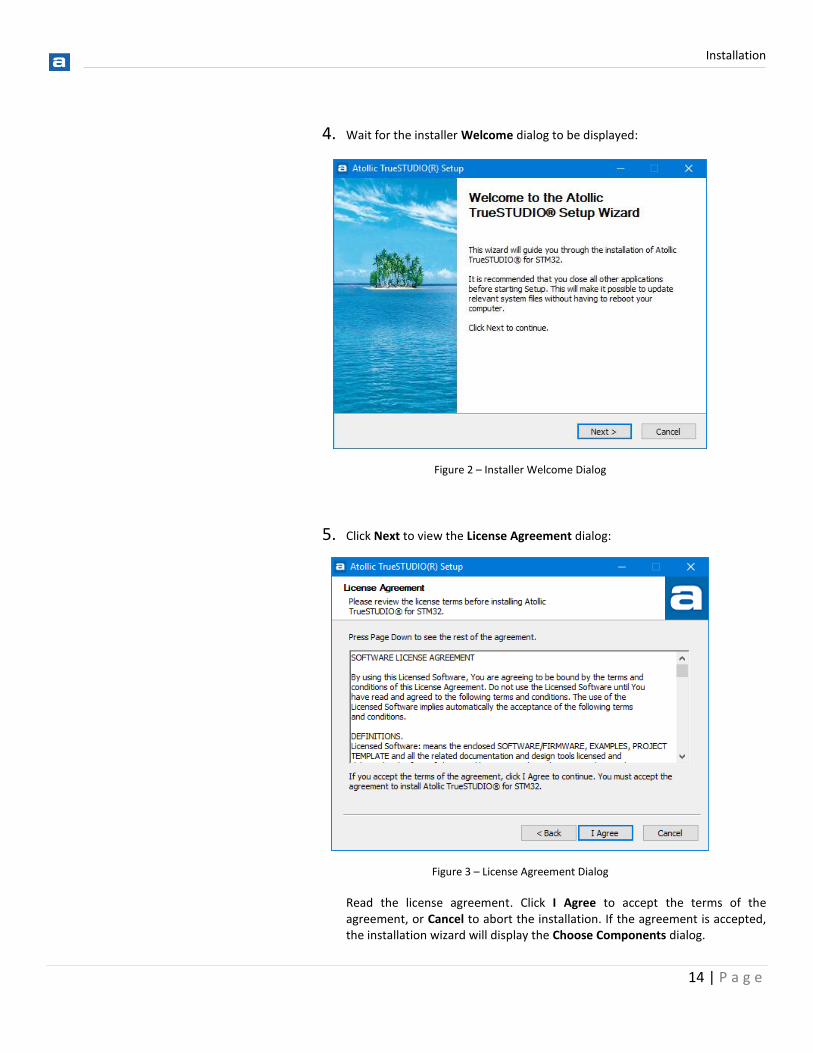
4. Wait for the installer Welcome dialog to be displayed:
Figure 2 – Installer Welcome Dialog
5. Click Next to view the License Agreement dialog:
Figure 3 – License Agreement Dialog
Read the license agreement. Click I Agree to accept the terms of the agreement, or Cancel to abort the installation. If the agreement is accepted, the installation wizard will display the Choose Components dialog.

Installation
15 | P a g e
6. Wait for the Choose Components dialog to be displayed.
Figure 4 – Selection of GDB Servers
Select the GDB Server components to be installed together with Atollic TrueSTUDIO. A server is needed for each type of JTAG probe that are to be used for debugging with Atollic TrueSTUDIO.
a. If installation of ST-Link GDB Server is selected STMicroelectronics device drivers using the Device Driver Installation Wizard will be started in a thread. Click Next to start the device driver installation required by ST-Link.
Figure 5 – STMicroelectronics Device Driver Installation
b. Click Finish to complete installation of STMicroelectronics device drivers.
Installation
16 | P a g e
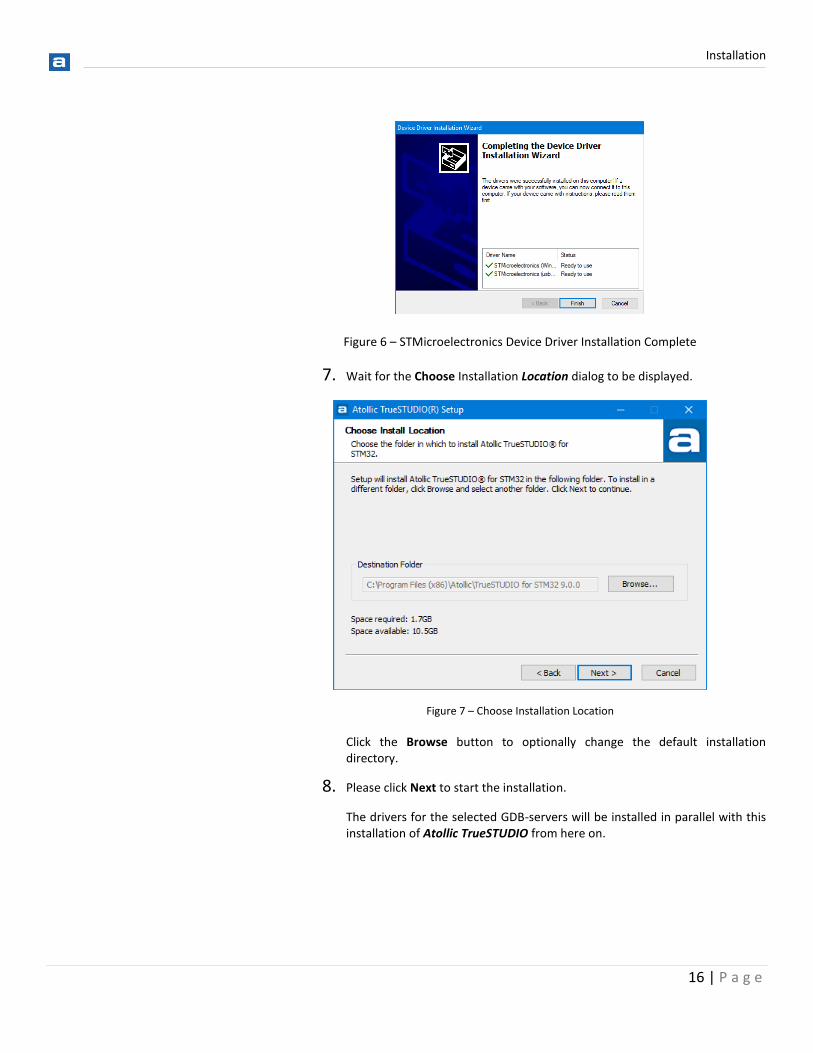
Figure 6 – STMicroelectronics Device Driver Installation Complete
7. Wait for the Choose Installation Location dialog to be displayed.
Figure 7 – Choose Installation Location
Click the Browse button to optionally change the default installation directory.
8. Please click Next to start the installation.
The drivers for the selected GDB-servers will be installed in parallel with this installation of Atollic TrueSTUDIO from here on.
Installation
17 | P a g e
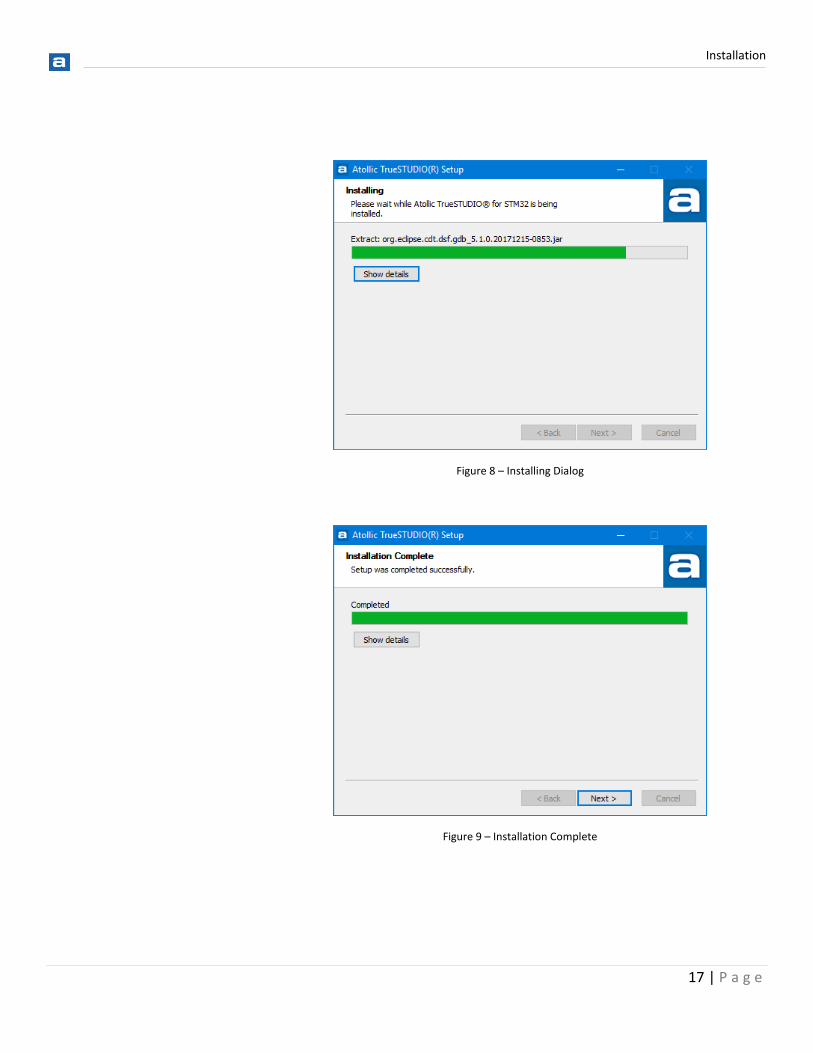
Figure 8 – Installing Dialog
Figure 9 – Installation Complete

Installation
18 | P a g e
9. Click Next and the File Association dialog is displayed.
Figure 10 – File Association
Please enter the desired associations between file-extensions and Atollic TrueSTUDIO. By associating the .project-file, it is possible to automatically import and start editing new projects, just by double-clicking on the file.
10. Please click Next and a page showing information that is relevant to users who are upgrading from a previous version of Atollic TrueSTUDIO is displayed. Please read this information carefully when upgrading from a previous version.
Installation
19 | P a g e
Figure 11 – Upgrade Information
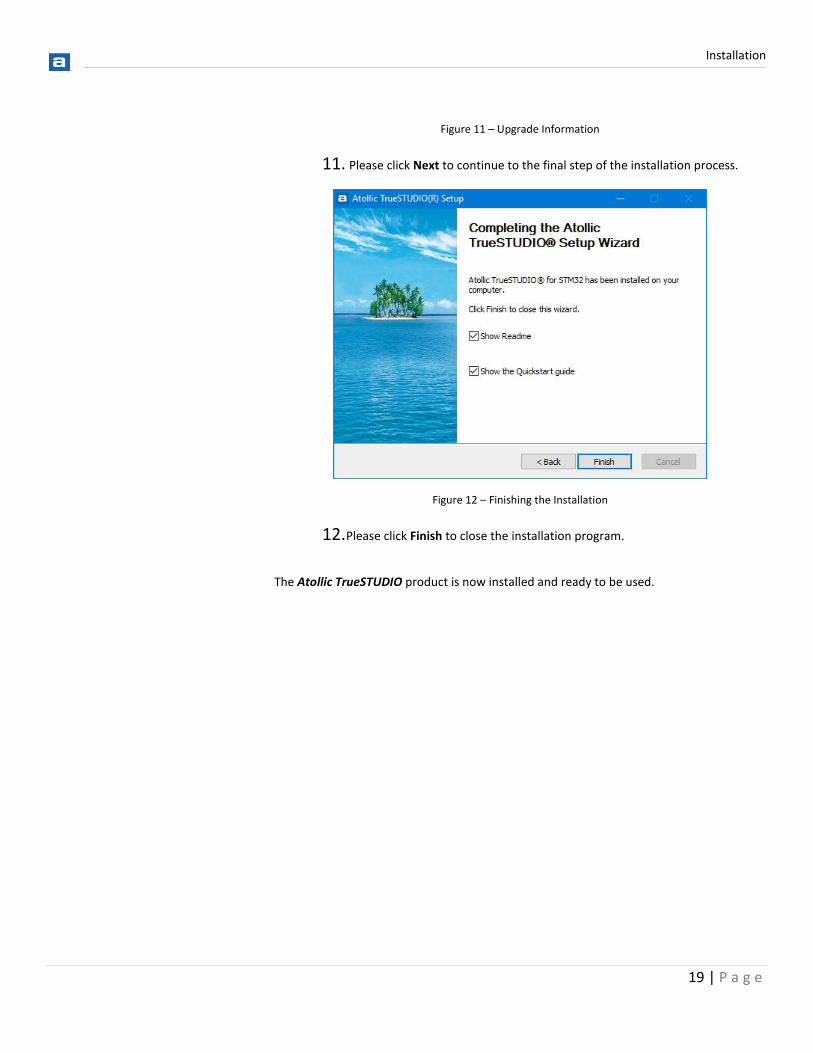
11. Please click Next to continue to the final step of the installation process.
Figure 12 – Finishing the Installation
12. Please click Finish to close the installation program.
The Atollic TrueSTUDIO product is now installed and ready to be used.
Installation
20 | P a g e
TRUESTUDIO INSTALLATION (LINUX) Install and start Atollic TrueSTUDIO on Linux using the following three steps.
1. Extract the downloaded archive, command example.
$ tar -xvf ~/Downloads/Atollic_TrueSTUDIO_for_STM32_linux_x86_64_9.0.0_yyyymmdd-hhmm.tar.gz
2. Run install.sh to install the product
The installation will prompt for install location and license agreement acceptance.
$ cd Atollic_TrueSTUDIO_for_ARM_9.0.0_installer && sudo ./install.sh
3. Start Atollic TrueSTUDIO from the Applications menu, or alternatively start from the command line:
$ cd /opt/Atollic_TrueSTUDIO_for_STM32_9.0.0/ide && ./TrueSTUDIO
Read the End User Software License Agreement terms carefully. If the terms are not accepted, delete extracted files and do not use the Software.