Embed Size (px)
Citation preview

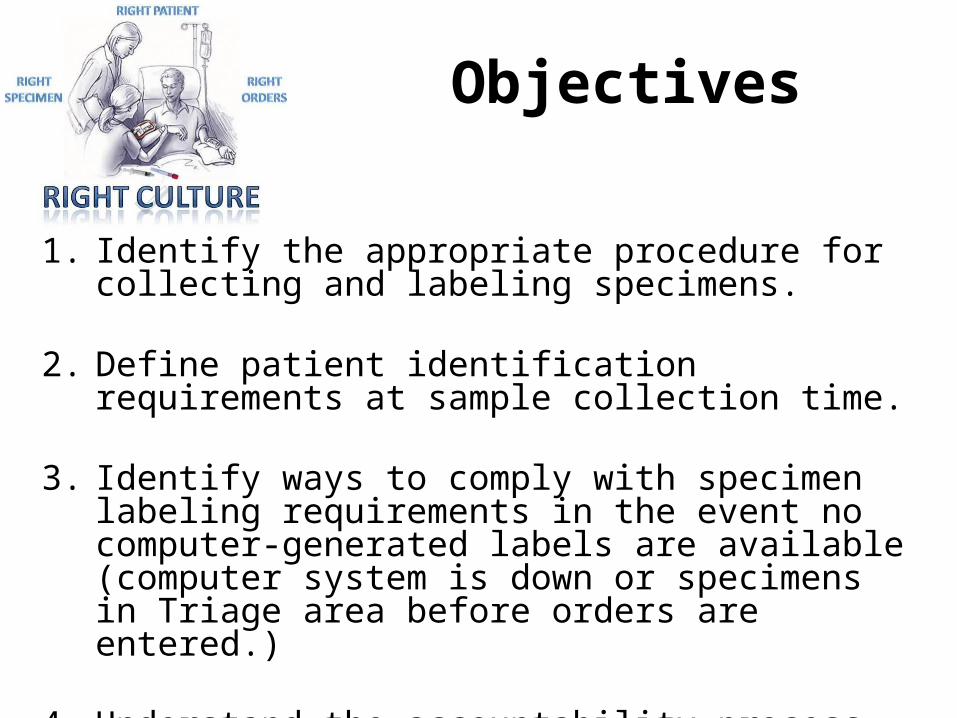
At the Bedside
1. Identify the appropriate procedure for collecting and labeling specimens.
2. Define patient identification requirements at sample collection time.
3. Identify ways to comply with specimen labeling requirements in the event no computer-generated labels are available (computer system is down or specimens in Triage area before orders are entered.)
4. Understand the accountability process associated with a mislabeled specimen.
Objectives
At the Bedside
• In order to ensure patient safety we must double check and label specimens, medications, blood or expressed breast milk while At the Bedside.
• Doing this At the Bedside allows us to compare the product to the ID band and ensure we are providing the right service or treatment to the right patient.
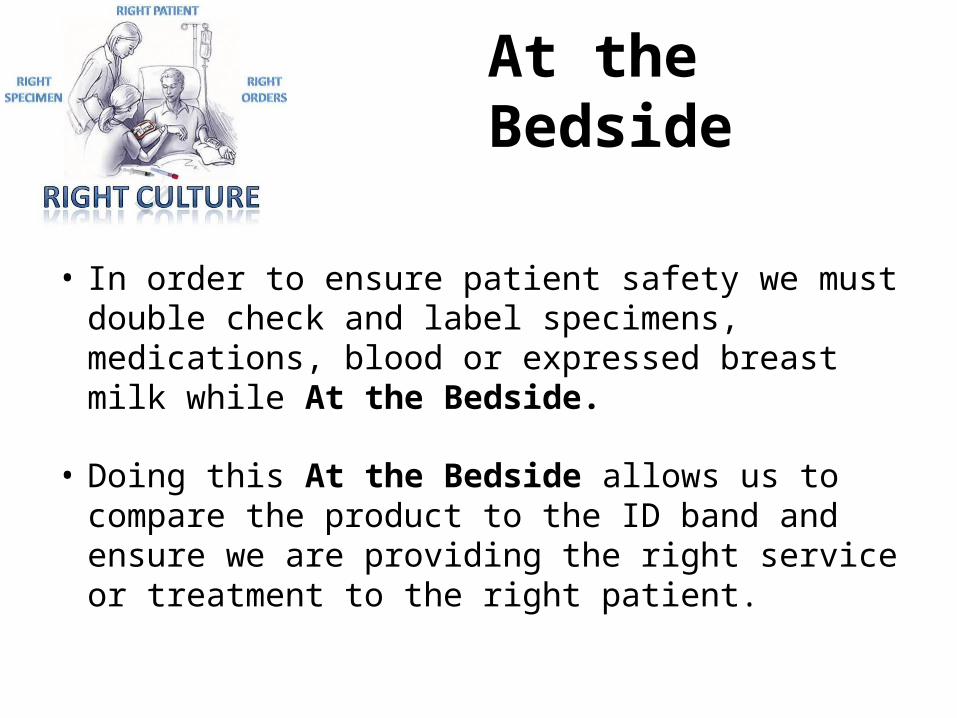
Lab Specimen Labeling
• The first topic we will address is lab specimen labeling.– Labeling lab specimens At the Bedside facilitates
quality patient care by decreasing the chances of a labeling error.
– Labeling errors can result in multiple sticks, infections, increased length of stay and other negative patient outcomes.
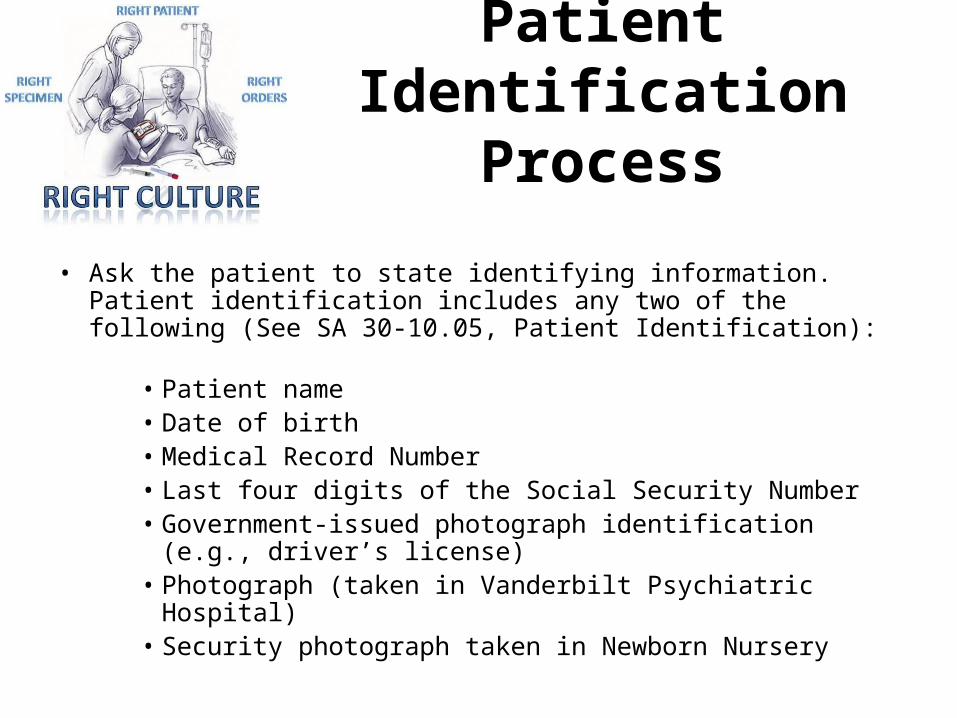
Patient Identification Process
• Ask the patient to state identifying information. Patient identification includes any two of the following (See SA 30-10.05, Patient Identification):
• Patient name• Date of birth • Medical Record Number• Last four digits of the Social Security Number• Government-issued photograph identification (e.g., driver’s
license)• Photograph (taken in Vanderbilt Psychiatric Hospital)• Security photograph taken in Newborn Nursery
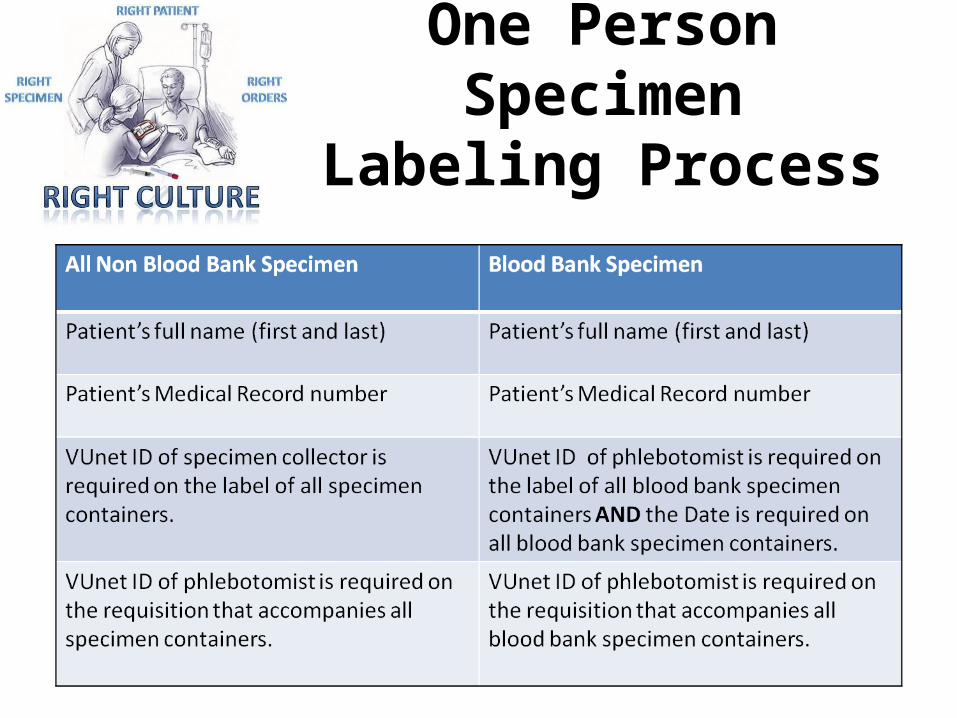
One Person Specimen Labeling Process
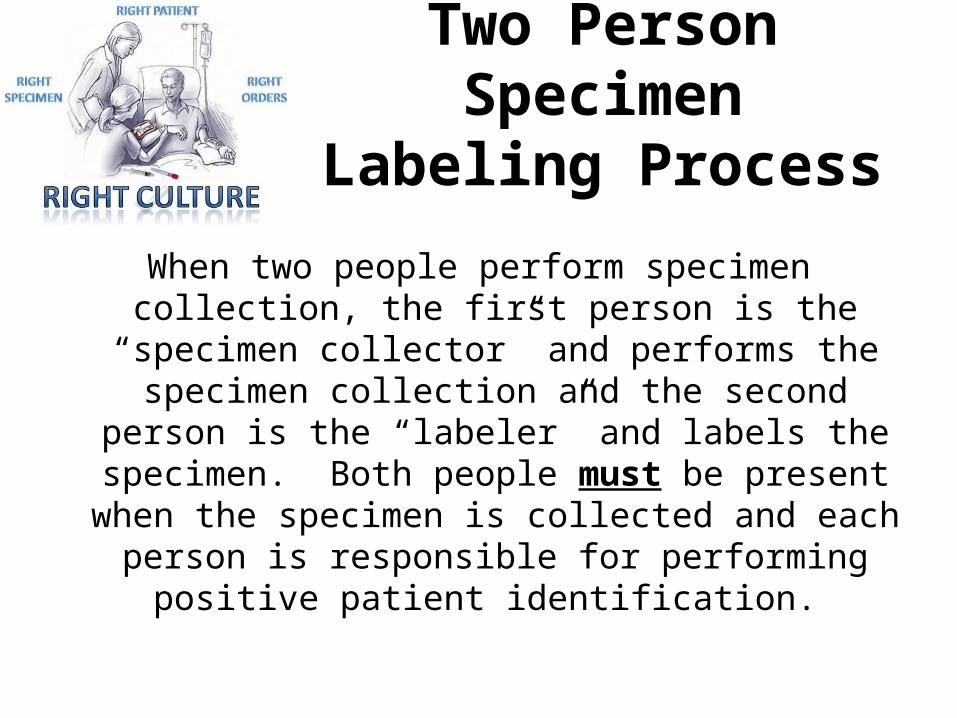
Two Person Specimen Labeling Process
When two people perform specimen collection, the first person is the “specimen collector” and performs the specimen collection and the second person is the “labeler” and labels the specimen. Both people must be present when the specimen is collected and each person is responsible for performing positive patient
identification.
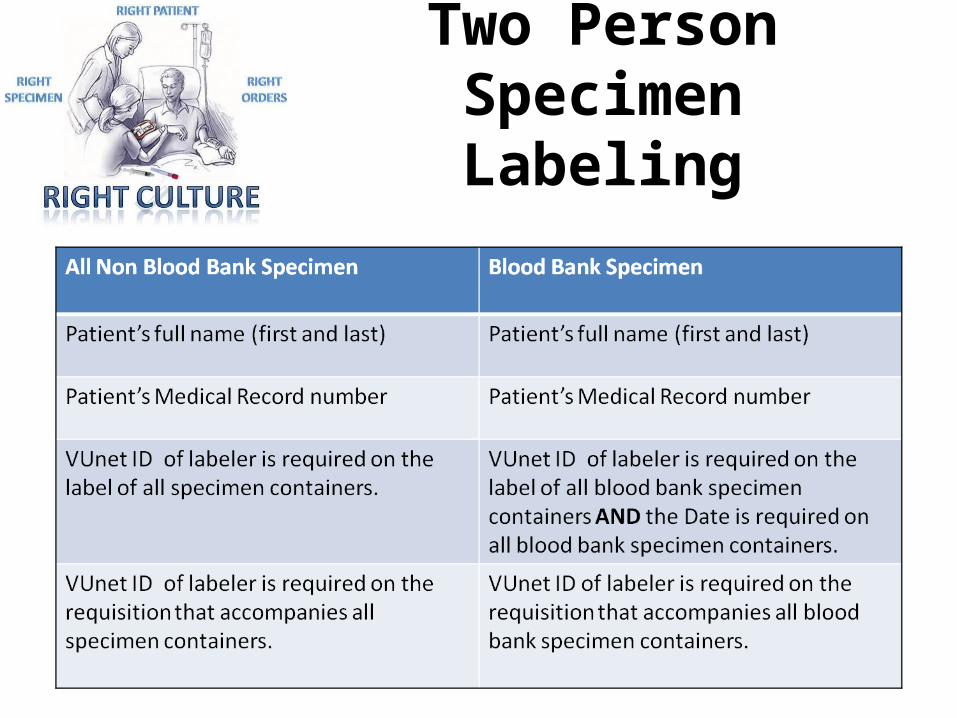
Two Person Specimen Labeling
Safe Specimen Labeling
• For any specimen, there are necessary items that need to be present on the label and they must all be correct or the specimen will be rejected.
• EVERY individual tube, container, specimen sent to the lab must have a label applied to it (not loose in the bag).
• All specimen or blood samples received in the lab without a label applied will be rejected.
• All labels & requisitions must be examined to determine if all information necessary is present & correct.
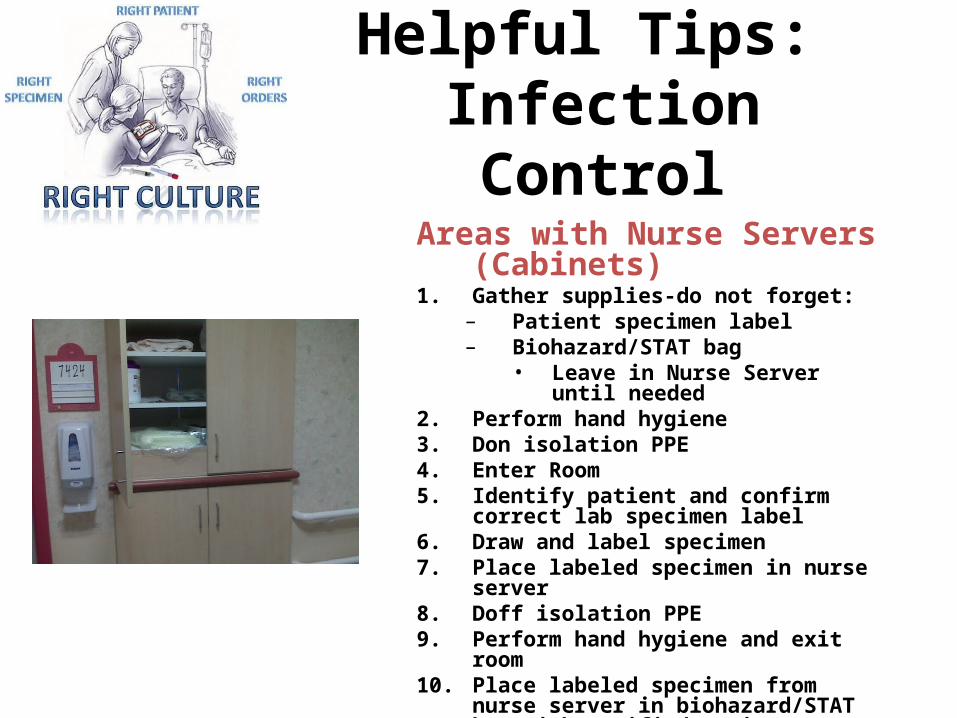
Helpful Tips: Infection Control
Areas with Nurse Servers (Cabinets)1. Gather supplies-do not forget:
– Patient specimen label– Biohazard/STAT bag
• Leave in Nurse Server until needed2. Perform hand hygiene3. Don isolation PPE4. Enter Room5. Identify patient and confirm correct lab
specimen label6. Draw and label specimen7. Place labeled specimen in nurse server8. Doff isolation PPE9. Perform hand hygiene and exit room10. Place labeled specimen from nurse server in
biohazard/STAT bag with verified patient requisition
11. Perform hand hygiene12. Send specimen
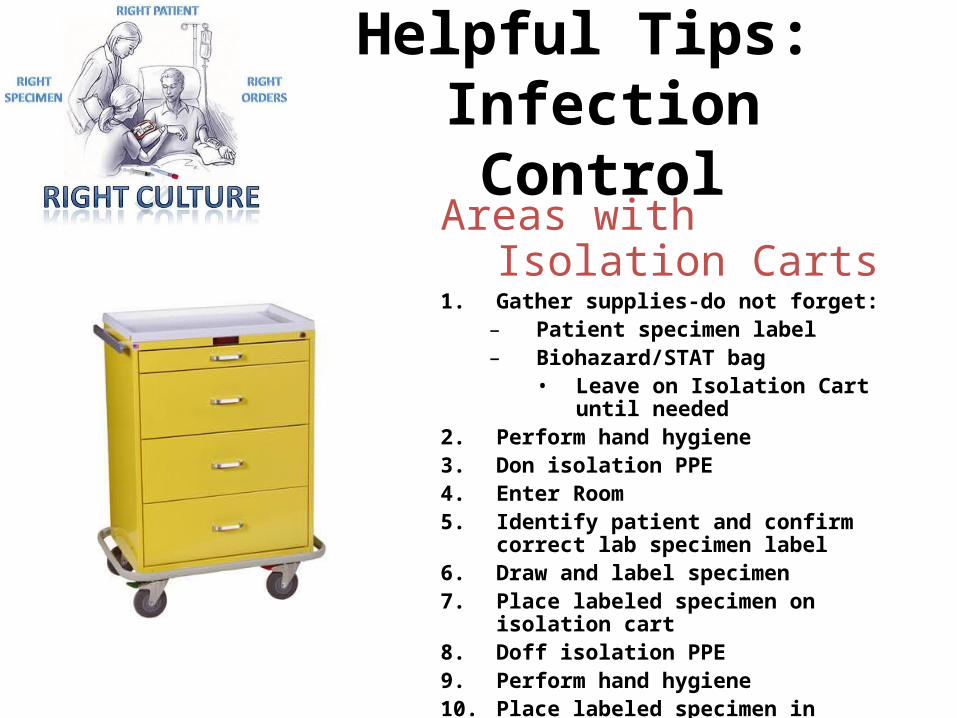
Helpful Tips: Infection Control
Areas with Isolation Carts1. Gather supplies-do not forget:
– Patient specimen label– Biohazard/STAT bag
• Leave on Isolation Cart until needed2. Perform hand hygiene3. Don isolation PPE4. Enter Room5. Identify patient and confirm correct lab
specimen label6. Draw and label specimen7. Place labeled specimen on isolation cart8. Doff isolation PPE9. Perform hand hygiene10. Place labeled specimen in biohazard/STAT bag
with verified patient requisition11. Perform hand hygiene12. Send specimen
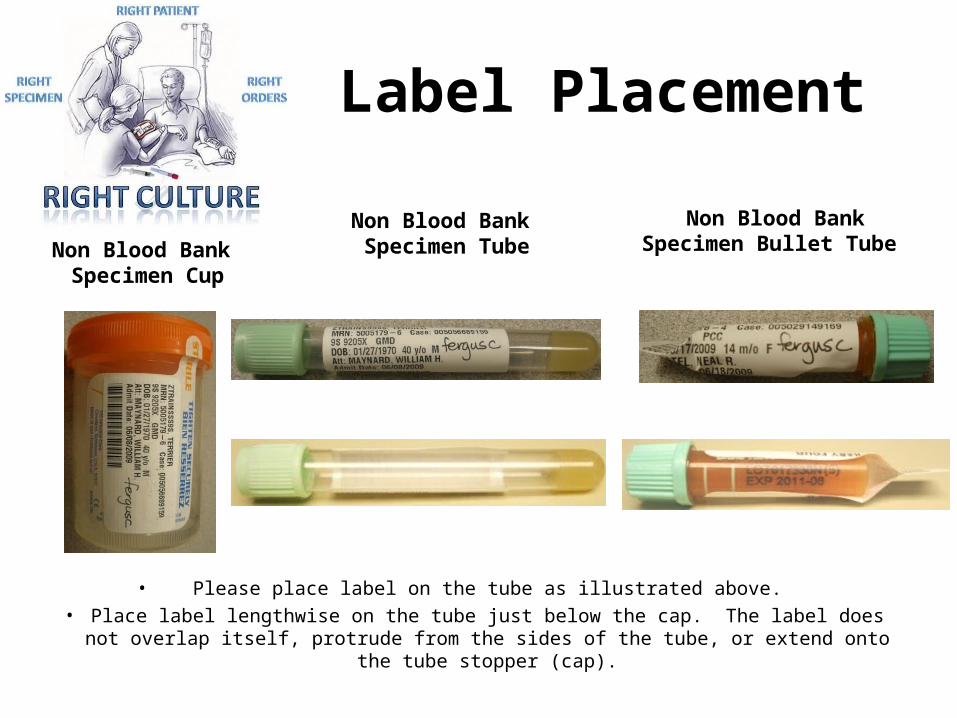
Label Placement
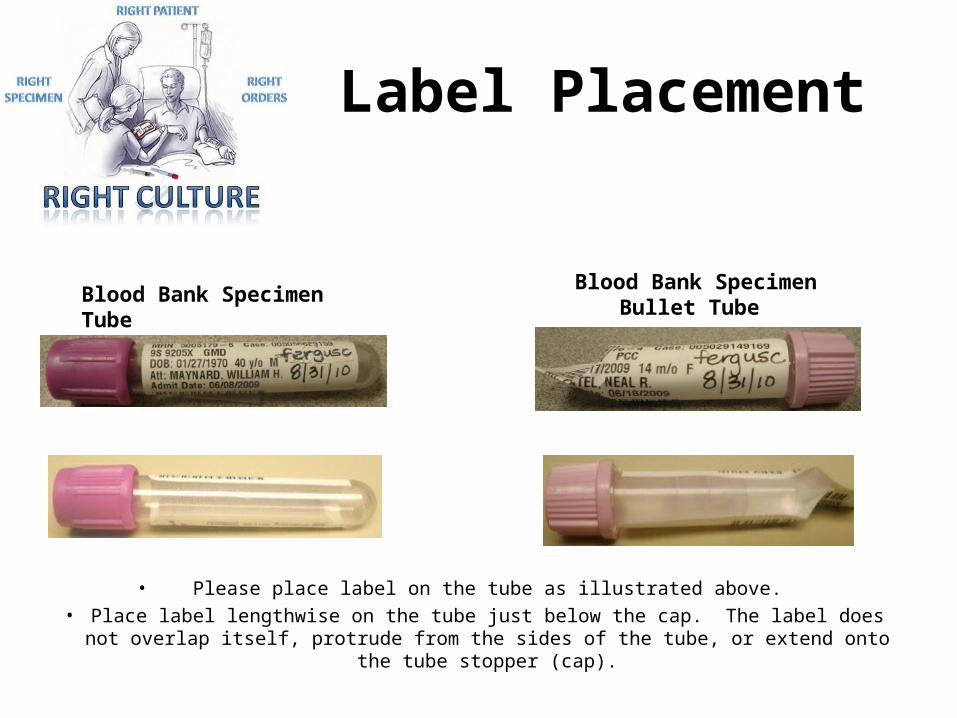
• Please place label on the tube as illustrated above.• Place label lengthwise on the tube just below the cap. The label does not overlap
itself, protrude from the sides of the tube, or extend onto the tube stopper (cap).
Non Blood Bank Specimen Tube
Non Blood Bank Specimen Bullet Tube Non Blood Bank
Specimen Cup
Label Placement
• Please place label on the tube as illustrated above.• Place label lengthwise on the tube just below the cap. The label does not overlap
itself, protrude from the sides of the tube, or extend onto the tube stopper (cap).
Blood Bank Specimen TubeBlood Bank Specimen
Bullet Tube
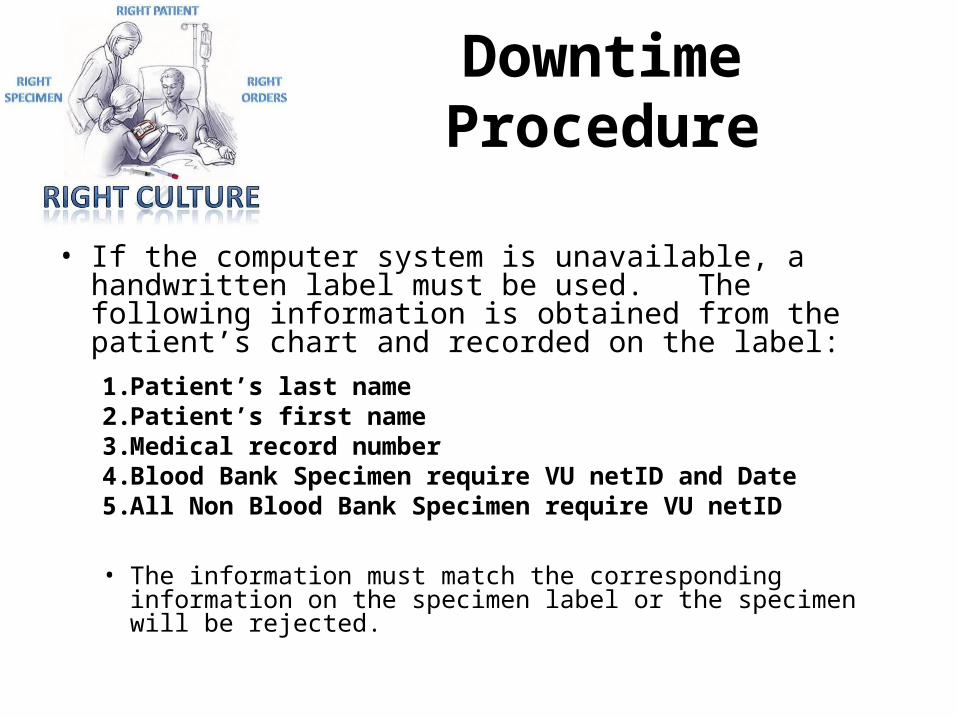
Downtime Procedure
• If the computer system is unavailable, a handwritten label must be used. The following information is obtained from the patient’s chart and recorded on the label:1. Patient’s last name2. Patient’s first name3. Medical record number4. Blood Bank Specimen require VU netID and Date 5. All Non Blood Bank Specimen require VU netID
• The information must match the corresponding information on the specimen label or the specimen will be rejected.
Outpatient Identification
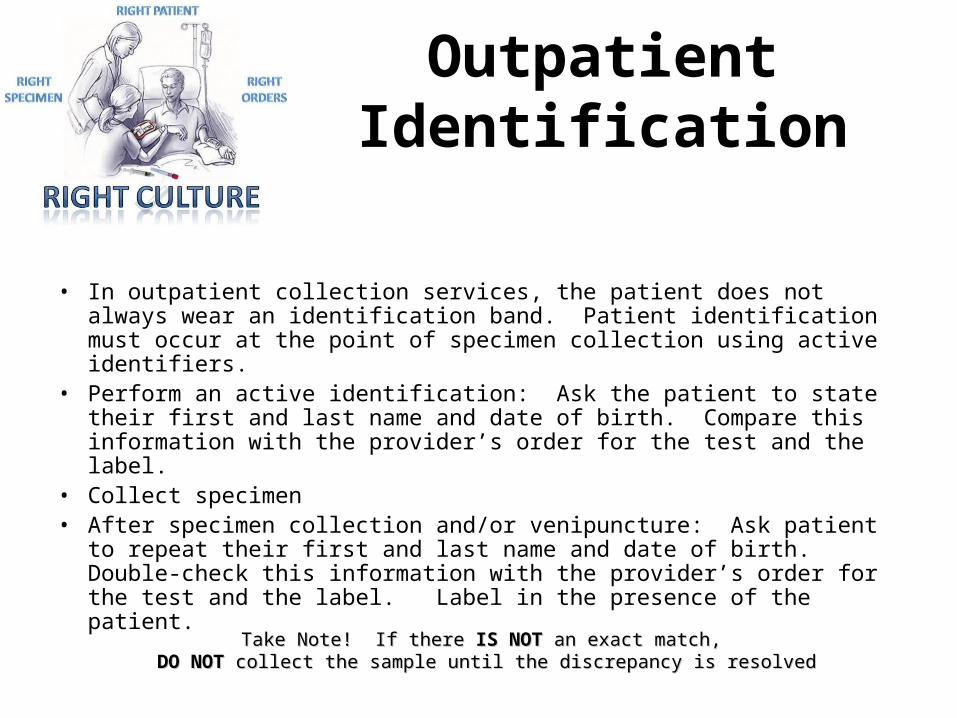
• In outpatient collection services, the patient does not always wear an identification band. Patient identification must occur at the point of specimen collection using active identifiers.
• Perform an active identification: Ask the patient to state their first and last name and date of birth. Compare this information with the provider’s order for the test and the label.
• Collect specimen• After specimen collection and/or venipuncture: Ask patient to repeat
their first and last name and date of birth. Double-check this information with the provider’s order for the test and the label. Label in the presence of the patient.
Take Note! If there Take Note! If there IS NOT IS NOT an exact match, an exact match, DO NOT DO NOT collect the sample until the discrepancy is resolvedcollect the sample until the discrepancy is resolved
Specimen Labeling Error Tracking
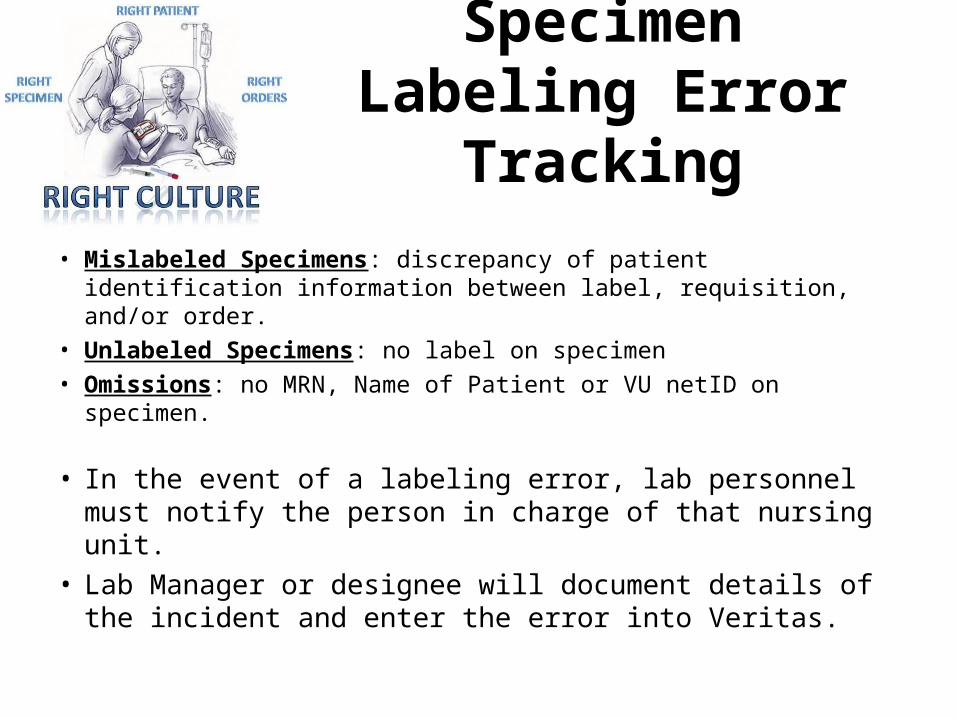
• Mislabeled Specimens: discrepancy of patient identification information between label, requisition, and/or order.
• Unlabeled Specimens: no label on specimen• Omissions: no MRN, Name of Patient or VU netID on specimen.
• In the event of a labeling error, lab personnel must notify the person in charge of that nursing unit.
• Lab Manager or designee will document details of the incident and enter the error into Veritas.
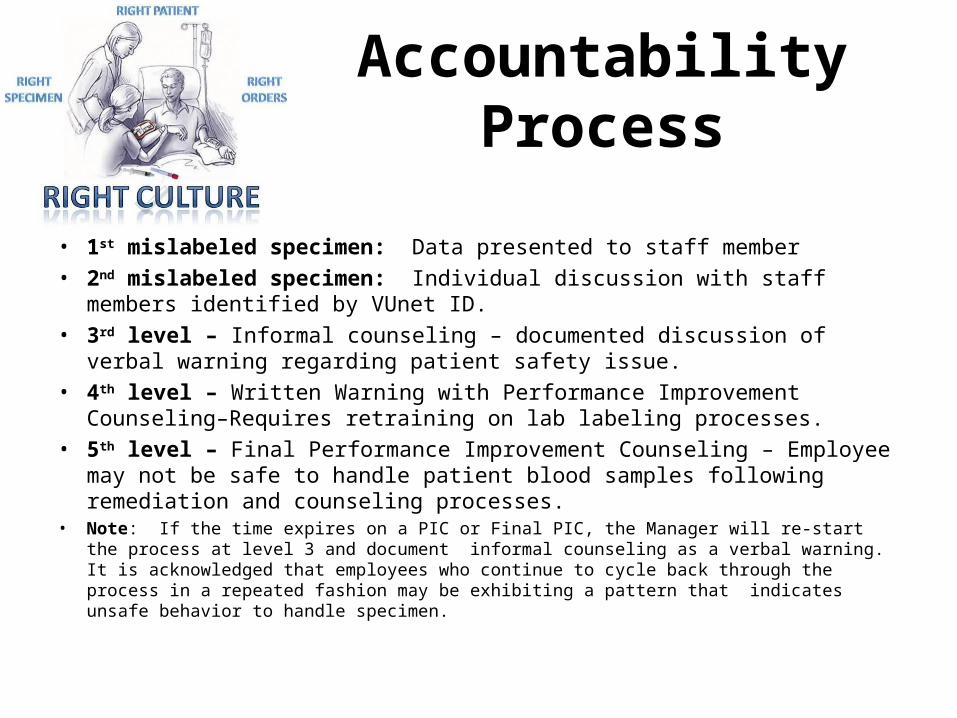
Accountability Process
• 1st mislabeled specimen: Data presented to staff member• 2nd mislabeled specimen: Individual discussion with staff members identified by
VUnet ID.• 3rd level – Informal counseling – documented discussion of verbal warning
regarding patient safety issue.• 4th level – Written Warning with Performance Improvement Counseling–Requires
retraining on lab labeling processes.• 5th level – Final Performance Improvement Counseling – Employee may not be safe
to handle patient blood samples following remediation and counseling processes. • Note: If the time expires on a PIC or Final PIC, the Manager will re-start the process at level 3 and
document informal counseling as a verbal warning. It is acknowledged that employees who continue to cycle back through the process in a repeated fashion may be exhibiting a pattern that indicates unsafe behavior to handle specimen.


![ExpressionofMicroRNAsandProtein-CodingGenes … · 2018-12-07 · The macro-dissected tumor specimens were ... in quadruplicate for 235 human and 222 mouse micro-RNAs [24]. The labeling](https://img.pdfslide.us/doc/110x75/5e3325781fed9b25a7571a66/expressionofmicrornasandprotein-codinggenes-2018-12-07-the-macro-dissected-tumor.jpg)