Embed Size (px)
Citation preview
Welcome to Astropad
Setup Manual
Table of Contents
What you need to use Astropad 3
Downloading and Installing the Apps 4
USB and Wireless Connection 5
Wireless Troubleshooting 6
Starting Astropad 7
Intro to Astropad 8White Ring Button Page 8Shortcuts Sidebar Page 9
Pairing your Stylus 10
Settings and Preferences 11Settings on iPad Page 11Preferences on Mac Page 12
Performance 15
What you need to use Astropad:
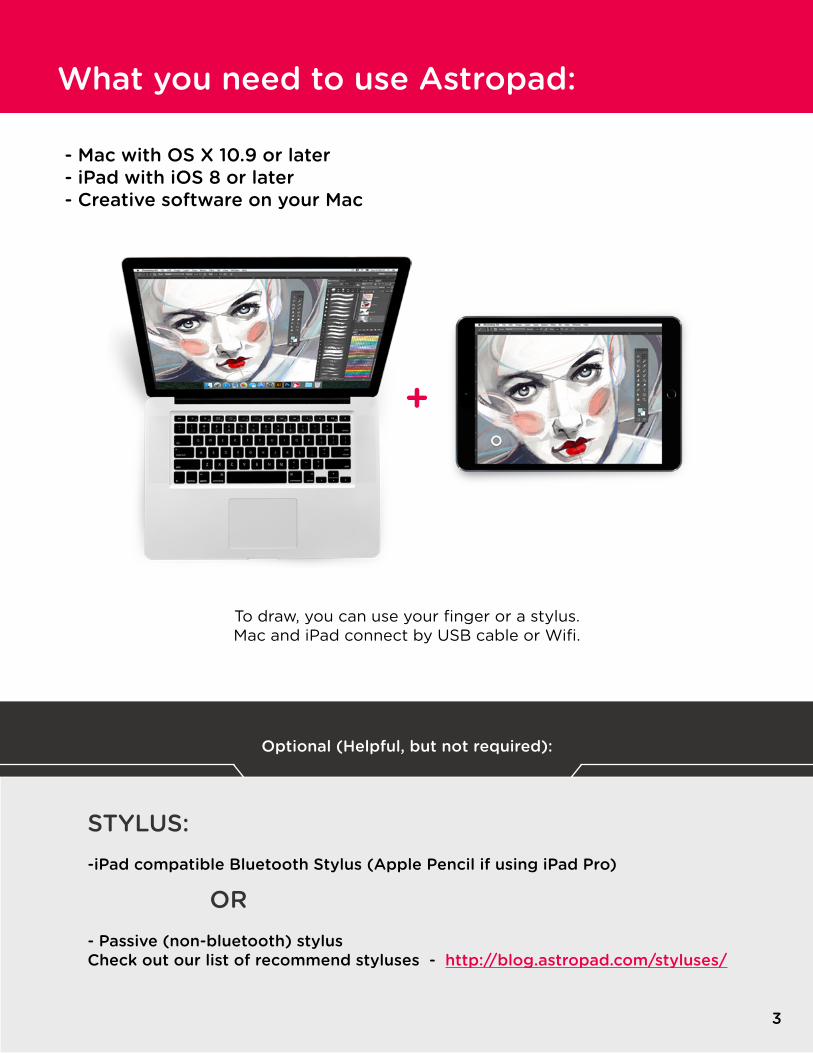
- Mac with OS X 10.9 or later- iPad with iOS 8 or later- Creative software on your Mac
STYLUS:-iPad compatible Bluetooth Stylus (Apple Pencil if using iPad Pro)
- Passive (non-bluetooth) stylus Check out our list of recommend styluses - http://blog.astropad.com/styluses/
Optional (Helpful, but not required):
OR
To draw, you can use your finger or a stylus.Mac and iPad connect by USB cable or Wifi.
+
3
Downloading and Installing Apps:
STEP 1: iPad App
Astropad’s iPad app can be purchased on your iPad through the App Store.If you are using your Mac to purchase, go to the App Store through iTunes.Install on your iPad.
STEP 2: Mac Companion App
After purchasing the iPad App, go to Astropad.com, to download the free Mac companion app. Go to “iPad”, click “Get It” and the Mac icon, or go directly to astropad.com/mac
- Download the .zip file to your Mac.- Extract the .zip file, and save the Mac app in “Applications”, or a location easy to find.
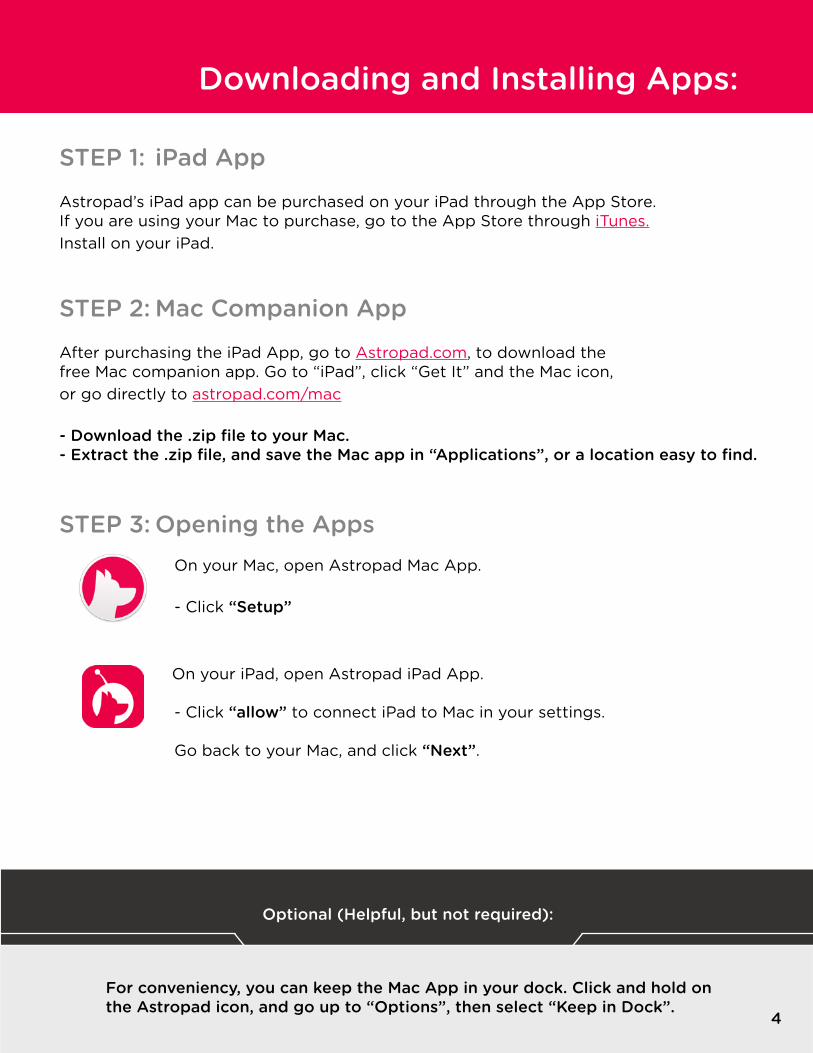
STEP 3: Opening the Apps On your Mac, open Astropad Mac App. - Click “Setup”
On your iPad, open Astropad iPad App. - Click “allow” to connect iPad to Mac in your settings.
Go back to your Mac, and click “Next”.
For conveniency, you can keep the Mac App in your dock. Click and hold on the Astropad icon, and go up to “Options”, then select “Keep in Dock”.
Optional (Helpful, but not required):
OR
3 4
USB and Wireless Connection:
To use Astropad, your iPad and Mac need to be connected, by either USB or Wi-Fi.
To connect by USB: Using your iPad’s corresponding USB cable (30-pin or Lightning to USB), connect iPad to your Mac.
To connect by Wi-Fi:
Make sure both Mac and iPad are on the same wireless network. If iPad and Mac are on the same network with a good signal, they will connect automatically.
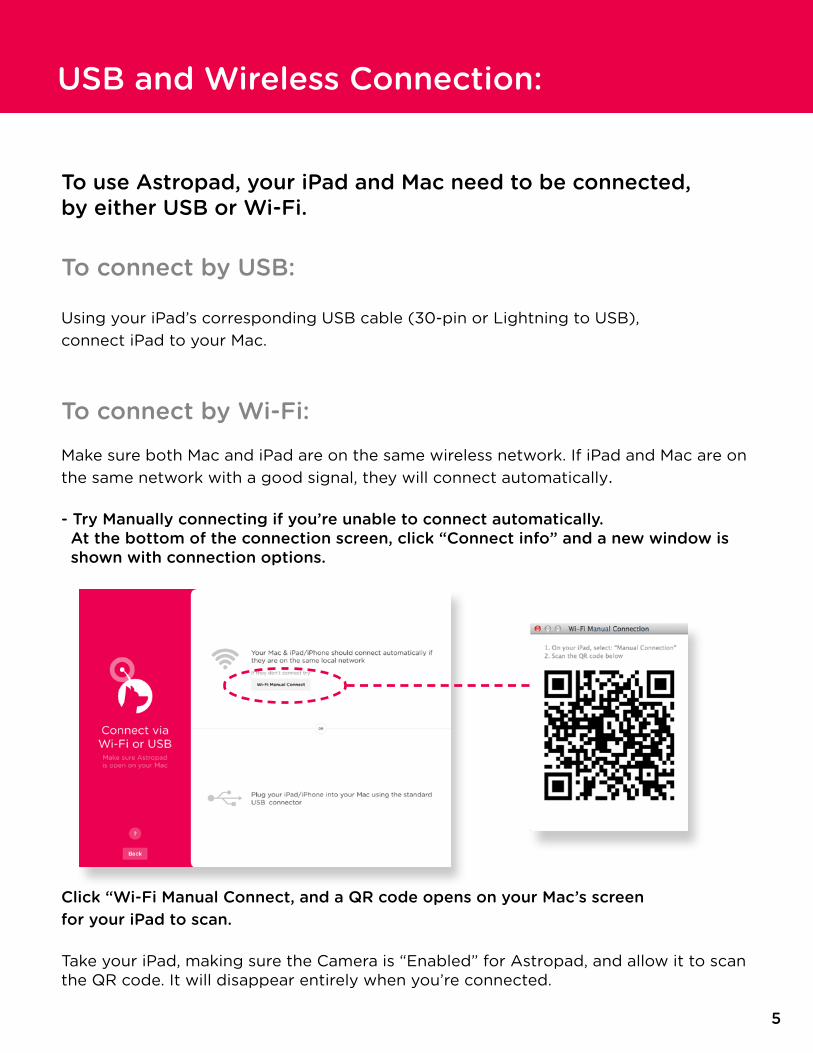
- Try Manually connecting if you’re unable to connect automatically. At the bottom of the connection screen, click “Connect info” and a new window is shown with connection options.
Click “Wi-Fi Manual Connect, and a QR code opens on your Mac’s screen for your iPad to scan.
Take your iPad, making sure the Camera is “Enabled” for Astropad, and allow it to scan the QR code. It will disappear entirely when you’re connected.
When in doubt, contact support [at] astro-hq.com5
Wireless Troubleshooting:
Things to try and check for if unable to connect:
- Does connection work with USB?
- Make sure both iPad and Mac are on the same wireless network. With WiFi enabled on both devices.
- Is there a firewall or security software installed on your Mac?
- Try restarting your router, and keep your Mac and iPad in close vicinity when doing this.
When in doubt, contact support [at] astro-hq.com
Optional (Helpful, but not required):
WiFi and Manual WiFi connection doesn’t work, why?
Local WiFi networks use different routers, and each router is configured in its own way. It is hard to point to a specific reason why things are not working in your network.
Security software like antivirus, firewall, VPN on your Mac could prevent WiFi connections.
Security restrictions/settings of your router could also be the problem.Some routers disable Apple Bonjour which is the service Astropad uses to allow Mac & iPad to find each other automatically. Some routers also disable connection within the same local network between devices. This effectively shuts down any possibility for your Mac & iPad to talk to each other.
WiFi extenders also can cause weak connection.
Lastly proximity to the router is also important. If your Mac & iPad are too far from the router, the connection quality might not be good enough.
5 6

What is “Move & Zoom”?
This mode allows you to pan and zoom to adjust the size of your iPad screen viewwith two-finger gestures.
Starting Astropad:
After successfully connecting, you’ll be asked to join Astropad’s Mailing List. Enter in your email to receive updates on new features on everything Astropad.
If you are interested in beta testing, check the box.
Click “Sign up” when ready, or choose “Skip”. The Choice is yours.
Astropad is now running.
First Steps:- Turn on your choice of program on your Mac- Adjust the screen selection.
Once resized and adjusted, the selection goes away; but you can always re-adjust.
Through Astropad, you can adjust the screen by using “Move & Zoom”.
Mac screen example iPad screen example
Your Mac’s screen is now mirrored to your iPad’s screen; allowing you to draw with and use the programs from the Mac through your iPad.
7
What is “Move & Zoom”?
Intro to Astropad:
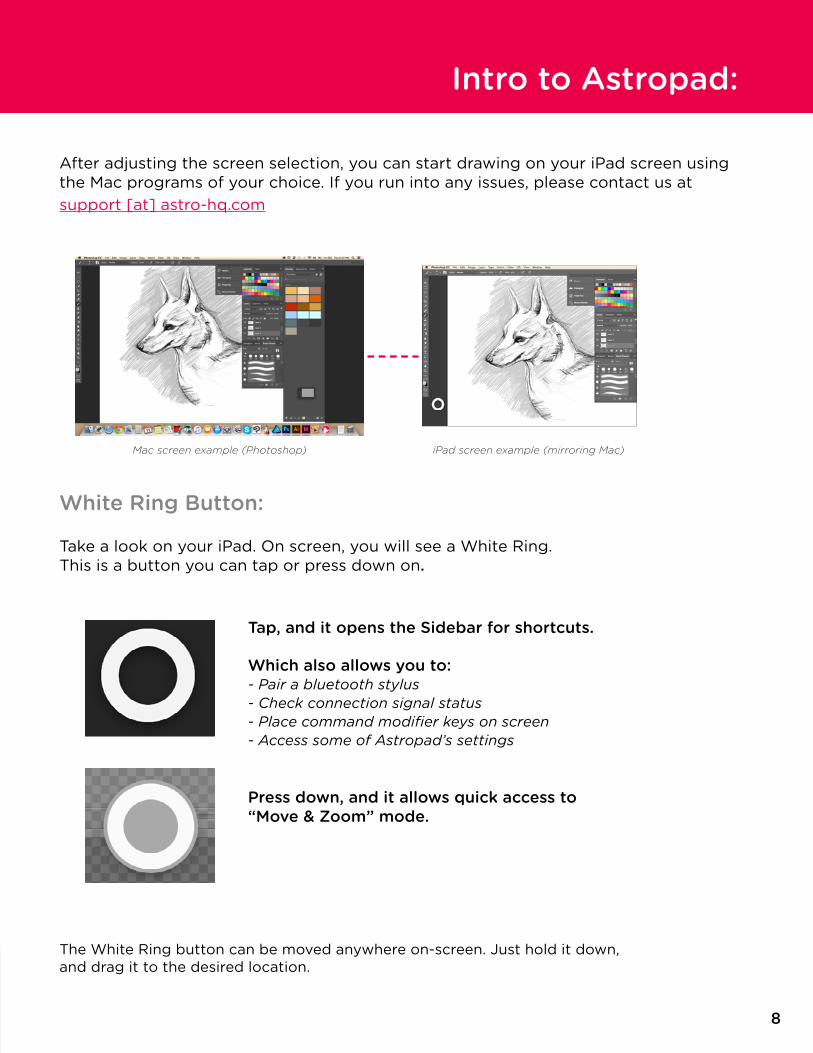
After adjusting the screen selection, you can start drawing on your iPad screen using the Mac programs of your choice. If you run into any issues, please contact us at support [at] astro-hq.com
White Ring Button:
Take a look on your iPad. On screen, you will see a White Ring. This is a button you can tap or press down on.
Tap, and it opens the Sidebar for shortcuts.
Which also allows you to:- Pair a bluetooth stylus- Check connection signal status- Place command modifier keys on screen- Access some of Astropad’s settings Press down, and it allows quick access to “Move & Zoom” mode.
The White Ring button can be moved anywhere on-screen. Just hold it down, and drag it to the desired location.
Mac screen example (Photoshop) iPad screen example (mirroring Mac)
7 8
Intro to Astropad:
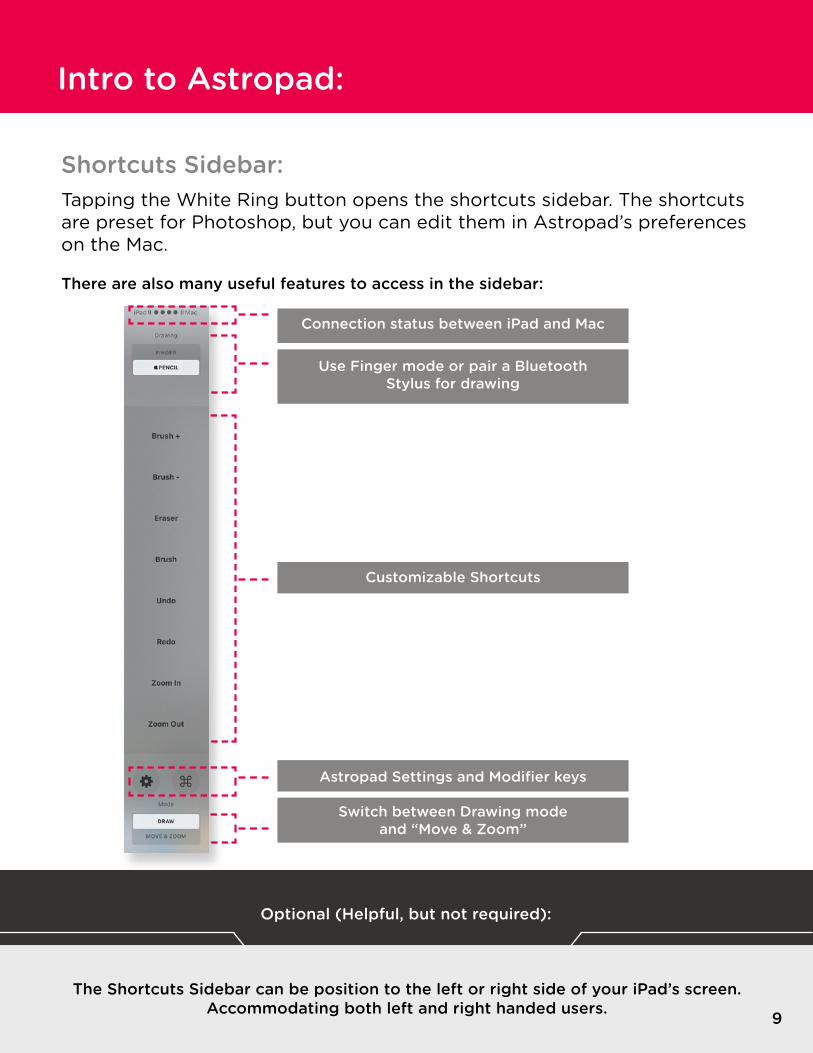
Shortcuts Sidebar:Tapping the White Ring button opens the shortcuts sidebar. The shortcuts are preset for Photoshop, but you can edit them in Astropad’s preferences on the Mac.
There are also many useful features to access in the sidebar:
Connection status between iPad and Mac
Use Finger mode or pair a Bluetooth Stylus for drawing
Customizable Shortcuts
Astropad Settings and Modifier keys
Switch between Drawing mode and “Move & Zoom”
The Shortcuts Sidebar can be position to the left or right side of your iPad’s screen.Accommodating both left and right handed users.
Optional (Helpful, but not required):
9
Pairing your Stylus:
Drawing with Astropad is as simple as using your Finger. There is support both non-bluetooth styluses, and iPad-compatible bluetooth styluses.
If you are still considering a stylus, check out our recommended stylus list http://blog.astropad.com/styluses/
How to pair your stylus:
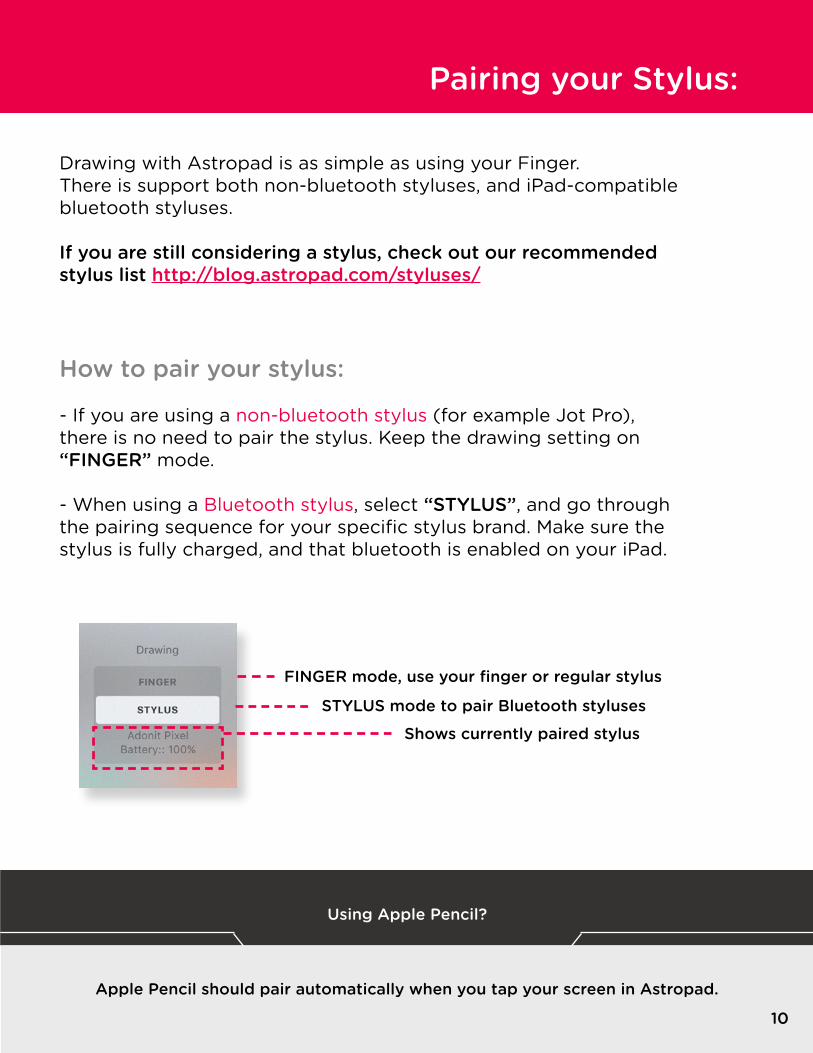
- If you are using a non-bluetooth stylus (for example Jot Pro), there is no need to pair the stylus. Keep the drawing setting on “FINGER” mode.
- When using a Bluetooth stylus, select “STYLUS”, and go through the pairing sequence for your specific stylus brand. Make sure the stylus is fully charged, and that bluetooth is enabled on your iPad.
Apple Pencil should pair automatically when you tap your screen in Astropad.
Using Apple Pencil?
Shows currently paired stylus
STYLUS mode to pair Bluetooth styluses
FINGER mode, use your finger or regular stylus
The Shortcuts Sidebar can be position to the left or right side of your iPad’s screen.Accommodating both left and right handed users. 9 10
Settings and Preferences:
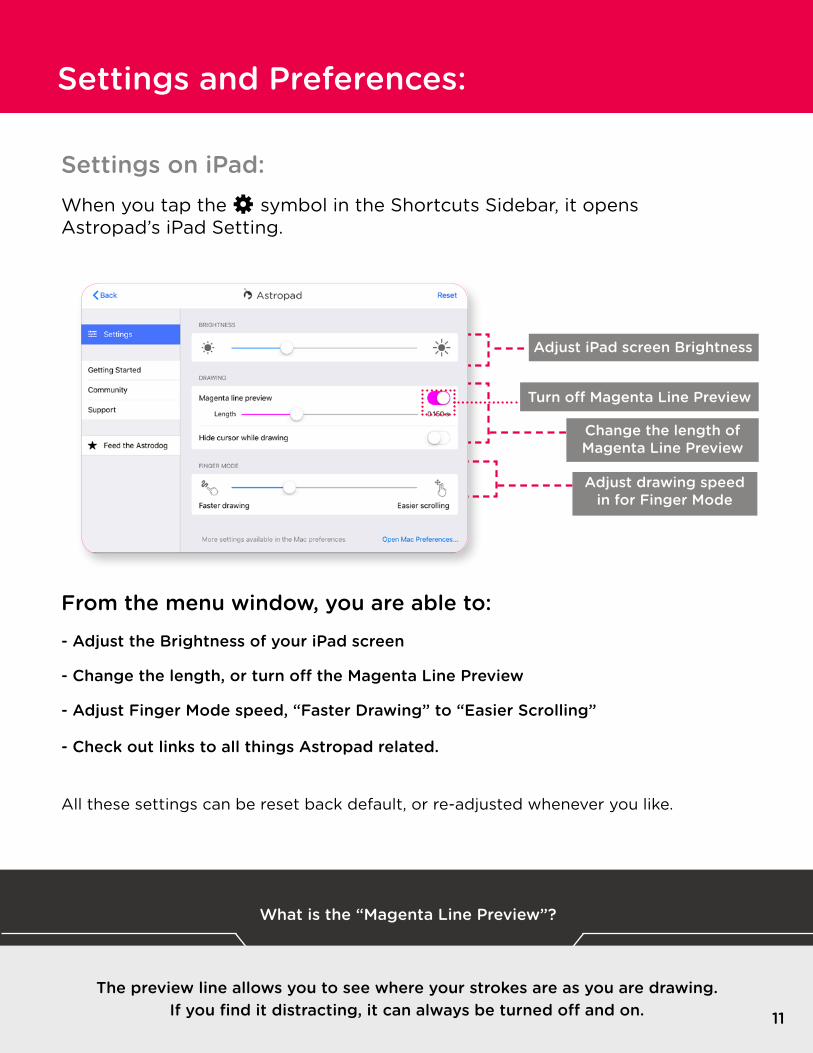
Settings on iPad:When you tap the symbol in the Shortcuts Sidebar, it opens Astropad’s iPad Setting.
Turn off Magenta Line Preview
Change the length of Magenta Line Preview
Adjust iPad screen Brightness
Adjust drawing speed in for Finger Mode
From the menu window, you are able to:
- Adjust the Brightness of your iPad screen
- Change the length, or turn off the Magenta Line Preview
- Adjust Finger Mode speed, “Faster Drawing” to “Easier Scrolling”
- Check out links to all things Astropad related.
All these settings can be reset back default, or re-adjusted whenever you like.
What is the “Magenta Line Preview”?
The preview line allows you to see where your strokes are as you are drawing.If you find it distracting, it can always be turned off and on. 11
Settings and Preferences:
What is the “Magenta Line Preview”?
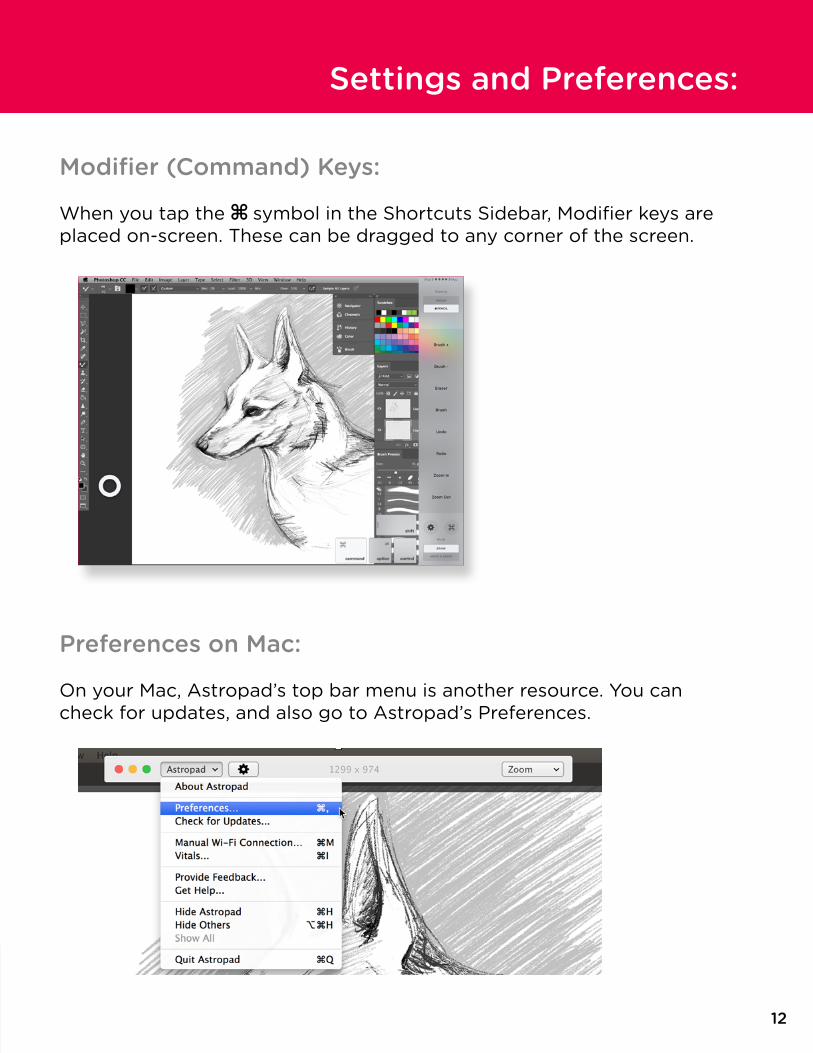
Modifier (Command) Keys:
When you tap the symbol in the Shortcuts Sidebar, Modifier keys are placed on-screen. These can be dragged to any corner of the screen.
⌘
Preferences on Mac:
On your Mac, Astropad’s top bar menu is another resource. You can check for updates, and also go to Astropad’s Preferences.
11 12
Settings and Preferences:
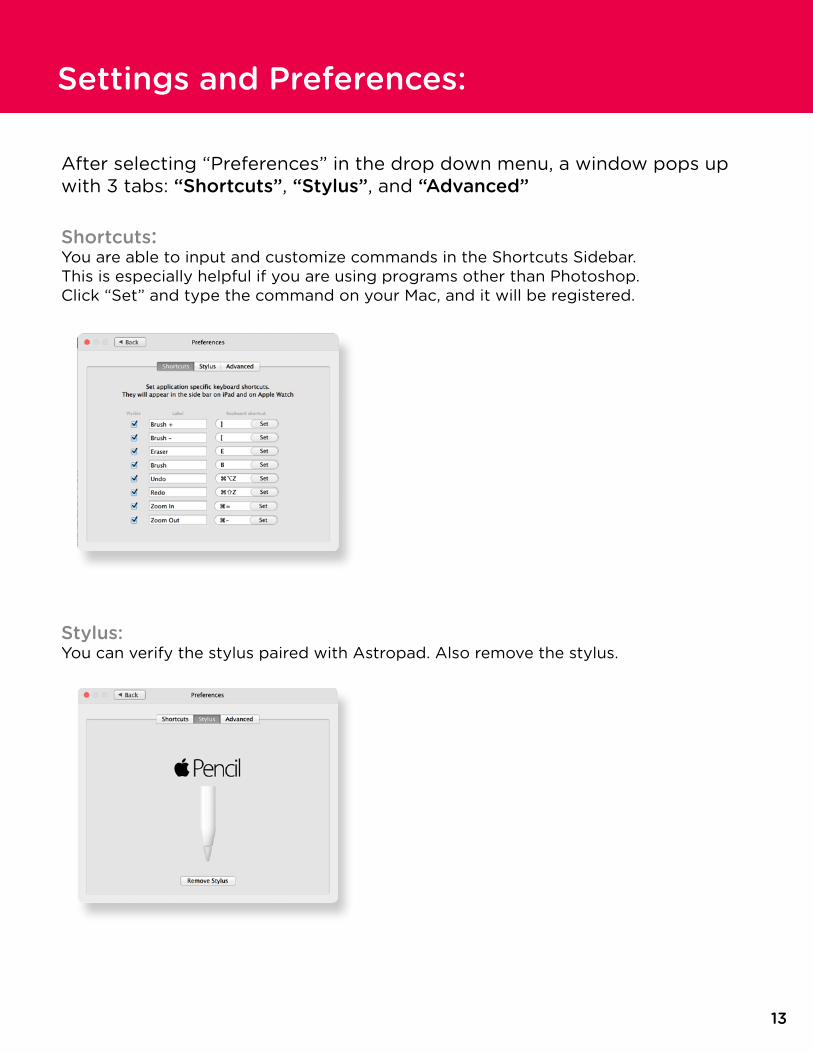
After selecting “Preferences” in the drop down menu, a window pops up with 3 tabs: “Shortcuts”, “Stylus”, and “Advanced”
Shortcuts:You are able to input and customize commands in the Shortcuts Sidebar. This is especially helpful if you are using programs other than Photoshop. Click “Set” and type the command on your Mac, and it will be registered.
Stylus:You can verify the stylus paired with Astropad. Also remove the stylus.
13
Settings and Preferences:
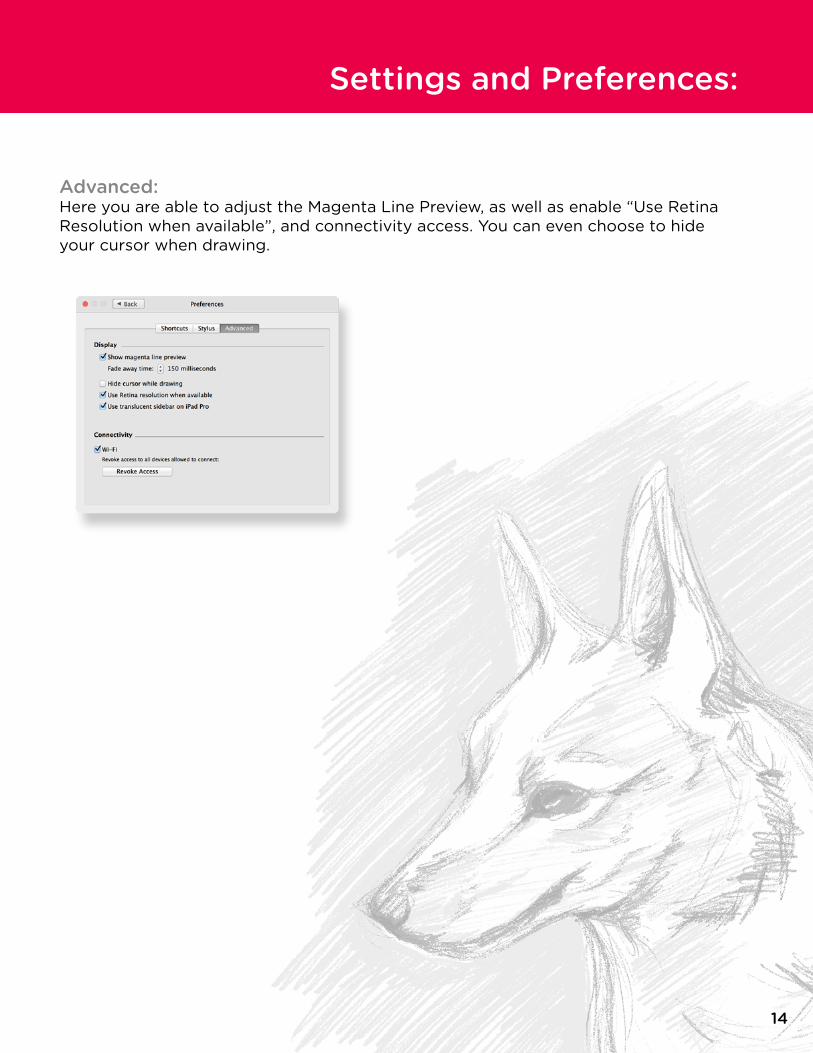
Advanced:Here you are able to adjust the Magenta Line Preview, as well as enable “Use Retina Resolution when available”, and connectivity access. You can even choose to hide your cursor when drawing.
13 14
Performance:
To improve latency:
- Try using the 5Ghz band since it doesn’t interfere with Bluetooth. Newer Wifi routers like 802.11ac have this.
- It’s best to run the latest El Capitan (OS X 10.11) version if possible, since it has Wifi bug fixes. If not, stay with Mavericks (OS X 10.9).
- Try restarting your Mac and iPad if it is very laggy.
- Move closer to your router when possible
- Try rebooting your router
15

Did you find this manual helpful? Let us know your opinion! Send us an email: feedback [at] astro-hq.com
HOW CAN WE IMPROVE?
15