Embed Size (px)
Citation preview
Session 2 Create a Flyer In this session, students begin work for TechnoAd Agency. Their first task is to
design a flyer for TechnoTeen Company. TechnoTeen Company sells shoes,
clothes, and accessories to teenagers. They have requested a flyer to promote
their Summer Heat sales event. To prepare for this task, students answer
questions to learn about the objects on the Insert tab that can be added into
a document. Once familiar with the range of options, they follow detailed
instructions to produce an eye-catching ad using pictures, shapes, and more!
The flyer is sure to draw attention with a SmartArt Graphic highlighting sales
items, colorful header and footer that lists store details, text box with discounts,
and a catchy phrase written using WordArt. This advertisement is sure to sizzle!
About the Insert Tab
Create a Flyer – Phase 1
Create a Flyer – Phase 2
Session 2 Review: About Graphics
Session 2 Skill Review: Design an Event Poster
Session 2 Extension Activity: Prepare a Summary Report
Each TechnoKids project consists of 6 sessions, which are divided into separate assignments. An assignment is an activity that takes about 20 minutes to complete.
SAMPLE
Session 2
Copyright © TechnoKids Inc. 2-1 TechnoAdvertise | Office 2019
Session 2: Create a Flyer
Overview
In this session, students begin work for TechnoAd Agency. Their first task is to design a flyer for TechnoTeen Company.
TechnoTeen Company sells shoes, clothes, and accessories to teenagers. They have requested a flyer to promote
their Summer Heat sales event. To prepare for this task, students answer questions to learn about the objects on the
Insert tab that can be added into a document. Once familiar with the range of options, they follow detailed
instructions to produce an eye-catching ad using pictures, shapes, and more! The flyer is sure to draw attention with
a SmartArt Graphic highlighting sales items, colorful header and footer that lists store details, text box with discounts,
and a catchy phrase written using WordArt. This advertisement is sure to sizzle!
Materials
• Microsoft Word
• Advertise Folder
o insert picture.png
o Flyer Folder: contains product images for the flyer and sample advertisement
o Workbook folder – individual assignments, reviews, skill reviews, extension activities
• Assessment Tools Folder
o Flyer Checklist (customizable checklist is available in the Assessment Tools folder)
o Flyer Marking Sheet (customizable marking sheet is available in the Assessment Tools folder)
• Flashcards (Optional)
o Word Home Tab, Insert Tab, Picture Tools Format Tab, Drawing Tools Format Tab, SmartArt Tools Format
Tab, SmartArt Tools Design Tab, Header & Footer Tools Design Tab, Background Removal, Mini Toolbar,
Chart Tools Design, Chart Tools Format
• Review and Skill Review (Optional)
o Session 2 Review: About Graphics
o Session 2 Skill Review: Design an Event Poster
o Poster Sample File
o dance party logo.gif
Teacher Preparation
(Refer to the Preparing to Teach section of this guide for instructions)
• (Optional) Gather advertisements from newspapers, magazines, flyers, and e-newsletters.
• (Optional) Print the flashcards listed in the materials list for this session.
Teaching Strategy
In this session, students create a flyer. Explain scenario to students.
Congratulations! You are now the Advertising Agent at TechnoAd Agency. The
agency offers training to all new staff. Your first training session focuses on learning
about the objects on the Insert tab that can be added into a document. Once you
understand the options available in Microsoft Word, you start working with a client from
TechnoTeen Company. This company sells shoes, clothes, and accessories to
teenagers. They have requested a flyer to promote their "Summer Heat" sales event.
Use your skills to produce an effective advertisement. This flyer is sure to attract interest
with the exciting combination of pictures, shapes, SmartArt Graphics, text boxes,
WordArt, and more!
For every session, the Teacher Guide features an Introduction with a materials list, preparationadvice, teaching strategies,lesson plans for each assignment, and learning objectives for the session.
SAMPLE
Session 2
Copyright © TechnoKids Inc. 2-2 TechnoAdvertise | Office 2019
Assignment 6 About the Insert Tab
In this assignment, students explore the Insert tab of Microsoft Word. They follow instructions to answer questions
about the objects that can be added to a document. Many of the commands on the Insert tab will be used in
Assignment 7 to create a flyer, while others will be used in upcoming sessions. Encourage students to experiment
with the range of options to gain an understanding of the variety of pages, illustrations, links, headers, footers, text,
and symbols that are available.
NOTE: About the Insert Tab
Assignment 6 is an introduction to the commands on the Insert tab. The goal is to show students the options that are
available, so that they will know where to look the next time they want to complete a task in Microsoft Word. This assignment
is not intended to teach every command in depth.
Assignment 7 Create a Flyer – Phase 1
In this assignment, students create a flyer for TechnoTeen Company. The client wants to promote their latest sales
event, Summer Heat. To produce the advertisement, students learn how to format pictures and shapes. Skills such
as how to position objects, wrap text, adjust object order, group, and rotate objects are introduced. You may
wish to show students sample flyers as a source of inspiration.
Introduce the following terminology:
• scale: resize an object to make it larger or smaller
• rotate: turn an object on its axis in a circular direction
• contextual tab: additional tab on the ribbon that appears when an object is selected
• border: decorative line around an object
• fill: cover an object with a solid color, gradient, or texture
• text wrap: adjust the way text goes around an object
• flip: turn an object on its axis in a horizontal or vertical direction
• crop: cut a picture to remove unwanted parts
• mini toolbar: small floating toolbar that appears when text is selected
• selection pane: pane that lists objects in document to allow them to be selected and formatted
• object order: layer that an object lies on in relation to a stack of other objects
• group: combine multiple objects together to form one large object
Assignment 8 Create a Flyer – Phase 2
In this assignment, students complete the flyer. They learn new word processing skills. Merchandise is promoted
using a SmartArt Graphic and sale details are attractively displayed in the header and footer. A text box is used to
draw attention to discounts, while WordArt includes a catchy phrase. Upon completion, copyright information is
placed onto the flyer using a symbol beside the creation date.
TEACHER TIP: EVALUATE THE FLYER
You may wish to evaluate the flyer. At the end of the assignment is a checklist. Students can use the checklist to determine if
their flyer is ready for publication. A customizable version of the checklist and a marking sheet is available in the Assessment
Tools folder.
Lesson Plan
Assignment 6 - About the Insert Tab
• Open Microsoft Word.
• Change the zoom level to Whole Page.
• Answer questions about the Insert tab to discover the purpose of each command.
• Close Microsoft Word.
This section, for teachers, explains each assignment and gives helpful tips.
SAMPLE
Session 2
Copyright © TechnoKids Inc. 2-3 TechnoAdvertise | Office 2019
Assignment 7 - Create a Flyer – Phase 1
• Open Microsoft Word.
• Type the flyer title Summer Heat Sales Event and then format the font and font size.
• Insert and format a picture using commands on the Picture Tools Format contextual tab:
o Insert the picture file shoes.
o Scale and rotate the picture file using handles.
o Remove the background from the picture.
o Experiment with the commands on the Picture Tools Format contextual tab.
o Reset a picture to remove all formatting.
o Customize the style applied to the picture by adjusting the border and effects.
o Adjusting the position, text wrap, alignment, and orientation of the picture.
o Crop a picture into a shape and manually set the size of a picture.
• Insert a summer clip art and apply knowledge to format the image.
• Insert a shape and format the object using commands on the Drawing Tools Format contextual tab:
o Draw a shape from the gallery.
o Bend the shape using an adjustment handle.
o Add the text Save to the object.
o Activate the mini toolbar and use it to format the text in the shape.
o Change the shape into a different one, while retaining the formatting.
o Format the style, fill, outline, and effects applied to a shape.
o Adjust the style, color, outline and effects applied to text in a shape.
o Set the direction and alignment of text in a shape.
• Adjust the shape and clip art:
o Change the object order.
o Select objects using the Selection Pane.
o Group and ungroup objects.
• Save the flyer and then Close Microsoft Word.
Assignment 8 - Create a Flyer – Phase 2
• Open the saved flyer in Microsoft Word.
• Insert a SmartArt Graphic that includes pictures of sales items:
o Insert pictures of sales items into a SmartArt Graphic.
o Add a bullet with a brief description of a product.
o Adjust the horizontal and vertical position of objects in a SmartArt Graphic.
o Change the layout of a SmartArt Graphic.
o Adjust the color and style of a SmartArt Graphic.
• Insert and format the header using commands on the Header & Footer Tools tab:
o Insert a header with a Document Title only.
o Type the sales event name Summer Heat into the document title placeholder.
o Below the title add a sale date.
o Insert TechnoTeen logo into the header.
o Set the size of the header.
• Insert and format the footer using commands on the Header & Footer Tools tab:
o Insert a footer using the Blank (Three Columns) option.
o Include Company Contact Information. Set the size of the footer.
The Lesson Plan lists the individual steps in each assignment. SAMPLE
Session 2
Copyright © TechnoKids Inc. 2-4 TechnoAdvertise | Office 2019
• Insert a text box that describes promotional details such as discounts or sale pricing:
o Insert a text box from the Text Box gallery.
o Add promotion details into the text box.
o Format the style, text style, position, text wrap, object order, alignment, and size.
• Insert WordArt that includes a catchy phrase such as Sizzling Savings or Hot Deals.
• Format the text style, position, text wrap, object order, alignment, and size.
• Insert TechnoAd Agency and the year with a copyright symbol:
o Draw a text box from the Shapes gallery. Type TechnoAd Agency and the year.
o Before the year, insert a copyright symbol.
• Use skills to complete the flyer. Complete the checklist.
• Print the publication. Save the changes to the flyer.
• Close Microsoft Word.
Learning Objectives
Desktop Publishing Skills
design a flyer for teenagers as the target audience size text so that important information is larger
leave white space so that the flyer does not look cluttered select a font that is easy to read
Word Processing Skills
About the Program Window
adjust magnification using the Zoom Slider tools
locate commands on the ribbon
About File Management
open and close a document
save a file as a document
print a document
About Text
format text using the mini toolbar
About Graphics
insert a picture file change an object into a new shape but retain formatting
remove the background from a picture format the style, fill, outline, or effects applied to a shape
adjust the sharpness, brightness, or contrast of a picture format text in an object: style, color, outline, effects
adjust the saturation, tone, or color of a picture set the text direction in a drawing object
apply an artistic effect to a picture align text in a drawing object to the left, center, and right
reset a picture to remove all formatting adjust object order
apply a picture style to an object select an object using the selection pane
format the border or effects applied to a picture group and ungroup objects
position an object on the page: top, middle, or bottom insert a screenshot of a window or part of a document
adjust text wrap insert a hyperlink to a website
align an object on the page: left, center, or right insert a bookmark to quickly return to a picture
rotate an object freehand or by 90º insert a cross-reference to list bookmarks in a document
flip an object horizontally or vertically insert a text box and format the style
scale an object using handles or manually set dimensions insert a quick part of the document title
crop an image into a shape insert and format WordArt: style, color, outline, and effects
bend an object using the adjustment handle insert a drop cap
draw a shape such as a rectangle, line, or banner insert a signature line with the name of the signer
add text to a shape insert date/time and select the format
insert a copyright symbol
About SmartArt Graphics
insert a SmartArt Graphic change the layout of a SmartArt Graphic
add a bullet to a SmartArt Graphic change the color of a SmartArt Graphic
adjust the vertical and horizontal position of objects format the style, fill, outline, or effects
About Page Layout
insert a cover page - add information into placeholders insert a page break
insert a blank page insert page numbers into the right margin
About Tables
insert a table using multiple methods
About Headers and Footers
insert a header and footer adjust the size of a header or footer
add text or a picture to the header and footer close the header or footer
Applied Technology
create a flyer using pictures, shapes, SmartArt, headers, footers, WordArt, text boxes, and symbols
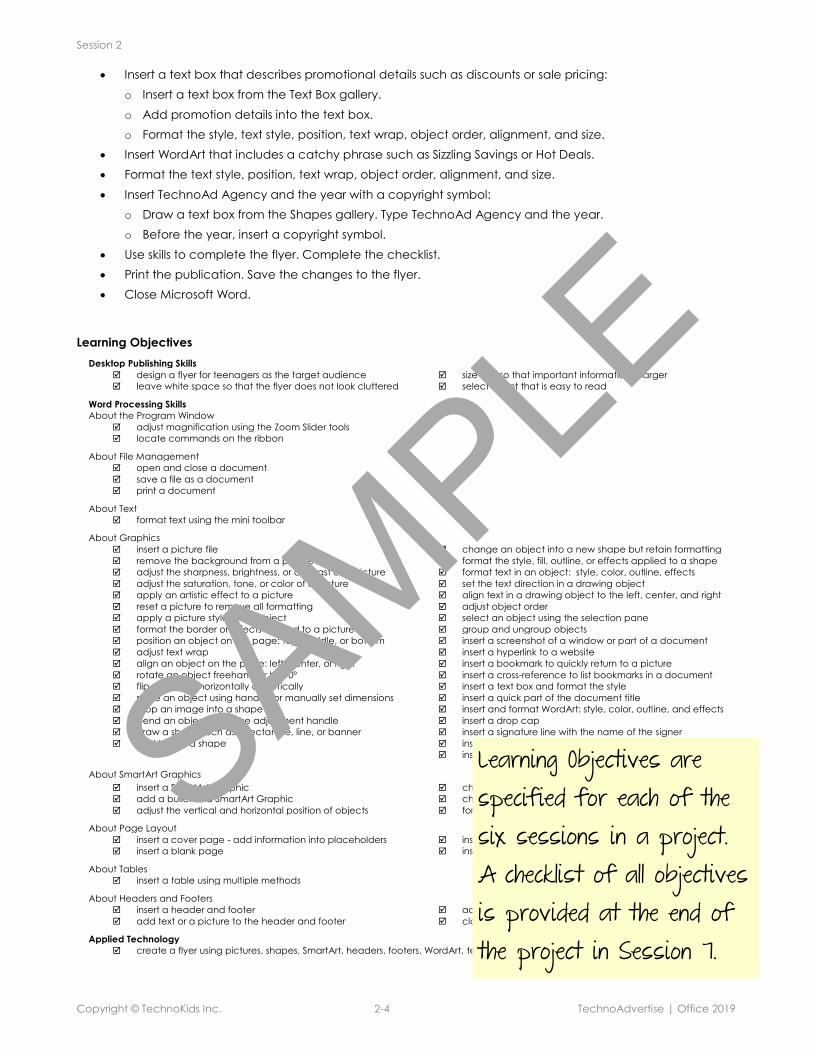
Learning Objectives are specified for each of the six sessions in a project. A checklist of all objectives is provided at the end of the project in Session 7.
SAMPLE
Session 2
Copyright © TechnoKids Inc. 2-5 TechnoAdvertise | Office 2019
Assignment 6: About the Insert Tab
Congratulations! You have been hired by TechnoAd Agency!
In your new position, you will be creating marketing materials. In the next assignment you will
start working on your first publication - an advertising flyer. To acquire the skills, you need for
this task, the agency offers training to all new staff.
The focus of this training assignment is on learning about the objects on the Insert tab that can be added into a
document. You will use these skills to produce an effective advertisement for your first client. To start, read about
the Insert tab. Afterwards, follow the instructions to insert pages, tables, pictures, hyperlinks, comments, headers,
footers, text, and symbols.
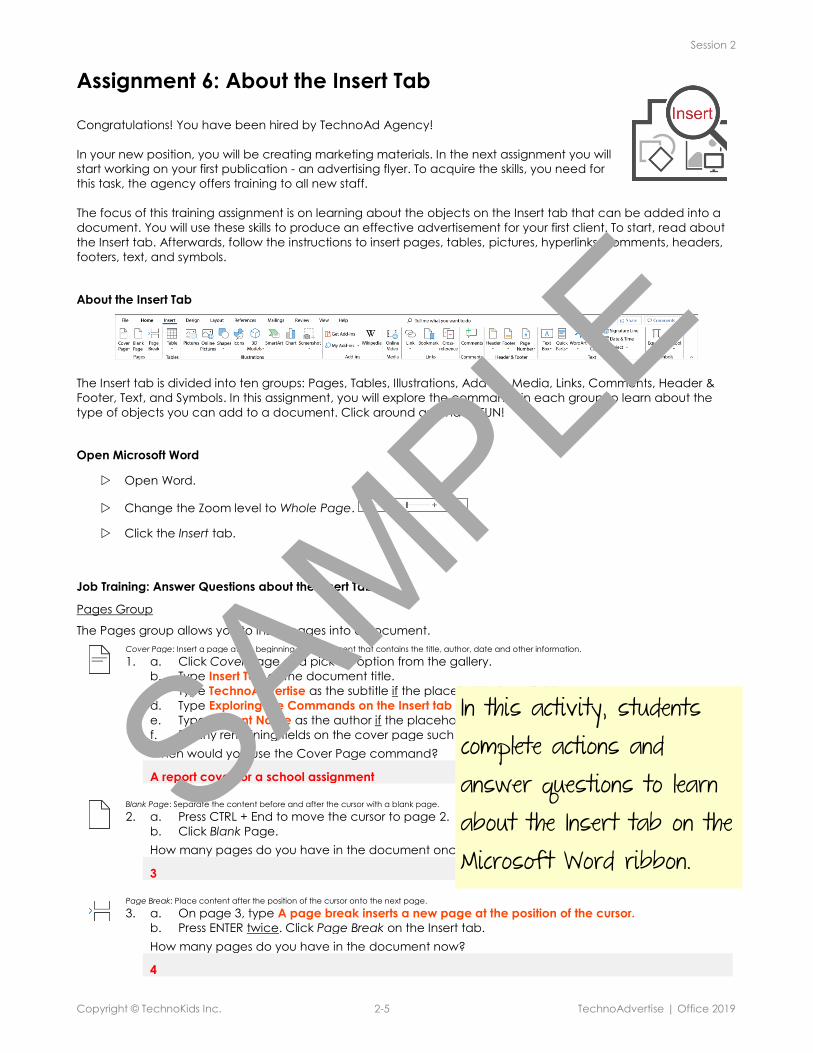
About the Insert Tab
The Insert tab is divided into ten groups: Pages, Tables, Illustrations, Add-ins, Media, Links, Comments, Header &
Footer, Text, and Symbols. In this assignment, you will explore the commands in each group to learn about the
type of objects you can add to a document. Click around and have FUN!
Open Microsoft Word
Open Word.
Change the Zoom level to Whole Page.
Click the Insert tab.
Job Training: Answer Questions about the Insert Tab
Pages Group
The Pages group allows you to insert pages into a document.
Cover Page: Insert a page at the beginning of a document that contains the title, author, date and other information.
1. a. Click Cover Page and pick an option from the gallery.
b. Type Insert Tab as the document title.
c. Type TechnoAdvertise as the subtitle if the placeholder is available.
d. Type Exploring the Commands on the Insert tab as the abstract if available.
e. Type Student Name as the author if the placeholder is available.
f. Fill any remaining fields on the cover page such as date or company information.
When would you use the Cover Page command?
A report cover for a school assignment
Blank Page: Separate the content before and after the cursor with a blank page.
2. a. Press CTRL + End to move the cursor to page 2.
b. Click Blank Page.
How many pages do you have in the document once the blank page is inserted?
3
Page Break: Place content after the position of the cursor onto the next page.
3. a. On page 3, type A page break inserts a new page at the position of the cursor.
b. Press ENTER twice. Click Page Break on the Insert tab.
How many pages do you have in the document now?
4
In this activity, students complete actions and answer questions to learn about the Insert tab on the Microsoft Word ribbon.
SAMPLE

Session 2
Copyright © TechnoKids Inc. 2-6 TechnoAdvertise | Office 2019
Tables Group
The Tables group allows you to insert a table. Table: Insert or draw a grid of rows and columns to organize information.
4. There are several ways to insert a table. Try some of the options:
Drag to Create a Table
a. Press CTRL + End to move the cursor to page 4. Click Table.
b. Click and drag the mouse over the grid to select a 4 x 3 Table. Click
the mouse to add the table to the document.
c. Click below the table and press ENTER.
Select the Number of Columns and Rows
d. Click the Insert tab. Click Table. Select Insert Table.
e. Type 4 columns and 3 rows. Click OK.
f. Click below the table and press ENTER.
Draw a Table
g. Click the Insert tab. Click Table. Click Draw Table.
h. Click and drag the Pencil to draw a box. Click and drag the Pencil to divide the box into
4 columns and 3 rows with the Pencil.
i. To remove the Pencil, click ESC on the keyboard.
j. Click below the table and press ENTER.
Which method do you prefer to use to insert a table? Why?
Illustrations Group
The Illustrations group allows you to insert graphics. Picture: Insert a graphic file stored on the computer or storage device.
5. a. Position the cursor on Page 3 below the sentence about page breaks.
b. Click the Insert tab. Click Pictures.
c. Browse to find the Advertise folder.
d. Select the picture insert picture. Click the Insert button.
When would you use the Picture command?
To add a saved picture such as a photograph or image saved from the Internet
Online Pictures: Insert pictures from a variety of online sources.
6. Position the cursor beside the picture. Click Online Pictures on the Insert tab. Click Close.
Why would you want to add pictures to a document?
To add reader interest, to clarify the text, to attract attention
Shapes: Insert a drawing object such as rectangles, circles, arrows, lines, flowchart symbols, callouts, stars, and banners.
7. Click Shapes in the Illustrations group. Rest the mouse pointer over an object to see the name of
the shape. List four shapes you would use often. Press ESC.
Icons: Insert an icon to visually communicate using symbols. Will we use these??
8. Click Icons in the Illustrations group. Scroll through the categories to browse the choices.
List two categories you would use. Click Cancel.
3D Models: Insert a 3D model so you can rotate it and see all angles. Will we use these?
9. Click 3D Models in the Illustrations group. This requires a previously made 3D model to insert into a
document. What object would be useful to view and rotate in 3D?
Insert SmartArt Graphic: Insert a graphic that summarizes information into a list, process, cycle, hierarchy, relationship, matrix, or pyramid.
10. Click SmartArt. Click a type of SmartArt in the left pane to see a selection of layouts.
List three types of graphic organizers you would use. Click Cancel.
For the paperless classroom, students can answer questions in their digital workbooks using the latest version of Adobe Reader.
SAMPLE
Session 2
Copyright © TechnoKids Inc. 2-7 TechnoAdvertise | Office 2019
Insert Chart: Insert a graphic that represents numerical data using bars, lines, pie pieces, or dots to illustrate and compare data.
11. Click Chart. Click a type of chart in the left pane, then click a layout from the choices to see a
sample. List three charts you can insert into a document. Click Cancel.
Screenshot: Insert a picture of an open window or any part of an open document.
12. a. Click Screenshot. Click Screen Clipping.
b. Click and drag to take a picture of the Desktop or an open window and place it in the
document.
When would you use the Screen Clipping command?
Add-ins Group
The Add-ins group lets you download apps from the Microsoft Office store to add capabilities to Word.
Get Add-ins: Browse through categories of software utilities that can be added to Microsoft Office.
13. a. Click Get Add-ins.
b. Browse through the Education and Utilities categories.
List two add-ins that you would find useful.
My Add-ins: A list of add-ins that the user has added to Microsoft Word.
14. a. Click My Add-ins.
Does your version of Word have any add-ins? If yes, what are they?
Wikipedia: An add-in that lets you search Wikipedia in a pane within the Word program to find information, images, and definitions.
14. a. Click Wikipedia. If prompted, click Trust Add-in.
How would this add-in make your research more efficient?
You would save time. You do not have to open a web browser and find Wikipedia.
Media Group
The Media group allows you to search for and insert a video from the web into a document.
Online Video: Insert a video from an online source into a document.
13. a. Click Online Video.
b. Browse the sources where you can search for a video.
c. Close the Online Video window.
For which school subjects do you think you might include a video in an assignment?
Links Group
The Links group allows you to connect to a file, email, website, or part in a document.
Link: Connect a picture or text to a file, email address, website, or bookmark.
14. a. Select the insert picture graphic inserted in Question 5. From the Insert tab, click Link.
b. In the address bar type www.technokids.com. Click OK.
c. Deselect the picture.
d. Rest the mouse pointer over the picture. Press CTRL and then click to open the website.
e. Close the web page window.
What happened when you clicked the picture? The website was opened in a web browser.
Bookmark: Mark text or a location in a document to view that part of the document quickly.
15. a. Select the screen clipping created in Question 12. Click Bookmark.
b. Type the bookmark name clipping and then click Add.
c. Press CTRL + Home to view the cover.
d. From the Insert tab, click Bookmark. Select clipping and then click Go To. Click Close.
What happened when you clicked Go To?
The part of the document in view changed to the bookmarked pictureSome pages have been removed from this sample session.
SAMPLE
Session 2
Copyright © TechnoKids Inc. 2-11 TechnoAdvertise | Office 2019
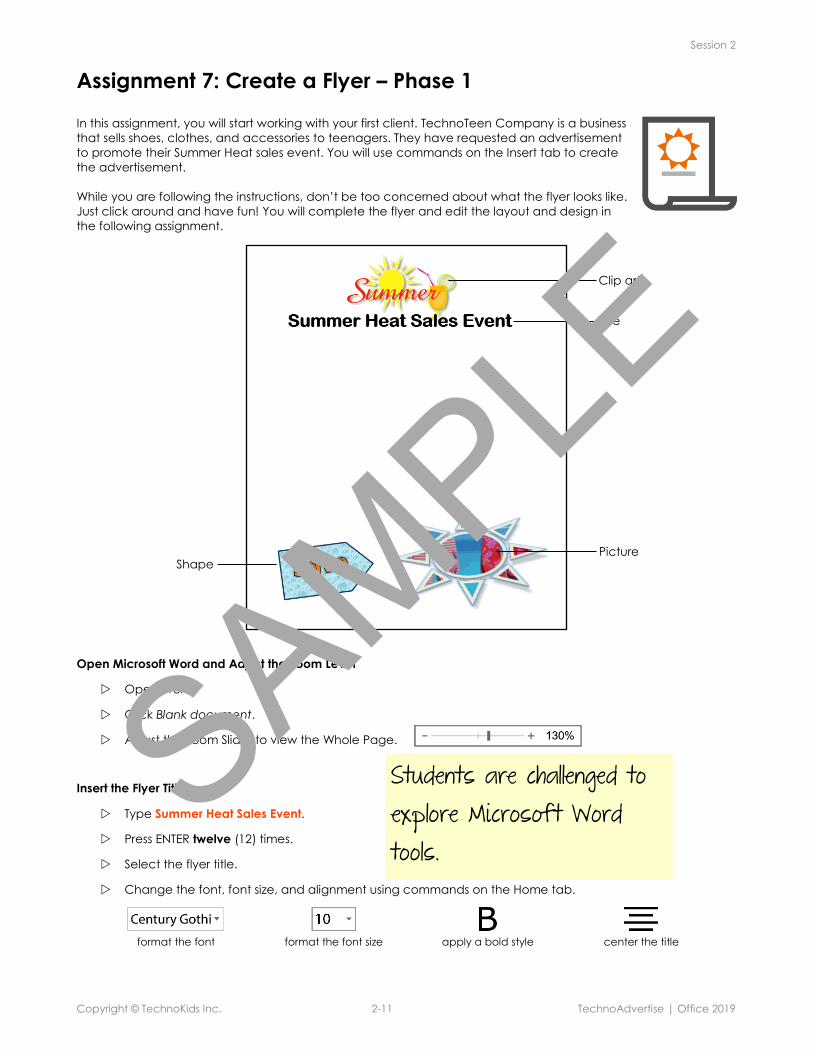
Assignment 7: Create a Flyer – Phase 1
In this assignment, you will start working with your first client. TechnoTeen Company is a business
that sells shoes, clothes, and accessories to teenagers. They have requested an advertisement
to promote their Summer Heat sales event. You will use commands on the Insert tab to create
the advertisement.
While you are following the instructions, don’t be too concerned about what the flyer looks like.
Just click around and have fun! You will complete the flyer and edit the layout and design in
the following assignment.
Open Microsoft Word and Adjust the Zoom Level
Open Word.
Click Blank document.
Adjust the Zoom Slider to view the Whole Page.
Insert the Flyer Title
Type Summer Heat Sales Event.
Press ENTER twelve (12) times.
Select the flyer title.
Change the font, font size, and alignment using commands on the Home tab.
format the font format the font size apply a bold style center the title
Clip art
Title
Picture Shape
Students are challenged to explore Microsoft Word tools.
SAMPLE
Session 2
Copyright © TechnoKids Inc. 2-12 TechnoAdvertise | Office 2019
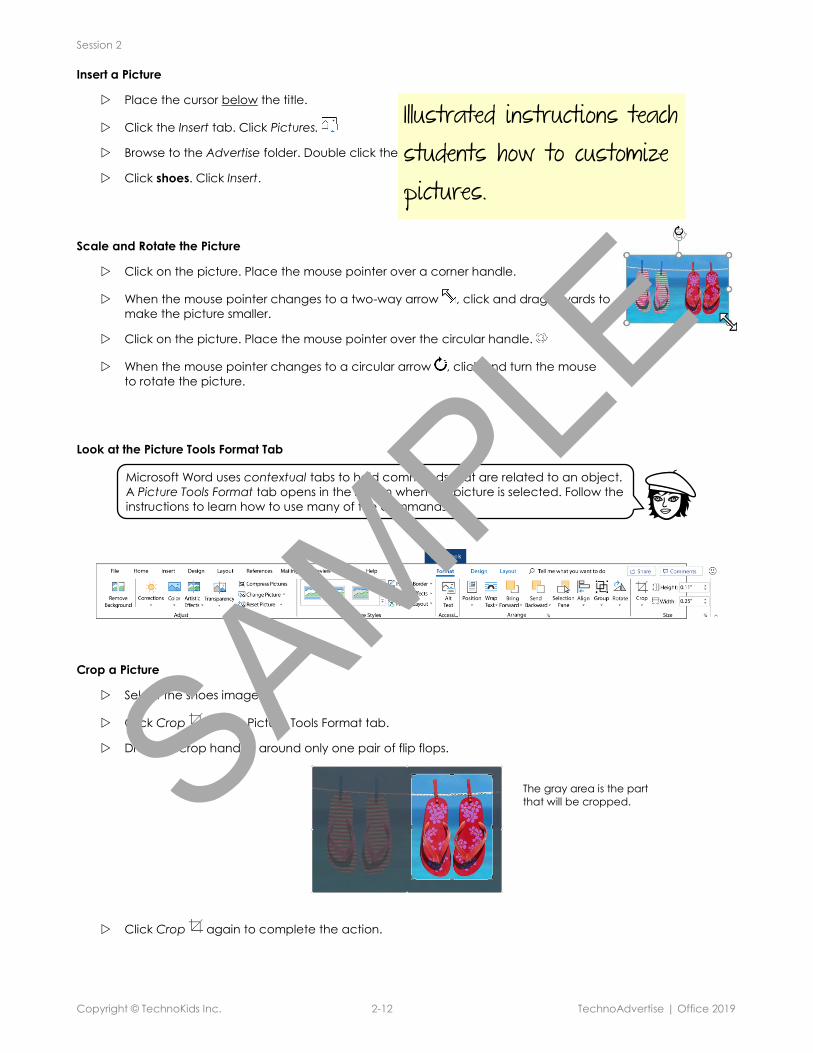
Insert a Picture
Place the cursor below the title.
Click the Insert tab. Click Pictures.
Browse to the Advertise folder. Double click the flyer folder.
Click shoes. Click Insert.
Scale and Rotate the Picture
Click on the picture. Place the mouse pointer over a corner handle.
When the mouse pointer changes to a two-way arrow , click and drag inwards to
make the picture smaller.
Click on the picture. Place the mouse pointer over the circular handle.
When the mouse pointer changes to a circular arrow , click and turn the mouse
to rotate the picture.
Look at the Picture Tools Format Tab
Crop a Picture
Select the shoes image.
Click Crop on the Picture Tools Format tab.
Drag the crop handles around only one pair of flip flops.
Click Crop again to complete the action.
Microsoft Word uses contextual tabs to hold commands that are related to an object.
A Picture Tools Format tab opens in the ribbon when the picture is selected. Follow the
instructions to learn how to use many of the commands.
The gray area is the part
that will be cropped.
Illustrated instructions teach students how to customize pictures.
SAMPLE
Session 2
Copyright © TechnoKids Inc. 2-13 TechnoAdvertise | Office 2019
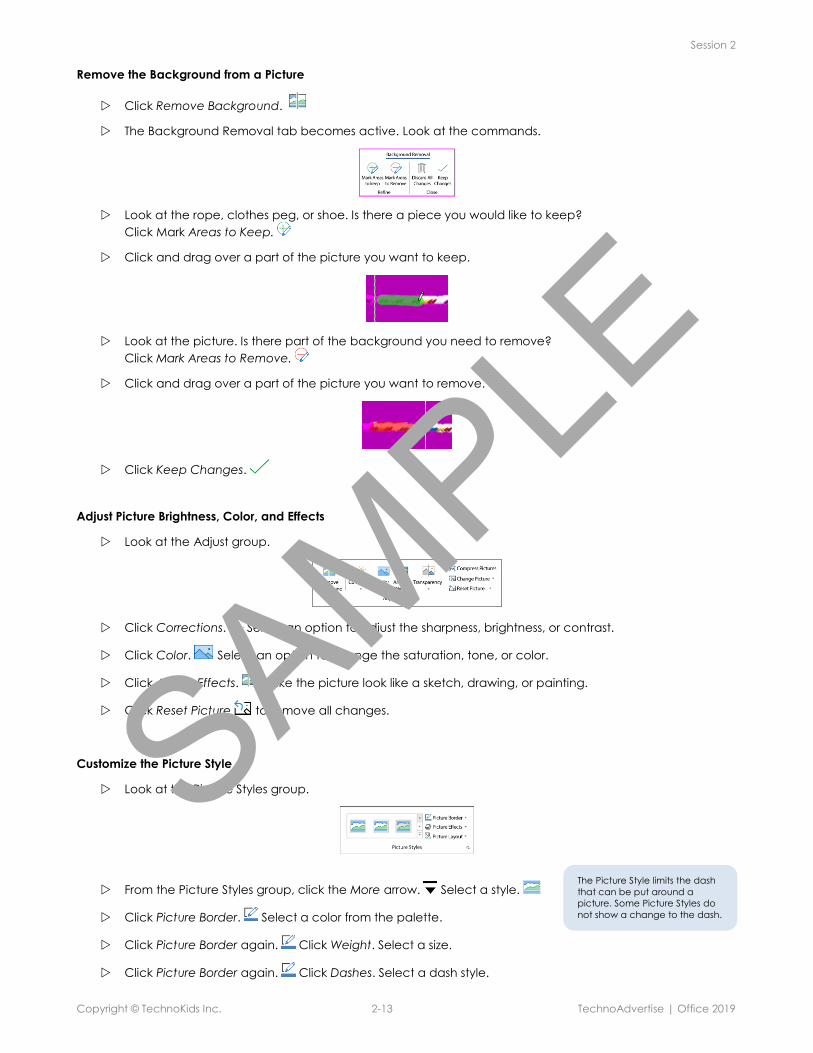
Remove the Background from a Picture
Click Remove Background.
The Background Removal tab becomes active. Look at the commands.
Look at the rope, clothes peg, or shoe. Is there a piece you would like to keep?
Click Mark Areas to Keep.
Click and drag over a part of the picture you want to keep.
Look at the picture. Is there part of the background you need to remove?
Click Mark Areas to Remove.
Click and drag over a part of the picture you want to remove.
Click Keep Changes.
Adjust Picture Brightness, Color, and Effects
Look at the Adjust group.
Click Corrections. Select an option to adjust the sharpness, brightness, or contrast.
Click Color. Select an option to change the saturation, tone, or color.
Click Artistic Effects. Make the picture look like a sketch, drawing, or painting.
Click Reset Picture to remove all changes.
Customize the Picture Style
Look at the Picture Styles group.
From the Picture Styles group, click the More arrow. Select a style.
Click Picture Border. Select a color from the palette.
Click Picture Border again. Click Weight. Select a size.
Click Picture Border again. Click Dashes. Select a dash style.
The Picture Style limits the dash
that can be put around a
picture. Some Picture Styles do
not show a change to the dash.
SAMPLE
Session 2
Copyright © TechnoKids Inc. 2-14 TechnoAdvertise | Office 2019
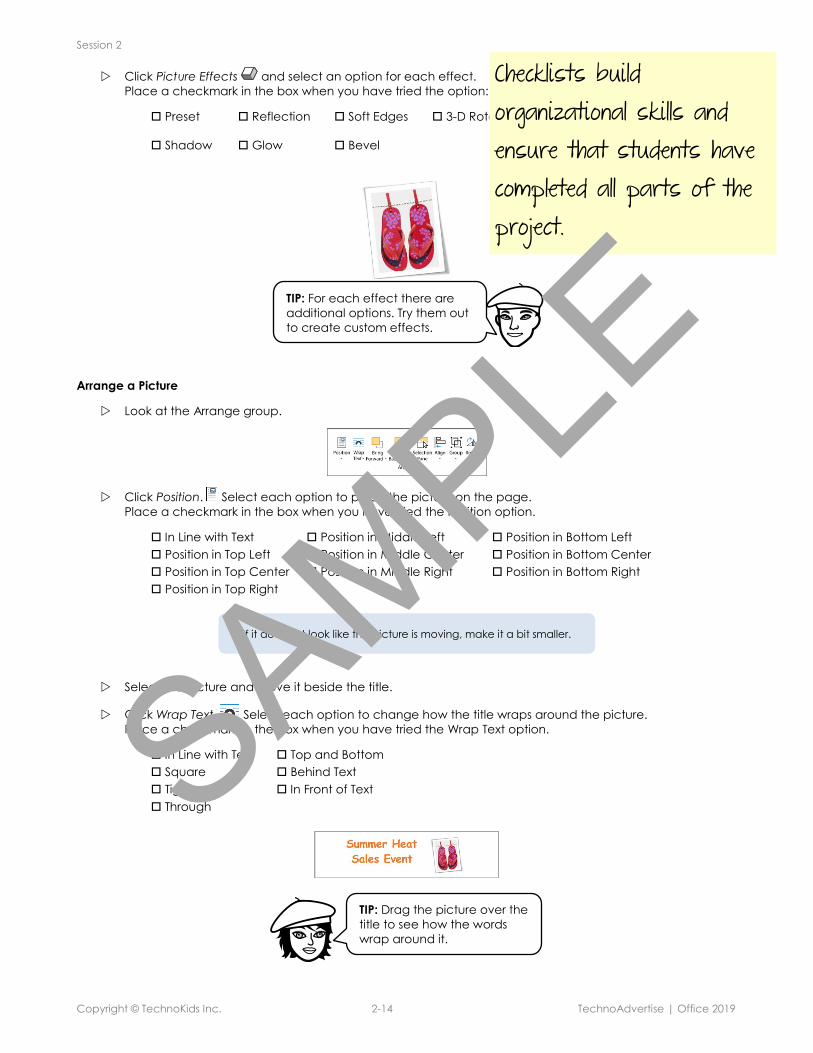
Click Picture Effects and select an option for each effect.
Place a checkmark in the box when you have tried the option:
Preset Reflection Soft Edges 3-D Rotation
Shadow Glow Bevel
Arrange a Picture
Look at the Arrange group.
Click Position. Select each option to place the picture on the page.
Place a checkmark in the box when you have tried the Position option.
In Line with Text
Position in Top Left
Position in Top Center
Position in Top Right
Position in Middle Left
Position in Middle Center
Position in Middle Right
Position in Bottom Left
Position in Bottom Center
Position in Bottom Right
Select the picture and move it beside the title.
Click Wrap Text. Select each option to change how the title wraps around the picture.
Place a checkmark in the box when you have tried the Wrap Text option.
In Line with Text
Square
Tight
Through
Top and Bottom
Behind Text
In Front of Text
Not all effects can
be combined.
TIP: For each effect there are
additional options. Try them out
to create custom effects.
If it does not look like the picture is moving, make it a bit smaller.
TIP: Drag the picture over the
title to see how the words
wrap around it.
Checklists build organizational skills and ensure that students have completed all parts of the project.
SAMPLE
Session 2
Copyright © TechnoKids Inc. 2-15 TechnoAdvertise | Office 2019
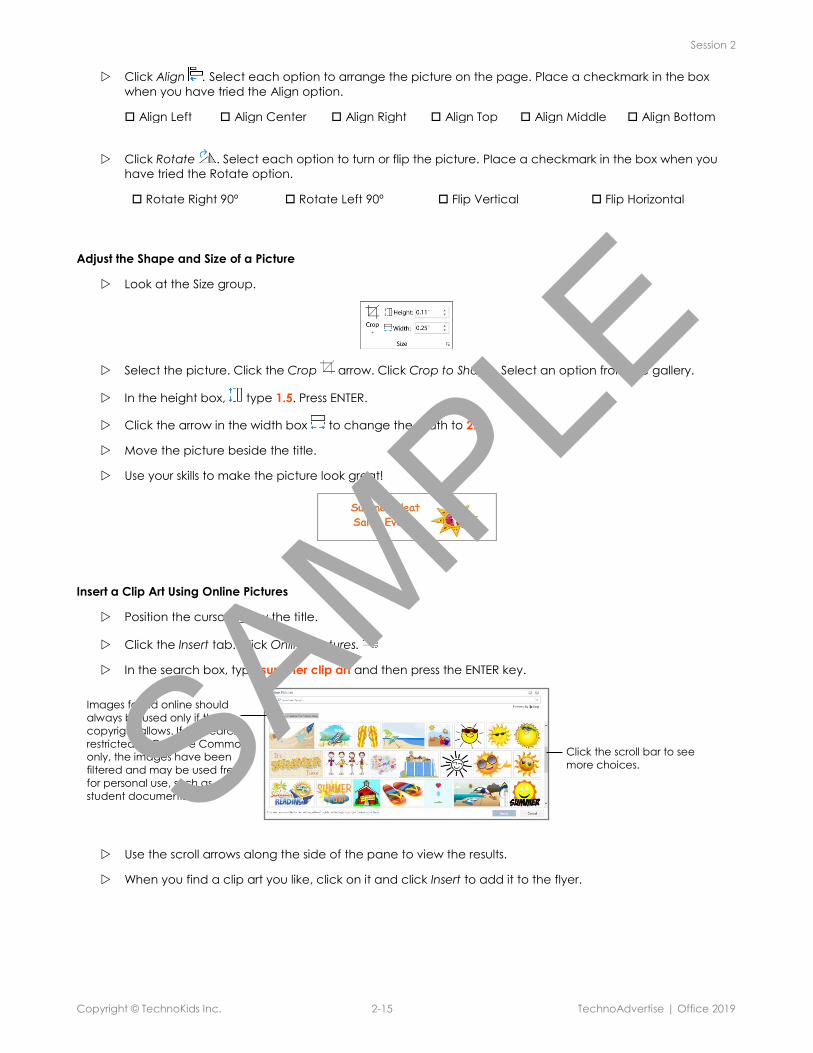
Click Align . Select each option to arrange the picture on the page. Place a checkmark in the box
when you have tried the Align option.
Align Left Align Center Align Right Align Top Align Middle Align Bottom
Click Rotate . Select each option to turn or flip the picture. Place a checkmark in the box when you
have tried the Rotate option.
Rotate Right 90º Rotate Left 90º Flip Vertical Flip Horizontal
Adjust the Shape and Size of a Picture
Look at the Size group.
Select the picture. Click the Crop arrow. Click Crop to Shape. Select an option from the gallery.
In the height box, type 1.5. Press ENTER.
Click the arrow in the width box to change the width to 2.
Move the picture beside the title.
Use your skills to make the picture look great!
Insert a Clip Art Using Online Pictures
Position the cursor below the title.
Click the Insert tab. Click Online Pictures.
In the search box, type summer clip art and then press the ENTER key.
Use the scroll arrows along the side of the pane to view the results.
When you find a clip art you like, click on it and click Insert to add it to the flyer.
Click the scroll bar to see
more choices.
Images found online should
always be used only if the
copyright allows. If the search is
restricted to Creative Commons
only, the images have been
filtered and may be used freely
for personal use, such as
student documents. SAMPLE

Session 2
Copyright © TechnoKids Inc. 2-16 TechnoAdvertise | Office 2019
Format an Image
Click Wrap Text and select In Front of Text.
Move the clip art to the bottom of the page.
Use your skills to format the image.
Insert a Shape, Bend It, and then Add Text
Position the cursor below the title.
Click the Insert tab. Click Shapes.
Select an option from the gallery.
Click and drag to draw the shape on the page.
Some shapes have an adjustment handle. It is an orange circle. If available, click and drag the yellow
adjustment handle to adjust the shape.
Right click on the shape and select Add Text.
Type Save!
Customize the Text Using the Mini Toolbar
Triple click on the word Save! The Mini Toolbar appears.
Use the commands to format the font, size, style, and color.
The Picture Tools Format contextual tab is used to format images. Use your
knowledge to make the picture look great!
Advanced graphic skills teach students how to customize shapes and pictures.
SAMPLE
Session 2
Copyright © TechnoKids Inc. 2-17 TechnoAdvertise | Office 2019
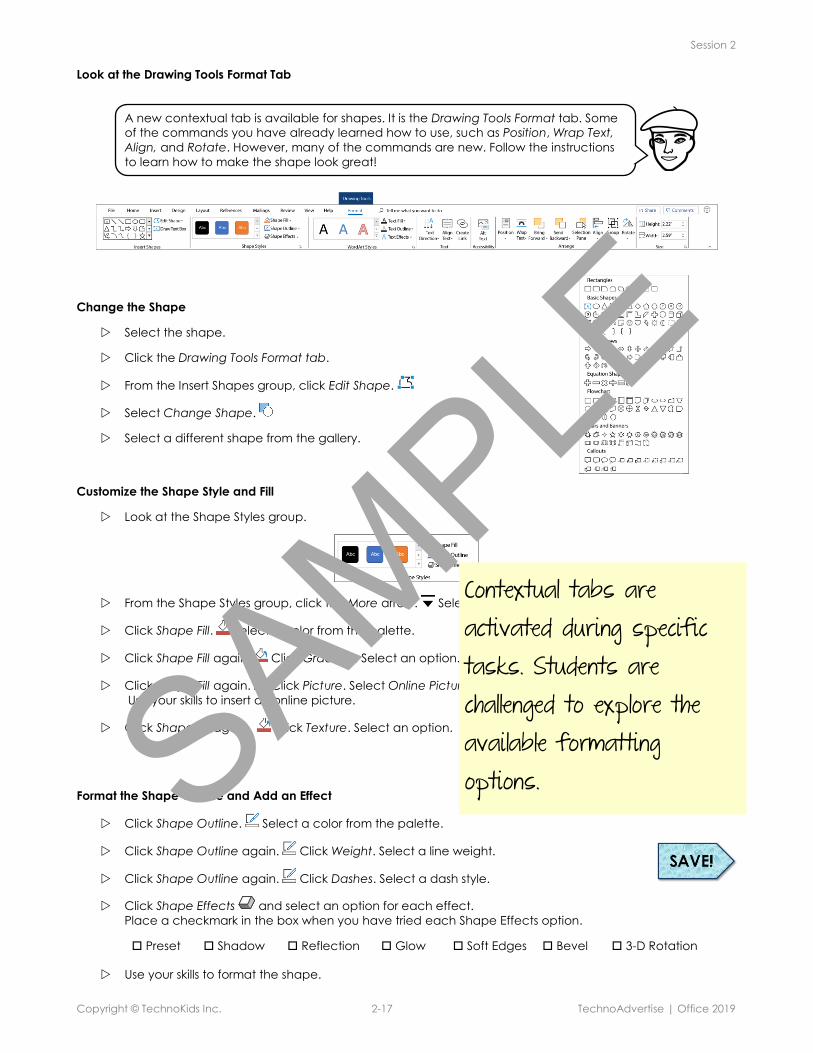
Look at the Drawing Tools Format Tab
Change the Shape
Select the shape.
Click the Drawing Tools Format tab.
From the Insert Shapes group, click Edit Shape.
Select Change Shape.
Select a different shape from the gallery.
Customize the Shape Style and Fill
Look at the Shape Styles group.
From the Shape Styles group, click the More arrow. Select a style.
Click Shape Fill. Select a color from the palette.
Click Shape Fill again. Click Gradient. Select an option.
Click Shape Fill again. Click Picture. Select Online Pictures. In the search box, type summer.
Use your skills to insert an online picture.
Click Shape Fill again. Click Texture. Select an option.
Format the Shape Outline and Add an Effect
Click Shape Outline. Select a color from the palette.
Click Shape Outline again. Click Weight. Select a line weight.
Click Shape Outline again. Click Dashes. Select a dash style.
Click Shape Effects and select an option for each effect.
Place a checkmark in the box when you have tried each Shape Effects option.
Preset Shadow Reflection Glow Soft Edges Bevel 3-D Rotation
Use your skills to format the shape.
A new contextual tab is available for shapes. It is the Drawing Tools Format tab. Some
of the commands you have already learned how to use, such as Position, Wrap Text,
Align, and Rotate. However, many of the commands are new. Follow the instructions
to learn how to make the shape look great!
Contextual tabs are activated during specific tasks. Students are challenged to explore the available formatting options. SAMPLE
Session 2
Copyright © TechnoKids Inc. 2-18 TechnoAdvertise | Office 2019
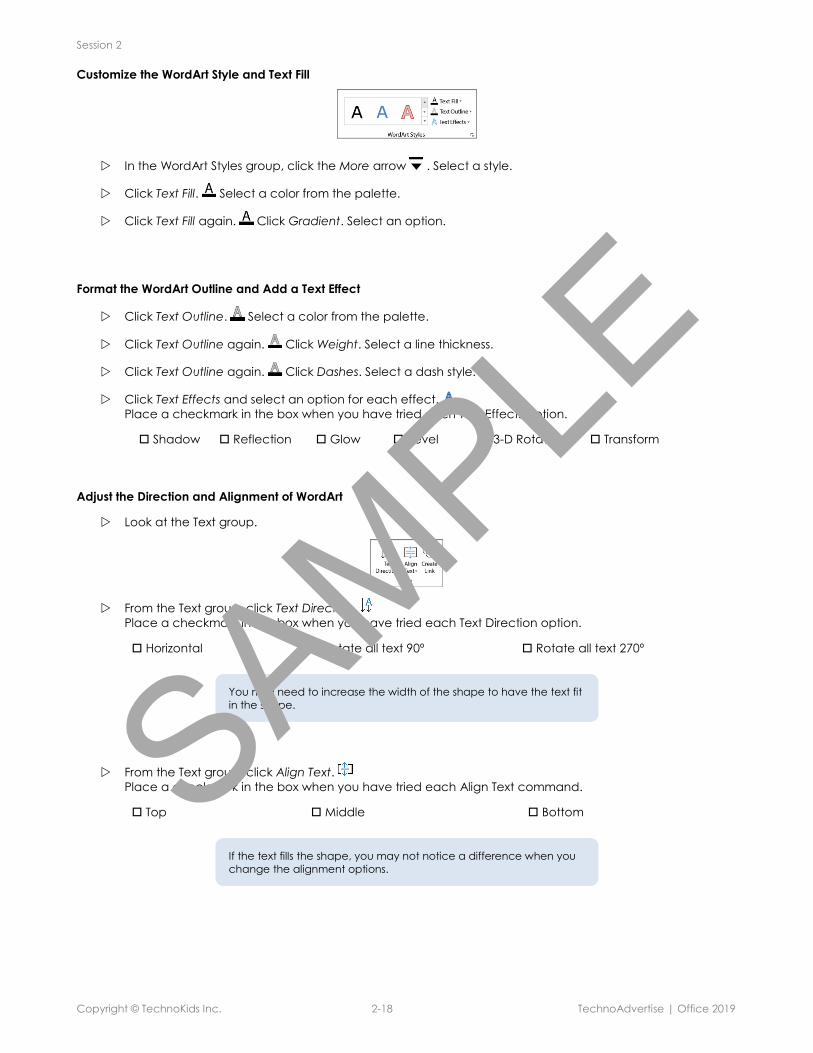
Customize the WordArt Style and Text Fill
In the WordArt Styles group, click the More arrow . Select a style.
Click Text Fill. Select a color from the palette.
Click Text Fill again. Click Gradient. Select an option.
Format the WordArt Outline and Add a Text Effect
Click Text Outline. Select a color from the palette.
Click Text Outline again. Click Weight. Select a line thickness.
Click Text Outline again. Click Dashes. Select a dash style.
Click Text Effects and select an option for each effect.
Place a checkmark in the box when you have tried each Text Effects option.
Shadow Reflection Glow Bevel 3-D Rotation Transform
Adjust the Direction and Alignment of WordArt
Look at the Text group.
From the Text group, click Text Direction.
Place a checkmark in the box when you have tried each Text Direction option.
Horizontal Rotate all text 90º Rotate all text 270º
From the Text group, click Align Text.
Place a checkmark in the box when you have tried each Align Text command.
Top Middle Bottom
You may need to increase the width of the shape to have the text fit
in the shape.
If the text fills the shape, you may not notice a difference when you
change the alignment options.
SAMPLE
Session 2
Copyright © TechnoKids Inc. 2-19 TechnoAdvertise | Office 2019
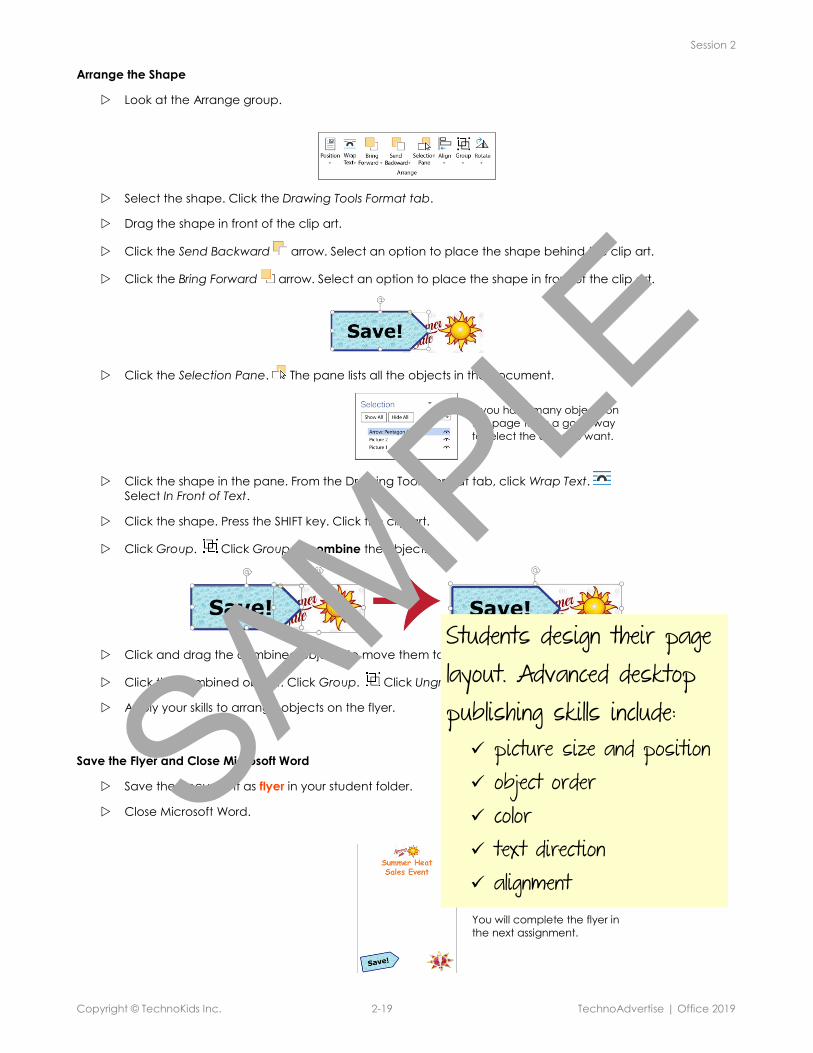
Arrange the Shape
Look at the Arrange group.
Select the shape. Click the Drawing Tools Format tab.
Drag the shape in front of the clip art.
Click the Send Backward arrow. Select an option to place the shape behind the clip art.
Click the Bring Forward arrow. Select an option to place the shape in front of the clip art.
Click the Selection Pane. The pane lists all the objects in the document.
Click the shape in the pane. From the Drawing Tools Format tab, click Wrap Text.
Select In Front of Text.
Click the shape. Press the SHIFT key. Click the clip art.
Click Group. Click Group to combine the objects.
Click and drag the combined objects to move them together.
Click the combined object. Click Group. Click Ungroup to separate the objects.
Apply your skills to arrange objects on the flyer.
Save the Flyer and Close Microsoft Word
Save the document as flyer in your student folder.
Close Microsoft Word.
You will complete the flyer in
the next assignment.
If you have many objects on
the page this is a good way
to select the one you want.
Students design their page layout. Advanced desktop publishing skills include: ✓ picture size and position✓ object order✓ color✓ text direction✓ alignment
SAMPLE
Session 2
Copyright © TechnoKids Inc. 2-20 TechnoAdvertise | Office 2019
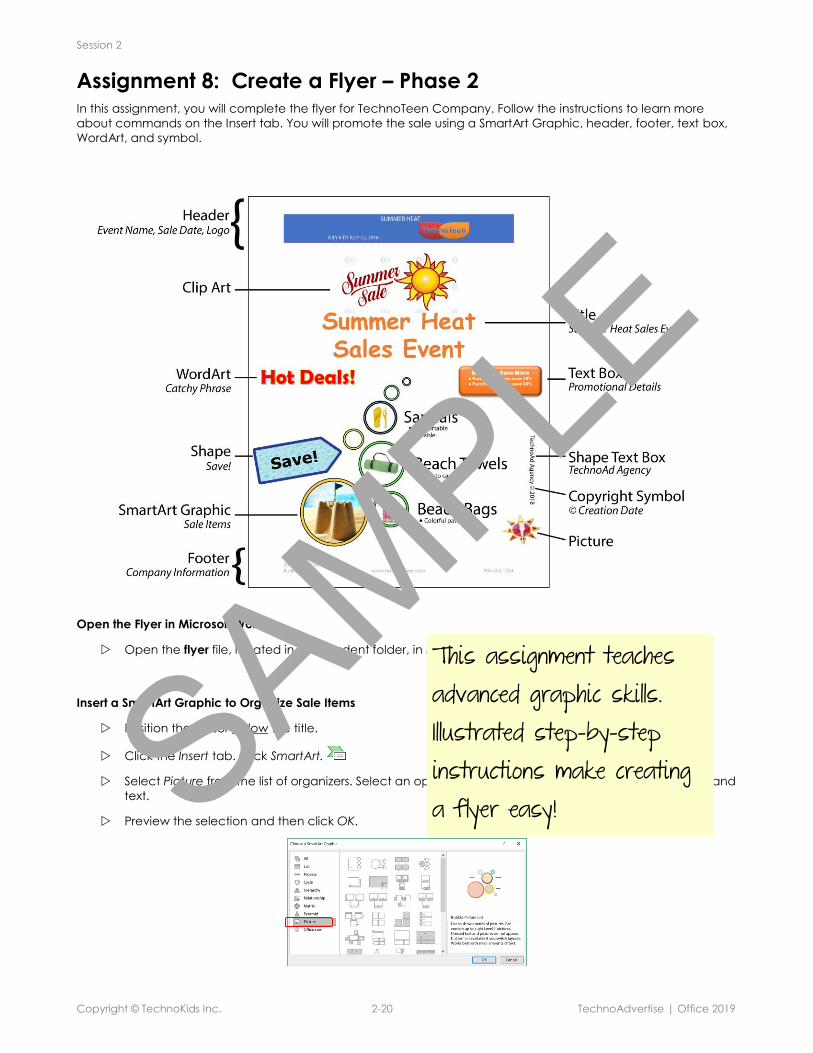
Assignment 8: Create a Flyer – Phase 2 In this assignment, you will complete the flyer for TechnoTeen Company. Follow the instructions to learn more
about commands on the Insert tab. You will promote the sale using a SmartArt Graphic, header, footer, text box,
WordArt, and symbol.
Open the Flyer in Microsoft Word
Open the flyer file, located in your student folder, in Microsoft Word.
Insert a SmartArt Graphic to Organize Sale Items
Position the cursor below the title.
Click the Insert tab. Click SmartArt.
Select Picture from the list of organizers. Select an option from the middle pane that includes pictures and
text.
Preview the selection and then click OK.
This assignment teaches advanced graphic skills. Illustrated step-by-step instructions make creating a flyer easy! SAMPLE
Session 2
Copyright © TechnoKids Inc. 2-21 TechnoAdvertise | Office 2019
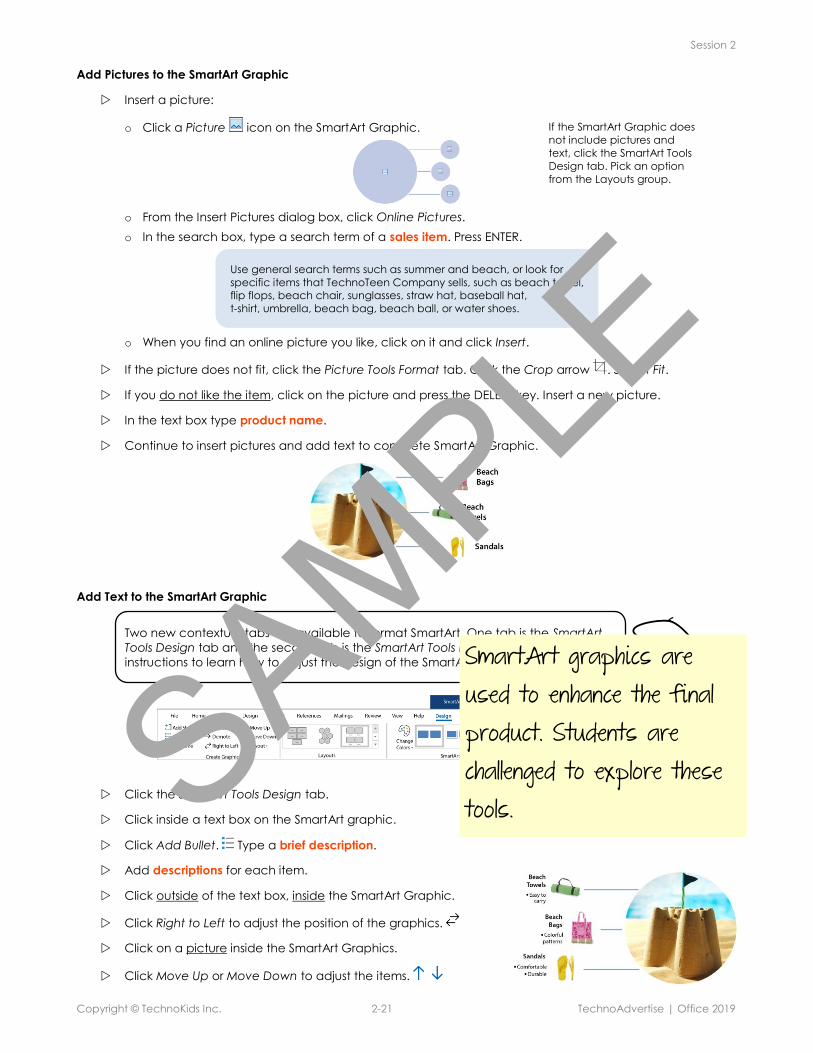
Add Pictures to the SmartArt Graphic
Insert a picture:
o Click a Picture icon on the SmartArt Graphic.
o From the Insert Pictures dialog box, click Online Pictures.
o In the search box, type a search term of a sales item. Press ENTER.
o When you find an online picture you like, click on it and click Insert.
If the picture does not fit, click the Picture Tools Format tab. Click the Crop arrow . Select Fit.
If you do not like the item, click on the picture and press the DELETE key. Insert a new picture.
In the text box type product name.
Continue to insert pictures and add text to complete SmartArt Graphic.
Add Text to the SmartArt Graphic
Click the SmartArt Tools Design tab.
Click inside a text box on the SmartArt graphic.
Click Add Bullet. Type a brief description.
Add descriptions for each item.
Click outside of the text box, inside the SmartArt Graphic.
Click Right to Left to adjust the position of the graphics.
Click on a picture inside the SmartArt Graphics.
Click Move Up or Move Down to adjust the items.
Use general search terms such as summer and beach, or look for
specific items that TechnoTeen Company sells, such as beach towel,
flip flops, beach chair, sunglasses, straw hat, baseball hat,
t-shirt, umbrella, beach bag, beach ball, or water shoes.
Two new contextual tabs are available to format SmartArt. One tab is the SmartArt
Tools Design tab and the second tab is the SmartArt Tools Format tab. Follow the
instructions to learn how to adjust the design of the SmartArt.
If the SmartArt Graphic does
not include pictures and
text, click the SmartArt Tools
Design tab. Pick an option
from the Layouts group.
SmartArt graphics are used to enhance the final product. Students are challenged to explore these tools. SAMPLE
Session 2
Copyright © TechnoKids Inc. 2-22 TechnoAdvertise | Office 2019
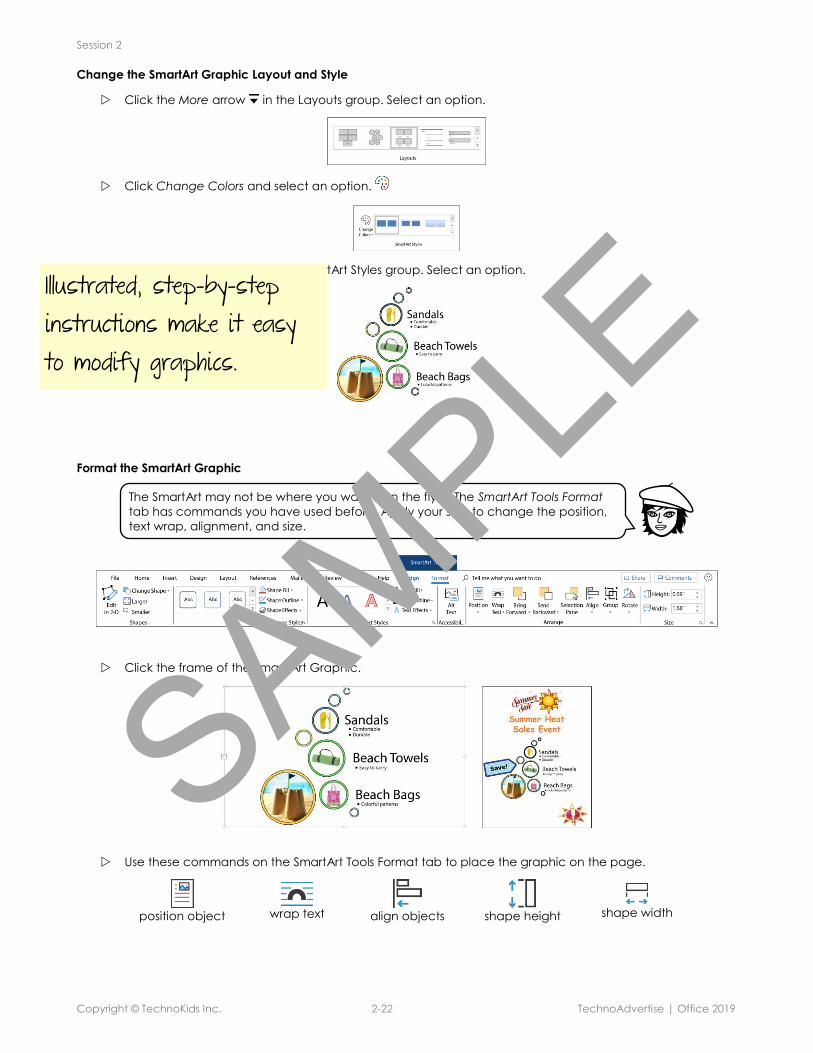
Change the SmartArt Graphic Layout and Style
Click the More arrow in the Layouts group. Select an option.
Click Change Colors and select an option.
Click the More arrow in the SmartArt Styles group. Select an option.
Format the SmartArt Graphic
Click the frame of the Smart Art Graphic.
Use these commands on the SmartArt Tools Format tab to place the graphic on the page.
position object wrap text align objects shape height shape width
The SmartArt may not be where you want it on the flyer. The SmartArt Tools Format
tab has commands you have used before. Apply your skills to change the position,
text wrap, alignment, and size.
Illustrated, step-by-step instructions make it easy to modify graphics.
SAMPLE
Session 2
Copyright © TechnoKids Inc. 2-23 TechnoAdvertise | Office 2019
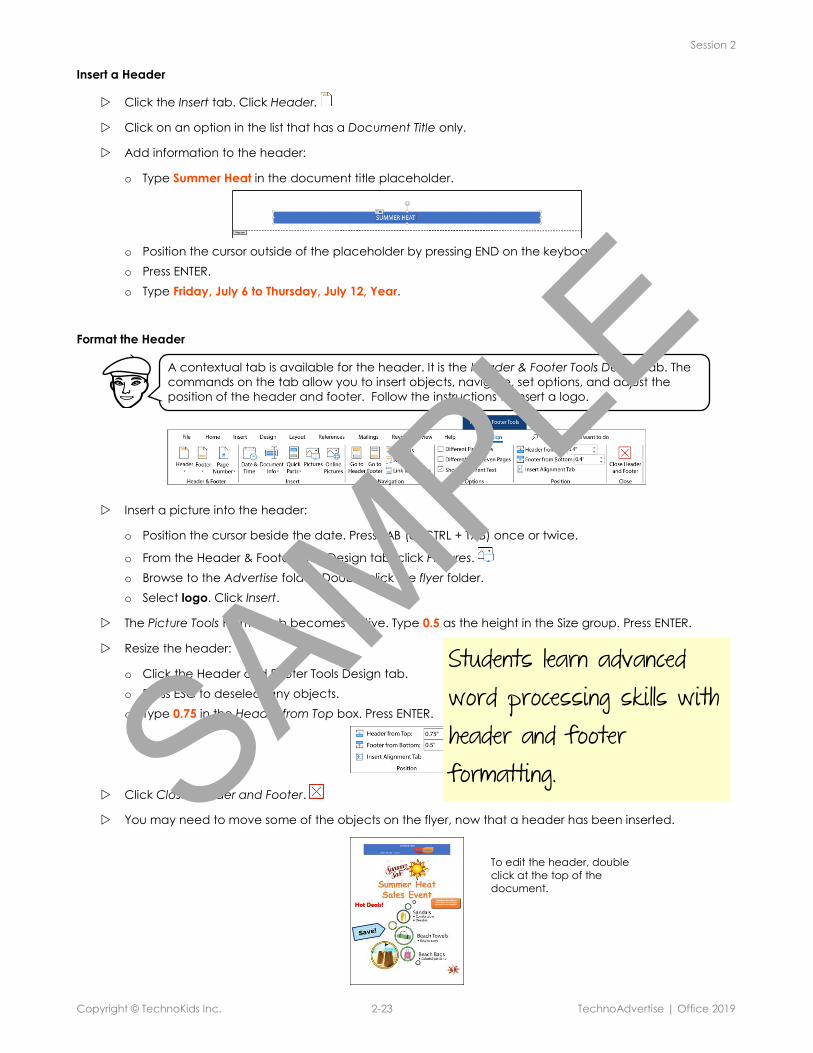
Insert a Header
Click the Insert tab. Click Header.
Click on an option in the list that has a Document Title only.
Add information to the header:
o Type Summer Heat in the document title placeholder.
o Position the cursor outside of the placeholder by pressing END on the keyboard.
o Press ENTER.
o Type Friday, July 6 to Thursday, July 12, Year.
Format the Header
Insert a picture into the header:
o Position the cursor beside the date. Press TAB (or CTRL + TAB) once or twice.
o From the Header & Footer Tools Design tab, click Pictures.
o Browse to the Advertise folder. Double click the flyer folder.
o Select logo. Click Insert.
The Picture Tools Format tab becomes active. Type 0.5 as the height in the Size group. Press ENTER.
Resize the header:
o Click the Header and Footer Tools Design tab.
o Press ESC to deselect any objects.
o Type 0.75 in the Header from Top box. Press ENTER.
Click Close Header and Footer.
You may need to move some of the objects on the flyer, now that a header has been inserted.
A contextual tab is available for the header. It is the Header & Footer Tools Design tab. The
commands on the tab allow you to insert objects, navigate, set options, and adjust the
position of the header and footer. Follow the instructions to insert a logo.
To edit the header, double
click at the top of the
document.
Students learn advanced word processing skills with header and footer formatting. SAMPLE

Session 2
Copyright © TechnoKids Inc. 2-24 TechnoAdvertise | Office 2019
Insert a Footer
Click the Insert tab. Click Footer.
Select Blank (Three Columns).
Add information to the footer:
o Type TechnoTeen Company in the left placeholder.
o Type www.technoteen.com in the second placeholder.
o Type phone number in the third placeholder. Press ENTER.
o Type store address.
Resize the footer:
o Click the Header and Footer Tools Design tab.
o Type 0.75 in the Footer from Bottom box.
Click Close Header and Footer.
You may need to move around some of the objects on the flyer, now that the footer has been inserted.
Insert a Text Box
Click the Insert tab. Click Text Box.
Click Draw Text Box.
Click and drag to draw a text box below the Smart Art graphic.
Click inside the text box. Type promotion details such as:
o 30% off
o Buy More, Save More, Purchase two items save 20%, Purchase three items save 30%
o Save $10 when you spend $50 or more
o Buy one item, receive the second item for free
Format the Text Box
The Drawing Tools Format contextual tab is used to format the text box. Use your skills to
change the style, text style, position, text wrap, object order, alignment, and size.
SAMPLE
Session 2
Copyright © TechnoKids Inc. 2-25 TechnoAdvertise | Office 2019
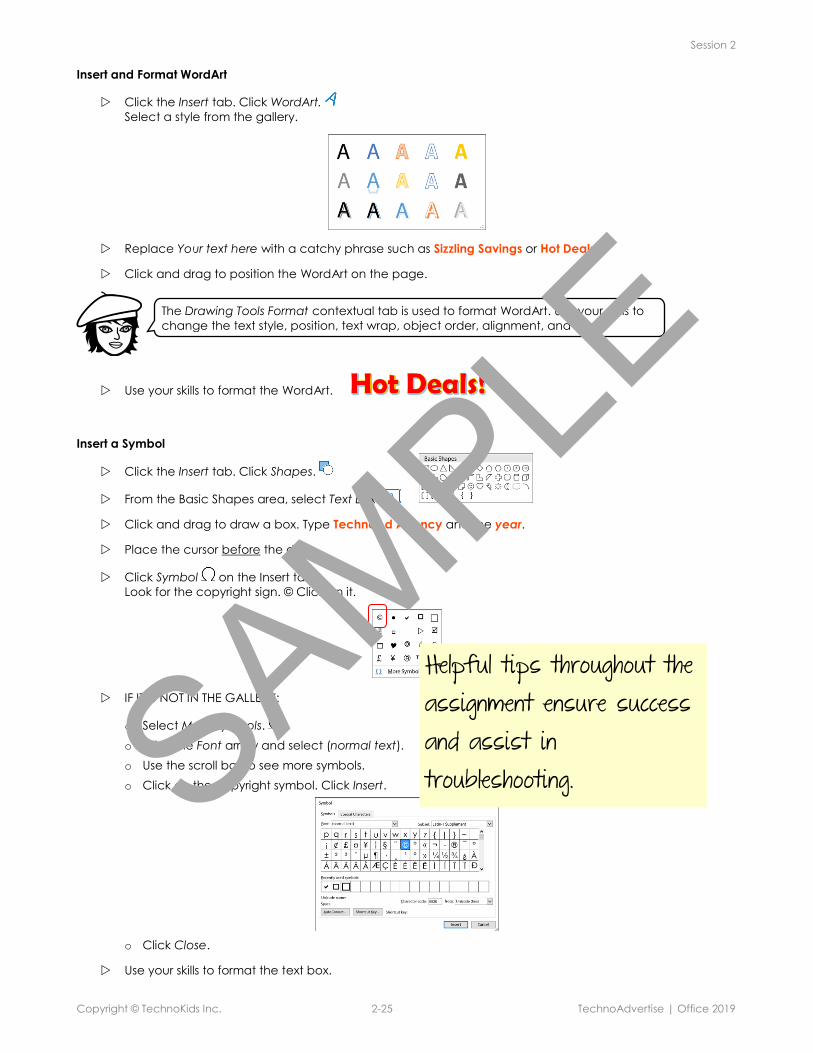
Insert and Format WordArt
Click the Insert tab. Click WordArt.
Select a style from the gallery.
Replace Your text here with a catchy phrase such as Sizzling Savings or Hot Deals.
Click and drag to position the WordArt on the page.
Use your skills to format the WordArt.
Insert a Symbol
Click the Insert tab. Click Shapes.
From the Basic Shapes area, select Text Box.
Click and drag to draw a box. Type TechnoAd Agency and the year.
Place the cursor before the date.
Click Symbol on the Insert tab.
Look for the copyright sign. © Click on it.
IF IT IS NOT IN THE GALLERY:
o Select More Symbols.
o Click the Font arrow and select (normal text).
o Use the scroll bar to see more symbols.
o Click on the copyright symbol. Click Insert.
o Click Close.
Use your skills to format the text box.
The Drawing Tools Format contextual tab is used to format WordArt. Use your skills to
change the text style, position, text wrap, object order, alignment, and size.
Helpful tips throughout the assignment ensure success and assist in troubleshooting. SAMPLE
Session 2
Copyright © TechnoKids Inc. 2-26 TechnoAdvertise | Office 2019
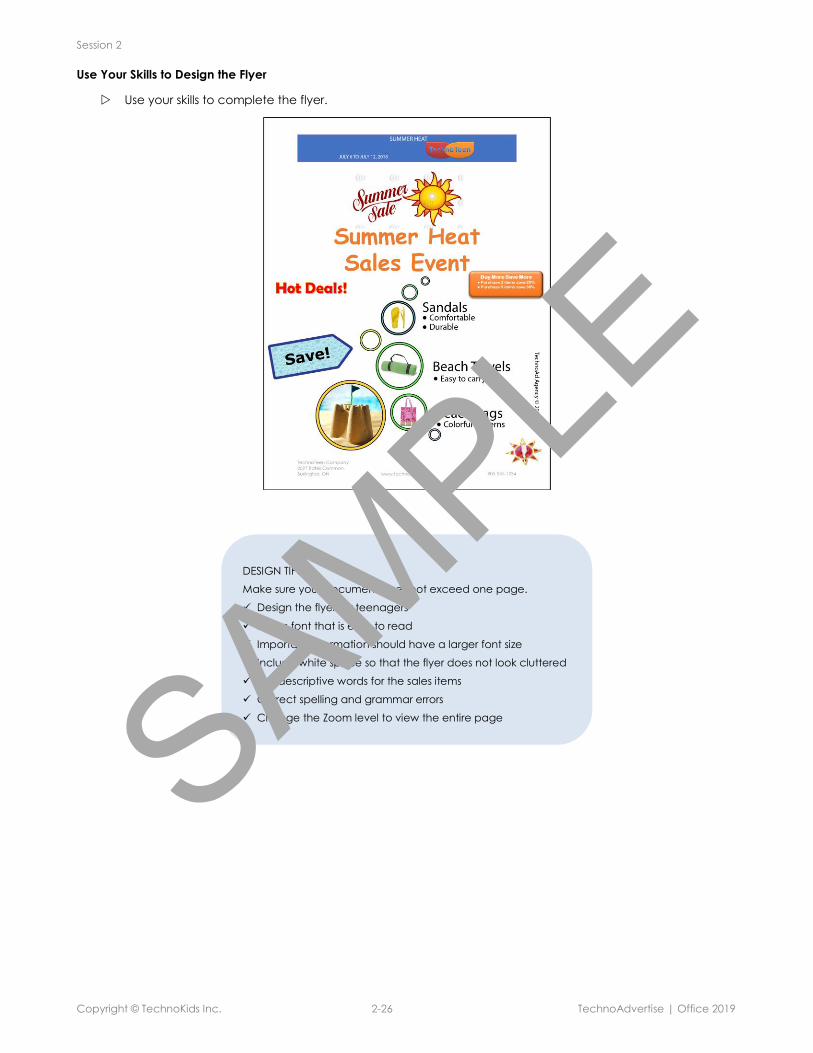
Use Your Skills to Design the Flyer
Use your skills to complete the flyer.
DESIGN TIPS:
Make sure your document does not exceed one page.
✓ Design the flyer for teenagers
✓ Pick a font that is easy to read
✓ Important information should have a larger font size
✓ Include white space so that the flyer does not look cluttered
✓ Use descriptive words for the sales items
✓ Correct spelling and grammar errors
✓ Change the Zoom level to view the entire page
SAMPLE
Session 2
Copyright © TechnoKids Inc. 2-27 TechnoAdvertise | Office 2019
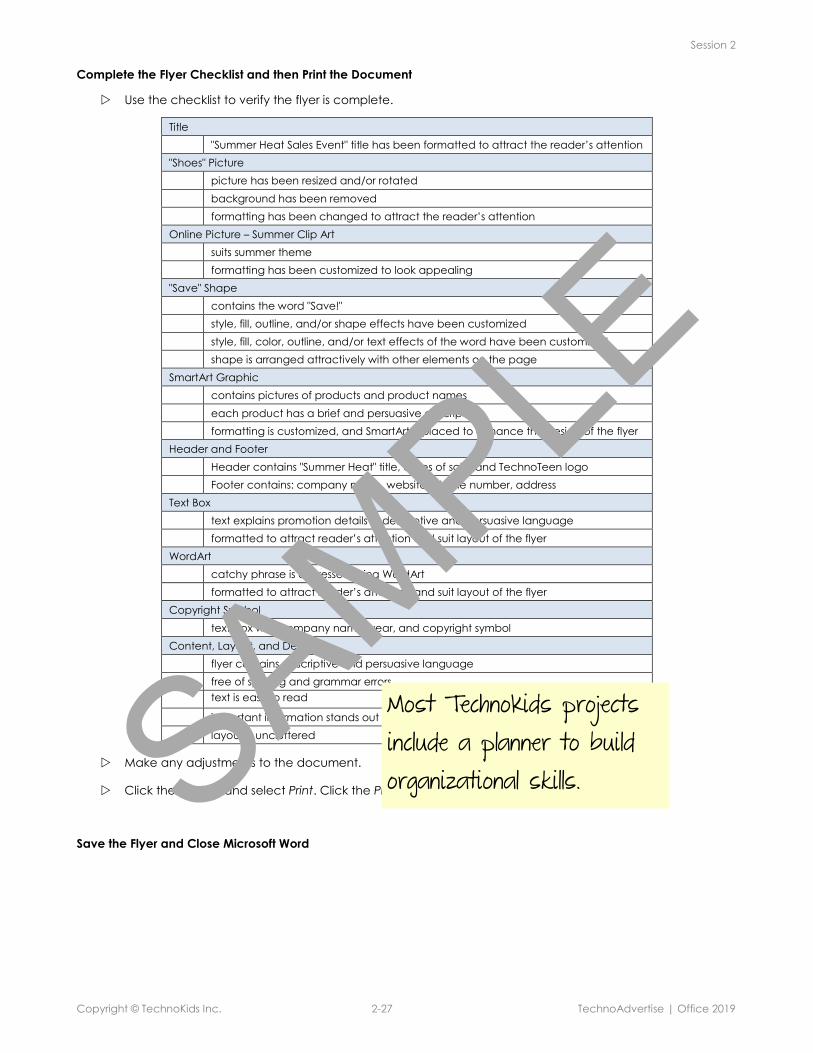
Complete the Flyer Checklist and then Print the Document
Use the checklist to verify the flyer is complete.
Title
"Summer Heat Sales Event" title has been formatted to attract the reader’s attention
"Shoes" Picture
picture has been resized and/or rotated
background has been removed
formatting has been changed to attract the reader’s attention
Online Picture – Summer Clip Art
suits summer theme
formatting has been customized to look appealing
"Save" Shape
contains the word "Save!"
style, fill, outline, and/or shape effects have been customized
style, fill, color, outline, and/or text effects of the word have been customized
shape is arranged attractively with other elements on the page
SmartArt Graphic
contains pictures of products and product names
each product has a brief and persuasive description
formatting is customized, and SmartArt is placed to enhance the design of the flyer
Header and Footer
Header contains "Summer Heat" title, dates of sale, and TechnoTeen logo
Footer contains: company name, website, phone number, address
Text Box
text explains promotion details in descriptive and persuasive language
formatted to attract reader’s attention and suit layout of the flyer
WordArt
catchy phrase is expressed using WordArt
formatted to attract reader’s attention and suit layout of the flyer
Copyright Symbol
text box with company name, year, and copyright symbol
Content, Layout, and Design
flyer contains descriptive and persuasive language
free of spelling and grammar errors
text is easy to read
important information stands out on the page
layout is uncluttered
Make any adjustments to the document.
Click the File tab and select Print. Click the Print button.
Save the Flyer and Close Microsoft Word
Most TechnoKids projects include a planner to build organizational skills. SAMPLE
Session 2
Copyright © TechnoKids Inc. 2-28 TechnoAdvertise | Office 2019
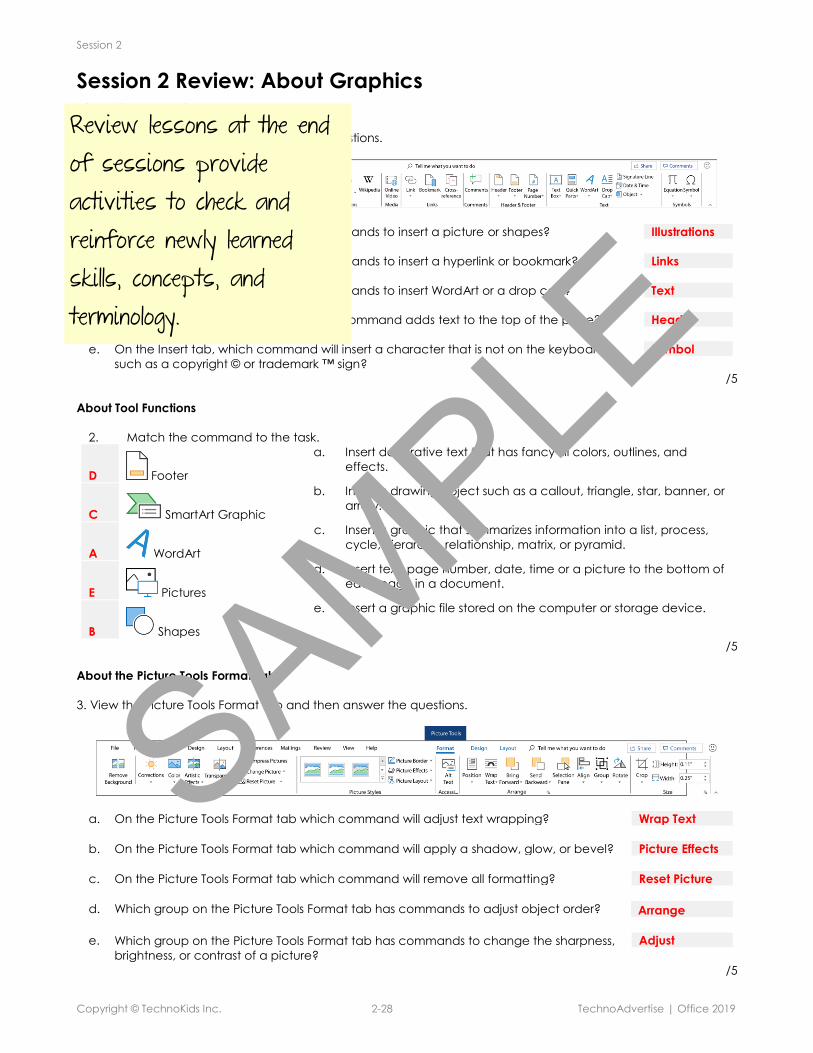
Session 2 Review: About Graphics About the Insert Tab
1. View the Insert tab and then answer the questions.
a. Which group on the Insert tab has commands to insert a picture or shapes? Illustrations
b. Which group on the Insert tab has commands to insert a hyperlink or bookmark? Links
c. Which group on the Insert tab has commands to insert WordArt or a drop cap? Text
d. In the Header and Footer group which command adds text to the top of the page? Header
e. On the Insert tab, which command will insert a character that is not on the keyboard,
such as a copyright © or trademark ™ sign?
Symbol
/5
About Tool Functions
2. Match the command to the task.
D Footer
a. Insert decorative text that has fancy fill colors, outlines, and
effects.
C SmartArt Graphic
b. Insert a drawing object such as a callout, triangle, star, banner, or
arrow.
A WordArt
c. Insert a graphic that summarizes information into a list, process,
cycle, hierarchy, relationship, matrix, or pyramid.
E Pictures
d. Insert text, page number, date, time or a picture to the bottom of
each page in a document.
B Shapes
e. Insert a graphic file stored on the computer or storage device.
/5
About the Picture Tools Format Tab
3. View the Picture Tools Format tab and then answer the questions.
a. On the Picture Tools Format tab which command will adjust text wrapping? Wrap Text
b. On the Picture Tools Format tab which command will apply a shadow, glow, or bevel? Picture Effects
c. On the Picture Tools Format tab which command will remove all formatting? Reset Picture
d. Which group on the Picture Tools Format tab has commands to adjust object order? Arrange
e. Which group on the Picture Tools Format tab has commands to change the sharpness,
brightness, or contrast of a picture?
Adjust
/5
Review lessons at the end of sessions provide activities to check and reinforce newly learned skills, concepts, and terminology.
SAMPLE
Session 2
Copyright © TechnoKids Inc. 2-29 TechnoAdvertise | Office 2019
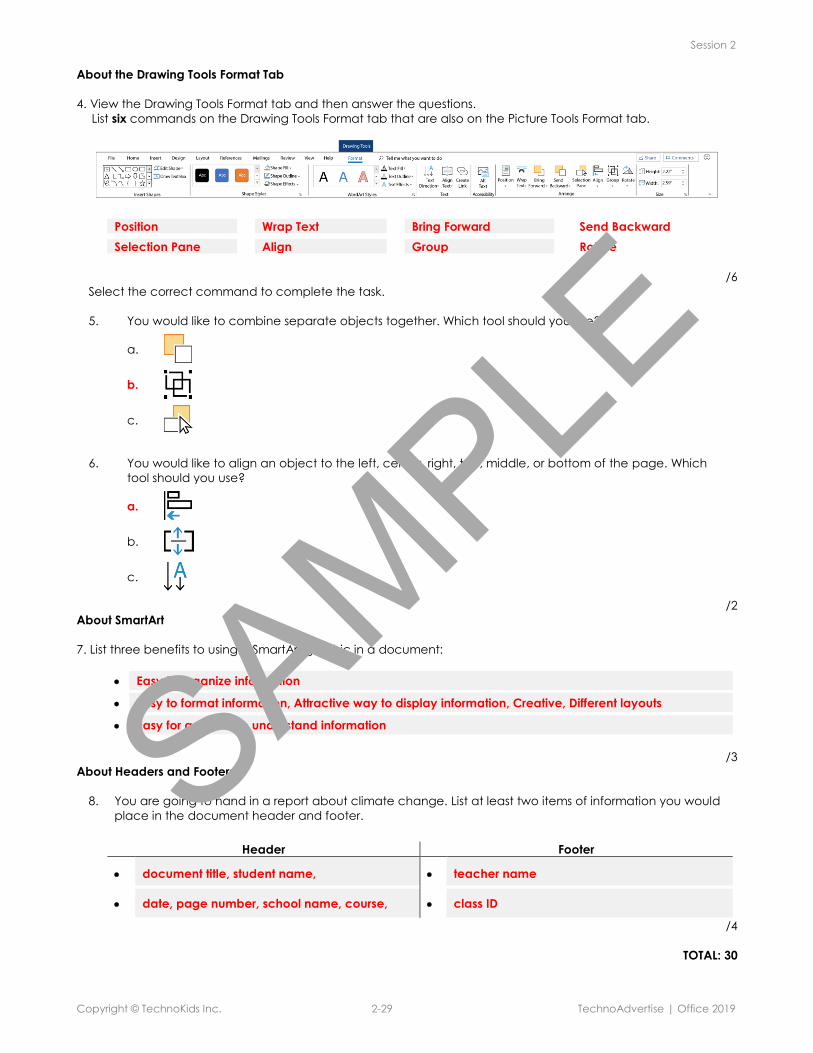
About the Drawing Tools Format Tab
4. View the Drawing Tools Format tab and then answer the questions.
List six commands on the Drawing Tools Format tab that are also on the Picture Tools Format tab.
Position Wrap Text Bring Forward Send Backward
Selection Pane Align Group Rotate
/6
Select the correct command to complete the task.
5. You would like to combine separate objects together. Which tool should you use?
a.
b.
c.
6. You would like to align an object to the left, center, right, top, middle, or bottom of the page. Which
tool should you use?
a.
b.
c.
/2
About SmartArt
7. List three benefits to using a SmartArt graphic in a document:
• Easy to organize information
• Easy to format information, Attractive way to display information, Creative, Different layouts
• Easy for a viewer to understand information
/3
About Headers and Footers
8. You are going to hand in a report about climate change. List at least two items of information you would
place in the document header and footer.
Header Footer
• document title, student name, • teacher name
• date, page number, school name, course, • class ID
/4
TOTAL: 30
SAMPLE
Session 2
Copyright © TechnoKids Inc. 2-30 TechnoAdvertise | Office 2019
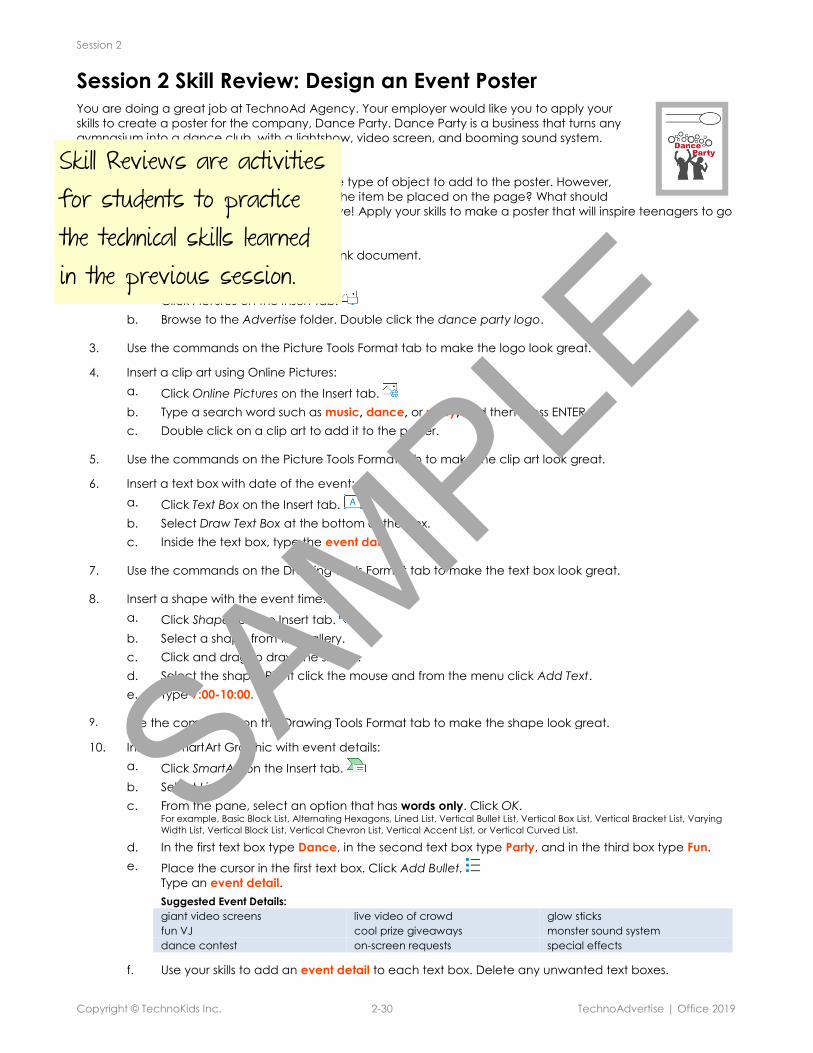
Session 2 Skill Review: Design an Event Poster You are doing a great job at TechnoAd Agency. Your employer would like you to apply your
skills to create a poster for the company, Dance Party. Dance Party is a business that turns any
gymnasium into a dance club, with a lightshow, video screen, and booming sound system.
They need a poster for their next event.
The instructions in the assignment describe the type of object to add to the poster. However,
you make the design choices. Where should the item be placed on the page? What should
the item look like? That is up to you! Be creative! Apply your skills to make a poster that will inspire teenagers to go
to the next school dance.
1. Open Microsoft Word and a new blank document.
2. Insert a picture of a company logo:
a. Click Pictures on the Insert tab.
b. Browse to the Advertise folder. Double click the dance party logo.
3. Use the commands on the Picture Tools Format tab to make the logo look great.
4. Insert a clip art using Online Pictures:
a. Click Online Pictures on the Insert tab.
b. Type a search word such as music, dance, or party, and then press ENTER.
c. Double click on a clip art to add it to the poster.
5. Use the commands on the Picture Tools Format tab to make the clip art look great.
6. Insert a text box with date of the event:
a. Click Text Box on the Insert tab.
b. Select Draw Text Box at the bottom of the box.
c. Inside the text box, type the event date.
7. Use the commands on the Drawing Tools Format tab to make the text box look great.
8. Insert a shape with the event time:
a. Click Shapes on the Insert tab.
b. Select a shape from the gallery.
c. Click and drag to draw the shape.
d. Select the shape. Right click the mouse and from the menu click Add Text.
e. Type 7:00-10:00.
9. Use the commands on the Drawing Tools Format tab to make the shape look great.
10. Insert a SmartArt Graphic with event details:
a. Click SmartArt on the Insert tab.
b. Select List.
c. From the pane, select an option that has words only. Click OK. For example, Basic Block List, Alternating Hexagons, Lined List, Vertical Bullet List, Vertical Box List, Vertical Bracket List, Varying
Width List, Vertical Block List, Vertical Chevron List, Vertical Accent List, or Vertical Curved List.
d. In the first text box type Dance, in the second text box type Party, and in the third box type Fun.
e. Place the cursor in the first text box. Click Add Bullet.
Type an event detail.
Suggested Event Details:
giant video screens live video of crowd glow sticks
fun VJ cool prize giveaways monster sound system
dance contest on-screen requests special effects
f. Use your skills to add an event detail to each text box. Delete any unwanted text boxes.
Skill Reviews are activities for students to practice the technical skills learned in the previous session.
SAMPLE
Session 2
Copyright © TechnoKids Inc. 2-31 TechnoAdvertise | Office 2019
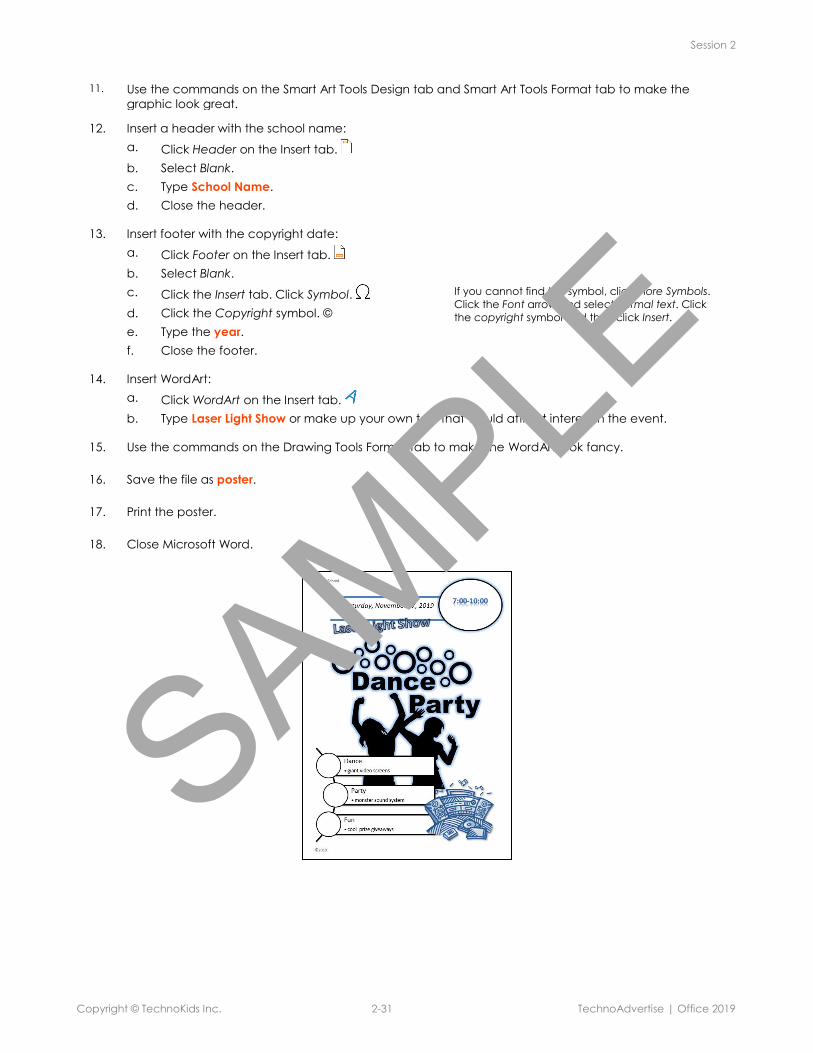
11. Use the commands on the Smart Art Tools Design tab and Smart Art Tools Format tab to make the
graphic look great.
12. Insert a header with the school name:
a. Click Header on the Insert tab.
b. Select Blank.
c. Type School Name.
d. Close the header.
13. Insert footer with the copyright date:
a. Click Footer on the Insert tab.
b. Select Blank.
c. Click the Insert tab. Click Symbol.
If you cannot find the symbol, click More Symbols.
Click the Font arrow and select normal text. Click
the copyright symbol and then click Insert. d. Click the Copyright symbol. ©
e. Type the year.
f. Close the footer.
14. Insert WordArt:
a. Click WordArt on the Insert tab.
b. Type Laser Light Show or make up your own text that would attract interest in the event.
15. Use the commands on the Drawing Tools Format tab to make the WordArt look fancy.
16. Save the file as poster.
17. Print the poster.
18. Close Microsoft Word.
SAMPLE
Session 2
Copyright © TechnoKids Inc. 2-32 TechnoAdvertise | Office 2019
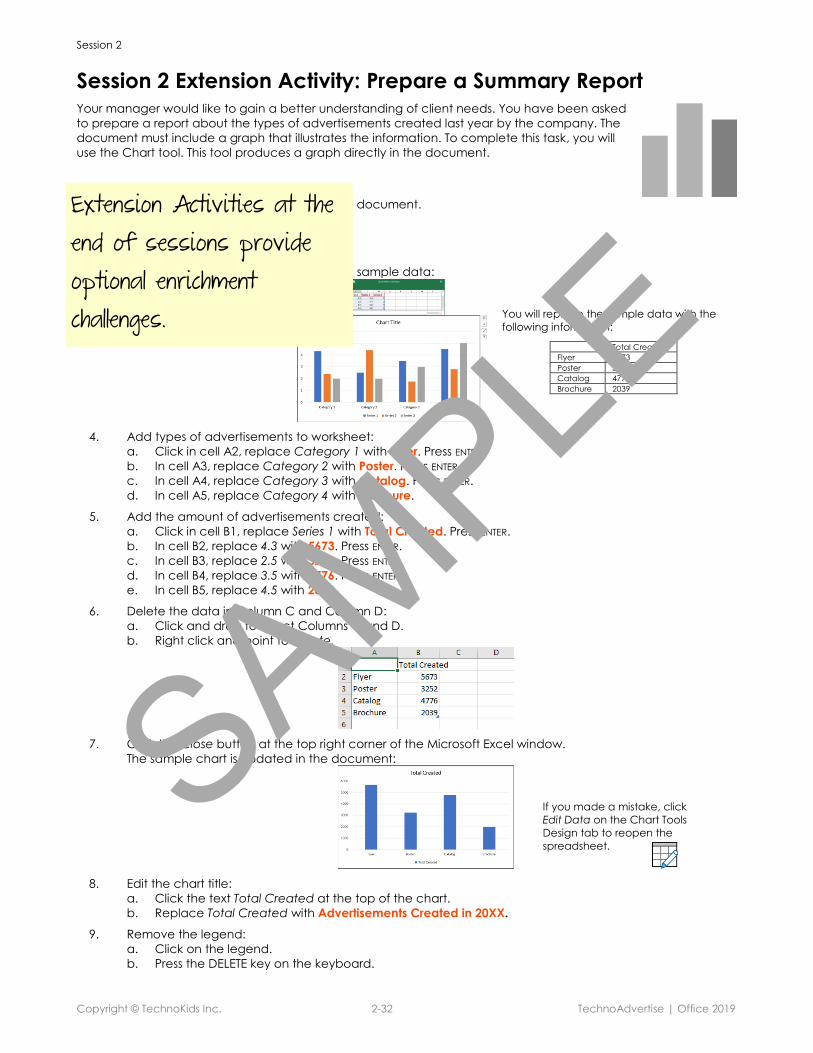
Session 2 Extension Activity: Prepare a Summary Report Your manager would like to gain a better understanding of client needs. You have been asked
to prepare a report about the types of advertisements created last year by the company. The
document must include a graph that illustrates the information. To complete this task, you will
use the Chart tool. This tool produces a graph directly in the document.
1. Open Microsoft Word and a new blank document.
2. Click the Insert tab. Click Chart.
3. Select Column. Click OK.
A Microsoft Excel worksheet opens with sample data:
You will replace the sample data with the
following information:
Total Created
Flyer 5673
Poster 3252
Catalog 4776
Brochure 2039
4. Add types of advertisements to worksheet:
a. Click in cell A2, replace Category 1 with Flyer. Press ENTER.
b. In cell A3, replace Category 2 with Poster. Press ENTER.
c. In cell A4, replace Category 3 with Catalog. Press ENTER.
d. In cell A5, replace Category 4 with Brochure.
5. Add the amount of advertisements created:
a. Click in cell B1, replace Series 1 with Total Created. Press ENTER.
b. In cell B2, replace 4.3 with 5673. Press ENTER.
c. In cell B3, replace 2.5 with 3252. Press ENTER.
d. In cell B4, replace 3.5 with 4776. Press ENTER.
e. In cell B5, replace 4.5 with 2039.
6. Delete the data in Column C and Column D:
a. Click and drag to select Columns C and D.
b. Right click and point to Delete.
7. Click the Close button at the top right corner of the Microsoft Excel window.
The sample chart is updated in the document:
8. Edit the chart title:
a. Click the text Total Created at the top of the chart.
b. Replace Total Created with Advertisements Created in 20XX.
9. Remove the legend:
a. Click on the legend.
b. Press the DELETE key on the keyboard.
If you made a mistake, click
Edit Data on the Chart Tools
Design tab to reopen the
spreadsheet.
Extension Activities at the end of sessions provide optional enrichment challenges.
SAMPLE
Session 2
Copyright © TechnoKids Inc. 2-33 TechnoAdvertise | Office 2019
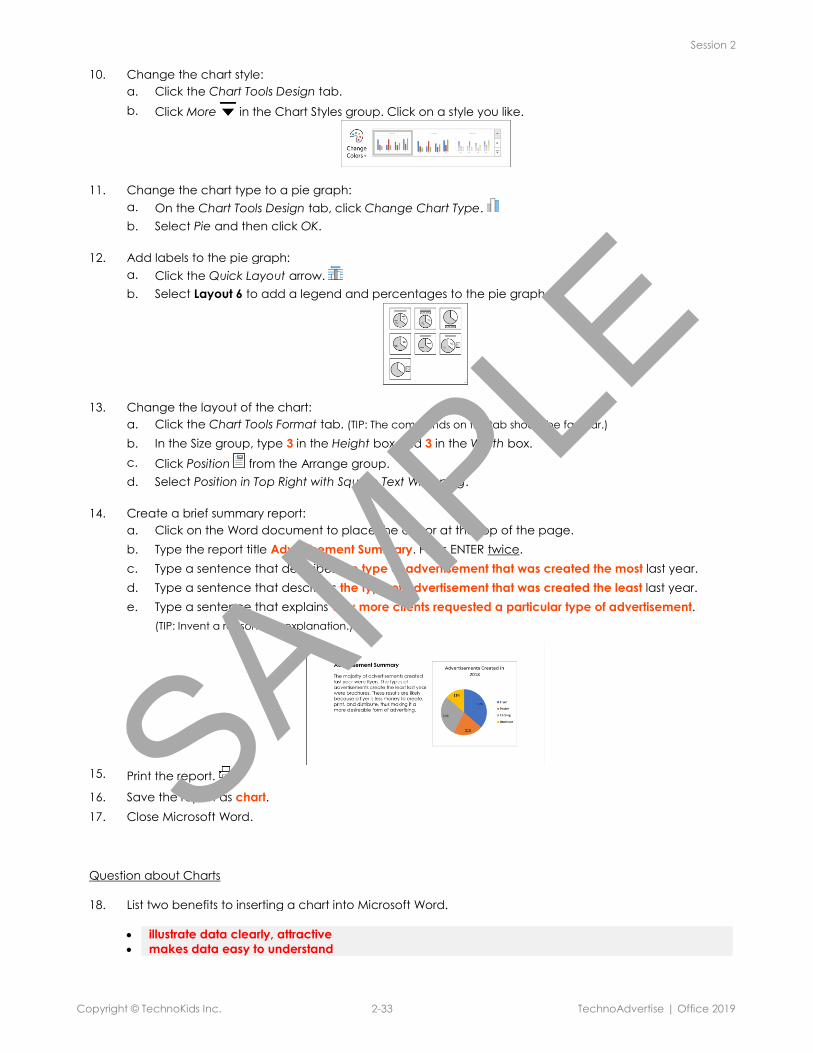
10. Change the chart style:
a. Click the Chart Tools Design tab.
b. Click More in the Chart Styles group. Click on a style you like.
11. Change the chart type to a pie graph: a. On the Chart Tools Design tab, click Change Chart Type.
b. Select Pie and then click OK.
12. Add labels to the pie graph:
a. Click the Quick Layout arrow.
b. Select Layout 6 to add a legend and percentages to the pie graph.
13. Change the layout of the chart:
a. Click the Chart Tools Format tab. (TIP: The commands on this tab should be familiar.)
b. In the Size group, type 3 in the Height box and 3 in the Width box.
c. Click Position from the Arrange group.
d. Select Position in Top Right with Square Text Wrapping.
14. Create a brief summary report:
a. Click on the Word document to place the cursor at the top of the page.
b. Type the report title Advertisement Summary. Press ENTER twice.
c. Type a sentence that describes the type of advertisement that was created the most last year.
d. Type a sentence that describes the type of advertisement that was created the least last year.
e. Type a sentence that explains why more clients requested a particular type of advertisement.
(TIP: Invent a reasonable explanation.)
15. Print the report.
16. Save the report as chart.
17. Close Microsoft Word.
Question about Charts
18. List two benefits to inserting a chart into Microsoft Word.
• illustrate data clearly, attractive
• makes data easy to understand
SAMPLE