Embed Size (px)
Citation preview
PipTreeArthrodesis of the PIP joint

Page 1
PipTree
▶ Table of Contents
Introduction PipTree 2 System Characteristics 2 Indication 2
Surgical Technique Access 3 Osteotomy 3 Preparation of the proximal phalanx 3 Preparation of the middle phalanx 4 Insertion of the implant 4 Tips and tricks 5 Follow-up treatment 5 Product Information Implants 6 Instruments 7 Instrument Tray 7
Notes 8
Note:The surgical technique outlined below reflect the surgical procedure usually chosen by the clinical advisor. However, each surgeon must decide which surgical method and which approach is the most successful for his patient.
Page 2
PipTree
▶ Introduction
PipTree
Implant for intramedullary arthrodesis on the proximal interphalangeal (PIP) joint of the small toes.Various procedures are available for osteosynthesis to correct contracted claw toe.The classical Kirschner wire has various disadvantages here.The Kirschner wire prevents the physiological flexion position of the toe in the proximal interphalangeal joint.The osteosynthesis material protruding on the toes is associated with a certain risk of infection and has to be removed again after the appropriate time.
System Characteristics
• The PipTree implant is an intramedullary load-bearing element, which enables stable osteosynthesis of the toe in a physiological position
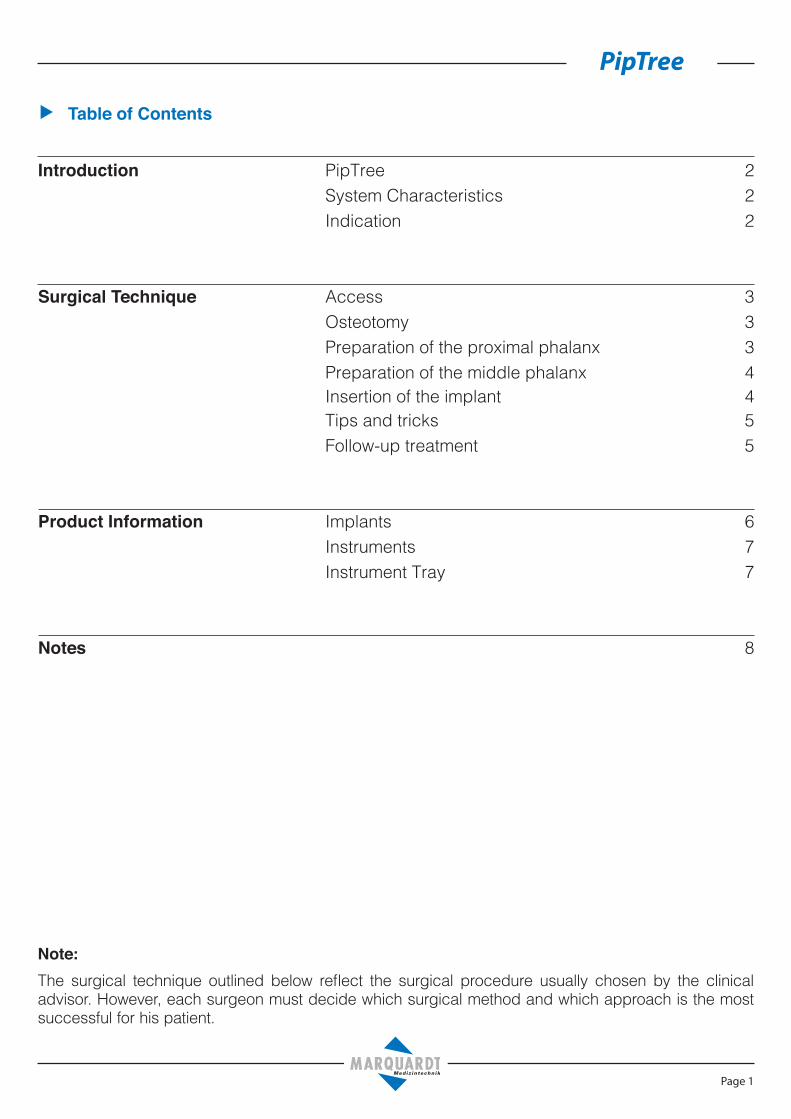
• This easy-to-insert titanium implant allows the toe to be fixed in the required flexion position of 0°, 10° or 20°• The different flexion angles are designated by different colour codes: 0° (green), 10° (blue) and 20° (gold)• The time for bone healing is around six weeks• Removal of metal is not necessary• The functional yet simple implant design was developed on the basis of established implant geometries and represents
a significant advancement in arthrodesis at the proximal interphalangeal joint of the small toes• Particularly the stable anchoring in the bone with high rotational and primary stability, while maintaining the physiologi-
cal flexion position and its fully intraosseous placement, are of enormous benefit to the patient
Indication
• Contracture malposition of the proximal interphalangeal joint of toes II-IV• In combination with correction of hallux valgus
Page 3
PipTree
▶ Surgical Technique
A
B
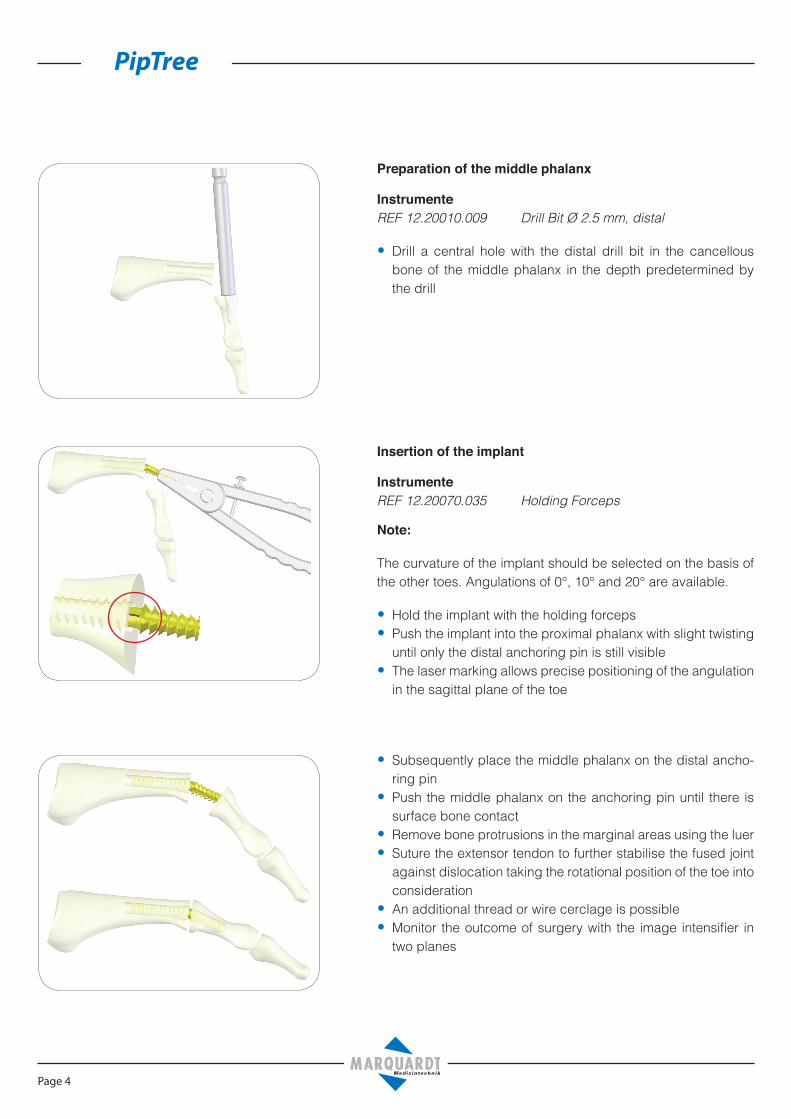
Osteotomy
• Resection of the proximal phalangeal head, analogous to classical arthrodesis of the joint with K-wire osteosynthesis
• As the bone surfaces should be in contact, extensive resec-tion should be avoided A
• The resection of the bone surfaces should be slightly diver-gent to plantar, according to the planned angulation of im-plant B
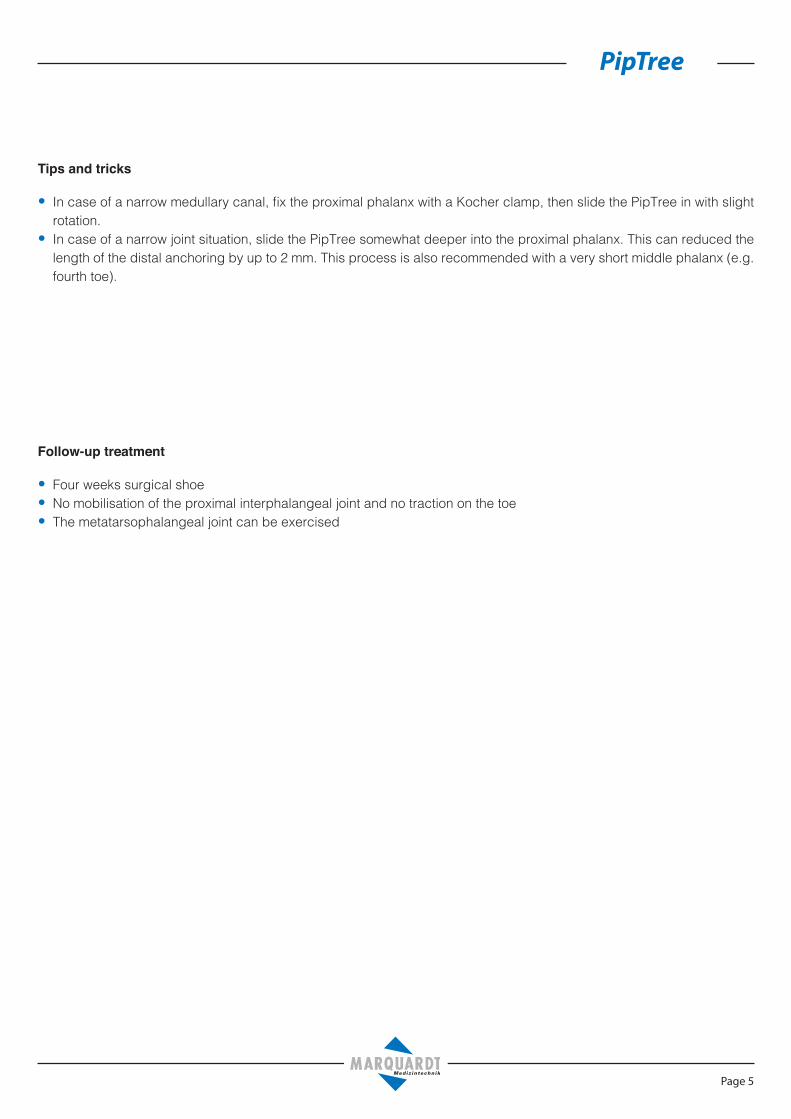
Preparation of the proximal phalanx
InstrumenteREF 12.20010.015 Drill Bit Ø 2.5 mm, proximal
REF 12.20030.025 Router Ø 2.5/3.3 mm
• Drill a central hole with the proximal drill bit in the cancellous bone of the proximal phalanx until the stop ring of the drill rests on the bone A
• Further prepare the anchor hole with the pilot countersink B
A
B
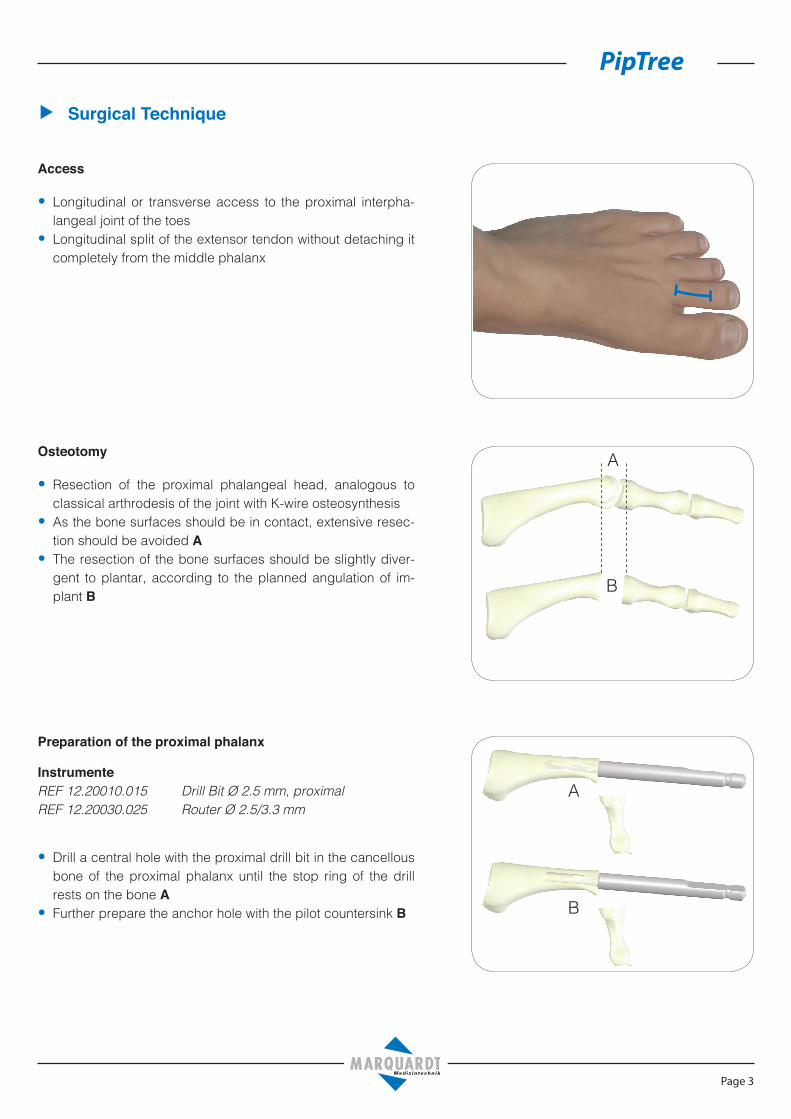
Access
• Longitudinal or transverse access to the proximal interpha-langeal joint of the toes
• Longitudinal split of the extensor tendon without detaching it completely from the middle phalanx
Page 4
PipTree
Preparation of the middle phalanx
InstrumenteREF 12.20010.009 Drill Bit Ø 2.5 mm, distal
• Drill a central hole with the distal drill bit in the cancellous bone of the middle phalanx in the depth predetermined by the drill
• Subsequently place the middle phalanx on the distal ancho-ring pin
• Push the middle phalanx on the anchoring pin until there is surface bone contact
• Remove bone protrusions in the marginal areas using the luer• Suture the extensor tendon to further stabilise the fused joint
against dislocation taking the rotational position of the toe into consideration
• An additional thread or wire cerclage is possible• Monitor the outcome of surgery with the image intensifier in
two planes
Insertion of the implant
InstrumenteREF 12.20070.035 Holding Forceps
Note:
The curvature of the implant should be selected on the basis of the other toes. Angulations of 0°, 10° and 20° are available.
• Hold the implant with the holding forceps• Push the implant into the proximal phalanx with slight twisting
until only the distal anchoring pin is still visible• The laser marking allows precise positioning of the angulation
in the sagittal plane of the toe
Page 5
PipTree
Tips and tricks
• In case of a narrow medullary canal, fix the proximal phalanx with a Kocher clamp, then slide the PipTree in with slight rotation.
• In case of a narrow joint situation, slide the PipTree somewhat deeper into the proximal phalanx. This can reduced the length of the distal anchoring by up to 2 mm. This process is also recommended with a very short middle phalanx (e.g. fourth toe).
Follow-up treatment
• Four weeks surgical shoe• No mobilisation of the proximal interphalangeal joint and no traction on the toe• The metatarsophalangeal joint can be exercised
Page 6
PipTree
▶ Product Information
Implants
PipTree
• Angle: 10° and 20°• Shaft diameter: 2.20 mm• Thread diameter: 2.80 mm• Core diameter: 1.80 mm• Material: Ti6Al4V
Article Number Angle Distal Proximal Colour12.30500.010 10° 7 mm 12 mm blue12.30500.020 20° 7 mm 12 mm gold
Article Number Angle Distal Proximal Colour12.30500.100 0° 6 mm 12 mm green12.30500.110 10° 6 mm 12 mm blue
PipTree
• Angle: 0° and 10°• Shaft diameter: 2.20 mm• Thread diameter: 2.50 mm• Core diameter: 1.80 mm• Material: Ti6Al4V
Page 7
PipTree
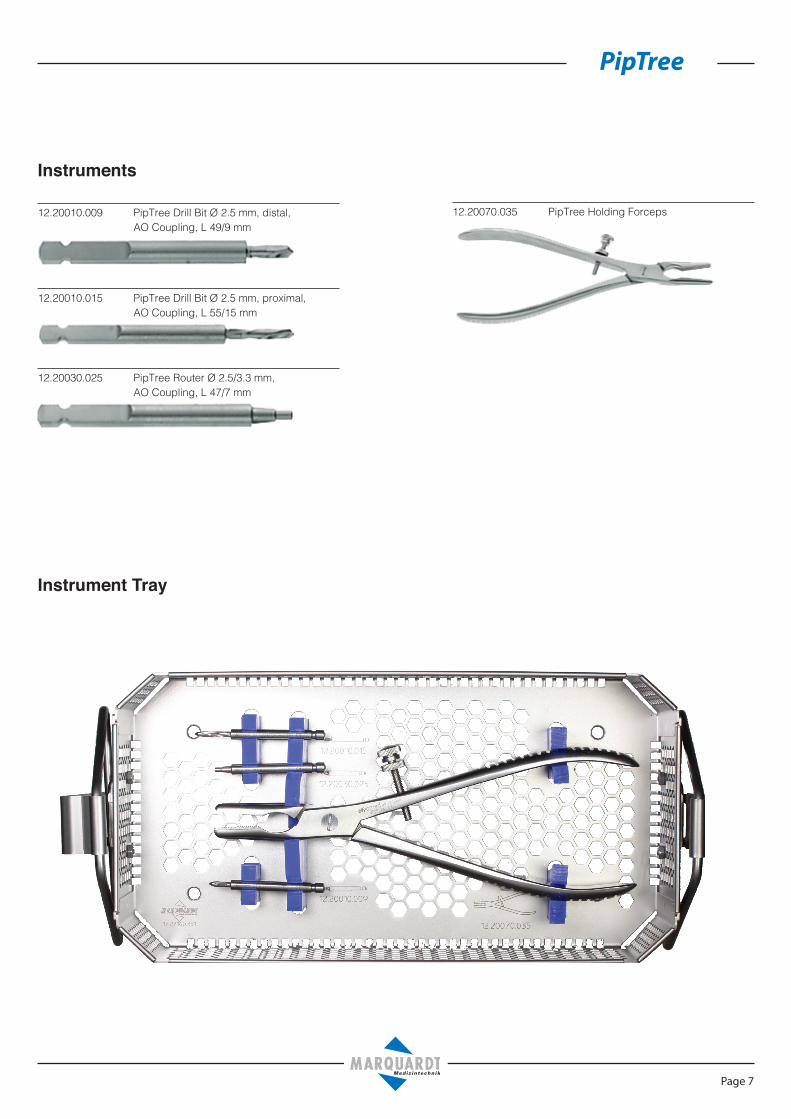
Instruments
12.20010.009 PipTree Drill Bit Ø 2.5 mm, distal, AO Coupling, L 49/9 mm
12.20010.015 PipTree Drill Bit Ø 2.5 mm, proximal, AO Coupling, L 55/15 mm
12.20030.025 PipTree Router Ø 2.5/3.3 mm, AO Coupling, L 47/7 mm
12.20070.035 PipTree Holding Forceps
Instrument Tray

Page 8
PipTree
▶ Notes


Dieter Marquardt Medizintechnik GmbH
Robert-Bosch-Str. 1 - 78549 SpaichingenTelefon: +49 (0) 7424 / 95810 - Telefax: +49 (0) 7424 / 501441
sgab
edat
um: 1
2.07
.201
6; 1
2.99
100.
602;
Rev
.: 00
1/00


![[AU1] Arthrodesis - TMIHI · the triscaphe joint, and nonunion scaphoid with detached proximal pole (7–10). ... The main contraindication for triscaphe arthrodesis is degenerative](https://img.pdfslide.us/doc/110x75/60d600733725c20863691b65/au1-arthrodesis-tmihi-the-triscaphe-joint-and-nonunion-scaphoid-with-detached.jpg)