Embed Size (px)
Citation preview

Art Adventure 2017-2018
Suggested Follow-up Activities

2
Amazing Animals in Art … 3
American Stories ... 5
Artists’ Inspirations ... 7
Cultural Reflections in Art ... 9
Dressed for the Occasion ... 12
Family, Friends, and Communities ... 16
How People Lived ... 18
Let’s Celebrate Life ... 20
People and Their Environments ... 22
Sources of Strength ... 24

3
Amazing Animals in Art
Animal Shaped Pinch Pot inspired by Vessel in the Form of a Fish
Element or Principle: Form
Technique: How to make a pinch pot of out clay
Supplies:
1. Clay (any version of air-dry clay)
2. Sculpting tools like popsicle sticks or toothpicks
http://www.firstpalette.com/Craft_themes/People/pinchpot/pinchpot.html
1. Start by taking a 3 inch ball of clay.
2. Roll it between your hands until it is smooth and resembles a lacrosse ball.
3. Holding it in the palm of one hand, press your other thumb into the center of the ball.
4. Using your pointer finger and thumb, pinch around the edges to create a bowl shape.
5. Gently pull clay to create arms and legs.
6. Carve animal features into your clay with popsicle sticks and toothpicks.

4
Animal Drawing in Context inspired by A “Bear” Chance
Element or Principle: Emphasis
Technique: Foreground, middle ground, background
Supplies:
1. White paper
2. Coloring utensil (crayons, colored pencils, markers)
http://www.activityvillage.co.uk/learn-to-draw-animals
http://www.getty.edu/education/teachers/classroom_resources/curricula/landscapes/lesson02.html
1. Begin by showing students realistic pictures of animals in their habitats.
http://animals.nationalgeographic.com/animals/photos/
2. Encourage students to observe closely: what does the weather look like? What season might it
be? What type of shelter is there? What color is the animal? What colors are its surroundings?
3. Using a pencil, sketch the animal first.
4. Next add details of the habitat. Tell as much of the animal’s story as you can.
5. Using crayons, colored pencils or markers, add color and detail to enliven the image.

5
American Stories
Abstract Collage inspired by Billboard
Element or Principle: Variety
Technique: Overlapping
Supplies:
1. Large variety of (appropriate) magazines
2. Scissors
3. Glue sticks
4. Plain paper
http://www.ehow.com/how_4795739_collage-art-using-magazine-clippings.html
1. Collect magazines at the beginning of the year, or encourage each student to bring in an old copy
of their favorite magazine.
2. Have students identify space, texture, balance and harmony.
3. Using scissors, go through the magazines and cut out a variety of pictures.
4. Glue your pictures down to the paper to create an abstract collage.

6
Not-So-Self Portrait inspired by Portrait of George Washington
Element or Principle: Color
Technique: Mixing tints and shades
Supplies:
1. White paper
2. Colored pencils
http://www.teachkidsart.net/personalized-self-portraits/
1. Have children sit down across from a classmate. Spend 30 silent seconds observing one another.
2. Tell students to identify characteristics important to their classmate: do they wear glasses? Do
they have freckles? How are they wearing their hair?
3. Encourage students to sketch their partner as realistically as possible.
4. Add colored details last.

7
Artists’ Inspirations
Recycled Object Sculpture inspired by Baboon and Young
Element or Principle: Form
Technique: Collaboration
Supplies:
1. Cardboard scraps, cereal boxes, moving boxes, shoe boxes, bottle caps, bottles, paper
towel rolls, toilet paper rolls, small figures from Oriental Trading or the Dollar Store, etc.
2. Duct tape
3. Permanent markers, or washable markers for younger students
4. Scissors
1. Look closely at Picasso’s Baboon and Young.
2. Have students identify an animal they wish to create.
3. Using the recycled pieces available and attaching them with duct tape, construct the body, arms
and legs.
4. Add details with marker.

8
Soap Carving inspired by Jade Mountain
Element or Principle: Form
Technique: Subtractive sculpture
Supplies:
1. Irish Spring soap
2. Carving utensils (popsicle sticks, toothpicks, etc.)
*This activity is suggested for grades 3 through 5
1. Give each student a fresh bar of soap.
2. Show students images of real landscapes
http://photography.nationalgeographic.com/photography/photo-of-the-day/landscapes/
3. Give each student a set of “carving” tools.
4. Lightly press a design into the bar of soap.
5. When you have a design sketched out, retrace your lines with more pressure to slowly remove
bits of soap.
6. Be careful not to remove too much or pieces will break off.

9
Cultural Reflections in Art
Contour Line Self-Portrait inspired by Portrait of Charlotte of France
Element or Principle: Line
Technique: Contour lines
Supplies:
1. Printed photo of student from the shoulders up
2. Scotch tape
3. Tracing paper
4. Pencils
http://www.arttango.com/kindergarten_art_lessons/kindergarten_Lesson_1.html
*With plenty of notice, ask the classroom teacher for copies of the students’ school photos
1. Print student portraits on 8 ½ x 11 paper, black and white images are fine.
2. Tape the student portrait to the desk to prevent it from slipping around.
3. Lay the tracing paper on top and tape that down, as well.
4. Without lifting the pencil, follow the lines of the photo to create a self-portrait – be sure to get all
of the details.
5. Carefully lift the paper off of the desk and separate the portrait from the tracing paper to reveal a
contour line drawing.

10
Grid Enlargement Drawing Inspired by Frank
Element or Principle: Form
Technique: Enlargement with grid
Supplies:
1. Photo or image from a magazine, comic book, etc.
2. Paper frame (see below)
3. Paper
4. Pencil
5. Scissors
1. Have students find an image from an (appropriate) magazine, comic book, etc.
2. Print and cut out a frame for each student.
3. Place the frame on a section of the image. Using a pencil, trace along the inside of the frame.
Remove the frame and cut out the square image.
4. On a clean sheet of paper, have the students draw a larger version of their chosen image. If time
permits, allow the students to color their new picture with markers, pencils or crayon.

11
12
Dressed for the Occasion
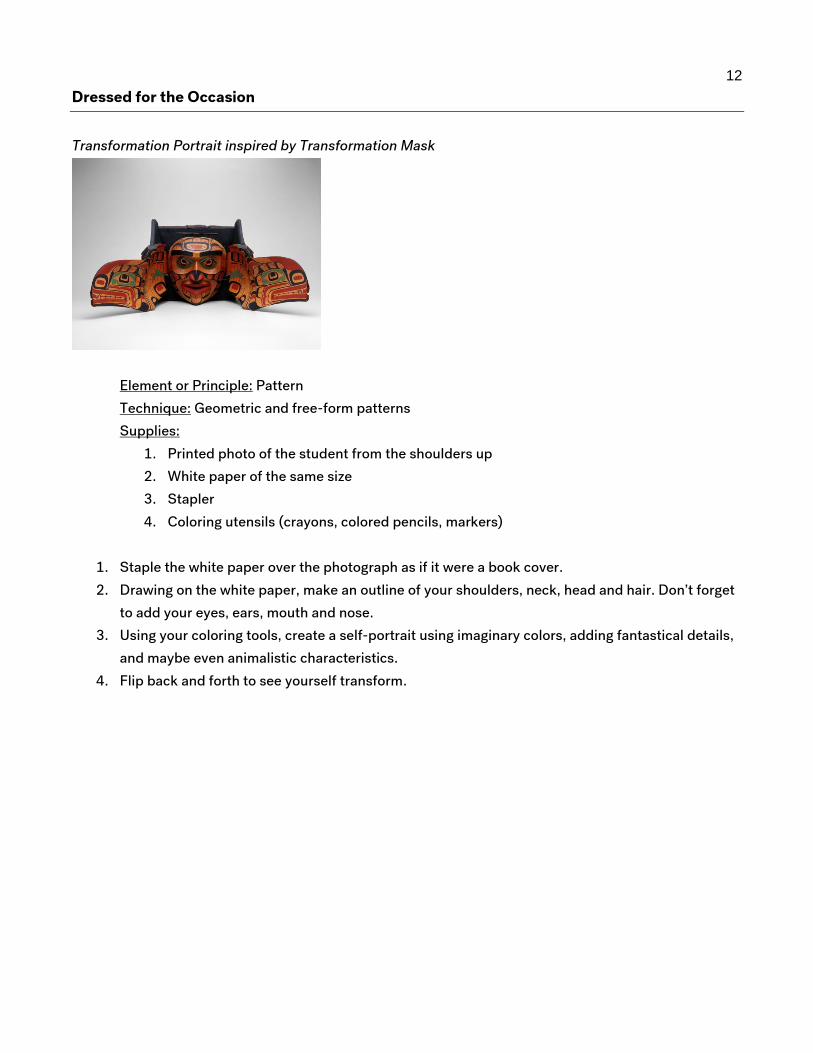
Transformation Portrait inspired by Transformation Mask
Element or Principle: Pattern
Technique: Geometric and free-form patterns
Supplies:
1. Printed photo of the student from the shoulders up
2. White paper of the same size
3. Stapler
4. Coloring utensils (crayons, colored pencils, markers)
1. Staple the white paper over the photograph as if it were a book cover.
2. Drawing on the white paper, make an outline of your shoulders, neck, head and hair. Don’t forget
to add your eyes, ears, mouth and nose.
3. Using your coloring tools, create a self-portrait using imaginary colors, adding fantastical details,
and maybe even animalistic characteristics.
4. Flip back and forth to see yourself transform.

13
Fashion Designer 101 inspired by Ceremonial Skirt
Element or Principle: Pattern
Technique: Warm and cool colors
Supplies:
1. Template (at the end of the lesson)
2. Coloring utensils (crayons, colored pencils, markers)
1. Have students choose from one of the attached templates.
2. Sketching over the existing design, encourage students to think about shape, pattern and line.
3. Once they have a rough draft, ask students how it might feel to wear? Would it be easy to walk
around in? Could you wear it in the winter? Would you want to wear it all day long?
4. Encourage students to pair-and-share with a partner before revising their original drawing
5. Add color at the end.

14

15
16
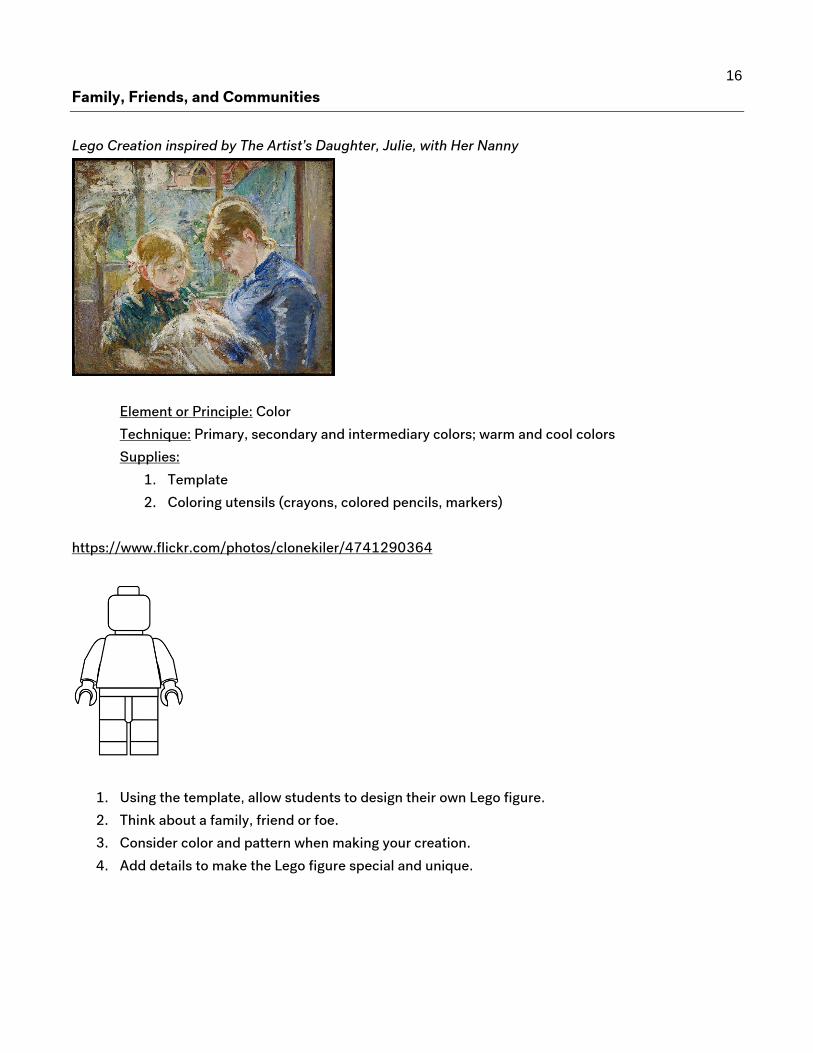
Family, Friends, and Communities
Lego Creation inspired by The Artist’s Daughter, Julie, with Her Nanny
Element or Principle: Color
Technique: Primary, secondary and intermediary colors; warm and cool colors
Supplies:
1. Template
2. Coloring utensils (crayons, colored pencils, markers)
https://www.flickr.com/photos/clonekiler/4741290364
1. Using the template, allow students to design their own Lego figure.
2. Think about a family, friend or foe.
3. Consider color and pattern when making your creation.
4. Add details to make the Lego figure special and unique.

17
Clay Creation inspired by The House Group
Element or Principle: Form
Technique: Figure proportions
Supplies:
1. Clay (any version of air-dry clay)
2. Sculpting tools like popsicle sticks or toothpicks
1. Begin by looking at The House Group.
2. Ask students to think about a happy memory. Where were they in that memory?
3. If time allows, sketch the place on scratch paper.
4. Divide clay among students, no larger than the size of their fist.
5. Have students shape the clay into the place they envisioned.
6. Encourage students to add details with their sculpting tools.

18
How People Lived
Power Image Hat inspired by Helmet in Dragonfly Shape
Element or Principle: Form
Technique: Additive and subtractive sculpture
Supplies:
1. Pipe cleaners
2. Scissors
1. Form a circle out of one or two pipe cleaners, depending on what size it needed.
2. Allow students to pick a variety of colors and lengths of pipe cleaners.
3. Demonstrate how to twist and shape the pipe cleaners into fun designs.
4. Encourage students to think about what makes them feel strong or powerful.
5. Attach shapes and designs to circle by twisting and looping piper cleaners around one another.

19
Futuristic Drawing inspired by Rainy Evening on Hennepin Ave
Element or Principle: Shape
Technique: Freeform vs. geometric shape
Supplies:
1. White paper
2. Coloring utensils (crayons, colored pencils, markers)
1. Have students think about their favorite place. Is it outside? Inside? What are some specific
features of the place?
2. Now have them imagine this place in the future (Define “future” based on the grade level you are
teaching. For example, a kindergartner might comprehend the future as only ten years from now,
whereas a fifth grader can imagine 100 years from now.) What about their place is different? How
have the specific features changed?
3. On a piece of paper, have the students draw their futuristic place.
4. Encourage them to fill the entire paper with color and details.
20
Let’s Celebrate Life
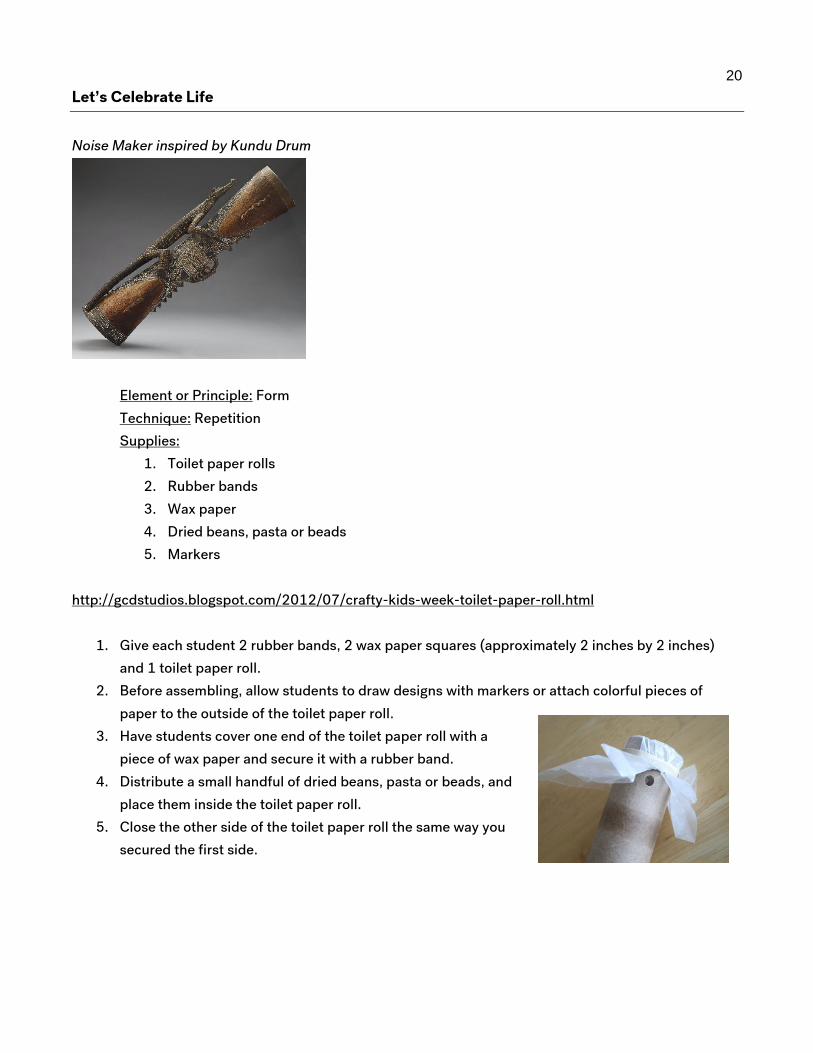
Noise Maker inspired by Kundu Drum
Element or Principle: Form
Technique: Repetition
Supplies:
1. Toilet paper rolls
2. Rubber bands
3. Wax paper
4. Dried beans, pasta or beads
5. Markers
http://gcdstudios.blogspot.com/2012/07/crafty-kids-week-toilet-paper-roll.html
1. Give each student 2 rubber bands, 2 wax paper squares (approximately 2 inches by 2 inches)
and 1 toilet paper roll.
2. Before assembling, allow students to draw designs with markers or attach colorful pieces of
paper to the outside of the toilet paper roll.
3. Have students cover one end of the toilet paper roll with a
piece of wax paper and secure it with a rubber band.
4. Distribute a small handful of dried beans, pasta or beads, and
place them inside the toilet paper roll.
5. Close the other side of the toilet paper roll the same way you
secured the first side.

21
Celebration Drawing inspired by Blessing of the Tuna Fleet at Groix
Element or Principle: Line, shape and color
Technique: Drawing a narrative
Supplies:
1. White paper
2. Coloring utensils (crayons, colored pencils, markers)
1. Have students reflect on a time of happy celebration. Where were they? Who were they with?
What were they wearing? Did they hear music? Was there dancing? Did they eat anything
special?
2. Encourage students to use the entire sheet of paper and draw what it is they remember.

22
People and Their Environments
Cardboard City inspired by Grand Canal from the Palazzo Flangini to Palazzo Bembo
Element or Principle: Form and color
Technique: Collaboration
Supplies:
1. Cardboard boxes of varying sizes
2. Markers
3. Packing tape
1. Give each student a small box or scrap of cardboard.
2. Using markers add windows, doors, signs, etc.
3. Set a time limit based on how long you are in the classroom.
4. Using duct tape, have students connect their building to the student next to them. Continue
partnering until you have a miniature city.

23
Never Have I Ever Drawing inspired by Tahitian Landscape
Element or Principle: Line, shape and color
Technique: Foreground, middle ground, background
Supplies:
1. White paper
2. Coloring utensils (crayons, colored pencils, markers)
1. Ask students to close their eyes and imagine a place they’ve always wanted to go. Are they inside
or outside? Where are they standing? What is the weather like? Who are they with? What is
happening around them?
2. Encourage students to use the entire sheet of paper and draw where it is they wish to go.

24
Sources of Strength
Superhero Self-Portrait inspired by Migrant Mother
Element or Principle: Color
Technique: Body structure
Supplies:
1. White paper
2. Coloring utensils (crayons, colored pencils, markers)
1. Asks students to pick a superpower, or two, that they wish they had.
2. Begin by drawing themselves as they are today.
3. Add details to turn themselves into a superhero. Do they need a cape? What about a jetpack?
What type of superpower tools do they need?
4. Encourage students to use the entire sheet of paper and include details that explain their
superpowers.

25
3D Symbol of Strength inspired by Guardian Figures
Element or Principle: Form
Technique: Additive and subtractive sculpture
Supplies:
1. Clay (any version of air-dry clay)
2. Sculpting tools like popsicle sticks or toothpicks
1. Ask students what it means to be strong.
2. What objects or ideas represent strength?
3. Allow students to identify their own symbol of strength.
4. If time allows, sketch a design on scratch paper.
5. Divide clay among students and have them form their symbol.
6. Encourage students to add details with their sculpting tools.