Embed Size (px)
Citation preview
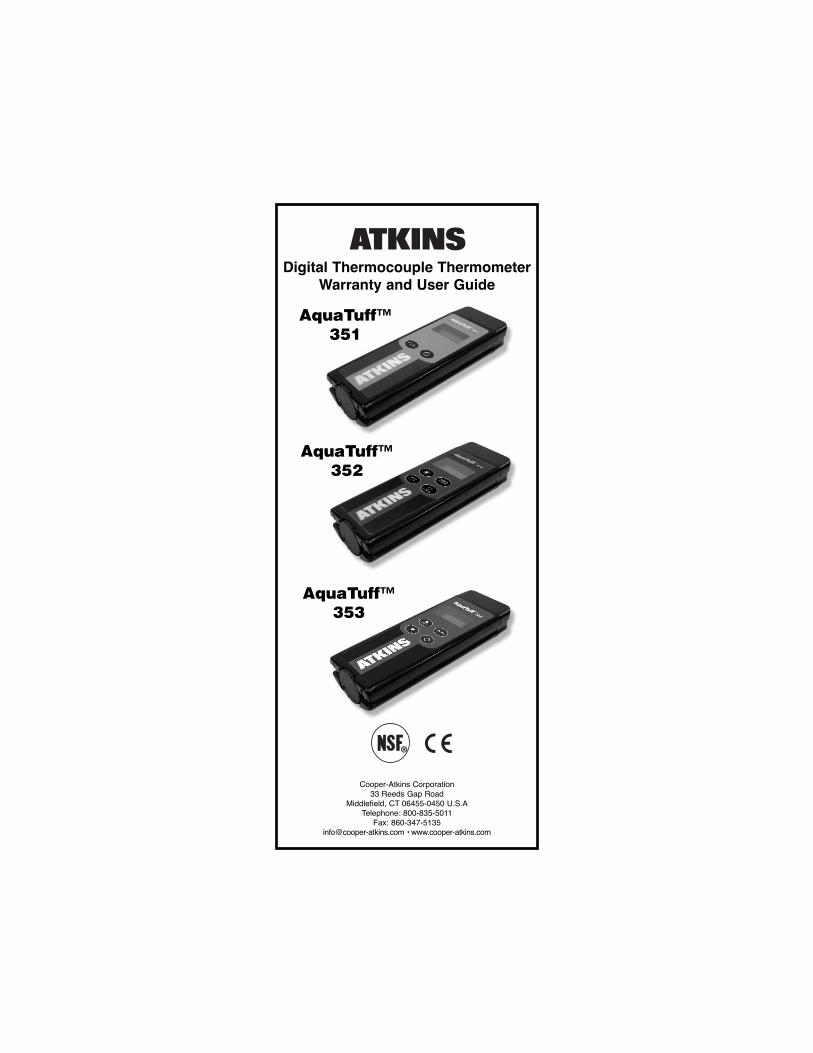
Digital Thermocouple ThermometerWarranty and User Guide
Cooper-Atkins Corporation33 Reeds Gap Road
Middlefield, CT 06455-0450 U.S.ATelephone: 800-835-5011
Fax: [email protected] • www.cooper-atkins.com
®
AquaTuff™351
AquaTuff™352
AquaTuff™353
Press to turn instrument ON or OFF.
Press to select Fahrenheit or Celsius temperature scale.
OPERATION:
1) Observing correct polarity, insert Type K thermocouple probe into connector on top of instrument.
2) Press key to turn instrument on.3) Default temperature scale is Fahrenheit. To change
temperature scale, press key. (NOTE: Display will toggle between “F” and “C” icons on right side of display with each press of the key).
4) The instrument has an auto-off feature that will turn off unit after 10 minutes of non-keypad activity to conserve battery life. To manually turn instrument off, press and hold key momentarily.
2 3
AquaTuff™ 352 THERMOMETER
Press to turn instrument ON or OFF. When used in combination with SHIFT key, enablesor disables AUTO-OFF feature.
Press to select FAHRENHEIT or CELSIUStemperature scale. When used in combination with SHIFT key, selects tenth degree or whole degree resolution.
Press to “FREEZE” current temperature reading on display. SHIFT function provides secondary user settings with other keys as noted.
Press to turn on BACKLIGHT for viewing temperatures in low lighting conditions. When pressed, BACKLIGHT will remain on for 5 seconds.
OPERATION:
1) Observing correct polarity, insert Type K thermocouple probe into connector on top of instrument.
2) Press key to turn instrument on.3) Default temperature scale is Fahrenheit. To change
temperature scale, press key. (NOTE: Display will toggle between “F” and “C” icons on right side ofdisplay with each press of the key).
TABLE OF CONTENTS
English..........................................3-9
Español.....................................10-17
Français....................................18-25
Deutsch.................................... 26-33
..................................................34-40
..................................................41-47
Manufactured in the U.S.A. by Cooper-Atkins CorporationAn ISO 9001 Registered Facility
33 Reeds Gap RoadMiddlefield, CT 06455-0450 U.S.A
CUSTOMER SERVICE: 800-835-5011 FAX: 860-347-5135Email: [email protected] • Website: www.cooper-atkins.com
27-958550B
AquaTuff™ 351 THERMOMETER
OVERVIEW - Continued
In STANDARD TEMPERATURE MODE, the instrumentfunctions like a normal thermometer. In ITS™ Mode, theinstrument operates with the Intelligent TemperatureStabilization™ feature. The 353 series instrument has aunique feature to display temperature of item beingmeasured when the temperature has reached its finalstabilized temperature. The purpose of this feature is toassist the user in determining when the final stabilized temperature has been reached.The ITS feature isdynamic, in that it operates continuously in real time. Itcan be used in ITS Mode with the option of recordingstabilized temperature readings or simply as a thermometer with ITS functionality. The MEMORY MODEis for viewing ITS temperature data stored in memoryand you can scroll in both directions. The key easily allows the user to select desired mode of operation.
STANDARD TEMPERATURE MODE:
1) Press ON/OFF key to turn instrument ON/OFF. 2) Default temperature scale is Fahrenheit. To change
temperature scale, with instrument turned OFF, press and hold key and then press key to enter USER MODE (NOTE: Display will show “USEr”). Press key to switch between Fahrenheit and Celsius (NOTE: Display will toggle between “F” and “C” icons on right side of display with each press of the key). Press
key to exit USER MODE to use instrument in STANDARD TEMPERATURE MODE.
3) The instrument has an auto-off feature that will turn off unit after 10 minutes of non-keypad activity to conserve battery life. To disable auto-off feature, withinstrument turned OFF, press and hold the MODE
key and then press key to enter USER MODE. Press key to enable or disable auto-off feature. When active, the AUTO icon appears at the top of LCD display. Press key to exit USER MODE to use instrument in STANDARD TEMPERATURE MODE.
ITS MODE (Intelligent Temperature Stabilization™):
1) To use ITS MODE, press to turn instrument ON. On power up, the instrument is placed in STANDARD TEMPERATURE MODE. Press the key to select and activate the ITS function. The ITS icon willappear at the top of the LCD when ITS MODE is selected.
4) The instrument has an auto-off feature that will turn off unit after 10 minutes of non-keypad activity to conserve battery life. To manually turn instrument off, press and hold key momentarily. To disable AUTO-OFF feature, press and hold key and then press key. (NOTE: “AUTO” icon at top of display will appear when AUTO-OFF feature is active).
5) The resolution default setting is tenth degree. To change resolution to whole degree, press and hold
key and then press key.6) Press key to turn on backlight. When pressed,
the backlight will remain on for 5 seconds and automatically turn off.
NOTE: USE OF BACKLIGHT WILLSIGNIFICANTLY DECREASE BATTERYLIFE DUE TO INCREASED POWER REQUIRED FOR BACKLIGHT OPERATION
7) The instrument has a “HOLD” feature to capture the current temperature reading on the display. To activate the hold feature, press and release thekey. The current temperature reading will flash on thedisplay and the hold icon will appear at top of display.Press the key again to return to STANDARD TEMPERATURE MODE.
4 5
AquaTuff™ 353 THERMOMETER
Press to turn instrument ON or OFF.
Press to select Standard, ITS™, or Memory mode of operation.
In ITS Mode, press to store ITS temperature readings. In Memory Mode, press to scroll forward. In User Mode, press to select temperature scale.
In Memory Mode, press to scroll backward. In User mode, press to enable/disable Auto-Off feature.
OPERATION OVERVIEW:There are 3 Main Modes of operation:1) Standard Temperature Mode 2) Intelligent Temperature Stabilization™ (ITS™) Mode 3) Memory Mode
AquaTuff™ 352 THERMOMETER
OPERATION - Continued:
AquaTuff™ 353 THERMOMETER
6 7
2) When ITS MODE is active, the display will show “- -”while the temperature is changing (stabilization seek mode). The final stabilized temperature readingwill flash on the display when reached. The ITStemperature reading will remain flashing on the display until the probe is removed or temperature changes by approximately 5°F(3°C). When the temperature changes, the instrument will return to ITS stabilization seek mode and “- -” will be displayed until the next stabilized temperature is reached and that temperature reading will flash on the display.
3) The user has the option of storing the ITStemperature reading in memory. To store ITStemperature reading, press key to store reading. The display will show reading number“r001-r250” and store reading in memory. Up to 250readings can be stored in memory.
4) To return to STANDARD TEMPERATURE MODE, turn unit OFF and back ON or repeatedly press
key until both ITS and MEM icons are turned off at top of display.
MEMORY MODE:
1) To view temperature readings stored in memory, turn instrument ON and press key to select MEMORY MODE. When active, MEM icon will appear at top of LCD. (NOTE: WITH NO TEMPERATURE DATA IN MEMORY, INSTRUMENTWILL NOT ENTER MEMORY MODE.)
2) To view temperature data, press key to scroll forward or key to scroll backward through temperature data. The display will show reading number “r001-r250” followed by the temperature recorded. (NOTE: TO ACCESS FAST SCROLLMODE, PRESS AND HOLD KEY OR KEY AND DISPLAY WILL QUICKLY SEQUENCE THROUGH TEMPERATURE READINGS.)
3) The temperature data is a cyclical data system. When scrolling through data, the temperature readings will cycle through all readings either forwardor backward and then repeat readings when either the first or last reading in memory is reached.
4) To clear temperature readings in memory, press and hold both the and keys at the same time until “CLr” is shown on display.
5) To return to STANDARD TEMPERATURE MODE, turn unit OFF and back ON or repeatedly press
key until both ITS and MEM icons are turned off at top of LCD display.
USER TIPWhen temperature readings are cleared
from memory, there is no facility to restore deleted temperature data.
Ensure that temperature data is not neededbefore clearing memory contents.
AquaTuff™ 353 THERMOMETER
ITS MODE - Continued:
AquaTuff™ 353 THERMOMETER
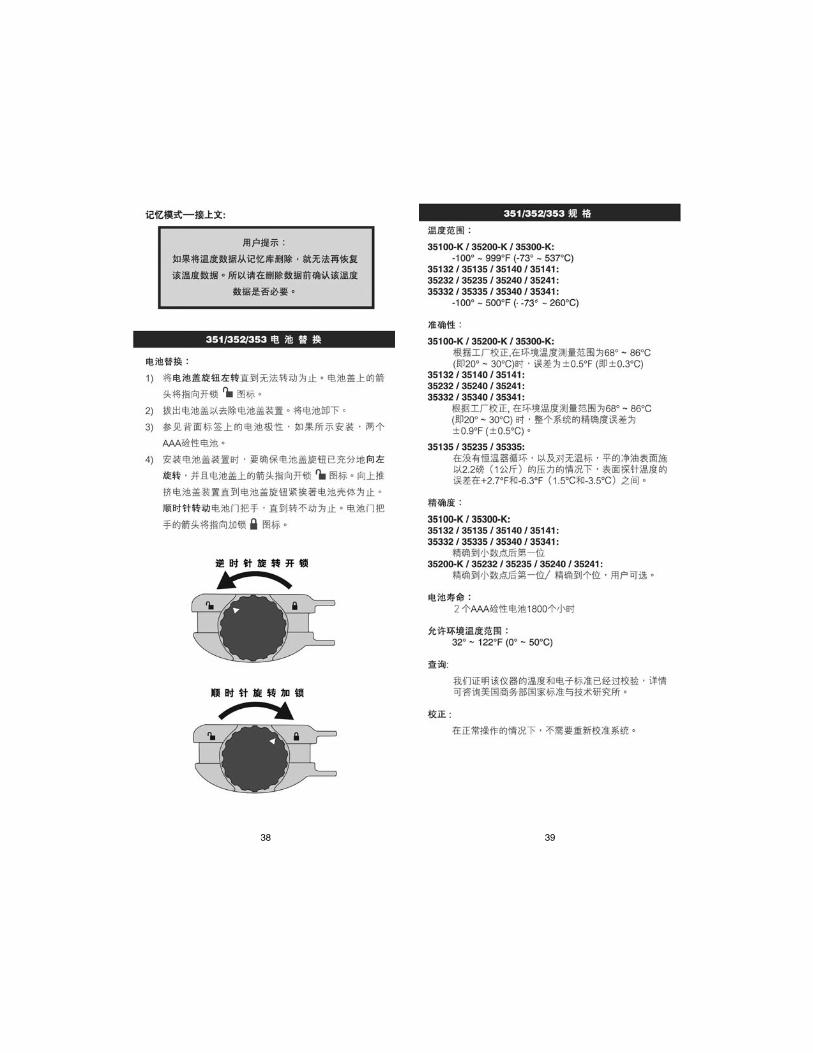
351 / 352 / 353 BATTERY REPLACEMENT
MEMORY MODE - Continued:
BATTERY REPLACEMENT:
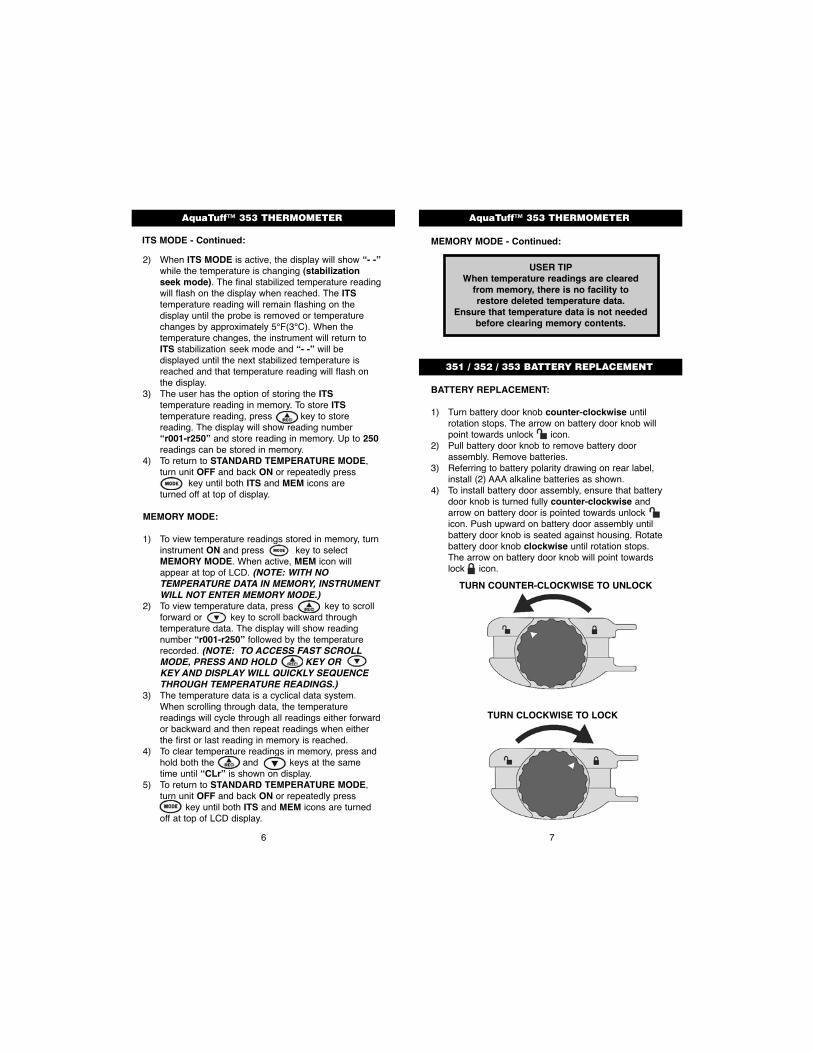
1) Turn battery door knob counter-clockwise until rotation stops. The arrow on battery door knob will point towards unlock icon.
2) Pull battery door knob to remove battery door assembly. Remove batteries.
3) Referring to battery polarity drawing on rear label, install (2) AAA alkaline batteries as shown.
4) To install battery door assembly, ensure that battery door knob is turned fully counter-clockwise and arrow on battery door is pointed towards unlock icon. Push upward on battery door assembly until battery door knob is seated against housing. Rotate battery door knob clockwise until rotation stops. The arrow on battery door knob will point towards lock icon.
TURN COUNTER-CLOCKWISE TO UNLOCK
TURN CLOCKWISE TO LOCK
8 9
351 / 352 / 353 SPECIFICATIONS 351 / 352 / 353 TROUBLESHOOTING
TEMPERATURE RANGES:35100-K / 35200-K / 35300-K:
-100° to 999°F (-73° to 537°C)35132 / 35135 / 35140 / 35141:35232 / 35235 / 35240 / 35241:35332 / 35335 / 35340 / 35341:
-100° to 500°F (-73° to 260°C)
ACCURACY:35100-K / 35200-K / 35300-K:
With factory calibration, ±0.5F° (±0.3C°) over entire measurement range at ambient temperatures between 68° to 86°F (20° to 30°C)
35132 / 35140 / 35141:35232 / 35240 / 35241:35332 / 35340 / 35341:
With factory calibration, ±0.9F° (±0.5C°) Total System Accuracy over entire measurement range at ambient temperatures between 68° to 86°F (20° to 30°C)
35135 / 35235 / 35335:Surface probe temperature errors for draft-free, flat,clean oiled surfaces with 2.2 lbs.(1 Kg) of pressureare typically within +2.7°F and –6.3°F (+1.5°C and –3.5°C) without thermostat recycling.
RESOLUTION:35100-K / 35300-K:35132 / 35135 / 35140 / 35141:35332 / 35335 / 35340 / 35341:
Tenth degree (.1)35200-K / 35232 / 35235 / 35240 / 35241:
Tenth degree / whole degree (.1/1), user selectable
BATTERY LIFE:1800 Hours (2) AAA Alkaline batteries
AMBIENT TEMPERATURE LIMITS:32° TO 122°F (0° TO 50°C)
TRACEABILITY: We certify that this instrument has been calibrated to temperature and/or electrical standards traceableto the U.S. Department of Commerce National Institute of Standards and Technology.
CALIBRATION:Under normal operating conditions, the unit should not require re-calibration.
TROUBLESHOOTING
Our Customer Service Department is availableMonday through Friday 8:00 AM to 5:00 PM ESTat 800-835-5011.
1) Unit Does Not Turn On:Batteries are installed incorrectly or dead.Check batteries are installed according to picture on rear label. Replace batteries.
2) Display Shows “Prob”: Probe is broken (Open thermocouple see “Test for Broken Probe” below).
3) Test for Broken Probe: Pull the probe connector out partially to expose the blade contacts. Place a metal paper clip across connector blades to short contacts. If instrument displays temperature, the probe is broken. Replace Probe.
4) Battery Icon Appears on Display: Low battery. Replace batteries.
5) Display Shows “bAtt” and Instrument Shuts Off:Replace batteries.
6) Display Shows “LO” or “HI”: Temperature measuredis outside measurement range of instrument.
351 / 352 / 353 WARRANTY
WARRANTY: Cooper-Atkins thermometers are backedby a 5-year Instrument Warranty and 1-year ProbeWarranty on defects in workmanship and materials.

10 11
TERMÓMETRO AquaTuff™ 351
[ON] Oprima para Prender o Apagar el instrumento.
[F/C] Oprima para seleccionar escala de temperatura Fahrenheit o Celsius.
OPERACIÓN:1) Observando la polaridad correcta, inserta la sonda
del termopar tipo K en la parte superior del instru-mento.
2) Oprima la tecla [ON] para prender el instrumento. 3) La escala de temperatura por defecto es Fahrenheit.
Para cambiar la escala de temperatura, oprima la tecla [F/C] . (NOTA: Se intercambiará la pantalla entre los iconos “F” y “C” al lado derecho de la pantalla cada vez que se oprime la tecla ).
4) El instrumento tiene una función de apagado automático que apagará la unidad después de 10 minutos sin actividad del teclado para conservar la vida de la pilas. Para apagar manualmente el instru-mento, oprima y mantenga oprimida momentáne-mente la tecla .
TERMÓMETRO AquaTuff™ 352
Oprima para Prender o Apagar el instrumento. Cuando se utiliza en combinación con la tecla de MAYÚSCULAS, le permite activar o desactivar la función de APAGADO AUTOMÁTICO
Oprima para seleccionar la escala de temperaturaFAHRENHEIT o CELSIUS. Cuando se utiliza en combinación con la tecla de MAYÚSCULAS, se selecciona una resolución de décimas o de grado entero.
Oprima para “CONGELAR” la lectura de temperatura actual en la pantalla. La función MAYÚSCULAS proporciona ajustes secundarios para el usuario en combinación con otras teclas, como se indica a continuación.
Oprima para prender LA ILUMINACIÓN DE FONDO para ver las temperaturas cuando no haymucha luz. Al oprimirla, ILUMINACIÓN DE FONDO se mantendrá prendida durante 5 segundos.
OPERACIÓN:1) Observando la polaridad correcta, inserte la sonda
del termopar tipo K en la parte superior del instru-mento.
2) Oprima la tecla para prender el instrumento.
TERMÓMETRO AquaTuff™ 352
OPERACIÓN - Continuación:
3) La escala de temperatura por defecto es Fahrenheit. Para cambiar la escala de temperatura oprima la tecla . (NOTA: Se intercambiará la pantalla entre los iconos “F” y “C” al lado derecho de la pantalla cada vez que se oprime la tecla ).
4) El instrumento tiene una función de apagado automático que apagará la unidad después de 10 minutos sin actividad del teclado para conservar la vida de la pilas. Para apagar manualmente el instrumento, oprima y mantenga oprimida momentáneamente la tecla . Para desactivar la función de APAGADO AUTOMÁTICO, oprima y mantenga oprimida la tecla y luego oprima la tecla . (NOTA: El icono “AUTO” aparecerá en la parte superior de la pantalla cuando está activada la función de APAGADO AUTOMÁTICO).
5) La resolución por defecto es décimas de grado. Paracambiar la resolución a grado entero, oprima y mantenga oprimida la tecla y luego oprima la tecla
.6) Oprima la tecla para prender la ilumi
nación de fondo. Al oprimirla, la iluminación de fondo se mantendrá prendida durante 5 segundos y luego se apagará automáticamente.
NOTA: USO DE LA ILUMINACIÓN DE NACIONFONDO PARA REDUCIRÁ REDUCIR LASENSIBILIDAD DE VIDA DE LA PILA POR LA ENERGÍA ADICIONAL QUE SE REQUIERE PARA LA OPERACIÓN DE ILUMINACIÓN DE FONDO.
7) El instrumento tiene la función de “HOLD” (MAN-TENER) para capturar la lectura de temperatura actual en la pantalla. Para activar esta función, oprima y suelte la tecla . La lectura de temper-atura actual parpadeará en la pantalla y el icono de “Hold” aparecerá en la parte superior de la pantalla. Oprima de nuevo la tecla [Hold para regresar al MODO DE TEMPERATURA ESTÁNDAR.
TERMÓMETRO AquaTuff™ 353
[ON] Oprima para Prender o Apagar el instrumento.
[Mode Oprima para seleccionar el modo de operación Estándar, ITSMR o de Memoria.
[Rec] En el modo ITS, oprima para almacenar lecturas de temperatura ITS. En el Modo de Memoria, oprima para desplazarse línea por línea hacia delante. En el Modo de Usuario, oprima para seleccionar la escala de temperatura.
TERMÓMETRO AquaTuff™ 353
En Modo de Memoria, oprima para desplazarse línea por línea hacia atrás. En el Modo de Usuario, oprima para activar/desactivar la función de Apagado Automático.
VISTAZO GENERAL DE LA OPERACIÓN:Tiene 3 Modos Principales de operación:1) Modo de Temperatura Estándar2) Modo de Estabilización Inteligente de Temperatura
(ITS™- Intelligent Temperature Stabilization™)3) Modo de Memoria
En el MODO DE TEMPERATURA ESTÁNDAR, el instru-mento funciona como un termómetro normal. En el ModoITS, el instrumento funciona con la función deEstabilización Inteligente de TemperaturaTM. El instru-mento de la serie 353 tiene una función exclusiva paramostrar la temperatura de la cosa que se está midiendocuando la temperatura haya llegado a la temperaturaestabilizada final. El propósito de esta función es paraayudar al usuario en determinar cuándo se ha alcanzadola temperatura estabilizada final. La función ITS esdinámica, o sea, opera continuamente en el tiempo real.Se puede utilizar el instrumento en el Modo ITS con laopción de grabar lecturas de temperatura estabilizadas osimplemente como termómetro con funcionalidad ITS. ElMODO DE MEMORIA es para ver los datos de temper-atura ITS almacenados en la memoria, y usted podrádesplazarse en ambas direcciones. La tecla per-mite que el usuario seleccione fácilmente el modo deoperación deseado.
MODO DE TEMPERATURA ESTÁNDAR
1) Oprima la tecla [ON] para Prender o Apagar el instrumento.
2) La escala de temperatura por defecto es Fahrenheit. Para cambiar la escala de temperatura, con el instrumento Apagado, oprima y mantenga oprimida la tecla [Mode y luego oprima la tecla para entrar en el MODO DE USUARIO. (NOTA: La pantalla mostrará “USEr”). Oprima la tecla para intercambiar entre Fahrenheit y Celsius. (NOTA: Se intercambiará la pantalla entre los iconos “F” y “C” al lado derecho de la pantalla cada vez que se oprime la tecla [Re ). Oprima la tecla [Mode para salir del MODO DE USUARIO para usar el instrumento en MODO DE TEMPERATURAESTÁNDAR.
3) El instrumento tiene una función de apagado automático que apagará la unidad después de 10 minutos sin actividad del teclado para conservar la vida de la pilas. Para desactivar la función de apaga
MODO DE TEMPERATURA ESTÁNDAR - Continuación
do automático, con el instrumento APAGADO, oprimay mantenga oprimida la tecla de MODO y luego oprima la tecla [ON] para entrar en el MODO DE USUARIO. Oprima la tecla [down]para activar o desactivar la función de apagado automático. Cuando está activada, el icono AUTO aparece en la parte superior de la pantalla. Oprima la tecla [Mopara salir del MODO DE USUARIO para usar el instrumento en el MODO DE TEMPERATURAESTÁNDAR.
MODO ITSTM Estabilización Inteligente de Temperatura.
1) Para usar el MODO ITS, oprima la tecla para Prenderel instrumento. Al encenderse, se coloca el instrumento en el MODO DE TEMPERATURA ESTÁNDAR.Oprima la tecla para seleccionar y activar la función ITS. El icono ITS aparecerá en la parte superior de la pantalla cuando el MODO ITS está seleccionado.
2) Cuando está activo el MODO ITS, la pantalla mostrará “- -“ mientras la temperatura esté cambiando (modo de búsqueda de estabilización). La lectura de temperatura estabilizada final parpadeará en la pan talla al alcanzarse. La lectura de temperatura ITSseguirá parpadeando en la pantalla hasta que se quite la sonda o la temperatura cambie aproximadamente 5°F (3°C). Al cambiarse la temperatura, elinstrumento volverá al modo de búsqueda de estabi-lización ITS y se desplegará “- -“ en la pantalla hastaque se haya alcanzado la siguiente temperatura estabilizada, en cuyo caso la lectura parpadeará en la pantalla.
3) El usuario tiene la opción de almacenar la lectura de temperatura ITS en la memoria. Para almacenar la lectura de temperatura ITS, oprima la tecla [Rec] paraguardar la lectura. La pantalla mostrará el número de lectura “r001- r250” y almacenará la lectura en la memoria. Se pueden guardar hasta 250 lecturas en lamemoria.
4) Para regresar al MODO DE TEMPERATURAESTÁNDAR, Apague la unidad y luego Préndala de nuevo, u oprima repetidamente la tecla [Modhasta que se apaguen tanto el icono de ITS como el de MEM en la parte superior de la pantalla.
12 13
TERMÓMETRO AquaTuff™ 353
TERMÓMETRO AquaTuff™ 353
MODO DE MEMORIA:
1) Para ver las lecturas de temperatura almacenadas en la memoria, Prenda el instrumento y oprima la tecla [Mod para seleccionar el MODO DE MEMORIA.Cuando está activo, el icono MEM aparece en la partesuperior de la pantalla. (NOTA: SI NO HAY DATOS DE TEMPERATURA EN LA MEMORIA, EL INSTRUMENTO NO ENTRARÁ EN EL MODO DE MEMORIA).
2) Para ver los datos de temperatura, oprima la tecla [Rec] para desplazarse adelante o la tecla para desplazarse hacia atrás a través de los datos de temperatura. La pantalla mostrará el número de lectura “r001- r250” y a continuación la temperatura grabada. (NOTA: PARA ACCEDER AL MODO DE DESPLAZAMIENTO RÁPIDO, OPRIMA Y MANTENGA OPRIMIDA LA TECLA [R O LA TECLA[Do Y LA PANTALA REPASARÁ RÁPIDAMENTE LAS LECTURAS DE TEMPERATURA.)
3) Los datos de temperatura son un sistema de datos cíclico. Al desplazarse a través de las lecturas, o bien hacia delante o hacia atrás, se pasará a través de todas las lecturas y luego se repetirán al llegar a la primera o la última lectura.
4) Para borrar las lecturas de temperatura de la memoria, oprima y mantenga oprimidas al mismo tiempo las teclas [Rec] y [dow hasta que aparezca “CLr” en la pantalla.
5) Para regresar al MODO DE TEMPERATURAESTÁNDAR, Apague la unidad y luego Préndala de nuevo, u oprima repetidamente la tecla [Mode hasta que se apaguen tanto el icono de ITS como el de MEM en la parte superior de la pantalla.
AVISO AL USUARIO
Al borrar las lecturas de temperatura de la memoria, no existe manera de restaurar los datos de temperatura borrados. Asegúrese de que no se necesitan los datos de temperatura
antes de borrar el contenido de la memoria.
REEMPLAZO DE PILAS EN EL 351 / 352 / 353
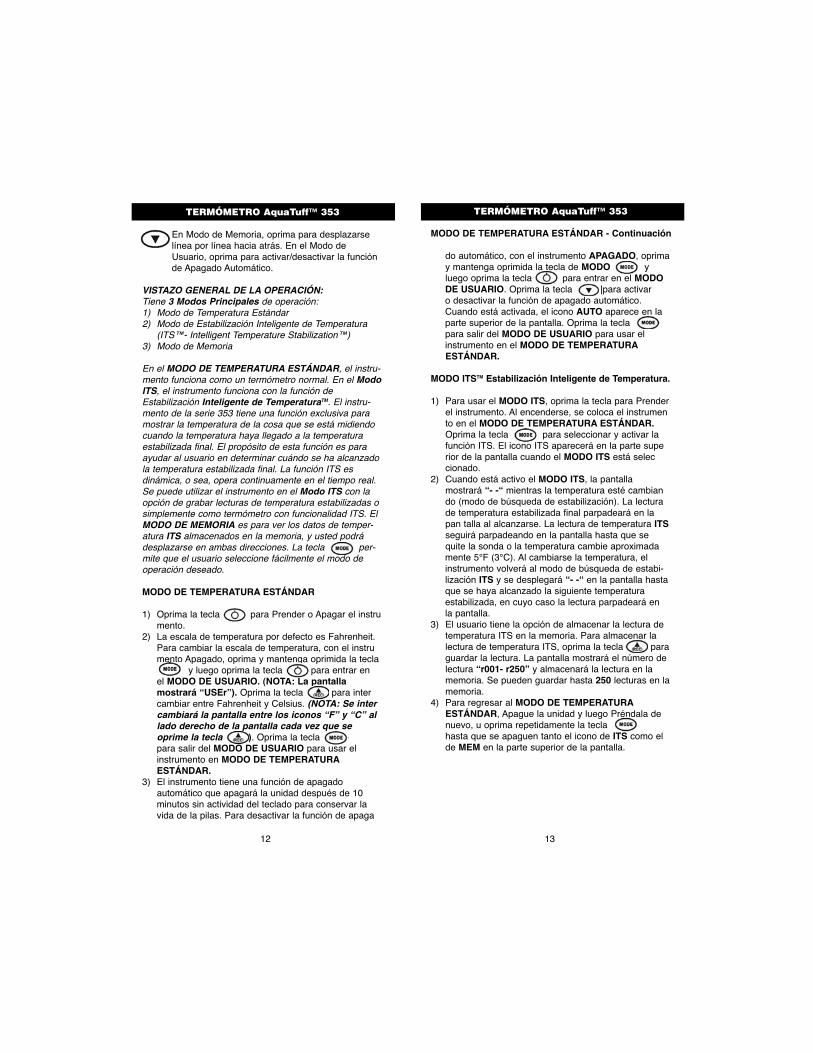
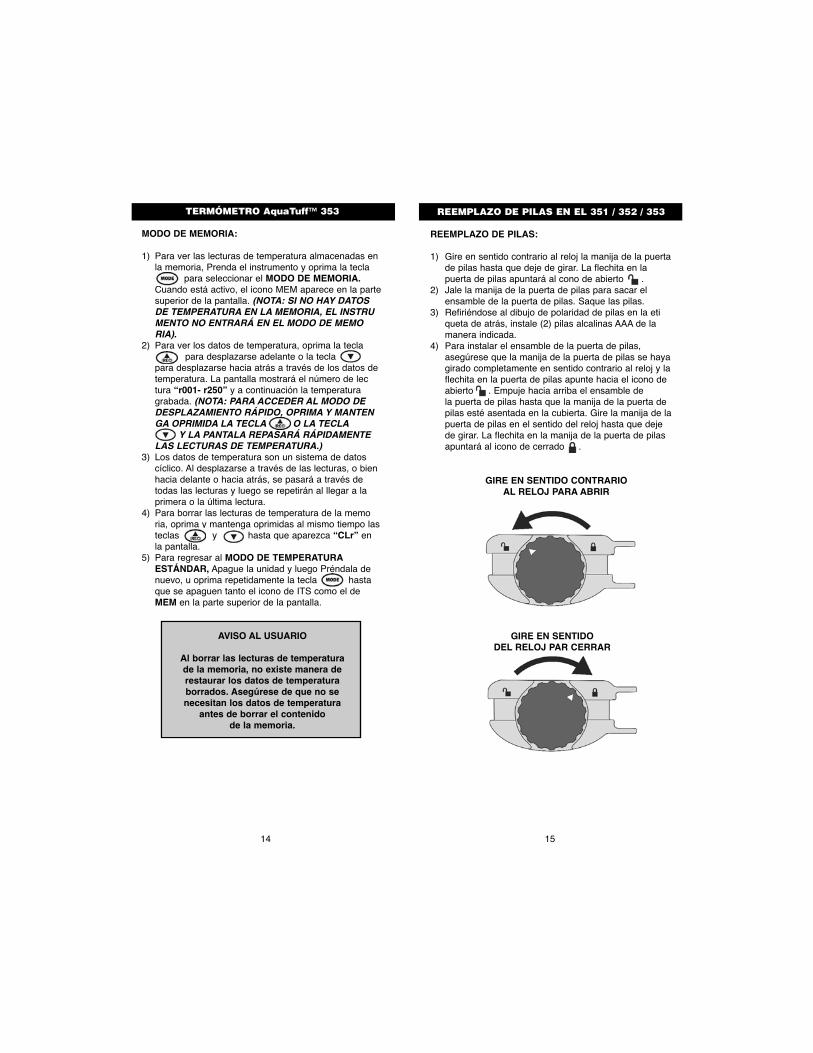
REEMPLAZO DE PILAS:
1) Gire en sentido contrario al reloj la manija de la puertade pilas hasta que deje de girar. La flechita en la puerta de pilas apuntará al cono de abierto [U .
2) Jale la manija de la puerta de pilas para sacar el ensamble de la puerta de pilas. Saque las pilas.
3) Refiriéndose al dibujo de polaridad de pilas en la etiqueta de atrás, instale (2) pilas alcalinas AAA de la manera indicada.
4) Para instalar el ensamble de la puerta de pilas, asegúrese que la manija de la puerta de pilas se hayagirado completamente en sentido contrario al reloj y laflechita en la puerta de pilas apunte hacia el icono de abierto [U . Empuje hacia arriba el ensamble de la puerta de pilas hasta que la manija de la puerta de pilas esté asentada en la cubierta. Gire la manija de lapuerta de pilas en el sentido del reloj hasta que deje de girar. La flechita en la manija de la puerta de pilas apuntará al icono de cerrado .
14 15
GIRE EN SENTIDO CONTRARIOAL RELOJ PARA ABRIR
GIRE EN SENTIDODEL RELOJ PAR CERRAR
ESPECIFICACIONES DEL 351 / 352 / 353
RANGOS DE TEMPERATURA:35100-K / 35200-K / 35300-K:
-100° a 999°F (-73° a 537°C)35132 / 35135 / 35140 / 35141:35232 / 35235 / 35240 / 35241:35332 / 35335 / 35340 / 35341:
-100° a 500°F (-73° a 260°C)
PRECISIÓN:35100-K / 35200-K / 35300-K:
Con calibración de fábrica, ±0.5F° (±0.3C°) sobre todoel rango de medición a temperaturas ambientales de 68° a 86°F (20° a 30°C).
35132 / 35140 / 35141:35232 / 35240 / 35241:35332 / 35340 / 35341:
Con calibración de fábrica, ±0.9F° (±0.5C°) Precisión Total de Sistema sobre todo el rango de medición a temperaturas ambientales de 68° a 86°F (20° a 30°C).
35135 / 35235 / 35335:Al aplicar 2.2 libras (1 kg) de presión a la sonda desuperficies, los errores de temperatura en superficiesaceitadas, limpias y planas sin corrientes de aire sontípicamente entre +2.7°F y -6.3°F (+1.5°C y -3.5°C),sin reciclar el termostato
RESOLUCIÓN:35100-K / 35300-K :35132 / 35135 / 35140 / 35141 :35332 / 35335 / 35340 / 35341 :
Décima parte de un grado (.1)35200-K / 35232 / 35235 / 35240 / 35241 :
Décimas de grado / grado entero (.1/1), lo puede seleccionar el usuario.
VIDA DE LAS PILAS:1800 horas, (2) pilas alcalinas AAA
LÍMITES DE TEMPERATURA AMBIENTAL32° A 122°F (0° A 50°C)
POSIBILIDAD DE RASTREO:Certificamos que este instrumento se ha calibrado paranormas de temperatura y/o electricidad que pueden rastrearse hasta el Instituto Nacional de Normas yTecnología del Departamento de Comercio de EU.
CALIBRACIÓN:Bajo condiciones normales de operación, la unidad norequiere recalibrarse.
LOCALIZACIÓN Y CORRECCIÓN DE FALLAS EN EL 351 / 352 / 353
LOCALIZACIÓN Y CORRECCIÓN DE FALLAS
Nuestro Departamento de Servicio al Cliente estádisponible de lunes a viernes de las 8:00 AM a las5:00 PM al 800-835-5011.
1) No Se Prende la Unidad: Pilas agotadas o instaladas erróneamente. Asegúrese que las pilas estén instal-adas de acuerdo con el dibujo en la etiqueta de atrás. Reemplace las pilas.
2) “Prob” Aparece en la Pantalla: La sonda está descompuesta. (Abra el termopar, véase “Prueba para Sonda Descompuesta” a continuación).
3) Prueba para Sonda Defectuosa: Saque parcial-mente el conector de la sonda para exponer los con-tactos. Coloque un clip de metal en los contactos para ponerlos en cortocircuito. Si el instrumento muestra temperatura, la sonda está descompuesta. Reemplacela sonda.
4) El Icono de Pilas Aparece en la Pantalla: Pila baja. Reemplace las pilas.
5) La Pantalla Muestra “bATT” y Se Apaga el Instrumento: Reemplace las pilas.
6) La Pantalla Muestra “LO” o “HI”: La temperatura medida se encuentra fuera del rango de medición del instrumento.
GARANTÍA DEL 351 / 352 / 353
GARANTÍA: Los termopares Cooper-Atkins son respalda-dos por una Garantía del Instrumento de 5 años y unaGarantía de la Sonda de 1 año contra defectos en lamanufactura y materiales.
16 17
THERMOMÈTRE AquaTuff™ 351
Appuyez pour allumer (ON) ou éteindre (OFF)l’instrument.
Appuyez pour choisir l’échelle de température Fahrenheit ou Celsius.
FONCTIONNEMENT :
1) Tout en observant une polarité correcte, insérez la sonde du thermocouple de Type K dans le connecteur sur le dessus de l’instrument.
2) Appuyer sur la touche pour allumer l’instrument.3) L’échelle de température par défaut est en Fahrenheit.
Pour changer d’échelle de température, appuyez sur la touche . (NOTE : L’affichage passe de l’icône « F » à « C » sur le côté droit de l’écran chaque fois que l’on appuie sur la touche ).
4) L’instrument a une fonctionnalité d’auto-off qui éteint l’unité après dix minutes s’il n’y a eu aucune activité sur le clavier pour conserver la vie de la pile. Pour éteindre l’instrument à la main, appuyer et maintenir latouche un moment.
THERMOMÈTRE AquaTuff™ 352
Appuyez pour allumer l’instrument ON ou pour l’éteindre OFF. Lorsqu’elle est utilisée de con-cert avec la touche MAJ, elle active ou désac-tive la fonction AUTO-OFF (ARRÊT AUTOMATIQUE).
Appuyez pour choisir l’échelle de température FAHREINHEIT ou CELSIUS. Lorsqu’elle est utilisée en combinaison avec la touche MAJ, elle sélectionne une résolution au dixième de degré ou au degré entier.
Appuyez pour “FIGER” le relevé de tempéra-ture présent sur l’écran. La fonction MAJ four-nit des paramètres d’utilisation secondaires avec d’autres touches comme il est noté.
Appuyez pour allumer le PANNEAU LUMINEUX pour voir les températures dans des conditions de pénombre. Lorsqu’on appuie sur PANNEAU LUMINEUX, il reste allumé pen-dant 5 secondes.
THERMOMÈTRE AquaTuff™ 352
FONCTIONNEMENT :
1) Tout en observant une polarité correcte, insérez la sonde du thermocouple de Type K dans le connecteur sur le dessus de l’instrument.
2) Appuyez sur la touche pour allumer l’instrument.3) L’échelle de température par défaut est en Fahrenheit.
Pour changer d’échelle de température appuyez sur la touche [auto . (NOTE : L’affichage passe de l’icône « F » à « C » sur le côté droit de l’écran chaque fois que l’on appuie sur la touche ).
4) L’instrument a une fonctionnalité d’auto-off qui éteint l’unité après dix minutes s’il n’y a eu aucune activité sur le clavier pour conserver la vie de la pile. Pour éteindre l’instrument manuellement, appuyer sur la touche et maintenez-la enfoncée un moment. Pour désactiver la fonction AUTO-OFF, appuyez sur latouche [Ho et maintenez-la enfoncée puis appuyez sur la touche . (NOTE : l’icône “AUTO” en haut de l’écran apparaîtra lorsque la fonction AUTO-OFFest activée.)
5) Le paramètre de résolution par défaut est au dixième de degré. Pour changer la résolution à un degré entier,appuyez sur la touche [H et maintenez-la puis appuyez sur la touche [auto .
6) Appuyez sur la touche [Back pour allumer le pan-neau lumineux. Lorsqu’on appuie sur cette touche, le panneau lumineux reste allumé pendant 5 secondes puis s’éteint automatiquement.
NOTE : L’UTILISATION DU PANNEAU LUMINEUX RÉDUIT DE BEAUCOUP LA VIE DE LA PILE `A CAUSE DE L’AUGMENTATIONEN PUISSANCE NÉCESSAIRE POUR FAIRE FONCTIONNER LE PANNEAU LUMINEUX.
7) L’instrument a une fonctionnalité d’attente « HOLD »pour capturer la température actuelle sur l’écran. Pour activer la fonction d’attente, appuyez sur la touche [Hold] puis relâchez-la. Le relevé de température actuel clignotera sur l’écran et l’icône d’attente appa-raîtra sur le haut de l’écran. Appuyez sur la touche [Hold] de nouveau pour revenir au MODE DE TEMPÉRATURE STANDARD.
18 19
THERMOMÈTRE AquaTuff™ 353
[ON] Appuyez pour allumer l’instrument ON ou pour l’éteindre OFF.
[Mod] Appuyez pour sélectionner le mode de fonc-tion- nement Standard, ITS™ ou Mémoire.
[Rec] En mode ITS, appuyez pour sauvegarder les relevés de température ITS. En mode Mémoire,appuyez pour dérouler en avant. En mode Utilisateur, appuyez pour sélectionner l’échelle de température.
[Dn] En mode Mémoire, appuyez pour dérouler versl’arrière. En mode Utilisateur, appuyez pour activer ou désactiver la fonction Auto-Off.
SURVOL DU FONCTIONNEMENT :Il y a 3 Modes principaux de fonctionnement :1) Le mode de température standard.2) Le mode de Stabilisation de ‘Température Intelligent
(Intelligent Température Stabilization™ ou ITS™.3) Le Mode Mémoire
Dans le MODE DE TEMPÉRATURE STANDARD, l’in-strument fonctionne comme un thermomètre normal. EnMode ITS™, l’instrument fonctionne avec la fonction deStabilisation de température intelligente (ITS).L'instrument de série 353 a une fonctionnalité uniquepour afficher la température de l'élément qui est mesurélorsque cette température atteint sa température stabil-isée définitive. L'objectif de cette fonctionnalité est depermettre à l'utilisateur de déterminer quand la tempéra-ture finale stabilisée a été atteinte. La fonction ITS estdynamique, en ce qu’elle fonctionne continuellement entemps réel. Elle peut être utilisée en Mode ITS avec l’op-tion d’enregistrer des relevés de température stabiliséeou simplement comme un thermomètre avec sa fonction-nalité ITS. Le MODE MÉMOIRE sert à visionner les don-nées de température ITS stockées en mémoire et vouspouvez dérouler dans les deux directions. La touche[Mod permet facilement à l’utilisateur de sélectionner lemode de fonctionnement désiré.
MODE DE TEMPÉRATURE STANDARD :
1) Appuyez sur la touche ON/OFF pour allumer ouéteindre l’instrument.
2) L’échelle de température par défaut est en Fahrenheit.Pour changer d’échelle de température, quand l’instru-ment est éteint (sur OFF), appuyez sur la touche et maintenez-la, puis appuyez sur la touche [Rec] pour entrer en MODE UTILISATEUR (NOTE : L’affichage indiquera “UTILISATEUR” “USEr”).Appuyez sur la touche [Rec] pour passer de Fahrentheit à Celsius (NOTE : L’affichage passe
THERMOMÈTRE AquaTuff™ 353
MODE DE TEMPÉRATURE STANDARD - suite:
de l’icône « F » à « C » sur le côté droit de l’écran chaque fois que l’on appuie sur la touche ).Appuyez sur la touche [Mode pour quitter le MODE UTILISATEUR pour utiliser l’instrument en MODE DE TEMPÉRATURE STANDARD.
3) L’instrument a une fonctionnalité d’auto-off qui éteint l’unité après dix minutes s’il n’y a eu aucune activité sur le clavier pour conserver la vie de la pile. Pour désactiver la fonction auto-off, pendant que l’instru-ment est éteint (sur OFF), appuyez sur la touche MODE [Mod et maintenez-la, puis appuyez sur la touche [ON pour entrer en MODE UTILISATEUR. Appuyez sur la touche pour activer ou désactiv-er la fonction Auto-Off. Lorsqu’elle est active, l’icône AUTO apparaît en haut de l’écran à cristaux liquides. Appuyez sur la touche [Modepour quitter le MODE UTILISATEUR pour utiliser l’instrument en MODE DE TEMPÉRATURE STANDARD.
MODE ITS™ - Stabilisation de température intelligente
1) Pour utiliser le MODE ITS, appuyez pour allumer l’in-strument. Quand l’instrument s’allume, il est placé en MODE DE TEMPÉRATURE STANDARD. Appuyez surla touche [Mod pour sélectionner et activer la fonc-tion ITS. L’icône ITS apparaîtra en haut de l’écran à cristaux liquides quand le MODE ITS a été sélection-né.
2) Quand le MODE ITS est activé, l’affichage indiquera «--» pendant que la température change (mode de recherche de stabilisation). Le relevé de température stabilisée définitive clignotera sur l’écran lorsqu’elle sera atteinte. Le relevé de température ITS continuera de clignoter sur l’écran jusqu’à ce que la sonde soit retirée ou que la température change d’environ 5°F(3°C). Quant la température change, l’instrumentreviendra à son mode de recherche de stabilisationITS et «--» sera affiché jusqu’à ce que la prochainetempérature stabilisée soit atteinte pour laquelle lerelevé de tem-pérature clignotera sur l’écran.
20 21

THERMOMÈTRE AquaTuff™ 353
MODE ITS - suite :
3) L’utilisateur a l’option de sauvegarder le relevé de température ITS en mémoire. Pour stocker le relevé de température ITS, appuyez sur la touche [Rec] pour sauvegarder le relevé. L’écran indiquera le numéro du relevé “r001-r250” et stockera le relevé en mémoire. Il est possible de sauvegarder jusqu’à 250 relevés en mémoire.
4) Pour revenir au MODE DE TEMPÉRATURE STANDARD, éteignez l’unité (OFF) et rallumez-la (ON) ou appuyez plusieurs fois sur la touche Mode] jusqu’à ce que les deux icônes ITS et MEM s’éteignent en haut de l’écran.
MODE MÉMOIRE :
1) Pour voir les relevés de température stockés en mémoire, allumez l’instrument (ON) et appuyez sur la touche [Mo d pour sélectionner le MODE MÉMOIRE. Quand il est activé, l’icône MEM apparaîtra sur le hautde l’écran. (NOTE : SANS DONNÉES DE TEMPÉRATURE EN MÉMOIRE, L’INSTRUMENT N’ENTRERA PAS EN MODE MÉMOIRE.)
2) Pour voir les données de température, appuyez sur la touche [R e pour dérouler vers l’avant ou sur la touche [down pour dérouler vers l’arrière des donnéesde température. L’écran indiquera le numéro du relevé“r001-r250” suivi de la température enregistrée. (REMARQUE : POUR ACCÉDER AU MODE DE DÉROULEMENT RAPIDE, APPUYEZ SUR LATOUCHE [RE OU ow ET TENEZ-LAENFONCÉE ET L’AFFICHAGE PASSERA RAPIDE-MENT PAR LES RELEVÉS DE TEMPÉRATURE.)
3) Les données de température sont un système de don-nées cycliques. Lorsque vous parcourez les données, les relevés de température passeront par un cycle de tous les relevés soit en avant soit en arrière puis répèteront les relevés quand on parvient au premier ou au dernier relevé en mémoire.
4) Pour effacer les relevés de température en mémoire, appuyez sur les deux touches [Re c] et dow en même temps jusqu’à ce que “CLr” soit indiqué sur l’écran.
5) Pour revenir au MODE DE TEMPÉRATURE STAN-DARD, éteignez l’unité (OFF) et rallumez-la (ON) ou appuyez plusieurs fois sur la touche Mode] jusqu’à ceque les deux icônes ITS et MEM soient éteintes en haut de l’écran à cristaux liquides.
THERMOMÈTRE AquaTuff™ 353
MODE MÉMOIRE – suite :
CONSEIL POUR L’UTILISATEURLorsque les relevés de température sont effacés de la mémoire, il n’y a pas moyen de restaurer les données de température
effacées. Assurez-vous que vous n’avez pas besoin des données de température avant
d’effacer le contenu de la mémoire.
REMPLACEMENT DE LA PILE 351 / 352 / 353
REMPLACEMENT DE LA PILE :
1) Tournez le bouton du logement de la pile dans le sens contraire des aiguilles d’une montre jusqu’à arrêt de larotation. La flèche sur le bouton de la porte de la pile indique l’icône de déverrouillage .
2) Retirez le bouton de la porte de la pile pour retirer l’assemblage de la porte. Retirez les piles.
3) En vous référant au dessin de polarité de la pile qui setrouve sur l’étiquette arrière, installez (2) AAA piles alcalines comme il est indiqué.
4) Pour installer l’assemblage de la porte de la pile, assurez-vous que le bouton de la porte des piles est totalement tourné dans le sens contraire des aiguilles d’une montre et que la flèche sur la porte de la pile indique l’icône de déverrouillage unl. Poussez vers le haut sur l’assemblage de la porte de la pile jusqu’à ce que le bouton de la porte de la pile soit contre le logement. Faites tourner le bouton de la porte de la pile dans le sens des aiguilles d’une mon-tre jusqu’à ce que la rotation s’arrête. La flèche sur le bouton de la porte de la pile indique l’icône de ver-rouillage .
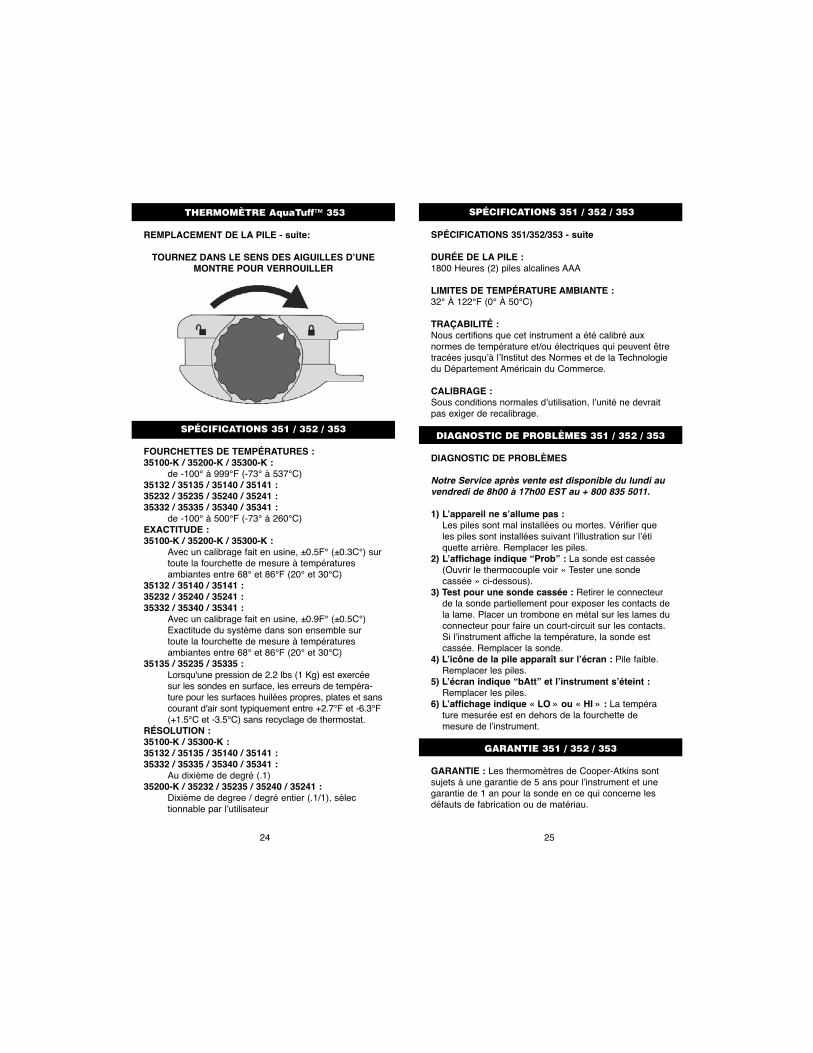
TOURNEZ DANS LE SENS CONTRAIRE DES AIGU-ILLES D’UNE MONTRE POUR DÉVERROUILLER
22 23
THERMOMÈTRE AquaTuff™ 353
REMPLACEMENT DE LA PILE - suite:
TOURNEZ DANS LE SENS DES AIGUILLES D’UNEMONTRE POUR VERROUILLER
SPÉCIFICATIONS 351/352/353 - suite
DURÉE DE LA PILE :1800 Heures (2) piles alcalines AAA
LIMITES DE TEMPÉRATURE AMBIANTE :32° À 122°F (0° À 50°C)
TRAÇABILITÉ :Nous certifions que cet instrument a été calibré auxnormes de température et/ou électriques qui peuvent êtretracées jusqu’à l’Institut des Normes et de la Technologiedu Département Américain du Commerce.
CALIBRAGE :Sous conditions normales d’utilisation, l’unité ne devraitpas exiger de recalibrage.
DIAGNOSTIC DE PROBLÈMES 351 / 352 / 353
DIAGNOSTIC DE PROBLÈMES
Notre Service après vente est disponible du lundi auvendredi de 8h00 à 17h00 EST au + 800 835 5011.
1) L’appareil ne s’allume pas :Les piles sont mal installées ou mortes. Vérifier que les piles sont installées suivant l’illustration sur l’étiquette arrière. Remplacer les piles.
2) L’affichage indique “Prob” : La sonde est cassée (Ouvrir le thermocouple voir « Tester une sonde cassée » ci-dessous).
3) Test pour une sonde cassée : Retirer le connecteur de la sonde partiellement pour exposer les contacts dela lame. Placer un trombone en métal sur les lames duconnecteur pour faire un court-circuit sur les contacts. Si l’instrument affiche la température, la sonde est cassée. Remplacer la sonde.
4) L’icône de la pile apparaît sur l’écran : Pile faible. Remplacer les piles.
5) L’écran indique “bAtt” et l’instrument s’éteint :Remplacer les piles.
6) L’affichage indique « LO » ou « HI » : La température mesurée est en dehors de la fourchette de mesure de l’instrument.
GARANTIE 351 / 352 / 353
GARANTIE : Les thermomètres de Cooper-Atkins sontsujets à une garantie de 5 ans pour l’instrument et unegarantie de 1 an pour la sonde en ce qui concerne lesdéfauts de fabrication ou de matériau.
SPÉCIFICATIONS 351 / 352 / 353
SPÉCIFICATIONS 351 / 352 / 353
FOURCHETTES DE TEMPÉRATURES :35100-K / 35200-K / 35300-K :
de -100° à 999°F (-73° à 537°C)35132 / 35135 / 35140 / 35141 :35232 / 35235 / 35240 / 35241 :35332 / 35335 / 35340 / 35341 :
de -100° à 500°F (-73° à 260°C)EXACTITUDE :35100-K / 35200-K / 35300-K :
Avec un calibrage fait en usine, ±0.5F° (±0.3C°) surtoute la fourchette de mesure à températures ambiantes entre 68° et 86°F (20° et 30°C)
35132 / 35140 / 35141 :35232 / 35240 / 35241 :35332 / 35340 / 35341 :
Avec un calibrage fait en usine, ±0.9F° (±0.5C°) Exactitude du système dans son ensemble sur toute la fourchette de mesure à températures ambiantes entre 68° et 86°F (20° et 30°C)
35135 / 35235 / 35335 :Lorsqu'une pression de 2.2 lbs (1 Kg) est exercéesur les sondes en surface, les erreurs de tempéra-ture pour les surfaces huilées propres, plates et sanscourant d'air sont typiquement entre +2.7°F et -6.3°F(+1.5°C et -3.5°C) sans recyclage de thermostat.
RÉSOLUTION :35100-K / 35300-K :35132 / 35135 / 35140 / 35141 :35332 / 35335 / 35340 / 35341 :
Au dixième de degré (.1)35200-K / 35232 / 35235 / 35240 / 35241 :
Dixième de degree / degré entier (.1/1), sélectionnable par l’utilisateur
24 25
BETRIEB – Forts.:(HINWEIS: Jedes Mal wenn, die Taste gedrückt wird schaltet das Symbol auf der recht-en Seite der Anzeige zwischen “F” und “C” um.
4) Das Instrument schaltet nach 10 Minuten ohne Bedienen der Tastatur automatisch ab, um Batterie zu sparen. Zum manuellen Abschalten des Instruments drücken und halten Sie die [Au Taste kurzfristig. Drücken und Halten Sie die [Ho l Taste und Drücken Sie dann die [Au Taste, um die AUTO-OFF Funktion zu deaktivieren. (HINWEIS: Auf der Anzeige erscheint oben bei aktiver AUTO-OFF Funktion das “AUTO” Symbol).
5) Die Werkseinstellung für die Auflösung ist Zehntel Grad. Drücken und Halten Sie die [Ho l Taste und Drücken Sie dann die [AF/C Taste, um die Auflösung auf ganze Grade umzuschalten.
6) Durch Drücken der Taste wird die HINTERGRUNDBELEUCHTUNG für die Anzeige der Temperatur bei geringem Licht angewählt. Nach demDrücken der Tast bleibt die HINTERGRUNDBELEUCHTUNG 5 Sekunden lang aktiv und erlischt
dann automatisch.HINWEIS: ANWENDEN DER HINTER-GRUNDBELEUCHTUNG VERRINGERTDIE LEBENSZEIT DER BATTERIEDRAMATISCH WEGEN DES ERHÖHTENSTROMBEDARFS FÜR DIE HINTER-GRUNDBELEUCHTUNG
7) Das Instrument besitzt eine “HALTE” Funktion, um die aktuelle Temperatur auf der Anzeige festzuhalten.Drücken Sie zum Aktivieren dieser Funktion kurz die [Ho Taste. Die aktuelle Temperatur blinkt auf der Anzeige, und das Halte Symbol erscheint oben auf der Anzeige. Durch erneutes Drücken der [Hold] Taste kehrt das Gerät in den STANDARD-TEMPERATURMODUS zurück.
AquaTuff™ 353 THERMOMETER
[ON] Durch Drücken das Instrument EIN oder AUS schalten.
[Mode] Durch Drücken kann die Betriebsart Standard, ITS™, oder Speichermodus angewählt werden.
[Rec] Drücken der Taste im ITS-Betrieb speichert die ITS Temperaturwerte, scrollt im Speicher-Betrieb vorwärts, und wählt die Temperaturskala im Benutzerbetrieb.
AquaTuff™ 351 THERMOMETER
Durch Drücken das Instrument EIN oder AUS schalten.Durch Drücken Fahrenheit oder Celsius Anzeige wählen.
BETRIEB:1) Stecken Sie ein Thermoelement der Type K richtig
gepolt an der Oberseite des Instruments an.2) Drücken der [O Taste schaltet das Instrument ein.3) Vom Werk ist die Anzeige auf Fahrenheit eingestellt.
Dies kann durch Drücken der [F/ Taste geändert werden. (HINWEIS: Jedes Mal, wenn die Taste gedrückt wird schaltet das Symbol auf der rechten Seite der Anzeige zwischen “F” und “C” um).
4) Das Instrument schaltet nach 10 Minuten ohne Bedienen der Tastatur automatisch ab, um Batterie zu sparen. Zum manuellen Abschalten des Instruments drücken und halten Sie die Taste kurzfristig.
AquaTuff™ 352 THERMOMETER
[ON] Durch Drücken das Instrument EIN oder AUS schalten. Durch Anwendung in Kombination mit der SHIFT Taste wird die AUTO-OFF Funktion aktiviert oder deak-tiviert.
[F/C] Durch Drücken, die Fahrenheit oder Celsius Anzeige wählen. Durch Anwendung in Kombination mit der SHIFTTaste wird zwischen Zehntel- oder Vollgrad-Anzeige gewählt.
[Hold] Durch Drücken wird die momentane Temperatur auf der Anzeige “FESTGE-HALTEN”. Die SHIFT Funktion bietet in Zusammenhang mit anderen Tasten Hilfseinstellungen wie angeführt.
[Bklght] Durch Drücken wird die HINTERGRUND-BELEUCHTUNG für die Anzeige der Temperatur bei geringem Licht angewählt. Nach dem Drücken der Tast bleibt die HIN-TERGRUNDBELEUCHTUNG 5 Sekundenlang aktiv.
BETRIEB:1) Stecken Sie ein Thermoelement der Type K richtig
gepolt an der Oberseite des Instruments an.2) Drücken der [Auto Taste schaltet das Instrument ein.3) Vom Werk ist die Anzeige auf Fahrenheit eingestellt.
Dies kann durch und Drücken der [Auto Taste geändert werden.
26 27
AquaTuff™ 352 THERMOMETER
[down] Drücken der Taste im Speicherbetrieb scrolltrückwärts, und aktiviert/deaktiviert die Auto-Off Funktion im Benutzerbetrieb.
BETRIEBSÜBERSICHT:
3 Hauptbetriebsarten stehen zur Verfügung:1) Standard-Temperaturbetrieb2) Intelligent Temperature Stabilization™ (ITS™)
Betrieb3) Speicherbetrieb
Im STANDARD-TEMPERATURBETRIEB arbeitet dasInstrument wie ein normales Thermometer. Im ITS™Betrieb arbeitet das Instrument mit der IntelligentTemperature Stabilization™ Funktion. Das Instrumentder 353 Serie besitzt eine spezielle Funktion, welche dieTemperatur eines gemessen Artikels erst dann anzeigt,wenn die gemessene Temperatur einen endgültigen stabil-isierten Wert erreicht hat. Zweck dieser Funktion ist es,den Benutzer bei der Bestimmung der endgültig erreichtenstabilisierten Temperatur zu unterstützen. Die ITS Funktionist dynamisch indem Sie kontinuierlich in Realzeit arbeitet. Der ITS Betrieb kann mit der Option derAufzeichnung stabilisierter Temperaturanzeigen gewähltwerden oder einfach als ein Thermometer mit ITSFunktionalität. Der SPEICHERBETRIEB dient zurAnzeige der im Speicher vorhandenen ITSTemperaturdaten verwendet werden. Es kann dabei inbeide Richtungen gescrollt werden. Die [Mo Tasteerlaubt das Anwählen der gewünschten Betriebsart.
STANDARD-TEMPERATURBETRIEB:
1) Drücken der EIN/AUS [O N] Taste schaltet das Instrument EIN/AUS.
2) Vom Werk ist die Anzeige auf Fahrenheit eingestellt. Dies kann im AUS-geschalteten Zustand durch Drücken und Halten der [Mode] Taste und dann Drücken der [Re c] Taste zum Einstieg in den BENUTZERBETRIEB (HINWEIS: Auf der Anzeige erscheint “USEr”) verändert werden. Drücken der [Re c] Taste schaltet zwischen Fahrenheit- und Celsisuanzeige um (HINWEIS: Jedes Mal wenn die [R ec Taste gedrückt wird schaltet das Symbol auf der rechten Seite der Anzeige zwischen “F” und “C” um). Durch Drücken der Taste ver-lasen Sie den BENUTZERBETRIEB und kehren zurück zum STANDARD-TEMPERATURBETRIEB.
3) Das Instrument schaltet nach 10 Minuten ohne Bedienen der Tastatur automatisch ab, um Batterie zu sparen. Um die Auto-Off Funktion im AUS-geschalteten Zustand des Instruments zu deaktivieren, drücken und halten Sie die BETRIEB[Mo Taste und drücken Sie dann die [O NTaste zum Einstieg in den BENUTZERBETRIEB.Drücken der [do Taste aktiviert/deaktiviert dann die Auto-Off Funktion. In aktivem Zustand erscheint das AUTO Symbol oben auf der LCD-Anzeige. DurchDrücken der Taste verlasen Sie den BENUTZERBETRIEB und kehren zurück zum STANDARD-TEMPERATURBETRIEB.
ITS™ BETRIEB (Intelligent Temperature Stabilization™):
1) Zur Verwendung im ITS BETRIEB, drücken und Instrument EIN schalten. Beim Einschalten geht das Instrument in den STANDARD-TEMPERATURBETRIEB. Durch Drücken der [M od Taste wird die ITS Funktion angewählt und aktiviert. Das ITS Symbol erscheint bei angewähltem ITS BETRIEBoben auf der LCD-Anzeige.
2) Bei aktiviertem ITS BETRIEB erscheint auf der Anzeige “- -” während sich die Temperatur verändert(Stabilisierungs-Suchbetrieb). Sobald die stabilisierte Endtemperatur erreicht ist, blinkt der Wert auf der Anzeige. Die ITS Temperaturanzeige blinkt, bis die Sonde entfernt wird oder sich die Temperatur um ca. 5°F (3°C) verändert. Wenn sich die Temperaturverändert, geht das Instrument wieder in den ITSStabilisierungs-Suchbetrieb über und auf der Anzeigeerscheint wieder “- -”, bis die nächste stabilisierteTemperatur erreicht ist und dieser Wert auf derAnzeige blinkt.
3) Der Anwender kann die ITS Temperatur im Speicher ablegen. Drücken Sie dazu die Re c] Taste. Auf der Anzeige erscheint die entsprechende Messnummer “r001-r250” und der Wert wird im Speicher abgelegt.Bis zu 250 Messwerte können gespeichert werden.
4) Um in den STANDARD-TEMPERATURBETRIEB zurückzukehren, schalten Sie die Einheit AUS und wieder EIN oder drücken Sie wiederholt die [Mode] Taste, bis sowohl das ITS als auch das MEM Symbolvon der Anzeige oben verschwindet.
AquaTuff™ 353 THERMOMETER AquaTuff™ 353 THERMOMETER
28 29
STANDARD-TEMPERATURBETRIEB - Forts.:
SPEICHERBETRIEB:
1) Zum Betrachten der im Speicher abgelegten Temperaturwerte, schalten Sie das Instrument EIN, und drücken Sie die [M ode Taste, um den SPEICHERBETRIEB anzuwählen. Sobald dieser aktiv ist, erscheint das MEM Symbol oben auf der LCD. (HINWEIS: BEFINDEN SICH IM SPEICHER KEINE TEMPERATURDATEN, DANN GEHT DAS INSTRUMENT NICHT IN DEN SPEICHERBETRIEB ÜBER.)
2) Zum Betrachten der Temperaturdaten drücken Sie die [Rec] Taste zum Vorwärts-Scrollen oder die Taste zum Rückwärts-Scrollen durch die Temperaturdaten. Auf der Anzeige erscheint die entsprechende Messnummer “r001-r250” und dann die aufgezeichnete Temperatur. (HINWEIS: ZUM ZUGRIFF AUF DEN SCHNELL-SCROLL-BETRIEB DRÜCKEN UND HALTEN SIE DIE [Re c TASTE ODER DIE [Dow TASTE UND DIE ANZEIGE LÄUFT SCHNELL DURCH DIE TEMPERATUR-MESSWERTE.)
3) Die Temperaturdaten sind ein zyklisches Datensystem. Beim Scrollen durch die Daten durchläuft die Anzeige alle Werte entweder Vorwärts oder Rückwärts und wird wiederholt wenn entweder der erste oder letzte Wert erreicht ist.
4) Um Temperaturwerte vom Speicher zu löschen, halten Sie die Re c] und die [down] Tasten gemeinsam gedrückt, bis “CLr” auf der Anzeige erscheint.
5) Um in den STANDARD-TEMPERATURBETRIEB zurückzukehren, schalten Sie die Einheit AUS und wieder EIN oder drücken Sie wiederholt die [ModeTaste, bis sowohl das ITS als auch das MEM Symbolvon der LCD Anzeige oben verschwindet.
ANWENDERTIPPWenn Temperaturwerte vom Speicher
gelöscht werden, besteht keine Möglichkeit, die gelöschten Werte wieder herzustellen.Vergewissern Sie sich vor dem Löschen
des Speichers, dass die Temperaturwerte nicht mehr benötigt werden.
351/352/353 AUSTAUSCHEN DAUSTAUSCHEN DER BATTERIEN:
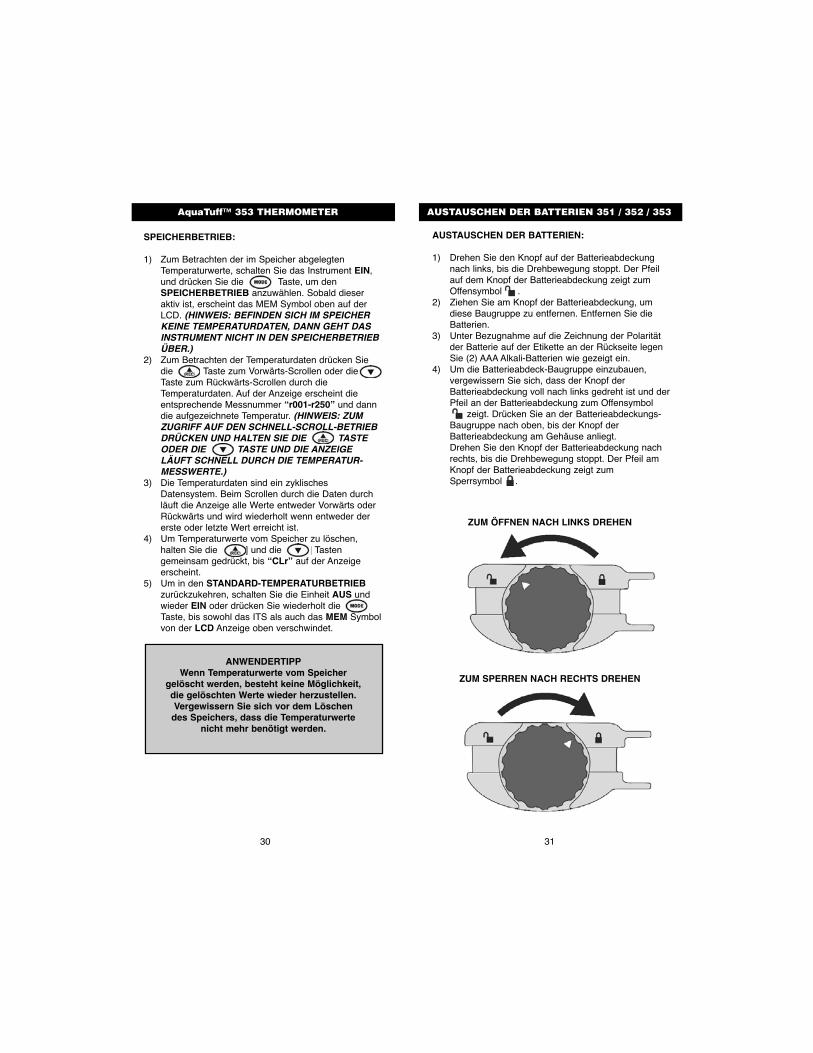
1) Drehen Sie den Knopf auf der Batterieabdeckung nach links, bis die Drehbewegung stoppt. Der Pfeil auf dem Knopf der Batterieabdeckung zeigt zum Offensymbol [un.
2) Ziehen Sie am Knopf der Batterieabdeckung, um diese Baugruppe zu entfernen. Entfernen Sie die Batterien.
3) Unter Bezugnahme auf die Zeichnung der Polarität der Batterie auf der Etikette an der Rückseite legen Sie (2) AAA Alkali-Batterien wie gezeigt ein.
4) Um die Batterieabdeck-Baugruppe einzubauen, vergewissern Sie sich, dass der Knopf der Batterieabdeckung voll nach links gedreht ist und derPfeil an der Batterieabdeckung zum Offensymbol
zeigt. Drücken Sie an der Batterieabdeckungs-Baugruppe nach oben, bis der Knopf der Batterieabdeckung am Gehäuse anliegt. Drehen Sie den Knopf der Batterieabdeckung nach rechts, bis die Drehbewegung stoppt. Der Pfeil am Knopf der Batterieabdeckung zeigt zum Sperrsymbol [l .
AquaTuff™ 353 THERMOMETER AUSTAUSCHEN DER BATTERIEN 351 / 352 / 353
30 31
ZUM ÖFFNEN NACH LINKS DREHEN
ZUM SPERREN NACH RECHTS DREHEN
351 / 352 / 353 SPEZIFIKATIONEN351 / 352 / 353 SPEZIFIKATIONEN
TEMPERATURBEREICHE:
35100-K / 35200-K / 35300-K:-100° bis 999°F (-73° bis 537°C).
35132 / 35135 / 35140 / 35141:35232 / 35235 / 35240 / 35241:35332 / 35335 / 35340 / 35341:
-100° bis 500°F (-73° bis 260°C).
GENAUIGKEIT:
35100-K / 35200-K / 35300-K:Mit Werkskalibrierung, ±0,5°F (±0,3°C) über den vollenMessbereich bei Umgebungstemperaturen von 68° bis86°F (20° bis 30°C).
TEMPERATURBEREICHE - Forts.:
35132 / 35140 / 35141:35232 / 35240 / 35241:35332 / 35340 / 35341:
Mit Werkskalibrierung, ±0,9°F (±0,5°C) Gesamtgenauigkeit des Systems über den vollen Messbereich bei Umgebungstemperaturen von 68° bis86°F (20° bis 30°C).
35135 / 35235 / 35335:Temperaturfehler für Oberflächensonden bei zugfreien,flachen, sauber geölten Oberflächen mit einem Druckvon 2.2 lbs (1 kg) befinden sich typisch innerhalb von+2.7°F und -6.3°F (+1.5°C und -3.5°C) ohneThermostat-Recycling.
AUFLÖSUNG:
35100-K / 35300-K:35132 / 35135 / 35140 / 35141:35332 / 35335 / 35340 / 35341:
Zehntel Grad (0,1)35200-K / 35232 / 35235 / 35240 / 35241:
Zehntel Grad / ganze Grade (0,1/1), wählbar
BATTERIE-LEBENSDAUER:1800 Stunden (2) AAA Alkali-Batterien
UMGEBUNGSTEMPERATUR-GRENZWERTE:32° BIS 122°F (0° BIS 50°C)
RÜCKFÜHRBARKEIT:Wir bestätigen, dass dieses Instrument auf Temperatur-und/oder elektrische Standards kalibriert worden ist,welche auf das U.S. Department of Commerce NationalInstitute of Standards and Technology rückführbar sind.
SPEZIFIKATIONEN - Forts.:
KALIBRIEREN:Unter normalen Betriebsbedingungen sollte kein neuesKalibrieren notwendig sein.
351 / 352 / 353 FEHLERBEHEBUNG
FEHLERBEHEBUNG
Unsere Kundenserviceabteilung steht Montag bisFreitag 8:00 bis 17:00 Uhr EST unter der Nummer800-835-5011 zur Verfügung.
1) Einheit schaltet nicht ein: Batterien sind falsch eingelegt oder leer. Überprüfen Sie, ob die Batterien entsprechend der Abbildung auf der Etikette auf der Rückseite eingelegt sind. Batterien austauschen.
2) Auf der Anzeige erscheint “Prob”: Sonde ist fehlerhaft (für offenes Thermoelement siehe “Test auf fehlerhafte Sonde” unten).
3) Test auf fehlerhafte Sonde: Ziehen Sie den Sondenstecker teilweise heraus, bis die Messerkontakte sichtbar sind. Legen Sie eine Metall-Büroklammer über die Messerkontakte, um diese kurzzuschließen. Wenn das Instrument eine Temperatur anzeigt, ist die Sonde fehlerhaft. Sonde ersetzen.
4) Batteriesymbol erscheint am Display: Spannung niedrig. Batterien austauschen.
5) Auf der Anzeige erscheint “bAtt” und das Gerät schaltet Aus: Batterien austauschen.
6) Auf der Anzeige erscheint “LO” oder “HI”: Die gemessenene Temperatur befindet sich außerhalb des Messbereichs des Geräts
351 / 352 / 353 GARANTIE
GARANTIE: Cooper-Atkins Thermometer sind unter-stützt durch eine 5-Jahre Gerätegarantie und 1-JahrSondengarantie auf Fehler in Material und Ausführung.
32 33
34 35
36 37
38 39
-73°
40 41
42 43
44 45
46 47
-73°
48
Manufactured in the U.S.A. by COOPER-ATKINS CORPORATIONAn ISO 9001 Registered Facility
33 Reeds Gap RoadMiddlefield, CT 06455-0450 U.S.A
CUSTOMER SERVICE: 800-835-5011 FAX: 860-347-5135Email: [email protected] • Website: www.cooper-atkins.com
27-958550B
5 YEAR WARRANTY
Any instrument which provesto be defective in materialor workmanship within fiveyears of original purchasewill be repaired or replacedwithout charge upon receipt of the unit prepaid with proofof purchase. This LimitedWarranty does not cover damage in shipment or failurecaused by tampering, obviouscarelessness, or abuse, and isthe purchaser’s sole remedy.