Embed Size (px)
Citation preview
7/31/2019 Aquarail Jetski
http://slidepdf.com/reader/full/aquarail-jetski 1/6
Build Our Aquarailfor Fun on the Water!
By Hal Kelly
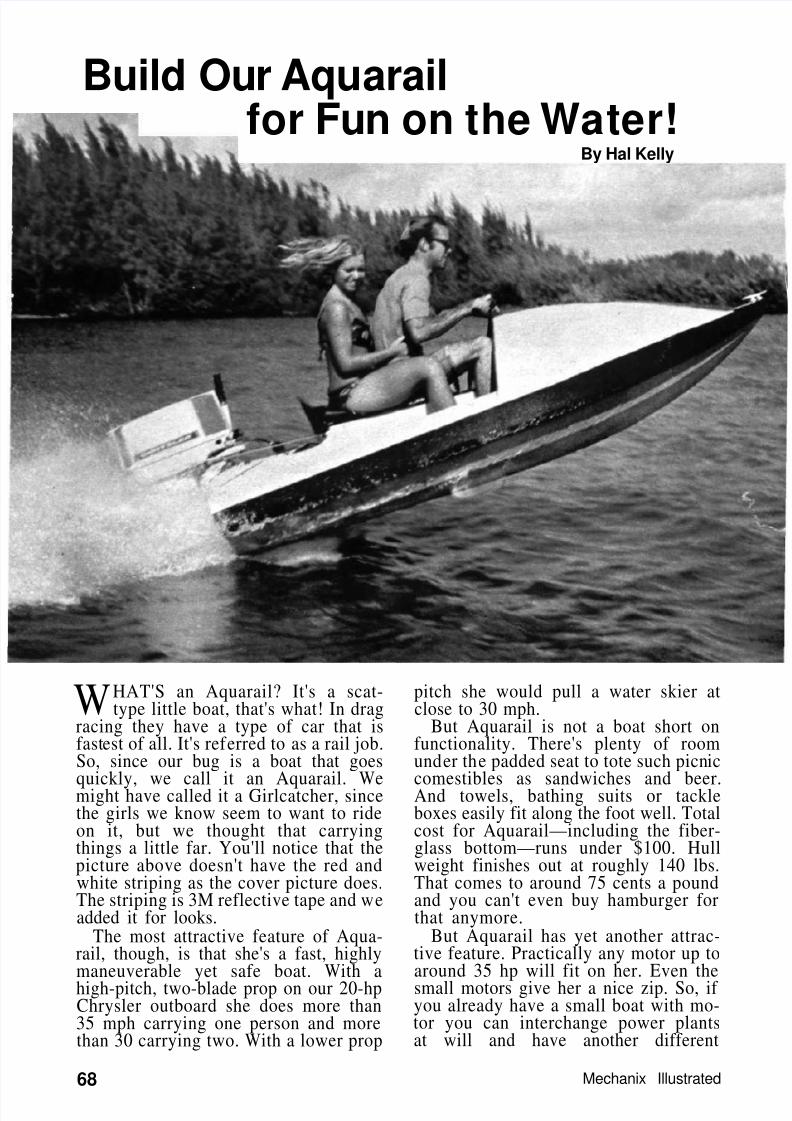
WHAT'S an Aquarail? It's a scat-type little boat, that's what! In drag
racing they have a type of car that isfastest of all. It's referred to as a rail job.So, since our bug is a boat that goes
quickly, we call it an Aquarail. Wemight have called it a Girlcatcher, sincethe girls we know seem to want to rideon it, but we thought that carryingthings a little far. You'll notice that thepicture above doesn't have the red andwhite striping as the cover picture does.The striping is 3M reflective tape and weadded it for looks.
The most attractive feature of Aqua-rail, though, is that she's a fast, highlymaneuverable yet safe boat. With ahigh-pitch, two-blade prop on our 20-hpChrysler outboard she does more than35 mph carrying one person and morethan 30 carrying two. With a lower prop
pitch she would pull a water skier atclose to 30 mph.
But Aquarail is not a boat short onfunctionality. There's plenty of roomunder the padded seat to tote such picnic
comestibles as sandwiches and beer.And towels, bathing suits or tackleboxes easily fit along the foot well. Totalcost for Aquarail—including the fiber-glass bottom—runs under $100. Hullweight finishes out at roughly 140 lbs.That comes to around 75 cents a poundand you can't even buy hamburger forthat anymore.
But Aquarail has yet another attrac-tive feature. Practically any motor up toaround 35 hp will fit on her. Even thesmall motors give her a nice zip. So, if you already have a small boat with mo-tor you can interchange power plantsat will and have another different
68 Mechanix Illustrated
7/31/2019 Aquarail Jetski
http://slidepdf.com/reader/full/aquarail-jetski 2/6
7/31/2019 Aquarail Jetski
http://slidepdf.com/reader/full/aquarail-jetski 3/6
> * •
Build Our Aquarail for Fun on the Water!transom frame at the ends and notch itfor all battens, etc. The 1/4in. transomis glued and nailed to this frame. Glueand nail a 3/4x l i n . piece to the bottom of the transom for the 1-in. afterplane.Since the transom has a 14° angle it isbest to cut the transom at the properangle before setting it against the gird-ers. This will save you a lot of fairing.
The two girders are set 12-1/4in apartinside. Thus the jig is simple. Set up two2 by 4s 12-1/4 in apart (outside measure-ment) . They can be nailed to any sort of a platform at a workable height. Itneedn't be as intricate as the one shown.Clamp the girders to these 2 by 4s, then
just slip the ribs and transom in place.
Glue and nail the girders to two 3/4-insq. battens inside of the girders. Thenscrew these to all ribs. Fasten the ribsto the girders with glue blocks and 1-1/4in. finishing nails.
The keel is next. It will take the bendup front quite easily if you slit it witha saw across the thickness. Coat the slitwith glue and after you have the propershape clamp it until it's dry.
Then come the chines. Like the keel,they are glued and screwed to the tran-som and ribs. Also glue and screw themto the front of the keel. Then put on the3/4-in. sq. bottom battens and the 3/4-in.sheer.
After all the battens, etc., are dry,fair the framing. If properly set up onlythe chines and keel will need this. Checkfrom time to time with a straight edge tomake sure the plywood planking willlay snugly on all battens, keel, etc.
The non-trip chines are next. (We
say non-trip because it's not a sharpchine line and the boat won't "trip" onit making a sharp turn.) We find usingcardboard for a pattern saves time andmaterial. (Cardboard mattress boxesare ideal.) The front section will haveto have a piece spliced to it so it willrun the full length of the boat.
After the non-trip planking has beenglued and nailed to the transom, chineand stem, fair at the chine for a goodbottom fit. Note that the non-trip chineand bottom planking butt together forthe front 3 in. From there to the tran-som the bottom fastens over the non-
trip planking.The bottom is in two sections. Tem-
porarily screw it in place and fair itfor a good fit, especially up front wherethe non-trip planking and the bottombutt. Then mark on the inside bottomwhere all the battens, chine, keel andtransom will make contact. Removeand drill pilot holes for all the nails.This will save you a lot of unnecessarypounding and you will know the nailsare going into the frame.
Put a glue coating on both the frameand the bottom sections that contacteach other. Using the temporary screwsas guides, line up the bottom true tothe framing and nail it in place. In some
sections you'll have to hold a weightunder the battens so the nails will pullthe bottom snugly up to the battens.
At the top of the non-trip, glue andclamp a 3/4-in sq. batten. When dry, re-move the clamps and fair it so the sidescan be glued and nailed to it. Use therib drawings to check for the shape of this batten. Putting it on the outside willgive you a full length spray rail. Glueand nail the sides of this batten and thesheer. Plane the sides flush with theoutside batten.
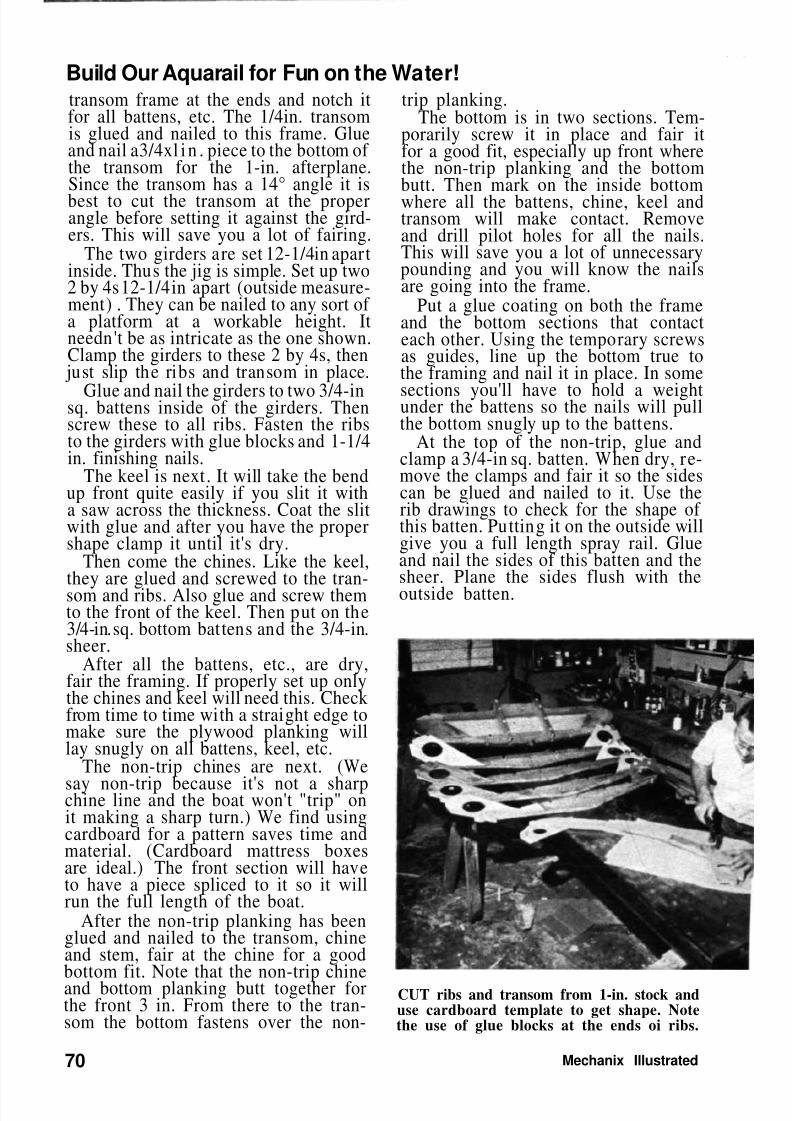
CUT ribs and transom from 1-in. stock anduse cardboard template to get shape. Notethe use of glue blocks at the ends oi ribs.
70 Mechanix Illustrated
7/31/2019 Aquarail Jetski
http://slidepdf.com/reader/full/aquarail-jetski 4/6
7/31/2019 Aquarail Jetski
http://slidepdf.com/reader/full/aquarail-jetski 5/6
Build Our Aquarail for Fun on the Water!
Now fiberglass the bottom. Mix colorwith the resin and coat the bottom. Laythe cloth in place, spread more resin onthe cloth with an old brush, then useabout a 12-in. wide window squeegee tospread the resin evenly over the cloth.
After it has hardened use a sander togrind off any lumps. Then feather thecloth to the non-trip chines. Apply an-other thin coat of resin and squeegeeit over the cloth. This won't take much.All you want is to get a slick finish.
Flip the boat rightside up on a paddedsurface and start on the inside, framingand planking with a good wood sealer.Give her two coats. We used XIM flashbond. After that put on the dash board.
It takes a bit of fitting, so use cardboardfor a pattern. Glue and nail the dash to3/4-in. sq. pieces that you've glued andnailed to the girders. Fair the front sec-tion to take the 1/4-in.plywood decking.The quickest and best way to do thisfairing is to use a husky disk sander.
Then glue and nail the sides of thefront decking in place. Since these pieceshave a slight compound curve, wet theoutside of the plywood with hot waterto facilitate bending. You can use a tem-
porary strut attached to Rib 1 to pushout the curve until the glue dries. Glueand nail 1/4-in. plywood (almost tr iangu-lar in shape) to the sheer at the very tipof the front deck. Trim and fair a fillerblock to support this front tip of thedeck. Use a sander to obtain the propershape of the filler block. You'll also wantto fit a beam between the girders at thetop about 22 in. forward of the dash-board. Cut the center piece of the front
decking into two pieces and screw themto this beam. The smaller piece can thenbe removed in case you have to get atthe steering mechanism.
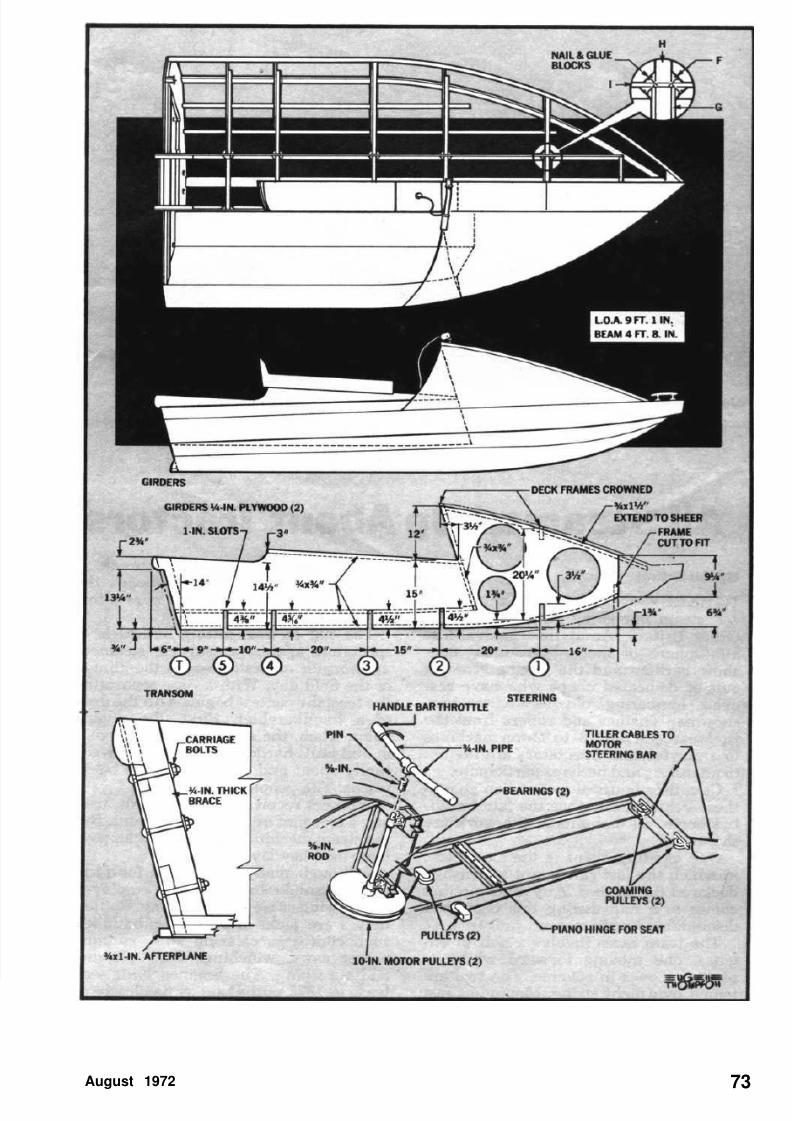
Check the drawing for your steeringcontrols. You may have to fasten a steer-ing bar to the motor. But this can bemade up at your local welding shop.
You can buy the handle bar throttlefrom Western Control Co., 2533 SouthWest St., Box 1202, Wichita, Kan. 67201.Install a piano hinge at the front toswing up the seat. We covered the seatwith 3-in. padding and a black vinyl.The gas tank will fit at the rear. •
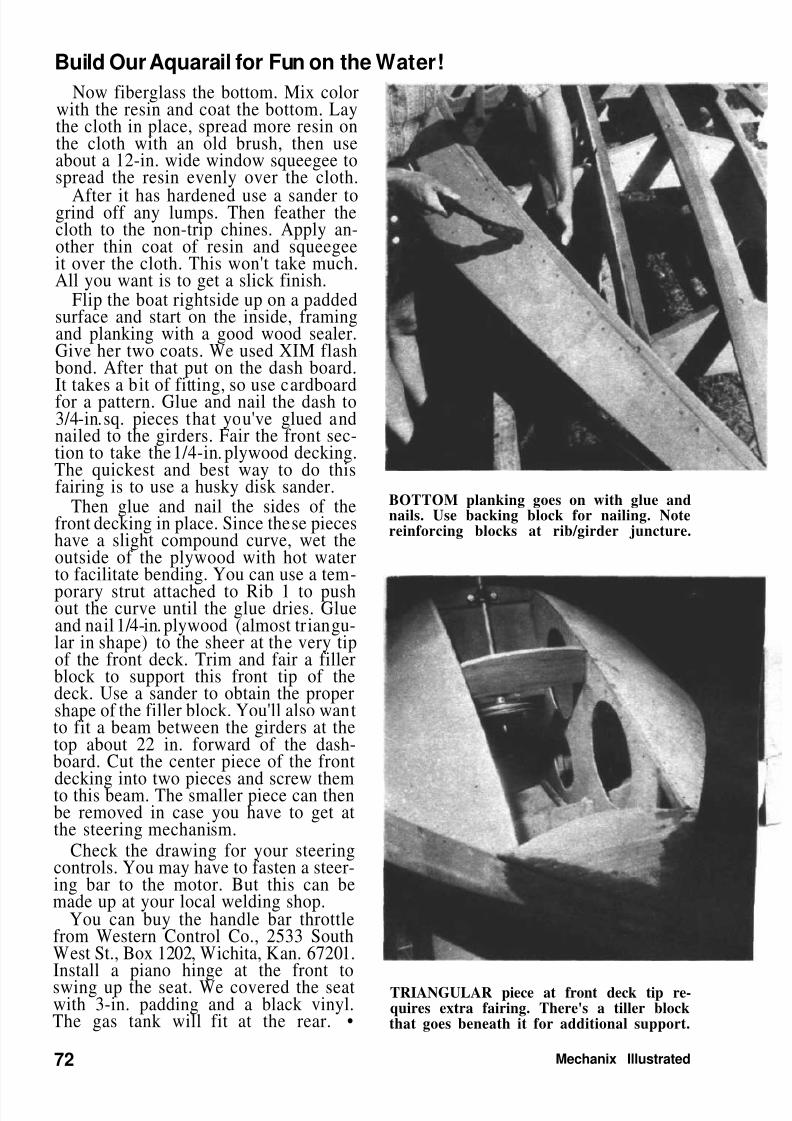
BOTTOM planking goes on with glue andnails. Use backing block for nailing. Notereinforcing blocks at rib/girder juncture.
72
TRIANGULAR piece at front deck tip re-quires extra fairing. There's a tiller blockthat goes beneath it for additional support.
Mechanix Illustrated
7/31/2019 Aquarail Jetski
http://slidepdf.com/reader/full/aquarail-jetski 6/6
August 1972 73