Embed Size (px)
Citation preview

1
Application Note - Creating and Managing a Monitoring
Portal Account
Introduction
This application note describes how installers can create an account in the SolarEdge monitoring portal and log in to the SolarEdge monitoring
portal. The account is the highest level of the portal hierarchy. Every installer creates a new account upon the first time registration. Once the
account is created, every new site created by that user is associated with that account.
When opening an account, make sure you have a SolarEdge inverter serial number and the name of the distributor from whom it was
purchased.
Creating an Account
1 Access the portal login page at monitoring.solaredge.com (or in any page of the SolarEdge website, click Monitoring Portal Login). The login page is displayed:
2 Click on the New Installer link at the bottom of the page. A registration form is displayed:
New Installer link
Login
2
3 Complete the form including all required details (mandatory data is marked with a red asterisk).
4 Read the SolarEdge Terms & Conditions and select the agreement checkbox.
5 Click Confirm.
After submitting the form you will receive an email with a link. By clicking the link you confirm your email address, and following a short
validation process by SolarEdge Support you will receive a second email including a username and a password. This email completes the
opening of your account.
You can now log-in to the monitoring portal and manage your account.
Logging-in to the Monitoring Portal
1 Access the portal login page as described above.
2 Enter your user name (e-mail) and password (as appears in the confirmation email) and click Login. First time you log in, there are no sites in the site list. Once sites are created, upon logging in, if more than one site is assigned to your account, the list of your SolarEdge sites is displayed. If only one site is assigned, the site’s Dashboard is displayed.
Managing the Account
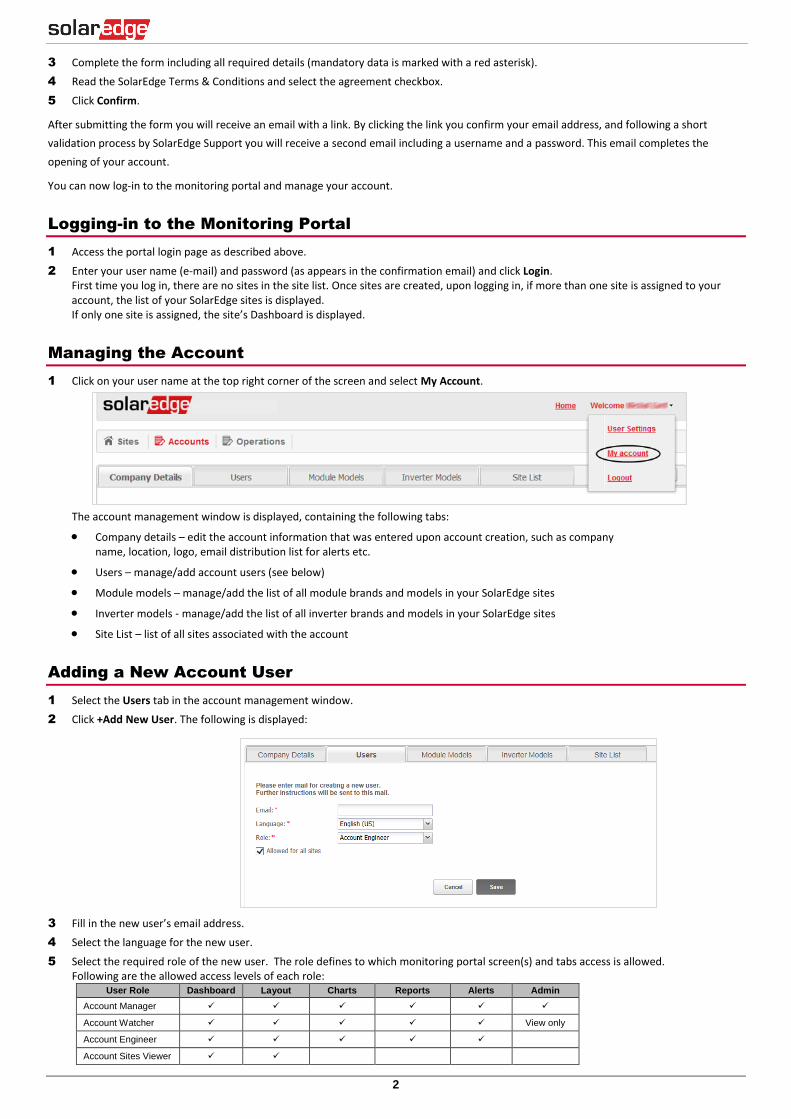
1 Click on your user name at the top right corner of the screen and select My Account.
The account management window is displayed, containing the following tabs:
Company details – edit the account information that was entered upon account creation, such as company name, location, logo, email distribution list for alerts etc.
Users – manage/add account users (see below)
Module models – manage/add the list of all module brands and models in your SolarEdge sites
Inverter models ‐ manage/add the list of all inverter brands and models in your SolarEdge sites
Site List – list of all sites associated with the account
Adding a New Account User
1 Select the Users tab in the account management window.
2 Click +Add New User. The following is displayed:
3 Fill in the new user’s email address.
4 Select the language for the new user.
5 Select the required role of the new user. The role defines to which monitoring portal screen(s) and tabs access is allowed. Following are the allowed access levels of each role:
User Role Dashboard Layout Charts Reports Alerts Admin
Account Manager
Account Watcher View only
Account Engineer
Account Sites Viewer
3
6 To grant the user access to all sites, select the Allowed for all sites checkbox. If you do not select this checkbox, you can select the sites to
which the user can access from a list after the user has been created, as described in steps 0-9.
7 Click Save. The user has been created. The user will receive an email with a short form to fill and once it is submitted, the new user is added.
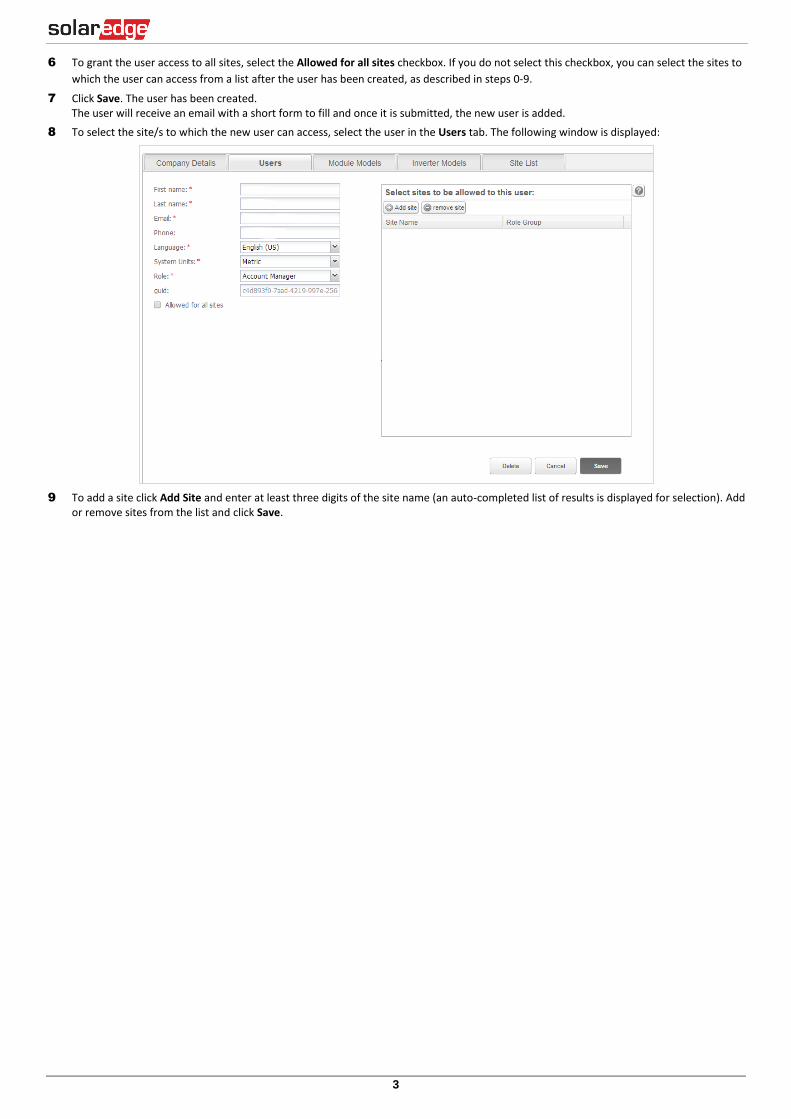
8 To select the site/s to which the new user can access, select the user in the Users tab. The following window is displayed:
9 To add a site click Add Site and enter at least three digits of the site name (an auto-completed list of results is displayed for selection). Add or remove sites from the list and click Save.