Embed Size (px)
Citation preview


Apple Pro Training Series
Final Cut Pro X, Second EditionDiana Weynand

Apple Pro Training Series: Final Cut Pro X, Second Edition Diana WeynandCopyright © 2013 by Diana Weynand and Shirley Craig
Published by Peachpit Press. For information on Peachpit Press books, go to: www.peachpit.com
To report errors, please send a note to [email protected]. Peachpit Press is a division of Pearson Education. Apple Series Editor: Lisa McClainEditor: Bob LindstromProduction Coordinator: Kim Elmore, Happenstance Type-O-RamaContributors: Brendan Boykin, James Alguire, Lisa Hendricks, and Susan Merzbach Apple Project Manager: John SignaApple Reviewers: Christopher PhrommayonTechnical Reviewer: Klark PerezCopy Editor: Darren MeissProofreader: Darren MeissCompositor: Cody Gates, Happenstance Type-O-RamaIndexer: Jack LewisCover Illustration: Kent OberheuCover Production: Cody Gates, Happenstance Type-O-RamaMedia Producer: Eric Geoffroy
Notice of RightsAll rights reserved. No part of this book may be reproduced or transmitted in any form by any means, electronic, mechanical, photocopying, recording, or otherwise, without the prior written permission of the publisher. For informa-tion on getting permission for reprints and excerpts, contact [email protected].
Footage from Delicious Peace Grows in a Ugandan Coffee Bean used with permission. © 2010 Jemglo, Inc. All rights reserved.Footage from Zero to Hero used with permission. © 2011 NHRA/Pullin TV, Inc. All rights reserved.Footage from Fairly Legal used with permission. © 2011 Open 4 Business Productions, LLC. All rights reserved.Footage from I Think I Thought used with permission. © 2011 Cinco Dedos Peliculas. All rights reserved.Stills of Baja Whales used with permission. © 2011 2nd Side Adventures, LLC. All rights reserved.Still from GoPro® HD HERO® camera used with permission. © 2011 GoPro. All rights reserved.
The projects and footage supplied with this book may only be used for educational purposes in association with the lessons included. Any other use, including but not limited to incorporating footage into another project, duplicating or distributing footage, is expressly forbidden and requires explicit permission from the copyright holders listed above.
Notice of Liability The information in this book is distributed on an “As Is” basis, without warranty. While every precaution has been taken in the preparation of the book, neither the authors nor Peachpit Press shall have any liability to any person or entity with respect to any loss or damage caused or alleged to be caused directly or indirectly by the instructions con-tained in this book or by the computer software and hardware products described in it.
Trademarks Many of the designations used by manufacturers and sellers to distinguish their products are claimed as trademarks. Where those designations appear in this book, and Peachpit was aware of a trademark claim, the designations appear as requested by the owner of the trademark. All other product names and services identified throughout this book are used in editorial fashion only and for the benefit of such companies with no intention of infringement of the trademark. No such use, or the use of any trade name, is intended to convey endorsement or other affiliation with this book.
ISBN 13: 978-0-321-91867-3 ISBN 10: 0-321-91867-3 9 8 7 6 5 4 3 2 1 Printed and bound in the United States of America
Acknowledgments My deepest gratitude to all who provided footage for this book: for the Fairly Legal footage, thanks to Sarah Shahi and Gerald McRaney (http://www.usanetwork.com/series/fairlylegal/) and the folks at NBC-Universal; for the Zero to Hero footage, Stephen Pullin (www.pullin.tv) and Tom Compton, President of NHRA (www.nhra.com); for the Delicious Peace Grows in a Ugandan Coffee Bean footage, Curt Fissel and Ellen Friedland (www.deliciouspeacethemovie.com); for the short film, I Think I Thought (http://tinyurl.com/3asgbbk), Matthew Modine, Terence Ziegler, Adam Rackoff, and the Cinco Dedos Peliculas production company; to GoPro® (www.gopro.com) for their car-racing image; and to 2nd Side Adventures for the Baja Whales still images (www.2ndside.com).
I would like to gratefully acknowledge the tireless efforts of my first edition team—James Alguire, Lisa Hendricks, Susan Merzbach, and Hubert Krzysztofik—for their contributions to this book. And huge thanks to Brendan Boykin for his ongoing collaboration and for sharing his passion for Final Cut Pro, and also his Alaska images.
Special thanks to the Peachpit editorial and production staff for producing this book: Lisa McClain, Bob Lindstrom, Darren Meiss, Kim Wimpsett, Cody Gates, and Eric Geoffroy. I see your hard work throughout these pages. And thanks to Klark Perez for his careful attention to dotting I’s and crossing T’s during the technical review for this edition.
At Apple, special thanks to Christopher Phrommayon for reviewing this edition, Anne Renehan for her support and editorial advice during the first edition, and to Steve Bayes, Liza Patnoe, John Signa, and the developers who created this extraordinary software. And to Kent Oberheu for the cover art.
Finally, to my business partner, Shirley Craig (www.revuptransmedia.com), my grateful thanks for all you do.


Contents at a Glance
v
Getting Started . . . . . . . . . . . . . . . . . . . . . . . . . . . . . . . . . . . . . . . .xiii
Preparing to Edit in Final Cut Pro XLesson 1 Exploring the Interface . . . . . . . . . . . . . . . . . . . . . . . . . . . . . . . . . . 3Lesson 2 Importing Media . . . . . . . . . . . . . . . . . . . . . . . . . . . . . . . . . . . . . . 39Lesson 3 Organizing Clips in an Event . . . . . . . . . . . . . . . . . . . . . . . . . . . . 71
Crafting the StoryLesson 4 Building the Rough Cut . . . . . . . . . . . . . . . . . . . . . . . . . . . . . . . . .115Lesson 5 Finishing the Rough Cut . . . . . . . . . . . . . . . . . . . . . . . . . . . . . . .161Lesson 6 Fine-Tuning the Rough Cut . . . . . . . . . . . . . . . . . . . . . . . . . . . . 197
Completing the CutLesson 7 Applying Transitions . . . . . . . . . . . . . . . . . . . . . . . . . . . . . . . . . . 237Lesson 8 Working with Sound . . . . . . . . . . . . . . . . . . . . . . . . . . . . . . . . . . 279Lesson 9 Working with Titles, Generators, and Themes . . . . . . . . . . . . 327
Applying Effects and FinishingLesson 10 Retiming and Transforming Clips . . . . . . . . . . . . . . . . . . . . . . . 375Lesson 11 Applying Effects and Enhancing Color . . . . . . . . . . . . . . . . . . 423Lesson 12 Sharing Your Project . . . . . . . . . . . . . . . . . . . . . . . . . . . . . . . . . . 463
Glossary . . . . . . . . . . . . . . . . . . . . . . . . . . . . . . . . . . . . . . . . . . . . . .511 Index . . . . . . . . . . . . . . . . . . . . . . . . . . . . . . . . . . . . . . . . . . . . . . . . 533 Downloading Lesson Files . . . . . . . . . . . . . . . . . . . . . . . . . . . . . 547

vi

Table of Contents
vii
Getting Started . . . . . . . . . . . . . . . . . . . . . . . . . . . . . xiii
Preparing to Edit in Final Cut Pro X
Lesson 1 Exploring the Interface . . . . . . . . . . . . . . . . . . . . . . . . 3Following a Workflow . . . . . . . . . . . . . . . . . . . . . . . . . . . . . . . . . . . 4Opening Final Cut Pro X . . . . . . . . . . . . . . . . . . . . . . . . . . . . . . . . . 5Exploring the Final Cut Pro Interface . . . . . . . . . . . . . . . . . . . . . . 7Using Menus, Shortcuts, and the Mouse . . . . . . . . . . . . . . . . . . . . 9Viewing and Sorting Events . . . . . . . . . . . . . . . . . . . . . . . . . . . . . 14Skimming Clips and Changing Views . . . . . . . . . . . . . . . . . . . . . 19Take 2 . . . . . . . . . . . . . . . . . . . . . . . . . . . . . . . . . . . . . . . . . . . . . . . . 26Working in the Project Library . . . . . . . . . . . . . . . . . . . . . . . . . . . 26Viewing Projects in the Timeline . . . . . . . . . . . . . . . . . . . . . . . . . 29Take 2 . . . . . . . . . . . . . . . . . . . . . . . . . . . . . . . . . . . . . . . . . . . . . . . . 33Editor’s Cut . . . . . . . . . . . . . . . . . . . . . . . . . . . . . . . . . . . . . . . . . . . . 33Hiding and Closing Final Cut Pro . . . . . . . . . . . . . . . . . . . . . . . . 34Lesson Review . . . . . . . . . . . . . . . . . . . . . . . . . . . . . . . . . . . . . . . . . 35
Lesson 2 Importing Media . . . . . . . . . . . . . . . . . . . . . . . . . . . . 39Importing Media into an Event . . . . . . . . . . . . . . . . . . . . . . . . . . 40Importing Folders as Keyword Collections . . . . . . . . . . . . . . . . . 45Analyzing and Correcting Imported Clips . . . . . . . . . . . . . . . . . 51Importing from a Camera . . . . . . . . . . . . . . . . . . . . . . . . . . . . . . . 58Importing from the Finder . . . . . . . . . . . . . . . . . . . . . . . . . . . . . . 64Importing from Other Applications . . . . . . . . . . . . . . . . . . . . . . . 67Editor’s Cut . . . . . . . . . . . . . . . . . . . . . . . . . . . . . . . . . . . . . . . . . . . . 67Lesson Review . . . . . . . . . . . . . . . . . . . . . . . . . . . . . . . . . . . . . . . . . 68

viii Contents
Lesson 3 Organizing Clips in an Event . . . . . . . . . . . . . . . . . . 71Using Metadata to Customize an Event . . . . . . . . . . . . . . . . . . . . 72Adding Keywords to Clips . . . . . . . . . . . . . . . . . . . . . . . . . . . . . . . 77Assigning Multiple Keywords to Clips. . . . . . . . . . . . . . . . . . . . . 83Take 2 . . . . . . . . . . . . . . . . . . . . . . . . . . . . . . . . . . . . . . . . . . . . . . . . 90Applying Keywords to a Clip Range . . . . . . . . . . . . . . . . . . . . . . 90Rating, Sorting, and Searching Clips . . . . . . . . . . . . . . . . . . . . . . 95Take 2 . . . . . . . . . . . . . . . . . . . . . . . . . . . . . . . . . . . . . . . . . . . . . . . 103Creating Smart Collections . . . . . . . . . . . . . . . . . . . . . . . . . . . . . 104Editor’s Cut . . . . . . . . . . . . . . . . . . . . . . . . . . . . . . . . . . . . . . . . . . . 110Lesson Review . . . . . . . . . . . . . . . . . . . . . . . . . . . . . . . . . . . . . . . . 110
Crafting the Story
Lesson 4 Building the Rough Cut . . . . . . . . . . . . . . . . . . . . . 115Creating a New Project . . . . . . . . . . . . . . . . . . . . . . . . . . . . . . . . 116Screening and Marking Clips . . . . . . . . . . . . . . . . . . . . . . . . . . . 119Appending Clips in the Timeline . . . . . . . . . . . . . . . . . . . . . . . . 126Viewing and Arranging Clips in the Magnetic Timeline . . . . 133Inserting Clips into the Primary Storyline . . . . . . . . . . . . . . . . 138Take 2 . . . . . . . . . . . . . . . . . . . . . . . . . . . . . . . . . . . . . . . . . . . . . . . 143Changing Edited Clips . . . . . . . . . . . . . . . . . . . . . . . . . . . . . . . . . 144Connecting Clips to the Primary Storyline . . . . . . . . . . . . . . . 150Editor’s Cut . . . . . . . . . . . . . . . . . . . . . . . . . . . . . . . . . . . . . . . . . . . 155Closing Your Project . . . . . . . . . . . . . . . . . . . . . . . . . . . . . . . . . . . 156Lesson Review . . . . . . . . . . . . . . . . . . . . . . . . . . . . . . . . . . . . . . . . 156
Lesson 5 Finishing the Rough Cut . . . . . . . . . . . . . . . . . . . . 161Adding Markers to a Project . . . . . . . . . . . . . . . . . . . . . . . . . . . . 162Connecting Clips to the Primary Storyline . . . . . . . . . . . . . . . . 167Take 2 . . . . . . . . . . . . . . . . . . . . . . . . . . . . . . . . . . . . . . . . . . . . . . . 174Overwriting and Replacing Clips . . . . . . . . . . . . . . . . . . . . . . . . 175Auditioning Clips in the Project . . . . . . . . . . . . . . . . . . . . . . . . . 180Working with Storylines . . . . . . . . . . . . . . . . . . . . . . . . . . . . . . . 186Editor’s Cut . . . . . . . . . . . . . . . . . . . . . . . . . . . . . . . . . . . . . . . . . . . 192Lesson Review . . . . . . . . . . . . . . . . . . . . . . . . . . . . . . . . . . . . . . . . 193

Contents ix
Lesson 6 Fine-Tuning the Rough Cut . . . . . . . . . . . . . . . . . . 197Duplicating a Project . . . . . . . . . . . . . . . . . . . . . . . . . . . . . . . . . . 198Removing Clip Selections and Adding Gaps . . . . . . . . . . . . . . 201Take 2 . . . . . . . . . . . . . . . . . . . . . . . . . . . . . . . . . . . . . . . . . . . . . . . 206Understanding Trimming . . . . . . . . . . . . . . . . . . . . . . . . . . . . . . 207Applying the Trim Tool . . . . . . . . . . . . . . . . . . . . . . . . . . . . . . . . 216Take 2 . . . . . . . . . . . . . . . . . . . . . . . . . . . . . . . . . . . . . . . . . . . . . . . 224Trimming with Precision . . . . . . . . . . . . . . . . . . . . . . . . . . . . . . . 224Take 2 . . . . . . . . . . . . . . . . . . . . . . . . . . . . . . . . . . . . . . . . . . . . . . . 231Editor’s Cut . . . . . . . . . . . . . . . . . . . . . . . . . . . . . . . . . . . . . . . . . . . 232Lesson Review . . . . . . . . . . . . . . . . . . . . . . . . . . . . . . . . . . . . . . . . 232
Completing the Cut
Lesson 7 Applying Transitions . . . . . . . . . . . . . . . . . . . . . . . . 237Preparing for Transitions . . . . . . . . . . . . . . . . . . . . . . . . . . . . . . . 238Applying a Video Transition . . . . . . . . . . . . . . . . . . . . . . . . . . . . 241Take 2 . . . . . . . . . . . . . . . . . . . . . . . . . . . . . . . . . . . . . . . . . . . . . . . 246Using the Transitions Browser . . . . . . . . . . . . . . . . . . . . . . . . . . 246Take 2 . . . . . . . . . . . . . . . . . . . . . . . . . . . . . . . . . . . . . . . . . . . . . . . 253Modifying Transitions . . . . . . . . . . . . . . . . . . . . . . . . . . . . . . . . . 253Changing Transition Parameters in the Inspector . . . . . . . . . . 260Take 2 . . . . . . . . . . . . . . . . . . . . . . . . . . . . . . . . . . . . . . . . . . . . . . . 266Adding Transitions to Other Storylines
and Compound Clips . . . . . . . . . . . . . . . . . . . . . . . . . . . . . . . 267Take 2 . . . . . . . . . . . . . . . . . . . . . . . . . . . . . . . . . . . . . . . . . . . . . . . 273Exploring Audio Transitions . . . . . . . . . . . . . . . . . . . . . . . . . . . . 273Editor’s Cut . . . . . . . . . . . . . . . . . . . . . . . . . . . . . . . . . . . . . . . . . . . 276Lesson Review . . . . . . . . . . . . . . . . . . . . . . . . . . . . . . . . . . . . . . . . 276
Lesson 8 Working with Sound . . . . . . . . . . . . . . . . . . . . . . . . 279Monitoring Audio in the Timeline . . . . . . . . . . . . . . . . . . . . . . . 280Adjusting Audio in the Timeline . . . . . . . . . . . . . . . . . . . . . . . . 285Adding Music and Sound Effects . . . . . . . . . . . . . . . . . . . . . . . . 291Adjusting Levels in the Audio Inspector . . . . . . . . . . . . . . . . . . 298Take 2 . . . . . . . . . . . . . . . . . . . . . . . . . . . . . . . . . . . . . . . . . . . . . . . 304

x Contents
Creating Audio Fades . . . . . . . . . . . . . . . . . . . . . . . . . . . . . . . . . . 305Recording Voiceovers . . . . . . . . . . . . . . . . . . . . . . . . . . . . . . . . . . 309Correcting Problem Audio . . . . . . . . . . . . . . . . . . . . . . . . . . . . . 314Editor’s Cut . . . . . . . . . . . . . . . . . . . . . . . . . . . . . . . . . . . . . . . . . . . 322Lesson Review . . . . . . . . . . . . . . . . . . . . . . . . . . . . . . . . . . . . . . . . 323
Lesson 9 Working with Titles, Generators, and Themes . . 327Using the Titles Browser . . . . . . . . . . . . . . . . . . . . . . . . . . . . . . . 328Adding a Lower Third . . . . . . . . . . . . . . . . . . . . . . . . . . . . . . . . . 335Take 2 . . . . . . . . . . . . . . . . . . . . . . . . . . . . . . . . . . . . . . . . . . . . . . . 340Modifying Titles . . . . . . . . . . . . . . . . . . . . . . . . . . . . . . . . . . . . . . 340Take 2 . . . . . . . . . . . . . . . . . . . . . . . . . . . . . . . . . . . . . . . . . . . . . . . 347Adding Bumpers and Credits . . . . . . . . . . . . . . . . . . . . . . . . . . . 347Working with Video Generators . . . . . . . . . . . . . . . . . . . . . . . . . 356Take 2 . . . . . . . . . . . . . . . . . . . . . . . . . . . . . . . . . . . . . . . . . . . . . . . 363Using Themes . . . . . . . . . . . . . . . . . . . . . . . . . . . . . . . . . . . . . . . . 363Take 2 . . . . . . . . . . . . . . . . . . . . . . . . . . . . . . . . . . . . . . . . . . . . . . . 369Editor’s Cut . . . . . . . . . . . . . . . . . . . . . . . . . . . . . . . . . . . . . . . . . . . 369Lesson Review . . . . . . . . . . . . . . . . . . . . . . . . . . . . . . . . . . . . . . . . 370
Applying Effects and Finishing
Lesson 10 Retiming and Transforming Clips . . . . . . . . . . . . 375Understanding Motion Properties . . . . . . . . . . . . . . . . . . . . . . . 376Changing Clip Speed . . . . . . . . . . . . . . . . . . . . . . . . . . . . . . . . . . 379Take 2 . . . . . . . . . . . . . . . . . . . . . . . . . . . . . . . . . . . . . . . . . . . . . . . 386Creating Holds and Variable Speed Segments . . . . . . . . . . . . . 386Applying Preset Speed Effects . . . . . . . . . . . . . . . . . . . . . . . . . . . 391Take 2 . . . . . . . . . . . . . . . . . . . . . . . . . . . . . . . . . . . . . . . . . . . . . . . 396Transforming an Image . . . . . . . . . . . . . . . . . . . . . . . . . . . . . . . . 396Cropping an Image . . . . . . . . . . . . . . . . . . . . . . . . . . . . . . . . . . . . 406Take 2 . . . . . . . . . . . . . . . . . . . . . . . . . . . . . . . . . . . . . . . . . . . . . . . 413Adding the Ken Burns Effect . . . . . . . . . . . . . . . . . . . . . . . . . . . 413Take 2 . . . . . . . . . . . . . . . . . . . . . . . . . . . . . . . . . . . . . . . . . . . . . . . 416Creating Keyboard Shortcuts . . . . . . . . . . . . . . . . . . . . . . . . . . . 417Editor’s Cut . . . . . . . . . . . . . . . . . . . . . . . . . . . . . . . . . . . . . . . . . . . 419Lesson Review . . . . . . . . . . . . . . . . . . . . . . . . . . . . . . . . . . . . . . . . 420

Contents xi
Lesson 11 Applying Effects and Enhancing Color . . . . . . . . 423Applying Video Effects . . . . . . . . . . . . . . . . . . . . . . . . . . . . . . . . . 424Modifying Effect Parameters . . . . . . . . . . . . . . . . . . . . . . . . . . . . 430Copying Effects Between Clips . . . . . . . . . . . . . . . . . . . . . . . . . . 436Take 2 . . . . . . . . . . . . . . . . . . . . . . . . . . . . . . . . . . . . . . . . . . . . . . . 440Auditioning and Animating Effects . . . . . . . . . . . . . . . . . . . . . . 440Take 2 . . . . . . . . . . . . . . . . . . . . . . . . . . . . . . . . . . . . . . . . . . . . . . . 447Applying Audio Effects . . . . . . . . . . . . . . . . . . . . . . . . . . . . . . . . 447Take 2 . . . . . . . . . . . . . . . . . . . . . . . . . . . . . . . . . . . . . . . . . . . . . . . 451Enhancing Color in Final Cut Pro . . . . . . . . . . . . . . . . . . . . . . . 451Editor’s Cut . . . . . . . . . . . . . . . . . . . . . . . . . . . . . . . . . . . . . . . . . . . 459Lesson Review . . . . . . . . . . . . . . . . . . . . . . . . . . . . . . . . . . . . . . . . 460
Lesson 12 Sharing Your Project . . . . . . . . . . . . . . . . . . . . . . . . 463Preparing a Project for Sharing . . . . . . . . . . . . . . . . . . . . . . . . . . 464Sharing a Master File . . . . . . . . . . . . . . . . . . . . . . . . . . . . . . . . . . 471Publishing a Project to Apple Devices . . . . . . . . . . . . . . . . . . . . 481Publishing a Project to Video Sharing Sites . . . . . . . . . . . . . . . 485Customizing the Destinations Menu . . . . . . . . . . . . . . . . . . . . . 489Take 2 . . . . . . . . . . . . . . . . . . . . . . . . . . . . . . . . . . . . . . . . . . . . . . . 496Exporting an Image from Your Project . . . . . . . . . . . . . . . . . . . 496Take 2 . . . . . . . . . . . . . . . . . . . . . . . . . . . . . . . . . . . . . . . . . . . . . . . 499Exporting for Blu-ray Disc, DVD, or Disk Image . . . . . . . . . . 499Backing Up Projects and Events . . . . . . . . . . . . . . . . . . . . . . . . . 503Editor’s Cut . . . . . . . . . . . . . . . . . . . . . . . . . . . . . . . . . . . . . . . . . . . 507Lesson Review . . . . . . . . . . . . . . . . . . . . . . . . . . . . . . . . . . . . . . . . 508
Glossary . . . . . . . . . . . . . . . . . . . . . . . . . . . . . . . . . . . 511 Index . . . . . . . . . . . . . . . . . . . . . . . . . . . . . . . . . . . . . 533 Downloading Lesson Files . . . . . . . . . . . . . . . . . . . 547
See last page of this eBook for instructions on downloading your lesson files.


xiii
Welcome to the official Apple Pro Training course for Final Cut Pro X.
This book is a comprehensive guide to editing with Final Cut Pro. It uses
exciting real-world footage from the USA Network series Fairly Legal, the
award-winning documentary Delicious Peace Grows in a Ugandan Coffee
Bean, exciting Zero to Hero racing footage from Pullin TV, and Matthew
Modine’s short film, I Think I Thought, all to demonstrate both the fea-
tures of the application and the practical techniques you’ll use daily in
your editing projects.
For those who have edited on earlier versions of Final Cut Pro, or who
edit on other NLE (nonlinear editing) platforms, you may ask yourselves:
why make the jump to Final Cut Pro X? The answer lies not only in what
Final Cut Pro X has the power to do, but what it has eliminated: many of
the stumbling blocks that slow down the editing process. So let’s start by
taking a closer look at how that power will affect you as an editor.
Getting Started

xiv Getting Started
The Power of “X”Final Cut Pro X is not an upgrade, but a completely new application integrating some of
the best of the latest OS X technologies. What this means for the editor is significantly bet-
ter performance, workflow improvements, and the ability to perform many tasks simulta-
neously. For example, gone from Final Cut Pro X is the wait time for rendering and ingest.
In the past, these activities halted the editing process. Now, rendering and importing, even
analyzing and fixing, go on in the background as you continue to edit.
Another powerful aspect of the Final Cut Pro X technology is the Magnetic Timeline,
which keeps audio and video locked in sync so it’s virtually impossible to separate the
two accidentally. The Resolution Independent Playback System allows you to handle
and smoothly play all formats, from standard definition to 5K resolutions, regardless of
the origin of media. Final Cut Pro X can automatically control the quality and color of
images during ingest, while at the same time performing audio cleanup tasks. And you
don’t have to wait to begin organizing your footage. Metadata-based Keyword and Smart
Collections begin during the import process, organizing files based on people and shot
detection. Keywords will help you organize and locate clips within Final Cut Pro X with
unprecedented speed, and unlimited undos and never having to save will provide a level of
protection you’ve never known.
Bundled together, the many new developments in Final Cut Pro X will make your work-
flow faster, smoother, and easier so that you can spend more time in the creative decision-
making process. And isn’t that what editing is really about? But before you begin to
explore the new interface or jump into the editing lessons in this book, let’s take a more
detailed look at what’s “under the hood” of Final Cut Pro X to get a better understanding
of this powerful and intuitive editing application.
The Technology of “X”You may have heard some of the geeky buzzwords like 64-bit processing and memory
management, Grand Central Dispatch, and OpenCL. But what do those terms mean, and
how do these features matter in the day-to-day drama of video editors? Here’s a brief look
at these technologies, what they are, and why they make a difference when editing with
Final Cut Pro X.
The 64-Bit QuestionIn order to utilize and support the new 64-bit processing in computer technology, Final
Cut Pro X had to be completely re-engineered. You might be asking, “2-bits, 4-bits,
64-bits, a dollar. . . how many bits do I really need?” Typically, more bits means you can
crunch bigger numbers—and crunch them faster—with more memory at your service.

The Technology of “X” xv
Each central processing unit (CPU) is composed of different parts (registers, arithmetic
units, controllers) working together to carry out an application’s instructions. CPUs (and
their components) are built to handle a specific number of bits (8, 16, 32, 64, and so on),
like different cars’ transmissions have different numbers of gears. Just as the number of
gears in a transmission determines how fast a car can go, the bit depth—or number of bits
the processor can manage—determines the largest number the processor can handle per
clock cycle, and the maximum amount of memory that can be accessed.
SpeedThe clock rate is how fast a CPU executes instructions. A 64-bit processor can move twice
as much data as a 32-bit processor at the same clock rate, significantly improving perfor-
mance. A 2 GHz processor can perform two billion instructions per second.
More MemoryA 32-bit processor is limited to using 4 GB of RAM, but a 64-bit processor can enable
applications to address a theoretical 16 billion gigabytes of memory, or 16 exabytes. The
more RAM you have, the faster your applications run because more data is kept in very
fast physical RAM instead of on slower hard drives.
All this means that Final Cut Pro X runs faster than previous versions, can handle video for-
mats from DV to 5K, can color correct video in an instant, can pitch correct audio on the fly
while scrubbing through it, and can handle larger than ever project and sequence sizes.
Core StrengthsThe Intel central processing units that Apple currently uses in its desktop and laptop
computers are actually made up of multiple processor cores. It’s like a two-for-one deal
at your favorite store. In older, single-processor computers, each step of a task had to be
performed in sequential order. Consider a task like mailing a letter. You fold the letter,
place it in an envelope, address and stamp it, and then drop it in the mailbox. If you’re
the only one working on the task, and there are hundreds of letters, it takes some time
to complete the task. With modern CPUs that have more cores (current Mac CPUs have
between two and six cores), the Mac does more things at the same time, improving over-
all performance. Looking at that same mailing task, think of it as having one person per
stage of the task. So a processor with four cores is like having three more people helping
you: one to fold the letter, one to place it in the envelope, one to address and stamp it,
and one to drop it in the mailbox. With more help tasks get done more quickly.
Following the ThreadOne method applications use to take advantage of multiple processors or cores is through
multi-threading, a programming technique allowing processors to work on different parts

xvi Getting Started
of a program at the same time. Multiple threads make applications more responsive by
allowing them to perform different tasks at the same time, like a mail program being able
to send and receive email simultaneously. But threading is complex, and implementing it
is difficult to program.
Now Arriving at Grand Central Dispatch WorkstationGrand Central Dispatch (GCD) is the technology Apple has developed to help software
developers write programs that let the operating system divide up jobs and schedule them
to run on different processor cores as an alternative to application threads. GCD is the
system services OS X uses to manage tasks, breaking them up into chunks, assigning the
chunks to different processors or cores, and integrating the results. It’s a lot like juggling,
but instead of balls or bowling pins, OS X is juggling code, making sure the right piece
gets to the right place at the right time. Programs that support GCD are multi-processor
aware and can do more work faster when more cores are available to do the work.
Because Final Cut Pro X supports GCD and is multi-processor aware, functions like back-
ground rendering, analyzing and correcting video on ingest, editing while still importing
video, and instant color correction are not only possible but fast. Think of more cores as
more hamsters spinning those wheels inside your Mac to make it work faster.
Come In, It’s OpenCLToday’s modern video cards sport powerful graphical processing units (GPUs) capable of
performing trillions of calculations per second. But unless you’re running games or high-
end 3D software, much of that power languishes, unused. OpenCL (Open Computing
Language) is an open standard set of routines, developed in part by Apple, that allows
application developers to harness the power of those GPUs. With OpenCL support, Final
Cut Pro X can use the video card’s GPU as another processor to analyze or render video,
perform instant color correction, or stabilize shaky footage.
Finish with a Cup of CocoaThe magic behind all these powerful modern new features of both OS X and Final Cut
Pro X is the Cocoa application development environment. Cocoa is a suite of object-
oriented software libraries, runtime systems, and integrated development environments
for creating software for both the OS X operating system and iOS. Originally released as
NextStep in the late 1980s, Cocoa is a powerful set of object-oriented tools for creating
almost any kind of software for the Mac and iOS devices that can take full advantage of
Mac or mobile device hardware.
Together, all these elements form the incredible Power of X.

The Course Methodology xvii
Downloading Final Cut Pro XFinal Cut Pro X is available from the Mac App Store. Since installation can begin immediately
after purchase, you should read Apple best practices (http://support.apple.com/kb/HT4722)
prior to installing to ensure the best performance. The exercises in this book are based on
Final Cut Pro version 10.0.7. If you have an earlier version, you should download this free
update or some exercises may not work as described.
The Course MethodologyThis is, first and foremost, a hands-on course. Every exercise is designed to enable you to
do professional-quality editing in Final Cut Pro as quickly as possible. Each lesson builds
on previous lessons to guide you through the program’s functions and capabilities.
If you are new to Final Cut Pro, start at the beginning and progress through each lesson in
order. If you are familiar with an earlier version of Final Cut Pro, you can go directly to a
specific section and focus on that topic, because every lesson is self-contained.
NOTE P Due to individual preferences settings, your screen may not match all screen
shots exactly as they appear in the book.
Course StructureThe book is designed to guide you through the editing process as you learn Final Cut Pro.
You will begin by learning to import and organize media, create metadata in the form of
keywords and Smart Collections, edit clips into a project, and then refine your project by
trimming and adjusting edit points and clip location.
After working on several projects, you’ll complete them by mixing the audio and adding
transitions and titles. Finally, you’ll add effects, color correct your project, and then pre-
pare it for delivery.
The lessons are grouped into the following categories:
�P Lessons 1–3: Preparing to Edit in Final Cut Pro X
�P Lessons 4–6: Crafting the Story
�P Lessons 7–9: Completing the Cut
�P Lessons 10–12: Applying Effects and Finishing
In addition to the exercises, each lesson includes “Take 2” scenarios that present real-world
challenges for you to practice what you’ve learned before moving on to new material.
xviii Getting Started
At the end of every lesson, you will have an opportunity to hone your skills as you apply
your own creative touches to an “Editor’s Cut” project, which is designed to review every-
thing you learned in the lesson.
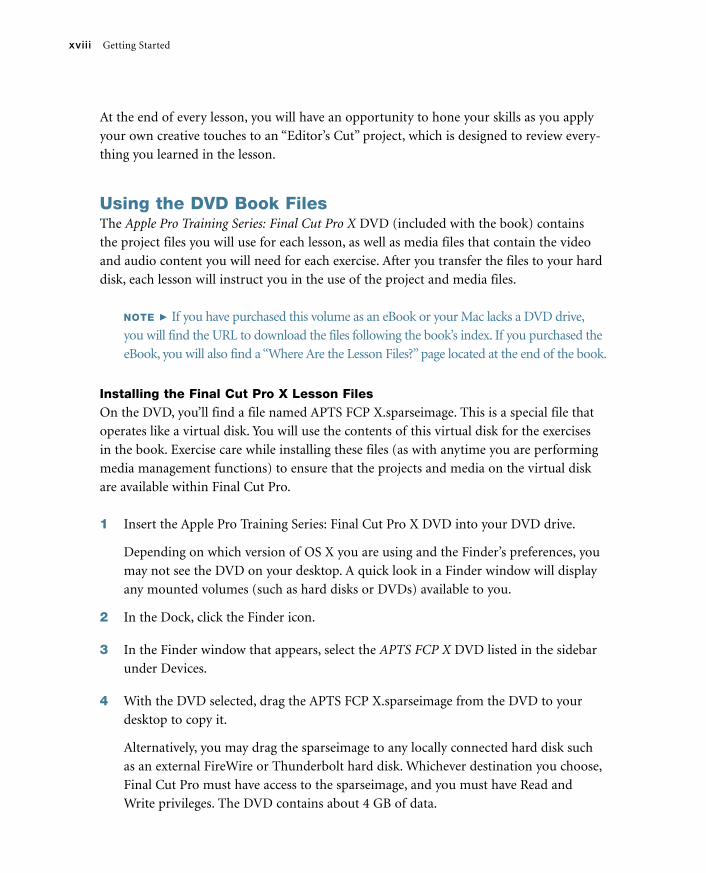
Using the DVD Book FilesThe Apple Pro Training Series: Final Cut Pro X DVD (included with the book) contains
the project files you will use for each lesson, as well as media files that contain the video
and audio content you will need for each exercise. After you transfer the files to your hard
disk, each lesson will instruct you in the use of the project and media files.
NOTE P If you have purchased this volume as an eBook or your Mac lacks a DVD drive,
you will find the URL to download the files following the book’s index. If you purchased the
eBook, you will also find a “Where Are the Lesson Files?” page located at the end of the book.
Installing the Final Cut Pro X Lesson FilesOn the DVD, you’ll find a file named APTS FCP X.sparseimage. This is a special file that
operates like a virtual disk. You will use the contents of this virtual disk for the exercises
in the book. Exercise care while installing these files (as with anytime you are performing
media management functions) to ensure that the projects and media on the virtual disk
are available within Final Cut Pro.
1 Insert the Apple Pro Training Series: Final Cut Pro X DVD into your DVD drive.
Depending on which version of OS X you are using and the Finder’s preferences, you
may not see the DVD on your desktop. A quick look in a Finder window will display
any mounted volumes (such as hard disks or DVDs) available to you.
2 In the Dock, click the Finder icon.
3 In the Finder window that appears, select the APTS FCP X DVD listed in the sidebar
under Devices.
4 With the DVD selected, drag the APTS FCP X.sparseimage from the DVD to your
desktop to copy it.
Alternatively, you may drag the sparseimage to any locally connected hard disk such
as an external FireWire or Thunderbolt hard disk. Whichever destination you choose,
Final Cut Pro must have access to the sparseimage, and you must have Read and
Write privileges. The DVD contains about 4 GB of data.

Using Final Cut Pro on a Portable xix
5 After the DVD is copied, eject it.
Before you begin a lesson in this book, you must mount the sparseimage to give Final
Cut Pro access to the project and media files for the lesson.
6 On your desktop (or other location to which you copied the file), double-click the
APTS FCP X.sparseimage file.
A virtual disk labeled APTS FCP X appears under Devices in the Finder window’s sidebar.
NOTE P Depending on which version of OS X you use and the Finder’s preferences,
you may not see the APTS FCP X disk on your desktop.
Each lesson will explain which files to open for that lesson’s exercises. You should not
disturb the contents of the Final Cut Events or Final Cut Projects folders on the APTS
FCP X virtual disk.
Connecting Media to Project FilesThe DVD’s APTS FCP X virtual disk links the projects and media files within itself. If for
some reason project clips appear as offline media files, you can reconnect to the Events
that contain the media.
1 In the Project Library, select the project containing the offline clips.
2 In the Inspector, select the Properties tab. At the bottom of the Inspector, click the
Modify Event References button.
3 If the media is available, click the Event referenced on APTS FCP X in the dialog that
appears and then click OK.
The clips appear and play back. You may skip the remaining step.
4 If the application is unable to find the media, click OK and quit the application by
choosing Final Cut Pro > Quit Final Cut Pro. Proceed with the steps in the previous sec-
tion “Installing the Final Cut Pro X Lesson Files” to reinstall the projects and media files.
Using Final Cut Pro on a PortableSome of the keystrokes identified in this book for desktop use work differently if you are
using a MacBook or Apple Wireless Keyboard. Specifically, you’ll need to hold down the
Function key (fn) when using the Left and Right Arrow keys to access the Home and End
keys, respectively.

xx Getting Started
About the MediaFour sets of media are used throughout this book. Together they represent different types
of projects and media formats. The exercises instruct you to edit the media in a particular
way, but you can use any part of this footage to practice editing methods. Techniques you
learn using one set of media in a lesson can be practiced with a different set of clips to
create a new project.
NOTE P Due to copyright restrictions, you cannot use this footage for any purpose
other than executing the exercises in this book.
The media, as it appears in the book, includes the following:
Delicious Peace Grows in a Ugandan Coffee Bean—An award-winning documentary narrated
by actor Ed O’Neill, produced by Ellen Friedland, and directed by Curt Fissel. This docu-
mentary film tells the uplifting and inspiring story of how a group of Christian, Jewish, and
Muslim Ugandan coffee farmers overcame historical and economic hurdles to build harmoni-
ous relationships and increase economic development. The footage was shot as HDV 1080i60.
Fairly Legal—This footage is from the USA Network television series that starred Sarah
Shahi as Kate Reed. In this episode, “Bridges,” which was directed by Peter Markle, veteran
actor Gerald McRaney guests stars as Judge Nicastro. Thanks to her innate understanding
of human nature, thorough legal knowledge, and wry sense of humor, Kate is a natural
when it comes to dispute resolution. Except, it seems, when it comes to conflicts in her per-
sonal life. This episode was shot using the RED MX camera at 1920 x 1080 and 23.98 fps.
Zero to Hero—This exciting racing footage was produced by Pullin Television, in partner-
ship with the National Hot Rod Association. The series, which was produced and directed by
Stephen Pullin, highlights different drag car racing stars and showcases their backgrounds,
their passions, and their commitment to racing. Broadcast on Fox Television as well as
distributed over the Internet, each episode was created using a variety of camera sources,
including Sony EX3, Panasonic P2, and GoPro for live events, interviews, and field produc-
tion, as well as additional footage from ESPN broadcasts that was mastered on DVC Pro.
I Think I Thought—Matthew Modine wrote, directed, and starred in this sardonically
humorous short film about Joe—a thinker in a world that no longer tolerates analytical
thinking. The film was co-produced and shot by Adam McClelland and edited by Terence
Ziegler. It was released in 2008 and is available to download from the iTunes Store. It was
shot on the Panasonic AG-HVX200 camera.

Apple Pro Certification Programs xxi
System RequirementsBefore using Apple Pro Training Series: Final Cut Pro X, you should have a working knowl-
edge of your Mac and the OS X operating system. Make sure that you know how to use
the mouse/trackpad and standard menus and commands and also how to open and close
files. If you need to review these techniques, see the printed or online documentation
included with your system.
For the basic system requirements for Final Cut Pro X, refer to the technical specifications
at www.apple.com/finalcutpro/specs/.
About the Apple Pro Training SeriesApple Pro Training Series: Final Cut Pro X is both a self-paced learning tool and the official
curriculum of the Apple Pro Training and Certification Program.
Developed by experts in the field and certified by Apple, the series is used by Apple
Authorized Training Centers worldwide and offers complete training in all Apple Pro
products. The lessons are designed to let you learn at your own pace. Each lesson con-
cludes with review questions and answers summarizing what you’ve learned, which you
can use to help prepare for the Apple Pro Certification Exam.
For a complete list of Apple Pro Training Series books, see the ad page at the back of this
book, or visit www.peachpit.com/apts.
Apple Pro Certification ProgramsThe Apple Pro Training and Certification Programs are designed to keep you at the forefront
of Apple digital media technology while giving you a competitive edge in today’s ever-changing
job market. Whether you’re an editor, graphic designer, sound designer, special effects artist,
student, or teacher, these training tools are meant to help you expand your skills.
Upon completing the course material in this book, you can earn Apple certification.
Certification is offered in all Pro Applications, including Aperture, Final Cut Pro, Motion,
and Logic Pro. Certification gives you official recognition of your knowledge of Apple
professional applications while allowing you to market yourself to employers and clients
as a skilled user of Apple products.
Apple offers three levels of certification, Apple Certified Associate, Apple Certified Pro - Level One, and Apple Certified Pro - Level Two. Certification exams do not require class
attendance. Students who prefer to learn on their own or who already have the necessary
skill set in the chosen application may take an exam for a fee.

xxii Getting Started
Apple Certified Associate status validates entry-level skills in a specific application. Unlike
an Apple Certified Pro exam, you can take Associate exams online from the comfort of your
own home or office. Apple Certified Associate status is appropriate for students, for some-
one who is preparing for a first job out of school or a college-level program, or for anyone
interested in validating entry-level credentials. Instructions on how to take the exam are
included later in this book. For details on what the exam covers, please visit training.
apple.com/certification/proapps.
An Apple Certified Pro is a user who has reached the highest skill level in the use and
operation of Apple Pro Applications as attested to by Apple. Students earn certification
by passing the online certification exam administered only at Apple Authorized Training
Centers (AATCs). Apple Certified Pro status is appropriate for industry professionals.
For those who prefer to learn in an instructor-led setting, training courses are taught by Apple
Certified Trainers at AATCs worldwide. The courses use the Apple Pro Training Series books as
their curriculum and balance concepts and lectures with hands-on labs and exercises. AATCs
are carefully selected to meet Apple’s highest standards in all areas, including facilities, instruc-
tors, course delivery, and infrastructure. The goal of the program is to offer Apple customers,
from beginners to the most seasoned professionals, the highest-quality training experience.
For more information, please see the page at the back of this book, or to find an Authorized
Training Center near you, visit training.apple.com.
ResourcesApple Pro Training Series: Final Cut Pro X is not intended as a comprehensive reference
manual, nor does it replace the documentation that comes with the application. For com-
prehensive information about program features, refer to these resources:
�P Final Cut Pro Help: Accessed through the Final Cut Pro Help menu, the Reference
Guide contains a complete description of all features. You can also access the help at
http://help.apple.com/finalcutpro/.
�P For a list of other resources, please visit the Apple website at
www.apple.com/finalcutpro/resources/.
�P For details on the Apple Training and Certification programs, please visit
training.apple.com.

#
Image here is FPO. Arrangements for purchase and placement of image to follow.
Bleed on all sides s/b 18pts; pages in Quark s/b staggered.
Time This lesson takes approximately 90 minutes to complete.
Goals Work with projects
Screen and mark clips
Use the append edit option
Arrange clips in the Timeline
Work with the Magnetic Timeline
Insert clips
Use drag-and-drop editing
Make changes to project clips
Connect clips to the primary storyline
4

115
Having imported your media and organized your Events, you are now
ready to move into one of the most exciting parts of the editing work-
flow: building and crafting your story. Why “building” and not “telling?”
Because a story needs a foundation, a primary thread—let’s call it a sto-
ryline—that will take you from beginning to end.
Once you craft the primary foundation or storyline, you can refine it
by rearranging some clips and trimming others. You may want to add
complementary B-roll visuals to create a secondary storyline, or enhance
the story by adding music or narration. This is the real work of an editor,
and represents the tasks you will encounter in this very important part
of the editing workflow, and in this section of this book.
In this lesson you’ll build a rough cut using the source media from the
Events. To begin, you will create a new project, and mark clips you’ve
Building the Rough CutLesson 4

116 Building the Rough Cut
placed in Keyword Collections. Then, you’ll choose your Favorite clips and edit them into the project to create a primary storyline. Remember, it’s a rough cut. It will require trimming, adjusting, and finessing, but all of that will be done in due time.
Creating a New ProjectEvery story you tell using Final Cut Pro is contained within a project. Projects are created and cataloged in the Project Library. Here you can neatly organize and store your projects until you are ready to refine them or share them with the world.
In this exercise, you will create a new project in the Project Library for the Zero to Hero story.
1 If the Project Library is not in view, click the Project Library button in the lower-left corner of the Timeline, or press Command-0 (zero).
When the Project Library is active, you’ll see your internal hard disk along with any external drives connected to your computer. Any projects stored on a volume will appear under that volume’s icon.
2 To reveal the projects on the APTS FCP X disk, click its disclosure triangle. To reveal the contents of the Lesson Projects folder, click its disclosure triangle.
The Lesson Projects folder was copied from the DVD and contains project files that you will use throughout the book. One folder has been created for each lesson.

Creating a New Project 117
You’ll create a new project for this lesson inside the Lesson 4 folder using the Zero to Hero Event on APTS FCP X.
3 In the Event Library, select the Zero to Hero Event under APTS FCP X. In the Project Library, select the Lesson 4 folder, and click the New Project (+) button.
A project dialog appears asking you to name the new project and the default Event that contains your source media.
4 In the Name field, enter Zero to Hero. From the Default Event pop-up menu, choose the first Zero to Hero Event listed.
NOTE P Two Zero to Hero Events are listed if you did not delete the Macintosh HD Events created in Lesson 2. The first Zero to Hero listed is on APTS FCP X and the second is the Event you created on Macintosh HD.
In the Default Event pop-up menu, Final Cut Pro will display Events stored in the Final Cut Events folders present on any connected hard disk. The current option dis-played in the menu simply reflects the Event that was most recently selected in your Event Library. As you edit, however, you can use clips from multiple Events in your project.
By using the default settings, you’re allowing Final Cut Pro to create a project using video formats that match the first clip you edit, and audio settings that follow the default audio options.

118 Building the Rough Cut
To customize a project’s audio and video properties, click the Use Custom Settings button. For Video Properties, select Custom, and then choose the desired Format, Resolution, and Rate from the pop-up menus that appear. Selecting Custom for the Audio and Render Properties section allows you to select Stereo or Surround sound, the audio sample rate, and the render file format.
5 Click OK.
When you create a new project, it automatically opens in the Timeline window. Notice that the name of the new project is displayed in the upper left of the window.
You still have a few more things to organize in the Project Library. For example, to narrow your focus among the many folders, you can bring your Lesson 4 folder front and center, and close the other folders.
6 To return to the Project Library, press Command-0 (zero). For the purposes of this lesson, drag the Lesson 4 folder onto APTS FCP X to bring it to the top level of that folder’s hierarchy. Then click the disclosure triangle for the Lesson Projects folder to hide the other lesson folders.

Screening and Marking Clips 119
When you create projects, Final Cut Pro creates a Final Cut Projects folder in your Movies folder if Macintosh HD is selected or at the root level of a selected, non-system volume. You can exercise a media management best practice by not manipu-lating the project or media files in the Finder.
You can have an unlimited number of Final Cut Pro projects, but you can work on only one at a time. Next you’ll get started building the project you just created.
7 Open the Lesson 4 folder to reveal its contents. To open the Zero to Hero project, double-click its icon. The project opens in the Timeline.
Screening and Marking ClipsIf you organized your clips into Keyword Collections, or had Final Cut Pro do it for you on import, you’ll have a head start on your editing process. Rather than needing to search through a large group of clips to find the content you want to use, you can select a col-lection of clips in the Event Library and start editing. In this exercise, you will work with Zero to Hero interview clips that were previously imported into a Keyword Collection based on the original folder structure of the media files.
P�About the Zero To Hero Media
“Zero To Hero” was produced by Pullin Television in partnership with The National Hot Rod Association to create entertainment programming for the professional race teams as well as the grassroots racing community. The series, which was pro-duced and directed by Stephen Pullin, highlights several drag car racing champions and showcases their backgrounds, their passions, and their commitment to racing. Some of the drivers featured in the series are Tony Pedregon, a two-time Funny Car World Champion with 43 career wins and a top speed of 311.49 MPH; Tony Schumacher, a seven-time winner of the Top Fuel Dragster World Championships with 67 career wins and a top speed of 327.03 MPH; Antron Brown, a top fuel drag-ster driver with 27 career wins, and a top speed of 325.37 MPH; and John Force, a fifteen-time Funny Car World Champion with 132 career wins, and a top speed of 316.23 MPH. The series was broadcast on Fox television and also distributed over the Internet. Each episode was created using a variety of camera sources, including Sony EX3, Panasonic P2, and GoPro for live events, interviews, and field produc-tion, as well as additional media from ESPN broadcasts mastered on DVC Pro.

120 Building the Rough Cut
Starting with a Keyword Collection is a good first step for narrowing the choice of clips. But the real craft of editing is to narrow your media choice within a clip so you can edit just that selection into your project.
You can do this several ways. In the previous lesson, you used start and end points to define a range, and rated that range as a Favorite. (Final Cut Pro can easily display those Favorites as a group.) But you can also identify a clip range using start and end points and then edit that selection directly into the Timeline. In this exercise, you will view clips and mark the desired ranges you want to edit. You will also adjust the Event Browser to maxi-mize its use for previewing clips before editing.
1 In the Event Library, click the disclosure triangle next to the Zero to Hero Event, and select the Interviews Keyword Collection. Click the Filmstrip View button.
The four people in this Keyword Collection are racers in the National Hot Rod Association (NHRA). They were interviewed on location at their race events.
As you’ve seen, the Event Browser can display clips in several ways. The more familiar you become with the Final Cut Pro editing process, the more you will gravitate to dif-ferent setups for specific purposes.

Screening and Marking Clips 121
2 To optimize the Event Browser for screening and marking selections within these clips, do the following:
�P Click the Filter pop-up menu and choose All Clips.
�P If text or icons are already in the search field, click the reset button (X) to clear the field.
�P In the Action pop-up menu, choose Group clips by > None, and Arrange clips by Name > Ascending.
�P To choose a single thumbnail representation, drag the Duration slider right to the All position, or press Shift-Z.
�P Click the Clip Appearance pop-up menu, and deselect Show Waveforms, and make the thumbnails as large as possible.
�P In the View menu, make sure Skimming, Audio Skimming, and Snapping are chosen.
NOTE P How you view clips in the Event Browser is a personal preference. You can modify your choices as you work through these lessons, but the display setup in step 2 will be reflected in the images in this lesson.
3 To select the first clip, Antron Brown, simply click it. Then move your pointer through the clip to skim it.
Playhead Skimmer
With a single click, a yellow range selection outlines the entire clip. Notice that you can skim anywhere in the clip, but the white playhead remains positioned at the loca-tion where you clicked when you selected the clip.
4 Skim away from the white playhead, and press the Spacebar to play the clip.

122 Building the Rough Cut
As you play a clip, you may want to fast forward a clip or play it backward slowly to find the beginning of a word or a specific moment. You can press the J-K-L keys to play the clip backward and forward, slow and fast, and use key combinations to move frame by frame.
When you play a clip by pressing the Spacebar or the L key, the clip starts playing from the skimmer location, not the playhead location. This makes it very convenient to skim and play, skim and play, as you seek out editing options. When you’re screen-ing a clip for the first time, however, you’ll typically want to play from the beginning of the clip.
5 To move the playhead and the skimmer to the beginning of the clip, press Shift-I, which moves both skimmer and playhead to the preceding start point. Then press Spacebar to play the entire clip.
NOTE P When the clip finishes playing, you can press the Spacebar to play it again.
To edit a portion of this clip, you will change its selection range. Since Antron begins his comment at the very beginning of the clip, “One day you could be a hero,” the current start point is fine. Next you’ll set an end point.
6 Play the Antron Brown clip from the beginning again and stop after you hear him say, “… you didn’t qualify for a race.” Press O to set an end point at that playhead loca-tion. To play from the start to the end points, press the / (slash) key and watch your selected clip range play in the Viewer.
If the end point isn’t exactly what you want—perhaps you caught Antron in the mid-dle of his next word—you can change your range selection by dragging the selection edge, or by remarking the clip. To help you find a specific ending frame, you can also use the J-K-L or Left and Right Arrow keys.
When audio skimming is enabled, you can hear Antron’s audio frame by frame as you skim across the clip. To enable audio skimming, press Shift-S.

Screening and Marking Clips 123
7 To move the playhead to the end point, press Shift-O. Press the Left or Right Arrow key to fine-tune the location of your new edit point, frame by frame. Make sure the frame is after Antron says, “…you didn’t qualify for a race,” but before he begins his next statement. To set a new end point at the playhead location, press O.
Don’t worry if your start and end points aren’t perfect. Once the clip has been edited into a project in the Timeline, you can later apply trimming techniques to fine-tune the edit points.
With your clip range marked, you’re ready to edit it. However, you have more clips to screen. You can rate this marked range as a Favorite for fast retrieval. You will learn more about editing in the next exercise.
You can also press I or O as the clip plays to set a start or end point. Creating edit points in real time is referred to as marking on-the-fly.
8 In the Antron Brown clip, rate this portion as a Favorite by clicking the Favorite button, or pressing F.
The green Favorite line appears in the clip over the selected range. This is one way you can always see or easily return to the portion of the clip you liked.
9 In the Event Browser, mark selections for the two following clips. After you mark one clip, remember to save that range as a Favorite so you can return to that portion and later edit it into your project.
John Force—“There’s nothing like….greatest feeling in the world.” Then press F to save that portion as a Favorite.
Tony Pedregon—“The breed of the drag racer…has no fear.” Press F to save this por-tion as a Favorite.

124 Building the Rough Cut
Although keywords applied within a clip may overlap, ratings may not. Marking a new Favorite that overlaps a previously marked Favorite results in one big Favorite.
Rating selections as Favorites is a good workflow to preserve and prepare potential sound bites for editing. But another approach is to simply mark one or more selec-tions within a single clip. In Lesson 2, you saw that Final Cut Pro remembers multiple selections while importing from an SD cards. It works similarly while screening and marking a clip in the Event Browser. You’ll begin by marking a single sound bite.
10 Play the Tony Schumacher clip. Use the I and O keys to mark a range around Tony saying “Nobody wakes up and thinks…average my whole life.” Do not press F.
NOTE P Make sure you read through the next few steps before marking a second selection. If you press the I or O key at this point, it would replace the previous selec-tion you made, not add to it.
This is a great comment and one you will most likely want to use in the Zero to Hero project. But you might find other comments in this clip that are equally useful. As you continue to screen this clip, you can mark another comment without losing this selected range.
11 Continue playing the Tony Schumacher clip, and listen for when Tony talks about dreaming of the monster moment. Skim or position the playhead to just before Tony says, “People dream for that massive....”
You’ve already marked one selection in this clip that you don’t want to lose. To add this second sound bite as an additional selection, you must use two modifier keys along with the I or O key.
12 To set an additional range, start in the already marked Tony Schumacher clip, and press Shift-Command-I.

Screening and Marking Clips 125
Another way to create an additional range selection is to Command-drag the clip’s filmstrip or thumbnail.
The start of a second range appears. As expected, this new range automatically extends to the end of the clip. Let’s find a more precise end point after Tony’s killer statement.
13 Play or skim the clip and position the playhead after Tony says, “…big monster moment.” Press Shift-Command-O.
Now you have two range selections within a single clip. Depending on the workflow you choose, you can continue screening and marking other clips before editing either selection. Let’s select a different clip and return to this one later.
14 In the Event Browser, select the Tony Pedregon clip, and then reselect the Tony
Schumacher clip by clicking in the middle of the clip between the two selections. Notice that both selections are still present. Click inside the first selection.

126 Building the Rough Cut
Clip selections are persistent. That is, they remain with the clip until you manually remove one or more of them. You can highlight a single range selection by clicking inside it, or select multiple ranges by using a modifier key.
15 Command-click inside the second range to add it to the selection. Command-click the first range to exclude it from the selection. Then Command-click it to add it again. With both range selections active, press F to make these selections Favorites.
Just as you can have multiple selections in a single clip, you can also create multiple favorites at one time from highlighted or active selections.
To remove a range selection, click inside it to select it, and then press Option-X to clear it, or Option-click the range.
Appending Clips in the TimelineA flexible feature of Final Cut Pro is the ability to mark many Favorites before editing, as you did in the previous exercise. Or, you can mark one clip, edit it into the project, and then you select and mark the next clip, edit it, and so on. Whichever approach you take, you have several methods for editing a source clip into a project.
One option is to simply add or append the clip to the end of the storyline immediately after the last clip you edited. When you’re building a rough cut, as you’re doing in this lesson, adding or appending clips is often the simplest approach to creating your primary storyline. Every project is based on a primary storyline. In this exercise, you will use the append edit option to edit the Favorite portions of the racers’ clips you marked in the pre-vious exercise. You’ll also take a closer look at some of the Timeline functions.
1 To view just the Favorite selections of the racers, in the Event Browser click the Filters pop-up, and choose Favorites, or press Control-F.
Although just four racers are featured, five clips are displayed. This is because you marked two portions of the Tony Schumacher clip as a Favorite. Those two ranges appear separately in this filtered Favorites view.

Appending Clips in the Timeline 127
For now, let’s add these clips to the project in the order they appear in the Event Browser. Later you can rearrange them in the Timeline.
2 In the Event Browser, select the Antron Brown clip.
Because you are viewing only the Favorites, the portion of the clip you previously rated as a Favorite is selected. To add this clip to your project, you will use the append function.
3 In the toolbar, click the Append button.
The Antron Brown clip is edited into the dark gray area in the middle of the Timeline. This is where you will build your primary storyline, which, like the sto-ryline of a book, is the main plot of your project. It drives the story you are telling with video and audio. For now, the append function simply adds the Antron Brown clip as the first clip of this story. Now you are ready to add your second Favorite clip to the Timeline.

128 Building the Rough Cut
If you do not choose to use Favorites as part of your workflow, you can mark a range selection within a clip, select that range, and click the Append button to edit that portion of the clip into a project.
4 In the Event Browser, select the John Force clip. To review the Favorite portion, press the / (slash) key.
Now let’s switch to the Timeline to see where this clip will be edited. As you switch from one window to the next, a few things will change in the interface. Let’s examine those changes so you will always know which is the active window.
5 To select the Timeline, choose Window > Go to Timeline, or press Command-2. To select the Event Browser, choose Window > Go to Event Browser, or press

Appending Clips in the Timeline 129
Command-1. Use these shortcuts to continue switching between the two windows and notice the changes in the following areas of the interface:
�P Viewer image and name
�P Dashboard
�P Event Browser and Timeline background color
�P Selected range color
�P Rating buttons
Rating buttons with Rating buttons withEvent Browser active Timeline active
When the Timeline window is active, the image of the project clip appears in the Viewer along with the project name. The Timeline timecode is displayed in the Dashboard, and the Rating buttons are dimmed. The recently selected clip, John Force, remains selected in the Event Browser but the selection outline is now gray and not yellow.
Selected clip in inactive window
When the Event Browser window is active, the John Force clip selection outline returns to yellow and appears in the Viewer along with the clip name. The Rating but-tons in the toolbar are active. Also, in each case, the active window’s background is a lighter gray than an inactive window.
Selected clip in active window
Before you edit the John Force clip, let’s take a closer look at how the append edit works.

130 Building the Rough Cut
6 To switch to the Timeline, press Command-2, and then press the Home key to move the playhead to the start of the clip. Play the clip from the beginning, but stop playback after Antron says, “take the Wally home.” Leave the playhead in the middle of the clip.
NOTE P The Wally is the trophy awarded to winners of an NHRA national event. It’s named after the late NHRA founder, Wally Parks.
The toolbar has three edit buttons: Connect, Insert, and Append. Clicking each but-ton performs a different type of edit. When you used append earlier, the function itself did not appear all that special; however, it really is significant. An append edit places the clip at the end of the primary storyline no matter where the playhead is positioned. (You will learn about the other edits later in this lesson.)
7 To edit the selected John Force clip to the Timeline, click the Append button in the toolbar, and watch where Final Cut Pro places the clip in the Timeline.
Even though the Timeline playhead was in the middle of the Antron Brown clip, Final Cut Pro appended the new clip to the end of the storyline. By using the append edit, you can very quickly add clips to your primary storyline.
The Append function is further defined as adding source clips to the end of the primary or selected storyline.
Let’s add the third clip using the append edit keyboard shortcut.
8 In the Event Browser, select the Tony Pedregon clip. To review it, press the / (slash) key. To append the clip to your project, press E.
When you take the time to select a Favorite range in each of your clips, as you’ve done with these interview clips, you can move the editing process along even faster by appending more than one clip at the same time. In fact, Final Cut Pro can append any number of selected clips, or marked selections, in one step.

Appending Clips in the Timeline 131
NOTE P If you want to change the order of the clips in your project, you can easily rearrange the clips in the Timeline. You will do this later in the lesson.
9 In the Event Browser, drag a selection rectangle around the two Tony Schumacher clips to select them. To append these two clips to the storyline, press E.
Both clips are added to the end of the project in the order they appear in the Event Browser. If you Command-click to select multiple clips, they are added in the order that you clicked them.
You can edit multiple range selections from one or more clips in the same way. Select the range selections you want to edit, and then click the Append button, or press E. The selected ranges will be edited in the order they appear.
To become more comfortable viewing your current project in the Timeline, let’s change the Timeline view and look at some of the Timeline buttons.
10 To fit all the project clips in the Timeline, make the Timeline window active, and press Shift-Z. To play the project, press Home and then press the Spacebar, or the L key. Remember that pressing the Up and Down Arrow keys moves the playhead back-ward or forward to the beginnings of clips.
Zooming your Timeline with the Shift-Z shortcut is like performing a “Zoom to fit” command. It will either stretch or shrink your clip display so the entire Timeline win-dow is filled with all the clips in the project.

132 Building the Rough Cut
In the upper-right corner of the Timeline, you’ll find three buttons that control how you skim through clips, including one that allows you to snap to clips as you skim.
11 Move your pointer slowly over the edit point between the Antron Brown and John
Force clips. Notice that the skimmer snaps to that edit point. In the upper right of the Timeline, click the Snapping button, or press N, and then move across the edit point once again. Notice that there is no longer a pull toward the edit point.
Snapping selected
With snapping enabled, the skimmer easily aligns or snaps to the edit point and, when at the edit point, turns yellow as a visual cue.
NOTE P The Snapping button also controls snapping in the Event Browser.
Both the Event Browser and the Timeline have a playhead and a skimmer. In the Timeline, the playhead and skimmer produce two different yet overlapping results.
12 Skim through the clips in the Timeline and notice that you are skimming the audio as well as the video. Then drag the playhead from the top of its stem through the clips.

Viewing and Arranging Clips in the Magnetic Timeline 133
Dragging the playhead through the project does not preview the audio as skimming a clip does.
13 Click the second button, Audio Skimming, to deselect it. Skim through the clips in the Timeline, and then skim through the clips in the Event Browser.
With audio skimming disabled, you no longer hear the clips as you skim through them. Earlier in this lesson, you chose Skimming, Audio Skimming, and Snapping from the View menu. These are the same options controlled by these Timeline buttons. Selecting these options in the Timeline also affects how you view the clips in the Event Browser.
The third button allows you to solo, or isolate, a clip. You will learn the use of this button in a later lesson.
At times during editing, you may want to edit using only the playhead. If you don’t want the skimmer to follow your every move, you can deselect the Skimming button.
14 In the Timeline, deselect the first button, Skimming. When you try to skim through the clips in the Timeline or the Event Browser, you can’t. In the Timeline, return the buttons to their active state by selecting all but the third button.
NOTE P When both skimming and audio skimming are enabled, deselecting the Skimming button will deselect audio skimming as well.
Viewing and Arranging Clips in the Magnetic TimelineOnce you’ve edited clips and viewed their placement relative to each other, you may decide that you can improve your story by changing the clip order. With the Magnetic Timeline, you can easily drag a clip to a different location and let Final Cut Pro automati-cally create a space for the clip by shifting the other clips. In this exercise, you will change the order of the clips to improve the racing story. You will also employ the Timeline Index to see the list of clips in your project, and learn additional methods to change the way you view clips in the Timeline. Let’s start by enlarging the clip thumbnails in the Timeline.

134 Building the Rough Cut
1 In the lower-right corner of the Timeline, click the Clip Appearance button. Click through the six buttons, and then click the fifth button from the left to create larger thumbnails. Drag the Clip Height slider to a middle position.
Each time you click a button, the clips in the Timeline change appearance. Sometimes, clip appearance is a personal choice. Depending on where you are in your editing workflow, however, it may be helpful to choose a particular view of your clips. For this exercise, you simply want to see the individual racers clearly, and you’re less concerned with audio waveforms.
Before you change the position of the clips in the graphical Timeline layout, let’s look at how they appear in a list.
2 In the lower-left corner of the Timeline, next to the Project Library button, click the Timeline Index button, or press Command-Shift-2.
The Timeline Index pane appears to the left of the Timeline. Clips and tags (such as keywords) in the current project are listed here in their order of appearance. The

Viewing and Arranging Clips in the Magnetic Timeline 135
Timeline Index provides a textual way to navigate your project. A gray highlight bar indicates the clip that is currently selected in the Timeline.
3 At the top of the pane, click Clips, if it’s not already selected. Beneath the list of clips, select All. Then select the Antron Brown clip at the top of the list.
The number to the right of each clip indicates the timecode location in the project where the clip begins. Above the list of clips, you can read the number of items in the project and the duration of the selected item(s).
4 In the Timeline, select the John Force clip. In the Timeline Index, notice that this clip is also highlighted. In the Index, select the Tony Pedregon clip. In the Timeline, that clip is selected.
If opening the Timeline Index caused some of the clips to go out of view, press Shift-Z again.
The Timeline Index is a great tool to help find clips and other items in your project. Although this project is small, it still provides a good opportunity to see how the Index works.

136 Building the Rough Cut
5 In the Timeline, drag the playhead through multiple clips, and watch what happens in the Index. In the Timeline, drag the playhead between the Antron Brown and John
Force clips.
In the Index, the playhead appears horizontally and moves up and down through the clips as you drag the playhead vertically through the Timeline. You can leave the Timeline Index open as you rearrange the clips in the project.
NOTE P You will explore other ways to view the Timeline Index in later exercises.
6 In the Timeline, play the first Tony Schumacher clip in which he says, “Nobody wakes up and thinks, ‘You know, gosh, I hope I’m just average my whole life.’”
This dynamic line could really kick off the project with a lot of energy. Let’s move it to the beginning of the sequence of clips.
To perform these steps, make sure that the default Select tool is chosen in the tool list.
7 Drag the first Tony Schumacher clip left to the head of the project. Before you release it, notice the blue insertion line where you will place the clip. When you see the

Viewing and Arranging Clips in the Magnetic Timeline 137
remaining clips reposition themselves, release the pointer to place the clip at this loca-tion. Then play the first few clips of the project.
As promised, this clip gives the project a fiery start. In the Timeline Index, notice how the clip appears at the top of the list. Now let’s bring Tony Pedregon into the second clip position.
8 Drag the Tony Pedregon clip to follow the first clip. When you see the blue insertion line and the other clips scoot aside, release the pointer. Play the first two clips.
When you drag a clip in the Timeline, a numerical value appears, indicating the length of time and in which direction you are repositioning the clip.
While the remaining clips could be reordered in a variety of ways, let’s leave them in the order they appear: Antron Brown, John Force, and the second Tony Schumacher clip.
9 To close the Timeline Index, click the Timeline Index button, or press Command-Shift-2.
In the next exercise, you will insert some B-roll racing clips into this project. You may want to create additional room in the Timeline for the new material.

138 Building the Rough Cut
10 In the Timeline, press the Home key to position the playhead at the beginning of the project. Then move the skimmer to the middle of the Timeline. Press Command-– (minus) a few times to zoom out and press Command-= (equals) several times to zoom in to the clips.
The more you zoom in, the wider the clip and skimmer become and the more clip thumbnails you can see. Only the visual representation of each clip changes, not the clip length or duration. Also, the zooming occurs around the skimmer location as long as skimming is enabled. When skimming is disabled, zooming occurs around the playhead position.
You can also zoom in and out of the clips by dragging the Zoom control in the Timeline.
11 In the lower-right corner of the Timeline, drag the Zoom control to the left to zoom out, and then to the right to zoom in on the clips. To prepare for the next edits, settle on leaving about a third of the Timeline empty.
If you are using a mouse with a scroll ball, you can scroll through project clips by moving the scroll ball left or right. You can also swipe two fingers across a Multi-Touch trackpad to scroll through a Timeline.
Inserting Clips into the Primary StorylineYou have added clips to the Timeline to build your rough cut. Like any rough cut, this one is a work in progress. So far, you’ve laid a strong foundation by editing and then reorder-ing the interview clips that give this project its face, personality, and energy. Now it’s time to insert other shots that show or demonstrate more of the racers’ story and passion.
But rather than append these clips to the end of the project, you will use the insert edit to place, or insert, them between existing clips in the primary storyline. When you insert a

Inserting Clips into the Primary Storyline 139
clip, a space for the new clip opens up in the storyline similar to the way the clips opened up when you repositioned them using the Magnetic Timeline.
In this exercise, you will work with media from the B-Roll Keyword Collection. In Lesson 2, Final Cut Pro used the existing media folder structure for that project to create a Keyword Collection of clips that were already organized in a B-Roll folder. Let’s start by picking three shots to mark and insert into this rough cut.
1 In the Event Library, select the B-Roll Keyword Collection. In the Event Browser, from the Filter pop-up menu, choose All Clips. Take a moment to change the thumbnail view so that all clips are visible in the Event Browser.
When you first select the B-Roll Keyword Collection, no clips appear in the Event Browser because the Favorites filter is still active from the previous exercises. By choosing All Clips, you can see all the B-Roll clips in this collection.
NOTE P You may wish to momentarily set the clip height to a smaller setting in order to see all of the clip thumbnails. The Clip Height setting is available by clicking the Clip Appearance button to the lower-right of the Event Browser.

140 Building the Rough Cut
As you look at the clip thumbnails, you will see a few audio-only clips. You won’t be inserting audio clips at the moment, so let’s hide those audio clips by choosing a media file type in the Filters window.
2 In the search field, click the Filter (magnifying glass) button to open the Filter window, or press Command-F. From the Add Rule pop-up menu, choose Media Type. Then, in the Media Type rule entry, from the Type pop-up menu, choose Video With Audio.
NOTE P You can leave the Text entry selected because the Text field is empty and will not impact the search.
Only those clips that have both video and audio now appear in the Event Browser. In the search field, notice the filmstrip icon that indicates that a search is active based on media type.
To help place your audience at the scene, let’s find some racing and crowd shots to insert into this project.
3 Close the Filter window. In the Event Browser, skim the wall low angle clip. To select the action portion of this clip, drag a selection from the head of the clip to the point where both cars are out of frame, at about 1:28 in the clip. Use the Viewer as a guide.

Inserting Clips into the Primary Storyline 141
If the entire clip is already selected, deselect it by clicking the selection, and then choose Mark > Clear Selected Ranges, or press Option-X. You can also Option-drag anywhere in the clip to create a new selection.
You could edit this selection immediately, but to preserve the range of this material for later use, rate it as a Favorite.
4 To rate the selected clip range as a Favorite, click the Favorite button, or press F.
Remember you can press Shift-I or Shift-O to move the playhead to the range start or end points, finesse the range by pressing the Left or Right Arrow keys or J-K-L, and reset the start or end points by pressing I or O.
5 Skim through the crowd ots clip. To select the latter part of this clip, press I to set the start point when the red racing lights come on, just before the man with a camera turns. Press F to rate this selection as a Favorite.
When you set a start point by itself, a selection automatically appears from the start point to the end of the clip. Likewise, when you set a single end point, the selection appears from the head of the clip to the end point.
NOTE P OTS stands for over the shoulder. It’s used to identify a shot that shows a point-of-view perspective, as though you were looking over a viewer’s shoulder. In this shot, you are seeing the race track from the crowd’s perspective.

142 Building the Rough Cut
6 Skim the crowd wide clip. Notice everyone in the crowd moves their heads together at the same time. Mark a start point before the heads turn, and press F to rate the selec-tion from here to the end as a Favorite.
7 To view the Favorites you just created, from the Filters pop-up menu, choose Favorites.
The three Favorite selections you just created appear. Now that they are marked, it’s easy to insert them anywhere in the project. To set the stage for this project, let’s insert them at the beginning. To do this, you must first specify the edit location.
8 Press Command-2 to switch to the Timeline, and press the Home key to move the play-head to the beginning of the project. Make sure the skimmer is not in a different location.
NOTE P When you press the Home key, it moves both the skimmer and playhead to the beginning of the project. If you skim away from the playhead location into other clips, and make an insert edit, the edit will be performed at the skimmer location.
To review, an append edit automatically places a clip at the end of a storyline no mat-ter where the playhead is located. For insert and connect edits, you must first position the playhead or skimmer where you want to place the clip.
9 In the Event Browser, select the wall low angle clip. In the toolbar, click the Insert but-ton. Then play the first few clips.

Take 2 143
In the Timeline, the wall low angle clip now appears before the Tony Schumacher clip.
10 In the Timeline, snap the playhead between the first two clips. In the Event Browser, select the crowd ots clip, and click the Insert button, or press W.
After you perform any type of edit in the Timeline, the playhead repositions to the end of the newly edited clip. If you want to insert a shot to follow the clip you just edited, the playhead is already in position.
11 To insert the crowd ws clip as the third clip, select it in the Event Browser, and press the insert edit keyboard shortcut, W.
As with append editing, you can also insert edit a group of selected clips or marked selections at one time.
Take 2 The producer of your project is old school and remembers the good old days of drag-and-drop editing. She says she doesn’t trust an editing system where you can’t drag and drop. Although you enjoy the ease of using keyboard shortcuts to make your edits, you know it’s also possible to drag a clip from the Event Browser directly into the Timeline at the desired edit point. You ease the producer’s worries and perform a drag-and-drop edit by following these steps:
Make sure snapping is enabled for these steps.
�P In the Timeline, zoom the project so you can see the last clip.�P In the Event Browser, from the Filter pop-up menu, choose All Clips.�P Select the smokey banner clip in its entirety.�P Drag the smokey banner clip into the Timeline and snap it to the end of the Tony
Schumacher clip. Look for the blue insertion line before releasing the pointer.

144 Building the Rough Cut
NOTE P With drag-and-drop editing, you needn’t drag the playhead to where you’re focused, and click a button in the toolbar. You can simply rely on your eyes to target the new location and manually drag the clip directly to where you want it in the storyline.
Changing Edited ClipsOnce you’ve edited several clips into your primary storyline, you may be distracted by one clip that’s too yellow or another clip that’s too loud. There are stages during the editing workflow when you will correct all of the color problems or perfectly blend each audio clip. But for now, you just want to view the project without cranking up the volume con-trol or checking to see if you’re wearing amber sunglasses.
As you learned in Lesson 2, you can access the Inspector window to view video or audio information about your clip. In this exercise, you will use the Inspector to make a few adjustments that will make viewing your project more pleasant. This is an important part of building a rough cut. Although you aren’t making final changes, you are tweaking the Timeline to determine whether or not the clips you’ve edited are effectively telling your story. Let’s start by adjusting the Timeline view.
1 In the Timeline, click the Clip Appearance button and click the third thumbnail but-ton. Then drag the Clip Height control to make the clips taller.

Changing Edited Clips 145
With this clip appearance option chosen, the clip waveform appears beneath the video thumbnails. This makes it easy to see which clips need an audio boost and which are already raising the roof.
Since you will be skimming a few loud clips, you may want to disable audio skimming by deselecting that button in the Timeline, or pressing Shift-S.
2 Skim to the first clip and press Command-= (equals) to zoom in to this area. Then play the first three clips in the project and watch the waveforms as they play.
Notice that the first clip’s audio waveform is shaded blue and falls safely beneath the horizontal audio volume line. The waveforms of the second and third clips, however, go above the volume line; those portions of the waveforms appear yellow and red. You can easily lower the volume of these two clips in the Timeline.
In the waveforms, yellow indicates audio levels approaching peak levels, whereas red indicates peaked audio. You’ll learn more about peaking in Lesson 8; but for now, know that red is too loud.
3 In the Timeline, move your pointer into the crowd ots clip and position it over the volume line. When it turns into a vertical resize pointer, notice the 0 dB info flag, and then drag down until the waveform is at a similar level to the first clip.

146 Building the Rough Cut
NOTE P The abbreviation dB means decibels, the unit of measurement for audio volume.
If the skimmer gets in the way of adjusting the volume line, deselect the Skimming button in the Timeline, or press S.
When you lower the volume of the crowd ots clip, the waveform no longer displays yellow areas or red peaks. But notice that the top portion of this clip is flat. When the audio was originally recorded at the racing location, the loudness of the race caused the audio to clip.
4 In the crowd wide clip, drag the volume line down to match the first two clips. Play these clips in the Timeline. To enable skimming again, press S.
NOTE P Remember, the dB number you see in the Level field represents a change of volume up or down relative to the original sound level of this clip.
Now when you play these clips, you can get a better idea of whether their audio con-tent will work in the project.
5 Skim to the fourth clip, Tony Schumacher, and play it. Then click above that clip to move the playhead to this location. Notice that the background sounds of the shop are too loud, and the video has a yellow tint. Leave the playhead over the clip so you can see it in the Viewer.

Changing Edited Clips 147
As you work with a particular portion of a project, it’s always a good idea to zoom in to that area so you can see it more clearly.
This type of show is often shot under extreme conditions where you have to grab a few minutes with a racer whenever you can, no matter what’s going on around him. You may not have time to color balance the camera or ask everyone to leave the shop and reduce the background noise. Final Cut Pro can help in both situations. To get a closer look at this clip’s properties, let’s open the Inspector.
6 In the toolbar, click the Inspector button, and then click the Video tab at the top of the window. In the Color section, select the checkbox next to Balance, and notice how the clip changes in the Viewer.
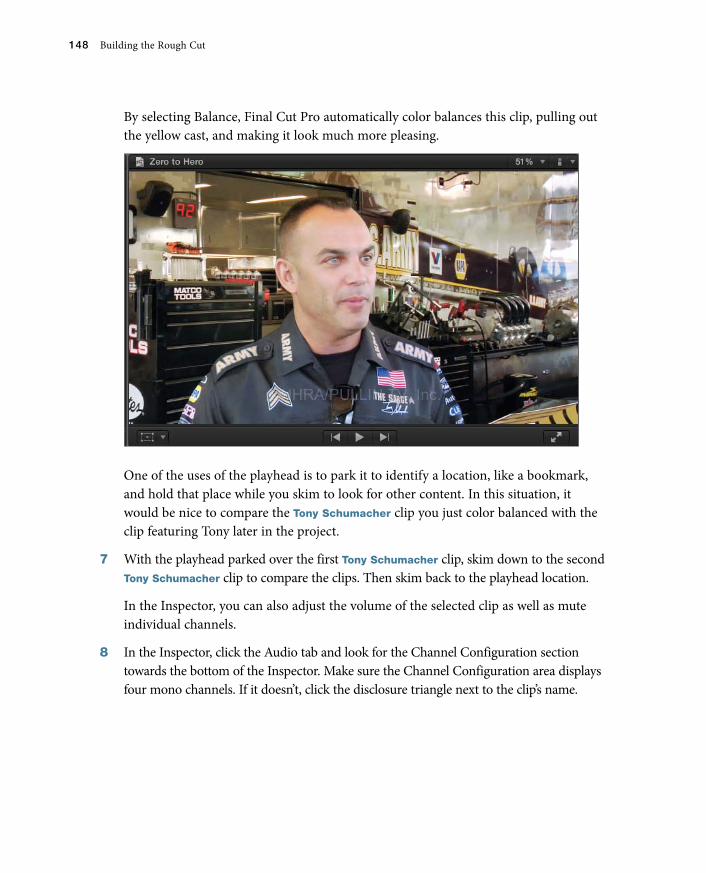
148 Building the Rough Cut
By selecting Balance, Final Cut Pro automatically color balances this clip, pulling out the yellow cast, and making it look much more pleasing.
One of the uses of the playhead is to park it to identify a location, like a bookmark, and hold that place while you skim to look for other content. In this situation, it would be nice to compare the Tony Schumacher clip you just color balanced with the clip featuring Tony later in the project.
7 With the playhead parked over the first Tony Schumacher clip, skim down to the second Tony Schumacher clip to compare the clips. Then skim back to the playhead location.
In the Inspector, you can also adjust the volume of the selected clip as well as mute individual channels.
8 In the Inspector, click the Audio tab and look for the Channel Configuration section towards the bottom of the Inspector. Make sure the Channel Configuration area displays four mono channels. If it doesn’t, click the disclosure triangle next to the clip’s name.

Changing Edited Clips 149
This clip has four audio channels. For this shoot, a lavaliere microphone recorded two channels of Tony’s interview, and another microphone recorded two channels of ambi-ent sound from the shop. By deselecting each channel, you can identify which is which.
9 In the Timeline, play the first Tony Schumacher clip, and as it plays, deselect the third and fourth mono audio channels in the Inspector window.
NOTE P If your pointer is over an audio channel in the Inspector when you press the spacebar, you will hear only that source channel play and not the Timeline clip.
The lower two channels contain the background ambient noise from the shop. By deselecting these channels, you can hear Tony’s interview more clearly.
Now let’s adjust the clip volume in the Inspector.

150 Building the Rough Cut
10 In the Timeline, click above the Tony Pedregon clip and look at the top of the Inspector window to see the clip name change.
You can also Option-click a project clip to simultaneously select the clip and cue the playhead to that location.
The Inspector window displays the selected clip’s properties, whether that clip is from the Timeline or the Event Browser.
11 Play this clip and deselect the third and fourth mono channels. Then select them again.
In this clip, deselecting and turning off these channels leaves the clip sounding a little tinny. Leaving them turned on gives the clip a fuller sound, but also raises the overall volume.
12 In the Inspector window, drag the Volume slider to the left until the clip waveform in the Timeline no longer has yellow areas or red peaks. Then close the Inspector. Now the clip plays at a lower volume.
Connecting Clips to the Primary Storyline As you build your rough cut, you may find that adding audio—such as narration, music, or sound effects—improves your storyline. For example, it might be nice to add music to help build momentum in the Zero to Hero project. But which edit option do you choose? You wouldn’t append music to the end of the clips. And you wouldn’t insert it between clips. Instead, you use another edit option in the toolbar to connect the clip to the primary storyline.

Connecting Clips to the Primary Storyline 151
A connected clip could be any clip that is attached to the primary storyline in the Timeline. Connected clips remain attached where you edit them until you move or remove them. In this exercise, you will filter the Zero to Hero B-roll clips so that only the audio clips appear, and then connect a music clip to your video sequence and adjust its position in the primary storyline.
If necessary, press Shift-Z to view all the clips in the Timeline.
1 In the Event Browser, from the Filter pop-up menu, choose All. Press Command-F to open the Filter window. From the Media Type pop-up menu, choose Audio Only. Close the Filter window.
You could also open the Filter window by clicking the search field when a search rule, such as the media type icon, is present.
You now see just the audio clips that are part of the B-Roll Keyword Collection. Since audio clips have no thumbnails, let’s view them as a list.

152 Building the Rough Cut
2 In the Event Browser, click the List View button. Then play the first part of the Battle Lines music clip. Viewing this clip in list view provides an expanded view of the waveform.
3 To edit the first half of this clip, mark a start point just before the music begins, and an end point after the first series of waveform peaks.
With audio skimming selected, you can press the Left and Right Arrow keys to find the exact music start.
In the clip waveform display, notice that some of the upper parts of the waveform appear yellow and some appear red, indicating that the audio may be peaking at 0 dB. As you know from the previous exercise, you can easily adjust the volume of this clip in the Timeline.
You could start this music at the head of the project. But it might be more fun to let the two race cars zoom by and then begin the music.
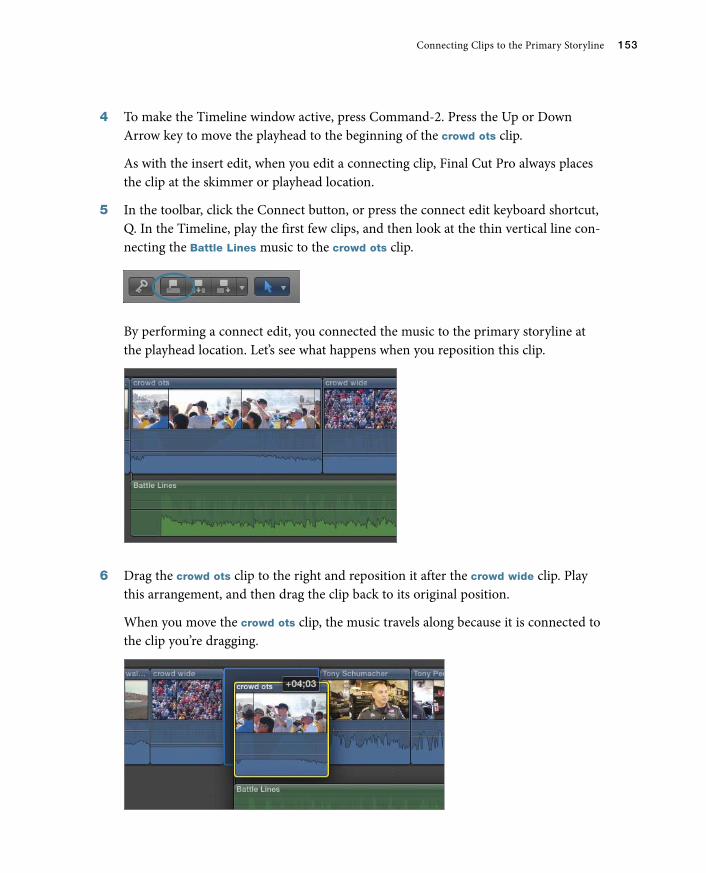
Connecting Clips to the Primary Storyline 153
4 To make the Timeline window active, press Command-2. Press the Up or Down Arrow key to move the playhead to the beginning of the crowd ots clip.
As with the insert edit, when you edit a connecting clip, Final Cut Pro always places the clip at the skimmer or playhead location.
5 In the toolbar, click the Connect button, or press the connect edit keyboard shortcut, Q. In the Timeline, play the first few clips, and then look at the thin vertical line con-necting the Battle Lines music to the crowd ots clip.
By performing a connect edit, you connected the music to the primary storyline at the playhead location. Let’s see what happens when you reposition this clip.
6 Drag the crowd ots clip to the right and reposition it after the crowd wide clip. Play this arrangement, and then drag the clip back to its original position.
When you move the crowd ots clip, the music travels along because it is connected to the clip you’re dragging.

154 Building the Rough Cut
But just because you started a connection with one clip doesn’t mean you have to keep that connection. By dragging the music later in the Timeline, you can connect it to a different clip.
7 Drag the Battle Lines clip to the right and snap it to the head of the first Tony
Schumacher clip. Notice that when you snap it to this edit point the playhead turns thick and yellow.
As you drag this connected clip, the thin vertical connection line relinks with another clip in the Timeline, in this case, the Tony Schumacher clip.
8 Play the first few clips of the project.
Now the music provides a very dynamic start to the interview clips. However, you are not limited to snapping a connected clip to an edit point. You can also shift the posi-tion of the clip left or right. You can do this by using shortcut keys to shift the clip one frame at a time, 10 frames at a time, or by entering a numerical length of time.
9 With the Battle Lines clip selected, press the , (comma) key several times to move the clip to the left in one-frame increments. Then press the . (period) key to move the clip to the right in one-frame increments. Press Shift-, (comma) to move the clip to the left 10 frames, or press Shift-. (period) to move it to the right 10 frames.
The comma key shares the Left Angle Bracket key, and the period key shares the Right Angle Bracket key. It may be helpful to think of moving in the direction these keys point.

Editor’s Cut 155
Sometimes you can successfully finesse clip placement by adjusting it just a few frames. Other times, you may need to move it a specific amount of time, perhaps to allow for another clip you know will be edited later.
10 With the Battle Lines clip still selected, enter –200. Look at the Dashboard and notice that the number entry has replaced the timecode location. Press Return or Enter.
When you precede a number amount with a + (plus) or – (minus) sign, Final Cut Pro reads that number as a trim or nudge amount, even adding colons every two digits, and moving the selected clip by that amount.
Editor’s CutYou’re now familiar with three types of edits, how to mark clips for editing, and how to customize the Timeline and Event Browser. With this arsenal of knowledge, you can create another rough cut using totally different media. Remember, you are still in the rough cut stage of the editing process.
�P To work with new media, in the Project Library, create a new project and name it I Think.�P In the Event Library, view the I Think clips and edit them in whatever sequence feels
natural for you. �P You can connect narration and music clips after you have the video clips in place.
NOTE P Although Final Cut Pro editing functions work the same regardless of the media in use, rehearsing them using different types of media is a good way to hone your editing chops and gain greater control over the tools, functions, and shortcuts.

156 Building the Rough Cut
Closing Your ProjectOnce you finish working in a project, you may want to close it so that you have a clean slate the next time you open Final Cut Pro.
1 In the Project Library, click the disclosure triangle next to the Lesson 4 folder to hide its contents.
2 Drag the Lesson 4 folder into the Lesson Projects folder beneath the APTS FCP X icon.
Closing a project in this way is a good practice to continue when finishing each lesson.
Lesson Review1. What methods can you use to create a new project?
2. How do you create an additional range selection in the same clip?
3. What four different methods allow you to edit clips into your project?
4. What is an append edit?
5. How can you zoom in or out of an area of the Timeline?
6. How do you change the display size of the clips in the Timeline?
7. How can you view a list of all clips in the Timeline?
8. How can you quickly adjust a clip’s volume in the Timeline?
9. How can you mute specific audio channels for a clip in the Timeline?
10. How can you toggle snapping on or off?
11. When you drag clips to rearrange their positions in the Timeline, what visual indica-tor shows where the clip will be positioned when you release the pointer?
12. How would you connect music or B-roll to the primary storyline in your Timeline?
Answers
1. Click the New Project (+) button; Control-click a folder or drive and choose New Project from the shortcut menu; or select the target location, and choose File > New Project, or press Command-N.

Lesson Review 157
2. Set a range start and end for one section of the clip, then press Shift-Command-I to start a new range, and Shift-Command-O to set the end of the new range. Another method is to press the Command key and drag a range within a clip’s thumbnail or filmstrip.
3. To create an edit, click an edit button in the toolbar; choose an editing command from the Edit menu, such as Append; press a keyboard shortcut; drag a clip from the Event Browser, from a media browser such as the Photos Browser, or from the Finder.
4. An append edit adds one or more clips to the end of a project or selected storyline.
5. Press Command-= (equals) to zoom in, and press Command-– (minus) to zoom out. You can also zoom in and out by dragging the Zoom control in the lower right of the Timeline.
6. Click the Clip Appearance button in the lower-right corner of the Timeline. In the Clip Appearance window, drag the Clip Height slider to the left to decrease the clip height, or to the right to increase the clip height.
7. In the lower-left corner of the Timeline, click the Timeline Index button, or press Command-Shift-2. The Timeline Index pane appears to the left of the Timeline and displays clips, roles, and tags (such as keywords) used in the current project in their order of appearance.
8. Position your pointer over the volume line in the Timeline. When the pointer turns into a vertical resize pointer, drag down to lower the volume or drag up to raise it. Audio that approaches peak levels appears yellow in the waveform; audio that exceeds peak levels appears red.
9. Select the clip in the Timeline, click the Inspector button in the toolbar, and then click the Audio tab and deselect the appropriate channels.
10. Click the Snapping button in the Timeline, press N, or choose View > Snapping.
11. A blue insertion line indicates where clips will be placed.
12. Position the playhead in the Timeline where you want to connect one or more clips. Select the clips in the Event Browser. In the toolbar, click the Connect button, or press Q. In the Timeline, a blue connection line for video or a green connection line for audio indicates the connection point.

158 Building the Rough Cut
Keyboard Shortcuts
N Turn snapping off and on
Command-N Create a new project
Control-click Open a shortcut menu
Command-F Open the Filter window
, (comma) Move selection to the left 1 frame
. (period) Move selection to the right 1 frame
Shift-, (comma) Move selection to the left 10 frames
Shift-. (period) Move selection to the right 10 frames
Command-0 (zero) Open the Project Library
Command-1 Go to the Event Browser
Command-2 Go to the Timeline
Command-Shift-2 Open the Timeline Index
Command-– (minus) Zoom out of the Timeline, Event Browser, or Viewer
Command-= (equals) Zoom in to the Timeline, Event Browser, or Viewer
Shift-I Move the playhead and skimmer to the beginning of the range
selection
Shift-O Move the playhead and skimmer to the end of the range
selection
Shift-Z Zoom the contents to fit the size of the Event Browser, the
Viewer, or the Timeline
Shift-S Toggle audio skimming
Up Arrow Go to the previous item (in the Event Browser) or the previous
edit point (in the Timeline)

Lesson Review 159
Keyboard Shortcuts
Down Arrow Go to the next item (in the Event Browser) or the next edit point
(in the Timeline)
S Toggle video and audio skimming
Q Connect to primary storyline
W Insert into primary or selected storyline
E Append to primary or selected storyline
F Rate selection as a Favorite
/ (slash) Play selection
J Play reverse
K Stop
L Play forward
I Set range start point
O Set range end point
Spacebar Play/pause

Symbols and Numbers’ (apostrophe) key, 229– (minus) sign, 155, 210, (comma) key, 154, 212. (period) key, 154, 212.caf extension
(Core Audio Format), 293/ (slash), play selection, 93, 122, 178; (semicolon) key, 229+ (plus) sign, 155, 210+3 dB fade option, 307–3 dB fade option, 307
AA key (Select tool), working with, 11Action pop-up menu
optimizing Event Browser for screening/marking clips, 121
restoring default settings in Event Browser, 95
sorting source clips alphabetically, 168
sorting/viewing Events, 16–17viewing/sorting Events, 20
Action safe zonesinserting title into primary
storyline, 332modifying titles, 344–347turning on/off, 348
Add (+) button, customizing destinations, 492–493
Add Correction button, 459Add Cross Dissolve, 241Add Freeze Frame (Option-4),
preset speed, 395–396Add Marker, 166Add Rule pop-up menu, 106,
108–109, 140
Add to Audition, 182–186, 313Additive color system, video as, 451ADSR (attack, decay, sustain, and
release) steps, sound, 305Alias files, 43–44All category
Generators Browser, 356–357Transitions Browser, 248–249
All Clips, Filter pop-up menu, 99–101
Alpha channels, 330Analyze and Fix, imported clips,
52–53, 454Analyzing process, imported clips,
51–58Animation
adding bumper title, 352adding credits, 352–355adding title. see titlesapplying Ken Burns effect,
413–417Animation menu, reset clips to 0 dB
levels, 302, 304Aperture, importing still images for
project from, 369Apostrophe (’) key, 229Append button, 127–128, 130–131Append edit (E)
adding generator, 363adding lower third to end as,
338adding secondary storyline,
189–190adding Slide bumper title, 349adding title to end as, 330insert edit vs., 142remembering shortcut for, 172in Timeline, 126–133
Apple devices, publishing project to, 481–485
Apple Pro Training Series: Final Cut Pro X Advanced Editing (Peachpit Press), 285, 418, 476
Apple ProRes codec, transcoding to, 58
Applications, importing media from other, 67
Applications folder, opening Final Cut Pro, 6
Archive, backing up project and Events, 504–507
Arrow tool, 11Attack, decay, sustain, and release
(ADSR) steps, sound, 305Attenuate audio, in Timeline, 286Audible playback, disabling, 163Audio. see also sound
connecting clips to primary storyline, 150–155
customizing properties, 118effects, 447–451
Audio, correcting problemsautomatically enhancing, 318comparing adjusted levels to
normalized waveforms, 321–322
overview of, 314–315removing hum, 315–318smoothing spike, 318–319
Audio Animation Editor, 450Audio Enhancements
(Command-8), 316–317Audio Enhancements pane, Audio
inspector, 316–318Audio file, sharing Master file as,
480–481Audio inspector, 298–302, 315–318Audio meters
adjusting audio in Timeline, 286–287
Index
532

Index 533
adjusting audio peaks, 465–467
adjusting in Audio inspector, 299–303
color-coding system of, 281–282
Command-Shift-8 to display, 465
correcting problem audio, 315increasing size of, 281monitoring levels in Timeline,
280, 285recording voiceovers using,
309reflecting output dB of clip,
287viewing peak levels in, 296
Audio skimming (Shift-S), 93, 121–123, 133, 145
Audio tab, Inspector, 148–150, 171Audio transitions, 245, 273–275Audition, duplicate as (Option-Y),
440Audition clips
animating effects and, 439–447
comparing voiceover recordings with, 313–314
keyboard shortcuts for, 186, 194
sampling music/sound with, 314
setting up in project, 180–186Audition Preview function, 184–185Auto Enhance Audio, 318
BB key (Blade tool), 204, 308–309Background process, sharing as, 478Background render, transitions,
242, 252Background Tasks indicator
(Command-9)analyzing imported clips,
53–54backing up projects/Events,
507exporting image from project,
498–499publishing project to video
sharing sites, 488
Backgrounds category, generators, 356–357
Backup, of projects and Events, 503–508
Balance checkbox, color, 453–454Balance Color (Command-
Option-B), 454Basic parameter, Text inspector, 344Blade tool (B key), 204, 308–309Bloom transition, 252Blu-ray disc, exporting for, 499–503Boost, adjusting audio in Timeline,
286Brightness (or luminance levels)
for broadcast-safe video, 468–469
correcting video problems, 467–471
defined, 452enhancing, 456–457
Broadcast-safe video, 468–471B-roll clips
adding markers to, 162–167connecting to primary
storyline, 168–175inserting into primary
storyline, 139–144inserting into Timeline,
137–138lifting from primary storyline,
190–192overwriting and replacing,
175–180Bundle, of multiple destinations,
493–494
CCamera
creating camera archive, 64importing media from, 58–64importing still images from,
369metadata, 73
Category pane, Transitions Browser, 248
Change Duration (Control-D), 254–255, 270, 352
Change End Source Frame, Retime Editor, 390, 421
Channel Configuration pane, Audio inspector, 148–150, 315–318
Chapter markerscreating, 166
including in Master file, 476publishing project to Apple
devices, 483Clear Selected Range (Option-X),
62, 126, 141, 471Clip Appearance button. see Clip
Height settingClip Browser, importing media
from camera, 61Clip Duration slider, customizing
Event, 76Clip Height setting
adding markers, 164adjusting audio peaks, 466enlarging clip thumbnails in
Timeline, 134, 144–145, 226
monitoring audio levels in Timeline, 282–283
resizing Event Browser for screening/marking, 121
resizing Event Browser to show all clips, 24, 76, 139
Clip menu, Disable command, 163Clip range
adding keywords to, 90–94adding speed segment in,
388–389adjusting volume in, 288–289appending to Timeline, 128creating range selection
(Command-drag), 125creating range selection (Shift-
Command-I), 124editing in Timeline, 120importing camera media from
as, 62–63keyboard shortcuts for, 93marking as Favorite, 102, 123rating, 95–103, 123selecting, 97
Clip speedaltering for playback in
Retime Editor, 377–379changes affecting placement of
other clips, 393checking off as to-do item, 385increasing, 381–384overview of, 379–380resetting, 384

534 Index
reversing direction, 380–381slowing down, 383–384trimming adjustments after
changing, 386Close active window
(Command-W), 54Closing
Final Cut Pro X, 34–35Media Browser, 13projects, 156
CNN iReports, publishing project to, 485–489
Coloradding to bumpers, 352adding to countdowns, 357backgrounds, transitions,
263–265mattes, 357–358modifying parameters,
262–265modifying title, 346
Color balancefor edited clips, 147–148for imported clips, 52–53,
55–57Color Board correction tool
correcting luminance, 467, 469–471
manually adjusting color, 454–459
Color enhancementbrightness or luminance
levels, 456–457color balance, 452–454manually, 454–458methods for, 451saturation level, 457–458understanding color basics,
451–452using Match Color function,
457–458Color wheel (vector scope), 452Color-coding
Audio meters, 281–283keyboard shortcuts, 418
Colors window, 263–265, 346, 357Columns, width of, 103Comma (,) key, 154, 212Command-, (comma)
see Preferences windowCommand Editor
(Command-Option-K), 417–419
Command-[ (left bracket), return to project, 209
Command-= (equals), zoom inchanging edited clips, 145creating room in Timeline,
138duplicating projects, 200overwriting clips, 177in Timeline, 31trimming clips, 208working with particular area,
147Command-0. see Project Library
(Command-0)Command-1 (Go to Event
Browser), 128Command-2 (Go to Timeline), 128,
130, 142, 153Command-4. see Inspector
(Command-4)Command-5. see Effects Browser
(Command-5)Command-6 (Show Color Board),
470Command-7 (Show/Hide video
scopes), 455, 468Command-8 (Audio
Enhancements), 316–317Command-9. see Background Tasks
indicator (Command-9)Command-A (select all clips),
43, 83, 291Command-C. see copy
(Command-C)Command-click (select group of
noncontiguous clips), using throughout project, 61
Command-Control-Y (preview audition clips), 185
Command-Delete (delete or move to Trash), 88, 491
Command-drag (creating range selection), 125
Command-E (Master File Share window), 473, 495
Command-F (Filter window), 105–109, 140, 151
Command-G (Create Storyline), 187–188, 211, 271–272
Command-H (Hide Final Cut Pro), 34, 59
Command-I. see Media Import window (Command-I)
Command-K (Keyword Editor), 78–79, 81, 84–87, 94
Command-L (Loop Playback), 93Command-–(minus), zoom out, 32,
138, 200, 259Command-Option-B (Balance
Color), 454Command-Option-click (move
clip’s connection point), 171Command-Option-K (Command
Editor), 417–419Command-Option-Up Arrow (Lift
from Storyline), 191Command-Q (Quit Final Cut Pro),
35Command-R. see Retime Editor
(Command-R)Command-Shift-1 (Show/Hide
Event Library), 195Command-Shift-2 (Show/Hide
Timeline Index), 134, 137, 285, 376, 418
Command-Shift-8 (display Audio meters), 465
Command-Shift-A (deselect clips), 61, 192, 206, 212–213
Command-Shift-K (new Keyword Collection), 112
Command-Shift-Z (redo last command), 214, 234
Command-T (apply default transition), 242–245, 268–269, 308–309
Command-V (paste), 337Command-W (close active
window), 54Command-Y (create audition clips),
186Command-Z (undo last command),
112, 173–174Compatibility pop-up menu,
sharing project, 476, 482Completed List, Timeline Index,
385Compound clips
adding transitions to, 267–273creating for sound effects,
296–297grouping/nesting clips in
Timeline, 271naming, 271–272

Index 535
preserving placement of voiceover clips, 211
understanding, 267Compression pop-up menu, 488–
489, 493Compressor, 496Connect button, 153Connect edit (Q), 150–155, 166–
175, 363Connected clips
adding Overlap lower third as, 336–340
adding titles as, 335applying transitions to,
267–273editing bumpers as, 348moving or deleting separately,
187in Themes Browser, 364
Connection point, moving (Command-Option-click), 171
Consolidate find people results, imported clips, 52–53
Control-’ (apostrophe), move playhead to next marker, 168, 195
Control-– (minus), lower clip volumes 1 dB at a time, 291
Control-; (semicolon), move playhead to previous marker, 168, 195
Control-= (equals), raise clip volumes 1dB at a time, 288, 290, 291
Control-0 (remove all keywords from all clips), 83
Control-D (Change Duration)changing title clip, 352for group of transitions, 270for selected transition,
254–255Control-E (Precision Editor), 226–
234, 243–244Control-F (Favorites), 126–127,
130–131Control-H (hide rejected), 100Control-M (delete marker at current
playhead location), 195Control-R (render selection), 252Control-S (Expand Audio/Video),
230–231, 234Control-Shift-I (play forward), 24
Control-V (Show/Hide Video Animation Editor), 461
Control-Y (Show/Hide Skimmer Info), 79, 84, 88–89
Copy (Command-C)adding lower third, 337applying audio effects, 449copying effects between clips,
437cropping image, 409–410
Copying files, 43, 436–439Copyrights, music, 291Core Audio Format (.caf extension),
293Corner handles, transforming
image, 400–403Countdown, creating with
generator, 357Create New Event (Option-N), 41,
112Create range selection (Shift-
Command-I), 124Create Smart Collections after
analysis, 52–53Create Storyline (Command-G),
187–188, 211, 271–272Create Transition, 272Crop button (Shift-C), 406, 411Cropping images
Ken Burns effect, 413–417overview of, 406, 411–413Trim option, 407–411
Cross Dissolve transitionadding to other storylines, 268applying, 241–245as default transition, 239locating in Timeline Index,
255–256modifying duration, 253–254re-applying as default, 273
Crossfades, audioapplying, 307–309automatically added to video
transitions, 245, 273–275defined, 308parameters, 261
Customize command, keyboard layout, 12
Customizingaudio/video properties for
project, 118destinations menu, 489–496keyboard layout, 12
keyboard shortcuts, 417–419marker name, 165
Cutawayschanging clip speed to extend,
380–381connecting to primary
storyline using markers, 166–175
creating secondary storyline, 188–190
defined, 162using markers to mark,
165–166
DD key (overwrite edit), 177Dashboard. see also Timecode
Audio meter, 280Background Tasks indicator,
53–54checking timecode of skimmer
location, 177modifying transition duration,
254–255not displayed for multiple
transitions, 270viewing project in Timeline,
32Dashcode, 129Date, grouping clips by, 16–17dB (decibels)
adjusting in Audio inspector, 300–302
for audio peaks, 466changing volume on edited
clips, 145–146connecting clips to primary
storyline, 152, 171creating secondary storyline,
190editing audio using, 286monitoring levels in Timeline,
281–282resetting clips to original 0 dB
levels, 302setting levels, 283
Decay ADSR steps, in sounds, 305Decibels (dB). see dB (decibels)Default Event pop-up menu, new
project, 117Delete
blank Event, 41

536 Index
destinations, 491–492rejecting unwanted clip
portion, 100removing clip selections/entire
clip, 202removing keyframes, 319removing titles, 341using Command-Delete
(delete/move to Trash), 88, 491
Delicious Peace media, about, 18Deselect clips (Command-Shift-A),
61, 192, 206, 212–213Destinations
adding, 492combining into bundle for
sharing, 493–495deleting, 491–492duplicating, 494opening Preferences window,
490positioning, 492–493presets for sharing Master
file, 472Record Audio options, 311
Dialogue. see soundDisk
creating Event on hard, 41grouping clips onto external,
17Disk images, 499–504Dock, opening Final Cut Pro
from, 6Double-click, (open marker’s Edit
Marker dialog), 195Down Arrow (move playhead
forward to next clip)appending clips in Timeline,
131connecting clips to primary
storyline, 153trimming with, 213, 229viewing projects in Timeline,
29Dragging clips, to Timeline, 137Drop Shadow effect, 459Duplicate as Audition (Option-Y),
440Duplicate Project
before applying transitions, 240
backing up project and Events, 505
overview of, 199–200saving version of project, 34using Transitions Browser, 246
Duplicate Project and Referenced Events, back up, 505
Duplicating project, 198–200Duration
Change Duration command (Control-D), 254–255, 270, 352
checking length of project before trimming using, 201–202
default crossfade, 308default transition, 240media handles applying
transitions without changing, 242–245
modifying audio crossfades, 274–275
modifying audio fade, 306–307
modifying clip speed, 381–382modifying title clip, 352modifying transitions, 253–
255, 260–261, 269–270replacing clips and, 179role in choosing appropriate
clip, 183–184trimming clips in storyline,
210working with timecode in
generators, 359–362Duration slider, 20, 22, 121DVD, exporting for, 499–503
EE key. see append edit (E)Edge Treatment, 261–262Edit points
covering with cutaways, 166duplicating projects, 200refining and trimming. see
trimmingTrim icon and, 210using set markers as, 172using Shift-? for quick look
at, 214Edited clips, changing, 144–150Editing process, taking notes in, 101Effects
audio, 447–451
auditioning clips with, 183, 439–447
color enhancement, 451–459copying between clips,
436–439keyboard shortcuts for, 461Media Browser displaying, 13modifying parameters,
430–436overview of, 423summary review, 460–461video, 424–430
Effects Browser (Command-5)applying audio effects,
448–450applying Broadcast Safe effect,
471applying Drop Shadow effect,
459applying video effects,
424–429Effects icon, 13Elements category, generators,
356–357End (move playhead to end of
project), 37End point (O key), 94Enhancements pop-up menu, audio,
318Equalization pop-up menu, hum
reduction, 318Esc (Escape) key, 33, 333, 338Event Browser
adding keywords to clips, 77–83
appending clips, 131applying markers to source
clips, 166basic functions, 7–8Command-1 shortcut to, 128controlling snapping, 132creating freeze frames, 396customizing Event using
metadata, 74–75displayed when window is
active, 129editing sound effect clips to
project, 294–297grouping clips, 16–17importing media into Event,
42–44increasing size with pointer,
10

Index 537
inserting clips into primary storyline, 140–144
playing clip in, 37resizing window, 76restoring default settings in, 95screening/marking clips in,
121–126switching between Timeline
and, 128–129viewing clips in, 19–26
Event Libraryapplying keywords to clip
range, 90–94Command-Shift-1 to show/
hide, 234creating new project, 117–119customizing Event using
metadata, 72–77Events stored in, 8importing media into Event,
40–45viewing and sorting Events,
14–17widening to read Event names,
17Events
arranging clips inside, 19–20backing up, 503–508changing display options
in, 44color coded in Event Library,
74Create New Event (Option-N),
41deleting, 68importing folders as Keyword
Collections, 46–51importing media into, 40–45,
58–64, 66overview of, 7–9rule of thumb for, 40viewing and sorting, 14–17
Events, organizing clips inadding keywords, 77–83applying keywords to clip
range, 90–94assigning multiple keywords,
83–90creating Smart Collections,
104–109customizing using metadata,
72–77keyboard shortcuts, 112
overview of, 71–72rating, sorting, and searching,
95–104summary review, 110–112
Expand Audio/Video (Control-S), 230–231, 234
Export pop-up menu, 498–499Exporting, for Blu-Ray, DVD or
disk image, 499–503Exports folder, 478Extend function, trimming
timecode display, 360
FF key. see Favorite (F)Facebook, publishing project to,
485–489Fade handles, 275, 306–307Fade shapes, 307Fades, audio, 305–309Fairly Legal media, 45Fast > 2x, changing clip speed,
381–382Favorite (F)
changing label to descriptive word, 103
Control-F to show Favorite clips/ranges, 126–127, 130–131
inserting clips into primary storyline, 141–142
marking clips/clip range as, 102–104, 123
marking selection in toolbar as, 10
overlapping previously marked Favorite, 124
rating range/selection as, 98viewing clips tagged as, 98
Filmstrip view buttonassigning multiple keywords
to clips, 84creating Smart Collections,
104customizing Event using
metadata, 73, 75identifying clip range/editing
in Timeline, 120–126importing media from
camera, 60Filter pop-up menu
connecting clips to primary storyline, 168
rating, sorting, and searching clips, 95–100
screening/marking clips in Event Browser, 121
Filter window (Command-F), 105–109, 140, 151
Filtering, rated clips, 95Final Cut Pro
Color Board, 454–459hiding and closing, 34–35metadata, 73Projects folder, 119
Finalize Audition (Shift-Option-Y), 186, 314
Find people option, imported clips, 52–53, 55
Finderbacking up project and Events,
504importing media from, 64–66importing media from
camera, 59viewing shared still image
file, 499Find/replace function, changing text
in long credit roll, 354–355Fine-tuning. see rough cut, fine-
tuningFlash transition, adding to other
storylines, 268–269Folders, importing as Keyword
Collections, 45–52Formats, exporting still images,
497–499Freeze frame effect, 395–396Full Screen button, viewing project/
clip in, 33
GGain option, Record Audio, 311Gap clips
inserting with Option-W shortcut, 206
removing clip selections/adding, 201–206
replacing with placeholders, 360–361
within storyline, 192GarageBand source folder, Music
and Sound Browser, 292Generator inspector, 357

538 Index
Generatorsadding timecode, 359–361creating color matte behind
credits, 358creating countdown, 357keyboard shortcuts, 371overview of, 356–357summary review, 370–371
Generators Browser, 356Getting Started, installing software
and book files, 5Ghost waveforms, 321Go to Event Browser (Command-1),
128Go to Timeline (Command-2), 128,
130, 142, 153Group Events by Date, 17Group Events by Disk, 17Group of transitions, changing
duration, 269–270
HH key (Hand tool), 227–228, 233Hand tool (H key), 227–228, 233Handles, media, 207, 209Hard disk, backing up project and
Events to, 504Hide Final Cut Pro (Command-H),
34, 59Hide rejected (Control-H), 100Highlights control, Control Board,
470Hold effect (Shift-H), 386–388Home key (move playhead to start
of clip), 29, 130, 137–138, 142Hue, defined, 451Hum, removing in audio, 315–318Hum Removal, Audio
Enhancements, 317–318
II key (set range start point), 93–94,
123, 141, 169, 215I Think I Thought media, 359Images
in background of transitions, 265–266
creating title theme with still, 364–368
cropping, 406–413transforming, 396–406
Import Media button, Event Browser, 42–43
Import Selected button, 61–63Import tab, Preferences window,
65–66Importing
analyzing/correcting imported clips, 51–58
from camera, 58–64from Finder, 64–66fixing color balance on
imported clips, 454folders, as keyword
collections, 45–51keyboard shortcuts, 69Media Import window. see
Media Import window (Command-I)
media into an Event, 40–45from other applications, 67–68overview of, 39–40still images in project, 369summary review, 68–69
Input Device option, Record Audio, 311
Insert button, 142–143, 176Insert edit (W)
adding generator to project, 363
connecting clips to primary storyline, 172
inserting clips into primary storyline, 144
inserting title into primary storyline, 330
overwriting/replacing clips, 176
Inspector (Command-4). see also Audio inspectorchanging edited clips, 144,
147–150connecting clips to primary
storyline, 171enabling color balance in
Video tab, 56–57modifying effect parameters,
430modifying titles, 330–337, 340modifying transition
parameters, 260–266removing hum, 315–318
Institute of Radio Engineers (IRE), broadcast-safe video, 468–469
Interface, Final Cut Pro Xabout Delicious Peace media,
18exploring, 7–9following workflow, 4–5hiding and closing, 34–35keyboard shortcuts, 36–37opening, 5–7overview of, 3–4resetting with Revert to
Original Layout, 10skimming clips and changing
views, 19–26summary review, 35–36using menus, shortcuts, and
mouse, 9–14viewing and sorting Events,
14–17viewing projects in Timeline,
29–33working in Project Library,
26–29iPhoto, importing still images for
project, 369IRE (Institute of Radio Engineers),
broadcast-safe video, 468–469iTunes, 484iTunes source folder, Music and
Sound Browser, 291
JJ key (play reverse), 24, 32Jagged edge, at end of row of clips,
23J-cuts (split edits), 306
KK key (stop playback), 24, 32, 93K tap J (move playhead one frame
to left), 36K tap L (move playhead one frame
to right), 37Kawomera (Delicious Peace)
Cooperative, 18Ken Burns effect, 399, 413–417Keyboard layout, customizing
keyboard shortcuts, 12Keyboard shortcuts
building rough cut, 158–159connect/insert/append edits,
172customizing, 417–419

Index 539
customizing keyboard layout for, 12
effects, 461fine-tuning rough cut,
233–234finishing rough cut, 194–195importing, 69interface, 36–37organizing clips in Event, 112sharing project, 510sound, 324–325titles, generators and themes,
371transitions, 276trimming, 215
Keyframes, 288–290, 319–321, 466Keyword Collections
adding keywords to clips/creating, 77–83
assigning multiple keywords to clips, 85–90
as color coded in Event Library, 74
connecting clips to primary storyline, 168–175
creating new with Command-Shift-K, 112
creating Smart Collections using, 107, 109
customizing Event using metadata, 75–76
defined, 45editing sound effect clips to
project, 294–297importing folders as, 44–51importing sound effects clips
as, 293inserting clips into primary
storyline, 139–144screening/marking clips using,
120–126Keyword Editor (Command-K),
78–79, 81, 84–87, 94Keyword shortcuts, 81, 87, 91–94Keywords
applying single, to one or more clips, 77–83
applying to clip range, 90–94assigning multiple, to several
clips, 83–90tagging to clips to create
metadata, 72–77
text field not searching against, 99
KJ keys (play backward in slow motion), 37
KL keys (play forward in slow motion), 36
LL key (play forward), 24, 32, 93, 122L-cuts, 306Left Arrow (move playhead to
previous frame), 30, 34, 93, 123
Left edge of edit point, 210Lens flare transition, 251Lesson Projects folder, revealing
contents of, 116Letter X transition, 250, 256–258,
260–262Lift from Storyline (Command-
Option-Up Arrow), 191Lift item/section from Timeline/
leave gap (Shift-Delete), 194, 204
Linear fade option, 307List, viewing clips as, 25List View button
adding keywords to clip range, 90–94
adding keywords to clips, 78audio clips in, 151–152clips in, 25customizing Event with
metadata, 73–77source clips in, 168
Location pop-up menu, backing up project and Events, 505
Loop Playback (Command-L), 93Lower thirds, adding, 335–340Luma, 467Luma channels, 467, 469–470Luminance levels. see brightness
(or luminance levels)
MM key (set marker), 165–166, 203Magnetic Timeline, 9, 133–138,
216, 383Make Default, 268–269, 273Markers
adding to project, 162–167building rough cut, 119–126
connecting cutaways to primary storyline using, 166–175
defined, 165deleting, 175to-do, 376–377editing clip range in Timeline,
124–126keyboard shortcuts, 165–166,
168, 195, 203open Edit Marker dialog with
double-click, 195removing clip selections,
201–203searching, 99–100
Master File Share window (Command-E), 473, 495
Master file, sharing, 471–481Match Color function, 457–458Media Browser, 12–13Media files. see importingMedia handles, 242–245Media Import window
(Command-I)analyzing/correcting imported
clips, 51–52backing up project and Events,
504–505creating camera archive in, 64importing folders as Keyword
Collections, 46, 47, 49importing from tape-based
device, 64importing media from
camera, 58–63importing media into Event,
42–44working with themes, 364
Media Type rule, 106–107, 140Menu bar, 11–13Menus, working with, 9–14Metadata
automatically logged during import, 45
customizing Event using, 73–77
customizing in Master File Share window, 473
embedding into shared files, 479
publishing project to video sharing sites using, 486

540 Index
rejecting unwanted clip portion, 100
searching for clip using, 103understanding, 72–73viewing in Favorites, 98–99
Microphone, recording voiceovers, 309
Minus (–) sign, 155, 210Monitor option, Record Audio, 311Monitoring audio, Roles metadata,
285Motion properties, 375–379, 397–
398, 404Mouse, 9–14, 138Move playhead forward ten frames
(Shift-Right Arrow), 34Move selections
left ten frames with Shift-, (comma), 154
move left one frame with comma (,), 154, 212
Multi-flip transition, 262, 263–266Multi-Touch device, 13, 33Music. see soundMusic and Sound Browser, 291–294
NN key (toggle snapping), 121, 132,
254Names, entering to search, 99Naming conventions
compound clips, 271–272duplicating projects, 200Events, 41Keyword Collections, 48markers, 165new project, 117Smart Collections, 108
Narration, recording voiceovers, 309–314
New Compound Clip (Option-G), 271, 296–297
No Ranges or Keywords filter, 96–98
Normal parameter, Text inspector, 342
Notes, 99, 101–104, 361–362
OO key (set range end point), 92–93,
97, 122–123, 141, 215Opacity, 241–242, 404–406
Opacity slider, 404–406Optical Flow, 391Optimized media, 58Option-\ (backslash), trimming edit
points, 215Option key, 219, 223–224Option-N (Create New Event), 41,
112Option-[ (left bracket), trimming
edit points, 215, 234Option-] (right bracket), trimming
edit points, 215, 234Option-4 (Add Freeze Frame),
preset speed, 395–396Option-click, 126, 150, 200,
257–258Option-drag, 141, 402Option-F (insert freeze frame), in
Timeline, 395Option-G (New Compound Clip),
271, 296–297Option-M (set marker/open Marker
window), 166Option-S. see solo (Option-S)Option-W (insert gap clip), 206Option-X (Clear Selected Range),
62, 126, 141, 471Option-Y (duplicate as Audition),
440Ornate title, 330–335, 340–341OS X Mountain Lion, opening Final
Cut Pro from, 6Over the shoulder (OTS) shot, 141Overlap transitions, 244–245, 272Overwrite to Primary Storyline,
294–295Overwriting clips, 176–177, 206
PP key (Position tool), 205–206Pan Mode pop-up menu, 302–303Panning audio, 302Parameters
modifying effect, 430–436modifying transition, 260–266Transform, 403–404
Paste (Command-V), 337Paste Attributes (Shift-
Command-V), 409–411Pause/play. see Spacebar (play/
pause)Pauses, creating dramatic, 206
PC Connect mode, importing from camera, 59
Peak indicators, Audio meters, 282Percentage size, image
transformations, 400–402Period (.) key, 154, 212Persistent changes, transformations
as, 402Photos Browser, importing still
images from, 369Placeholders, 357, 360–361Play backward in slow motion
(KJ), 37Play clip/project in reverse (Shift-
Spacebar), 37Play forward (Control-Shift-I), 24Play forward in slow motion (KL),
36Play forward (L), 24, 32, 93, 122Play reverse (J), 24, 32Playback
alter clip speed for, 377–379disable audible, 163Loop Playback (Command-L),
93play/pause. see Spacebar (play/
pause)stop (K), 24, 32, 93
Playheaddefined, 22delete marker at current
location of (Control-M), 195
move back one clip (Left Arrow), 30, 34, 93, 123
move back ten frames (Shift-Left Arrow), 34, 38, 190
move back to previous clip (Up Arrow), 23, 34
move forward one frame (Right Arrow), 34, 93, 123
move forward ten frames (Shift-Right Arrow), 32, 34
move forward to next clip (Down Arrow), 29, 131, 153, 213, 229
move left one frame (K tap J), 36
move left ten frames with Shift-, (comma), 213

Index 541
move right one frame [period (.)], 154, 212
move right one frame (K tap L), 37
move right ten frames [Shift-period (.)], 154, 213
move to next marker [Control-’ (apostrophe)], 168, 195
move to previous marker [Control-; (semicolon)], 168, 195
move to range end (Shift-O), 93, 141
move to range start (Shift-I), 93, 121–122, 141
position at end of project (End), 37
position at head of project (Home), 29, 130, 137–138, 142
snapping skimmer to, 22, 215Play/pause. see Spacebar (play/
pause)Plus (+) sign, 155, 210Pointer, 9Position tool (P), 205–206Positioning, resized image clips,
400–402Post-transcoding action (or post-
action) options, 483–485Precision Editor (Control-E), 226–
234, 243–244Preferences window
(Command-, [comma])changing default duration for
freeze frames, 396correcting problem audio, 321creating audio fades, 308customizing destinations,
490–491importing media from Finder,
65trimming clips in storyline,
213using Trim tool, 218
Presetscolor, 459exporting with destination,
472publishing project to Apple
devices, 482speed effect, 392–396
Previewingauditioned clips, 185transitions in Transitions
Browser, 246, 248–249Primary storyline
appended clip automatically placed at end of, 189
appending clips to Timeline, 127–128, 130
changing edited clips in, 144–150
connecting clips to, 150–155inserting clips into, 138–144inserting generator into, 357inserting lower third into, 338inserting title into, 330lifting B-roll clips from,
190–192overwriting sound effect clip
to, 294–295removing clip selections/
adding gaps in, 201–206trimming clips in, 208–216
Projectbacking up, 503–508closing, 156Command-[ shortcut for
returning to, 209creating new, 116–119
Project Library (Command-0)adding markers, 162–167backing up project and Events,
503–508creating new project, 116–119duplicating projects in,
198–200saving version of project in, 34sharing project from, 471sharing projects from, 489showing/hiding, 9working in, 26–29
Propertiescustomizing project audio/
video, 118displaying for selected clip in
Inspector, 150motion, 375–379, 397–398publishing project to video
sharing sites, 486–489Proxy media, creating, 58
QQ key. see connect edit (Q)QuickTime
publishing project to Apple devices, 484–485
sharing Master file, 476, 478–479
QuickView, viewing shared still image file, 499
Quit Final Cut Pro (Command-Q), 35
RR key (Range Selection tool), 203,
388–389Ramping sound levels, 305–309Range. see clip rangeRange end point (O key), 92–93, 97,
122–123, 141, 215Range Selection tool (R key), 203,
388–389Range start point (I key), 93–94,
123, 141, 169, 215Rating buttons, 129Rating clips
creating metadata by, 72as Favorites, 124overview of, 95–103
Record Audio window, voiceovers, 310–314
Recording voiceovers, 309–314Redo last command (Command-
Shift-Z), 214, 234Reference waveforms, 321–322Reject (X) button, 100Release, ADSR steps in sounds, 305Remove (–) button, customizing
destinations, 491Render selection (Control-R), 252Replacing clips, 178–180Reset (X) button, 95, 101, 109, 121Reset parameter, animation menu,
302, 304Reset Speed, 384Resolution
customizing destinations, 493publishing project to Apple
devices, 482publishing project to video
sharing sites, 487–488Resolution independent, editing
as, 40

542 Index
Retime Editor (Command-R)hold effect, 387–388increasing clip speed, 381–384modifying clip playback,
377–379preset speed effects, 391–396reversing direction clip plays,
381–382Retime pop-up menu, 381–382Retiming clips
clip speed, 379–386customizing keyboard
shortcuts, 417–419holds and variable speed
segments, 386–391motion properties and,
375–379overview of, 375preset speed effects, 391–396
Retiming handle, 384, 389–390Return, creating additional line of
text, 333Reverse Clip, retiming option, 380Reverse Normal –100, 384Revert to Original Layout, 10Rewind > 2x preset, 394Right Arrow (move playhead
forward one frame), 34, 93, 123
Right edge of edit point, 210Ripple effect, 207, 210Ripple trims, using Trim tool,
217–218Roll trims, 220Rotating image, 403Rough cut, building
appending clips in Timeline, 126–133
changing edited clips, 144–150closing project, 156connecting clips to primary
storyline, 150–155creating new project, 116–119inserting clips into primary
storyline, 138–144keyboard shortcuts, 158–159overview of, 115–116screening/marking clips,
119–126summary review, 156–157viewing/arranging clips in
Magnetic Timeline, 133–138
Rough cut, fine-tuningapplying Trim tool, 216–224duplicating project, 198–200keyboard shortcuts, 233–234overview of, 197–198removing clip selections/
adding gaps, 201–206summary review, 232–233trimming, 207–216trimming with precision,
224–231Rough cut, finishing
adding markers, 162–166auditioning clips in project,
180–186connecting clips to primary
storyline, 166–175keyboard shortcuts for,
194–195overview of, 161–162overwriting and replacing
clips, 175–180summary review, 193–194working with storylines,
186–192Rules, creating Smart Collections,
106, 108–109
SS key. see skimming, on/off (S)Saturation level, 452, 457–458Saving
camera archives, 64done automatically, 34
Scale percentages, transforming image, 404
Scratch track, 309Screening clips, 119–126Scrolling credits, 352–355S-curve fade option, 307SDHC card, importing media from
cameras, 59–60Searching clips
complex clips in Filter window, 105
entering first letters to start, 256
find/replace title text, 354–355in Music and Sound Browser,
292–294rating by, 95–97
rating clip range as Favorite, 97–98
rejecting unwanted portion, 99–100
in Timeline Index. see Timeline Index
via notes, 101–103Secondary colors, defined, 451Secondary storyline, 187–192,
267–273Select all clips (Command-A), 43,
83, 291Select group of noncontiguous clips
(Command-click), 69Select tool (A), 11Semicolon (;), 229Share button, activating, 472Share icon, 479–480Share inspector, 499Sharing project
backing up projects/Events, 503–508
customizing destinations menu, 489–496
exporting for Blu-ray, DVD, or disk image, 499–503
exporting image from project, 496–499
keyboard shortcuts, 510Master file. see Master file,
sharingoverview of, 463–464preparing project, add visual
timecode, 471preparing project, correct
audio peaks, 465–467preparing project, correct
video, 467–471publishing project to Apple
devices, 481–485publishing project to video
sharing sites, 485–489summary review, 508–509
Shift-. (period), clip moves right by ten frames, 154, 213
Shift-? (play around skimmer), 213–214
Shift-, (comma), clip moves left by ten frames, 154, 213
Shift-C (Crop button), 406, 411Shift-click, 85

Index 543
Shift-Command-8 (Show Audio Meters), 280
Shift-Command-I (create range selection), 124
Shift-Command-V (Paste Attributes), 409–411
Shift-Delete (lift item/section from Timeline and leave gap), 194, 204
Shift-drag (transforming image), 402–403
Shift-H (Hold), 386Shift-I (move playhead to range
start), 93, 121–122, 141Shift-Left Arrow (move playhead
back ten frames), 34, 38, 190Shift-O (move playhead to range
end), 93, 141Shift-Option-N (Show Clip Names),
19, 84Shift-Option-Y (finalize audition),
186Shift-Right Arrow (move playhead
forward ten frames), 32, 34Shift-S (audio skimming), 93, 121–
123, 133, 145Shift-Spacebar (play clip/project in
reverse), 37Shift-T. see Transform (Shift-T)Shift-Z. see zoom to fit (Shift-Z)Shortcuts, 9–14Show Audio Enhancements,
316–318Show Audio Meters (Shift-
Command-8), 280Show Clip Names (Shift-Option-N),
19, 84Show Color Board (Command-6),
454, 470Show Connections, adding markers,
164Show Correction button, 459Show incomplete to-do items
button, Timeline Index, 376Show Skimmer Info (Control-Y),
79, 84Show Standard Markers button, 167Show Waveforms, 100Show/Hide button, transforming
image, 404Show/Hide Event Library
(Command-Shift-1), 8, 15, 195Show/Hide Project Library button, 9
Show/Hide video scopes (Command-7), 455, 468
Skimmer info (Control-Y), 79, 84, 89
Skimmingappending clips to Timeline,
132–133in Clip Browser, 60in Event Browser, 21– 26marking clip range, 121–122in Project Library, 28selecting clip range, 96–98snapping to clips, 132as target location when
zooming Timeline, 200timecode appearing in
Dashboard, 92using location to extend edit
points, 216Skimming, on/off (S), 37, 121–122,
133, 146Slash (/) key, play selection, 93,
122, 178Slide bumper, 348–352Slide mode, Trim tool, 223–224Slip icon, Trim tool, 221–223Slip mode, Trim tool, 221Smart Collections
as color coded in Event Library, 74
creating, 104–109creating after analyzing
imported clips, 53–55customizing Event using
metadata, 75Snapping
adding markers with, 165connecting audio clips to
primary storyline, 154creating secondary storyline,
188trimming small increments by
turning off, 212turning on, 22turning on for audio, 319
Solids category, generators, 356–357, 359
Solo (Option-S)adjusting audio in Timeline,
286–290adjusting levels in Audio
inspector, 299–301, 304creating audio fades, 306–307
creating crossfades, 308monitoring audio levels in
Timeline, 284–285Sorting
Events, 14–17, 97–103rated clips, 95source clips alphabetically, 168
Soundadding music and sound
effects, 291–297adjusting in Timeline, 285–291adjusting levels in Audio
inspector, 298–304correcting problem audio.
see audio, correcting problems
creating fades, 305–309environment, 298keyboard shortcuts, 324–325monitoring in Timeline,
280–285overview of, 279–280recording voiceovers, 309–314setting decibel levels, 283summary review, 323–324
Spacebar (play/pause)appending clips to Timeline,
131defined, 37, 159marking clip range, 121–122stopping preview of
auditioned clips, 185Speakers
lowering volume for sound effects, 293
recording voiceovers, 309in your environment, 298
Speed. see clip speed; retiming clipsSpeed Ramp preset, 392–393Split edits (J-cuts), 306Stereo Left/Right, Pan Amount
slider, 303Still images
applying Ken Burns effect to, 399, 413–417
creating Smart Collections of, 107–109
exporting from project, 496–499
thumbnails of video clips vs., 365
using in project, 369working with themes, 364–369

544 Index
Storylineadding transitions to other,
267–273create (Command-G),
187–188, 271–272primary. see primary storylineworking with, 186–192
Storyline shelf, 188–190, 211–212Style pop-up menu, Text inspector,
342–343Sustain, ADSR steps in sounds, 305Sweetening, audio, 291System Preferences, 298
TT key. see Trim tool (T)Tag options, Timeline Index, 376Text
changing title, 333creating Smart Collections of,
105–107editing for still image or
graphic, 365–369searching for clips by, 99typing title in Viewer, 333
Text field, Text inspector, 343Text inspector
adding bumper title, 350–351choosing stylized fonts in,
342–344modifying font and color for
credits, 354modifying title color, 346–347
Textures category, generators, 356–357
Themesadding to titles, 363–369keyboard shortcuts, 371summary review, 370–371templates for Blu-ray output,
502Themes Browser, 363–369Timecode
checking skimmer location in clip, 177
Dashboard and, 23–24in Dashboard when skimming
clips, 92defined, 24displayed when Timeline
window is active, 129
displaying marker location, 166
modifying transition duration, 254–255
preparing for project output with visual, 471
working with generators, 359–360
Timelineaccessing tools to edit project
in, 10–11adjusting view in, 144–145appending clips in, 126–133basic functions of, 7, 9Command-2 shortcut to, 153controlling snapping in, 132creating room for new
material in, 137–138display when window is active,
129displaying stacked clips in, 170identifying clip range/editing
in, 120–126inserting clips into primary
storyline, 143–144new project opening
automatically in, 118playing clip in, 37switching between Event
Browser and, 128viewing projects in, 29–33viewing voiceover recording
in, 312Timeline, adjusting audio in
within clip range using keyframes, 288–290
for entire project, 291overview of, 285using menu command or
keyboard shortcut for, 288
using Solo function, 286–290Timeline, monitoring audio in
disabling clips from audio mix, 283–284
with Roles metadata, 285using Audio meters to track
levels, 280–283using Solo function, 284–285
Timeline history arrow, 240Timeline Index
changing clip speed in, 380–385
closing to allow room for project clips, 187
connecting clips to primary storyline, 167, 172
deleting transitions from, 260exporting image from project,
497locating title clips to change
in, 341–342searching for transitions in,
255–256, 258, 260show/hide with Command-
Shift-2, 134, 137, 285, 376, 418
to-do markers in, 376–377, 385
viewing/arranging clips in Magnetic Timeline, 134–137
viewing/navigating markers, 167
Title inspectoradding bumper title, 350–352adding imported stills to
project, 365–367changing fonts in, 344–346
Title safe zonesadding lower third, 338–339inserting title into primary
storyline, 332modifying titles, 344–347turning on/off, 348
Titlesadding bumpers, 347–352adding credits, 352–355adding lower third, 335–340adding themes to, 363–369changing font and color of
text, 344–347determining name of font
used, 340–341keyboard shortcuts, 371locating title clip for font
change, 341–342overview of, 340stylized font options, 342–344summary review, 370–371using alpha channels
for transparent backgrounds, 330
using Titles Browser, 328–335Titles Browser
action safe zones, 332
Index 545
adding bumpers, 347–352adding credits, 352–355adding lower third, 336applying title, 334–335categories and subcategories,
329inserting title into primary
storyline, 330overview of, 328–329repositioning title in Viewer,
334selecting Build In/Out
category, 330typing in text in Viewer, 333
Toolbar, resizing windows in, 10Tools pop-up menu, 10–11Transcoding media files, 58Transform (Shift-T), 400–401,
407–409Crop controls vs., 407cropping images, 409–411transforming images, 399–403
Transforming clipscropping image, 406–413customizing keyboard
shortcuts, 417–419Ken Burns effect, 413–417transforming image, 396–406
Transforming imagesdisplay Scale percentages, 404motion properties of finished
project, 397–398opacity, 404–406overview of, 396–397Transform controls in Viewer,
399–403Transform parameters,
403–404using Shift-drag, 402–403
Transition inspector, Audio Crossfade controls, 309
Transitionsadding to other storylines/
compound clips, 267–273
applying video, 241–246audio transitions, 273–275changing parameters in
Inspector, 260–266Command-T shortcut for
default, 242–245, 268–269, 308–309
cross dissolves as default, 239
default duration for, 240deleting from Timeline, 260keyboard shortcuts, 276modifying durations, 253–256modifying Letter X transition,
256–258modifying Video Wall
transition, 258–260overview of, 237–238preparing for, 238–240previewing frame by frame,
258summary review, 276–277theme, 363using Transitions Browser. see
Transitions BrowserTransitions Browser
applying Flash transition, 268–269
applying Lens Flare, 251applying Letter X, 250applying Multi-flip transition,
262–263applying Video Wall, 251–252dragging transition to
Timeline edit from, 250opening, 247–248overview of, 246previewing transitions,
248–249replacing one transition with
another, 252Transparency, adjusting image
opacity, 404–406Transport controls, Viewer, 31Trim icon, 210Trim info flag, 210Trim option, Crop control, 407–409Trim targets, 215Trim tool (T)
adjusting audio/video separately, 231
enabling detailed trimming feedback, 219
features of, 216–217ripple mode, 217–218roll mode, 220showing both clips in edit
point, 218slide mode, 223–224slip mode, 221–223using Left/Right Arrow keys
with edit points in, 231
Trimmingafter changing clip speed, 386applying Trim tool. see Trim
tool (T)keyboard shortcuts, 215small increments, 212understanding, 207–216
Trimming with precisionadjusting audio/video
separately, 230–231incoming clip, 228–229opening Precision Editor,
226–227opening project, 225–226outgoing clip, 227–228overview of, 224–225roll trims, 229–230using Hand tool, 227–228
Typeface options, Title inspector, 344
UUndo last command (Command-Z),
112, 173–174Up, modifying volume, 288Up Arrow (move playhead back to
previous clip), 23, 34Use Image Well, 265–266User metadata, 73
VV key (Disable/Enable)
audio playback, 163clips from audio mix, 283–284editing sound effect clips to
project, 297Variable speed segments, and holds,
386–391Vector scope (color wheel), 452Video
customizing properties for, 118
effects, 424–430generators. see generators
Video Animation Editor (Control-V), 430, 433–436, 439, 447, 461
Video inspectoradjusting image opacity,
404–406changing edited clips, 147–148color balancing, 453–454

546 Index
effects to transform titles in, 347
enabling color balance, 56–57transform motion parameters,
404transforming image, 403
Video scopes, 455, 468–470Video sharing sites, publishing
project to, 485–489Video skimming (Shift-S), 132Video transitions, 241–246Video Wall transition, 251–252,
258–259View menu, skimming clips in, 21View Notes, Generator inspector,
361–362Viewer
adding lower third title in, 334–337
basic function of, 7decreasing size of, 10display when Event Browser
window is active, 129display when Timeline
window is active, 129displaying clip in, 21displaying stacked clips in, 170editing text for still image or
graphic, 367–369repositioning title in, 334syncing sound effects with
video action, 296Transform controls in, 399turning title/action safe zones
off and on, 348typing title in, 333video scopes open in, 455viewing projects in Timeline,
30Viewer, Media Import, 43Viewing
clips in Magnetic Timeline, 133–138
Events, 14–17
Vimeo, publishing project to, 485–489
Visual indicators, trimming clips, 215–216
Voiceoversadjusting audio level, 299–301preserving current placement,
211recording, 309–314trimming storyline clips to
match, 208, 210–212Volume
adjusting in Audio inspector, 298–304
adjusting in Timeline, 285–291
adjusting when recording voiceovers, 309
changing on edited clips, 144–150
lowering one dB at a time, 291monitoring audio levels in
Timeline, 280–285raising one dB at a time, 288,
290–291, 309Volume and Pan control panel,
Audio inspector, 300–303Volume slider, Inspector
adjusting levels in Audio inspector, 300–302
changing edited clips, 150connecting clips to primary
storyline, 171creating secondary storyline,
189–190Volume System Status icon, 298
WW key. see insert edit (W)Wally trophy, 130Waveform Monitor, enhancing
color, 456Waveforms
adjusting audio peaks, 466–467
changing edited clips, 145connecting audio clips to
primary storyline, 152–155
correcting luminance in video, 468–470
creating audio fades, 307reference, 321–322removing hum, 316viewing ADSR steps in shapes
of, 305Weighted search, 105White-balance, color basics, 451Window menu, 11–13Workflows, following, 4–5
XX (reject button), 100
YYouTube, publishing project to,
485–489
ZZero to Hero media, 119Zoom
in. see Command-= (equals), zoom in
out. see Command-–(minus), zoom out
Zoom tool (Z key) in toolbar, 200, 233
Zoom to fit (Shift-Z)creating Smart Collections,
104duplicating projects, 200out of view clips after opening
Timeline Index, 135–136trimming clips, 208viewing all clips in Timeline,
131, 151