Embed Size (px)
DESCRIPTION
Welcome to the AutoCAD 2007: Conceptual Design Autodesk Official Training Courseware (AOTC),a training course for use in Authorized Training Center (ATC) locations, corporate training settings, andother classroom settings.
Citation preview
7/17/2019 AOTC AutoCAD 2007 Conceptual Design-ToC
http://slidepdf.com/reader/full/aotc-autocad-2007-conceptual-design-toc 1/9
AutoCAD®
2007
Conceptual Design
Autodesk® OfficialTraining Courseware(AOTC)
00127 050008 1705A
May 2006

7/17/2019 AOTC AutoCAD 2007 Conceptual Design-ToC
http://slidepdf.com/reader/full/aotc-autocad-2007-conceptual-design-toc 2/9
© Copyright 2006 Autodesk, Inc.All rights reserved.
This publication, or parts thereof, may not be reproduced in any form, by any method, for any purpose.
AUTODESK, INC., MAKES NO WARRANTY, EITHER EXPRESS OR IMPLIED, INCLUDING BUT NOT LIMITED TO ANY IMPLIED WARRANTIES OF MERCHANTABILITY ORFITNESS FOR A PARTICULAR PURPOSE REGARDING THESE MATERIALS, AND MAKES SUCH MATERIALS AVAILABLE SOLELY ON AN “AS-IS” BASIS.
IN NO EVENT SHALL AUTODESK, INC., BE LIABLE TO ANYONE FOR SPECIAL, COLLATERAL, INCIDENTAL, OR CONSEQUENTIAL DAMAGES IN CONNECTION WITH ORARISING OUT OF PURCHASE OR USE OF THESE MATERIALS. THE SOLE AND EXCLUSIVE LIABILITY TO AUTODESK, INC., REGARDLESS OF THE FORM OF ACTION,SHALL NOT EXCEED THE PURCHASE PRICE OF THE MATERIALS DESCRIBED HEREIN.
Autodesk, Inc., reserves the right to revise and improve its products as it sees fit. This publication describes the state of this product at the time of its publication,and may not reflect the product at all times in the future.
Autodesk Trademarks
The following are registered trademarks of Autodesk, Inc., in the USA and other countries: 3DEC (design/logo), 3December, 3December.com, 3D Studio, 3D StudioMAX, 3D Studio VIZ, 3ds Max, ActiveShapes, Actrix, ADI, AEC-X, Alias, Alias (swirl design/logo), Alias|Wavefront (design/logo), ATC, AUGI, AutoCAD, AutoCAD LT,Autodesk, Autodesk Envision, Autodesk Inventor, Autodesk Map, Autodesk MapGuide, Autodesk Streamline, Autodesk WalkThrough, Autodesk World, AutoLISP,AutoSketch, Backdraft, Bringing information down to earth, Buzzsaw, CAD Overlay, Can You Imagine, Character Studio, Cinepak, Cinepak (logo), Civil 3D, Cleaner,Combustion, Constructware, Create>what’s>Next (design/logo), DesignStudio, Design|Studio (design/logo), Design Your World, Design Your World (design/logo), EditDV, Education by Design, FBX, Filmbox, Gmax, Heidi, HOOPS, HumanIK, i-drop, IntroDV, Kaydara, Kaydara (design/logo), Lustre, Maya, MechanicalDesktop, ObjectARX, Open Reality, PortfolioWall, Powered with Autodesk Technology (logo), ProjectPoint, RadioRay, Reactor, Revit, SketchBook, Visual, VisualConstruction, Visual Drainage, Visual Hydro, Visual Landscape, Visual Roads, Visual Survey, Visual Toolbox, Visual Tugboat, Visual LISP, Voice Reality, Volo, WHIP!,and WHIP! (logo).
The following are trademarks of Autodesk, Inc., in the USA and other countries: AliasStudio, AutoCAD Learning Assistance, AutoCAD Simulator, AutoCAD SQLExtension, AutoCAD SQL Interface, AutoSnap, AutoTrack, Built with ObjectARX (logo), Burn, CAiCE, Cinestream, Cleaner Central, ClearScale, Colour Warper,Content Explorer, Dancing Baby (image), DesignCenter, Design Doctor, Designer’s Toolkit, DesignKids, DesignProf, DesignServer, Design Web Format, DWF,DWG, DWG Linking, DWG (logo), DWG TrueConvert, DWG TrueView, DXF, Extending the Design Team, GDX Driver, Gmax (logo), Gmax ready (logo), Heads-upDesign, Incinerator, LocationLogic, MotionBuilder, ObjectDBX, Plasma, PolarSnap, Productstream, RealDWG, Real-time Roto, Render Queue, ShowCase,StudioTools, Subcontractor Desktop, Topobase, Toxik, Visual Bridge, Visual Syllabus, and Wiretap.
Autodesk Canada Co. Trademarks
The following are registered trademarks of Autodesk Canada Co. in the USA and/or Canada and other countries: Discreet, Fire, Flame, Flint, Flint RT, Frost, Glass,Inferno, MountStone, Riot, River, Smoke, Sparks, Stone, Stream, Vapour, Wire.
The following are trademarks of Autodesk Canada Co., in the USA, Canada, and/or other countries: Backburner, Multi-Master Editing.
Third Party Trademarks
All other brand names, product names, or trademarks belong to their respective holders.
Third Party Software Program Credits
Microsoft and Windows are registered trademarks of Microsoft Corporation in the United States and/or other countries.
ACIS copyright © 1989–2001 Spatial Corp. Portions copyright © 2002 Autodesk, Inc.
AnswerWorks 4.0 ©; 1997–2003 WexTech Systems, Inc. Portions of this software © Vantage-Knexys. All rights reserved.
Copyright © 1997 Microsoft Corporation. All rights reserved.
Copyright © 1988–1997 Sam Leffler.
Copyright © 1991–1997 Silicon Graphics, Inc. AutoCAD ® 2007 and AutoCAD LT ® 2007 are produced under a license of data derived from DIC Color Guide ® from Dainippon Ink and Chemicals,Inc. Copyright © Dainippon Ink and Chemicals, Inc. All rights reserved. DIC and DIC Color Guide are registered trademarks of Dainippon Ink andChemicals, Inc.
International CorrectSpell™ Spelling Correction System © 1995 by Lernout & Hauspie Speech Products, N.V. All rights reserved.
InstallShield™ 3.0. copyright © 1997 InstallShield Software Corporation. All rights reserved.
Macromedia ® and Flash ® are registered trademarks or trademarks of Adobe Systems Incorporated in the United States or other countries.
PANTONE ® Colors displayed in the software application or in the user documentation may not match PANTONE-identified standards. Consult currentPANTONE Color Publications for accurate color.
PANTONE ® and other Pantone, Inc. trademarks are the property of Pantone, Inc. © Pantone, Inc., 2002.
Pantone, Inc. is the copyright owner of color data and/or software which are licensed to Autodesk, Inc., to distribute for use only in combination withcertain Autodesk software products. PANTONE Color Data and/or Software shall not be copied onto another disk or into memory unless as part of theexecution of this Autodesk software product.
Portions copyright © 1991–1996 Arthur D. Applegate. All rights reserved.
Portions of this software are based on the work of the Independent JPEG Group.
RAL DESIGN © RAL, Sankt Augustin, 2002.
RAL CLASSIC © RAL, Sankt Augustin, 2002.
Representation of the RAL Colors is done with the approval of RAL Deutsches Institut für Gütesicherung und Kennzeichnung e.V. (RAL German Institute for Quality Assurance and Certification, re. Assoc.), D-53757 Sankt Augustin.
Typefaces from the Bitstream ® typeface library copyright 1992.
Typefaces from Payne Loving Trust © 1996. All rights reserved.
Printed and Help produced with Idiom WorldServer™.
GOVERNMENT USE
Use, duplication, or disclosure by the U.S. Government is subject to restrictions as set forth in FAR 12.212 (Commercial Computer Software-Restricted Rights) andDFAR 227.7202 (Rights in Technical Data and Computer Software), as applicable.
7/17/2019 AOTC AutoCAD 2007 Conceptual Design-ToC
http://slidepdf.com/reader/full/aotc-autocad-2007-conceptual-design-toc 3/9
iii
Contents
Introduction. . . . . . . . . . . . . . . . . . . . . . . . . . . . . . . . . . . . . . . . . . . . . . . . . . . . . . v
Lessons . . . . . . . . . . . . . . . . . . . . . . . . . . . . . . . . . . . . . . . . . . . . . . . . . . . . . . . . . . 1
Lesson 1: Integrating Raster Images with 3D Models . . . . . . . . . . . . . . . . . . . . . . . 1Overview. . . . . . . . . . . . . . . . . . . . . . . . . . . . . . . . . . . . . . . . . . . . . . . . . . . . . . . . . . . . 1About Raster Images. . . . . . . . . . . . . . . . . . . . . . . . . . . . . . . . . . . . . . . . . . . . . . . . . 2Applications of Raster Image Integration . . . . . . . . . . . . . . . . . . . . . . . . . . . . . 3
Process for Integrating Raster Images with 3D Models . . . . . . . . . . . . . . . . 4Exercise: Use Raster Images with 3D Models . . . . . . . . . . . . . . . . . . . . . . . . . 6Lesson 2: Massing Shapes with 3D Solids . . . . . . . . . . . . . . . . . . . . . . . . . . . . . . . . . . 9
Overview. . . . . . . . . . . . . . . . . . . . . . . . . . . . . . . . . . . . . . . . . . . . . . . . . . . . . . . . . . . . 9About Massing Shapes with D Solids . . . . . . . . . . . . . . . . . . . . . . . . . . . . . . . . 10Creating a Model Using Presspull . . . . . . . . . . . . . . . . . . . . . . . . . . . . . . . . . . . 12Guidelines for Massing Shapes with 3D Solids . . . . . . . . . . . . . . . . . . . . . . . 14Exercise: Mass Shapes with 3D Solids . . . . . . . . . . . . . . . . . . . . . . . . . . . . . . . 15
Lesson 3: Using the Sun. . . . . . . . . . . . . . . . . . . . . . . . . . . . . . . . . . . . . . . . . . . . . . . . . . 19Overview. . . . . . . . . . . . . . . . . . . . . . . . . . . . . . . . . . . . . . . . . . . . . . . . . . . . . . . . . . . 19About the Sun. . . . . . . . . . . . . . . . . . . . . . . . . . . . . . . . . . . . . . . . . . . . . . . . . . . . . . 20About the Light Control Panel . . . . . . . . . . . . . . . . . . . . . . . . . . . . . . . . . . . . . . 21
Specifying the North Direction and a Geographic Location. . . . . . . . . . . 22About the Sun Properties Palette. . . . . . . . . . . . . . . . . . . . . . . . . . . . . . . . . . . . 25Exercise: Use the Sun . . . . . . . . . . . . . . . . . . . . . . . . . . . . . . . . . . . . . . . . . . . . . . 27
Lesson 4: Using Visual Styles . . . . . . . . . . . . . . . . . . . . . . . . . . . . . . . . . . . . . . . . . . . . . 29Overview. . . . . . . . . . . . . . . . . . . . . . . . . . . . . . . . . . . . . . . . . . . . . . . . . . . . . . . . . . . 29About Visual Styles . . . . . . . . . . . . . . . . . . . . . . . . . . . . . . . . . . . . . . . . . . . . . . . . . 30Using the Visual Styles Manager. . . . . . . . . . . . . . . . . . . . . . . . . . . . . . . . . . . . . 32Using the Visual Styles Control Panel . . . . . . . . . . . . . . . . . . . . . . . . . . . . . . . . 34Exporting Visual Styles. . . . . . . . . . . . . . . . . . . . . . . . . . . . . . . . . . . . . . . . . . . . . . 36Exercise: Use and Create Visual Styles . . . . . . . . . . . . . . . . . . . . . . . . . . . . . . 40
Lesson 5: Using Materials . . . . . . . . . . . . . . . . . . . . . . . . . . . . . . . . . . . . . . . . . . . . . . . . 43Overview. . . . . . . . . . . . . . . . . . . . . . . . . . . . . . . . . . . . . . . . . . . . . . . . . . . . . . . . . . . 43
About Materials . . . . . . . . . . . . . . . . . . . . . . . . . . . . . . . . . . . . . . . . . . . . . . . . . . . . 44Working with Predefined Materials. . . . . . . . . . . . . . . . . . . . . . . . . . . . . . . . . . 46Creating and Editing Materials . . . . . . . . . . . . . . . . . . . . . . . . . . . . . . . . . . . . . . 49Exercise: Add Materials to Your Conceptual Design . . . . . . . . . . . . . . . . . 55
7/17/2019 AOTC AutoCAD 2007 Conceptual Design-ToC
http://slidepdf.com/reader/full/aotc-autocad-2007-conceptual-design-toc 4/9
iv ■ Contents
Lesson 6: Navigating the Model . . . . . . . . . . . . . . . . . . . . . . . . . . . . . . . . . . . . . . . . . . 59Overview. . . . . . . . . . . . . . . . . . . . . . . . . . . . . . . . . . . . . . . . . . . . . . . . . . . . . . . . . . . 59Walking and Flying Through a Model. . . . . . . . . . . . . . . . . . . . . . . . . . . . . . . . 60Recording an Animation . . . . . . . . . . . . . . . . . . . . . . . . . . . . . . . . . . . . . . . . . . . . 64Using Animation Paths . . . . . . . . . . . . . . . . . . . . . . . . . . . . . . . . . . . . . . . . . . . . . 66Exercise: Visualize Your Conceptual Design . . . . . . . . . . . . . . . . . . . . . . . . . 68
Lesson 7: Conceptual Design Project Challenge . . . . . . . . . . . . . . . . . . . . . . . . . . 71
Overview. . . . . . . . . . . . . . . . . . . . . . . . . . . . . . . . . . . . . . . . . . . . . . . . . . . . . . . . . . . 71Exercise: Conceptual Design – Project Challenge . . . . . . . . . . . . . . . . . . . 72
Appendix A: Taking Your Conceptual Design to the Next Level . . . . . 77
Lesson 8: Using Lights . . . . . . . . . . . . . . . . . . . . . . . . . . . . . . . . . . . . . . . . . . . . . . . . . . . 79About Lighting . . . . . . . . . . . . . . . . . . . . . . . . . . . . . . . . . . . . . . . . . . . . . . . . . . . . . 80 The Light Control Panel of the Dashboard . . . . . . . . . . . . . . . . . . . . . . . . . . . 83Adding Lights to a Scene . . . . . . . . . . . . . . . . . . . . . . . . . . . . . . . . . . . . . . . . . . . 84About Selecting Lights in a Scene . . . . . . . . . . . . . . . . . . . . . . . . . . . . . . . . . . . 86About Editing Lights in a Scene . . . . . . . . . . . . . . . . . . . . . . . . . . . . . . . . . . . . . 87Exercise: Work with Lights in a Scene . . . . . . . . . . . . . . . . . . . . . . . . . . . . . . . 93
Lesson 9: Rendering . . . . . . . . . . . . . . . . . . . . . . . . . . . . . . . . . . . . . . . . . . . . . . . . . . . . . 97Overview. . . . . . . . . . . . . . . . . . . . . . . . . . . . . . . . . . . . . . . . . . . . . . . . . . . . . . . . . . . 97About the Rendering Environment and Render Presets . . . . . . . . . . . . . . 98Rendering Views, Cropped Regions, and Selected Objects . . . . . . . . . . . 99About the Render Window and Image Information . . . . . . . . . . . . . . . . . 100Render Output Size and Format. . . . . . . . . . . . . . . . . . . . . . . . . . . . . . . . . . . . 103Rendering to a File . . . . . . . . . . . . . . . . . . . . . . . . . . . . . . . . . . . . . . . . . . . . . . . . 105Advanced Rendering . . . . . . . . . . . . . . . . . . . . . . . . . . . . . . . . . . . . . . . . . . . . . . 105Exercise: Render a Scene . . . . . . . . . . . . . . . . . . . . . . . . . . . . . . . . . . . . . . . . . . 108
Appendix B: Additional Resources . . . . . . . . . . . . . . . . . . . . . . . . . . . . . . . 111
Courseware from Autodesk . . . . . . . . . . . . . . . . . . . . . . . . . . . . . . . . . . . . . . . . . . . . . 112Autodesk Authorized Training Centers. . . . . . . . . . . . . . . . . . . . . . . . . . . . . . . . . . . 114Autodesk Certification . . . . . . . . . . . . . . . . . . . . . . . . . . . . . . . . . . . . . . . . . . . . . . . . . . 114Autodesk Consulting. . . . . . . . . . . . . . . . . . . . . . . . . . . . . . . . . . . . . . . . . . . . . . . . . . . . 114Autodesk Developer Network . . . . . . . . . . . . . . . . . . . . . . . . . . . . . . . . . . . . . . . . . . . 114Product Support . . . . . . . . . . . . . . . . . . . . . . . . . . . . . . . . . . . . . . . . . . . . . . . . . . . . . . . . 114
7/17/2019 AOTC AutoCAD 2007 Conceptual Design-ToC
http://slidepdf.com/reader/full/aotc-autocad-2007-conceptual-design-toc 5/9
v
Introduction
Welcome to the AutoCAD 2007: Conceptual Design Autodesk Official Training Courseware (AOTC),a training course for use in Authorized Training Center (ATC) locations, corporate training settings, andother classroom settings.
Although this courseware is designed for instructor-led courses, you can also use it for self-pacedlearning. The courseware encourages self-learning through the use of the AutoCAD® Help system.
This introduction covers the following topics:
■ Course objectives■ Elements of conceptual design■ Prerequisites■ Using this courseware■ CD contents■ Completing the exercises■ Installing the exercise data files from the CD■ Imperial and metric datasets■ Notes, tips, and warnings■ Feedback
This courseware is complementary to the software documentation. For detailed explanations offeatures and functionality, refer to the Help in the software.
Course Objectives
This course discusses how to use AutoCAD 2007 to create conceptual designs. Using only the coreAutoCAD commands, you can create compelling conceptual designs using simple techniques andcommands to quickly mass shapes, use raster images, and visualize your designs with materials, visualstyles, and animated walk-throughs.
After completing this course, you will be able to:
■
Apply raster images to drawings with 3D solids.■ Use commands such as Extrude and Presspull to mass buildings and other structures in the
conceptual design.■ Use the sun to enhance outdoor scenes of your 3D models.■ Create, apply, and manage visual styles and visual style overrides.■ Create and edit materials and apply them to a model.■ Use the 3Dfly, 3Dwalk, and Motion Path Animation commands to navigate models.■ Take a residential floor plan example through the various stages of conceptual design.
7/17/2019 AOTC AutoCAD 2007 Conceptual Design-ToC
http://slidepdf.com/reader/full/aotc-autocad-2007-conceptual-design-toc 6/9
vi ■ Introduction
Elements of Conceptual Design
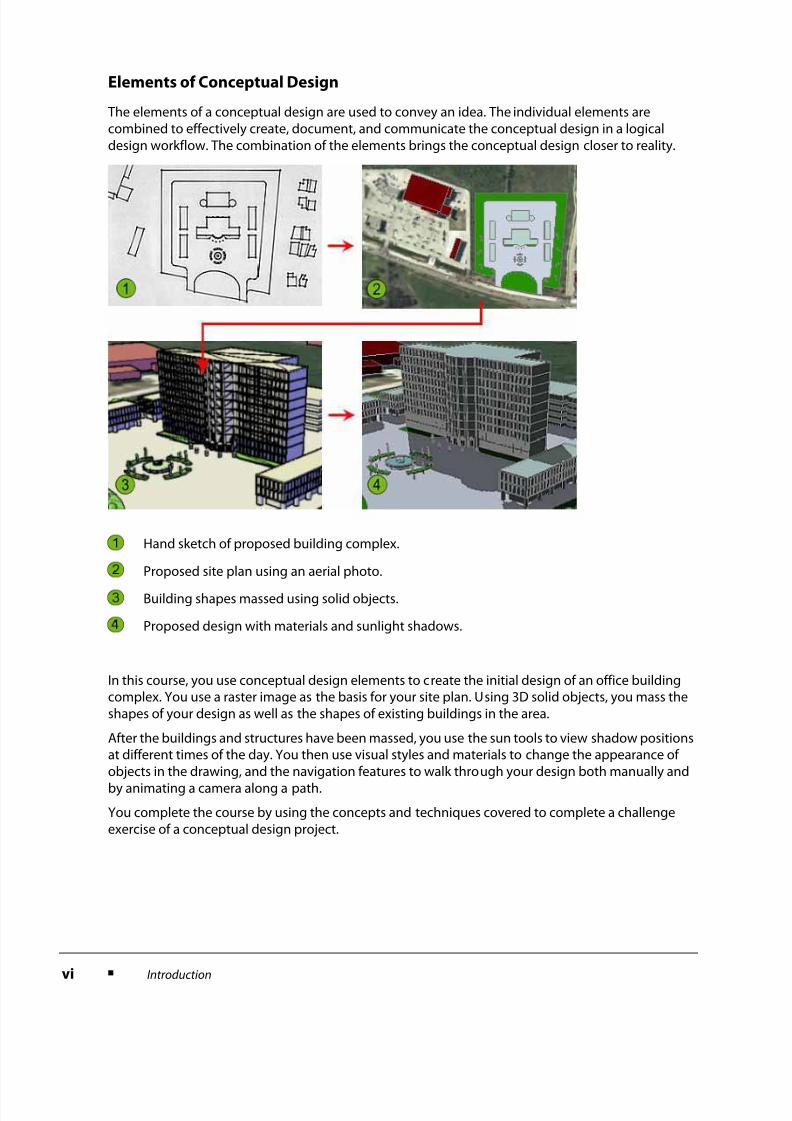
The elements of a conceptual design are used to convey an idea. The individual elements arecombined to effectively create, document, and communicate the conceptual design in a logicaldesign workflow. The combination of the elements brings the conceptual design closer to reality.
In this course, you use conceptual design elements to create the initial design of an office buildingcomplex. You use a raster image as the basis for your site plan. Using 3D solid objects, you mass theshapes of your design as well as the shapes of existing buildings in the area.
After the buildings and structures have been massed, you use the sun tools to view shadow positionsat different times of the day. You then use visual styles and materials to change the appearance ofobjects in the drawing, and the navigation features to walk through your design both manually and
by animating a camera along a path.
You complete the course by using the concepts and techniques covered to complete a challengeexercise of a conceptual design project.
Hand sketch of proposed building complex.
Proposed site plan using an aerial photo.
Building shapes massed using solid objects.
Proposed design with materials and sunlight shadows.
7/17/2019 AOTC AutoCAD 2007 Conceptual Design-ToC
http://slidepdf.com/reader/full/aotc-autocad-2007-conceptual-design-toc 7/9
Introduction ■
vii
Prerequisites
This course is designed for the experienced user who needs to create, modify, or present conceptualdesigns using AutoCAD.
It is recommended that you have a working knowledge of:
■ AutoCAD.■ Architectural or engineering conceptual design concepts.■ Fundamental geometric and three-dimensional drafting terms.■ Microsoft® Windows® 2000 or Microsoft® Windows® XP.
Using This Courseware
The lessons in this courseware are independent of each other. However, it is recommended that youcomplete these lessons in the order that they are presented unless you are familiar with the conceptsand functionality described in those lessons.
Each lesson contains one or more exercises, practical, real-world examples for you to practice usingthe functionality you have just learned. Each exercise contains step-by-step procedures and graphicsto help you complete the exercise successfully.
The lessons in the Appendix are not central to this course but are provided if you have additional timein class, or wish to complete them in your own time after class.
CD Contents
The CD attached to the back cover of this book contains all the data and drawings you need tocomplete the exercises in this course.
To complete some lessons in this course, you must have installed the Materials Library duringinstallation.
7/17/2019 AOTC AutoCAD 2007 Conceptual Design-ToC
http://slidepdf.com/reader/full/aotc-autocad-2007-conceptual-design-toc 8/9
viii ■ Introduction
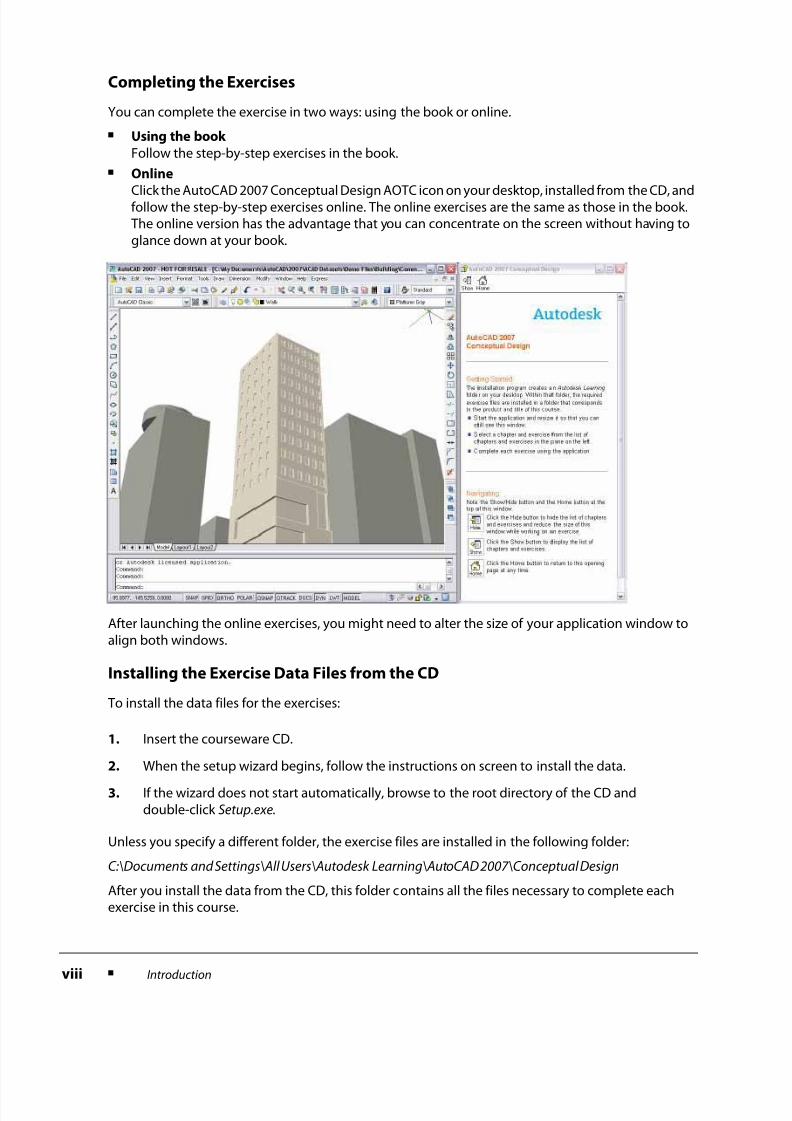
Completing the Exercises
You can complete the exercise in two ways: using the book or online.
■ Using the book
Follow the step-by-step exercises in the book.■ Online
Click the AutoCAD 2007 Conceptual Design AOTC icon on your desktop, installed from the CD, andfollow the step-by-step exercises online. The online exercises are the same as those in the book. The online version has the advantage that you can concentrate on the screen without having toglance down at your book.
After launching the online exercises, you might need to alter the size of your application window toalign both windows.
Installing the Exercise Data Files from the CD
To install the data files for the exercises:
Unless you specify a different folder, the exercise files are installed in the following folder:
C:\Documents and Settings\All Users\Autodesk Learning\AutoCAD 2007\Conceptual Design
After you install the data from the CD, this folder contains all the files necessary to complete eachexercise in this course.
1. Insert the courseware CD.
2. When the setup wizard begins, follow the instructions on screen to install the data.
3. If the wizard does not start automatically, browse to the root directory of the CD anddouble-click Setup.exe.
7/17/2019 AOTC AutoCAD 2007 Conceptual Design-ToC
http://slidepdf.com/reader/full/aotc-autocad-2007-conceptual-design-toc 9/9
Introduction ■
ix
Imperial and Metric Datasets
In exercises that specify units of measurement, alternative files are provided as shown in thefollowing example:
■ Open i_stair_settings.dwg (imperial) or m_stair_settings.dwg (metric).
In the exercise steps, the imperial value is followed by the metric value in parentheses as shown in the
following example:
■ For Length, enter 13'2" (4038 mm).
For exercises with no specific units of measurement, files are provided as shown in thefollowing example:
■ Open c_stair_settings.dwg (common).
In the exercise steps, the unitless value is specified as shown in the following example:
■ For Length, enter 400.
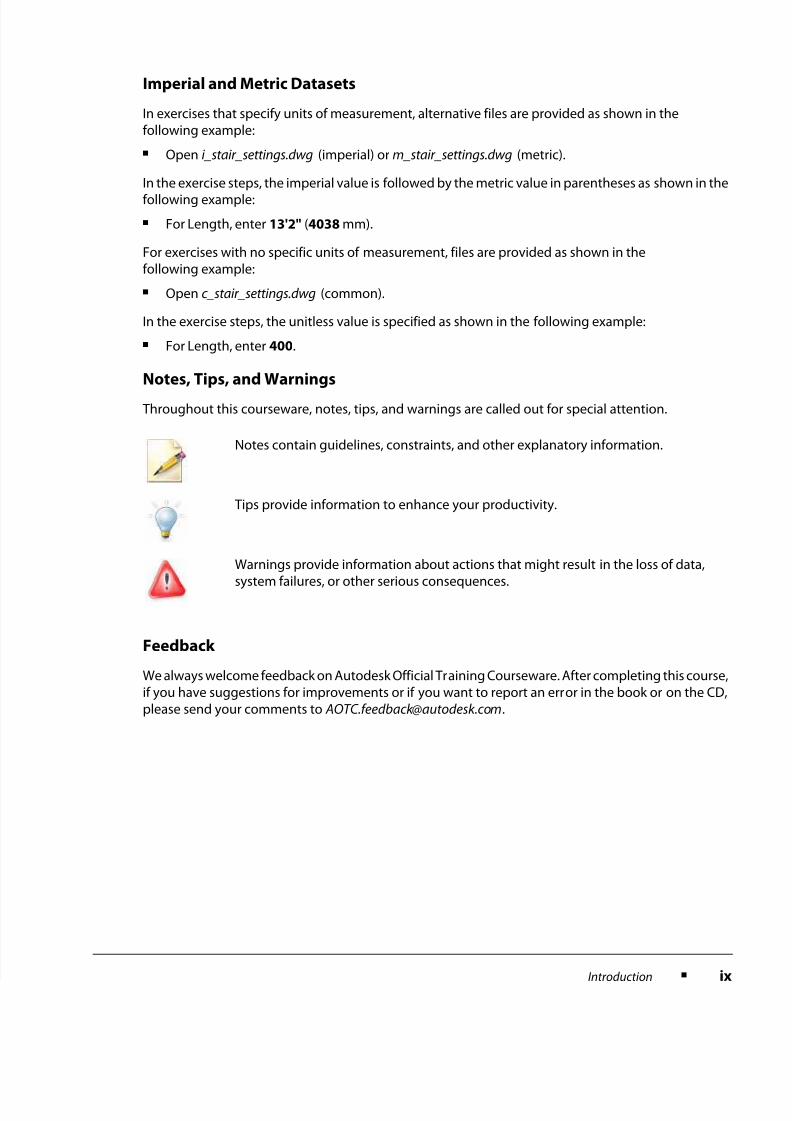
Notes, Tips, and Warnings
Throughout this courseware, notes, tips, and warnings are called out for special attention.
Feedback
We always welcome feedback on Autodesk Official Training Courseware. After completing this course,if you have suggestions for improvements or if you want to report an error in the book or on the CD,please send your comments to [email protected].
Notes contain guidelines, constraints, and other explanatory information.
Tips provide information to enhance your productivity.
Warnings provide information about actions that might result in the loss of data,system failures, or other serious consequences.