Embed Size (px)
Citation preview
Page 1
AnyNet 2G click
This document details which steps should be taken in order to connect AnyNet 2G click to the AWS cloud and exchange data.

Page 2
1. Set up an account on AWS IoT Service It is required to create an AWS account and an Administrator User. Please follow these instructions for creating it:
https://aws.amazon.com/premiumsupport/
knowledge-center/create-and-activate-aws-account/
Page 3
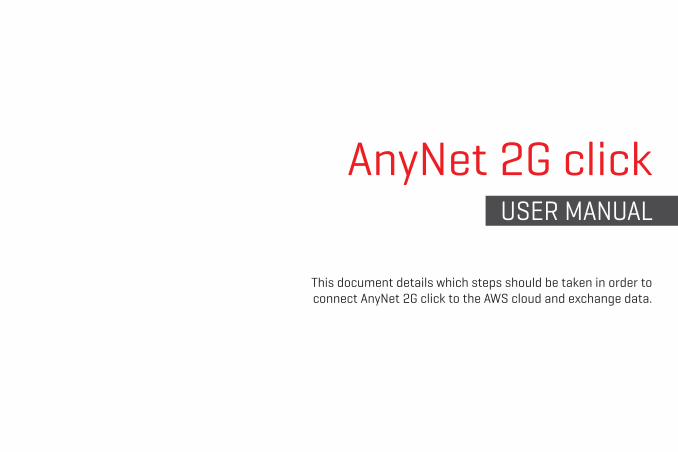
2. Subscribe to AnyNet Secure SAAS After successfully creating an account you need to subscribe to a“AnyNet Secure Cellular Connectivity” on AWS Marketplace and make an account. Follow the instructions explained here:
https://eseye.zendesk.com/hc/en-us/articles/115005289086
Page 4
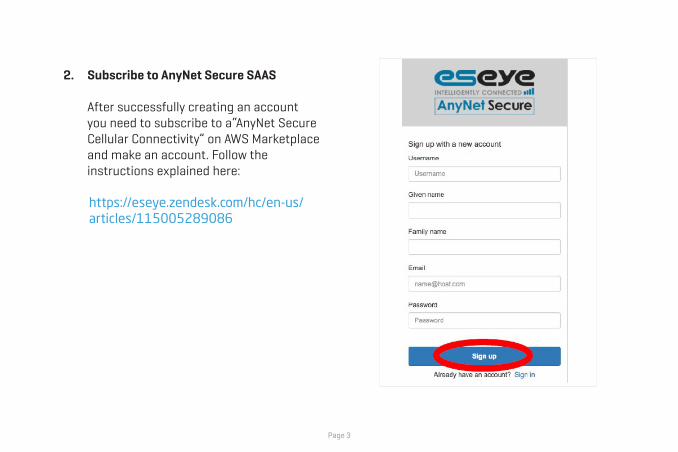
3. Connect your hardware and power up the module Connect AnyNet 2G click to the board which has UART serial connection and two voltages 3.3 and 5V to power up. Send AT commands through the terminal to the board for testing it (9600 Baud, 8n1): AT – return OK AT + AWSVER– return click’s firmware version AT + QCCID – return embedded SIM CARD ID (ICCID) (which is also located on the packaging)
Page 5
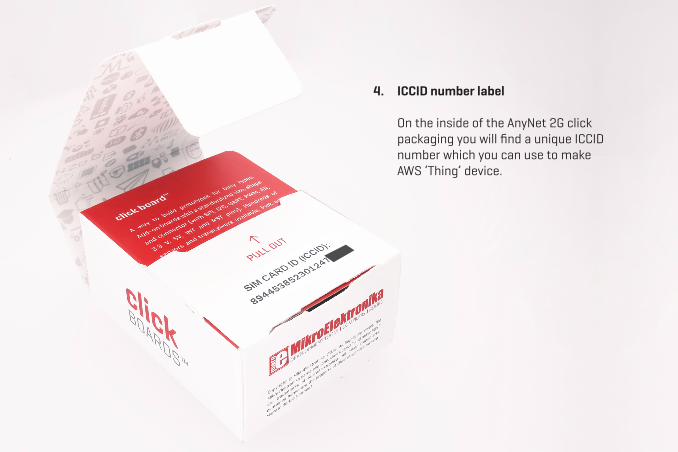
4. ICCID number label On the inside of the AnyNet 2G click packaging you will find a unique ICCID number which you can use to make AWS ‘Thing’ device.
Page 6
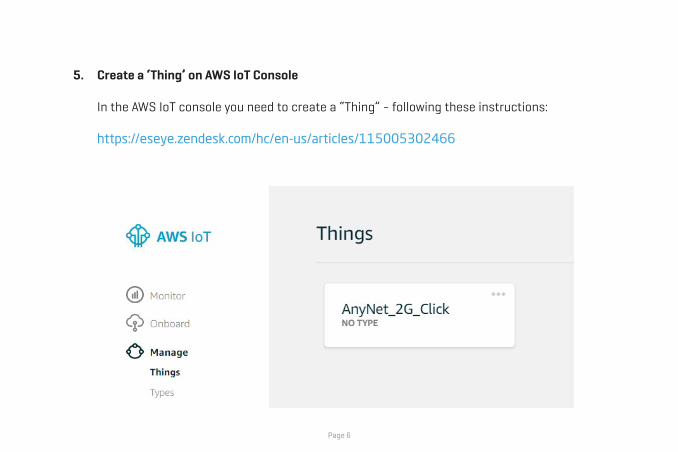
5. Create a ‘Thing’ on AWS IoT Console In the AWS IoT console you need to create a “Thing” - following these instructions:
https://eseye.zendesk.com/hc/en-us/articles/115005302466
Page 7
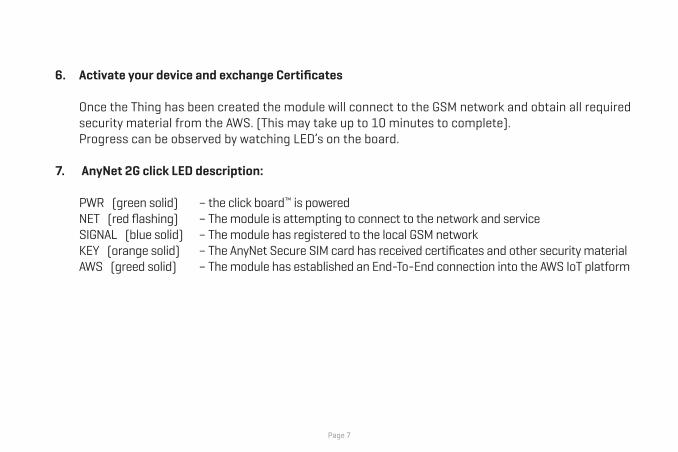
6. Activate your device and exchange Certificates Once the Thing has been created the module will connect to the GSM network and obtain all required security material from the AWS. (This may take up to 10 minutes to complete). Progress can be observed by watching LED’s on the board.
7. AnyNet 2G click LED description: PWR (green solid) – the click board™ is powered NET (red flashing) – The module is attempting to connect to the network and service SIGNAL (blue solid) – The module has registered to the local GSM network KEY (orange solid) – The AnyNet Secure SIM card has received certificates and other security material AWS (greed solid) – The module has established an End-To-End connection into the AWS IoT platform
Page 8
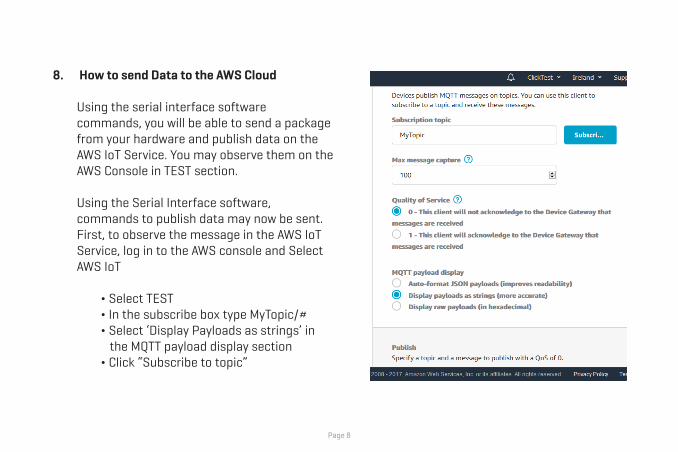
8. How to send Data to the AWS Cloud Using the serial interface software commands, you will be able to send a package from your hardware and publish data on the AWS IoT Service. You may observe them on the AWS Console in TEST section. Using the Serial Interface software, commands to publish data may now be sent. First, to observe the message in the AWS IoT Service, log in to the AWS console and Select AWS IoT ¬ Select TEST ¬ In the subscribe box type MyTopic/# ¬ Select ‘Display Payloads as strings’ in the MQTT payload display section ¬ Click “Subscribe to topic”
Page 9
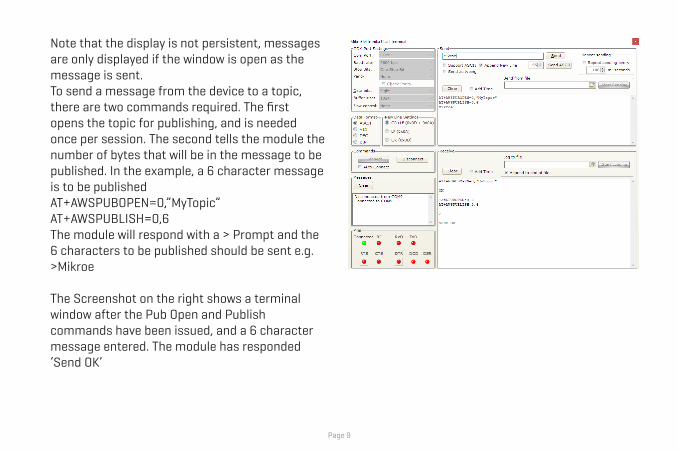
Note that the display is not persistent, messages are only displayed if the window is open as the message is sent. To send a message from the device to a topic, there are two commands required. The first opens the topic for publishing, and is needed once per session. The second tells the module the number of bytes that will be in the message to be published. In the example, a 6 character message is to be published AT+AWSPUBOPEN=0,”MyTopic” AT+AWSPUBLISH=0,6 The module will respond with a > Prompt and the 6 characters to be published should be sent e.g. >Mikroe The Screenshot on the right shows a terminal window after the Pub Open and Publish commands have been issued, and a 6 character message entered. The module has responded ‘Send OK’

Page 10
The Message will appear in the AWS IoT Console
Page 11
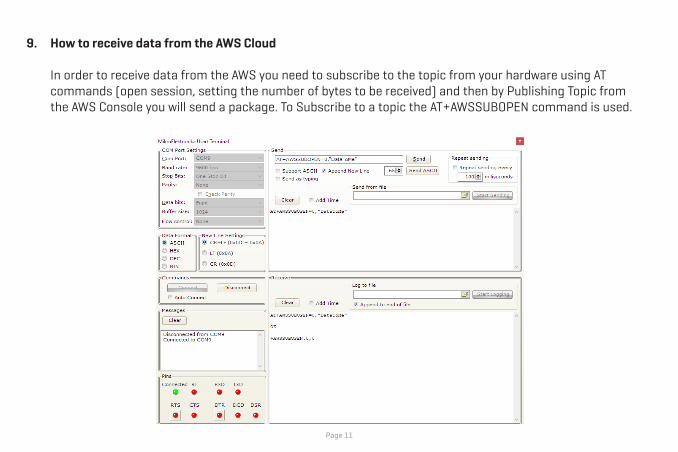
9. How to receive data from the AWS Cloud In order to receive data from the AWS you need to subscribe to the topic from your hardware using AT commands (open session, setting the number of bytes to be received) and then by Publishing Topic from the AWS Console you will send a package. To Subscribe to a topic the AT+AWSSUBOPEN command is used.
Page 12
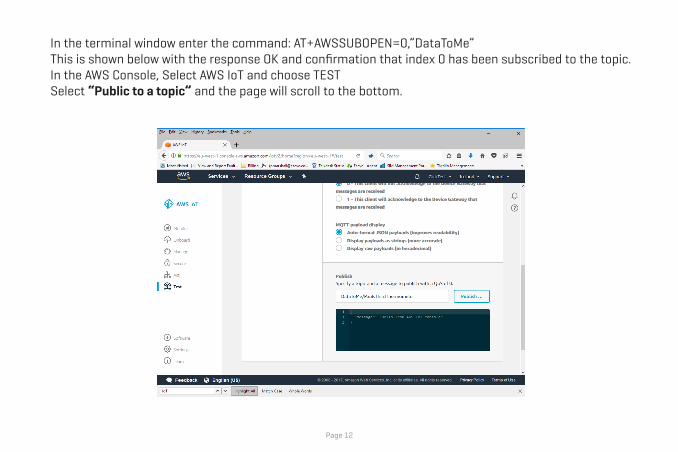
In the terminal window enter the command: AT+AWSSUBOPEN=0,”DataToMe” This is shown below with the response OK and confirmation that index 0 has been subscribed to the topic. In the AWS Console, Select AWS IoT and choose TEST Select “Public to a topic” and the page will scroll to the bottom.
Page 13
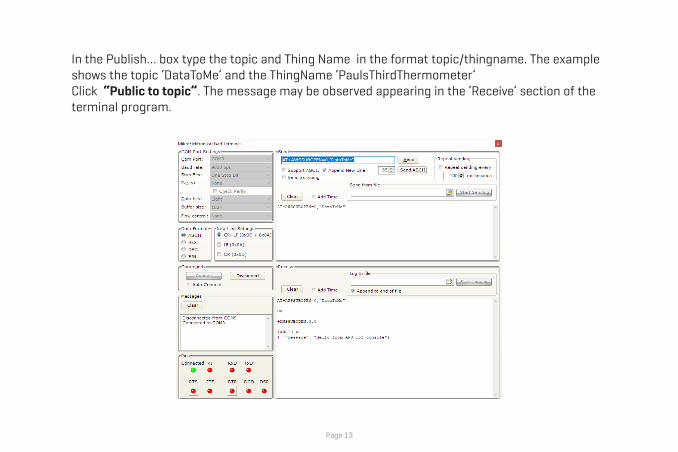
In the Publish… box type the topic and Thing Name in the format topic/thingname. The example shows the topic ‘DataToMe’ and the ThingName ‘PaulsThirdThermometer’ Click “Public to topic”. The message may be observed appearing in the ‘Receive’ section of the terminal program.
Page 14
The Module will issue an unsolicited Serial Message, first indicating the index and the length of the message, followed by the message characters.
10. FREE activation and credit Each AnyNet 2G click is coming with one Free activation and 5,000 messages enabled only with Eseye AnyNet Secure Cellular Connectivity (MQTT messaging buckets) through AWS Marketplace: https://aws.amazon.com/marketplace/pp/B073S37V78