Embed Size (px)
Citation preview

Installation Guide for Linux
Release 16.2ANSYS, Inc.July 2015Southpointe
2600 ANSYS Drive 000408Canonsburg, PA 15317 ANSYS, Inc. is
certified to ISO9001:2008.
[email protected]://www.ansys.com(T) 724-746-3304(F) 724-514-9494
Revision Information
The information in this guide applies to all ANSYS, Inc. products released on or after this date, until supersededby a newer version of this guide. This guide replaces individual product installation guides from previous releases.
Copyright and Trademark Information
© 2015 SAS IP, Inc. All rights reserved. Unauthorized use, distribution or duplication is prohibited.
ANSYS, ANSYS Workbench, Ansoft, AUTODYN, EKM, Engineering Knowledge Manager, CFX, FLUENT, HFSS, AIMand any and all ANSYS, Inc. brand, product, service and feature names, logos and slogans are registered trademarksor trademarks of ANSYS, Inc. or its subsidiaries in the United States or other countries. ICEM CFD is a trademarkused by ANSYS, Inc. under license. CFX is a trademark of Sony Corporation in Japan. All other brand, product,service and feature names or trademarks are the property of their respective owners.
Disclaimer Notice
THIS ANSYS SOFTWARE PRODUCT AND PROGRAM DOCUMENTATION INCLUDE TRADE SECRETS AND ARE CONFID-ENTIAL AND PROPRIETARY PRODUCTS OF ANSYS, INC., ITS SUBSIDIARIES, OR LICENSORS. The software productsand documentation are furnished by ANSYS, Inc., its subsidiaries, or affiliates under a software license agreementthat contains provisions concerning non-disclosure, copying, length and nature of use, compliance with exportinglaws, warranties, disclaimers, limitations of liability, and remedies, and other provisions. The software productsand documentation may be used, disclosed, transferred, or copied only in accordance with the terms and conditionsof that software license agreement.
ANSYS, Inc. is certified to ISO 9001:2008.
U.S. Government Rights
For U.S. Government users, except as specifically granted by the ANSYS, Inc. software license agreement, the use,duplication, or disclosure by the United States Government is subject to restrictions stated in the ANSYS, Inc.software license agreement and FAR 12.212 (for non-DOD licenses).
Third-Party Software
See the legal information in the product help files for the complete Legal Notice for ANSYS proprietary softwareand third-party software. If you are unable to access the Legal Notice, please contact ANSYS, Inc.
Published in the U.S.A.
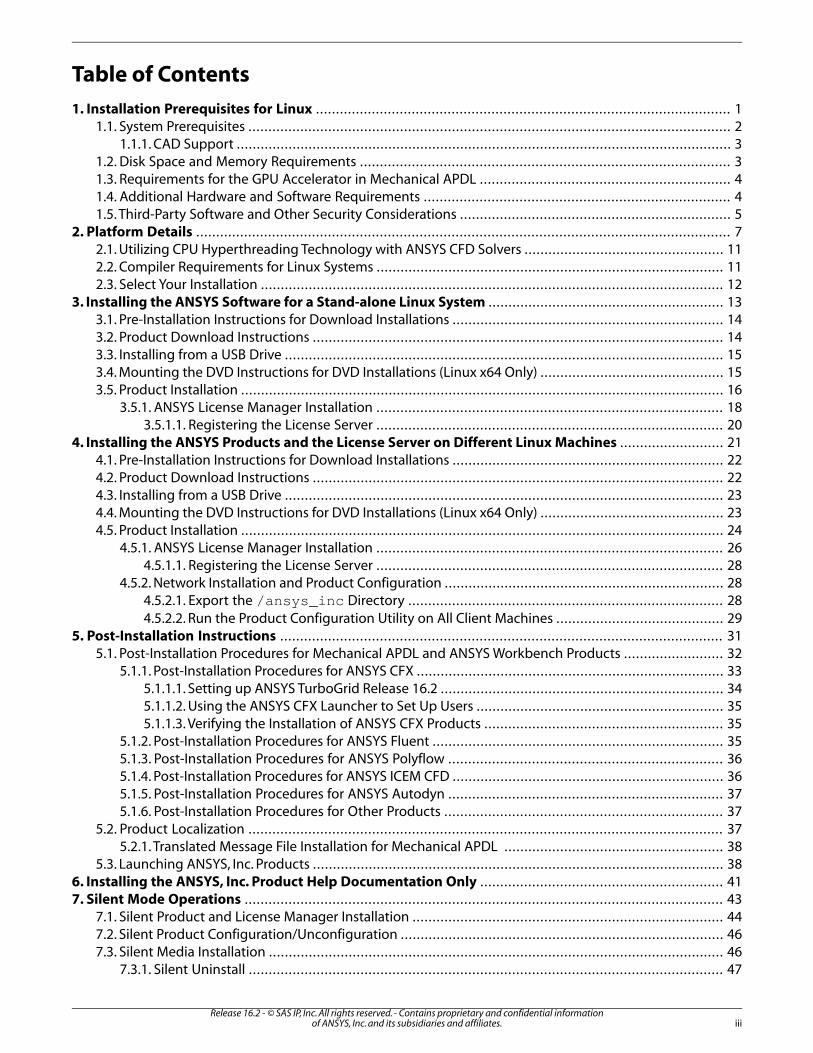
Table of Contents
1. Installation Prerequisites for Linux . . . . . . . . . . . . . . . . . . . . . . . . . . . . . . . . . . . . . . . . . . . . . . . . . . . . . . . . . . . . . . . . . . . . . . . . . . . . . . . . . . . . . . . . . . . . . . . . . . . . . . . . 11.1. System Prerequisites .... . . . . . . . . . . . . . . . . . . . . . . . . . . . . . . . . . . . . . . . . . . . . . . . . . . . . . . . . . . . . . . . . . . . . . . . . . . . . . . . . . . . . . . . . . . . . . . . . . . . . . . . . . . . . . . . . . . . . . 2
1.1.1. CAD Support ... . . . . . . . . . . . . . . . . . . . . . . . . . . . . . . . . . . . . . . . . . . . . . . . . . . . . . . . . . . . . . . . . . . . . . . . . . . . . . . . . . . . . . . . . . . . . . . . . . . . . . . . . . . . . . . . . . . . . . . . . . 31.2. Disk Space and Memory Requirements .... . . . . . . . . . . . . . . . . . . . . . . . . . . . . . . . . . . . . . . . . . . . . . . . . . . . . . . . . . . . . . . . . . . . . . . . . . . . . . . . . . . . . . . . . . 31.3. Requirements for the GPU Accelerator in Mechanical APDL .... . . . . . . . . . . . . . . . . . . . . . . . . . . . . . . . . . . . . . . . . . . . . . . . . . . . . . . . . . . . 41.4. Additional Hardware and Software Requirements .... . . . . . . . . . . . . . . . . . . . . . . . . . . . . . . . . . . . . . . . . . . . . . . . . . . . . . . . . . . . . . . . . . . . . . . . . . 41.5. Third-Party Software and Other Security Considerations .... . . . . . . . . . . . . . . . . . . . . . . . . . . . . . . . . . . . . . . . . . . . . . . . . . . . . . . . . . . . . . . . . 5
2. Platform Details . . . . . . . . . . . . . . . . . . . . . . . . . . . . . . . . . . . . . . . . . . . . . . . . . . . . . . . . . . . . . . . . . . . . . . . . . . . . . . . . . . . . . . . . . . . . . . . . . . . . . . . . . . . . . . . . . . . . . . . . . . . . . . . . . . . . . . 72.1. Utilizing CPU Hyperthreading Technology with ANSYS CFD Solvers ... . . . . . . . . . . . . . . . . . . . . . . . . . . . . . . . . . . . . . . . . . . . . . . . 112.2. Compiler Requirements for Linux Systems .... . . . . . . . . . . . . . . . . . . . . . . . . . . . . . . . . . . . . . . . . . . . . . . . . . . . . . . . . . . . . . . . . . . . . . . . . . . . . . . . . . . . 112.3. Select Your Installation .... . . . . . . . . . . . . . . . . . . . . . . . . . . . . . . . . . . . . . . . . . . . . . . . . . . . . . . . . . . . . . . . . . . . . . . . . . . . . . . . . . . . . . . . . . . . . . . . . . . . . . . . . . . . . . . . . 12
3. Installing the ANSYS Software for a Stand-alone Linux System . . . . . . . . . . . . . . . . . . . . . . . . . . . . . . . . . . . . . . . . . . . . . . . . . . . . . . . . . . . 133.1. Pre-Installation Instructions for Download Installations .... . . . . . . . . . . . . . . . . . . . . . . . . . . . . . . . . . . . . . . . . . . . . . . . . . . . . . . . . . . . . . . . . 143.2. Product Download Instructions .... . . . . . . . . . . . . . . . . . . . . . . . . . . . . . . . . . . . . . . . . . . . . . . . . . . . . . . . . . . . . . . . . . . . . . . . . . . . . . . . . . . . . . . . . . . . . . . . . . . . 143.3. Installing from a USB Drive .... . . . . . . . . . . . . . . . . . . . . . . . . . . . . . . . . . . . . . . . . . . . . . . . . . . . . . . . . . . . . . . . . . . . . . . . . . . . . . . . . . . . . . . . . . . . . . . . . . . . . . . . . . . 153.4. Mounting the DVD Instructions for DVD Installations (Linux x64 Only) ... . . . . . . . . . . . . . . . . . . . . . . . . . . . . . . . . . . . . . . . . . . . 153.5. Product Installation .... . . . . . . . . . . . . . . . . . . . . . . . . . . . . . . . . . . . . . . . . . . . . . . . . . . . . . . . . . . . . . . . . . . . . . . . . . . . . . . . . . . . . . . . . . . . . . . . . . . . . . . . . . . . . . . . . . . . . . 16
3.5.1. ANSYS License Manager Installation .... . . . . . . . . . . . . . . . . . . . . . . . . . . . . . . . . . . . . . . . . . . . . . . . . . . . . . . . . . . . . . . . . . . . . . . . . . . . . . . . . . . . 183.5.1.1. Registering the License Server ... . . . . . . . . . . . . . . . . . . . . . . . . . . . . . . . . . . . . . . . . . . . . . . . . . . . . . . . . . . . . . . . . . . . . . . . . . . . . . . . . . . . . 20
4. Installing the ANSYS Products and the License Server on Different Linux Machines . . . . . . . . . . . . . . . . . . . . . . . . . . 214.1. Pre-Installation Instructions for Download Installations .... . . . . . . . . . . . . . . . . . . . . . . . . . . . . . . . . . . . . . . . . . . . . . . . . . . . . . . . . . . . . . . . . 224.2. Product Download Instructions .... . . . . . . . . . . . . . . . . . . . . . . . . . . . . . . . . . . . . . . . . . . . . . . . . . . . . . . . . . . . . . . . . . . . . . . . . . . . . . . . . . . . . . . . . . . . . . . . . . . . 224.3. Installing from a USB Drive .... . . . . . . . . . . . . . . . . . . . . . . . . . . . . . . . . . . . . . . . . . . . . . . . . . . . . . . . . . . . . . . . . . . . . . . . . . . . . . . . . . . . . . . . . . . . . . . . . . . . . . . . . . . 234.4. Mounting the DVD Instructions for DVD Installations (Linux x64 Only) ... . . . . . . . . . . . . . . . . . . . . . . . . . . . . . . . . . . . . . . . . . . . 234.5. Product Installation .... . . . . . . . . . . . . . . . . . . . . . . . . . . . . . . . . . . . . . . . . . . . . . . . . . . . . . . . . . . . . . . . . . . . . . . . . . . . . . . . . . . . . . . . . . . . . . . . . . . . . . . . . . . . . . . . . . . . . . 24
4.5.1. ANSYS License Manager Installation .... . . . . . . . . . . . . . . . . . . . . . . . . . . . . . . . . . . . . . . . . . . . . . . . . . . . . . . . . . . . . . . . . . . . . . . . . . . . . . . . . . . . 264.5.1.1. Registering the License Server ... . . . . . . . . . . . . . . . . . . . . . . . . . . . . . . . . . . . . . . . . . . . . . . . . . . . . . . . . . . . . . . . . . . . . . . . . . . . . . . . . . . . . 28
4.5.2. Network Installation and Product Configuration .... . . . . . . . . . . . . . . . . . . . . . . . . . . . . . . . . . . . . . . . . . . . . . . . . . . . . . . . . . . . . . . . . . . 284.5.2.1. Export the /ansys_inc Directory .... . . . . . . . . . . . . . . . . . . . . . . . . . . . . . . . . . . . . . . . . . . . . . . . . . . . . . . . . . . . . . . . . . . . . . . . . . . . 284.5.2.2. Run the Product Configuration Utility on All Client Machines .... . . . . . . . . . . . . . . . . . . . . . . . . . . . . . . . . . . . . . . 29
5. Post-Installation Instructions . . . . . . . . . . . . . . . . . . . . . . . . . . . . . . . . . . . . . . . . . . . . . . . . . . . . . . . . . . . . . . . . . . . . . . . . . . . . . . . . . . . . . . . . . . . . . . . . . . . . . . . . . . . . . . . 315.1. Post-Installation Procedures for Mechanical APDL and ANSYS Workbench Products .... . . . . . . . . . . . . . . . . . . . . . 32
5.1.1. Post-Installation Procedures for ANSYS CFX .... . . . . . . . . . . . . . . . . . . . . . . . . . . . . . . . . . . . . . . . . . . . . . . . . . . . . . . . . . . . . . . . . . . . . . . . . . 335.1.1.1. Setting up ANSYS TurboGrid Release 16.2 .... . . . . . . . . . . . . . . . . . . . . . . . . . . . . . . . . . . . . . . . . . . . . . . . . . . . . . . . . . . . . . . . . . . . 345.1.1.2. Using the ANSYS CFX Launcher to Set Up Users ... . . . . . . . . . . . . . . . . . . . . . . . . . . . . . . . . . . . . . . . . . . . . . . . . . . . . . . . . . . . 355.1.1.3. Verifying the Installation of ANSYS CFX Products .... . . . . . . . . . . . . . . . . . . . . . . . . . . . . . . . . . . . . . . . . . . . . . . . . . . . . . . . . 35
5.1.2. Post-Installation Procedures for ANSYS Fluent .... . . . . . . . . . . . . . . . . . . . . . . . . . . . . . . . . . . . . . . . . . . . . . . . . . . . . . . . . . . . . . . . . . . . . . 355.1.3. Post-Installation Procedures for ANSYS Polyflow .... . . . . . . . . . . . . . . . . . . . . . . . . . . . . . . . . . . . . . . . . . . . . . . . . . . . . . . . . . . . . . . . . . 365.1.4. Post-Installation Procedures for ANSYS ICEM CFD .... . . . . . . . . . . . . . . . . . . . . . . . . . . . . . . . . . . . . . . . . . . . . . . . . . . . . . . . . . . . . . . . . 365.1.5. Post-Installation Procedures for ANSYS Autodyn .... . . . . . . . . . . . . . . . . . . . . . . . . . . . . . . . . . . . . . . . . . . . . . . . . . . . . . . . . . . . . . . . . . 375.1.6. Post-Installation Procedures for Other Products .... . . . . . . . . . . . . . . . . . . . . . . . . . . . . . . . . . . . . . . . . . . . . . . . . . . . . . . . . . . . . . . . . . . 37
5.2. Product Localization .... . . . . . . . . . . . . . . . . . . . . . . . . . . . . . . . . . . . . . . . . . . . . . . . . . . . . . . . . . . . . . . . . . . . . . . . . . . . . . . . . . . . . . . . . . . . . . . . . . . . . . . . . . . . . . . . . . . . 375.2.1. Translated Message File Installation for Mechanical APDL ... . . . . . . . . . . . . . . . . . . . . . . . . . . . . . . . . . . . . . . . . . . . . . . . . . . . . 38
5.3. Launching ANSYS, Inc. Products .... . . . . . . . . . . . . . . . . . . . . . . . . . . . . . . . . . . . . . . . . . . . . . . . . . . . . . . . . . . . . . . . . . . . . . . . . . . . . . . . . . . . . . . . . . . . . . . . . . . . 386. Installing the ANSYS, Inc. Product Help Documentation Only . . . . . . . . . . . . . . . . . . . . . . . . . . . . . . . . . . . . . . . . . . . . . . . . . . . . . . . . . . . . . 417. Silent Mode Operations . . . . . . . . . . . . . . . . . . . . . . . . . . . . . . . . . . . . . . . . . . . . . . . . . . . . . . . . . . . . . . . . . . . . . . . . . . . . . . . . . . . . . . . . . . . . . . . . . . . . . . . . . . . . . . . . . . . . . . . . 43
7.1. Silent Product and License Manager Installation .... . . . . . . . . . . . . . . . . . . . . . . . . . . . . . . . . . . . . . . . . . . . . . . . . . . . . . . . . . . . . . . . . . . . . . . . . . . 447.2. Silent Product Configuration/Unconfiguration .... . . . . . . . . . . . . . . . . . . . . . . . . . . . . . . . . . . . . . . . . . . . . . . . . . . . . . . . . . . . . . . . . . . . . . . . . . . . . . 467.3. Silent Media Installation .... . . . . . . . . . . . . . . . . . . . . . . . . . . . . . . . . . . . . . . . . . . . . . . . . . . . . . . . . . . . . . . . . . . . . . . . . . . . . . . . . . . . . . . . . . . . . . . . . . . . . . . . . . . . . . . 46
7.3.1. Silent Uninstall .. . . . . . . . . . . . . . . . . . . . . . . . . . . . . . . . . . . . . . . . . . . . . . . . . . . . . . . . . . . . . . . . . . . . . . . . . . . . . . . . . . . . . . . . . . . . . . . . . . . . . . . . . . . . . . . . . . . . . . 47
iiiRelease 16.2 - © SAS IP, Inc. All rights reserved. - Contains proprietary and confidential information
of ANSYS, Inc. and its subsidiaries and affiliates.
8. Configuring CAD Products . . . . . . . . . . . . . . . . . . . . . . . . . . . . . . . . . . . . . . . . . . . . . . . . . . . . . . . . . . . . . . . . . . . . . . . . . . . . . . . . . . . . . . . . . . . . . . . . . . . . . . . . . . . . . . . . . . . . 498.1. Using the CAD Configuration Manager .... . . . . . . . . . . . . . . . . . . . . . . . . . . . . . . . . . . . . . . . . . . . . . . . . . . . . . . . . . . . . . . . . . . . . . . . . . . . . . . . . . . . . . . . . 49
8.1.1. Unconfiguring .... . . . . . . . . . . . . . . . . . . . . . . . . . . . . . . . . . . . . . . . . . . . . . . . . . . . . . . . . . . . . . . . . . . . . . . . . . . . . . . . . . . . . . . . . . . . . . . . . . . . . . . . . . . . . . . . . . . . . 508.1.2. Running the CAD Configuration Manager in Batch Mode .... . . . . . . . . . . . . . . . . . . . . . . . . . . . . . . . . . . . . . . . . . . . . . . . . . 518.1.3. NX Configuration .... . . . . . . . . . . . . . . . . . . . . . . . . . . . . . . . . . . . . . . . . . . . . . . . . . . . . . . . . . . . . . . . . . . . . . . . . . . . . . . . . . . . . . . . . . . . . . . . . . . . . . . . . . . . . . . . 51
8.2. Configuring the Geometry Interface for NX for ANSYS Workbench Products .... . . . . . . . . . . . . . . . . . . . . . . . . . . . . . . . . . 529. Uninstalling the Software . . . . . . . . . . . . . . . . . . . . . . . . . . . . . . . . . . . . . . . . . . . . . . . . . . . . . . . . . . . . . . . . . . . . . . . . . . . . . . . . . . . . . . . . . . . . . . . . . . . . . . . . . . . . . . . . . . . . . 5310. Troubleshooting . . . . . . . . . . . . . . . . . . . . . . . . . . . . . . . . . . . . . . . . . . . . . . . . . . . . . . . . . . . . . . . . . . . . . . . . . . . . . . . . . . . . . . . . . . . . . . . . . . . . . . . . . . . . . . . . . . . . . . . . . . . . . . . . . . 55
10.1. Installation Troubleshooting .... . . . . . . . . . . . . . . . . . . . . . . . . . . . . . . . . . . . . . . . . . . . . . . . . . . . . . . . . . . . . . . . . . . . . . . . . . . . . . . . . . . . . . . . . . . . . . . . . . . . . . . 5510.1.1. Gathering Diagnostic Information .... . . . . . . . . . . . . . . . . . . . . . . . . . . . . . . . . . . . . . . . . . . . . . . . . . . . . . . . . . . . . . . . . . . . . . . . . . . . . . . . . . . . . 5510.1.2.The GUI Installation Process Hangs .... . . . . . . . . . . . . . . . . . . . . . . . . . . . . . . . . . . . . . . . . . . . . . . . . . . . . . . . . . . . . . . . . . . . . . . . . . . . . . . . . . . . . 5510.1.3.The Target Machine Does Not Have a DVD Drive .... . . . . . . . . . . . . . . . . . . . . . . . . . . . . . . . . . . . . . . . . . . . . . . . . . . . . . . . . . . . . . . . . 5510.1.4. CAD Configuration Manager Help Does Not Load .... . . . . . . . . . . . . . . . . . . . . . . . . . . . . . . . . . . . . . . . . . . . . . . . . . . . . . . . . . . . . . 5610.1.5. Cannot Enter Data in Text Fields .... . . . . . . . . . . . . . . . . . . . . . . . . . . . . . . . . . . . . . . . . . . . . . . . . . . . . . . . . . . . . . . . . . . . . . . . . . . . . . . . . . . . . . . . . 5610.1.6. Download and Installation Error Messages .... . . . . . . . . . . . . . . . . . . . . . . . . . . . . . . . . . . . . . . . . . . . . . . . . . . . . . . . . . . . . . . . . . . . . . . . . 5610.1.7. System-related Error Messages .... . . . . . . . . . . . . . . . . . . . . . . . . . . . . . . . . . . . . . . . . . . . . . . . . . . . . . . . . . . . . . . . . . . . . . . . . . . . . . . . . . . . . . . . . . 5610.1.8. High Performance Computing Error Messages .... . . . . . . . . . . . . . . . . . . . . . . . . . . . . . . . . . . . . . . . . . . . . . . . . . . . . . . . . . . . . . . . . . . 57
10.2. Installation Troubleshooting - Mechanical APDL .... . . . . . . . . . . . . . . . . . . . . . . . . . . . . . . . . . . . . . . . . . . . . . . . . . . . . . . . . . . . . . . . . . . . . . . . . 5710.2.1.Your batch jobs terminate when you log out of a session .... . . . . . . . . . . . . . . . . . . . . . . . . . . . . . . . . . . . . . . . . . . . . . . . . . . . 5710.2.2. Mechanical APDL Documentation File for User Interface Error Messages .... . . . . . . . . . . . . . . . . . . . . . . . . . . . . 5710.2.3. Launcher Error Messages .... . . . . . . . . . . . . . . . . . . . . . . . . . . . . . . . . . . . . . . . . . . . . . . . . . . . . . . . . . . . . . . . . . . . . . . . . . . . . . . . . . . . . . . . . . . . . . . . . . . 5710.2.4. FORTRAN Runtime Error Messages ... . . . . . . . . . . . . . . . . . . . . . . . . . . . . . . . . . . . . . . . . . . . . . . . . . . . . . . . . . . . . . . . . . . . . . . . . . . . . . . . . . . . . 58
10.2.4.1. Intel Linux 64 Systems .... . . . . . . . . . . . . . . . . . . . . . . . . . . . . . . . . . . . . . . . . . . . . . . . . . . . . . . . . . . . . . . . . . . . . . . . . . . . . . . . . . . . . . . . . . . . . . . 5810.2.4.2. Intel EM64T Linux x64 Systems .... . . . . . . . . . . . . . . . . . . . . . . . . . . . . . . . . . . . . . . . . . . . . . . . . . . . . . . . . . . . . . . . . . . . . . . . . . . . . . . . . . 5810.2.4.3. AMD Opteron Linux x64 Systems .... . . . . . . . . . . . . . . . . . . . . . . . . . . . . . . . . . . . . . . . . . . . . . . . . . . . . . . . . . . . . . . . . . . . . . . . . . . . . . 58
10.3. Installation Troubleshooting - ANSYS Workbench .... . . . . . . . . . . . . . . . . . . . . . . . . . . . . . . . . . . . . . . . . . . . . . . . . . . . . . . . . . . . . . . . . . . . . . . 5810.3.1. Startup or Graphics Problems .... . . . . . . . . . . . . . . . . . . . . . . . . . . . . . . . . . . . . . . . . . . . . . . . . . . . . . . . . . . . . . . . . . . . . . . . . . . . . . . . . . . . . . . . . . . . 58
10.4. Installation Troubleshooting - ANSYS CFX .... . . . . . . . . . . . . . . . . . . . . . . . . . . . . . . . . . . . . . . . . . . . . . . . . . . . . . . . . . . . . . . . . . . . . . . . . . . . . . . . . . . 5910.4.1. CFX Distributed Parallel Runs Fail .. . . . . . . . . . . . . . . . . . . . . . . . . . . . . . . . . . . . . . . . . . . . . . . . . . . . . . . . . . . . . . . . . . . . . . . . . . . . . . . . . . . . . . . . . 59
10.5. Contacting Technical Support ... . . . . . . . . . . . . . . . . . . . . . . . . . . . . . . . . . . . . . . . . . . . . . . . . . . . . . . . . . . . . . . . . . . . . . . . . . . . . . . . . . . . . . . . . . . . . . . . . . . . . 5911. Applications Included with Each Product . . . . . . . . . . . . . . . . . . . . . . . . . . . . . . . . . . . . . . . . . . . . . . . . . . . . . . . . . . . . . . . . . . . . . . . . . . . . . . . . . . . . . . . . . . . 63
Release 16.2 - © SAS IP, Inc. All rights reserved. - Contains proprietary and confidential informationof ANSYS, Inc. and its subsidiaries and affiliates.iv
Linux Installation Guide

List of Tables
1.1. Supported Linux Platforms .... . . . . . . . . . . . . . . . . . . . . . . . . . . . . . . . . . . . . . . . . . . . . . . . . . . . . . . . . . . . . . . . . . . . . . . . . . . . . . . . . . . . . . . . . . . . . . . . . . . . . . . . . . . . . . . . . . 21.2. CAD Support by Platform ..... . . . . . . . . . . . . . . . . . . . . . . . . . . . . . . . . . . . . . . . . . . . . . . . . . . . . . . . . . . . . . . . . . . . . . . . . . . . . . . . . . . . . . . . . . . . . . . . . . . . . . . . . . . . . . . . . . . . 32.1. Compiler Requirements for All Linux Versions .... . . . . . . . . . . . . . . . . . . . . . . . . . . . . . . . . . . . . . . . . . . . . . . . . . . . . . . . . . . . . . . . . . . . . . . . . . . . . . . . . . . . . 115.1. Startup Commands .... . . . . . . . . . . . . . . . . . . . . . . . . . . . . . . . . . . . . . . . . . . . . . . . . . . . . . . . . . . . . . . . . . . . . . . . . . . . . . . . . . . . . . . . . . . . . . . . . . . . . . . . . . . . . . . . . . . . . . . . . . . . 38
vRelease 16.2 - © SAS IP, Inc. All rights reserved. - Contains proprietary and confidential information
of ANSYS, Inc. and its subsidiaries and affiliates.

Release 16.2 - © SAS IP, Inc. All rights reserved. - Contains proprietary and confidential informationof ANSYS, Inc. and its subsidiaries and affiliates.vi
Chapter 1: Installation Prerequisites for Linux
This document describes the steps necessary to correctly install and configure all ANSYS, Inc. productson Linux platforms for Release 16.2. These products include:
• ANSYS Structural Mechanics
– ANSYS Mechanical Products (includes Mechanical APDL and Mechanical, where supported)
– ANSYS Customization Files for User Programmable Features
• ANSYS Explicit Dynamics
– ANSYS Autodyn
– ANSYS LS-DYNA
• ANSYS Fluid Dynamics
– ANSYS CFX (includes ANSYS CFD-Post)
– ANSYS Fluent (includes ANSYS CFD-Post)
– ANSYS TurboGrid
– ANSYS Polyflow (includes ANSYS CFD-Post)
– ANSYS CFD-Post only
• ANSYS ICEM CFD
• ANSYS Additional Tools
– ANSYS Composite PrepPost
– ANSYS Icepak (includes ANSYS CFD-Post)
– Remote Solve Manager Standalone Services
• ANSYS Geometry Interfaces
– ACIS
– CATIA, Version 4
– CATIA, Version 5
– NX
– Parasolid
1Release 16.2 - © SAS IP, Inc. All rights reserved. - Contains proprietary and confidential information
of ANSYS, Inc. and its subsidiaries and affiliates.
Notes Not all products may be available on all Linux platforms. Please see the remainder of thisdocument for detailed information on which products are available on which platforms.
At Release 16.2, ANSYS BladeGen, Vista CCD, Vista CPD, Vista RTD, and Vista AFD are not supported onLinux platforms.
ANSYS Workbench and ANSYS EKM Desktop are installed by default as product components to mostANSYS, Inc. products. ANSYS Workbench is not installed as part of the products under ANSYS AdditionalTools. ANSYS Workbench includes the following applications:
• DesignModeler
• Design Exploration
• Meshing
• Remote Solve Manager
• Fluent Meshing
• FE Modeler
• EKM Client
Important Notice
If you wish to run multiple releases of ANSYS, Inc. software, you MUST install them chronologically (i.e.,Release 16.1 followed by Release 16.2). If you install an earlier release after installing Release 16.2, youwill encounter licensing issues that may prevent you from running any products/releases. If you needto install an earlier release after you have already installed Release 16.2, you MUST uninstall Release16.2, then re-install the releases in order.
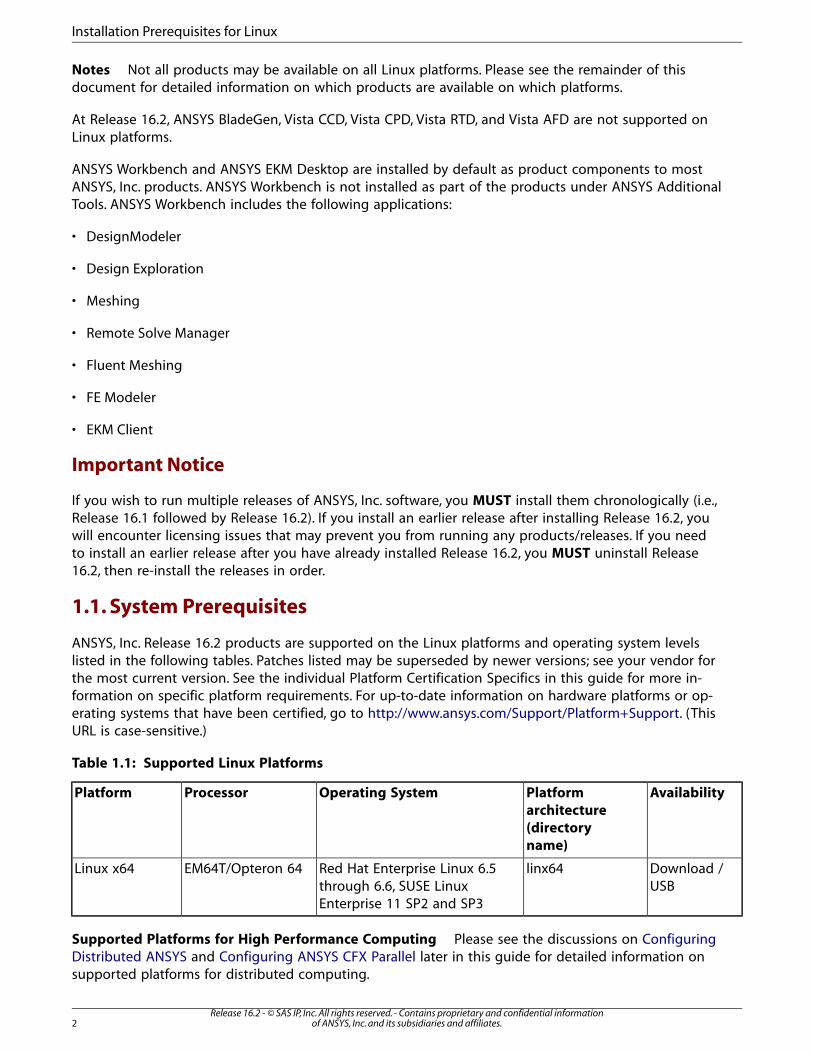
1.1. System Prerequisites
ANSYS, Inc. Release 16.2 products are supported on the Linux platforms and operating system levelslisted in the following tables. Patches listed may be superseded by newer versions; see your vendor forthe most current version. See the individual Platform Certification Specifics in this guide for more in-formation on specific platform requirements. For up-to-date information on hardware platforms or op-erating systems that have been certified, go to http://www.ansys.com/Support/Platform+Support. (ThisURL is case-sensitive.)
Table 1.1: Supported Linux Platforms
AvailabilityPlatformarchitecture(directoryname)
Operating SystemProcessorPlatform
Download /USB
linx64Red Hat Enterprise Linux 6.5through 6.6, SUSE LinuxEnterprise 11 SP2 and SP3
EM64T/Opteron 64Linux x64
Supported Platforms for High Performance Computing Please see the discussions on ConfiguringDistributed ANSYS and Configuring ANSYS CFX Parallel later in this guide for detailed information onsupported platforms for distributed computing.
Release 16.2 - © SAS IP, Inc. All rights reserved. - Contains proprietary and confidential informationof ANSYS, Inc. and its subsidiaries and affiliates.2
Installation Prerequisites for Linux
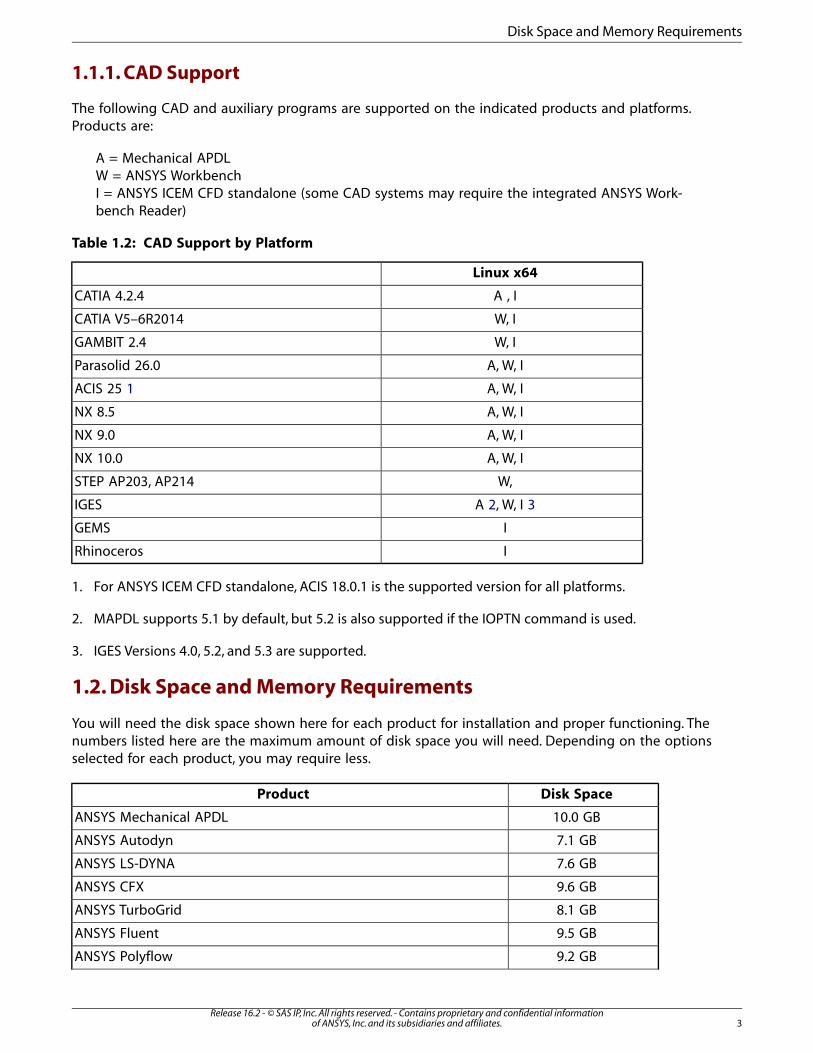
1.1.1. CAD Support
The following CAD and auxiliary programs are supported on the indicated products and platforms.Products are:
A = Mechanical APDLW = ANSYS WorkbenchI = ANSYS ICEM CFD standalone (some CAD systems may require the integrated ANSYS Work-bench Reader)
Table 1.2: CAD Support by Platform
Linux x64
A , ICATIA 4.2.4
W, ICATIA V5–6R2014
W, IGAMBIT 2.4
A, W, IParasolid 26.0
A, W, IACIS 25 1
A, W, INX 8.5
A, W, INX 9.0
A, W, INX 10.0
W,STEP AP203, AP214
A 2, W, I 3IGES
IGEMS
IRhinoceros
1. For ANSYS ICEM CFD standalone, ACIS 18.0.1 is the supported version for all platforms.
2. MAPDL supports 5.1 by default, but 5.2 is also supported if the IOPTN command is used.
3. IGES Versions 4.0, 5.2, and 5.3 are supported.
1.2. Disk Space and Memory Requirements
You will need the disk space shown here for each product for installation and proper functioning. Thenumbers listed here are the maximum amount of disk space you will need. Depending on the optionsselected for each product, you may require less.
Disk SpaceProduct
10.0 GBANSYS Mechanical APDL
7.1 GBANSYS Autodyn
7.6 GBANSYS LS-DYNA
9.6 GBANSYS CFX
8.1 GBANSYS TurboGrid
9.5 GBANSYS Fluent
9.2 GBANSYS Polyflow
3Release 16.2 - © SAS IP, Inc. All rights reserved. - Contains proprietary and confidential information
of ANSYS, Inc. and its subsidiaries and affiliates.
Disk Space and Memory Requirements

Disk SpaceProduct
2.8 GBANSYS ICEM CFD
5.5 GBANSYS Icepak
8.0 GBANSYS CFD Post only
302 MBANSYS Geometry Interfaces
2.9 GBANSYS Composite PrepPost
Memory Requirements You must have a minimum of 8 GB of memory to run product installations;16 or 32 GB of memory is recommended.
1.3. Requirements for the GPU Accelerator in Mechanical APDL
Your system must meet the following requirements to use the GPU accelerator capability in MechanicalAPDL:
• The machine(s) being used for the simulation must contain at least one supported nVIDIA GPU card or oneIntel Xeon Phi coprocessor. The following cards are supported:
nVIDIA Tesla series (any model)nVIDIA Quadro 6000nVIDIA Quadro K5000nVIDIA Quadro K6000Intel Xeon Phi 7120Intel Xeon Phi 5110Intel Xeon Phi 3120
• For nVIDIA GPU cards, the driver version must be 331.75 or newer.
• For Intel Xeon Phi coprocessors, the driver version must be “MPSS 3.4” or newer.
Note
Mechanical APDL assumes that the Intel Xeon Phi coprocessor driver is installed in /opt/in-tel/mic/coi. If the installation is located in a different folder, set the ANS_MIC_LIB_PATHenvironment variable to the path where the Xeon Phi driver is installed (for example,/mypath/mic/coi).
1.4. Additional Hardware and Software Requirements
• Intel 64 / AMD64 system with a supported operating system version installed
• 8 GB of RAM
• 128 GB free on the hard drive is recommended
• TCP/IP for the license manager (see the ANSYS, Inc. Licensing Guide for more information on TCP/IP)
• Approximately twice as much swap space as memory. The amount of memory swap space on the systemmay limit the size of the model that can be created and/or solved.
Release 16.2 - © SAS IP, Inc. All rights reserved. - Contains proprietary and confidential informationof ANSYS, Inc. and its subsidiaries and affiliates.4
Installation Prerequisites for Linux

• Graphics card compatible with the supported operating systems, capable of supporting 1024x768 HighColor (16-bit) and a 17-inch monitor compatible with this type of graphics card; ANSYS CFX products andANSYS TurboGrid require 24-bit color and that antialiasing on your graphics card be disabled. Refer to youroperating system's documentation for specific instructions.
Note
– A number of cosmetic display issues have been reported when running the installationprogram on Linux platforms using AMD graphics cards. These issues do not affect theinstallation functionality.
– Use of Ultra High Definition (4K) graphics cards cause a number of cosmetic display issues(including enlarged or reduced text and incorrect positioning of option labels). Theseissues do not affect the installation functionality.
• X11, OpenGL graphics libraries
• Mesa-libGL (OpenGL) is required to run data-integrated ANSYS Workbench applications such as Mechanical.
• For Fluent, CFX-Pre, and CFD-Post, a three-button mouse is required to access all available functionality.
• PDF reader software is required to read the installation guides and other user documentation.
• CFX-RIF requires 32-bit X11 libraries when running on a 64-bit machine.
1.5. Third-Party Software and Other Security Considerations
The following third-party products are used as part of the installation process. In order for the installationto work properly, you must allow access to these products.
Executable NameProduct Name
tclshTcl
wishTk
perlPerl
gzipGNU gzip
tarGNU tar
ANSYS, Inc. products may have softlinks that require 777 permissions. In addition, the following third-party products are known to contain softlinks that require 777 permissions:
• CPython
• GCC
• HPMPI
• IMPI
• INTELMPI
• MainWin
5Release 16.2 - © SAS IP, Inc. All rights reserved. - Contains proprietary and confidential information
of ANSYS, Inc. and its subsidiaries and affiliates.
Third-Party Software and Other Security Considerations
• Mono
• MPICH
• OPENMPI
• PCMPI
• Perl
• Python
• Qt
• Qwt
Release 16.2 - © SAS IP, Inc. All rights reserved. - Contains proprietary and confidential informationof ANSYS, Inc. and its subsidiaries and affiliates.6
Installation Prerequisites for Linux

Chapter 2: Platform Details
Linux
For ALL 64-bit Linux platforms, OpenMotif, and Mesa libraries should be installed. These libraries aretypically installed during a normal Linux installation. You will also need the xpdf package to view theonline help.
You can find the necessary OpenMotif libraries for your platform at http://www.motifzone.net.
SUSE Linux Enterprise 11 requires SP2 or SP3. After installing the SP2/SP3 updates, you must also installOpenMotif and the prerequisites from the SLES11 SDK DVD, as well as the OpenMotif22 packages (re-commended packages are openmotif22-libs-2.2.4-138.18.1.x86_64.rpm and openmotif22-libs-32bit-2.2.4-138.18.1.x86_64.rpm from SLED11 SP1 x86_64 distribution. You may need to use "rpm -iv -force" to installthese).
Red Hat Enterprise Linux 6 Red Hat Enterprise Linux 6 base install requires patch kernel-2.6.32-71.14.1.el6.x86_64.rpm and kernel-devel-2.6.32-71.14.1.el6.x86_64.rpm.
In addition, you need to install the following libraries:
• libXp.x86_64
• xorg-x11-fonts-cyrillic.noarch
• xterm.x86_64
• openmotif.x86_64
• compat-libstdc++-33.x86_64
• libstdc++.x86_64
• libstdc++.i686
• gcc-c++.x86_64
• compat-libstdc++-33.i686
• libstdc++-devel.x86_64
• libstdc++-devel.i686
• compat-gcc-34.x86_64
• gtk2.i686
• libXxf86vm.i686
• libSM.i686
7Release 16.2 - © SAS IP, Inc. All rights reserved. - Contains proprietary and confidential information
of ANSYS, Inc. and its subsidiaries and affiliates.
• libXt.i686
• xorg-x11-fonts-ISO8859-1-75dpi.noarch
Red Hat no longer includes the 32-bit libraries in the base configuration so you must install those sep-arately.
Additional requirements for Intel, AMD Opteron, and EM64T Linux systems are detailed below.
ANSYS, Inc. License Manager Linux x64 systems running the ANSYS, Inc. License Manager requirethe Linux Standard Base (LSB) 3.0 package.
CATIA V4 with Mechanical APDL To run CATIA V4 with Mechanical APDL on Linux 64-bit platforms,you must have the following Linux 32-bit i686 libraries:
• glibc
• libstdc++
ANSYS Workbench If you are running ANSYS Workbench using the KDE desktop environment, setthe focus stealing prevention level to "None" to prevent the project save dialog boxes from appearingbehind the application window:
1. Use the kcontrol command to launch the KDE Control Center.
2. In the Control Center window, select Desktop> Window Behavior> Advanced.
3. Change Focus Stealing Prevention Level to None.
4. Click Apply.
If you are running on KDE 4 or if the kcontrol command does not exist, use System Settings to setthe focus stealing prevention setting level to "None":
1. Use the systemsettings command to launch the System Settings.
2. In the System Settings window, select General> Window Behavior> Focus.
3. Change Focus Stealing Prevention Level to None.
4. Click Apply.
Semaphore Limit On some Linux systems, ANSYS Workbench reaches a system limit on the numberof semaphores in the Linux configuration. In this case, you will see a message similar to the following:
sem_lock->semop->op_op: Invalid argument
sem_unlock->semctl: Invalid argument
To increase the number of semaphores, run the following command as owner or root:
% echo 256 40000 32 32000 > /proc/sys/kernel/sem
This modification takes effect immediately, but is reset at the next reboot. To avoid resetting the limitwhen rebooting, add the above command to one of your system’s startup scripts by copying the com-mand into a file called mod_sem and then setting up the following links to execute the file each timeyou restart your system:
Release 16.2 - © SAS IP, Inc. All rights reserved. - Contains proprietary and confidential informationof ANSYS, Inc. and its subsidiaries and affiliates.8
Platform Details

cp mod_sem /etc/init.dln -s /etc/init.d/mod_sem /etc/rc3.d/S61mod_semln -s /etc/init.d/mod_sem /etc/rc5.d/S61mod_sem
Mechanical, Meshing, DesignModeler, and FE Modeler Applications If you are using a localizedoperating system (such as French or German), you must set the mwcontrol VisualMainWin control onany machines running these applications in order for these applications to recognize the correct numer-ical format. ANSYS Workbench must already be installed before setting this control.
First, you need to ensure that the /v162/aisol/WBMWRegistry/ directory has write permissions.From the /v162/aisol/ directory, issue the following command:
chmod -R 777 WBMWRegistry/
Then, use the following procedure to set mwcontrol for your locale:
1. cd to <wb_install directory>/v162/aisol
2. Issue the following command:
./.workbench -cmd mwcontrol
3. On the MainWin Control Panel, select Regional Settings.
4. Select the Regional Settings tab.
5. Change the language in the dropdown to match the language you want to use.
6. Check the Set as system default locale option.
7. Click Apply to accept the changes, and then click OK to dismiss the Change Regional Settings notification.
Using Fluent with Infiniband On some operating systems, the default amount of physical memorythat can be pinned/locked by a user application is set to a low value and must be explicitly increased.A value recommended by Intel is 90% of the physical memory. Therefore, the following should be addedto the /etc/security/limits.conf file:
* hard memlock unlimited* soft memlock unlimited
The need for increasing the limits may be indicated by the following error message with Platform MPI:
fluent_mpi.16.0.0: Rank 0:1: MPI_Init: ibv_create_cq() failedfluent_mpi.16.0.0: Rank 0:1: MPI_Init: Can't initialize RDMA devicefluent_mpi.16.0.0: Rank 0:1: MPI_Init: MPI BUG: Cannot initialize RDMA protocollibibverbs: Warning: RLIMIT_MEMLOCK is 32768 bytes.This will severely limit memory registrations
When Fluent is launched by a scheduler (like PBSPro, SGE, etc.), these limits may be reset by thescheduler. You may check running the “limit” command within and without the scheduler to compare.Any differences indicate the issue above.
If you use PBSPro, add ulimit -l unlimited directly in the pbs_mom startup script, and let PBSreload the pbs_mom.
If you use SGE, you must change the startup script /etc/init.d/sgeexecd to include the ulimit-l unlimited command as shown in the following example:
-- BEGIN --if [ "$startup" = true ]; then
9Release 16.2 - © SAS IP, Inc. All rights reserved. - Contains proprietary and confidential information
of ANSYS, Inc. and its subsidiaries and affiliates.
# execution daemon is started on this host!echo " starting SGE_execd"exec 1>/dev/null 2>&1ulimit -l unlimited$bin_dir/SGE_execdelse-- END --
Once this modification is in place, restart SGE to set the correct memory limits on the SGE daemon andany invoked processes.
Using Mechanical APDL with Infiniband On some operating systems, the default amount of physicalmemory that can be pinned/locked by a user application is set to a low value and must be explicitlyincreased. A value recommended by Intel is 90% of the physical memory. Therefore, the followingshould be added to the /etc/security/limits.conf file:
* hard memlock unlimited* soft memlock unlimited
This behavior has been observed on Intel MPI 4.1.3, but might also occur on Platform MPI 9.1.2.1.
Using the Fluent Launcher On Linux systems, you must have the following package (as appropriatefor your platform) installed in order to use the Fluent launcher:
SUSE 11: libstdc++33
Using ANSCUSTOM If you use ANSCUSTOM to link your own version of ANSYS Release 16.2 on aSUSE SLES 11.x computer, you may see two unsatisfied externals that are system, not ANSYS files, dueto the linker looking for some system files in a Red Hat directory on a SUSE computer.
To work around this problem, run the following as root:
mkdir –p /usr/lib/gcc/x86_64-redhat-linux/3.4.6ln -sf /usr/lib/gcc/i586-suse-linux/2.95.3/crtbegin.o /usr/lib/gcc/x86_64-redhat-linux/ 3.4.6/crtbegin.oln -sf /usr/lib/gcc/i586-suse-linux/2.95.3/crtend.o /usr/lib/gcc/x86_64-redhat-linux/ 3.4.6/crtend.o
The revision numbers shown in the examples (2.95.3 and 3.4.6) may be different on your system. Thelinker will specify where it is trying to find the crtbegin.o and crtend.o files; that location will bethe last part of the above commands. You can use the Linux locate command to find the existingcrtbegin.o and crtend.o files; that location would be the first part of the above commands.
System Libraries On 64-bit Linux linx64 systems, the ANSYS Release 16.2 executable is looking forsystem libraries that do not have revision numbers appended to the end of their file names. On someSUSE systems, the graphics libraries all have revision numbers appended to the end of the library file-names. In these cases, ANSYS quits because the loader cannot find all of the libraries that it is lookingfor. When running ANSYS Release 16.2, the loader will inform you that it is unable to locate a specificlibrary (for example, libXm.so). Using the Linux locate command, find the library (libXm.so inthis example) on your system and add the appropriate symbolic link as seen below.
To overcome this possible problem, run the following as root:
ln -sf /usr/lib64/libGLU.so.1.3.060402 /usr/lib64/libGLU.soln -sf /usr/X11R6/lib64/libXm.so.3.0.3 /usr/X11R6/lib64/libXm.soln -sf /usr/X11R6/lib64/libXp.so.6.2 /usr/X11R6/lib64/libXp.soln -sf /usr/X11R6/lib64/libXt.so.6.0 /usr/X11R6/lib64/libXt.soln -sf /usr/X11R6/lib64/libXext.so.6.4 /usr/X11R6/lib64/libXext.soln -sf /usr/X11R6/lib64/libXi.so.6.0 /usr/X11R6/lib64/libXi.soln -sf /usr/X11R6/lib64/libX11.so.6.2 /usr/X11R6/lib64/libX11.soln -sf /usr/X11R6/lib64/libSM.so.6.0 /usr/X11R6/lib64/libSM.so
Release 16.2 - © SAS IP, Inc. All rights reserved. - Contains proprietary and confidential informationof ANSYS, Inc. and its subsidiaries and affiliates.10
Platform Details

ln -sf /usr/X11R6/lib64/libICE.so.6.4 /usr/X11R6/lib64/libICE.soln -sf /lib64/libgcc_s.so.1 /lib64/libgcc.so
For Linux, you may need the following:
ln -sf /usr/lib64/libXm.so.4.0.0 /usr/lib64/libXm.so.3
The revision numbers appended to the filenames on the left may be different on your system.
Intel LinuxANSYS was built and tested on Red Hat using the compilers as noted in Table 2.1: Compiler Requirementsfor All Linux Versions (p. 11). The ANSYS solver is built on Red Hat Enterprise Linux AS release 4 (Update5).
For ANSYS Workbench and ANSYS Autodyn, you may need to increase the stack size; we recommendsetting it to 1 GB. Add the following to your configuration file:
For the Bourne (bash) shell:
ulimit -s 1024000
For the C (csh) shell:
limit stacksize 1024000
Other shells may have different settings; please refer to your shell documentation for specific details.
Intel Xeon EM64TANSYS was built and tested on a generic Intel EM64T system running Red Hat Enterprise Linux AS release5.3.
If you are running on Intel's Xeon EM64T system, we recommend that you turn CPU hyperthreadingoff (default is on). A system administrator needs to reboot the system and enter the BIOS to turnthe hyperthreading option off.
2.1. Utilizing CPU Hyperthreading Technology with ANSYS CFD Solvers
Hyperthreading technology uses one processor core to run more than one task at a time. ANSYS doesnot recommend using hyperthreading technology in conjunction with ANSYS CFD Solvers (Fluent, CFXand AIM Fluids). We recommend that you turn CPU hyperthreading off (default is on). A system admin-istrator needs to reboot the system and enter the BIOS to turn the hyperthreading option off.
2.2. Compiler Requirements for Linux Systems
Table 2.1: Compiler Requirements for All Linux Versions
AUTODYNCompilers*
Fluent Compilers*CFXCompilers*
Mechanical APDL,ANSYS WorkbenchCompilers*
Intel 14.0.3(FORTRAN, C,C++)
GCC 4.6.1 (typicallyinstalled as part of theoperating system)
Intel 14.0.3(FORTRAN, C,C++)
Intel 14.0.3 (FORTRAN,C, C++)
* Compilers are required only if you will be using User Programmable Features (UPF), User DefinedFunctions (UDF), or other customization options.
11Release 16.2 - © SAS IP, Inc. All rights reserved. - Contains proprietary and confidential information
of ANSYS, Inc. and its subsidiaries and affiliates.
Compiler Requirements for Linux Systems
2.3. Select Your Installation
The next step is to select your installation type. Please select the option below that matches your install-ation.
• Installing the ANSYS Software for a Stand-alone Linux System (p. 13)
• Installing the ANSYS Products and the License Server on Different Linux Machines (p. 21)
Release 16.2 - © SAS IP, Inc. All rights reserved. - Contains proprietary and confidential informationof ANSYS, Inc. and its subsidiaries and affiliates.12
Platform Details
Chapter 3: Installing the ANSYS Software for a Stand-alone LinuxSystem
This section explains how to install ANSYS, Inc. products, including ANSYS client licensing, as well asthe ANSYS, Inc. License Manager.
The default installation expects you to be logged in as root. You can install as non-root; however, if youare not logged in as root, you will not be able to set the /ansys_inc symbolic link and may potentiallyexperience permission problems. The inability to set the /ansys_inc symbolic link will in no way in-hibit your ability to run ANSYS, Inc. products; it is provided as a convenience.
If you do not use the /ansys_inc symbolic link, you must install all releases into a common directoryto ensure license manager compatibility and availability among releases and products.
If you did not use the /ansys_inc symbolic link, you must replace all references to /ansys_inc/v162or <install_dir> with the actual installation path you used.
Before You Begin
We recommend that you have the following information available before you begin this installation:
• An account on the ANSYS Customer Portal. If you do not have an account, you may register at https://sup-port.ansys.com/portal/site/AnsysCustomerPortal to receive your own account.
• Your license file from ANSYS, Inc., saved to a temporary directory. For more information, see Registering theLicense Server (p. 20).
• Open port numbers for both the FLEXlm and ANSYS Licensing Interconnect. Defaults are 1055 and 2325,respectively. To verify that these port numbers are available, open a command line and enter the followingcommand:
netstat -a -t
You will see a list of active ports. If 1055 and 2325 are listed, they are already in use and cannot beused for ANSYS, Inc. licensing. In this case, you will need to specify different port numbers where in-dicated later in this installation.
• Your local machine's name, to specify as the license server.
You should also verify that you are running on a supported platform. ANSYS, Inc. products support 64-bit Linux systems running Red Hat 6 (6.4 and 6.5) and SUSE Linux Enterprise 11 (SP2 or SP3).
Verify that you have sufficient disk space to download, uncompress, and install the products you willbe installing. Approximate disk space requirements for each product are shown in Disk Space andMemory Requirements (p. 3).
If you have any problems with--or questions about--the installation process, log a Service Request onthe ANSYS Customer Portal to have a Systems Support Specialist assist you.
13Release 16.2 - © SAS IP, Inc. All rights reserved. - Contains proprietary and confidential information
of ANSYS, Inc. and its subsidiaries and affiliates.
This section is divided into four sets of instructions:
• Product Download Instructions: This set of instructions describes the download and extraction process.
• Product Installation with Client Licensing: This set of instructions describes the product installation, includingthe client licensing portion.
• License Manager Installation: This set of instructions describes the license manager installation.
• Post-Installation Procedures for All Products: This is a set of instructions that describes any configurationsteps that may be required for the various products.
Both the product and the license manager will be installed on the same machine. You must completeboth the client licensing portion and the license manager installation in order to run ANSYS, Inc. products.
3.1. Pre-Installation Instructions for Download Installations
Before downloading the installation files, you need to accurately determine your platform type. Versionsthat are optimized for different chip sets from the same vendor can have similar names, causing confu-sion. We strongly recommend that you run the getFLEXid script on each machine first. This scriptwill output the correct platform name for each machine on which it is run. This script can be obtainedfrom the ANSYS website, by clicking Support>Licensing>Capture License Server Info.
3.2. Product Download Instructions
To download the installation files from our website, you will need to have a current technical supportagreement.
Depending on the product/platform combination(s) you choose, you may need to download multiplefiles.
1. From the Customer Portal, https://support.ansys.com/portal/site/AnsysCustomerPortal, click Downloads> Current Release.
Step 1 of the ANSYS Download Center Select Full Products page is displayed.
2. Select your installation operating system (Windows x64 or Linux x64).
3. Select the type of files you wish to download:
• Primary Packages: Individual full packages for the primary ANSYS products.
• ISO Images: ISO images for the DVD installation.
4. Click the appropriate download option.
5. Select your desired download directory and click Save.
6. Repeat this process for each download file.
7. To download Add-On Packages, Tools or Academic Packages, click the + to the right of the appropriateproduct group title to display the download options and download as required.
Release 16.2 - © SAS IP, Inc. All rights reserved. - Contains proprietary and confidential informationof ANSYS, Inc. and its subsidiaries and affiliates.14
Installing the ANSYS Software for a Stand-alone Linux System
8. After all downloads have been completed, uncompress each package using standard uncompressionutilities for your specific platform. We strongly recommend that you extract the files into new, temporarydirectories.
• Continue with the steps described in Product Installation (p. 16).
3.3. Installing from a USB Drive
Insert the USB drive into an appropriate USB slot on your computer. Navigate to the root directory ofthe USB drive and Run ./INSTALL. Continue with the steps described in Product Installation (p. 16).
3.4. Mounting the DVD Instructions for DVD Installations (Linux x64 Only)
If you install ANSYS, Inc. products from the installation media (DVD), you will need to run the installationprocedure using either a locally- or remotely-mounted DVD, depending on your site's system.
Note
Typically, a Linux system will mount a local DVD for you under /media/ANSYS162.
For a locally-mounted DVD installation, issue the following commands:
mkdir dvdrom_dirmount -t iso9660 /dev/cdrom dvdrom_dir
If the target machine does not have a DVD reader, first follow the steps for locally-mounted DVD, andthen follow the procedure below for remotely-mounted DVDs:
Remotely-Mounted DVD Procedure
1. Add the dvdrom_dir directory to the /etc/exports file on the machine with the DVD device. Asample /etc/exports entry is:
/dvdrom_dir *(ro)
or
/dvdrom_dir (ro)
2. Run exportfs to export the dvdrom_dir directory:
exportfs –a
Check the manual page for 'exports' for the correct syntax, as different Linux versions can havedifferent syntax.
3. Log on to the machine where you wish to install ANSYS, Inc. products and issue the following commands:
mkdir dvdrom_dir2mount -t nfs Host:cdrom_dir dvdrom_dir2
where Host is the hostname of the machine where the DVD device is located.
Run man exports for more information.
15Release 16.2 - © SAS IP, Inc. All rights reserved. - Contains proprietary and confidential information
of ANSYS, Inc. and its subsidiaries and affiliates.
Mounting the DVD Instructions for DVD Installations (Linux x64 Only)
3.5. Product Installation
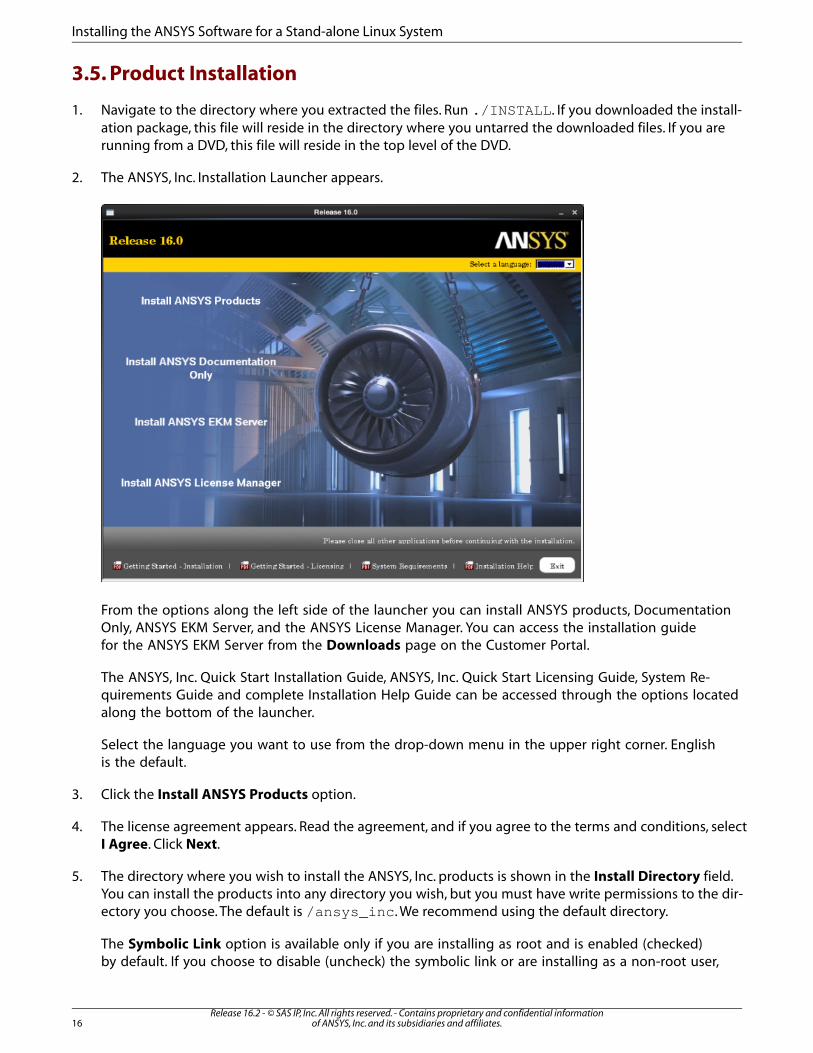
1. Navigate to the directory where you extracted the files. Run ./INSTALL. If you downloaded the install-ation package, this file will reside in the directory where you untarred the downloaded files. If you arerunning from a DVD, this file will reside in the top level of the DVD.
2. The ANSYS, Inc. Installation Launcher appears.
From the options along the left side of the launcher you can install ANSYS products, DocumentationOnly, ANSYS EKM Server, and the ANSYS License Manager. You can access the installation guidefor the ANSYS EKM Server from the Downloads page on the Customer Portal.
The ANSYS, Inc. Quick Start Installation Guide, ANSYS, Inc. Quick Start Licensing Guide, System Re-quirements Guide and complete Installation Help Guide can be accessed through the options locatedalong the bottom of the launcher.
Select the language you want to use from the drop-down menu in the upper right corner. Englishis the default.
3. Click the Install ANSYS Products option.
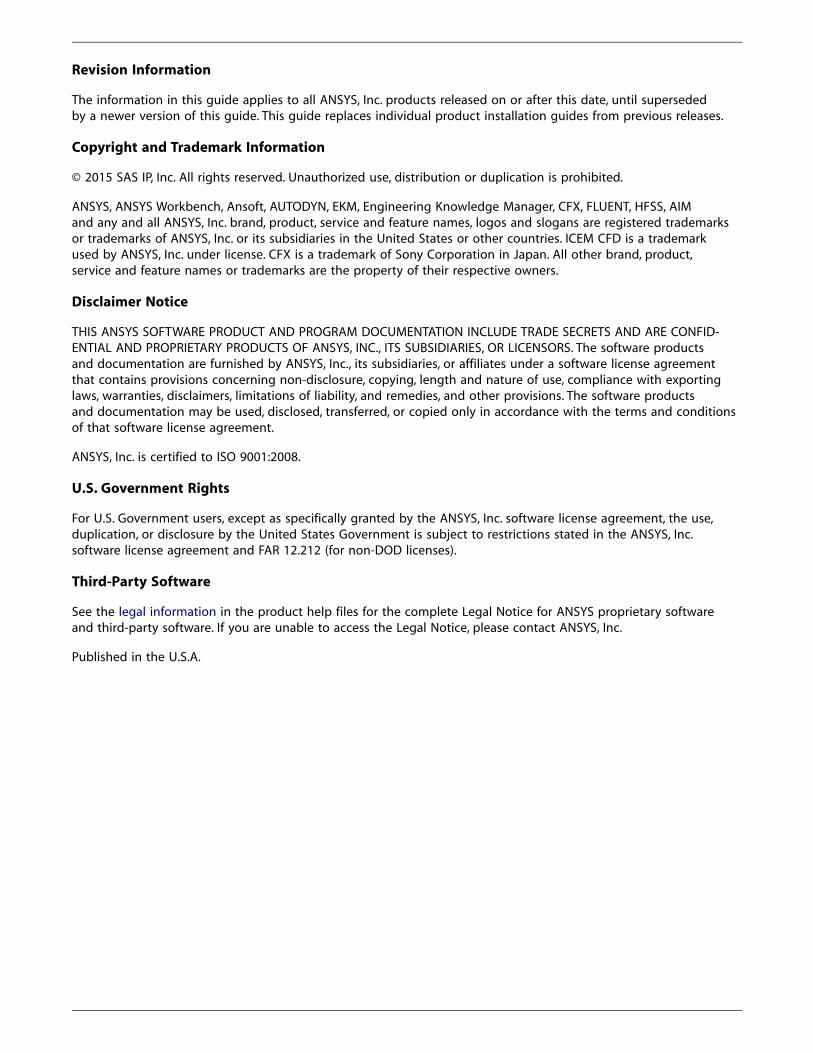
4. The license agreement appears. Read the agreement, and if you agree to the terms and conditions, selectI Agree. Click Next.
5. The directory where you wish to install the ANSYS, Inc. products is shown in the Install Directory field.You can install the products into any directory you wish, but you must have write permissions to the dir-ectory you choose. The default is /ansys_inc. We recommend using the default directory.
The Symbolic Link option is available only if you are installing as root and is enabled (checked)by default. If you choose to disable (uncheck) the symbolic link or are installing as a non-root user,
Release 16.2 - © SAS IP, Inc. All rights reserved. - Contains proprietary and confidential informationof ANSYS, Inc. and its subsidiaries and affiliates.16
Installing the ANSYS Software for a Stand-alone Linux System
substitute the directory path where you installed the product for all subsequent occurrences of/ansys_inc in this guide.
We strongly recommend that you use the Symbolic Link option. If you do not use this option, youmust install all releases into a common directory to ensure license manager compatibility andavailability among releases and products.
If you have already installed the ANSYS Workbench Framework for Ansoft, you must install anyadditional ANSYS, Inc. products into the same directory.
On Linux, you can choose Disable RSS to disable automatic internet feeds to ANSYS, Inc. products.
Click Next.
6. If this is a first time installation, you are prompted to enter your license server specification. If you alreadyhave an existing license server specification file, you will not see this window and proceed directly to thenext step.
Enter your ANSYS Licensing Interconnect port number and your ANSYS FlexNet port number. Defaultsare provided and will work in most cases. You may need to check with your IT department toconfirm that the default port numbers are valid or to get different port numbers if necessary.
Specify the hostname for your license server machine(s).
Click Next.
7. All products available in the installation package(s) you downloaded are listed.
The installation program attempts to query your license server to pre-select your installation options.If the query is successful, the following message is displayed:
Your installation options were pre-selected based upon information from your license server.
You can select or deselect any combination of products. ANSYS Workbench is automatically installedwith most ANSYS, Inc. products; there is no individual product selection for ANSYS Workbench.
If you select NX or Catia V5, you will have additional installation steps. This installation assumesyou are not installing these CAD packages. Deselect these options before continuing.
By default, the Install Documentation option is enabled (checked). When enabled, help document-ation is included as part of the installation process for all products selected. No help documentationis included with the installation if this box is disabled (unchecked).
You will also see an estimate of the disk space required to install all of the selected components,and the disk space you have available. The actual amount of disk space required may be less, butif you choose to run the installation with insufficient disk space available, we strongly recommendthat you review the log files at the end of the installation to verify that all products were installedcorrectly. Installation log files are written to the installation directory.
Note
On a first time installation, if you chose to install any ANSYS Geometry Interfaces, en-sure that you have also selected at least one ANSYS, Inc. product as part of the in-
17Release 16.2 - © SAS IP, Inc. All rights reserved. - Contains proprietary and confidential information
of ANSYS, Inc. and its subsidiaries and affiliates.
Product Installation
stallation. Installing an ANSYS Geometry Interface without an underlying ANSYS,Inc. product on a first time installation may cause installation errors.
Select the products you want to install and click Next.
The dates on the licensing files being installed are compared to any that may already exist on yourmachine. (This may take a few moments.)
8. A summary screen appears listing your installation selections. Please review this list carefully to verify thatit is correct. When you are sure all selections are correct, click Next to begin the installation.
9. The installation progress screen displays a status bar towards the bottom of the installation window. Thisstatus bar tracks the percentage of packages that have been installed on your computer. Depending onthe number of products you have selected, the installation time required could be lengthy. You will notbe able to interrupt the installation process. Please be patient while the installation completes.
Note
Clicking the View Details Progress Log button opens a second window that displaysthe name of each product package as it is uncompressed and installed.
Click Next to continue the installation.
10. The product installation window reappears with a message noting that the installation is complete. ALaunch Survey Upon Exiting option is included here. Clicking Exit while the Launch Survey Upon Ex-iting is enabled causes your default browser to open, displaying the product survey. Disabling (un-checking) the Launch Survey Upon Exiting option and then clicking Exit skips the survey.
The ANSYS, Inc. Installation Launcher appears. For this stand-alone installation, you must completethe License Manager installation (next) to run ANSYS, Inc. products.
3.5.1. ANSYS License Manager Installation
Follow the instructions below to install the ANSYS, Inc. License Manager on your Linux machine. Becauseyou will not be using a network server, you must install and configure the ANSYS, Inc. License Manageron your machine. The License Manager controls access to the ANSYS, Inc. products you have purchased.
1. Navigate to the directory where you extracted the files. Run ./INSTALL.LM. If you downloaded the licensemanager installation package, this file will reside in the directory where you untarred the downloadedfiles. If you are running from a DVD, this file will reside in the top level of the DVD.
2. You may see a warning stating that if the license manager is currently running, it will be shut down. Thisinstallation assumes that you have not previously installed the products or the licensing on this machine,and you are not pointing to a network license server machine. You may safely ignore this message andclick OK.
3. Select the language you want to use. English is the default.
4. The license agreement appears. Read the agreement, and if you agree to the terms and conditions, selectI Agree. Click Next.
5. The directory where you wish to install the ANSYS, Inc. License Manager is shown in the Install Directoryfield. You can install the License Manager into any directory you wish, but you must have write permissions
Release 16.2 - © SAS IP, Inc. All rights reserved. - Contains proprietary and confidential informationof ANSYS, Inc. and its subsidiaries and affiliates.18
Installing the ANSYS Software for a Stand-alone Linux System
to the directory you choose. The default is /ansys_inc. We recommend using the default directory.You must use the same directory where the products were installed.
Note
You are unable to change the installation directory for a computer that currently containsan instance of the ANSYS, Inc. License Manager or ANSYS Electromagnetics LicenseManager. To change the installation directory location, you must first uninstall any pre-vious versions of both products.
6. The ANSYS, Inc. License Manager is selected as the only product available to install. As with the productinstallation, the required and available disk space numbers are shown. Click Next.
7. A summary screen appears that lists the products to be installed. Because this is a license manager install-ation, the ANSYS, Inc. License Manager is the only product listed.
Click Next. The license manager installation begins.
The ANSYS, Inc. License Manager is now being installed and configured on your system. After theLicense Manager installation has been completed, the Launch License Management Center uponexiting option is included on the screen. The ANSYS License Management Center is a browser-based user interface that centralizes many of the ANSYS product licensing administrative functions.If you do not wish to launch the License Management Center, uncheck the Launch License Man-agement Center upon exiting option.
8. Click Exit to close the License Manager Installation screen.
9. Click Exit to close the ANSYS, Inc. Installation Manager.
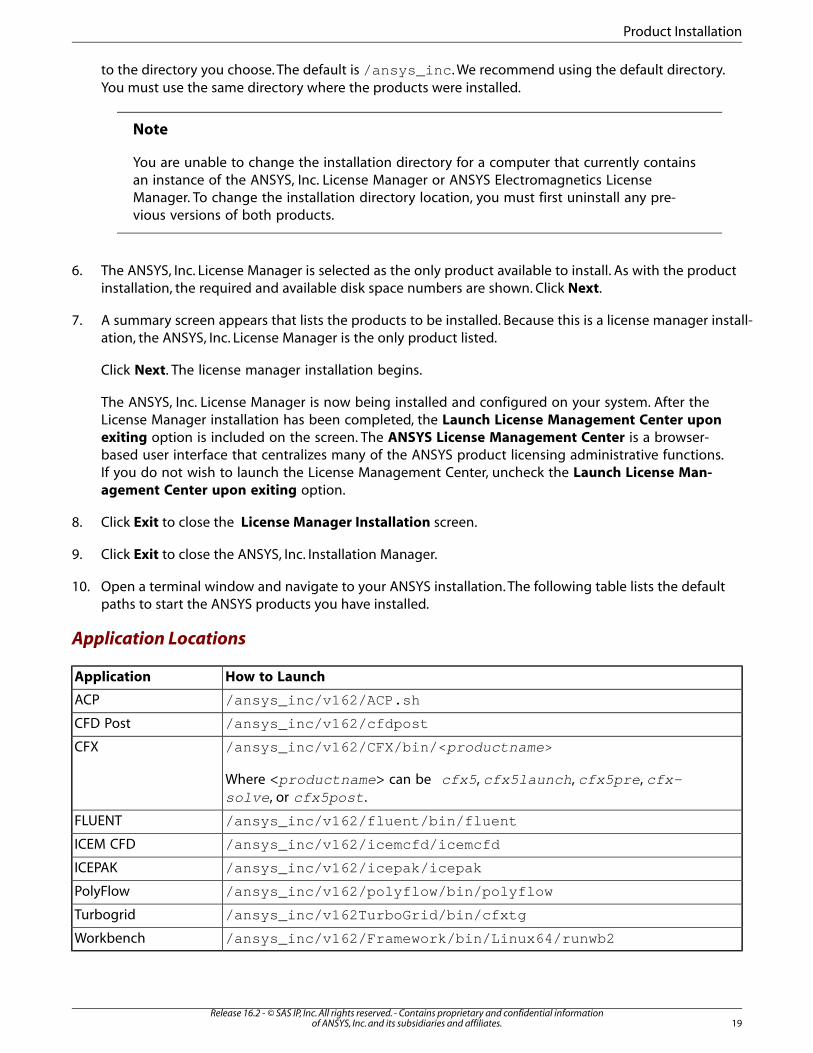
10. Open a terminal window and navigate to your ANSYS installation. The following table lists the defaultpaths to start the ANSYS products you have installed.
Application Locations
How to LaunchApplication
/ansys_inc/v162/ACP.shACP
/ansys_inc/v162/cfdpostCFD Post
/ansys_inc/v162/CFX/bin/<productname>CFX
Where <productname> can be cfx5, cfx5launch, cfx5pre, cfx-solve, or cfx5post.
/ansys_inc/v162/fluent/bin/fluentFLUENT
/ansys_inc/v162/icemcfd/icemcfdICEM CFD
/ansys_inc/v162/icepak/icepakICEPAK
/ansys_inc/v162/polyflow/bin/polyflowPolyFlow
/ansys_inc/v162TurboGrid/bin/cfxtgTurbogrid
/ansys_inc/v162/Framework/bin/Linux64/runwb2Workbench
19Release 16.2 - © SAS IP, Inc. All rights reserved. - Contains proprietary and confidential information
of ANSYS, Inc. and its subsidiaries and affiliates.
Product Installation
3.5.1.1. Registering the License Server
If you are a new user who has not received a license file for your server or if you add or change a licenseserver machine, follow this procedure to register your license server information. See the ANSYS, Inc.Licensing Guide for more information on selecting license servers (Selecting License Server Machines)and on using the ANSYS License Management Center (License Server Administration Using ANSYS LicenseManagement Center).
1. Open the ANSYS License Management Center. To run the ANSYS License Management Center on Linuxrun the following script:.
/shared_files/licensing/start_lmcenter
2. Click the Get System Hostid Information option to display your system ID code(s).
3. Select the system ID you wish to use and click SAVE TO FILE.
A text file containing your system ID information is created.
4. Forward this text file to your ANSYS sales representative so that a license file can be created for you.
5. Add your license files though the ANSYS License Management Center. For these steps, see Adding a Licensewith the ANSYS License Management Center.
After completing the installation process, please refer to Post-Installation Instructions (p. 31).
Release 16.2 - © SAS IP, Inc. All rights reserved. - Contains proprietary and confidential informationof ANSYS, Inc. and its subsidiaries and affiliates.20
Installing the ANSYS Software for a Stand-alone Linux System
Chapter 4: Installing the ANSYS Products and the License Server onDifferent Linux Machines
This section explains how to install ANSYS, Inc. products, including ANSYS client licensing, as well asthe ANSYS, Inc. License Manager.
The default installation expects you to be logged in as root. You can install as non-root; however, youwill not be able to set the /ansys_inc symbolic link and may potentially experience permissionproblems. The inability to set the /ansys_inc symbolic link will in no way inhibit your ability to runANSYS, Inc. products; it is provided as a convenience when navigating to the /ansys_inc directory.
If you do not use the /ansys_inc symbolic link, you must install all releases into a common directoryto ensure license manager compatibility and availability among releases and products.
If you did not use the /ansys_inc symbolic link, you must replace all references to /ansys_inc/v162or <install_dir> with the actual installation path you used.
Before You Begin
We recommend that you have the following information available before you begin this installation:
• An account on the ANSYS Customer Portal. If you do not have an account, you may register at https://sup-port.ansys.com/portal/site/AnsysCustomerPortal to receive your own account.
• Your license file from ANSYS, Inc., saved to a temporary directory. For more information, see Registering theLicense Server (p. 28).
• Open port numbers for both the FLEXlm and ANSYS Licensing Interconnect. Defaults are 1055 and 2325,respectively. To verify that these port numbers are available, open a command line and enter the followingcommand:
netstat -a -t
You will see a list of active ports. If 1055 and 2325 are listed, they are already in use and cannot beused for ANSYS, Inc. licensing. In this case, you will need to specify different port numbers where in-dicated later in this installation.
• Your local machine's name, to specify as the license server.
You should also verify that you are running on a supported platform. ANSYS, Inc. products support 64-bit Linux systems running Red Hat 6 (6.4 and 6.5) and SUSE Linux Enterprise 11 (SP2 or SP3). For detailedinformation on which products are supported on which platforms, please see the ANSYS, Inc. Linux In-stallation Guide, which is available for download when you download ANSYS, Inc. products or as aprinted manual if you receive installation media.
Verify that you have sufficient disk space to download, uncompress, and install the products you willbe installing. Approximate disk space requirements for each product are shown in Disk Space andMemory Requirements (p. 3).
21Release 16.2 - © SAS IP, Inc. All rights reserved. - Contains proprietary and confidential information
of ANSYS, Inc. and its subsidiaries and affiliates.
If you have any problems with--or questions about--the installation process, log a Service Request onthe ANSYS Customer Portal to have a Systems Support Specialist assist you.
This section is divided into four sets of instructions:
• Product Download Instructions: This set of instructions describes the download and extraction process.
• Product Installation with Client Licensing: This set of instructions describes the product installation, includingthe client licensing portion.
• License Manager Installation: This set of instructions describes the license manager installation.
• Post-Installation Procedures for All Products: This is a set of instructions that describes any configurationsteps that may be required for the various products.
For this procedure, the product and the license manager will be installed on separate machines. Youmust complete both the client licensing portion and the license manager installation in order to run ANSYS,Inc. products.
4.1. Pre-Installation Instructions for Download Installations
Before downloading the installation files, you need to accurately determine your platform type. Versionsthat are optimized for different chip sets from the same vendor can have similar names, causing confu-sion. We strongly recommend that you run the getFLEXid script on each machine first. This scriptwill output the correct platform name for each machine on which it is run. This script can be obtainedfrom the ANSYS website, in the Licensing Support area under “Capture License Server Info”.
4.2. Product Download Instructions
To download the installation files from our website, you will need to have a current technical supportagreement.
Depending on the product/platform combination(s) you choose, you may need to download multiplefiles.
1. From the Customer Portal, https://support.ansys.com/portal/site/AnsysCustomerPortal, click Downloads> Current Release.
Step 1 of the ANSYS Download Center Select Full Products page is displayed.
2. Select your installation operating system (Windows x64 or Linux x64).
3. Select the type of files you wish to download:
• Primary Packages: Individual full packages for the primary ANSYS products.
• ISO Images: ISO images for the DVD installation.
4. Click the appropriate download option.
5. Select your desired download directory and click Save.
6. Repeat this process for each download file.
Release 16.2 - © SAS IP, Inc. All rights reserved. - Contains proprietary and confidential informationof ANSYS, Inc. and its subsidiaries and affiliates.22
Installing the ANSYS Products and the License Server on Different Linux Machines
7. To download Add-On Packages, Tools or Academic Packages, click the + to the right of the appropriateproduct group title to display the download options and download as required.
8. After all downloads have been completed, uncompress each package using standard uncompressionutilities for your specific platform. We strongly recommend that you extract the files into new, temporarydirectories.
• Continue with the steps described in Product Installation (p. 24).
4.3. Installing from a USB Drive
Insert the USB drive into an appropriate USB slot on your computer. Navigate to the root directory ofthe USB drive and Run ./INSTALL. Continue with the steps described in Product Installation (p. 24).
4.4. Mounting the DVD Instructions for DVD Installations (Linux x64 Only)
If you install ANSYS, Inc. products from the installation media (DVD), you will need to run the installationprocedure using either a locally- or remotely-mounted DVD, depending on your site's system.
Note
Typically, a Linux system will mount a local DVD for you under /media/ANSYS162.
For a locally-mounted DVD installation, issue the following commands:
mkdir dvdrom_dirmount -t iso9660 /dev/cdrom dvdrom_dir
If the target machine does not have a DVD reader, first follow the steps for locally-mounted DVD, andthen follow the procedure below for remotely-mounted DVDs:
Remotely-Mounted DVD Procedure
1. Add the dvdrom_dir directory to the /etc/exports file on the machine with the DVD device. Asample /etc/exports entry is:
/dvdrom_dir *(ro)
or
/dvdrom_dir (ro)
2. Run exportfs to export the dvdrom_dir directory:
exportfs –a
Check the manual page for 'exports' for the correct syntax, as different Linux versions can havedifferent syntax.
3. Log on to the machine where you want to install ANSYS, Inc. products and issue the following commands:
mkdir dvdrom_dir2mount -t nfs Host:cdrom_dir dvdrom_dir2
where Host is the hostname of the machine where the DVD device is located.
Run man exports for more information.
23Release 16.2 - © SAS IP, Inc. All rights reserved. - Contains proprietary and confidential information
of ANSYS, Inc. and its subsidiaries and affiliates.
Mounting the DVD Instructions for DVD Installations (Linux x64 Only)
4.5. Product Installation
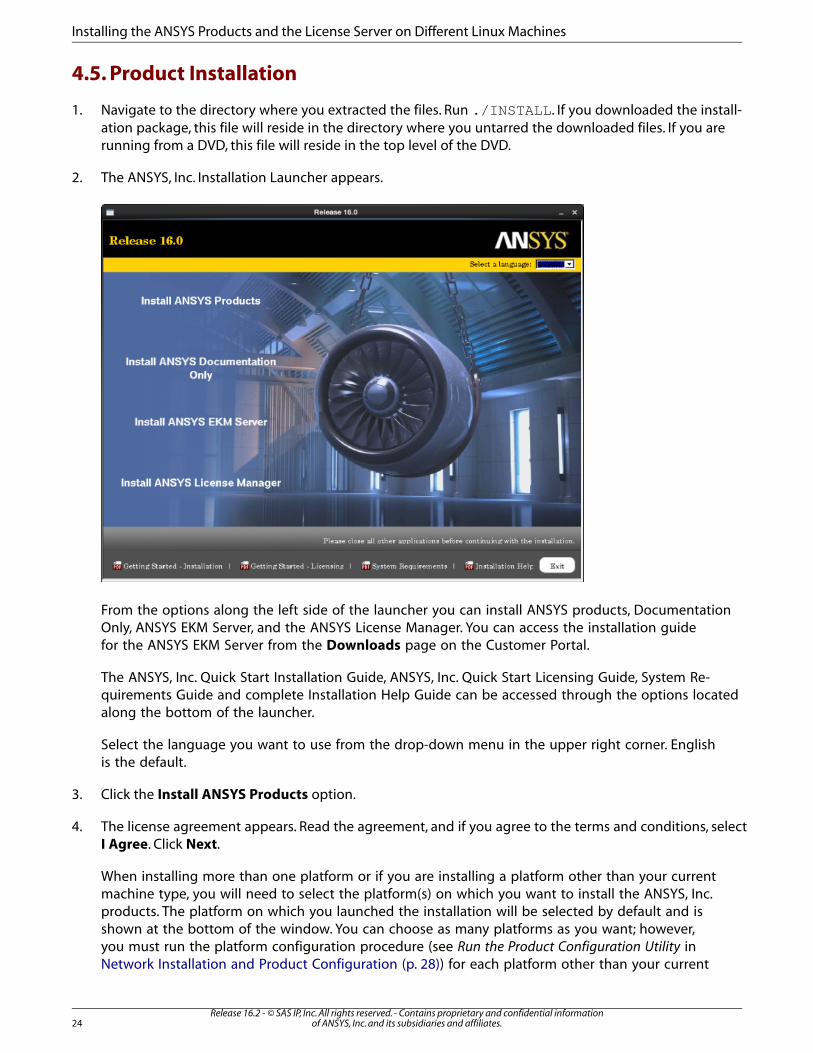
1. Navigate to the directory where you extracted the files. Run ./INSTALL. If you downloaded the install-ation package, this file will reside in the directory where you untarred the downloaded files. If you arerunning from a DVD, this file will reside in the top level of the DVD.
2. The ANSYS, Inc. Installation Launcher appears.
From the options along the left side of the launcher you can install ANSYS products, DocumentationOnly, ANSYS EKM Server, and the ANSYS License Manager. You can access the installation guidefor the ANSYS EKM Server from the Downloads page on the Customer Portal.
The ANSYS, Inc. Quick Start Installation Guide, ANSYS, Inc. Quick Start Licensing Guide, System Re-quirements Guide and complete Installation Help Guide can be accessed through the options locatedalong the bottom of the launcher.
Select the language you want to use from the drop-down menu in the upper right corner. Englishis the default.
3. Click the Install ANSYS Products option.
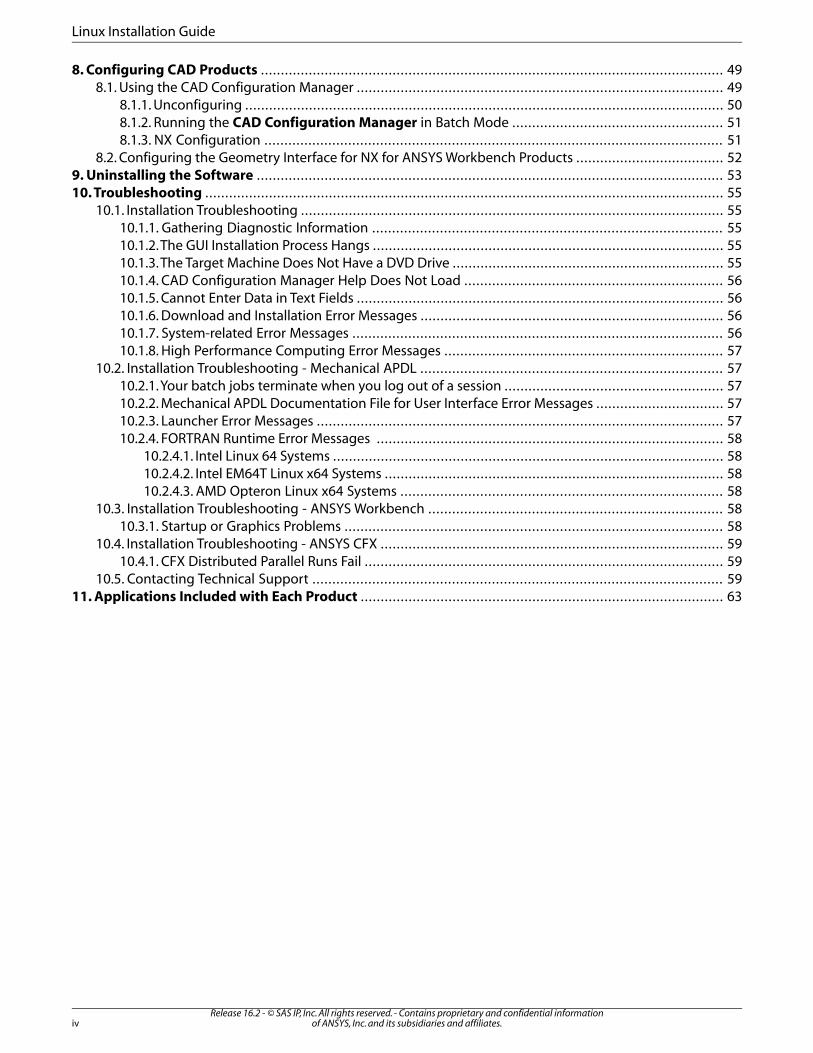
4. The license agreement appears. Read the agreement, and if you agree to the terms and conditions, selectI Agree. Click Next.
When installing more than one platform or if you are installing a platform other than your currentmachine type, you will need to select the platform(s) on which you want to install the ANSYS, Inc.products. The platform on which you launched the installation will be selected by default and isshown at the bottom of the window. You can choose as many platforms as you want; however,you must run the platform configuration procedure (see Run the Product Configuration Utility inNetwork Installation and Product Configuration (p. 28)) for each platform other than your current
Release 16.2 - © SAS IP, Inc. All rights reserved. - Contains proprietary and confidential informationof ANSYS, Inc. and its subsidiaries and affiliates.24
Installing the ANSYS Products and the License Server on Different Linux Machines
machine type. See Network Installation and Product Configuration (p. 28) for specific instructionson how to configure a shared installation directory across multiple machines using a commonnetwork file system.
5. The directory where you want to install the ANSYS, Inc. products is shown in the Install Directory field.You can install the products into any directory you want, but you must have write permissions to thedirectory you choose. The default is /ansys_inc. We recommend using the default directory.
The Symbolic Link option is available only if you are installing as root and is enabled (checked)by default. If you choose to disable (uncheck) the symbolic link or are installing as a non-root user,substitute the directory path where you installed the product for all subsequent occurrences of/ansys_inc in this guide.
We strongly recommend that you use the Symbolic Link option. If you do not use this option, youmust install all releases into a common directory to ensure license manager compatibility andavailability among releases and products.
If you have already installed the ANSYS Workbench Framework for Ansoft, you must install anyadditional ANSYS, Inc. products into the same directory.
On Linux, you can choose Disable RSS to disable automatic internet feeds to ANSYS, Inc. products.
Click Next.
6. If this is a first time installation, you are prompted to enter your license server specification. If you alreadyhave an existing license server specification file, you will not see this window and proceed directly to thenext step.
Enter your ANSYS Licensing Interconnect port number and your ANSYS FlexNet port number. Defaultsare provided and will work in most cases. You may need to check with your IT department toconfirm that the default port numbers are valid or to get different port numbers if necessary.
Specify the hostname for your license server machine(s).
Click Next.
7. All products available in the installation package(s) you downloaded are listed.
The installation program attempts to query your license server to pre-select your installation options.If the query is successful, the following message is displayed:
Your installation options were pre-selected based upon information from your license server.
You can select or deselect any combination of products. ANSYS Workbench is automatically installedwith most ANSYS, Inc. products; there is no individual product selection for ANSYS Workbench.
If you select NX or Catia V5, you will have additional installation steps. This installation assumesyou are not installing these CAD packages. Deselect these options before continuing.
By default, the Install Documentation option is enabled (checked). When enabled, help document-ation is included as part of the installation process for all products selected. No help documentationis included with the installation if this box is disabled (unchecked).
You will also see an estimate of the disk space required to install all of the selected components,and the disk space you have available. The actual amount of disk space required may be less, but
25Release 16.2 - © SAS IP, Inc. All rights reserved. - Contains proprietary and confidential information
of ANSYS, Inc. and its subsidiaries and affiliates.
Product Installation
if you choose to run the installation with insufficient disk space available, we strongly recommendthat you review the log files at the end of the installation to verify that all products were installedcorrectly. Installation log files are written to the installation directory.
Note
On a first time installation, if you chose to install any ANSYS Geometry Interfaces, en-sure that you have also selected at least one ANSYS, Inc. product as part of the in-stallation. Installing an ANSYS Geometry Interface without an underlying ANSYS,Inc. product on a first time installation may cause installation errors.
Select the products you want to install and click Next.The dates on the licensing files being installedare compared to any that may already exist on your machine. (This may take a few moments.)
8. A summary screen appears listing your installation selections. Please review this list carefully to verify thatit is correct. When you are sure all selections are correct, click Next to begin the installation.
9. The installation progress screen displays a status bar towards the bottom of the installation window. Thisstatus bar tracks the percentage of packages that have been installed on your computer. Depending onthe number of products you have selected, the installation time required could be lengthy. You will notbe able to interrupt the installation process. Please be patient while the installation completes.
Note
Clicking the View Details Progress Log button opens a second window that displaysthe name of each product package as it is uncompressed and installed.
Click Next to continue the installation.
10. The product installation window reappears with a message noting that the installation is complete. ALaunch Survey Upon Exiting option is included here. Clicking Exit while the Launch Survey Upon Ex-iting is enabled causes your default browser to open, displaying the product survey. Disabling (un-checking) the Launch Survey Upon Exiting option and then clicking Exit skips the survey.
11. If you have installed ANSYS, Inc. products on a file server, follow the instructions under Network Installationand Product Configuration (p. 28).
4.5.1. ANSYS License Manager Installation
After you have installed the ANSYS products on your client machines, follow the instructions below toinstall the ANSYS, Inc. License Manager on your license server machine. The License Manager controlsaccess to the ANSYS, Inc. products you have purchased.
1. Navigate to the directory where you extracted the files. Run ./INSTALL.LM. If you downloaded the licensemanager installation package, this file will reside in the directory where you untarred the downloadedfiles. If you are running from a DVD, this file will reside in the top level of the DVD.
2. You may see a warning stating that if the license manager is currently running, it will be shut down. Ifyou have not previously installed the products or the licensing on this machine, and you are not pointingto a network license server machine, you may safely ignore this message and click OK.
3. Select the language you want to use. English is the default.
Release 16.2 - © SAS IP, Inc. All rights reserved. - Contains proprietary and confidential informationof ANSYS, Inc. and its subsidiaries and affiliates.26
Installing the ANSYS Products and the License Server on Different Linux Machines
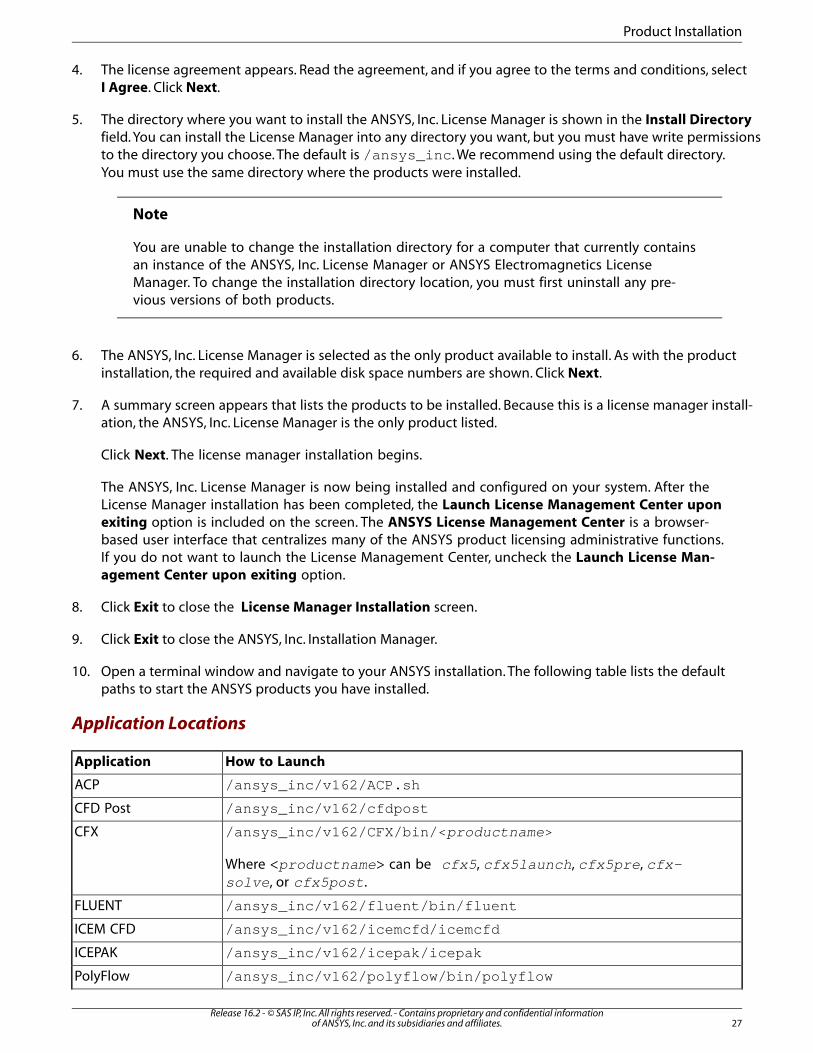
4. The license agreement appears. Read the agreement, and if you agree to the terms and conditions, selectI Agree. Click Next.
5. The directory where you want to install the ANSYS, Inc. License Manager is shown in the Install Directoryfield. You can install the License Manager into any directory you want, but you must have write permissionsto the directory you choose. The default is /ansys_inc. We recommend using the default directory.You must use the same directory where the products were installed.
Note
You are unable to change the installation directory for a computer that currently containsan instance of the ANSYS, Inc. License Manager or ANSYS Electromagnetics LicenseManager. To change the installation directory location, you must first uninstall any pre-vious versions of both products.
6. The ANSYS, Inc. License Manager is selected as the only product available to install. As with the productinstallation, the required and available disk space numbers are shown. Click Next.
7. A summary screen appears that lists the products to be installed. Because this is a license manager install-ation, the ANSYS, Inc. License Manager is the only product listed.
Click Next. The license manager installation begins.
The ANSYS, Inc. License Manager is now being installed and configured on your system. After theLicense Manager installation has been completed, the Launch License Management Center uponexiting option is included on the screen. The ANSYS License Management Center is a browser-based user interface that centralizes many of the ANSYS product licensing administrative functions.If you do not want to launch the License Management Center, uncheck the Launch License Man-agement Center upon exiting option.
8. Click Exit to close the License Manager Installation screen.
9. Click Exit to close the ANSYS, Inc. Installation Manager.
10. Open a terminal window and navigate to your ANSYS installation. The following table lists the defaultpaths to start the ANSYS products you have installed.
Application Locations
How to LaunchApplication
/ansys_inc/v162/ACP.shACP
/ansys_inc/v162/cfdpostCFD Post
/ansys_inc/v162/CFX/bin/<productname>CFX
Where <productname> can be cfx5, cfx5launch, cfx5pre, cfx-solve, or cfx5post.
/ansys_inc/v162/fluent/bin/fluentFLUENT
/ansys_inc/v162/icemcfd/icemcfdICEM CFD
/ansys_inc/v162/icepak/icepakICEPAK
/ansys_inc/v162/polyflow/bin/polyflowPolyFlow
27Release 16.2 - © SAS IP, Inc. All rights reserved. - Contains proprietary and confidential information
of ANSYS, Inc. and its subsidiaries and affiliates.
Product Installation
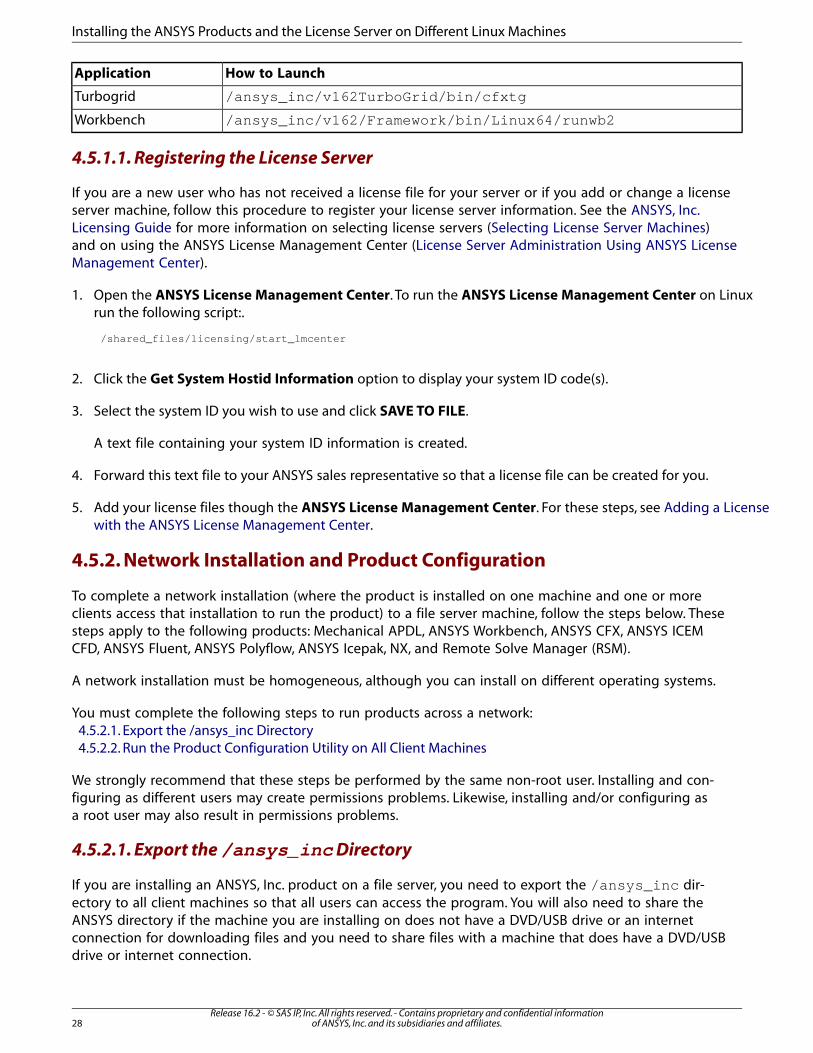
How to LaunchApplication
/ansys_inc/v162TurboGrid/bin/cfxtgTurbogrid
/ansys_inc/v162/Framework/bin/Linux64/runwb2Workbench
4.5.1.1. Registering the License Server
If you are a new user who has not received a license file for your server or if you add or change a licenseserver machine, follow this procedure to register your license server information. See the ANSYS, Inc.Licensing Guide for more information on selecting license servers (Selecting License Server Machines)and on using the ANSYS License Management Center (License Server Administration Using ANSYS LicenseManagement Center).
1. Open the ANSYS License Management Center. To run the ANSYS License Management Center on Linuxrun the following script:.
/shared_files/licensing/start_lmcenter
2. Click the Get System Hostid Information option to display your system ID code(s).
3. Select the system ID you wish to use and click SAVE TO FILE.
A text file containing your system ID information is created.
4. Forward this text file to your ANSYS sales representative so that a license file can be created for you.
5. Add your license files though the ANSYS License Management Center. For these steps, see Adding a Licensewith the ANSYS License Management Center.
4.5.2. Network Installation and Product Configuration
To complete a network installation (where the product is installed on one machine and one or moreclients access that installation to run the product) to a file server machine, follow the steps below. Thesesteps apply to the following products: Mechanical APDL, ANSYS Workbench, ANSYS CFX, ANSYS ICEMCFD, ANSYS Fluent, ANSYS Polyflow, ANSYS Icepak, NX, and Remote Solve Manager (RSM).
A network installation must be homogeneous, although you can install on different operating systems.
You must complete the following steps to run products across a network:4.5.2.1. Export the /ansys_inc Directory4.5.2.2. Run the Product Configuration Utility on All Client Machines
We strongly recommend that these steps be performed by the same non-root user. Installing and con-figuring as different users may create permissions problems. Likewise, installing and/or configuring asa root user may also result in permissions problems.
4.5.2.1. Export the /ansys_inc Directory
If you are installing an ANSYS, Inc. product on a file server, you need to export the /ansys_inc dir-ectory to all client machines so that all users can access the program. You will also need to share theANSYS directory if the machine you are installing on does not have a DVD/USB drive or an internetconnection for downloading files and you need to share files with a machine that does have a DVD/USBdrive or internet connection.
Release 16.2 - © SAS IP, Inc. All rights reserved. - Contains proprietary and confidential informationof ANSYS, Inc. and its subsidiaries and affiliates.28
Installing the ANSYS Products and the License Server on Different Linux Machines
The instructions below assume ANSYS, Inc. products were installed in the specified directory.
1. Install the ANSYS, Inc. products. The following example uses /usr/ansys_inc.
2. Export the ansys_inc directory by adding the following line to the /etc/exports file:
/usr/ansys_inc
The default behavior on Linux provides read-only access from all clients. To enable read/writepermission from all clients, use *(rw):
/usr/ansys_inc *(rw)
Alternatively, if the installing user is root, use:
/usr/ansys_inc *(rw,no_root_squash)
3. Run
exportfs -a
4. On all client computers, mount the ansys_inc directory.
If you perform a network install where you want the clients to be able to modify the licensing configur-ation, you need to consider the NFS write options for the exported file system as shown in the aboveexamples. You also need local permissions to the licensing directory (/shared_files/licensing/)if you want to be able to create the install_licconfig.log that the license configuration produces.
If you need to transfer the files from a Windows machine with a DVD drive to a Linux machine withoutone, copy the DVD contents using a Samba mount or some other transfer method that is safe to usebetween Windows and Linux.
If sharing the ANSYS directory between Linux machines, you must use the same mount point for boththe client and server. For example, if you installed to a file server in a directory named /apps/an-sys_inc and you did not choose the symbolic link to /ansys_inc, then you must mount this directoryon the client machine using /apps/ansys_inc as the mount point. If you did choose the symboliclink to /ansys_inc during installation on the file server, you must either use /ansys_inc as themount point on the client or you must create a symbolic link to /ansys_inc on the client machine.(The symbolic link is created by default during installation if you installed as root).
4.5.2.2. Run the Product Configuration Utility on All Client Machines
For network installations, you must run this step on every client machine.
Note
The username and user ID utilized when running the Product Configuration Utility must bethe same as the installing server user.
1. On each client machine, issue the following command to run the Product Configuration utility:
/ansys_inc/v162/ProductConfig.sh
2. Select Configure Products.
29Release 16.2 - © SAS IP, Inc. All rights reserved. - Contains proprietary and confidential information
of ANSYS, Inc. and its subsidiaries and affiliates.
Product Installation
3. Select the products you want to configure and click Configure.
Note
ANSYS Workbench is configured when Mechanical APDL, ANSYS CFX, ANSYS Fluent,ANSYS Polyflow, or Remote Solve Manager Standalone Services is selected. CFD-Post isconfigured when either ANSYS CFX, ANSYS Fluent, ANSYS Polyflow or ANSYS Icepak isconfigured.
4. On the Configuration Complete dialog box, click Finish.
After completing the installation process, please refer to Post-Installation Instructions (p. 31).
Release 16.2 - © SAS IP, Inc. All rights reserved. - Contains proprietary and confidential informationof ANSYS, Inc. and its subsidiaries and affiliates.30
Installing the ANSYS Products and the License Server on Different Linux Machines
Chapter 5: Post-Installation Instructions
The following post-installation procedures apply to all ANSYS, Inc. products. Individual products mayhave additional post-installation procedures; please refer to the following sections for each product.
5.1. Post-Installation Procedures for Mechanical APDL and ANSYS Workbench Products5.2. Product Localization5.3. Launching ANSYS, Inc. Products
Note
If the installation program reported any errors, please review the installation error file (in-stall.err) located in the ANSYS Inc directory. Contact your ANSYS Support representative ifyou have any questions.
After the product is installed, you need to establish some system settings, including path names andenvironment variables. See your shell documentation or man pages file for the shell being used forspecific instructions on setting paths and environment variables.
1. Add the following paths to all users' login startup files (i.e.,.cshrc ,.profile, or .login files).
(or appropriate path to theindividual products'executables)
/ansys_inc/v162/ansys/bin
(contains ANSLIC_ADMINutility)
/ansys_inc/shared_files/licensing/lic_admin
2. Set the following environment variables based on the behavior you want. Set the environment variablesfollowing the conventions of your shell. For example, to set an environment variable in the C shell, type:
setenv environment_variable value
For example, to set the DISPLAY environment variable, you type the following, where dev is theworkstation hostname or IP address on which to display graphics:
setenv DISPLAY dev:0.0
DISPLAY - set this to the IP address or hostname of the workstation to which the users willoutput their analysis results. Note that the X server must have permission to connect to thehost machine.
If you will be using connection functionality, you may have additional environment variables toset. See the section Configuring CAD Products (p. 49) later in this guide for more information.
3. Set the license manager to start automatically at boot time. For platform-specific instructions, see LicenseManager Automatic Startup Instructions in the ANSYS, Inc. Licensing Guide.
31Release 16.2 - © SAS IP, Inc. All rights reserved. - Contains proprietary and confidential information
of ANSYS, Inc. and its subsidiaries and affiliates.
4. Designate server(s) for license checkout and establish necessary user privileges (recommended but notrequired). For information on these tasks, see Post-Installation Instructions for the License Manager in theANSYS, Inc. Licensing Guide.
5. Make a backup copy of the /ansys_inc directory using a tape backup command such as tar.
6. Verify the installation by logging out as root (if you installed as root) and logging back in as a regular userand then starting the product to verify that it starts and runs correctly.
Quality Assurance Services: If you require verification of Mechanical APDL, the Mechanical Application,Fluent, or CFX, ANSYS, Inc. offers Quality Assurance services. If you are interested in this service, go tohttp://www.ansys.com/Support/Quality+Assurance/Quality+Services or call the ANSYS, Inc. CorporateQuality Group at (724) 746-3304.
5.1. Post-Installation Procedures for Mechanical APDL and ANSYSWorkbench Products
The following post-installation procedures apply only to the Mechanical APDL and ANSYS Workbenchproducts. These are in addition to the post-installation procedures in the previous section.
1. Set the following environment variables based on the behavior you want. Set the environment variablesfollowing the conventions of your shell. Not all of these are required for all integrated ANSYS Workbenchproducts (such as ANSYS Autodyn), but setting them correctly for ANSYS Workbench will in no way hinderthe performance of the other products.
The ANSYS162_DIR environment variable sets the location of the ANSYS directory hierarchy.The default value is /ansys_inc/v162/ansys. You probably will not need to reset thisvariable, unless you change the location of the installed files.The ANSYSLIC_DIR environment variable sets the location of the ANSYS licensing directoryhierarchy. The default value is /ansys_inc/shared_files/licensing . You probablywill not need to reset this variable, unless you change the location of the licensing files.ANSYS162_PRODUCT - set this to the correct product variable to run Mechanical APDL tostart with the correct product without specifying the -p command modifier each time. See theProduct Variable Table in the ANSYS, Inc. Licensing Guide for a list of valid product variables.ANSYS_LOCK - set to ON (default) to create file locks to prevent users from opening a newjob with the same name and in the same directory as the current job.ANSYS162_WORKING_DIRECTORY - set this variable to the directory you want designated asyour working directory. The working directory setting in the launcher will reflect this setting.ANSYS162_MAT161 - set this environment variable to 1 to enable use of the LS-DYNA*MAT_COMPOSITE_MSC material (requires an LS-DYNA MAT_161 license).ANSYS162_MAT162 - set this environment variable to 1 to enable use of the LS-DYNA*MAT_COMPOSITE_DMG_MSG material (requires an LS-DYNA MAT_162 license).ANSBROWSER - set this environment variable to the browser on your system (specify the fullpath) if the automatic browser detection fails. A browser is needed to view HTML reports andhelp for the ANS_ADMIN utility and the Mechanical APDL launcher. By default, ANSBROWSERpoints to one of several Linux browsers, based on the browser specified in your path (if any).
If you will be using connection functionality, you may have additional environment variables toset. See the section Configuring CAD Products (p. 49) later in this guide for more information.
2. Create or update the at. files. The at.allow file should contain the username of all users allowed torun batch jobs; the at.deny file should contain the username of users who are not permitted to run
Release 16.2 - © SAS IP, Inc. All rights reserved. - Contains proprietary and confidential informationof ANSYS, Inc. and its subsidiaries and affiliates.32
Post-Installation Instructions
batch jobs. The files consist of one username per line and can be modified only by the superuser. If neitherfile exists, only root will be able to run batch jobs.
The at. files are located in the /etc directory on Linux machines.
3. Run the ANS_ADMIN utility to properly configure ANSYS (depending on the products you are running)or relink ANSYS.
4. Specify the product order as it will appear in the Mechanical APDL launcher (optional). If you want tospecify product order, use the ANSLIC_ADMIN utility. See the ANSYS, Inc. Licensing Guide for more in-formation.
Explicit Dynamics, Rigid Dynamics, My Computer Background, and Remote Solve Manager (RSM)Users: If you are running ANSYS Workbench on a multi-user RSM machine, the ‘My Computer, Back-ground’ Solve Process Settings will likely not function as expected due to write permissions for RSMworking directories. In this situation, we strongly recommend that you set up RSM as a daemon.
This issue also affects Rigid Dynamics and Explicit Dynamics using both ‘My Computer’ and ‘My Computer,Background’ Solve Process Settings. Please see Configuring a Multi-User RSM Machine in the RSM doc-umentation for more information.
5.1.1. Post-Installation Procedures for ANSYS CFX
The following post-installation procedures apply only to the ANSYS CFX product.
The Linux installation of ANSYS CFX or ANSYS TurboGrid automatically installs the Sun Java 2 RuntimeEnvironment in the /ansys_inc/v162/commonfiles/jre directory. Regardless of whether youhave modified your setup files, you can still run ANSYS CFX commands by specifying the full pathnameof the commands you want to run. This procedure may be useful if you have several releases of ANSYSCFX installed and you want to run more than one release.
Unless you want to run ANSYS CFX commands by typing their full path names, for example cfx-root/bin/cfx5 (where cfxroot is the directory in which ANSYS CFX is installed), your commandsearch paths must be modified to search the directory cfxroot/bin. This can be done by one of thefollowing methods:
Modification of individual user setup files You can select Tools> Configure User Startup Filesfrom the ANSYS CFX Launcher to modify your own setup files: .login for the C shell, .profile forthe Bourne and Korn shells. The utility can also be run from the command line by entering:
cfxroot/bin/cfx5setupuser
If this modification is done, the ANSYS CFX software will be available every time you log in, just byrunning the ANSYS CFX commands by name. This method has the advantage that it need not be doneby the system administrator, but has the disadvantage that it must be done by each user.
Use the -h option to view the optional commands.
If you choose to modify your setup files, you will see a message indicating that your setup files havebeen changed. You will then need to log out and log in again or source your setup files before you canuse the software.
Manual execution of a setup script each time the software is used You can also use the Toolsmenu of the launcher to launch an editor to create new setup scripts which need to be run each timeyou want to use the ANSYS CFX software. This method has the advantage of not requiring changes to
33Release 16.2 - © SAS IP, Inc. All rights reserved. - Contains proprietary and confidential information
of ANSYS, Inc. and its subsidiaries and affiliates.
Post-Installation Procedures for Mechanical APDL and ANSYS Workbench Products
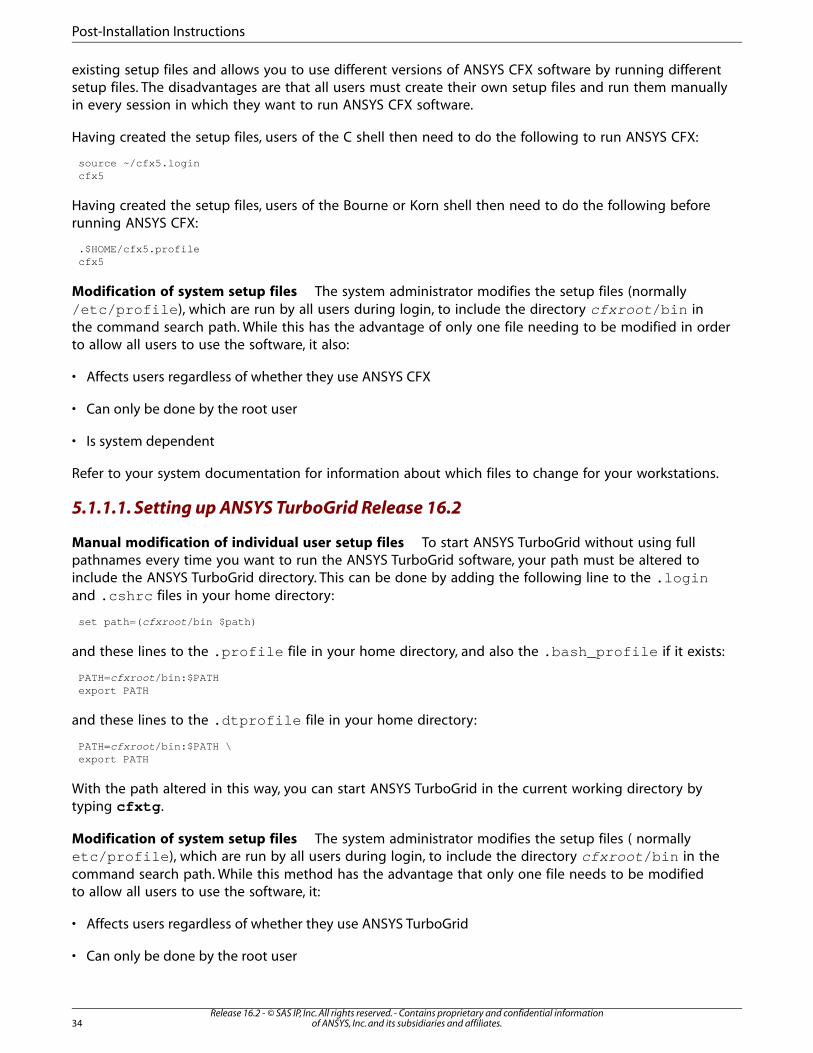
existing setup files and allows you to use different versions of ANSYS CFX software by running differentsetup files. The disadvantages are that all users must create their own setup files and run them manuallyin every session in which they want to run ANSYS CFX software.
Having created the setup files, users of the C shell then need to do the following to run ANSYS CFX:
source ~/cfx5.logincfx5
Having created the setup files, users of the Bourne or Korn shell then need to do the following beforerunning ANSYS CFX:
.$HOME/cfx5.profilecfx5
Modification of system setup files The system administrator modifies the setup files (normally/etc/profile), which are run by all users during login, to include the directory cfxroot/bin inthe command search path. While this has the advantage of only one file needing to be modified in orderto allow all users to use the software, it also:
• Affects users regardless of whether they use ANSYS CFX
• Can only be done by the root user
• Is system dependent
Refer to your system documentation for information about which files to change for your workstations.
5.1.1.1. Setting up ANSYS TurboGrid Release 16.2
Manual modification of individual user setup files To start ANSYS TurboGrid without using fullpathnames every time you want to run the ANSYS TurboGrid software, your path must be altered toinclude the ANSYS TurboGrid directory. This can be done by adding the following line to the .loginand .cshrc files in your home directory:
set path=(cfxroot/bin $path)
and these lines to the .profile file in your home directory, and also the .bash_profile if it exists:
PATH=cfxroot/bin:$PATHexport PATH
and these lines to the .dtprofile file in your home directory:
PATH=cfxroot/bin:$PATH \export PATH
With the path altered in this way, you can start ANSYS TurboGrid in the current working directory bytyping cfxtg.
Modification of system setup files The system administrator modifies the setup files ( normallyetc/profile), which are run by all users during login, to include the directory cfxroot/bin in thecommand search path. While this method has the advantage that only one file needs to be modifiedto allow all users to use the software, it:
• Affects users regardless of whether they use ANSYS TurboGrid
• Can only be done by the root user
Release 16.2 - © SAS IP, Inc. All rights reserved. - Contains proprietary and confidential informationof ANSYS, Inc. and its subsidiaries and affiliates.34
Post-Installation Instructions

• Is system dependent
Refer to your system documentation for information about which files to change for your workstations.
5.1.1.2. Using the ANSYS CFX Launcher to Set Up Users
To create setup files to be merged or run manually, start the ANSYS CFX Launcher using the command:
cfxroot/bin/cfx5
and select Tools> Configure User Startup Files. This option runs cfxroot/bin/cfx5setupuserthat modifies your setup files or writes the necessary commands to files, which you can merge manuallywith your existing setup files.
If you choose to modify your setup files, you will see a message indicating that your setup files havebeen changed. You will then need to log out and log in again or source your setup files before you canuse the software.
User setup can also be run from the command line by entering:
cfxroot/bin/cfx5setupuser
Enter the flag -h to view the optional commands.
5.1.1.3. Verifying the Installation of ANSYS CFX Products
If you are working on a Linux machine and have not used ANSYS CFX before, you will first need to setyourself up to run the ANSYS CFX commands.
To keep all the files for the example together, you should first create a new directory in which to runthe example. This can be done by typing:
mkdir cfx_example
at the command line. You should then change to this directory by typing:
cd cfx_example
Start the ANSYS CFX Launcher by typing cfx5.
To complete testing, perform all the steps in Flow in a Static Mixer. This can be found in the Tutorials& Training Materials section of the ANSYS Customer Portal.
Note
To speed up the process of testing, consider using the provided session files whenworking with ANSYS CFX-Pre.
5.1.2. Post-Installation Procedures for ANSYS Fluent
To start ANSYS Fluent without using full pathnames every time you want to run the Fluent software,your path must be altered to include the ANSYS Fluent bin directory. You can do this in the C shelland its derivatives by entering:
set path = (/ansys_inc/v162/fluent/bin $path)
or in the Bourne/Korn shell or bash, by entering:
35Release 16.2 - © SAS IP, Inc. All rights reserved. - Contains proprietary and confidential information
of ANSYS, Inc. and its subsidiaries and affiliates.
Post-Installation Procedures for Mechanical APDL and ANSYS Workbench Products

PATH=(/ansys_inc/v162/fluent/bin $path)export PATH
We recommend adding these statements to your $HOME/.cshrc (C shell), $HOME/.profile(Bourne/Korn shell), or $HOME/.bashrc (bash shell) file for regular use.
After installing the ANSYS Fluent software, you will need to reset the default values in the ANSYS Fluentlauncher as follows:
1. Verify that the FLUENT_INC environment variable is not set.
Remove the FLUENT_INC setting from your .cshrc, .profile, or .bashrc file if you haveadded it for previous versions. Verify that the environment variable is unset by typing:
printenv FLUENT_INC
This command should not return anything.
2. Add the following paths to all users' login startup files:
<install_dir>/ansys_inc/v162/fluent/bin
3. Run the following command:
<install_dir>/ansys_inc/v162/fluent/bin/fluent
4. Click Default.
5. Click Yes when asked if you want to discard the LAUNCHER history.
6. Click Cancel if you do not want to start Fluent at this time. The new defaults will have been saved.
Please refer to the ANSYS Fluent Quick Start Guide for more information.
5.1.3. Post-Installation Procedures for ANSYS Polyflow
Polyflow no longer requires the FLUENT_INC environmental variable. It should be deleted as is recom-mended for Fluent:
• Remove the FLUENT_INC setting from your .cshrc,.profile, or .bashrc file if you have added itfor previous versions. Verify that the environment variable is unset by typing:
printenv FLUENT_INC
This command should not return anything.
5.1.4. Post-Installation Procedures for ANSYS ICEM CFD
The following post-installation procedures apply only to the ANSYS ICEM CFD product.
1. Add the following paths to all users' login startup files (i.e.,.cshrc or .login files).
/ansys_inc/v162/icemcfd/linux64_amd/bin
2. Add the following environment variable to all users' login startup files.
ICEM_ACN - set to /ansys_inc/v162/icemcfd/linux64_amd
Release 16.2 - © SAS IP, Inc. All rights reserved. - Contains proprietary and confidential informationof ANSYS, Inc. and its subsidiaries and affiliates.36
Post-Installation Instructions
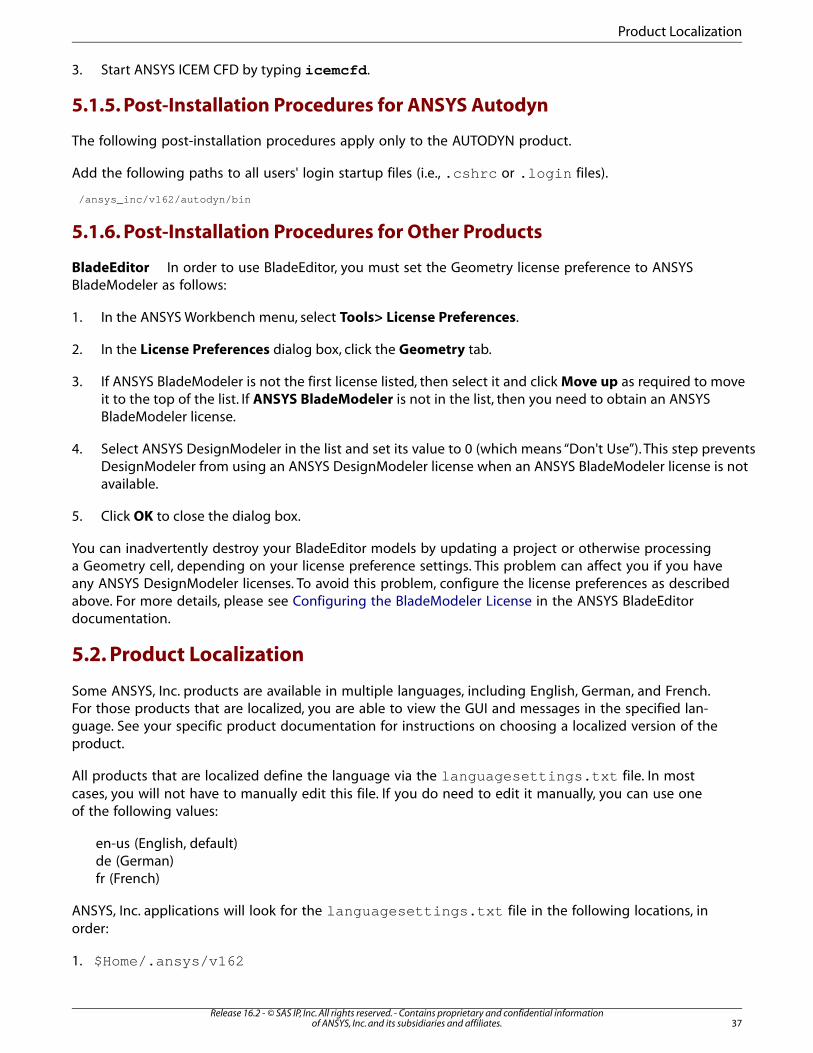
3. Start ANSYS ICEM CFD by typing icemcfd.
5.1.5. Post-Installation Procedures for ANSYS Autodyn
The following post-installation procedures apply only to the AUTODYN product.
Add the following paths to all users' login startup files (i.e., .cshrc or .login files).
/ansys_inc/v162/autodyn/bin
5.1.6. Post-Installation Procedures for Other Products
BladeEditor In order to use BladeEditor, you must set the Geometry license preference to ANSYSBladeModeler as follows:
1. In the ANSYS Workbench menu, select Tools> License Preferences.
2. In the License Preferences dialog box, click the Geometry tab.
3. If ANSYS BladeModeler is not the first license listed, then select it and click Move up as required to moveit to the top of the list. If ANSYS BladeModeler is not in the list, then you need to obtain an ANSYSBladeModeler license.
4. Select ANSYS DesignModeler in the list and set its value to 0 (which means “Don't Use”). This step preventsDesignModeler from using an ANSYS DesignModeler license when an ANSYS BladeModeler license is notavailable.
5. Click OK to close the dialog box.
You can inadvertently destroy your BladeEditor models by updating a project or otherwise processinga Geometry cell, depending on your license preference settings. This problem can affect you if you haveany ANSYS DesignModeler licenses. To avoid this problem, configure the license preferences as describedabove. For more details, please see Configuring the BladeModeler License in the ANSYS BladeEditordocumentation.
5.2. Product Localization
Some ANSYS, Inc. products are available in multiple languages, including English, German, and French.For those products that are localized, you are able to view the GUI and messages in the specified lan-guage. See your specific product documentation for instructions on choosing a localized version of theproduct.
All products that are localized define the language via the languagesettings.txt file. In mostcases, you will not have to manually edit this file. If you do need to edit it manually, you can use oneof the following values:
en-us (English, default)de (German)fr (French)
ANSYS, Inc. applications will look for the languagesettings.txt file in the following locations, inorder:
1. $Home/.ansys/v162
37Release 16.2 - © SAS IP, Inc. All rights reserved. - Contains proprietary and confidential information
of ANSYS, Inc. and its subsidiaries and affiliates.
Product Localization
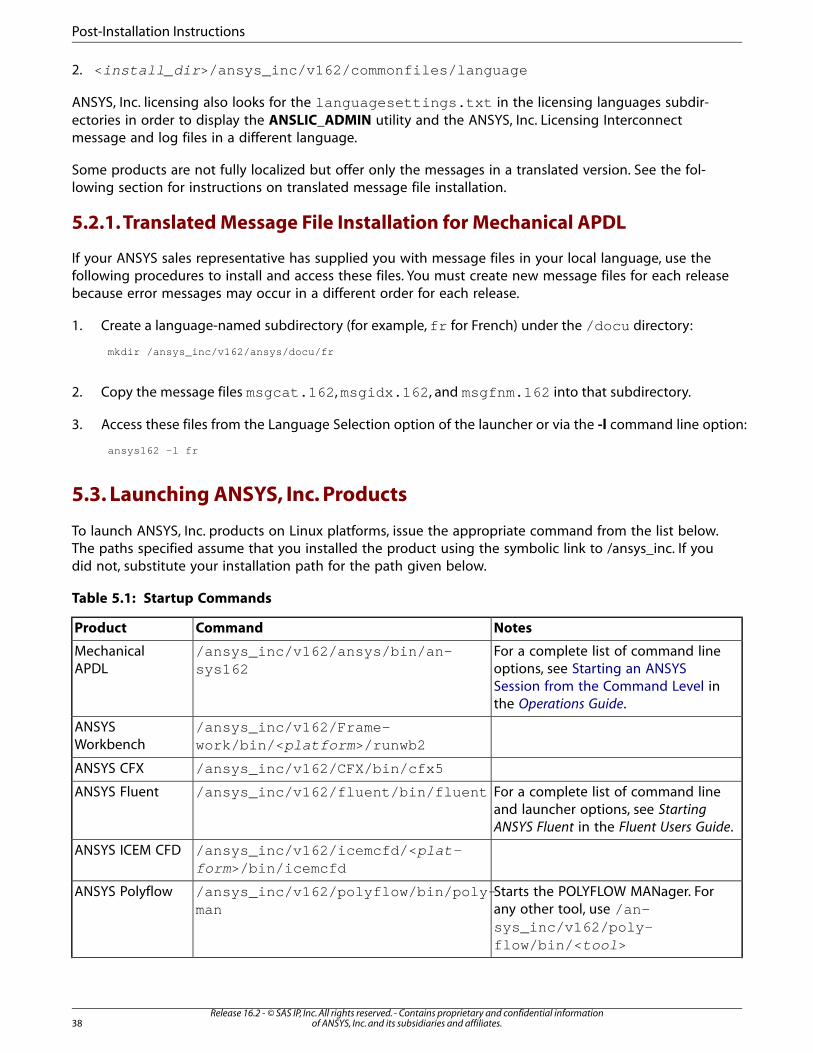
2. <install_dir>/ansys_inc/v162/commonfiles/language
ANSYS, Inc. licensing also looks for the languagesettings.txt in the licensing languages subdir-ectories in order to display the ANSLIC_ADMIN utility and the ANSYS, Inc. Licensing Interconnectmessage and log files in a different language.
Some products are not fully localized but offer only the messages in a translated version. See the fol-lowing section for instructions on translated message file installation.
5.2.1. Translated Message File Installation for Mechanical APDL
If your ANSYS sales representative has supplied you with message files in your local language, use thefollowing procedures to install and access these files. You must create new message files for each releasebecause error messages may occur in a different order for each release.
1. Create a language-named subdirectory (for example,fr for French) under the /docu directory:
mkdir /ansys_inc/v162/ansys/docu/fr
2. Copy the message files msgcat.162,msgidx.162, and msgfnm.162 into that subdirectory.
3. Access these files from the Language Selection option of the launcher or via the -l command line option:
ansys162 -l fr
5.3. Launching ANSYS, Inc. Products
To launch ANSYS, Inc. products on Linux platforms, issue the appropriate command from the list below.The paths specified assume that you installed the product using the symbolic link to /ansys_inc. If youdid not, substitute your installation path for the path given below.
Table 5.1: Startup Commands
NotesCommandProduct
For a complete list of command lineoptions, see Starting an ANSYS
/ansys_inc/v162/ansys/bin/an-sys162
MechanicalAPDL
Session from the Command Level inthe Operations Guide.
/ansys_inc/v162/Frame-work/bin/<platform>/runwb2
ANSYSWorkbench
/ansys_inc/v162/CFX/bin/cfx5ANSYS CFX
For a complete list of command lineand launcher options, see StartingANSYS Fluent in the Fluent Users Guide.
/ansys_inc/v162/fluent/bin/fluentANSYS Fluent
/ansys_inc/v162/icemcfd/<plat-form>/bin/icemcfd
ANSYS ICEM CFD
Starts the POLYFLOW MANager. Forany other tool, use /an-
/ansys_inc/v162/polyflow/bin/poly-man
ANSYS Polyflow
sys_inc/v162/poly-flow/bin/<tool>
Release 16.2 - © SAS IP, Inc. All rights reserved. - Contains proprietary and confidential informationof ANSYS, Inc. and its subsidiaries and affiliates.38
Post-Installation Instructions
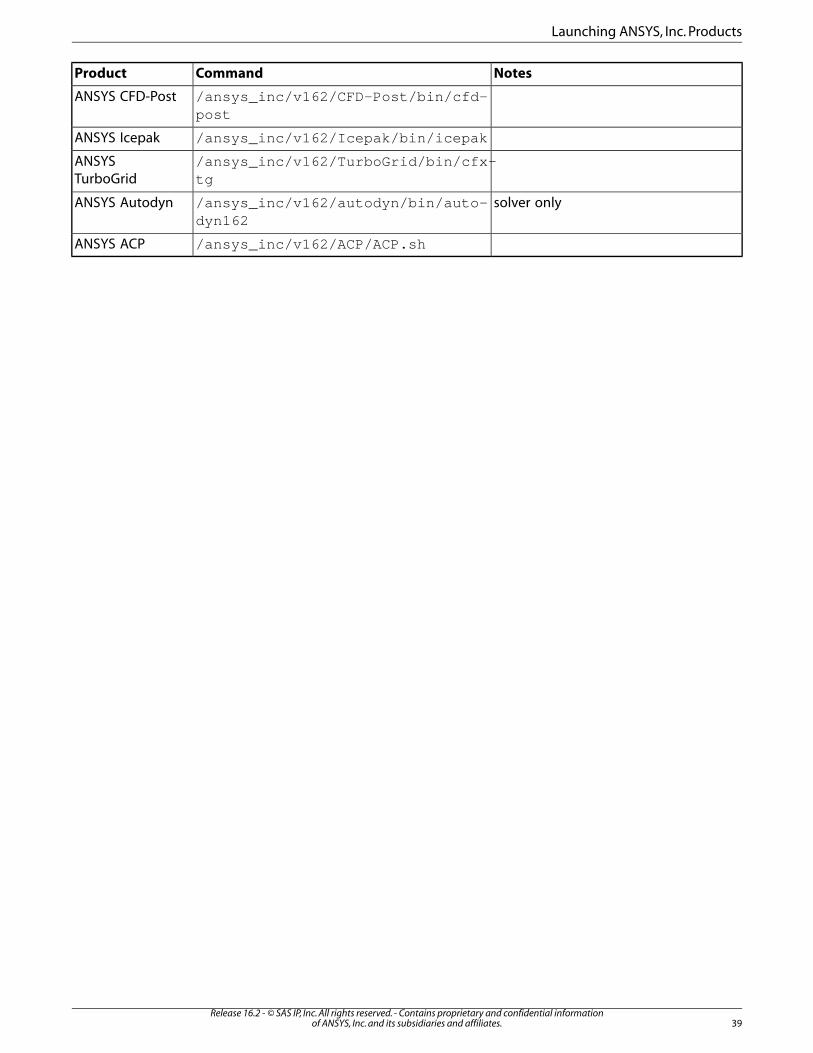
NotesCommandProduct
/ansys_inc/v162/CFD-Post/bin/cfd-post
ANSYS CFD-Post
/ansys_inc/v162/Icepak/bin/icepakANSYS Icepak
/ansys_inc/v162/TurboGrid/bin/cfx-tg
ANSYSTurboGrid
solver only/ansys_inc/v162/autodyn/bin/auto-dyn162
ANSYS Autodyn
/ansys_inc/v162/ACP/ACP.shANSYS ACP
39Release 16.2 - © SAS IP, Inc. All rights reserved. - Contains proprietary and confidential information
of ANSYS, Inc. and its subsidiaries and affiliates.
Launching ANSYS, Inc. Products

Release 16.2 - © SAS IP, Inc. All rights reserved. - Contains proprietary and confidential informationof ANSYS, Inc. and its subsidiaries and affiliates.40
Chapter 6: Installing the ANSYS, Inc. Product Help DocumentationOnly
Performing the ANSYS product help documentation installation places the entire help library onto yourcomputer.
To perform the installation:
1. Navigate to the directory where you extracted the installation files. Run ./INSTALL.
• If you downloaded the installation package, this file will reside in the directory where you untarred thedownloaded files.
• If you are running from a DVD or USB, this file will reside in the top level of the DVD or USB.
The ANSYS, Inc. Installation Launcher appears.
2. From the options along the left side of the launcher click Install ANSYS Documentation Only.
The license agreement appears.
3. Read the agreement, and if you agree to the terms and conditions, click I Agree. Click Next.
4. The directory where you want to install the ANSYS, Inc. help documentation is shown in the Install Direct-ory field. You can install the help documentation into any directory you want, but you must have writepermissions to the directory you choose. The default is /ansys_inc. We recommend using the default dir-ectory.
We strongly recommend that you also set the symbolic link /ansys_inc to the directory where theANSYS, Inc. product is installed. The symbolic link option is available only if you are installing asroot and is set by default. If you choose not to specify the symbolic link or are installing as a non-root user, substitute the directory path where you installed the product for all subsequent occurrencesof/ansys_inc in this guide.
If you do not use the /ansys_inc symbolic link, you must install all releases into a common directoryto ensure license manager compatibility and availability among releases and products.
Click Next.
5. A summary screen appears listing your help documentation installation. You will also see an estimate ofthe disk space required to install all of the selected components, and the disk space you have available.
Click Next to begin the installation.
41Release 16.2 - © SAS IP, Inc. All rights reserved. - Contains proprietary and confidential information
of ANSYS, Inc. and its subsidiaries and affiliates.
6. When the help documentation installation has completed, click Exit. The product installation window re-appears. You can close this window at this time.
Note
Alternatively, you can run the document installation by running the INSTALL.DOCONLYinstallation file. This file is located in the linux directory on USB drives.
The ANSYS help documentation can be installed silently by running the INSTALL.DOCONLY installationfile with the –silent flag. For more information, see Silent Mode Operations.
Release 16.2 - © SAS IP, Inc. All rights reserved. - Contains proprietary and confidential informationof ANSYS, Inc. and its subsidiaries and affiliates.42
Installing the ANSYS, Inc. Product Help Documentation Only
Chapter 7: Silent Mode Operations
ANSYS, Inc. supports silent mode operations, including installation, product configuration/unconfiguration,and uninstall.
You can specify the following product flags. These flags are all valid for a silent install. However, becauseof the way the products are packaged, not all of these flags may be valid for a silent configuration/un-configuration, or uninstall.
Product Flags
product_flagProduct
-mechapdlMechanical APDL
-ansyscustANSYS Customization Files
-autodynANSYS Autodyn
-lsdynaANSYS LS-DYNA
-cfdpostANSYS CFD-Post
-cfxANSYS CFX
-turbogridANSYS TurboGrid
-fluentANSYS Fluent
-polyflowANSYS Polyflow
-aqwaANSYS Aqwa
-icemcfdANSYS ICEM CFD
Note: Installing any of the above products will install ANSYS Workbench.
-acpANSYS Composite PrepPost
-rsmANSYS Remote Solve Manager Standalone Services
-ugNX Geometry Interface
-catia4CATIA 4.x Geometry Interface
-catia5CATIA 5.x Geometry Interface
-parasolidParasolid Geometry Interface
-acisACIS Geometry Interface
-ug_readerNX Geometry Interface Reader
-ug_pluginNX Geometry Interface Plugin
-icepakANSYS Icepak
43Release 16.2 - © SAS IP, Inc. All rights reserved. - Contains proprietary and confidential information
of ANSYS, Inc. and its subsidiaries and affiliates.
7.1. Silent Product and License Manager Installation
Caution
A silent license manager installation could shut down the ANSYS, Inc. License Manager, af-fecting other users who are using that license server machine.
You can deploy an ANSYS, Inc. product installation in silent mode. The general form to run a silentproduct installation, including the client licensing, is:
INSTALL -silent -install_dir path -product_flag
If no product flags from the list above are specified, all available products will be installed. To installspecific products, run the silent install with any combination of the product flags listed above (not allproducts are available on all platforms). For example, to install only TurboGrid and Icepak, issue thefollowing command:
INSTALL -silent —install_dir “/ansys_inc/” -turbogrid -icepak
Additional command line arguments are available; please see the list below.
To install the ANSYS, Inc. License Manager on Linux systems that will act as license servers, you mustrun the INSTALL.LM command:
INSTALL.LM -silent -install_dir path
The silent license manager installation is valid only for the default Licensing Configuration option "Runthe ANSYS Licensing Interconnect with FLEXlm." Please see the ANSYS, Inc. Licensing Guide for moreinformation.
You can use the following arguments when running a silent installation. Note that some options areavailable only for a silent license manager installation.
Initiates a silent installation.-silent
Displays a list of valid arguments for a silent installation.-help
Specifies the directory to which the product or license manager is to be installed.If you want to install to the default location, you can omit the -install_dir
-install_dirpath
argument. The default location is /ansys_inc if the symbolic link is set; otherwise,it will default to /usr/ansys_inc.
Specifies one or more products to install specific products. If you omit the-product_flag argument, all products will be installed. See the list of validproduct_flags below.
-product_flag
You can specify an options file that lists the products you want to install. To doso, you must provide a full path to a file containing desired products. See SpecifyingProducts with an Options File (p. 46) below for more details.
-productfilepath
Disables automatic internet feeds to ANSYS, Inc. products (Linux only).-disablerss
Specifies the location of the license file to install. If the path is not specified or ifthe path is the same as the existing license file, the license file will not be installed.Valid only when doing a silent license manager installation (INSTALL.LM).
-licfilepathpath
Specifies a language to use for the ANSLIC_ADMIN utility and the ANSYS, Inc.Licensing Interconnect log file. Use the language directory name in the language
-setliclanglanguage
subdirectory of the licensing directory (en-us, fr, de, etc.) as the language
Release 16.2 - © SAS IP, Inc. All rights reserved. - Contains proprietary and confidential informationof ANSYS, Inc. and its subsidiaries and affiliates.44
Silent Mode Operations
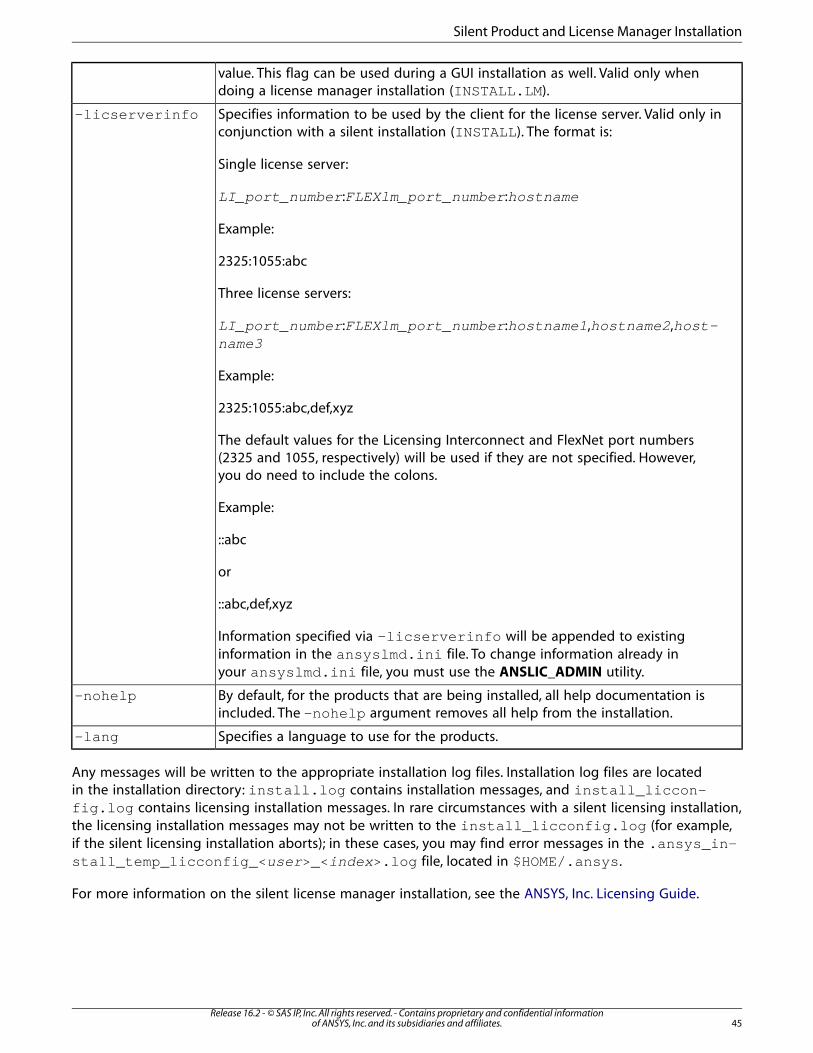
value. This flag can be used during a GUI installation as well. Valid only whendoing a license manager installation (INSTALL.LM).
Specifies information to be used by the client for the license server. Valid only inconjunction with a silent installation (INSTALL). The format is:
Single license server:
-licserverinfo
LI_port_number:FLEXlm_port_number:hostname
Example:
2325:1055:abc
Three license servers:
LI_port_number:FLEXlm_port_number:hostname1,hostname2,host-name3
Example:
2325:1055:abc,def,xyz
The default values for the Licensing Interconnect and FlexNet port numbers(2325 and 1055, respectively) will be used if they are not specified. However,you do need to include the colons.
Example:
::abc
or
::abc,def,xyz
Information specified via -licserverinfo will be appended to existinginformation in the ansyslmd.ini file. To change information already inyour ansyslmd.ini file, you must use the ANSLIC_ADMIN utility.
By default, for the products that are being installed, all help documentation isincluded. The -nohelp argument removes all help from the installation.
-nohelp
Specifies a language to use for the products.-lang
Any messages will be written to the appropriate installation log files. Installation log files are locatedin the installation directory: install.log contains installation messages, and install_liccon-fig.log contains licensing installation messages. In rare circumstances with a silent licensing installation,the licensing installation messages may not be written to the install_licconfig.log (for example,if the silent licensing installation aborts); in these cases, you may find error messages in the .ansys_in-stall_temp_licconfig_<user>_<index>.log file, located in $HOME/.ansys.
For more information on the silent license manager installation, see the ANSYS, Inc. Licensing Guide.
45Release 16.2 - © SAS IP, Inc. All rights reserved. - Contains proprietary and confidential information
of ANSYS, Inc. and its subsidiaries and affiliates.
Silent Product and License Manager Installation

Specifying Products with an Options File
You can also specify an options file on the command line using the -productfile path option.The options file can have any name and extension, but the path must include the full path and filename,including any extension used. The options file can specify which products you want to install. The optionsfile can contain all possible products, with the products you do not want to install commented out, orit can contain only the products you want to install. An example options file is shown below. In theexample, NX is commented out using an acceptable comment indicator. When using the options file,do not include the dash (-) before the product name.
mechapdlansyscustautodynlsdynacfdpostcfxturbogridfluentpolyflowicepak#ug
7.2. Silent Product Configuration/Unconfiguration
You can also run the ProductConfig utility via command line (i.e., silent mode) to configure products.
To run in silent mode, from each client machine, run the ProductConfig with the -silent option:
/ansys_inc/v162/ProductConfig.sh -silent
Use the -product_flag argument to specify which products should be configured. If you do notspecify one or more products, all products that have been installed will be configured. The validproduct_flags are:
product_flagProduct
-mechapdlMechanical APDL
-cfdpostANSYS CFD-Post
-cfxANSYS CFX
-turbogridANSYS TurboGrid
-fluentANSYS Fluent
-polyflowANSYS Polyflow
-icepakANSYS Icepak
-icemcfdANSYS ICEM CFD
-rsmANSYS Remote Solve Manager Standalone Services
Errors will be written to the ${HOME}/.ansys/v160/ directory on the client machine.
7.3. Silent Media Installation
To run a silent installation from the media, you can either:
• Copy the contents of each DVD to a folder on the machine's hard disk such that the 162-<number>.dvdfiles of each DVD are located in the same directory. You can then proceed with the silent installation as de-scribed earlier.
Release 16.2 - © SAS IP, Inc. All rights reserved. - Contains proprietary and confidential informationof ANSYS, Inc. and its subsidiaries and affiliates.46
Silent Mode Operations
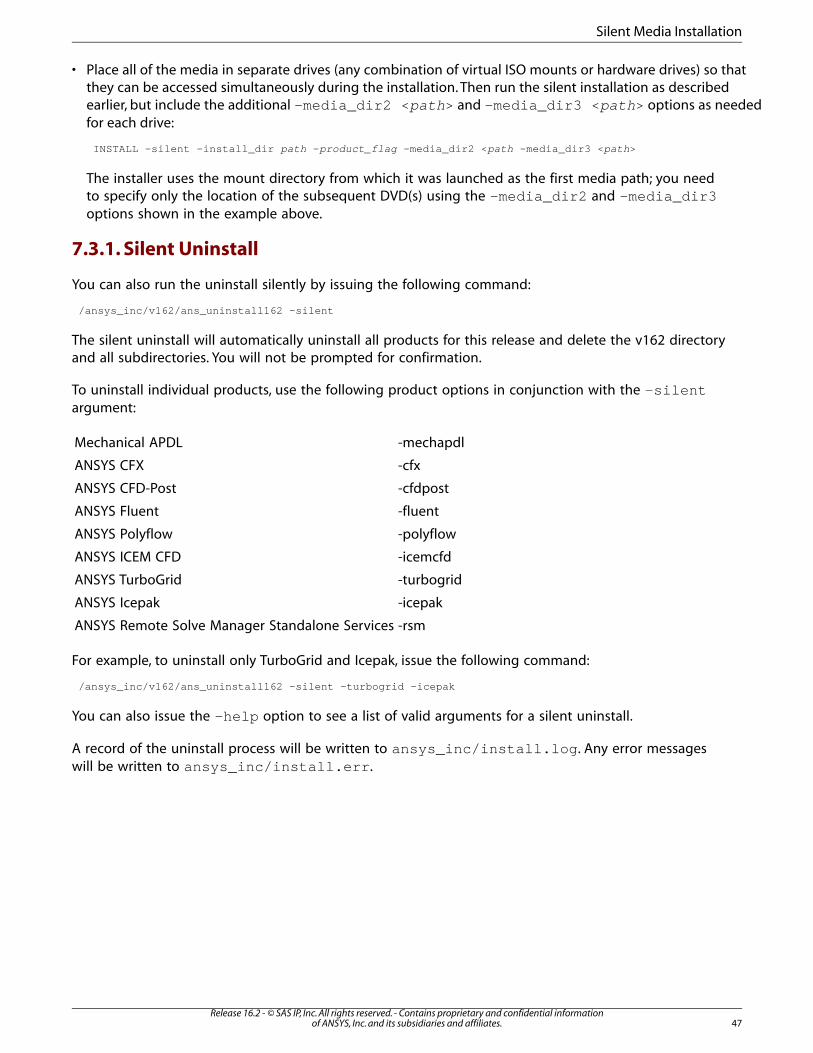
• Place all of the media in separate drives (any combination of virtual ISO mounts or hardware drives) so thatthey can be accessed simultaneously during the installation. Then run the silent installation as describedearlier, but include the additional -media_dir2 <path> and -media_dir3 <path> options as neededfor each drive:
INSTALL -silent -install_dir path -product_flag -media_dir2 <path -media_dir3 <path>
The installer uses the mount directory from which it was launched as the first media path; you needto specify only the location of the subsequent DVD(s) using the -media_dir2 and -media_dir3options shown in the example above.
7.3.1. Silent Uninstall
You can also run the uninstall silently by issuing the following command:
/ansys_inc/v162/ans_uninstall162 –silent
The silent uninstall will automatically uninstall all products for this release and delete the v162 directoryand all subdirectories. You will not be prompted for confirmation.
To uninstall individual products, use the following product options in conjunction with the -silentargument:
-mechapdlMechanical APDL
-cfxANSYS CFX
-cfdpostANSYS CFD-Post
-fluentANSYS Fluent
-polyflowANSYS Polyflow
-icemcfdANSYS ICEM CFD
-turbogridANSYS TurboGrid
-icepakANSYS Icepak
-rsmANSYS Remote Solve Manager Standalone Services
For example, to uninstall only TurboGrid and Icepak, issue the following command:
/ansys_inc/v162/ans_uninstall162 –silent -turbogrid -icepak
You can also issue the -help option to see a list of valid arguments for a silent uninstall.
A record of the uninstall process will be written to ansys_inc/install.log. Any error messageswill be written to ansys_inc/install.err.
47Release 16.2 - © SAS IP, Inc. All rights reserved. - Contains proprietary and confidential information
of ANSYS, Inc. and its subsidiaries and affiliates.
Silent Media Installation

Release 16.2 - © SAS IP, Inc. All rights reserved. - Contains proprietary and confidential informationof ANSYS, Inc. and its subsidiaries and affiliates.48
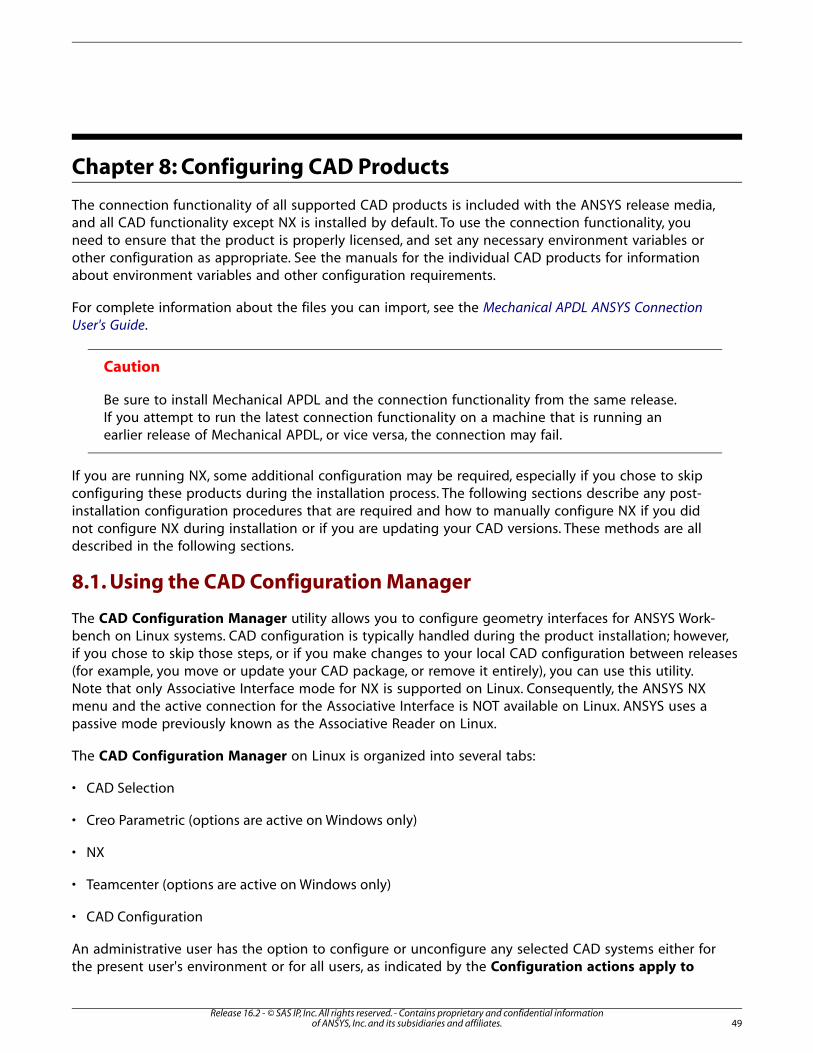
Chapter 8: Configuring CAD Products
The connection functionality of all supported CAD products is included with the ANSYS release media,and all CAD functionality except NX is installed by default. To use the connection functionality, youneed to ensure that the product is properly licensed, and set any necessary environment variables orother configuration as appropriate. See the manuals for the individual CAD products for informationabout environment variables and other configuration requirements.
For complete information about the files you can import, see the Mechanical APDL ANSYS ConnectionUser's Guide.
Caution
Be sure to install Mechanical APDL and the connection functionality from the same release.If you attempt to run the latest connection functionality on a machine that is running anearlier release of Mechanical APDL, or vice versa, the connection may fail.
If you are running NX, some additional configuration may be required, especially if you chose to skipconfiguring these products during the installation process. The following sections describe any post-installation configuration procedures that are required and how to manually configure NX if you didnot configure NX during installation or if you are updating your CAD versions. These methods are alldescribed in the following sections.
8.1. Using the CAD Configuration Manager
The CAD Configuration Manager utility allows you to configure geometry interfaces for ANSYS Work-bench on Linux systems. CAD configuration is typically handled during the product installation; however,if you chose to skip those steps, or if you make changes to your local CAD configuration between releases(for example, you move or update your CAD package, or remove it entirely), you can use this utility.Note that only Associative Interface mode for NX is supported on Linux. Consequently, the ANSYS NXmenu and the active connection for the Associative Interface is NOT available on Linux. ANSYS uses apassive mode previously known as the Associative Reader on Linux.
The CAD Configuration Manager on Linux is organized into several tabs:
• CAD Selection
• Creo Parametric (options are active on Windows only)
• NX
• Teamcenter (options are active on Windows only)
• CAD Configuration
An administrative user has the option to configure or unconfigure any selected CAD systems either forthe present user's environment or for all users, as indicated by the Configuration actions apply to
49Release 16.2 - © SAS IP, Inc. All rights reserved. - Contains proprietary and confidential information
of ANSYS, Inc. and its subsidiaries and affiliates.

options. When the original installation was performed by a non-administrative user, an administrativeuser will only be allowed to configure or unconfigure for all users. In this situation, NX configure andunconfigure actions are skipped. Non-administrative users will only be allowed to configure for them-selves. Any user-specific configuration settings take precedence over global configuration settings.
This document describes how to use the CAD Configuration Manager as a wizard on Linux systems,beginning with the CAD Selection tab and using the Next button to progress through the configurationprocess. You can also manually select each tab to progress through the configuration process; bothmethods work the same. However, the applicable tabs will not be enabled until you choose the associatedproduct on the CAD Selection tab.
You can choose Help to view instructions on using the CAD Configuration Manager at any time. Ifthe help does not load into your default browser, set the BROWSER environment variable to the pathof your HTML viewer (such as Mozilla or Firefox) and restart the CAD Configuration Manager.
1. Run the following command to start the CAD Configuration Manager, substituting the full installationpath if different than /ansys_inc:
/ansys_inc/v162/commonfiles/CAD/bin/ansmono Ans.CadInt.CADConfigUtilityGUI.exe.
2. On the CAD Selection tab, choose the ANSYS products and the CAD products that you need to configure.You must select at least one ANSYS product and at least one CAD product to enable the remaining func-tionality.
3. If you selected NX as one of your CAD products, the NX tab opens.
a. Enter or browse to the NX installation location.
b. The NX custom directory file is not applicable on Linux and can be ignored as it will be disabled.
c. Click Next.
4. The CAD Configuration tab opens.
a. Click the Configure Selected CAD Interfaces button.
b. When the configuration for all products is complete, log entries appear, listing those products thatwere successfully configured and those that were not. Address any errors and reconfigure.
c. For more details, click the Display Configuration Log File button to see a detailed log file.
5. When all of your CAD products have been successfully configured, click Exit.
You can review the CAD Configuration Manager log file, CADConfigurationMgr.log, in /an-sys_inc. If you do not have write permissions to the /ansys_inc directory, the log file will bewritten to $TEMP. If you have not defined $TEMP, the log file is written to /tmp. When /tmp is notaccessible, this file will be written to the current working directory.
8.1.1. Unconfiguring
If you need to unconfigure any of your CAD products, follow the steps above, but choose UnconfigureSelected CAD Interfaces on the CAD Configuration tab.
Release 16.2 - © SAS IP, Inc. All rights reserved. - Contains proprietary and confidential informationof ANSYS, Inc. and its subsidiaries and affiliates.50
Configuring CAD Products
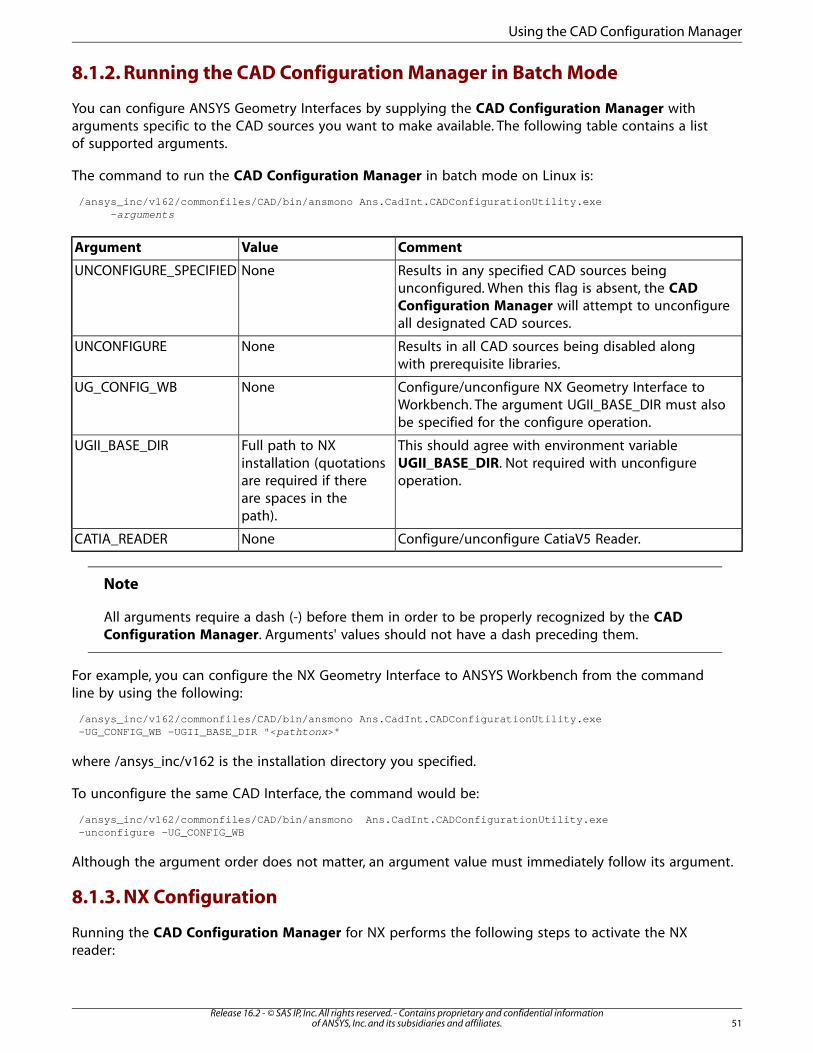
8.1.2. Running the CAD Configuration Manager in Batch Mode
You can configure ANSYS Geometry Interfaces by supplying the CAD Configuration Manager witharguments specific to the CAD sources you want to make available. The following table contains a listof supported arguments.
The command to run the CAD Configuration Manager in batch mode on Linux is:
/ansys_inc/v162/commonfiles/CAD/bin/ansmono Ans.CadInt.CADConfigurationUtility.exe -arguments
CommentValueArgument
Results in any specified CAD sources beingunconfigured. When this flag is absent, the CAD
NoneUNCONFIGURE_SPECIFIED
Configuration Manager will attempt to unconfigureall designated CAD sources.
Results in all CAD sources being disabled alongwith prerequisite libraries.
NoneUNCONFIGURE
Configure/unconfigure NX Geometry Interface toWorkbench. The argument UGII_BASE_DIR must alsobe specified for the configure operation.
NoneUG_CONFIG_WB
This should agree with environment variableUGII_BASE_DIR. Not required with unconfigureoperation.
Full path to NXinstallation (quotationsare required if there
UGII_BASE_DIR
are spaces in thepath).
Configure/unconfigure CatiaV5 Reader.NoneCATIA_READER
Note
All arguments require a dash (-) before them in order to be properly recognized by the CADConfiguration Manager. Arguments' values should not have a dash preceding them.
For example, you can configure the NX Geometry Interface to ANSYS Workbench from the commandline by using the following:
/ansys_inc/v162/commonfiles/CAD/bin/ansmono Ans.CadInt.CADConfigurationUtility.exe -UG_CONFIG_WB -UGII_BASE_DIR "<pathtonx>"
where /ansys_inc/v162 is the installation directory you specified.
To unconfigure the same CAD Interface, the command would be:
/ansys_inc/v162/commonfiles/CAD/bin/ansmono Ans.CadInt.CADConfigurationUtility.exe -unconfigure -UG_CONFIG_WB
Although the argument order does not matter, an argument value must immediately follow its argument.
8.1.3. NX Configuration
Running the CAD Configuration Manager for NX performs the following steps to activate the NXreader:
51Release 16.2 - © SAS IP, Inc. All rights reserved. - Contains proprietary and confidential information
of ANSYS, Inc. and its subsidiaries and affiliates.
Using the CAD Configuration Manager
• Registers the NX Associative Geometry Interface for ANSYS Workbench by copying the file UGNX#.Compon-ent.XML from /ansys_inc/v162/aisol/CADIntegration/UG to either /ansys_inc/v162/com-monfiles/registry/linx64/append when the configuration manager is in administrative mode orto $HOME/.config/ANSYS/162/UserRegFiles_NNNN/append, when the CAD ConfigurationManager is run by a non-administrator. The CAD Configuration Manager ensures that only one versionof the file exists in the target location.
UGNX# is the NX version detected by the CAD Configuration Manager, and NNNN is a numericidentifier appended to the UserRegFiles directory.
• You must specify the environment variables UGII_BASE_DIR and UGII_ROOT_DIR. The UGII_BASE_DIR mustpoint to the install location supplied to the CAD Configuration Manager. The UGII_ROOT_DIR must pointto the /ugii or /bin subdirectory in the NX install location. The Workbench Associative Interface for NXwill not work without these two variables set properly, as these are required for proper startup of the CAD.
• Prior to configuring a client of a network install, the client system must have its UGII_BASE_DIR point tothe same version of NX as designated on the server system. This must be done before running CAD Config-uration Manager or the Product Configuration Tool. For more information, see Network Installation andProduct Configuration (p. 28).
8.2. Configuring the Geometry Interface for NX for ANSYS WorkbenchProducts
If you chose to skip configuring the Geometry Interface for NX during the ANSYS Workbench installation,you may need to run the CAD Configuration Utility's CAD Interface Configuration > Configure UGNX Reader for Workbench option.
1. Launch CAD Configuration Utility.
2. Select CAD Interface Configuration to continue.
3. Select Configure UG NX Reader for Workbench to continue.
4. Enter the directory path to the NX installation path. Select OK to continue.
5. Select EXIT to close CAD Configuration Utility.
Release 16.2 - © SAS IP, Inc. All rights reserved. - Contains proprietary and confidential informationof ANSYS, Inc. and its subsidiaries and affiliates.52
Configuring CAD Products
Chapter 9: Uninstalling the Software
To uninstall a product, issue the following command:
/ansys_inc/v162/ans_uninstall162
Alternatively, if you are using the Mechanical APDL product, you can use the Uninstall option of theANS_ADMIN utility. To launch ANS_ADMIN, issue the following command:
/ansys_inc/v162/ansys/bin/ans_admin162
1. From the uninstall panel, click Select Products to Uninstall.
If you are not a superuser, you will see a warning message, and then the uninstall continues.
2. A list of products that are installed appears. Select those products you want to uninstall and click Continue.Then click OK to confirm the list of products to be uninstalled.
3. When the uninstall has completed, click Finish.
In the case of a platform (file server) installation, the uninstall will remove the selected product(s) fromall of the Linux platforms.
53Release 16.2 - © SAS IP, Inc. All rights reserved. - Contains proprietary and confidential information
of ANSYS, Inc. and its subsidiaries and affiliates.

Release 16.2 - © SAS IP, Inc. All rights reserved. - Contains proprietary and confidential informationof ANSYS, Inc. and its subsidiaries and affiliates.54
Chapter 10: Troubleshooting
10.1. Installation Troubleshooting
This section lists problems and error messages that you may encounter while installing and/or runningANSYS, Inc. products. After each situation description or error message is the user action required tocorrect the problem.
You can also find answers to commonly-asked questions on our customer portal. After you log in tothe customer portal, select Knowledge Resources> Solutions.
For information on licensing-related errors, see the Troubleshooting section of the ANSYS, Inc. LicensingGuide.
10.1.1. Gathering Diagnostic Information
There are situations which require licensing-related information to be gathered for diagnostic andtroubleshooting purposes. At times it may be necessary to provide this information to technical support.
The client-related diagnostic information can be gathered by using the Client ANSLIC_ADMIN utility.For more information, see, Gather Client Diagnostic Information.
The server-related diagnostic information can be gathered by using ANSYS License ManagementCenter or by using the standalone gatherdiagnostics script. For more information, see, GatheringDiagnostic Information.
10.1.2. The GUI Installation Process Hangs
• If the GUI installation process appears to “hang” during file extraction, with no activity appearing in themessage window, press ENTER on the command window used to start the installation. When the installationis complete, check the message window carefully for any installation errors or warnings; however, this situationrarely causes installation errors.
• If the installation does not progress beyond the extraction of any single file during the file extraction phase,you may have insufficient disk space in the temporary directory that the file extraction utility uses. Be awarethat some components require a lengthy extraction time; we recommend allowing up to 30 minutes forthese components to extract if you are running on a particularly old or slow system.
To resolve this problem, remove files from your $TEMP directory to free up disk space, or increasethe size of any disk quotas on your $TEMP directory.
10.1.3. The Target Machine Does Not Have a DVD Drive
If the target machine does not have a DVD drive, we recommend that you download the installationfiles from the Customer Portal on www.ansys.com, use a USB Flash drive or follow the instructions inMounting the DVD Instructions for DVD Installations (Linux x64 Only) (p. 15) to mount to a machinethat does have a DVD drive.
55Release 16.2 - © SAS IP, Inc. All rights reserved. - Contains proprietary and confidential information
of ANSYS, Inc. and its subsidiaries and affiliates.

10.1.4. CAD Configuration Manager Help Does Not Load
If the help for the CAD Configuration Manager does not load into your default browser, set theBROWSER environment variable to the path of your HTML viewer (such as Mozilla or Firefox) and restartthe CAD Configuration Manager.
10.1.5. Cannot Enter Data in Text Fields
SUSE On some SUSE Linux systems, if you cannot enter data in text fields during the installation orwhen using the ANSLIC_ADMIN utility, you may be encountering a Tcl incompatibility. To correct theproblem, unset the following environment variables before running the installation or the ANSLIC_ADMINutility:
QT_IM_MODULEXMODIFIERSGTK_IM_MODULE
You should reset these environment variables when you are finished running the installation or usingANSLIC_ADMIN. Do not permanently unset these environment variables as doing so could affect otherapplications.
10.1.6. Download and Installation Error Messages
The current platform type is not selected and is not included in current download files. Pleasemake sure that you are using the correct media or downloaded file. Continuing with a platforminstallation may require additional post-install configuration.
Do you want to continue?
This message occurs if you have selected a platform for installation that does not match the filesyou are trying to install (either from the installation DVD, USB or from downloaded installation files).
Cannot find file <product>.tar in directory <dvd_dir>
This error may appear during the ANSYS installation if you have entered the wrong DVD pathname.Check Mounting the DVD Instructions for DVD Installations (Linux x64 Only) (p. 15) and enter thecorrect pathname for your platform.
Licensing files currently installed for <platform> are more recent than those on the installationmedia. The <platform> files will not be installed and will be deselected.
This message appears during an ANSYS, Inc. product installation if the installed license managerfiles are newer than the ones being installed. You should always use the newest files. However, dueto system format changes or other unlikely scenarios, the date check could produce incorrect results.To override the date check and force the installation to always install the files from the media, re-gardless of the file dates, re-run the installation with the -nodatecheck option. We strongly re-commend that you exercise caution when running the installation with the -nodatecheck option;installing older license files can result in licensing errors and the inability to run ANSYS, Inc. products.
10.1.7. System-related Error Messages
Error, could not open display.
Release 16.2 - © SAS IP, Inc. All rights reserved. - Contains proprietary and confidential informationof ANSYS, Inc. and its subsidiaries and affiliates.56
Troubleshooting
Either the DISPLAY environment variable is not correct or the xhosts command was not properlyset. See the Mechanical APDL Basic Analysis Guide for specific graphics information.
***Error, ANSYS162_DIR environment variable is not set. This is a fatal error – exiting.
This message indicates that the ANSYS162_DIR environment variable was not set where necessaryfor licensing. This environment variable (which is set in the scripts that run ANSYS) should be setto the release-specific installation directory.
10.1.8. High Performance Computing Error Messages
The following error messages are associated with the High Performance Computing solvers.
mpid: Error: HP MPI version incompatibility detected
You may encounter this or a similar message if you attempt to use ANSYS 16.2 with a differentversion of MPI than is supported. See the Parallel Processing Guide for a complete list of supportedMPI versions.
10.2. Installation Troubleshooting - Mechanical APDL
The items listed below apply only to the Mechanical APDL product.
10.2.1. Your batch jobs terminate when you log out of a session
On some systems, you may need to use the ‘nohup’ option to allow batch jobs to continue runningafter you log out of a session. If you are running via the Launcher, select Options> Use ‘nohup’ ToStart Batch Runs With Output Sent to ‘File Only.’ We do not recommend using this setting on systemsthat automatically set ‘nohup.’
10.2.2. Mechanical APDL Documentation File for User Interface Error Messages
Missing or erroneous documentation files for user interface. Command ignored.
Verify that the documentation list file for the user interface exists in the /ansys_inc/v162/an-sys/gui/en-us/UIDL subdirectory.
ls -l /ansys_inc/v162/ansys/gui/en-us/UIDL/menulist162.ans
The system should respond with:
-rw-r--r-- 1 root 23 Jan 8 11:50 /ansys_inc/v162/ansys/gui /en-us/UIDL/menulist162.ans
Make sure that the pathnames in the menulist162.ans file are correct.
10.2.3. Launcher Error Messages
Some of the more common error messages follow. See the ANSYS, Inc. Licensing Guide for licensing-related launcher messages.
***Cannot create required <profile> file. Therefore, cannot write to profile information duringthis launcher session.
57Release 16.2 - © SAS IP, Inc. All rights reserved. - Contains proprietary and confidential information
of ANSYS, Inc. and its subsidiaries and affiliates.
Installation Troubleshooting - Mechanical APDL
If you see this error, you cannot add or modify profile information during this launcher session.Verify that you have write access to the directory and restart the launcher session. Typically, thisdirectory is C:\Documents and Settings\<user name>\Application Data\AN-SYS\v162\launcher on Windows or ~/.ansys/v162/launcher on Linux.
10.2.4. FORTRAN Runtime Error Messages
The following error messages occur if you are running Mechanical APDL in a directory in which the userdoes not have write permission, or if Mechanical APDL files (i.e., Jobname.RST, Jobname.DB) existin the current directory but you do not have write permissions to the files. The specific messages thatappear on each system are shown below.
10.2.4.1. Intel Linux 64 Systems
Input/Output Error 177: Create Failure
In Procedure: fappnd
At Line: 72
Statement: Formatted WRITE
Unit: 19
10.2.4.2. Intel EM64T Linux x64 Systems
forrtl: Permission denied
forrtl: severe (9): permission to access file denied, unit 19, file /build/v162/ansys/objs
10.2.4.3. AMD Opteron Linux x64 Systems
***ERROR
Unable to open file /build/v162/ansys/objs/file.err for WRITE. Check directory and file permissions.
10.3. Installation Troubleshooting - ANSYS Workbench
10.3.1. Startup or Graphics Problems
To minimize graphics problems, always verify that you are running the latest graphics drivers providedby your computer's hardware manufacturer.
If you are running ANSYS Workbench on Linux and experience problems at startup or with the GUI orgraphics displaying correctly, and you are running in accelerated graphics mode, you may need to re-launch ANSYS Workbench using the -oglmesa flag to activate software rendering:
runwb2 -oglmesa
If ANSYS Workbench detects that graphics problems are causing crashes, it will automatically switch tosoftware rendering. ANSYS Workbench also will use software rending mode by default when runningon a remote display, or on a local display if the hardware does not appear to be accelerated.
To revert to accelerated graphics mode, launch ANSYS Workbench using the -oglhw flag:
Release 16.2 - © SAS IP, Inc. All rights reserved. - Contains proprietary and confidential informationof ANSYS, Inc. and its subsidiaries and affiliates.58
Troubleshooting
runwb2 -oglhw
10.4. Installation Troubleshooting - ANSYS CFX
10.4.1. CFX Distributed Parallel Runs Fail
On some SLES machines (typically ones with more than one network card), the default configurationof /etc/hosts will cause CFX distributed parallel runs to fail. In such cases, the problem might besolved by editing the /etc/hosts file to remove all lines that contain redundant loopback addresses.Do not remove the line with the first loopback address, which is typically 127.0.0.1.
10.5. Contacting Technical Support
Technical Support for ANSYS, Inc. products is provided either by ANSYS, Inc. directly or by one of ourcertified ANSYS Support Providers. Please check with the ANSYS Support Coordinator (ASC) at yourcompany to determine who provides support for your company, or go to www.ansys.com and selectContacts> Contacts and Locations.
If your support is provided by ANSYS, Inc. directly, Technical Support can be accessed quickly and effi-ciently from the ANSYS Customer Portal, which is available from the ANSYS Website (www.ansys.com)under Support > Customer Portal. The direct URL is: support.ansys.com.
One of the many useful features of the Customer Portal is the Knowledge Resources Search, which canbe found on the Home page of the Customer Portal. To use this feature, enter relevant text (errormessage, etc.) in the Knowledge Resources Search box and click the magnifying glass icon. TheseKnowledge Resources provide solutions and guidance on how to resolve installation and licensing issuesquickly.
NORTH AMERICA
All ANSYS Products except Esterel, Apache and Reaction Design products
Web: Go to the ANSYS Customer Portal (http://support.ansys.com) and select the appropriate option.
Toll-Free Telephone: 1.800.711.7199 (Please have your Customer or Contact ID ready.)
Support for University customers is provided only through the ANSYS Customer Portal.
GERMANY
ANSYS Mechanical Products
Telephone: +49 (0) 8092 7005-55 (CADFEM)
Email: [email protected]
All ANSYS Products
Web: Go to the ANSYS Customer Portal (http://support.ansys.com) and select the appropriate option.
National Toll-Free Telephone: (Please have your Customer or Contact ID ready.)
German language: 0800 181 8499
English language: 0800 181 1565
Austria: 0800 297 835
Switzerland: 0800 546 318
International Telephone: (Please have your Customer or Contact ID ready.)
German language: +49 6151 152 9981
59Release 16.2 - © SAS IP, Inc. All rights reserved. - Contains proprietary and confidential information
of ANSYS, Inc. and its subsidiaries and affiliates.
Contacting Technical Support
English language: +49 6151 152 9982
Email: [email protected]
UNITED KINGDOM
All ANSYS Products
Web: Go to the ANSYS Customer Portal (http://support.ansys.com) and select the appropriate option.
Telephone: Please have your Customer or Contact ID ready.
UK: 0800 048 0462
Republic of Ireland: 1800 065 6642
Outside UK: +44 1235 420130
Email: [email protected]
Support for University customers is provided only through the ANSYS Customer Portal.
JAPAN
Mechanical Products
Telephone: +81-3-5324-8333
Email:
Mechanical: [email protected]
Fluids Products
Telephone: +81-3-5324-7305
Email:
Fluent: [email protected];
CFX: [email protected];
Polyflow: [email protected];
Icepak
Telephone: +81-3-5324-7444
Email: [email protected]
Licensing and Installation
Email: [email protected]
INDIA
All ANSYS Products
Web: Go to the ANSYS Customer Portal (http://support.ansys.com) and select the appropriate option.
Telephone: +91 1 800 209 3475 (toll free) or +91 20 6654 3000 (toll) (Please have your Customer orContact ID ready.)
Support for University customers is provided only through the ANSYS Customer Portal.
FRANCE
All ANSYS Products
Web: Go to the ANSYS Customer Portal (http://support.ansys.com) and select the appropriate option.
Release 16.2 - © SAS IP, Inc. All rights reserved. - Contains proprietary and confidential informationof ANSYS, Inc. and its subsidiaries and affiliates.60
Troubleshooting
Toll-Free Telephone: +33 (0) 800 919 225 Toll Number: +33 (0) 170 489 087 (Please have your Customeror Contact ID ready.)
Email: [email protected]
BELGIUM
All ANSYS Products
Web: Go to the ANSYS Customer Portal (http://support.ansys.com) and select the appropriate option.
Telephone: +32 (0) 10 45 28 61
Email: [email protected]
Support for University customers is provided only through the ANSYS Customer Portal.
SWEDEN
All ANSYS Products
Web: Go to the ANSYS Customer Portal (http://support.ansys.com) and select the appropriate option.
Telephone: +46 (0) 10 516 49 00
Email: [email protected]
SPAIN and PORTUGAL
All ANSYS Products
Web: Go to the ANSYS Customer Portal (http://support.ansys.com) and select the appropriate option.
Telephone: +34 900 933 407 (Spain), +351 800 880 513 (Portugal)
Email: [email protected], [email protected]
Support for University customers is provided only through the ANSYS Customer Portal.
ITALY
All ANSYS Products
Web: Go to the ANSYS Customer Portal (http://support.ansys.com) and select the appropriate option.
Telephone: +39 02 89013378
Email: [email protected]
Support for University customers is provided only through the ANSYS Customer Portal.
61Release 16.2 - © SAS IP, Inc. All rights reserved. - Contains proprietary and confidential information
of ANSYS, Inc. and its subsidiaries and affiliates.
Contacting Technical Support

Release 16.2 - © SAS IP, Inc. All rights reserved. - Contains proprietary and confidential informationof ANSYS, Inc. and its subsidiaries and affiliates.62
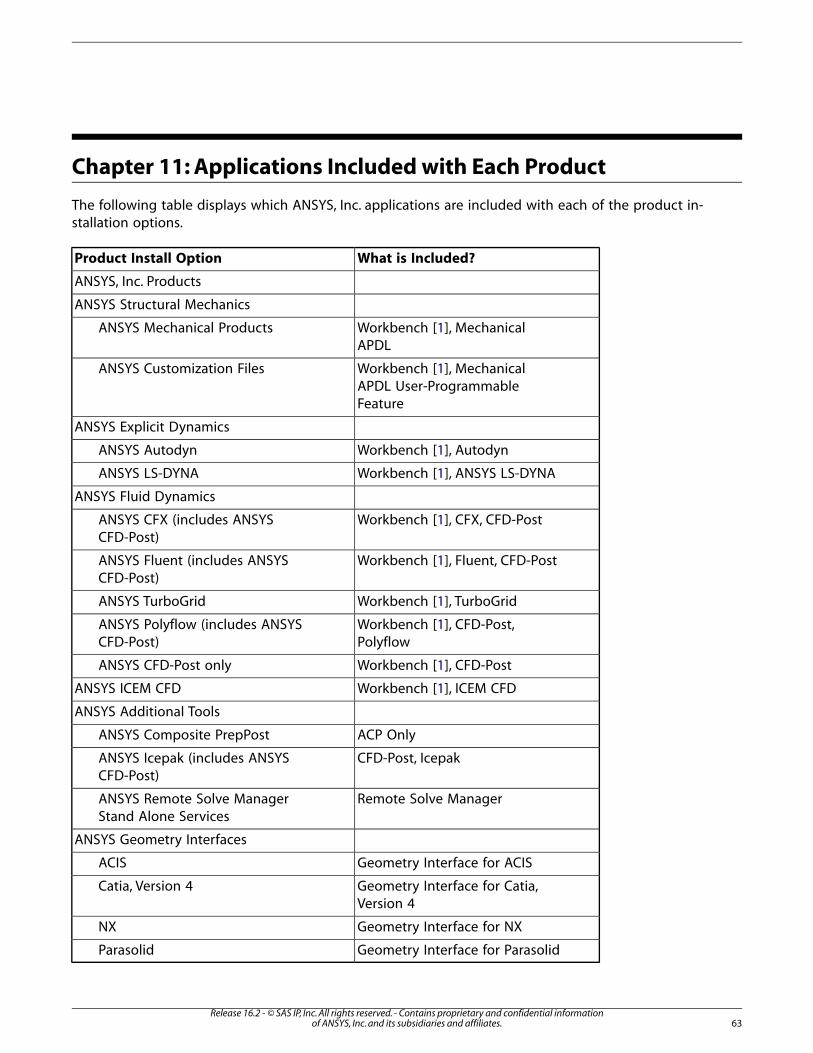
Chapter 11: Applications Included with Each Product
The following table displays which ANSYS, Inc. applications are included with each of the product in-stallation options.
What is Included?Product Install Option
ANSYS, Inc. Products
ANSYS Structural Mechanics
Workbench [1], MechanicalAPDL
ANSYS Mechanical Products
Workbench [1], MechanicalAPDL User-ProgrammableFeature
ANSYS Customization Files
ANSYS Explicit Dynamics
Workbench [1], AutodynANSYS Autodyn
Workbench [1], ANSYS LS-DYNAANSYS LS-DYNA
ANSYS Fluid Dynamics
Workbench [1], CFX, CFD-PostANSYS CFX (includes ANSYSCFD-Post)
Workbench [1], Fluent, CFD-PostANSYS Fluent (includes ANSYSCFD-Post)
Workbench [1], TurboGridANSYS TurboGrid
Workbench [1], CFD-Post,Polyflow
ANSYS Polyflow (includes ANSYSCFD-Post)
Workbench [1], CFD-PostANSYS CFD-Post only
Workbench [1], ICEM CFDANSYS ICEM CFD
ANSYS Additional Tools
ACP OnlyANSYS Composite PrepPost
CFD-Post, IcepakANSYS Icepak (includes ANSYSCFD-Post)
Remote Solve ManagerANSYS Remote Solve ManagerStand Alone Services
ANSYS Geometry Interfaces
Geometry Interface for ACISACIS
Geometry Interface for Catia,Version 4
Catia, Version 4
Geometry Interface for NXNX
Geometry Interface for ParasolidParasolid
63Release 16.2 - © SAS IP, Inc. All rights reserved. - Contains proprietary and confidential information
of ANSYS, Inc. and its subsidiaries and affiliates.

1. Workbench includes the Workbench Framework, DesignModeler, DesignXplorer, and Remote Solve Manager.
Release 16.2 - © SAS IP, Inc. All rights reserved. - Contains proprietary and confidential informationof ANSYS, Inc. and its subsidiaries and affiliates.64
Applications Included with Each Product