Embed Size (px)
Citation preview
Añadir para firmar digitalmente documentos EDE
Add digital signatures to EDE documents
Desarrollado por: DTE, LLC Versión: 01.2017 Developed by: DTE, LLC
Revisado en: 27 de Marzo de 201
Revised: March 27, 2017
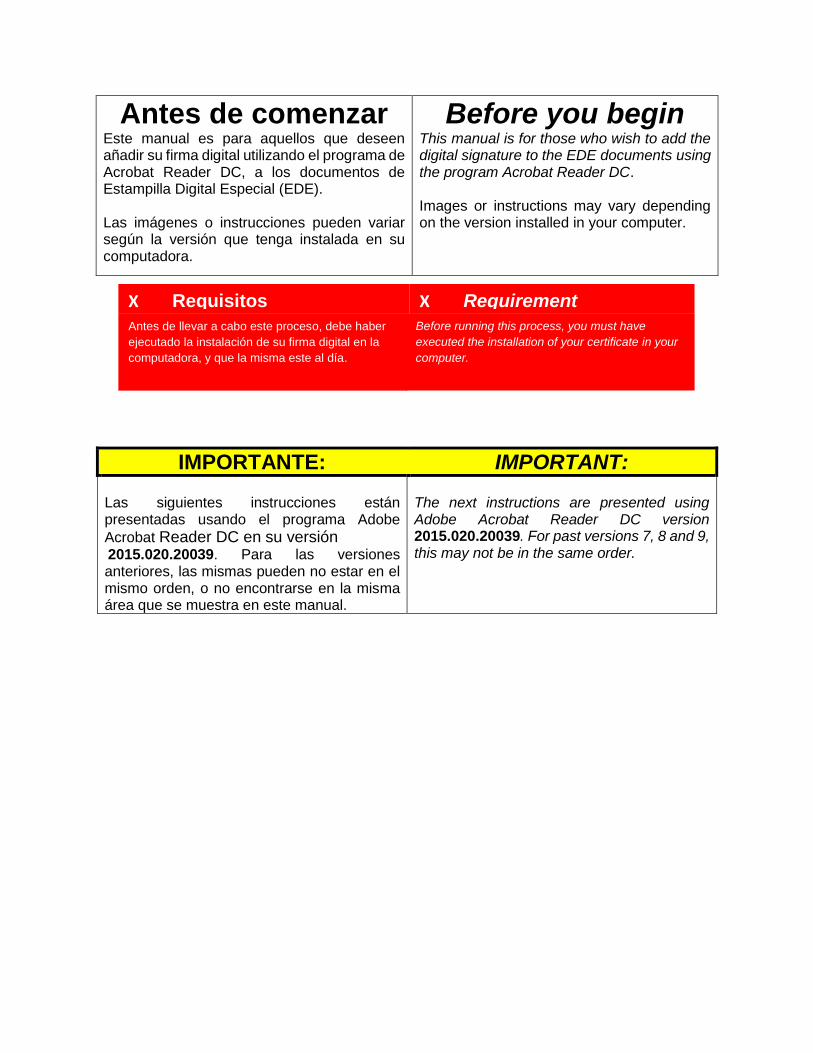
Antes de comenzar Este manual es para aquellos que deseen añadir su firma digital utilizando el programa de Acrobat Reader DC, a los documentos de Estampilla Digital Especial (EDE). Las imágenes o instrucciones pueden variar según la versión que tenga instalada en su computadora.
Before you begin This manual is for those who wish to add the digital signature to the EDE documents using the program Acrobat Reader DC. Images or instructions may vary depending on the version installed in your computer.
IMPORTANTE: IMPORTANT: Las siguientes instrucciones están presentadas usando el programa Adobe
Acrobat Reader DC en su versión 2015.020.20039. Para las versiones anteriores, las mismas pueden no estar en el mismo orden, o no encontrarse en la misma área que se muestra en este manual.
The next instructions are presented using Adobe Acrobat Reader DC version 2015.020.20039. For past versions 7, 8 and 9, this may not be in the same order.
X Requisitos X Requirement Antes de llevar a cabo este proceso, debe haber
ejecutado la instalación de su firma digital en la
computadora, y que la misma este al día.
Before running this process, you must have
executed the installation of your certificate in your
computer.
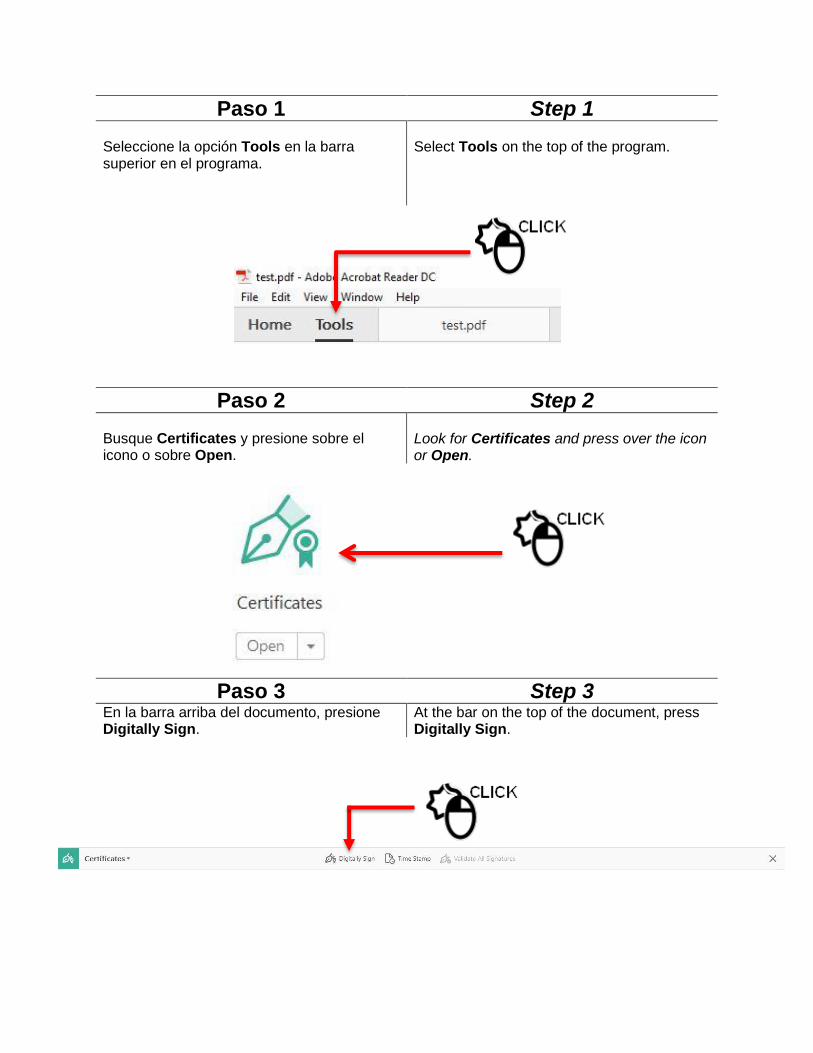
Paso 1 Step 1 Seleccione la opción Tools en la barra superior en el programa.
Select Tools on the top of the program.
Paso 2 Step 2 Busque Certificates y presione sobre el icono o sobre Open.
Look for Certificates and press over the icon or Open.
Paso 3 Step 3 En la barra arriba del documento, presione Digitally Sign.
At the bar on the top of the document, press Digitally Sign.
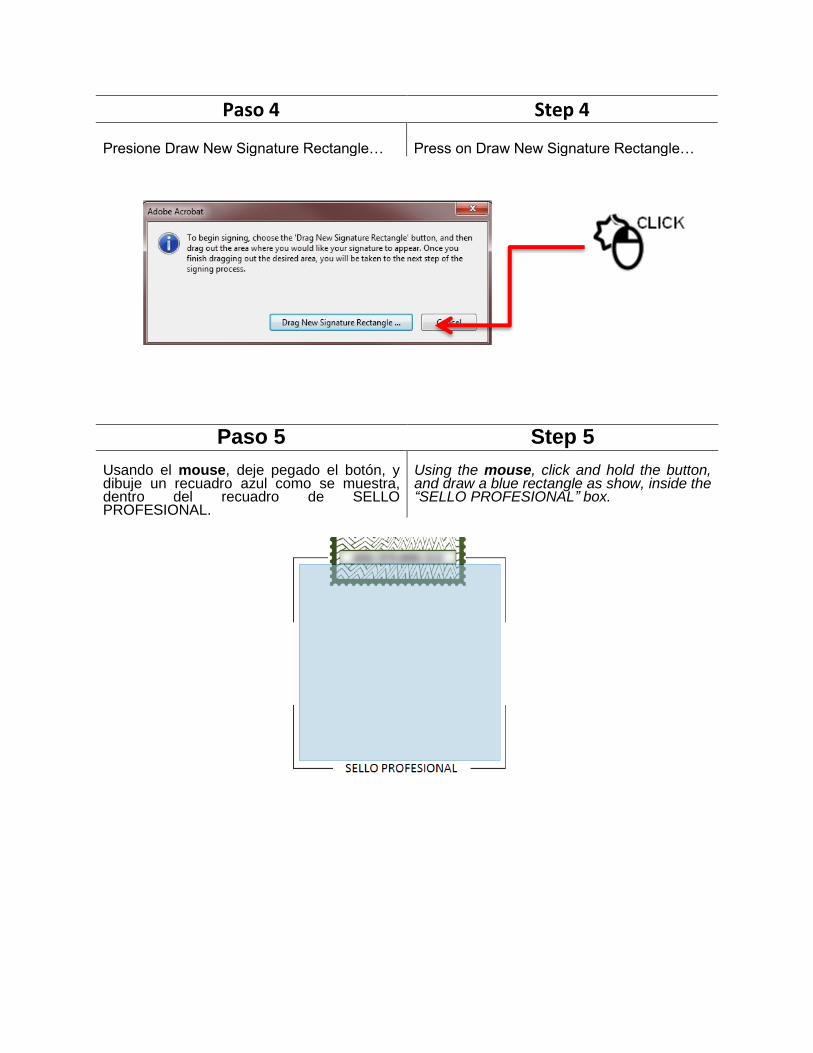
Paso 4 Step 4 Presione Draw New Signature Rectangle…
Press on Draw New Signature Rectangle…
Paso 5 Step 5 Usando el mouse, deje pegado el botón, y dibuje un recuadro azul como se muestra, dentro del recuadro de SELLO PROFESIONAL.
Using the mouse, click and hold the button, and draw a blue rectangle as show, inside the “SELLO PROFESIONAL” box.
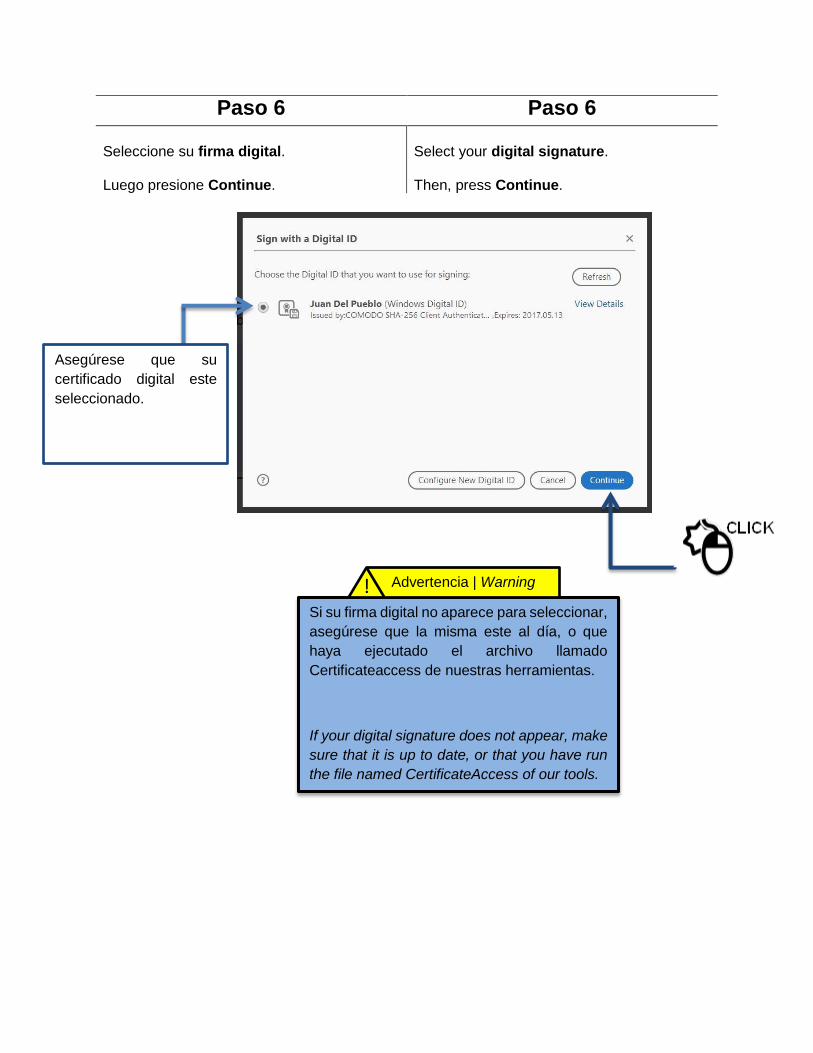
Paso 6 Paso 6
Seleccione su firma digital. Luego presione Continue.
Select your digital signature. Then, press Continue.
Si su firma digital no aparece para seleccionar,
asegúrese que la misma este al día, o que
haya ejecutado el archivo llamado
Certificateaccess de nuestras herramientas.
If your digital signature does not appear, make
sure that it is up to date, or that you have run
the file named CertificateAccess of our tools.
Advertencia | Warning
!
Asegúrese que su
certificado digital este
seleccionado.
Make sure your digital
certificate is selected.
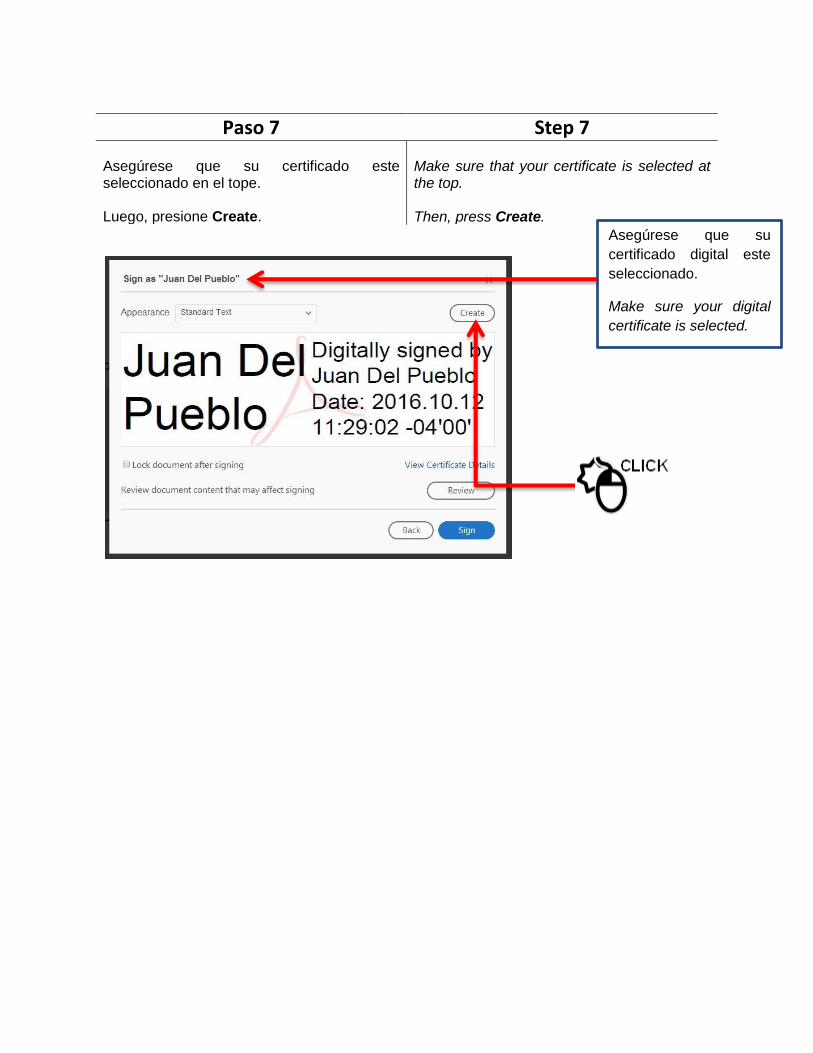
Paso 7 Step 7 Asegúrese que su certificado este seleccionado en el tope. Luego, presione Create.
Make sure that your certificate is selected at the top. Then, press Create.
Asegúrese que su
certificado digital este
seleccionado.
Make sure your digital
certificate is selected.
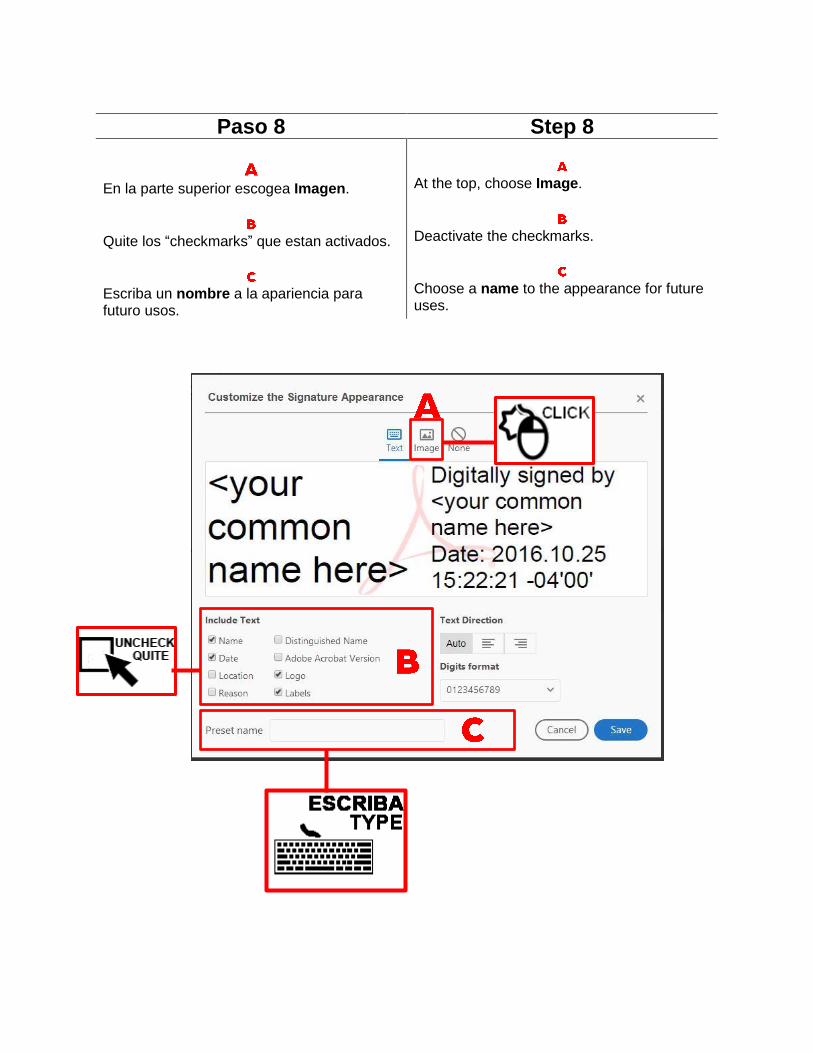
Paso 8 Step 8
En la parte superior escogea Imagen.
Quite los “checkmarks” que estan activados.
Escriba un nombre a la apariencia para futuro usos.
At the top, choose Image.
Deactivate the checkmarks.
Choose a name to the appearance for future uses.

El programa de Acrobat Reader DC solo aceptara imágenes en el formato PDF. Por lo tanto, si su imagen está en otro formato, deberá convertirla a PDF primero para poder utilizarla.
Acrobat Reader DC only accept images in the PDF format. Therefore, if your image is in another format, you must convert it to PDF first to use it.
Presionar la opción de Browse como se muestra a continuación, para que el programa le permita seleccionar la imagen que vaya a usar. Recuerde, como se indicó anteriormente, la imagen debe estar en formato PDF. Si no la encuentra, asegúrese que este en ese formato.
If you select an image for your appearance, you must press the Browse option as shown below so that the program allows you to select the image to be used. Remember, as noted above, the image must be in PDF format. If not found, make sure it is in that format.
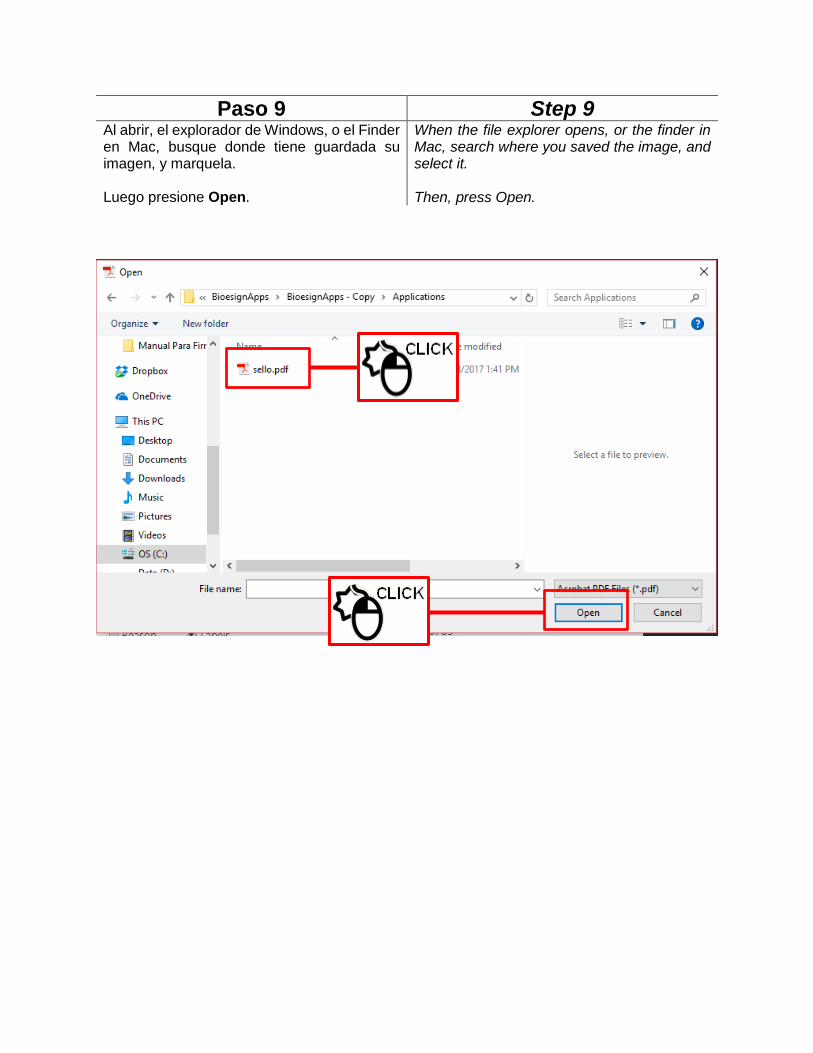
Paso 9 Step 9 Al abrir, el explorador de Windows, o el Finder en Mac, busque donde tiene guardada su imagen, y marquela. Luego presione Open.
When the file explorer opens, or the finder in Mac, search where you saved the image, and select it. Then, press Open.
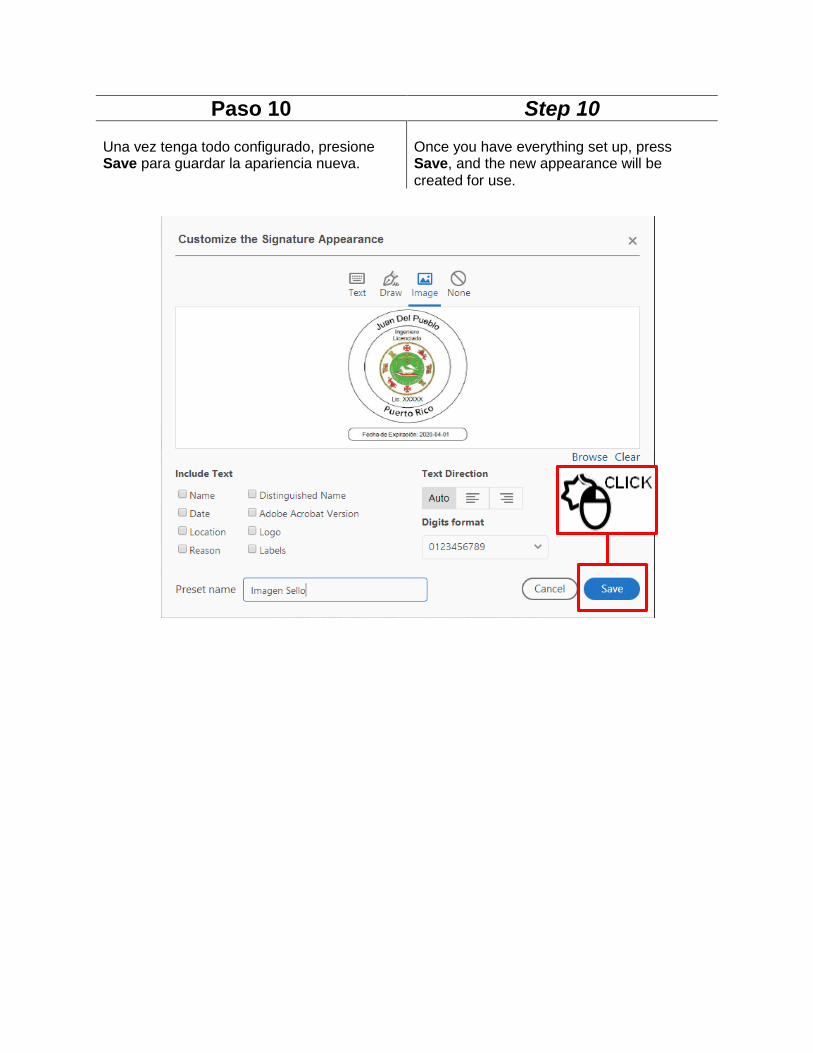
Paso 10 Step 10 Una vez tenga todo configurado, presione Save para guardar la apariencia nueva.
Once you have everything set up, press Save, and the new appearance will be created for use.
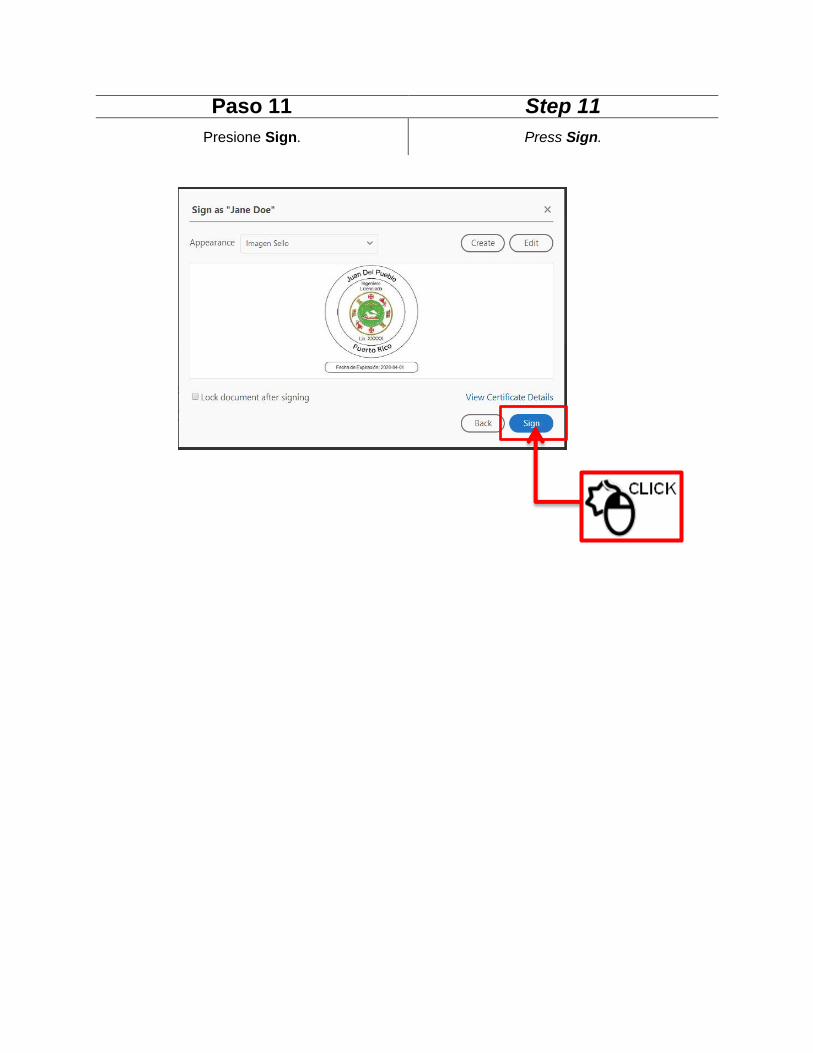
Paso 11 Step 11
Presione Sign.
Press Sign.
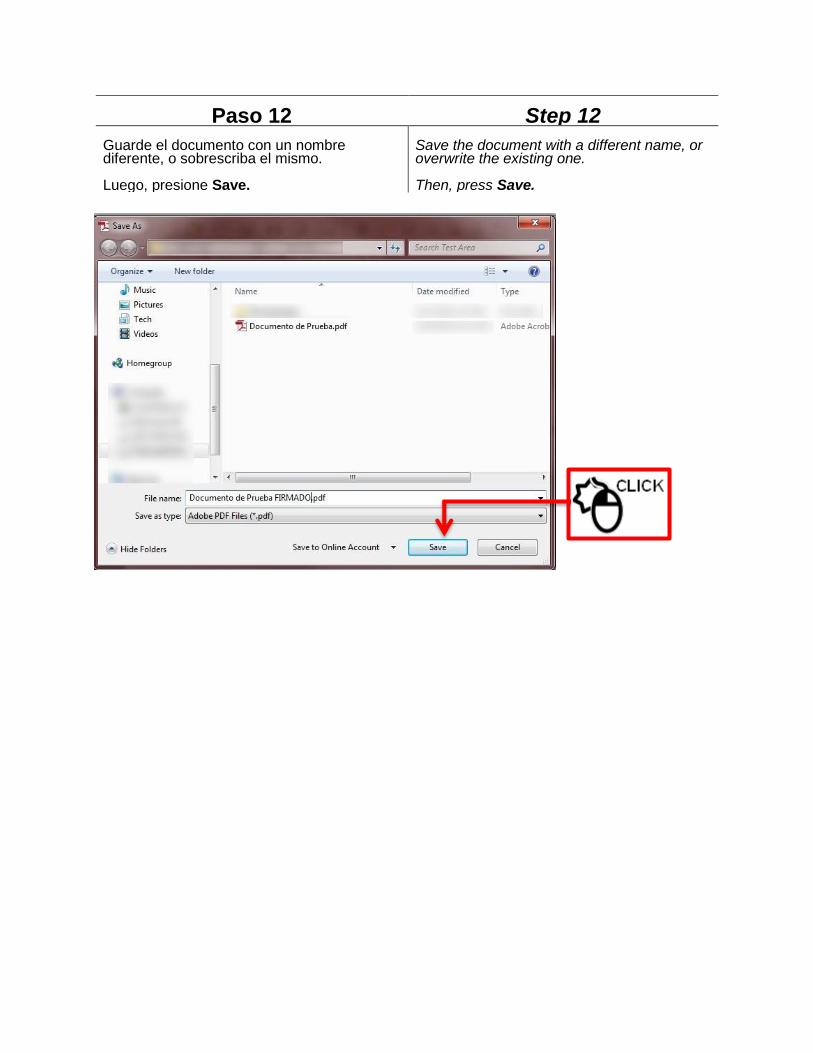
Paso 12 Step 12 Guarde el documento con un nombre diferente, o sobrescriba el mismo. Luego, presione Save.
Save the document with a different name, or overwrite the existing one. Then, press Save.
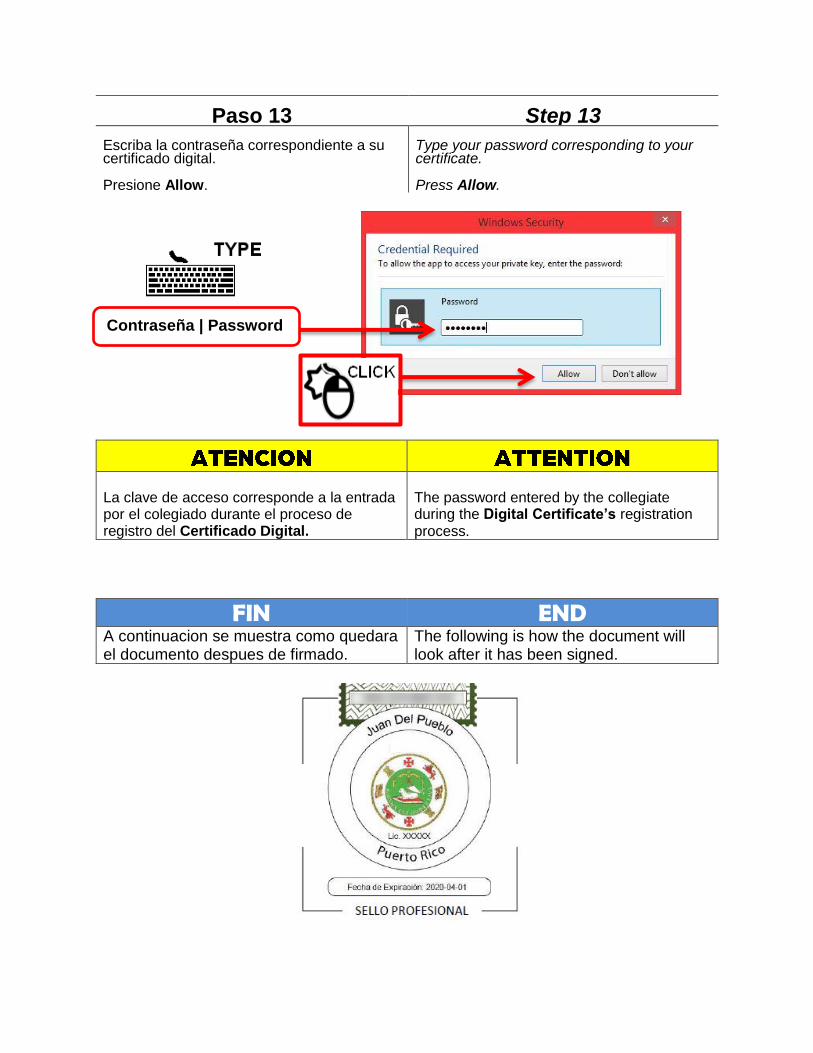
Paso 13 Step 13 Escriba la contraseña correspondiente a su certificado digital. Presione Allow.
Type your password corresponding to your certificate. Press Allow.
La clave de acceso corresponde a la entrada por el colegiado durante el proceso de registro del Certificado Digital.
The password entered by the collegiate during the Digital Certificate’s registration process.
FIN END A continuacion se muestra como quedara el documento despues de firmado.
The following is how the document will look after it has been signed.
Password
Contraseña | Password
www.dtellcpr.com