Embed Size (px)
Citation preview
An Educational Hands-On Demonstration Program for Groups of 25 Students in Grades 2-6
Prepared by the
National Chemistry Week Planning Committee
of the
American Chemical Society
Cleveland Section
For
National Chemistry Week 2017
Called
Chemistry Rocks!
Overview:
Join us this year for an adventure into the chemistry of rocks, minerals and volcanoes. Notes: 1) After Sept. 9, 2017, please see our Cleveland Section web site (p. 3) for an Errata sheet. 2) This year we have created some partial kits which have materials for only 15 students at
3 tables (full kits have materials for 25 students at 5 tables). PARTIAL kits are so indicated on all kits’ external labels. A lack of any such marking indicates a FULL kit.
.
Table of Contents Page
List of Experiments….…………………………………….….…….. 2 How Experiment Write-ups are Organized………………....…… 2 Websites of Interest……………………………………..………. 3 Checklists………………………………………………..………… 4 Supplies for Demonstrator to Bring from Home..…….……. 7 Supplies Included in Your Kit…………………….……….…… 8 Setup…………………………………………………………..……. 11 Greet the Students and Opening Discussion………..…….... 14 Background for the Demonstrator (only)…………………….. 15 Introduction to This Year’s Program…………………………… 18 The Program……………………………………………………….. 19 Closing Session…………………………………………………… 36 Cleanup & Return Procedures……………………………......... 36 Appendices…………………………………………………………. 38
Acknowledgments The National Chemistry Week (NCW) Program of the Cleveland Section of the American Chemical Society (ACS) began in 1994 with an idea to put together a scripted Program that could be performed at any local school or library. It is a fun and educational Program designed to interest students in grades 2-6 in chemistry and science. This idea has expanded to become the centerpiece of the Cleveland Section's NCW activities. On numerous occasions it has received national recognition from the American Chemical Society including several ChemLuminary Awards. In 2017 the Cleveland Section’s volunteers will perform at least 40 demonstrations at libraries, schools, and other public sites. Our NCW efforts reach many students each year because of various sponsors who have donated money, materials and/or services to the Cleveland Section specifically for National Chemistry Week. We extend our thanks to Cleveland’s DayGlo Corporation for its donation of fluorescent dyes. We would like to especially thank our partners at the Cuyahoga County Public Library (CCPL) for creating and distributing flyers and providing the facilities for this Program. We further extend our sincere thanks to John Carroll University for hosting GAK Day (Grand Assembly of Kits Day) and our Dress Rehearsal, to NASA’s Glenn Research Center which printed this and other documents and to our Cleveland ACS Section for its financial support. Last and most importantly, we thank all the volunteers who donate their time and expertise. This library/school Program and other NCW events are the result of the hard work of many dedicated and talented volunteers. It all starts with our local section NCW Planning Committee. The Committee recommends, tests, and reviews activities & experiments; writes this script; collects supplies and materials; prepares the kits; recruits sponsors and volunteers; contacts libraries and schools; and schedules demonstrations. Committee members include Betty Dabrowski, Bob Fowler, Lois Kuhns, Helen Mayer, Katie Arendt, Vince Opaskar, Marcia Schiele and Shermila Singham. Additional credit and thanks is given to the many GAK Day volunteers including professors and students from Baldwin Wallace, Case Western Reserve, Cleveland State and John Carroll universities, Oberlin College & Conservatory and Notre Dame College who gave up a Saturday in September to help count, measure and assemble all of the necessary materials for our demonstration kits. A final thank you goes out to the dozens of dedicated chemistry professionals and scientists who lead the presentations and activities in schools, libraries, and other public locations. Without them there would be no Cleveland Section NCW Program.
National Chemistry Week 2017 – ACS Cleveland Section
2
List of Experiments
1. Fossils in Sedimentary Rocks—Glowing Chalk ……………………………… 19 2. Identifying Rocks and Minerals ……………………………………………… 22 3. Formation of Minerals—Copper Precipitation via Aluminum Replacement ..... 26 4. Submarine Volcanoes—a Lava Lamp ………………………………………… 29 5. Shield volcanoes—Elephant Toothpaste ……………………………………… 31 6. Cinder Cone volcanoes—Exploding Canisters ……………………………….. 33
How Experiment Write-ups are Organized Each Experiment’s write-up is presented as follows:
1. Purpose & General Methodology: Background on the Experiment. 2. Introduce the Experiment: Suggestions for introducing the Experiment to the students. 3. Performance Details: How to perform the Experiment in detail. 4. Conclusions: Suggested conclusions to draw from the Experiment. 5. Technical Information (for the Demonstrator): This information is background info to
help you understand what we’re trying to accomplish technically in the Experiment. It certainly isn’t intended that you give these technical details to the students unless the students ask or request it.
VOLUNTEERS This year the NCW Committee will be videotaping the annual “Dress Rehearsal” demonstrations as they are presented at JCU. We’ll post this video on YouTube and the link to it on the Volunteers page at our web site at http://www.csuohio.edu/sciences/dept/cleveland_acs/ as soon as possible. It can be found by searching YouTube for “Cleveland NCW 2017”. It will demonstrate this year’s NCW Program in detail and may be viewed by anyone interested in hosting our Program. Alternately, this script provides enough detail for a teacher or parent to perform the presentation. The Cleveland ACS and NCW Committee do not require background checks on its volunteers nor do we require formal educational/teaching experience from all of its volunteers.
National Chemistry Week 2017 – ACS Cleveland Section
3
MAKE SURE TO FOLLOW ALL DIRECTIONS IN EXPERIMENTS If experiments have special safety concerns due to the materials being used, they will be listed in the section for that experiment. Eye protection should be worn at all times by everyone, and students should be specifically told to never touch their eyes or smell things directly. Some of the chemicals used this year are household chemicals, and some have been purchased from chemical distributors (see p. 38). Note that 0.3M HCl is being used in Exp. 2; we have the students wearing gloves here, but make sure the students exercise special care with it. If exposure to any chemical should occur, flush with water and report the incident to the librarian and parent. See also http://www.chemsafetypro.com/Topics/CRA/Skin_and_Eye_Irritation.html. For skin contact, washing with soap and water may suffice. Websites for where to obtain a Material Safety Data Sheet (MSDS) [now SDS] are listed in the Appendix A and also on our NCW website below. For information about the American Chemical Society’s NCW safety guidelines, visit https://www.acs.org/content/acs/en/chemical-safety.html.
Websites of Interest
Cleveland Section:
http://www.csuohio.edu/sciences/dept/cleveland_acs/NCW/
National American Chemical Society’s “National Chemistry Week” website: www.acs.org/ncw
Checklists Presenter’s Guide
National Chemistry Week 2017 – ACS Cleveland Section
4
Check Lists
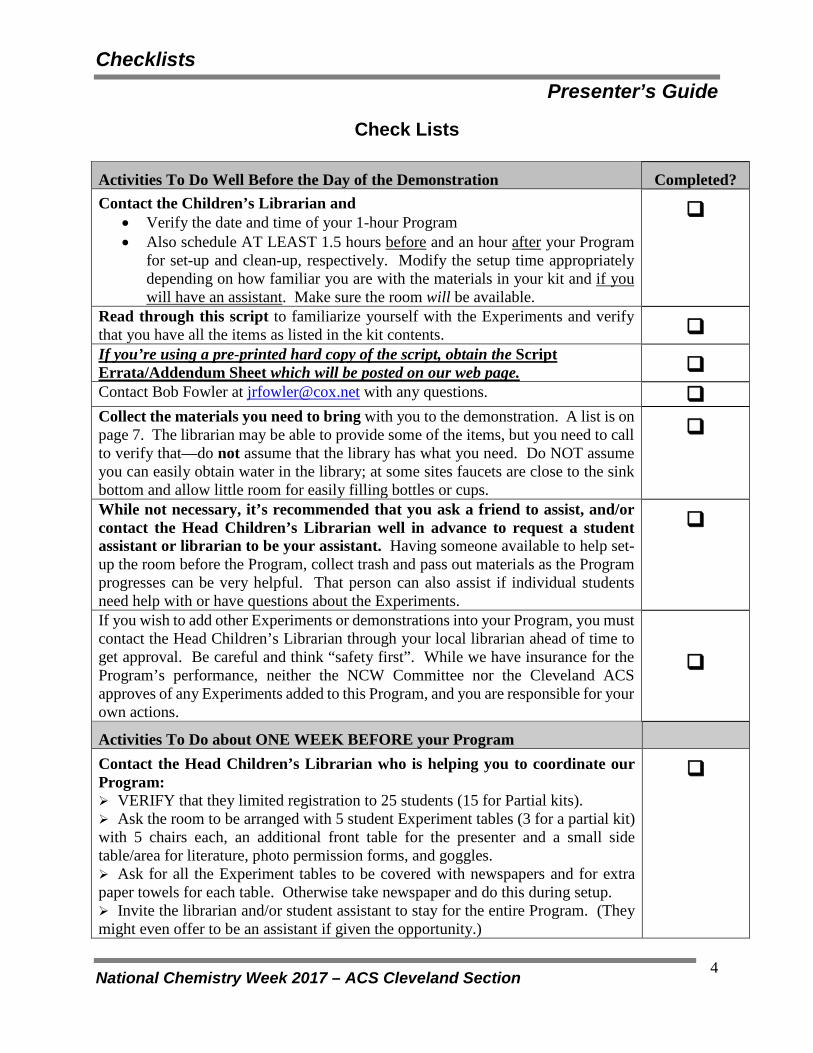
Activities To Do Well Before the Day of the Demonstration Completed? Contact the Children’s Librarian and
• Verify the date and time of your 1-hour Program • Also schedule AT LEAST 1.5 hours before and an hour after your Program
for set-up and clean-up, respectively. Modify the setup time appropriately depending on how familiar you are with the materials in your kit and if you will have an assistant. Make sure the room will be available.
Read through this script to familiarize yourself with the Experiments and verify that you have all the items as listed in the kit contents. If you’re using a pre-printed hard copy of the script, obtain the Script Errata/Addendum Sheet which will be posted on our web page. Contact Bob Fowler at [email protected] with any questions. Collect the materials you need to bring with you to the demonstration. A list is on page 7. The librarian may be able to provide some of the items, but you need to call to verify that—do not assume that the library has what you need. Do NOT assume you can easily obtain water in the library; at some sites faucets are close to the sink bottom and allow little room for easily filling bottles or cups.
While not necessary, it’s recommended that you ask a friend to assist, and/or contact the Head Children’s Librarian well in advance to request a student assistant or librarian to be your assistant. Having someone available to help set-up the room before the Program, collect trash and pass out materials as the Program progresses can be very helpful. That person can also assist if individual students need help with or have questions about the Experiments.
If you wish to add other Experiments or demonstrations into your Program, you must contact the Head Children’s Librarian through your local librarian ahead of time to get approval. Be careful and think “safety first”. While we have insurance for the Program’s performance, neither the NCW Committee nor the Cleveland ACS approves of any Experiments added to this Program, and you are responsible for your own actions.
Activities To Do about ONE WEEK BEFORE your Program Contact the Head Children’s Librarian who is helping you to coordinate our Program: VERIFY that they limited registration to 25 students (15 for Partial kits). Ask the room to be arranged with 5 student Experiment tables (3 for a partial kit) with 5 chairs each, an additional front table for the presenter and a small side table/area for literature, photo permission forms, and goggles. Ask for all the Experiment tables to be covered with newspapers and for extra paper towels for each table. Otherwise take newspaper and do this during setup. Invite the librarian and/or student assistant to stay for the entire Program. (They might even offer to be an assistant if given the opportunity.)
Checklists Presenter’s Guide
National Chemistry Week 2017 – ACS Cleveland Section
5
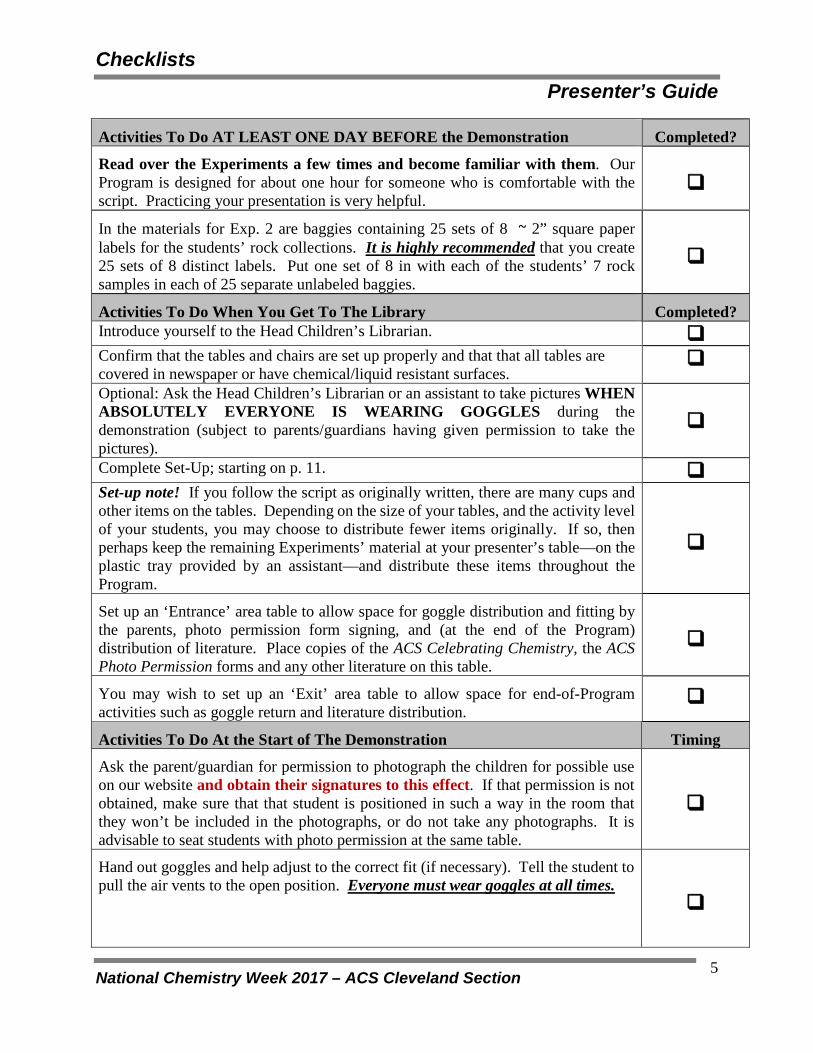
Activities To Do AT LEAST ONE DAY BEFORE the Demonstration Completed?
Read over the Experiments a few times and become familiar with them. Our Program is designed for about one hour for someone who is comfortable with the script. Practicing your presentation is very helpful.
In the materials for Exp. 2 are baggies containing 25 sets of 8 ~ 2” square paper labels for the students’ rock collections. It is highly recommended that you create 25 sets of 8 distinct labels. Put one set of 8 in with each of the students’ 7 rock samples in each of 25 separate unlabeled baggies.
Activities To Do When You Get To The Library Completed? Introduce yourself to the Head Children’s Librarian. Confirm that the tables and chairs are set up properly and that that all tables are covered in newspaper or have chemical/liquid resistant surfaces.
Optional: Ask the Head Children’s Librarian or an assistant to take pictures WHEN ABSOLUTELY EVERYONE IS WEARING GOGGLES during the demonstration (subject to parents/guardians having given permission to take the pictures).
Complete Set-Up; starting on p. 11. Set-up note! If you follow the script as originally written, there are many cups and other items on the tables. Depending on the size of your tables, and the activity level of your students, you may choose to distribute fewer items originally. If so, then perhaps keep the remaining Experiments’ material at your presenter’s table—on the plastic tray provided by an assistant—and distribute these items throughout the Program.
Set up an ‘Entrance’ area table to allow space for goggle distribution and fitting by the parents, photo permission form signing, and (at the end of the Program) distribution of literature. Place copies of the ACS Celebrating Chemistry, the ACS Photo Permission forms and any other literature on this table.
You may wish to set up an ‘Exit’ area table to allow space for end-of-Program activities such as goggle return and literature distribution.
Activities To Do At the Start of The Demonstration Timing
Ask the parent/guardian for permission to photograph the children for possible use on our website and obtain their signatures to this effect. If that permission is not obtained, make sure that that student is positioned in such a way in the room that they won’t be included in the photographs, or do not take any photographs. It is advisable to seat students with photo permission at the same table.
Hand out goggles and help adjust to the correct fit (if necessary). Tell the student to pull the air vents to the open position. Everyone must wear goggles at all times.
Checklists Presenter’s Guide
National Chemistry Week 2017 – ACS Cleveland Section
6
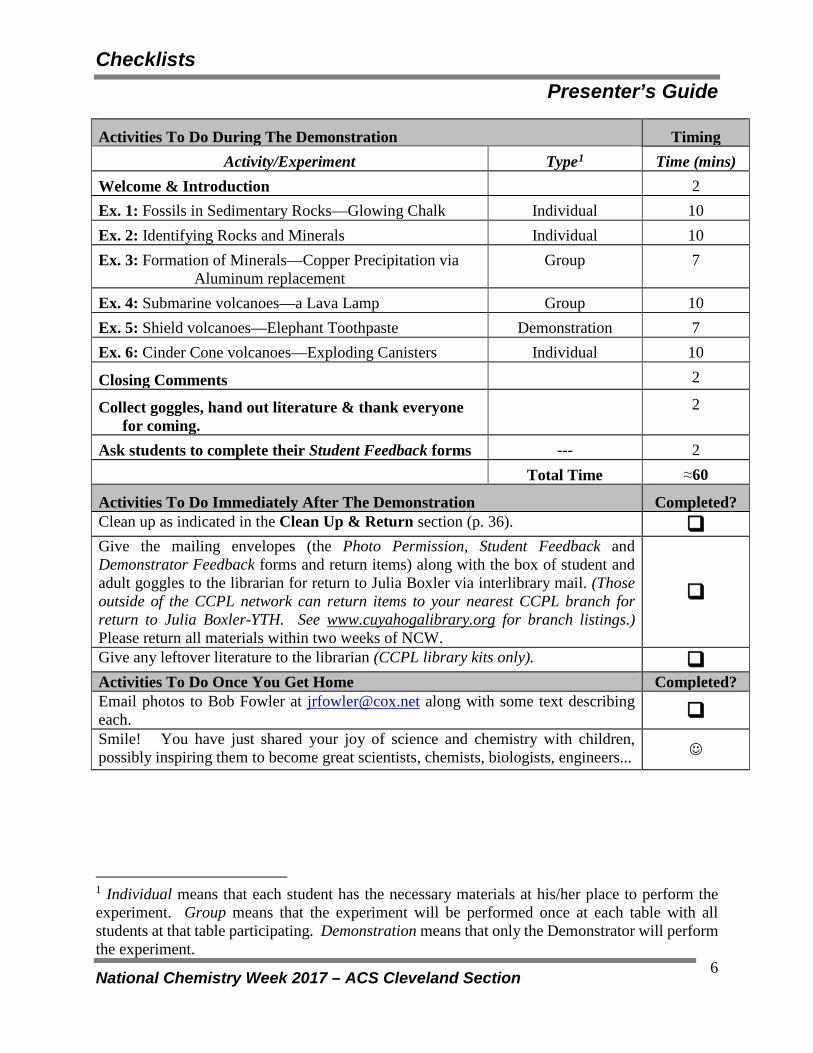
Activities To Do During The Demonstration Timing Activity/Experiment Type1 Time (mins)
Welcome & Introduction 2 Ex. 1: Fossils in Sedimentary Rocks—Glowing Chalk Individual 10 Ex. 2: Identifying Rocks and Minerals Individual 10 Ex. 3: Formation of Minerals—Copper Precipitation via
Aluminum replacement Group 7
Ex. 4: Submarine volcanoes—a Lava Lamp Group 10 Ex. 5: Shield volcanoes—Elephant Toothpaste Demonstration 7 Ex. 6: Cinder Cone volcanoes—Exploding Canisters Individual 10
Closing Comments 2
Collect goggles, hand out literature & thank everyone for coming.
2
Ask students to complete their Student Feedback forms --- 2 Total Time ≈60
Activities To Do Immediately After The Demonstration Completed? Clean up as indicated in the Clean Up & Return section (p. 36). Give the mailing envelopes (the Photo Permission, Student Feedback and Demonstrator Feedback forms and return items) along with the box of student and adult goggles to the librarian for return to Julia Boxler via interlibrary mail. (Those outside of the CCPL network can return items to your nearest CCPL branch for return to Julia Boxler-YTH. See www.cuyahogalibrary.org for branch listings.) Please return all materials within two weeks of NCW.
Give any leftover literature to the librarian (CCPL library kits only). Activities To Do Once You Get Home Completed? Email photos to Bob Fowler at [email protected] along with some text describing each.
Smile! You have just shared your joy of science and chemistry with children, possibly inspiring them to become great scientists, chemists, biologists, engineers...
1 Individual means that each student has the necessary materials at his/her place to perform the experiment. Group means that the experiment will be performed once at each table with all students at that table participating. Demonstration means that only the Demonstrator will perform the experiment.
Supplies for Demonstrator to Bring from Home Presenter’s Guide
National Chemistry Week 2017 – ACS Cleveland Section
7
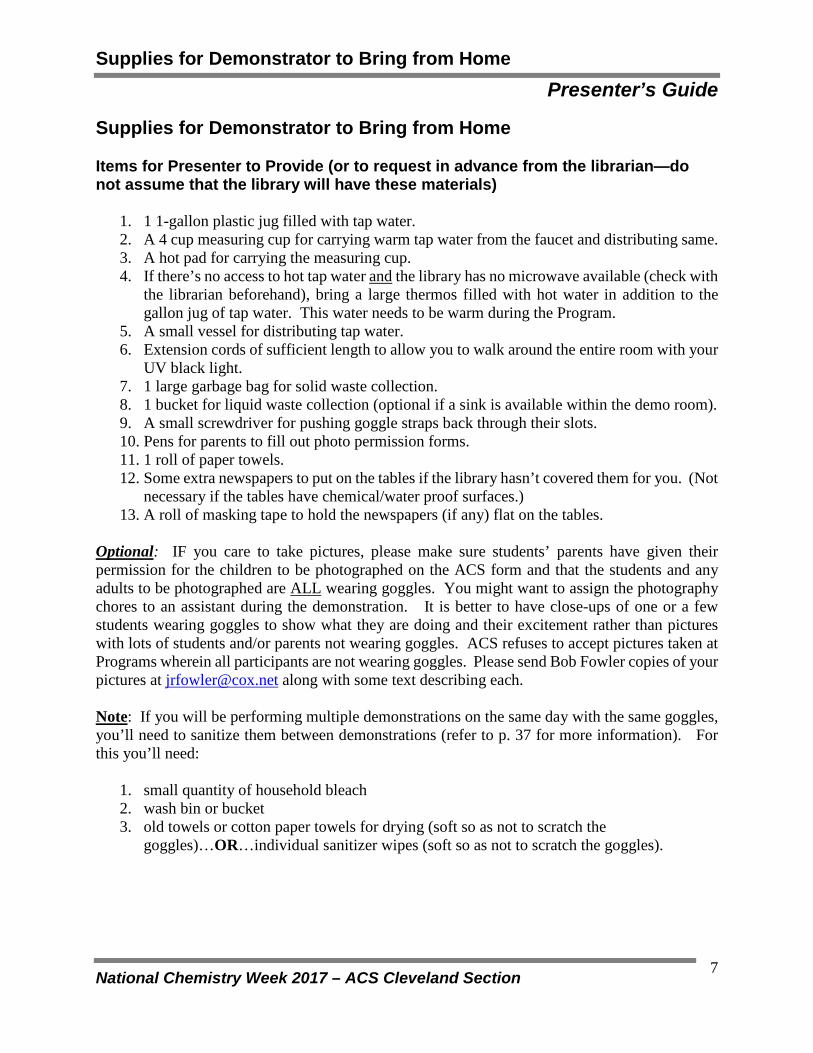
Supplies for Demonstrator to Bring from Home Items for Presenter to Provide (or to request in advance from the librarian—do not assume that the library will have these materials)
1. 1 1-gallon plastic jug filled with tap water. 2. A 4 cup measuring cup for carrying warm tap water from the faucet and distributing same. 3. A hot pad for carrying the measuring cup. 4. If there’s no access to hot tap water and the library has no microwave available (check with
the librarian beforehand), bring a large thermos filled with hot water in addition to the gallon jug of tap water. This water needs to be warm during the Program.
5. A small vessel for distributing tap water. 6. Extension cords of sufficient length to allow you to walk around the entire room with your
UV black light. 7. 1 large garbage bag for solid waste collection. 8. 1 bucket for liquid waste collection (optional if a sink is available within the demo room). 9. A small screwdriver for pushing goggle straps back through their slots. 10. Pens for parents to fill out photo permission forms. 11. 1 roll of paper towels. 12. Some extra newspapers to put on the tables if the library hasn’t covered them for you. (Not
necessary if the tables have chemical/water proof surfaces.) 13. A roll of masking tape to hold the newspapers (if any) flat on the tables.
Optional: IF you care to take pictures, please make sure students’ parents have given their permission for the children to be photographed on the ACS form and that the students and any adults to be photographed are ALL wearing goggles. You might want to assign the photography chores to an assistant during the demonstration. It is better to have close-ups of one or a few students wearing goggles to show what they are doing and their excitement rather than pictures with lots of students and/or parents not wearing goggles. ACS refuses to accept pictures taken at Programs wherein all participants are not wearing goggles. Please send Bob Fowler copies of your pictures at [email protected] along with some text describing each. Note: If you will be performing multiple demonstrations on the same day with the same goggles, you’ll need to sanitize them between demonstrations (refer to p. 37 for more information). For this you’ll need:
1. small quantity of household bleach 2. wash bin or bucket 3. old towels or cotton paper towels for drying (soft so as not to scratch the
goggles)…OR…individual sanitizer wipes (soft so as not to scratch the goggles).
Supplies Included in Your Kit Presenter’s Guide
National Chemistry Week 2017 – ACS Cleveland Section
8
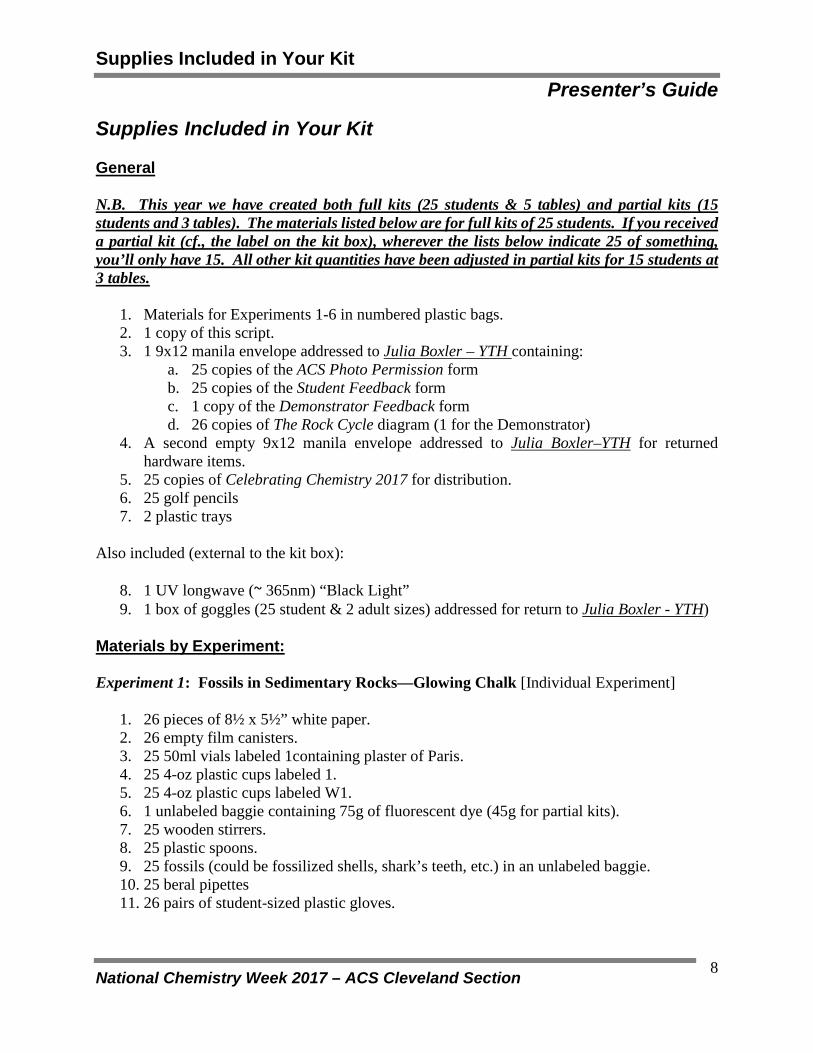
Supplies Included in Your Kit General N.B. This year we have created both full kits (25 students & 5 tables) and partial kits (15 students and 3 tables). The materials listed below are for full kits of 25 students. If you received a partial kit (cf., the label on the kit box), wherever the lists below indicate 25 of something, you’ll only have 15. All other kit quantities have been adjusted in partial kits for 15 students at 3 tables.
1. Materials for Experiments 1-6 in numbered plastic bags. 2. 1 copy of this script. 3. 1 9x12 manila envelope addressed to Julia Boxler – YTH containing:
a. 25 copies of the ACS Photo Permission form b. 25 copies of the Student Feedback form c. 1 copy of the Demonstrator Feedback form d. 26 copies of The Rock Cycle diagram (1 for the Demonstrator)
4. A second empty 9x12 manila envelope addressed to Julia Boxler–YTH for returned hardware items.
5. 25 copies of Celebrating Chemistry 2017 for distribution. 6. 25 golf pencils 7. 2 plastic trays
Also included (external to the kit box):
8. 1 UV longwave (~ 365nm) “Black Light” 9. 1 box of goggles (25 student & 2 adult sizes) addressed for return to Julia Boxler - YTH)
Materials by Experiment: Experiment 1: Fossils in Sedimentary Rocks—Glowing Chalk [Individual Experiment]
1. 26 pieces of 8½ x 5½” white paper. 2. 26 empty film canisters. 3. 25 50ml vials labeled 1containing plaster of Paris. 4. 25 4-oz plastic cups labeled 1. 5. 25 4-oz plastic cups labeled W1. 6. 1 unlabeled baggie containing 75g of fluorescent dye (45g for partial kits). 7. 25 wooden stirrers. 8. 25 plastic spoons. 9. 25 fossils (could be fossilized shells, shark’s teeth, etc.) in an unlabeled baggie. 10. 25 beral pipettes 11. 26 pairs of student-sized plastic gloves.
Supplies Included in Your Kit Presenter’s Guide
National Chemistry Week 2017 – ACS Cleveland Section
9
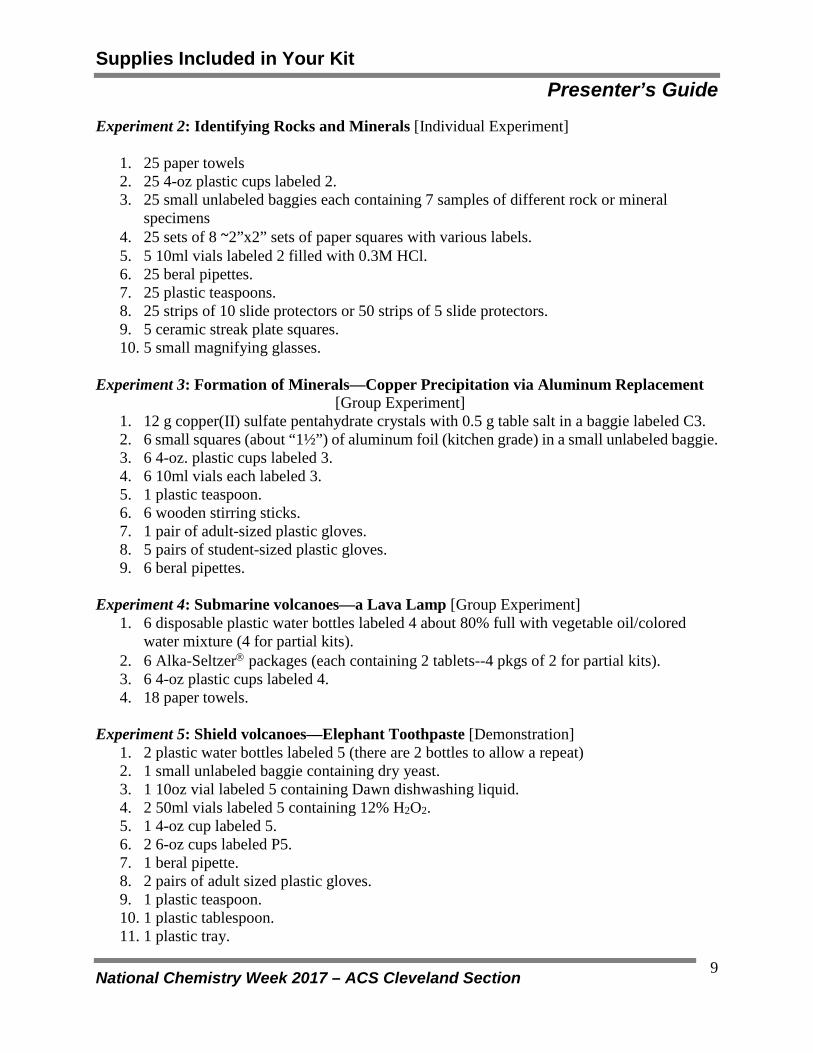
Experiment 2: Identifying Rocks and Minerals [Individual Experiment]
1. 25 paper towels 2. 25 4-oz plastic cups labeled 2. 3. 25 small unlabeled baggies each containing 7 samples of different rock or mineral
specimens 4. 25 sets of 8 ~2”x2” sets of paper squares with various labels. 5. 5 10ml vials labeled 2 filled with 0.3M HCl. 6. 25 beral pipettes. 7. 25 plastic teaspoons. 8. 25 strips of 10 slide protectors or 50 strips of 5 slide protectors. 9. 5 ceramic streak plate squares. 10. 5 small magnifying glasses.
Experiment 3: Formation of Minerals—Copper Precipitation via Aluminum Replacement [Group Experiment]
1. 12 g copper(II) sulfate pentahydrate crystals with 0.5 g table salt in a baggie labeled C3. 2. 6 small squares (about “1½”) of aluminum foil (kitchen grade) in a small unlabeled baggie. 3. 6 4-oz. plastic cups labeled 3. 4. 6 10ml vials each labeled 3. 5. 1 plastic teaspoon. 6. 6 wooden stirring sticks. 7. 1 pair of adult-sized plastic gloves. 8. 5 pairs of student-sized plastic gloves. 9. 6 beral pipettes.
Experiment 4: Submarine volcanoes—a Lava Lamp [Group Experiment]
1. 6 disposable plastic water bottles labeled 4 about 80% full with vegetable oil/colored water mixture (4 for partial kits).
2. 6 Alka-Seltzer packages (each containing 2 tablets--4 pkgs of 2 for partial kits). 3. 6 4-oz plastic cups labeled 4. 4. 18 paper towels.
Experiment 5: Shield volcanoes—Elephant Toothpaste [Demonstration]
1. 2 plastic water bottles labeled 5 (there are 2 bottles to allow a repeat) 2. 1 small unlabeled baggie containing dry yeast. 3. 1 10oz vial labeled 5 containing Dawn dishwashing liquid. 4. 2 50ml vials labeled 5 containing 12% H2O2. 5. 1 4-oz cup labeled 5. 6. 2 6-oz cups labeled P5. 7. 1 beral pipette. 8. 2 pairs of adult sized plastic gloves. 9. 1 plastic teaspoon. 10. 1 plastic tablespoon. 11. 1 plastic tray.
Supplies Included in Your Kit Presenter’s Guide
National Chemistry Week 2017 – ACS Cleveland Section
10
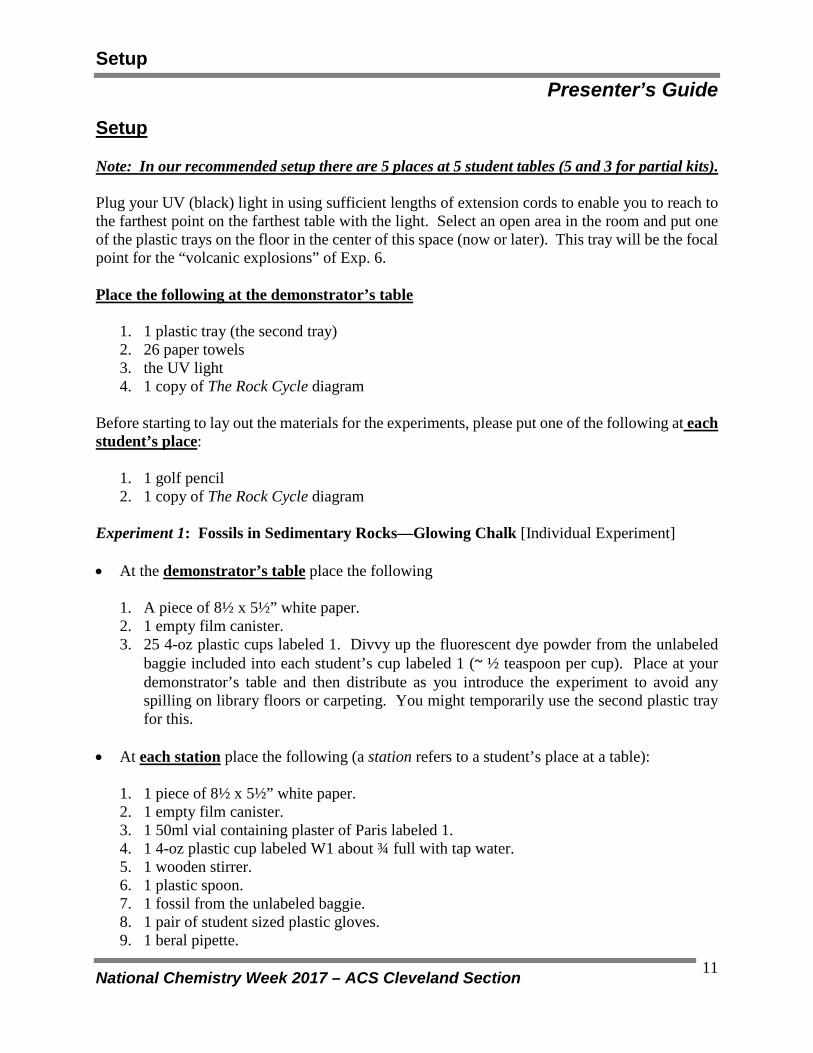
Experiment 6: Cinder Cone volcanoes—Exploding Canisters [Individual Experiment]
1. 25 empty film canisters 2. 4 Alka-Seltzer packages (each containing 2 tablets--2 pkgs of 2 for partial kits) 3. 1 tray (explosion pad)—located at the bottom of the kit 4. 25 paper towels 5. 5 4-oz cups labeled 6 (for holding the Alka-Seltzer® tablet pieces). 6. 1 plastic spoon
Setup Presenter’s Guide
National Chemistry Week 2017 – ACS Cleveland Section
11
Setup Note: In our recommended setup there are 5 places at 5 student tables (5 and 3 for partial kits). Plug your UV (black) light in using sufficient lengths of extension cords to enable you to reach to the farthest point on the farthest table with the light. Select an open area in the room and put one of the plastic trays on the floor in the center of this space (now or later). This tray will be the focal point for the “volcanic explosions” of Exp. 6. Place the following at the demonstrator’s table
1. 1 plastic tray (the second tray) 2. 26 paper towels 3. the UV light 4. 1 copy of The Rock Cycle diagram
Before starting to lay out the materials for the experiments, please put one of the following at each student’s place:
1. 1 golf pencil 2. 1 copy of The Rock Cycle diagram
Experiment 1: Fossils in Sedimentary Rocks—Glowing Chalk [Individual Experiment] • At the demonstrator’s table place the following
1. A piece of 8½ x 5½” white paper. 2. 1 empty film canister. 3. 25 4-oz plastic cups labeled 1. Divvy up the fluorescent dye powder from the unlabeled
baggie included into each student’s cup labeled 1 (~ ½ teaspoon per cup). Place at your demonstrator’s table and then distribute as you introduce the experiment to avoid any spilling on library floors or carpeting. You might temporarily use the second plastic tray for this.
• At each station place the following (a station refers to a student’s place at a table):
1. 1 piece of 8½ x 5½” white paper. 2. 1 empty film canister. 3. 1 50ml vial containing plaster of Paris labeled 1. 4. 1 4-oz plastic cup labeled W1 about ¾ full with tap water. 5. 1 wooden stirrer. 6. 1 plastic spoon. 7. 1 fossil from the unlabeled baggie. 8. 1 pair of student sized plastic gloves. 9. 1 beral pipette.
Setup Presenter’s Guide
National Chemistry Week 2017 – ACS Cleveland Section
12
Experiment 2: Identifying Rocks and Minerals [Individual Experiment] • In the center of each table put the following:
1. 1 small magnifying glass. 2. 1 ceramic streak plate square. 3. 1 10ml vial labeled 2 filled with 0.3M HCl.
• At each station place the following:
4. 1 paper towel 5. 1 4-oz cup labeled 2 filled ¾ of the way with tap water. 6. 1 beral pipette. 7. 1 plastic teaspoon. 8. 1 pair of student-sized plastic gloves. 9. 1 small baggie containing 7 small rock/mineral samples and a stack of 8 ~2”x2” paper
squares with various labels. 10. 1 strip of 10 slide protectors or 2 strips of 5 35mm slide protectors.
Experiment 3: Formation of Minerals—Copper Precipitation via Aluminum Replacement [Group Experiment] Overall
1. Thoroughly mix the copper sulfate and salt within the baggie labeled C3. 2. Using the teaspoon provided, place approximately equal amounts of the copper
sulfate/salt mixture into each of the six 10ml vials labeled 3. 3. Put about 1 oz. of tap water in each of the cups labeled 3 (about ¼ filled).
• At the demonstrator’s table place the following
1. 1 10ml vial labeled 3 containing the copper sulfate/salt mixture. 2. 1 square of aluminum foil. 3. 1 4-oz cup labeled 3 containing tap water. 4. 1 pair of adult-sized gloves 5. 1 wooden stirring stick.
• At at the center of each student table place the following:
1. 1 10ml vial labeled 3 containing the copper sulfate/salt mixture. 2. 1 piece of aluminum foil. 3. 1 4-oz cup labeled 3 about ¼ filled with tap water. 4. 1 wooden stirring stick. 5. 1 pair of student-sized gloves.

Setup Presenter’s Guide
National Chemistry Week 2017 – ACS Cleveland Section
13
Experiment 4: Submarine volcanoes—a Lava Lamp [Group Experiment] • At the demonstrator’s table and at the center of each student table place the following:
1. One stack of 3 unfolded paper towels. 2. Place one plastic bottle labeled 4 containing the oil, water and food coloring on the stack
of paper towels on the instructor’s table. 3. Break the Alka-Seltzer tablets in half. Place 1 4-oz cup labeled 4 containing 4 half pieces
of Alka-Seltzer tablets on each table.
Experiment 5: Shield volcanoes—Elephant Toothpaste [Demonstration] • At the demonstrator’s table place the following
1. Put the second plastic tray on your demonstrator’s table. 2. Put 1 teaspoon of dry yeast powder from the small baggie into each of two plastic water
bottles labeled 5. 3. Put one of the plastic water bottles labeled 5 in the center of the tray. Sit the other bottle
labeled 5 next to the tray. 4. Pour the contents of each of the 2 50ml vials labeled 5 containing colored 12% H2O2 into
one of the 2 6-oz cups labeled P5. USE GLOVES WHEN HANDLING 12% PEROXIDE. Using the beral pipette provided, put 2 drops of Dawn detergent from the 10-oz vial labeled 5 into each 4-oz cup labeled P5.
5. Fill the 4-oz cup labeled 5 about ¾ full with hot tap water. This water needs to be warm later when the experiment is performed.
Experiment 6: Cinder Cone volcanoes—Exploding Canisters [Individual Experiment] • In the center of each table put the following:
1. Break 7 Alka-Seltzer tablets into quarters (28 pieces) and put 5 pieces into each of 5 4-oz cups labeled 6. Put 1 cup labeled 6 with 5 quarter pieces of Alka-Seltzer on the table.
• At each station place the following:
1. 1 paper towel. 2. Put 1 film canister filled about ½ full with tap water on the paper towel. Leave its top next
to each canister.
Greeting the Students and Opening Discussion Presenter’s Guide
National Chemistry Week 2017 – ACS Cleveland Section
14
Greet the Students (and Parents) Upon Their Arrival, Distribute Goggles, and Organize the Seating 1. Welcome the students and parents as they arrive, and tell them that they’re in for a lot of fun
today. Maybe ask the librarian to do this as well. 2. Help the students or have the students’ parents put on their goggles. Adjust the straps as
necessary. (Note: These goggles are sanitized each year and prior to each demonstration.) Suggest that the students pull the air vents open for comfort while wearing the goggles.
3. Distribute the students 3-5 per table. 5 students per table would be best. Opening Discussion Introduce the Items on the Tables: • Tell the students to please not touch anything until told to do so and not to shake the table or
things could fall over and the fun ruined. We have liquids on the table which could stain clothing. Be careful!! Never taste or smell anything directly, as if they were in a laboratory!
• Tell the students that various items have been gathered for them on their table. Most items in today’s Program are common household items.
• Put on a pair of the adult-sized goggles. If you have an assistant, ask them to do the same. Verify that all students have goggles on.
Introduce Yourself and the Program • Introduce yourself as a chemist, science teacher or engineer (or state your interest in
chemistry), and introduce the American Chemical Society as the largest organization in the world devoted to a single profession.
• Introduce National Chemistry Week—what it is and why we do it. (Hint: it is a nationwide event put on by volunteers like you to let non-scientists know about chemistry, how much fun it can be and how it can improve our everyday lives.)
• Please tell the students that we’d really like for them to vote for the Experiment they liked most in today’s Program. At the end of the Program they’re going to have a chance to vote for their favorite Experiment as well as the one that they think taught them the most. They’ll do this via the hardcopy Student Feedback form at their places. So tell them to remember what they like about each Experiment.
Background for the Demonstrator (only) Presenter’s Guide
National Chemistry Week 2017 – ACS Cleveland Section
15
Background for the Demonstrator (only) This year’s NCW theme from national ACS is Chemistry Rocks! The resulting Program for the Cleveland Section features a study of various rocks composed of minerals that are found on the earth, their characteristics, their origin and how to identify them. Since this year’s Program really focuses on Geology, we’ve made this Background section a little more extensive than usual. The ultimate source for the three kinds of rocks found on the earth today (cf., Exp. 2) is the magma at the center of the earth. Magma consists primarily of silicon, iron and magnesium but contains oxygen, aluminum, calcium, sodium, potassium, and trace amounts of other elements. Magma is typically ejected through volcanoes—sometimes explosively, sometimes more gently. If explosively, it’s ejected as lava where it cools relatively quickly forming mineral crystals with a small lattice. Igneous (i.e., from fire) rocks consisting primarily of silicates are formed in this way. Basalt, for example—the main component of the earth’s crust, consists of a porphyritic structure, with larger crystals (phenocrysts) of the minerals olivine, augite, or feldspar in a finely crystalline matrix. If magma is forced into surrounding rock slowly rather than rapidly through vents, it cools more slowly creating minerals with a larger crystalline structure. Granite is an example. If the cooling magma contains a significant gaseous fraction, the rock can be light and porous like pumice. Ash is also created by erupting volcanoes. Igneous rocks generally don’t contain fossils, don’t react with acids, don’t usually contain obvious layers, can be made of different minerals, sometimes have holes or bubbles and may be glassy in appearance. Note that all rocks are composed of minerals, but we’ll use the terms somewhat interchangeably throughout this script. Over millennia, weathering of igneous rocks occurs via acid rain, freeze-thaw and plant roots. Erosion occurs as wind, ice, rivers, glaciers and the sea all attack igneous rocks causing them to break down into mud, sand and pebbles. Transported by wind and water, this sediment finds its way into lowland areas and into the sea. Layers of sediment slowly build up; lower layers are compressed by the upper ones or by the pressure of the sea. Ground water, rich in dissolved minerals, seeps through the grains in the sediment to precipitate out hard mineral cements. Common mineral cements include silica (quartz), calcite, limonite, hematite, and clay minerals. This process called cementation changes layers of sediment into the second type of rock: sedimentary rocks such as sandstone. Some sedimentary rocks are comprised mainly of CaCO3 which in limestone is derived from the shells of marine animals and in coal from layers of plant material. They react with acids to form CO2, and fossils are often found within them (Exp. 1). Minerals are naturally occurring inorganic crystalline solids at room temperature. Minerals can be elements such as iron, lead, graphite, gold, silver, and platinum or compounds such as oxides, carbonates, sulfides, phosphates, sulfates, halides and silicates. As described above, mineral “precipitation” from enriched water via cementation results from changes in physical and chemical conditions (such as changes in temperature, pressure, or addition or removal of dissolved compounds like CO2, and biological activity) as mineral-laden water is forced through openings in rocks. Veins of minerals and geodes are formed in this way (Exp. 3). Minerals also result directly from cooling lava and from water evaporation in arid regions such as the Great Salt Lake2.
2 https://en.wikibooks.org/wiki/High_School_Earth_Science/Formation_of_Minerals
Background for the Demonstrator (only) Presenter’s Guide
National Chemistry Week 2017 – ACS Cleveland Section
16
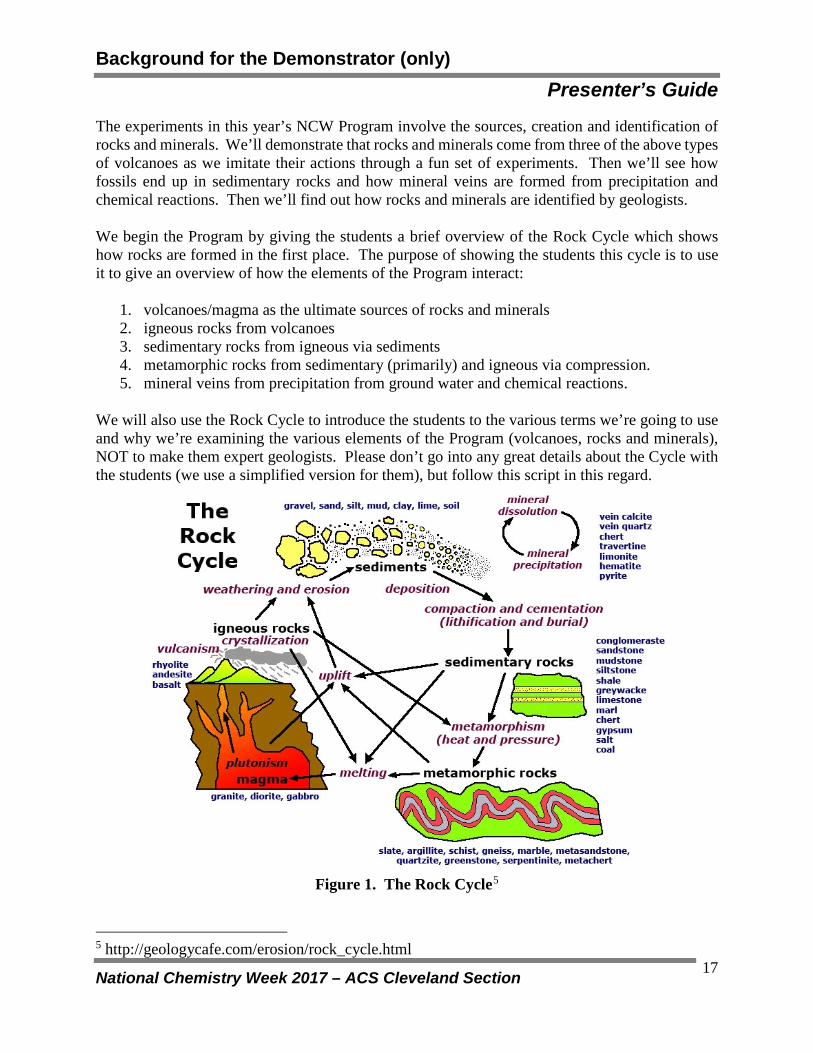
Sedimentary rocks can be further changed when movement pushes them deep into the earth’s crust where they’re affected by heat and pressure from burial, tectonic stress and heating by magma. Sedimentary rocks are also subject to alteration by fluids to develop such a different set of minerals and such a thoroughly changed texture that it is often difficult to recognize what the original rock was. Rocks formed from this kind of process are the third type of rock known as metamorphic rocks. Examples of metamorphic rocks are slate (sedimentary fine silt and mud are changed to slate), marble (limestone is changed) and quartzite (sandstone) and coke (coal). The changes that occur with rocks are shown in the Rock Cycle, Figure 1 (next page). Geologists use the Rock Cycle to indicate graphically the formation of these various rocks. As background information for the demonstrator, Figure 1 shows details of the steps in the processes involved in the rock cycle and gives examples of rocks which result. A somewhat simplified version will be used to show the overall picture to the students. Depending upon the reference source there many types of volcanoes which emit igneous rocks. They include composite (e.g., Mt. St. Helen’s or Vesuvius), shield (e.g., Mauna Loa in Hawaii), lava dome (e.g., Mont Pelee in Martinique) and submarine or underwater volcanoes3. More than 75% of the world's active and dormant volcanoes are located near the Pacific Ocean’s Ring of Fire4 and their existence is closely related to plate tectonics in the earth’s crust. Referencing Cain3:
• Composite volcanoes, sometimes known as strato or cinder cone volcanoes, are steep sided cones formed from layers of ash and lava flows. The cinder cone volcano is usually the most dangerous type of volcano because it tends to explode when it erupts (Exp. 6).
• Shield volcanoes are large volcanoes with gently sloping sides. They’re called shields because they look like large shields when viewed from the air. These shield volcanoes are the largest volcanoes on Earth (and even the Solar System). They form when lava flows of low viscosity build up over long periods of time creating volcanoes with huge internal volume. The common feature with shield volcanoes is that they’re built up slowly over time from a very stable central summit vent (Exp. 5).
• Lava dome volcanoes form from a slow eruption of very thick lava or multiple eruptions of different kinds of lava. Instead of breaking through to the surface, the material builds up underneath the ground, causing the huge lava dome mound to form. It’s so thick that the lava can’t flow very far at all; it just hardens quickly, extruding new material around the vent.
• Underwater or submarine volcanoes are typically located near areas of tectonic plate movement known as mid-ocean ridges. They can eventually grow into islands that rise above the surface of the ocean. A submarine volcano erupts differently than a surface volcano because there is an unlimited amount of water to cool down the lava. A shell of rock hardens around the lava almost immediately, creating a type of formation called pillow lava. Submarine volcanoes build up over time, and can eventually reach the surface of the ocean. This is what happened to form the Hawaiian Islands (Exp. 4).
3 https://www.universetoday.com/27333/types-of-volcanoes/ 4 https://en.wikipedia.org/wiki/Ring_of_Fire
Background for the Demonstrator (only) Presenter’s Guide
National Chemistry Week 2017 – ACS Cleveland Section
17
The experiments in this year’s NCW Program involve the sources, creation and identification of rocks and minerals. We’ll demonstrate that rocks and minerals come from three of the above types of volcanoes as we imitate their actions through a fun set of experiments. Then we’ll see how fossils end up in sedimentary rocks and how mineral veins are formed from precipitation and chemical reactions. Then we’ll find out how rocks and minerals are identified by geologists. We begin the Program by giving the students a brief overview of the Rock Cycle which shows how rocks are formed in the first place. The purpose of showing the students this cycle is to use it to give an overview of how the elements of the Program interact:
1. volcanoes/magma as the ultimate sources of rocks and minerals 2. igneous rocks from volcanoes 3. sedimentary rocks from igneous via sediments 4. metamorphic rocks from sedimentary (primarily) and igneous via compression. 5. mineral veins from precipitation from ground water and chemical reactions.
We will also use the Rock Cycle to introduce the students to the various terms we’re going to use and why we’re examining the various elements of the Program (volcanoes, rocks and minerals), NOT to make them expert geologists. Please don’t go into any great details about the Cycle with the students (we use a simplified version for them), but follow this script in this regard.
Figure 1. The Rock Cycle5
5 http://geologycafe.com/erosion/rock_cycle.html
Introducing the Program Presenter’s Guide
National Chemistry Week 2017 – ACS Cleveland Section
18
Introduction to This Year’s Program Please tell the students the following to introduce this year’s Program. This year’s Program is all about the story of the chemistry of rocks. This might not seem very exciting until we realize that rocks and minerals come from deep under the earth in the magma that forms the center of the planet. Sometimes rocks result as lava cools from volcanoes. Solid minerals are often formed when mineral bearing hot water is forced through opening in rocks deep underground. Gold and silver deposits are formed in this way. So we’re going to explore the fascinating world of rocks as we check out several kinds of volcanoes, look at some cool minerals and how some are formed, see how fossils end up in some rocks, and find out how geologists identify different kinds of rocks and minerals. We’re going to start our exploring by hearing about the three different kinds of rocks that are found on earth all around us: igneous, sedimentary and metamorphic. We’ll check out examples of all three. Then we’ll identify several rocks and minerals before we study the actions of three different kinds of volcanoes. To help us understand where rocks come from, everyone has a copy of a diagram known as The Rock Cycle at their place. Have a look at it (Demonstrator: the students are looking at a simplified version of the Cycle which is different from the one in your Background section). What you see is a picture that shows where rocks come from and the order in which they’re formed. Start at the top right corner with hot molten rock called magma: magma exists at the center of the earth in what’s known as the earth’s inner core. It can shoot out to the surface of the earth though volcanic eruptions which throw the hot liquid high into the sky. As it cools solid minerals form inside what are called igneous rocks. As these rocks are slowly eroded over centuries by wind and rain, the sediment from them enters the sea or forms layers on the ground. As more and more layers form over the first one or sea water presses down, sedimentary rocks result from this compaction. Over time the movement of the earth forces some of these rocks further and further down into the earth where heat and pressure causes them to form metamorphic rocks or even to melt back into magma to complete the rock cycle. We’re going to perform experiments with all three of these kinds of rocks, the volcanoes that give rise to them and the minerals that result from them. We’ll start our rocky adventure today by re-creating some materials often associated with sedimentary rocks as we create fluorescent chalk with a fossil inside. We’ll then find out how geologists identify different kinds of rocks as we create our own take-home rock collection. We’ll see how some minerals can be formed in rocks and examine the actions of three kinds of volcanoes by three different fun experiments which imitate6 the motion of magma within them. These volcanoes will start with slow “magma” flows and climax with an imitation of a more explosive type. So hang on as we adventure through the fascinating world of the chemistry of rocks! Before you start the Program, assign numbers 1-5 to each of the 5 students at each table. If there are fewer than 5 students at a table, assign more than one number to the students there.
6 We use this word for the students rather than simulate.
The Program--Experiment 1: Fossils in Sedimentary Rocks— Glowing Chalk Presenter’s Guide
National Chemistry Week 2017 – ACS Cleveland Section
19
Experiment 1: Fossils in Sedimentary Rocks—Glowing Chalk [Individual Experiment] Experiment Purpose & General Methodology For the demonstrator: (Demonstrator: deliver their cups labeled 1 containing fluorescent dye to each student as you introduce this experiment.) As we’ve heard and seen on the Rock Cycle, sedimentary rocks are formed from the sediment produced over centuries from igneous rocks. Deposits of the mineral gypsum (CaSO4∙2H2O—the primary ingredient in Plaster of Paris) are often formed from the evaporation of seawater and are typically associated with sedimentary rocks. If fossils are to be found in rocks, they’re found in sedimentary rocks. And among rocks that exist in parts of the world are fluorescent rocks which can be sedimentary. This experiment creates a photo luminescent chalk containing a genuine fossil which imitates some of the materials associated with sedimentary rocks. Introduce the Experiment Tell the students: We’ll use blue, orange or pink fluorescent pigments (Demonstrator: you have only one of these colors in your kit, not all) to make Glowing Chalk and we’ll include a fossil in each to imitate materials that could be associated with fluorescent sedimentary rocks. We’ll see actual examples of real fluorescent rocks in the next experiment. Performance Details Tell the students to do the following: Part 1 Students start the experiment with the demonstrator showing them how to fold their piece of 8½ X 5½” in half lengthwise (each piece of folded paper is now 8½” X 2¾”). Show them how to wrap it around one of their fingers into a roll and place the roll into their round canister (remove the top) allowing it to expand to the canister’s diameter to form a paper “mold”. The paper should be manipulated until it has a uniform diameter—not like a funnel. Help students do this if needed. Students should now put on their gloves. Now ask students to remove the red cap from the 50 ml vial labeled 1. Noting that the 4-oz cup labeled 1 already contains a small amount of a powder (the fluorescent dye), pour the powder contents of the 50 ml vial into the cup labeled 1. Before adding any water, carefully and thoroughly stir the two dry powders together with the stirring stick provided. Now add 4 teaspoons of water from the cup labeled W1 and carefully stir the mixture with the stirring stick. We’re
The Program--Experiment 1: Fossils in Sedimentary Rocks— Glowing Chalk Presenter’s Guide
National Chemistry Week 2017 – ACS Cleveland Section
20
trying to get a slurry with the approximate consistency of ketchup. Add a little more water if necessary drop-by-drop using the pipette provided. Don’t make it too soupy or it won’t harden in time. Once the student is satisfied with the slurry’s consistency, tell him/her to slowly and carefully pour half of it from the plastic cup into the center of the paper mold. Tap the mold on the table occasionally so all the plaster goes to the bottom. When the paper mold is about half full, tell the students to stop pouring and insert their fossil into the center of the slurry and then add the reminder of the slurry to fill the mold. These students should keep their gloves on for the next experiment. While the chalk is hardening, move to Experiment 2; we’ll return to this experiment twice. Part 2 of Exp. 1: Remove the paper mold with the plaster in it from the canister and peel the paper away from the chalk which should have hardened sufficiently by now. Ask the students to lay their chalk on the table fully exposed to light from all sources. Now go to Experiment 5 and complete it. Part 3 of Exp. 1: Dim the lights in the room & close the curtains once again. Ask the students to pick up their chalk, hold it under the table and see what they observe. (Ans.: the chalk should have a mild glow to it depending on the time of exposure to the light. This is called phosphorescence.) If time permits, go around to each student with the black light and shine it on the chalk. Ask the students what they see now. (Ans: the chalk should fluoresce under the UV light). Conclusions Tell the students: Notice that the chalk you’ve made is one of three different colors: blue, orange and pink. The colors are not really all that bright, but that’s OK because the chalk glows in the dark after it’s been exposed to light. What caused the chalk to glow? The small amount of powder that was originally in their cups contained pigments which fluoresce when exposed to UV light and phosphorescence when exposed to visible light. Phosphorescence means that these special pigments absorb visible light and then later give off light that’s not so bright; instead the chalk appears to glow in the dark or phosphoresce. Fluorescence occurs when fluorescing rocks in the next experiment or the chalk in this one glow under UV light.
The Program--Experiment 1: Fossils in Sedimentary Rocks— Glowing Chalk Presenter’s Guide
National Chemistry Week 2017 – ACS Cleveland Section
21
You’ve also placed a genuine fossil into the middle of your “sedimentary rock” just like fossils appear in real sedimentary rocks. As you have fun writing with your chalk, at some point as you use the chalk the fossil will reappear and you can keep it as a souvenir of today’s Program. The students can take their chalk home with them. Tonight they should expose their chalk to a light at home for a few minutes (any photons will do), turn off the lights in the room and then observe the Glowing Chalk. They can write something on the sidewalk during daylight, go outside after dark, shine a flashlight or porch light on it and they’ll see a slight glow. Now return to and complete Experiment 6.
The Program--Experiment 2: Identifying Rocks and Minerals Presenter’s Guide
National Chemistry Week 2017 – ACS Cleveland Section
22
Experiment 2: Identifying Rocks and Minerals [Individual Experiment] Purpose & General Methodology For the demonstrator: This experiment will show the students how to differentiate between different mineral and rock types. The students will use several different techniques to examine the minerals Hematite, Malachite, and Pyrite as well as what we will call rocks: Pumice (Igneous), Limestone (Sedimentary), Fluorescent (Igneous, Sedimentary and/or Metamorphic) and marble (metamorphic). At this experiment progresses, the students will create their own rock collection to take home with them. Introduce the Experiment Tell the students: In the previous experiment we put a fossil into a material associated with a sedimentary rock. Now we’re going to use several methods to identify different rock and mineral types. Performance Details Tell the students to do the following: It is time to identify several different rocks and minerals and create your own rock collection. At each student’s place, there is a baggie containing 7 small pieces of rock or mineral specimens (Demonstrator: the sample are Malachite [green but typically very small], Hematite [brown and often rough], pyrite [black with gold speckles], fluorescent [many different sizes; nondescript under visible light; samples may be duplicated if also very small], pumice [very light and porous], limestone [gray and grainy] and marble [white and somewhat shiny]) and several small squares of paper with different rocks/minerals indicated on them. Tell the students to remove only the paper squares from the baggie and slip them into the 8 slots on the 35mm slide protectors7: insert them part way and then put a finger under the paper and push/slide it in all the way. Put the square which says “My Rock Collection” in the top, left slot. Demonstrate how to do this. After the squares are all inserted, tell the students to now put the seven rock samples onto their hand and hold them in their open hand for a second. We’re going to perform several tests on the seven specimens. Start by asking the students if they see anything special or unusual about any of the rock/mineral samples. (Ans: Other than colors they probably won’t, but this is preparation for the fluorescent rocks which appear normal under
7 Some students have a single sheet of 8 slots, some have 2 rows of 4.
The Program--Experiment 2: Identifying Rocks and Minerals Presenter’s Guide
National Chemistry Week 2017 – ACS Cleveland Section
23
visible light.) The demonstrator will now darken the room as much as possible and go to each student’s place in turn shining the UV light on the students’ rock samples in their hands. Is anything in your hand glowing under the black light? (Ans: One or two of the samples should glow in this light and not in normal light.) If so, place it/them in the slot which says “Glows under Black Light”. [N.B.: The fluorescent rocks may glow brightly or somewhat dimly; they may be several different colors; they may have spots or veins that glow while the rest of the sample does not. In short, if the students don’t see immediate glowing, tell them to turn the rocks over until they do.] This is a unique rock called a Fluorescent Rock, examples of which can be found all over the earth in old mines and quarries and dried up creek beds. It looks like a normal, uninteresting rock in visible light, but really shines under UV light! Turn the lights back on. Fluorescent rocks can be igneous, sedimentary or metamorphic. The students should now place their remaining 6 rock samples on the paper towel at their place. We’re going to see if any of them leaves a line on the streak plates (Ans: 3 of them do.) Ask Student No. 1 at each table to put on his/her pair of plastic gloves and leave them on for the balance of this experiment. Have this student (only) inspect the other students’ rock specimens and select the largest of the small green rocks s/he sees. (These are pieces of Malachite, a green gemstone; the ones we received are all small.) Using the largest of the green rocks and his/her other 5 samples, Student No.1 should now pick up the ceramic streak plate in the middle of the table and scratch it hard several times with each of his/her 6 samples one by one. CAUTION: SOME OF THE ROCK SAMPLES COULD BE A LITTLE SHARP, SO STUDENT No. 1 SHOULD BE VERY CAREFUL WHEN HANDLING THEM. The student can tear off a piece of the paper towel to wrap around any sample that appears to be too sharp to handle. The three samples which leave streaks are the minerals Hematite (brown streak), Pyrite (black) and Malachite (faint green). Tell Student No. 1 to describe the 3 rocks which made streaks to the other students at the table. All the students should now match their three mineral samples that gave a positive streak test with the corresponding information on the paper squares and insert these three samples into the appropriate slot on the slide protector. For example, the green sample is Malachite. It will leave a faint green streak on the plate. The students should put the green Malachite sample in the slide protector slot which indicates this mineral leaving a faint green streak on the plate. The students now have three samples left for identification. Let’s see if any of them are light enough to actually float on water. Each student should put each of his/her three remaining samples into the spoon provided and gently lower them into the water in the cup labeled 2. Do any of them float? (Ans: one does.) If so, fish the floater out of the water with the spoon, dry it off with the paper towel and then put it in the slot which says “Floats in Water”. This is a rock called Pumice which is found in the vicinity of many types of volcanoes, and it’s an example of an igneous rock. Now let’s identify the last two rock specimens. Fish each of them out of the cup labeled 2 with your spoon and dry them off with the paper towel. Now lay the towel down and put each of them on it. Every student should have his/her plastic gloves still on. Student No. 1 should now carefully remove the sealant on the cap of the 10-ml vial labeled 2 (Demonstrator: you may need to show the students how to peel the Parafilm off) and open the vial. Now squeeze the empty beral pipette’s

The Program--Experiment 2: Identifying Rocks and Minerals Presenter’s Guide
National Chemistry Week 2017 – ACS Cleveland Section
24
bulb to remove air, and–while still squeezing it—put it into the liquid in the vial. Stop squeezing the bulb and fill the beral pipette with the liquid. Sit the beral pipette down on the paper towel for a second while you put the cap back on the vial labeled 2. (Demonstrator: this is 0.3M HCl; it’s relatively safe, but tell the students not to play around with it or get it into their eyes.) Now carefully pick up the beral pipette and squeeze a drop or two of this liquid onto each of the two remaining rock samples. Student No. 1 should now pass the vial marked 2 around to the other students who should repeat what s/he did with the HCl. Did anything happen? (Ans: CO2 bubbles should form on both.) Tell Student No 2 to pick up the magnifying glass in the middle of the table, examine the samples with it to better see the bubbles (while leaving them on the towel!) and then pass the magnifying glass around the table to the other students to do the same. Did both samples bubble? (Ans: Yes!) So if the same thing happened to both samples, how are we supposed to tell them apart? Tell the students that the two remaining specimens are closely related rocks and are most commonly found all around us. One is a sedimentary rock called limestone and the other is a metamorphic rock called marble. In fact, limestone forms when shells, sand, and mud are deposited at the bottom of oceans and lakes and over time solidify into rock. Marble forms over centuries as limestone is compressed. Tell the students to rinse the two samples in the water in the cup labeled 2 with their spoon, fish them back out with the spoon, then dry them off again and then lay them back down on the paper towel as before. Now the students should take turns looking at the two dry specimens under the magnifying glass at the center of the table that they should pass around and share. The rock that looks most grainy and dull is limestone. It’s made of small grains like sand and sometimes even the shells of the creatures which formed it (they’re fossils now!). It should be put in the “My Rock Collection” slot where it says “Made of Small Particles”. The last specimen is marble which forms when sedimentary limestone is heated and squeezed by natural rock-forming processes so that the grains are formed into crystals. The marble sample looks somewhat shiny, it’s more crystalline than the limestone and glistens because of this more crystalline structure. The two rocks are essentially identical chemically—they’re both composed primarily of calcite—CaCO3; they differ only in morphology. The marble sample should be put in the final slot which says “Not Made of Small Particles”. The slide protector sheet with all the identified samples now constitute “My Rock Collection”, and each student can take his/her’s home with them. Conclusions Tell the students: We’ve now using chemical and physical techniques to identify examples of common rocks and minerals which you find all around you. They represent all three rock types—Igneous, Sedimentary and Metamorphic and several other types of minerals. Your Rock Collection is yours to take home with you. All students except Student No. 3 may now remove their gloves.
The Program--Experiment 2: Identifying Rocks and Minerals Presenter’s Guide
National Chemistry Week 2017 – ACS Cleveland Section
25
Technical Information (for the Demonstrator): Fluorescence is the emission of light by a substance that has absorbed light or other electromagnetic radiation. It is a form of luminescence. In most cases, the emitted light has a longer wavelength, and therefore lower energy, than the absorbed radiation. Lastly, please tell the students that they can purchase a black light bulb that’s shaped like a regular incandescent bulb at Walmart or similar stores for a little over a dollar. Seven stones were examined in this experiment. They are the minerals hematite (rust colored) and malachite (green), and pyrites, and the stones pumice (igneous--light and porous), a fluorescent stone (could be igneous, sedimentary or metamorphic), limestone (sedimentary) and marble (metamorphic). Pyrite is FeS2; it is the most common sulfide mineral. It forms at high and low temperatures and occurs, usually in small quantities, in igneous, metamorphic, and sedimentary rocks worldwide. It’s known as Fool’s Gold for obvious reasons. A detailed discussion of rocks and minerals can be found at http://www.columbia.edu/~vjd1/min%26rock_rev.htm or http://www.geology.com.
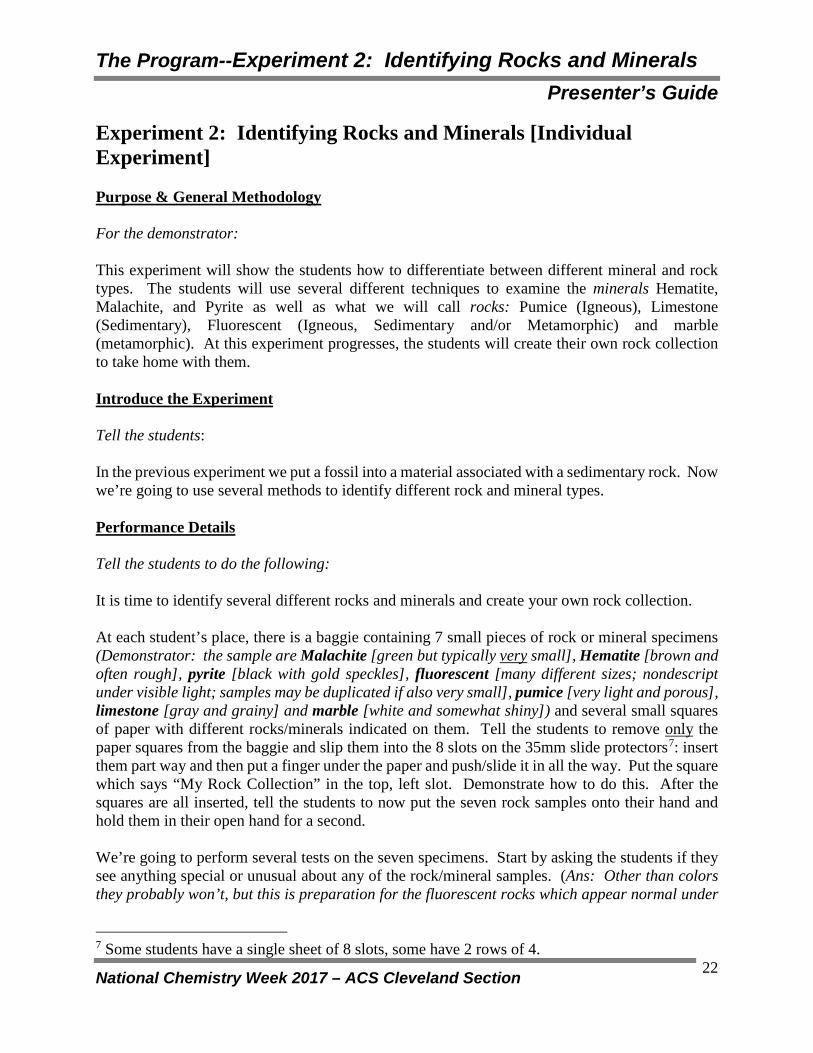
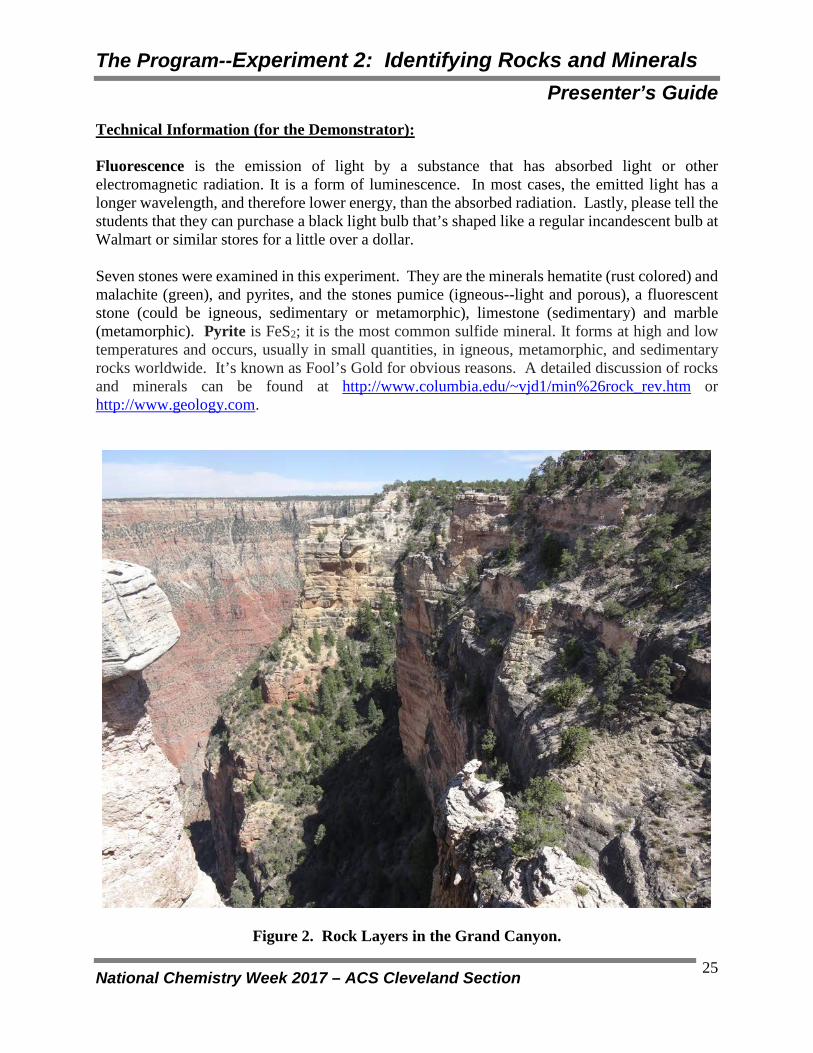
Figure 2. Rock Layers in the Grand Canyon.
The Program--Experiment 3: Formation of Minerals—Copper Precipitation via Aluminum Replacement Presenter’s Guide
National Chemistry Week 2017 – ACS Cleveland Section
26
Experiment 3: Formation of Minerals—Copper Precipitation via Aluminum Replacement [Group Experiment] Purpose & General Methodology For the demonstrator: This experiment shows a general practice of metal extraction from its ores; in other words, getting metal directly from a rock. It also provides an explanation as to why less reactive metals are found as bare metals in rocks, but more reactive metals are only found as their compounds. A few pieces of aluminum foil are placed in a vial containing a copper sulfate solution. The aluminum is oxidized, reducing the copper ions in solution to a pile of copper metal on the bottom of the vial. The students will use one sample at each table; the demonstrator will use one sample. Introduce the Experiment Tell the students: More reactive metals, such as aluminum, can replace less reactive metals present as compounds through a chemical reaction8. This means that rocks can contain large amounts of less reactive metals such as copper. Because of chemical reactions, high reactive metals, such as aluminum, are not commonly found as the bare metal in common rocks but as oxides instead. In this experiment, we will use a chemical reaction to separate copper from one of its simulated ores (or compounds) by using aluminum foil. Performance Details The Demonstrator and students will do the following: Part I – Dissolving the copper sulfate
• Demonstrator: o Pick up the vial of copper(II) sulfate pentahydrate labeled 3 and the 4-oz cup of
water labeled 3. o With your gloves on and using the beral pipette, open your vial and add water from
the cup labeled 3 into the vial up to the 7ml mark and no higher. Recap the vial.
8 If one were to write out the half cell potentials, rearrange and add them appropriately, one would find that Cu(s) results spontaneously from the overall reaction with the negative Gibbs free energy.
The Program--Experiment 3: Formation of Minerals—Copper Precipitation via Aluminum Replacement Presenter’s Guide
National Chemistry Week 2017 – ACS Cleveland Section
27
• Have Student No. 3 at each table—still with plastic gloves still on—repeat all your actions and then recap his/her vial as well.
• Tell the students that the first step to obtain metal from its ore is to put it into solution. • Have Student No. 3 shake his/her vial vigorously as the other students observe. • While Student No. 3 shakes the vial, ask Student No. 4 to tear the aluminum square into
about 8 smaller pieces by first folding the square and then tearing along the folds. • Do the same with your vial and your piece of foil. • Tell the students that it will take a little time for the water to dissolve the ore.
Note: It will take about a minute or two to dissolve the copper(II) sulfate pentahydrate. Keep shaking the vial to speed dissolution.
REMEMBER - COPPER(II) SULFATE IS TOXIC. DO NOT LET STUDENTS SPILL THE SOLUTION.
Note: If there is a spill, clean it up with paper towels. The U.S. recommended Daily Allowance for copper (as Cu2+) is 4 mg. To exceed that, the students would need to ingest 0.5 ml of this solution.
Part II - Electroless Plating of Copper from Solution Do the following:
• Pick up your vial of copper(II) sulfate solution. • Have the Student No. 3 with gloves on do the same. • Pick up your small pieces of aluminum foil and have Student No. 4 pick up his/her’s. • Open your vial and drop the aluminum pieces into it. Push the pieces down into the solution
using the stirring stick. Sit the cap down and DO NOT recap. Ask Student No. 4 to do exactly the same steps as Student No. 3 holds the vial by its base on the table so it’s steady.
• Show the students the reaction occurring and ask them to check for the temperature rise of the vial by gently touching the side of the vial.
• Have Student No. 3 holding the vial allow the others to gently touch the side of the vial to feel the heat generated. The solution will actually boil as it produces hydrogen gas bubbles as well as the copper. Only Student No. 3 with gloves on should hold the vial.
• When complete, Student No. 3 may remove his/her gloves. • Place the 10ml vial into the water in cup 3 to cool it. Do NOT re-cap it. If an aide is
available, ask them to remove this cup from the student tables. Conclusions Tell the students:
• The solid accumulating on the bottom of the vial is copper metal. It looks different from a penny because it is many little tiny balls joined together in filaments or threads.
The Program--Experiment 3: Formation of Minerals—Copper Precipitation via Aluminum Replacement Presenter’s Guide
National Chemistry Week 2017 – ACS Cleveland Section
28
• Normally you see metal as very large sheets or chunks. • This difference in the way the copper has been formed causes the different appearance. • If we removed the solid from the vial, melted it, and then cooled it, it would look as shiny
as a new penny. • This is exactly what is done with metals made in this fashion, i.e., made by metal extraction
from ores. Technical Information (for the Demonstrator): The salt aids in the reaction producing hydrogen gas as it acidifies the solution which reacts independently with the aluminum: CuSO4 + 2 NaCl → CuCl2 + Na2SO4 CuCl2 + H2O → CuOHCl + HCl 3 CuCl2 + 2 Al → 2 AlCl3 + 3 Cu(s) 2 Al + 6HCl →2 AlCl3 + 3 H2(g) See: https://www.flinnsci.com/globalassets/flinn-scientific/all-free-pdfs/dc95000.pdf
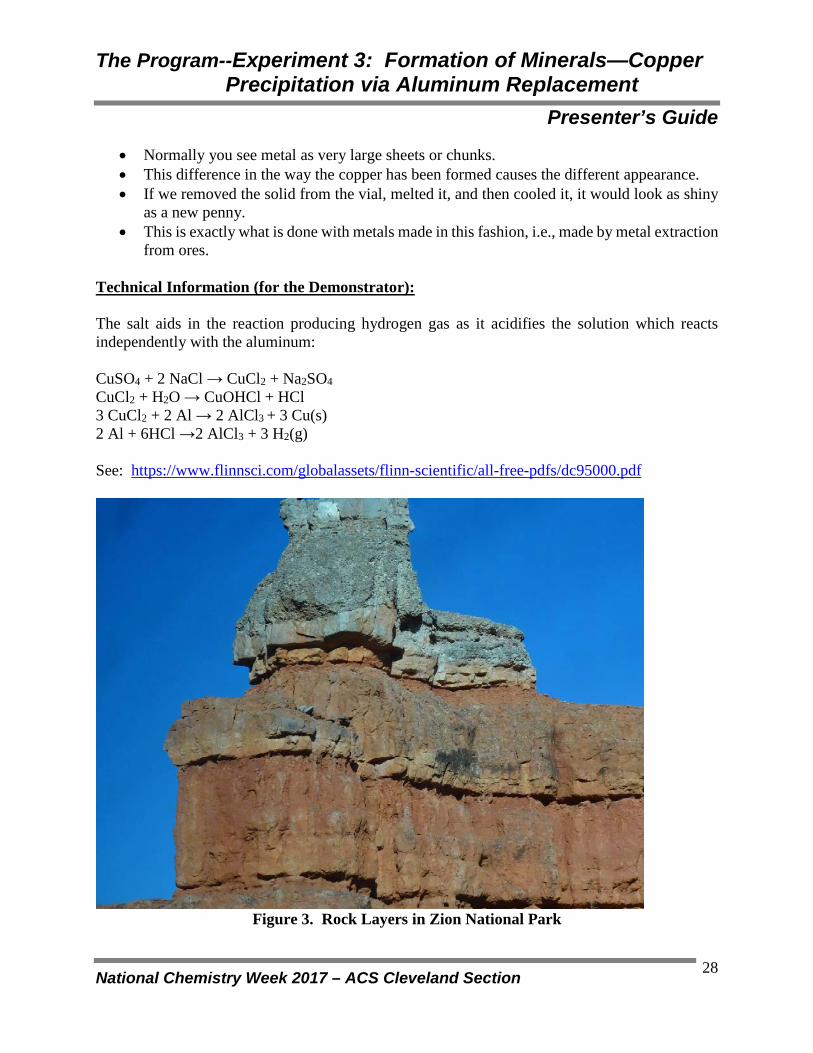
Figure 3. Rock Layers in Zion National Park

The Program—Experiment 4: Submarine volcanoes—a Lava Lamp Presenter’s Guide
National Chemistry Week 2017 – ACS Cleveland Section
29
Experiment 4: Submarine volcanoes—a Lava Lamp [Group Experiment] Purpose & General Methodology For the demonstrator: The first type of volcano whose action we’ll imitate today is the Submarine or Underwater Volcano. A large number of submarine volcanoes are located near areas of tectonic plate movement, known as mid-ocean ridges, and there are estimated to be more than a million of them. Perhaps as many as 75,000 of these volcanoes rise over half a mile (1 kilometer) above the ocean floor9. Lava discharging from submarine volcanoes cools and hardens almost immediately. Introduce the Experiment Tell the students: Lava discharges slowly from submarine volcanoes where it meets cold ocean water and quickly cools to form basaltic rock, often termed "pillow lava" due to its rounded shape. We will imitate the action of this type of volcano with a lava lamp whose oil oozes slowly through water in much the same way as a submarine volcano’s lava does. Performance Details Tell the students to do the following:
• Before you allow the students to perform this experiment, please demonstrate the experiment. Begin by showing the students the plastic bottle labeled 4 on your table. Open the cap and place one ½ Alka-Selzer tablet from your cup labeled 4 into the bottle.
• WARNING: Do NOT put the cap back on the bottle until all of the Alka-Seltzer tablet has dissolved and there are no more bubbles forming (otherwise, carbon dioxide gas may build up in the bottle and it may jet out upon its next opening)!
• Ask Students No. 4, 5, 1 and 2 at each table to each find the ½ pieces of Alka-Seltzer in the cup labeled 4 at the center of their table. Ask Student No. 3 to uncap the bottle at the center of the table and hold it steady on a stack of several unfolded paper towels placed on the table. Ask Student No. 4 to drop the Alka-Seltzer tablet in the bottle. Leave time for the students to admire the bubbles.
• Ask if the students want to see that again. As the answer will be “yes,” ask Student No. 5 to drop his/her ½ piece of Alka-Seltzer tablet in the bottle. Wait for the bubbles to subside.
• Ask the students if they wish to see even more bubbles. Ask Students No. 1 and 2 to simultaneously drop their ½ tablets into the bottle.
9 volcano.oregonstate.edu/submarine
The Program—Experiment 4: Submarine volcanoes—a Lava Lamp Presenter’s Guide
National Chemistry Week 2017 – ACS Cleveland Section
30
• When the last student has put his/her Alka-Seltzer ½ tablet into the bottle, collect the bottles from each table so that they do not spill, and keep them uncapped until the end of the demonstration (see Warning).
Conclusions Tell the students: We usually don’t see submarine volcanoes since they’re underwater. The only way we might see one is if the lava has risen to the point when a new island starts to form in the middle of the ocean. When it does, you can be sure that the movement of the lava flowing out of the volcano resembles the movement in our lava lamps. Before going to Experiment 5, please return to and complete Part 2 of Exp. 1 (p. 20).
The Program--Experiment 5: Shield volcanoes—Elephant Toothpaste Presenter’s Guide
National Chemistry Week 2017 – ACS Cleveland Section
31
Experiment 5: Shield volcanoes—Elephant Toothpaste [Demonstration] Purpose & General Methodology For the demonstrator: The next type of volcanoes whose action we’re going to imitate is Shield Volcanoes10. Shield volcanoes are the largest volcanoes on Earth that actually look like volcanoes. The Hawaiian shield volcanoes—Kilauea and Mauna Loa (and their Hawaiian friends)—are the most famous examples. Shield volcanoes are so named because their low, flat formation resembles a round shield when viewed from the air. Only you, the Demonstrator, will perform this experiment. Introduce the Experiment Tell the students: Kilauea, on the "Big Island" of Hawaii, has erupted with enough molten lava to pave a road around the Earth three times. When it erupts, magma slowly oozes from the volcano and rolls slowly down its sides. There is no explosive activity with shield volcanoes. We’re going to imitate the action of this slow-moving magma using something called elephant toothpaste. Performance Details The demonstrator will do the following at his/her table do the following:
• Ask the students to come up and gather around your demonstrator table. • Place one of the plastic bottles labeled 5 on the tray at your table. The second bottle will
be used to repeat the experiment if time permits. • Add 2 tablespoons of warm water from the 4-oz cup labeled 5 into the plastic bottle labeled
5 on the tray. Swirl the bottle to mix (it does not need to dissolve completely). • Put on your plastic gloves before working with the peroxide in the next step. • Squeeze one of the 6-oz disposable cups labeled P5 containing the colored hydrogen
peroxide/dishwashing liquid solution so that it makes a pouring funnel. QUICKLY but carefully, pour the contents of this cup labeled P5 into the plastic bottle. Speed makes a more impressive reaction.
• If time permits, repeat the experiment with the other plastic bottle labeled 5 and the other hydrogen peroxide cup labeled P5.
10 http://volcano.oregonstate.edu/shield-volcanoes
The Program--Experiment 5: Shield volcanoes—Elephant Toothpaste Presenter’s Guide
National Chemistry Week 2017 – ACS Cleveland Section
32
Conclusions Tell the students: Not all volcanoes erupt explosively. If you’ve even been to Hawaii or seen it on TV, you may have seen how slowly magma oozes out of the volcanoes there and flows down their sides, sometimes into the sea. As the molten lave reaches the sea, the size of the island with the volcano slowly increases as the lava cools and hardens. The slowly moving elephant toothpaste in this experiment imitates the action of a shield volcano like those in Hawaii.
The Program--Experiment 6: Cinder Cone Volcanoes— Exploding Canisters Presenter’s Guide
National Chemistry Week 2017 – ACS Cleveland Section
33
Experiment 6: Cinder Cone Volcanoes—Exploding Canisters [Individual Experiment] Experiment Purpose & General Methodology Rocks ultimately come from magma—that hot, liquid core at the center of the earth. This magma often gets to the surface of the earth by a type of volcano called a Cinder Cone Volcano. This is the exploding kind of volcano like Paricutin in Mexico. We’re going to use a 35mm film canister containing Alka-Seltzer® and water to imitate the explosive nature of cinder cone volcanoes. In a closed container, the CO2 expands and exerts pressure sufficient to blow the top off the film canister and send it flying to imitate the immense power of volcanoes such as what happened at Mt. St. Helen’s in the USA in 1980 and Mt. Vesuvius in Italy which destroyed Pompeii in 79 AD. Introduce the Experiment Tell the students the following: This experiment is about cinder cone volcanoes. We will imitate how they can explode using exploding canisters. Performance Details Our canisters use the reaction of water and Alka-Seltzer® tablets to blow the top off. We’re going to do this table by table. Each student will set off one canister, and we need all moms and dads to help us. There is no demonstrator canister, so use the one from Exp. 1 to demonstrate. You should locate the “explosion pad” tray in a clear area (i.e., as far away from light fixtures as possible) near the center of the room if possible. Tell the students to do the following:
CAUTION: THE CANISTERS ARE DANGEROUS. A MISFIRED CANISTER COULD HIT A PERSON IN THE EYE. ALL GOGGLES MUST BE WORN.
Note: Keep all spectators at least 5 feet away from the explosion pad. Do not point the canister at yourself or anyone else. All must wear goggles at all times.
1. Table by table starting with Table 1, ask the students to take 1 Alka-Seltzer quarter tablet
from the cup labeled 6 at the center of their table. Tell the students not to put the tablets into the canisters until you tell them to do so: they’ll ruin the experiment if they do! Then bring their canisters, Alka-Seltzer® tablets, paper towels and canister lids to the clear
The Program--Experiment 6: Cinder Cone Volcanoes— Exploding Canisters Presenter’s Guide
National Chemistry Week 2017 – ACS Cleveland Section
34
area of the room where the Demonstrator has placed the tray “explosion pad” on the floor. (Do not locate the tray directly below light fixtures in which the canisters may become caught or do damage). With the students from Table 1 in front, students from all the other tables and moms and dads should also gather around the explosion pad in a circle at least 5 feet away from it.
2. Now tell the students how to perform the explosion and tell everyone to pay close attention. 3. Without actually putting an Alka-Seltzer® tablet into a canister, tell them two items:
a. How to place their Alka-Seltzer tablet in the canister and snap their lids in tightly and
b. How to sit the canister down right side up (i.e., top up to simulate a volcano blowing off its top) quickly and squarely on the explosion pad and then retreat to a safe spot to observe the results.
4. Now tell the students to do what you just explained quickly and efficiently all together. It should take 15-30 seconds for the explosions to happen once the canisters are on the explosion pad.
Do NOT allow the students to approach the canisters before they explode for any reason. They should wait a little longer if they have to. If over 2 minutes have passed and a canister or two hasn’t exploded, retrieve it/them yourself, open carefully and place the canister(s) and contents into your waste bucket. Again, don’t allow the students to approach apparent duds and wear your goggles: a blown explode isn’t worth someone’s eye—including yours!
5. Once all the canisters have been exploded, ask the students to retrieve their canisters (lids and canisters)—it doesn’t matter which one since they’re all the same. They can take their canisters home with them.
6. Tell them to use their paper towels to dry off their hands and their canisters. 7. Repeat the process for all the other tables, one at a time.
Optional. If running out of time, the demonstrator may wish to explode only one canister as a demonstration Conclusions Tell the students the following: We didn’t hear the roar and see the flames coming from our canisters like we were present when a volcano erupts, but we can see the effect of how hot magma is blown into the sky. Magma then cools and becomes igneous rocks. The ingredients in an Alka-Seltzer tablet react with water to form a gas called carbon dioxide (CO2). Carbon dioxide is the gas people exhale and plants use. It is also the gas that forms the fizz in soda pop. As it expands, as gases do, it pushed on the lid of the canister and blew it off.
The Program--Experiment 6: Cinder Cone Volcanoes— Exploding Canisters Presenter’s Guide
National Chemistry Week 2017 – ACS Cleveland Section
35
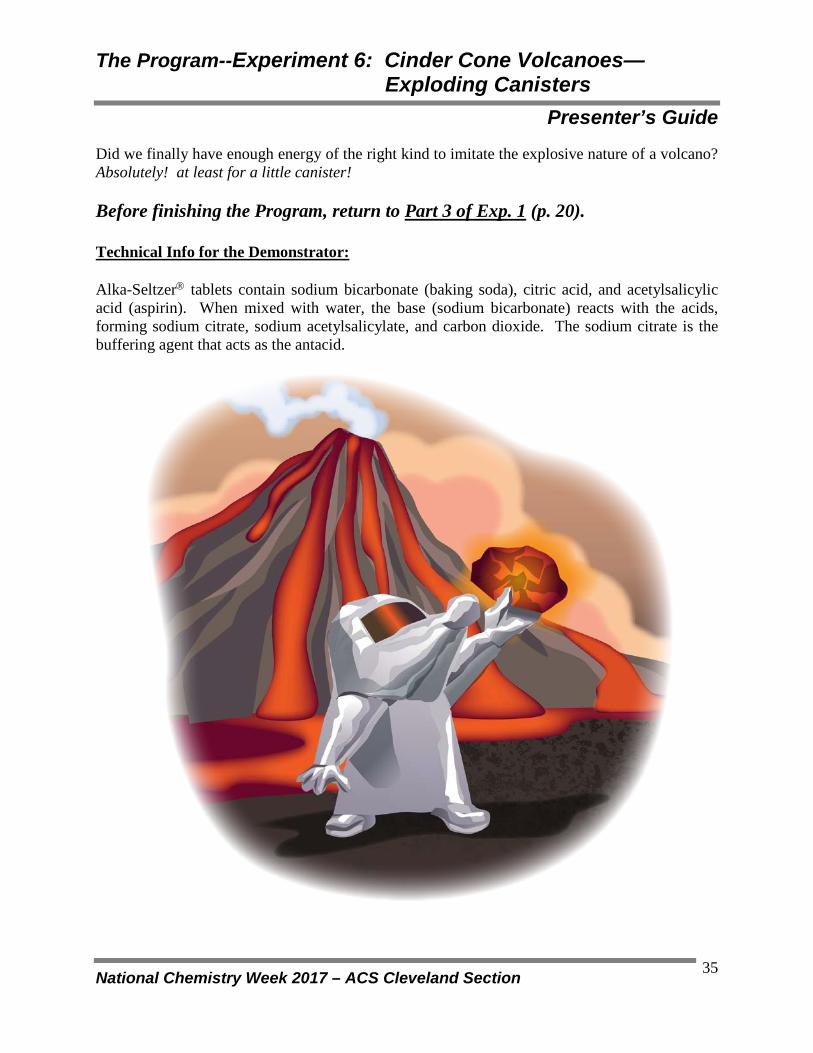
Did we finally have enough energy of the right kind to imitate the explosive nature of a volcano? Absolutely! at least for a little canister! Before finishing the Program, return to Part 3 of Exp. 1 (p. 20). Technical Info for the Demonstrator: Alka-Seltzer tablets contain sodium bicarbonate (baking soda), citric acid, and acetylsalicylic acid (aspirin). When mixed with water, the base (sodium bicarbonate) reacts with the acids, forming sodium citrate, sodium acetylsalicylate, and carbon dioxide. The sodium citrate is the buffering agent that acts as the antacid.
Closing Session Presenter’s Guide
National Chemistry Week 2017 – ACS Cleveland Section
36
Closing Session • Remind the students that we need their help to determine which Experiment they liked the most. So vote for your favorite Experiment AND the Experiment that helped you learn some fun facts about the chemistry of rocks. Use your golf pencil to complete your Student Feedback form now. • The students can take the following home with them:
1. Their rock collection 2. Their glowing chalk 3. Both canisters 4. A copy of Celebrating Chemistry 2017. Leave any extra copies with the librarian.
• Tell the students that you hope they enjoyed our adventures with our rocks, volcanoes and minerals and you hope that they’ve learned a lot. • Deposit all other liquids into your bucket and then place all other items (with the exception of the items listed below in Returns) in the trash bag. • Thank the students and parents for coming to this year’s demonstration and learning about the chemistry of forensics. • Have the students come to the closing area to turn in their goggles and Student Feedback forms. Have them put their goggles back into the box and then give it to the librarian for return to Julia Boxler at the main library. Cleanup & Return Procedures A. General clean up procedures for Experiments
• All solid waste other than the chemicals can be placed into a regular trash bag. • Any liquid wastes should be collected in your bucket and disposed of into sinks or toilets
as appropriate. • Check with the librarian if they are willing to take the solid trash; otherwise, please dispose
of it with your own trash. B. Returns
• Please give the following items to the Children’s Librarian at the end of your Program for return to us via the County Library’s interoffice mail system: 1. The goggles in the box provided. 2. In the first manila envelope addressed to the Library’s Julia Boxler:
a. the golf pencils b. the streak plates c. the magnifying glasses
3. In the second manila envelope addressed to the Library’s Julia Boxler: a. completed hardcopy Student Feedback forms b. completed hardcopy ACS Photo Permission forms. c. completed Demonstrator Feedback form.
Clean-up & Return Procedures Presenter’s Guide
National Chemistry Week 2017 – ACS Cleveland Section
37
C. Goggles:
• If you are performing another demonstration for this year’s National Chemistry Week, sanitize the goggles between demonstrations with a dilute bleach solution as instructed in the written directions found on the underside of the cover of the goggle container. Be sure to dry them with soft cloth or soft paper towels to prevent scratching. Please stack them into their box without twisting or crushing!
• If you are finished performing your demonstration(s) for this year, place the used goggles into their box and give the box to the librarian for return to us through the Library system. Please stack them without twisting or crushing! There is no need to clean them when you are through; our Planning Committee will clean and sanitize them for the next year and/or for other Programs.
D. Before you leave the library
• Return any items borrowed from the library. • Give any leftover literature to the librarian. (You may save a copy for yourself though!) • Give the manila envelopes (containing completed forms and all Returns) as well as the
box of goggles to the Children’s librarian with instructions to put it them in the interlibrary mail. (Or take to your nearest CCPL library branch.)
At Home (Feedback)
• If you took any photos to share (and have submitted signed permission forms to us), please
email them to Bob Fowler at [email protected]. Please note that any photos that you care to share with us could end up on our web site and/or possibly with ACS if we choose to use your photo in one of award self-nominations.
• Smile! You may have expanded or even sparked scientific interest in a student today! ☺ ☺ ☺ ☺ ☺ ☺
THANK YOU! …for your participation in our Program this year. We hope you will join us next year too. Planning of Experiments and contests starts in April. You don’t have to be a teacher or scientist to join our Planning Committee; all you need is a desire to share science with students. Development of ideas and refinement of experiments goes on throughout the summer (a couple of hours every other week), donation gathering and shopping is in late summer, and kit assembly (about 45 of them needing a lot of volunteer hands) is on a Saturday in September. It takes many, many volunteers to develop and put on all our programs. Even a little bit of help goes a long way. Please contact us this year or next at [email protected] if you (or a friend of yours) want to join in on the activities!
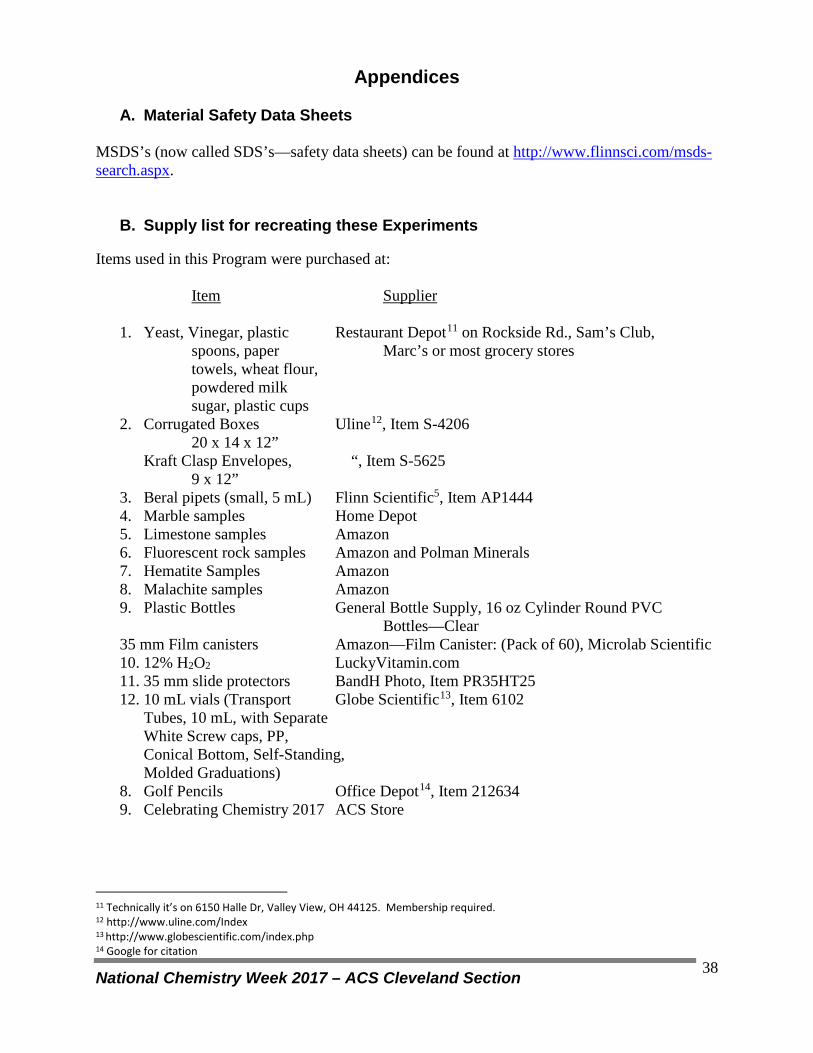
National Chemistry Week 2017 – ACS Cleveland Section
38
Appendices
A. Material Safety Data Sheets MSDS’s (now called SDS’s—safety data sheets) can be found at http://www.flinnsci.com/msds-search.aspx.
B. Supply list for recreating these Experiments Items used in this Program were purchased at: Item Supplier
1. Yeast, Vinegar, plastic Restaurant Depot11 on Rockside Rd., Sam’s Club, spoons, paper Marc’s or most grocery stores towels, wheat flour, powdered milk sugar, plastic cups
2. Corrugated Boxes Uline12, Item S-4206 20 x 14 x 12”
Kraft Clasp Envelopes, “, Item S-5625 9 x 12”
3. Beral pipets (small, 5 mL) Flinn Scientific5, Item AP1444 4. Marble samples Home Depot 5. Limestone samples Amazon 6. Fluorescent rock samples Amazon and Polman Minerals 7. Hematite Samples Amazon 8. Malachite samples Amazon 9. Plastic Bottles General Bottle Supply, 16 oz Cylinder Round PVC Bottles—Clear 35 mm Film canisters Amazon—Film Canister: (Pack of 60), Microlab Scientific 10. 12% H2O2 LuckyVitamin.com 11. 35 mm slide protectors BandH Photo, Item PR35HT25 12. 10 mL vials (Transport Globe Scientific13, Item 6102
Tubes, 10 mL, with Separate White Screw caps, PP, Conical Bottom, Self-Standing, Molded Graduations)
8. Golf Pencils Office Depot14, Item 212634 9. Celebrating Chemistry 2017 ACS Store
11 Technically it’s on 6150 Halle Dr, Valley View, OH 44125. Membership required. 12 http://www.uline.com/Index 13 http://www.globescientific.com/index.php 14 Google for citation