Embed Size (px)
Citation preview

Mixing of Resins AMTS-SWP-0007-A-2008
1
AMTS STANDARD WORKSHOP PRACTICE _________________________________________
Mixing of Resins
Reference Number:
AMTS_SWP_7_2008
Date:
August 2008
Version:
A

Mixing of Resins AMTS-SWP-0007-A-2008
2
Contents
1 Technical Terms .................................... ............................................... 3
2 Scope.............................................. ....................................................... 3
3 Mixing of an Epoxy Resin System.................... ................................... 4
3.1 Health and safety considerations ................................................................4 3.1.1 Personal protective equipment (PPE) ...........................................4 3.1.2 Environment ...................................................................................4 3.1.3 Equipment ......................................................................................4
3.2 General.........................................................................................................4
3.3 Materials, tools and documentation.............................................................5 3.3.1 Epoxies...........................................................................................5 3.3.2 Tools and equipment .....................................................................5 3.3.3 Quantity of resin and hardener ......................................................5
3.4 Mixing of resin and hardeners (small quantities).........................................6
3.5 Ensure homogeneous mix ...........................................................................6 3.5.1 Hand mixing ...................................................................................7 3.5.2 Electrical mixers .............................................................................7
3.6 Quality control methods ...............................................................................7
3.7 Mixing ratio error limits.................................................................................8
3.8 Correcting of mixing error ............................................................................8
3.9 Mixing ratio sheet example ..........................................................................9
3.10 Epoxy Mixing Control Sheet ....................................................................10
4 Quality Assurance Process .......................... ..................................... 12
4.1 Accuracy of Mixture ...................................................................................12
4.2 Quality of Mixture .......................................................................................12
5 Using an electronic scale (Appendix) ............... ................................ 14
5.1 Scale specification / setup .........................................................................14
5.2 Calibration check .......................................................................................14
5.3 Scale Operating instructions......................................................................14
Mixing of Resins AMTS-SWP-0007-A-2008
3
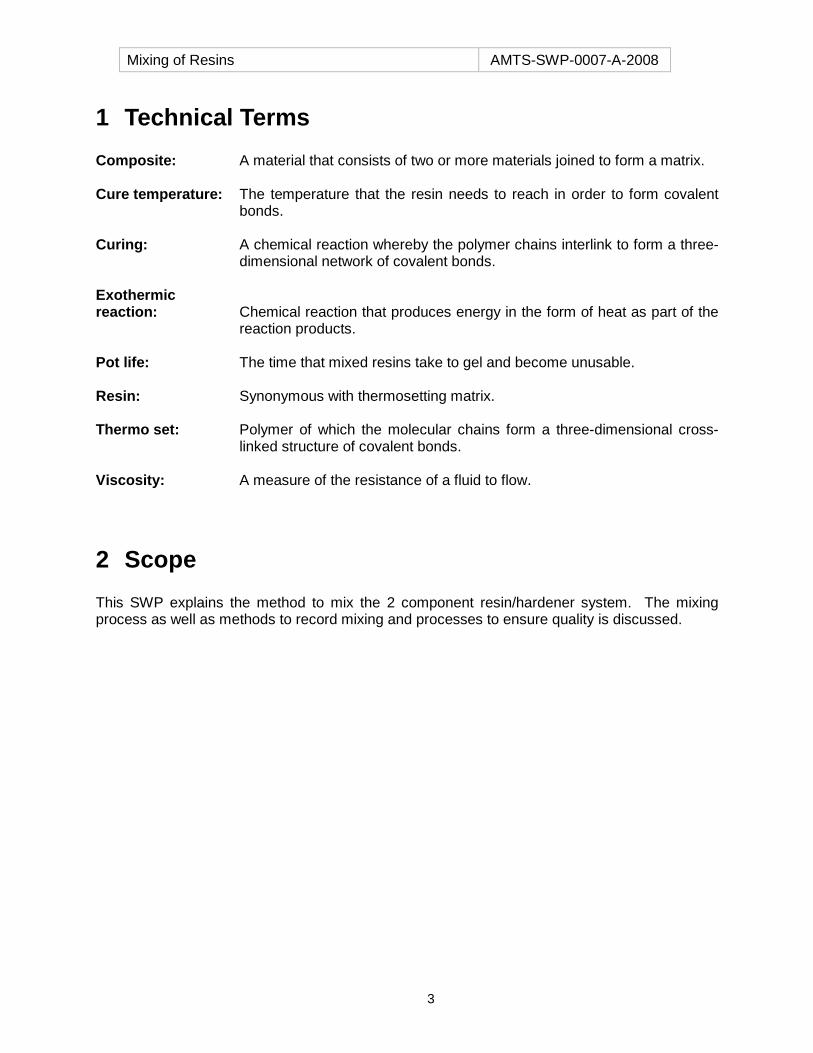
1 Technical Terms
Composite: A material that consists of two or more materials joined to form a matrix.
Cure temperature: The temperature that the resin needs to reach in order to form covalent bonds.
Curing: A chemical reaction whereby the polymer chains interlink to form a three-
dimensional network of covalent bonds.
Exothermic reaction: Chemical reaction that produces energy in the form of heat as part of the
reaction products. Pot life: The time that mixed resins take to gel and become unusable.
Resin: Synonymous with thermosetting matrix.
Thermo set: Polymer of which the molecular chains form a three-dimensional cross-
linked structure of covalent bonds.
Viscosity: A measure of the resistance of a fluid to flow.
2 Scope This SWP explains the method to mix the 2 component resin/hardener system. The mixing process as well as methods to record mixing and processes to ensure quality is discussed.
Mixing of Resins AMTS-SWP-0007-A-2008
4
3 Mixing of an Epoxy Resin System The mechanical properties of all composite parts are dependant on the epoxy that is used. Therefore it is important to ensure the quality of the mixed epoxy by controlling the mixing process.
3.1 Health and safety considerations Health and safety should be the first priority of any manufacturing process. When adhering to the following guidelines workers will be protected from obvious hazards:
3.1.1 Personal protective equipment (PPE) Ensure that the following pieces of PPE are worn:
• Gloves (Latex or rubber)
• Suitable clothing to minimize skin contact
• Eye protection when mixing with electrical mixers
3.1.2 Environment
• Ensure room has adequate ventilation
• Room should be in a generally safe condition (report obvious hazards)
3.1.3 Equipment
• Electrical devices in safe working condition: o Electronic scales o Electric Mixers
3.2 General The following are general work-precautions:
• Avoid skin contact with resin and hardeners.
• Ensure no resin comes contact with eyes or surrounding skin
• No eating or drinking should be allowed when mixing resins.
• Wash hands properly after working with resins, even if gloves were used.
• Refer to the manufacturer’s safety data sheet and adhere to all prescribed rules.
Mixing of Resins AMTS-SWP-0007-A-2008
5
3.3 Materials, tools and documentation
3.3.1 Epoxies Epoxy resin systems normally consist of 2 components named the resin and the hardener . The resin is also sometimes referred to as “Part A” and the hardener as “Part B”.
Various types of epoxies can be used in a composite workshop:
1. Laminating epoxies 2. Bonding epoxies 3. Epoxy based gelcoats
Refer to the manufacturer’s datasheet to determine the mixing ratios of the selected resin system. Also ensure that mixing ratios are given in terms of:
• Weight, when using scales • Volume, when using volumetric measuring equipment
3.3.2 Tools and equipment Ensure the following tools are available
• Mixing should only be allowed in designated jugs or cups. Wooden sticks or suitable plastic mixing sticks are used for hand mixing.
• Larger volumes of epoxy may be mixed with electrical mixing devices, e.g. an electric drill with stirring attachment.
• Electronic/mechanical scales must be used for accurate weighing
• Mould for making epoxy samples, ensuring quality control
Important: When mixing in a paraffin wax-covered cup, the wax can be dissolved by the hardener and will affect the mechanical properties of the finished part and should thus be avoided.
• The following documentation is necessary for quality control:
o Epoxy Mixing Ratio Sheet (Figure 3.9-1) o Epoxy Mixing Control Sheet (Figure 3.10-1)
3.3.3 Quantity of resin and hardener
• Determine the amount of epoxy required. Required quantities can be found: o on lay-up schedules, or o may be calculated as per the weight of the specific material
• Once the total amount of required epoxy is determined, use a Mixing Ratio Table to determine the resin and hardener quantities needed
Mixing of Resins AMTS-SWP-0007-A-2008
6
• A minimum of 50g is allowed to be measured on a scale with a ±1g resolution (accuracy)
• When mixing larger quantities the allowed margin of error can be greater.
• Note that larger quantities being mixed may cause an exothermic reaction. Important: To prevent such runaway exothermic reactions:
• Large quantities of mixed epoxy must be used quickly, spread over a large area, or
divided into smaller separate cups or shallow trays. This prevents too much heat from building up.
• Lower the room temperature
• Use an epoxy system with a longer pot life
Note: Approximately 10g of epoxy will be lost in the brush and cup and approximately 5g is required for making a quality control sample
3.4 Mixing of resin and hardeners (small quantities)
If quality must be ensured, it is advisable to develop a SOP (Standard Operating Procedure) that is suitable to the required application.
The following is a typical SOP that can be followed to ensure that the resin and hardener are mixed in the correct ratio:
1. Zero the scale 2. Weigh cup and note weight 3. Zero the scale with the cup on 4. Add the required resin in the cup 5. Zero the scale 6. Use table to add required amount of hardener 7. Remove cup and zero the scale 8. Calculate cup + total epoxy weight 9. Weigh the cup with epoxy and compare with value calculated in step 8 10. Mix for approximately one minute
Note: Steps 8 & 9, together, are used to check for possible mixing ratio errors. However, this method will NOT show an error when the quantity of the hardener and resin were swapped. A visual check must be used for this purpose: If the hardener is coloured, the resulting colour of the mixed product can then be checked and verified.
3.5 Ensure homogeneous mix The mixture of resin and hardener must be mixed thoroughly. The following are mixing methods that may be used:
Mixing of Resins AMTS-SWP-0007-A-2008
7
3.5.1 Hand mixing This method is effective when small quantities resin must be mixed.
• Mixing container:
o Select a large enough cup or suitable container. (It is good practice to use a container with a capacity of at least 50% more than that required volume to be mixed. This will reduce chances of spillage during the stirring process.)
• Mixing tools: o Wooden or suitable plastic spatulas (e.g. tongue depressors) can be used for hand
mixing.
• Mixing process: o Mix small quantities for approximately 1 minute with a stirring action. Scrape the
sides of the jug/cup frequently to prevent unmixed material being left on the sides of the container.
o Mix until no clouding is visible in the mixing container. o Ensure no resin remains in the corners of the jug/cup. o Ensure no cords or streaks are visible in the mixture.
3.5.2 Electrical mixers When using an electrical mixer (e.g. electrical drill or a drum mixer), take care not to allow any resin being spilt (also wear eye protection). Also follow any safety precautions for rotating machinery.
Important: It is good practice to take a few samples of a large batch mixed with an electric
mixer to ensure mixing was done properly and thoroughly.
3.6 Quality control methods The following should serve as guidelines to ensure quality control of batches of mixed resin:
• Before any is mixed, ensure that an Epoxy Mixing Control Sheet (Figure 3.10-1) is available with open spaces for a new entry. The person making the last entry on a sheet is responsible for collecting a new sheet. Empty sheets are available from the QA-Manager. When collecting a new Epoxy Mixing Control Sheet, it must be signed out from the “New Control Sheet File”.
• More than one sheet may be signed out at a time. All of these sheets are then kept at the mixing station in the “Mixing Station File”.
• Casting of epoxy sample with label: o Place the label, related to the row of the Control Sheet in which the entry is
made, in one of the sample moulds.
Mixing of Resins AMTS-SWP-0007-A-2008
8
o After the epoxy is mixed, cast a sample (approx 3-5g).
• After all the rows on a sheet are completed, the store attendant signs the sheet into the “Inspection File” together with the corresponding samples. The samples will then be inspected by a qualified person.
Note: Quality assurance is discussed more in-depth later in Section 4.
3.7 Mixing ratio error limits
• The specific mixing ratios must be observed as accurately as possible. Adding more or using less hardener will not result in a faster or slower reaction – it only results in incomplete curing which cannot be corrected in any way.
• The mixing of any epoxy has to be done thoroughly to ensure that the correct properties of the mixture are achieved. Therefore mixing errors must be avoided at all cost. A selected mixing procedure should be followed step by step, and all values noted on an Epoxy Mixing Control Sheet.
• Resins must be mixed accurately according to the supplier’s data sheet. Failing to do this will jeopardize the structural integrity of the system and may well lead to structural failures.
• For example, say an epoxy system specifies a mixing ration of 100:40±2. This implies that if 100 g of resin is mixed, 38 g to 42g of hardener will be within the allowed tolerance range.
3.8 Correcting of mixing error If a mistake was made, e.g. adding too much hardener, the mixture cannot be saved:
E.g. the system is specified as: 100:40±2. If 140g of the system was to be mixed (100g resin, 40g hardener) but instead of 40g hardener, 43g was added, the mixture would fall outside the allowable tolerance.
• Advise the supervisor on the problem – he should ov ersee the correction of the mixture.
• Use the mixing table to find the next resin value on the mixing ratio table, in this case: 44g. Add hardener to the quantity of 44g. Note 44g hardener on the mixing workbook.
• Add additional resin to compensate; the quantity is the difference between the new required resin value and the previous selected one. In the case: 110g – 100g = 10 g.
• Zero scale and add another 10g resin.
• Check the new gross weight as per mixing instructions and note values on the mixing workbook.
Important: If in doubt, rather dispose of the mixed epoxy in question.
Mixing of Resins AMTS-SWP-0007-A-2008
9
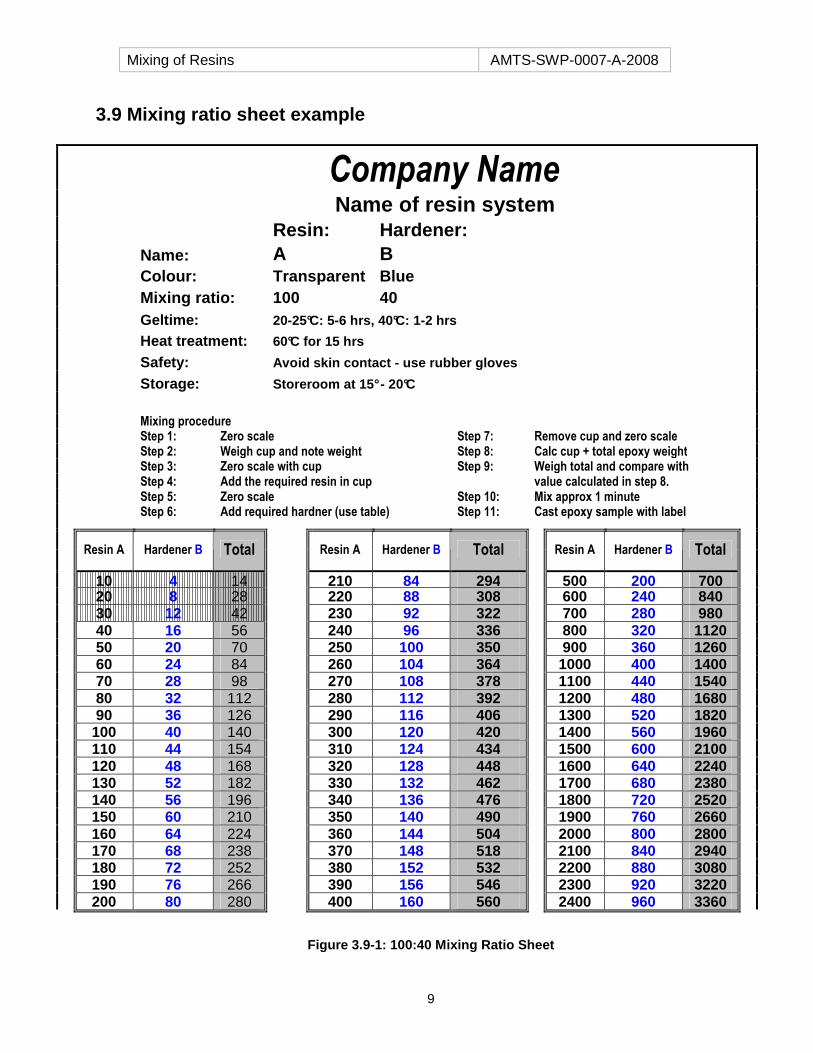
3.9 Mixing ratio sheet example
Company Name Name of resin system Resin: Hardener:
Name: A B
Colour: Transparent Blue
Mixing ratio: 100 40
Geltime: 20-25°C: 5-6 hrs, 40°C: 1-2 hrs
Heat treatment: 60°C for 15 hrs
Safety: Avoid skin contact - use rubber gloves
Storage: Storeroom at 15° - 20°C
Mixing procedure
Step 1: Zero scale Step 7: Remove cup and zero scale Step 2: Weigh cup and note weight Step 8: Calc cup + total epoxy weight Step 3: Zero scale with cup Step 9: Weigh total and compare with Step 4: Add the required resin in cup value calculated in step 8.
Step 5: Zero scale Step 10: Mix approx 1 minute
Step 6: Add required hardner (use table) Step 11: Cast epoxy sample with label
Resin A Hardener B Total
Resin A Hardener B Total
Resin A Hardener B Total
10 4 14 210 84 294 500 200 700 20 8 28 220 88 308 600 240 840 30 12 42 230 92 322 700 280 980 40 16 56 240 96 336 800 320 1120 50 20 70 250 100 350 900 360 1260 60 24 84 260 104 364 1000 400 1400 70 28 98 270 108 378 1100 440 1540 80 32 112 280 112 392 1200 480 1680 90 36 126 290 116 406 1300 520 1820 100 40 140 300 120 420 1400 560 1960 110 44 154 310 124 434 1500 600 2100 120 48 168 320 128 448 1600 640 2240 130 52 182 330 132 462 1700 680 2380 140 56 196 340 136 476 1800 720 2520 150 60 210 350 140 490 1900 760 2660 160 64 224 360 144 504 2000 800 2800 170 68 238 370 148 518 2100 840 2940 180 72 252 380 152 532 2200 880 3080 190 76 266 390 156 546 2300 920 3220 200 80 280 400 160 560 2400 960 3360
Figure 3.9-1: 100:40 Mixing Ratio Sheet
Mixing of Resins AMTS-SWP-0007-A-2008
10
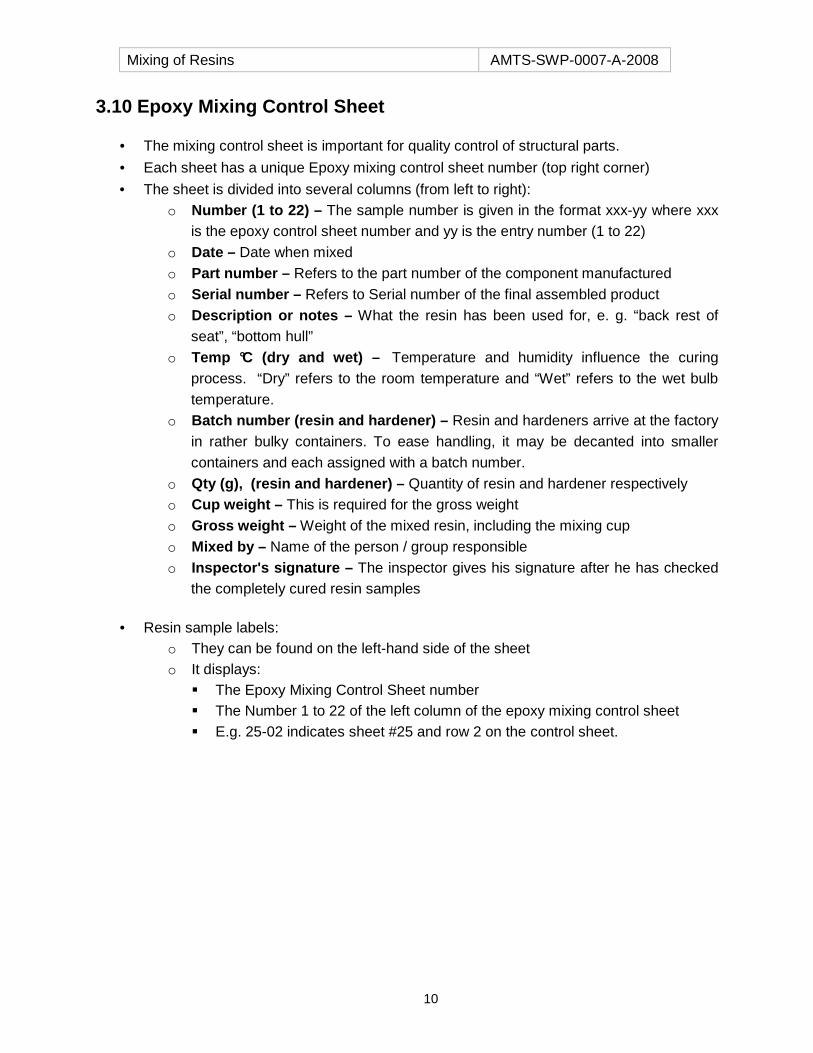
3.10 Epoxy Mixing Control Sheet
• The mixing control sheet is important for quality control of structural parts.
• Each sheet has a unique Epoxy mixing control sheet number (top right corner)
• The sheet is divided into several columns (from left to right): o Number (1 to 22) – The sample number is given in the format xxx-yy where xxx
is the epoxy control sheet number and yy is the entry number (1 to 22) o Date – Date when mixed o Part number – Refers to the part number of the component manufactured o Serial number – Refers to Serial number of the final assembled product o Description or notes – What the resin has been used for, e. g. “back rest of
seat”, “bottom hull” o Temp °C (dry and wet) – Temperature and humidity influence the curing
process. “Dry” refers to the room temperature and “Wet” refers to the wet bulb temperature.
o Batch number (resin and hardener) – Resin and hardeners arrive at the factory in rather bulky containers. To ease handling, it may be decanted into smaller containers and each assigned with a batch number.
o Qty (g), (resin and hardener) – Quantity of resin and hardener respectively o Cup weight – This is required for the gross weight o Gross weight – Weight of the mixed resin, including the mixing cup o Mixed by – Name of the person / group responsible o Inspector's signature – The inspector gives his signature after he has checked
the completely cured resin samples
• Resin sample labels: o They can be found on the left-hand side of the sheet o It displays:
� The Epoxy Mixing Control Sheet number � The Number 1 to 22 of the left column of the epoxy mixing control sheet � E.g. 25-02 indicates sheet #25 and row 2 on the control sheet.
Mixing of Resins AMTS-SWP-0007-A-2008
11
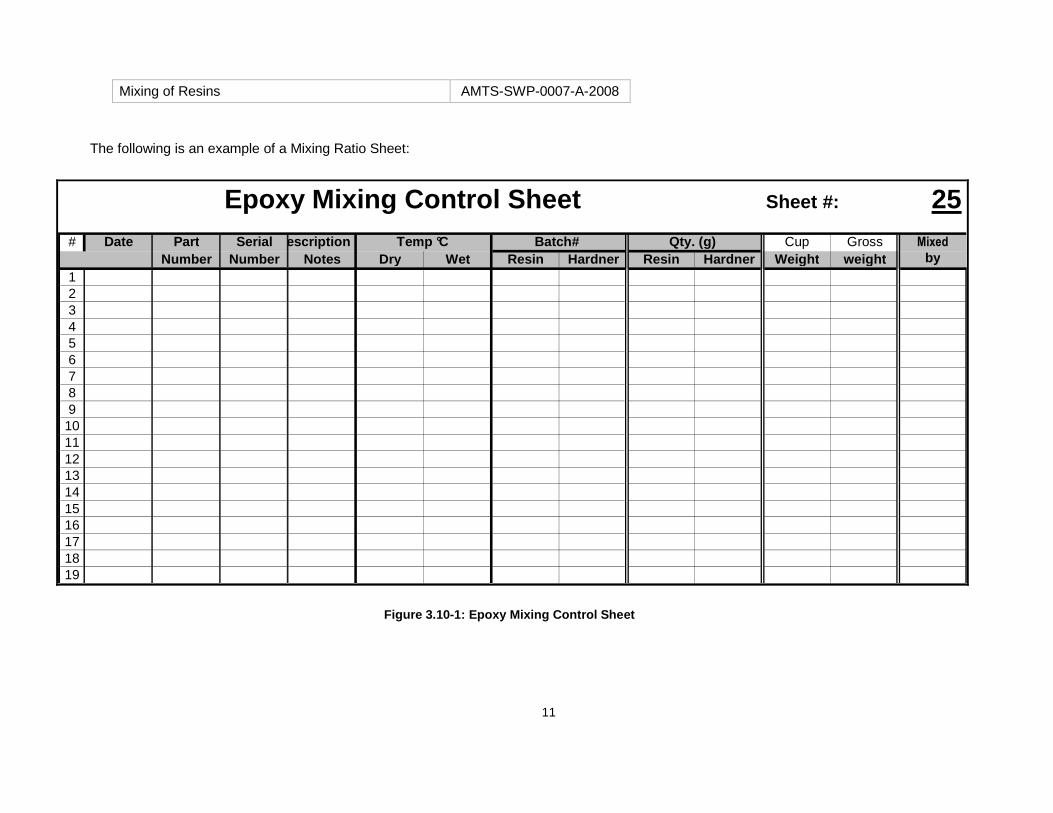
The following is an example of a Mixing Ratio Sheet:
Epoxy Mixing Control Sheet Sheet #: 25# Date Part Serial Description or Cup Gross Mixed
Number Number Notes Dry Wet Resin Hardner Resin Hardner Weight weight by123456789
10111213141516171819
Temp °C Batch# Qty. (g)
Figure 3.10-1: Epoxy Mixing Control Sheet
Mixing of Resins AMTS-SWP-0007-A-2008
12
4 Quality Assurance Process Every time epoxy is mixed, the accuracy of the mix needs to be checked for any mixing errors. The properties of a sample as also check after curing.
4.1 Accuracy of Mixture When mixing the epoxy, the total weight of the cup, resin and hardener is calculated theoretically. This value is then compared with the actual value which is obtained from weighing the cup together with the epoxy mixture. This method is used to check for any mixing ratio errors, in other words, when too much or too little of either or both substances were used. However, this method will not show any errors when the quantity of the hardener and resin were swapped. A visual check must be used for this purpose. E.g. when a ratio of 100:40 is used, the smaller part must therefore be the colour of the hardener (if coloured) and the colour of the mixture will indicate if the correct part was used (40:100 would have a darker colour than 100:40)
4.2 Quality of Mixture To ensure the quality of the epoxy mixture, there must be control over the mixing process. This is done by Epoxy Mixing Control Sheets. Empty sheets are collected from the QA-Manager and signed out of the “New Control Sheet File”. Sheets that are in use should be kept at the mixing station in a “Mixing Station File”. Each time epoxy is mixed, one line on the sheet is completed and a sample is cast together with the number corresponding to the line that has been completed. As soon as a sheet is full, it is signed into the “Inspection File” together with the corresponding samples. These samples are then inspected by a qualified person. After a sample is inspected it will either be accepted or rejected:
• When all the samples of a particular Control Sheet are accepted: o The Epoxy Mixing Control Sheet will be filed in an “Archive File”. This file
together with all the samples from that sheet will then be archived
• When a sample is rejected: 1. All Epoxy Mixing Control Sheets will be checked for parts built with the rejected
epoxy 2. These part(s) will be inspected and will either be scrapped, reworked or passed
under concession 3. A fault-finding investigation must then be conducted
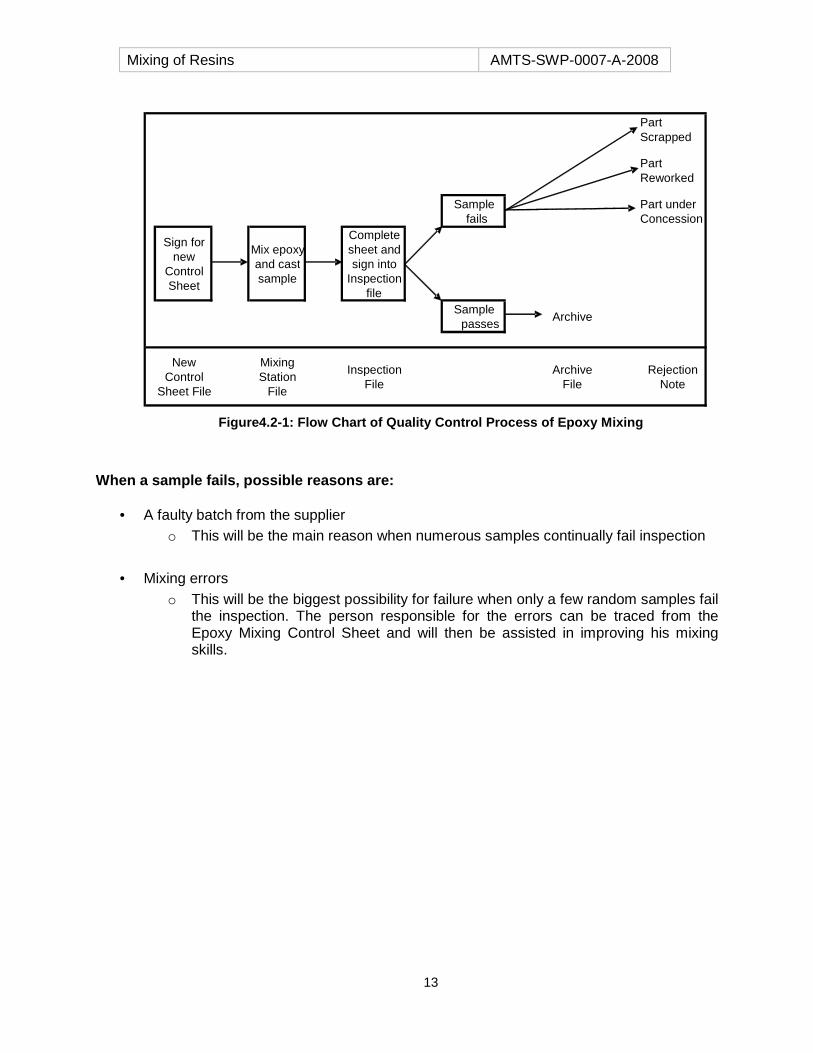
The following flow chart explains the Quality Assurance process:
Mixing of Resins AMTS-SWP-0007-A-2008
13
Figure4.2-1: Flow Chart of Quality Control Process of Epoxy Mixing
When a sample fails, possible reasons are:
• A faulty batch from the supplier o This will be the main reason when numerous samples continually fail inspection
• Mixing errors o This will be the biggest possibility for failure when only a few random samples fail
the inspection. The person responsible for the errors can be traced from the Epoxy Mixing Control Sheet and will then be assisted in improving his mixing skills.
Part Scrapped
Part Reworked
Sample fails
Part under Concession
Sign for new
Control Sheet
Mix epoxy and cast sample
Complete sheet and sign into
Inspection file
Sample passes Archive
New Control
Sheet File
Mixing Station
File
Inspection File
Archive File
Rejection Note
Mixing of Resins AMTS-SWP-0007-A-2008
14
5 Using an electronic scale (Appendix) The mixing ratios of epoxies are normally given by weight or by volume. As it is more accurate to determine quantities by weight, weighing is the preferred measuring method. The electronic scale is an accurate, reliable measuring device provided that it is used correctly.
5.1 Scale specification / setup
When using an electronic scale, the following must observed: 1. Resolution of the scale – indication of the accuracy of the scale 2. Maximum weight – this shows the maximum weight that the scale can measure. If
the maximum capacity of the scale is exceeded, can be permanently damaged. 3. Units of measure – a scale can normally be set to indicate metric (kg, g, mg) or
imperial (ounces, pounds).
5.2 Calibration check
It is a good practice to check the calibration of a scale regularly. Checks are performed by weighing calibrated weights within the range of the scale. The weighed numbers are compared to the calibrated weight to ensure the scale is still within its tolerances.
A scale that becomes out of calibration
1. Must be marked clearly :Out of calibration” 2. Must be re-calibrated as per the manufactures 3. Check if it is within calibration 4. Put back into service
5.3 Scale Operating instructions 1. Ensure the scale weigh surface is not obstructed or touching anything. Also check
that any covering or protection material does not obstruct the movement of the weighing surface.
2. Switch scale “ON” and allows it to complete the built-in check sequence. Check for any error messages.
3. Zero the scale 4. Place the material to be weighed on the scale. Wait for the read-out to stabilize and
note the weight. 5. Switch scale off after usage, and ensure it is in left in serviceable condition - cleaned
carefully if required.