Embed Size (px)
Citation preview
AWS Snowball EdgeDeveloper Guide

AWS Snowball Edge Developer Guide
AWS Snowball Edge: Developer Guide
AWS Snowball Edge Developer Guide
Table of Contents. . . . . . . . . . . . . . . . . . . . . . . . . . . . . . . . . . . . . . . . . . . . . . . . . . . . . . . . . . . . . . . . . . . . . . . . . . . . . . . . . . . . . . . . . . . . . . . . . . . . . . . . . . . . . . . . . . . . . . . . . . . . . . . . . . . . . . . . . . . . . . . . . . . . . . vii
What Is a Snowball Edge? .... . . . . . . . . . . . . . . . . . . . . . . . . . . . . . . . . . . . . . . . . . . . . . . . . . . . . . . . . . . . . . . . . . . . . . . . . . . . . . . . . . . . . . . . . . . . . . . . . . . . . . . . . . . . . . . . 1AWS Snowball Edge Features .... . . . . . . . . . . . . . . . . . . . . . . . . . . . . . . . . . . . . . . . . . . . . . . . . . . . . . . . . . . . . . . . . . . . . . . . . . . . . . . . . . . . . . . . . . . . . . . . . . . 1Prerequisites for Using Snowball Edge .... . . . . . . . . . . . . . . . . . . . . . . . . . . . . . . . . . . . . . . . . . . . . . . . . . . . . . . . . . . . . . . . . . . . . . . . . . . . . . . . . . . . . . . 1Related Services .... . . . . . . . . . . . . . . . . . . . . . . . . . . . . . . . . . . . . . . . . . . . . . . . . . . . . . . . . . . . . . . . . . . . . . . . . . . . . . . . . . . . . . . . . . . . . . . . . . . . . . . . . . . . . . . . . . . . . . 2Service Access .... . . . . . . . . . . . . . . . . . . . . . . . . . . . . . . . . . . . . . . . . . . . . . . . . . . . . . . . . . . . . . . . . . . . . . . . . . . . . . . . . . . . . . . . . . . . . . . . . . . . . . . . . . . . . . . . . . . . . . . . . 3
Accessing an AWS Snowball Edge Device .... . . . . . . . . . . . . . . . . . . . . . . . . . . . . . . . . . . . . . . . . . . . . . . . . . . . . . . . . . . . . . . . . . . . . . . . . . . . 3Pricing for the AWS Snowball Edge .... . . . . . . . . . . . . . . . . . . . . . . . . . . . . . . . . . . . . . . . . . . . . . . . . . . . . . . . . . . . . . . . . . . . . . . . . . . . . . . . . . . . . . . . . . . 3Are You a First-Time AWS Snowball User? ... . . . . . . . . . . . . . . . . . . . . . . . . . . . . . . . . . . . . . . . . . . . . . . . . . . . . . . . . . . . . . . . . . . . . . . . . . . . . . . . . . . 3Device Differences .... . . . . . . . . . . . . . . . . . . . . . . . . . . . . . . . . . . . . . . . . . . . . . . . . . . . . . . . . . . . . . . . . . . . . . . . . . . . . . . . . . . . . . . . . . . . . . . . . . . . . . . . . . . . . . . . . . . 3
Snowball Edge Device Options .... . . . . . . . . . . . . . . . . . . . . . . . . . . . . . . . . . . . . . . . . . . . . . . . . . . . . . . . . . . . . . . . . . . . . . . . . . . . . . . . . . . . . . . . . . 3Use Case Differences .... . . . . . . . . . . . . . . . . . . . . . . . . . . . . . . . . . . . . . . . . . . . . . . . . . . . . . . . . . . . . . . . . . . . . . . . . . . . . . . . . . . . . . . . . . . . . . . . . . . . . . . 5Hardware Differences .... . . . . . . . . . . . . . . . . . . . . . . . . . . . . . . . . . . . . . . . . . . . . . . . . . . . . . . . . . . . . . . . . . . . . . . . . . . . . . . . . . . . . . . . . . . . . . . . . . . . . . . 5Tool Differences .... . . . . . . . . . . . . . . . . . . . . . . . . . . . . . . . . . . . . . . . . . . . . . . . . . . . . . . . . . . . . . . . . . . . . . . . . . . . . . . . . . . . . . . . . . . . . . . . . . . . . . . . . . . . . . 6Other Differences .... . . . . . . . . . . . . . . . . . . . . . . . . . . . . . . . . . . . . . . . . . . . . . . . . . . . . . . . . . . . . . . . . . . . . . . . . . . . . . . . . . . . . . . . . . . . . . . . . . . . . . . . . . . . 8
How It Works .... . . . . . . . . . . . . . . . . . . . . . . . . . . . . . . . . . . . . . . . . . . . . . . . . . . . . . . . . . . . . . . . . . . . . . . . . . . . . . . . . . . . . . . . . . . . . . . . . . . . . . . . . . . . . . . . . . . . . . . . . 8How Import Works .... . . . . . . . . . . . . . . . . . . . . . . . . . . . . . . . . . . . . . . . . . . . . . . . . . . . . . . . . . . . . . . . . . . . . . . . . . . . . . . . . . . . . . . . . . . . . . . . . . . . . . . . . . 9How Export Works .... . . . . . . . . . . . . . . . . . . . . . . . . . . . . . . . . . . . . . . . . . . . . . . . . . . . . . . . . . . . . . . . . . . . . . . . . . . . . . . . . . . . . . . . . . . . . . . . . . . . . . . . . 10How Local Compute and Storage Works .... . . . . . . . . . . . . . . . . . . . . . . . . . . . . . . . . . . . . . . . . . . . . . . . . . . . . . . . . . . . . . . . . . . . . . . . . . . 10Snowball Edge Videos and Blogs .... . . . . . . . . . . . . . . . . . . . . . . . . . . . . . . . . . . . . . . . . . . . . . . . . . . . . . . . . . . . . . . . . . . . . . . . . . . . . . . . . . . . . 10
Setting Up .... . . . . . . . . . . . . . . . . . . . . . . . . . . . . . . . . . . . . . . . . . . . . . . . . . . . . . . . . . . . . . . . . . . . . . . . . . . . . . . . . . . . . . . . . . . . . . . . . . . . . . . . . . . . . . . . . . . . . . . . . . . . 11Sign Up for AWS .... . . . . . . . . . . . . . . . . . . . . . . . . . . . . . . . . . . . . . . . . . . . . . . . . . . . . . . . . . . . . . . . . . . . . . . . . . . . . . . . . . . . . . . . . . . . . . . . . . . . . . . . . . . 11Create an IAM User .... . . . . . . . . . . . . . . . . . . . . . . . . . . . . . . . . . . . . . . . . . . . . . . . . . . . . . . . . . . . . . . . . . . . . . . . . . . . . . . . . . . . . . . . . . . . . . . . . . . . . . . 11Next Step .... . . . . . . . . . . . . . . . . . . . . . . . . . . . . . . . . . . . . . . . . . . . . . . . . . . . . . . . . . . . . . . . . . . . . . . . . . . . . . . . . . . . . . . . . . . . . . . . . . . . . . . . . . . . . . . . . . . . . 13
Understanding AWS Snowball Edge Jobs .... . . . . . . . . . . . . . . . . . . . . . . . . . . . . . . . . . . . . . . . . . . . . . . . . . . . . . . . . . . . . . . . . . . . . . . . . . . . . . . . . . . . . . . . . . 14Job Details ... . . . . . . . . . . . . . . . . . . . . . . . . . . . . . . . . . . . . . . . . . . . . . . . . . . . . . . . . . . . . . . . . . . . . . . . . . . . . . . . . . . . . . . . . . . . . . . . . . . . . . . . . . . . . . . . . . . . . . . . . . . . 14Job Statuses .... . . . . . . . . . . . . . . . . . . . . . . . . . . . . . . . . . . . . . . . . . . . . . . . . . . . . . . . . . . . . . . . . . . . . . . . . . . . . . . . . . . . . . . . . . . . . . . . . . . . . . . . . . . . . . . . . . . . . . . . . 14
Cluster Statuses .... . . . . . . . . . . . . . . . . . . . . . . . . . . . . . . . . . . . . . . . . . . . . . . . . . . . . . . . . . . . . . . . . . . . . . . . . . . . . . . . . . . . . . . . . . . . . . . . . . . . . . . . . . . . 16Import Jobs into Amazon S3 .... . . . . . . . . . . . . . . . . . . . . . . . . . . . . . . . . . . . . . . . . . . . . . . . . . . . . . . . . . . . . . . . . . . . . . . . . . . . . . . . . . . . . . . . . . . . . . . . . . 16Export Jobs from Amazon S3 .... . . . . . . . . . . . . . . . . . . . . . . . . . . . . . . . . . . . . . . . . . . . . . . . . . . . . . . . . . . . . . . . . . . . . . . . . . . . . . . . . . . . . . . . . . . . . . . . . 17
Using Export Ranges .... . . . . . . . . . . . . . . . . . . . . . . . . . . . . . . . . . . . . . . . . . . . . . . . . . . . . . . . . . . . . . . . . . . . . . . . . . . . . . . . . . . . . . . . . . . . . . . . . . . . . . 17Local Compute and Storage Only Jobs .... . . . . . . . . . . . . . . . . . . . . . . . . . . . . . . . . . . . . . . . . . . . . . . . . . . . . . . . . . . . . . . . . . . . . . . . . . . . . . . . . . . . . 19
Local Compute Jobs .... . . . . . . . . . . . . . . . . . . . . . . . . . . . . . . . . . . . . . . . . . . . . . . . . . . . . . . . . . . . . . . . . . . . . . . . . . . . . . . . . . . . . . . . . . . . . . . . . . . . . . 19Local Storage Jobs .... . . . . . . . . . . . . . . . . . . . . . . . . . . . . . . . . . . . . . . . . . . . . . . . . . . . . . . . . . . . . . . . . . . . . . . . . . . . . . . . . . . . . . . . . . . . . . . . . . . . . . . . 20Local Cluster Option .... . . . . . . . . . . . . . . . . . . . . . . . . . . . . . . . . . . . . . . . . . . . . . . . . . . . . . . . . . . . . . . . . . . . . . . . . . . . . . . . . . . . . . . . . . . . . . . . . . . . . . 20
Cloning a Job in the Console .... . . . . . . . . . . . . . . . . . . . . . . . . . . . . . . . . . . . . . . . . . . . . . . . . . . . . . . . . . . . . . . . . . . . . . . . . . . . . . . . . . . . . . . . . . . . . . . . . . 20Canceling Jobs in the Console .... . . . . . . . . . . . . . . . . . . . . . . . . . . . . . . . . . . . . . . . . . . . . . . . . . . . . . . . . . . . . . . . . . . . . . . . . . . . . . . . . . . . . . . . . . . . . . . . . 20
Getting Started .... . . . . . . . . . . . . . . . . . . . . . . . . . . . . . . . . . . . . . . . . . . . . . . . . . . . . . . . . . . . . . . . . . . . . . . . . . . . . . . . . . . . . . . . . . . . . . . . . . . . . . . . . . . . . . . . . . . . . . . . . . . . . 22Sign Up for AWS .... . . . . . . . . . . . . . . . . . . . . . . . . . . . . . . . . . . . . . . . . . . . . . . . . . . . . . . . . . . . . . . . . . . . . . . . . . . . . . . . . . . . . . . . . . . . . . . . . . . . . . . . . . . . . . . . . . . 22Create an Administrator IAM User .... . . . . . . . . . . . . . . . . . . . . . . . . . . . . . . . . . . . . . . . . . . . . . . . . . . . . . . . . . . . . . . . . . . . . . . . . . . . . . . . . . . . . . . . . . . 22Getting Started: Your First Job .... . . . . . . . . . . . . . . . . . . . . . . . . . . . . . . . . . . . . . . . . . . . . . . . . . . . . . . . . . . . . . . . . . . . . . . . . . . . . . . . . . . . . . . . . . . . . . . . 23
Create Your First Job .... . . . . . . . . . . . . . . . . . . . . . . . . . . . . . . . . . . . . . . . . . . . . . . . . . . . . . . . . . . . . . . . . . . . . . . . . . . . . . . . . . . . . . . . . . . . . . . . . . . . . 23Receive the Snowball Edge .... . . . . . . . . . . . . . . . . . . . . . . . . . . . . . . . . . . . . . . . . . . . . . . . . . . . . . . . . . . . . . . . . . . . . . . . . . . . . . . . . . . . . . . . . . . . . 25Connect to Your Local Network .... . . . . . . . . . . . . . . . . . . . . . . . . . . . . . . . . . . . . . . . . . . . . . . . . . . . . . . . . . . . . . . . . . . . . . . . . . . . . . . . . . . . . . . 26Get Your Credentials and Tools ... . . . . . . . . . . . . . . . . . . . . . . . . . . . . . . . . . . . . . . . . . . . . . . . . . . . . . . . . . . . . . . . . . . . . . . . . . . . . . . . . . . . . . . . 26Download and Install the Snowball Client ... . . . . . . . . . . . . . . . . . . . . . . . . . . . . . . . . . . . . . . . . . . . . . . . . . . . . . . . . . . . . . . . . . . . . . . . . 27Unlock the Snowball Edge .... . . . . . . . . . . . . . . . . . . . . . . . . . . . . . . . . . . . . . . . . . . . . . . . . . . . . . . . . . . . . . . . . . . . . . . . . . . . . . . . . . . . . . . . . . . . . . 27Set Up Local Users ... . . . . . . . . . . . . . . . . . . . . . . . . . . . . . . . . . . . . . . . . . . . . . . . . . . . . . . . . . . . . . . . . . . . . . . . . . . . . . . . . . . . . . . . . . . . . . . . . . . . . . . . . 28Use the Snowball Edge .... . . . . . . . . . . . . . . . . . . . . . . . . . . . . . . . . . . . . . . . . . . . . . . . . . . . . . . . . . . . . . . . . . . . . . . . . . . . . . . . . . . . . . . . . . . . . . . . . . 29Stop the Snowball Client, and Power Off the Snowball Edge .... . . . . . . . . . . . . . . . . . . . . . . . . . . . . . . . . . . . . . . . . . . . . . . 30Disconnect the Snowball Edge .... . . . . . . . . . . . . . . . . . . . . . . . . . . . . . . . . . . . . . . . . . . . . . . . . . . . . . . . . . . . . . . . . . . . . . . . . . . . . . . . . . . . . . . . 30Return the Snowball Edge .... . . . . . . . . . . . . . . . . . . . . . . . . . . . . . . . . . . . . . . . . . . . . . . . . . . . . . . . . . . . . . . . . . . . . . . . . . . . . . . . . . . . . . . . . . . . . . 30Monitor the Import Status .... . . . . . . . . . . . . . . . . . . . . . . . . . . . . . . . . . . . . . . . . . . . . . . . . . . . . . . . . . . . . . . . . . . . . . . . . . . . . . . . . . . . . . . . . . . . . . 31Get Your Job Completion Report and Logs .... . . . . . . . . . . . . . . . . . . . . . . . . . . . . . . . . . . . . . . . . . . . . . . . . . . . . . . . . . . . . . . . . . . . . . . 31
iii

AWS Snowball Edge Developer Guide
Where Do I Go from Here? .... . . . . . . . . . . . . . . . . . . . . . . . . . . . . . . . . . . . . . . . . . . . . . . . . . . . . . . . . . . . . . . . . . . . . . . . . . . . . . . . . . . . . . . . . . . . . . . . . . . . . 32Best Practices .... . . . . . . . . . . . . . . . . . . . . . . . . . . . . . . . . . . . . . . . . . . . . . . . . . . . . . . . . . . . . . . . . . . . . . . . . . . . . . . . . . . . . . . . . . . . . . . . . . . . . . . . . . . . . . . . . . . . . . . . . . . . . . . 33
Performance .... . . . . . . . . . . . . . . . . . . . . . . . . . . . . . . . . . . . . . . . . . . . . . . . . . . . . . . . . . . . . . . . . . . . . . . . . . . . . . . . . . . . . . . . . . . . . . . . . . . . . . . . . . . . . . . . . . . . . . . . . 34Performance Recommendations .... . . . . . . . . . . . . . . . . . . . . . . . . . . . . . . . . . . . . . . . . . . . . . . . . . . . . . . . . . . . . . . . . . . . . . . . . . . . . . . . . . . . . . 34Speeding Up Data Transfer ... . . . . . . . . . . . . . . . . . . . . . . . . . . . . . . . . . . . . . . . . . . . . . . . . . . . . . . . . . . . . . . . . . . . . . . . . . . . . . . . . . . . . . . . . . . . . . 34
How to Transfer Petabytes of Data Efficiently ... . . . . . . . . . . . . . . . . . . . . . . . . . . . . . . . . . . . . . . . . . . . . . . . . . . . . . . . . . . . . . . . . . . . . . . . . . . . 35Planning Your Large Transfer ... . . . . . . . . . . . . . . . . . . . . . . . . . . . . . . . . . . . . . . . . . . . . . . . . . . . . . . . . . . . . . . . . . . . . . . . . . . . . . . . . . . . . . . . . . . 35Calibrating a Large Transfer ... . . . . . . . . . . . . . . . . . . . . . . . . . . . . . . . . . . . . . . . . . . . . . . . . . . . . . . . . . . . . . . . . . . . . . . . . . . . . . . . . . . . . . . . . . . . . 37Managing EC2 Instances .... . . . . . . . . . . . . . . . . . . . . . . . . . . . . . . . . . . . . . . . . . . . . . . . . . . . . . . . . . . . . . . . . . . . . . . . . . . . . . . . . . . . . . . . . . . . . . . . . 37
Using a Snowball Edge Device .... . . . . . . . . . . . . . . . . . . . . . . . . . . . . . . . . . . . . . . . . . . . . . . . . . . . . . . . . . . . . . . . . . . . . . . . . . . . . . . . . . . . . . . . . . . . . . . . . . . . . . . . 38Using the Snowball Client ... . . . . . . . . . . . . . . . . . . . . . . . . . . . . . . . . . . . . . . . . . . . . . . . . . . . . . . . . . . . . . . . . . . . . . . . . . . . . . . . . . . . . . . . . . . . . . . . . . . . . . . 39
Downloading and Installing the Snowball Client ... . . . . . . . . . . . . . . . . . . . . . . . . . . . . . . . . . . . . . . . . . . . . . . . . . . . . . . . . . . . . . . . . 39Commands for the Snowball Client ... . . . . . . . . . . . . . . . . . . . . . . . . . . . . . . . . . . . . . . . . . . . . . . . . . . . . . . . . . . . . . . . . . . . . . . . . . . . . . . . . . 39
Transferring Files Using the S3 Adapter ... . . . . . . . . . . . . . . . . . . . . . . . . . . . . . . . . . . . . . . . . . . . . . . . . . . . . . . . . . . . . . . . . . . . . . . . . . . . . . . . . . . . 51Downloading and Installing the AWS CLI Version 1.16.14 .... . . . . . . . . . . . . . . . . . . . . . . . . . . . . . . . . . . . . . . . . . . . . . . . . . . 51Using the AWS CLI and API Operations on Snowball Edge .... . . . . . . . . . . . . . . . . . . . . . . . . . . . . . . . . . . . . . . . . . . . . . . . . . 52Getting and Using Local Amazon S3 Credentials ... . . . . . . . . . . . . . . . . . . . . . . . . . . . . . . . . . . . . . . . . . . . . . . . . . . . . . . . . . . . . . . . . 53Unsupported Amazon S3 Features for Snowball Edge .... . . . . . . . . . . . . . . . . . . . . . . . . . . . . . . . . . . . . . . . . . . . . . . . . . . . . . . . 54Batching Small Files ... . . . . . . . . . . . . . . . . . . . . . . . . . . . . . . . . . . . . . . . . . . . . . . . . . . . . . . . . . . . . . . . . . . . . . . . . . . . . . . . . . . . . . . . . . . . . . . . . . . . . . . 55Supported CLI Commands .... . . . . . . . . . . . . . . . . . . . . . . . . . . . . . . . . . . . . . . . . . . . . . . . . . . . . . . . . . . . . . . . . . . . . . . . . . . . . . . . . . . . . . . . . . . . . . 55Supported REST API Actions .... . . . . . . . . . . . . . . . . . . . . . . . . . . . . . . . . . . . . . . . . . . . . . . . . . . . . . . . . . . . . . . . . . . . . . . . . . . . . . . . . . . . . . . . . . . 58
Transferring Files Using the File Interface .... . . . . . . . . . . . . . . . . . . . . . . . . . . . . . . . . . . . . . . . . . . . . . . . . . . . . . . . . . . . . . . . . . . . . . . . . . . . . . . . . 59Overview of the File Interface .... . . . . . . . . . . . . . . . . . . . . . . . . . . . . . . . . . . . . . . . . . . . . . . . . . . . . . . . . . . . . . . . . . . . . . . . . . . . . . . . . . . . . . . . . 60Starting the File Interface .... . . . . . . . . . . . . . . . . . . . . . . . . . . . . . . . . . . . . . . . . . . . . . . . . . . . . . . . . . . . . . . . . . . . . . . . . . . . . . . . . . . . . . . . . . . . . . 61Mounting a Bucket with the File Interface .... . . . . . . . . . . . . . . . . . . . . . . . . . . . . . . . . . . . . . . . . . . . . . . . . . . . . . . . . . . . . . . . . . . . . . . . 63Monitoring the File Interface .... . . . . . . . . . . . . . . . . . . . . . . . . . . . . . . . . . . . . . . . . . . . . . . . . . . . . . . . . . . . . . . . . . . . . . . . . . . . . . . . . . . . . . . . . . 65
Using AWS Lambda .... . . . . . . . . . . . . . . . . . . . . . . . . . . . . . . . . . . . . . . . . . . . . . . . . . . . . . . . . . . . . . . . . . . . . . . . . . . . . . . . . . . . . . . . . . . . . . . . . . . . . . . . . . . . . . . 66Before You Start ... . . . . . . . . . . . . . . . . . . . . . . . . . . . . . . . . . . . . . . . . . . . . . . . . . . . . . . . . . . . . . . . . . . . . . . . . . . . . . . . . . . . . . . . . . . . . . . . . . . . . . . . . . . . 66Getting Started with Lambda .... . . . . . . . . . . . . . . . . . . . . . . . . . . . . . . . . . . . . . . . . . . . . . . . . . . . . . . . . . . . . . . . . . . . . . . . . . . . . . . . . . . . . . . . . 68
Using Amazon EC2 .... . . . . . . . . . . . . . . . . . . . . . . . . . . . . . . . . . . . . . . . . . . . . . . . . . . . . . . . . . . . . . . . . . . . . . . . . . . . . . . . . . . . . . . . . . . . . . . . . . . . . . . . . . . . . . . . 72Overview .... . . . . . . . . . . . . . . . . . . . . . . . . . . . . . . . . . . . . . . . . . . . . . . . . . . . . . . . . . . . . . . . . . . . . . . . . . . . . . . . . . . . . . . . . . . . . . . . . . . . . . . . . . . . . . . . . . . . . . 72Prerequisites ... . . . . . . . . . . . . . . . . . . . . . . . . . . . . . . . . . . . . . . . . . . . . . . . . . . . . . . . . . . . . . . . . . . . . . . . . . . . . . . . . . . . . . . . . . . . . . . . . . . . . . . . . . . . . . . . . . 73Using the AWS CLI and API Operations on Snowball Edge .... . . . . . . . . . . . . . . . . . . . . . . . . . . . . . . . . . . . . . . . . . . . . . . . . . 74Quotas for Compute Instances on a Snowball Edge .... . . . . . . . . . . . . . . . . . . . . . . . . . . . . . . . . . . . . . . . . . . . . . . . . . . . . . . . . . . 74Creating a Job with Compute Instances .... . . . . . . . . . . . . . . . . . . . . . . . . . . . . . . . . . . . . . . . . . . . . . . . . . . . . . . . . . . . . . . . . . . . . . . . . . . . 76Network Configuration for Compute Instances .... . . . . . . . . . . . . . . . . . . . . . . . . . . . . . . . . . . . . . . . . . . . . . . . . . . . . . . . . . . . . . . . . . 78Connecting to Your Compute Instance on a Snowball Edge Using SSH .... . . . . . . . . . . . . . . . . . . . . . . . . . . . . . . . . . 79Transferring Data from Amazon EC2 Compute Instances to Amazon S3 Buckets on the SameSnowball Edge .... . . . . . . . . . . . . . . . . . . . . . . . . . . . . . . . . . . . . . . . . . . . . . . . . . . . . . . . . . . . . . . . . . . . . . . . . . . . . . . . . . . . . . . . . . . . . . . . . . . . . . . . . . . . . . 80Snowball Client Commands for Compute Instances .... . . . . . . . . . . . . . . . . . . . . . . . . . . . . . . . . . . . . . . . . . . . . . . . . . . . . . . . . . . . 80Using the Amazon EC2 Endpoint ... . . . . . . . . . . . . . . . . . . . . . . . . . . . . . . . . . . . . . . . . . . . . . . . . . . . . . . . . . . . . . . . . . . . . . . . . . . . . . . . . . . . . . 84Autostarting Amazon EC2 Instances with Launch Templates .... . . . . . . . . . . . . . . . . . . . . . . . . . . . . . . . . . . . . . . . . . . . . . . . 94Using Block Storage with Your EC2 Instances .... . . . . . . . . . . . . . . . . . . . . . . . . . . . . . . . . . . . . . . . . . . . . . . . . . . . . . . . . . . . . . . . . . . . 95Security Groups in Snowball Edge Devices .... . . . . . . . . . . . . . . . . . . . . . . . . . . . . . . . . . . . . . . . . . . . . . . . . . . . . . . . . . . . . . . . . . . . . . . . 96Supported Instance Metadata and User Data .... . . . . . . . . . . . . . . . . . . . . . . . . . . . . . . . . . . . . . . . . . . . . . . . . . . . . . . . . . . . . . . . . . . . 96Troubleshooting Amazon EC2 .... . . . . . . . . . . . . . . . . . . . . . . . . . . . . . . . . . . . . . . . . . . . . . . . . . . . . . . . . . . . . . . . . . . . . . . . . . . . . . . . . . . . . . . . . 97
Using IAM Locally ... . . . . . . . . . . . . . . . . . . . . . . . . . . . . . . . . . . . . . . . . . . . . . . . . . . . . . . . . . . . . . . . . . . . . . . . . . . . . . . . . . . . . . . . . . . . . . . . . . . . . . . . . . . . . . . . . . . 98Using the AWS CLI and API Operations on Snowball Edge .... . . . . . . . . . . . . . . . . . . . . . . . . . . . . . . . . . . . . . . . . . . . . . . . . . 99List of Supported IAM AWS CLI Commands on a Snowball Edge .... . . . . . . . . . . . . . . . . . . . . . . . . . . . . . . . . . . . . . . . . . 99IAM Policy Examples .... . . . . . . . . . . . . . . . . . . . . . . . . . . . . . . . . . . . . . . . . . . . . . . . . . . . . . . . . . . . . . . . . . . . . . . . . . . . . . . . . . . . . . . . . . . . . . . . . . . 102Example 9: Policy for API Calls ... . . . . . . . . . . . . . . . . . . . . . . . . . . . . . . . . . . . . . . . . . . . . . . . . . . . . . . . . . . . . . . . . . . . . . . . . . . . . . . . . . . . . . . 105TrustPolicy Example .... . . . . . . . . . . . . . . . . . . . . . . . . . . . . . . . . . . . . . . . . . . . . . . . . . . . . . . . . . . . . . . . . . . . . . . . . . . . . . . . . . . . . . . . . . . . . . . . . . . . . 105
Using AWS STS .... . . . . . . . . . . . . . . . . . . . . . . . . . . . . . . . . . . . . . . . . . . . . . . . . . . . . . . . . . . . . . . . . . . . . . . . . . . . . . . . . . . . . . . . . . . . . . . . . . . . . . . . . . . . . . . . . . . 106Using the AWS CLI and API Operations on Snowball Edge .... . . . . . . . . . . . . . . . . . . . . . . . . . . . . . . . . . . . . . . . . . . . . . . . . 106Supported AWS STS AWS CLI Commands on a Snowball Edge .... . . . . . . . . . . . . . . . . . . . . . . . . . . . . . . . . . . . . . . . . . . 106Supported AWS STS API Operations .... . . . . . . . . . . . . . . . . . . . . . . . . . . . . . . . . . . . . . . . . . . . . . . . . . . . . . . . . . . . . . . . . . . . . . . . . . . . . . 107
Ports Required to Use AWS Services .... . . . . . . . . . . . . . . . . . . . . . . . . . . . . . . . . . . . . . . . . . . . . . . . . . . . . . . . . . . . . . . . . . . . . . . . . . . . . . . . . . . . . . 107
iv

AWS Snowball Edge Developer Guide
Using an AWS Snowball Edge Cluster ... . . . . . . . . . . . . . . . . . . . . . . . . . . . . . . . . . . . . . . . . . . . . . . . . . . . . . . . . . . . . . . . . . . . . . . . . . . . . . . . . . . . . . . . . . . . . . 109Clustering Overview .... . . . . . . . . . . . . . . . . . . . . . . . . . . . . . . . . . . . . . . . . . . . . . . . . . . . . . . . . . . . . . . . . . . . . . . . . . . . . . . . . . . . . . . . . . . . . . . . . . . . . . . . . . . . . 109
Snowball Edge Cluster Quorums .... . . . . . . . . . . . . . . . . . . . . . . . . . . . . . . . . . . . . . . . . . . . . . . . . . . . . . . . . . . . . . . . . . . . . . . . . . . . . . . . . . . . 109Cluster Job Considerations .... . . . . . . . . . . . . . . . . . . . . . . . . . . . . . . . . . . . . . . . . . . . . . . . . . . . . . . . . . . . . . . . . . . . . . . . . . . . . . . . . . . . . . . . . . . . 110
Related Topics ... . . . . . . . . . . . . . . . . . . . . . . . . . . . . . . . . . . . . . . . . . . . . . . . . . . . . . . . . . . . . . . . . . . . . . . . . . . . . . . . . . . . . . . . . . . . . . . . . . . . . . . . . . . . . . . . . . . . . . 110Administrating a Cluster ... . . . . . . . . . . . . . . . . . . . . . . . . . . . . . . . . . . . . . . . . . . . . . . . . . . . . . . . . . . . . . . . . . . . . . . . . . . . . . . . . . . . . . . . . . . . . . . . . . . . . . . . 111
Reading and Writing Data to a Cluster ... . . . . . . . . . . . . . . . . . . . . . . . . . . . . . . . . . . . . . . . . . . . . . . . . . . . . . . . . . . . . . . . . . . . . . . . . . . . 111Reconnecting an Unavailable Cluster Node .... . . . . . . . . . . . . . . . . . . . . . . . . . . . . . . . . . . . . . . . . . . . . . . . . . . . . . . . . . . . . . . . . . . . . 111Removing an Unhealthy Node from a Cluster ... . . . . . . . . . . . . . . . . . . . . . . . . . . . . . . . . . . . . . . . . . . . . . . . . . . . . . . . . . . . . . . . . . . 112Adding or Replacing a Node in a Cluster ... . . . . . . . . . . . . . . . . . . . . . . . . . . . . . . . . . . . . . . . . . . . . . . . . . . . . . . . . . . . . . . . . . . . . . . . . 112
Updating a Snowball Edge .... . . . . . . . . . . . . . . . . . . . . . . . . . . . . . . . . . . . . . . . . . . . . . . . . . . . . . . . . . . . . . . . . . . . . . . . . . . . . . . . . . . . . . . . . . . . . . . . . . . . . . . . . . . . 114Prerequisites ... . . . . . . . . . . . . . . . . . . . . . . . . . . . . . . . . . . . . . . . . . . . . . . . . . . . . . . . . . . . . . . . . . . . . . . . . . . . . . . . . . . . . . . . . . . . . . . . . . . . . . . . . . . . . . . . . . . . . . . . 114Downloading Updates .... . . . . . . . . . . . . . . . . . . . . . . . . . . . . . . . . . . . . . . . . . . . . . . . . . . . . . . . . . . . . . . . . . . . . . . . . . . . . . . . . . . . . . . . . . . . . . . . . . . . . . . . . . 114Installing Updates .... . . . . . . . . . . . . . . . . . . . . . . . . . . . . . . . . . . . . . . . . . . . . . . . . . . . . . . . . . . . . . . . . . . . . . . . . . . . . . . . . . . . . . . . . . . . . . . . . . . . . . . . . . . . . . . . 115
Shipping Considerations .... . . . . . . . . . . . . . . . . . . . . . . . . . . . . . . . . . . . . . . . . . . . . . . . . . . . . . . . . . . . . . . . . . . . . . . . . . . . . . . . . . . . . . . . . . . . . . . . . . . . . . . . . . . . . . . 117Preparing an AWS Snowball Edge for Shipping .... . . . . . . . . . . . . . . . . . . . . . . . . . . . . . . . . . . . . . . . . . . . . . . . . . . . . . . . . . . . . . . . . . . . . . . . 117Shipping an AWS Snowball Edge .... . . . . . . . . . . . . . . . . . . . . . . . . . . . . . . . . . . . . . . . . . . . . . . . . . . . . . . . . . . . . . . . . . . . . . . . . . . . . . . . . . . . . . . . . . . 117
Shipping Carriers ... . . . . . . . . . . . . . . . . . . . . . . . . . . . . . . . . . . . . . . . . . . . . . . . . . . . . . . . . . . . . . . . . . . . . . . . . . . . . . . . . . . . . . . . . . . . . . . . . . . . . . . . . . 118Using AWS OpsHub to Manage Devices .... . . . . . . . . . . . . . . . . . . . . . . . . . . . . . . . . . . . . . . . . . . . . . . . . . . . . . . . . . . . . . . . . . . . . . . . . . . . . . . . . . . . . . . . . . 119
Unlocking a Device .... . . . . . . . . . . . . . . . . . . . . . . . . . . . . . . . . . . . . . . . . . . . . . . . . . . . . . . . . . . . . . . . . . . . . . . . . . . . . . . . . . . . . . . . . . . . . . . . . . . . . . . . . . . . . . 119Using AWS Services .... . . . . . . . . . . . . . . . . . . . . . . . . . . . . . . . . . . . . . . . . . . . . . . . . . . . . . . . . . . . . . . . . . . . . . . . . . . . . . . . . . . . . . . . . . . . . . . . . . . . . . . . . . . . . 120
Using Compute Instances Locally ... . . . . . . . . . . . . . . . . . . . . . . . . . . . . . . . . . . . . . . . . . . . . . . . . . . . . . . . . . . . . . . . . . . . . . . . . . . . . . . . . . . . 121Managing Clusters ... . . . . . . . . . . . . . . . . . . . . . . . . . . . . . . . . . . . . . . . . . . . . . . . . . . . . . . . . . . . . . . . . . . . . . . . . . . . . . . . . . . . . . . . . . . . . . . . . . . . . . . . 123Managing S3 Storage .... . . . . . . . . . . . . . . . . . . . . . . . . . . . . . . . . . . . . . . . . . . . . . . . . . . . . . . . . . . . . . . . . . . . . . . . . . . . . . . . . . . . . . . . . . . . . . . . . . . 123
Managing Your Devices .... . . . . . . . . . . . . . . . . . . . . . . . . . . . . . . . . . . . . . . . . . . . . . . . . . . . . . . . . . . . . . . . . . . . . . . . . . . . . . . . . . . . . . . . . . . . . . . . . . . . . . . . 125Rebooting Your Device .... . . . . . . . . . . . . . . . . . . . . . . . . . . . . . . . . . . . . . . . . . . . . . . . . . . . . . . . . . . . . . . . . . . . . . . . . . . . . . . . . . . . . . . . . . . . . . . . . 125Editing Your Device Alias ... . . . . . . . . . . . . . . . . . . . . . . . . . . . . . . . . . . . . . . . . . . . . . . . . . . . . . . . . . . . . . . . . . . . . . . . . . . . . . . . . . . . . . . . . . . . . . . 125Updating Your Device .... . . . . . . . . . . . . . . . . . . . . . . . . . . . . . . . . . . . . . . . . . . . . . . . . . . . . . . . . . . . . . . . . . . . . . . . . . . . . . . . . . . . . . . . . . . . . . . . . . 125Managing Profiles .... . . . . . . . . . . . . . . . . . . . . . . . . . . . . . . . . . . . . . . . . . . . . . . . . . . . . . . . . . . . . . . . . . . . . . . . . . . . . . . . . . . . . . . . . . . . . . . . . . . . . . . . 126
Automating Your Management Tasks .... . . . . . . . . . . . . . . . . . . . . . . . . . . . . . . . . . . . . . . . . . . . . . . . . . . . . . . . . . . . . . . . . . . . . . . . . . . . . . . . . . . . . 126Creating and Starting a Task .... . . . . . . . . . . . . . . . . . . . . . . . . . . . . . . . . . . . . . . . . . . . . . . . . . . . . . . . . . . . . . . . . . . . . . . . . . . . . . . . . . . . . . . . . 127Viewing Details of a Task .... . . . . . . . . . . . . . . . . . . . . . . . . . . . . . . . . . . . . . . . . . . . . . . . . . . . . . . . . . . . . . . . . . . . . . . . . . . . . . . . . . . . . . . . . . . . . 129Deleting a Task .... . . . . . . . . . . . . . . . . . . . . . . . . . . . . . . . . . . . . . . . . . . . . . . . . . . . . . . . . . . . . . . . . . . . . . . . . . . . . . . . . . . . . . . . . . . . . . . . . . . . . . . . . . . 129
Security ... . . . . . . . . . . . . . . . . . . . . . . . . . . . . . . . . . . . . . . . . . . . . . . . . . . . . . . . . . . . . . . . . . . . . . . . . . . . . . . . . . . . . . . . . . . . . . . . . . . . . . . . . . . . . . . . . . . . . . . . . . . . . . . . . . . . . . . 130Data Protection .... . . . . . . . . . . . . . . . . . . . . . . . . . . . . . . . . . . . . . . . . . . . . . . . . . . . . . . . . . . . . . . . . . . . . . . . . . . . . . . . . . . . . . . . . . . . . . . . . . . . . . . . . . . . . . . . . . . 130
Protecting Data in the Cloud .... . . . . . . . . . . . . . . . . . . . . . . . . . . . . . . . . . . . . . . . . . . . . . . . . . . . . . . . . . . . . . . . . . . . . . . . . . . . . . . . . . . . . . . . 131Protecting Data On Your Device .... . . . . . . . . . . . . . . . . . . . . . . . . . . . . . . . . . . . . . . . . . . . . . . . . . . . . . . . . . . . . . . . . . . . . . . . . . . . . . . . . . . . 131
Identity and Access Management .... . . . . . . . . . . . . . . . . . . . . . . . . . . . . . . . . . . . . . . . . . . . . . . . . . . . . . . . . . . . . . . . . . . . . . . . . . . . . . . . . . . . . . . . . . . 132Access Control for Console and Jobs .... . . . . . . . . . . . . . . . . . . . . . . . . . . . . . . . . . . . . . . . . . . . . . . . . . . . . . . . . . . . . . . . . . . . . . . . . . . . . . 133
Logging and Monitoring .... . . . . . . . . . . . . . . . . . . . . . . . . . . . . . . . . . . . . . . . . . . . . . . . . . . . . . . . . . . . . . . . . . . . . . . . . . . . . . . . . . . . . . . . . . . . . . . . . . . . . . . 146Compliance Validation .... . . . . . . . . . . . . . . . . . . . . . . . . . . . . . . . . . . . . . . . . . . . . . . . . . . . . . . . . . . . . . . . . . . . . . . . . . . . . . . . . . . . . . . . . . . . . . . . . . . . . . . . . . 147Resilience .... . . . . . . . . . . . . . . . . . . . . . . . . . . . . . . . . . . . . . . . . . . . . . . . . . . . . . . . . . . . . . . . . . . . . . . . . . . . . . . . . . . . . . . . . . . . . . . . . . . . . . . . . . . . . . . . . . . . . . . . . . . 147Infrastructure Security ... . . . . . . . . . . . . . . . . . . . . . . . . . . . . . . . . . . . . . . . . . . . . . . . . . . . . . . . . . . . . . . . . . . . . . . . . . . . . . . . . . . . . . . . . . . . . . . . . . . . . . . . . . . 147
Data Validation .... . . . . . . . . . . . . . . . . . . . . . . . . . . . . . . . . . . . . . . . . . . . . . . . . . . . . . . . . . . . . . . . . . . . . . . . . . . . . . . . . . . . . . . . . . . . . . . . . . . . . . . . . . . . . . . . . . . . . . . . . . . 149Checksum Validation of Transferred Data .... . . . . . . . . . . . . . . . . . . . . . . . . . . . . . . . . . . . . . . . . . . . . . . . . . . . . . . . . . . . . . . . . . . . . . . . . . . . . . . 149Common Validation Errors ... . . . . . . . . . . . . . . . . . . . . . . . . . . . . . . . . . . . . . . . . . . . . . . . . . . . . . . . . . . . . . . . . . . . . . . . . . . . . . . . . . . . . . . . . . . . . . . . . . . . . 149Manual Data Validation for Snowball Edge After Import into Amazon S3 .... . . . . . . . . . . . . . . . . . . . . . . . . . . . . . . . . . . . 150
Notifications .... . . . . . . . . . . . . . . . . . . . . . . . . . . . . . . . . . . . . . . . . . . . . . . . . . . . . . . . . . . . . . . . . . . . . . . . . . . . . . . . . . . . . . . . . . . . . . . . . . . . . . . . . . . . . . . . . . . . . . . . . . . . . . . 151Logging with AWS CloudTrail .. . . . . . . . . . . . . . . . . . . . . . . . . . . . . . . . . . . . . . . . . . . . . . . . . . . . . . . . . . . . . . . . . . . . . . . . . . . . . . . . . . . . . . . . . . . . . . . . . . . . . . . . . . 152
AWS Snowball Edge Information in CloudTrail .. . . . . . . . . . . . . . . . . . . . . . . . . . . . . . . . . . . . . . . . . . . . . . . . . . . . . . . . . . . . . . . . . . . . . . . . . . . 152Understanding Log File Entries for AWS Snowball Edge .... . . . . . . . . . . . . . . . . . . . . . . . . . . . . . . . . . . . . . . . . . . . . . . . . . . . . . . . . . . . 153
Specifications .... . . . . . . . . . . . . . . . . . . . . . . . . . . . . . . . . . . . . . . . . . . . . . . . . . . . . . . . . . . . . . . . . . . . . . . . . . . . . . . . . . . . . . . . . . . . . . . . . . . . . . . . . . . . . . . . . . . . . . . . . . . . . . 154Snowball Edge Storage Optimized (For Data Transfer) Specifications .... . . . . . . . . . . . . . . . . . . . . . . . . . . . . . . . . . . . . . . . . . 154Snowball Edge Storage Optimized Specifications .... . . . . . . . . . . . . . . . . . . . . . . . . . . . . . . . . . . . . . . . . . . . . . . . . . . . . . . . . . . . . . . . . . . . . 155Snowball Edge Compute Optimized Specifications .... . . . . . . . . . . . . . . . . . . . . . . . . . . . . . . . . . . . . . . . . . . . . . . . . . . . . . . . . . . . . . . . . . . 156Supported Network Hardware .... . . . . . . . . . . . . . . . . . . . . . . . . . . . . . . . . . . . . . . . . . . . . . . . . . . . . . . . . . . . . . . . . . . . . . . . . . . . . . . . . . . . . . . . . . . . . . . 157
Quotas .... . . . . . . . . . . . . . . . . . . . . . . . . . . . . . . . . . . . . . . . . . . . . . . . . . . . . . . . . . . . . . . . . . . . . . . . . . . . . . . . . . . . . . . . . . . . . . . . . . . . . . . . . . . . . . . . . . . . . . . . . . . . . . . . . . . . . . . 160
v
AWS Snowball Edge Developer Guide
Limitations AWS Snowball Edge Jobs .... . . . . . . . . . . . . . . . . . . . . . . . . . . . . . . . . . . . . . . . . . . . . . . . . . . . . . . . . . . . . . . . . . . . . . . . . . . . . . . . . . . . . 160Limitations on Transferring On-Premises Data with an AWS Snowball Edge Device .... . . . . . . . . . . . . . . . . . . . . . . 160Limitations for Lambda Powered by AWS IoT Greengrass .... . . . . . . . . . . . . . . . . . . . . . . . . . . . . . . . . . . . . . . . . . . . . . . . . . . . . . . . . . 160Limitations on Shipping an AWS Snowball Edge .... . . . . . . . . . . . . . . . . . . . . . . . . . . . . . . . . . . . . . . . . . . . . . . . . . . . . . . . . . . . . . . . . . . . . . 161Limitations on Processing Your Returned AWS Snowball Edge for Import ... . . . . . . . . . . . . . . . . . . . . . . . . . . . . . . . . . . . . 161
Troubleshooting .... . . . . . . . . . . . . . . . . . . . . . . . . . . . . . . . . . . . . . . . . . . . . . . . . . . . . . . . . . . . . . . . . . . . . . . . . . . . . . . . . . . . . . . . . . . . . . . . . . . . . . . . . . . . . . . . . . . . . . . . . . 162How to Identify Your Device .... . . . . . . . . . . . . . . . . . . . . . . . . . . . . . . . . . . . . . . . . . . . . . . . . . . . . . . . . . . . . . . . . . . . . . . . . . . . . . . . . . . . . . . . . . . . . . . . . 162Troubleshooting Connection Problems .... . . . . . . . . . . . . . . . . . . . . . . . . . . . . . . . . . . . . . . . . . . . . . . . . . . . . . . . . . . . . . . . . . . . . . . . . . . . . . . . . . . 163Troubleshooting Manifest File Problems .... . . . . . . . . . . . . . . . . . . . . . . . . . . . . . . . . . . . . . . . . . . . . . . . . . . . . . . . . . . . . . . . . . . . . . . . . . . . . . . . . 163Troubleshooting Credentials Problems .... . . . . . . . . . . . . . . . . . . . . . . . . . . . . . . . . . . . . . . . . . . . . . . . . . . . . . . . . . . . . . . . . . . . . . . . . . . . . . . . . . . . 163
Unable to Locate AWS CLI Credentials ... . . . . . . . . . . . . . . . . . . . . . . . . . . . . . . . . . . . . . . . . . . . . . . . . . . . . . . . . . . . . . . . . . . . . . . . . . . . 163Error Message: Check Your Secret Access Key and Signing .... . . . . . . . . . . . . . . . . . . . . . . . . . . . . . . . . . . . . . . . . . . . . . . . . 163
Troubleshooting Data Transfer Problems .... . . . . . . . . . . . . . . . . . . . . . . . . . . . . . . . . . . . . . . . . . . . . . . . . . . . . . . . . . . . . . . . . . . . . . . . . . . . . . . . 164Troubleshooting Problems with Transferring Data with the File Interface .... . . . . . . . . . . . . . . . . . . . . . . . . . . . 164
Troubleshooting AWS CLI Problems .... . . . . . . . . . . . . . . . . . . . . . . . . . . . . . . . . . . . . . . . . . . . . . . . . . . . . . . . . . . . . . . . . . . . . . . . . . . . . . . . . . . . . . . 165AWS CLI Error Message: "Profile Cannot Be Null" ... . . . . . . . . . . . . . . . . . . . . . . . . . . . . . . . . . . . . . . . . . . . . . . . . . . . . . . . . . . . . . 165Null Pointer Error When Transferring Data with the AWS CLI ... . . . . . . . . . . . . . . . . . . . . . . . . . . . . . . . . . . . . . . . . . . . . . 165
Troubleshooting Import Job Problems .... . . . . . . . . . . . . . . . . . . . . . . . . . . . . . . . . . . . . . . . . . . . . . . . . . . . . . . . . . . . . . . . . . . . . . . . . . . . . . . . . . . . 165Troubleshooting Export Job Problems .... . . . . . . . . . . . . . . . . . . . . . . . . . . . . . . . . . . . . . . . . . . . . . . . . . . . . . . . . . . . . . . . . . . . . . . . . . . . . . . . . . . . 166
Additional Information .... . . . . . . . . . . . . . . . . . . . . . . . . . . . . . . . . . . . . . . . . . . . . . . . . . . . . . . . . . . . . . . . . . . . . . . . . . . . . . . . . . . . . . . . . . . . . . . . . . . . . . . . . . . . . . . . . 167Using the Snowball Client ... . . . . . . . . . . . . . . . . . . . . . . . . . . . . . . . . . . . . . . . . . . . . . . . . . . . . . . . . . . . . . . . . . . . . . . . . . . . . . . . . . . . . . . . . . . . . . . . . . . . . 167
Downloading and Installing the Snowball Client ... . . . . . . . . . . . . . . . . . . . . . . . . . . . . . . . . . . . . . . . . . . . . . . . . . . . . . . . . . . . . . . 167Commands for the Snowball Client ... . . . . . . . . . . . . . . . . . . . . . . . . . . . . . . . . . . . . . . . . . . . . . . . . . . . . . . . . . . . . . . . . . . . . . . . . . . . . . . . . 167Unlocking the AWS Snowball Edge Device .... . . . . . . . . . . . . . . . . . . . . . . . . . . . . . . . . . . . . . . . . . . . . . . . . . . . . . . . . . . . . . . . . . . . . . 171
Clustering Overview .... . . . . . . . . . . . . . . . . . . . . . . . . . . . . . . . . . . . . . . . . . . . . . . . . . . . . . . . . . . . . . . . . . . . . . . . . . . . . . . . . . . . . . . . . . . . . . . . . . . . . . . . . . . . . 172Snowball Edge Cluster Quorums .... . . . . . . . . . . . . . . . . . . . . . . . . . . . . . . . . . . . . . . . . . . . . . . . . . . . . . . . . . . . . . . . . . . . . . . . . . . . . . . . . . . . 172Cluster Job Considerations .... . . . . . . . . . . . . . . . . . . . . . . . . . . . . . . . . . . . . . . . . . . . . . . . . . . . . . . . . . . . . . . . . . . . . . . . . . . . . . . . . . . . . . . . . . . . 173Related Topics ... . . . . . . . . . . . . . . . . . . . . . . . . . . . . . . . . . . . . . . . . . . . . . . . . . . . . . . . . . . . . . . . . . . . . . . . . . . . . . . . . . . . . . . . . . . . . . . . . . . . . . . . . . . . . . 173Administrating a Cluster ... . . . . . . . . . . . . . . . . . . . . . . . . . . . . . . . . . . . . . . . . . . . . . . . . . . . . . . . . . . . . . . . . . . . . . . . . . . . . . . . . . . . . . . . . . . . . . . . 173
Using the File Interface .... . . . . . . . . . . . . . . . . . . . . . . . . . . . . . . . . . . . . . . . . . . . . . . . . . . . . . . . . . . . . . . . . . . . . . . . . . . . . . . . . . . . . . . . . . . . . . . . . . . . . . . . 176Overview of the File Interface .... . . . . . . . . . . . . . . . . . . . . . . . . . . . . . . . . . . . . . . . . . . . . . . . . . . . . . . . . . . . . . . . . . . . . . . . . . . . . . . . . . . . . . . 177Mounting a Bucket with the File Interface .... . . . . . . . . . . . . . . . . . . . . . . . . . . . . . . . . . . . . . . . . . . . . . . . . . . . . . . . . . . . . . . . . . . . . . 178Monitoring the File Interface .... . . . . . . . . . . . . . . . . . . . . . . . . . . . . . . . . . . . . . . . . . . . . . . . . . . . . . . . . . . . . . . . . . . . . . . . . . . . . . . . . . . . . . . . . 180
Using AWS Lambda .... . . . . . . . . . . . . . . . . . . . . . . . . . . . . . . . . . . . . . . . . . . . . . . . . . . . . . . . . . . . . . . . . . . . . . . . . . . . . . . . . . . . . . . . . . . . . . . . . . . . . . . . . . . . . 182Before You Start ... . . . . . . . . . . . . . . . . . . . . . . . . . . . . . . . . . . . . . . . . . . . . . . . . . . . . . . . . . . . . . . . . . . . . . . . . . . . . . . . . . . . . . . . . . . . . . . . . . . . . . . . . . 183Getting Started with Lambda .... . . . . . . . . . . . . . . . . . . . . . . . . . . . . . . . . . . . . . . . . . . . . . . . . . . . . . . . . . . . . . . . . . . . . . . . . . . . . . . . . . . . . . . . 184
API Reference .... . . . . . . . . . . . . . . . . . . . . . . . . . . . . . . . . . . . . . . . . . . . . . . . . . . . . . . . . . . . . . . . . . . . . . . . . . . . . . . . . . . . . . . . . . . . . . . . . . . . . . . . . . . . . . . . . . . . . . . . . . . . . . 187Document History .... . . . . . . . . . . . . . . . . . . . . . . . . . . . . . . . . . . . . . . . . . . . . . . . . . . . . . . . . . . . . . . . . . . . . . . . . . . . . . . . . . . . . . . . . . . . . . . . . . . . . . . . . . . . . . . . . . . . . . . 188AWS glossary .... . . . . . . . . . . . . . . . . . . . . . . . . . . . . . . . . . . . . . . . . . . . . . . . . . . . . . . . . . . . . . . . . . . . . . . . . . . . . . . . . . . . . . . . . . . . . . . . . . . . . . . . . . . . . . . . . . . . . . . . . . . . . . 193
vi

AWS Snowball Edge Developer Guide
This guide is for the Snowball Edge. If you are looking for documentation for the Snowball, see the AWSSnowball User Guide.
vii
AWS Snowball Edge Developer GuideAWS Snowball Edge Features
What Is an AWS Snowball Edge?The AWS Snowball Edge is a type of Snowball device with on-board storage and compute power forselect AWS capabilities. Snowball Edge can undertake local processing and edge-computing workloads inaddition to transferring data between your local environment and the AWS Cloud.
Each Snowball Edge device can transport data at speeds faster than the internet. This transport is doneby shipping the data in the appliances through a regional carrier. The appliances are rugged shippingcontainers, complete with E Ink shipping labels. The AWS Snowball Edge device differs from the standardSnowball because it can bring the power of the AWS Cloud to your on-premises location, with localstorage and compute functionality.
Snowball Edge devices have three options for device configurations – storage optimized, computeoptimized, and with GPU. When this guide refers to Snowball Edge devices, it's referring to all options ofthe device. Whenever specific information applies only to one or more optional configurations of devices,like how the Snowball Edge with GPU has an on-board GPU, it will be called out. For more information,see Snowball Edge Device Options (p. 3).
AWS Snowball Edge FeaturesSnowball Edge devices have the following features:
• Large amounts of storage capacity or compute functionality for devices, depending on the options youchoose when you create your job.
• Network adapters with transfer speeds of up to 100 GB/second.• Encryption is enforced, protecting your data at rest and in physical transit.• You can import or export data between your local environments and Amazon S3, physically
transporting the data with one or more devices, completely bypassing the internet.• AWS Snowball Edge devices are their own rugged shipping containers, and the built-in E Ink display
changes to show your shipping label when the device is ready to ship.• Snowball Edge devices come with an on-board LCD display that can be used to manage network
connections and get service status information.• You can cluster Snowball Edge devices for local storage and compute jobs to achieve 99.999 percent
data durability across 5–10 devices, and to locally grow and shrink storage on demand.• You can use the file interface to read and write data to an AWS Snowball Edge device through a file
share or Network File System (NFS) mount point.• You can write Python-language Lambda functions and associate them with Amazon S3 buckets when
you create an AWS Snowball Edge device job. Each function triggers whenever there's a local AmazonS3 PUT object action executed on the associated bucket on the appliance.
• Snowball Edge devices have Amazon S3 and Amazon EC2 compatible endpoints available, enablingprogrammatic use cases.
• Snowball Edge devices support the new sbe1, sbe-c, and sbe-g instance types, which you can use torun compute instances on the device using Amazon Machine Images (AMIs).
Prerequisites for Using Snowball EdgeBefore creating your first job, keep the following in mind.
1
AWS Snowball Edge Developer GuideRelated Services
For jobs where you import data into Amazon S3, take these steps:
• Create an AWS account with AWS Identity and Access Management (IAM) administrator-levelpermissions. For more information, see Setting Up Your AWS Access for AWS Snowball Edge (p. 11).
• Confirm that the files and folders to transfer are named according to the object key naming guidelinesfor Amazon S3. Any files or folders with names that don't meet these guidelines aren't imported intoAmazon S3.
• Plan what data you want to import into Amazon S3. For more information, see How to TransferPetabytes of Data Efficiently (p. 35).
Before exporting data from Amazon S3, take these steps:
• Understand what data is exported when you create your job. For more information, see Using ExportRanges (p. 17).
• For any files with a colon (:) in the file name, change the file names in Amazon S3 before you createthe export job to get these files. Files with a colon in the file name fail export to Microsoft WindowsServer.
For jobs using compute instances:
• Before you can add any AMIs to your job, you must have an AMI created in your AWS account of thesupported image type. Currently, supported AMIs are based on the CentOS 7 (x86_64) - with UpdatesHVM, Ubuntu Server 14.04 LTS (HVM), and Ubuntu 16.04 LTS - Xenial (HVM) images. You can get theseimages from the AWS Marketplace.
• If you're going to SSH into the instances running on a Snowball Edge, you must already have the keypair for connecting to the instance.
• For information specific to using compute instances on a device, see Using Amazon EC2 ComputeInstances (p. 72).
Services Related to the AWS Snowball EdgeYou can use AWS Snowball with an AWS Snowball Edge device with the following related AWS services:
• Amazon S3 – You can use the Amazon S3 Adapter for Snowball, which supports a subset of theAmazon S3 API actions, to transfer data onto an AWS Snowball Edge device. You can do this in a singleAWS Snowball Edge device or in a cluster of devices for increased data durability. In addition, you canimport data hosted on an AWS Snowball Edge device into Amazon S3 and your local environmentthrough a shipped AWS Snowball Edge device. For more information on using Amazon S3, see theAmazon Simple Storage Service Getting Started Guide.
• Amazon EC2 – You can use the Amazon EC2 compatible endpoint, which supports a subset of theAmazon EC2 API actions, to run compute instances on a Snowball Edge device. For more informationon using Amazon EC2 in AWS, see Amazon EC2 Getting Started Guide.
• AWS Lambda powered by AWS Greengrass – You can trigger Lambda functions based on Amazon S3storage actions made on an AWS Snowball Edge device. These Lambda functions are associated withan AWS Snowball Edge device during job creation. For more information on using Lambda, see theAWS Lambda Developer Guide.
NoteCompute instances and AWS Lambda powered by AWS Greengrass are not supported in the AsiaPacific (Mumbai) AWS Region.
2
AWS Snowball Edge Developer GuideService Access
Service AccessYou can either use the AWS Snowball Management Console or the job management API to create andmanage jobs. For more information on the job management API, see Job Management API Reference forAWS Snowball.
Accessing an AWS Snowball Edge DeviceAfter your Snowball Edge device or devices are onsite, you can access them through either the LCDdisplay built into each device, the Amazon S3 and Amazon EC2 compatible endpoints, or through theavailable file interface. For more information, see Using an AWS Snowball Edge Device (p. 38).
Pricing for the AWS Snowball EdgeFor information about the pricing and fees associated with the service and its appliances, see AWSSnowball Edge Pricing.
Are You a First-Time AWS Snowball User?If you are a first-time user of the AWS Snowball service with the AWS Snowball Edge device, werecommend that you read the following sections in order:
1. For information on the device types and options, see AWS Snowball Device Differences (p. 3).2. To learn more about the types of jobs, see Understanding AWS Snowball Edge Jobs (p. 14).3. For an end-to-end overview of how to use an AWS Snowball Edge device, see How AWS Snowball
Works with the Snowball Edge (p. 8).4. When you're ready to get started, see Getting Started with an AWS Snowball Edge Device (p. 22).5. For information about using compute instances on a device, see Using Amazon EC2 Compute
Instances (p. 72).
AWS Snowball Device DifferencesThe Snowball and the Snowball Edge are two different devices. This guide is for the Snowball Edge. Ifyou are looking for documentation for the Snowball, see the AWS Snowball User Guide. Both devicesallow you to move huge amounts of data into and out of Amazon S3, they both have the same jobmanagement API, and they both use the same console. However, the two devices differ in hardwarespecifications, some features, what transfer tools are used, and price.
Snowball Edge Device OptionsSnowball Edge devices have the following options for device configurations:
• Snowball Edge Storage Optimized (for data transfer) – This Snowball Edge device option has a 100TB (80 TB usable) storage capacity.
• Snowball Edge Storage Optimized (with EC2 compute functionality) – This Snowball Edge deviceoption has up to 80 TB of usable storage space, 24 vCPUs, and 32 GiB of memory for computefunctionality. It also comes with 1 TB of additional SSD storage space for block volumes attached toAmazon EC2 AMIs.
• Snowball Edge Compute Optimized – This Snowball Edge device option has the most computefunctionality, with 52 vCPUs, 208 GiB of memory, and 42 TB (39.5 usable) plus 7.68 TB of dedicated
3
AWS Snowball Edge Developer GuideSnowball Edge Device Options
NVMe SSD for compute instances for block storage volumes for EC2 compute instances, and 42 TB ofHDD capacity for either object storage or block storage volumes.
• Snowball Edge Compute Optimized with GPU – This Snowball Edge device option is identical tothe compute optimized option, save for an installed GPU, equivalent to the one available in the P3Amazon EC2 instance type. It has a storage capacity of 42 TB (39.5 TB of HDD storage that can be usedfor a combination of Amazon S3 compatible object storage and Amazon EBS compatible block storagevolumes) plus 7.68 TB of dedicated NVMe SSD for compute instances.
For more information about the compute functionality of these three options, see Using Amazon EC2Compute Instances (p. 72).
NoteWhen this guide refers to Snowball Edge devices, it's referring to all optional variants of thedevice. Whenever specific information applies only to one or more optional configurations ofdevices, like how the Snowball Edge Compute Optimized with GPU option has an on-board GPUperipheral, it is mentioned explicitly.
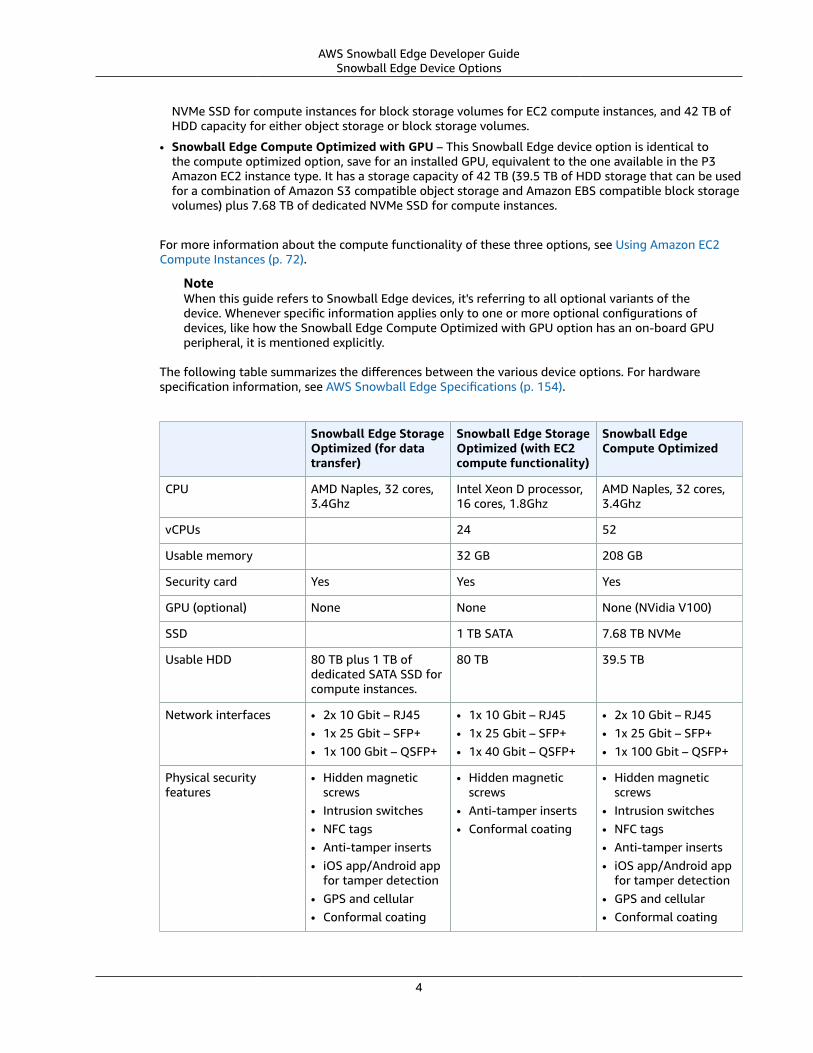
The following table summarizes the differences between the various device options. For hardwarespecification information, see AWS Snowball Edge Specifications (p. 154).
Snowball Edge StorageOptimized (for datatransfer)
Snowball Edge StorageOptimized (with EC2compute functionality)
Snowball EdgeCompute Optimized
CPU AMD Naples, 32 cores,3.4Ghz
Intel Xeon D processor,16 cores, 1.8Ghz
AMD Naples, 32 cores,3.4Ghz
vCPUs 24 52
Usable memory 32 GB 208 GB
Security card Yes Yes Yes
GPU (optional) None None None (NVidia V100)
SSD 1 TB SATA 7.68 TB NVMe
Usable HDD 80 TB plus 1 TB ofdedicated SATA SSD forcompute instances.
80 TB 39.5 TB
Network interfaces • 2x 10 Gbit – RJ45• 1x 25 Gbit – SFP+• 1x 100 Gbit – QSFP+
• 1x 10 Gbit – RJ45• 1x 25 Gbit – SFP+• 1x 40 Gbit – QSFP+
• 2x 10 Gbit – RJ45• 1x 25 Gbit – SFP+• 1x 100 Gbit – QSFP+
Physical securityfeatures
• Hidden magneticscrews
• Intrusion switches• NFC tags• Anti-tamper inserts• iOS app/Android app
for tamper detection• GPS and cellular• Conformal coating
• Hidden magneticscrews
• Anti-tamper inserts• Conformal coating
• Hidden magneticscrews
• Intrusion switches• NFC tags• Anti-tamper inserts• iOS app/Android app
for tamper detection• GPS and cellular• Conformal coating
4
AWS Snowball Edge Developer GuideUse Case Differences
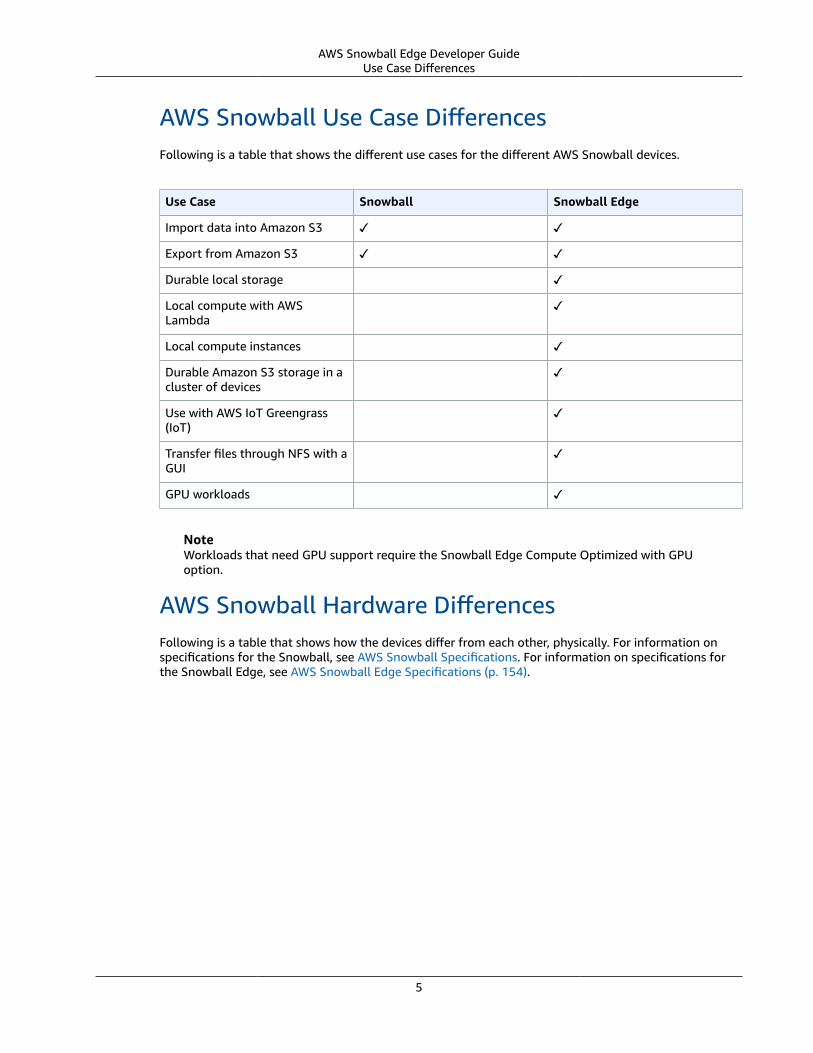
AWS Snowball Use Case DifferencesFollowing is a table that shows the different use cases for the different AWS Snowball devices.
Use Case Snowball Snowball Edge
Import data into Amazon S3 ✓ ✓
Export from Amazon S3 ✓ ✓
Durable local storage ✓
Local compute with AWSLambda
✓
Local compute instances ✓
Durable Amazon S3 storage in acluster of devices
✓
Use with AWS IoT Greengrass(IoT)
✓
Transfer files through NFS with aGUI
✓
GPU workloads ✓
NoteWorkloads that need GPU support require the Snowball Edge Compute Optimized with GPUoption.
AWS Snowball Hardware DifferencesFollowing is a table that shows how the devices differ from each other, physically. For information onspecifications for the Snowball, see AWS Snowball Specifications. For information on specifications forthe Snowball Edge, see AWS Snowball Edge Specifications (p. 154).
5
AWS Snowball Edge Developer GuideTool Differences
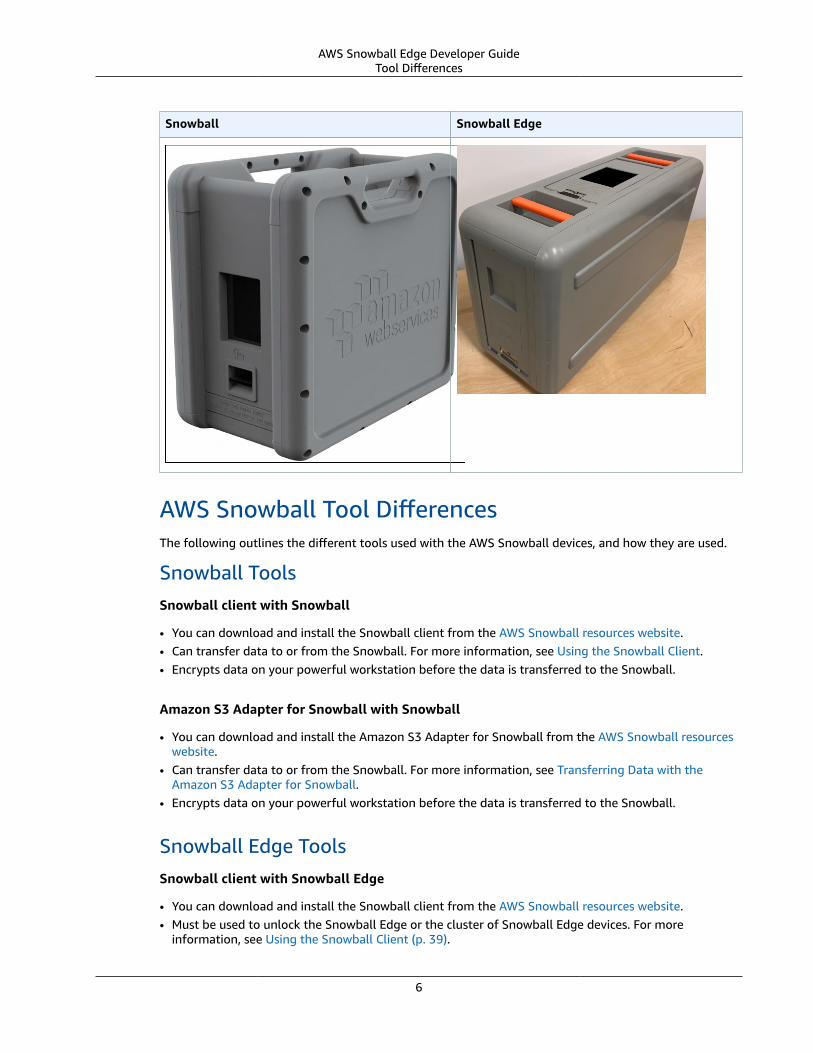
Snowball Snowball Edge
AWS Snowball Tool DifferencesThe following outlines the different tools used with the AWS Snowball devices, and how they are used.
Snowball ToolsSnowball client with Snowball
• You can download and install the Snowball client from the AWS Snowball resources website.• Can transfer data to or from the Snowball. For more information, see Using the Snowball Client.• Encrypts data on your powerful workstation before the data is transferred to the Snowball.
Amazon S3 Adapter for Snowball with Snowball
• You can download and install the Amazon S3 Adapter for Snowball from the AWS Snowball resourceswebsite.
• Can transfer data to or from the Snowball. For more information, see Transferring Data with theAmazon S3 Adapter for Snowball.
• Encrypts data on your powerful workstation before the data is transferred to the Snowball.
Snowball Edge ToolsSnowball client with Snowball Edge
• You can download and install the Snowball client from the AWS Snowball resources website.• Must be used to unlock the Snowball Edge or the cluster of Snowball Edge devices. For more
information, see Using the Snowball Client (p. 39).
6
AWS Snowball Edge Developer GuideTool Differences
• Doesn't transfer data.
AWS OpsHub for Snow Family
• The Snow Family Devices now offer a user-friendly tool, AWS OpsHub for Snow Family, that you canuse to manage your devices and local AWS services. You use AWS OpsHub on a client computer toperform tasks such as unlocking and configuring single or clustered devices, transferring files, andlaunching and managing instances running on Snow Family Devices.For more information, see UsingAWS OpsHub for Snow Family to Manage Snowball Devices.
Amazon S3 Adapter for Snowball with Snowball Edge
• Is already installed on the Snowball Edge by default. It does not need to be downloaded or installed.• Can transfer data to or from the Snowball Edge. For more information, see Transferring Files Using the
Amazon S3 Adapter (p. 51).• Encrypts data on the Snowball Edge while the data is transferred to the device.
File interface with Snowball Edge
• Is already installed on the Snowball Edge by default. It does not need to be downloaded or installed.• Can transfer data by dragging and dropping files up to 150 GB in size from your computer to the
buckets on the Snowball Edge through an easy-to-configure NFS mount point. For more information,see Transferring Files to AWS Snowball Edge Using the File Interface (p. 59).
• Encrypts data on the Snowball Edge while the data is transferred to the device.
AWS IoT Greengrass console with Snowball Edge
• With a Snowball Edge, you can use the AWS IoT Greengrass console to update your AWS IoTGreengrass group and the core running on the Snowball Edge.
Differences Between Items Provided for the Snowball andSnowball EdgeThe following outlines the differences between the network adapters, cables used, and cables providedfor the Snowball and Snowball Edge.
Network Interface Snowball Support Snowball EdgeSupport
Cables Provided withDevice
RJ45 ✓ ✓ Only provided withSnowball
SFP+ ✓ ✓ Only provided withSnowball
SFP+ (with opticconnector)
✓ ✓ No cables provided foreither device. No opticconnector provided forSnowball Edge devices.An optic connector isprovided with eachSnowball
7
AWS Snowball Edge Developer GuideOther Differences
Network Interface Snowball Support Snowball EdgeSupport
Cables Provided withDevice
QSFP ✓ No cables or opticsprovided
For more information on the network interfaces, cables, and connectors that work with the differentdevice types, see the following topics:
• Supported Network Hardware in the AWS Snowball User Guide.
• Supported Network Hardware (p. 157) in this guide.
AWS Snowball Other DifferencesFor other differences, including FAQs and pricing information, see:
• http://www.amazonaws.cn/snowball
• http://www.amazonaws.cn/snowball-edge
How AWS Snowball Works with the Snowball EdgeWith AWS Snowball, Edge you can use one of two devices. From this guide, you can learn how to useAWS Snowball with an AWS Snowball Edge device. The devices are owned by AWS, and they reside atyour on-premises location while they're in use.
There are three job types you can use with an AWS Snowball Edge device. Although the job types differin their use cases, every job type has the same workflow for how you order, receive, and return devices.
The shared workflow
1. Create the job – Each job is created in the AWS Snowball Management Console or programmaticallythrough the job management API, and the status for a job can be tracked in the console or throughthe API.
2. A device is prepared for your job – We prepare an AWS Snowball Edge device for your job, and thestatus of your job is now Preparing Snowball.
3. A device is shipped to you by your region's carrier – The carrier takes over from here, and the statusof your job is now In transit to you. You can find your tracking number and a link to the trackingwebsite on the console or with the job management API. For information on who your region's carrieris, see Shipping Considerations for AWS Snowball (p. 117).
4. Receive the device – A few days later, your region's carrier delivers the AWS Snowball Edge deviceto the address that you provided when you created the job, and the status of your job changes toDelivered to you. When it arrives, you’ll notice that it didn’t arrive in a box, because the device is itsown shipping container.
5. Get your credentials and download the Snowball client – Get ready to start transferring data bygetting your credentials, your job manifest, and the manifest's unlock code, and then downloading theSnowball client.
• The Snowball client is the tool that you’ll use to manage the flow of data from the device to youron-premises data destination.
You can download and install the Snowball client from the AWS Snowball resources website.
8
AWS Snowball Edge Developer GuideHow Import Works
• The manifest is used to authenticate your access to the device, and it is encrypted so that only theunlock code can decrypt it. You can get the manifest from the console or with the job managementAPI when the device is on-premises at your location.
• The unlock code is a 29-character code used to decrypt the manifest. You can get the unlock codefrom the console or with the job management API. We recommend that you keep the unlock codesaved somewhere separate from the manifest to prevent unauthorized access to the device while it’sat your facility.
6. Position the hardware – Move the device into your data center and open it following the instructionson the case. Connect the device to power and your local network.
7. Power on the device – Next, power on the device by pressing the power button above the LCD display.Wait a few minutes, and the Ready screen appears.
8. Get the IP address for the device – The LCD display has a CONNECTION tab on it. Tap this tab andget the IP address for the AWS Snowball Edge device.
9. Use the Snowball client to unlock the device – When you use the Snowball client to unlock the AWSSnowball Edge device, type the IP address of the device, the path to your manifest, and the unlockcode. The Snowball client decrypts the manifest and uses it to authenticate your access to the device.
NoteFor a cluster job, there are additional steps; see How Clustered Local Compute and StorageWorks (p. 10).
10.Use the device – The device is up and running. You can use it to transfer data or for local compute andstorage. You can read and write data with the Amazon S3 Adapter for Snowball or the Network FileSystem (NFS) mount point.
11.Prepare the device for its return trip – After you're done with the device in your on-premises locationand the file interface status is Complete, press the power button above the LCD display. It takes about20 seconds or so for the device to power off. Unplug the device and its power cables into the cablenook on top of the device, and shut all three of the device's doors. The device is now ready to bereturned.
12.Your region's carrier returns the device to AWS – When the carrier has the AWS Snowball Edgedevice, the status for the job becomes In transit to AWS.
NoteFor export and cluster jobs, there are additional steps; see How Export Works (p. 10) andHow Clustered Local Compute and Storage Works (p. 10).
Topics
• How Import Works (p. 9)
• How Export Works (p. 10)
• How Local Compute and Storage Works (p. 10)
• Snowball Edge Videos and Blogs (p. 10)
How Import WorksEach import job uses a single Snowball appliance. After you create a job in the AWS SnowballManagement Console or the job management API, we ship you a Snowball. When it arrives in a few days,you’ll connect the Snowball to your network and transfer the data that you want imported into AmazonS3 onto the device. When you’re done transferring data, ship the Snowball back to AWS, and we’ll importyour data into Amazon S3.
9
AWS Snowball Edge Developer GuideHow Export Works
How Export WorksEach export job can use any number of AWS Snowball Edge devices. After you create a job in the AWSSnowball Management Console or the job management API, a listing operation starts in Amazon S3. Thislisting operation splits your job into parts. Each job part has exactly one device associated with it. Afteryour job parts are created, your first job part enters the Preparing Snowball status.
NoteThe listing operation to split your job into parts is a function of Amazon S3, and you are billedfor it as you are for any Amazon S3 operation.
Soon after that, we start exporting your data onto a device. Typically, exporting data takes one businessday; however, this process can take longer. Once the export is done, AWS gets the device ready for pickupby your region's carrier.
When it arrives in a few days, you’ll connect the AWS Snowball Edge device to your network and transferthe data that you want imported from Amazon S3 onto the device. When you’re done transferring data,ship the device back to AWS. Once we receive a returned device for your export job part, we erase itcompletely. This erasure follows the National Institute of Standards and Technology (NIST) 800-88standards. This step marks the completion of that particular job part. If there are more job parts, thenext job part now is prepared for shipping.
How Local Compute and Storage WorksYou can use the local compute and storage functionality of an AWS Snowball Edge device with all jobtypes in regions that support Lambda. The compute functionality is AWS Lambda powered by AWSGreengrass, where Python-language AWS Lambda functions can be triggered by Amazon S3 PUT objectactions on buckets specified when you created the job. For more information, see Local Compute andStorage Only Jobs (p. 19).
How Clustered Local Compute and Storage WorksA special kind of job for local storage and compute only, the cluster job is for those workloads thatrequire increased data durability and storage capacity. For more information, see Local ClusterOption (p. 20).
NoteAs with standalone local storage and compute jobs, the data stored in a cluster can't beimported into Amazon S3 without ordering additional devices as a part of separate import jobs.If you order these devices, you can transfer the data from the cluster to the devices and importthe data when you return the devices for the import jobs.
Clusters have anywhere from 5 to 10 AWS Snowball Edge devices, called nodes. When you receivethe nodes from your regional carrier, connect all the nodes to power and network to obtain their IPaddresses. With these IP addresses, you unlock all the nodes of the cluster at once with a single unlockcommand, with the IP address of one of the nodes. For more information, see Using the SnowballClient (p. 39).
You can write data to an unlocked cluster by using the Amazon S3 Adapter for Snowball or the NFSmount point through the leader node, and it distributes the data among the other nodes.
When you’re done with your cluster, ship all the nodes back to AWS. Once we receive a returned clusternode, we perform a complete erasure of the Snowball. This erasure follows the National Institute ofStandards and Technology (NIST) 800-88 standards.
Snowball Edge Videos and Blogs• AWS Snowball Edge Data Migration
10
AWS Snowball Edge Developer GuideSetting Up
• AWS OpsHub for Snow Family• Novetta delivers IoT and Machine Learning to the edge for disaster response• Enable large-scale database migrations with AWS DMS and AWS Snowball• Data Migration Best Practices with AWS Snowball Edge• AWS Snowball Resources
Setting Up Your AWS Access for AWS SnowballEdge
Before you use AWS Snowball for the first time, you need to complete the following tasks:
1. Sign Up for AWS (p. 11).
NoteIn the Asia Pacific (Mumbai) AWS Region service is provided by Amaz on Internet ServicesPrivate Limited (AISPL). For information on signing up for Amazon Web Services in the AsiaPacific (Mumbai) AWS Region, see Signing Up for AISPL.
2. Create an IAM User (p. 11).
Sign Up for AWSWhen you sign up for Amazon Web Services (AWS), your AWS account is automatically signed up for allservices in AWS, including AWS Snowball. You are charged only for the services that you use. For moreinformation about pricing and fees for AWS Snowball, see AWS Snowball Edge Pricing. AWS Snowball isnot free to use; for more information on what AWS services are free, see AWS Free Usage Tier.
If you have an AWS account already, skip to the next task. If you don't have an AWS account, use thefollowing procedure to create one.
To create an AWS account
1. Open https://portal.amazonaws.cn/billing/signup.2. Follow the online instructions.
Part of the sign-up procedure involves receiving a phone call and entering a verification code on thephone keypad.
Note your AWS account number, because you'll need it for the next task.
Create an IAM UserServices in AWS, such as AWS Snowball, require that you provide credentials when you access them, sothat the service can determine whether you have permission to access its resources. AWS recommendsnot using the root credentials of your AWS account to make requests. Instead, create an AWS Identityand Access Management (IAM) user, and grant that user full access. We refer to these users as IAM userswith administrator-level credentials.
You can use the administrator user credentials, instead of root credentials of your account, to interactwith AWS and perform tasks, such as to create an Amazon S3 bucket, create users, and grant thempermissions. For more information, see Root Account Credentials vs. IAM User Credentials in the AWSGeneral Reference and IAM Best Practices in IAM User Guide.
11
AWS Snowball Edge Developer GuideCreate an IAM User
If you signed up for AWS but have not created an IAM user for yourself, you can create one using the IAMconsole.
To create an administrator user for yourself and add the user to an administrators group(console)
1. Use your AWS account email address and password to sign in as the AWS account root user to theIAM console at https://console.aws.amazon.com/iam/.
NoteWe strongly recommend that you adhere to the best practice of using the AdministratorIAM user below and securely lock away the root user credentials. Sign in as the root useronly to perform a few account and service management tasks.
2. In the navigation pane, choose Users and then choose Add user.
3. For User name, enter Administrator.
4. Select the check box next to AWS Management Console access. Then select Custom password, andthen enter your new password in the text box.
5. (Optional) By default, AWS requires the new user to create a new password when first signing in. Youcan clear the check box next to User must create a new password at next sign-in to allow the newuser to reset their password after they sign in.
6. Choose Next: Permissions.
7. Under Set permissions, choose Add user to group.
8. Choose Create group.
9. In the Create group dialog box, for Group name enter Administrators.
10. Choose Filter policies, and then select AWS managed -job function to filter the table contents.
11. In the policy list, select the check box for AdministratorAccess. Then choose Create group.
NoteYou must activate IAM user and role access to Billing before you can use theAdministratorAccess permissions to access the AWS Billing and Cost Managementconsole. To do this, follow the instructions in step 1 of the tutorial about delegating accessto the billing console.
12. Back in the list of groups, select the check box for your new group. Choose Refresh if necessary tosee the group in the list.
13. Choose Next: Tags.
14. (Optional) Add metadata to the user by attaching tags as key-value pairs. For more informationabout using tags in IAM, see Tagging IAM Entities in the IAM User Guide.
15. Choose Next: Review to see the list of group memberships to be added to the new user. When youare ready to proceed, choose Create user.
You can use this same process to create more groups and users and to give your users access to your AWSaccount resources. To learn about using policies that restrict user permissions to specific AWS resources,see Access Management and Example Policies.
To sign in as this new IAM user, sign out of the AWS Management Console, then use the following URL,where your_aws_account_id is your AWS account number without the hyphens (for example, if yourAWS account number is 1234-5678-9012, your AWS account ID is 123456789012).
https://your_aws_account_id.signin.www.amazonaws.cn/console/
Type the IAM user name and password that you just created. When you're signed in, the navigation bardisplays "your_user_name @ your_aws_account_id".
12

AWS Snowball Edge Developer GuideNext Step
If you don't want the URL for your sign-in page to contain your AWS account ID, you can create anaccount alias. From the IAM dashboard, choose Create Account Alias and type an alias, such as yourcompany name. To sign in after you create an account alias, use the following URL.
https://your_account_alias.signin.www.amazonaws.cn/console/
To verify the sign-in link for IAM users for your account, open the IAM console and check under AWSAccount Alias on the dashboard.
If you're going to create AWS Snowball jobs through an IAM user that is not an administrator user, thatuser needs certain permissions to use the AWS Snowball Management Console effectively. For moreinformation on those permissions, see Permissions Required to Use the AWS Snowball Console (p. 139).
Next StepGetting Started with an AWS Snowball Edge Device (p. 22)
13
AWS Snowball Edge Developer GuideJob Details
Understanding AWS Snowball EdgeJobs
A job in AWS Snowball is a discrete unit of work, defined when you create it in the console or the jobmanagement API. With the AWS Snowball Edge device, there are three different job types, all of whichare capable of local storage and compute functionality. This functionality uses the file interface orAmazon S3 Adapter for Snowball to read and write data. It triggers Lambda functions based on AmazonS3 PUT object API actions running locally on the AWS Snowball Edge device.
ImportantWith an AWS Snowball Edge device, all jobs can use the compute functionality in regions whereAWS Lambda is supported. How the compute functionality is implemented in AWS Snowballjobs is specific to Snowball—the functionality can differ significantly from how Lambda worksin the cloud. Before creating your first compute job, we recommend that you familiarize yourselfwith how AWS Lambda powered by AWS Greengrass works. For more information, see UsingAWS Lambda with an AWS Snowball Edge (p. 66).
• Import Jobs into Amazon S3 (p. 16) – The transfer of 80 TB or less of your local data copied ontoa single device, and then moved into Amazon S3. For import jobs, AWS Snowball Edge devices andjobs have a one-to-one relationship. Each job has exactly one device associated with it. If you need toimport more data, you can create new import jobs or clone existing ones. When you return a device ofthis job type, that data on it is imported into Amazon S3.
• Export Jobs from Amazon S3 (p. 17) – The transfer of any amount of data (located in AmazonS3), copied onto any number of AWS Snowball Edge devices, and then moved one AWS SnowballEdge device at a time into your on-premises data destination. When you create an export job, it's splitinto job parts. Each job part is no more than 100 TB in size, and each job part has exactly one AWSSnowball Edge device associated with it. When you return a device of this job type, it's erased.
• Local Compute and Storage Only Jobs (p. 19) – These jobs involve one AWS Snowball Edge device,or multiple devices used in a cluster. These jobs don't start with data in their buckets like an export job,and can't have data imported into Amazon S3 at the end like an import job. When you return a deviceof this job type, it's erased. With this job type, you also have the option of creating a cluster of devices.A cluster improves local storage durability and you can scale up or down with local storage capacity.
In regions where Lambda is not available, this job type will be called Local storage only.
Job DetailsEach job is defined by the details that you specify when it's created. The following table describes all thedetails of a job.
Job StatusesEach job has a status, which changes to denote the current state of the job. This job status informationdoesn't reflect the health, the current processing state, or the storage used for the associated devices.
14
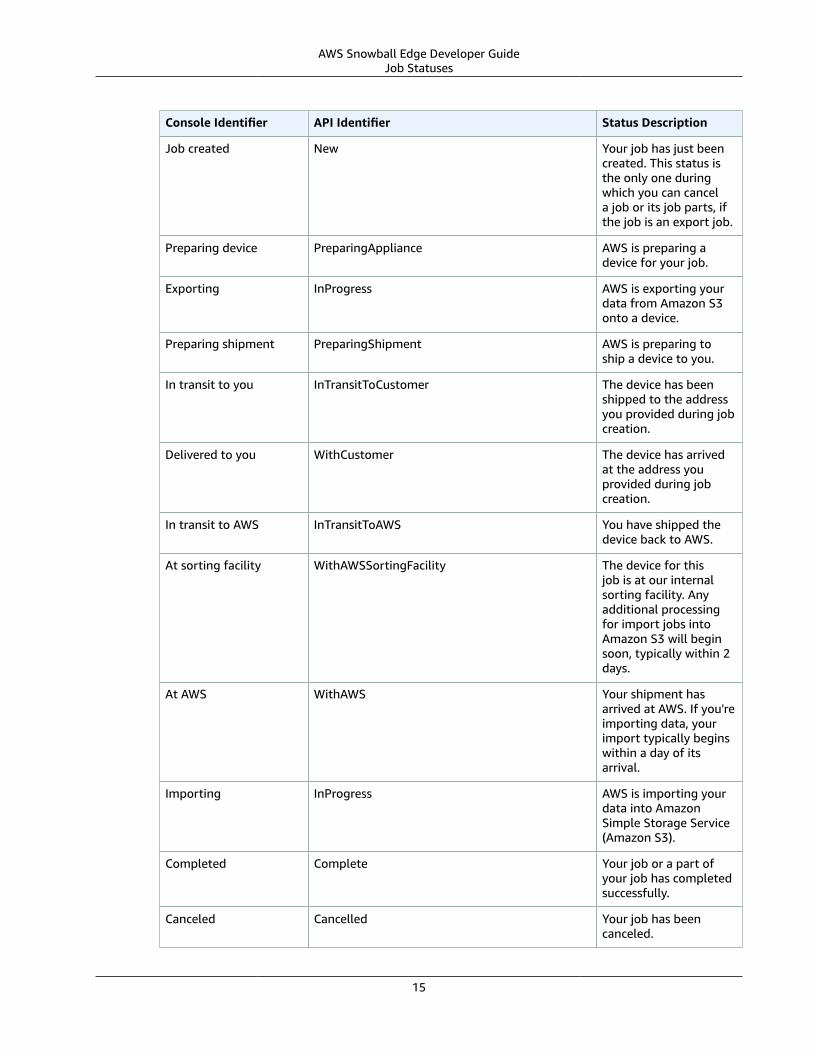
AWS Snowball Edge Developer GuideJob Statuses
Console Identifier API Identifier Status Description
Job created New Your job has just beencreated. This status isthe only one duringwhich you can cancela job or its job parts, ifthe job is an export job.
Preparing device PreparingAppliance AWS is preparing adevice for your job.
Exporting InProgress AWS is exporting yourdata from Amazon S3onto a device.
Preparing shipment PreparingShipment AWS is preparing toship a device to you.
In transit to you InTransitToCustomer The device has beenshipped to the addressyou provided during jobcreation.
Delivered to you WithCustomer The device has arrivedat the address youprovided during jobcreation.
In transit to AWS InTransitToAWS You have shipped thedevice back to AWS.
At sorting facility WithAWSSortingFacility The device for thisjob is at our internalsorting facility. Anyadditional processingfor import jobs intoAmazon S3 will beginsoon, typically within 2days.
At AWS WithAWS Your shipment hasarrived at AWS. If you'reimporting data, yourimport typically beginswithin a day of itsarrival.
Importing InProgress AWS is importing yourdata into AmazonSimple Storage Service(Amazon S3).
Completed Complete Your job or a part ofyour job has completedsuccessfully.
Canceled Cancelled Your job has beencanceled.
15
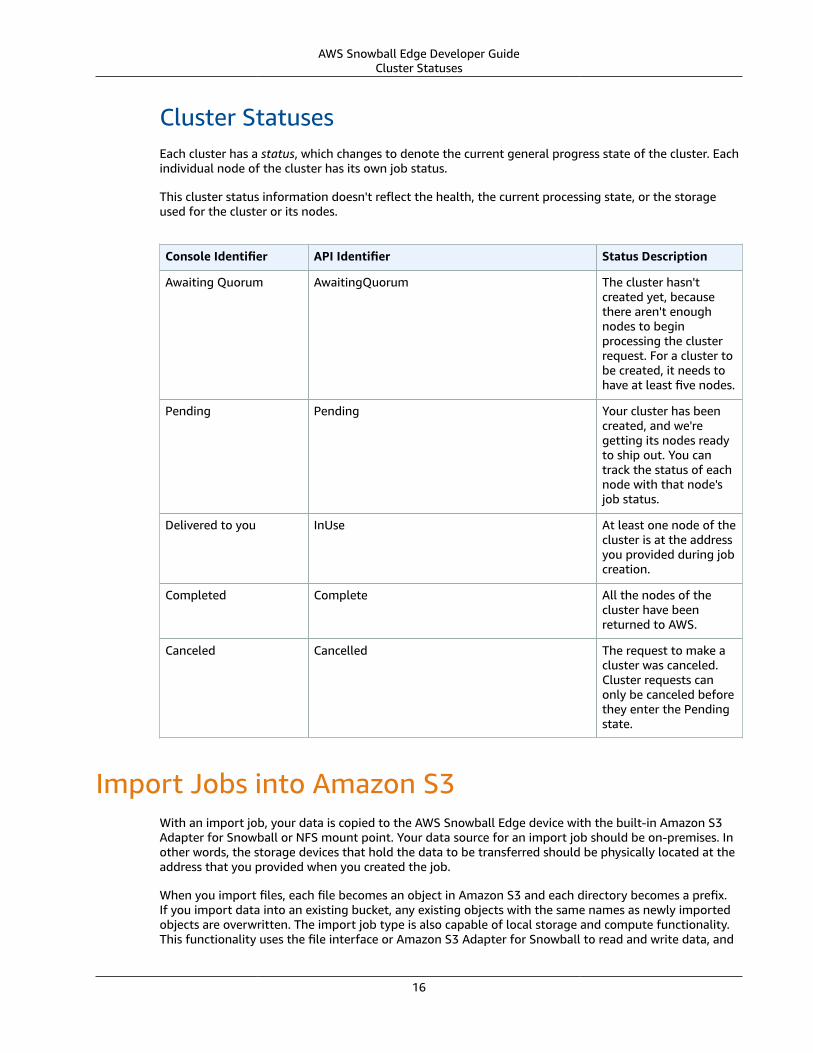
AWS Snowball Edge Developer GuideCluster Statuses
Cluster StatusesEach cluster has a status, which changes to denote the current general progress state of the cluster. Eachindividual node of the cluster has its own job status.
This cluster status information doesn't reflect the health, the current processing state, or the storageused for the cluster or its nodes.
Console Identifier API Identifier Status Description
Awaiting Quorum AwaitingQuorum The cluster hasn'tcreated yet, becausethere aren't enoughnodes to beginprocessing the clusterrequest. For a cluster tobe created, it needs tohave at least five nodes.
Pending Pending Your cluster has beencreated, and we'regetting its nodes readyto ship out. You cantrack the status of eachnode with that node'sjob status.
Delivered to you InUse At least one node of thecluster is at the addressyou provided during jobcreation.
Completed Complete All the nodes of thecluster have beenreturned to AWS.
Canceled Cancelled The request to make acluster was canceled.Cluster requests canonly be canceled beforethey enter the Pendingstate.
Import Jobs into Amazon S3With an import job, your data is copied to the AWS Snowball Edge device with the built-in Amazon S3Adapter for Snowball or NFS mount point. Your data source for an import job should be on-premises. Inother words, the storage devices that hold the data to be transferred should be physically located at theaddress that you provided when you created the job.
When you import files, each file becomes an object in Amazon S3 and each directory becomes a prefix.If you import data into an existing bucket, any existing objects with the same names as newly importedobjects are overwritten. The import job type is also capable of local storage and compute functionality.This functionality uses the file interface or Amazon S3 Adapter for Snowball to read and write data, and
16

AWS Snowball Edge Developer GuideExport Jobs from Amazon S3
triggers Lambda functions based off of Amazon S3 PUT object API actions running locally on the AWSSnowball Edge device.
When all of your data has been imported into the specified Amazon S3 buckets in the AWS Cloud, AWSperforms a complete erasure of the device. This erasure follows the NIST 800-88 standards.
After your import is complete, you can download a job report. This report alerts you to any objects thatfailed the import process. You can find additional information in the success and failure logs.
ImportantDon't delete your local copies of the transferred data until you can verify the results of the jobcompletion report and review your import logs.
Export Jobs from Amazon S3Your data source for an export job is one or more Amazon S3 buckets. Once the data for a job part ismoved from Amazon S3 to an AWS Snowball Edge device, you can download a job report. This reportalerts you to any objects that failed the transfer to the device. You can find more information in yourjob's success and failure logs.
You can export any number of objects for each export job, using as many devices as it takes to completethe transfer. AWS Snowball Edge devices for an export job's job parts are delivered one after another,with subsequent devices shipping to you after the previous job part enters the In transit to AWS status.
When you copy objects into your on-premises data destination from a device using the Amazon S3Adapter for Snowball or the NFS mount point, those objects are saved as files. If you copy objects into alocation that already holds files, any existing files with the same names are overwritten. The export jobtype is also capable of local storage and compute functionality. This functionality uses the file interfaceor Amazon S3 Adapter for Snowball to read and write data, and triggers Lambda functions based off ofAmazon S3 PUT object API actions running locally on the AWS Snowball Edge device.
When AWS receives a returned device, we completely erase it, following the NIST 800-88 standards.
ImportantDon't change, update, or delete the exported Amazon S3 objects until you can verify that all ofyour contents for the entire job have been copied to your on-premises data destination.
When you create an export job, you can export an entire Amazon S3 bucket or a specific range of objectskeys.
Using Export RangesWhen you create an export job in the AWS Snowball Management Console or with the job managementAPI, you can export an entire Amazon S3 bucket or a specific range of objects keys. Object key namesuniquely identify objects in a bucket. If you export a range, you define the length of the range byproviding either an inclusive range beginning, an inclusive range ending, or both.
Ranges are UTF-8 binary sorted. UTF-8 binary data is sorted in the following way:
• The numbers 0–9 come before both uppercase and lowercase English characters.
• Uppercase English characters come before all lowercase English characters.
• Lowercase English characters come last when sorted against uppercase English characters andnumbers.
• Special characters are sorted among the other character sets.
17

AWS Snowball Edge Developer GuideUsing Export Ranges
For more information on the specifics of UTF-8, see https://en.wikipedia.org/wiki/UTF-8.
Export Range ExamplesAssume you have a bucket containing the following objects, sorted in UTF-8 binary order:
• 01• Aardvark• Aardwolf• Aasvogel/apple• Aasvogel/banana• Aasvogel/cherry• Banana• Car
Specified RangeBeginning
Specified Range Ending Objects in theRange That WillBe Exported
(none) (none) All of the objectsin your bucket
(none) Aasvogel 01
Aardvark
Aardwolf
Aasvogel/apple
Aasvogel/banana
Aasvogel/cherry
(none) Aasvogel/banana 01
Aardvark
Aardwolf
Aasvogel/apple
Aasvogel/banana
Aasvogel (none) Aasvogel/apple
Aasvogel/banana
Aasvogel/cherry
Banana
Car
Aardwolf (none) Aardwolf
Aasvogel/apple
18

AWS Snowball Edge Developer GuideLocal Compute and Storage Only Jobs
Specified RangeBeginning
Specified Range Ending Objects in theRange That WillBe Exported
Aasvogel/banana
Aasvogel/cherry
Banana
Car
Aar (none) Aardvark
Aardwolf
Aasvogel/apple
Aasvogel/banana
Aasvogel/cherry
Banana
Car
car (none) No objects areexported, andyou get an errormessage when youtry to create thejob. Note that caris sorted belowCar accordingto UTF-8 binaryvalues.
Aar Aarrr Aardvark
Aardwolf
Local Compute and Storage Only JobsLocal compute and storage jobs enable you to use Amazon S3 and AWS Lambda powered by AWSGreengrass locally, without an internet connection. While local storage and compute functionality alsoexists for the import and export job types, this job type is only for local use. You can't export data fromAmazon S3 onto the device or import data into Amazon S3 when the device is returned.
Local Compute JobsThe local compute functionality is AWS Lambda powered by AWS Greengrass, and can automatically runPython-language code in response to Amazon S3 PUT object action API calls to the AWS Snowball Edgedevice. You write the Python code as a Lambda function in the Lambda console.
Buckets and Lambda functions have a one-to-one relationship, meaning that one Lambda function canbe associated with one bucket when the job is created. For more information, see Using AWS Lambdawith an AWS Snowball Edge (p. 66).
19
AWS Snowball Edge Developer GuideLocal Storage Jobs
Local Storage JobsYou can read and write objects to an AWS Snowball Edge device using the Amazon S3 Adapter forSnowball or the file interface. The adapter comes built-into the device, and it supports Amazon S3 RESTAPI actions. This Amazon S3 REST API support is limited to a subset of S3 REST API actions. For moreinformation, see Transferring Files Using the Amazon S3 Adapter (p. 51).
When you've finished using the device, return it to AWS and the device will be erased. This erasurefollows the National Institute of Standards and Technology (NIST) 800-88 standards.
Local Cluster OptionA cluster is a logical grouping of Snowball Edge devices, in groups of 5 to 10 devices. A cluster is createdas a single job, which offers increased durability and storage size when compared to other AWS Snowballjob offerings. For more information on cluster jobs, see Using an AWS Snowball Edge Cluster (p. 109).
Cloning a Job in the ConsoleWhen you first create an import job or a local compute and storage job, you might discover that youneed more than one AWS Snowball Edge device. Because import jobs and local compute and storagejobs are associated with a single device, requiring more than one device means that you need to createmore than one job. When creating additional jobs, you can go through the job creation wizard again inthe console, or you can clone an existing job.
NoteCloning a job is a shortcut available in the console to make creating additional jobs easier.If you're creating jobs with the job management API, you can simply run the job creationcommand again.
Cloning a job means recreating it exactly, except for an automatically modified name. Cloning is a simpleprocess.
To clone a job in the console
1. In the AWS Snowball Management Console, choose your job from the table.2. For Actions, choose Clone job.3. The Create job wizard opens to the last page, Step 6: Review.4. Review the information and make any changes you want by choosing the appropriate Edit button.5. To create your cloned job, choose Create job.
Cloned jobs are named in the format Job Name-clone-number. The number is automatically added tothe job name and represents the number of times you've cloned this job after the first time you clone it.For example, AprilFinanceReports-clone represents the first cloned job of AprilFinanceReports job, andDataCenterMigration-clone-42 represents the forty-second clone of the DataCenterMigration job.
Canceling Jobs in the ConsoleIf you need to cancel a job request or a cluster creation request for any reason, you have at least an hourafter you created the request to do so. You can only cancel jobs can when they have Job created status.Once a job begins processing, you can no longer cancel it. Likewise, to cancel a cluster creation requestyou have about an hour.
20

AWS Snowball Edge Developer GuideCanceling Jobs in the Console
To cancel a job in the console
1. Sign in to the AWS Management Console and open the AWS Snowball Management Console.2. Search for and choose your job from the table.3. From Actions, choose Cancel job.
You have now canceled your job.
21
AWS Snowball Edge Developer GuideSign Up for AWS
Getting Started with an AWSSnowball Edge Device
With AWS Snowball using an AWS Snowball Edge device, you can access the storage and compute powerof the AWS Cloud locally and cost effectively in places where connecting to the internet might not be anoption. You can also transfer hundreds of terabytes or petabytes of data between your on-premises datacenters and Amazon Simple Storage Service (Amazon S3).
Following, you can find general instructions for creating and completing your first AWS SnowballEdge device job in the AWS Snowball Management Console. The console presents the most commonworkflows, separated into job types. You can find more information on specific components of the AWSSnowball Edge device later in this documentation. For an overview of the service as a whole, see HowAWS Snowball Works with the Snowball Edge (p. 8). The getting started exercises cover the following jobtypes:
Each of the getting started exercises assume that you use the AWS Snowball Management Consoleto create your job, the Snowball client to unlock the AWS Snowball Edge device, and the Amazon S3Adapter for Snowball to read and write data. If you'd rather create your job programmatically with moreoptions for the jobs you're creating, you can use the job management API. For more information, seeAWS Snowball API Reference.
Before you can get started, you need to create an AWS account and an administrator user in AWSIdentity and Access Management (IAM). If you already have these, then you can skip these first two steps.
NoteThis getting started exercise focuses on creating jobs for transferring data. For more informationabout jobs using compute instances, see Using Amazon EC2 Compute Instances (p. 72).
Sign Up for AWSIf you already have an AWS account, go ahead and skip to the next section: Create an Administrator IAMUser (p. 22). Otherwise, see Sign Up for AWS (p. 11).
Create an Administrator IAM UserIf you already have an administrator AWS Identity and Access Management (IAM) user account, goahead and skip to one of the sections listed following. If you don't have an administrator IAM user, werecommend that you create one and not use the root credentials of your AWS account to make requests.To do so, see Create an IAM User (p. 11).
For information about how to use AWS Identity and Access Management policies to control access, seeAWS-Managed (Predefined) Policies for AWS Snowball Edge (p. 140).
NoteAfter you unlock your device, you will also want to create local users. You will do this in a laterstep.
ImportantThere is no free tier for AWS Snowball. To avoid unwanted charges and delays, read through therelevant import or export section following before you start creating your jobs.
22

AWS Snowball Edge Developer GuideGetting Started: Your First Job
Next:
• Getting Started with AWS Snowball Edge: Your First Job (p. 23)
Getting Started with AWS Snowball Edge: YourFirst Job
Regardless of the type of job you're creating for an AWS Snowball Edge device, there's a set of commonprocedures in the AWS Snowball Management Console. These are procedures for creating a job,monitoring the status of your job, setting up the device, unlocking the device, transferring data, andreturning the device. Following, you can walk through these procedures. Whenever there is a job-typespecific consideration, we call out that consideration in a note.
Topics• Create Your First Job (p. 23)• Receive the Snowball Edge (p. 25)• Connect to Your Local Network (p. 26)• Get Your Credentials and Tools (p. 26)• Download and Install the Snowball Client (p. 27)• Unlock the Snowball Edge (p. 27)• Set Up Local Users (p. 28)• Use the Snowball Edge (p. 29)• Stop the Snowball Client, and Power Off the Snowball Edge (p. 30)• Disconnect the Snowball Edge (p. 30)• Return the Snowball Edge (p. 30)• Monitor the Import Status (p. 31)• Get Your Job Completion Report and Logs in the Console (p. 31)
Create Your First JobThe process for creating an AWS Snowball Edge device job in the AWS Snowball Management Consolehas the following steps.
ImportantBefore including Amazon EC2 compute instances in your job creation request, see Creating a Jobwith Compute Instances (p. 76).
To create an AWS Snowball Edge device job in the console
1. Sign in to the AWS Management Console and open the AWS Snowball Management Console.2. Choose Create Job.3. On the Plan your job page of the job creation wizard, choose your job type.
Job-Type Specific Consideration
• If you are creating a cluster, select the Make this a cluster check box.4. Choose Next.5. On the Give shipping details page, provide the shipping address that you want the AWS Snowball
Edge device for this job delivered to. In some Regions, you choose your shipping speed at this point.For more information, see Shipping Speeds (p. 118).
23
AWS Snowball Edge Developer GuideCreate Your First Job
6. Choose Next.7. On the Give job details page, provide the details for your job, including a name, Region, and at least
one bucket.
ImportantWith an AWS Snowball Edge device, all jobs can use the compute functionality in Regionswhere Lambda is supported. How the compute functionality is implemented in AWSSnowball jobs is specific to Snowball—the functionality can differ significantly from howLambda works in the cloud. Before creating your first compute job, we recommend that youfamiliarize yourself with how AWS Lambda powered by AWS Greengrass works. For moreinformation, see Using AWS Lambda with an AWS Snowball Edge (p. 66).
8. Choose Next.9. On the Set security page, specify the following:
• The Amazon Resource Name (ARN) for the AWS Identity and Access Management (IAM) role thatAWS Snowball assumes to import your data to your destination S3 bucket when you return theAWS Snowball Edge device.
•10. Choose Next.11. On the Set notifications page, specify the Amazon Simple Notification Service (Amazon SNS)
notification options for your job and provide a list of comma-separated email addresses toreceive email notifications for this job. You can also choose which job status values trigger thesenotifications. For more information, see Notifications for the AWS Snowball Edge (p. 151).
12. Choose Next.13. On the Review page, review the information you've provided. To make changes, choose Edit next to
the step to change in the navigation pane, or choose Back.
ImportantReview this information carefully, because incorrect information can result in unwanteddelays.
Once your job is created, you're taken to the job dashboard, where you can view and manage your jobs.The last job you created is selected by default, with its Job status pane open.
NoteThe Job created status is the only status during which you can cancel a job.
For more information on managing jobs from the AWS Snowball Management Console and tracking jobstatus, see Job Statuses (p. 14). Jobs can also be created and managed with the job management API. Formore information, see the AWS Snowball API Reference.
After you created your first job, AWS processes the information you provided and prepares an AWSSnowball Edge device specifically for your job. During the processing stage, if there's an issue with yourjob, we contact you by email. Otherwise, we ship the device to the address you provided when youcreated the job. Shipping can take a few days, but you can track the shipping status of the device weprepared for your job. In your job's details, you should see a link to the tracking webpage with yourtracking number provided.
Job-Type Specific Consideration
For an export job, once the Snowball is prepared, the status for your first job part becomes Exporting.Exporting typically takes one business day; however, it can take longer on occasion. Now that your exportjob is on its way, you can get from the console a report of the data transfer from Amazon S3 to theAWS Snowball Edge device, and also success and failure logs. For more information, see Get Your JobCompletion Report and Logs in the Console (p. 31).
Next: Receive the Snowball Edge (p. 25)
24
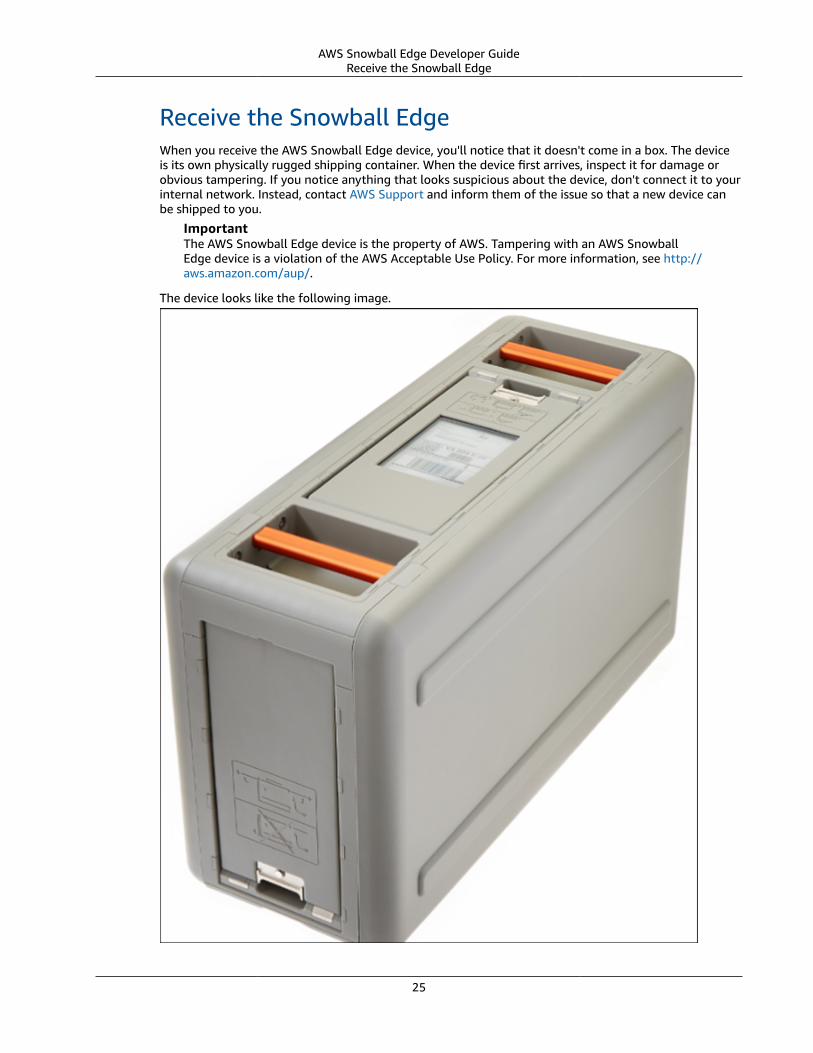
AWS Snowball Edge Developer GuideReceive the Snowball Edge
Receive the Snowball EdgeWhen you receive the AWS Snowball Edge device, you'll notice that it doesn't come in a box. The deviceis its own physically rugged shipping container. When the device first arrives, inspect it for damage orobvious tampering. If you notice anything that looks suspicious about the device, don't connect it to yourinternal network. Instead, contact AWS Support and inform them of the issue so that a new device canbe shipped to you.
ImportantThe AWS Snowball Edge device is the property of AWS. Tampering with an AWS SnowballEdge device is a violation of the AWS Acceptable Use Policy. For more information, see http://aws.amazon.com/aup/.
The device looks like the following image.
25
AWS Snowball Edge Developer GuideConnect to Your Local Network
If you're ready to connect the device to your internal network, see the next section.
Next: Connect to Your Local Network (p. 26)
Connect to Your Local NetworkUsing the following procedure, you connect the AWS Snowball Edge device to your local network. Thedevice doesn't need to be connected to the internet. The device has three doors, a front, a back, and atop.
To connect the device to your network
1. Open the front and back doors, sliding them inside the device door slots. Doing this gives you accessto the touch screen on the LCD display embedded in the front of the device, and the power andnetwork ports in the back.
2. Open the top door and remove the provided power cable from the cable nook, and plug the deviceinto power.
3. Choose one of your RJ45, SFP+, or QSFP+ network cables, and plug the device into your network.The network ports are on the back of the device.
4. Power on the AWS Snowball Edge device by pressing the power button above the LCD display.
5. When the device is ready, the LCD display shows a short video while the device is getting ready tostart. After about 10 minutes, the device is ready to be unlocked.
6. (Optional) Change the default network settings through the LCD display by choosing CONNECTION.
You can change your IP address to a different static address, which you provide by using thefollowing procedure.
To change the IP address of an AWS Snowball Edge device
1. On the LCD display, choose CONNECTION.
A screen appears that shows you the current network settings for the AWS Snowball Edge device.The IP address below the drop-down box is automatically updated to reflect the DHCP address thatthe AWS Snowball Edge device requested.
2. (Optional) Change the IP address to a static IP address. You can also keep it as is.
The device is now connected to your network.
ImportantTo prevent corrupting your data, don't disconnect the AWS Snowball Edge device or change itsconnection settings while it's in use.
Next: Get Your Credentials and Tools (p. 26)
Get Your Credentials and ToolsEach job has a set of credentials that you must get from the AWS Snowball Management Console or thejob management API to authenticate your access to the Snowball. These credentials are an encryptedmanifest file and an unlock code. The manifest file contains important information about the job andpermissions associated with it.
NoteYou can only get your credentials after the device has been delivered to you.
26
AWS Snowball Edge Developer GuideDownload and Install the Snowball Client
To get your credentials by using the console
1. Sign in to the AWS Management Console and open the AWS Snowball Management Console at AWSSnowball Management Console.
2. In the console, search the table for the specific job to download the job manifest for, and thenchoose that job.
3. Expand that job's Job status pane, and choose View job details.4. In the details pane that appears, expand Credentials and then do the following:
• Make a note of the unlock code (including the hyphens), because you need to provide all 29characters to transfer data.
• Choose Download manifest in the dialog box and follow the instructions to download the jobmanifest file to your computer. The name of your manifest file includes your Job ID.
NoteWe recommend that you don't save a copy of the unlock code in the same location in theworkstation as the manifest for that job. For more information, see Best Practices for theAWS Snowball Edge Device (p. 33).
Now that you have your credentials, the next step is to download the Snowball client, which is used tounlock the AWS Snowball Edge device.
Next: Download and Install the Snowball Client (p. 27)
Download and Install the Snowball ClientThe Snowball client is the tool that you use to unlock the AWS Snowball Edge device.
You can download and install the Snowball client from the AWS Snowball resources Website.
Next: Unlock the Snowball Edge (p. 27)
Unlock the Snowball EdgeTo unlock the AWS Snowball Edge device, run the snowballEdge unlock-device command. To runthis command, the AWS Snowball Edge device that you use for your job must be onsite, plugged intopower and network, and turned on. In addition, the LCD display on the AWS Snowball Edge device's frontmust indicate that the device is ready for use.
To unlock the device with the Snowball client
1. Get your manifest and unlock code.
a. Download a copy of the manifest from the AWS Snowball Management Console. Your job'smanifest is encrypted so that only the job's unlock code can decrypt it. Make a note of the pathto the manifest file on your local server.
b. Get the unlock code, a 29-character code that also appears when you download your manifest.We recommend that you write down the unlock code and keep it in a separate location fromthe manifest that you downloaded, to prevent unauthorized access to the AWS Snowball Edgedevice while it’s at your facility.
2. Find the IP address for the AWS Snowball Edge device on the AWS Snowball Edge device's LCDdisplay, under the Connections tab. Make a note of that IP address.
3. Run the snowballEdge unlock-device command to authenticate your access to the AWSSnowball Edge device with the AWS Snowball Edge device's endpoint and your credentials, asfollows:
27
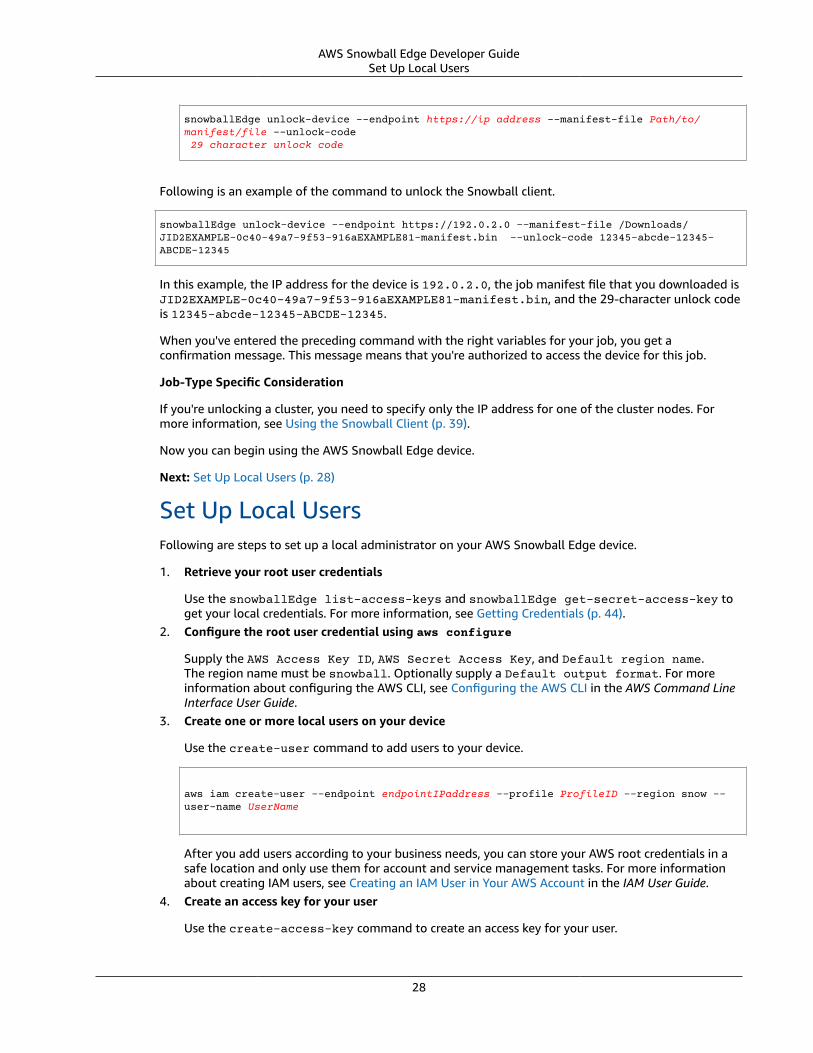
AWS Snowball Edge Developer GuideSet Up Local Users
snowballEdge unlock-device --endpoint https://ip address --manifest-file Path/to/manifest/file --unlock-code 29 character unlock code
Following is an example of the command to unlock the Snowball client.
snowballEdge unlock-device --endpoint https://192.0.2.0 --manifest-file /Downloads/JID2EXAMPLE-0c40-49a7-9f53-916aEXAMPLE81-manifest.bin --unlock-code 12345-abcde-12345-ABCDE-12345
In this example, the IP address for the device is 192.0.2.0, the job manifest file that you downloaded isJID2EXAMPLE-0c40-49a7-9f53-916aEXAMPLE81-manifest.bin, and the 29-character unlock codeis 12345-abcde-12345-ABCDE-12345.
When you've entered the preceding command with the right variables for your job, you get aconfirmation message. This message means that you're authorized to access the device for this job.
Job-Type Specific Consideration
If you're unlocking a cluster, you need to specify only the IP address for one of the cluster nodes. Formore information, see Using the Snowball Client (p. 39).
Now you can begin using the AWS Snowball Edge device.
Next: Set Up Local Users (p. 28)
Set Up Local UsersFollowing are steps to set up a local administrator on your AWS Snowball Edge device.
1. Retrieve your root user credentials
Use the snowballEdge list-access-keys and snowballEdge get-secret-access-key toget your local credentials. For more information, see Getting Credentials (p. 44).
2. Configure the root user credential using aws configure
Supply the AWS Access Key ID, AWS Secret Access Key, and Default region name.The region name must be snowball. Optionally supply a Default output format. For moreinformation about configuring the AWS CLI, see Configuring the AWS CLI in the AWS Command LineInterface User Guide.
3. Create one or more local users on your device
Use the create-user command to add users to your device.
aws iam create-user --endpoint endpointIPaddress --profile ProfileID --region snow --user-name UserName
After you add users according to your business needs, you can store your AWS root credentials in asafe location and only use them for account and service management tasks. For more informationabout creating IAM users, see Creating an IAM User in Your AWS Account in the IAM User Guide.
4. Create an access key for your user
Use the create-access-key command to create an access key for your user.
28
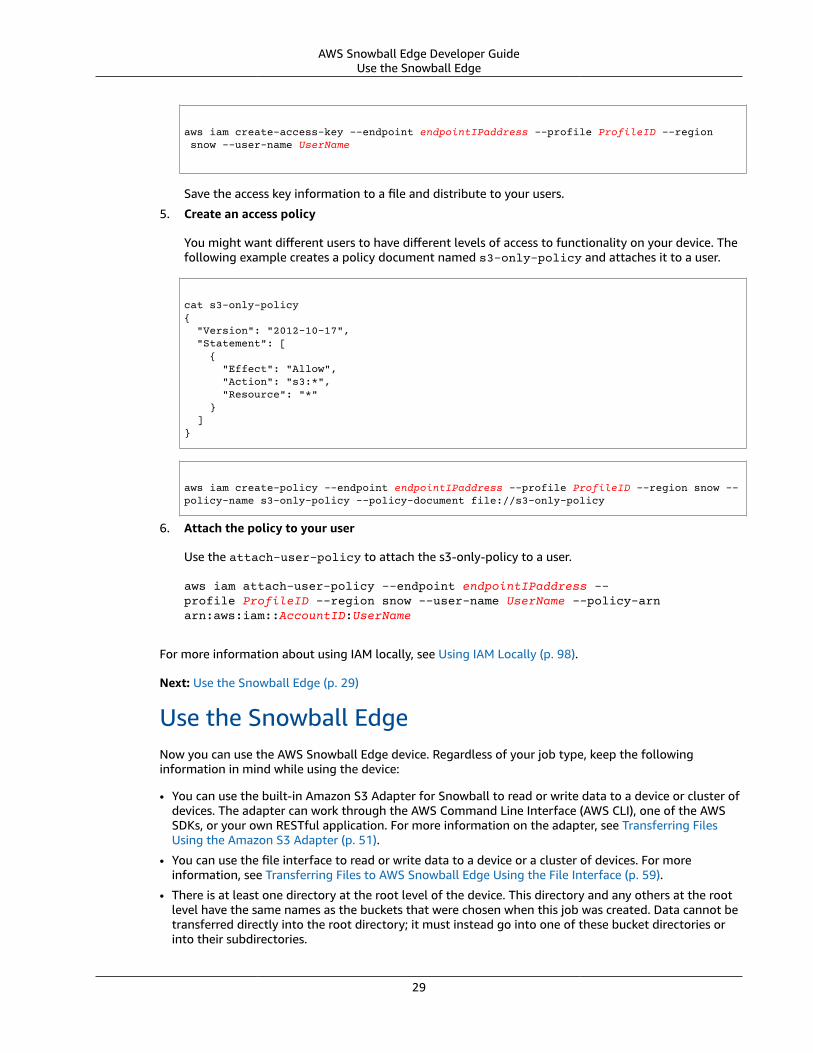
AWS Snowball Edge Developer GuideUse the Snowball Edge
aws iam create-access-key --endpoint endpointIPaddress --profile ProfileID --region snow --user-name UserName
Save the access key information to a file and distribute to your users.
5. Create an access policy
You might want different users to have different levels of access to functionality on your device. Thefollowing example creates a policy document named s3-only-policy and attaches it to a user.
cat s3-only-policy{ "Version": "2012-10-17", "Statement": [ { "Effect": "Allow", "Action": "s3:*", "Resource": "*" } ]}
aws iam create-policy --endpoint endpointIPaddress --profile ProfileID --region snow --policy-name s3-only-policy --policy-document file://s3-only-policy
6. Attach the policy to your user
Use the attach-user-policy to attach the s3-only-policy to a user.
aws iam attach-user-policy --endpoint endpointIPaddress --profile ProfileID --region snow --user-name UserName --policy-arnarn:aws:iam::AccountID:UserName
For more information about using IAM locally, see Using IAM Locally (p. 98).
Next: Use the Snowball Edge (p. 29)
Use the Snowball EdgeNow you can use the AWS Snowball Edge device. Regardless of your job type, keep the followinginformation in mind while using the device:
• You can use the built-in Amazon S3 Adapter for Snowball to read or write data to a device or cluster ofdevices. The adapter can work through the AWS Command Line Interface (AWS CLI), one of the AWSSDKs, or your own RESTful application. For more information on the adapter, see Transferring FilesUsing the Amazon S3 Adapter (p. 51).
• You can use the file interface to read or write data to a device or a cluster of devices. For moreinformation, see Transferring Files to AWS Snowball Edge Using the File Interface (p. 59).
• There is at least one directory at the root level of the device. This directory and any others at the rootlevel have the same names as the buckets that were chosen when this job was created. Data cannot betransferred directly into the root directory; it must instead go into one of these bucket directories orinto their subdirectories.
29

AWS Snowball Edge Developer GuideStop the Snowball Client, andPower Off the Snowball Edge
When you're done using the AWS Snowball Edge device, it's time to prepare the device for its return tripto AWS.
Next: Stop the Snowball Client, and Power Off the Snowball Edge (p. 30)
Stop the Snowball Client, and Power Off theSnowball EdgeWhen you've finished transferring data on to the AWS Snowball Edge device, prepare it for its returntrip to AWS. Before you continue, make sure that all data transfer to the device has stopped. If you wereusing the file interface to transfer data, you need to disable it before you power off the device. For moreinformation, see Disabling the File Interface (p. 66).
When all communication with the device has ended, simply turn it off by pressing the power buttonabove the LCD display. It takes about 20 seconds for the device to shut down.
Next: Disconnect the Snowball Edge (p. 30)
Disconnect the Snowball EdgeDisconnect the AWS Snowball Edge device cables. Secure the device's power cable into the cablenook beneath the top door on the device. Pull out and close the front and back doors. When theyclose completely, you hear an audible click. When the return shipping label appears on the E Inkdisplay on top of the device, it's ready to be returned. To see who your region's carrier is, see ShippingCarriers (p. 118).
Job-Type Specific Consideration
If you are importing data, don't delete your local copies of the transferred data until the import intoAmazon S3 is successful at the end of the process and you can verify the results of the data transfer.
Next: Return the Snowball Edge (p. 30)
Return the Snowball EdgeThe prepaid shipping label on the E Ink display contains the correct address to return the AWS SnowballEdge device. For information on how to return the device, see Shipping Carriers (p. 118). The deviceis delivered to an AWS sorting facility and forwarded to the AWS data center. The carrier automaticallyreports back a tracking number for your job to the AWS Snowball Management Console. You can accessthat tracking number, and also a link to the tracking website, by viewing the job's status details in theconsole, or by making calls to the job management API.
ImportantUnless personally instructed otherwise by AWS, never affix a separate shipping label to thedevice. Always use the shipping label that is displayed on the E Ink display.
Additionally, you can track the status changes of your job through the AWS Snowball ManagementConsole, by Amazon SNS notifications if you selected that option during job creation, or by making callsto the job management API. For more information on this API, see AWS Snowball API Reference. Thefinal status values include when the AWS Snowball Edge device has been received by AWS, when dataimport begins, and when the job is completed.
Job-Type Specific Consideration
If you are exporting data or if you are using a device for a local storage and compute only job, then yourjob is now complete. For information on what to do next, see Where Do I Go from Here? (p. 32).
30
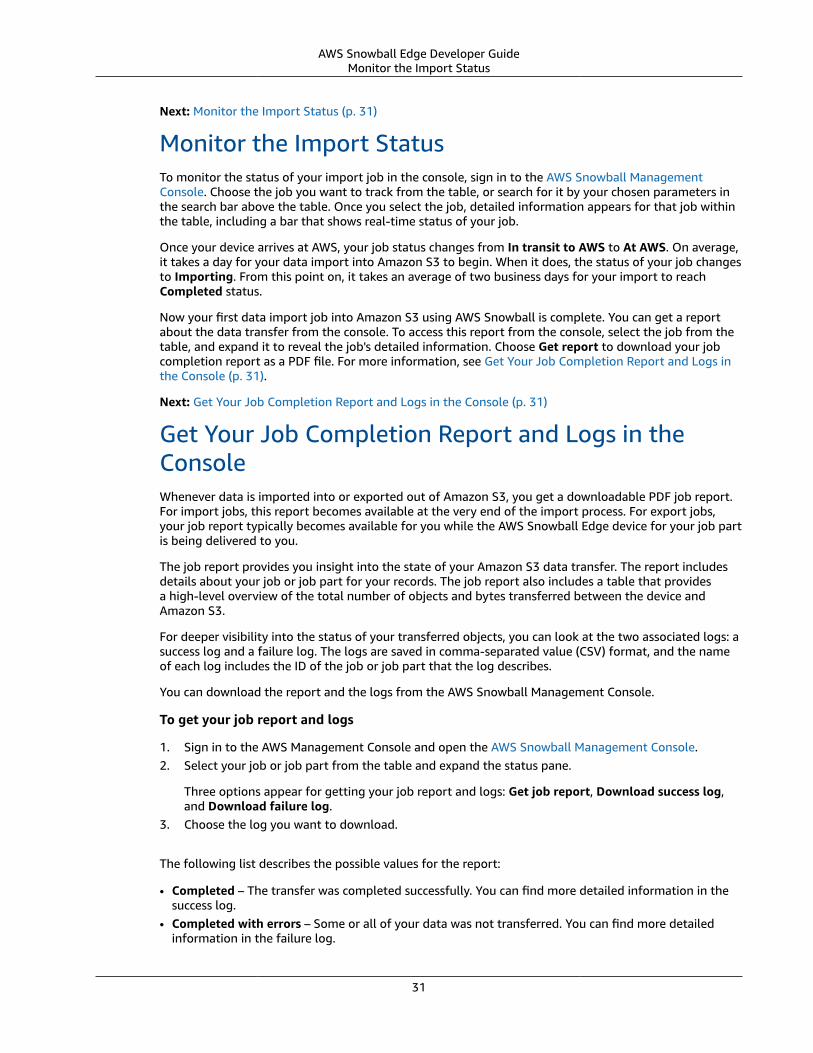
AWS Snowball Edge Developer GuideMonitor the Import Status
Next: Monitor the Import Status (p. 31)
Monitor the Import StatusTo monitor the status of your import job in the console, sign in to the AWS Snowball ManagementConsole. Choose the job you want to track from the table, or search for it by your chosen parameters inthe search bar above the table. Once you select the job, detailed information appears for that job withinthe table, including a bar that shows real-time status of your job.
Once your device arrives at AWS, your job status changes from In transit to AWS to At AWS. On average,it takes a day for your data import into Amazon S3 to begin. When it does, the status of your job changesto Importing. From this point on, it takes an average of two business days for your import to reachCompleted status.
Now your first data import job into Amazon S3 using AWS Snowball is complete. You can get a reportabout the data transfer from the console. To access this report from the console, select the job from thetable, and expand it to reveal the job's detailed information. Choose Get report to download your jobcompletion report as a PDF file. For more information, see Get Your Job Completion Report and Logs inthe Console (p. 31).
Next: Get Your Job Completion Report and Logs in the Console (p. 31)
Get Your Job Completion Report and Logs in theConsoleWhenever data is imported into or exported out of Amazon S3, you get a downloadable PDF job report.For import jobs, this report becomes available at the very end of the import process. For export jobs,your job report typically becomes available for you while the AWS Snowball Edge device for your job partis being delivered to you.
The job report provides you insight into the state of your Amazon S3 data transfer. The report includesdetails about your job or job part for your records. The job report also includes a table that providesa high-level overview of the total number of objects and bytes transferred between the device andAmazon S3.
For deeper visibility into the status of your transferred objects, you can look at the two associated logs: asuccess log and a failure log. The logs are saved in comma-separated value (CSV) format, and the nameof each log includes the ID of the job or job part that the log describes.
You can download the report and the logs from the AWS Snowball Management Console.
To get your job report and logs
1. Sign in to the AWS Management Console and open the AWS Snowball Management Console.2. Select your job or job part from the table and expand the status pane.
Three options appear for getting your job report and logs: Get job report, Download success log,and Download failure log.
3. Choose the log you want to download.
The following list describes the possible values for the report:
• Completed – The transfer was completed successfully. You can find more detailed information in thesuccess log.
• Completed with errors – Some or all of your data was not transferred. You can find more detailedinformation in the failure log.
31

AWS Snowball Edge Developer GuideWhere Do I Go from Here?
Next: Where Do I Go from Here? (p. 32)
Where Do I Go from Here?Now that you've read through one of the previous getting started sections and begun your first job,you can learn more about using the AWS Snowball Edge device tools and interfaces in detail from thefollowing topics:
• Using an AWS Snowball Edge Device (p. 38)• Using the Snowball Client (p. 39)• Transferring Files Using the Amazon S3 Adapter (p. 51)
We also recommend that you learn about the job management API for AWS Snowball. For moreinformation, see AWS Snowball API Reference.
If you're importing data into Amazon S3 for the first time, you might want to learn more about what youcan do with your data once it's there. For more information, see the Amazon S3 Getting Started Guide.
32
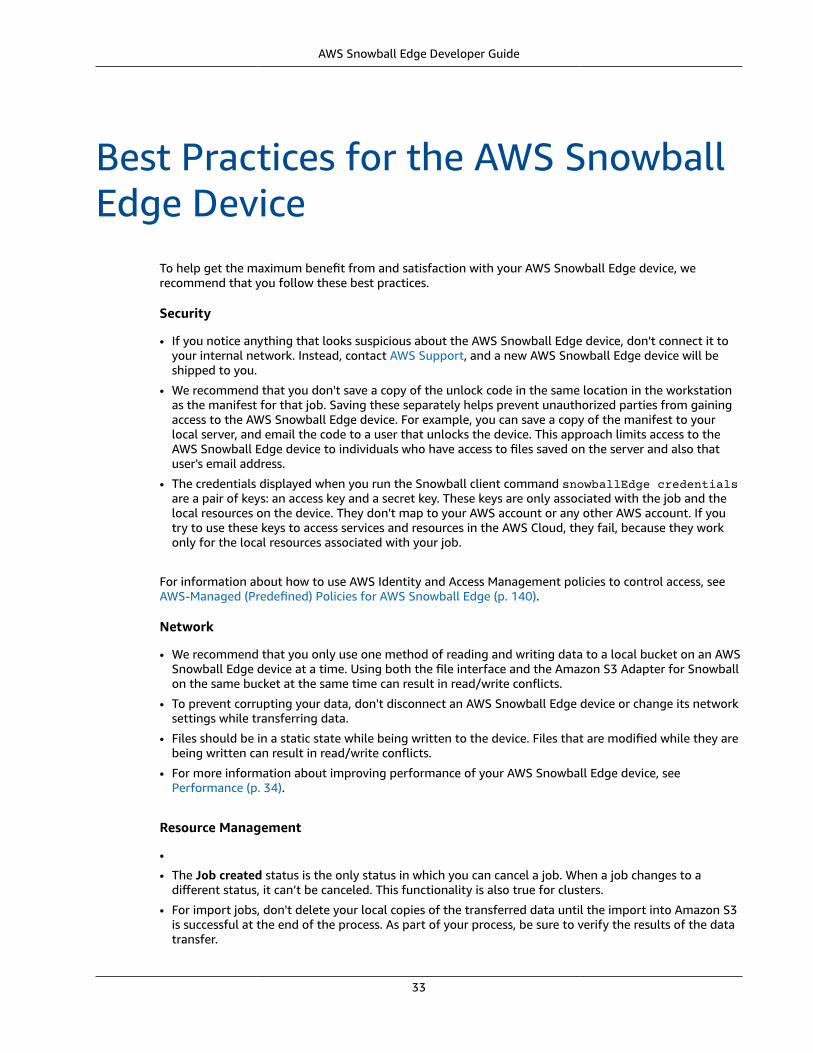
AWS Snowball Edge Developer Guide
Best Practices for the AWS SnowballEdge Device
To help get the maximum benefit from and satisfaction with your AWS Snowball Edge device, werecommend that you follow these best practices.
Security
• If you notice anything that looks suspicious about the AWS Snowball Edge device, don't connect it toyour internal network. Instead, contact AWS Support, and a new AWS Snowball Edge device will beshipped to you.
• We recommend that you don't save a copy of the unlock code in the same location in the workstationas the manifest for that job. Saving these separately helps prevent unauthorized parties from gainingaccess to the AWS Snowball Edge device. For example, you can save a copy of the manifest to yourlocal server, and email the code to a user that unlocks the device. This approach limits access to theAWS Snowball Edge device to individuals who have access to files saved on the server and also thatuser's email address.
• The credentials displayed when you run the Snowball client command snowballEdge credentialsare a pair of keys: an access key and a secret key. These keys are only associated with the job and thelocal resources on the device. They don't map to your AWS account or any other AWS account. If youtry to use these keys to access services and resources in the AWS Cloud, they fail, because they workonly for the local resources associated with your job.
For information about how to use AWS Identity and Access Management policies to control access, seeAWS-Managed (Predefined) Policies for AWS Snowball Edge (p. 140).
Network
• We recommend that you only use one method of reading and writing data to a local bucket on an AWSSnowball Edge device at a time. Using both the file interface and the Amazon S3 Adapter for Snowballon the same bucket at the same time can result in read/write conflicts.
• To prevent corrupting your data, don't disconnect an AWS Snowball Edge device or change its networksettings while transferring data.
• Files should be in a static state while being written to the device. Files that are modified while they arebeing written can result in read/write conflicts.
• For more information about improving performance of your AWS Snowball Edge device, seePerformance (p. 34).
Resource Management
•
• The Job created status is the only status in which you can cancel a job. When a job changes to adifferent status, it can’t be canceled. This functionality is also true for clusters.
• For import jobs, don't delete your local copies of the transferred data until the import into Amazon S3is successful at the end of the process. As part of your process, be sure to verify the results of the datatransfer.
33
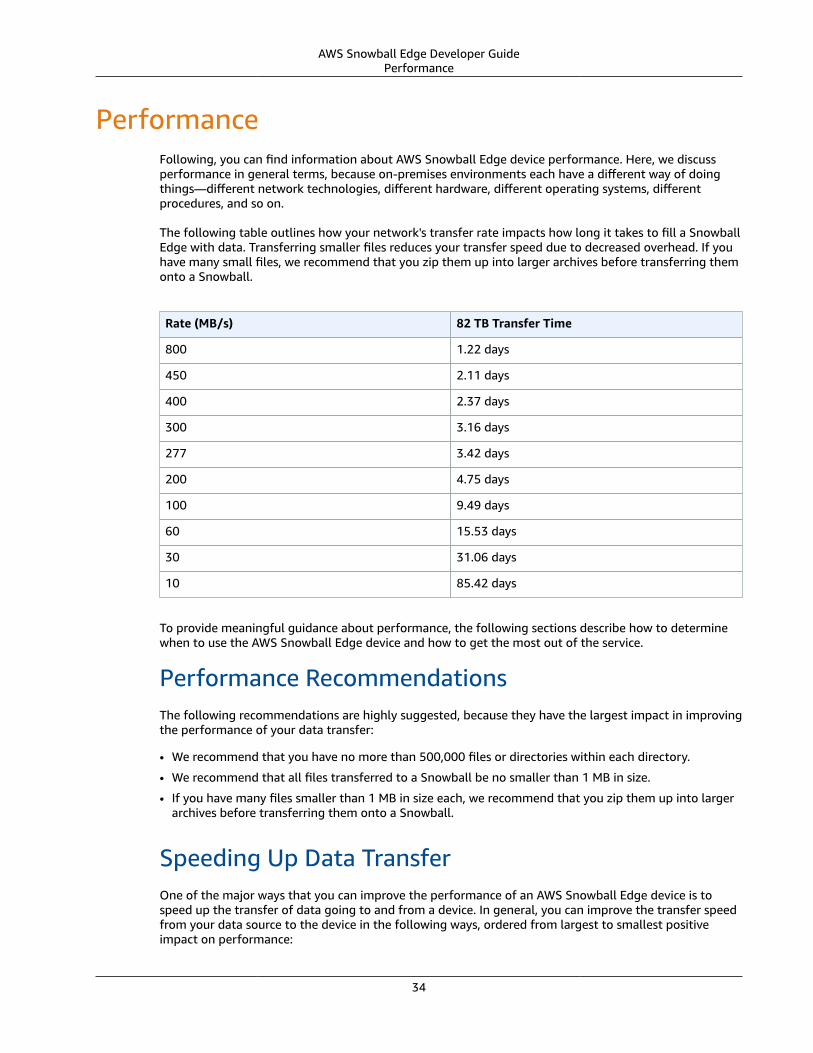
AWS Snowball Edge Developer GuidePerformance
PerformanceFollowing, you can find information about AWS Snowball Edge device performance. Here, we discussperformance in general terms, because on-premises environments each have a different way of doingthings—different network technologies, different hardware, different operating systems, differentprocedures, and so on.
The following table outlines how your network's transfer rate impacts how long it takes to fill a SnowballEdge with data. Transferring smaller files reduces your transfer speed due to decreased overhead. If youhave many small files, we recommend that you zip them up into larger archives before transferring themonto a Snowball.
Rate (MB/s) 82 TB Transfer Time
800 1.22 days
450 2.11 days
400 2.37 days
300 3.16 days
277 3.42 days
200 4.75 days
100 9.49 days
60 15.53 days
30 31.06 days
10 85.42 days
To provide meaningful guidance about performance, the following sections describe how to determinewhen to use the AWS Snowball Edge device and how to get the most out of the service.
Performance RecommendationsThe following recommendations are highly suggested, because they have the largest impact in improvingthe performance of your data transfer:
• We recommend that you have no more than 500,000 files or directories within each directory.
• We recommend that all files transferred to a Snowball be no smaller than 1 MB in size.
• If you have many files smaller than 1 MB in size each, we recommend that you zip them up into largerarchives before transferring them onto a Snowball.
Speeding Up Data TransferOne of the major ways that you can improve the performance of an AWS Snowball Edge device is tospeed up the transfer of data going to and from a device. In general, you can improve the transfer speedfrom your data source to the device in the following ways, ordered from largest to smallest positiveimpact on performance:
34
AWS Snowball Edge Developer GuideHow to Transfer Petabytes of Data Efficiently
1. Perform multiple write operations at one time – You can perform multiple write operations at onetime. You can do this by running each command from multiple terminal windows on a computer witha network connection to a single AWS Snowball Edge device.
2. Transfer small files in batches – Each copy operation has some overhead because of encryption. Tospeed the process up, batch files together in a single archive. When you batch files together, they canbe auto-extracted when they are imported into Amazon S3. For more information, see Batching SmallFiles (p. 55).
3. Write from multiple computers – A single AWS Snowball Edge device can be connected to manycomputers on a network. Each computer can connect to any of the three network interfaces at once.
4. Don't perform other operations on files during transfer – Renaming files during transfer, changingtheir metadata, or writing data to the files during a copy operation has a negative impact on transferperformance. We recommend that your files remain in a static state while you transfer them.
5. Reduce local network use – Your AWS Snowball Edge device communicates across your local network.Because of this, reducing other local network traffic between the AWS Snowball Edge device, theswitch it's connected to, and the computer that hosts your data source can improve data transferspeeds.
6. Eliminate unnecessary hops – We recommend that you set up your AWS Snowball Edge device, yourdata source, and the computer running the terminal connection between them so that they're the onlymachines communicating across a single switch. Doing so can result in improved data transfer speeds.
NoteThe data transfer rate using the file interface is typically between 25 MB/s and 40 MB/s. If youneed to transfer data faster than this, use the Amazon S3 adapter for Snowball, which has adata transfer rate typically between 250 MB/s and 400 MB/s. For more information on using thefile interface, see Transferring Files to AWS Snowball Edge Using the File Interface (p. 59). Formore information on using the Amazon S3 adapter, see Transferring Files Using the Amazon S3Adapter (p. 51).
How to Transfer Petabytes of Data EfficientlyWhen transferring petabytes of data, we recommend that you plan and calibrate your data transferbetween the AWS Snowball Edge devices you have on-site and your servers according to the followingguidelines.
Planning Your Large TransferTo plan your petabyte-scale data transfer, we recommend the following steps:
Topics• Step 1: Understand What You're Moving to the Cloud (p. 35)• Step 2: Calculate Your Target Transfer Rate (p. 36)• Step 3: Determine How Many AWS Snowball Edge Devices You Need (p. 36)• Step 4: Create Your Jobs (p. 36)• Step 5: Separate Your Data into Transfer Segments (p. 36)
Step 1: Understand What You're Moving to the CloudBefore you create your first job using AWS Snowball Edge devices, you should make sure you know whatdata you want to transfer, where it is currently stored, and the destination you want to transfer it to. Fordata transfers that are a petabyte in scale or larger, this administrative housekeeping should make yourlife much easier when your AWS Snowball Edge devices start to arrive.
35
AWS Snowball Edge Developer GuidePlanning Your Large Transfer
You can keep this data in a spreadsheet or on a whiteboard—however it works best for you to organizethe large amount of content you plan to move to the AWS Cloud. If you're migrating data into the cloudfor the first time, we recommend that you design a cloud migration model. For more information, seethe whitepaper, A Practical Guide to Cloud Migration, on the AWS Whitepapers website.
When you're done with this step, you should know the total amount of data that you're going to moveinto the cloud.
Step 2: Calculate Your Target Transfer RateIt's important to estimate how quickly you can transfer data to the AWS Snowball Edge devicesconnected to each of your servers. This estimated speed equals your target transfer rate. This rate is therate at which you can expect data to move into an AWS Snowball Edge device given the realities of yourlocal network architecture.
NoteFor large data transfers, we recommend using the Amazon S3 Adapter for Snowball to transferyour data.
To calculate your target transfer rate, transfer a representative subset of your data to a Snowball Edge.During the transfer, run the snowballEdge status command to track the progress of the transfer.When the transfer is complete, compare the size of the transferred data against the time it took thetransfer to complete to get an estimate of your current transfer speed.
While determining your target transfer speed, keep in mind that you can change the speed throughchanges to network speed, the size of the files being transferred, and the speed at which data can beread from your local servers. The Amazon S3 Adapter for Snowball copies data to the AWS SnowballEdge device as fast as conditions allow.
Step 3: Determine How Many AWS Snowball Edge Devices YouNeedUsing the total amount of data you're going to move into the cloud, found in step 1, the transfer speedyou estimated from step 2, and the number of days in which you want to move the data into AWS,determine how many AWS Snowball Edge devices you need to finish your large-scale data migration.Remember that AWS Snowball Edge devices have about 73 TB of usable space. So if you want to move300 TB of data into AWS in 10 days, and you have a transfer speed of 250 MB/s, you would need fiveAWS Snowball Edge devices.
Step 4: Create Your JobsNow that you know how many AWS Snowball Edge devices you need, you can create an import job foreach device. Because each AWS Snowball Edge device import job involves a single AWS Snowball Edgedevice, you have to create multiple import jobs. For more information, see Create Your First Job (p. 23).
Step 5: Separate Your Data into Transfer SegmentsAs a best practice for large data transfers involving multiple jobs, we recommend that you separateyour data into a number of smaller, manageable data transfer segments. If you separate the data thisway, you can transfer each segment one at a time, or multiple segments in parallel. When planning yoursegments, make sure that all the sizes of the data for each segment combined fit on the AWS SnowballEdge device for this job. When segmenting your data transfer, take care not to copy the same files ordirectories multiple times. Some examples of separating your transfer into segments are as follows:
• You can make 9 segments of 8 TB each for an AWS Snowball Edge device.• For large files, each file can be an individual segment, keeping in mind the 5 TB size limit for objects in
Amazon S3.
36
AWS Snowball Edge Developer GuideCalibrating a Large Transfer
• Each segment can be a different size, and each individual segment can be made of the same kind ofdata—for example, small files in one segment, compressed archives in another, large files in anothersegment, and so on. This approach helps you determine your average transfer rate for different typesof files.
NoteMetadata operations are performed for each file transferred. Regardless of a file's size, thisoverhead remains the same. Therefore, you get faster performance out of compressing smallfiles into a larger bundle, batching your files, or transferring larger individual files.
Creating these data transfer segments makes it easier for you to quickly resolve any transfer issues,because trying to troubleshoot a large, heterogeneous transfer after the transfer has run for a day ormore can be complex.
When you've finished planning your petabyte-scale data transfer, we recommend that you transfer afew segments onto the AWS Snowball Edge device from your server to calibrate your speed and totaltransfer time.
Calibrating a Large TransferYou can calibrate a large transfer by transferring a representative set of your data transfer segments. Inother words, choose a number of the data segments that you defined following last section's guidelinesand transfer them to an AWS Snowball Edge device. At the same time, make a record of the transferspeed and total transfer time for each operation.
While the calibration is being performed, monitor the information that comes from the snowballEdgestatus command. If the calibration's results are less than the target transfer rate, you might be ableto copy multiple parts of your data transfer at the same time. In this case, repeat the calibration withadditional data transfer segment.
Continue adding additional parallel copy operations during calibration until you see diminishing returnsin the sum of the transfer speed of all instances currently transferring data. At this point, you can endthe last active instance and make a note of your new target transfer rate.
Sometimes the fastest way to transfer data with the AWS Snowball Edge device is to transfer data inparallel in one of the following scenarios:
• Using multiple instances of the Amazon S3 Adapter for Snowball on a single AWS Snowball Edgedevice.
• Using multiple instances of the Amazon S3 Adapter for Snowball on multiple AWS Snowball Edgedevices.
When you complete these steps, you should know how quickly you can transfer data to an AWS SnowballEdge device.
Managing EC2 InstancesTo avoid accidentally deleting the Amazon EC2 instances that you create on your device, don't shutdown your instances from the operating system. For example, don't use the shutdown or rebootcommands. Shutting down an instance from within the operating system has the same effect as callingthe terminate-instances command.
Instead, use the stop-instances command to suspend Amazon EC2 instances that you want to preserve.
37
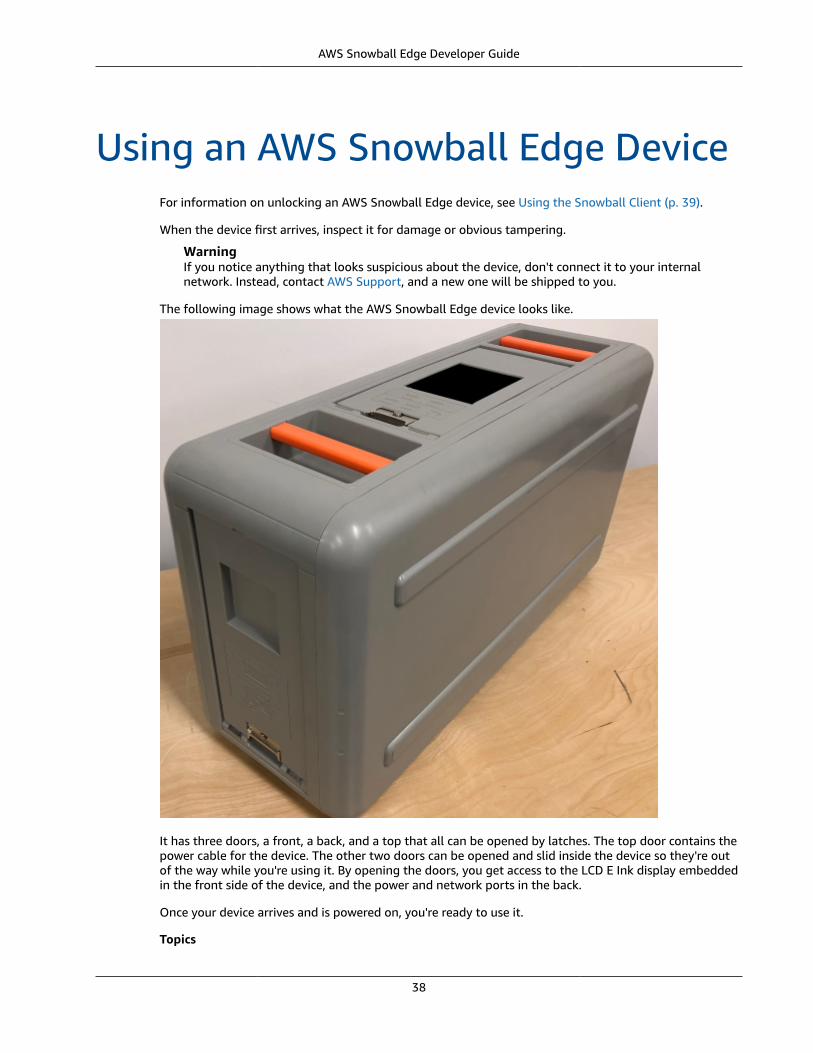
AWS Snowball Edge Developer Guide
Using an AWS Snowball Edge DeviceFor information on unlocking an AWS Snowball Edge device, see Using the Snowball Client (p. 39).
When the device first arrives, inspect it for damage or obvious tampering.
WarningIf you notice anything that looks suspicious about the device, don't connect it to your internalnetwork. Instead, contact AWS Support, and a new one will be shipped to you.
The following image shows what the AWS Snowball Edge device looks like.
It has three doors, a front, a back, and a top that all can be opened by latches. The top door contains thepower cable for the device. The other two doors can be opened and slid inside the device so they're outof the way while you're using it. By opening the doors, you get access to the LCD E Ink display embeddedin the front side of the device, and the power and network ports in the back.
Once your device arrives and is powered on, you're ready to use it.
Topics
38
AWS Snowball Edge Developer GuideUsing the Snowball Client
• Using the Snowball Client (p. 39)• Transferring Files Using the Amazon S3 Adapter (p. 51)• Transferring Files to AWS Snowball Edge Using the File Interface (p. 59)• Using AWS Lambda with an AWS Snowball Edge (p. 66)• Using Amazon EC2 Compute Instances (p. 72)• Using IAM Locally (p. 98)• Using AWS Security Token Service (p. 106)• Ports Required to Use AWS Services on an AWS Snowball Edge Device (p. 107)
Using the Snowball ClientFollowing, you can find information about how to get and use the Snowball client with your AWSSnowball Edge device. The Snowball client is a standalone terminal application that you run on yourlocal server to unlock the device and get credentials, logs, and status information. You can also usethe client for administrative tasks for a cluster. While using the Snowball client, you can get additionalsupport information by running the snowballEdge help command.
When you read and write data to the AWS Snowball Edge device, you use the Amazon S3 Adapter forSnowball or the file interface.
NoteIn January 2018, there was a feature update for clusters, making them leaderless. Thecluster update is backward-compatible with older clusters. However, if you're looking fordocumentation for the original Snowball client for Snowball Edge, see Using the SnowballClient (p. 167).
Downloading and Installing the Snowball ClientYou can download and install the Snowball client from the AWS Snowball resources website.
• Microsoft Windows – When the client has been installed, you can run it from any directory withoutany additional preparation.
• Linux – The Snowball client must be run from the ~/snowball-client-linux-build_number/bin/directory. Note that the Snowball client is only supported on 64-bit Linux distributions.
• MacOS – The install.sh script copies folders from the Snowball client .tar file to the /usr/local/bin/snowball directory. If you run this script, you can then run the Snowball client from any directory if /usr/local/bin is a path in your bash_profile. You can verify your path with the echo $PATH command.
Commands for the Snowball ClientFollowing, you can find information on the Snowball client commands, including examples of use andsample outputs.
Topics• Configuring a Profile for the Snowball Client (p. 40)• Getting Your QR Code for NFC Validation (p. 40)• Unlocking Snowball Edge Devices (p. 41)• Updating a Snowball Edge (p. 41)• Getting Credentials (p. 44)• Starting a Service on your Snowball Edge (p. 44)
39
AWS Snowball Edge Developer GuideCommands for the Snowball Client
• Stopping a Service on your Snowball Edge (p. 45)• Getting Your Certificate for Transferring Data (p. 45)• AWS Snowball Edge Logs (p. 46)• Getting Device Status (p. 47)• Getting Service Status (p. 49)• Removing a Node from a Cluster (p. 50)• Adding a Node to a Cluster (p. 51)
Configuring a Profile for the Snowball ClientEvery time you run a command for the Snowball client, you provide your manifest file, unlock code, andan IP address. You can get the first two of these from the AWS Snowball Management Console or thejob management API. For more information on getting your manifest and unlock code, see Get YourCredentials and Tools (p. 26).
You have the option of using the snowballEdge configure command to store the path to themanifest, the 29-character unlock code, and the endpoint as a profile. After configuration, you can useother Snowball client commands without having to manually type in these values for a particular job.After you configure the Snowball client, the information is saved in a plaintext JSON format to homedirectory/.aws/snowball/config/snowball-edge.config.
The endpoint is the IP address, with https:// added to it. You can locate the IP address for the AWSSnowball Edge device on the AWS Snowball Edge device's LCD display. When the AWS Snowball Edgedevice is connected to your network for the first time, it automatically gets a DHCP IP address, if a DHCPserver is available. If you want to use a different IP address, you can change it from the LCD display. Formore information, see Using an AWS Snowball Edge Device (p. 38).
ImportantAnyone who can access the configuration file can access the data on your Snowball Edgedevices or clusters. Managing local access control for this file is one of your administrativeresponsibilities.
Usage
You can use this command in two ways: inline, or when prompted. This usage example shows theprompted method.
snowballEdge configure
Example Output
Configuration will stored at home directory\.aws\snowball\config\snowball-edge.configSnowball Edge Manifest Path: Path/to/manifest/fileUnlock Code: 29 character unlock codeDefault Endpoint: https://192.0.2.0
You can have multiple profiles if you have multiple jobs at once, or if you want the option of managinga cluster from different endpoints. For more info on multiple AWS CLI profiles, see Named Profiles in theAWS Command Line Interface User Guide.
Getting Your QR Code for NFC ValidationYou can use this command to generate a device-specific QR code for use with the AWS Snowball EdgeVerification App. You can download this app from the Apple App Store or Google Play store. For moreinformation on NFC validation, see Validating NFC Tags (p. 132).
40
AWS Snowball Edge Developer GuideCommands for the Snowball Client
Usage
snowballEdge get-app-qr-code --output-file ~/downloads/snowball-qr-code.png
Example Output
QR code is saved to ~/downloads/snowball-qr-code.png
Unlocking Snowball Edge DevicesTo unlock a standalone AWS Snowball Edge device, run the snowballEdge unlock-devicecommand. To unlock a cluster, use the snowballEdge unlock-cluster command. These commandsauthenticate your access to the AWS Snowball Edge device.
NoteTo unlock the devices associated with your job, the devices must be on site, plugged into powerand network, and turned on. In addition, the LCD display on the AWS Snowball Edge device'sfront must indicate that the device is ready for use.
Usage (configured Snowball client)
snowballEdge unlock-device
Example Single Device Unlock Input
snowballEdge unlock-device
Example Single Device Unlock Output
Your Snowball Edge device is unlocking. You may determine the unlock state of your device using the describe-device command. Your Snowball Edge device will be available for use when it is in the UNLOCKED state.
Cluster Usage
When you unlock a cluster, you provide the endpoint for one of your nodes, and all the IP addresses forthe other devices in your cluster.
snowballEdge unlock-cluster --endpoint https://192.0.2.0 --manifest-file Path/to/manifest/file --unlock-code 01234-abcde-ABCDE-01234 --device-ip-addresses 192.0.2.0 192.0.2.1 192.0.2.2 192.0.2.3 192.0.2.4
Example Cluster Unlock Output
Your Snowball Edge Cluster is unlocking. You may determine the unlock state of your cluster using the describe-device command. Your Snowball Edge Cluster will be available for use when your Snowball Edge devices are in the UNLOCKED state.
Updating a Snowball EdgeThe following commands can be used to download and install updates for your Snowball Edge device.For procedures that use these commands, see Updating software on a AWS Snowball Edge (p. 114).
41
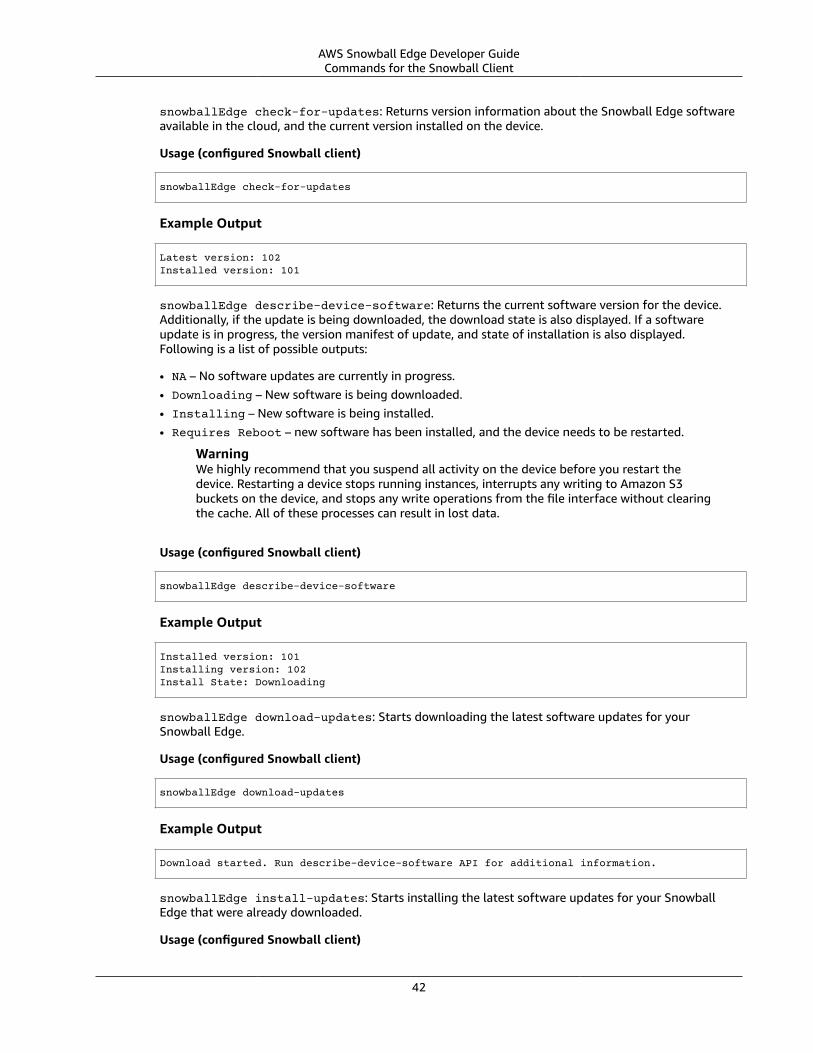
AWS Snowball Edge Developer GuideCommands for the Snowball Client
snowballEdge check-for-updates: Returns version information about the Snowball Edge softwareavailable in the cloud, and the current version installed on the device.
Usage (configured Snowball client)
snowballEdge check-for-updates
Example Output
Latest version: 102Installed version: 101
snowballEdge describe-device-software: Returns the current software version for the device.Additionally, if the update is being downloaded, the download state is also displayed. If a softwareupdate is in progress, the version manifest of update, and state of installation is also displayed.Following is a list of possible outputs:
• NA – No software updates are currently in progress.• Downloading – New software is being downloaded.• Installing – New software is being installed.• Requires Reboot – new software has been installed, and the device needs to be restarted.
WarningWe highly recommend that you suspend all activity on the device before you restart thedevice. Restarting a device stops running instances, interrupts any writing to Amazon S3buckets on the device, and stops any write operations from the file interface without clearingthe cache. All of these processes can result in lost data.
Usage (configured Snowball client)
snowballEdge describe-device-software
Example Output
Installed version: 101Installing version: 102Install State: Downloading
snowballEdge download-updates: Starts downloading the latest software updates for yourSnowball Edge.
Usage (configured Snowball client)
snowballEdge download-updates
Example Output
Download started. Run describe-device-software API for additional information.
snowballEdge install-updates: Starts installing the latest software updates for your SnowballEdge that were already downloaded.
Usage (configured Snowball client)
42

AWS Snowball Edge Developer GuideCommands for the Snowball Client
snowballEdge install-updates
Example Output
Installation started.
snowballEdge reboot-device: Reboots the device.
WarningWe highly recommend that you suspend all activity on the device before you restart the device.Restarting a device stops running instances, interrupts any writing to Amazon S3 buckets on thedevice, and stops any write operations from the file interface without clearing the cache. All ofthese processes can result in lost data.
Usage (configured Snowball client)
snowballEdge reboot-device
Example Output
Rebooting device now.
snowballEdge configure-auto-update-strategies: Configures an automatic update strategy.
Usage (configured Snowball client)
snowballEdge configure-auto-update-strategy --auto-check autoCheck [--auto-check-frequencyautoCheckFreq] --auto-download autoDownload[--auto-download-frequency autoDownloadFreq]--auto-install autoInstall[--auto-install-frequency autoInstallFreq]--auto-reboot autoReboot [--endpointendpoint]
Example Output
Successfully configured auto update strategy. Run describe-auto-update-strategies for additional information.
snowballEdge describe-auto-update-strategies: Returns any currently configured automaticupdate strategy.
Usage (configured Snowball client)
snowballEdge describe-auto-update-strategies
Example Output
auto-update-strategy {[auto-check:true,auto-check-frequency: "0 0 * * FRI", // CRON Expression String, Every Friday at midnightauto-download:true,auto-download-frequency: "0 0 * * SAT", // CRON Expression String, Every Saturday atmidnightauto-install:true,
43
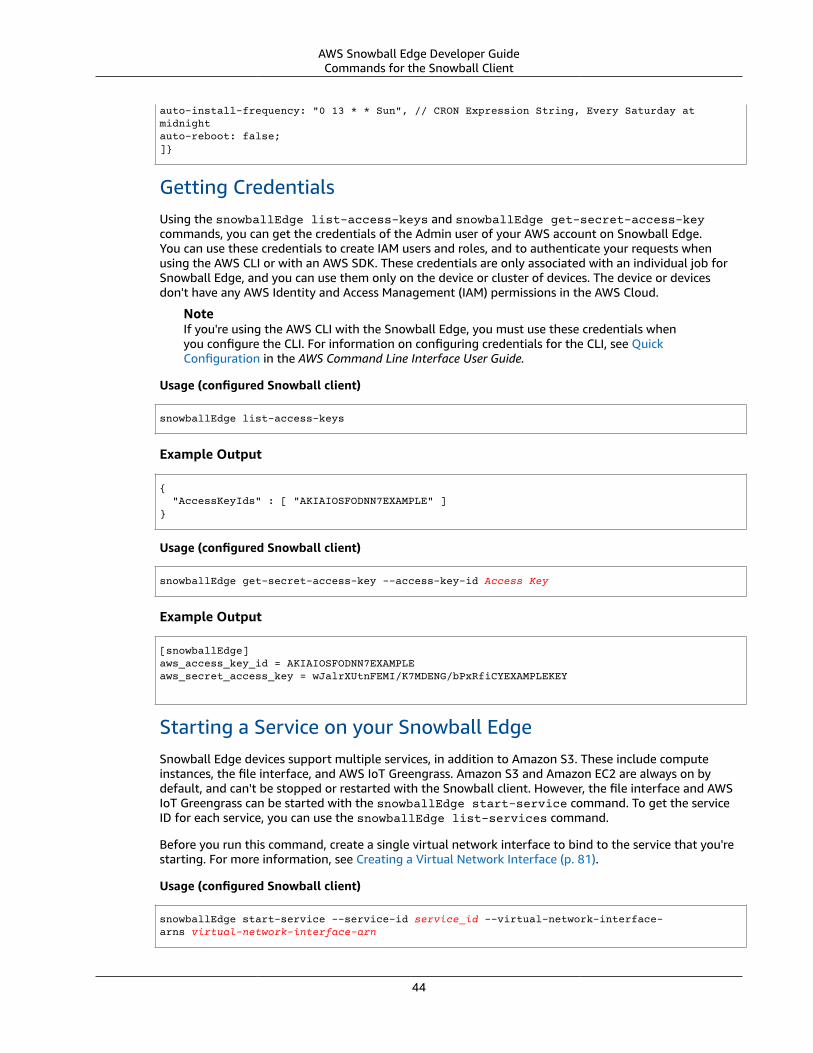
AWS Snowball Edge Developer GuideCommands for the Snowball Client
auto-install-frequency: "0 13 * * Sun", // CRON Expression String, Every Saturday atmidnightauto-reboot: false;]}
Getting CredentialsUsing the snowballEdge list-access-keys and snowballEdge get-secret-access-keycommands, you can get the credentials of the Admin user of your AWS account on Snowball Edge.You can use these credentials to create IAM users and roles, and to authenticate your requests whenusing the AWS CLI or with an AWS SDK. These credentials are only associated with an individual job forSnowball Edge, and you can use them only on the device or cluster of devices. The device or devicesdon't have any AWS Identity and Access Management (IAM) permissions in the AWS Cloud.
NoteIf you're using the AWS CLI with the Snowball Edge, you must use these credentials whenyou configure the CLI. For information on configuring credentials for the CLI, see QuickConfiguration in the AWS Command Line Interface User Guide.
Usage (configured Snowball client)
snowballEdge list-access-keys
Example Output
{ "AccessKeyIds" : [ "AKIAIOSFODNN7EXAMPLE" ]}
Usage (configured Snowball client)
snowballEdge get-secret-access-key --access-key-id Access Key
Example Output
[snowballEdge]aws_access_key_id = AKIAIOSFODNN7EXAMPLEaws_secret_access_key = wJalrXUtnFEMI/K7MDENG/bPxRfiCYEXAMPLEKEY
Starting a Service on your Snowball EdgeSnowball Edge devices support multiple services, in addition to Amazon S3. These include computeinstances, the file interface, and AWS IoT Greengrass. Amazon S3 and Amazon EC2 are always on bydefault, and can't be stopped or restarted with the Snowball client. However, the file interface and AWSIoT Greengrass can be started with the snowballEdge start-service command. To get the serviceID for each service, you can use the snowballEdge list-services command.
Before you run this command, create a single virtual network interface to bind to the service that you'restarting. For more information, see Creating a Virtual Network Interface (p. 81).
Usage (configured Snowball client)
snowballEdge start-service --service-id service_id --virtual-network-interface-arns virtual-network-interface-arn
44
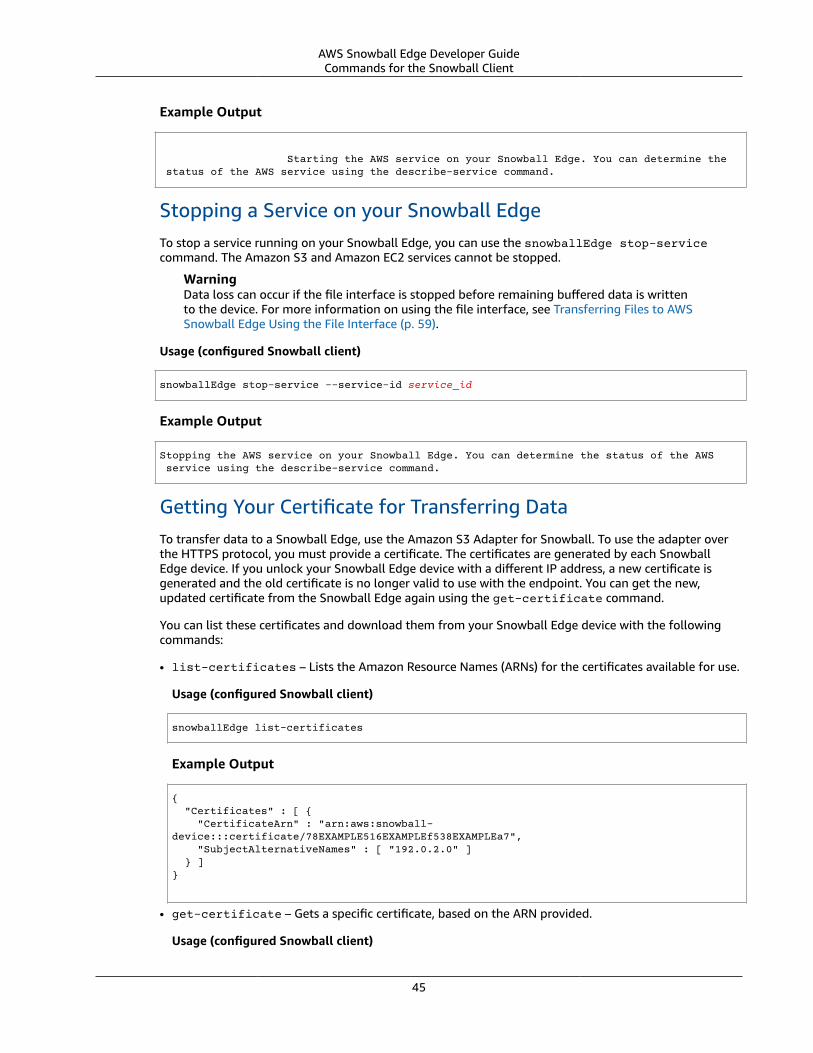
AWS Snowball Edge Developer GuideCommands for the Snowball Client
Example Output
Starting the AWS service on your Snowball Edge. You can determine the status of the AWS service using the describe-service command.
Stopping a Service on your Snowball EdgeTo stop a service running on your Snowball Edge, you can use the snowballEdge stop-servicecommand. The Amazon S3 and Amazon EC2 services cannot be stopped.
WarningData loss can occur if the file interface is stopped before remaining buffered data is writtento the device. For more information on using the file interface, see Transferring Files to AWSSnowball Edge Using the File Interface (p. 59).
Usage (configured Snowball client)
snowballEdge stop-service --service-id service_id
Example Output
Stopping the AWS service on your Snowball Edge. You can determine the status of the AWS service using the describe-service command.
Getting Your Certificate for Transferring DataTo transfer data to a Snowball Edge, use the Amazon S3 Adapter for Snowball. To use the adapter overthe HTTPS protocol, you must provide a certificate. The certificates are generated by each SnowballEdge device. If you unlock your Snowball Edge device with a different IP address, a new certificate isgenerated and the old certificate is no longer valid to use with the endpoint. You can get the new,updated certificate from the Snowball Edge again using the get-certificate command.
You can list these certificates and download them from your Snowball Edge device with the followingcommands:
• list-certificates – Lists the Amazon Resource Names (ARNs) for the certificates available for use.
Usage (configured Snowball client)
snowballEdge list-certificates
Example Output
{ "Certificates" : [ { "CertificateArn" : "arn:aws:snowball-device:::certificate/78EXAMPLE516EXAMPLEf538EXAMPLEa7", "SubjectAlternativeNames" : [ "192.0.2.0" ] } ]}
• get-certificate – Gets a specific certificate, based on the ARN provided.
Usage (configured Snowball client)
45
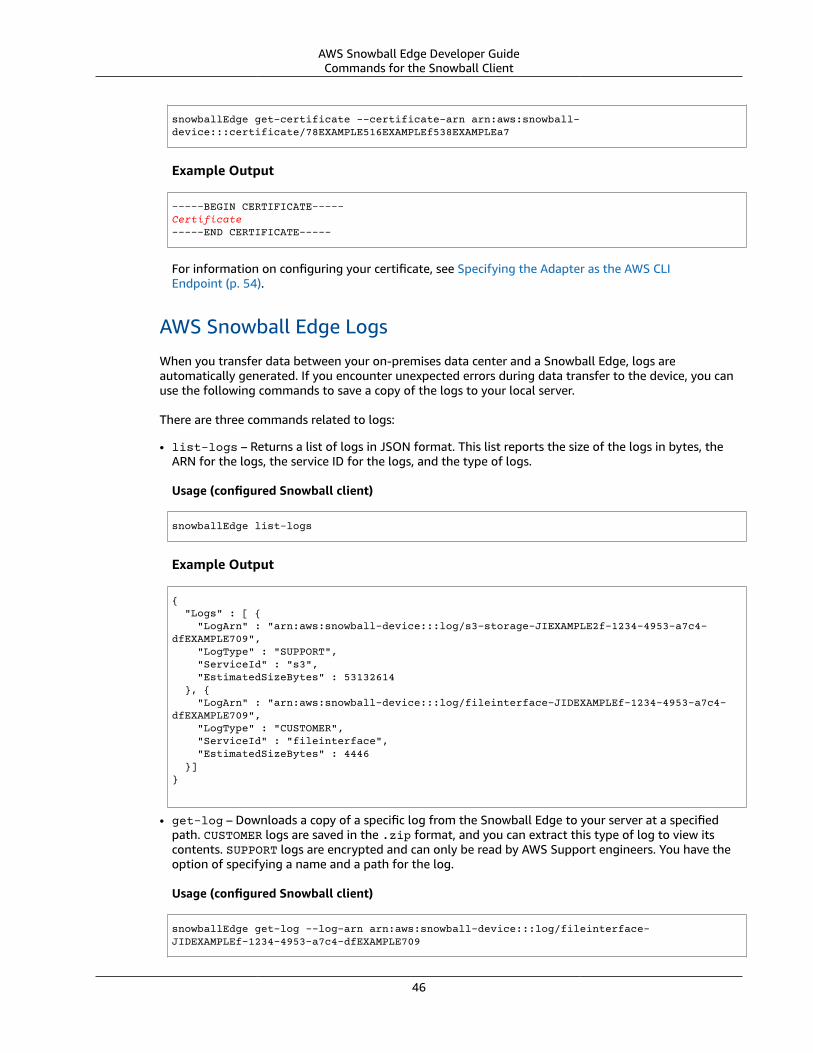
AWS Snowball Edge Developer GuideCommands for the Snowball Client
snowballEdge get-certificate --certificate-arn arn:aws:snowball-device:::certificate/78EXAMPLE516EXAMPLEf538EXAMPLEa7
Example Output
-----BEGIN CERTIFICATE-----Certificate-----END CERTIFICATE-----
For information on configuring your certificate, see Specifying the Adapter as the AWS CLIEndpoint (p. 54).
AWS Snowball Edge Logs
When you transfer data between your on-premises data center and a Snowball Edge, logs areautomatically generated. If you encounter unexpected errors during data transfer to the device, you canuse the following commands to save a copy of the logs to your local server.
There are three commands related to logs:
• list-logs – Returns a list of logs in JSON format. This list reports the size of the logs in bytes, theARN for the logs, the service ID for the logs, and the type of logs.
Usage (configured Snowball client)
snowballEdge list-logs
Example Output
{ "Logs" : [ { "LogArn" : "arn:aws:snowball-device:::log/s3-storage-JIEXAMPLE2f-1234-4953-a7c4-dfEXAMPLE709", "LogType" : "SUPPORT", "ServiceId" : "s3", "EstimatedSizeBytes" : 53132614 }, { "LogArn" : "arn:aws:snowball-device:::log/fileinterface-JIDEXAMPLEf-1234-4953-a7c4-dfEXAMPLE709", "LogType" : "CUSTOMER", "ServiceId" : "fileinterface", "EstimatedSizeBytes" : 4446 }]}
• get-log – Downloads a copy of a specific log from the Snowball Edge to your server at a specifiedpath. CUSTOMER logs are saved in the .zip format, and you can extract this type of log to view itscontents. SUPPORT logs are encrypted and can only be read by AWS Support engineers. You have theoption of specifying a name and a path for the log.
Usage (configured Snowball client)
snowballEdge get-log --log-arn arn:aws:snowball-device:::log/fileinterface-JIDEXAMPLEf-1234-4953-a7c4-dfEXAMPLE709
46
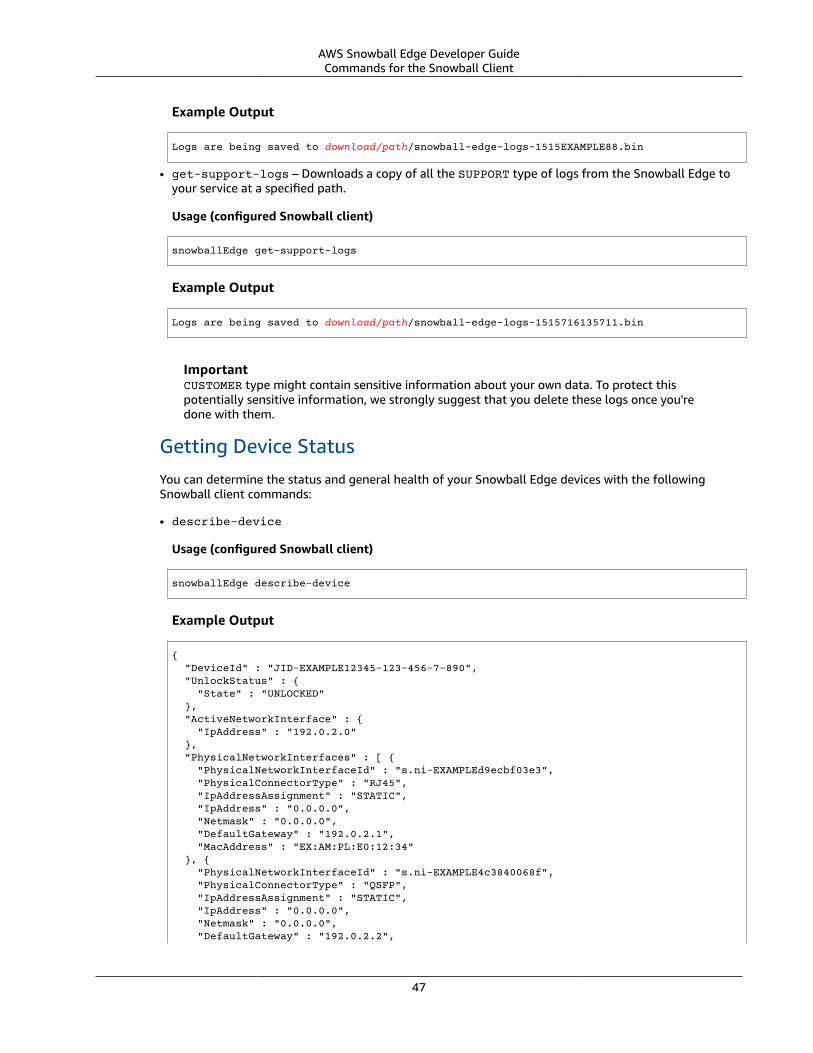
AWS Snowball Edge Developer GuideCommands for the Snowball Client
Example Output
Logs are being saved to download/path/snowball-edge-logs-1515EXAMPLE88.bin
• get-support-logs – Downloads a copy of all the SUPPORT type of logs from the Snowball Edge toyour service at a specified path.
Usage (configured Snowball client)
snowballEdge get-support-logs
Example Output
Logs are being saved to download/path/snowball-edge-logs-1515716135711.bin
ImportantCUSTOMER type might contain sensitive information about your own data. To protect thispotentially sensitive information, we strongly suggest that you delete these logs once you'redone with them.
Getting Device StatusYou can determine the status and general health of your Snowball Edge devices with the followingSnowball client commands:
• describe-device
Usage (configured Snowball client)
snowballEdge describe-device
Example Output
{ "DeviceId" : "JID-EXAMPLE12345-123-456-7-890", "UnlockStatus" : { "State" : "UNLOCKED" }, "ActiveNetworkInterface" : { "IpAddress" : "192.0.2.0" }, "PhysicalNetworkInterfaces" : [ { "PhysicalNetworkInterfaceId" : "s.ni-EXAMPLEd9ecbf03e3", "PhysicalConnectorType" : "RJ45", "IpAddressAssignment" : "STATIC", "IpAddress" : "0.0.0.0", "Netmask" : "0.0.0.0", "DefaultGateway" : "192.0.2.1", "MacAddress" : "EX:AM:PL:E0:12:34" }, { "PhysicalNetworkInterfaceId" : "s.ni-EXAMPLE4c3840068f", "PhysicalConnectorType" : "QSFP", "IpAddressAssignment" : "STATIC", "IpAddress" : "0.0.0.0", "Netmask" : "0.0.0.0", "DefaultGateway" : "192.0.2.2",
47
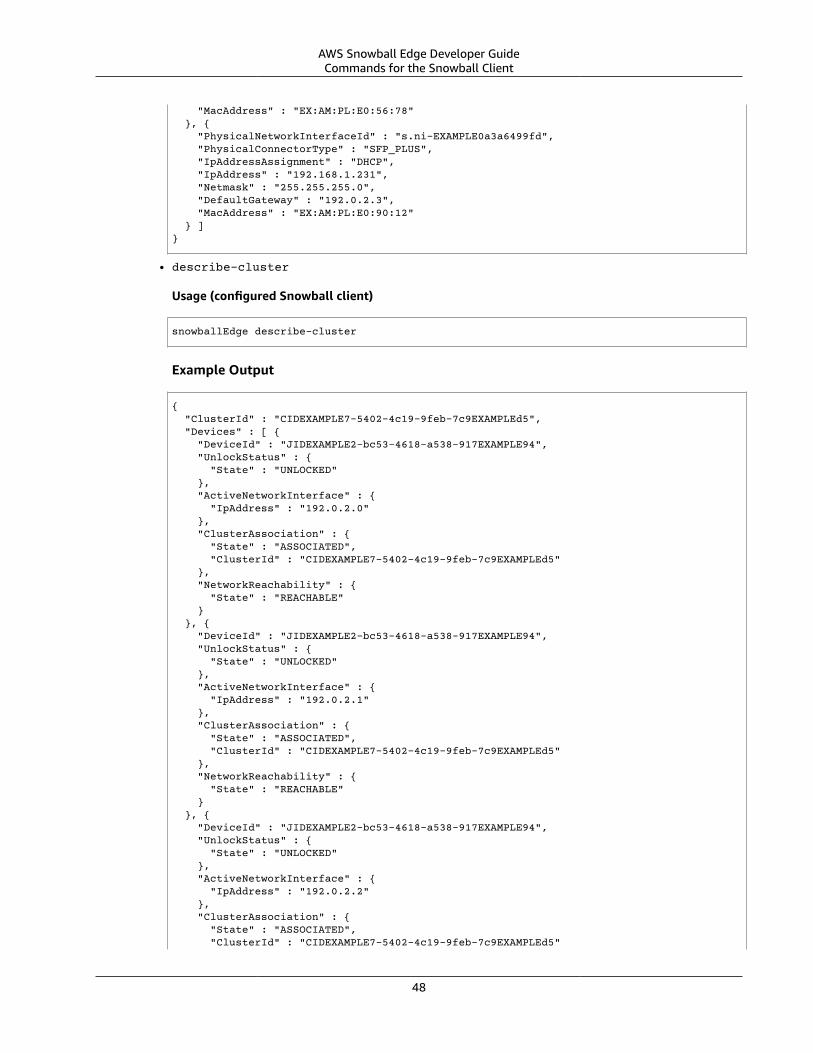
AWS Snowball Edge Developer GuideCommands for the Snowball Client
"MacAddress" : "EX:AM:PL:E0:56:78" }, { "PhysicalNetworkInterfaceId" : "s.ni-EXAMPLE0a3a6499fd", "PhysicalConnectorType" : "SFP_PLUS", "IpAddressAssignment" : "DHCP", "IpAddress" : "192.168.1.231", "Netmask" : "255.255.255.0", "DefaultGateway" : "192.0.2.3", "MacAddress" : "EX:AM:PL:E0:90:12" } ]}
• describe-cluster
Usage (configured Snowball client)
snowballEdge describe-cluster
Example Output
{ "ClusterId" : "CIDEXAMPLE7-5402-4c19-9feb-7c9EXAMPLEd5", "Devices" : [ { "DeviceId" : "JIDEXAMPLE2-bc53-4618-a538-917EXAMPLE94", "UnlockStatus" : { "State" : "UNLOCKED" }, "ActiveNetworkInterface" : { "IpAddress" : "192.0.2.0" }, "ClusterAssociation" : { "State" : "ASSOCIATED", "ClusterId" : "CIDEXAMPLE7-5402-4c19-9feb-7c9EXAMPLEd5" }, "NetworkReachability" : { "State" : "REACHABLE" } }, { "DeviceId" : "JIDEXAMPLE2-bc53-4618-a538-917EXAMPLE94", "UnlockStatus" : { "State" : "UNLOCKED" }, "ActiveNetworkInterface" : { "IpAddress" : "192.0.2.1" }, "ClusterAssociation" : { "State" : "ASSOCIATED", "ClusterId" : "CIDEXAMPLE7-5402-4c19-9feb-7c9EXAMPLEd5" }, "NetworkReachability" : { "State" : "REACHABLE" } }, { "DeviceId" : "JIDEXAMPLE2-bc53-4618-a538-917EXAMPLE94", "UnlockStatus" : { "State" : "UNLOCKED" }, "ActiveNetworkInterface" : { "IpAddress" : "192.0.2.2" }, "ClusterAssociation" : { "State" : "ASSOCIATED", "ClusterId" : "CIDEXAMPLE7-5402-4c19-9feb-7c9EXAMPLEd5"
48
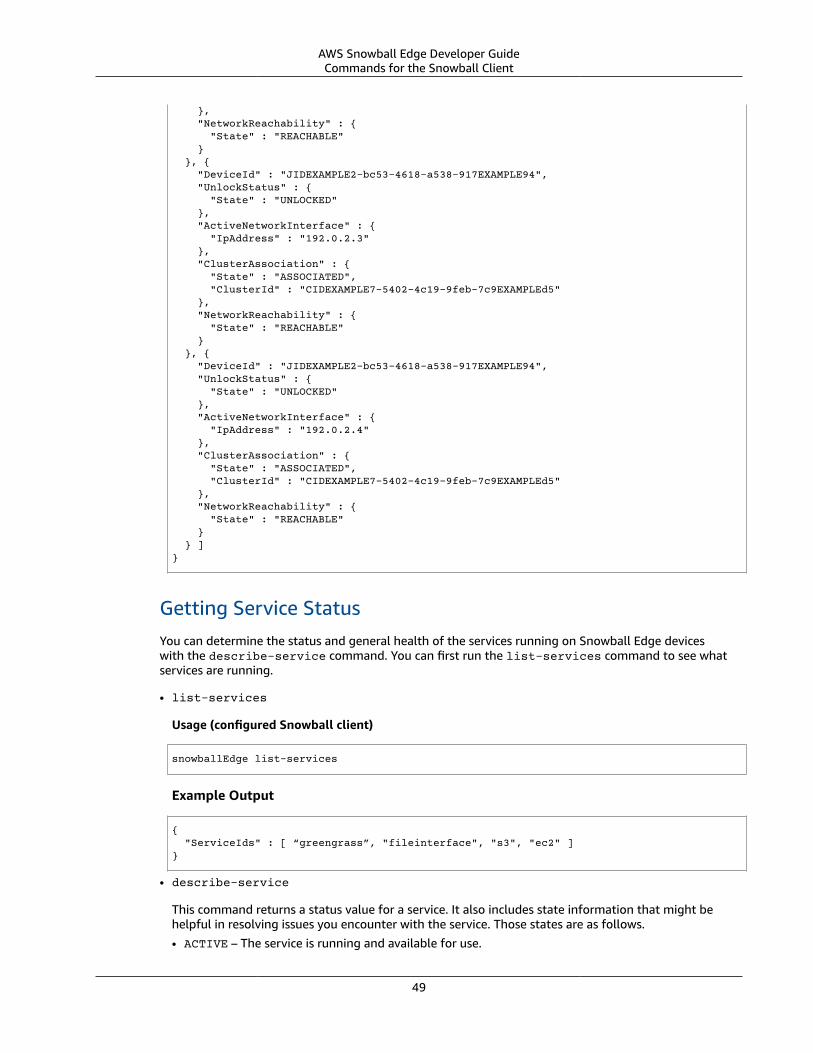
AWS Snowball Edge Developer GuideCommands for the Snowball Client
}, "NetworkReachability" : { "State" : "REACHABLE" } }, { "DeviceId" : "JIDEXAMPLE2-bc53-4618-a538-917EXAMPLE94", "UnlockStatus" : { "State" : "UNLOCKED" }, "ActiveNetworkInterface" : { "IpAddress" : "192.0.2.3" }, "ClusterAssociation" : { "State" : "ASSOCIATED", "ClusterId" : "CIDEXAMPLE7-5402-4c19-9feb-7c9EXAMPLEd5" }, "NetworkReachability" : { "State" : "REACHABLE" } }, { "DeviceId" : "JIDEXAMPLE2-bc53-4618-a538-917EXAMPLE94", "UnlockStatus" : { "State" : "UNLOCKED" }, "ActiveNetworkInterface" : { "IpAddress" : "192.0.2.4" }, "ClusterAssociation" : { "State" : "ASSOCIATED", "ClusterId" : "CIDEXAMPLE7-5402-4c19-9feb-7c9EXAMPLEd5" }, "NetworkReachability" : { "State" : "REACHABLE" } } ]}
Getting Service StatusYou can determine the status and general health of the services running on Snowball Edge deviceswith the describe-service command. You can first run the list-services command to see whatservices are running.
• list-services
Usage (configured Snowball client)
snowballEdge list-services
Example Output
{ "ServiceIds" : [ “greengrass”, "fileinterface", "s3", "ec2" ]}
• describe-service
This command returns a status value for a service. It also includes state information that might behelpful in resolving issues you encounter with the service. Those states are as follows.• ACTIVE – The service is running and available for use.
49

AWS Snowball Edge Developer GuideCommands for the Snowball Client
• ACTIVATING – The service is starting up, but it is not yet available for use.
• DEACTIVATING – The service is in the process of shutting down.
• INACTIVE – The service is not running and is not available for use.
Usage (configured Snowball client)
snowballEdge describe-service --service-id service-id
Example Output
{"ServiceId" : "s3", "Status" : { "State" : "ACTIVE" },"Storage" : {"TotalSpaceBytes" : 99608745492480,"FreeSpaceBytes" : 99608744468480},"Endpoints" : [ {"Protocol" : "http","Port" : 8080,"Host" : "192.0.2.0"}, {"Protocol" : "https","Port" : 8443,"Host" : "192.0.2.0","CertificateAssociation" : {"CertificateArn" : "arn:aws:snowball-device:::certificate/6d955EXAMPLEdb71798146EXAMPLE3f0"}} ]}
Removing a Node from a Cluster
The disassociate-device command removes a node from a Snowball Edge cluster. If you want toreplace an unhealthy node, use this command. For more information on clusters, see Using an AWSSnowball Edge Cluster (p. 109).
ImportantUse the disassociate-device command only when you are removing an unhealthy node.This command fails and returns an error if you try to remove a healthy node.
Don't use this command to remove a node that was accidentally powered off or disconnected from thenetwork and is therefore temporarily unavailable to the rest of the cluster. Nodes removed with thiscommand can't be added to any cluster, and must be returned to AWS.
If a node was accidentally powered off or disconnected from the network, simply plug the node back intopower, and the network, and use the associate-device command. You can't use the disassociate-device command to disassociate a node if it's powered on and healthy.
Usage (configured Snowball client)
snowballEdge disassociate-device --device-id Job ID for the Device
50
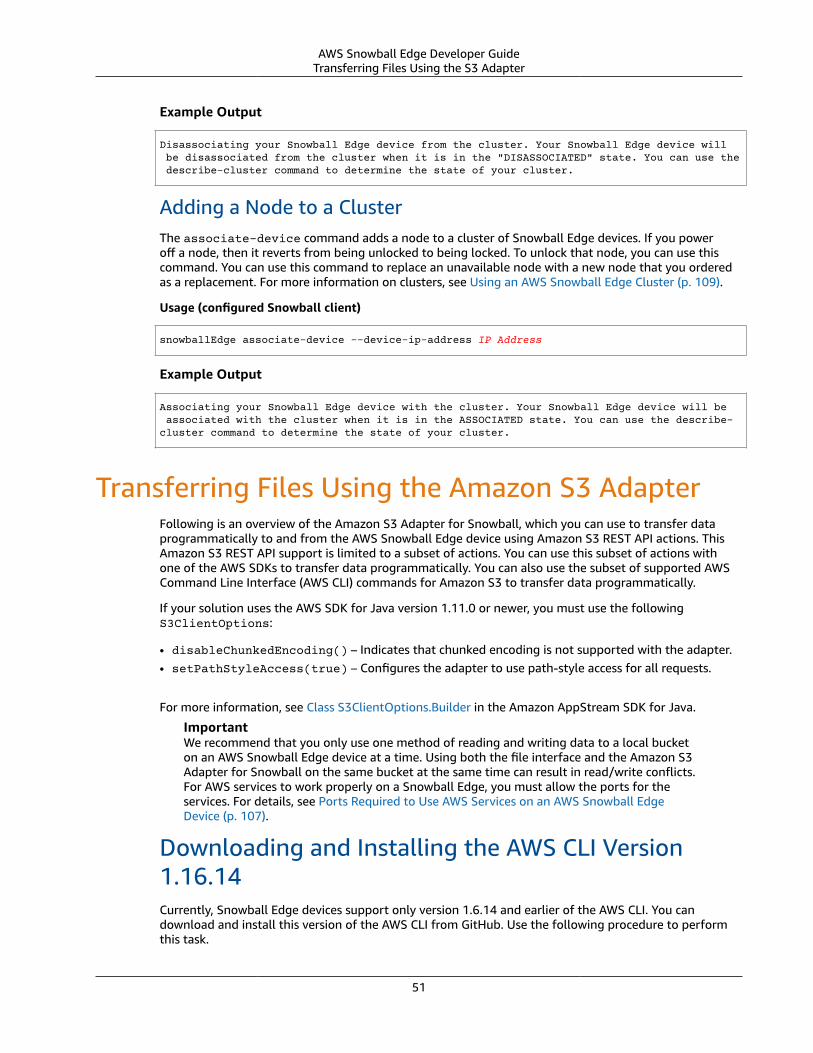
AWS Snowball Edge Developer GuideTransferring Files Using the S3 Adapter
Example Output
Disassociating your Snowball Edge device from the cluster. Your Snowball Edge device will be disassociated from the cluster when it is in the "DISASSOCIATED" state. You can use the describe-cluster command to determine the state of your cluster.
Adding a Node to a ClusterThe associate-device command adds a node to a cluster of Snowball Edge devices. If you poweroff a node, then it reverts from being unlocked to being locked. To unlock that node, you can use thiscommand. You can use this command to replace an unavailable node with a new node that you orderedas a replacement. For more information on clusters, see Using an AWS Snowball Edge Cluster (p. 109).
Usage (configured Snowball client)
snowballEdge associate-device --device-ip-address IP Address
Example Output
Associating your Snowball Edge device with the cluster. Your Snowball Edge device will be associated with the cluster when it is in the ASSOCIATED state. You can use the describe-cluster command to determine the state of your cluster.
Transferring Files Using the Amazon S3 AdapterFollowing is an overview of the Amazon S3 Adapter for Snowball, which you can use to transfer dataprogrammatically to and from the AWS Snowball Edge device using Amazon S3 REST API actions. ThisAmazon S3 REST API support is limited to a subset of actions. You can use this subset of actions withone of the AWS SDKs to transfer data programmatically. You can also use the subset of supported AWSCommand Line Interface (AWS CLI) commands for Amazon S3 to transfer data programmatically.
If your solution uses the AWS SDK for Java version 1.11.0 or newer, you must use the followingS3ClientOptions:
• disableChunkedEncoding() – Indicates that chunked encoding is not supported with the adapter.• setPathStyleAccess(true) – Configures the adapter to use path-style access for all requests.
For more information, see Class S3ClientOptions.Builder in the Amazon AppStream SDK for Java.
ImportantWe recommend that you only use one method of reading and writing data to a local bucketon an AWS Snowball Edge device at a time. Using both the file interface and the Amazon S3Adapter for Snowball on the same bucket at the same time can result in read/write conflicts.For AWS services to work properly on a Snowball Edge, you must allow the ports for theservices. For details, see Ports Required to Use AWS Services on an AWS Snowball EdgeDevice (p. 107).
Downloading and Installing the AWS CLI Version1.16.14Currently, Snowball Edge devices support only version 1.6.14 and earlier of the AWS CLI. You candownload and install this version of the AWS CLI from GitHub. Use the following procedure to performthis task.
51
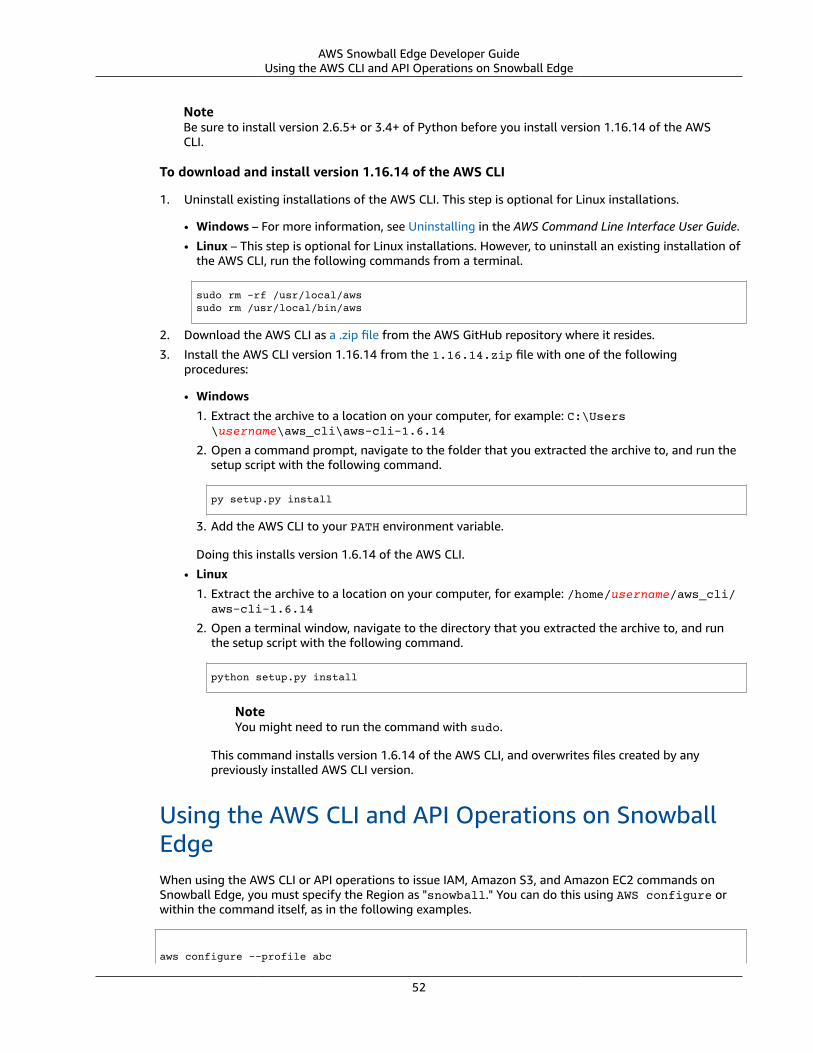
AWS Snowball Edge Developer GuideUsing the AWS CLI and API Operations on Snowball Edge
NoteBe sure to install version 2.6.5+ or 3.4+ of Python before you install version 1.16.14 of the AWSCLI.
To download and install version 1.16.14 of the AWS CLI
1. Uninstall existing installations of the AWS CLI. This step is optional for Linux installations.
• Windows – For more information, see Uninstalling in the AWS Command Line Interface User Guide.
• Linux – This step is optional for Linux installations. However, to uninstall an existing installation ofthe AWS CLI, run the following commands from a terminal.
sudo rm -rf /usr/local/awssudo rm /usr/local/bin/aws
2. Download the AWS CLI as a .zip file from the AWS GitHub repository where it resides.
3. Install the AWS CLI version 1.16.14 from the 1.16.14.zip file with one of the followingprocedures:
• Windows
1. Extract the archive to a location on your computer, for example: C:\Users\username\aws_cli\aws-cli-1.6.14
2. Open a command prompt, navigate to the folder that you extracted the archive to, and run thesetup script with the following command.
py setup.py install
3. Add the AWS CLI to your PATH environment variable.
Doing this installs version 1.6.14 of the AWS CLI.
• Linux
1. Extract the archive to a location on your computer, for example: /home/username/aws_cli/aws-cli-1.6.14
2. Open a terminal window, navigate to the directory that you extracted the archive to, and runthe setup script with the following command.
python setup.py install
NoteYou might need to run the command with sudo.
This command installs version 1.6.14 of the AWS CLI, and overwrites files created by anypreviously installed AWS CLI version.
Using the AWS CLI and API Operations on SnowballEdgeWhen using the AWS CLI or API operations to issue IAM, Amazon S3, and Amazon EC2 commands onSnowball Edge, you must specify the Region as "snowball." You can do this using AWS configure orwithin the command itself, as in the following examples.
aws configure --profile abc
52

AWS Snowball Edge Developer GuideGetting and Using Local Amazon S3 Credentials
AWS Access Key ID [None]: defghAWS Secret Access Key [None]: 1234567Default region name [None]: snowballDefault output format [None]: json
Or
aws s3 ls --profile snowballEdge --endpoint http://192.0.2.0:8080 --region snow
Authorization with the Amazon S3 API Adapter for AWSSnowball
When you use the Amazon S3 Adapter for Snowball, every interaction is signed with the AWS SignatureVersion 4 algorithm by default. This authorization is used only to verify the data traveling from its sourceto the adapter. All encryption and decryption happens on the device. Unencrypted data is never storedon the device.
When using the adapter, keep the following in mind:
• To get the local Amazon S3 credentials to sign your requests to the AWS Snowball Edge device, run thesnowballEdge list-access-keys and snowballEdge get-secret-access-keys Snowballclient commands. For more information, see Using the Snowball Client (p. 39). These local AmazonS3 credentials include a pair of keys: an access key and a secret key. These keys are only valid for thedevices associated with your job. They can't be used in the AWS Cloud because they have no AWSIdentity and Access Management (IAM) counterpart.
• The encryption key is not changed by what AWS credentials you use. Signing with the SignatureVersion 4 algorithm is only used to verify the data traveling from its source to the adapter. Thus, thissigning never factors into the encryption keys used to encrypt your data on the Snowball.
Getting and Using Local Amazon S3 CredentialsEvery interaction with a Snowball Edge is signed with the AWS Signature Version 4 algorithm. For moreinformation about the algorithm, see Signature Version 4 Signing Process in the AWS General Reference.
You can get the local Amazon S3 credentials to sign your requests to the Snowball Edge device byrunning the snowballEdge list-access-keys and snowballEdge get-secret-access-keySnowball client commands. For more information, see Getting Credentials (p. 44). These local AmazonS3 credentials include a pair of keys: an access key ID and a secret key. These credentials are only validfor the devices that are associated with your job. They can't be used in the AWS Cloud because they haveno IAM counterpart.
You can add these credentials to the AWS credentials file on your server. The default credential profilesfile is typically located at ~/.aws/credentials, but the location can vary per platform. This file isshared by many of the AWS SDKs and by the AWS CLI. You can save local credentials with a profile nameas in the following example.
[snowballEdge]aws_access_key_id = AKIAIOSFODNN7EXAMPLEaws_secret_access_key = wJalrXUtnFEMI/K7MDENG/bPxRfiCYEXAMPLEKEY
53
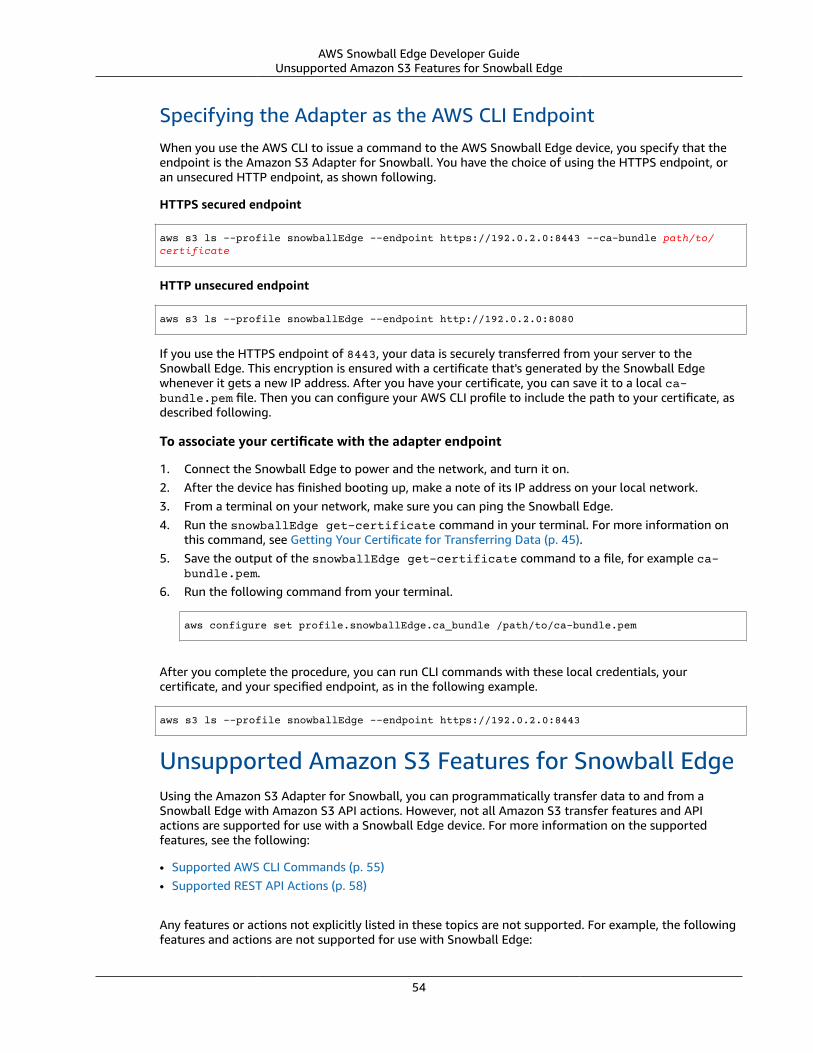
AWS Snowball Edge Developer GuideUnsupported Amazon S3 Features for Snowball Edge
Specifying the Adapter as the AWS CLI EndpointWhen you use the AWS CLI to issue a command to the AWS Snowball Edge device, you specify that theendpoint is the Amazon S3 Adapter for Snowball. You have the choice of using the HTTPS endpoint, oran unsecured HTTP endpoint, as shown following.
HTTPS secured endpoint
aws s3 ls --profile snowballEdge --endpoint https://192.0.2.0:8443 --ca-bundle path/to/certificate
HTTP unsecured endpoint
aws s3 ls --profile snowballEdge --endpoint http://192.0.2.0:8080
If you use the HTTPS endpoint of 8443, your data is securely transferred from your server to theSnowball Edge. This encryption is ensured with a certificate that's generated by the Snowball Edgewhenever it gets a new IP address. After you have your certificate, you can save it to a local ca-bundle.pem file. Then you can configure your AWS CLI profile to include the path to your certificate, asdescribed following.
To associate your certificate with the adapter endpoint
1. Connect the Snowball Edge to power and the network, and turn it on.2. After the device has finished booting up, make a note of its IP address on your local network.3. From a terminal on your network, make sure you can ping the Snowball Edge.4. Run the snowballEdge get-certificate command in your terminal. For more information on
this command, see Getting Your Certificate for Transferring Data (p. 45).5. Save the output of the snowballEdge get-certificate command to a file, for example ca-
bundle.pem.6. Run the following command from your terminal.
aws configure set profile.snowballEdge.ca_bundle /path/to/ca-bundle.pem
After you complete the procedure, you can run CLI commands with these local credentials, yourcertificate, and your specified endpoint, as in the following example.
aws s3 ls --profile snowballEdge --endpoint https://192.0.2.0:8443
Unsupported Amazon S3 Features for Snowball EdgeUsing the Amazon S3 Adapter for Snowball, you can programmatically transfer data to and from aSnowball Edge with Amazon S3 API actions. However, not all Amazon S3 transfer features and APIactions are supported for use with a Snowball Edge device. For more information on the supportedfeatures, see the following:
• Supported AWS CLI Commands (p. 55)• Supported REST API Actions (p. 58)
Any features or actions not explicitly listed in these topics are not supported. For example, the followingfeatures and actions are not supported for use with Snowball Edge:
54
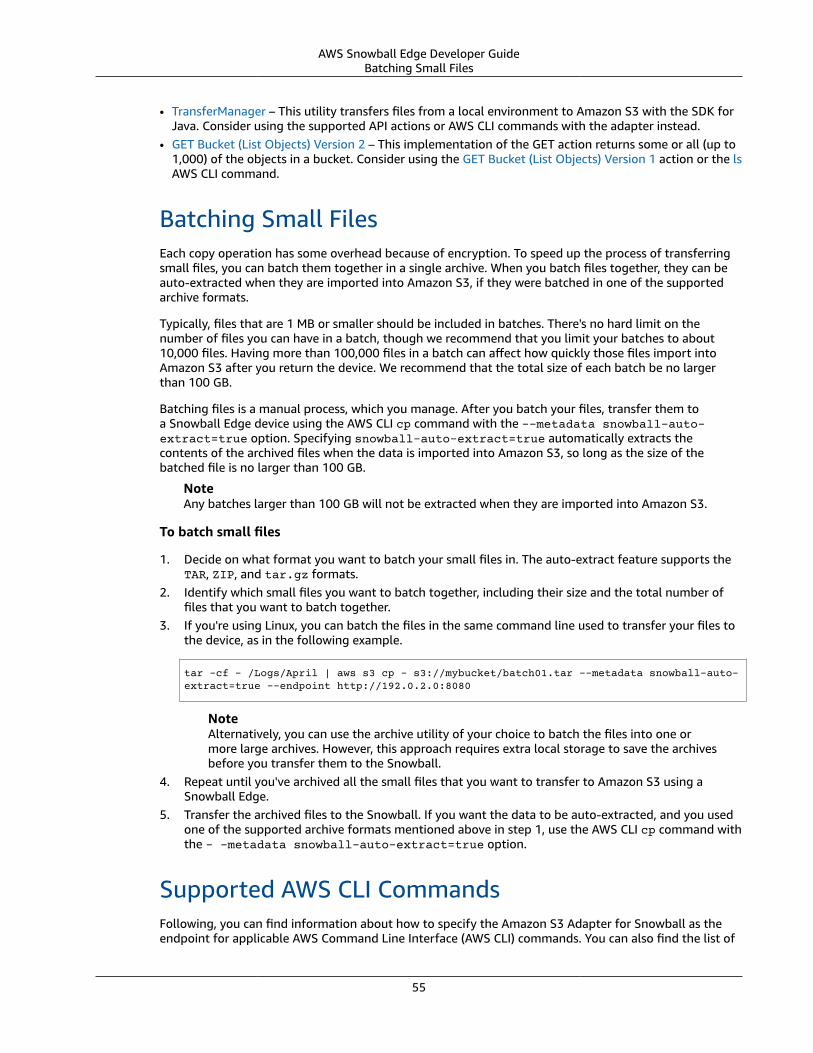
AWS Snowball Edge Developer GuideBatching Small Files
• TransferManager – This utility transfers files from a local environment to Amazon S3 with the SDK forJava. Consider using the supported API actions or AWS CLI commands with the adapter instead.
• GET Bucket (List Objects) Version 2 – This implementation of the GET action returns some or all (up to1,000) of the objects in a bucket. Consider using the GET Bucket (List Objects) Version 1 action or the lsAWS CLI command.
Batching Small FilesEach copy operation has some overhead because of encryption. To speed up the process of transferringsmall files, you can batch them together in a single archive. When you batch files together, they can beauto-extracted when they are imported into Amazon S3, if they were batched in one of the supportedarchive formats.
Typically, files that are 1 MB or smaller should be included in batches. There's no hard limit on thenumber of files you can have in a batch, though we recommend that you limit your batches to about10,000 files. Having more than 100,000 files in a batch can affect how quickly those files import intoAmazon S3 after you return the device. We recommend that the total size of each batch be no largerthan 100 GB.
Batching files is a manual process, which you manage. After you batch your files, transfer them toa Snowball Edge device using the AWS CLI cp command with the --metadata snowball-auto-extract=true option. Specifying snowball-auto-extract=true automatically extracts thecontents of the archived files when the data is imported into Amazon S3, so long as the size of thebatched file is no larger than 100 GB.
NoteAny batches larger than 100 GB will not be extracted when they are imported into Amazon S3.
To batch small files
1. Decide on what format you want to batch your small files in. The auto-extract feature supports theTAR, ZIP, and tar.gz formats.
2. Identify which small files you want to batch together, including their size and the total number offiles that you want to batch together.
3. If you're using Linux, you can batch the files in the same command line used to transfer your files tothe device, as in the following example.
tar -cf - /Logs/April | aws s3 cp - s3://mybucket/batch01.tar --metadata snowball-auto-extract=true --endpoint http://192.0.2.0:8080
NoteAlternatively, you can use the archive utility of your choice to batch the files into one ormore large archives. However, this approach requires extra local storage to save the archivesbefore you transfer them to the Snowball.
4. Repeat until you've archived all the small files that you want to transfer to Amazon S3 using aSnowball Edge.
5. Transfer the archived files to the Snowball. If you want the data to be auto-extracted, and you usedone of the supported archive formats mentioned above in step 1, use the AWS CLI cp command withthe - -metadata snowball-auto-extract=true option.
Supported AWS CLI CommandsFollowing, you can find information about how to specify the Amazon S3 Adapter for Snowball as theendpoint for applicable AWS Command Line Interface (AWS CLI) commands. You can also find the list of
55
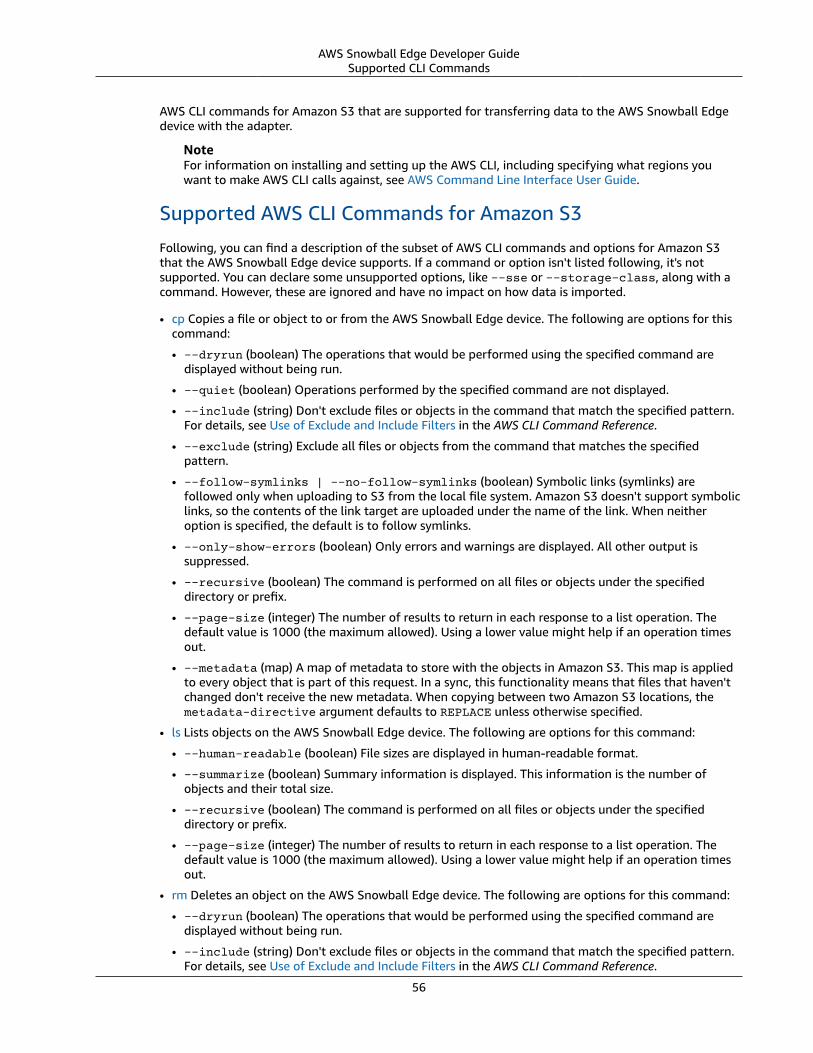
AWS Snowball Edge Developer GuideSupported CLI Commands
AWS CLI commands for Amazon S3 that are supported for transferring data to the AWS Snowball Edgedevice with the adapter.
NoteFor information on installing and setting up the AWS CLI, including specifying what regions youwant to make AWS CLI calls against, see AWS Command Line Interface User Guide.
Supported AWS CLI Commands for Amazon S3
Following, you can find a description of the subset of AWS CLI commands and options for Amazon S3that the AWS Snowball Edge device supports. If a command or option isn't listed following, it's notsupported. You can declare some unsupported options, like --sse or --storage-class, along with acommand. However, these are ignored and have no impact on how data is imported.
• cp Copies a file or object to or from the AWS Snowball Edge device. The following are options for thiscommand:
• --dryrun (boolean) The operations that would be performed using the specified command aredisplayed without being run.
• --quiet (boolean) Operations performed by the specified command are not displayed.
• --include (string) Don't exclude files or objects in the command that match the specified pattern.For details, see Use of Exclude and Include Filters in the AWS CLI Command Reference.
• --exclude (string) Exclude all files or objects from the command that matches the specifiedpattern.
• --follow-symlinks | --no-follow-symlinks (boolean) Symbolic links (symlinks) arefollowed only when uploading to S3 from the local file system. Amazon S3 doesn't support symboliclinks, so the contents of the link target are uploaded under the name of the link. When neitheroption is specified, the default is to follow symlinks.
• --only-show-errors (boolean) Only errors and warnings are displayed. All other output issuppressed.
• --recursive (boolean) The command is performed on all files or objects under the specifieddirectory or prefix.
• --page-size (integer) The number of results to return in each response to a list operation. Thedefault value is 1000 (the maximum allowed). Using a lower value might help if an operation timesout.
• --metadata (map) A map of metadata to store with the objects in Amazon S3. This map is appliedto every object that is part of this request. In a sync, this functionality means that files that haven'tchanged don't receive the new metadata. When copying between two Amazon S3 locations, themetadata-directive argument defaults to REPLACE unless otherwise specified.
• ls Lists objects on the AWS Snowball Edge device. The following are options for this command:
• --human-readable (boolean) File sizes are displayed in human-readable format.
• --summarize (boolean) Summary information is displayed. This information is the number ofobjects and their total size.
• --recursive (boolean) The command is performed on all files or objects under the specifieddirectory or prefix.
• --page-size (integer) The number of results to return in each response to a list operation. Thedefault value is 1000 (the maximum allowed). Using a lower value might help if an operation timesout.
• rm Deletes an object on the AWS Snowball Edge device. The following are options for this command:
• --dryrun (boolean) The operations that would be performed using the specified command aredisplayed without being run.
• --include (string) Don't exclude files or objects in the command that match the specified pattern.For details, see Use of Exclude and Include Filters in the AWS CLI Command Reference.
56
AWS Snowball Edge Developer GuideSupported CLI Commands
• --exclude (string) Exclude all files or objects from the command that matches the specifiedpattern.
• --recursive (boolean) The command is performed on all files or objects under the specifieddirectory or prefix.
• --page-size (integer) The number of results to return in each response to a list operation. Thedefault value is 1000 (the maximum allowed). Using a lower value might help if an operation timesout.
• --only-show-errors (boolean) Only errors and warnings are displayed. All other output issuppressed.
• --quiet (boolean) Operations performed by the specified command are not displayed.
• sync Syncs directories and prefixes. This command copies new and updated files from the sourcedirectory to the destination. This command only creates folders in the destination if they contain oneor more files.
ImportantSyncing from one directory to another directory on the same Snowball Edge isn't supported.Syncing from one AWS Snowball device to another AWS Snowball device isn't supported.You can only use this option to sync the contents between your on-premises data storage anda Snowball Edge.
• --dryrun (boolean) The operations that would be performed using the specified command aredisplayed without being run.
• --quiet (boolean) Operations performed by the specified command are not displayed.
• --include (string) Don't exclude files or objects in the command that match the specified pattern.For details, see Use of Exclude and Include Filters in the AWS CLI Command Reference.
• --exclude (string) Exclude all files or objects from the command that matches the specifiedpattern.
• --follow-symlinks or --no-follow-symlinks (boolean) Symbolic links (symlinks) arefollowed only when uploading to S3 from the local file system. S3 doesn't support symbolic links,so the contents of the link target are uploaded under the name of the link. When neither option isspecified, the default is to follow symlinks.
• --only-show-errors (boolean) Only errors and warnings are displayed. All other output issuppressed.
• --no-progress (boolean) File transfer progress is not displayed. This option is only applied whenthe --quiet and --only-show-errors options are not provided.
• --page-size (integer) The number of results to return in each response to a list operation. Thedefault value is 1000 (the maximum allowed). Using a lower value might help if an operation timesout.
• --metadata (map) A map of metadata to store with the objects in Amazon S3. This map is appliedto every object that is part of this request. In a sync, this functionality means that files that haven'tchanged don't receive the new metadata. When copying between two Amazon S3 locations, themetadata-directive argument defaults to REPLACE unless otherwise specified.
ImportantSyncing from one directory to another directory on the same Snowball Edge isn'tsupported.Syncing from one AWS Snowball device to another AWS Snowball device isn't supported.You can only use this option to sync the contents between your on-premises data storageand a Snowball Edge.
• --size-only (boolean) With this option, the size of each key is the only criterion used to decidewhether to sync from source to destination.
• --exact-timestamps (boolean) When syncing from S3 to local storage, same-sized items areignored only when the timestamps match exactly. The default behavior is to ignore same-sizeditems unless the local version is newer than the S3 version.
57
AWS Snowball Edge Developer GuideSupported REST API Actions
• --delete (boolean) Files that exist in the destination but not in the source are deleted during sync.
You can work with files or folders with spaces in their names, such as my photo.jpg or My Documents.However, make sure that you handle the spaces properly in the AWS CLI commands. For moreinformation, see Specifying Parameter Values for the AWS Command Line Interface in the AWSCommand Line Interface User Guide.
Supported REST API ActionsFollowing, you can find REST API actions that you can use with a Snowball Edge.
Topics• Supported REST API Actions for Snowball Edge (p. 58)• Supported REST API Actions for Amazon S3 (p. 58)
Supported REST API Actions for Snowball Edge
HEAD Snowball Edge
Description
Currently, there's only one Snowball Edge REST API operation, which you can use to return statusinformation for a specific device. This operation returns the status of a Snowball Edge. This statusincludes information that can be used by AWS Support for troubleshooting purposes.
You can't use this operation with the AWS SDKs or the AWS CLI. We recommend that you use curl or anHTTP client. The request doesn't need to be signed for this operation.
Request
In the following example, the IP address for the Snowball Edge is 192.0.2.0. Replace this value with theIP address of your actual device.
curl -X HEAD http://192.0.2.0:8080
Response
<Status xsi:schemaLocation="http://s3.amazonaws.com/doc/2006-03-01/" xmlns:xsi="http://www.w3.org/2001/XMLSchema-instance"> <snowballIp>127.0.0.1</snowballIp> <snowballPort>8080</snowballPort> <snowballId>device-id</snowballId> <totalSpaceInBytes>499055067136</totalSpaceInBytes> <freeSpaceInBytes>108367699968</freeSpaceInBytes> <jobId>job-id</jobId> <snowballServerVersion>1.0.1</snowballServerVersion> <snowballServerBuild>DevBuild</snowballServerBuild> <snowballClientVersion>Version 1.0</snowballClientVersion> <snowballRoundTripLatencyInMillis>33</snowballRoundTripLatencyInMillis></Status>
Supported REST API Actions for Amazon S3Following, you can find the list of Amazon S3 REST API actions that are supported for using the AmazonS3 Adapter for Snowball. The list includes links to information about how the API actions work with
58
AWS Snowball Edge Developer GuideTransferring Files Using the File Interface
Amazon S3. The list also covers any differences in behavior between the Amazon S3 API action and theAWS Snowball Edge device counterpart. All responses coming back from an AWS Snowball Edge devicedeclare Server as AWSSnowball, as in the following example.
HTTP/1.1 200 OKx-amz-id-2: JuKZqmXuiwFeDQxhD7M8KtsKobSzWA1QEjLbTMTagkKdBX2z7Il/jGhDeJ3j6s80x-amz-request-id: 32FE2CEB32F5EE25Date: Fri, 08 2016 21:34:56 GMTServer: AWSSnowball
Amazon S3 REST API calls require SigV4 signing. If you're using the AWS CLI or an AWS SDK to makethese API calls, the SigV4 signing is handled for you. Otherwise, you need to implement your own SigV4signing solution. For more information, see Authenticating Requests (AWS Signature Version 4) in theAmazon Simple Storage Service Developer Guide.
• GET Bucket (List Objects) version 1 – Supported. However, the only supported delimiter is a forwardslash. Only version 1 is supported. GET Bucket (List Objects) version 2 is not supported.
• GET Service• HEAD Bucket• HEAD Object• GET Object – When an object is uploaded to an AWS Snowball Edge device using GET Object, an
entity tag (ETag) is not generated unless the object was uploaded using multipart upload. The ETagis a hash of the object. The ETag reflects changes only to the contents of an object, not its metadata.The ETag might or might not be an MD5 digest of the object data. For more information on ETags, seeCommon Response Headers in the Amazon Simple Storage Service API Reference.
• PUT Object – When an object is uploaded to an AWS Snowball Edge device using PUT Object, anETag is not generated unless the object was uploaded using multipart upload.
• DELETE Object• Initiate Multipart Upload – In this implementation, initiating a multipart upload request for an object
already on the AWS Snowball Edge device first deletes that object. It then copies it in parts to the AWSSnowball Edge device.
• List Multipart Uploads• Upload Part• Complete Multipart Upload• Abort Multipart Upload
NoteAny Amazon S3 REST API actions not listed here are not supported. Using any unsupportedREST API actions with your Snowball Edge returns an error message saying that the action is notsupported.
Transferring Files to AWS Snowball Edge Using theFile Interface
Following, you can find information about using the file interface for the AWS Snowball Edge. Using thisfile interface, you can drag and drop files from your computer onto Amazon S3 buckets on the SnowballEdge.
NoteIf you created your job before July 17, 2018, this information doesn't apply to your device.Instead, see Using the File Interface for the AWS Snowball Edge (p. 176).
59
AWS Snowball Edge Developer GuideOverview of the File Interface
Topics• Overview of the File Interface (p. 60)• Starting the File Interface (p. 61)• Mounting a Bucket with the File Interface (p. 63)• Monitoring the File Interface (p. 65)
Overview of the File InterfaceThe file interface exposes a Network File System (NFS) mount point for each bucket on your AWSSnowball Edge device. You can mount the file share from your NFS client using standard Linux, MicrosoftWindows, or Mac commands. You can use standard file operations to access the file share.
After the file share has been mounted, a new file interface tab appears on the LCD screen on the frontof the Snowball Edge. From this tab, you can get transfer status information, see your NFS point IPaddresses, and secure NFS client access to specific buckets.
You can use the local LCD display on the AWS Snowball Edge device to disable or enable the fileinterface. By unlocking the AWS Snowball Edge device, you have all the permissions necessary to readand write data through the file interface.
Topics• Benefits of the File Interface (p. 60)• Prerequisites for Using the File Interface (p. 60)• Considerations for Using the File Interface (p. 61)
Benefits of the File InterfaceYou might want to use the file interface to read and write data because of the following benefits:
• You can more easily read, write, and delete files by using the file interface.• You can use the local LCD display on the AWS Snowball Edge device to monitor the file interface
status.• The file interface preserves user-defined metadata in objects. This metadata includes permissions,
ownership, and time stamps and can be useful for tracking.• Because files are written to the buckets on the device, adding files can trigger associated AWS Lambda
powered by AWS Greengrass functions.
Prerequisites for Using the File InterfaceBefore you can use the file interface, the following steps must occur:
• You must create a job for your Snowball Edge.• Your Snowball Edge device must arrive at your location.• You must unlock your device by using the Snowball client.
If one or more of those steps haven't occurred, see the following topics:
• For more information about creating a job to use a Snowball Edge, see Getting Started with an AWSSnowball Edge Device (p. 22).
• For more information about unlocking a Snowball Edge, see Transferring Files Using the Amazon S3Adapter (p. 51).
60
AWS Snowball Edge Developer GuideStarting the File Interface
ImportantFor AWS services to work properly on a Snowball Edge, you must allow the ports for theservices. For details, see Ports Required to Use AWS Services on an AWS Snowball EdgeDevice (p. 107).
Considerations for Using the File InterfaceWhile using the file interface, keep the following considerations in mind:
• The maximum size of a file that you can transfer to the file interface on a Snowball Edge is 150 GB.If you try to transfer a file larger than 150 GB, the file interface will write the first 150 GB of that file,and then return an error message indicating that the file is too large.
• We recommend that you use only one method of reading and writing data to each bucket on aSnowball Edge device. Using both the file interface and the Amazon S3 Adapter for Snowball on thesame bucket might result in undefined behavior.
• File interface supports all NFS file operations, except truncate, rename, or changing ownership.Requests that use these unsupported file operations are rejected with error messages sent to your NFSclient. Attempts to change a file’s permissions after the file has been created on the Snowball Edge areignored without error.
• If the Snowball Edge has a power failure or is rebooted, data in the file interface buffer persists.On reboot, this buffered data is uploaded to buckets on the device. When Write status on the Fileinterface tab shows 100 percent with a green progress bar, all data in the file interface buffer isuploaded to the buckets on the device.
• Don't write data to a Snowball Edge that is full, or write more data than the size of the remainingavailable storage. Either action causes errors that might corrupt your data. We recommend that youuse the Snowball client's snowballEdge status command to determine the remaining amount ofspace on the Snowball Edge. Then compare that to the amount of data you want to copy over usingthe file interface before copying the data.
• When you've finished copying data to the Snowball Edge using the file interface, you must disable thefile interface to avoid losing any data that might be in the buffer but not yet written to the Amazon S3bucket. For more information, see Disabling the File Interface (p. 66).
• We recommend that you keep a local copy of all data that is written to the file interface until theSnowball Edge has been shipped back to AWS and the data has been ingested to Amazon S3.
NoteThe data transfer rate using the file interface is typically between 25 MB/s and 40 MB/s. Ifyou need to transfer data faster than this, use the Amazon S3 adapter for Snowball, whichhas a data transfer rate typically between 250 MB/s and 400 MB/s. For more information, seeTransferring Files Using the Amazon S3 Adapter (p. 51).
Starting the File InterfaceBefore you can use the file interface, you need to use the Snowball client to start it.
ImportantIt can take an hour or more for the file interface to activate. Don't power off or restart the deviceduring this time.
To start the file interface
1. Run the snowballEdge describe-device command to get the list of network interface IDs. Formore information on this command, see Getting Device Status (p. 47).
2. Create a virtual network interface. As part of this, identify the ID for the physical network interfacethat you want to use, and make a note of it. The following examples show running the command
61
AWS Snowball Edge Developer GuideStarting the File Interface
to create a virtual network interface with the two different IP address assignment methods, eitherDHCP or STATIC.
snowballEdge create-virtual-network-interface \--physical-network-interface-id s.ni-abcd1234 \--ip-address-assignment DHCP //OR// snowballEdge create-virtual-network-interface \--physical-network-interface-id s.ni-abcd1234 \--ip-address-assignment STATIC \--static-ip-address-configuration IpAddress=192.0.2.0,Netmask=255.255.255.0
Example
Output
{ "VirtualNetworkInterface" : { "VirtualNetworkInterfaceArn" : "arn:aws:snowball-device:::interface/s.ni-abcd1234", "PhysicalNetworkInterfaceId" : "s.ni-abcd1234", "IpAddressAssignment" : "DHCP", "IpAddress" : "192.0.2.0", "Netmask" : "255.255.255.0", "DefaultGateway" : "192.0.2.10", "MacAddress" : "1a:2b:3c:4d:5e:6f" }}
3. When the command returns a JSON structure that includes the IP address, make a note of that IPaddress.
4. Start the file interface service using the virtual network interface, as in the following example.
snowballEdge start-service \--service-id fileinterface \--virtual-network-interface-arns arn:aws:snowball-device:::interface/s.ni-abcd1234abcd1234a
Example
Output
Starting the AWS service on your Snowball Edge. You can determine the status of the AWS service using the describe-service command.
5. It can take an hour or more for the file interface to activate. To see if the service has started, orif it's still activating, you can run the snowballEdge describe-service --service-idfileinterface Snowball client command.
It takes an hour or more for the file interface to activate. After that time the file interface will start.Anytime you need the IP address for the file interface, you can use the snowballEdge describe-virtual-network-interfaces Snowball client command.
62
AWS Snowball Edge Developer GuideMounting a Bucket with the File Interface
Mounting a Bucket with the File InterfaceThe following contains guidance on mounting a file share on Snowball Edge to the NFS client onyour computer using the file interface. It includes information about the supported NFS clients andprocedures for enabling those clients on Linux, Mac, and Windows operating systems.
Topics
• Supported NFS Clients for the File Interface (p. 63)
• Getting the IP Address for the File Share of a Bucket on a Snowball Edge (p. 63)
• Mounting a File Share with the File Interface on Linux (p. 64)
• Mounting a File Share with the File Interface on a Mac (p. 64)
• Mounting a File Share with the File Interface on Microsoft Windows (p. 64)
Supported NFS Clients for the File InterfaceThe file interface supports the following NFS clients:
Clients with NFSv4 support
• Amazon Linux
• macOS
• Red Hat Enterprise Linux (RHEL) 7
• Ubuntu 14.04
Clients with NFSv3 support
• Windows 10, Windows Server 2012, and Windows Server 2016
• Windows 7 and Windows Server 2008. For these clients, the maximum supported NFS I/O size is 32KB. Because of this factor, you might experience degraded performance on these versions of Windows.
Getting the IP Address for the File Share of a Bucket on aSnowball EdgeYou can mount the file shares with a simple command, if you have the IP address for the file share on aSnowball Edge. You can find the file share's IP address on the LCD display in the CONNECTION tab. Youcan't use the file interface if this IP address is blank. Ensure that the file interface gets an IP address.
ImportantThe IP address for the file interface is not the IP address that you used to unlock the SnowballEdge device. The IP address for the file interface can either be a static IP or one issued by yourDHCP server.
To get the IP address for the file interface
1. Access the LCD display on the front of the AWS Snowball Edge device.
2. Tap CONNECTION at the top of the LCD display to open the network connection tab.
3. From the drop-down list in the center of the page, choose file interface.
The IP address below this list updates to reflect the DHCP address that the AWS Snowball Edgedevice requested for the file interface. You can change it to a static IP address, or leave it as is.
63

AWS Snowball Edge Developer GuideMounting a Bucket with the File Interface
Now that you have your IP address, you're ready to mount a bucket on the Snowball Edge using theappropriate mount command for your computer's operating system.
Mounting a File Share with the File Interface on Linux
When you mount file shares on your Linux server, we recommend that you first update your NFS clientwith the following command.
$sudo yum install nfs-utils
When the file interface is enabled, it exposes an NFS mount point for each local bucket on the device.The file interface supports NFS versions 3, 4.0, and 4.1. You can mount the file shares with a simplecommand with the IP address for the file interface. For more information, see Getting the IP Address forthe File Share of a Bucket on a Snowball Edge (p. 63).
When you have the IP address, you can mount a bucket with the following command.
mount -t nfs –o nolock IP Address:/BucketName local/mount/directory
For example, suppose that the IP address for the file interface is 192.0.1.0 and your bucket name istest-bucket. You want to mount your bucket to the mnt/test-bucket directory on your local Linuxserver. In this case, your command looks like the following.
mount –o nolock 192.0.1.0:/test-bucket mnt/test-bucket
Mounting a File Share with the File Interface on a Mac
You can mount the file shares with a simple command with the IP address for the file interface. For moreinformation, see Getting the IP Address for the File Share of a Bucket on a Snowball Edge (p. 63).When you mount file shares on your Mac, you need to declare the version of the NFS protocol that you'reusing when you run the mount command. For example, if you're using the NFSv3.0 protocol, you use thevers=3 option.
mount -t nfs –o vers=3,nolock IP Address:/BucketName local mount directory
For example, suppose the IP address for the file interface is 192.0.1.0, your bucket name is test-bucket, and you want to mount your bucket to the private/mybucket directory on your Mac. In thiscase, your command looks like the following.
sudo mount_nfs -o vers=3,nolock -v 192.0.1.0:/test-bucket private/mybucket
Mounting a File Share with the File Interface on MicrosoftWindows
When you mount file shares on your Windows server, you need to turn on the Windows Client for NFS.You also need to assign the mount point a drive letter with the mount command.
NoteFor a Windows 7 or Windows Server 2008 server, the maximum supported NFS I/O size is 32 KB.Because of this limit, you might experience degraded performance for the file interface on theseversions of Windows.
64

AWS Snowball Edge Developer GuideMonitoring the File Interface
To turn on Windows Client for NFS
1. In Windows, from Start, search for Turn Windows features on or off and choose the application ofthe same name that appears in the search results.
2. In the Windows Features dialog box that appears, scroll through the list of features until you findServices for NFS.
3. Expand Services for NFS, and select the Client for NFS check box.4. Choose OK to close the dialog box with Client for NFS activated.
You can mount the file shares with a simple command with the IP address for the file interface. For moreinformation, see Getting the IP Address for the File Share of a Bucket on a Snowball Edge (p. 63).You can now mount the file shares on the AWS Snowball Edge device to an unused drive letter on yourWindows server as in the following example.
mount -o nolock 192.0.1.0:/test-bucket Z:
Monitoring the File InterfaceWhen you use the file interface, it's important to keep an eye on its overall health and current status.You can perform these tasks by using the file interface tab on the LCD display on the front of the AWSSnowball Edge device.
Topics• Getting the Status of the File Interface (p. 65)• Securing Your NFS Connection (p. 65)• Disabling the File Interface (p. 66)
Getting the Status of the File InterfaceOn the file interface tab, there are two health indicators, Status and Write status. The following listdescribes how to work with these indicators:
• Status indicates the operational status of the file interface as a whole. It has the following possiblevalues:• Enabled – The file interface is up and running normally.• Disabling – The file interface is stopped, and nothing can be written to it.• Disabled – The file interface has stopped and the mount point is no longer available. In addition,
all the data in the device's memory buffer has been encrypted and written to the local Amazon S3buckets.
• Error – An error has occurred. If you see this status, contact AWS Support.• Write status shows you the progress of the current write operation executed on the AWS Snowball
Edge device using a progress bar:• At 0–99 percent, a write operation is actively happening on the device and data is in the buffer. Don't
disconnect the device before writing has completed.• At 100 percent, with a green progress bar, the last write operation completed successfully. There is
no data in the buffer, and no new write operations have begun.
Securing Your NFS ConnectionWhen a job for an AWS Snowball Edge device is created on the AWS console, all Amazon S3 bucketsselected for the job are enabled by default as active file shares. When the device arrives at your site,
65
AWS Snowball Edge Developer GuideUsing AWS Lambda
and you set up, connect, and unlock it, anyone on your network who can see the IP address for the fileinterface can access the file shares for each bucket.
Therefore, we recommend that you secure the buckets by specifying which NFS clients are allowed toaccess your buckets. You can do this from the LCD screen on the front of the Snowball Edge with thefollowing procedure.
To allow only certain NFS clients to access the file shares for your buckets on a SnowballEdge
1. On the LCD display, tap File interface to open its tab.2. From Allowed clients, choose your bucket from the drop-down list.3. Tap Edit to reveal the text boxes that you can enter your IP addresses into.4. In the top box, use the onscreen keyboard to type in the IP address of a computer that you want to
mount the file share for that bucket to.5. If you have other computers connected to this same bucket, type in their IP addresses in the
subsequent text boxes.
You have now secured the file share for one of your buckets on the Snowball Edge. You can repeat thisprocess for all the file shares for the buckets on the Snowball Edge to secure access to the data in yourdevice.
Once you specify an IP address for an allowed client, you can return that file share to unrestricted againby changing the IP address to 0.0.0.0. If the IP address of the computer connected to it ever changes,you need to update the IP address for that allowed client.
Disabling the File InterfaceWhen you're done using the file interface, you should disable the file interface after the Write Status onthe AWS Snowball Edge device is set to Complete. Disabling the file interface helps you avoid data lossby ensuring that all files have been written to the device.
When you're done with the file interface, you can stop it with the snowballEdge stop-serviceSnowball client command. For more information, see Stopping a Service on your SnowballEdge (p. 45).
Using AWS Lambda with an AWS Snowball EdgeFollowing, you can find an overview of AWS Lambda powered by AWS Greengrass as used in an AWSSnowball Edge device. With this feature, you can run Lambda functions locally on a Snowball Edge. Touse AWS Lambda powered by AWS Greengrass functions with Snowball Edge, you must create your jobsin an AWS Region supported by AWS IoT Greengrass. For a list of valid AWS Regions, see AWS Greengrassin the AWS General Reference.
If you created your job before July 17, 2018, this information doesn't apply to your device. Instead, seeUsing AWS Lambda with an AWS Snowball Edge (p. 182).
NoteThese features are not supported in the Asia Pacific (Mumbai) AWS Region.
Before You StartBefore you create a Python-language Lambda function to run on your Snowball Edge, we recommendthat you familiarize yourself with the following services, concepts, and related topics.
66
AWS Snowball Edge Developer GuideBefore You Start
Prerequisites for AWS IoT GreengrassAWS IoT Greengrass is software that extends AWS Cloud capabilities to local devices. AWS IoTGreengrass makes it possible for local devices to collect and analyze data closer to the source ofinformation, while also securely communicating with each other on local networks. More specifically,developers who use AWS IoT Greengrass can author serverless code (Lambda functions) in the AWSCloud. They can then conveniently deploy this code to devices for local execution of applications.
The following AWS IoT Greengrass concepts are important to understand when using AWS IoTGreengrass with a Snowball Edge:
• AWS IoT Greengrass Requirements – For a full list of AWS IoT Greengrass requirements, seeRequirements in the AWS IoT Greengrass Developer Guide. AWS IoT Greengrass supports Python version2.7, and each Lambda function has a minimum RAM requirement of 128 MB.
• AWS IoT Greengrass Core – Each Snowball Edge has the AWS IoT Greengrass core software. For moreinformation on the AWS IoT Greengrass core software, see Greengrass Core Software in the AWS IoTGreengrass Developer Guide.
• AWS IoT Greengrass Group – A Snowball Edge is part of an AWS IoT Greengrass group as the group'score device. For more information on groups, see AWS Greengrass Groups in the AWS IoT GreengrassDeveloper Guide.
• MQTT – AWS IoT Greengrass uses the industry-standard, lightweight Message Queue TelemetryTransport (MQTT) protocol to communicate within a group. Within a Snowball Edge, there is an IoTdevice associated with the Amazon S3 Adapter for Snowball. When data is written using Amazon S3PUT object operations on buckets specified at job creation, these operations trigger MQTT messages.These messages in turn trigger any associated Lambda functions. In addition, any MQTT-compatibledevice or software in your AWS IoT Greengrass group can trigger the Lambda functions, if you definethe related MQTT message to do so.
• Associated service role – Before you can use AWS IoT Greengrass with a Snowball Edge as a coredevice, you must associate an AWS IoT Greengrass service role with your account. This associationallows AWS IoT Greengrass to access your Lambda functions and AWS IoT resources. For moreinformation, see Associating an AWS IoT Greengrass Service Role with Your Account (p. 68).
Prerequisites for AWS LambdaAWS Lambda is a compute service that lets you run code without provisioning or managing servers. Thefollowing Lambda concepts are important to understand when using Lambda with a Snowball Edge:
• Lambda functions – Your custom code, uploaded and published to Lambda and used on a SnowballEdge. For more information, see Lambda Functions in the AWS Lambda Developer Guide.
• Lambda console – The management console in which you'll upload, update, and publish your Python-language Lambda functions for use on a Snowball Edge. For a sample on how to use the Lambdaconsole, see Step 2: Create a HelloWorld Lambda Function and Explore the Console in the AWSLambda Developer Guide.
• Python – The high-level programming language used for your Lambda functions powered by AWS IoTGreengrass on a Snowball Edge. AWS IoT Greengrass supports Python version 2.7.
Related TopicsThe following topics are related to running AWS Lambda powered by AWS Greengrass functions on aSnowball Edge:
• Limitations for Lambda Powered by AWS IoT Greengrass (p. 160)• Customer Managed Policy Examples (p. 143)
67

AWS Snowball Edge Developer GuideGetting Started with Lambda
Next:
Getting Started with Lambda Powered by AWS IoT Greengrass (p. 68)
Getting Started with Lambda Powered by AWS IoTGreengrassTo get started with AWS Lambda powered by AWS Greengrass functions on a Snowball Edge, take thefollowing steps:
1. Associating an AWS IoT Greengrass Service Role with Your Account (p. 68)
2. Configuring AWS IoT Greengrass with a Snowball Edge (p. 69)
3. Creating Your Job (p. 69)
4. Creating a Virtual Network Interface (p. 69)
5. Starting AWS IoT Greengrass on a Snowball Edge (p. 70)
6. Using Lambda Powered by AWS Greengrass Functions on a Snowball Edge (p. 71)
Associating an AWS IoT Greengrass Service Role with YourAccountBefore you can use AWS IoT Greengrass with a Snowball Edge as a core device, you must associate anAWS IoT Greengrass service role with your account. This association allows AWS IoT Greengrass to accessyour Lambda functions and AWS IoT resources. If you try to create a job for a Snowball Edge before youassociate the service role, the job creation request fails.
The following procedures show how to configure and store your AWS IoT Greengrass settings in thecloud. This configuration means that you can push Lambda function changes to the Snowball Edge andchanges to other devices in your AWS IoT Greengrass group. The first procedure uses the AWS Identityand Access Management (IAM) console, and the second procedure uses the AWS Command Line Interface(AWS CLI).
To create an AWS IoT Greengrass service role in the IAM console
1. Sign in to the AWS Management Console and open the IAM console at https://console.amazonaws.cn/iam/.
2. For Role Type, choose AWS Greengrass Role.
3. Select AWSGreengrassResourceAccessPolicy, and then choose Next Step.
4. Type a name for your role, and then choose Create Role.
After creating the role, make a note of the role Amazon Resource Name (ARN), and use it in the nextprocedure.
To associate the AWS IoT Greengrass service role with your account
1. Install the AWS CLI on your computer, if you haven't already. For more information, see Installing theAWS Command Line Interface in the AWS Command Line Interface User Guide.
2. Configure the AWS CLI on your computer, if you haven't already. For more information, seeConfiguring the AWS CLI in the AWS Command Line Interface User Guide.
3. Open a terminal on your computer and run the following AWS CLI command, with the AWS IoTGreengrass role ARN you created in the first procedure.
68
AWS Snowball Edge Developer GuideGetting Started with Lambda
aws greengrass associate-service-role-to-account --role-arn arn:aws:iam::123EXAMPLE12:role/GreengrassRole
Now you can create a job for a Snowball Edge and use AWS Lambda powered by AWS Greengrass.
Configuring AWS IoT Greengrass with a Snowball EdgeWhen you create a compute job for a Snowball Edge, the service automatically configures the followingAWS IoT Greengrass elements:
• AWS IoT Greengrass Core Software – The AWS IoT Greengrass distributable has been pre-installed onthe Snowball Edge.
• AWS IoT Greengrass Group – When you create a compute job, an AWS IoT Greengrass group namedJobID_group is created and provisioned. The core of this group is named JobID_core, and it hasa device in it named JobID_s3adapter. The Amazon S3 Adapter for Snowball is registered as anIoT device in your AWS IoT Greengrass group. This registration is because the adapter sends MQTTmessages for every Amazon S3 PUT object action for the buckets on the Snowball Edge.
If you have other configuration changes that you want to make for the AWS IoT Greengrass groupassociated with a Snowball Edge, you can make them after you unlock the device and connect it to theinternet.
Creating Your JobCreate a job in the AWS Snowball Management Console and associate the Amazon Resource Name (ARN)for at least one published Lambda function with a bucket. For a walkthrough on creating your first job,see Getting Started with AWS Snowball Edge: Your First Job (p. 23).
All the Lambda functions that you choose during job creation are triggered by MQTT messages sentby the IoT device associated with the Amazon S3 Adapter for Snowball. These MQTT messages aretriggered whenever an Amazon S3 PUT object action is made against the bucket on the AWS SnowballEdge device.
Creating a Virtual Network InterfaceWhen the Snowball Edge arrives, unlock the device, and create a virtual network interface to bind toAWS IoT Greengrass. Each Snowball Edge has three network interfaces (NICs), the physical networkinterface controllers for the device. These are the RJ45, SFP, and QSFP ports on the back of the device.
Each virtual NIC (VNIC) is based on the physical one, and you can have any number of VNICs associatedwith each NIC. To create a virtual network interface, use the snowballEdge create-virtual-network-interface command.
Note--static-ip-address-configuration is only a valid option when using STATIC for --ip-address-assignment.
Usage (configured Snowball client)
snowballEdge create-virtual-network-interface --ip-address-assignment [DHCP or STATIC] --physical-network-interface-id [physical network interface id] --static-ip-address-configuration IpAddress=[IP address],NetMask=[Netmask]
Usage (Snowball client not configured)
69
AWS Snowball Edge Developer GuideGetting Started with Lambda
snowballEdge create-virtual-network-interface --endpoint https://[ip address] --manifest-file /path/to/manifest --unlock-code [unlock code] --ip-address-assignment [DHCP or STATIC] --physical-network-interface-id [physical network interface id] --static-ip-address-configuration IpAddress=[IP address],NetMask=[Netmask]
Example Creating VNICs (DHCP)
./snowballEdge create-virtual-network-interface --ip-address-assignment dhcp --physical-network-interface-id s.ni-8EXAMPLEaEXAMPLEd{ "VirtualNetworkInterface" : { "VirtualNetworkInterfaceArn" : "arn:aws:snowball-device:::interface/s.ni-8EXAMPLE8EXAMPLEf", "PhysicalNetworkInterfaceId" : "s.ni-8EXAMPLEaEXAMPLEd", "IpAddressAssignment" : "DHCP", "IpAddress" : "192.0.2.0", "Netmask" : "255.255.255.0", "DefaultGateway" : "192.0.2.1", "MacAddress" : "EX:AM:PL:E1:23:45" }}
Starting AWS IoT Greengrass on a Snowball EdgeBefore you can use AWS Lambda powered by AWS Greengrass, you need to use the Snowball client tostart it.
NoteIt can take several minutes to start AWS IoT Greengrass on a Snowball Edge. We recommendusing the describe-service Snowball client command after you start the service todetermine when it's active. For more information, see Getting Service Status (p. 49).
To start AWS Lambda powered by AWS Greengrass
1. Run the snowballEdge describe-device command to get the list of network interface IDs. Formore information on this command, see Getting Device Status (p. 47).
2. Identify the ID for the physical network interface that you want to use, and make a note of it. Thefollowing examples show running this command with the two different IP address assignmentmethods, either DHCP or STATIC.
snowballEdge create-virtual-network-interface \--physical-network-interface-id s.ni-abcd1234 \--ip-address-assignment DHCP //OR// snowballEdge create-virtual-network-interface \--physical-network-interface-id s.ni-abcd1234 \--ip-address-assignment STATIC \--static-ip-address-configuration IpAddress=192.0.2.0,Netmask=255.255.255.0
3. The command returns a JSON structure that includes the virtual network interface ARN. Make a noteof that ARN.
4. Start the AWS IoT Greengrass service using the virtual network interface, as in the followingexample.
snowballEdge start-service \--service-id greengrass\
70

AWS Snowball Edge Developer GuideGetting Started with Lambda
--virtual-network-interface-arns arn:aws:snowball-device:::interface/s.ni-abcd1234abcd1234a
AWS Lambda powered by AWS Greengrass has now started. Anytime you need the IP address or virtualnetwork interface ARN for the AWS IoT Greengrass, you can use the snowballEdge describe-virtual-network-interfaces Snowball client command.
Connecting to the Internet to Update AWS IoT GreengrassGroup CertificatesEvery time you start the AWS IoT Greengrass service, you must log into the AWS IoT Greengrass Consolewith the account used to create the job in the AWS Snowball Management Console and initiate a AWSIoT Greengrass Group deployment to the AWS IoT Greengrass Core. For more information, see DeployCloud Configurations to an AWS Greengrass Core Device in the AWS IoT Greengrass Developer Guide.After that, you can disconnect the device from the internet. The associated AWS IoT Greengrass groupthen functions in offline mode.
ImportantWhen the IP address for any device in the local AWS IoT Greengrass group changes, reconnectthe Snowball Edge to the internet so it can get new certificates.
Using Lambda Powered by AWS Greengrass Functions on aSnowball EdgeNow that the service is started, and you've initiated a AWS IoT Greengrass Group deployment to theAWS IoT Greengrass Core, you can trigger Lambda functions by writing data to the Amazon S3 bucketson the device. Unless programmed otherwise, Lambda functions are triggered by MQTT messages sentby the IoT device associated with the Amazon S3 Adapter for Snowball. These MQTT messages are inturn triggered by Amazon S3 PUT object actions. Amazon S3 PUT object actions occur through thefile interface (with a write operation), the AWS CLI (using the Amazon S3 Adapter for Snowball), orprogrammatically through one of the SDKs or a REST application of your own design.
You can use your AWS Lambda powered by AWS Greengrass functions to execute Python code againstpublic endpoints among AWS services in the cloud. For this Python code execution to work, your AWSSnowball Edge device needs to be connected to the internet. For more information, see the AWS LambdaDeveloper Guide.
Updating Existing Functions
You can update existing Lambda functions in the console. If you do, and if your AWS Snowball Edgedevice is connected to the internet, a deployment agent notifies each Lambda function of the updatedAWS IoT Greengrass group configuration. For more information, see Create a Deployment in the AWS IoTGreengrass Developer Guide.
Adding New Functions
After your Snowball Edge arrives and you unlock it and connect it to the internet, you can add or removeadditional Lambda functions. These new Lambda functions don't have to be triggered by Amazon S3PUT object actions. Instead, the event that you programmed to trigger the new functions performsfunction triggering, as with typical Lambda functions running in an AWS IoT Greengrass group.
Testing Lambda Powered by AWS IoT Greengrass Functions
You can test your Lambda functions before you create your job, or after you've started the AWS IoTGreengrass on the device. When testing your Python-coded function in the Lambda console, before
71
AWS Snowball Edge Developer GuideUsing Amazon EC2
creating your job, you might encounter errors. If that happens, see Retries on Errors in the AWS LambdaDeveloper Guide.
To test your Lambda functions on-premises, use the following procedure.
To test your Lambda functions on-premises
1. Create a subscription in the AWS IoT Greengrass console. For more information, see ConfigureSubscriptions in the AWS IoT Greengrass Developer Guide.
2. Deploy the AWS IoT Greengrass Group containing that subscription to the AWS IoT Greengrass Corerunning on the Snowball Edge device. In this subscription, you specify the following:
• The Source as the device with Snowball Edge Job ID generated when you created the job.• The Target as the AWS IoT service.
3. After the deployment is successfully completed, log into the AWS IoT console with the account usedto create your job.
4. Choose Test and then choose Subscribe to a topic.5. For Subscription topic, enter the name of the bucket on the Snowball Edge to copy an object into.6. Choose Subscribe to topic. The MQTT client page then shows you the subscription to the bucket
that you specified.7. Using the AWS CLI, Amazon S3 Adapter for Snowball, or one of the AWS SDKs, copy an object to the
specified bucket.
A JSON object then display the payloads included in the MQTT message published to the AWS IoTGreengrass Core backing the AWS IoT Greengrass service running on the Snowball Edge device. Thispayload includes the name of the object and the name of the bucket the object was PUT into.
You've now successfully tested your Lambda function. The JSON object indicates that the MQTT messagepublished to the AWS IoT Greengrass Core was received successfully, and the associated Lambda functionwas executed. For information on adding AWS IoT Greengrass subscriptions to your AWS IoT GreengrassGroup, see Configure Subscriptions in the AWS IoT Greengrass Developer Guide.
Stopping AWS IoT Greengrass
When you're done with AWS Lambda powered by AWS Greengrass, you can stop it with thesnowballEdge stop-service Snowball client command. For more information, see Stopping aService on your Snowball Edge (p. 45).
AWS Lambda powered by AWS Greengrass running on a Snowball Edge; device is stateless. As a result,any data (including AWS IoT Greengrass configuration, certificates, and Lambda functions) running onthe device is lost when the AWS IoT Greengrass service enters the DEACTIVATING state or becomesINACTIVE.
Using Amazon EC2 Compute InstancesThis topic provides an overview of using Amazon EC2 compute instances on an AWS Snowball Edgedevice, including conceptual information, procedures, and examples.
NoteThese features are not supported in the Asia Pacific (Mumbai) AWS Region.
OverviewYou can run Amazon EC2 compute instances hosted on a Snowball Edge with the sbe1, sbe-c, and sbe-g instance types. The sbe1 instance type works on devices with the Snowball Edge Storage Optimized
72
AWS Snowball Edge Developer GuidePrerequisites
option. The sbe-c instance type works on devices with the Snowball Edge Compute Optimized option.Both the sbe-c and sbe-g instance types work on devices with the Snowball Edge Compute Optimizedwith GPU option.
All three compute instance types supported for use on Snowball Edge device options are unique toSnowball Edge devices. Like their cloud-based counterparts, these instances require Amazon MachineImages (AMIs) to launch. You choose the AMI to be that base image for an instance in the cloud, beforeyou create your Snowball Edge job.
To use a compute instance on a Snowball Edge, create a job and specify your AMIs. You can do this fromthe AWS Snowball Management Console, with the AWS CLI, or with one of the AWS SDKs. Typically,there are some housekeeping prerequisites that you must perform before creating your job, to use yourinstances.
After your device arrives, you can start managing your AMIs and instances. You can manage yourcompute instances on a Snowball Edge through an Amazon EC2–compatible endpoint. This type ofendpoint supports many of the Amazon EC2 CLI commands and actions for the AWS SDKs. You can't usethe AWS Management Console on the Snowball Edge to manage your AMIs and compute instances.
When you're done with your device, return it to AWS. If the device was used in an import job, the datatransferred using the Amazon S3 Adapter for Snowball or the file interface is imported into Amazon S3.Otherwise, we perform a complete erasure of the device when it is returned to AWS. This erasure followsthe National Institute of Standards and Technology (NIST) 800-88 standards.
ImportantData in compute instances running on a Snowball Edge isn't imported into AWS.
Compute Instances on ClustersYou can use compute instances on clusters of Snowball Edge devices. The procedures and guidance fordoing so are the same as for using compute instances on a standalone device.
When you create a cluster job with AMIs, a copy of each AMI exists on each node in the cluster. For thatreason, there can only be 10 AMIs associated with a cluster of devices, regardless of the number of nodeson the cluster. When you launch an instance in a cluster, you declare the node to host the instance inyour command, and the instance runs on a single node.
Clusters must be either compute optimized or storage optimized. You can have a cluster of computeoptimized nodes, and some number of them can have GPUs. You can have a cluster made entirely ofstorage optimized nodes. A cluster can't be made of a combination of compute optimized nodes andstorage optimized nodes.
Pricing for Compute Instances on Snowball EdgeThere are additional costs associated with using compute instances. For more information, see AWSSnowball Edge Pricing.
PrerequisitesBefore creating your job, keep the following information in mind:
•
• All AMIs must be based on Amazon Elastic Block Store (Amazon EBS), with a single volume.
• If you are planning connecting to a compute instance running on a Snowball Edge, you must useSecure Shell (SSH). To do so, you first add the key pair. For more information, see Configure an AMI toUse SSH to Connect to Compute Instances Launched on the Device (p. 77).
73
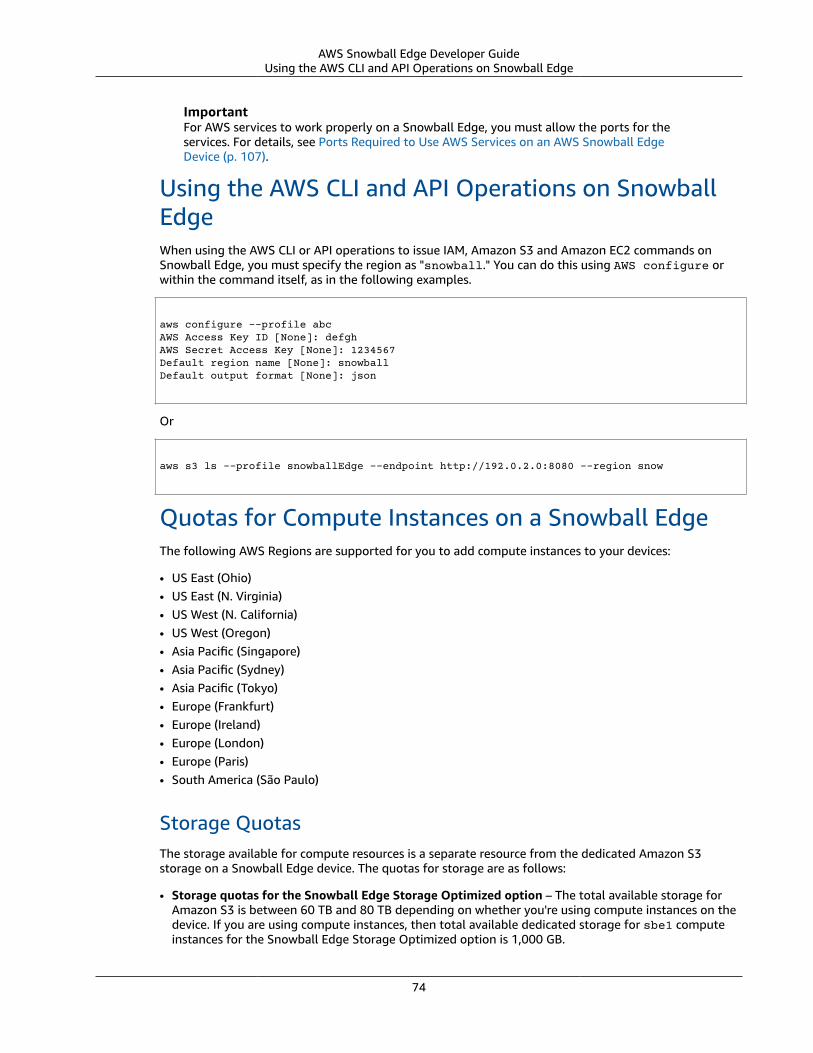
AWS Snowball Edge Developer GuideUsing the AWS CLI and API Operations on Snowball Edge
ImportantFor AWS services to work properly on a Snowball Edge, you must allow the ports for theservices. For details, see Ports Required to Use AWS Services on an AWS Snowball EdgeDevice (p. 107).
Using the AWS CLI and API Operations on SnowballEdgeWhen using the AWS CLI or API operations to issue IAM, Amazon S3 and Amazon EC2 commands onSnowball Edge, you must specify the region as "snowball." You can do this using AWS configure orwithin the command itself, as in the following examples.
aws configure --profile abcAWS Access Key ID [None]: defghAWS Secret Access Key [None]: 1234567Default region name [None]: snowballDefault output format [None]: json
Or
aws s3 ls --profile snowballEdge --endpoint http://192.0.2.0:8080 --region snow
Quotas for Compute Instances on a Snowball EdgeThe following AWS Regions are supported for you to add compute instances to your devices:
• US East (Ohio)• US East (N. Virginia)• US West (N. California)• US West (Oregon)• Asia Pacific (Singapore)• Asia Pacific (Sydney)• Asia Pacific (Tokyo)• Europe (Frankfurt)• Europe (Ireland)• Europe (London)• Europe (Paris)• South America (São Paulo)
Storage QuotasThe storage available for compute resources is a separate resource from the dedicated Amazon S3storage on a Snowball Edge device. The quotas for storage are as follows:
• Storage quotas for the Snowball Edge Storage Optimized option – The total available storage forAmazon S3 is between 60 TB and 80 TB depending on whether you're using compute instances on thedevice. If you are using compute instances, then total available dedicated storage for sbe1 computeinstances for the Snowball Edge Storage Optimized option is 1,000 GB.
74
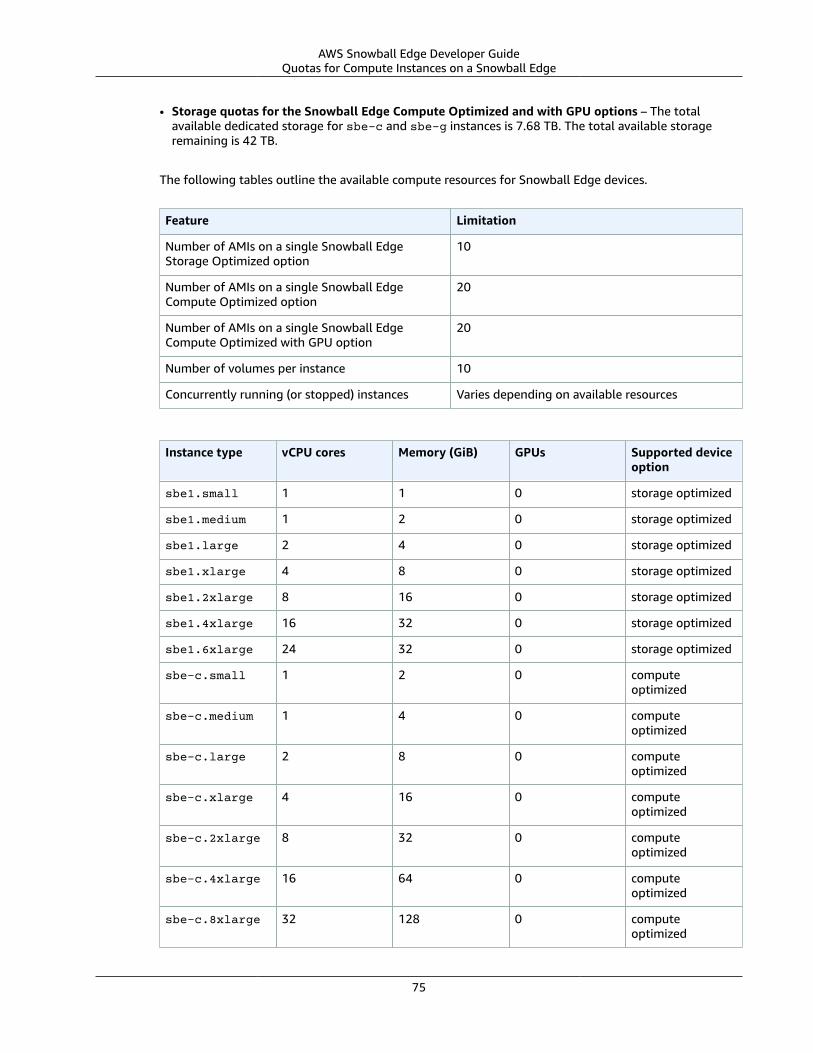
AWS Snowball Edge Developer GuideQuotas for Compute Instances on a Snowball Edge
• Storage quotas for the Snowball Edge Compute Optimized and with GPU options – The totalavailable dedicated storage for sbe-c and sbe-g instances is 7.68 TB. The total available storageremaining is 42 TB.
The following tables outline the available compute resources for Snowball Edge devices.
Feature Limitation
Number of AMIs on a single Snowball EdgeStorage Optimized option
10
Number of AMIs on a single Snowball EdgeCompute Optimized option
20
Number of AMIs on a single Snowball EdgeCompute Optimized with GPU option
20
Number of volumes per instance 10
Concurrently running (or stopped) instances Varies depending on available resources
Instance type vCPU cores Memory (GiB) GPUs Supported deviceoption
sbe1.small 1 1 0 storage optimized
sbe1.medium 1 2 0 storage optimized
sbe1.large 2 4 0 storage optimized
sbe1.xlarge 4 8 0 storage optimized
sbe1.2xlarge 8 16 0 storage optimized
sbe1.4xlarge 16 32 0 storage optimized
sbe1.6xlarge 24 32 0 storage optimized
sbe-c.small 1 2 0 computeoptimized
sbe-c.medium 1 4 0 computeoptimized
sbe-c.large 2 8 0 computeoptimized
sbe-c.xlarge 4 16 0 computeoptimized
sbe-c.2xlarge 8 32 0 computeoptimized
sbe-c.4xlarge 16 64 0 computeoptimized
sbe-c.8xlarge 32 128 0 computeoptimized
75
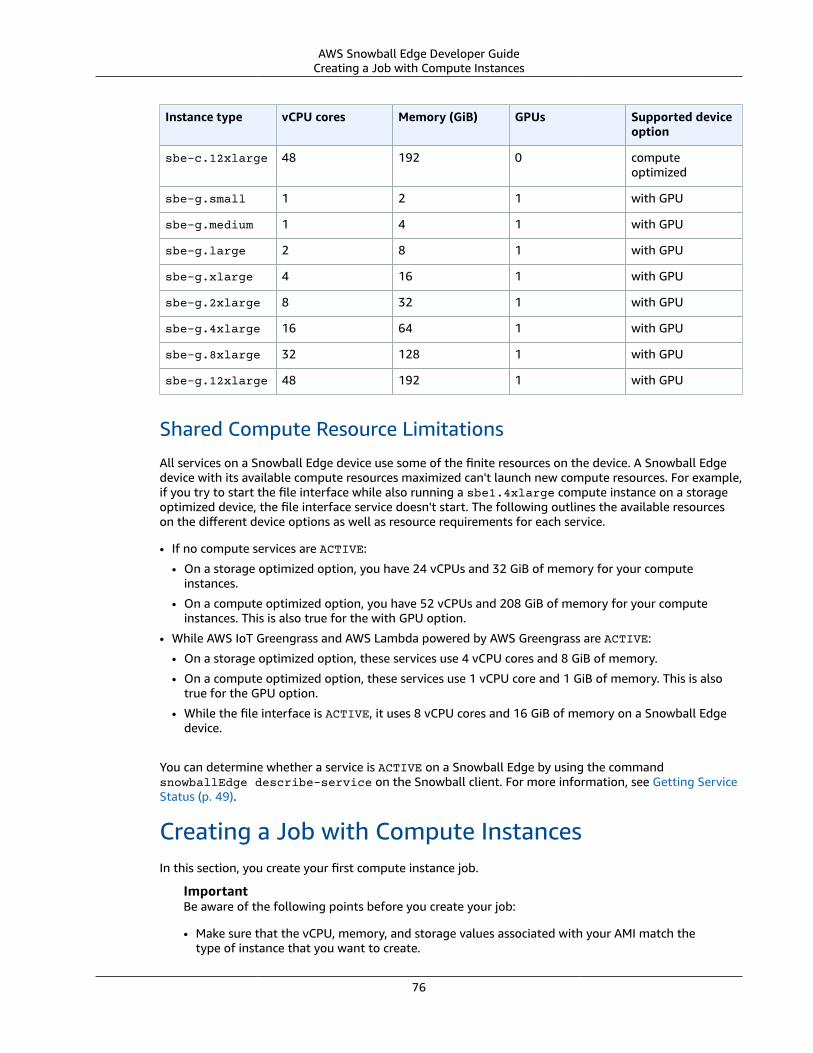
AWS Snowball Edge Developer GuideCreating a Job with Compute Instances
Instance type vCPU cores Memory (GiB) GPUs Supported deviceoption
sbe-c.12xlarge 48 192 0 computeoptimized
sbe-g.small 1 2 1 with GPU
sbe-g.medium 1 4 1 with GPU
sbe-g.large 2 8 1 with GPU
sbe-g.xlarge 4 16 1 with GPU
sbe-g.2xlarge 8 32 1 with GPU
sbe-g.4xlarge 16 64 1 with GPU
sbe-g.8xlarge 32 128 1 with GPU
sbe-g.12xlarge 48 192 1 with GPU
Shared Compute Resource Limitations
All services on a Snowball Edge device use some of the finite resources on the device. A Snowball Edgedevice with its available compute resources maximized can't launch new compute resources. For example,if you try to start the file interface while also running a sbe1.4xlarge compute instance on a storageoptimized device, the file interface service doesn't start. The following outlines the available resourceson the different device options as well as resource requirements for each service.
• If no compute services are ACTIVE:
• On a storage optimized option, you have 24 vCPUs and 32 GiB of memory for your computeinstances.
• On a compute optimized option, you have 52 vCPUs and 208 GiB of memory for your computeinstances. This is also true for the with GPU option.
• While AWS IoT Greengrass and AWS Lambda powered by AWS Greengrass are ACTIVE:
• On a storage optimized option, these services use 4 vCPU cores and 8 GiB of memory.
• On a compute optimized option, these services use 1 vCPU core and 1 GiB of memory. This is alsotrue for the GPU option.
• While the file interface is ACTIVE, it uses 8 vCPU cores and 16 GiB of memory on a Snowball Edgedevice.
You can determine whether a service is ACTIVE on a Snowball Edge by using the commandsnowballEdge describe-service on the Snowball client. For more information, see Getting ServiceStatus (p. 49).
Creating a Job with Compute InstancesIn this section, you create your first compute instance job.
ImportantBe aware of the following points before you create your job:
• Make sure that the vCPU, memory, and storage values associated with your AMI match thetype of instance that you want to create.
76

AWS Snowball Edge Developer GuideCreating a Job with Compute Instances
• If you're going to use SSH to connect to the instance after you launch the instance on yourSnowball Edge, you must first perform the following procedure. You can't update the AMIs onyour Snowball Edge after the fact. You must do this step before creating the job.
Configure an AMI to Use SSH to Connect to Compute InstancesLaunched on the DeviceTo use Secure Shell (SSH) to connect to your compute instances on Snowball Edge devices, you mustperform the following procedure. This procedure adds the SSH key to the AMI before creating your job.We also recommend that you use this procedure to set up your applications on the instance that you planto use as the AMI for your job.
ImportantIf you don't follow this procedure, you can't connect to your instances with SSH when youreceive your Snowball Edge device.
To put an SSH key into an AMI
1. When you launch your instance, make sure that the storage size that you assign to the instance isappropriate for your later use on the Snowball Edge. In the Amazon EC2 console, you do this inStep 4: Add Storage. For a list of the supported sizes for compute instance storage volumes on aSnowball Edge, see Quotas for Compute Instances on a Snowball Edge (p. 74).
2. Install and configure the applications that you want to run on the Snowball Edge, and test that theywork as expected.
3. Make a copy of the PEM/PPK file that you used for the SSH key pair to create this instance. Save thisfile to the server that you plan to use to communicate with the Snowball Edge. This file is requiredfor using SSH to connect to the launched instance on your device, so make a note of the path to thisfile.
4. Save the instance as an AMI. For more information, see Creating an Amazon EBS-Backed Linux AMIin the Amazon EC2 User Guide for Linux Instances.
5. Repeat this procedure for each of the instances that you want to connect to using SSH. Make surethat you make copies of your different SSH key pairs and take note of the AMIs they're associatedwith.
Creating Your Job in the ConsoleYour next step is to create a job. Your job can be of any job type, including a cluster. Using the AWSSnowball Management Console, and follow the instructions provided in Create Your First Job (p. 23), addthese additional steps when you get to the Step 3: Give job details page in the job creation wizard.
1. Choose Enable compute with EC2.2. Choose Add an AMI.3. In the dialog box that opens, choose an AMI and choose Save.4. Add up to 10 total AMIs to your job.5. Continue creating your job as normal.
Creating Your Job in the AWS CLIYou can also create your job using the AWS CLI. To do this, open a terminal and run the followingcommand, replacing the red text with your actual values:
aws snowball create-job --job-type IMPORT --resources '{"S3Resources":[{"BucketArn":"arn:aws:s3:::bucket-name"}],"Ec2AmiResources":[{"AmiId":"ami-12345678"}]}'
77
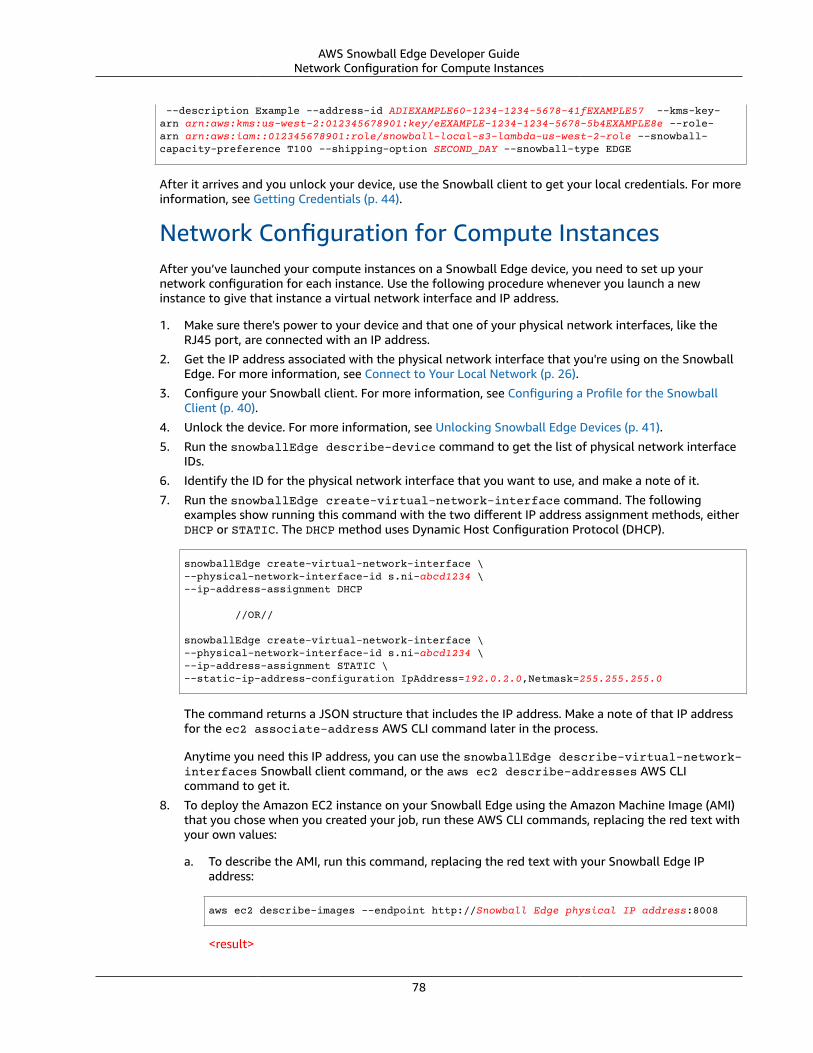
AWS Snowball Edge Developer GuideNetwork Configuration for Compute Instances
--description Example --address-id ADIEXAMPLE60-1234-1234-5678-41fEXAMPLE57 --kms-key-arn arn:aws:kms:us-west-2:012345678901:key/eEXAMPLE-1234-1234-5678-5b4EXAMPLE8e --role-arn arn:aws:iam::012345678901:role/snowball-local-s3-lambda-us-west-2-role --snowball-capacity-preference T100 --shipping-option SECOND_DAY --snowball-type EDGE
After it arrives and you unlock your device, use the Snowball client to get your local credentials. For moreinformation, see Getting Credentials (p. 44).
Network Configuration for Compute InstancesAfter you’ve launched your compute instances on a Snowball Edge device, you need to set up yournetwork configuration for each instance. Use the following procedure whenever you launch a newinstance to give that instance a virtual network interface and IP address.
1. Make sure there's power to your device and that one of your physical network interfaces, like theRJ45 port, are connected with an IP address.
2. Get the IP address associated with the physical network interface that you're using on the SnowballEdge. For more information, see Connect to Your Local Network (p. 26).
3. Configure your Snowball client. For more information, see Configuring a Profile for the SnowballClient (p. 40).
4. Unlock the device. For more information, see Unlocking Snowball Edge Devices (p. 41).
5. Run the snowballEdge describe-device command to get the list of physical network interfaceIDs.
6. Identify the ID for the physical network interface that you want to use, and make a note of it.
7. Run the snowballEdge create-virtual-network-interface command. The followingexamples show running this command with the two different IP address assignment methods, eitherDHCP or STATIC. The DHCP method uses Dynamic Host Configuration Protocol (DHCP).
snowballEdge create-virtual-network-interface \--physical-network-interface-id s.ni-abcd1234 \--ip-address-assignment DHCP //OR// snowballEdge create-virtual-network-interface \--physical-network-interface-id s.ni-abcd1234 \--ip-address-assignment STATIC \--static-ip-address-configuration IpAddress=192.0.2.0,Netmask=255.255.255.0
The command returns a JSON structure that includes the IP address. Make a note of that IP addressfor the ec2 associate-address AWS CLI command later in the process.
Anytime you need this IP address, you can use the snowballEdge describe-virtual-network-interfaces Snowball client command, or the aws ec2 describe-addresses AWS CLIcommand to get it.
8. To deploy the Amazon EC2 instance on your Snowball Edge using the Amazon Machine Image (AMI)that you chose when you created your job, run these AWS CLI commands, replacing the red text withyour own values:
a. To describe the AMI, run this command, replacing the red text with your Snowball Edge IPaddress:
aws ec2 describe-images --endpoint http://Snowball Edge physical IP address:8008
<result>
78
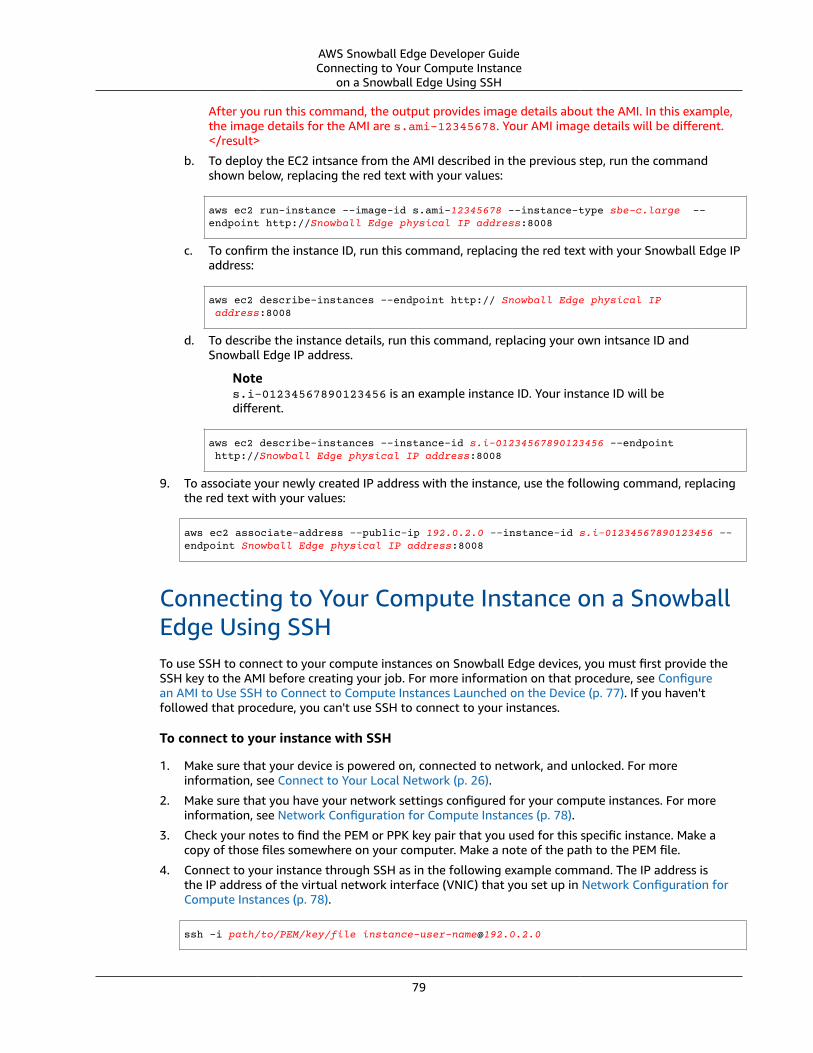
AWS Snowball Edge Developer GuideConnecting to Your Compute Instance
on a Snowball Edge Using SSH
After you run this command, the output provides image details about the AMI. In this example,the image details for the AMI are s.ami-12345678. Your AMI image details will be different.</result>
b. To deploy the EC2 intsance from the AMI described in the previous step, run the commandshown below, replacing the red text with your values:
aws ec2 run-instance --image-id s.ami-12345678 --instance-type sbe-c.large --endpoint http://Snowball Edge physical IP address:8008
c. To confirm the instance ID, run this command, replacing the red text with your Snowball Edge IPaddress:
aws ec2 describe-instances --endpoint http:// Snowball Edge physical IP address:8008
d. To describe the instance details, run this command, replacing your own intsance ID andSnowball Edge IP address.
Notes.i-01234567890123456 is an example instance ID. Your instance ID will bedifferent.
aws ec2 describe-instances --instance-id s.i-01234567890123456 --endpoint http://Snowball Edge physical IP address:8008
9. To associate your newly created IP address with the instance, use the following command, replacingthe red text with your values:
aws ec2 associate-address --public-ip 192.0.2.0 --instance-id s.i-01234567890123456 --endpoint Snowball Edge physical IP address:8008
Connecting to Your Compute Instance on a SnowballEdge Using SSHTo use SSH to connect to your compute instances on Snowball Edge devices, you must first provide theSSH key to the AMI before creating your job. For more information on that procedure, see Configurean AMI to Use SSH to Connect to Compute Instances Launched on the Device (p. 77). If you haven'tfollowed that procedure, you can't use SSH to connect to your instances.
To connect to your instance with SSH
1. Make sure that your device is powered on, connected to network, and unlocked. For moreinformation, see Connect to Your Local Network (p. 26).
2. Make sure that you have your network settings configured for your compute instances. For moreinformation, see Network Configuration for Compute Instances (p. 78).
3. Check your notes to find the PEM or PPK key pair that you used for this specific instance. Make acopy of those files somewhere on your computer. Make a note of the path to the PEM file.
4. Connect to your instance through SSH as in the following example command. The IP address isthe IP address of the virtual network interface (VNIC) that you set up in Network Configuration forCompute Instances (p. 78).
ssh -i path/to/PEM/key/file [email protected]
79
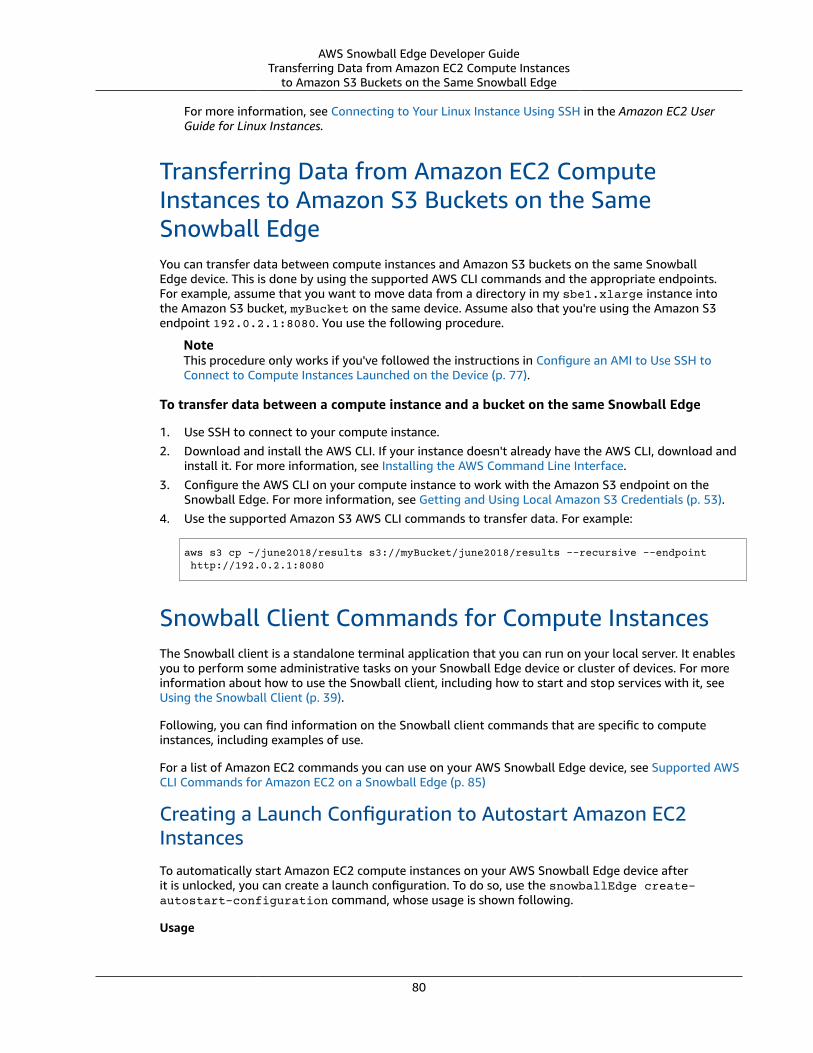
AWS Snowball Edge Developer GuideTransferring Data from Amazon EC2 Compute Instances
to Amazon S3 Buckets on the Same Snowball Edge
For more information, see Connecting to Your Linux Instance Using SSH in the Amazon EC2 UserGuide for Linux Instances.
Transferring Data from Amazon EC2 ComputeInstances to Amazon S3 Buckets on the SameSnowball EdgeYou can transfer data between compute instances and Amazon S3 buckets on the same SnowballEdge device. This is done by using the supported AWS CLI commands and the appropriate endpoints.For example, assume that you want to move data from a directory in my sbe1.xlarge instance intothe Amazon S3 bucket, myBucket on the same device. Assume also that you're using the Amazon S3endpoint 192.0.2.1:8080. You use the following procedure.
NoteThis procedure only works if you've followed the instructions in Configure an AMI to Use SSH toConnect to Compute Instances Launched on the Device (p. 77).
To transfer data between a compute instance and a bucket on the same Snowball Edge
1. Use SSH to connect to your compute instance.2. Download and install the AWS CLI. If your instance doesn't already have the AWS CLI, download and
install it. For more information, see Installing the AWS Command Line Interface.3. Configure the AWS CLI on your compute instance to work with the Amazon S3 endpoint on the
Snowball Edge. For more information, see Getting and Using Local Amazon S3 Credentials (p. 53).4. Use the supported Amazon S3 AWS CLI commands to transfer data. For example:
aws s3 cp ~/june2018/results s3://myBucket/june2018/results --recursive --endpoint http://192.0.2.1:8080
Snowball Client Commands for Compute InstancesThe Snowball client is a standalone terminal application that you can run on your local server. It enablesyou to perform some administrative tasks on your Snowball Edge device or cluster of devices. For moreinformation about how to use the Snowball client, including how to start and stop services with it, seeUsing the Snowball Client (p. 39).
Following, you can find information on the Snowball client commands that are specific to computeinstances, including examples of use.
For a list of Amazon EC2 commands you can use on your AWS Snowball Edge device, see Supported AWSCLI Commands for Amazon EC2 on a Snowball Edge (p. 85)
Creating a Launch Configuration to Autostart Amazon EC2InstancesTo automatically start Amazon EC2 compute instances on your AWS Snowball Edge device afterit is unlocked, you can create a launch configuration. To do so, use the snowballEdge create-autostart-configuration command, whose usage is shown following.
Usage
80
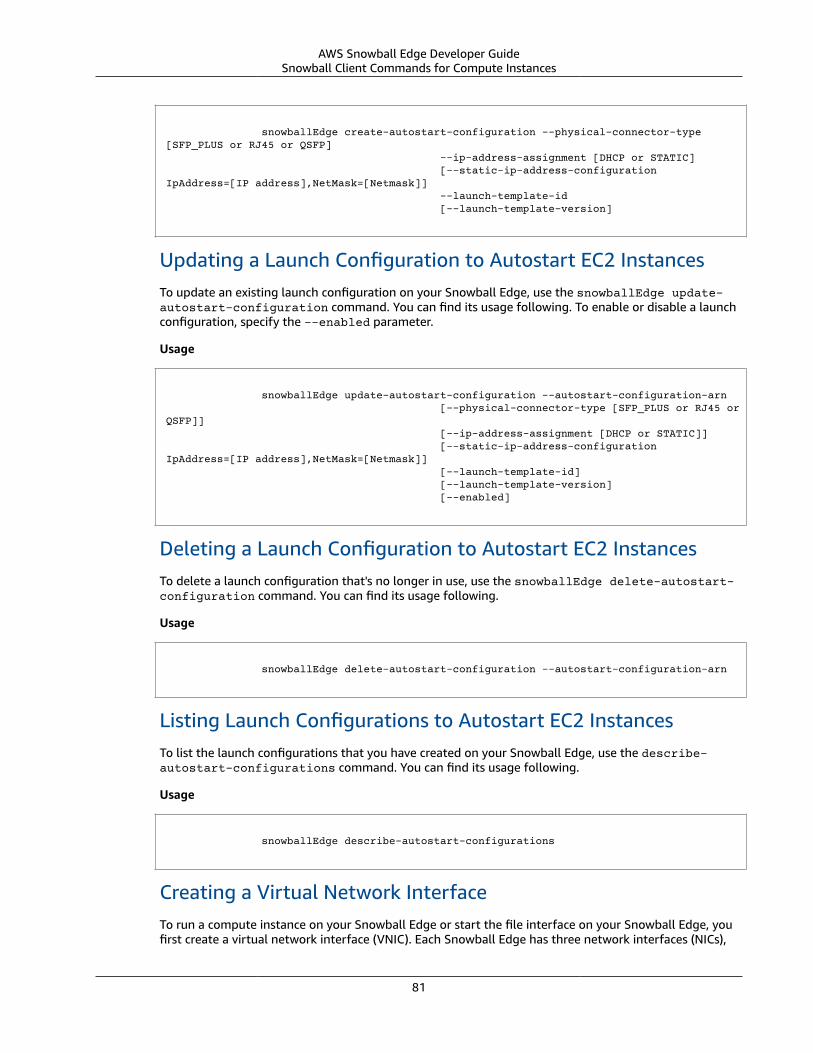
AWS Snowball Edge Developer GuideSnowball Client Commands for Compute Instances
snowballEdge create-autostart-configuration --physical-connector-type [SFP_PLUS or RJ45 or QSFP] --ip-address-assignment [DHCP or STATIC] [--static-ip-address-configuration IpAddress=[IP address],NetMask=[Netmask]] --launch-template-id [--launch-template-version]
Updating a Launch Configuration to Autostart EC2 InstancesTo update an existing launch configuration on your Snowball Edge, use the snowballEdge update-autostart-configuration command. You can find its usage following. To enable or disable a launchconfiguration, specify the --enabled parameter.
Usage
snowballEdge update-autostart-configuration --autostart-configuration-arn [--physical-connector-type [SFP_PLUS or RJ45 or QSFP]] [--ip-address-assignment [DHCP or STATIC]] [--static-ip-address-configuration IpAddress=[IP address],NetMask=[Netmask]] [--launch-template-id] [--launch-template-version] [--enabled]
Deleting a Launch Configuration to Autostart EC2 InstancesTo delete a launch configuration that's no longer in use, use the snowballEdge delete-autostart-configuration command. You can find its usage following.
Usage
snowballEdge delete-autostart-configuration --autostart-configuration-arn
Listing Launch Configurations to Autostart EC2 InstancesTo list the launch configurations that you have created on your Snowball Edge, use the describe-autostart-configurations command. You can find its usage following.
Usage
snowballEdge describe-autostart-configurations
Creating a Virtual Network InterfaceTo run a compute instance on your Snowball Edge or start the file interface on your Snowball Edge, youfirst create a virtual network interface (VNIC). Each Snowball Edge has three network interfaces (NICs),
81
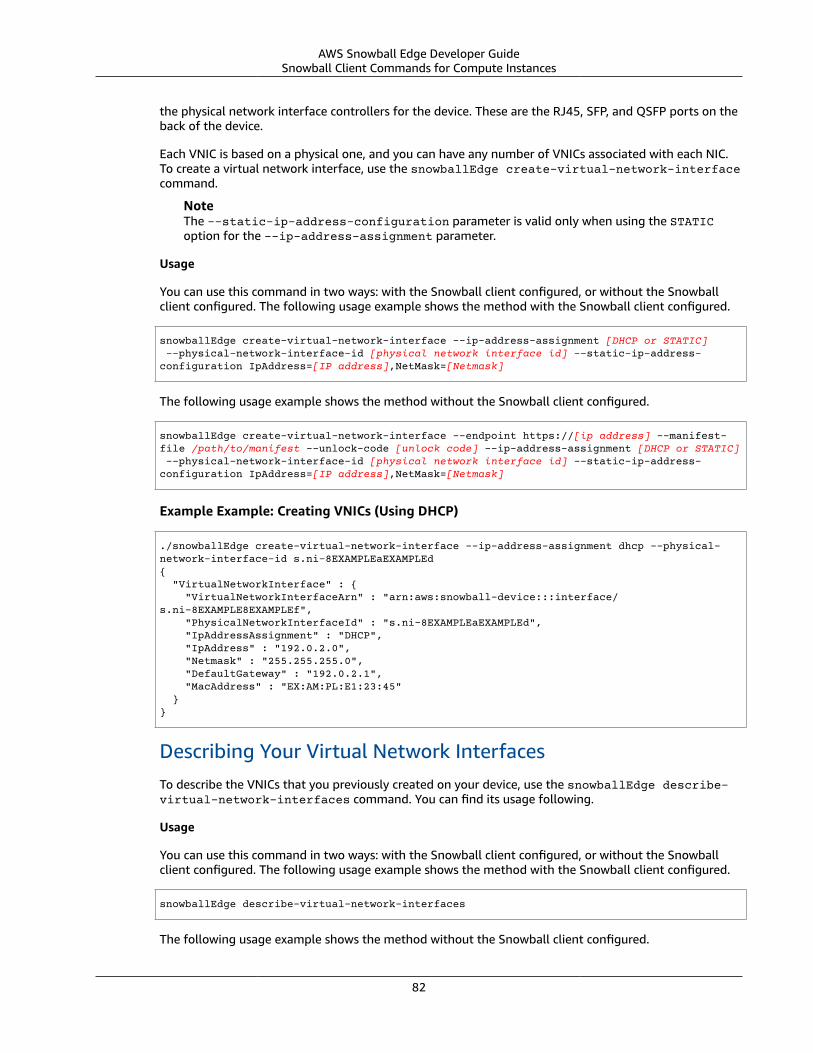
AWS Snowball Edge Developer GuideSnowball Client Commands for Compute Instances
the physical network interface controllers for the device. These are the RJ45, SFP, and QSFP ports on theback of the device.
Each VNIC is based on a physical one, and you can have any number of VNICs associated with each NIC.To create a virtual network interface, use the snowballEdge create-virtual-network-interfacecommand.
NoteThe --static-ip-address-configuration parameter is valid only when using the STATICoption for the --ip-address-assignment parameter.
Usage
You can use this command in two ways: with the Snowball client configured, or without the Snowballclient configured. The following usage example shows the method with the Snowball client configured.
snowballEdge create-virtual-network-interface --ip-address-assignment [DHCP or STATIC] --physical-network-interface-id [physical network interface id] --static-ip-address-configuration IpAddress=[IP address],NetMask=[Netmask]
The following usage example shows the method without the Snowball client configured.
snowballEdge create-virtual-network-interface --endpoint https://[ip address] --manifest-file /path/to/manifest --unlock-code [unlock code] --ip-address-assignment [DHCP or STATIC] --physical-network-interface-id [physical network interface id] --static-ip-address-configuration IpAddress=[IP address],NetMask=[Netmask]
Example Example: Creating VNICs (Using DHCP)
./snowballEdge create-virtual-network-interface --ip-address-assignment dhcp --physical-network-interface-id s.ni-8EXAMPLEaEXAMPLEd{ "VirtualNetworkInterface" : { "VirtualNetworkInterfaceArn" : "arn:aws:snowball-device:::interface/s.ni-8EXAMPLE8EXAMPLEf", "PhysicalNetworkInterfaceId" : "s.ni-8EXAMPLEaEXAMPLEd", "IpAddressAssignment" : "DHCP", "IpAddress" : "192.0.2.0", "Netmask" : "255.255.255.0", "DefaultGateway" : "192.0.2.1", "MacAddress" : "EX:AM:PL:E1:23:45" }}
Describing Your Virtual Network InterfacesTo describe the VNICs that you previously created on your device, use the snowballEdge describe-virtual-network-interfaces command. You can find its usage following.
Usage
You can use this command in two ways: with the Snowball client configured, or without the Snowballclient configured. The following usage example shows the method with the Snowball client configured.
snowballEdge describe-virtual-network-interfaces
The following usage example shows the method without the Snowball client configured.
82
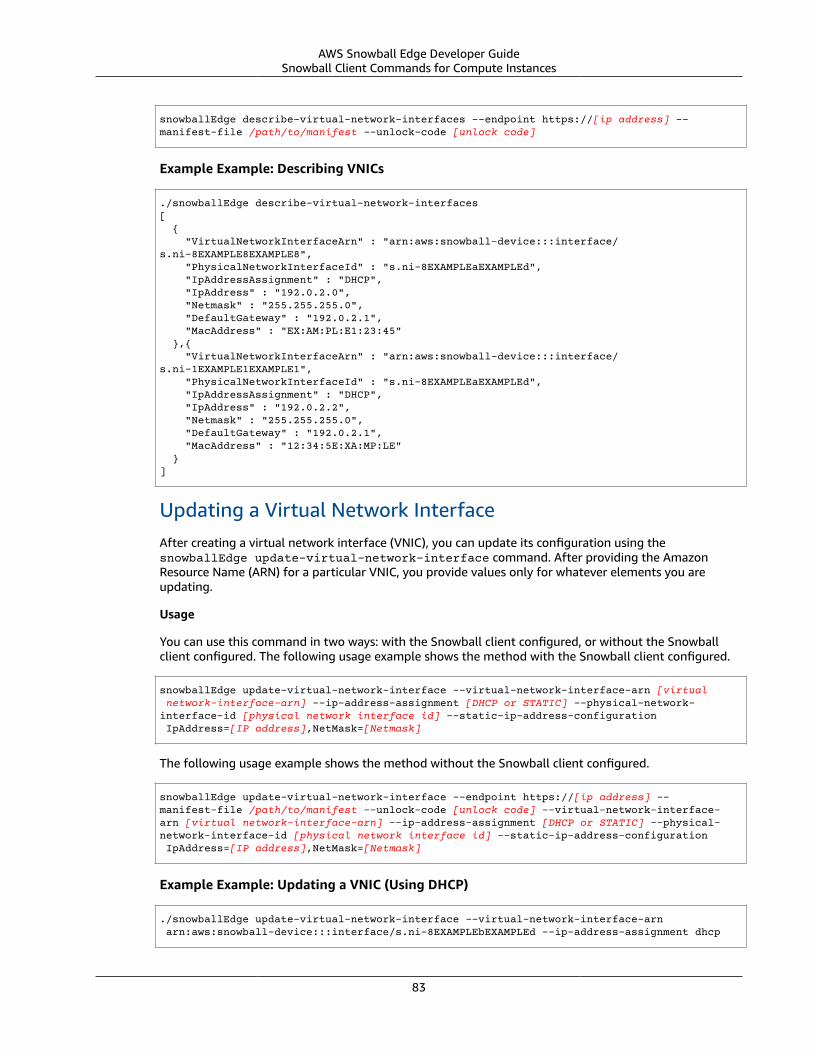
AWS Snowball Edge Developer GuideSnowball Client Commands for Compute Instances
snowballEdge describe-virtual-network-interfaces --endpoint https://[ip address] --manifest-file /path/to/manifest --unlock-code [unlock code]
Example Example: Describing VNICs
./snowballEdge describe-virtual-network-interfaces[ { "VirtualNetworkInterfaceArn" : "arn:aws:snowball-device:::interface/s.ni-8EXAMPLE8EXAMPLE8", "PhysicalNetworkInterfaceId" : "s.ni-8EXAMPLEaEXAMPLEd", "IpAddressAssignment" : "DHCP", "IpAddress" : "192.0.2.0", "Netmask" : "255.255.255.0", "DefaultGateway" : "192.0.2.1", "MacAddress" : "EX:AM:PL:E1:23:45" },{ "VirtualNetworkInterfaceArn" : "arn:aws:snowball-device:::interface/s.ni-1EXAMPLE1EXAMPLE1", "PhysicalNetworkInterfaceId" : "s.ni-8EXAMPLEaEXAMPLEd", "IpAddressAssignment" : "DHCP", "IpAddress" : "192.0.2.2", "Netmask" : "255.255.255.0", "DefaultGateway" : "192.0.2.1", "MacAddress" : "12:34:5E:XA:MP:LE" } ]
Updating a Virtual Network InterfaceAfter creating a virtual network interface (VNIC), you can update its configuration using thesnowballEdge update-virtual-network-interface command. After providing the AmazonResource Name (ARN) for a particular VNIC, you provide values only for whatever elements you areupdating.
Usage
You can use this command in two ways: with the Snowball client configured, or without the Snowballclient configured. The following usage example shows the method with the Snowball client configured.
snowballEdge update-virtual-network-interface --virtual-network-interface-arn [virtual network-interface-arn] --ip-address-assignment [DHCP or STATIC] --physical-network-interface-id [physical network interface id] --static-ip-address-configuration IpAddress=[IP address],NetMask=[Netmask]
The following usage example shows the method without the Snowball client configured.
snowballEdge update-virtual-network-interface --endpoint https://[ip address] --manifest-file /path/to/manifest --unlock-code [unlock code] --virtual-network-interface-arn [virtual network-interface-arn] --ip-address-assignment [DHCP or STATIC] --physical-network-interface-id [physical network interface id] --static-ip-address-configuration IpAddress=[IP address],NetMask=[Netmask]
Example Example: Updating a VNIC (Using DHCP)
./snowballEdge update-virtual-network-interface --virtual-network-interface-arn arn:aws:snowball-device:::interface/s.ni-8EXAMPLEbEXAMPLEd --ip-address-assignment dhcp
83
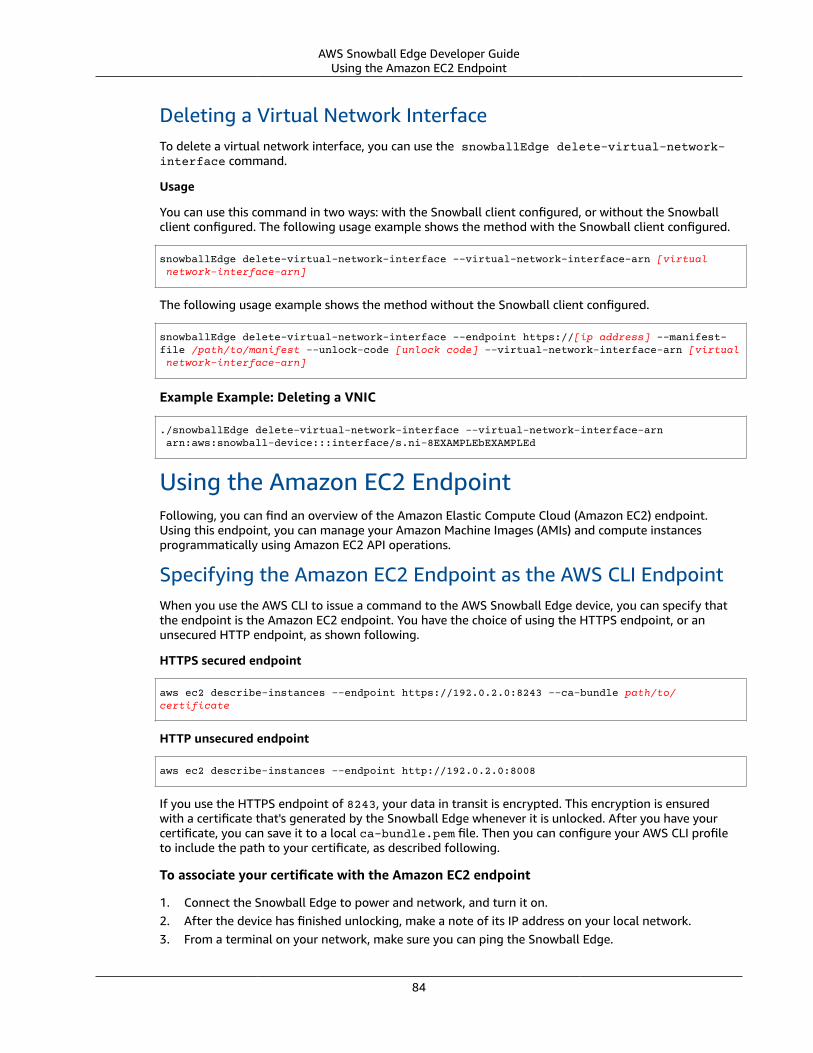
AWS Snowball Edge Developer GuideUsing the Amazon EC2 Endpoint
Deleting a Virtual Network InterfaceTo delete a virtual network interface, you can use the snowballEdge delete-virtual-network-interface command.
Usage
You can use this command in two ways: with the Snowball client configured, or without the Snowballclient configured. The following usage example shows the method with the Snowball client configured.
snowballEdge delete-virtual-network-interface --virtual-network-interface-arn [virtual network-interface-arn]
The following usage example shows the method without the Snowball client configured.
snowballEdge delete-virtual-network-interface --endpoint https://[ip address] --manifest-file /path/to/manifest --unlock-code [unlock code] --virtual-network-interface-arn [virtual network-interface-arn]
Example Example: Deleting a VNIC
./snowballEdge delete-virtual-network-interface --virtual-network-interface-arn arn:aws:snowball-device:::interface/s.ni-8EXAMPLEbEXAMPLEd
Using the Amazon EC2 EndpointFollowing, you can find an overview of the Amazon Elastic Compute Cloud (Amazon EC2) endpoint.Using this endpoint, you can manage your Amazon Machine Images (AMIs) and compute instancesprogrammatically using Amazon EC2 API operations.
Specifying the Amazon EC2 Endpoint as the AWS CLI EndpointWhen you use the AWS CLI to issue a command to the AWS Snowball Edge device, you can specify thatthe endpoint is the Amazon EC2 endpoint. You have the choice of using the HTTPS endpoint, or anunsecured HTTP endpoint, as shown following.
HTTPS secured endpoint
aws ec2 describe-instances --endpoint https://192.0.2.0:8243 --ca-bundle path/to/certificate
HTTP unsecured endpoint
aws ec2 describe-instances --endpoint http://192.0.2.0:8008
If you use the HTTPS endpoint of 8243, your data in transit is encrypted. This encryption is ensuredwith a certificate that's generated by the Snowball Edge whenever it is unlocked. After you have yourcertificate, you can save it to a local ca-bundle.pem file. Then you can configure your AWS CLI profileto include the path to your certificate, as described following.
To associate your certificate with the Amazon EC2 endpoint
1. Connect the Snowball Edge to power and network, and turn it on.2. After the device has finished unlocking, make a note of its IP address on your local network.3. From a terminal on your network, make sure you can ping the Snowball Edge.
84
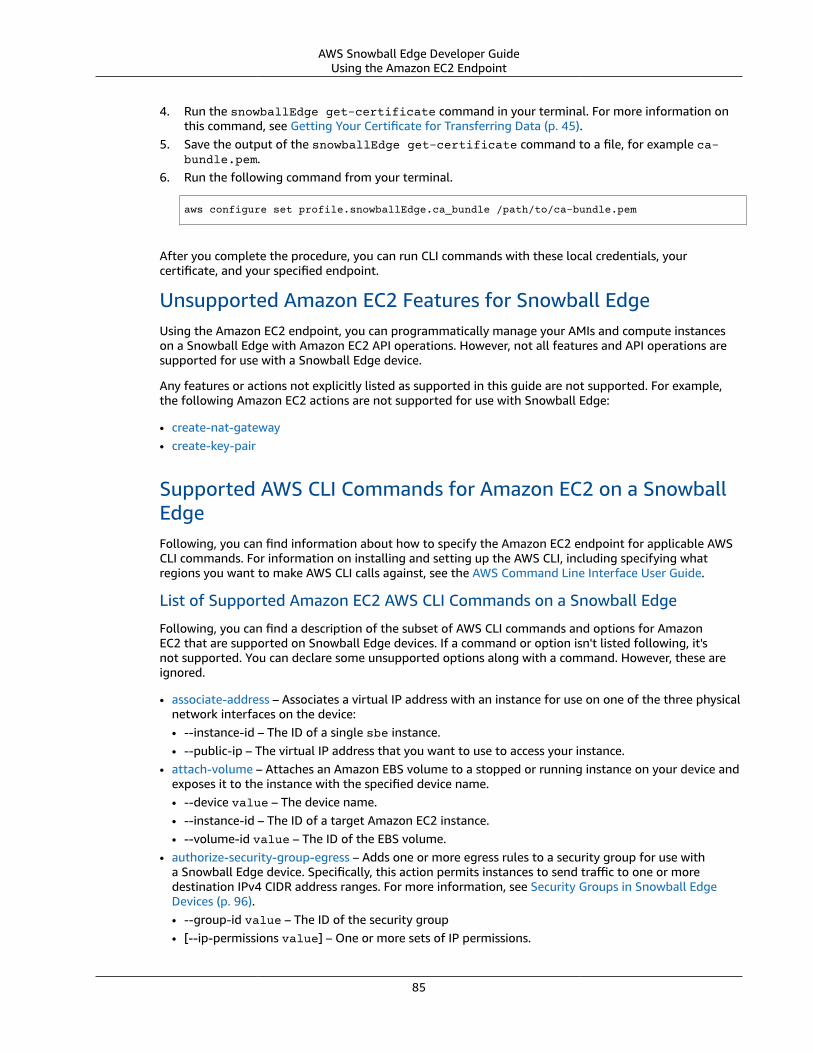
AWS Snowball Edge Developer GuideUsing the Amazon EC2 Endpoint
4. Run the snowballEdge get-certificate command in your terminal. For more information onthis command, see Getting Your Certificate for Transferring Data (p. 45).
5. Save the output of the snowballEdge get-certificate command to a file, for example ca-bundle.pem.
6. Run the following command from your terminal.
aws configure set profile.snowballEdge.ca_bundle /path/to/ca-bundle.pem
After you complete the procedure, you can run CLI commands with these local credentials, yourcertificate, and your specified endpoint.
Unsupported Amazon EC2 Features for Snowball EdgeUsing the Amazon EC2 endpoint, you can programmatically manage your AMIs and compute instanceson a Snowball Edge with Amazon EC2 API operations. However, not all features and API operations aresupported for use with a Snowball Edge device.
Any features or actions not explicitly listed as supported in this guide are not supported. For example,the following Amazon EC2 actions are not supported for use with Snowball Edge:
• create-nat-gateway• create-key-pair
Supported AWS CLI Commands for Amazon EC2 on a SnowballEdgeFollowing, you can find information about how to specify the Amazon EC2 endpoint for applicable AWSCLI commands. For information on installing and setting up the AWS CLI, including specifying whatregions you want to make AWS CLI calls against, see the AWS Command Line Interface User Guide.
List of Supported Amazon EC2 AWS CLI Commands on a Snowball Edge
Following, you can find a description of the subset of AWS CLI commands and options for AmazonEC2 that are supported on Snowball Edge devices. If a command or option isn't listed following, it'snot supported. You can declare some unsupported options along with a command. However, these areignored.
• associate-address – Associates a virtual IP address with an instance for use on one of the three physicalnetwork interfaces on the device:• --instance-id – The ID of a single sbe instance.• --public-ip – The virtual IP address that you want to use to access your instance.
• attach-volume – Attaches an Amazon EBS volume to a stopped or running instance on your device andexposes it to the instance with the specified device name.• --device value – The device name.• --instance-id – The ID of a target Amazon EC2 instance.• --volume-id value – The ID of the EBS volume.
• authorize-security-group-egress – Adds one or more egress rules to a security group for use witha Snowball Edge device. Specifically, this action permits instances to send traffic to one or moredestination IPv4 CIDR address ranges. For more information, see Security Groups in Snowball EdgeDevices (p. 96).• --group-id value – The ID of the security group• [--ip-permissions value] – One or more sets of IP permissions.
85
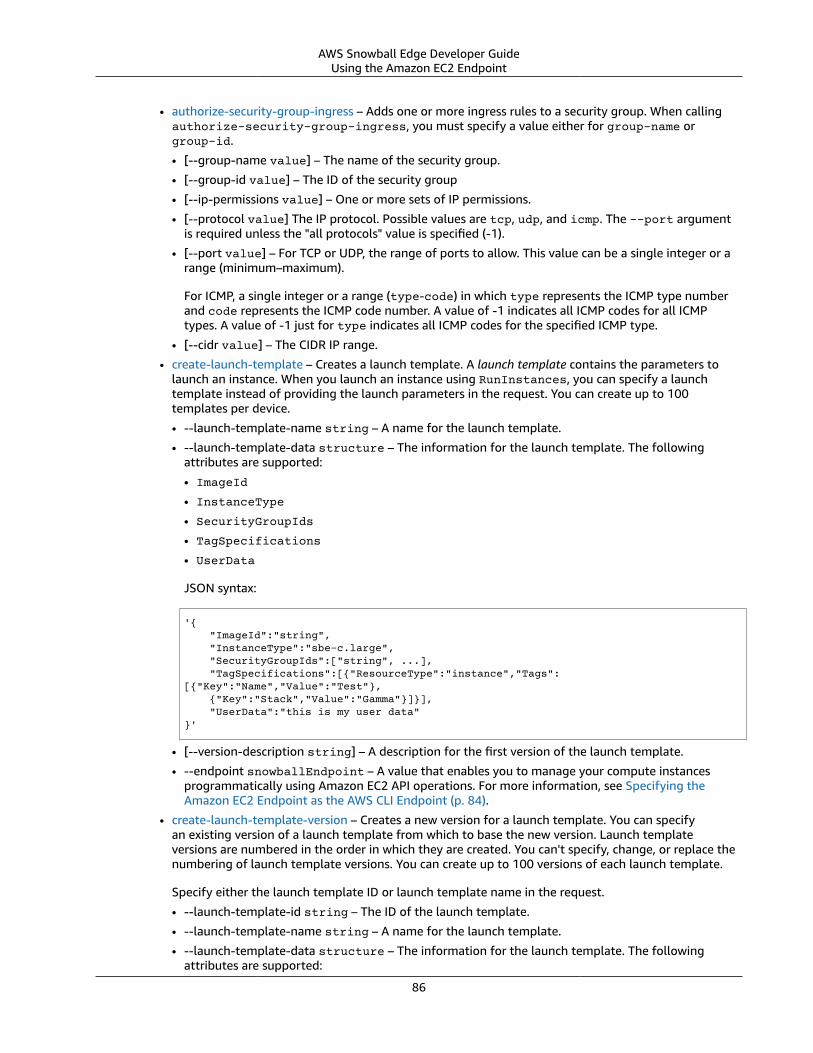
AWS Snowball Edge Developer GuideUsing the Amazon EC2 Endpoint
• authorize-security-group-ingress – Adds one or more ingress rules to a security group. When callingauthorize-security-group-ingress, you must specify a value either for group-name orgroup-id.
• [--group-name value] – The name of the security group.
• [--group-id value] – The ID of the security group
• [--ip-permissions value] – One or more sets of IP permissions.
• [--protocol value] The IP protocol. Possible values are tcp, udp, and icmp. The --port argumentis required unless the "all protocols" value is specified (-1).
• [--port value] – For TCP or UDP, the range of ports to allow. This value can be a single integer or arange (minimum–maximum).
For ICMP, a single integer or a range (type-code) in which type represents the ICMP type numberand code represents the ICMP code number. A value of -1 indicates all ICMP codes for all ICMPtypes. A value of -1 just for type indicates all ICMP codes for the specified ICMP type.
• [--cidr value] – The CIDR IP range.
• create-launch-template – Creates a launch template. A launch template contains the parameters tolaunch an instance. When you launch an instance using RunInstances, you can specify a launchtemplate instead of providing the launch parameters in the request. You can create up to 100templates per device.
• --launch-template-name string – A name for the launch template.
• --launch-template-data structure – The information for the launch template. The followingattributes are supported:
• ImageId
• InstanceType
• SecurityGroupIds
• TagSpecifications
• UserData
JSON syntax:
'{ "ImageId":"string", "InstanceType":"sbe-c.large", "SecurityGroupIds":["string", ...], "TagSpecifications":[{"ResourceType":"instance","Tags":[{"Key":"Name","Value":"Test"}, {"Key":"Stack","Value":"Gamma"}]}], "UserData":"this is my user data"}'
• [--version-description string] – A description for the first version of the launch template.
• --endpoint snowballEndpoint – A value that enables you to manage your compute instancesprogrammatically using Amazon EC2 API operations. For more information, see Specifying theAmazon EC2 Endpoint as the AWS CLI Endpoint (p. 84).
• create-launch-template-version – Creates a new version for a launch template. You can specifyan existing version of a launch template from which to base the new version. Launch templateversions are numbered in the order in which they are created. You can't specify, change, or replace thenumbering of launch template versions. You can create up to 100 versions of each launch template.
Specify either the launch template ID or launch template name in the request.
• --launch-template-id string – The ID of the launch template.
• --launch-template-name string – A name for the launch template.
• --launch-template-data structure – The information for the launch template. The followingattributes are supported:
86
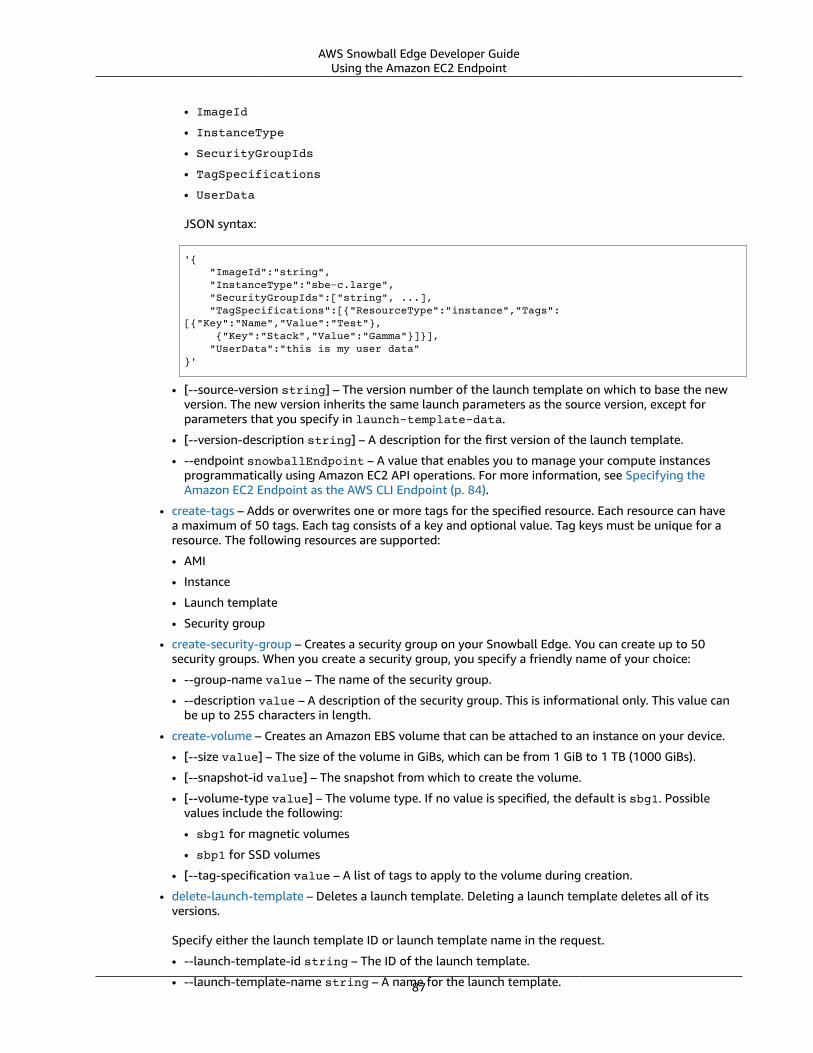
AWS Snowball Edge Developer GuideUsing the Amazon EC2 Endpoint
• ImageId
• InstanceType
• SecurityGroupIds
• TagSpecifications
• UserData
JSON syntax:
'{ "ImageId":"string", "InstanceType":"sbe-c.large", "SecurityGroupIds":["string", ...], "TagSpecifications":[{"ResourceType":"instance","Tags":[{"Key":"Name","Value":"Test"}, {"Key":"Stack","Value":"Gamma"}]}], "UserData":"this is my user data"}'
• [--source-version string] – The version number of the launch template on which to base the newversion. The new version inherits the same launch parameters as the source version, except forparameters that you specify in launch-template-data.
• [--version-description string] – A description for the first version of the launch template.
• --endpoint snowballEndpoint – A value that enables you to manage your compute instancesprogrammatically using Amazon EC2 API operations. For more information, see Specifying theAmazon EC2 Endpoint as the AWS CLI Endpoint (p. 84).
• create-tags – Adds or overwrites one or more tags for the specified resource. Each resource can havea maximum of 50 tags. Each tag consists of a key and optional value. Tag keys must be unique for aresource. The following resources are supported:
• AMI
• Instance
• Launch template
• Security group
• create-security-group – Creates a security group on your Snowball Edge. You can create up to 50security groups. When you create a security group, you specify a friendly name of your choice:
• --group-name value – The name of the security group.
• --description value – A description of the security group. This is informational only. This value canbe up to 255 characters in length.
• create-volume – Creates an Amazon EBS volume that can be attached to an instance on your device.
• [--size value] – The size of the volume in GiBs, which can be from 1 GiB to 1 TB (1000 GiBs).
• [--snapshot-id value] – The snapshot from which to create the volume.
• [--volume-type value] – The volume type. If no value is specified, the default is sbg1. Possiblevalues include the following:
• sbg1 for magnetic volumes
• sbp1 for SSD volumes
• [--tag-specification value – A list of tags to apply to the volume during creation.
• delete-launch-template – Deletes a launch template. Deleting a launch template deletes all of itsversions.
Specify either the launch template ID or launch template name in the request.
• --launch-template-id string – The ID of the launch template.
• --launch-template-name string – A name for the launch template.87
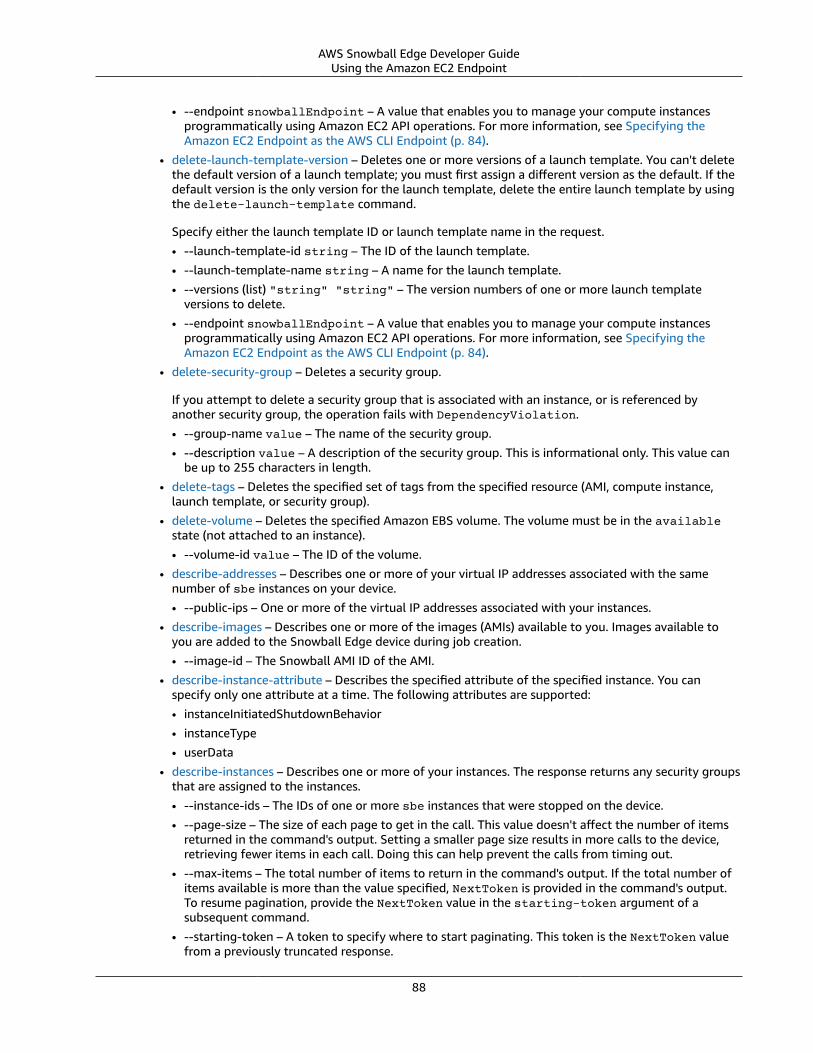
AWS Snowball Edge Developer GuideUsing the Amazon EC2 Endpoint
• --endpoint snowballEndpoint – A value that enables you to manage your compute instancesprogrammatically using Amazon EC2 API operations. For more information, see Specifying theAmazon EC2 Endpoint as the AWS CLI Endpoint (p. 84).
• delete-launch-template-version – Deletes one or more versions of a launch template. You can't deletethe default version of a launch template; you must first assign a different version as the default. If thedefault version is the only version for the launch template, delete the entire launch template by usingthe delete-launch-template command.
Specify either the launch template ID or launch template name in the request.
• --launch-template-id string – The ID of the launch template.
• --launch-template-name string – A name for the launch template.
• --versions (list) "string" "string" – The version numbers of one or more launch templateversions to delete.
• --endpoint snowballEndpoint – A value that enables you to manage your compute instancesprogrammatically using Amazon EC2 API operations. For more information, see Specifying theAmazon EC2 Endpoint as the AWS CLI Endpoint (p. 84).
• delete-security-group – Deletes a security group.
If you attempt to delete a security group that is associated with an instance, or is referenced byanother security group, the operation fails with DependencyViolation.
• --group-name value – The name of the security group.
• --description value – A description of the security group. This is informational only. This value canbe up to 255 characters in length.
• delete-tags – Deletes the specified set of tags from the specified resource (AMI, compute instance,launch template, or security group).
• delete-volume – Deletes the specified Amazon EBS volume. The volume must be in the availablestate (not attached to an instance).
• --volume-id value – The ID of the volume.
• describe-addresses – Describes one or more of your virtual IP addresses associated with the samenumber of sbe instances on your device.
• --public-ips – One or more of the virtual IP addresses associated with your instances.
• describe-images – Describes one or more of the images (AMIs) available to you. Images available toyou are added to the Snowball Edge device during job creation.
• --image-id – The Snowball AMI ID of the AMI.
• describe-instance-attribute – Describes the specified attribute of the specified instance. You canspecify only one attribute at a time. The following attributes are supported:
• instanceInitiatedShutdownBehavior
• instanceType
• userData
• describe-instances – Describes one or more of your instances. The response returns any security groupsthat are assigned to the instances.
• --instance-ids – The IDs of one or more sbe instances that were stopped on the device.
• --page-size – The size of each page to get in the call. This value doesn't affect the number of itemsreturned in the command's output. Setting a smaller page size results in more calls to the device,retrieving fewer items in each call. Doing this can help prevent the calls from timing out.
• --max-items – The total number of items to return in the command's output. If the total number ofitems available is more than the value specified, NextToken is provided in the command's output.To resume pagination, provide the NextToken value in the starting-token argument of asubsequent command.
• --starting-token – A token to specify where to start paginating. This token is the NextToken valuefrom a previously truncated response.
88
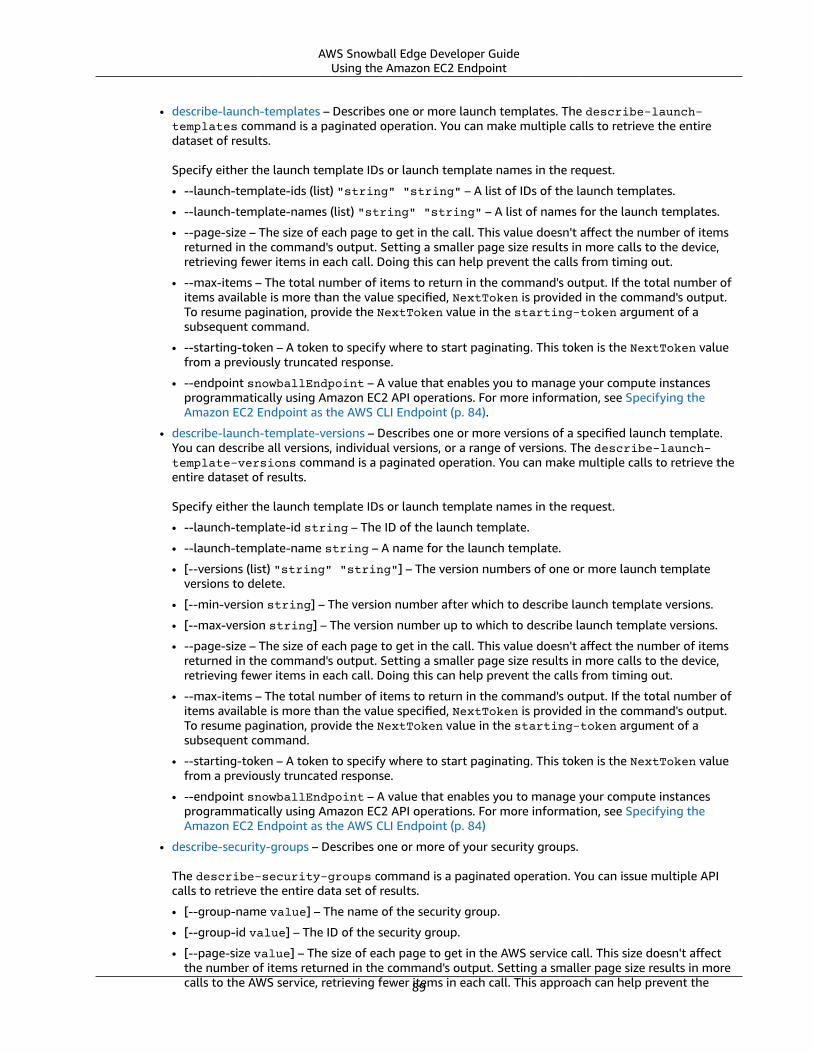
AWS Snowball Edge Developer GuideUsing the Amazon EC2 Endpoint
• describe-launch-templates – Describes one or more launch templates. The describe-launch-templates command is a paginated operation. You can make multiple calls to retrieve the entiredataset of results.
Specify either the launch template IDs or launch template names in the request.
• --launch-template-ids (list) "string" "string" – A list of IDs of the launch templates.
• --launch-template-names (list) "string" "string" – A list of names for the launch templates.
• --page-size – The size of each page to get in the call. This value doesn't affect the number of itemsreturned in the command's output. Setting a smaller page size results in more calls to the device,retrieving fewer items in each call. Doing this can help prevent the calls from timing out.
• --max-items – The total number of items to return in the command's output. If the total number ofitems available is more than the value specified, NextToken is provided in the command's output.To resume pagination, provide the NextToken value in the starting-token argument of asubsequent command.
• --starting-token – A token to specify where to start paginating. This token is the NextToken valuefrom a previously truncated response.
• --endpoint snowballEndpoint – A value that enables you to manage your compute instancesprogrammatically using Amazon EC2 API operations. For more information, see Specifying theAmazon EC2 Endpoint as the AWS CLI Endpoint (p. 84).
• describe-launch-template-versions – Describes one or more versions of a specified launch template.You can describe all versions, individual versions, or a range of versions. The describe-launch-template-versions command is a paginated operation. You can make multiple calls to retrieve theentire dataset of results.
Specify either the launch template IDs or launch template names in the request.
• --launch-template-id string – The ID of the launch template.
• --launch-template-name string – A name for the launch template.
• [--versions (list) "string" "string"] – The version numbers of one or more launch templateversions to delete.
• [--min-version string] – The version number after which to describe launch template versions.
• [--max-version string] – The version number up to which to describe launch template versions.
• --page-size – The size of each page to get in the call. This value doesn't affect the number of itemsreturned in the command's output. Setting a smaller page size results in more calls to the device,retrieving fewer items in each call. Doing this can help prevent the calls from timing out.
• --max-items – The total number of items to return in the command's output. If the total number ofitems available is more than the value specified, NextToken is provided in the command's output.To resume pagination, provide the NextToken value in the starting-token argument of asubsequent command.
• --starting-token – A token to specify where to start paginating. This token is the NextToken valuefrom a previously truncated response.
• --endpoint snowballEndpoint – A value that enables you to manage your compute instancesprogrammatically using Amazon EC2 API operations. For more information, see Specifying theAmazon EC2 Endpoint as the AWS CLI Endpoint (p. 84)
• describe-security-groups – Describes one or more of your security groups.
The describe-security-groups command is a paginated operation. You can issue multiple APIcalls to retrieve the entire data set of results.
• [--group-name value] – The name of the security group.
• [--group-id value] – The ID of the security group.
• [--page-size value] – The size of each page to get in the AWS service call. This size doesn't affectthe number of items returned in the command's output. Setting a smaller page size results in morecalls to the AWS service, retrieving fewer items in each call. This approach can help prevent the89
AWS Snowball Edge Developer GuideUsing the Amazon EC2 Endpoint
AWS service calls from timing out. For usage examples, see Pagination in the AWS Command LineInterface User Guide.
• [--max-items value] – The total number of items to return in the command's output. If thetotal number of items available is more than the value specified, NextToken is provided in thecommand's output. To resume pagination, provide the NextToken value in the starting-tokenargument of a subsequent command. Don't use the NextToken response element directly outsideof the AWS CLI. For usage examples, see Pagination in the AWS Command Line Interface User Guide.
• [--starting-token value] – A token to specify where to start paginating. This token is theNextToken value from a previously truncated response. For usage examples, see Pagination in theAWS Command Line Interface User Guide.
• describe-tags – Describes one or more of the tags for specified resource (image, instance, or securitygroup). With this command, the following filters are supported:
• launch-template
• resource-id
• resource-type – image or instance
• key
• value
• describe-volumes – Describes the specified Amazon EBS volumes.
• [--max-items value] – The total number of items to return in the command's output. If thetotal number of items available is more than the value specified, NextToken is provided in thecommand's output. To resume pagination, provide the NextToken value in the starting-tokenargument of a subsequent command.
• [--starting-token value] – A token to specify where to start paginating. This token is theNextToken value from a previously truncated response.
• [--volume-ids value] – One or more volume IDs.
• detach-volume – Detaches an Amazon EBS volume from a stopped or running instance.
• [--device value] – The device name.
• [--instance-id] – The ID of a target Amazon EC2 instance.
• --volume-id value – The ID of the volume.
• disassociate-address – Disassociates a virtual IP address from the instance it's associated with.
• --public-ip – The virtual IP address that you want to disassociate from your instance.
• get-launch-template-data – Retrieves the configuration data of the specified instance. You can use thisdata to create a launch template.
• --instance-id – The ID of a single sbe instance.
• --endpoint snowballEndpoint – A value that enables you to manage your compute instancesprogrammatically using Amazon EC2 API operations. For more information, see Specifying theAmazon EC2 Endpoint as the AWS CLI Endpoint (p. 84).
• modify-launch-template – Modifies a launch template. You can specify which version of the launchtemplate to set as the default version. When you launch an instance without specifying a launchtemplate version, the default version of the launch template applies.
Specify either the launch template ID or launch template name in the request.
• --launch-template-id string – The ID of the launch template.
• --launch-template-name string – A name for the launch template.
• --default-version string – The version number of the launch template to set as the default version.
• --endpoint snowballEndpoint – A value that enables you to manage your compute instancesprogrammatically using Amazon EC2 API operations. For more information, see Specifying theAmazon EC2 Endpoint as the AWS CLI Endpoint (p. 84).
• modify-instance-attribute – Modifies an attribute of the specified instance. The following attributesare supported:
90
AWS Snowball Edge Developer GuideUsing the Amazon EC2 Endpoint
• instanceInitiatedShutdownBehavior
• userData
• revoke-security-group-egress – Removes one or more egress rules from a security group:
• [--group-id value] – The ID of the security group
• [--ip-permissions value] – One or more sets of IP permissions.
• revoke-security-group-ingress – Revokes one or more ingress rules to a security group. When callingrevoke-security-group-ingress, you must specify a value for either group-name or group-id.
• [--group-name value] – The name of the security group.
• [--group-id value] – The ID of the security group.
• [--ip-permissions value] – One or more sets of IP permissions.
• [--protocol value] The IP protocol. Possible values are tcp, udp, and icmp. The --port argumentis required unless the "all protocols" value is specified (-1).
• [--port value] – For TCP or UDP, the range of ports to allow. A single integer or a range (minimum–maximum).
For ICMP, a single integer or a range (type-code) in which type represents the ICMP type numberand code represents the ICMP code number. A value of -1 indicates all ICMP codes for all ICMPtypes. A value of -1 just for type indicates all ICMP codes for the specified ICMP type.
• [--cidr value] – The CIDR IP range.
• run-instances – Launches a number of compute instances by using a Snowball AMI ID for an AMI.
NoteIt can take up to an hour and a half to launch a compute instance on a Snowball Edge,depending on the size and type of the instance.
• [--block-device-mappings (list)] – The block device mapping entries. The parametersDeleteOnTermination, VolumeSize, and VolumeType are supported. Boot volumes must betype sbg1.
The JSON syntax for this command is as follows.
{ "DeviceName": "/dev/sdh", "Ebs": { "DeleteOnTermination": true|false, "VolumeSize": 100, "VolumeType": "sbp1"|"sbg1" }}
• --count – Number of instances to launch. If a single number is provided, it is assumed to be theminimum to launch (defaults to 1). If a range is provided in the form min:max, then the first numberis interpreted as the minimum number of instances to launch and the second is interpreted as themaximum number of instances to launch.
• --image-id – The Snowball AMI ID of the AMI, which you can get by calling describe-images. AnAMI is required to launch an instance.
• --InstanceInitiatedShutdownBehavior – By default, when you initiate a shutdown from your instance(using a command such as shutdown or poweroff), the instance stops. You can change this behaviorso that it terminates instead. The parameters stop and terminate are supported. The default isstop. For more information, see Changing the Instance Initiated Shutdown Behavior in the AmazonEC2 User Guide for Linux Instances.
• --instance-type – The sbe instance type.
91
AWS Snowball Edge Developer GuideUsing the Amazon EC2 Endpoint
• --launch-template structure – The launch template to use to launch the instances. Anyparameters that you specify in the run-instances command override the same parameters in thelaunch template. You can specify either the name or ID of a launch template, but not both.
{ "LaunchTemplateId": "string", "LaunchTemplateName": "string", "Version": "string"}
• --security-group-ids – One or more security group IDs. You can create a security group usingCreateSecurityGroup. If no value is provided, the ID for the default security group is assigned tocreated instances.
• --tag-specifications – The tags to apply to the resources during launch. You can only tag instanceson launch. The specified tags are applied to all instances that are created during launch. To tag aresource after it has been created, use create-tags.
• --user-data – The user data to make available to the instance. If you are using the AWS CLI, base64-encoding is performed for you, and you can load the text from a file. Otherwise, you must providebase64-encoded text.
• start-instances – Starts an sbe instance that you've previously stopped. All resources attached to theinstance persist through starts and stops, but are erased if the instance is terminated.• --instance-ids – The IDs of one or more sbe instances that were stopped on the device.
• stop-instances – Stops an sbe instance that is running. All resources attached to the instance persistthrough starts and stops, but are erased if the instance is terminated.• --instance-ids – The IDs of one or more sbe instances to be stopped on the device.
• terminate-instances – Shuts down one or more instances. This operation is idempotent; if youterminate an instance more than once, each call succeeds. All resources attached to the instancepersist through starts and stops, but data is erased if the instance is terminated.
NoteBy default, when you use a command like shutdown or poweroff to initiatea shutdown from your instance, the instance stops. However, you can use theInstanceInitiatedShutdownBehavior attribute to change this behavior so that thesecommands terminiate your instance. For more information, see Changing the InstanceInitiated Shutdown Behavior in the Amazon EC2 User Guide for Linux Instances.
• --instance-ids – The IDs of one or more sbe instances to be terminated on the device. All associateddata stored for those instances will be lost.
Supported Amazon EC2 API OperationsFollowing, you can find Amazon EC2 API operations that you can use with a Snowball Edge, withlinks to their descriptions in the Amazon EC2 API Reference. Amazon EC2 API calls require SignatureVersion 4 (SigV4) signing. If you're using the AWS CLI or an AWS SDK to make these API calls,the SigV4 signing is handled for you. Otherwise, you need to implement your own SigV4 signingsolution. For more information, see Getting and Using Local Amazon S3 Credentials (p. 53).
• AssociateAddress – Associates an Elastic IP address with an instance or a network interface.• AttachVolume – The following request parameters are supported:
• Device
• InstanceId
• VolumeId
• AuthorizeSecurityGroupEgress – Adds one or more egress rules to a security group for use witha Snowball Edge device. Specifically, this action permits instances to send traffic to one or moredestination IPv4 CIDR address ranges.
92

AWS Snowball Edge Developer GuideUsing the Amazon EC2 Endpoint
• AuthorizeSecurityGroupIngress – Adds one or more ingress rules to a security group. When callingAuthorizeSecurityGroupIngress, you must specify a value either for GroupName or GroupId.
• CreateVolume – The following request parameters are supported:
• SnapshotId
• Size
• VolumeType
• TagSpecification.N
• CreateLaunchTemplate – The following request parameters are supported:
• ImageId
• InstanceType
• SecurityGroupIds
• TagSpecifications
• UserData
• CreateLaunchTemplateVersion
• CreateTags – The following request parameters are supported:
• AMI
• Instance
• Launch template
• Security group
• CreateSecurityGroup – Creates a security group on your Snowball Edge. You can create up to 50security groups. When you create a security group, you specify a friendly name of your choice.
• DeleteLaunchTemplate
• DeleteLaunchTemplateVersions
• DeleteSecurityGroup – Deletes a security group. If you attempt to delete a security group that isassociated with an instance, or is referenced by another security group, the operation fails withDependencyViolation.
• DeleteTags – Deletes the specified set of tags from the specified set of resources.
• DeleteVolume – The following request parameters are supported:
• VolumeId
• DescribeAddresses
• DescribeImages
• DescribeInstanceAttribute – The following attributes are supported:
• instanceType
• userData
• DescribeLaunchTemplates
• DescribeLaunchTemplateVersions
• DescribeInstances
• DescribeSecurityGroups – Describes one or more of your security groups. DescribeSecurityGroupsis a paginated operation. You can issue multiple API calls to retrieve the entire data set of results.
• DescribeTags – With this command, the following filters are supported:
• resource-id
• resource-type – AMI or compute instance only
• key
• value
• DescribeVolume – The following request parameters are supported:
• MaxResults
93
AWS Snowball Edge Developer GuideAutostarting Amazon EC2 Instances with Launch Templates
• NextToken
• VolumeId.N
• DetachVolume – The following request parameters are supported:
• Device
• InstanceId
• VolumeId
• DisassociateAddress
• GetLaunchTemplateData
• ModifyLaunchTemplate
• ModifyInstanceAttribute – Only the userData attribute is supported.
• RevokeSecurityGroupEgress – Removes one or more egress rules from a security group.
• RevokeSecurityGroupIngress – Revokes one or more ingress rules to a security group. When callingRevokeSecurityGroupIngress, you must specify a value either for group-name or group-id.
• RunInstances –
NoteIt can take up to an hour and a half to launch a compute instance on a Snowball Edge,depending on the size and type of the instance.
• StartInstances
• StopInstances – Resources associated with a stopped instance persist. You can terminate the instanceto free up these resources. However, any associated data is deleted.
• TerminateInstances
Autostarting Amazon EC2 Instances with LaunchTemplatesYou can automatically start your Amazon EC2 instances on your AWS Snowball Edge device using launchtemplates and Snowball client launch configuration commands.
A launch template contains the configuration information necessary to create an Amazon EC2 instanceon your Snowball Edge. You can use a launch template to store launch parameters so you don't have tospecify them every time that you start an EC2 instance on your Snowball Edge.
When you use autostart configurations on your Snowball Edge, you configure the parameters that youwant your Amazon EC2 instance to start with. After your Snowball Edge is configured, when you rebootand unlock it, it uses your autostart configuration to launch an instance with the parameters that youspecified. If an instance that you launched using an autostart configuration is stopped, the instancestarts running when you unlock your device.
NoteAfter you first configure an autostart configuration, restart your device to launch it. Allsubsequent instance launches (after planned or unplanned reboots) happen automatically afteryour device is unlocked.
A launch template can specify the Amazon Machine Image (AMI) ID, instance type, user data, securitygroups, and tags for an Amazon EC2 instance when you launch that instance.
To automatically launch EC2 instances on your Snowball Edge, take the following steps:
1. When you order your AWS Snowball Edge device, create a job with compute instances. For moreinformation, see Creating a Job with Compute Instances (p. 76).
94
AWS Snowball Edge Developer GuideUsing Block Storage with Your EC2 Instances
2. After receiving your Snowball Edge, unlock it.
3. Use the EC2 API command aws ec2 create-launch-template to create a launch template.
4. Use the Snowball client command snowballEdge create-autostart-configuration to bindyour EC2 launch template to your network configuration. For more information, see Creating a LaunchConfiguration to Autostart Amazon EC2 Instances (p. 80).
5. Reboot, then unlock your device. Your EC2 instances are automatically started using the attributesspecified in your launch template and your Snowball client command create-autostart-configuration.
To view the status of your running instances, use the EC2 API command describe-autostart-configurations.
NoteThere is no console or job management API for AWS Snowball support for launch templates.You use EC2 and Snowball client CLI commands to automatically start EC2 instances on yourAWS Snowball Edge device.
Using Block Storage With Your Amazon EC2 InstancesBlock Storage on Snowball Edge enables you to add or remove block storage based on the needs of yourapplications. Volumes that are attached to an Amazon EC2 instance are exposed as storage volumes thatpersist independently from the life of the instance. You can manage block storage using the familiarAmazon EBS API.
Certain Amazon EBS commands are supported by using the EC2 endpoint. Supported commands includeattach-volume, create-volume, delete-volume, detach-volume, and describe-volumes. Formore information on these commands, see List of Supported Amazon EC2 AWS CLI Commands on aSnowball Edge (p. 85).
ImportantMake sure to unmount any file systems on the device within your operating system beforedetaching the volume. Failure to do so can potentially result in data loss.
Following, you can find Amazon EBS volume quotas and differences between Amazon EBS volumes onyour device and Amazon EBS volumes in the cloud:
• Amazon EBS volumes are only available to EC2 instances running on the device hosting the volumes.
• Volume types are limited to either capacity-optimized HDD (sbg1) or >performance-optimized SSD(sbp1). The default volume type is sbg1.
• Snowball Edge shares HDD memory between Amazon S3 objects and Amazon EBS. If you use HDD-based block storage on Snowball Edge, that will reduce the amount of memory available for AmazonS3 objects. Likewise, Amazon S3 objects will reduce the amount of memory available for Amazon EBSblock storage on HDD volumes.
• Amazon EC2 root volumes always use the IDE driver. Additional Amazon EBS volumes willpreferentially use the Virtio driver if available. If the Virtio driver isn't available, SBE will default to theIDE driver. The Virtio driver allows for better performance and is recommended.
• When creating Amazon EBS volumes, the encrypted parameter isn't supported. However, all data onyour device is encrypted by default. .
• Volumes can be from 1 GB to 10 TB in size.
• Up to 10 Amazon EBS volumes can be attached to a single EC2 instance.
• There is no formal limit to the number of Amazon EBS volumes you can have on your AWS SnowballEdge device. However, total Amazon EBS volume capacity is limited by the available space on yourdevice.
95

AWS Snowball Edge Developer GuideSecurity Groups in Snowball Edge Devices
Security Groups in Snowball Edge DevicesA security group acts as a virtual firewall that controls the traffic for one or more instances. When youlaunch an instance, you associate one or more security groups with the instance. You can add rules toeach security group to allow traffic to or from its associated instances. For more information, see AmazonEC2 Security Groups for Linux Instances in the Amazon EC2 User Guide for Linux Instances.
Security groups in Snowball Edge devices are similar to security groups in the AWS Cloud. Virtual privateclouds (VPCs) aren't supported on Snowball Edge devices.
Following, you can find the other differences between Snowball Edge security groups and EC2-VPCsecurity groups:
• Each Snowball Edge has a limit of 50 security groups.• The default security group allows all inbound and outbound traffic.• Traffic between local instances can use either the private instance IP address or a public IP address. For
example, suppose that you want to connect using SSH from instance A to instance B. In this case, yourtarget IP address can be either the public IP or private IP address of instance B, if the security grouprule allows the traffic.
• Only the parameters listed for AWS CLI actions and API calls are supported. These typically are asubset of those supported in EC2-VPC instances.
For more information on supported AWS CLI actions, see List of Supported Amazon EC2 AWS CLICommands on a Snowball Edge (p. 85). For more information on supported API operations, seeSupported Amazon EC2 API Operations (p. 92).
Supported Instance Metadata and User DataInstance metadata is data about your instance that you can use to configure or manage the runninginstance. Snowball Edge supports a subset of instance metadata categories for your compute instances.For more information, see Instance Metadata and User Data in the Amazon EC2 User Guide for LinuxInstances.
The following categories are supported. Using any other categories returns a 404 error message.
Supported Instance Metadata Categories on a Snowball Edge
Data Description
ami-id The AMI ID used to launch the instance.
hostname The private IPv4 DNS hostname of the instance.
instance-id The ID of this instance.
instance-type The type of instance.
local-hostname The private IPv4 DNS hostname of the instance.
local-ipv4 The private IPv4 address of the instance.
mac The instance's media access control (MAC) address.
network/interfaces/macs/mac/local-hostname
The interface's local hostname.
network/interfaces/macs/mac/local-ipv4s
The private IPv4 addresses associated with theinterface.
96
AWS Snowball Edge Developer GuideTroubleshooting Amazon EC2
Data Description
network/interfaces/macs/mac/mac The instance's MAC address.
network/interfaces/macs/mac/public-ipv4s
The Elastic IP addresses associated with theinterface.
public-ipv4 The public IPv4 address.
public-keys/0/openssh-key Public key. Only available if supplied at instancelaunch time.
reservation-id The ID of the reservation.
userData Shell scripts to send instructions to an instance atlaunch.
Supported Instance Dynamic Data Categories on a Snowball Edge
Data Description
instance-identity/document JSON containing instance attributes. OnlyinstanceId, imageId, privateIp, andinstanceType have values, and the otherreturned attributes are null. For more information,see Instance Identity Documents in the AmazonEC2 User Guide for Linux Instances.
User Data in Snowball Compute InstancesUser data is supported for use with shell scripts for compute instances on a Snowball Edge. Using shellscripts, you can send instructions to an instance at launch. You can change user data with the modify-instance-attribute AWS CLI command, or the ModifyInstanceAttribute API action.
To change user data
1. Stop your compute instance with the stop-instances AWS CLI command.2. Using the modify-instance-attribute AWS CLI command, modify the userData attribute.3. Restart your compute instance with the start-instances AWS CLI command.
Only shell scripts are supported with compute instances. There is no support for cloud-init packagedirectives on compute instances running on a Snowball Edge. For more information about working withAWS CLI commands, see the AWS CLI Command Reference.
Troubleshooting Compute Instances on SnowballEdge DevicesFollowing, you can find troubleshooting tips for Snowball Edge jobs with compute instances.
Topics• Virtual Network Interface Has an IP Address of 0.0.0.0 (p. 98)• Snowball Edge Hangs When Launching a Large Compute Instance (p. 98)• My Instance Has One Root Volume (p. 98)
97
AWS Snowball Edge Developer GuideUsing IAM Locally
• Unprotected Private Key File Error (p. 98)
Virtual Network Interface Has an IP Address of 0.0.0.0This issue can occur if the physical network interface (NIC) you associated with your virtual networkinterface (VNIC) also has an IP address of 0.0.0.0. This effect can happen if the NIC wasn't configuredwith an IP address (for instance, if you've just powered on the device). It can also happen if you're usingthe wrong interface. For example, you might be trying to get the IP address of the SFP+ interface, but it'sthe RJ45 interface that's connected to your network.
Action to Take
If this occurs, you can do the following:
• Create a new VNIC, associated with a NIC that has an IP address. For more information, see NetworkConfiguration for Compute Instances (p. 78).
• Update an existing VNIC. For more information, see Updating a Virtual Network Interface (p. 83).
Snowball Edge Hangs When Launching a Large ComputeInstanceIt can appear that your Snowball Edge has stopped launching an instance. This is generally not the case.However, it can take an hour or more for the largest compute instances to launch. You can check thestatus of your instances with the AWS CLI command aws ec2 describe-instances run against theHTTP or HTTPS Amazon EC2 endpoint on the Snowball Edge.
My Instance Has One Root VolumeInstances have one root volume by design. All sbe instances have a single root volume.
Unprotected Private Key File ErrorThis error can occur if your .pem file on your compute instance has insufficient read/write permissions.
Action to Take
You can resolve this by changing the permissions for the file with the following procedure:
1. Open a terminal and navigate to the location that you saved your .pem file to.2. Enter the following command.
chmod 400 filename.pem
Using IAM LocallyAWS Identity and Access Management (IAM) helps you securely control access to AWS resources runningon your AWS Snowball Edge device. You use IAM to control who is authenticated (signed in) andauthorized (has permissions) to use resources.
IAM is supported locally on your device. You can use the local IAM service to create new users and attachIAM policies to them. You can use these policies to allow the access necessary to perform assigned tasks.For example, you can give a user the ability to transfer data, but limit their ability to create new AmazonEC2 instances.
98
AWS Snowball Edge Developer GuideUsing the AWS CLI and API Operations on Snowball Edge
Additionally, you can create local, session-based credentials using AWS Security Token Service (AWS STS)on your device. For information about the IAM service, see Getting Started in the IAM User Guide.
Your device's root credentials can't be disabled, and you can't use policies within your account toexplicitly deny access to the AWS account root user. We recommend that you secure your root user accesskeys and create IAM user credentials for everyday interaction with your device.
ImportantThe documentation in this section applies to using IAM locally on an AWS Snowball Edge device.For information about using IAM in the AWS Cloud, see Identity and Access Management inSnowball (p. 132).For AWS services to work properly on a Snowball Edge, you must allow the ports for theservices. For details, see Ports Required to Use AWS Services on an AWS Snowball EdgeDevice (p. 107).
Topics• Using the AWS CLI and API Operations on Snowball Edge (p. 99)• List of Supported IAM AWS CLI Commands on a Snowball Edge (p. 99)• IAM Policy Examples (p. 102)• Example 9: Policy for API Calls (p. 105)• TrustPolicy Example (p. 105)
Using the AWS CLI and API Operations on SnowballEdgeWhen using the AWS CLI or API operations to issue IAM, AWS STS, Amazon S3, and Amazon EC2commands on Snowball Edge, you must specify the region as "snow." You can do this using AWSconfigure or within the command itself, as in the following examples.
aws configure --profile abcAWS Access Key ID [None]: defghAWS Secret Access Key [None]: 1234567Default region name [None]: snowDefault output format [None]: json
Or
aws iam ls --profile snowballEdge --endpoint http://192.0.2.0:6078 --region snow
NoteThe access key ID and access secret key that are used locally on AWS Snowball Edge can't beinterchanged with the keys in the AWS Cloud.
List of Supported IAM AWS CLI Commands on aSnowball EdgeFollowing is a description of the subset of AWS CLI commands and options for IAM that are supportedon Snowball Edge devices. If a command or option isn't listed following, it's not supported. Unsupportedparameters for commands are noted in the description.
99
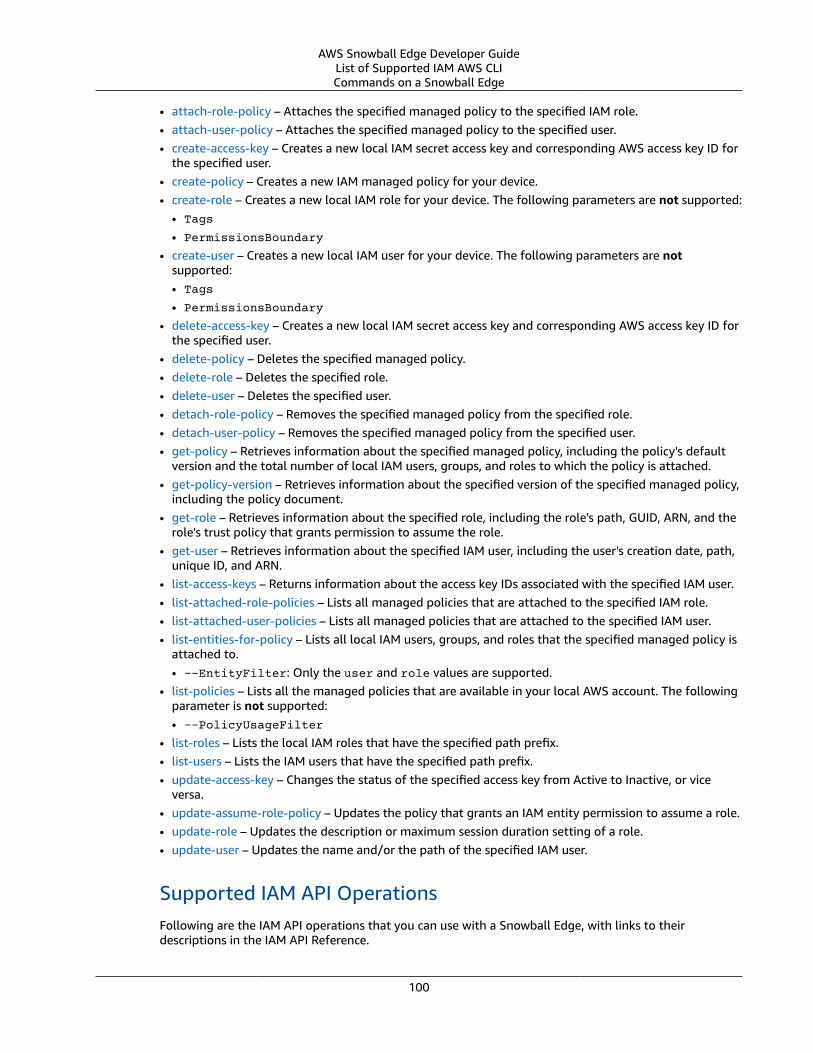
AWS Snowball Edge Developer GuideList of Supported IAM AWS CLICommands on a Snowball Edge
• attach-role-policy – Attaches the specified managed policy to the specified IAM role.• attach-user-policy – Attaches the specified managed policy to the specified user.• create-access-key – Creates a new local IAM secret access key and corresponding AWS access key ID for
the specified user.• create-policy – Creates a new IAM managed policy for your device.• create-role – Creates a new local IAM role for your device. The following parameters are not supported:
• Tags
• PermissionsBoundary
• create-user – Creates a new local IAM user for your device. The following parameters are notsupported:• Tags
• PermissionsBoundary
• delete-access-key – Creates a new local IAM secret access key and corresponding AWS access key ID forthe specified user.
• delete-policy – Deletes the specified managed policy.• delete-role – Deletes the specified role.• delete-user – Deletes the specified user.• detach-role-policy – Removes the specified managed policy from the specified role.• detach-user-policy – Removes the specified managed policy from the specified user.• get-policy – Retrieves information about the specified managed policy, including the policy's default
version and the total number of local IAM users, groups, and roles to which the policy is attached.• get-policy-version – Retrieves information about the specified version of the specified managed policy,
including the policy document.• get-role – Retrieves information about the specified role, including the role's path, GUID, ARN, and the
role's trust policy that grants permission to assume the role.• get-user – Retrieves information about the specified IAM user, including the user's creation date, path,
unique ID, and ARN.• list-access-keys – Returns information about the access key IDs associated with the specified IAM user.• list-attached-role-policies – Lists all managed policies that are attached to the specified IAM role.• list-attached-user-policies – Lists all managed policies that are attached to the specified IAM user.• list-entities-for-policy – Lists all local IAM users, groups, and roles that the specified managed policy is
attached to.• --EntityFilter: Only the user and role values are supported.
• list-policies – Lists all the managed policies that are available in your local AWS account. The followingparameter is not supported:• --PolicyUsageFilter
• list-roles – Lists the local IAM roles that have the specified path prefix.• list-users – Lists the IAM users that have the specified path prefix.• update-access-key – Changes the status of the specified access key from Active to Inactive, or vice
versa.• update-assume-role-policy – Updates the policy that grants an IAM entity permission to assume a role.• update-role – Updates the description or maximum session duration setting of a role.• update-user – Updates the name and/or the path of the specified IAM user.
Supported IAM API OperationsFollowing are the IAM API operations that you can use with a Snowball Edge, with links to theirdescriptions in the IAM API Reference.
100
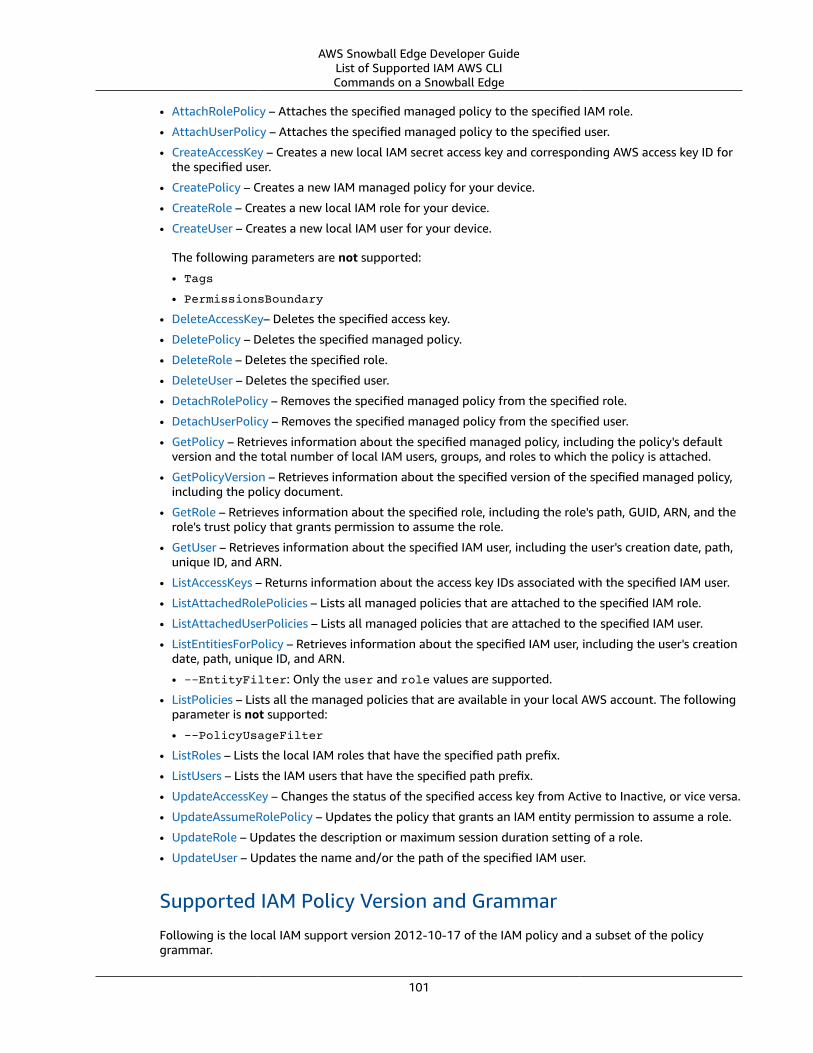
AWS Snowball Edge Developer GuideList of Supported IAM AWS CLICommands on a Snowball Edge
• AttachRolePolicy – Attaches the specified managed policy to the specified IAM role.
• AttachUserPolicy – Attaches the specified managed policy to the specified user.
• CreateAccessKey – Creates a new local IAM secret access key and corresponding AWS access key ID forthe specified user.
• CreatePolicy – Creates a new IAM managed policy for your device.
• CreateRole – Creates a new local IAM role for your device.
• CreateUser – Creates a new local IAM user for your device.
The following parameters are not supported:
• Tags
• PermissionsBoundary
• DeleteAccessKey– Deletes the specified access key.
• DeletePolicy – Deletes the specified managed policy.
• DeleteRole – Deletes the specified role.
• DeleteUser – Deletes the specified user.
• DetachRolePolicy – Removes the specified managed policy from the specified role.
• DetachUserPolicy – Removes the specified managed policy from the specified user.
• GetPolicy – Retrieves information about the specified managed policy, including the policy's defaultversion and the total number of local IAM users, groups, and roles to which the policy is attached.
• GetPolicyVersion – Retrieves information about the specified version of the specified managed policy,including the policy document.
• GetRole – Retrieves information about the specified role, including the role's path, GUID, ARN, and therole's trust policy that grants permission to assume the role.
• GetUser – Retrieves information about the specified IAM user, including the user's creation date, path,unique ID, and ARN.
• ListAccessKeys – Returns information about the access key IDs associated with the specified IAM user.
• ListAttachedRolePolicies – Lists all managed policies that are attached to the specified IAM role.
• ListAttachedUserPolicies – Lists all managed policies that are attached to the specified IAM user.
• ListEntitiesForPolicy – Retrieves information about the specified IAM user, including the user's creationdate, path, unique ID, and ARN.
• --EntityFilter: Only the user and role values are supported.
• ListPolicies – Lists all the managed policies that are available in your local AWS account. The followingparameter is not supported:
• --PolicyUsageFilter
• ListRoles – Lists the local IAM roles that have the specified path prefix.
• ListUsers – Lists the IAM users that have the specified path prefix.
• UpdateAccessKey – Changes the status of the specified access key from Active to Inactive, or vice versa.
• UpdateAssumeRolePolicy – Updates the policy that grants an IAM entity permission to assume a role.
• UpdateRole – Updates the description or maximum session duration setting of a role.
• UpdateUser – Updates the name and/or the path of the specified IAM user.
Supported IAM Policy Version and Grammar
Following is the local IAM support version 2012-10-17 of the IAM policy and a subset of the policygrammar.
101
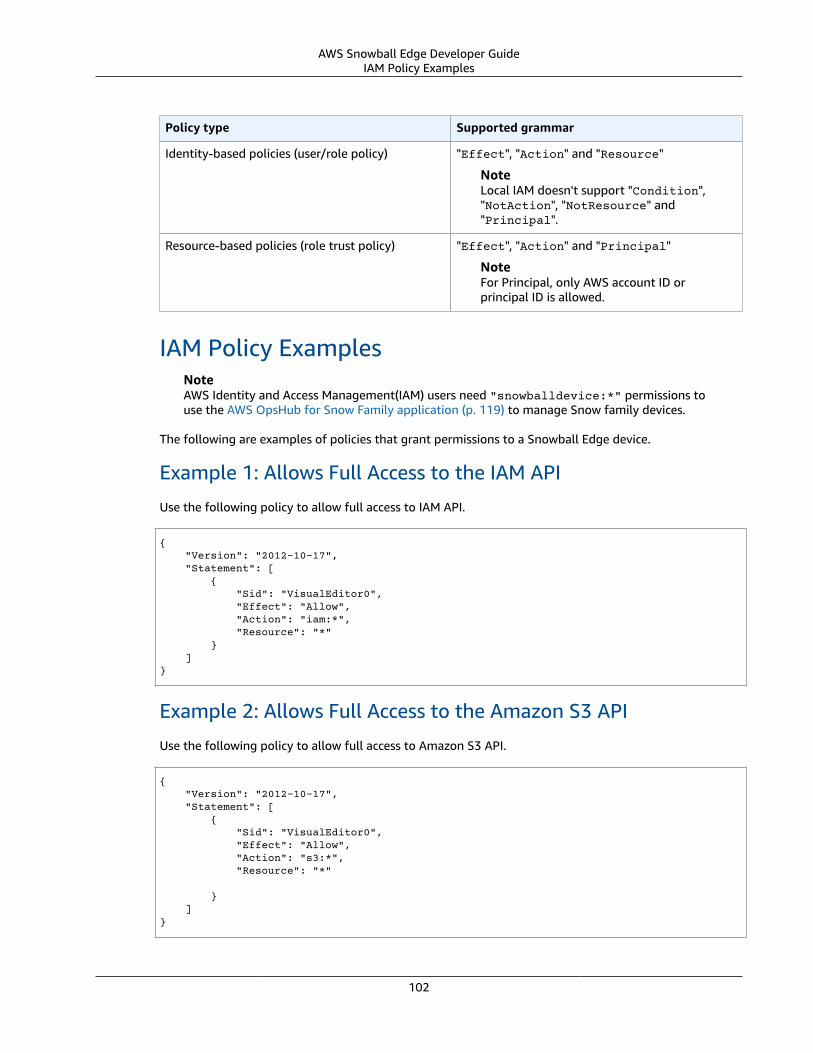
AWS Snowball Edge Developer GuideIAM Policy Examples
Policy type Supported grammar
Identity-based policies (user/role policy) "Effect", "Action" and "Resource"
NoteLocal IAM doesn't support "Condition","NotAction", "NotResource" and"Principal".
Resource-based policies (role trust policy) "Effect", "Action" and "Principal"
NoteFor Principal, only AWS account ID orprincipal ID is allowed.
IAM Policy ExamplesNoteAWS Identity and Access Management(IAM) users need "snowballdevice:*" permissions touse the AWS OpsHub for Snow Family application (p. 119) to manage Snow family devices.
The following are examples of policies that grant permissions to a Snowball Edge device.
Example 1: Allows Full Access to the IAM API
Use the following policy to allow full access to IAM API.
{ "Version": "2012-10-17", "Statement": [ { "Sid": "VisualEditor0", "Effect": "Allow", "Action": "iam:*", "Resource": "*" } ]}
Example 2: Allows Full Access to the Amazon S3 API
Use the following policy to allow full access to Amazon S3 API.
{ "Version": "2012-10-17", "Statement": [ { "Sid": "VisualEditor0", "Effect": "Allow", "Action": "s3:*", "Resource": "*" } ]}
102
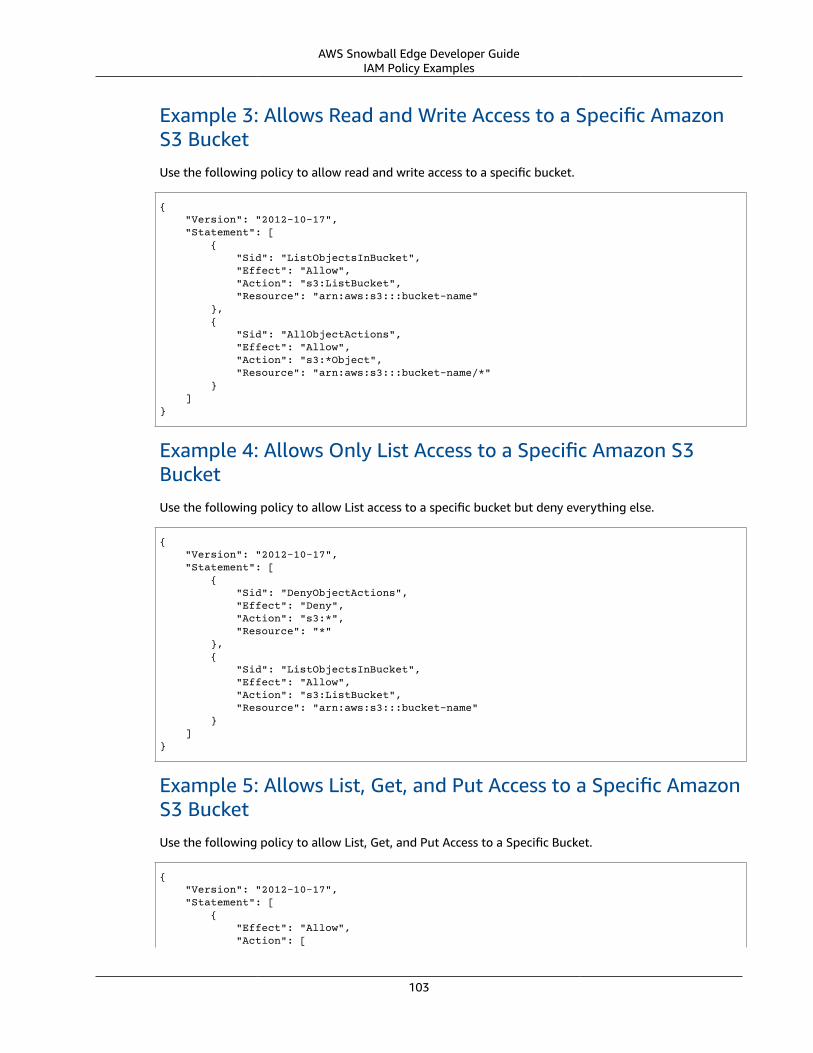
AWS Snowball Edge Developer GuideIAM Policy Examples
Example 3: Allows Read and Write Access to a Specific AmazonS3 BucketUse the following policy to allow read and write access to a specific bucket.
{ "Version": "2012-10-17", "Statement": [ { "Sid": "ListObjectsInBucket", "Effect": "Allow", "Action": "s3:ListBucket", "Resource": "arn:aws:s3:::bucket-name" }, { "Sid": "AllObjectActions", "Effect": "Allow", "Action": "s3:*Object", "Resource": "arn:aws:s3:::bucket-name/*" } ]}
Example 4: Allows Only List Access to a Specific Amazon S3BucketUse the following policy to allow List access to a specific bucket but deny everything else.
{ "Version": "2012-10-17", "Statement": [ { "Sid": "DenyObjectActions", "Effect": "Deny", "Action": "s3:*", "Resource": "*" }, { "Sid": "ListObjectsInBucket", "Effect": "Allow", "Action": "s3:ListBucket", "Resource": "arn:aws:s3:::bucket-name" } ]}
Example 5: Allows List, Get, and Put Access to a Specific AmazonS3 BucketUse the following policy to allow List, Get, and Put Access to a Specific Bucket.
{ "Version": "2012-10-17", "Statement": [ { "Effect": "Allow", "Action": [
103
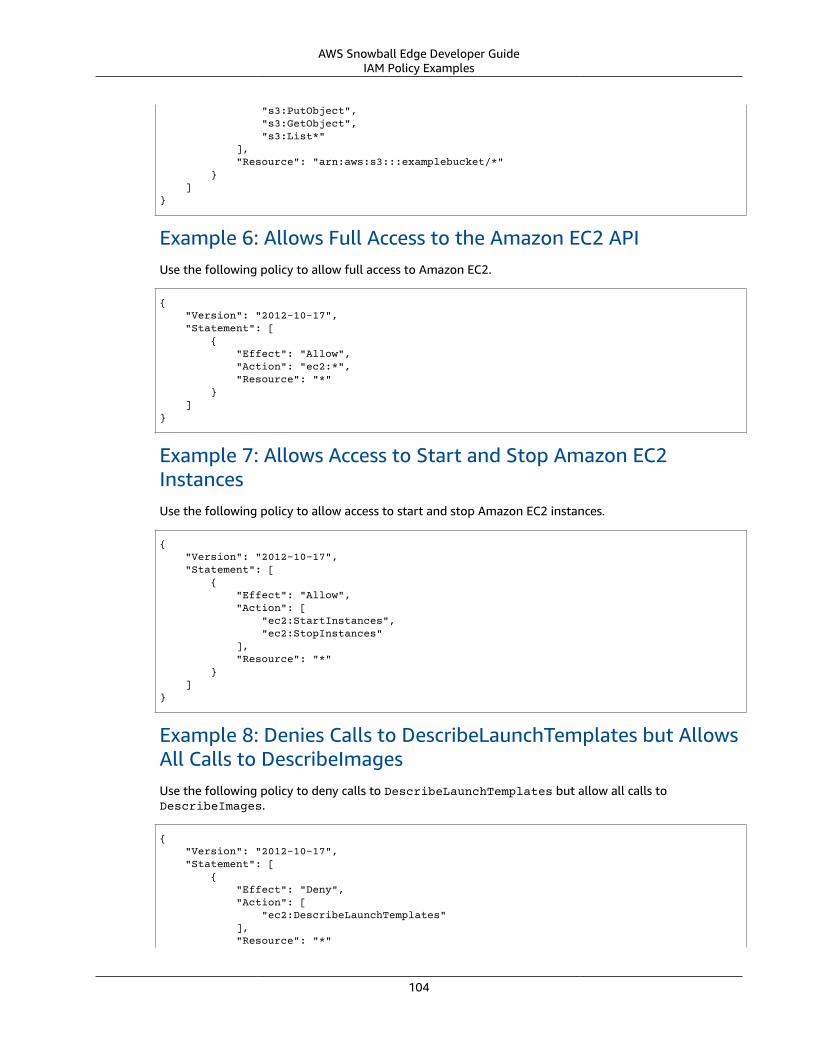
AWS Snowball Edge Developer GuideIAM Policy Examples
"s3:PutObject", "s3:GetObject", "s3:List*" ], "Resource": "arn:aws:s3:::examplebucket/*" } ]}
Example 6: Allows Full Access to the Amazon EC2 APIUse the following policy to allow full access to Amazon EC2.
{ "Version": "2012-10-17", "Statement": [ { "Effect": "Allow", "Action": "ec2:*", "Resource": "*" } ]}
Example 7: Allows Access to Start and Stop Amazon EC2InstancesUse the following policy to allow access to start and stop Amazon EC2 instances.
{ "Version": "2012-10-17", "Statement": [ { "Effect": "Allow", "Action": [ "ec2:StartInstances", "ec2:StopInstances" ], "Resource": "*" } ]}
Example 8: Denies Calls to DescribeLaunchTemplates but AllowsAll Calls to DescribeImagesUse the following policy to deny calls to DescribeLaunchTemplates but allow all calls toDescribeImages.
{ "Version": "2012-10-17", "Statement": [ { "Effect": "Deny", "Action": [ "ec2:DescribeLaunchTemplates" ], "Resource": "*"
104
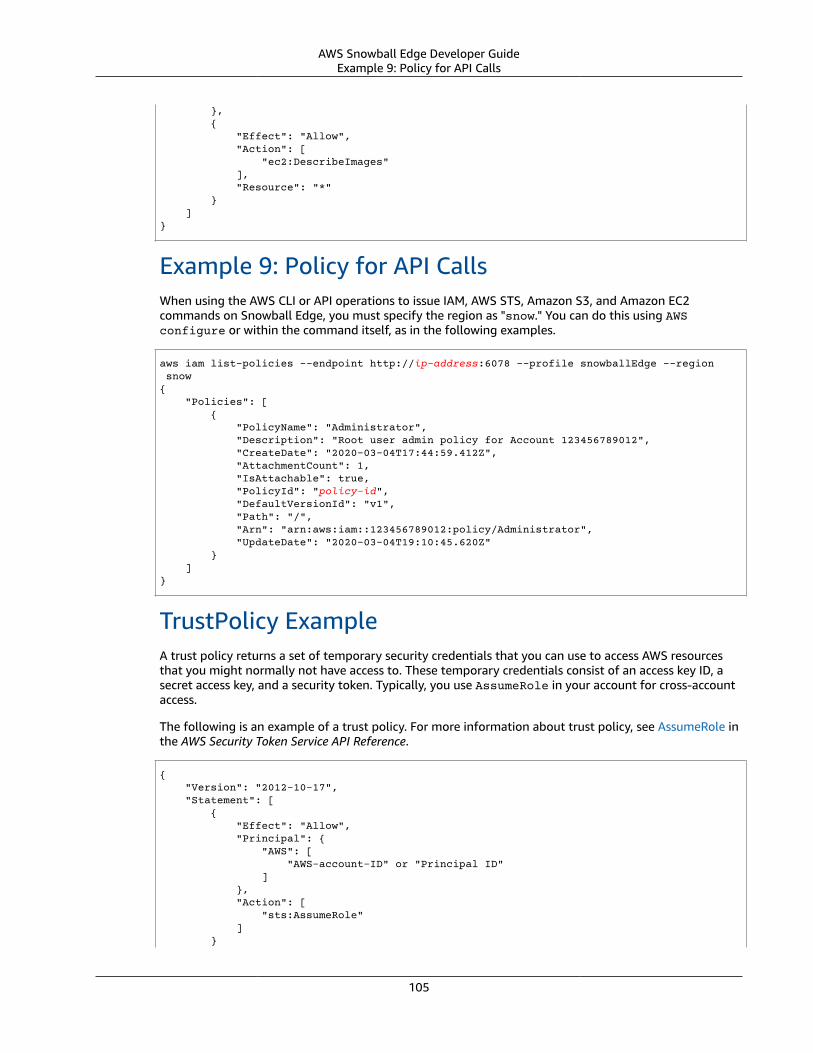
AWS Snowball Edge Developer GuideExample 9: Policy for API Calls
}, { "Effect": "Allow", "Action": [ "ec2:DescribeImages" ], "Resource": "*" } ]}
Example 9: Policy for API CallsWhen using the AWS CLI or API operations to issue IAM, AWS STS, Amazon S3, and Amazon EC2commands on Snowball Edge, you must specify the region as "snow." You can do this using AWSconfigure or within the command itself, as in the following examples.
aws iam list-policies --endpoint http://ip-address:6078 --profile snowballEdge --region snow{ "Policies": [ { "PolicyName": "Administrator", "Description": "Root user admin policy for Account 123456789012", "CreateDate": "2020-03-04T17:44:59.412Z", "AttachmentCount": 1, "IsAttachable": true, "PolicyId": "policy-id", "DefaultVersionId": "v1", "Path": "/", "Arn": "arn:aws:iam::123456789012:policy/Administrator", "UpdateDate": "2020-03-04T19:10:45.620Z" } ]}
TrustPolicy ExampleA trust policy returns a set of temporary security credentials that you can use to access AWS resourcesthat you might normally not have access to. These temporary credentials consist of an access key ID, asecret access key, and a security token. Typically, you use AssumeRole in your account for cross-accountaccess.
The following is an example of a trust policy. For more information about trust policy, see AssumeRole inthe AWS Security Token Service API Reference.
{ "Version": "2012-10-17", "Statement": [ { "Effect": "Allow", "Principal": { "AWS": [ "AWS-account-ID" or "Principal ID" ] }, "Action": [ "sts:AssumeRole" ] }
105
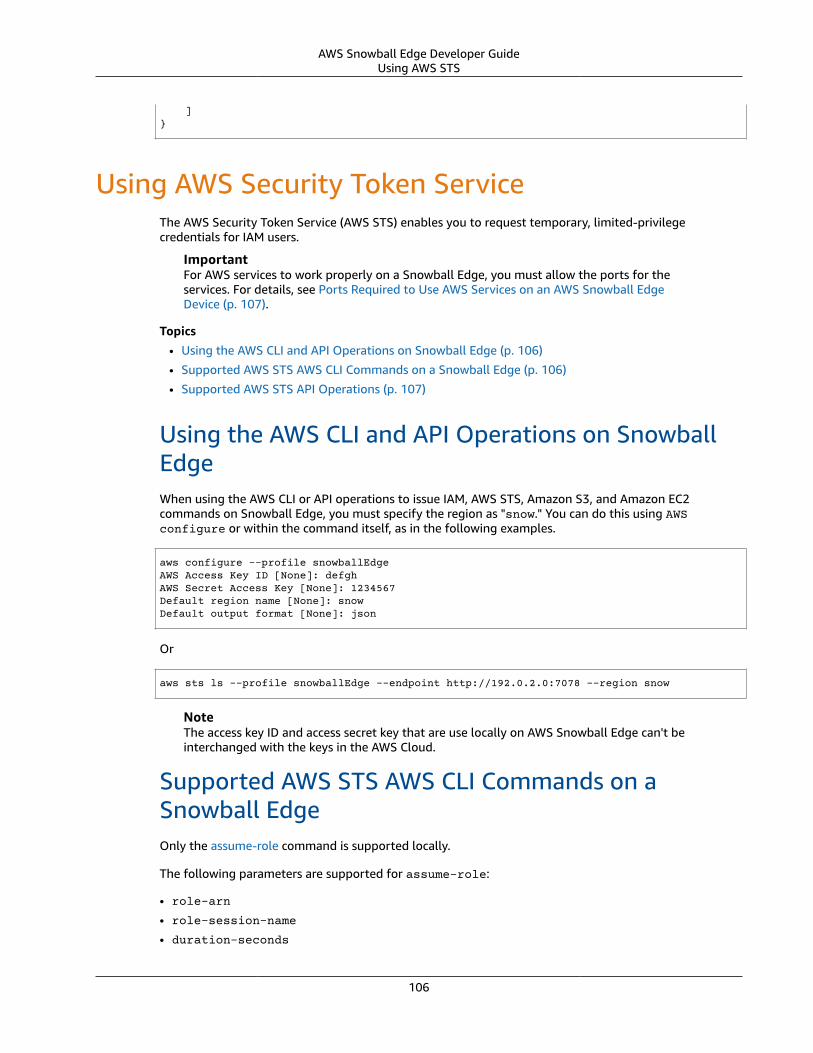
AWS Snowball Edge Developer GuideUsing AWS STS
]}
Using AWS Security Token ServiceThe AWS Security Token Service (AWS STS) enables you to request temporary, limited-privilegecredentials for IAM users.
ImportantFor AWS services to work properly on a Snowball Edge, you must allow the ports for theservices. For details, see Ports Required to Use AWS Services on an AWS Snowball EdgeDevice (p. 107).
Topics• Using the AWS CLI and API Operations on Snowball Edge (p. 106)
• Supported AWS STS AWS CLI Commands on a Snowball Edge (p. 106)
• Supported AWS STS API Operations (p. 107)
Using the AWS CLI and API Operations on SnowballEdgeWhen using the AWS CLI or API operations to issue IAM, AWS STS, Amazon S3, and Amazon EC2commands on Snowball Edge, you must specify the region as "snow." You can do this using AWSconfigure or within the command itself, as in the following examples.
aws configure --profile snowballEdgeAWS Access Key ID [None]: defghAWS Secret Access Key [None]: 1234567Default region name [None]: snowDefault output format [None]: json
Or
aws sts ls --profile snowballEdge --endpoint http://192.0.2.0:7078 --region snow
NoteThe access key ID and access secret key that are use locally on AWS Snowball Edge can't beinterchanged with the keys in the AWS Cloud.
Supported AWS STS AWS CLI Commands on aSnowball EdgeOnly the assume-role command is supported locally.
The following parameters are supported for assume-role:
• role-arn
• role-session-name
• duration-seconds
106
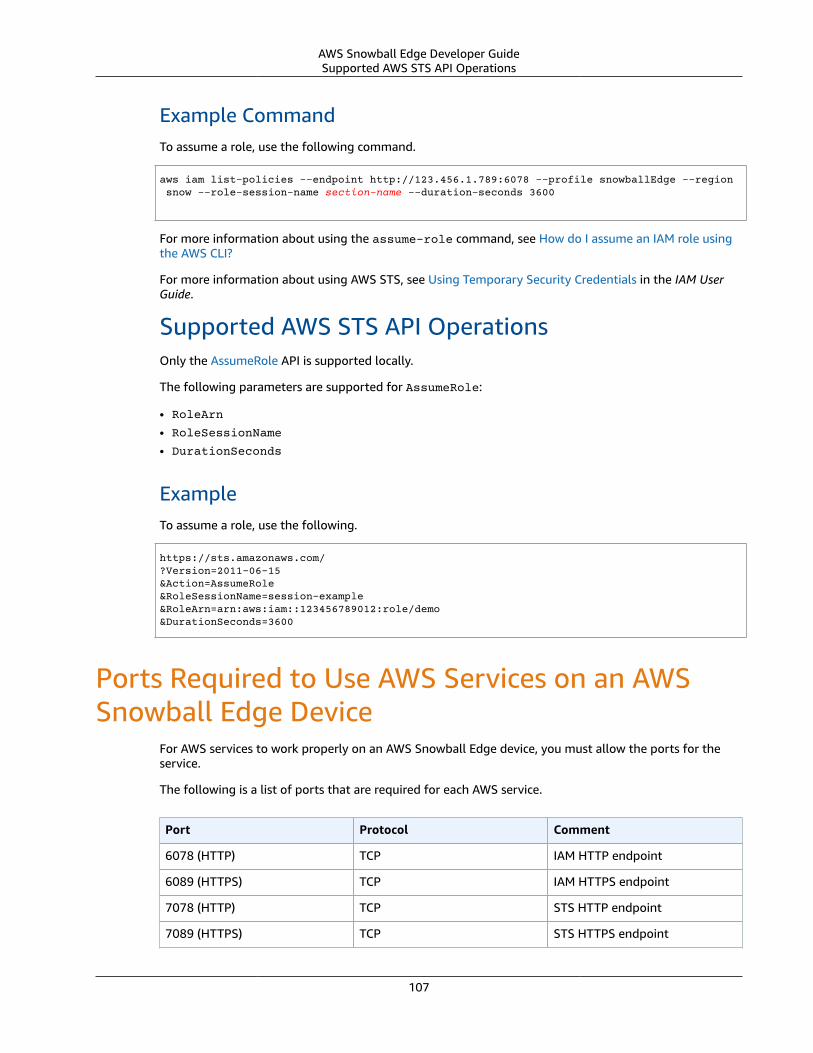
AWS Snowball Edge Developer GuideSupported AWS STS API Operations
Example CommandTo assume a role, use the following command.
aws iam list-policies --endpoint http://123.456.1.789:6078 --profile snowballEdge --region snow --role-session-name section-name --duration-seconds 3600
For more information about using the assume-role command, see How do I assume an IAM role usingthe AWS CLI?
For more information about using AWS STS, see Using Temporary Security Credentials in the IAM UserGuide.
Supported AWS STS API OperationsOnly the AssumeRole API is supported locally.
The following parameters are supported for AssumeRole:
• RoleArn
• RoleSessionName
• DurationSeconds
ExampleTo assume a role, use the following.
https://sts.amazonaws.com/?Version=2011-06-15&Action=AssumeRole&RoleSessionName=session-example&RoleArn=arn:aws:iam::123456789012:role/demo&DurationSeconds=3600
Ports Required to Use AWS Services on an AWSSnowball Edge Device
For AWS services to work properly on an AWS Snowball Edge device, you must allow the ports for theservice.
The following is a list of ports that are required for each AWS service.
Port Protocol Comment
6078 (HTTP) TCP IAM HTTP endpoint
6089 (HTTPS) TCP IAM HTTPS endpoint
7078 (HTTP) TCP STS HTTP endpoint
7089 (HTTPS) TCP STS HTTPS endpoint
107

AWS Snowball Edge Developer GuidePorts Required to Use AWS Services
Port Protocol Comment
8080 (HTTP) TCP S3 HTTP endpoint
8443 (HTTPS) TCP S3 HTTPS endpoint
8008 (HTTP) TCP EC2 HTTP endpoint
8243 (HTTPS) TCP EC2 HTTPS endpoint
9091 (HTTPS) TCP Endpoint for Snowball EdgeAWS Command Line Interface
108
AWS Snowball Edge Developer GuideClustering Overview
Using an AWS Snowball Edge ClusterA cluster is a logical grouping of AWS Snowball Edge devices, in groups of 5 to 10 devices. A cluster iscreated as a single job, which offers increased durability and storage capacity. In the following topic, youcan find information about Snowball Edge clusters. This information includes conceptual, usage, andadministrative information, in addition to walkthroughs for common Snowball Edge procedures.
NoteIn January 2018, there was a feature update for clusters, making them leaderless. The clusterupdate is backward-compatible with older clusters. However, if you're looking for the originalcluster documentation, see Additional Information for Snowball Edge (p. 167).
Topics• Clustering Overview (p. 109)• Related Topics (p. 110)• Administrating a Cluster (p. 111)
Clustering OverviewFor the AWS Snowball service, a cluster is a collective of Snowball Edges, used as a single logical unit, forlocal storage and compute purposes.
A cluster offers two primary benefits over a standalone Snowball Edge for local storage and computepurposes:
• Increased Durability – The data stored in a cluster of Snowball Edge devices enjoys increased datadurability over a single device. In addition, the data on the cluster remains as safe and viable as it waspreviously, despite possible Snowball Edge outages in the cluster. Clusters can withstand the loss oftwo nodes before the data is in danger. You can also add or replace nodes.
• Increased Storage – The total available storage is 45 terabytes of data per node in the cluster. Thus, ina five-node cluster there are 225 terabytes of available storage space. In contrast, there are about 80terabytes of available storage space in a standalone Snowball Edge. Clusters that have more than fivenodes have even more storage space.
A cluster of Snowball Edge devices is made of leaderless nodes. Any node can write data to andread data from the entire cluster, and all nodes are capable of performing the behind-the-scenesmanagement of the cluster.
Snowball Edge Cluster QuorumsA quorum represents the minimum number of Snowball Edge devices in a cluster that must becommunicating with each other to maintain some level of operation. There are two levels of quorum forSnowball Edge clusters—a read/write quorum and a read quorum.
Let's say you upload your data to a cluster of Snowball Edge devices. With all devices healthy, you have aread/write quorum for your cluster.
If one of those nodes goes offline, you reduce the operational capacity of the cluster. However, you canstill read and write to the cluster. In that sense, with the cluster operating all but one node, the clusterstill has a read/write quorum.
109
AWS Snowball Edge Developer GuideCluster Job Considerations
If two nodes in your cluster are down, any additional or ongoing write operations fail. But any data thatwas successfully written to the cluster can be accessed and read. This is called a read quorum.
Finally, suppose that a third node loses power. Then the cluster is offline, and the data in the cluster isunavailable. You might be able fix this, or the data might be permanently lost, depending on the severityof the event. If it is a temporary external power event, and you can power the three Snowball Edges backon and unlock all the nodes in the cluster, then your data is available again.
ImportantIf a minimum quorum of healthy nodes doesn't exist, contact AWS Support.
You can determine the quorum state of your cluster by determining your node's lock state and networkreachability. The snowballEdge describe-cluster command reports back the lock and networkreachability state for every node in an unlocked cluster. Ensuring that the devices in your clusterare healthy and connected is an administrative responsibility that you take on when you create thecluster job. For more information on the different client commands, see Commands for the SnowballClient (p. 39).
Considerations for Cluster Jobs for AWS SnowballEdgeKeep the following considerations in mind when planning to use a cluster of Snowball Edges:
• We recommend that you have a redundant power supply to reduce potential performance and stabilityissues for your cluster.
• As with standalone local storage and compute jobs, the data stored in a cluster can't be imported intoAmazon S3 without ordering additional devices as a part of separate import jobs. If you order thesedevices, you can transfer the data from the cluster to the devices and import the data when you returnthe devices for the import jobs.
• To get data onto a cluster from Amazon S3, create a separate export job and copy the data from thedevices of the export job onto the cluster.
• You can create a cluster job from the console, the AWS CLI, or one of the AWS SDKs. For a guidedwalkthrough of creating a job, see Getting Started with an AWS Snowball Edge Device (p. 22).
• Cluster nodes have node IDs. A node ID is the same as the job ID for a device that you can get fromthe console, the AWS CLI, the AWS SDKs, and the Snowball client. You can use node IDs to remove oldnodes from clusters. You can get a list of node IDs by using the snowballEdge describe-devicecommand on an unlocked device or the describe-cluster on an unlocked cluster.
• The lifespan of a cluster is limited by the security certificate granted to the cluster devices when thecluster is provisioned. By default, Snowball Edge devices can be used for up to 365 days before theyneed to be returned. At the end of that time, the devices stop responding to read/write requests. If youneed to keep one or more devices for longer than 365 days, contact AWS Support.
• When AWS receives a returned device that was part of a cluster, we perform a complete erasure ofthe device. This erasure follows the National Institute of Standards and Technology (NIST) 800-88standards.
Related TopicsBeyond the content presented in this topic, you can find other topics in this guide that are relevant toclusters:
• Getting Started with an AWS Snowball Edge Device (p. 22) – This section outlines how to get startedcreating your first job. The techniques in this section work for all job types, including cluster jobs.
• Commands for the Snowball Client (p. 39) – This section contains a list of commands for the Snowballclient tool. These commands include the Snowball Edge administrative commands to unlock a cluster,
110
AWS Snowball Edge Developer GuideAdministrating a Cluster
get the status information for the nodes and the cluster as a whole, remove unavailable nodes, andadd new nodes.
• Administrating a Cluster (p. 111) – This section contains information about the administrative tasksyou perform with a cluster, like adding and removing nodes, and includes helpful procedures.
Administrating a ClusterFollowing, you can find information about administrative tasks to operate a healthy cluster of SnowballEdge devices. The primary administrative tasks are covered in the following topics.
Topics• Reading and Writing Data to a Cluster (p. 111)• Reconnecting an Unavailable Cluster Node (p. 111)• Removing an Unhealthy Node from a Cluster (p. 112)• Adding or Replacing a Node in a Cluster (p. 112)
Most administrative tasks require that you use the Snowball client and its commands that perform thefollowing actions:
• Unlocking Snowball Edge Devices (p. 41)• Getting Device Status (p. 47) of a cluster• Removing a Node from a Cluster (p. 50)• Adding a Node to a Cluster (p. 51)
Reading and Writing Data to a ClusterAfter you've unlocked a cluster, you're ready to read and write data to it. You can use the Amazon S3Adapter for Snowball to read and write data to a cluster. For more information, see Transferring FilesUsing the Amazon S3 Adapter (p. 51).
To write data to a cluster, you must have a read/write quorum with no more than one unavailable node.To read data from a cluster, you must have a read quorum of no more than two unavailable nodes. Formore information on quorums, see Snowball Edge Cluster Quorums (p. 109).
Reconnecting an Unavailable Cluster NodeA node can become temporarily unavailable due to an issue (like power or network loss) withoutdamaging the data on the node. When this happens, it affects the status of your cluster. A node'snetwork reachability and lock status is reported in the Snowball client by using the snowballEdgedescribe-cluster command.
We recommend that you physically position your cluster so you have access to the front, back, and topof all nodes. This way, you can access the power and network cables on the back, the shipping label onthe top to get your node ID, and the LCD screen on the front of the device for the IP address and otheradministrative information.
When you detect that a node is unavailable, we recommend that you try one of the followingprocedures, depending on the scenario that caused the unavailability.
To reconnect an unavailable node
1. Ensure that the node has power.
111
AWS Snowball Edge Developer GuideRemoving an Unhealthy Node from a Cluster
2. Ensure that the node is connected to the same internal network that the rest of the cluster is on.3. Wait for the node to finish powering up, if it needed to be powered up.4. Run the snowballEdge unlock-cluster command, or the snowballEdge associate-device
command. For an example, see Unlocking Snowball Edge Devices (p. 41).
To reconnect an unavailable node that lost network but didn't lose power
1. Ensure that the node is connected to the same internal network that the rest of the cluster is on.2. Run the snowballEdge describe-device command to see when the previously unavailable
node is added back to the cluster. For an example, see Getting Device Status (p. 47).
When you have performed the preceding procedures, your nodes should be working normally. Youshould also have a read/write quorum. If that's not the case, then one or more of your nodes might havea more serious issue and might need to be removed from the cluster.
Removing an Unhealthy Node from a ClusterRarely, a node in your cluster might become unhealthy. If the node is unavailable, we recommend goingthrough the procedures listed in Reconnecting an Unavailable Cluster Node (p. 111) first.
If doing so doesn't resolve the issue, then the node might be unhealthy. An unhealthy node can occur ifthe node has taken damage from an external source, if there was an unusual electrical event, or if someother unlikely event occurs. If this happens, you need to remove the node from the cluster before youcan add a new node as a replacement.
When you detect that a node is unhealthy and needs to be removed, we recommend that you do so withthe following procedure.
To remove an unhealthy node
1. Ensure that the node is unhealthy and not just unavailable. For more information, see Reconnectingan Unavailable Cluster Node (p. 111).
2. Disconnect the unhealthy node from the network and power it off.3. Run the snowballEdge dissassociate-device Snowball client command. For more
information, see Removing a Node from a Cluster (p. 50).4. Order a replacement node using the console, the AWS CLI, or one of the AWS SDKs.5. Return the unhealthy node to AWS. When we have the node, we perform a complete erasure of
the device. This erasure follows the National Institute of Standards and Technology (NIST) 800-88standards.
After you successfully remove a node, your data is still available on the cluster if you still have a readquorum. To have read quorum, a cluster must have no more than two unavailable nodes. Therefore, werecommend that you order replacement nodes as soon as you remove an unavailable node from thecluster.
Adding or Replacing a Node in a ClusterYou can add a new node after you have removed an unhealthy node from a cluster. You can also add anew node to increase local storage.
To add a new node, you first need to order a replacement. You can order a replacement node from theconsole, the AWS CLI, or one of the AWS SDKs. If you're ordering a replacement node from the console,you can order replacements for any job that hasn't been canceled or completed.
112

AWS Snowball Edge Developer GuideAdding or Replacing a Node in a Cluster
To order a replacement node from the console
1. Sign in to the AWS Snowball Management Console.2. Find and choose a job for a node that belongs to the cluster that you created from the Job
dashboard.3. For Actions, choose Replace node.
Doing this opens the final step of the job creation wizard, with all settings identical to how thecluster was originally created.
4. Choose Create job.
Your replacement Snowball Edge is now on its way to you. When it arrives, use the following procedureto add it to your cluster.
To add a replacement node
1. Position the new node for the cluster such that you have access to the front, back, and top of allnodes.
2. Ensure that the node has power.3. Ensure that the node is connected to the same internal network that the rest of the cluster is on.4. Wait for the node to finish powering up, if it needed to be powered on.5. Run the snowballEdge associate-device command. For an example, see Adding a Node to a
Cluster (p. 51).
113
AWS Snowball Edge Developer GuidePrerequisites
Updating software on a AWSSnowball Edge
The software update allows you to download an update from AWS and install it on Snowball Edgedevices in your on-premises environments. These updates happen in the background. You can continueto use your devices as normal while the latest software is downloaded securely from AWS to your device.However, to apply downloaded updates, you need to restart the device.
WarningWe highly recommend that you suspend all activity on your device before restarting it.Restarting a device stops running instances, interrupts any writing to local Amazon S3 buckets,and stops any write operations from the file interface without clearing the cache. All of theseprocesses can result in lost data.
PrerequisitesBefore you can update your device, the following prerequisites must be met:
• You've created your job, have the device on-premises, and you've unlocked it. For more information seeGetting Started with an AWS Snowball Edge Device (p. 22).
• Updating a Snowball Edge is done through the Snowball client. The Snowball client must bedownloaded and installed on a computer in your local environment that has a network connection tothe device you want to update. For more information, see Using the Snowball Client (p. 39).
• (Optional) We recommend that you configure a profile for the Snowball client. For more information,see Configuring a Profile for the Snowball Client (p. 40).
Now that you've completed those tasks, you can now download and install updates for Snowball Edgedevices.
Downloading UpdatesThere are two primary ways that you can download an update for a Snowball Edge device:
• You can trigger manual updates at any time using specific Snowball client commands.
• You can programmatically determine a time to automatically update the device.
The following procedure outlines the process of manually downloading updates. For information onautomatically updating your Snowball Edge device, see snowballEdge configure-auto-update-strategy in Updating a Snowball Edge (p. 41).
NoteIf your device has no access to the internet, you can download an update file using theGetSoftwareUpdates API. Then point to a local file location when you call download-updatesusing the --uri option. For example:
114
AWS Snowball Edge Developer GuideInstalling Updates
snowballEdge download-updates --uri file:///tmp/local-update
To check for and download Snowball Edge software updates
1. Open a terminal window, and ensure that the Snowball Edge device is unlocked with thesnowballEdge describe-device command. If the device is locked, use the snowballEdgeunlock-device command to unlock it.
2. When the device is unlocked, run the snowballEdge check-for-updates command. Thiscommand returns the latest available version of the Snowball Edge software, and also the currentversion installed on the device.
3. If your device software is out of date, run the snowballEdge download-updates command.
NoteIf you device is not connected to the internet, first download an update file using use theGetSoftwareUpdates API. Then run the snowballEdge download-updates commandusing the --uri option with a local path to the file you downloaded. For example:
snowballEdge download-updates --uri file:///tmp/local-update
4. You can check the status of this download with the snowballEdge describe-device-softwarecommand. While an update is downloading, the status displayed with this command.
Example output
Install State: Downloading
Installing UpdatesAfter you've downloaded updates, you need to install them and restart your device for the updates totake effect. The following procedure guides you through how to manually install updates.
To install Snowball Edge software updates that were already downloaded
1. Open a terminal window, and ensure that the Snowball Edge device is unlocked with thesnowballEdge describe-device command. If the device is locked, use the snowballEdgeunlock-device command to unlock it.
2. Run the snowballEdge install-updates command.
3. You can check the status of this installation with the snowballEdge describe-device-software command. While an update is installing, the status is displayed with this command.
Example output
Install State: Installing //Possible values[NA, Installing, Requires Reboot]
You’ve successfully installed a software update for your Snowball Edge device. Installing an updatedoes not automatically apply the update to the device. To finish installing the update, the devicemust be restarted.
We highly recommend that you suspend all activity on the device before you restart the device.Restarting a device stops running instances, interrupts any writing to Amazon S3 buckets on thedevice, and stops any write operations from the file interface without clearing the cache.
WarningRestarting your Snowball Edge device without stopping all activity on the device can resultin lost data.
115

AWS Snowball Edge Developer GuideInstalling Updates
4. Run the snowballEdge list-services command to list the currently running services on thedevice.
5. Run the snowballEdge describe-service command for each of the running services, to seetheir status.
6. Use this information to stop those services (setting the services to the INACTIVE state).7. When all the services on the device have stopped, run the snowballEdge reboot-device
command. This command immediately power-cycles the device to complete installation of thedownloaded software updates.
8. After the device powers on open a terminal window and use the snowballEdge unlock-devicecommand to unlock the device.
9. Run the snowballEdge check-for-updates command. This command returns the latestavailable version of the Snowball Edge software, and also the current version installed on the device
You have now successfully updated your device and confirmed that your device is up-to-date with thelatest Snowball Edge software.
116
AWS Snowball Edge Developer GuidePreparing an AWS Snowball Edge for Shipping
Shipping Considerations for AWSSnowball
Topics• Preparing an AWS Snowball Edge for Shipping (p. 117)• Shipping an AWS Snowball Edge (p. 117)
When you create a job, you specify a shipping address and shipping speed. This shipping speed doesn’tindicate how soon you can expect to receive the AWS Snowball Edge device from the day you createdthe job. It only shows the time that the device is in transit between AWS and your shipping address. Thattime doesn’t include any time for processing, which depends on factors including job type (exports takelonger than imports, typically) and job size (cluster jobs take longer than individual jobs, typically). Also,carriers generally only pick up outgoing AWS Snowball Edge devices once a day. Thus, processing beforeshipping can take a day or more.
NoteSnowball Edge devices can only be used to import or export data within the AWS Region wherethe devices were ordered.
Preparing an AWS Snowball Edge for ShippingThe following explains how to prepare a Snowball appliance and ship it back to AWS.
To prepare an AWS Snowball Edge device for shipping
1. Make sure that you've finished transferring all the data for this job to or from the AWS SnowballEdge device.
2. Press the power button above the LCD display. It takes about 20 seconds for the device to power off.
NoteIf you've powered off and unplugged the AWS Snowball Edge device, and your shippinglabel doesn't appear after about a minute on the E Ink display on top of the device, contactAWS Support.
3. Disconnect and stow the power cable the AWS Snowball Edge device was sent with in the cable nookon top of the device.
4. Close the three doors on the back, the top, and the front of the AWS Snowball Edge device, pressingin on each one at a time until you hear and feel them click.
You don't need to pack the AWS Snowball Edge device in a container, because it is its own physicallyrugged shipping container. The E Ink display on the top of the AWS Snowball Edge device changes toyour return shipping label when the AWS Snowball Edge device is turned off.
Shipping an AWS Snowball EdgeThe prepaid shipping label contains the correct address to return the AWS Snowball Edge device. Forinformation on how to return your AWS Snowball Edge device, see Shipping Carriers (p. 118). The AWS
117
AWS Snowball Edge Developer GuideShipping Carriers
Snowball Edge device is delivered to an AWS sorting facility and forwarded to the AWS data center.Package tracking is available through your region's carrier. You can track status changes for your job byusing the AWS Snowball Management Console.
ImportantUnless personally instructed otherwise by AWS, don't affix a separate shipping label to the AWSSnowball Edge device. Always use the shipping label that is displayed on the AWS SnowballEdge device E Ink display.
Shipping CarriersWhen you create a job, you provide the address that you want the AWS Snowball Edge device shippedto. The carrier that supports your region handles the shipping of AWS Snowball Edge devices from AWSto you, and from you back to AWS. Whenever an AWS Snowball Edge device is shipped, you'll get atracking number. You can find each job's tracking number and a link to the tracking website from theAWS Snowball Management Console's job dashboard, or by using API calls to the job management API.In China, the carrier is S.F. Express.
AWS Snowball Edge device Pickups in ChinaIn the China regions, keep the following information in mind for S.F. Express to pick up an AWS SnowballEdge device:
• You arrange for S.F. Express to pick up the AWS Snowball Edge device by scheduling a pickup with S.F.Express directly.
• The prepaid S.F. Express shipping label on the E Ink display contains the correct address to return theAWS Snowball Edge device.
• The AWS Snowball Edge device will be delivered to an AWS sorting facility and forwarded to the AWSdata center. S.F. Express will automatically report back a tracking number for your job.
ImportantUnless personally instructed otherwise by AWS, never affix a separate shipping label to the AWSSnowball Edge device. Always use the shipping label that is displayed on the AWS SnowballEdge device's E Ink display.
Region-Based Shipping RestrictionsBefore you create a job, you should sign in to the console from the AWS Region that your Amazon S3data is housed in. A few shipping restrictions apply, as follows:
• We don't ship AWS Snowball Edge devices between regions.
NoteAWS will not ship a AWS Snowball Edge device to a post office box.
Shipping SpeedsEach country has different shipping speeds available. These shipping speeds are based on the country inwhich you're shipping an AWS Snowball Edge device. Shipping speeds are as follows:
• China – When shipping within China, you have access to standard shipping speeds.
118
AWS Snowball Edge Developer GuideUnlocking a Device
Using AWS OpsHub for Snow Familyto Manage Snowball Devices
The Snow Family Devices now offer a user-friendly tool, AWS OpsHub for Snow Family, that you can useto manage your devices and local AWS services. You use AWS OpsHub on a client computer to performtasks such as unlocking and configuring single or clustered devices, transferring files, and launching andmanaging instances running on Snow Family Devices. You can use AWS OpsHub to manage both theStorage Optimized and Compute Optimized device types. The AWS OpsHub application is available at noadditional cost to you.
AWS OpsHub takes all the existing operations available in the Snowball API and presents them as asimple graphical user interface. This interface helps you quickly and easily migrate data to the AWSCloud and deploy edge computing applications on Snow Family Devices.
AWS OpsHub provides a unified view of AWS services that are running on Snow Family Devices andautomates operational tasks through AWS Systems Manager. With AWS OpsHub, users with differentlevels of technical expertise can easily manage a large number of Snow Family Devices. With just a fewclicks, you can unlock devices, transfer files, manage Amazon EC2 instances, and monitor device metrics.
When your Snow device arrives at your site, you download, install, and launch the AWS OpsHubapplication on a client machine, such as a laptop. After installation, you can unlock the device andstart managing it and using supported AWS services locally. AWS OpsHub provides a dashboard thatsummarizes key metrics such as storage capacity and active instances on your device. It also provides aselection of the AWS services that are supported on the Snow Family Devices. Within minutes, you canbegin transferring files to the device.
Topics• Unlocking a Device (p. 119)• Using AWS Services on Your Device (p. 120)• Managing Your Devices (p. 125)• Automating Your Management Tasks (p. 126)
Unlocking a DeviceWhen your Snowball device arrives at your site, the first step is to connect your device and unlock it.
To connect and unlock your device
1. Open the AWS OpsHub application. If you are a first-time user, you are prompted to choose alanguage, and then choose Next.
2. Choose how you want to log in to the device. You have the following options:
Access with device credentials - This option enables you to unlock and use your device withunrestricted access. It requires that your device be connected to your local network. You must havethe IP address of your device, the device unlock code, and the device manifest.
Sign in as IAM user - This option enables you to sign in as an AWS Identity and Access Management(IAM) user. You must have your device access code and secret key.
3. Choose Next.4. On the Select your device page, choose the type of device that you want to set up, and then choose
Next.
119
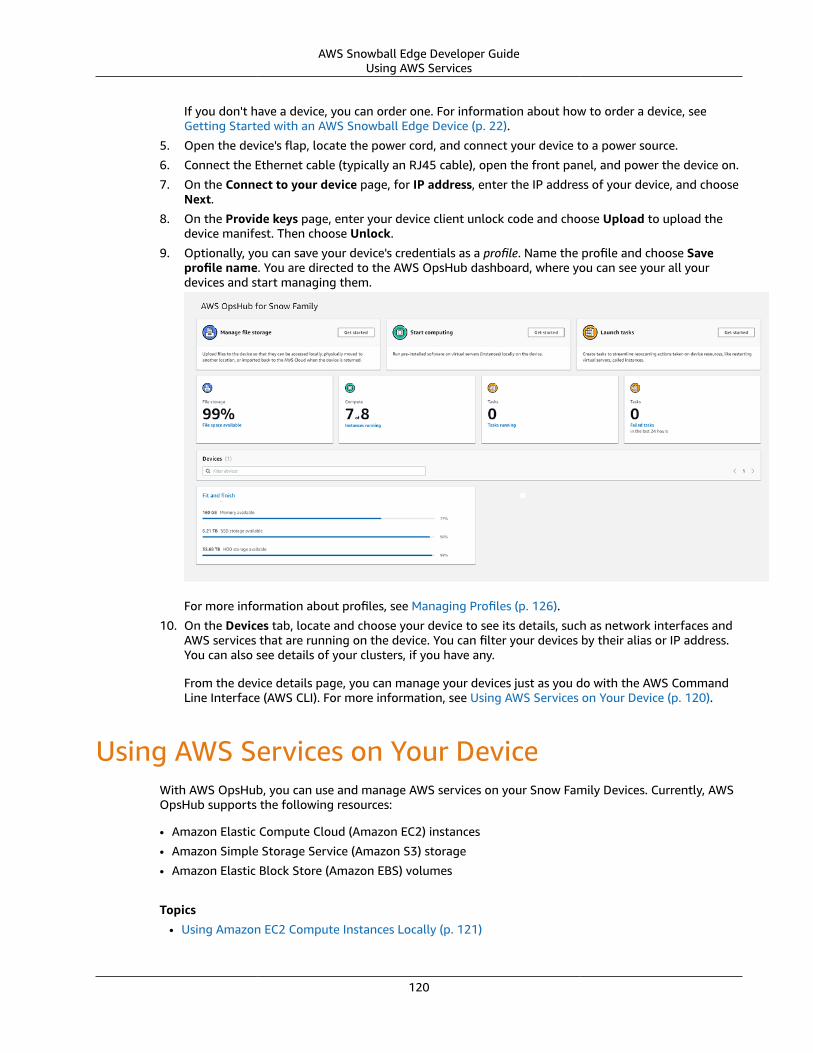
AWS Snowball Edge Developer GuideUsing AWS Services
If you don't have a device, you can order one. For information about how to order a device, seeGetting Started with an AWS Snowball Edge Device (p. 22).
5. Open the device's flap, locate the power cord, and connect your device to a power source.
6. Connect the Ethernet cable (typically an RJ45 cable), open the front panel, and power the device on.
7. On the Connect to your device page, for IP address, enter the IP address of your device, and chooseNext.
8. On the Provide keys page, enter your device client unlock code and choose Upload to upload thedevice manifest. Then choose Unlock.
9. Optionally, you can save your device's credentials as a profile. Name the profile and choose Saveprofile name. You are directed to the AWS OpsHub dashboard, where you can see your all yourdevices and start managing them.
For more information about profiles, see Managing Profiles (p. 126).
10. On the Devices tab, locate and choose your device to see its details, such as network interfaces andAWS services that are running on the device. You can filter your devices by their alias or IP address.You can also see details of your clusters, if you have any.
From the device details page, you can manage your devices just as you do with the AWS CommandLine Interface (AWS CLI). For more information, see Using AWS Services on Your Device (p. 120).
Using AWS Services on Your DeviceWith AWS OpsHub, you can use and manage AWS services on your Snow Family Devices. Currently, AWSOpsHub supports the following resources:
• Amazon Elastic Compute Cloud (Amazon EC2) instances
• Amazon Simple Storage Service (Amazon S3) storage
• Amazon Elastic Block Store (Amazon EBS) volumes
Topics
• Using Amazon EC2 Compute Instances Locally (p. 121)
120
AWS Snowball Edge Developer GuideUsing Compute Instances Locally
• Managing an Amazon EC2 Cluster (p. 123)• Managing Amazon S3 Storage (p. 123)
Using Amazon EC2 Compute Instances LocallyYou can use AWS OpsHub to run pre-installed software on virtual servers (instances) locally on yourdevice, and also to manage Amazon EC2 instances on your device.
Topics• Launching an EC2 Instance (p. 121)• Stopping an EC2 Instance (p. 121)• Starting an EC2 Instance (p. 122)• Terminating an EC2 Instance (p. 122)• Using Storage Volumes Locally (p. 122)
Launching an EC2 InstanceFollow these steps to launch an Amazon EC2 instance using AWS OpsHub.
To launch an Amazon EC2 instance
1. Open the AWS OpsHub application.2. In the Start computing section on the dashboard, choose Get started. Or, choose the Services menu
at the top, and then choose Compute (EC2) to open the Compute page. All your compute resourcesappear in the Resources section.
3. If you have Amazon EC2 instances running on your device, they appear in the Instance name columnunder Instances. You can see details of each instance on this page.
4. Choose Launch instance. The launch instance wizard opens.5. For Device, choose the Snow device that you want to launch the EC2 instance on.6. For Image (AMI), choose an Amazon Machine Image (AMI) from the list. This AMI is used to launch
your instance.7. For Instance type, choose one from the list.8. Choose how you want to attach an IP address to the instance. You have the following options:
• Create public IP address (VNI)—choose this option to create a new IP address using a physicalnetwork interface. Choose a physical network interface and IP address assignment.
• Use existing IP address (VNI)—choose this option to use an existing IP address and then useexisting virtual network interfaces. Choose a physical network interface and a virtual networkinterface.
• Do not attach IP address—choose this option if you don't want to attach an IP address.9. Choose Launch. You should see your instance launching in the Compute instances section. The
State is Pending and then changes to Running when done.
Stopping an EC2 InstanceUse the following steps to use AWS OpsHub to stop an Amazon EC2 instance.
To stop an EC2 instance
1. Open the AWS OpsHub application.
121
AWS Snowball Edge Developer GuideUsing Compute Instances Locally
2. In the Start computing section of the dashboard, choose Get started. Or, choose the Services menuat the top, and then choose Compute (EC2) to open the Compute page.
All your compute resources appear in the Resources section.3. If you have Amazon EC2 instances running on your device, they appear in the Instance name column
under Instances.4. Choose the instance that you want to stop, and choose Stop. The State changes to Stopping, and
then to Stopped when done.
Starting an EC2 InstanceUse these steps to start an Amazon EC2 instance using AWS OpsHub.
To start an EC2 instance
1. Open the AWS OpsHub application.2. In the Start computing section of the dashboard, choose Get started. Or, choose the Services menu
at the top, and then choose Compute (EC2) to open the Compute page.
Your compute resources appear in the Resources section.3. In the Instance name column, under Instances, find the instance that you want to start.4. Choose the instance, and then choose Start. The State changes to Pending, and then changes to
Running when done.
Terminating an EC2 InstanceAfter you terminate an Amazon EC2 instance, you can't restart the instance.
To terminate an EC2 instance
1. Open the AWS OpsHub application.2. In the Start computing section on the dashboard, choose Get started. Or, choose the Services
menu at the top, and then choose Compute (EC2) to open the Compute page. You can see all yourcompute resources in the Resources section.
3. In the Instance name column, under Instances, find the instance that you want to terminate.4. Choose the instance, and choose Terminate. The State changes to Terminating, and then to
Terminated when done.
After the instance is terminated, you can't restart it.
Using Storage Volumes LocallyAmazon EC2 instances use Amazon EBS volumes for storage. In this procedure, you create a storagevolume and attach it to your instance using AWS OpsHub.
To create a storage volume
1. Open the AWS OpsHub application.2. In the Start computing section on the dashboard, choose Get started. Or, choose the Services menu
at the top, and then choose Compute (EC2) to open the Compute page.3. Choose the Storage volumes tab. If you have storage volumes on your device, the details about the
volumes appear under Storage volumes.
122
AWS Snowball Edge Developer GuideManaging Clusters
4. Choose Create volume to open the Create volume page.
5. Choose the device that you want to create the volume on, enter the size (in GiBs) that you want tocreate, and choose the type of volume.
6. Choose Submit. The State is Creating, and changes to Available when done. You can see yourvolume and details about it in the Volumes tab.
To attach a storage volume to your instance
1. Choose the volume that you created, and then choose Attach volume.
2. For Compute instance Id, choose the instance that you want to attach the volume to.
3. For Volume Device Name, enter the device name of your volume (for example, /dev/sdh or xvdh).
4. Choose Attach.
If you no longer need the volume, you can detach it from the instance and then delete it.
Managing an Amazon EC2 ClusterAn Amazon EC2 cluster is a group of devices that provision together as a cluster of devices. To use acluster, the AWS services on your device must be running at your default endpoint. You also need tochoose the specific device in the cluster that you want to talk to. You use a cluster on a per-device basis.
To create an EC2 cluster
1. Connect and log in to your Snow device. For instructions on how to log in to your device, seeUnlocking a Device (p. 119).
2. On the Choose device page, choose Snowball Edge Cluster, and then choose Next.
3. On the Connect to your device page, provide the IP address of the device and the IP addresses ofother devices in the cluster.
4. Choose Add another device to add more devices, and then choose Next.
5. On the Provide the keys page, enter the device client unlock code, upload the device manifest, andchoose Unlock device.
Snowball Edge devices use 256-bit encryption to help ensure both security and full chain-of-custodyfor your data.
6. Optionally, you can enter a name to create a profile, and then choose Save profile name. You aredirected to the dashboard, where you see all your clusters.
You can now start using AWS services and managing your cluster. You manage instances in thecluster the same way you manage individual instances. For instructions, see Using AWS Services onYour Device (p. 120) or Managing Your Devices (p. 125).
Managing Amazon S3 StorageYou can use AWS OpsHub to create and manage Amazon Simple Storage Service (Amazon S3) storage onyour Snow Family Devices.
Topics
• Creating Amazon S3 Storage (p. 124)
• Uploading Files to Amazon S3 Storage (p. 124)
• Downloading Files from Amazon S3 Storage (p. 124)
123
AWS Snowball Edge Developer GuideManaging S3 Storage
• Deleting Files from S3 Storage (p. 124)
Creating Amazon S3 StorageYou can upload files to your device and access the files locally. You can physically move them to anotherlocation on the device, or import them back to the AWS Cloud when the device is returned.
Snow Family Devices use Amazon S3 buckets to store and manage files on your device.
To create an S3 bucket
1. Open the AWS OpsHub application.2. In the Manage file storage section of the dashboard, choose Get started.
If you have S3 buckets on your device, they appear in the Buckets section on the File storage page.You can see details of each bucket on the page.
3. Choose the Devices menu, and then choose the name of your device.4. Under Services, choose S3 Storage, and then choose Start service.
Uploading Files to Amazon S3 Storage
To upload a file
1. In the Manage file storage section on the dashboard, choose Get started.
If you have S3 buckets on your device, they appear in the Buckets section on the File storage page.You can see details of each bucket on the page.
2. Choose the bucket that you want to upload files into.3. Choose Upload files, or drag and drop the files in the bucket, and choose OK.
Downloading Files from Amazon S3 Storage
To download a file
1. In the Manage file storage section of the dashboard, choose Get started. If you have S3 buckets onyour device, they appear in the Buckets section on the File storage page. You can see details of eachbucket on the page.
2. Choose the bucket that you want to download files from and navigate to the file that you want todownload.
3. In the Actions menu, choose Download.4. Choose a location to download the file to, and choose OK.
Deleting Files from S3 Storage
To delete a file
1. In the Manage file storage section of the dashboard, choose Get started. If you have S3 buckets onyour device, they appear in the Buckets section on the File storage page. You can see details of eachbucket on the page.
2. Choose the bucket that you want to delete files from, and navigate to the file that you want todelete.
124
AWS Snowball Edge Developer GuideManaging Your Devices
3. On the Actions menu, choose Delete.4. In the dialog box that appears, choose Confirm delete.
Managing Your DevicesYou use the AWS OpsHub to manage your Snow Family Devices. On the Device details page, you canperform the same the tasks that you do using the AWS CLI, including changing the alias of your device,rebooting the device, and checking for updates.
Topics• Rebooting Your Device (p. 125)• Editing Your Device Alias (p. 125)• Updating Your Device (p. 125)• Managing Profiles (p. 126)
Rebooting Your DeviceFollow these steps to use AWS OpsHub to reboot your Snow device.
ImportantWe highly recommend that you suspend all activities on the device before you reboot thedevice. Rebooting a device stops running instances, interrupts any writing to Amazon S3 bucketson the device, and stops any write operations from the file interface without clearing the cache.
To reboot a device
1. On the AWS OpsHub dashboard, find your device under Devices. Then choose the device to open thedevice details page.
2. Choose the Reboot device tab, and in the dialog box that appears, choose Reboot device. Yourdevice starts to reboot.
Editing Your Device AliasUse these steps to edit your device alias using AWS OpsHub.
To edit your device's alias
1. On the AWS OpsHub dashboard, find your device under Devices. Choose the device to open thedevice details page.
2. Choose the Edit device alias tab.3. For Device alias, enter a new name, and choose Save alias.
Updating Your DeviceFollow these steps to use AWS OpsHub to update your Snow device.
To update your device
1. On the AWS OpsHub dashboard, find your device under Devices. Choose the device to open thedevice details page.
125
AWS Snowball Edge Developer GuideManaging Profiles
2. Choose the Check for updates tab.
The Check for updates page displays the current software version on your device and the latestsoftware version, if there is one.
3. If there is an update, choose Update. Otherwise, choose Close.
Managing ProfilesA profile is a persistent storage of your credentials on your local file system. You can create a profilewhen you first unlock your device, or you can create one after your device is running. You can create newprofiles, edit existing profiles, or delete them.
To create a profile
1. In the upper-right corner of the application, choose your name, and then choose Manage profile.2. On the Manage profiles page, choose Create profile. You create a profile for each device.
If your device is unlocked, see Unlocking a Device (p. 119) for instructions.3. Provide the name for the profile, the IP address of your device, and the unlock code.4. Choose Upload, upload the manifest, and then choose Create device.
You now have a new profile for your device. You use this profile to log in to the device.
To edit a profile
1. In the upper-right corner of the application, choose your name, and then choose Manage profile.
All your profiles appear on the page.2. On the Manage profiles page, choose the profile that you want to edit.3. On the next page, choose Edit. Make the changes that you want for your device, and choose Save
device.
To delete a profile
1. In the upper-right corner of the application, choose your name, and then choose Manage profile.
All your profiles appear on the page.2. Choose the profile that you want to delete, and choose Delete profile.
Automating Your Management TasksYou can use AWS OpsHub to automate operational tasks that you perform frequently on your SnowFamily Devices. You can create a task for reoccurring actions that you might want to perform onresources, such as restarting virtual servers, stopping Amazon EC2 instances, and so on. You providean automation document that safely performs operational tasks and executes the operation on AWSresources in bulk. You can also schedule common IT workflows.
NoteAutomating tasks is not supported on clusters.
Topics• Creating and Starting a Task (p. 127)
126
AWS Snowball Edge Developer GuideCreating and Starting a Task
• Viewing Details of a Task (p. 129)• Deleting a Task (p. 129)
Creating and Starting a TaskWhen you create a task, you specify the types of resources that the task should run on, and then providea task document that contains the instructions that run the task. The task document is either in YAML orJSON format. You then provide the required parameters for the task and start the task.
To create a task
1. In the Launch tasks section of the dashboard, choose Get started to open the Tasks page. If youhave created tasks, they appear under Tasks.
2. Choose Create task and provide details for the task.3. For Name, enter a unique name for the task.
TipThe name must be between 3 and 128 characters. Valid characters are a-z, A-Z, 0-9, ., _,and -.
4. Optionally, you can choose a target type from the Target type-optional list. This is the type ofresource that you want the task to run on.
For example, you can specify /AWS::EC2::Instance for the tasks to run on an Amazon EC2instance or / to run on all resource types.
5. In the Content section, choose YAML or JSON, and provide the script that executes the task. Youhave two options, YAML or JSON format. For examples, see Task Examples (p. 127).
6. Choose Create. The task that you created then appears on the Tasks page.
To start a task
1. In the Launch tasks section of the dashboard, choose Get started to open the Tasks page. Yourtasks appear under Tasks.
2. Choose your task to open the Start task page.3. Choose Simple execution to run on targets.
Choose Rate control to run safely on multiple targets and define concurrency and error thresholds.For this option, you provide the additional target and error threshold information in the Ratecontrol section.
4. Provide the required input parameters, and choose Start task.
The status of the task is Pending, and changes to Success when the task has run successfully.
Task ExamplesThe following example restarts an Amazon EC2 instance. It requires two input parameters: endpointand instance ID.
YAML example
description: Restart EC2 instanceschemaVersion: '0.3'parameters:
127
AWS Snowball Edge Developer GuideCreating and Starting a Task
Endpoint: type: String description: (Required) EC2 Service Endpoint URL Id: type: String description: (Required) Instance IdmainSteps: - name: restartInstance action: aws:executeScript description: Restart EC2 instance step inputs: Runtime: python3.7 Handler: restart_instance InputPayload: Endpoint: "{{ Endpoint }}" Id: "{{ Id }}" TimeoutSeconds: 30 Script: |- import boto3 import time def restart_instance(payload, context): ec2_endpoint = payload['Endpoint'] instance_id = payload['Id'] ec2 = boto3.resource('ec2', endpoint_url=ec2_endpoint) instance = ec2.Instance(instance_id) if instance.state['Name'] != 'stopped': instance.stop() instance.wait_until_stopped() instance.start() instance.wait_until_running() return {'InstanceState': instance.state}
JSON example
{ "description" : "Restart EC2 instance", "schemaVersion" : "0.3", "parameters" : { "Endpoint" : { "type" : "String", "description" : "(Required) EC2 Service Endpoint URL" }, "Id" : { "type" : "String", "description" : "(Required) Instance Id" } }, "mainSteps" : [ { "name" : "restartInstance", "action" : "aws:executeScript", "description" : "Restart EC2 instance step", "inputs" : { "Runtime" : "python3.7", "Handler" : "restart_instance", "InputPayload" : { "Endpoint" : "{{ Endpoint }}", "Id" : "{{ Id }}" }, "TimeoutSeconds" : 30, "Script" : "import boto3\nimport time\ndef restart_instance(payload, context):\n ec2_endpoint = payload['Endpoint']\n instance_id = payload['Id']\n ec2 = boto3.resource('ec2', endpoint_url=ec2_endpoint)\n instance = ec2.Instance(instance_id)\n if instance.state['Name'] != 'stopped':\n
128
AWS Snowball Edge Developer GuideViewing Details of a Task
instance.stop()\n instance.wait_until_stopped()\n instance.start()\n instance.wait_until_running()\n return {'InstanceState': instance.state}" } } ]}
Viewing Details of a TaskYou can view details of a management task, such as the description and the parameters that are requiredto run the task.
To view details of a task
1. In the Launch tasks section of the dashboard, choose Get started to open the Tasks page.2. On the Tasks page, locate and choose the task that you want to see details of.3. Choose View details, and choose one of the tabs to see the details. For example, the Parameters tab
shows you the input parameters in the script.
Deleting a TaskFollow these steps to delete a management task.
To delete a task
1. In the Launch tasks section of the dashboard, choose Get started to open the Tasks page.2. Locate the task that you want to delete. Choose the task, and then choose Delete.
129
AWS Snowball Edge Developer GuideData Protection
Security for AWS Snowball EdgeCloud security at AWS is the highest priority. As an AWS customer, you benefit from a data center andnetwork architecture that is built to meet the requirements of the most security-sensitive organizations.
Security is a shared responsibility between AWS and you. The shared responsibility model describes thisas security of the cloud and security in the cloud:
• Security of the cloud – AWS is responsible for protecting the infrastructure that runs AWS services inthe AWS Cloud. AWS also provides you with services that you can use securely. Third-party auditorsregularly test and verify the effectiveness of our security as part of the AWS compliance programs.To learn about the compliance programs that apply to AWS Snowball, see AWS Services in Scope byCompliance Program.
• Security in the cloud – Your responsibility is determined by the AWS service that you use. You are alsoresponsible for other factors including the sensitivity of your data, your company’s requirements, andapplicable laws and regulations.
This documentation helps you understand how to apply the shared responsibility model when usingSnowball. The following topics show you how to configure Snowball to meet your security andcompliance objectives. You also learn how to use other AWS services that help you to monitor and secureyour Snowball resources.
Topics• Data Protection in Snowball Edge (p. 130)• Identity and Access Management in Snowball (p. 132)• Logging and Monitoring in Snowball (p. 146)• Compliance Validation for Snowball (p. 147)• Resilience (p. 147)• Infrastructure Security in Snowball (p. 147)
Data Protection in Snowball EdgeAWS Snowball conforms to the AWS shared responsibility model, which includes regulations andguidelines for data protection. AWS is responsible for protecting the global infrastructure that runs allthe AWS services. AWS maintains control over data hosted on this infrastructure, including the securityconfiguration controls for handling customer content and personal data. AWS customers and APNpartners, acting either as data controllers or data processors, are responsible for any personal data thatthey put in the AWS Cloud.
Topics• Protecting Data in the Cloud (p. 131)• Protecting Data On Your Device (p. 131)
For data protection purposes, we recommend that you protect AWS account credentials and set upindividual user accounts with AWS Identity and Access Management (IAM), so that each user is given onlythe permissions necessary to fulfill their job duties. We also recommend that you secure your data in thefollowing ways:
• Use multi-factor authentication (MFA) with each account.• Use SSL/TLS to communicate with AWS resources.
130
AWS Snowball Edge Developer GuideProtecting Data in the Cloud
• Set up API and user activity logging with AWS CloudTrail.
• Use AWS encryption solutions, along with all default security controls within AWS services.
• Use advanced managed security services such as Amazon Macie, which assists in discovering andsecuring personal data that is stored in Amazon S3.
We strongly recommend that you never put sensitive identifying information, such as your customers'account numbers, into free-form fields such as a Name field. This includes when you work with Snowballor other AWS services using the console, API, AWS CLI, or AWS SDKs. Any data that you enter intoSnowball or other services might get picked up for inclusion in diagnostic logs. When you provide a URLto an external server, don't include credentials information in the URL to validate your request to thatserver.
For more information about data protection, see the AWS Shared Responsibility Model and GDPR blogpost on the AWS Security Blog.
Protecting Data in the CloudSnowball protects your data when you're importing or exporting data into Amazon S3, when you createa job, and when your device is updated. The following sections describe how you can protect your datawhen you use Snowball and are online or interacting with AWS in the cloud.
Protecting Data On Your Device
Securing your AWS SnowballFollowing are some security points that we recommend you consider when using AWS Snowball, and alsosome high-level information on other security precautions that we take when a device arrives at AWS forprocessing.
We recommend the following security approaches:
• You should make an effort to protect your job credentials from disclosure. Any individual who hasaccess to a job's manifest and unlock code can access the contents of the device sent for that job.
• Don't leave the device sitting on a loading dock. Left on a loading dock, it can be exposed to theelements. Although each AWS Snowball device is rugged, weather can damage the sturdiest ofhardware. Report stolen, missing, or broken devices as soon as possible. The sooner such an issue isreported, the sooner another one can be sent to complete your job.
We perform the following security steps:
• When transferring data with the Amazon S3 Adapter for Snowball, object metadata is not persisted.The only metadata that remains the same is filename and filesize. All other metadata is setas in the following example: -rw-rw-r-- 1 root root [filesize] Dec 31 1969 [path/filename]
• When transferring data with the file interface, object metadata is persisted.
• When a device arrives at AWS, we inspect it for any signs of tampering and to verify that no changeswere detected by the Trusted Platform Module (TPM). AWS Snowball uses multiple layers of securitydesigned to protect your data, including tamper-resistant enclosures, 256-bit encryption, and anindustry-standard TPM designed to provide both security and full chain of custody for your data.
• Once the data transfer job has been processed and verified, AWS performs a software erasure of theSnowball device that follows the National Institute of Standards and Technology (NIST) guidelines formedia sanitization.
131
AWS Snowball Edge Developer GuideIdentity and Access Management
Validating NFC TagsSnowball Edge devices have three options for device configurations. Snowball Edge Compute Optimizeddevices (with or without the GPU) have NFC tags built into them. You can scan these tags with the AWSSnowball Edge Verification App, available on iOS and Android. Scanning and validating these NFC tagscan help you verify that your device has not been tampered with before you use it.
Validating NFC tags includes using the Snowball client to generate a device-specific QR code to verifythat the tags you're scanning are for the right device.
The following procedure describes how to validate the NFC tags on a Snowball Edge device. Before youget started, make sure you've performed the following first five steps of the getting started exercise:
1. Create your first job. For more information, see Create Your First Job (p. 23).2. Receive the device. For more information, see Receive the Snowball Edge (p. 25).3. Connect to your local network. For more information, see Connect to Your Local Network (p. 26).4. Get your credentials and tools. For more information, see Get Your Credentials and Tools (p. 26).5. Download and install the Snowball client. For more information, see Download and Install the
Snowball Client (p. 27).
To validate the NFC tags in a Snowball Edge Compute Optimized device
1. Run the snowballEdge get-app-qr-code Snowball client command. If you run this commandfor a node in a cluster, provide the serial number (--device-sn) to get a QR code for a single node.Repeat this step for each node in the cluster. For more information on using this command, seeGetting Your QR Code for NFC Validation (p. 40).
The QR code is saved to a location of your choice as a .png file.2. Navigate to the .png file that you saved, and open it so that you can scan the QR code with the app.3. To scan the NFC tags with your phone, download and install the AWS Snowball Edge Verification
App from the Apple App store if you are using an iPhone. Download the app from the Google Playstore if you are using an Android phone.
4. Start the app, and follow the on-screen instructions.
You've now successfully scanned and validated the NFC tags for your device.
If you encounter issues while scanning, try the following:
• Confirm that your device has the Snowball Edge Compute Optimized options (with or without GPU).• Download the app on another phone, and try again.• Move the device to an isolated area of the room, away from interference from other NFC tags, and try
again.• If issues persist, contact AWS Support.
Identity and Access Management in SnowballEvery Snowball job must be authenticated. You do this by creating and managing the IAM users in youraccount. Using IAM, you can create and manage users and permissions in AWS.
Snowball users must have certain IAM-related permissions to access the AWS Snowball AWSManagement Console to create jobs. An IAM user that creates an import or export job must also haveaccess to the right Amazon Simple Storage Service (Amazon S3) resources, such as the Amazon S3buckets to be used for the job.
132
AWS Snowball Edge Developer GuideAccess Control for Console and Jobs
ImportantFor information about using IAM locally on your device, see Using IAM Locally (p. 98).
Topics• Access Control for Snow Family Console and Creating Jobs (p. 133)
Access Control for Snow Family Console and CreatingJobsAs with all AWS services, access to AWS Snowball requires credentials that AWS can use to authenticateyour requests. Those credentials must have permissions to access AWS resources, such an Amazon S3bucket or an AWS Lambda function. AWS Snowball differs in two ways:
1. Jobs in AWS Snowball do not have Amazon Resource Names (ARNs).2. Physical and network access control for a device on-premises is your responsibility.
The following sections provide details on how you can use AWS Identity and Access Management (IAM)and AWS Snowball to help secure your resources by controlling who can access them in the AWS Cloud,and also local access control recommendations.
• Authentication (p. 133)• Access Control in the AWS Cloud (p. 134)
AuthenticationYou can access AWS as any of the following types of identities:
• AWS account root user – When you first create an AWS account, you begin with a single sign-inidentity that has complete access to all AWS services and resources in the account. This identity iscalled the AWS account root user and is accessed by signing in with the email address and passwordthat you used to create the account. We strongly recommend that you do not use the root user foryour everyday tasks, even the administrative ones. Instead, adhere to the best practice of using theroot user only to create your first IAM user. Then securely lock away the root user credentials and usethem to perform only a few account and service management tasks.
• IAM user – An IAM user is an identity within your AWS account that has specific custom permissions(for example, permissions to create a job in AWS Snowball). You can use an IAM user name andpassword to sign in to secure AWS webpages like the AWS Management Console, AWS DiscussionForums, or the AWS Support Center.
In addition to a user name and password, you can also generate access keys for each user. You canuse these keys when you access AWS services programmatically, either through one of the severalSDKs or by using the AWS Command Line Interface (CLI). The SDK and CLI tools use the access keysto cryptographically sign your request. If you don’t use AWS tools, you must sign the request yourself.AWS Snowball supports Signature Version 4, a protocol for authenticating inbound API requests. Formore information about authenticating requests, see Signature Version 4 Signing Process in the AWSGeneral Reference.
• IAM role – An IAM role is an IAM identity that you can create in your account that has specific
permissions. An IAM role is similar to an IAM user in that it is an AWS identity with permissions policiesthat determine what the identity can and cannot do in AWS. However, instead of being uniquely
133
AWS Snowball Edge Developer GuideAccess Control for Console and Jobs
associated with one person, a role is intended to be assumable by anyone who needs it. Also, a roledoes not have standard long-term credentials such as a password or access keys associated with it.Instead, when you assume a role, it provides you with temporary security credentials for your rolesession. IAM roles with temporary credentials are useful in the following situations:
• Federated user access – Instead of creating an IAM user, you can use existing identities from AWSDirectory Service, your enterprise user directory, or a web identity provider. These are known asfederated users. AWS assigns a role to a federated user when access is requested through an identityprovider. For more information about federated users, see Federated Users and Roles in the IAM UserGuide.
• AWS service access – A service role is an IAM role that a service assumes to perform actions in youraccount on your behalf. When you set up some AWS service environments, you must define a rolefor the service to assume. This service role must include all the permissions that are required forthe service to access the AWS resources that it needs. Service roles vary from service to service, butmany allow you to choose your permissions as long as you meet the documented requirementsfor that service. Service roles provide access only within your account and cannot be used to grantaccess to services in other accounts. You can create, modify, and delete a service role from withinIAM. For example, you can create a role that allows Amazon Redshift to access an Amazon S3 bucketon your behalf and then load data from that bucket into an Amazon Redshift cluster. For moreinformation, see Creating a Role to Delegate Permissions to an AWS Service in the IAM User Guide.
• Applications running on Amazon EC2 – You can use an IAM role to manage temporary credentialsfor applications that are running on an EC2 instance and making AWS CLI or AWS API requests. Thisis preferable to storing access keys within the EC2 instance. To assign an AWS role to an EC2 instanceand make it available to all of its applications, you create an instance profile that is attached tothe instance. An instance profile contains the role and enables programs that are running on theEC2 instance to get temporary credentials. For more information, see Using an IAM Role to GrantPermissions to Applications Running on Amazon EC2 Instances in the IAM User Guide.
Access Control in the AWS Cloud
You can have valid credentials to authenticate your requests in AWS. However, unless you havepermissions you cannot create or access AWS resources. For example, you must have permissions tocreate a job for AWS Snowball.
The following sections describe how to manage cloud-based permissions for AWS Snowball. Werecommend that you read the overview first.
• Overview of Managing Access Permissions to Your Resources in the AWS Cloud (p. 134)
• Using Identity-Based Policies (IAM Policies) for AWS Snowball (p. 137)
Overview of Managing Access Permissions to Your Resources inthe AWS Cloud
Every AWS resource is owned by an AWS account, and permissions to create or access a resource aregoverned by permissions policies. An account administrator can attach permissions policies to IAMidentities (that is, users, groups, and roles), and some services (such as AWS Lambda) also supportattaching permissions policies to resources.
134
AWS Snowball Edge Developer GuideAccess Control for Console and Jobs
NoteAn account administrator (or administrator user) is a user with administrator privileges. For moreinformation, see IAM Best Practices in the IAM User Guide.
When granting permissions, you decide who is getting the permissions, the resources they getpermissions for, and the specific actions that you want to allow on those resources.
Topics• Resources and Operations (p. 135)• Understanding Resource Ownership (p. 135)• Managing Access to Resources in the AWS Cloud (p. 135)• Specifying Policy Elements: Actions, Effects, and Principals (p. 137)• Specifying Conditions in a Policy (p. 137)
Resources and Operations
In AWS Snowball, the primary resource is a job. AWS Snowball also has devices like the Snowball and theAWS Snowball Edge device, however, you can only use those devices in the context of an existing job.Amazon S3 buckets and Lambda functions are resources of Amazon S3 and Lambda respectively.
As mentioned previously, jobs don't have Amazon Resource Names (ARNs) associated with them.However, other services' resources, like Amazon S3 buckets, do have unique (ARNs) associated with themas shown in the following table.
AWS Snowball provides a set of operations to create and manage jobs. For a list of available operations,see the AWS Snowball API Reference.
Understanding Resource Ownership
The AWS account owns the resources that are created in the account, regardless of who created theresources. Specifically, the resource owner is the AWS account of the principal entity (that is, the rootaccount, an IAM user, or an IAM role) that authenticates the resource creation request. The followingexamples illustrate how this works:
• If you use the root account credentials of your AWS account to create a file system, your AWS accountis the owner of the resource (in AWS Snowball, the resource is the job).
• If you create an IAM user in your AWS account and grant permissions to create a job to that user, theuser can create a job. However, your AWS account, to which the user belongs, owns the job resource.
• If you create an IAM role in your AWS account with permissions to create a job, anyone who canassume the role can create a job. Your AWS account, to which the role belongs, owns the job resource.
Managing Access to Resources in the AWS Cloud
A permissions policy describes who has access to what. The following section explains the availableoptions for creating permissions policies.
NoteThis section discusses using IAM in the context of AWS Snowball. It doesn't provide detailedinformation about the IAM service. For complete IAM documentation, see What Is IAM? in theIAM User Guide. For information about IAM policy syntax and descriptions, see AWS IAM PolicyReference in the IAM User Guide.
Policies attached to an IAM identity are referred to as identity-based policies (IAM polices) and policiesattached to a resource are referred to as resource-based policies. AWS Snowball supports only identity-based policies (IAM policies).
Topics
135
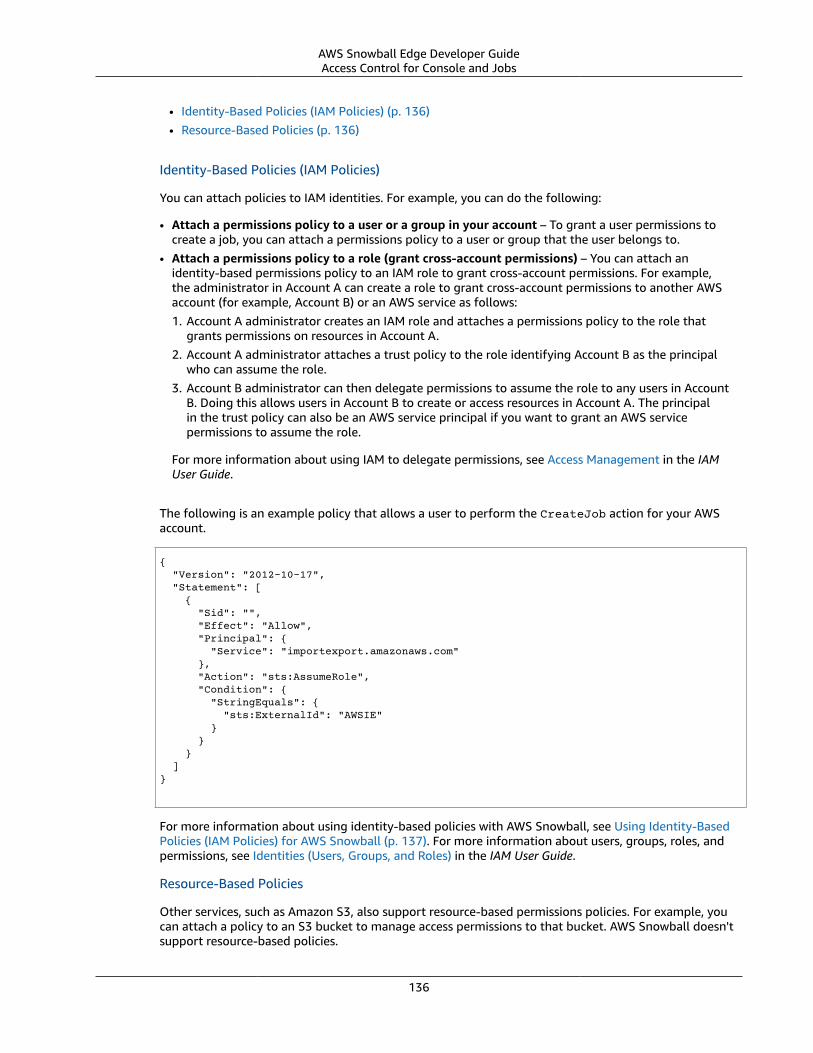
AWS Snowball Edge Developer GuideAccess Control for Console and Jobs
• Identity-Based Policies (IAM Policies) (p. 136)• Resource-Based Policies (p. 136)
Identity-Based Policies (IAM Policies)
You can attach policies to IAM identities. For example, you can do the following:
• Attach a permissions policy to a user or a group in your account – To grant a user permissions tocreate a job, you can attach a permissions policy to a user or group that the user belongs to.
• Attach a permissions policy to a role (grant cross-account permissions) – You can attach anidentity-based permissions policy to an IAM role to grant cross-account permissions. For example,the administrator in Account A can create a role to grant cross-account permissions to another AWSaccount (for example, Account B) or an AWS service as follows:1. Account A administrator creates an IAM role and attaches a permissions policy to the role that
grants permissions on resources in Account A.2. Account A administrator attaches a trust policy to the role identifying Account B as the principal
who can assume the role.3. Account B administrator can then delegate permissions to assume the role to any users in Account
B. Doing this allows users in Account B to create or access resources in Account A. The principalin the trust policy can also be an AWS service principal if you want to grant an AWS servicepermissions to assume the role.
For more information about using IAM to delegate permissions, see Access Management in the IAMUser Guide.
The following is an example policy that allows a user to perform the CreateJob action for your AWSaccount.
{ "Version": "2012-10-17", "Statement": [ { "Sid": "", "Effect": "Allow", "Principal": { "Service": "importexport.amazonaws.com" }, "Action": "sts:AssumeRole", "Condition": { "StringEquals": { "sts:ExternalId": "AWSIE" } } } ]}
For more information about using identity-based policies with AWS Snowball, see Using Identity-BasedPolicies (IAM Policies) for AWS Snowball (p. 137). For more information about users, groups, roles, andpermissions, see Identities (Users, Groups, and Roles) in the IAM User Guide.
Resource-Based Policies
Other services, such as Amazon S3, also support resource-based permissions policies. For example, youcan attach a policy to an S3 bucket to manage access permissions to that bucket. AWS Snowball doesn'tsupport resource-based policies.
136
AWS Snowball Edge Developer GuideAccess Control for Console and Jobs
Specifying Policy Elements: Actions, Effects, and Principals
For each job (see Resources and Operations (p. 135)), the service defines a set of API operations(see AWS Snowball API Reference) to create and manage said job. To grant permissions for these APIoperations, AWS Snowball defines a set of actions that you can specify in a policy. For example, for a job,the following actions are defined: CreateJob, CancelJob, and DescribeJob. Note that, performingan API operation can require permissions for more than one action.
The following are the most basic policy elements:
• Resource – In a policy, you use an Amazon Resource Name (ARN) to identify the resource to which thepolicy applies. For more information, see Resources and Operations (p. 135).
NoteThis is supported for Amazon S3 only.Snowball does not support specifying a resource ARN in the Resource element of an IAMpolicy statement. To allow access to Snowball, specify “Resource”: “*” in your policy.
• Action – You use action keywords to identify resource operations that you want to allow or deny.For example, depending on the specified Effect, snowball:* either allows or denies the userpermissions to perform all operations.
NoteThis is supported for Amazon EC2, Amazon S3, and IAM.
• Effect – You specify the effect when the user requests the specific action—this can be either allow ordeny. If you don't explicitly grant access to (allow) a resource, access is implicitly denied. You can alsoexplicitly deny access to a resource, which you might do to make sure that a user cannot access it, evenif a different policy grants access.
NoteThis is supported for Amazon EC2, Amazon S3, and IAM.
• Principal – In identity-based policies (IAM policies), the user that the policy is attached to is theimplicit principal. For resource-based policies, you specify the user, account, service, or other entitythat you want to receive permissions (applies to resource-based policies only). AWS Snowball doesn'tsupport resource-based policies.
To learn more about IAM policy syntax and descriptions, see AWS IAM Policy Reference in the IAM UserGuide.
For a table showing all of the AWS Snowball API actions, see AWS Snowball API Permissions: Actions,Resources, and Conditions Reference (p. 146).
Specifying Conditions in a Policy
When you grant permissions, you can use the IAM policy language to specify the conditions when apolicy should take effect. For example, you might want a policy to be applied only after a specific date.For more information about specifying conditions in a policy language, see Condition in the IAM UserGuide.
To express conditions, you use predefined condition keys. There are no condition keys specific to AWSSnowball. However, there are AWS-wide condition keys that you can use as appropriate. For a completelist of AWS-wide keys, see Available Keys for Conditions in the IAM User Guide.
Using Identity-Based Policies (IAM Policies) for AWS SnowballThis topic provides examples of identity-based policies that demonstrate how an account administratorcan attach permissions policies to IAM identities (that is, users, groups, and roles). These policies therebygrant permissions to perform operations on AWS Snowball resources in the AWS Cloud.
137
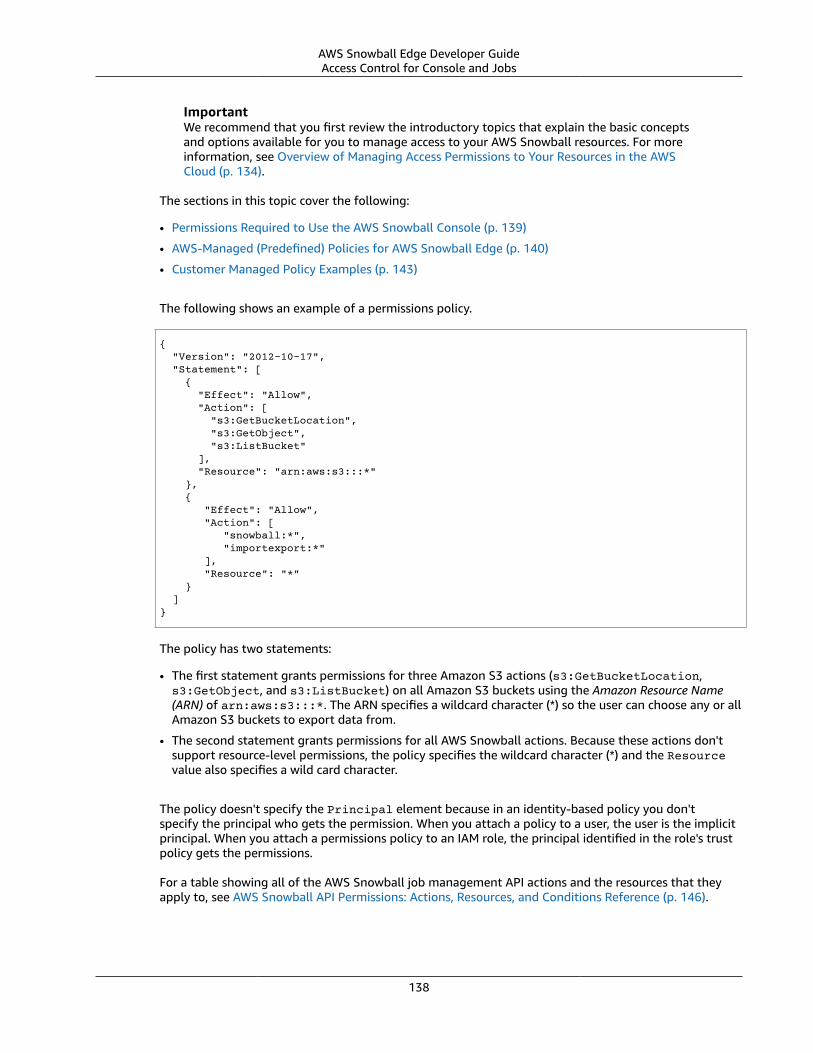
AWS Snowball Edge Developer GuideAccess Control for Console and Jobs
ImportantWe recommend that you first review the introductory topics that explain the basic conceptsand options available for you to manage access to your AWS Snowball resources. For moreinformation, see Overview of Managing Access Permissions to Your Resources in the AWSCloud (p. 134).
The sections in this topic cover the following:
• Permissions Required to Use the AWS Snowball Console (p. 139)
• AWS-Managed (Predefined) Policies for AWS Snowball Edge (p. 140)
• Customer Managed Policy Examples (p. 143)
The following shows an example of a permissions policy.
{ "Version": "2012-10-17", "Statement": [ { "Effect": "Allow", "Action": [ "s3:GetBucketLocation", "s3:GetObject", "s3:ListBucket" ], "Resource": "arn:aws:s3:::*" }, { "Effect": "Allow", "Action": [ "snowball:*", "importexport:*" ], "Resource": "*" } ]}
The policy has two statements:
• The first statement grants permissions for three Amazon S3 actions (s3:GetBucketLocation,s3:GetObject, and s3:ListBucket) on all Amazon S3 buckets using the Amazon Resource Name(ARN) of arn:aws:s3:::*. The ARN specifies a wildcard character (*) so the user can choose any or allAmazon S3 buckets to export data from.
• The second statement grants permissions for all AWS Snowball actions. Because these actions don'tsupport resource-level permissions, the policy specifies the wildcard character (*) and the Resourcevalue also specifies a wild card character.
The policy doesn't specify the Principal element because in an identity-based policy you don'tspecify the principal who gets the permission. When you attach a policy to a user, the user is the implicitprincipal. When you attach a permissions policy to an IAM role, the principal identified in the role's trustpolicy gets the permissions.
For a table showing all of the AWS Snowball job management API actions and the resources that theyapply to, see AWS Snowball API Permissions: Actions, Resources, and Conditions Reference (p. 146).
138

AWS Snowball Edge Developer GuideAccess Control for Console and Jobs
Permissions Required to Use the AWS Snowball Console
The permissions reference table lists the AWS Snowball job management API operations and shows therequired permissions for each operation. For more information about job management API operations,see AWS Snowball API Permissions: Actions, Resources, and Conditions Reference (p. 146).
To use the AWS Snowball Management Console, you need to grant permissions for additional actions asshown in the following permissions policy:
{ "Version": "2012-10-17", "Statement": [ { "Effect": "Allow", "Action": [ "s3:GetBucketLocation", "s3:GetBucketPolicy", "s3:ListBucket", "s3:ListBucketMultipartUploads", "s3:ListAllMyBuckets" ], "Resource": "arn:aws:s3:::*" }, { "Effect": "Allow", "Action": [ "s3:CreateBucket", "s3:PutObject", "s3:AbortMultipartUpload", "s3:ListMultipartUploadParts", "s3:PutObjectAcl" ], "Resource": "arn:aws:s3:::*" }, { "Effect": "Allow", "Action": [ "lambda:GetFunction", "lambda:GetFunctionConfiguration" ], "Resource": "arn:aws:lambda:::function:*" }, { "Effect": "Allow", "Action": [ "lambda:ListFunctions" ], "Resource": "arn:aws:lambda:::*" }, { "Effect": "Allow", "Action": [ "iam:AttachRolePolicy", "iam:CreatePolicy", "iam:CreateRole", "iam:ListRoles", "iam:ListRolePolicies", "iam:PutRolePolicy", "iam:PassRole" ], "Resource": [ "*" ] },
139
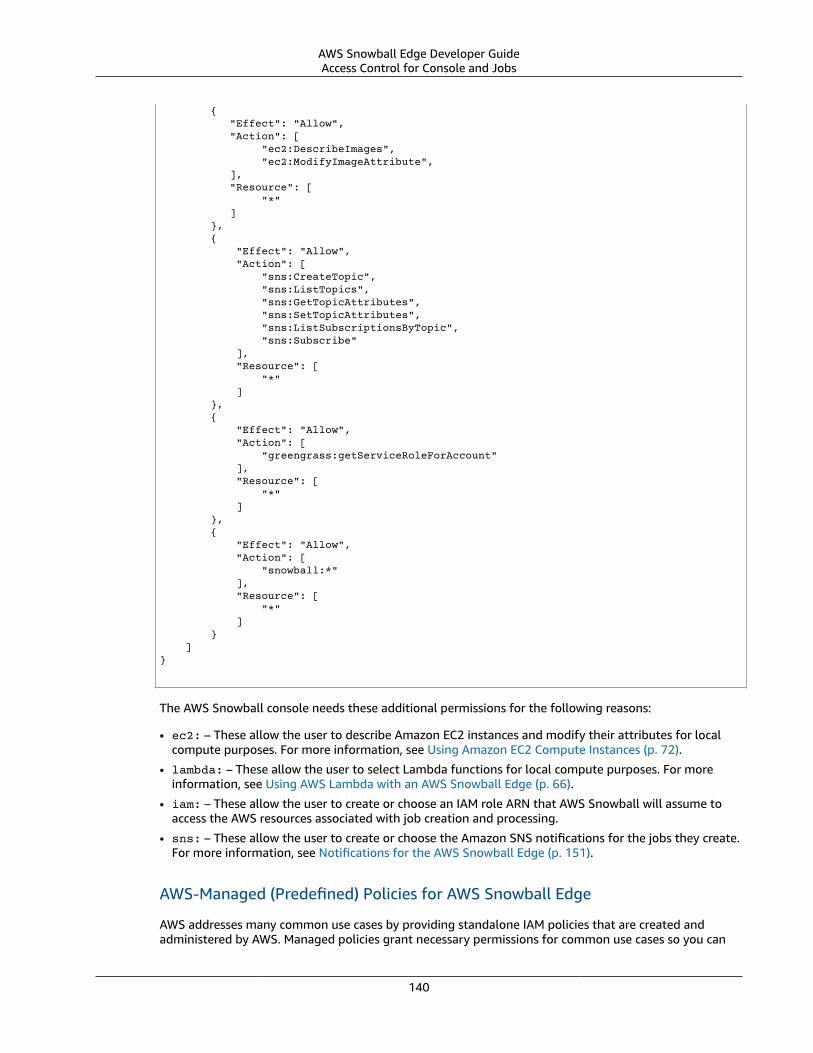
AWS Snowball Edge Developer GuideAccess Control for Console and Jobs
{ "Effect": "Allow", "Action": [ "ec2:DescribeImages", "ec2:ModifyImageAttribute", ], "Resource": [ "*" ] }, { "Effect": "Allow", "Action": [ "sns:CreateTopic", "sns:ListTopics", "sns:GetTopicAttributes", "sns:SetTopicAttributes", "sns:ListSubscriptionsByTopic", "sns:Subscribe" ], "Resource": [ "*" ] }, { "Effect": "Allow", "Action": [ "greengrass:getServiceRoleForAccount" ], "Resource": [ "*" ] }, { "Effect": "Allow", "Action": [ "snowball:*" ], "Resource": [ "*" ] } ]}
The AWS Snowball console needs these additional permissions for the following reasons:
• ec2: – These allow the user to describe Amazon EC2 instances and modify their attributes for localcompute purposes. For more information, see Using Amazon EC2 Compute Instances (p. 72).
• lambda: – These allow the user to select Lambda functions for local compute purposes. For moreinformation, see Using AWS Lambda with an AWS Snowball Edge (p. 66).
• iam: – These allow the user to create or choose an IAM role ARN that AWS Snowball will assume toaccess the AWS resources associated with job creation and processing.
• sns: – These allow the user to create or choose the Amazon SNS notifications for the jobs they create.For more information, see Notifications for the AWS Snowball Edge (p. 151).
AWS-Managed (Predefined) Policies for AWS Snowball Edge
AWS addresses many common use cases by providing standalone IAM policies that are created andadministered by AWS. Managed policies grant necessary permissions for common use cases so you can
140
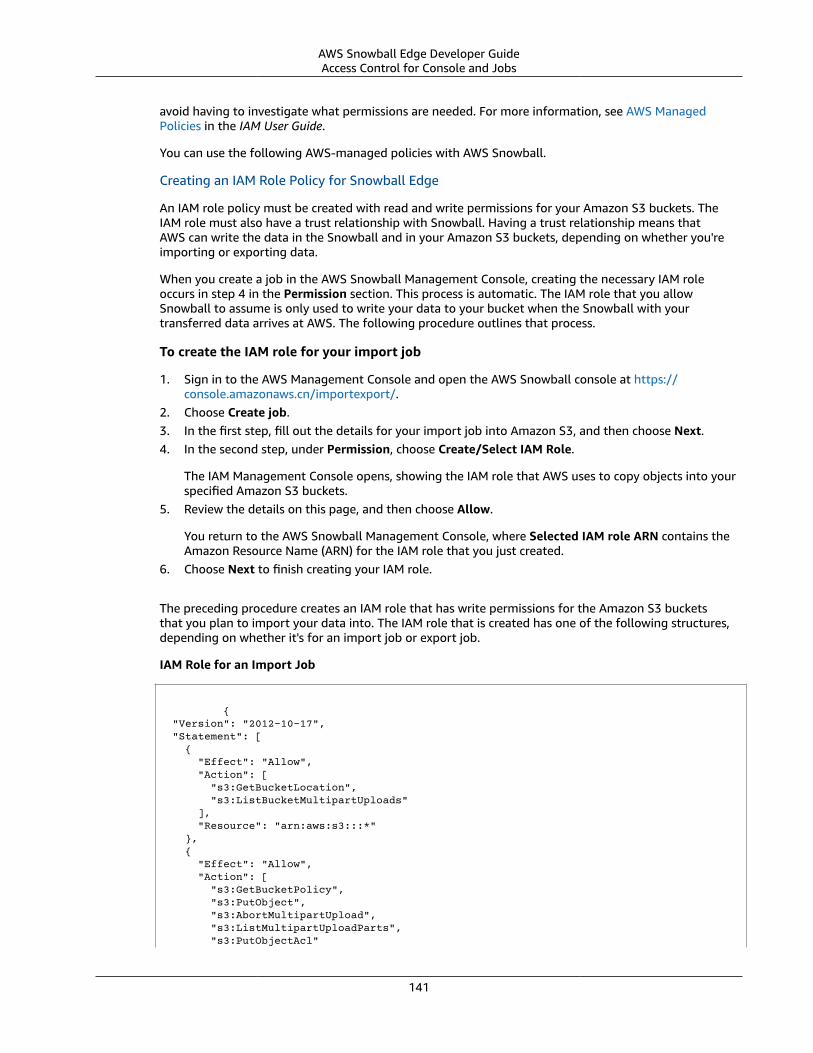
AWS Snowball Edge Developer GuideAccess Control for Console and Jobs
avoid having to investigate what permissions are needed. For more information, see AWS ManagedPolicies in the IAM User Guide.
You can use the following AWS-managed policies with AWS Snowball.
Creating an IAM Role Policy for Snowball Edge
An IAM role policy must be created with read and write permissions for your Amazon S3 buckets. TheIAM role must also have a trust relationship with Snowball. Having a trust relationship means thatAWS can write the data in the Snowball and in your Amazon S3 buckets, depending on whether you'reimporting or exporting data.
When you create a job in the AWS Snowball Management Console, creating the necessary IAM roleoccurs in step 4 in the Permission section. This process is automatic. The IAM role that you allowSnowball to assume is only used to write your data to your bucket when the Snowball with yourtransferred data arrives at AWS. The following procedure outlines that process.
To create the IAM role for your import job
1. Sign in to the AWS Management Console and open the AWS Snowball console at https://console.amazonaws.cn/importexport/.
2. Choose Create job.3. In the first step, fill out the details for your import job into Amazon S3, and then choose Next.4. In the second step, under Permission, choose Create/Select IAM Role.
The IAM Management Console opens, showing the IAM role that AWS uses to copy objects into yourspecified Amazon S3 buckets.
5. Review the details on this page, and then choose Allow.
You return to the AWS Snowball Management Console, where Selected IAM role ARN contains theAmazon Resource Name (ARN) for the IAM role that you just created.
6. Choose Next to finish creating your IAM role.
The preceding procedure creates an IAM role that has write permissions for the Amazon S3 bucketsthat you plan to import your data into. The IAM role that is created has one of the following structures,depending on whether it's for an import job or export job.
IAM Role for an Import Job
{ "Version": "2012-10-17", "Statement": [ { "Effect": "Allow", "Action": [ "s3:GetBucketLocation", "s3:ListBucketMultipartUploads" ], "Resource": "arn:aws:s3:::*" }, { "Effect": "Allow", "Action": [ "s3:GetBucketPolicy", "s3:PutObject", "s3:AbortMultipartUpload", "s3:ListMultipartUploadParts", "s3:PutObjectAcl"
141
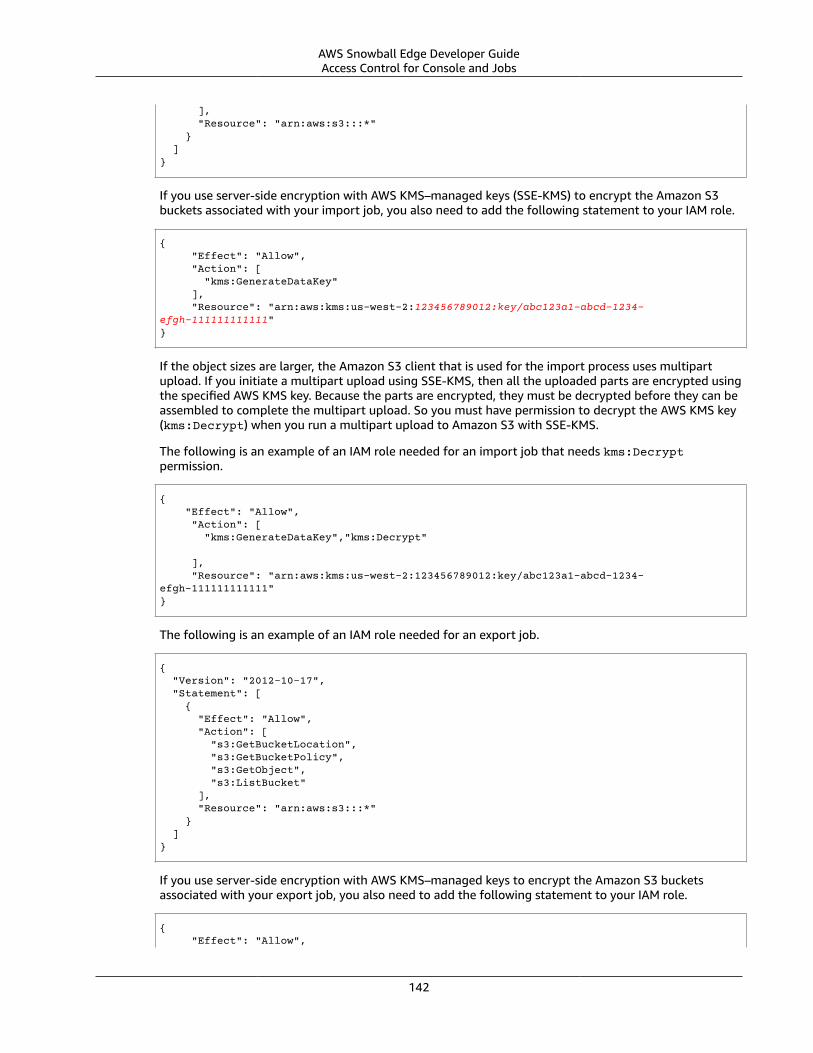
AWS Snowball Edge Developer GuideAccess Control for Console and Jobs
], "Resource": "arn:aws:s3:::*" } ]}
If you use server-side encryption with AWS KMS–managed keys (SSE-KMS) to encrypt the Amazon S3buckets associated with your import job, you also need to add the following statement to your IAM role.
{ "Effect": "Allow", "Action": [ "kms:GenerateDataKey" ], "Resource": "arn:aws:kms:us-west-2:123456789012:key/abc123a1-abcd-1234-efgh-111111111111"}
If the object sizes are larger, the Amazon S3 client that is used for the import process uses multipartupload. If you initiate a multipart upload using SSE-KMS, then all the uploaded parts are encrypted usingthe specified AWS KMS key. Because the parts are encrypted, they must be decrypted before they can beassembled to complete the multipart upload. So you must have permission to decrypt the AWS KMS key(kms:Decrypt) when you run a multipart upload to Amazon S3 with SSE-KMS.
The following is an example of an IAM role needed for an import job that needs kms:Decryptpermission.
{ "Effect": "Allow", "Action": [ "kms:GenerateDataKey","kms:Decrypt"
], "Resource": "arn:aws:kms:us-west-2:123456789012:key/abc123a1-abcd-1234-efgh-111111111111"}
The following is an example of an IAM role needed for an export job.
{ "Version": "2012-10-17", "Statement": [ { "Effect": "Allow", "Action": [ "s3:GetBucketLocation", "s3:GetBucketPolicy", "s3:GetObject", "s3:ListBucket" ], "Resource": "arn:aws:s3:::*" } ]}
If you use server-side encryption with AWS KMS–managed keys to encrypt the Amazon S3 bucketsassociated with your export job, you also need to add the following statement to your IAM role.
{ "Effect": "Allow",
142
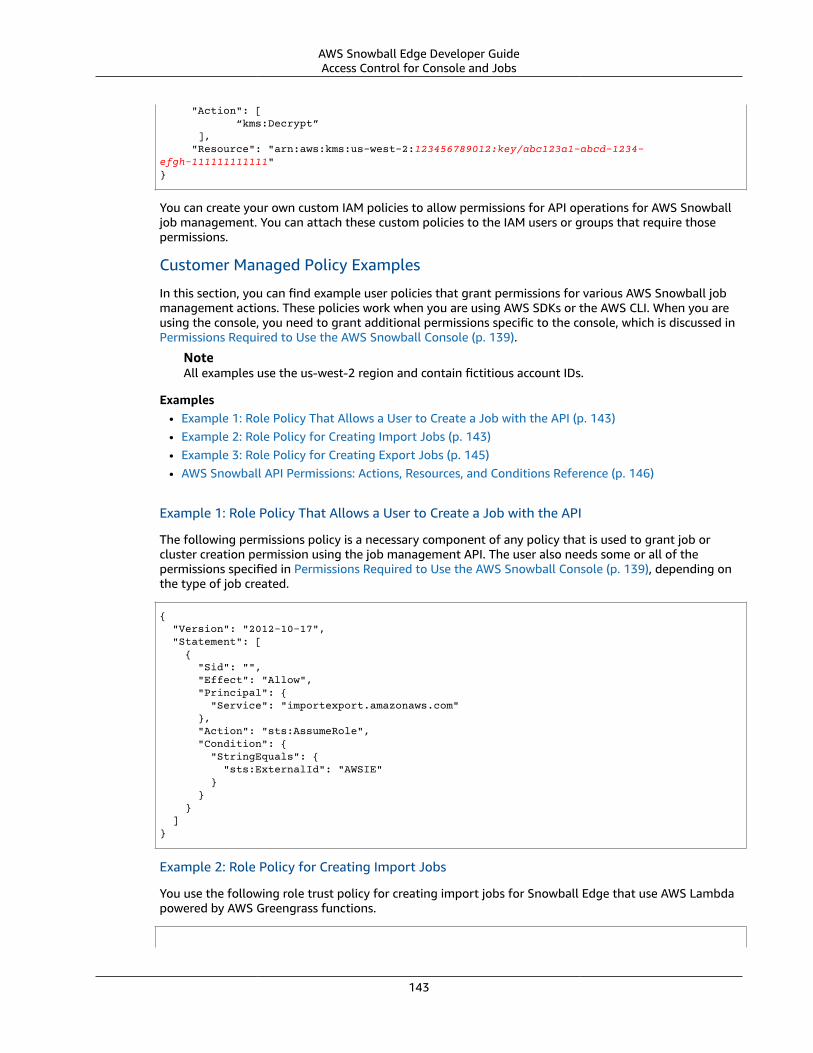
AWS Snowball Edge Developer GuideAccess Control for Console and Jobs
"Action": [ “kms:Decrypt” ], "Resource": "arn:aws:kms:us-west-2:123456789012:key/abc123a1-abcd-1234-efgh-111111111111"}
You can create your own custom IAM policies to allow permissions for API operations for AWS Snowballjob management. You can attach these custom policies to the IAM users or groups that require thosepermissions.
Customer Managed Policy Examples
In this section, you can find example user policies that grant permissions for various AWS Snowball jobmanagement actions. These policies work when you are using AWS SDKs or the AWS CLI. When you areusing the console, you need to grant additional permissions specific to the console, which is discussed inPermissions Required to Use the AWS Snowball Console (p. 139).
NoteAll examples use the us-west-2 region and contain fictitious account IDs.
Examples• Example 1: Role Policy That Allows a User to Create a Job with the API (p. 143)• Example 2: Role Policy for Creating Import Jobs (p. 143)• Example 3: Role Policy for Creating Export Jobs (p. 145)• AWS Snowball API Permissions: Actions, Resources, and Conditions Reference (p. 146)
Example 1: Role Policy That Allows a User to Create a Job with the API
The following permissions policy is a necessary component of any policy that is used to grant job orcluster creation permission using the job management API. The user also needs some or all of thepermissions specified in Permissions Required to Use the AWS Snowball Console (p. 139), depending onthe type of job created.
{ "Version": "2012-10-17", "Statement": [ { "Sid": "", "Effect": "Allow", "Principal": { "Service": "importexport.amazonaws.com" }, "Action": "sts:AssumeRole", "Condition": { "StringEquals": { "sts:ExternalId": "AWSIE" } } } ]}
Example 2: Role Policy for Creating Import Jobs
You use the following role trust policy for creating import jobs for Snowball Edge that use AWS Lambdapowered by AWS Greengrass functions.
143
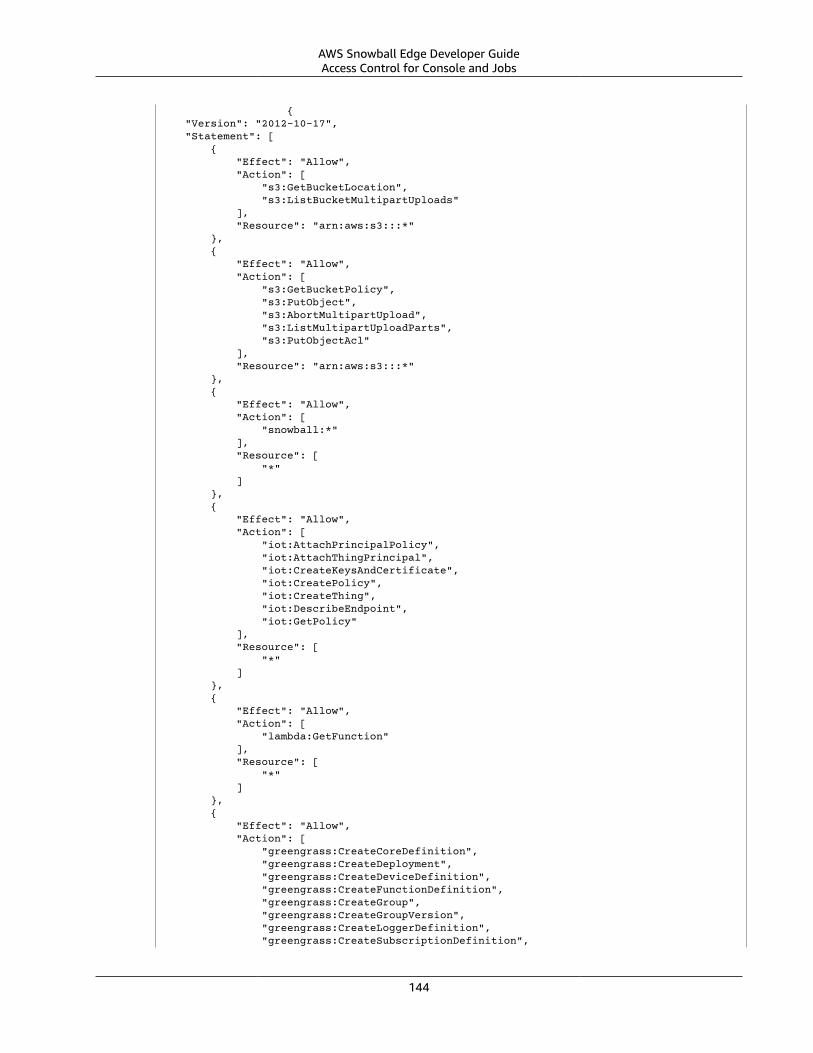
AWS Snowball Edge Developer GuideAccess Control for Console and Jobs
{ "Version": "2012-10-17", "Statement": [ { "Effect": "Allow", "Action": [ "s3:GetBucketLocation", "s3:ListBucketMultipartUploads" ], "Resource": "arn:aws:s3:::*" }, { "Effect": "Allow", "Action": [ "s3:GetBucketPolicy", "s3:PutObject", "s3:AbortMultipartUpload", "s3:ListMultipartUploadParts", "s3:PutObjectAcl" ], "Resource": "arn:aws:s3:::*" }, { "Effect": "Allow", "Action": [ "snowball:*" ], "Resource": [ "*" ] }, { "Effect": "Allow", "Action": [ "iot:AttachPrincipalPolicy", "iot:AttachThingPrincipal", "iot:CreateKeysAndCertificate", "iot:CreatePolicy", "iot:CreateThing", "iot:DescribeEndpoint", "iot:GetPolicy" ], "Resource": [ "*" ] }, { "Effect": "Allow", "Action": [ "lambda:GetFunction" ], "Resource": [ "*" ] }, { "Effect": "Allow", "Action": [ "greengrass:CreateCoreDefinition", "greengrass:CreateDeployment", "greengrass:CreateDeviceDefinition", "greengrass:CreateFunctionDefinition", "greengrass:CreateGroup", "greengrass:CreateGroupVersion", "greengrass:CreateLoggerDefinition", "greengrass:CreateSubscriptionDefinition",
144
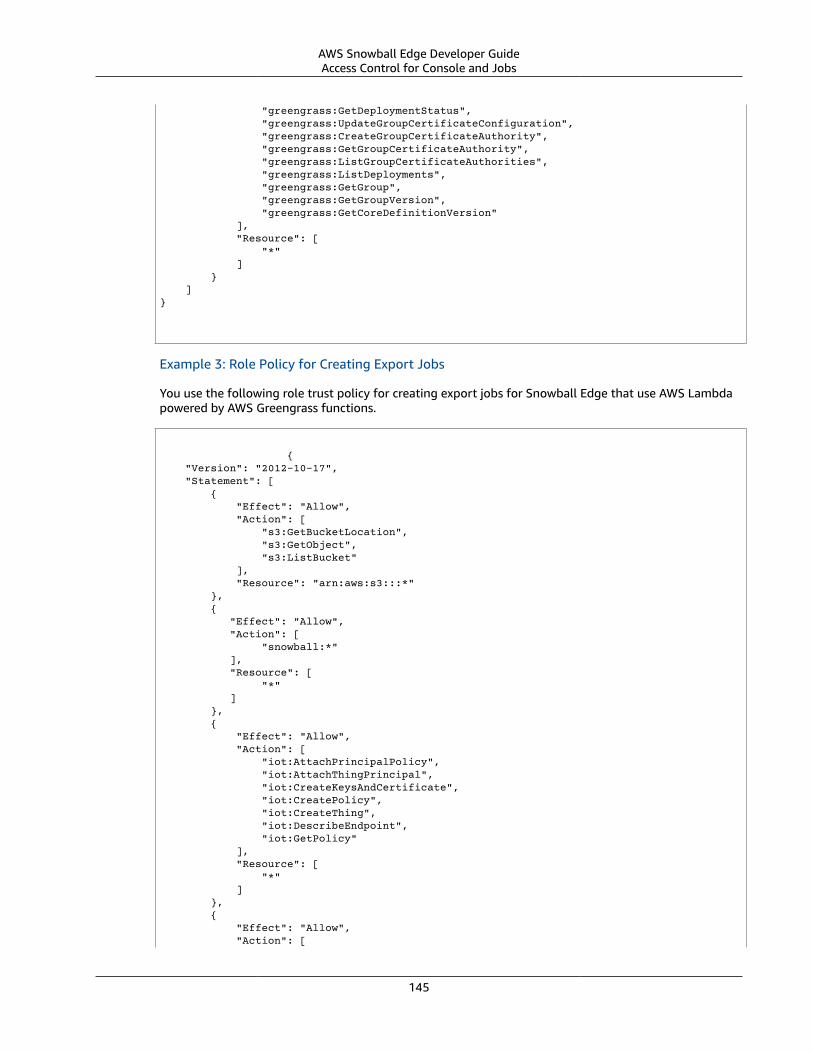
AWS Snowball Edge Developer GuideAccess Control for Console and Jobs
"greengrass:GetDeploymentStatus", "greengrass:UpdateGroupCertificateConfiguration", "greengrass:CreateGroupCertificateAuthority", "greengrass:GetGroupCertificateAuthority", "greengrass:ListGroupCertificateAuthorities", "greengrass:ListDeployments", "greengrass:GetGroup", "greengrass:GetGroupVersion", "greengrass:GetCoreDefinitionVersion" ], "Resource": [ "*" ] } ]}
Example 3: Role Policy for Creating Export Jobs
You use the following role trust policy for creating export jobs for Snowball Edge that use AWS Lambdapowered by AWS Greengrass functions.
{ "Version": "2012-10-17", "Statement": [ { "Effect": "Allow", "Action": [ "s3:GetBucketLocation", "s3:GetObject", "s3:ListBucket" ], "Resource": "arn:aws:s3:::*" }, { "Effect": "Allow", "Action": [ "snowball:*" ], "Resource": [ "*" ] }, { "Effect": "Allow", "Action": [ "iot:AttachPrincipalPolicy", "iot:AttachThingPrincipal", "iot:CreateKeysAndCertificate", "iot:CreatePolicy", "iot:CreateThing", "iot:DescribeEndpoint", "iot:GetPolicy" ], "Resource": [ "*" ] }, { "Effect": "Allow", "Action": [
145
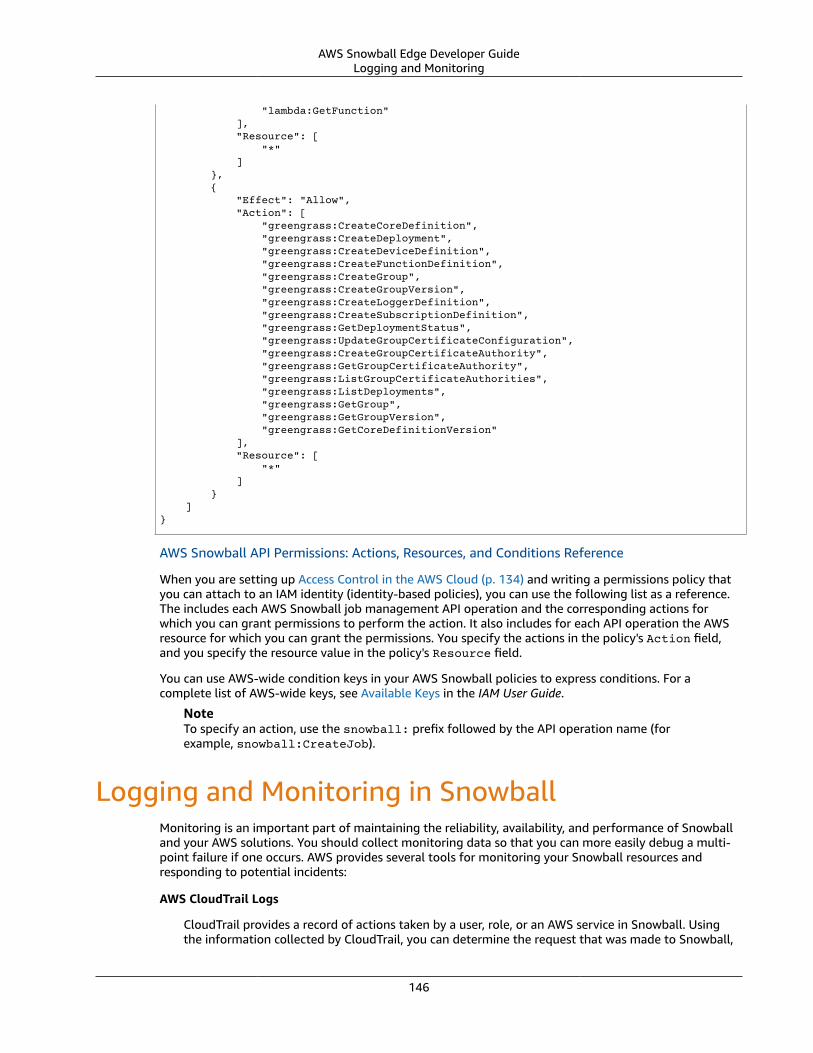
AWS Snowball Edge Developer GuideLogging and Monitoring
"lambda:GetFunction" ], "Resource": [ "*" ] }, { "Effect": "Allow", "Action": [ "greengrass:CreateCoreDefinition", "greengrass:CreateDeployment", "greengrass:CreateDeviceDefinition", "greengrass:CreateFunctionDefinition", "greengrass:CreateGroup", "greengrass:CreateGroupVersion", "greengrass:CreateLoggerDefinition", "greengrass:CreateSubscriptionDefinition", "greengrass:GetDeploymentStatus", "greengrass:UpdateGroupCertificateConfiguration", "greengrass:CreateGroupCertificateAuthority", "greengrass:GetGroupCertificateAuthority", "greengrass:ListGroupCertificateAuthorities", "greengrass:ListDeployments", "greengrass:GetGroup", "greengrass:GetGroupVersion", "greengrass:GetCoreDefinitionVersion" ], "Resource": [ "*" ] } ]}
AWS Snowball API Permissions: Actions, Resources, and Conditions Reference
When you are setting up Access Control in the AWS Cloud (p. 134) and writing a permissions policy thatyou can attach to an IAM identity (identity-based policies), you can use the following list as a reference.The includes each AWS Snowball job management API operation and the corresponding actions forwhich you can grant permissions to perform the action. It also includes for each API operation the AWSresource for which you can grant the permissions. You specify the actions in the policy's Action field,and you specify the resource value in the policy's Resource field.
You can use AWS-wide condition keys in your AWS Snowball policies to express conditions. For acomplete list of AWS-wide keys, see Available Keys in the IAM User Guide.
NoteTo specify an action, use the snowball: prefix followed by the API operation name (forexample, snowball:CreateJob).
Logging and Monitoring in SnowballMonitoring is an important part of maintaining the reliability, availability, and performance of Snowballand your AWS solutions. You should collect monitoring data so that you can more easily debug a multi-point failure if one occurs. AWS provides several tools for monitoring your Snowball resources andresponding to potential incidents:
AWS CloudTrail Logs
CloudTrail provides a record of actions taken by a user, role, or an AWS service in Snowball. Usingthe information collected by CloudTrail, you can determine the request that was made to Snowball,
146
AWS Snowball Edge Developer GuideCompliance Validation
the IP address from which the request was made, who made the request, when it was made, andadditional details. For more information, see Logging AWS Snowball Edge API Calls with AWSCloudTrail (p. 152).
Compliance Validation for SnowballThird-party auditors assess the security and compliance of Snowball as part of multiple AWS complianceprograms, such as SOC, PCI, FedRAMP, HIPAA, and others.
For a list of AWS services in scope of specific compliance programs, see AWS Services in Scope byCompliance Program. For general information, see AWS Compliance Programs.
You can download third-party audit reports using AWS Artifact. For more information, see DownloadingReports in AWS Artifact.
Your compliance responsibility when using Snowball is determined by the sensitivity of your data, yourorganization’s compliance objectives, and applicable laws and regulations. AWS provides the followingresources to help with compliance:
• Security and Compliance Quick Start Guides – These deployment guides discuss architecturalconsiderations and provide steps for deploying security- and compliance-focused baselineenvironments on AWS.
• Architecting for HIPAA Security and Compliance Whitepaper – This whitepaper describes howcompanies can use AWS to create HIPAA-compliant applications.
• AWS Compliance Resources – This collection of workbooks and guides might apply to your industryand location.
• AWS Config – This AWS service assesses how well your resource configurations comply with internalpractices, industry guidelines, and regulations.
• AWS Security Hub – This AWS service provides a comprehensive view of your security state within AWSthat helps you check your compliance with security industry standards and best practices.
ResilienceThe AWS global infrastructure is built around AWS Regions and Availability Zones. AWS Regions providemultiple physically separated and isolated Availability Zones, which are connected with low-latency,high-throughput, and highly redundant networking. With Availability Zones, you can design and operateapplications and databases that automatically fail over between Availability Zones without interruption.Availability Zones are more highly available, fault tolerant, and scalable than traditional single ormultiple data center infrastructures.
For more information about AWS Regions and Availability Zones, see AWS Global Infrastructure.
Infrastructure Security in SnowballAs a managed service, AWS Snowball is protected by the AWS global network security procedures thatare described in the Amazon Web Services: Overview of Security Processes whitepaper.
You use AWS published API calls to access Snowball through the network. Clients must supportTransport Layer Security (TLS) 1.0 or later. We recommend TLS 1.2 or later. Clients must also supportcipher suites with perfect forward secrecy (PFS) such as Ephemeral Diffie-Hellman (DHE) or Elliptic CurveEphemeral Diffie-Hellman (ECDHE). Most modern systems such as Java 7 and later support these modes.
147

AWS Snowball Edge Developer GuideInfrastructure Security
Additionally, requests must be signed by using an access key ID and a secret access key that is associatedwith an IAM principal. Or you can use the AWS Security Token Service (AWS STS) to generate temporarysecurity credentials to sign requests.
148
AWS Snowball Edge Developer GuideChecksum Validation of Transferred Data
Data Validation with Snowball EdgeJobs
Following, you'll find information on how Snowball Edge validates data transfers, and the manual stepsyou can take to ensure data integrity during and after a job.
Topics• Checksum Validation of Transferred Data (p. 149)• Common Validation Errors (p. 149)• Manual Data Validation for Snowball Edge After Import into Amazon S3 (p. 150)
Checksum Validation of Transferred DataWhen you copy a file from a local data source using the Amazon S3 Adapter for Snowball to theSnowball Edge, a number of checksums are created. These checksums are used to automatically validatedata as it's transferred.
At a high level, these checksums are created for each file (or for parts of large files). For the SnowballEdge, these checksums are visible when you run the following AWS CLI command against a bucket on thedevice. The checksums are used to validate the integrity of your data throughout the transfers and willensure that your data is copied correctly.
aws s3api list-objects --bucket bucket-name --endpoint http://ip:8080 --profile edge-profile
When these checksums don't match, we won't import the associated data into Amazon S3.
Common Validation ErrorsValidations errors can occur. Whenever there's a validation error, the corresponding data (a file or a partof a large file) is not written to the destination. The common causes for validation errors are as follows:
• Attempting to copy symbolic links.• Attempting to copy files that are actively being modified. This will not result in a validation error, but it
will cause the checksums to not match at the end of the transfer.• Attempting to copy files larger than 5 TB in size.• Attempting to copy part sizes larger than 512 MB in size.• Attempting to copy files to a Snowball Edge that is already at full data storage capacity.• Attempting to copy files to a Snowball Edge that doesn't follow the Object Key Naming Guidelines for
Amazon S3.
Whenever any one of these validation errors occurs, it is logged. You can take steps to manually identifywhat files failed validation and why as described in the following sections.
149

AWS Snowball Edge Developer GuideManual Data Validation for SnowballEdge After Import into Amazon S3
Manual Data Validation for Snowball Edge AfterImport into Amazon S3
After an import job has completed, you have several options to manually validate the data in AmazonS3, as described following.
Check job completion report and associated logs
Whenever data is imported into or exported out of Amazon S3, you get a downloadable PDF job report.For import jobs, this report becomes available at the end of the import process. For more information,see Get Your Job Completion Report and Logs in the Console (p. 31).
S3 inventory
If you transferred a huge amount of data into Amazon S3 in multiple jobs, going through each jobcompletion report might not be an efficient use of time. Instead, you can get an inventory of all theobjects in one or more Amazon S3 buckets. Amazon S3 inventory provides a comma-separated value(CSV) file showing your objects and their corresponding metadata on a daily or weekly basis. This filecovers objects for an Amazon S3 bucket or a shared prefix (that is, objects that have names that beginwith a common string).
Once you have the inventory of the Amazon S3 buckets that you've imported data into, you can easilycompare it against the files that you transferred on your source data location. In this way, you can quicklyidentify what files where not transferred.
Use the Amazon S3 sync command
If your workstation can connect the internet, you can do a final validation of all your transferred filesby running the AWS CLI command aws s3 sync. This command syncs directories and S3 prefixes. Thiscommand recursively copies new and updated files from the source directory to the destination. Formore information, see https://docs.amazonaws.cn/cli/latest/reference/s3/sync.html.
ImportantIf you specify your local storage as the destination for this command, make sure that you have abackup of the files you sync against. These files are overwritten by the contents in the specifiedAmazon S3 source.
150
AWS Snowball Edge Developer Guide
Notifications for the AWS SnowballEdge
The AWS Snowball Edge device is designed to take advantage of the robust notifications deliveredby Amazon Simple Notification Service (Amazon SNS). While creating a job, you can provide a list ofcomma-separated email addresses to receive email notifications for your job.
You configure Amazon SNS to send text messages for these status notifications from the Amazon SNSconsole. For more information, see Sending and Receiving SMS Notifications Using Amazon SNS.
After you create your job, every email address that you specified to get Amazon SNS notificationsreceives an email from AWS Notifications asking for confirmation to the topic subscription. For eachemail address to receive additional notifications, a user of the account must confirm the subscription bychoosing Confirm subscription.
The Amazon SNS notification emails are tailored for each triggering state, and include a link to the AWSSnowball Management Console.
151
AWS Snowball Edge Developer GuideAWS Snowball Edge Information in CloudTrail
Logging AWS Snowball Edge APICalls with AWS CloudTrail
The AWS Snowball Edge device is integrated with AWS CloudTrail, a service that provides a record ofactions taken by a user, role, or an AWS service in AWS Snowball Edge. CloudTrail captures all API callsfor AWS Snowball Edge as events. The calls captured include calls from the AWS Snowball Edge consoleand code calls to the AWS Snowball Edge API operations. If you create a trail, you can enable continuousdelivery of CloudTrail events to an Amazon S3 bucket, including events for AWS Snowball Edge. Ifyou don't configure a trail, you can still view the most recent events in the CloudTrail console in Eventhistory. Using the information collected by CloudTrail, you can determine the request that was made toAWS Snowball Edge, the IP address from which the request was made, who made the request, when itwas made, and additional details.
To learn more about CloudTrail, see the AWS CloudTrail User Guide.
AWS Snowball Edge Information in CloudTrailCloudTrail is enabled on your AWS account when you create the account. When activity occurs in AWSSnowball Edge, that activity is recorded in a CloudTrail event along with other AWS service eventsin Event history. You can view, search, and download recent events in your AWS account. For moreinformation, see Viewing Events with CloudTrail Event History in the AWS CloudTrail User Guide.
For an ongoing record of events in your AWS account, including events for AWS Snowball Edge, create atrail. A trail enables CloudTrail to deliver log files to an Amazon S3 bucket. By default, when you create atrail in the console, the trail applies to all AWS Regions. The trail logs events from all AWS Regions in theAWS partition and delivers the log files to the Amazon S3 bucket that you specify. Additionally, you canconfigure other AWS services to further analyze and act upon the event data collected in CloudTrail logs.For more information, see the following topics in the AWS CloudTrail User Guide:
• Overview for Creating a Trail• CloudTrail Supported Services and Integrations• Configuring Amazon SNS Notifications for CloudTrail• Receiving CloudTrail Log Files from Multiple Regions and Receiving CloudTrail Log Files from Multiple
Accounts
All job management actions are documented in the AWS Snowball API Reference and are logged byCloudTrail with the following exceptions:
• The CreateAddress operation is not logged to protect customer sensitive information.• All read-only API calls (for API operations beginning with the prefix of Get, Describe, or List) don't
record response elements.
Every event or log entry contains information about who generated the request. The identityinformation helps you determine the following:
• Whether the request was made with root or AWS Identity and Access Management (IAM) usercredentials.
• Whether the request was made with temporary security credentials for a role or federated user.
152
AWS Snowball Edge Developer GuideUnderstanding Log File Entries for AWS Snowball Edge
• Whether the request was made by another AWS service.
For more information, see the CloudTrail userIdentity Element in the AWS CloudTrail User Guide.
Understanding Log File Entries for AWS SnowballEdge
A trail is a configuration that enables delivery of events as log files to an Amazon S3 bucket that youspecify. CloudTrail log files contain one or more log entries. An event represents a single request fromany source and includes information about the requested action, the date and time of the action, requestparameters, and so on. CloudTrail log files aren't an ordered stack trace of the public API calls, so theydon't appear in any specific order.
The following example shows a CloudTrail log entry that demonstrates the DescribeJob operation.
{"Records": [ { "eventVersion": "1.05", "userIdentity": { "type": "Root", "principalId": "111122223333", "arn": "arn:aws:iam::111122223333:root", "accountId": "111122223333", "accessKeyId": "AKIAIOSFODNN7EXAMPLE", "sessionContext": {"attributes": { "mfaAuthenticated": "false", "creationDate": "2019-01-22T21:58:38Z" }}, "invokedBy": "signin.amazonaws.com" }, "eventTime": "2019-01-22T22:02:21Z", "eventSource": "snowball.amazonaws.com", "eventName": "DescribeJob", "awsRegion": "eu-west-1", "sourceIPAddress": "192.0.2.0", "userAgent": "signin.amazonaws.com", "requestParameters": {"jobId": "JIDa1b2c3d4-0123-abcd-1234-0123456789ab"}, "responseElements": null, "requestID": "12345678-abcd-1234-abcd-ab0123456789", "eventID": "33c7ff7c-3efa-4d81-801e-7489fe6fff62", "eventType": "AwsApiCall", "recipientAccountId": "444455556666" }]}
153
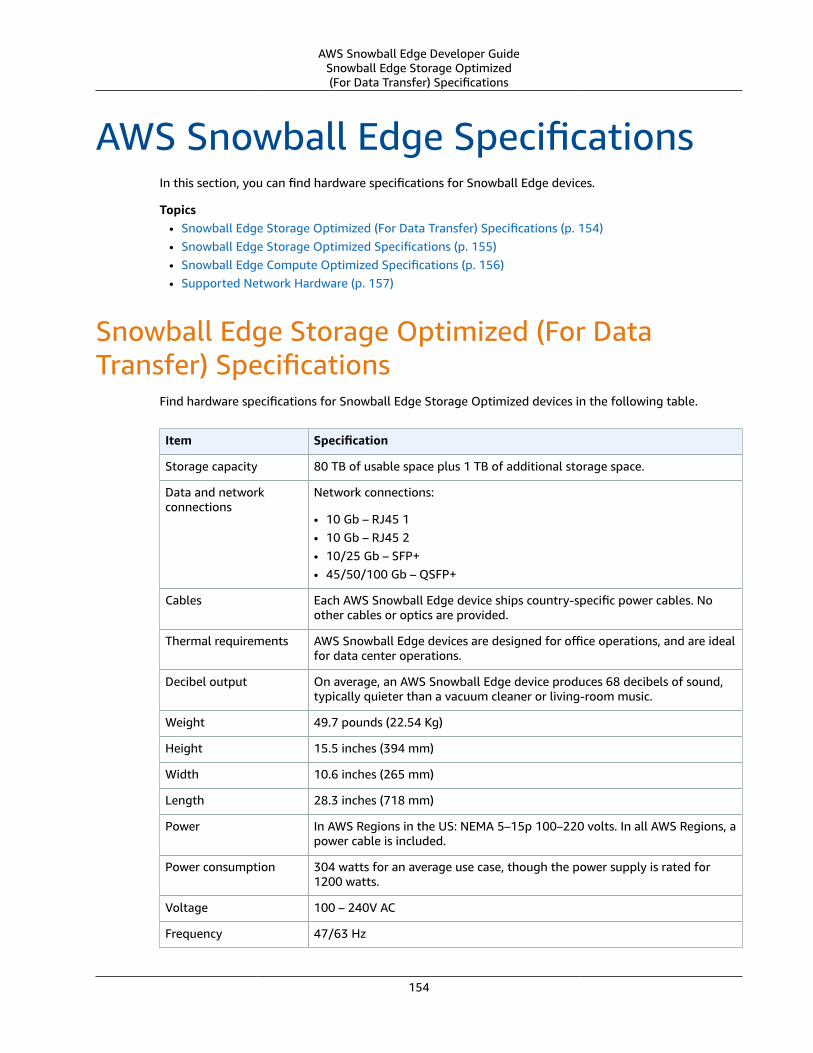
AWS Snowball Edge Developer GuideSnowball Edge Storage Optimized(For Data Transfer) Specifications
AWS Snowball Edge SpecificationsIn this section, you can find hardware specifications for Snowball Edge devices.
Topics• Snowball Edge Storage Optimized (For Data Transfer) Specifications (p. 154)• Snowball Edge Storage Optimized Specifications (p. 155)• Snowball Edge Compute Optimized Specifications (p. 156)• Supported Network Hardware (p. 157)
Snowball Edge Storage Optimized (For DataTransfer) Specifications
Find hardware specifications for Snowball Edge Storage Optimized devices in the following table.
Item Specification
Storage capacity 80 TB of usable space plus 1 TB of additional storage space.
Data and networkconnections
Network connections:
• 10 Gb – RJ45 1• 10 Gb – RJ45 2• 10/25 Gb – SFP+• 45/50/100 Gb – QSFP+
Cables Each AWS Snowball Edge device ships country-specific power cables. Noother cables or optics are provided.
Thermal requirements AWS Snowball Edge devices are designed for office operations, and are idealfor data center operations.
Decibel output On average, an AWS Snowball Edge device produces 68 decibels of sound,typically quieter than a vacuum cleaner or living-room music.
Weight 49.7 pounds (22.54 Kg)
Height 15.5 inches (394 mm)
Width 10.6 inches (265 mm)
Length 28.3 inches (718 mm)
Power In AWS Regions in the US: NEMA 5–15p 100–220 volts. In all AWS Regions, apower cable is included.
Power consumption 304 watts for an average use case, though the power supply is rated for1200 watts.
Voltage 100 – 240V AC
Frequency 47/63 Hz
154
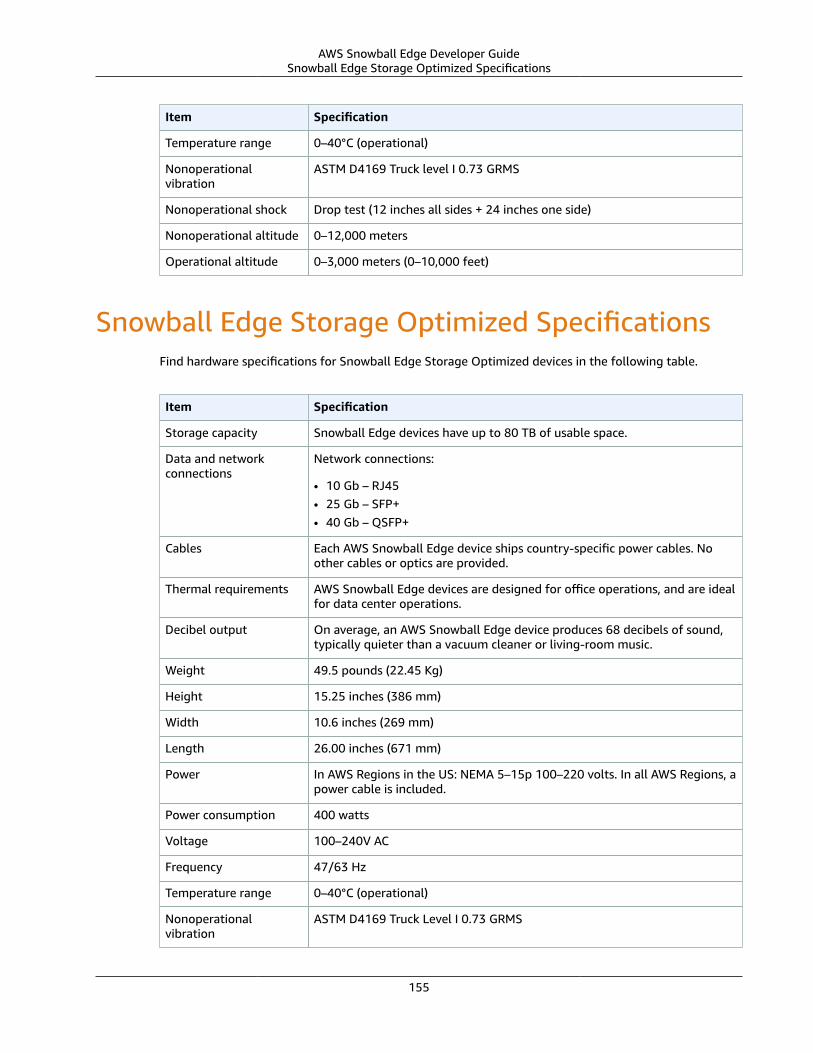
AWS Snowball Edge Developer GuideSnowball Edge Storage Optimized Specifications
Item Specification
Temperature range 0–40°C (operational)
Nonoperationalvibration
ASTM D4169 Truck level I 0.73 GRMS
Nonoperational shock Drop test (12 inches all sides + 24 inches one side)
Nonoperational altitude 0–12,000 meters
Operational altitude 0–3,000 meters (0–10,000 feet)
Snowball Edge Storage Optimized SpecificationsFind hardware specifications for Snowball Edge Storage Optimized devices in the following table.
Item Specification
Storage capacity Snowball Edge devices have up to 80 TB of usable space.
Data and networkconnections
Network connections:
• 10 Gb – RJ45• 25 Gb – SFP+• 40 Gb – QSFP+
Cables Each AWS Snowball Edge device ships country-specific power cables. Noother cables or optics are provided.
Thermal requirements AWS Snowball Edge devices are designed for office operations, and are idealfor data center operations.
Decibel output On average, an AWS Snowball Edge device produces 68 decibels of sound,typically quieter than a vacuum cleaner or living-room music.
Weight 49.5 pounds (22.45 Kg)
Height 15.25 inches (386 mm)
Width 10.6 inches (269 mm)
Length 26.00 inches (671 mm)
Power In AWS Regions in the US: NEMA 5–15p 100–220 volts. In all AWS Regions, apower cable is included.
Power consumption 400 watts
Voltage 100–240V AC
Frequency 47/63 Hz
Temperature range 0–40°C (operational)
Nonoperationalvibration
ASTM D4169 Truck Level I 0.73 GRMS
155
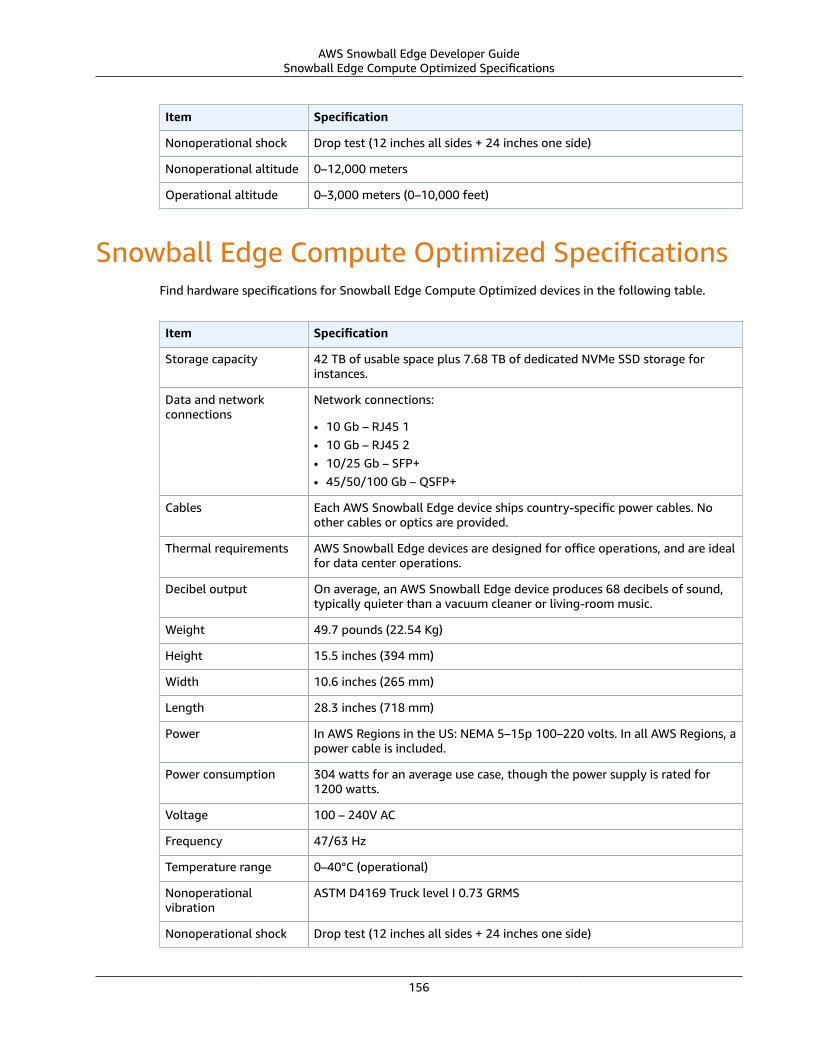
AWS Snowball Edge Developer GuideSnowball Edge Compute Optimized Specifications
Item Specification
Nonoperational shock Drop test (12 inches all sides + 24 inches one side)
Nonoperational altitude 0–12,000 meters
Operational altitude 0–3,000 meters (0–10,000 feet)
Snowball Edge Compute Optimized SpecificationsFind hardware specifications for Snowball Edge Compute Optimized devices in the following table.
Item Specification
Storage capacity 42 TB of usable space plus 7.68 TB of dedicated NVMe SSD storage forinstances.
Data and networkconnections
Network connections:
• 10 Gb – RJ45 1• 10 Gb – RJ45 2• 10/25 Gb – SFP+• 45/50/100 Gb – QSFP+
Cables Each AWS Snowball Edge device ships country-specific power cables. Noother cables or optics are provided.
Thermal requirements AWS Snowball Edge devices are designed for office operations, and are idealfor data center operations.
Decibel output On average, an AWS Snowball Edge device produces 68 decibels of sound,typically quieter than a vacuum cleaner or living-room music.
Weight 49.7 pounds (22.54 Kg)
Height 15.5 inches (394 mm)
Width 10.6 inches (265 mm)
Length 28.3 inches (718 mm)
Power In AWS Regions in the US: NEMA 5–15p 100–220 volts. In all AWS Regions, apower cable is included.
Power consumption 304 watts for an average use case, though the power supply is rated for1200 watts.
Voltage 100 – 240V AC
Frequency 47/63 Hz
Temperature range 0–40°C (operational)
Nonoperationalvibration
ASTM D4169 Truck level I 0.73 GRMS
Nonoperational shock Drop test (12 inches all sides + 24 inches one side)
156
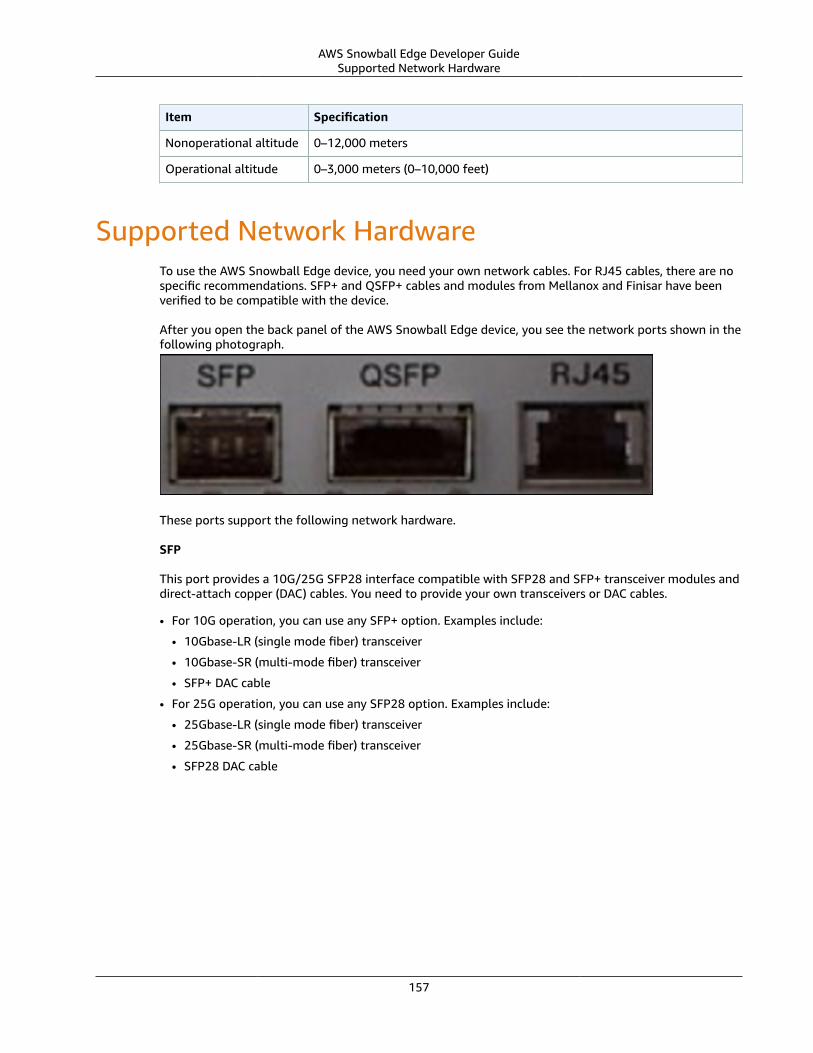
AWS Snowball Edge Developer GuideSupported Network Hardware
Item Specification
Nonoperational altitude 0–12,000 meters
Operational altitude 0–3,000 meters (0–10,000 feet)
Supported Network HardwareTo use the AWS Snowball Edge device, you need your own network cables. For RJ45 cables, there are nospecific recommendations. SFP+ and QSFP+ cables and modules from Mellanox and Finisar have beenverified to be compatible with the device.
After you open the back panel of the AWS Snowball Edge device, you see the network ports shown in thefollowing photograph.
These ports support the following network hardware.
SFP
This port provides a 10G/25G SFP28 interface compatible with SFP28 and SFP+ transceiver modules anddirect-attach copper (DAC) cables. You need to provide your own transceivers or DAC cables.
• For 10G operation, you can use any SFP+ option. Examples include:
• 10Gbase-LR (single mode fiber) transceiver
• 10Gbase-SR (multi-mode fiber) transceiver
• SFP+ DAC cable
• For 25G operation, you can use any SFP28 option. Examples include:
• 25Gbase-LR (single mode fiber) transceiver
• 25Gbase-SR (multi-mode fiber) transceiver
• SFP28 DAC cable
157
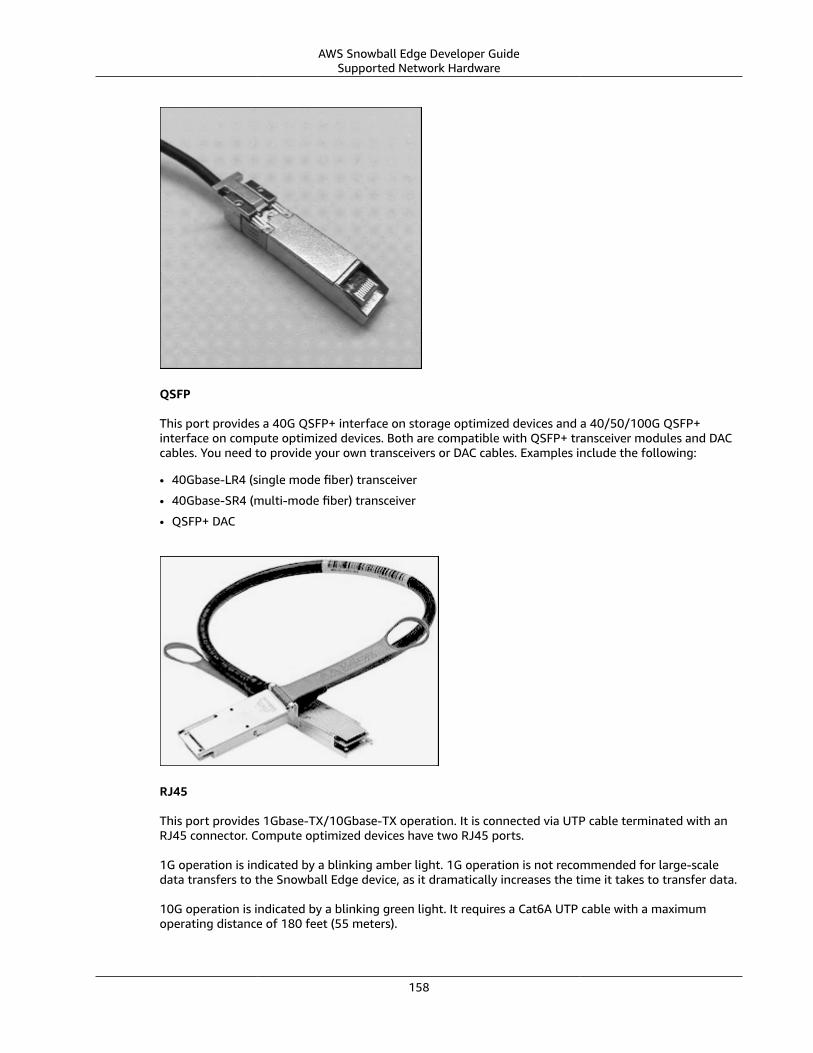
AWS Snowball Edge Developer GuideSupported Network Hardware
QSFP
This port provides a 40G QSFP+ interface on storage optimized devices and a 40/50/100G QSFP+interface on compute optimized devices. Both are compatible with QSFP+ transceiver modules and DACcables. You need to provide your own transceivers or DAC cables. Examples include the following:
• 40Gbase-LR4 (single mode fiber) transceiver
• 40Gbase-SR4 (multi-mode fiber) transceiver
• QSFP+ DAC
RJ45
This port provides 1Gbase-TX/10Gbase-TX operation. It is connected via UTP cable terminated with anRJ45 connector. Compute optimized devices have two RJ45 ports.
1G operation is indicated by a blinking amber light. 1G operation is not recommended for large-scaledata transfers to the Snowball Edge device, as it dramatically increases the time it takes to transfer data.
10G operation is indicated by a blinking green light. It requires a Cat6A UTP cable with a maximumoperating distance of 180 feet (55 meters).
158
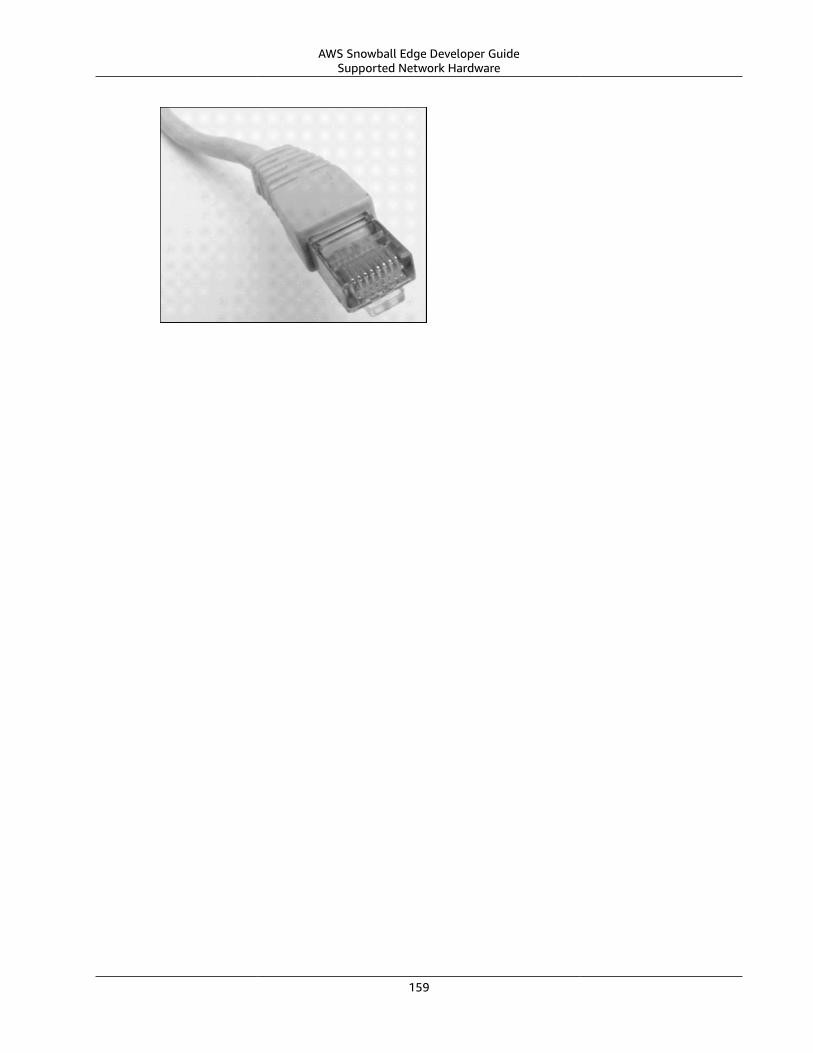
AWS Snowball Edge Developer GuideSupported Network Hardware
159
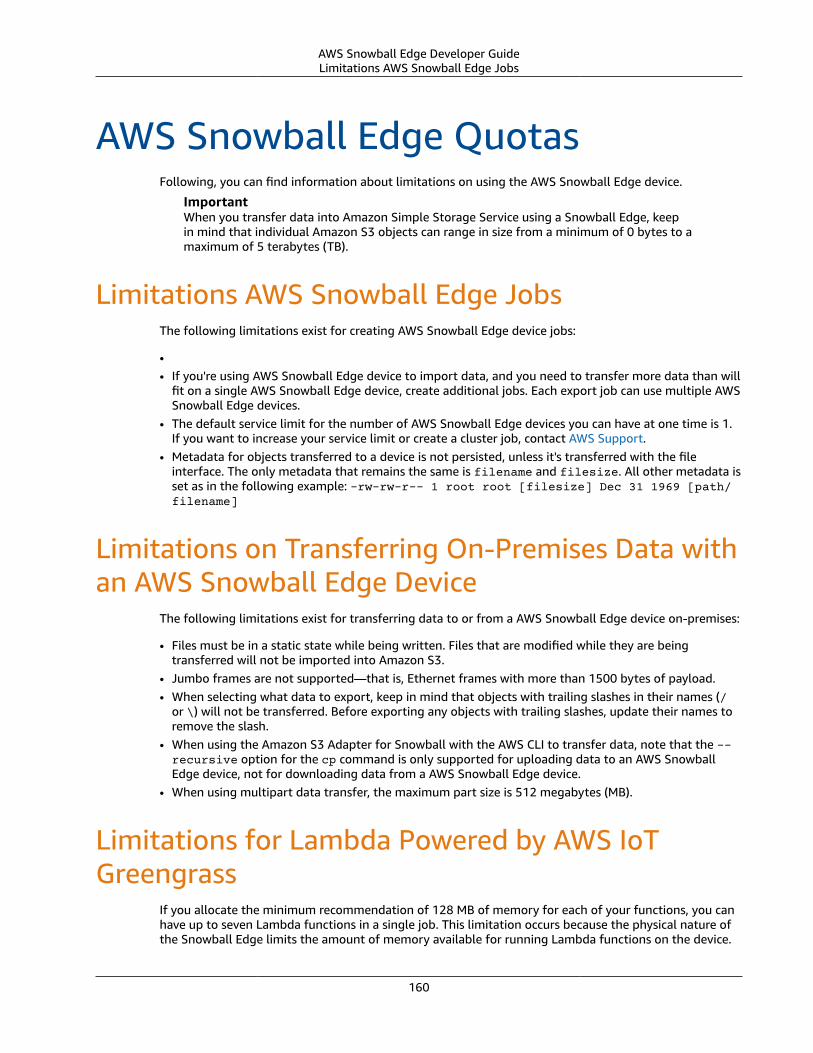
AWS Snowball Edge Developer GuideLimitations AWS Snowball Edge Jobs
AWS Snowball Edge QuotasFollowing, you can find information about limitations on using the AWS Snowball Edge device.
ImportantWhen you transfer data into Amazon Simple Storage Service using a Snowball Edge, keepin mind that individual Amazon S3 objects can range in size from a minimum of 0 bytes to amaximum of 5 terabytes (TB).
Limitations AWS Snowball Edge JobsThe following limitations exist for creating AWS Snowball Edge device jobs:
•• If you're using AWS Snowball Edge device to import data, and you need to transfer more data than will
fit on a single AWS Snowball Edge device, create additional jobs. Each export job can use multiple AWSSnowball Edge devices.
• The default service limit for the number of AWS Snowball Edge devices you can have at one time is 1.If you want to increase your service limit or create a cluster job, contact AWS Support.
• Metadata for objects transferred to a device is not persisted, unless it's transferred with the fileinterface. The only metadata that remains the same is filename and filesize. All other metadata isset as in the following example: -rw-rw-r-- 1 root root [filesize] Dec 31 1969 [path/filename]
Limitations on Transferring On-Premises Data withan AWS Snowball Edge Device
The following limitations exist for transferring data to or from a AWS Snowball Edge device on-premises:
• Files must be in a static state while being written. Files that are modified while they are beingtransferred will not be imported into Amazon S3.
• Jumbo frames are not supported—that is, Ethernet frames with more than 1500 bytes of payload.• When selecting what data to export, keep in mind that objects with trailing slashes in their names (/
or \) will not be transferred. Before exporting any objects with trailing slashes, update their names toremove the slash.
• When using the Amazon S3 Adapter for Snowball with the AWS CLI to transfer data, note that the --recursive option for the cp command is only supported for uploading data to an AWS SnowballEdge device, not for downloading data from a AWS Snowball Edge device.
• When using multipart data transfer, the maximum part size is 512 megabytes (MB).
Limitations for Lambda Powered by AWS IoTGreengrass
If you allocate the minimum recommendation of 128 MB of memory for each of your functions, you canhave up to seven Lambda functions in a single job. This limitation occurs because the physical nature ofthe Snowball Edge limits the amount of memory available for running Lambda functions on the device.
160
AWS Snowball Edge Developer GuideLimitations on Shipping an AWS Snowball Edge
Limitations on Shipping an AWS Snowball EdgeThe following limitations exist for shipping a AWS Snowball Edge device:
• AWS will not ship a AWS Snowball Edge device to a post office box.• AWS will not ship a AWS Snowball Edge device between non-US regions—for example, from EU
(Ireland) to EU (Frankfurt), or to Asia Pacific (Sydney).• Moving a AWS Snowball Edge device to an address outside of the country specified when the job was
created is not allowed and is a violation of the AWS Service Terms.
For more information on shipping, see Shipping Considerations for AWS Snowball (p. 117).
Limitations on Processing Your Returned AWSSnowball Edge for Import
To import your data into AWS, the device must meet the following requirements:
• The AWS Snowball Edge device must not be compromised. Except for opening the three doors on thefront, back, and top, or to add and replace the optional air filter, don't open the AWS Snowball Edgedevice for any reason.
• The device must not be physically damaged. You can prevent damage by closing the three doors onthe AWS Snowball Edge device until the latches make an audible clicking sound.
• The AWS Snowball Edge device's E Ink display must be visible, and must show the return label thatwas automatically generated when you finished transferring your data onto the AWS Snowball Edgedevice.
NoteAll AWS Snowball Edge devices returned that do not meet these requirements are erasedwithout work performed on them.
161
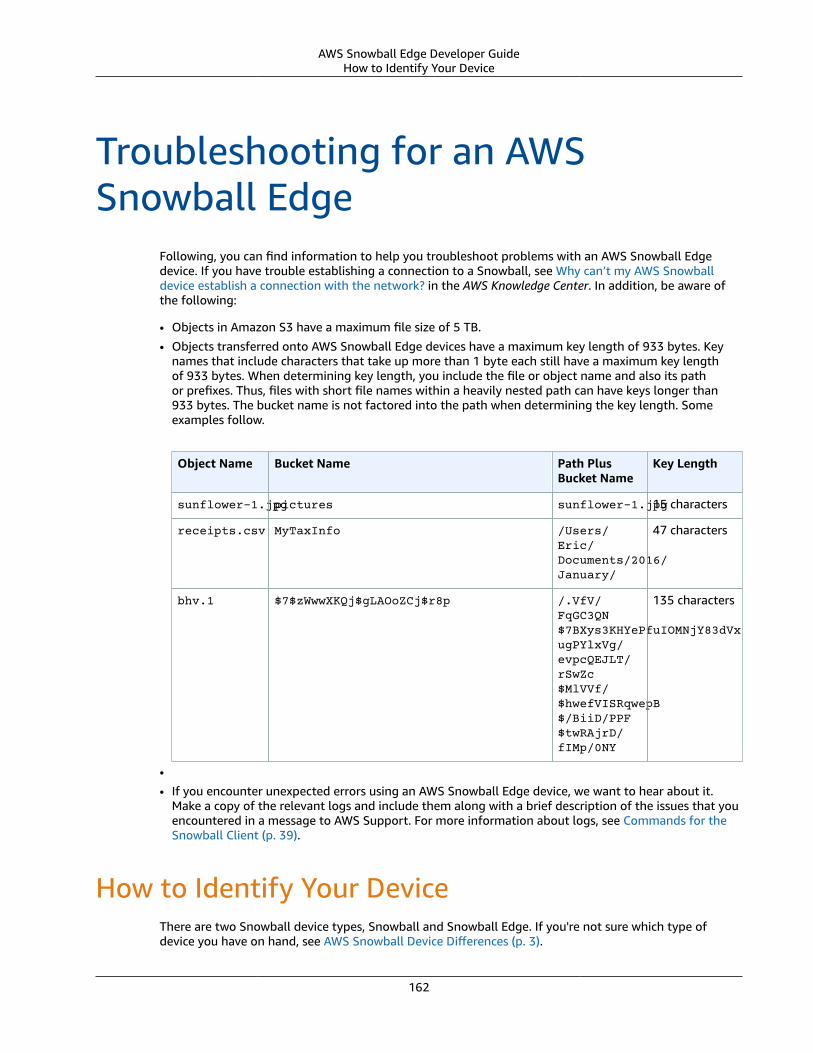
AWS Snowball Edge Developer GuideHow to Identify Your Device
Troubleshooting for an AWSSnowball Edge
Following, you can find information to help you troubleshoot problems with an AWS Snowball Edgedevice. If you have trouble establishing a connection to a Snowball, see Why can’t my AWS Snowballdevice establish a connection with the network? in the AWS Knowledge Center. In addition, be aware ofthe following:
• Objects in Amazon S3 have a maximum file size of 5 TB.
• Objects transferred onto AWS Snowball Edge devices have a maximum key length of 933 bytes. Keynames that include characters that take up more than 1 byte each still have a maximum key lengthof 933 bytes. When determining key length, you include the file or object name and also its pathor prefixes. Thus, files with short file names within a heavily nested path can have keys longer than933 bytes. The bucket name is not factored into the path when determining the key length. Someexamples follow.
Object Name Bucket Name Path PlusBucket Name
Key Length
sunflower-1.jpgpictures sunflower-1.jpg15 characters
receipts.csv MyTaxInfo /Users/Eric/Documents/2016/January/
47 characters
bhv.1 $7$zWwwXKQj$gLAOoZCj$r8p /.VfV/FqGC3QN$7BXys3KHYePfuIOMNjY83dVxugPYlxVg/evpcQEJLT/rSwZc$MlVVf/$hwefVISRqwepB$/BiiD/PPF$twRAjrD/fIMp/0NY
135 characters
•
• If you encounter unexpected errors using an AWS Snowball Edge device, we want to hear about it.Make a copy of the relevant logs and include them along with a brief description of the issues that youencountered in a message to AWS Support. For more information about logs, see Commands for theSnowball Client (p. 39).
How to Identify Your DeviceThere are two Snowball device types, Snowball and Snowball Edge. If you're not sure which type ofdevice you have on hand, see AWS Snowball Device Differences (p. 3).
162
AWS Snowball Edge Developer GuideTroubleshooting Connection Problems
Troubleshooting Connection ProblemsThe following information can help you troubleshoot certain issues that you might have with connectingto your Snowball Edge:
• Routers and switches that work at a rate of 100 megabytes per second don't work with a SnowballEdge. We recommend that you use a switch that works at a rate of 1 GB per second (or faster).
• If you experience odd connection errors with the device, power off the Snowball Edge, unplug all thecables, and leave it for 10 minutes. After 10 minutes have passed, restart the device, and try again.
• Ensure that no antivirus software or firewalls block the Snowball Edge device's network connection.• Be aware that the file interface and Amazon S3 Adapter for Snowball have different IP addresses.
For more advanced connection troubleshooting, you can take the following steps:
• If you can't communicate with the Snowball Edge, ping the IP address of the device. If the ping returnsno connect, confirm the IP address for the device and confirm your local network configuration.
• If the IP address is correct and the lights on the back of the device are flashing, then use telnet to testthe device on ports 22 and 8080. Testing port 22 determines if the Snowball Edge is working correctly.Testing port 8080 ensures that the device can write to the Amazon S3 buckets on it. If you can connecton port 22 but not on port 8080, first power off the Snowball Edge and then unplug all the cables.Leave the device for 10 minutes, and then reconnect it and start again.
Troubleshooting Manifest File ProblemsEach job has a specific manifest file associated with it. If you create multiple jobs, track which manifest isfor which job.
If you lose a manifest file or if a manifest file is corrupted, you can redownload the manifest file for aspecific job. You do so using the console, AWS CLI, or one of the AWS APIs.
Troubleshooting Credentials ProblemsUse the following topics to help you resolve credentials issues with the Snowball Edge.
Unable to Locate AWS CLI CredentialsIf you're communicating with the AWS Snowball Edge device through the Amazon S3 Adapter forSnowball by using the AWS CLI, you might encounter an error message that says Unable to locatecredentials. You can configure credentials by running "aws configure".
Action to take
Configure the AWS credentials that the AWS CLI uses to run commands for you. For more information,see Configuring the AWS Command Line Interface in the AWS Command Line Interface User Guide.
Error Message: Check Your Secret Access Key andSigningWhen using the Amazon S3 Adapter for Snowball to transfer data to a Snowball Edge, you mightencounter the following error message.
163
AWS Snowball Edge Developer GuideTroubleshooting Data Transfer Problems
An error occurred (SignatureDoesNotMatch) when calling the CreateMultipartUpload operation: The request signature we calculated does not match the signature you provided. Check your AWS secret access key and signing method. For more details go to:http://docs.aws.amazon.com/AmazonS3/latest/dev/RESTAuthentication.html#ConstructingTheAuthenticationHeader
Action to take
Get your credentials from the Snowball client. For more information, see Getting Credentials (p. 44).
Troubleshooting Data Transfer ProblemsIf you encounter performance issues while transferring data to or from a Snowball Edge, seePerformance (p. 34) for recommendations and guidance on improving transfer performance. Thefollowing can help you troubleshoot issues that you might have with your data transfer to or from aSnowball Edge:
• You can't transfer data into the root directory of the Snowball Edge. If you have trouble transferringdata into the device, make sure that you're transferring data into a subdirectory. The top-levelsubdirectories have the names of the Amazon S3 buckets that you included in the job. Put your data inthose subdirectories.
• If you're using Linux and you can't upload files with UTF-8 characters to an AWS Snowball Edge device,it might be because your Linux server doesn't recognize UTF-8 character encoding. You can correctthis issue by installing the locales package on your Linux server and configuring it to use one ofthe UTF-8 locales like en_US.UTF-8. You can configure the locales package by exporting theenvironment variable LC_ALL, for example: export LC_ALL=en_US.UTF-8
• When you use the Amazon S3 Adapter for Snowball with the AWS CLI, you can work with files orfolders with spaces in their names, such as my photo.jpg or My Documents. However, make surethat you handle the spaces properly. For more information, see Specifying Parameter Values for theAWS Command Line Interface in the AWS Command Line Interface User Guide.
Troubleshooting Problems with Transferring Datawith the File InterfaceIf you encounter issues while transferring data with the file interface, keep the following considerationsin mind:
• The maximum size of a file that you can transfer to the file interface on a Snowball Edge is 150 GB. Ifyou try to transfer a file larger than 150 GB, the file interface writes the first 150 GB of that file, andthen returns an error message indicating that the file is too large.
• We recommend that you use only one method of reading and writing data to each bucket on aSnowball Edge device. Using both the file interface and the Amazon S3 Adapter for Snowball on thesame bucket might result in undefined behavior.
• The file interface supports all NFS file operations, except truncation, renaming, and changingownership. Requests that use these unsupported file operations are rejected with error messagessent to your NFS client. Attempts to change a file's permissions after the file has been created on theSnowball Edge are ignored without an error message.
• If the Snowball Edge has a power failure or is rebooted, data in the file interface buffer persists.On reboot, this buffered data is uploaded to buckets on the device. When Write status on the Fileinterface tab shows 100 percent with a green progress bar, all data in the file interface buffer isuploaded to the buckets on the device.
164
AWS Snowball Edge Developer GuideTroubleshooting AWS CLI Problems
• Don't write data to a Snowball Edge that is full. Also, don't write more data to a Snowball Edge thancan fit in the remaining available storage. Either action causes errors that might corrupt your data. Werecommend that you use the Snowball client's snowballEdge status command to determine theremaining amount of space on the Snowball Edge. Then compare the remaining space to the amountof data that you want to copy using the file interface before copying the data.
• When you've finished copying data to the Snowball Edge using the file interface, you must disable thefile interface. You do so to avoid losing any data that might be in the buffer but not yet written to theAmazon S3 bucket. For more information, see Disabling the File Interface (p. 66).
• We recommend that you keep a local copy of all data that is written to the file interface until theSnowball Edge has been shipped back to AWS and the data has been ingested to Amazon S3.
Troubleshooting AWS CLI ProblemsUse the following topics to help you resolve problems when working with an AWS Snowball Edge deviceand the AWS CLI.
AWS CLI Error Message: "Profile Cannot Be Null"When working with the AWS CLI, you might encounter an error message that says "Profile cannotbe null". You can encounter this error if the AWS CLI hasn't been installed or an AWS CLI profile hasn'tbeen configured.
Action to take
Ensure that you have downloaded and configured the AWS CLI on your workstation. For moreinformation, see Install the AWS CLI Using the Bundled Installer (Linux, macOS, or Unix) in the AWSCommand Line Interface User Guide.
Null Pointer Error When Transferring Data with theAWS CLIWhen using the AWS CLI to transfer data, you might encounter a null pointer error. This error can occurin the following conditions:
• If the specified file name is misspelled, for example flowwer.png or flower.npg instead offlower.png
• If the specified path is incorrect, for example C:\Doccuments\flower.png instead of C:\Documents\flower.png
• If the file is corrupted
Action to take
Confirm that your file name and path are correct, and try again. If you continue to experience this issue,confirm that the file has not corrupted, abandon the transfer, or attempt repairs to the file.
Troubleshooting Import Job ProblemsSometimes files fail to import into Amazon S3. If the following issue occurs, try the actions specifiedto resolve your issue. If a file fails import, you might need to try importing it again. Importing it againmight require a new job for Snowball Edge.
165
AWS Snowball Edge Developer GuideTroubleshooting Export Job Problems
Files failed import into Amazon S3 due to invalid characters in object names
This problem occurs if a file or folder name has characters that aren't supported by Amazon S3. AmazonS3 has rules about what characters can be in object names. For more information, see Object KeyNaming Guidelines.
Action to take
If you encounter this issue, you see the list of files and folders that failed import in your job completionreport.
In some cases, the list is prohibitively large, or the files in the list are too large to transfer over theinternet. In these cases, you should create a new Snowball import job, change the file and folder namesto comply with Amazon S3 rules, and transfer the files again.
If the files are small and there isn't a large number of them, you can copy them to Amazon S3 throughthe AWS CLI or the AWS Management Console. For more information, see How Do I Upload Files andFolders to an S3 Bucket? in the Amazon Simple Storage Service Console User Guide.
Troubleshooting Export Job ProblemsSometimes files fail to export into your workstation. If the following issue occurs, try the actionsspecified to resolve your issue. If a file fails export, you might need to try exporting it again. Exporting itagain might require a new job for Snowball Edge.
Files failed export to a Microsoft Windows Server
A file can fail export to a Microsoft Windows Server if it or a related folder is named in a format notsupported by Windows. For example, if your file or folder name has a colon (:) in it, the export failsbecause Windows doesn't allow that character in file or folder names.
Action to take
1. Make a list of the names that are causing the error. You can find the names of the files and foldersthat failed export in your logs. For more information, see AWS Snowball Edge Logs (p. 46).
2. Change the names of the objects in Amazon S3 that are causing the issue to remove or replace theunsupported characters.
3. If the list of names is prohibitively large, or if the files in the list are too large to transfer over theinternet, create a new export job specifically for those objects.
If the files are small and there isn't a large number of them, copy the renamed objects from AmazonS3 through the AWS CLI or the AWS Management Console. For more information, see How Do IDownload an Object from an S3 Bucket? in the Amazon Simple Storage Service Console User Guide.
166
AWS Snowball Edge Developer GuideUsing the Snowball Client
Additional Information for SnowballEdge
Following, you can find additional information for Snowball Edge, including a discussion of features thatare still supported but not necessarily recommended.
Topics• Using the Snowball Client (p. 167)• Clustering Overview (p. 172)• Using the File Interface for the AWS Snowball Edge (p. 176)• Using AWS Lambda with an AWS Snowball Edge (p. 182)
Using the Snowball ClientNoteIn January 2018, there was a feature update for clusters, making them leaderless. The clusterupdate is backward-compatible with older clusters. Following, you can find the documentationfor the original Snowball client for Snowball Edge. If you're looking for the updated content, seeUsing the Snowball Client (p. 39).
Following, you can find information about how to get and use the Snowball client with your AWSSnowball Edge device. The Snowball client is a standalone terminal application that you run on yourlocal server to unlock the device and get credentials, logs, and status information. You can also use theclient for administrative tasks for a cluster. When you read and write data to the AWS Snowball Edgedevice, you use the Amazon S3 Adapter for Snowball or the file interface.
Downloading and Installing the Snowball ClientYou can download and install the Snowball client from the AWS Snowball resources website. Whenyou've reached that page, find the installation package for your operating system and follow theinstructions to install the Snowball client. Running the Snowball client from a terminal in yourworkstation might require using a specific path, depending on your operating system:
• Microsoft Windows – When the client has been installed, you can run it from any directory withoutany additional preparation.
• Linux – The Snowball client must be run from the ~/snowball-client-linux-build_number/bin/directory.
• Mac – The install.sh script creates symbolic links (symlinks) in addition to copying folders from theSnowball client .tar file to the /usr/local/bin/snowball directory. If you run this script, you can then runthe Snowball client from any directory, as long as the /usr/local/bin is a path in your bash_profile. Youcan verify your path with the echo $PATH command.
Commands for the Snowball ClientFollowing, you can find information on the Snowball client commands, including examples of use andsample outputs.
167
AWS Snowball Edge Developer GuideCommands for the Snowball Client
UnlockingThe unlock command unlocks access to the AWS Snowball Edge device with the AWS Snowball Edgedevice's IP address and your credentials.
If you're unlocking a cluster, you use the -i option for your primary node and the -s option for eachsecondary node, as in the following example. All nodes are identical until you assign one to be theprimary node. The primary node is the leader of the cluster and performs most of the behind-the-scenesmanagement of the cluster. For more information on clusters, see Clustering Overview (p. 172).
Usage
snowballEdge unlock -i IP Address -m Path/to/manifest/file -u 29 character unlock code
Example Single Device Unlock Input
snowballEdge unlock -i 192.0.2.0 -m /user/tmp/manifest -u 01234-abcde-01234-ABCDE-01234
Example Single Device Unlock Output
The Snowball Edge unlock status is: UnlockSnowballResult(status=UNLOCKING)
Example Cluster Unlock Input
snowballEdge unlock -i 192.0.2.0 -m /user/tmp/manifest -u 01234-abcde-01234-ABCDE-01234 -s 192.0.2.1 -s 192.0.2.2 -s 192.0.2.3 -s 192.0.2.4
Example Cluster Unlock Output
Snowball Unlock Status: SUCCESSNode Ip: [Node Id, State]192.0.2.0 : [JID850f06EXAMPLE-4EXA-MPLE-2EXAMPLEab00, AVAILABLE]192.0.2.1 : [JID850f06EXAMPLE-4EXA-MPLE-2EXAMPLEab01, AVAILABLE]192.0.2.2 : [JID850f06EXAMPLE-4EXA-MPLE-2EXAMPLEab02, AVAILABLE]192.0.2.3 : [JID850f06EXAMPLE-4EXA-MPLE-2EXAMPLEab03, AVAILABLE]192.0.2.4 : [JID850f06EXAMPLE-4EXA-MPLE-2EXAMPLEab04, AVAILABLE]Total Size: 225 TBFree Space: 121 TBPrimary Node: 192.0.2.0S3 Endpoint running at: http://192.0.2.0:8080Durability Status: HEALTHY - The Snowball Edge cluster is highly durable.
Getting CredentialsThe credentials command returns the set of local credentials (an access key and a secret key). Youuse these to sign your requests when using the AWS CLI or your own application with the Amazon S3Adapter for Snowball to read and write data to the AWS Snowball Edge device. These credentials areonly associated with an individual job for AWS Snowball, and they can only be used on the device orcluster of devices. The device or devices don't have any AWS Identity and Access Management (IAM)permissions in the AWS Cloud.
NoteIf you're using the AWS CLI with the Snowball Edge, you must use these credentials whenyou configure the CLI. For information on configuring credentials for the CLI, see QuickConfiguration in the AWS Command Line Interface User Guide.
Usage
168
AWS Snowball Edge Developer GuideCommands for the Snowball Client
snowballEdge credentials -i IP Address -m Path/to/manifest/file -u 29 character unlock code
Example Input
snowballEdge credentials -i 192.0.2.0 -m /user/tmp/manifest -u 01234-abcde-01234-ABCDE-01234
Example Output
[snowballEdge]aws_access_key_id = AKIAIOSFODNN7EXAMPLEaws_secret_access_key = wJalrXUtnFEMI/K7MDENG/bPxRfiCYEXAMPLEKEY
Getting StatusThe status command returns the status of an AWS Snowball Edge device. When you run this commandto check the status of a cluster, the IP address you should use is the IP address of the primary node. Formore information on clusters, see Clustering Overview (p. 172).
Usage
snowballEdge status -i IP Address -m Path/to/manifest/file -u 29 character unlock code
Example Input
snowballEdge status -i 192.0.2.0 -m /user/tmp/manifest -u 01234-abcde-01234-ABCDE-01234
Example Output
Snowball Status: SUCCESSS3 Endpoint running at: http://192.0.2.0:8080Total Size: 82 TBFree Space: 74 TB
Getting AWS Lambda Powered by AWS Greengrass and FileInterface LogsThe logs command saves a copy of the Lambda and file interface logs to the specified path on yourserver in an archive format. You can specify the path with the -o option.
Usage
snowballEdge logs -i IP Address -m Path/to/manifest/file -u 29 character unlock code -o Path/to/logs
Example Input
snowballEdge logs -i 192.0.2.0 -m /user/tmp/manifest -u 01234-abcde-01234-ABCDE-01234 -o ~/
Example Output
Snowball logs written to: /home/dan/snowballLogs-14EXAMPLE8009.zip
169

AWS Snowball Edge Developer GuideCommands for the Snowball Client
Getting Device LogsThe servicelogs saves an encrypted blob of support logs from a Snowball Edge or cluster to thespecified output path on your server. Give these logs to AWS Support when debugging issues.
Usage
snowballEdge servicelogs -o Path/to/service/logs/output/directory -i IP Address -m Path/to/manifest/file -u 29 character unlock code
Example Input
snowballEdge servicelogs -i 192.0.2.0 -m /user/tmp/manifest -u 01234-abcde-01234-ABCDE-01234 -o ~/
Example Output
Snowball servicelogs written to: /home/dan/snowballLogs-14EXAMPLE8010.bin
Removing a Node from a ClusterThe removenode command removes a node from a cluster of Snowball Edge devices. Use this commandif a node has become unavailable. For more information on clusters, see Clustering Overview (p. 172).
ImportantUse the removenode command only when you are removing an unresponsive node. Don't usethis command to remove a healthy node.
If a node was accidentally powered off or disconnected from the network and was therefore temporarilyunavailable to the rest of the cluster, you don't have to use this command. In this case, simply plug thepreviously unavailable node back into power and the network. The node should then rejoin the clusterautomatically.
Usage
snowballEdge removenode -i IP Address -m Path/to/manifest/file -u 29 character unlock code -n node id of unavailable node
Example Input
snowballEdge removenode -i 192.0.2.0 -m /user/tmp/manifest -u 01234-abcde-01234-ABCDE-01234 -n JIDfEXAMPLE-1234-abcd-1234-4EXAMPLE8ae9
Example Output
The node: JIDfEXAMPLE-1234-abcd-1234-4EXAMPLE8ae9 was successfully removed from the cluster.
Adding a Node to a ClusterThe addnode command adds a node to a cluster of Snowball Edge devices. You can use this command toreplace an unavailable node with a new node that you ordered as a replacement. For more informationon clusters, see Clustering Overview (p. 172).
170
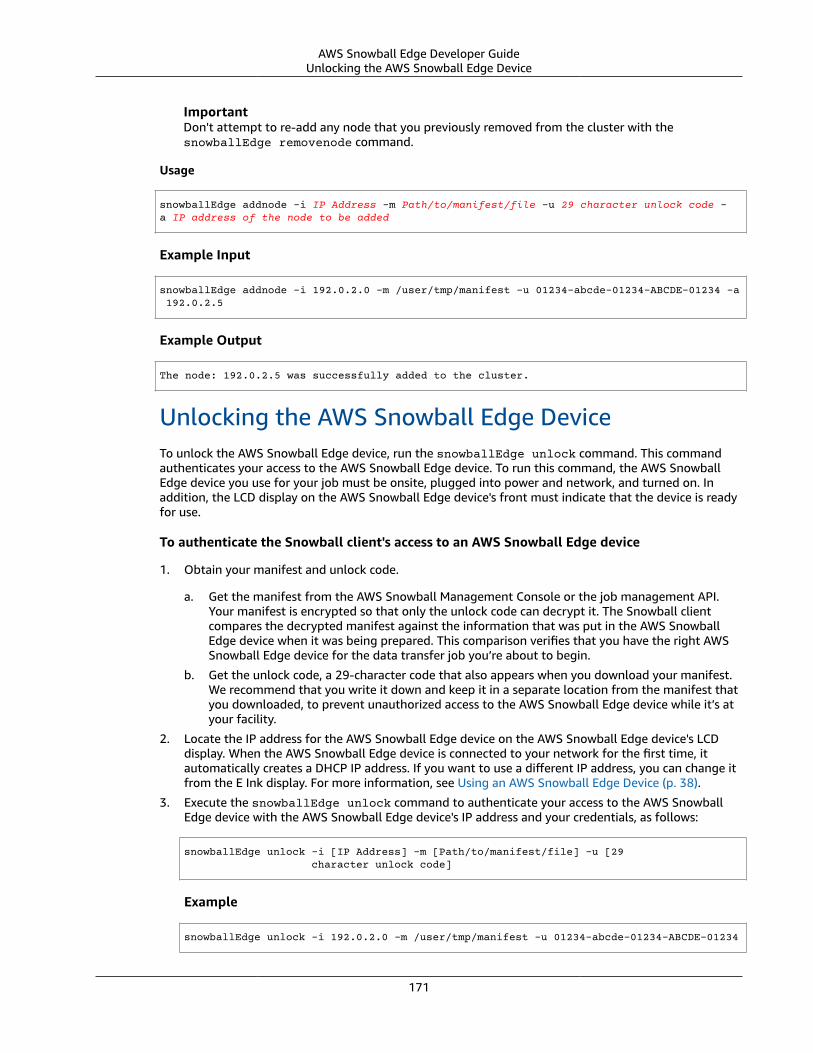
AWS Snowball Edge Developer GuideUnlocking the AWS Snowball Edge Device
ImportantDon't attempt to re-add any node that you previously removed from the cluster with thesnowballEdge removenode command.
Usage
snowballEdge addnode -i IP Address -m Path/to/manifest/file -u 29 character unlock code -a IP address of the node to be added
Example Input
snowballEdge addnode -i 192.0.2.0 -m /user/tmp/manifest -u 01234-abcde-01234-ABCDE-01234 -a 192.0.2.5
Example Output
The node: 192.0.2.5 was successfully added to the cluster.
Unlocking the AWS Snowball Edge DeviceTo unlock the AWS Snowball Edge device, run the snowballEdge unlock command. This commandauthenticates your access to the AWS Snowball Edge device. To run this command, the AWS SnowballEdge device you use for your job must be onsite, plugged into power and network, and turned on. Inaddition, the LCD display on the AWS Snowball Edge device's front must indicate that the device is readyfor use.
To authenticate the Snowball client's access to an AWS Snowball Edge device
1. Obtain your manifest and unlock code.
a. Get the manifest from the AWS Snowball Management Console or the job management API.Your manifest is encrypted so that only the unlock code can decrypt it. The Snowball clientcompares the decrypted manifest against the information that was put in the AWS SnowballEdge device when it was being prepared. This comparison verifies that you have the right AWSSnowball Edge device for the data transfer job you’re about to begin.
b. Get the unlock code, a 29-character code that also appears when you download your manifest.We recommend that you write it down and keep it in a separate location from the manifest thatyou downloaded, to prevent unauthorized access to the AWS Snowball Edge device while it’s atyour facility.
2. Locate the IP address for the AWS Snowball Edge device on the AWS Snowball Edge device's LCDdisplay. When the AWS Snowball Edge device is connected to your network for the first time, itautomatically creates a DHCP IP address. If you want to use a different IP address, you can change itfrom the E Ink display. For more information, see Using an AWS Snowball Edge Device (p. 38).
3. Execute the snowballEdge unlock command to authenticate your access to the AWS SnowballEdge device with the AWS Snowball Edge device's IP address and your credentials, as follows:
snowballEdge unlock -i [IP Address] -m [Path/to/manifest/file] -u [29 character unlock code]
Example
snowballEdge unlock -i 192.0.2.0 -m /user/tmp/manifest -u 01234-abcde-01234-ABCDE-01234
171
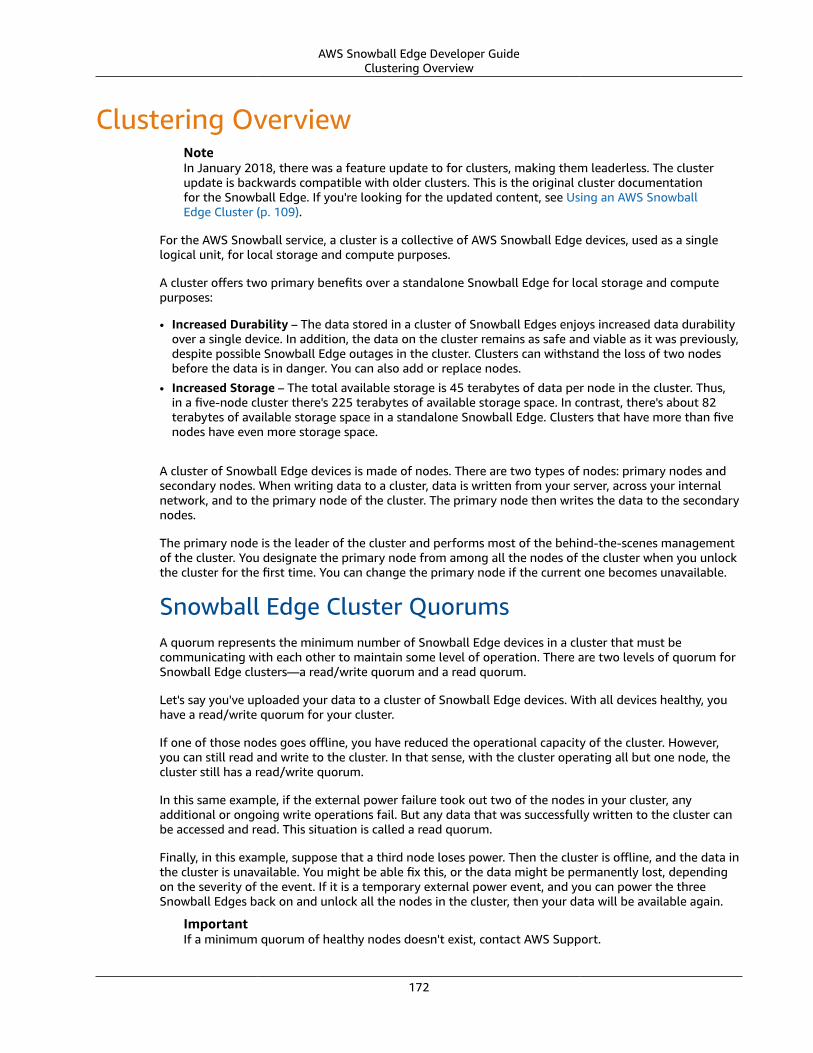
AWS Snowball Edge Developer GuideClustering Overview
Clustering OverviewNoteIn January 2018, there was a feature update to for clusters, making them leaderless. The clusterupdate is backwards compatible with older clusters. This is the original cluster documentationfor the Snowball Edge. If you're looking for the updated content, see Using an AWS SnowballEdge Cluster (p. 109).
For the AWS Snowball service, a cluster is a collective of AWS Snowball Edge devices, used as a singlelogical unit, for local storage and compute purposes.
A cluster offers two primary benefits over a standalone Snowball Edge for local storage and computepurposes:
• Increased Durability – The data stored in a cluster of Snowball Edges enjoys increased data durabilityover a single device. In addition, the data on the cluster remains as safe and viable as it was previously,despite possible Snowball Edge outages in the cluster. Clusters can withstand the loss of two nodesbefore the data is in danger. You can also add or replace nodes.
• Increased Storage – The total available storage is 45 terabytes of data per node in the cluster. Thus,in a five-node cluster there's 225 terabytes of available storage space. In contrast, there's about 82terabytes of available storage space in a standalone Snowball Edge. Clusters that have more than fivenodes have even more storage space.
A cluster of Snowball Edge devices is made of nodes. There are two types of nodes: primary nodes andsecondary nodes. When writing data to a cluster, data is written from your server, across your internalnetwork, and to the primary node of the cluster. The primary node then writes the data to the secondarynodes.
The primary node is the leader of the cluster and performs most of the behind-the-scenes managementof the cluster. You designate the primary node from among all the nodes of the cluster when you unlockthe cluster for the first time. You can change the primary node if the current one becomes unavailable.
Snowball Edge Cluster QuorumsA quorum represents the minimum number of Snowball Edge devices in a cluster that must becommunicating with each other to maintain some level of operation. There are two levels of quorum forSnowball Edge clusters—a read/write quorum and a read quorum.
Let's say you've uploaded your data to a cluster of Snowball Edge devices. With all devices healthy, youhave a read/write quorum for your cluster.
If one of those nodes goes offline, you have reduced the operational capacity of the cluster. However,you can still read and write to the cluster. In that sense, with the cluster operating all but one node, thecluster still has a read/write quorum.
In this same example, if the external power failure took out two of the nodes in your cluster, anyadditional or ongoing write operations fail. But any data that was successfully written to the cluster canbe accessed and read. This situation is called a read quorum.
Finally, in this example, suppose that a third node loses power. Then the cluster is offline, and the data inthe cluster is unavailable. You might be able fix this, or the data might be permanently lost, dependingon the severity of the event. If it is a temporary external power event, and you can power the threeSnowball Edges back on and unlock all the nodes in the cluster, then your data will be available again.
ImportantIf a minimum quorum of healthy nodes doesn't exist, contact AWS Support.
172
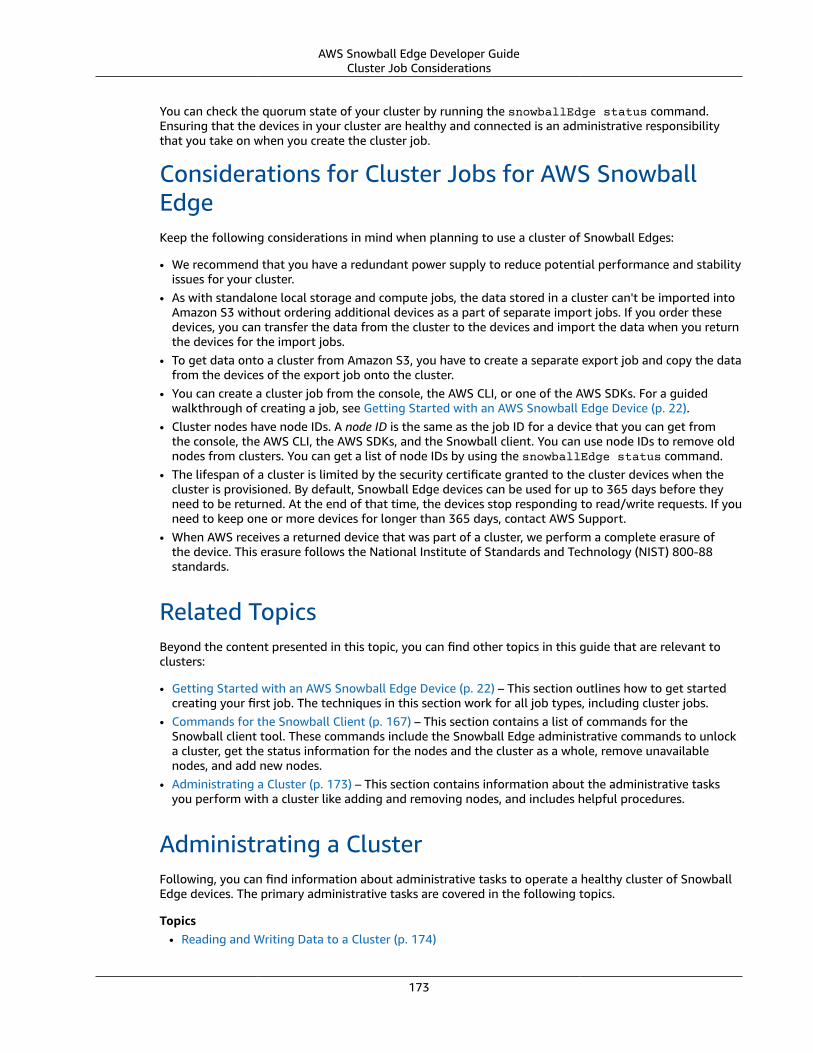
AWS Snowball Edge Developer GuideCluster Job Considerations
You can check the quorum state of your cluster by running the snowballEdge status command.Ensuring that the devices in your cluster are healthy and connected is an administrative responsibilitythat you take on when you create the cluster job.
Considerations for Cluster Jobs for AWS SnowballEdgeKeep the following considerations in mind when planning to use a cluster of Snowball Edges:
• We recommend that you have a redundant power supply to reduce potential performance and stabilityissues for your cluster.
• As with standalone local storage and compute jobs, the data stored in a cluster can't be imported intoAmazon S3 without ordering additional devices as a part of separate import jobs. If you order thesedevices, you can transfer the data from the cluster to the devices and import the data when you returnthe devices for the import jobs.
• To get data onto a cluster from Amazon S3, you have to create a separate export job and copy the datafrom the devices of the export job onto the cluster.
• You can create a cluster job from the console, the AWS CLI, or one of the AWS SDKs. For a guidedwalkthrough of creating a job, see Getting Started with an AWS Snowball Edge Device (p. 22).
• Cluster nodes have node IDs. A node ID is the same as the job ID for a device that you can get fromthe console, the AWS CLI, the AWS SDKs, and the Snowball client. You can use node IDs to remove oldnodes from clusters. You can get a list of node IDs by using the snowballEdge status command.
• The lifespan of a cluster is limited by the security certificate granted to the cluster devices when thecluster is provisioned. By default, Snowball Edge devices can be used for up to 365 days before theyneed to be returned. At the end of that time, the devices stop responding to read/write requests. If youneed to keep one or more devices for longer than 365 days, contact AWS Support.
• When AWS receives a returned device that was part of a cluster, we perform a complete erasure ofthe device. This erasure follows the National Institute of Standards and Technology (NIST) 800-88standards.
Related TopicsBeyond the content presented in this topic, you can find other topics in this guide that are relevant toclusters:
• Getting Started with an AWS Snowball Edge Device (p. 22) – This section outlines how to get startedcreating your first job. The techniques in this section work for all job types, including cluster jobs.
• Commands for the Snowball Client (p. 167) – This section contains a list of commands for theSnowball client tool. These commands include the Snowball Edge administrative commands to unlocka cluster, get the status information for the nodes and the cluster as a whole, remove unavailablenodes, and add new nodes.
• Administrating a Cluster (p. 173) – This section contains information about the administrative tasksyou perform with a cluster like adding and removing nodes, and includes helpful procedures.
Administrating a ClusterFollowing, you can find information about administrative tasks to operate a healthy cluster of SnowballEdge devices. The primary administrative tasks are covered in the following topics.
Topics• Reading and Writing Data to a Cluster (p. 174)
173
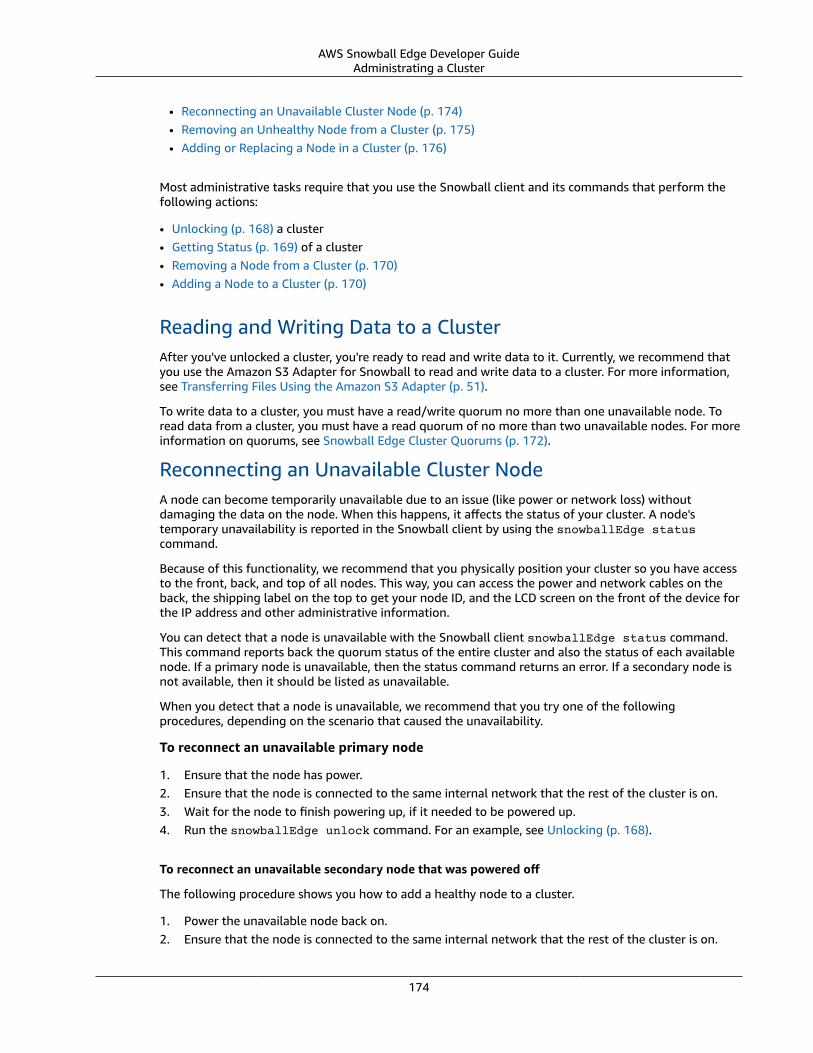
AWS Snowball Edge Developer GuideAdministrating a Cluster
• Reconnecting an Unavailable Cluster Node (p. 174)• Removing an Unhealthy Node from a Cluster (p. 175)• Adding or Replacing a Node in a Cluster (p. 176)
Most administrative tasks require that you use the Snowball client and its commands that perform thefollowing actions:
• Unlocking (p. 168) a cluster• Getting Status (p. 169) of a cluster• Removing a Node from a Cluster (p. 170)• Adding a Node to a Cluster (p. 170)
Reading and Writing Data to a ClusterAfter you've unlocked a cluster, you're ready to read and write data to it. Currently, we recommend thatyou use the Amazon S3 Adapter for Snowball to read and write data to a cluster. For more information,see Transferring Files Using the Amazon S3 Adapter (p. 51).
To write data to a cluster, you must have a read/write quorum no more than one unavailable node. Toread data from a cluster, you must have a read quorum of no more than two unavailable nodes. For moreinformation on quorums, see Snowball Edge Cluster Quorums (p. 172).
Reconnecting an Unavailable Cluster NodeA node can become temporarily unavailable due to an issue (like power or network loss) withoutdamaging the data on the node. When this happens, it affects the status of your cluster. A node'stemporary unavailability is reported in the Snowball client by using the snowballEdge statuscommand.
Because of this functionality, we recommend that you physically position your cluster so you have accessto the front, back, and top of all nodes. This way, you can access the power and network cables on theback, the shipping label on the top to get your node ID, and the LCD screen on the front of the device forthe IP address and other administrative information.
You can detect that a node is unavailable with the Snowball client snowballEdge status command.This command reports back the quorum status of the entire cluster and also the status of each availablenode. If a primary node is unavailable, then the status command returns an error. If a secondary node isnot available, then it should be listed as unavailable.
When you detect that a node is unavailable, we recommend that you try one of the followingprocedures, depending on the scenario that caused the unavailability.
To reconnect an unavailable primary node
1. Ensure that the node has power.2. Ensure that the node is connected to the same internal network that the rest of the cluster is on.3. Wait for the node to finish powering up, if it needed to be powered up.4. Run the snowballEdge unlock command. For an example, see Unlocking (p. 168).
To reconnect an unavailable secondary node that was powered off
The following procedure shows you how to add a healthy node to a cluster.
1. Power the unavailable node back on.2. Ensure that the node is connected to the same internal network that the rest of the cluster is on.
174
AWS Snowball Edge Developer GuideAdministrating a Cluster
3. Wait for the node to finish powering up.4. Run the snowballEdge addnode command. For an example, see Adding a Node to a
Cluster (p. 51).
To reconnect an unavailable secondary node that lost network but didn't lose power
1. Ensure that the node is connected to the same internal network that the rest of the cluster is on.2. Run the snowballEdge status command to see when the previously unavailable node is added
back to the cluster. For an example, see Getting Device Status (p. 47).
When you have performed the preceding procedures, your nodes should be working normally. Youshould also have a read/write quorum. If that's not the case, then one or more of your nodes might havea more serious issue and might need to be removed from the cluster.
Changing the Primary Node on a Cluster
The primary node is the leader of a cluster and performs most behind-the-scenes management of thecluster. You designate the primary node from among all the nodes of the cluster when you unlock thecluster for the first time. You can also change the primary node if the current one becomes unavailable.
To change which node is primary because the old primary node is unavailable
1. Power off all cluster nodes by pressing the power button above the LCD screen for no longer thantwo seconds.
2. Power on all the cluster nodes.3. Wait for the node to finish powering up, if it needed to be powered up.4. Make sure that the nodes are connected to the same internal network and make a note of their IP
addresses.5. Run the snowballEdge unlock Snowball client command with a different node as the primary
node.
Removing an Unhealthy Node from a ClusterRarely, a node in your cluster might become unhealthy. If the node is unavailable, we recommend goingthrough the procedures listed in Reconnecting an Unavailable Cluster Node (p. 174) first.
If doing so doesn't resolve the issue, then the node might be unhealthy. An unhealthy node can occur ifthe node has taken damage from an eternal source, if there was an unusual electrical event, or if someother unlikely event occurs. If this happens, you need to remove the node from the cluster before youcan add a new node as a replacement.
If the node that needs to be removed is the primary node, before going through the following procedureyou should change which node is your primary node. For more information, see Changing the PrimaryNode on a Cluster (p. 175).
When you detect that a secondary node is unhealthy and needs to be removed, we recommend that youdo so with the following procedure.
To remove an unhealthy node
1. Ensure that the node is unhealthy and not just unavailable. For more information, see Reconnectingan Unavailable Cluster Node (p. 174).
2. Disconnect the unhealthy node from the network and power it off.3. Run the snowballEdge removenode Snowball client command. For more information, see
Removing a Node from a Cluster (p. 170).
175
AWS Snowball Edge Developer GuideUsing the File Interface
4. Turn the power off on each node in the cluster once again.5. Power each node in the cluster back on again.6. Unlock the cluster once again, but without the unhealthy node.7. Order a replacement node using the console, the AWS CLI, or one of the AWS SDKs.8. Return the unhealthy node to AWS. When we have the node, we perform a complete erasure of
the device. This erasure follows the National Institute of Standards and Technology (NIST) 800-88standards.
After you successfully remove a node, your data is still available on the cluster if you still have a readquorum. To have read quorum, a cluster must have no more than two unavailable nodes. Therefore, werecommend that you order replacement nodes as soon as you remove an unavailable node from thecluster.
Adding or Replacing a Node in a ClusterYou can add a new node after you have removed an unhealthy node from a cluster. You can also add anew node to increase local storage.
To add a new node, you first need to order a replacement. You can order a replacement node from theconsole, the AWS CLI, or one of the AWS SDKs. If you're ordering a replacement node from the console,you can order replacements for any job that hasn't been canceled or completed.
To order a replacement node from the console
1. Sign in to the AWS Snowball Management Console.2. Find and choose a job for a node that belongs to the cluster that you created from the Job
dashboard.3. For Actions, choose Replace node.
Doing this opens the final step of the job creation wizard, with all settings identical to how thecluster was originally created.
4. Choose Create job.
Your replacement Snowball Edge is now on its way to you. When it arrives, use the following procedureto add it to your cluster.
To add a replacement node
1. Position the new node for the cluster such that you have access to the front, back, and top of allnodes.
2. Ensure that the node has power.3. Ensure that the node is connected to the same internal network that the rest of the cluster is on.4. Wait for the node to finish powering up, if it needed to be powered up.5. Run the snowballEdge add command. For an example, see Adding a Node to a Cluster (p. 170).
Using the File Interface for the AWS SnowballEdge
Following, you can find information about using the file interface for the AWS Snowball Edge. Using thisfile interface, you can drag and drop files from your computer onto Amazon S3 buckets on the SnowballEdge.
176

AWS Snowball Edge Developer GuideOverview of the File Interface
NoteIf you created your job after July 17, 2018, this information doesn't apply to your device.Instead, see Transferring Files to AWS Snowball Edge Using the File Interface (p. 59).
Topics• Overview of the File Interface (p. 177)• Mounting a Bucket with the File Interface (p. 178)• Monitoring the File Interface (p. 180)
Overview of the File InterfaceThe file interface exposes a Network File System (NFS) mount point for each bucket on your AWSSnowball Edge device. You can mount the file share from your NFS client using standard Linux, MicrosoftWindows, or Mac commands. You can use standard file operations to access the file share.
After the file share has been mounted, a new file interface tab appears on the LCD screen on the frontof the Snowball Edge. From this tab, you can get transfer status information, see your NFS point IPaddresses, and secure NFS client access to specific buckets.
You can use the local LCD display on the AWS Snowball Edge device to disable or enable the fileinterface. By unlocking the AWS Snowball Edge device, you have all the permissions necessary to readand write data through the file interface.
Topics• Benefits of the File Interface (p. 177)• Prerequisites for Using the File Interface (p. 177)• Considerations for Using the File Interface (p. 178)
Benefits of the File InterfaceYou might want to use the file interface to read and write data because of the following benefits:
• You can more easily read, write, and delete files by using the file interface.• You can use the local LCD display on the AWS Snowball Edge device to monitor the file interface
status.• The file interface preserves user-defined metadata in objects. This metadata includes permissions,
ownership, and time stamps and can be useful for tracking.• Because files are written to the buckets on the device, adding files can trigger associated AWS Lambda
powered by AWS Greengrass functions.
Prerequisites for Using the File InterfaceBefore you can use the file interface, the following steps must occur:
• You must create a job for your Snowball Edge.• Your Snowball Edge device must arrive at your location.• You must unlock your device by using the Snowball client.
If one or more of those steps haven't occurred, see the following topics:
• For more information about creating a job to use a Snowball Edge, see Getting Started with an AWSSnowball Edge Device (p. 22).
177
AWS Snowball Edge Developer GuideMounting a Bucket with the File Interface
• For more information about unlocking a Snowball Edge, see Transferring Files Using the Amazon S3Adapter (p. 51).
Considerations for Using the File InterfaceWhile using the file interface, keep the following considerations in mind:
• The maximum size of a file that you can transfer to the file interface on a Snowball Edge is 150 GB.If you try to transfer a file larger than 150 GB, the file interface will write the first 150 GB of that file,and then return an error message indicating that the file is too large.
• We recommend that you use only one method of reading and writing data to each bucket on aSnowball Edge device. Using both the file interface and the Amazon S3 Adapter for Snowball on thesame bucket might result in undefined behavior.
• File interface supports all NFS file operations, except truncate, rename, or changing ownership.Requests that use these unsupported file operations are rejected with error messages sent to your NFSclient. Attempts to change a file’s permissions after the file has been created on the Snowball Edge areignored without error.
• If the Snowball Edge has a power failure or is rebooted, data in the file interface buffer persists.On reboot, this buffered data is uploaded to buckets on the device. When Write status on the Fileinterface tab shows 100 percent with a green progress bar, all data in the file interface buffer isuploaded to the buckets on the device.
• Don't write data to a Snowball Edge that is full, or write more data than the size of the remainingavailable storage. Either action causes errors that might corrupt your data. We recommend that youuse the Snowball client's snowballEdge status command to determine the remaining amount ofspace on the Snowball Edge. Then compare that to the amount of data you want to copy over usingthe file interface before copying the data.
• When you've finished copying data to the Snowball Edge using the file interface, you must disable thefile interface to avoid losing any data that might be in the buffer but not yet written to the Amazon S3bucket. For more information, see Disabling the File Interface (p. 182).
• We recommend that you keep a local copy of all data that is written to the file interface until theSnowball Edge has been shipped back to AWS and the data has been ingested to Amazon S3.
Mounting a Bucket with the File InterfaceThe following contains guidance on mounting a file share on Snowball Edge to the NFS client onyour computer using the file interface. It includes information about the supported NFS clients andprocedures for enabling those clients on Linux, Mac, and Windows operating systems.
Topics• Supported NFS Clients for the File Interface (p. 178)• Getting the IP Address for the File Share of a Bucket on a Snowball Edge (p. 179)• Mounting a File Share with the File Interface on Linux (p. 179)• Mounting a File Share with the File Interface on a Mac (p. 180)• Mounting a File Share with the File Interface on Microsoft Windows (p. 180)
Supported NFS Clients for the File InterfaceThe file interface supports the following NFS clients:
Clients with NFSv4 support
• Amazon Linux
178
AWS Snowball Edge Developer GuideMounting a Bucket with the File Interface
• macOS• Red Hat Enterprise Linux (RHEL) 7• Ubuntu 14.04
Clients with NFSv3 support
• Windows 10, Windows Server 2012, and Windows Server 2016• Windows 7 and Windows Server 2008. For these clients, the maximum supported NFS I/O size is 32
KB. Because of this factor, you might experience degraded performance on these versions of Windows.
Getting the IP Address for the File Share of a Bucket on aSnowball EdgeYou can mount the file shares with a simple command, if you have the IP address for the file share on aSnowball Edge. You can find the file share's IP address on the LCD display in the CONNECTION tab. Youcan't use the file interface if this IP address is blank. Ensure that the file interface gets an IP address.
ImportantThe IP address for the file interface is not the IP address that you used to unlock the SnowballEdge device. The IP address for the file interface can either be a static IP or one issued by yourDHCP server.
To get the IP address for the file interface
1. Access the LCD display on the front of the AWS Snowball Edge device.2. Tap CONNECTION at the top of the LCD display to open the network connection tab.3. From the drop-down list in the center of the page, choose file interface.
The IP address below this list updates to reflect the DHCP address that the AWS Snowball Edgedevice requested for the file interface. You can change it to a static IP address, or leave it as is.
Now that you have your IP address, you're ready to mount a bucket on the Snowball Edge using theappropriate mount command for your computer's operating system.
Mounting a File Share with the File Interface on LinuxWhen you mount file shares on your Linux server, we recommend that you first update your NFS clientwith the following command.
$sudo yum install nfs-utils
When the file interface is enabled, it exposes an NFS mount point for each local bucket on the device.The file interface supports NFS versions 3, 4.0, and 4.1. You can mount the file shares with a simplecommand with the IP address for the file interface. For more information, see Getting the IP Address forthe File Share of a Bucket on a Snowball Edge (p. 179).
When you have the IP address, you can mount a bucket with the following command.
mount -t nfs –o nolock IP Address:/BucketName local/mount/directory
For example, suppose that the IP address for the file interface is 192.0.1.0 and your bucket name istest-bucket. You want to mount your bucket to the mnt/test-bucket directory on your local Linuxserver. In this case, your command looks like the following.
179
AWS Snowball Edge Developer GuideMonitoring the File Interface
mount –o nolock 192.0.1.0:/test-bucket mnt/test-bucket
Mounting a File Share with the File Interface on a MacYou can mount the file shares with a simple command with the IP address for the file interface. For moreinformation, see Getting the IP Address for the File Share of a Bucket on a Snowball Edge (p. 179).When you mount file shares on your Mac, you need to declare the version of the NFS protocol that you'reusing when you run the mount command. For example, if you're using the NFSv3.0 protocol, you use thevers=3 option.
mount -t nfs –o vers=3,nolock IP Address:/BucketName local mount directory
For example, suppose the IP address for the file interface is 192.0.1.0, your bucket name is test-bucket, and you want to mount your bucket to the private/mybucket directory on your Mac. In thiscase, your command looks like the following.
sudo mount_nfs -o vers=3,nolock -v 192.0.1.0:/test-bucket private/mybucket
Mounting a File Share with the File Interface on MicrosoftWindowsWhen you mount file shares on your Windows server, you need to turn on the Windows Client for NFS.You also need to assign the mount point a drive letter with the mount command.
NoteFor a Windows 7 or Windows Server 2008 server, the maximum supported NFS I/O size is 32 KB.Because of this limit, you might experience degraded performance for the file interface on theseversions of Windows.
To turn on Windows Client for NFS
1. In Windows, from Start, search for Turn Windows features on or off and choose the application ofthe same name that appears in the search results.
2. In the Windows Features dialog box that appears, scroll through the list of features until you findServices for NFS.
3. Expand Services for NFS, and select the Client for NFS check box.
4. Choose OK to close the dialog box with Client for NFS activated.
You can mount the file shares with a simple command with the IP address for the file interface. For moreinformation, see Getting the IP Address for the File Share of a Bucket on a Snowball Edge (p. 179).You can now mount the file shares on the AWS Snowball Edge device to an unused drive letter on yourWindows server as in the following example.
mount -o nolock 192.0.1.0:/test-bucket Z:
Monitoring the File InterfaceWhen you use the file interface, it's important to keep an eye on its overall health and current status.You can perform these tasks by using the file interface tab on the LCD display on the front of the AWSSnowball Edge device.
180
AWS Snowball Edge Developer GuideMonitoring the File Interface
Topics• Getting the Status of the File Interface (p. 181)• Securing Your NFS Connection (p. 181)• Disabling the File Interface (p. 182)• Opening a Support Channel for AWS Support (p. 182)
Getting the Status of the File InterfaceOn the file interface tab, there are two health indicators, Status and Write status. The following listdescribes how to work with these indicators:
• Status indicates the operational status of the file interface as a whole. It has the following possiblevalues:• Enabled – The file interface is up and running normally.• Disabling – The file interface is stopped, and nothing can be written to it.• Disabled – The file interface has stopped and the mount point is no longer available. In addition,
all the data in the device's memory buffer has been encrypted and written to the local Amazon S3buckets.
• Error – An error has occurred. If you see this status, contact AWS Support.• Write status shows you the progress of the current write operation executed on the AWS Snowball
Edge device using a progress bar:• At 0–99 percent, a write operation is actively happening on the device and data is in the buffer. Don't
disconnect the device before writing has completed.• At 100 percent, with a green progress bar, the last write operation completed successfully. There is
no data in the buffer, and no new write operations have begun.
Securing Your NFS ConnectionWhen a job for an AWS Snowball Edge device is created on the AWS console, all Amazon S3 bucketsselected for the job are enabled by default as active file shares. When the device arrives at your site,and you set up, connect, and unlock it, anyone on your network who can see the IP address for the fileinterface can access the file shares for each bucket.
Therefore, we recommend that you secure the buckets by specifying which NFS clients are allowed toaccess your buckets. You can do this from the LCD screen on the front of the Snowball Edge with thefollowing procedure.
To allow only certain NFS clients to access the file shares for your buckets on a SnowballEdge
1. On the LCD display, tap File interface to open its tab.2. From Allowed clients, choose your bucket from the drop-down list.3. Tap Edit to reveal the text boxes that you can enter your IP addresses into.4. In the top box, use the onscreen keyboard to type in the IP address of a computer that you want to
mount the file share for that bucket to.5. If you have other computers connected to this same bucket, type in their IP addresses in the
subsequent text boxes.
You have now secured the file share for one of your buckets on the Snowball Edge. You can repeat thisprocess for all the file shares for the buckets on the Snowball Edge to secure access to the data in yourdevice.
181
AWS Snowball Edge Developer GuideUsing AWS Lambda
Once you specify an IP address for an allowed client, that file share return to unrestricted again bychanging the IP address to 0.0.0.0. If the IP address of the computer connected to it ever changes, youneed to update the IP address for that allowed client.
Disabling the File Interface
When you're done using the file interface, you should disable the file interface after the Write Status onthe AWS Snowball Edge device is set to Complete. Disabling the file interface helps you avoid data lossby ensuring that all files have been written to the device.
To stop the file interface
1. Access the LCD display on the front of the device.
2. On the LCD display, tap File interface to open its tab.
3. Press the Disable button on the file interface tab on the LCD display.
After you press the Disable button, the status changes to Disabling and any remaining buffered data iswritten to the device. When the write operation is complete, the status changes to Disabled.
You have now stopped the file interface. If you are otherwise finished with the AWS Snowball Edgedevice, it can now be safely powered off.
Opening a Support Channel for AWS Support
If the file interface ever enters into an error state, you might need to contact AWS Support. When you doso, AWS Support might ask you to open the support channel on your Snowball Edge.
The support channel is a special channel through which AWS Support can get information aboutthe state of the file interface for troubleshooting purposes, if the Snowball Edge is connected to theinternet. The following procedure outlines how to open a support channel when you're asked to do so byAWS Support.
To open a support channel for AWS Support
1. Access the LCD display on the front of the device.
2. On the LCD display, tap File interface to open its tab.
3. Scroll down to the bottom of the page.
4. When instructed by AWS Support, tap Open support channel.
5. After the channel opens, a port number appears that is labeled on port: XXXX. Give this portnumber to AWS Support. where XXXX is your port number.
At this point, you can work with AWS Support through this channel to troubleshoot the issue.
Using AWS Lambda with an AWS Snowball EdgeFollowing, you can find an overview of AWS Lambda powered by AWS Greengrass as used in an AWSSnowball Edge device. With this feature, you can run Lambda functions locally on a Snowball Edge.There is no charge for AWS Lambda powered by AWS Greengrass functions executed locally on anappliance. However, there might be charges for functions that create or use resources in the AWS Cloud.To use AWS Lambda powered by AWS Greengrass functions with Snowball Edge, you must create your
182
AWS Snowball Edge Developer GuideBefore You Start
jobs in an AWS Region supported by AWS IoT Greengrass. For a list of valid regions, see AWS Greengrassin the AWS General Reference.
NoteIf you created your job after July 17, 2018, this information doesn't apply to your device.Instead, see Using AWS Lambda with an AWS Snowball Edge (p. 66).
Before You StartBefore you create a Python-language Lambda function to run on your Snowball Edge, we recommendthat you familiarize yourself with the following services, concepts, and related topics.
Prerequisites for AWS IoT GreengrassAWS IoT Greengrass is software that extends AWS Cloud capabilities to local devices. AWS IoTGreengrass makes it possible for local devices to collect and analyze data closer to the source ofinformation, while also securely communicating with each other on local networks. More specifically,developers who use AWS IoT Greengrass can author serverless code (Lambda functions) in the AWSCloud. They can then conveniently deploy this code to devices for local execution of applications.
The following AWS IoT Greengrass concepts are important to understand when using AWS IoTGreengrass with a Snowball Edge:
• AWS IoT Greengrass Requirements – For a full list of AWS IoT Greengrass requirements, seeRequirements in the AWS IoT Greengrass Developer Guide. AWS IoT Greengrass supports Python version2.7, and each Lambda function has a minimum RAM requirement of 128 MB.
• AWS IoT Greengrass Core – Each Snowball Edge has the AWS IoT Greengrass core software. For moreinformation on the AWS IoT Greengrass core software, see Greengrass Core Software in the AWS IoTGreengrass Developer Guide.
• AWS IoT Greengrass Group – A Snowball Edge is part of an AWS IoT Greengrass group as the group'score device. For more information on groups, see AWS Greengrass Groups in the AWS IoT GreengrassDeveloper Guide.
• MQTT – AWS IoT Greengrass uses the industry-standard, lightweight Message Queue TelemetryTransport (MQTT) protocol to communicate within a group. Within a Snowball Edge, there is an IoTdevice associated with the Amazon S3 Adapter for Snowball. When data is written using Amazon S3PUT object operations on buckets specified at job creation, these operations trigger MQTT messages.These messages in turn trigger any associated Lambda functions. In addition, any MQTT-compatibledevice or software in your AWS IoT Greengrass group can trigger the Lambda functions, if you definethe related MQTT message to do so.
• Associated service role – Before you can use AWS IoT Greengrass with a Snowball Edge as a coredevice, you must associate an AWS IoT Greengrass service role with your account. This associationallows AWS IoT Greengrass to access your Lambda functions and AWS IoT resources. For moreinformation, see Associating an AWS IoT Greengrass Service Role with Your Account (p. 68).
Prerequisites for AWS LambdaAWS Lambda is a compute service that lets you run code without provisioning or managing servers. Thefollowing Lambda concepts are important to understand when using Lambda with a Snowball Edge:
• Lambda functions – Your custom code, uploaded and published to Lambda and used on a SnowballEdge. For more information, see Lambda Functions in the AWS Lambda Developer Guide.
• Lambda console – The management console in which you'll upload, update, and publish your Python-language Lambda functions for use on a Snowball Edge. For a sample on how to use the Lambdaconsole, see Step 2: Create a HelloWorld Lambda Function and Explore the Console in the AWSLambda Developer Guide.
183
AWS Snowball Edge Developer GuideGetting Started with Lambda
• Python – The high-level programming language used for your Lambda functions powered by AWS IoTGreengrass on a Snowball Edge. AWS IoT Greengrass supports Python version 2.7.
Related TopicsThe following topics are related to running AWS Lambda powered by AWS Greengrass functions on aSnowball Edge:
• Limitations for Lambda Powered by AWS IoT Greengrass (p. 160)• Customer Managed Policy Examples (p. 143)
Next:
Getting Started with Lambda Powered by AWS IoT Greengrass (p. 68)
Getting Started with Lambda Powered by AWS IoTGreengrassTo get started with AWS Lambda powered by AWS Greengrass functions on a Snowball Edge, take thefollowing steps:
1. Associating an AWS IoT Greengrass Service Role with Your Account (p. 184)2. Configuring AWS IoT Greengrass with a Snowball Edge (p. 185)3. Creating Your Job (p. 185)4. Using Lambda Powered by AWS Greengrass Functions on a Snowball Edge (p. 186)
Associating an AWS IoT Greengrass Service Role with YourAccountBefore you can use AWS IoT Greengrass with a Snowball Edge as a core device, you must associate anAWS IoT Greengrass service role with your account. This association allows AWS IoT Greengrass to accessyour Lambda functions and AWS IoT resources. If you try to create a job for a Snowball Edge before youassociate the service role, the job creation request fails.
The following procedures show how to configure and store your AWS IoT Greengrass settings in thecloud. This configuration means that you can push Lambda function changes to the Snowball Edge andchanges to other devices in your AWS IoT Greengrass group. The first procedure uses the AWS Identityand Access Management (IAM) console, and the second procedure uses the AWS Command Line Interface(AWS CLI).
To create an AWS IoT Greengrass service role in the IAM console
1. Sign in to the AWS Management Console and open the IAM console at https://console.amazonaws.cn/iam/.
2. For Role Type, choose AWS Greengrass Role.3. Select AWSGreengrassResourceAccessPolicy, and then choose Next Step.4. Type a name for your role, and then choose Create Role.
After creating the role, make a note of the role Amazon Resource Name (ARN), and use it in the nextprocedure.
184

AWS Snowball Edge Developer GuideGetting Started with Lambda
To associate the AWS IoT Greengrass service role with your account
1. Install the AWS CLI on your computer, if you haven't already. For more information, see Installing theAWS Command Line Interface in the AWS Command Line Interface User Guide.
2. Configure the AWS CLI on your computer, if you haven't already. For more information, seeConfiguring the AWS CLI in the AWS Command Line Interface User Guide.
3. Open a terminal on your computer and run the following AWS CLI command, with the AWS IoTGreengrass role ARN you created in the first procedure.
aws greengrass associate-service-role-to-account --role-arn arn:aws:iam::123EXAMPLE12:role/GreengrassRole
Now you can create a job for a Snowball Edge and use AWS Lambda powered by AWS Greengrass.
Configuring AWS IoT Greengrass with a Snowball EdgeWhen you create a compute job for a Snowball Edge, the service automatically configures the followingAWS IoT Greengrass elements:
• AWS IoT Greengrass Core Software – The AWS IoT Greengrass distributable has been pre-installed onthe Snowball Edge.
• AWS IoT Greengrass Group – When you create a compute job, an AWS IoT Greengrass group namedJobID_group is created and provisioned. The core of this group is named JobID_core, and it hasa device in it named JobID_s3adapter. The Amazon S3 Adapter for Snowball is registered as anIoT device in your AWS IoT Greengrass group. This registration is because the adapter sends MQTTmessages for every Amazon S3 PUT object action for the buckets on the Snowball Edge.
If you have other configuration changes that you want to make for the AWS IoT Greengrass groupassociated with a Snowball Edge, you can make them after you unlock the device and connect it to theinternet.
Creating Your JobCreate a job in the AWS Snowball Management Console and associate the Amazon Resource Name (ARN)for at least one published Lambda function with a bucket. For a walkthrough on creating your first job,see Getting Started with AWS Snowball Edge: Your First Job (p. 23).
All the Lambda functions that you choose during job creation are triggered by MQTT messages sentby the IoT device associated with the Amazon S3 Adapter for Snowball. These MQTT messages aretriggered whenever an Amazon S3 PUT object action is made against the bucket on the AWS SnowballEdge device.
Connecting to the Internet to Update AWS IoT GreengrassGroup CertificatesWhen the Snowball Edge arrives, unlock the device, and then connect it to the internet for at least oneminute. Connecting the device to the internet allows the AWS IoT Greengrass service in the cloud to sendthe AWS IoT Greengrass certificates that are needed to operate the Snowball Edge. After that, you candisconnect the device from the internet. The associated AWS IoT Greengrass group then functions inoffline mode.
ImportantWhen the IP address for any device in the local AWS IoT Greengrass group changes, reconnectthe Snowball Edge to the internet so it can get new certificates.
185
AWS Snowball Edge Developer GuideGetting Started with Lambda
Using Lambda Powered by AWS Greengrass Functions on aSnowball EdgeUnless programmed otherwise, Lambda functions are triggered by MQTT messages sent by the IoTdevice associated with the Amazon S3 Adapter for Snowball. These MQTT messages are in turn triggeredby Amazon S3 PUT object actions. Amazon S3 PUT object actions occur through the file interface (with awrite operation), the AWS CLI (using the Amazon S3 Adapter for Snowball), or programmatically throughone of the SDKs or a REST application of your own design.
You can use your AWS Lambda powered by AWS Greengrass functions to execute Python code againstpublic endpoints among AWS services in the cloud. For this Python code execution to work, your AWSSnowball Edge device needs to be connected to the internet. For more information, see the AWS LambdaDeveloper Guide.
Updating Existing Functions
You can update existing Lambda functions in the console. If you do, and if your AWS Snowball Edgedevice is connected to the internet, a deployment agent notifies each Lambda function of the updatedAWS IoT Greengrass group configuration. For more information, see Create a Deployment in the AWS IoTGreengrass Developer Guide.
Adding New Functions
After your Snowball Edge arrives and you unlock it and connect it to the internet, you can add or removeadditional Lambda functions. These new Lambda functions don't have to be triggered by Amazon S3PUT object actions. Instead, the event that you programmed to trigger the new functions performsfunction triggering, as with typical Lambda functions running in an AWS IoT Greengrass group.
Testing Lambda Powered by AWS IoT Greengrass Functions
While testing your Python-coded function in the Lambda console, you might encounter errors. If thathappens, see Retries on Errors in the AWS Lambda Developer Guide.
186

AWS Snowball Edge Developer Guide
API ReferenceIn addition to using the console, you can use the AWS Snowball API to programmatically configure andmanage AWS Snowball Edge device and its resources. This section describes the device operations anddata types and contains the API Reference documentation for AWS Snowball Edge device.
Topics
• Job Management API Reference• Actions• Data Types• Common Parameters• Common Errors
187
AWS Snowball Edge Developer Guide
Document History• API version: 1.0• Latest documentation update: April 16, 2020
The following table describes important changes to the AWS Snowball Edge Developer Guide after July2018. For notifications about documentation updates, you can subscribe to the RSS feed.
update-history-change update-history-description update-history-date
Introducing AWS OpsHub forSnow Family (p. 188)
The Snow Family Devices nowoffer a user-friendly tool, AWSOpsHub for Snow Family, thatyou can use to manage yourdevices and local AWS services.For more information, see UsingAWS OpsHub for Snow Family toManage Snowball Devices.
April 16, 2020
AWS Identity and AccessManagement (IAM) is nowavailable locally on the AWSSnowball Edge device (p. 188)
You can now use AWS Identityand Access Management (IAM)to securely control access toAWS resources running on yourAWS Snowball Edge device. Formore information, see Using IAMLocally.
April 16, 2020
Introducing a new SnowballEdge Storage Optimized(for data transfer) deviceoption (p. 188)
Snowball now adds a newstorage optimized devicebased on the current compute-optimized and GPU devices. Formore information, see SnowballEdge Device Options.
March 23, 2020
NFC tag validationsupport (p. 188)
Snowball Edge ComputeOptimized devices (with orwithout the GPU) have NFCtags built into them. You canscan these tags with the AWSSnowball Edge Verification App,available on iOS and Android.For more information, seeValidating NFC Tags.
December 13, 2018
Security groups are nowavailable for computeinstances (p. 188)
Security groups in SnowballEdge devices are similarto security groups in theAWS Cloud, with somesubtle differences. For moreinformation, see Security Groupsin Snowball Edge Devices.
November 26, 2018
Introducing on-premisesupdate (p. 188)
You can now update thesoftware that makes a SnowballEdge device run in your local
November 26, 2018
188
AWS Snowball Edge Developer Guide
environment. Note that on-premises updates require aninternet connection. For moreinformation, see Updating anSnowball Edge.
Introducing new device optionsfor Snowball Edge (p. 188)
Snowball Edge devices comein three options – storageoptimized, compute optimized,and with GPU. For moreinformation, see Snowball EdgeDevice Options.
November 15, 2018
New AWS Regionsupported (p. 188)
Snowball Edge devices are nowavailable in the Asia Pacific(Mumbai). Note that computeinstances and AWS Lambdapowered by AWS Greengrass arenot supported in this region.
September 24, 2018
Introducing support for AmazonEC2 compute instances onSnowball Edge devices (p. 188)
AWS Snowball now supportslocal Amazon EC2 computeinstances running on SnowballEdge devices. For moreinformation about jobs usingAmazon EC2 compute instances,see https://docs.amazonaws.cn/snowball/latest/developer-guide/using-ec2.html.
July 17, 2018
Improved troubleshootingcontent (p. 188)
The troubleshooting chapter hasbeen updated and reorganized.
July 11, 2018
The following table describes documentation releases for the AWS Snowball Edge device before July2018.
Change Description Date
New AWS Region supported AWS Snowball is now supportedin the Asia Pacific (Singapore)region. For more informationon shipping in this AWS Region,see Shipping Considerations forAWS Snowball (p. 117).
April 3, 2018
Automatically extracted batchesof small files are now supported
You can now batch many smallfiles together into a largerarchive, and specify that thosebatches are automaticallyextracted when the data isimported into Amazon S3.Batching small files togethercan significantly improveyour transfer performancewhen moving data fromyour on-premises server to aSnowball Edge device. For more
March 20, 2018
189
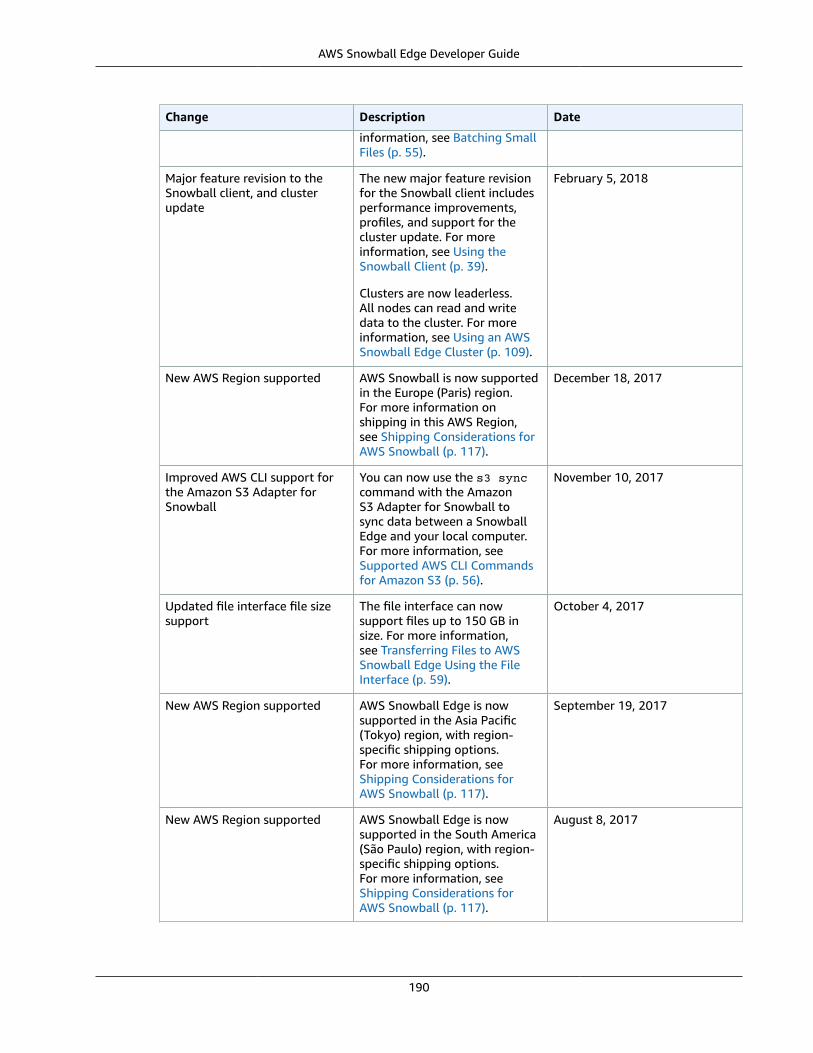
AWS Snowball Edge Developer Guide
Change Description Date
information, see Batching SmallFiles (p. 55).
Major feature revision to theSnowball client, and clusterupdate
The new major feature revisionfor the Snowball client includesperformance improvements,profiles, and support for thecluster update. For moreinformation, see Using theSnowball Client (p. 39).
Clusters are now leaderless.All nodes can read and writedata to the cluster. For moreinformation, see Using an AWSSnowball Edge Cluster (p. 109).
February 5, 2018
New AWS Region supported AWS Snowball is now supportedin the Europe (Paris) region.For more information onshipping in this AWS Region,see Shipping Considerations forAWS Snowball (p. 117).
December 18, 2017
Improved AWS CLI support forthe Amazon S3 Adapter forSnowball
You can now use the s3 synccommand with the AmazonS3 Adapter for Snowball tosync data between a SnowballEdge and your local computer.For more information, seeSupported AWS CLI Commandsfor Amazon S3 (p. 56).
November 10, 2017
Updated file interface file sizesupport
The file interface can nowsupport files up to 150 GB insize. For more information,see Transferring Files to AWSSnowball Edge Using the FileInterface (p. 59).
October 4, 2017
New AWS Region supported AWS Snowball Edge is nowsupported in the Asia Pacific(Tokyo) region, with region-specific shipping options.For more information, seeShipping Considerations forAWS Snowball (p. 117).
September 19, 2017
New AWS Region supported AWS Snowball Edge is nowsupported in the South America(São Paulo) region, with region-specific shipping options.For more information, seeShipping Considerations forAWS Snowball (p. 117).
August 8, 2017
190

AWS Snowball Edge Developer Guide
Change Description Date
Updated AWS IoT Greengrassand Lambda functionality
Lambda functions running onAWS Snowball Edge devicescan now be added, updated,removed, or replaced, oncethe devices are on-premises. Inaddition, AWS Snowball Edgedevices can now be used as AWSIoT Greengrass core devices. Formore information, see UsingAWS Lambda with an AWSSnowball Edge (p. 66).
July 25, 2017
New AWS Region supported AWS Snowball Edge is nowsupported in the Canada(Central) region, with region-specific shipping options.For more information, seeShipping Considerations forAWS Snowball (p. 117).
June 29, 2017
Updated file interfacefunctionality
With the file interface, youcan now choose the NetworkFile System (NFS) clients thatare allowed to access the fileshare on the Snowball Edge,in addition to accessing othersupport and troubleshootingfeatures. For more information,see Transferring Files to AWSSnowball Edge Using the FileInterface (p. 59).
June 21, 2017
Updated cluster functionality Clusters can now be created ingroups of 5–10 AWS SnowballEdge devices. For moreinformation, see Using an AWSSnowball Edge Cluster (p. 109).
June 5, 2017
191
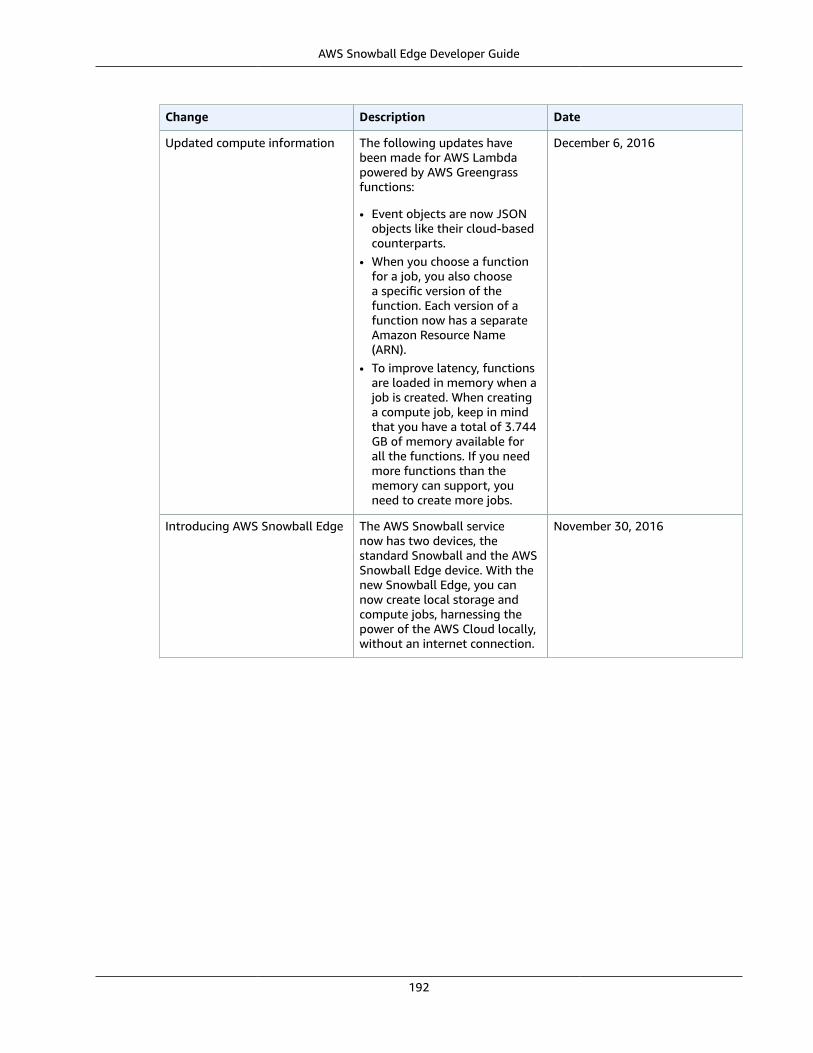
AWS Snowball Edge Developer Guide
Change Description Date
Updated compute information The following updates havebeen made for AWS Lambdapowered by AWS Greengrassfunctions:
• Event objects are now JSONobjects like their cloud-basedcounterparts.
• When you choose a functionfor a job, you also choosea specific version of thefunction. Each version of afunction now has a separateAmazon Resource Name(ARN).
• To improve latency, functionsare loaded in memory when ajob is created. When creatinga compute job, keep in mindthat you have a total of 3.744GB of memory available forall the functions. If you needmore functions than thememory can support, youneed to create more jobs.
December 6, 2016
Introducing AWS Snowball Edge The AWS Snowball servicenow has two devices, thestandard Snowball and the AWSSnowball Edge device. With thenew Snowball Edge, you cannow create local storage andcompute jobs, harnessing thepower of the AWS Cloud locally,without an internet connection.
November 30, 2016
192

AWS Snowball Edge Developer Guide
AWS glossaryFor the latest AWS terminology, see the AWS glossary in the AWS General Reference.
193