Embed Size (px)
Citation preview
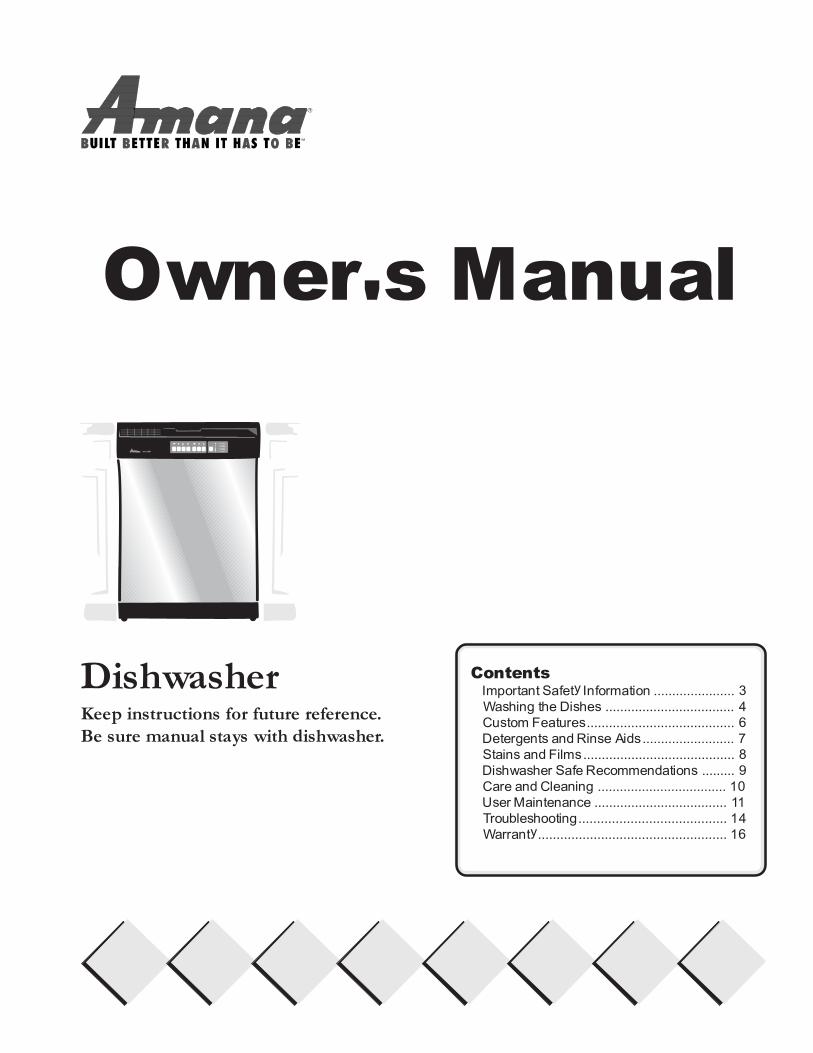
Owner's Manual
ContentsImportant Safety Information ...................... 3Washing the Dishes ................................... 4Custom Features ........................................ 6Detergents and Rinse Aids ......................... 7Stains and Films ......................................... 8Dishwasher Safe Recommendations ......... 9Care and Cleaning ................................... 10User Maintenance .................................... 11Troubleshooting ........................................ 14Warranty ................................................... 16
DishwasherKeep instructions for future reference.Be sure manual stays with dishwasher.
2
Please take the time to complete the registration card and return promptly.If registration card is missing, call Amana Consumer Affairs Department.When contacting Amana, provide product information from serial platefound on the inside right edge of the dishwasher:
Model Number __________________________________Manufacturing (P) Number _________________________Serial Number (S/N) ______________________________Purchase Date __________________________________Dealer Name ___________________________________Dealer Address _________________________________Dealer Phone ___________________________________
Keep this manual and your sales receipt together in a safe place forfuture reference or if warranty service is required.
For answers to questions or to locate an authorized servicer, call1-800-NAT-LSVC (1-800-628-5782). Warranty service must be performedby an authorized servicer. Amana Appliances also recommendscontacting an authorized servicer if service is required after warrantyexpires.
What You Need to Knowabout Safety InstructionsWarning and Important SafetyInstructions appearing in this manualare not meant to cover all possibleconditions and situations that may occur.Common sense, caution, and care mustbe exercised when installing,maintaining, or operating dishwasher.
Always contact your dealer, distributor,service agent, or manufacturer aboutproblems or conditions you do notunderstand.
Thank you for buying an Amana® dishwasher!
For more information on this and other Amanaproducts, visit our Web site
www.amana.comor
call Consumer Affairs Department at
1-800-843-0304
Asure� ExtendedService PlanAmana Appliances offers long-termservice protection for this newdishwasher. Asure™ Extended ServicePlan, covering functional parts, labor,and travel charges, is specially designedto supplement a strong warranty.Call 1-800-528-2682 for information.
Parts and AccessoriesPurchase replacement parts andadditional accessories by phone.To order accessories for your Amanaproduct, call 1-800-843-0304.
Save Time and MoneyIf something seems unusual, pleasecheck “Troubleshooting” section,which is designed to help you solveproblems before calling service. If youhave a question, write or call us(include model number and phonenumber) at:
Consumer Affairs DepartmentAmana Appliances2800 - 220th TrailAmana, Iowa 52204Ph# 1-800-843-0304
Recognize Safety Symbols, Words, Labels
DANGER!DANGER�Immediate hazards which WILL result in severe personalinjury or death
WARNING!WARNING�Hazards or unsafe practices which COULD result in severepersonal injury or death.
CAUTION!CAUTION�Hazards or unsafe practices which COULD result in minorpersonal injury or product or property damage.
3
IMPORTANT SAFETY INFORMATION
WARNING!
To avoid risk of fire, electric shock, serious injury, or death when using your dishwasher, follow these basicprecautions:
1. Read all instructions before using the dishwasher.
2. Use the dishwasher only for its intended function.
3. Use only detergents or wetting agents recommended for use in a dishwasher and keep them out of thereach of children.
4. When loading items to be washed:
� Locate sharp items so that they are not likely to damage the door seal.
� Load sharp knives with the handles up to reduce the risk of cut-type injuries.
5. Do not wash plastic items unless they are marked 'dishwasher safe' or the equivalent. For plastic itemsnot so marked, check the manufacturer's recommendations.
6. Do not touch the heating element during or immediately after use.
7. Do not operate your dishwasher unless all enclosure panels are properly in place.
8. Do not tamper with controls.
9. Do not abuse, sit on or stand on the door or dish rack of the dishwasher.
10. To reduce the risk of injury, do not allow children to play in or on a dishwasher.
11. Under certain conditions, hydrogen gas may be produced in a hot-water system that has not been usedfor two weeks or more. HYDROGEN GAS IS EXPLOSIVE. If the hot-water system has not been used forsuch a period, before using the dishwasher turn on all hot-water faucets and let the water flow from eachfor several minutes. This will release any accumulated hydrogen gas. As the gas is flammable, do notsmoke or use an open flame during this time.
12. Remove the door to the washing compartment when removing an old dishwasher from service ordiscarding it.
SAVE THESE INSTRUCTIONS
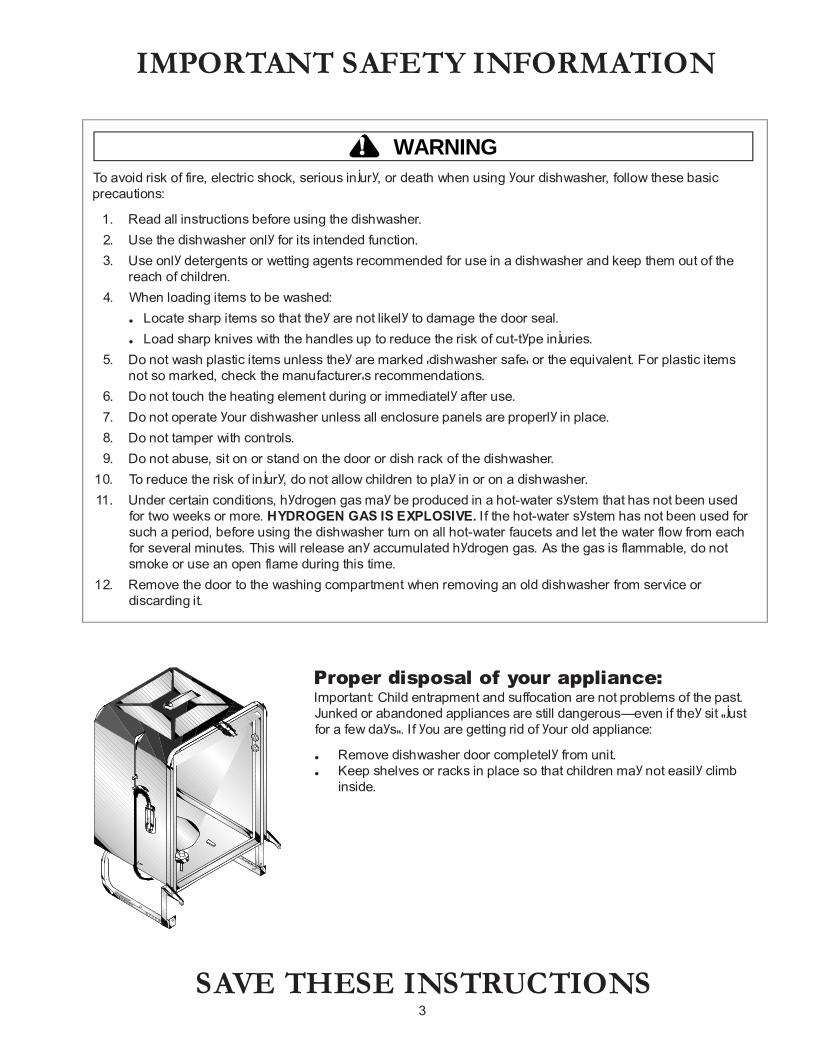
Proper disposal of your appliance:Important: Child entrapment and suffocation are not problems of the past.Junked or abandoned appliances are still dangerous�even if they sit "justfor a few days". If you are getting rid of your old appliance:
� Remove dishwasher door completely from unit.� Keep shelves or racks in place so that children may not easily climb
inside.
4
Washing the Dishes
1. Prepare dishes for washing
For best results:� Scrape away large pieces of food, bones, pits, toothpicks, etc.� Burned-on foods should be loosened before loading.� Empty liquids from glasses and cups.� Foods such as mustard, mayonnaise, vinegar, lemon juice and
tomato based products may cause discoloration over time. It is best torinse off these soils if not operating the dishwasher right away.
� Check manufacturer's recommendations before washing items inquestion.
2. Load bottom rack
To ensure best cleaning:� Make sure tall items do not block spray arm rotation.� Place plates and platters so they do not touch.� Do not load glasses in bottom rack. Damage may occur.� Do not place plastic items in bottom rack. They may melt.� Place bowls, casseroles and saucepans with the soiled surface facing
down. Tilt slightly for better drainage.� Be sure pan handles do not protrude through the bottom of rack and
block spray arm rotation.
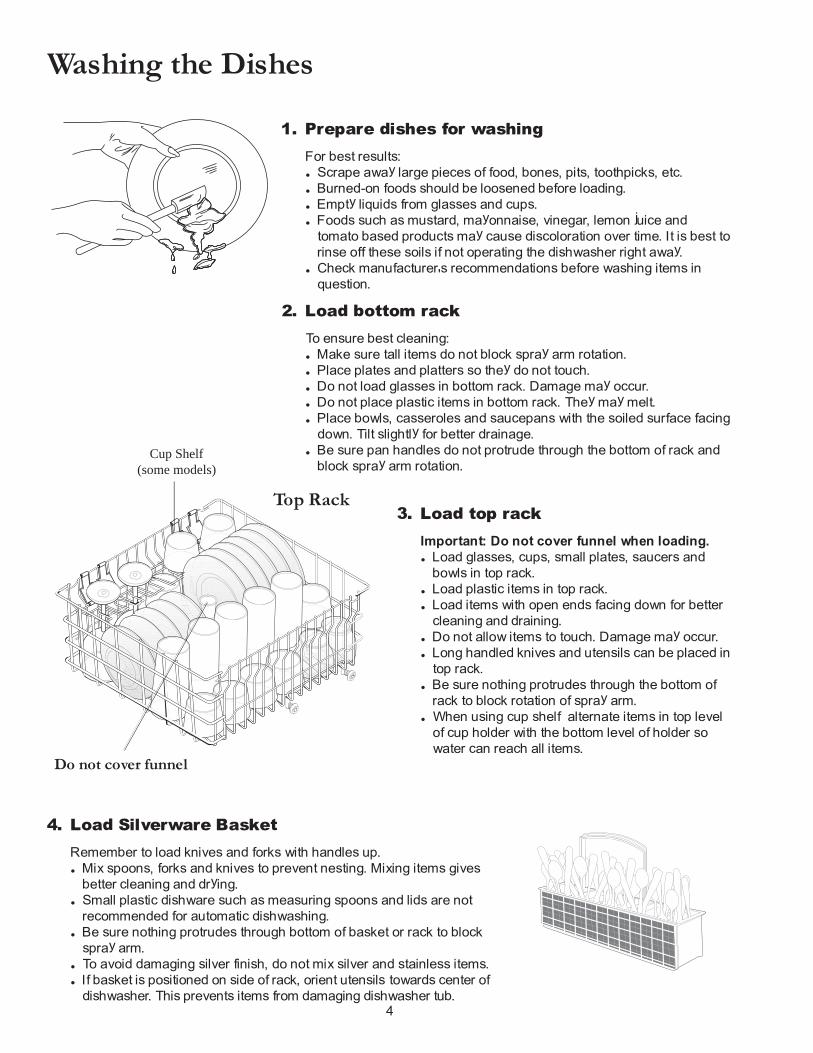
3. Load top rack
Important: Do not cover funnel when loading.� Load glasses, cups, small plates, saucers and
bowls in top rack.� Load plastic items in top rack.� Load items with open ends facing down for better
cleaning and draining.� Do not allow items to touch. Damage may occur.� Long handled knives and utensils can be placed in
top rack.� Be sure nothing protrudes through the bottom of
rack to block rotation of spray arm.� When using cup shelf alternate items in top level
of cup holder with the bottom level of holder sowater can reach all items.
4. Load Silverware Basket
Remember to load knives and forks with handles up.� Mix spoons, forks and knives to prevent nesting. Mixing items gives
better cleaning and drying.� Small plastic dishware such as measuring spoons and lids are not
recommended for automatic dishwashing.� Be sure nothing protrudes through bottom of basket or rack to block
spray arm.� To avoid damaging silver finish, do not mix silver and stainless items.� If basket is positioned on side of rack, orient utensils towards center of
dishwasher. This prevents items from damaging dishwasher tub.
Cup Shelf(some models)
Do not cover funnel
Top Rack
5
5. Check rinse aid dispenser
Rinse aids reduce water spots and hard water film, especially where lowwater temperature or pressure are problems.
� To increase the amount of rinse aid dispensed, rotate the dial to ahigher number.
� The indicator will be dark when the rinse aid dispenser is full, clearwhen more needs to be added.
� To add more rinse aid, see Detergents and Rinse Aids.
6. Add dishwashing detergent
Use detergent manufactured for automatic dishwashers only.Other types will cause oversudsing. For information about how muchdetergent to use see Detergents and Rinse Aids.
� Fill uncovered detergent cup if using a prewash cycle.� Fill covered detergent cup for main wash cycle.� Check racks so large items do not prevent covered detergent cup
from opening during main wash cycle.� Use only fresh automatic dishwashing detergent. Moist or caked
detergent will not dissolve properly.
7. Close door - Electronic Models
For models with electronic cycle selection, close dishwasher door andlatch securely.
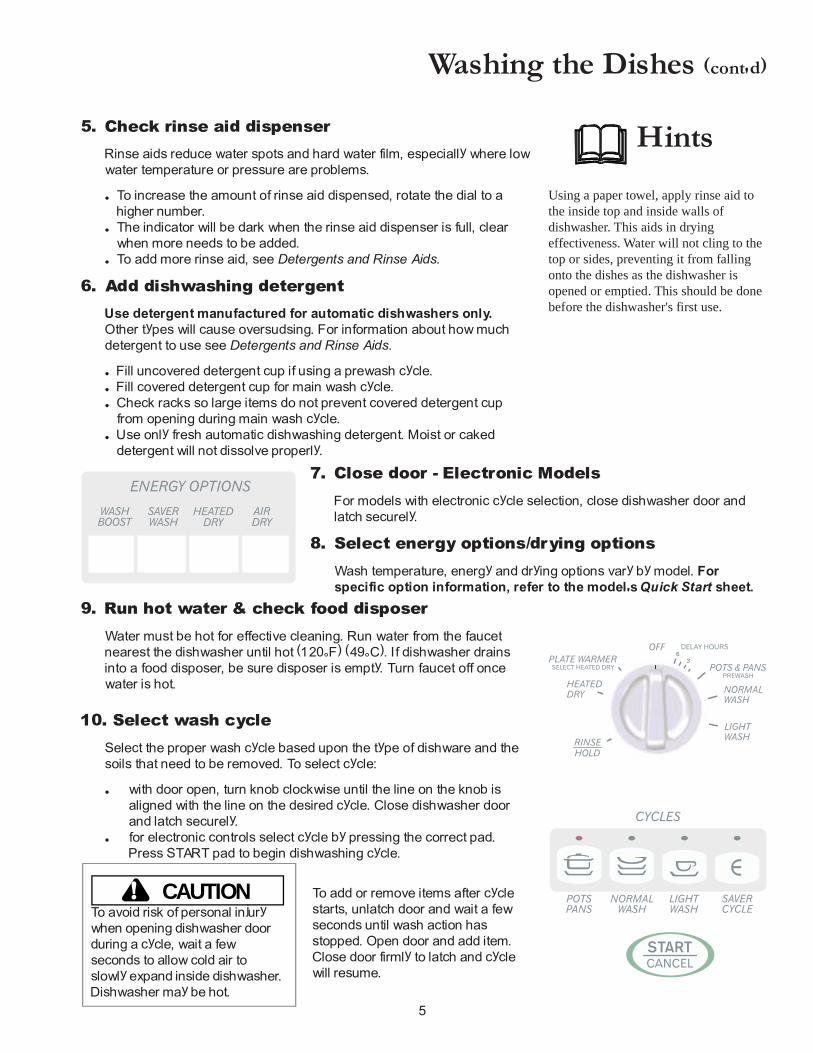
8. Select energy options/drying options
Wash temperature, energy and drying options vary by model. Forspecific option information, refer to the model's Quick Start sheet.
Hints
Using a paper towel, apply rinse aid tothe inside top and inside walls ofdishwasher. This aids in dryingeffectiveness. Water will not cling to thetop or sides, preventing it from fallingonto the dishes as the dishwasher isopened or emptied. This should be donebefore the dishwasher's first use.
Washing the Dishes (cont'd)
9. Run hot water & check food disposer
Water must be hot for effective cleaning. Run water from the faucetnearest the dishwasher until hot (120°F) (49°C). If dishwasher drainsinto a food disposer, be sure disposer is empty. Turn faucet off oncewater is hot.
10. Select wash cycle
Select the proper wash cycle based upon the type of dishware and thesoils that need to be removed. To select cycle:
� with door open, turn knob clockwise until the line on the knob isaligned with the line on the desired cycle. Close dishwasher doorand latch securely.
� for electronic controls select cycle by pressing the correct pad.Press START pad to begin dishwashing cycle.
CAUTION!To avoid risk of personal injurywhen opening dishwasher doorduring a cycle, wait a fewseconds to allow cold air toslowly expand inside dishwasher.Dishwasher may be hot.
To add or remove items after cyclestarts, unlatch door and wait a fewseconds until wash action hasstopped. Open door and add item.Close door firmly to latch and cyclewill resume.
6
Custom Features
Dishwasher Wash Cycles (without heat delay)NOTE: Not all cycles available on all models
Wash Cycle Pot/Soil Type
CycleTime
(minutes)
WaterUsed
(approx.)Washes/Rinses
Pots & PansPots, pans, casseroles and dinnerware withdried or baked on soils.
84 to 115 7.2 to 9.7 gallons2 washes
4 to 6 rinses
Normal Wash Regularly soiled dishes and silverware. 75 to 95 4.9 to 9.7 gallons2 washes
2 to 6 rinses
Light Wash For lightly soiled or pre-rinsed dishes andsilverware.
75 to 105 4.8 to 8.5 gallons 1 wash3 to 6 rinses
Saver Cycle For lightly soiled china and crystal. 65 3.7 gallons1 wash2 rinse
Rinse/Hold For rinsing dishes that will be washed later. 6-18 1.2 to 2.5 gallons 1 to 2 rinses
Power VentingTo speed the drying process, a fan circulates the air inside the dishwasher.The fan operates whether or not heated dry is selected. If heated dry isnot selected, the dishwasher door may be opened slightly to speedthe drying process after the dry cycle.
Clean SensorThis feature senses the amount of soil on the dishes during the Pots andPans, Normal, and Light Wash cycles. Depending on how soiled the dishesare water fills will be added or deleted to the cleaning cycle, allowing themost efficient use of water.
SANITIZEThis feature raises the final rinse temperature to 150°F (66°C). This hightemperature is maintained for 10 minutes while rinsing the dishes. Cycle timemay increase depending on incoming water temperature. For best results,incoming water temperature must be at least 120°F (49°C). This option canbe selected in Pots & Pans, Normal Wash, and Light Wash cycles.
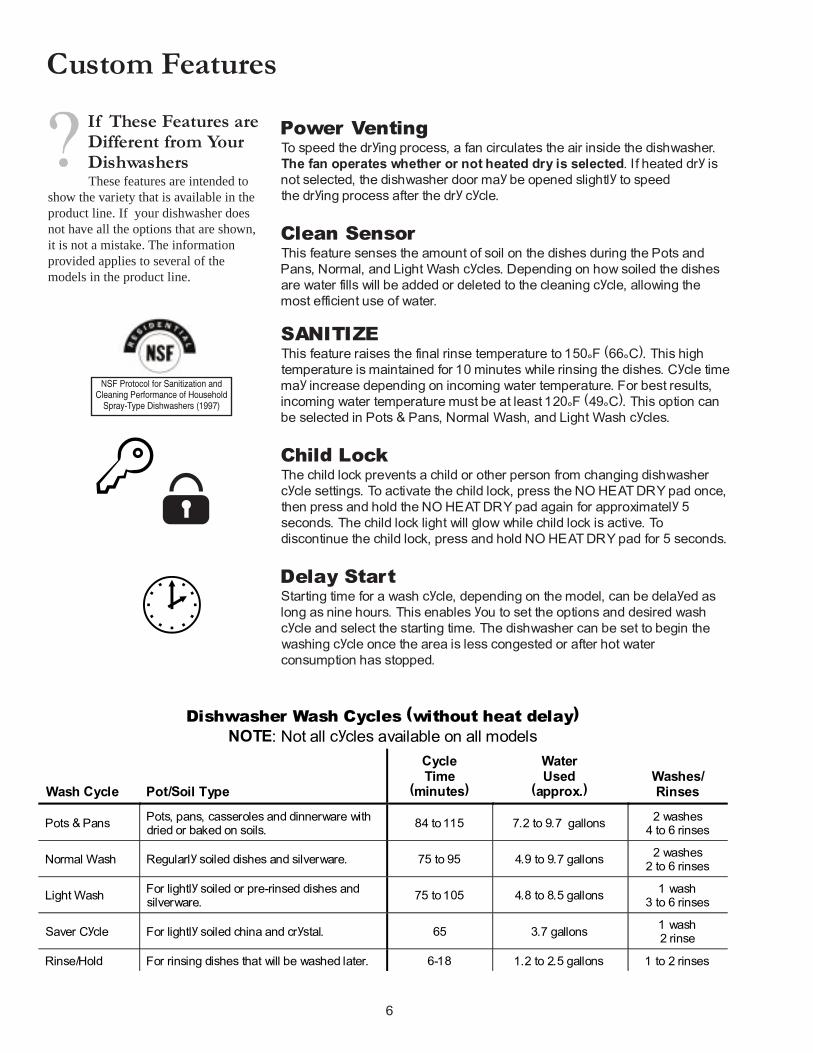
Child LockThe child lock prevents a child or other person from changing dishwashercycle settings. To activate the child lock, press the NO HEAT DRY pad once,then press and hold the NO HEAT DRY pad again for approximately 5seconds. The child lock light will glow while child lock is active. Todiscontinue the child lock, press and hold NO HEAT DRY pad for 5 seconds.
Delay StartStarting time for a wash cycle, depending on the model, can be delayed aslong as nine hours. This enables you to set the options and desired washcycle and select the starting time. The dishwasher can be set to begin thewashing cycle once the area is less congested or after hot waterconsumption has stopped.
¸
B
If These Features areDifferent from YourDishwashersThese features are intended to
show the variety that is available in theproduct line. If your dishwasher doesnot have all the options that are shown,it is not a mistake. The informationprovided applies to several of themodels in the product line.

7
How Much Detergent to UseThe amount of detergent to use depends on water hardness, the type ofdetergent (regular or ultra) and the phosphorus content in the detergent.
Water hardness is measured in grains per gallon. The higher the number ofgrains, the harder the water. The harder the water, the more detergent needed.Using too little detergent in hard water results in dirty dishes and hard waterfilming or spotting. Using too much detergent in soft water results in permanentetching in the dishes. Your local water company, water softener company orcounty extension agent can tell you the water hardness in your area.
More detergent may be needed if the phosphorus content is 8.7% or less.The phosphorus content is shown on the detergent label. Due toenvironmental concerns, phosphorus use has been reduced, and detergentscontaining phosphates are not available in some areas.
Detergents and Rinse Aids
Rinse AidsRinse aids are extremelybeneficial where lowwater temperature orpoor water pressure are
problems. Rinse aid also helpsreduce water spots and marks fromlarge water droplets clinging to dishesas they dry.
The dispenser, located next to thedetergent cup, automatically releasesa preset amount of rinse aid duringthe last rinse cycle. To adjust theamount of rinse aid dispensed, rotatethe dial to a higher number. Thedispenser holds enough rinse aid for35 to 140 washes, depending onsetting. The indicator will be darkwhen the rinse aid dispenser is full,and will be clear when more needs tobe added.
To add liquid rinse aid:
1. Turn dispenser cap 1/4 turncounterclockwise and lift out.
2. Pour in rinse aid until liquidtouches the indicated fill level.Do not overfill. Spilling canlead to foaming, causingoverflow.
3. Replace cap.4. Wipe up any spills with damp
cloth to avoid oversudsing.
Is It Fresh?The type and quality of detergent usedwill make a difference on effectivenessof the dishwasher. A detergent that istoo old, clumpy, or damp will not be aseffective as one that is fresh. Activeingredients in the detergent degradeover time so the detergent no longerworks properly.
Detergent Chart
Water Hardness Grains Amount per Cup
Soft 0 � 3 grains 2 Teaspoons
Medium 4 � 8 grains 5 Teaspoons
Hard 9 + 10 Teaspoons (fill level to top)
12 grains and higher is extremely hard water. Detergent alone may not beenough. A water softener is recommended to improve water quality anddishwashing performance.
Detergent Cup
Dispenser Cap
Rinse Aid Dispenser
Detergent Cup Cover
Rinse Aid Indicator
8
Stains and Films
RemovalSolutionTo remove buildup, ruststains from thedishwasher interior,spots and film from both
the dishwasher interior and dishes, cleanusing the following instructions.
1. Load clean dishes and glasses innormal manner. Do not load anymetal utensils or silverware.
2. DO NOT add detergent.3. Select the NORMAL WASH
cycle. Close and latch door to start.4. Allow dishwasher to run for 25
minutes to reach the main washportion of wash cycle.
5. Unlatch and open door and pour 2cups of white vinegar into thebottom of dishwasher.
6. Close and latch door and allow thecycle to finish.
7. If condition persists repeat aboveprocedure using 1/4 cup of citricacid crystals instead of vinegar instep 5. Contact Consumer Affairsto order citric acid crystals (partnumber R0910039)
8. When using citric acid crystals,DO NOT load dishwasher withdishes.
9. Run an empty load on a normalcycle before placing dishes in thedishwasher.
Prevention is the best method for ending stain or film problems. Stains andfilms can be caused by one or multiple problems. Some common steps toprevent films or stains:
1. Rinse all dishes immediately after use. Foods such as coffee and tea,tomato or citric based products can cause stains when left on dishwareor utensils.
2. Test your water hardness. Depending on water hardness, it may benecessary to use more or less detergent to get your dishes clean.Using too much detergent in soft water will lead to etching, making thedishes appear filmed.
3. Use the removal solution with a normal wash cycle on a regular basis.This will avoid a lime build up that is difficult to remove with one washing.
4. Do not allow aluminum flatware or dishes to come in contact with otherdishware. Aluminum can mark porcelain and other dishware, leavingdistinctive aluminum marks.
Stop stains before they get started
STAINS AND FILMS
Stain Cause Removal
Tea or coffee Left in cups too long
Hand wash in solution of ½cup (120 ml) bleach and onequart (1 L) of warm water.Rinse thoroughly.
Iron deposits(yellow or brownfilm)
Unfiltered water
Use citric acid crystalsavailable from AmanaConsumer Affairs.A special filter installed in thewater supply line will correctthis problem.
Aluminum marks(gray or black marks)
Aluminum utensilsimproperly loaded
Load properly, see RemovalSolution.
Discoloration ofplasticsor stainless steel
Certain high acid foodsleft in contact for a longtime
Use Rinse & Hold cycle orrinse by hand if not operatingdishwasher at once.
Pitting of stainlesssteel
Mixing stainless steeland silver utensils insilverware basket
No treatment. Avoid mixingstainless steel and silverutensils.
Lime deposits/scale Hard water deposits See Removal Solution.
9
To get best results from your new dishwasher, do not attempt to wash anything not designed to be washed by anautomatic dishwasher. In general, do not try to wash dishware that may be heat-sensitive, that should not be jostledaround by the water action of the spray arms, or that has sentimental value.
Dishwasher Safe Recommendations
Dishwasher Safe Items
MaterialUsually
Safe Special Instructions
Aluminum Yes Some darkening or spotting possible. Remove by scouring with soap-filled steelwool pads. Some colored anodized aluminum can fade.
ChinaStoneware
Yes Load securely to prevent movement. Check china manufacturer�s instructions. Donot wash antique, gold leaf, metal trimmed, hand painted or over the glazepatterns.
Crystal Yes Load securely to prevent movement. Do not use the SaniSure or any heat boostoption, if available. Check crystal manufacturer�s instructions. Wash cycle shouldbe a low temperature wash or the crystal may crack. Antique, metal trimmed, goldleaf, hand painted or over the glaze patterns should not be washed.
Glass Yes Milk glass may yellow.
Iron No Not considered dishwasher safe.
Non-dishware(filters, etc.)
No Damage, discoloration or staining of dishwasher may result.
Non-stickcoatings
Yes After washing, wipe non-stick coating with vegetable oil to keep coating fromlosing non-stick quality.
Pewter No Not considered dishwasher safe.
Plastics Yes If plastic does not say �dishwasher-safe�, test one piece before washing entire set(top rack reduces heat).
Stainless Steel Yes Rinse if not washing immediately. Salty or acid foods can stain if left on.
Sterling silverSilver plate
Yes Rinse if not washing immediately. Salty or acid foods can stain if left on. Powderdetergent can cause black spots. Avoid placing near detergent dispenser. Do notwash with stainless steel or copper.
Tin No Not considered dishwasher safe.
Wood No Wooden carving boards and cooking utensils can be washed to sanitize, but willwarp and separate at seams over time.
10
General Dishwasher Care:� Do not use abrasive, harsh cleaners, solvents, concentrated detergents
or metal scouring pads to clean the inside of dishwasher.� Occasionally wipe the outside panel with a mild nonabrasive cleaner
and water. Rinse and dry.� Inside of tub is self cleaning with normal use. If needed, clean around
the tub gasket with a damp cloth.� To remove lime deposit buildup on interior of dishwasher see
Stains and Films section in this manual.� The filter is self-cleaning.
WARNING!To avoid risk of burns, allowheating element to cool beforecleaning the interior.
Care and Cleaning
Glass TrapA glass trap is located in the bottom of the dishwasher next to the filter. Thistrap is designed to collect pieces of small bone, pits, or larger pieces of food.It will need to be emptied. To remove items from the glass trap, grasp thehandle and lift the glass trap out. Empty and clean, and then replace theglass trap before the next use.
Overfill ProtectorThe overfill protector keeps the dishwasher from overfilling during a wash orrinse cycle. It is located in the lower left front corner of the dishwasherbottom. The overfill protector should move up and down freely about oneinch.
� Clean the protector occasionally with household cleaner containingvinegar or bleach to dissolve any buildup.
� To ensure easy movement, clean underneath the protector.
Citric Acid
To prevent damage to thefinish of your stainless
steel appliance, do not allow mustard,tomato juice, marinara sauce, orother citrus based sauces or productsto remain on stainless steel surface.Citric acid permanently discolorsstainless steel.
Cleaning Stainless SteelStainless steel appliances have been factory finished for high shine andluster. To maintain this quality appearance:
DO USE:� Warm soapy water for routine
cleaning.� Dry with soft, clean cloth.� For heavy soil, ONLY a stainless
steel cleaner designed forkitchen appliance use.
DO NOT USE:� Abrasive powders or liquids� Citrus based cleaners� Ammonia� Steel wool pads� Abrasive cloths� Oven cleansers� Acidic or vinegar based cleaners
Damage to stainless steel finish due to improper use of cleaning products, or using non-recommendedcleaning products, is not covered under warranty. For stainless steel cleaner, call our Consumer Affairs divisionat (800) 843-0304 and request part number 31960801.
11
User Maintenance
Water PressureWater line to the dishwasher must provide water pressure between 20 and120 psi. Without proper pressure, food residue may not be removedeffectively. Normal water pressure may be reduced by running laundry orshowers at the same time as the dishwasher. For best results, wait until wateruse is reduced before operating the dishwasher. The dishwasher can beprepared for a wash cycle and be set for a delay start when water use isreduced.
Water TemperatureImportant: Before starting dishwasher, run water until hot.Hot water is needed for best dishwashing and drying results.Water entering dishwasher should be at least 120°F (49°C)to give satisfactory results. Having cooler water may result in
longer wash times, if the dishwasher needs to heat the water before runninga wash cycle, or reduced performance.
To check water temperature entering dishwasher:
� Turn on hot water faucet nearest dishwasher for several minutes toclear cool water from pipes.
� Hold a candy or meat thermometer in stream of water to check thetemperature.
� If temperature is below 120°F (49°C) have a qualified person raise thethermostat setting on household water heater.
� Powder detergent may not completely dissolve or be effective if watertemperature is below 120°F (49°C).
WinterizingA dishwasher left in an unheated place should be protectedfrom freezing.
To Disconnect Service:1. Turn off electrical power to the dishwasher at the supply source by
removing fuses or tripping circuit breaker.2. Shut off water supply.3. Place a pan under the inlet valve. Disconnect water line from inlet valve
and drain into pan.4. Disconnect drain line from pump and drain water into pan.
To Restore Service:1. Reconnect the water, drain, and electrical power supply.2. Turn on water and electrical power supply.3. Fill both detergent dispensers and run dishwasher through a NORMAL
cycle.4. Check connections to make sure they do not leak.
CAUTION!To avoid property damage allsupply lines to and circulatingwithin dishwasher must beprotected. Freezingtemperatures may cause waterlines to rupture.
Caring for a Drain Air GapIf a drain air gap was installed for yourbuilt-in dishwasher, check to make sureit is clean so the dishwasher will drainproperly. A drain air gap is usuallymounted on the countertop and can beinspected by removing the cover. This isnot part of your dishwasher and is notcovered under warranty.
12
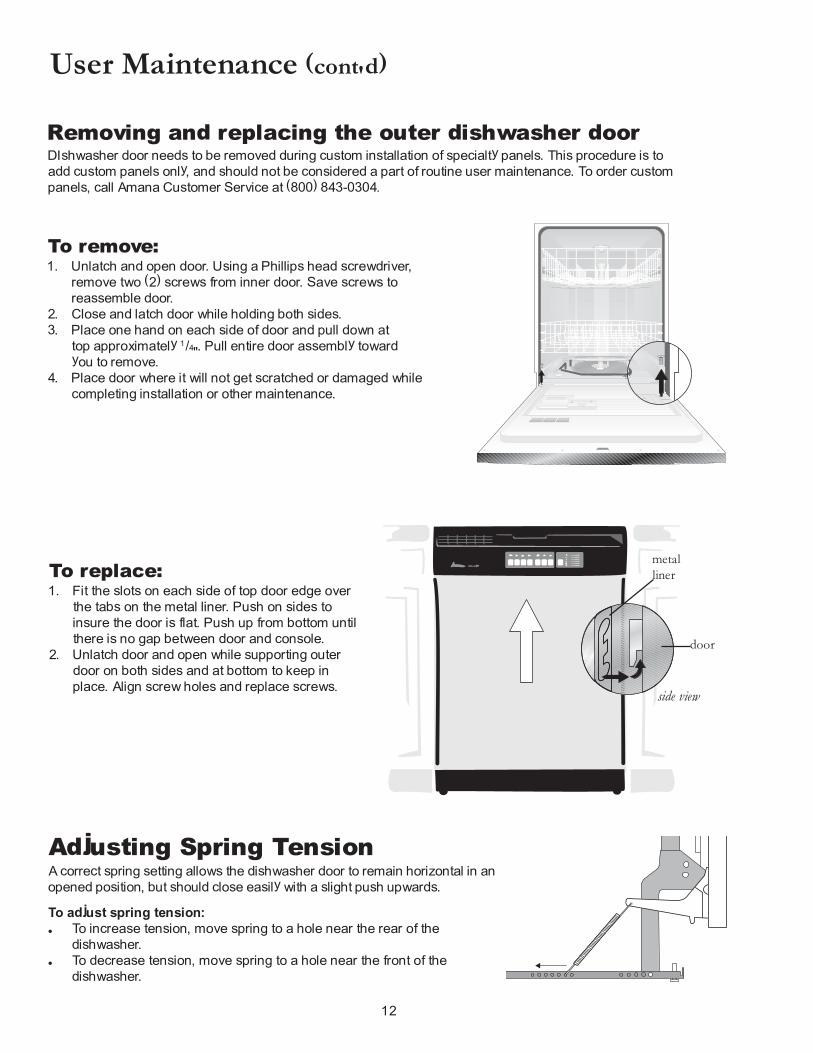
Removing and replacing the outer dishwasher doorDIshwasher door needs to be removed during custom installation of specialty panels. This procedure is toadd custom panels only, and should not be considered a part of routine user maintenance. To order custompanels, call Amana Customer Service at (800) 843-0304.
User Maintenance (cont'd)
To replace:1. Fit the slots on each side of top door edge over
the tabs on the metal liner. Push on sides toinsure the door is flat. Push up from bottom untilthere is no gap between door and console.
2. Unlatch door and open while supporting outerdoor on both sides and at bottom to keep inplace. Align screw holes and replace screws.
door
metalliner
side view
To remove:1. Unlatch and open door. Using a Phillips head screwdriver,
remove two (2) screws from inner door. Save screws toreassemble door.
2. Close and latch door while holding both sides.3. Place one hand on each side of door and pull down at
top approximately 1/4". Pull entire door assembly towardyou to remove.
4. Place door where it will not get scratched or damaged whilecompleting installation or other maintenance.
Adjusting Spring TensionA correct spring setting allows the dishwasher door to remain horizontal in anopened position, but should close easily with a slight push upwards.
To adjust spring tension:� To increase tension, move spring to a hole near the rear of the
dishwasher.� To decrease tension, move spring to a hole near the front of the
dishwasher.

13
14
You may save time and money by checking items below before calling for service. List includes common concernsthat are not the result of defective workmanship or materials. If your question is not explained below, contact AmanaConsumer Affairs Department at 800-843-0304.
Troubleshooting
TOPIC POSSIBLE CAUSE SOLUTION
NOISE
Dishwasher pauses (no noise) Wash action is switching between arms. Normal
OPERATION
Circuit breaker/fuse blownReplace household fuse or reset circuitbreaker
Cycle set incorrectlySee Operating Instructions. Make sure delay start option is not selected.
Door ajar Shut door securely and latch.
Dishwasher won�t run
Inadequate water supplyMake sure water supply is turned on, waterpressure is between 20 and 120 psi.
CLEAN light continues to glow after awash cycle
CLEAN light is a feature on some models toindicate the dishes in the washer are clean.Light can remain on until dishwasher isunloaded. To shut off light, turn knob to OFFposition.
Normal
Wrong cycle selected Try a longer cycle.
Dishes stacked incorrectlyAvoid nesting items. Allow enough space forwater to reach all areas.
Low water pressureMake sure the water pressure is between 20and 120 psi.
Low water temperatureCheck water temperature. Water temperatureneeds to be at least 120 °F (49 °C).
Hard waterIncrease detergent depending upon waterhardness. Install water softener.
Blocked funnel Remove blockage (upper rack)
Blocked spray arms (not rotating)Make sure there are no utensils protrudingfrom utensil basket.
No rinse aid Fill rinse aid container.
Food soil left on dishes orGlassware/Flatware spotted or cloudy
Poor detergentMake sure detergent is fresh. Increasephosphate level if possible.
No rinse aidRinse aid level too low
Fill rinse aid container or increase amountdispensed.
Low water temperatureCheck water temperature. Water temperatureneeds to be at least 120 °F (49 °C).
Heated dry option is off. Select heated dry.
Dishes not dry
Cups with concave bottom Normal.
Dishware chipped Poor loading
Load with care. Do not overload. Avoidnesting. Place glasses securely against pins.Delicate items should go in top rack. Makesure tall glasses and stemware will clear topof tub when rack is pushed in. Fine antiquechina and crystal should be hand washed.
15
Troubleshooting
OPERATION (cont�d)
Oversudsing Hand washing dish soap or detergent.
Use detergent designed for automaticdishwashers.Add 1/4 cup vegetable oil to dishwasher whenit fills with water. The oil will help reduce theamount of sudsing.
Too much detergentReduce amount of detergent used per washcycle.
Temperature of water too hot Lower the water temperature.Etching
Drying too harsh Use the air dry option.
Old detergent Discard detergent and use fresh.
Blocked water actionBe sure water action can reach dispenser.Ensure items do not prevent the detergentdispenser from opening.
Detergent left in cups
Cycle incomplete Allow cycle to complete.
Soiled dishes Wash dishes more frequently.
�New scent� Normal
Improper draining See Dishwasher does not drain properly inTrouble Shooting, under WATER.
Dishwasher has an odor
Incomplete cycle Allow cycle to complete.
Stains Tomato based foods
Large amounts of dishware with tomato basedresidue can cause a pink/orange appearance.This does not affect performance and willgradually fade. Pre-rinsing or using the Rinse& Hold cycle will reduce the chance ofstaining. Using the Air Dry option will reducestaining.
WATER
Old detergent around seal or gasketCheck to make sure detergent residue is notcaked around door seal or gasket.
Rinse aidSpillage can cause foam and lead tooverflowing. Wipe up any spills with dampcloth
Cracked tub Damage. Contact place of purchase.
Dishwasher leaks
Not levelCheck to see that dishwasher is level. SeeInstallation Instructions.
Clogged food waste disposalMake sure disposal is empty prior to runningdishwasher.
Knockout plugCheck to see if the knockout plug has beenremoved from inside the food waste disposalinlet. See Installation Instructions.
Drain hose removed from side of unit. Verify that drain hose has not been removed.
Drain hose higher than antisiphon loopVerify that the extra drain hose does not travelhigher than the mandatory loop. DO NOTremove loop from dishwasher.
Dishwasher does not drain properly(Water in tub bottom)
Kinked drain hose Make sure drain hose is straight.
Water supply Verify that water supply is turned on.
Water pressureWater pressure should be between 20 and120 psi.Dishwasher won�t fill
Blocked overfill protectorOverfill protector should move up and downfreely.
2001 Amana AppliancesAmana, Iowa 52204
Amana Warranty
What is not covered by thesewarranties� Replacement of household fuses, resetting of
circuit breakers, or correction to household wiringor plumbing.
� Normal product maintenance and cleaning.� Products with original serial numbers removed,
altered, or not readily determined.� Products purchased for commercial, industrial,
rental, or leased use.� Products located outside of the United States.� Premium service charges, if the servicer is
requested to perform service in addition to normalservice or outside normal service hours or area.
� Adjustments after the first year.� Repairs resulting from the following:
� Improper installation or maintenance.� Any modification, alteration, or adjustment not
authorized by Amana.� Accident, misuse, abuse, fire, flood, or
acts of nature.� Connections to improper electrical current,
voltage supply or water supply.� Use of improper pans, containers, or accessories
that cause damage to the product.
To Receive Warranty Service
Service must be performed by an authorized Amanaservice representative. To schedule service, contact theAmana dealer where you purchased your appliance orcontact Amana Appliances Factory Service.
Amana Appliances Factory Service1-800-628-5782
For more information,Amana Appliances Consumer ServicesAmana Appliances2800 220th TrailAmana, Iowa 522041-800-843-0304
When contacting Amana Appliances pleaseinclude the following information:� Your name, address, and telephone number.� Model number and serial number of your
appliance.� The name and address of your dealer and the date
of purchase.� A clear description of the problem.� Proof of purchase (sales receipt).
Amana Appliances Online � http://www.amana.com
IN NO EVENT SHALL AMANA BE LIABLE FOR INCIDENTAL OR CONSEQUENTIAL DAMAGES.This warranty gives you specific legal rights, and you may have others which vary from state to state. For example, some statesdo not allow the exclusion or limitation of incidental or consequential damages, so this exclusion may not apply to you.
Full ONE Year WarrantyAmana Appliances will repair or replace, including related labor and travel, any part (f.o.b. Amana Iowa) whichhas proved to fail due to workmanship or materials.
Full TWENTY Year WarrantyAmana Appliances will repair or replace, including related labor and travel, any defective tub or inner door liner,(f.o.b. Amana Iowa) which has proved to fail due to workmanship or materials.
Limited WarrantySecond YearDuring the second year from the date of original retail purchase Amana will provide a replacement part, part only, forany failed water distribution system component (circulation pump/motor, drain pump/motor, lower spray arm system,middle spray arm system, delivery tube system and filtration system), which has proved to fail due to workmanship ormaterials. The owner will be responsible for paying all other costs including labor, mileage and transportation.
Second through Fifth YearDuring the second through fifth year from the date of original retail purchase, Amana will provide a replacementrack, rack only, which has proved to fail due to workmanship or materials. The owner will be responsible forpaying all other costs including labor, mileage and transportation.
Owner's Manual Number154397401Part No.12422605Printed in U.S.A.01/01