Embed Size (px)
Citation preview
Aloaha FindMail.eMail
Aloaha FindMail.eMail is an email archiving solution that can archive inbound-,
internal and outbound emails directly and transparently into a central mailstore.
Additionally emails can be pushed into the mail archive via the Exchange and/or
POP3 Connector.
Users can connect to their own email library from a web-based user interface. The
simple but very powerful user interface allows easy and very fast searches and mail
retrievals. Additionally, Aloaha can also be configured to act as a Mail
Server/Endpoint itself. Like that you can send all journaling mails to Aloaha.
Aloaha FindMail.eMail does NOT depend on any external database or any other
propriety technology, which means that Installation, Operation, and the Backup and
Disaster Recovery are as simple, reliable and straight forward as possible. This
translates into minimal requirements:
Server Requirements:
Any windows from Windows XP SP3 onwards
.NET 3.5 Framework
Windows Search
Not required:
Aloaha does NOT require any dedicated database
Aloaha does NOT require any dedicated web server for the web interface
Aloaha does NOT require any specific mail server or IIS
Client Requirements:
Web browser only. Ideally with cookies enabled
Download Links:
http://www.aloaha.com/download/aloaha_mail.zip
http://www.aloaha.com/downloader/setup_mail.exe
Features:
Very fast full text search on archived mails, PDF, TIFF and MS Office
Documents without dedicated central database.
Emails are saved in a plain folder structure to eliminate any worries regarding
long term archiving or database administration.
TIFF attachments are automatically passed to the internal OCR Engine and
included in the full text index.
WinWord (docx) documents and emails are internally converted to html and
saved as original document and additional as html document. Consequently,
users can preview their Word documents in the Aloaha Web Interface without
requiring any applications to be installed on the client – ideal for mobile
workers accessing the archive via mobile device.
Multithreaded.
Highly scalable - ideal for large end customers in private cloud scenarios
MS Exchange Connector included.
POP3 Connector included.
ASP.Net compatible Web Server included. HTTP and HTTPS
Aloaha can act as SMTP Proxy or Mail Server/Endpoint or both.
Tiny footprint of approx. 6 MB only!
Windows 8.1/10 and Windows Phone 8.1/10 Clients available.
Archive can be accessed via web interface or mail interface
(send an email to search@<yourdomain>)
Contents Aloaha FindMail.eMail .................................................................................................. 1
How can mails be archived? ...................................................................................... 5
Installing Aloaha FindMail.eMail .................................................................................. 5
Support and Blog ........................................................................................................... 5
Initial Settings ................................................................................................................ 6
Initial SMTP Configuration ........................................................................................... 7
IP and Domain Configuration ........................................................................................ 8
Local Domains and Local IPs .................................................................................... 8
Domain/IP Whitelist and Blacklist ............................................................................ 8
End Domains .............................................................................................................. 8
Auto-blacklist Mails................................................................................................... 8
Server Settings ............................................................................................................... 9
Server by Domain or User ....................................................................................... 10
User and Domain Mappings .................................................................................... 10
Library IDs ............................................................................................................... 11
Connectors ................................................................................................................... 12
Exchange Connector ................................................................................................ 12
POP3 Connector....................................................................................................... 13
Registry Settings .......................................................................................................... 14
Initial Settings .......................................................................................................... 14
Archive Location ................................................................................................. 14
ArchiveALL ......................................................................................................... 14
Basic security settings .......................................................................................... 14
Basic Settings ........................................................................................................... 15
Enable SMTP Proxy ............................................................................................ 15
SMTP listen IP ..................................................................................................... 15
SMTP listen port .................................................................................................. 15
RelayHost, RelayPort and RelayHostForceSSL .................................................. 15
Allowed Domains ................................................................................................ 15
File based configuration settings ................................................................................. 16
LocalDomains.txt ..................................................................................................... 16
LocalIPs.txt .............................................................................................................. 16
BlacklistedIPs.txt ..................................................................................................... 16
WhitelistedIPs.txt ..................................................................................................... 16
EndDomains.txt ....................................................................................................... 17
DomainBlacklist.txt and DomainWhiteList.txt ....................................................... 17
AutoBlackListMails.txt ............................................................................................ 18
ServerByDomain.ini and ServerByUser.ini ............................................................. 18
Server Configuration file format .......................................................................... 18
Archiver Web Interface ................................................................................................ 19
Usage of Archiver Web Interface ............................................................................ 19
Library ID ............................................................................................................ 19
Keywords ............................................................................................................. 19
Max. search results............................................................................................... 19
Folder Tree ........................................................................................................... 20
How can mails be archived?
There are several ways of getting mails into your archive:
You can use Aloaha as an SMTP Proxy between your perimeter and SMTP
Server and archive every mail passing through Aloaha.
It is possible to configure Aloaha as a Journaling Endpoint for MS Exchange
or other mail server.
With the Exchange Connector you can define a folder in your exchange
Inbox. Every item or subfolder which will be dropped into that folder will be
polled into the archive
You can use the POP3 downloader to download emails from a remote server
to inject into your local email workflow and archive them.
You can just mail your items to be archived to archive@<yourdomain>
Installing Aloaha FindMail.eMail
Since the installer of Aloaha is very compact (approx. 6 MB) the easiest installation
method is using the web installer.
Just run http://www.aloaha.com/downloader/setup_mail.exe and wait for the
installation to finish.
YouTube: https://www.youtube.com/watch?v=FEpTVul3lQY
Please note that the only requirement for Aloaha is an installed .NET 3.5
Framework!
In case that your company policy or firewall does NOT allow any web installer you
can always request the full setup in .exe or .msi format from [email protected].
Support and Blog
Due to the initial success of our Aloaha FindMail.eMail we decided to dedicate a
Blog just for this product. The address is: http://www.FindMail.eMail
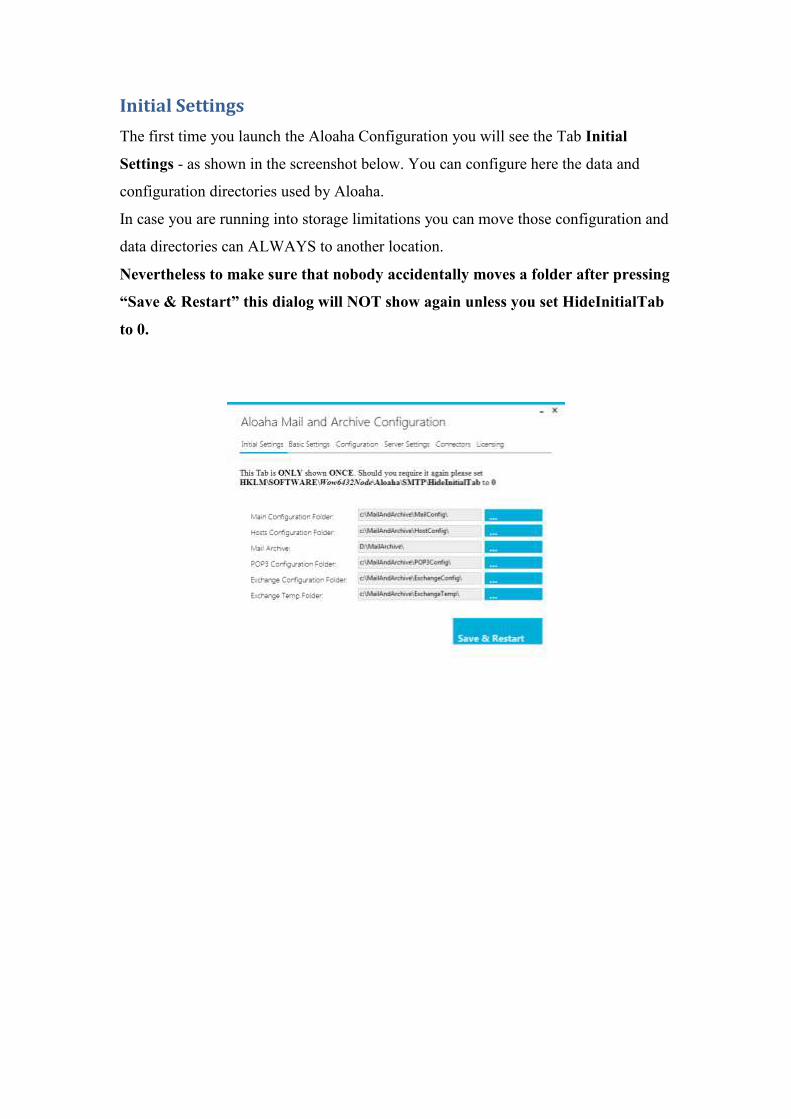
Initial Settings
The first time you launch the Aloaha Configuration you will see the Tab Initial
Settings - as shown in the screenshot below. You can configure here the data and
configuration directories used by Aloaha.
In case you are running into storage limitations you can move those configuration and
data directories can ALWAYS to another location.
Nevertheless to make sure that nobody accidentally moves a folder after pressing
“Save & Restart” this dialog will NOT show again unless you set HideInitialTab
to 0.
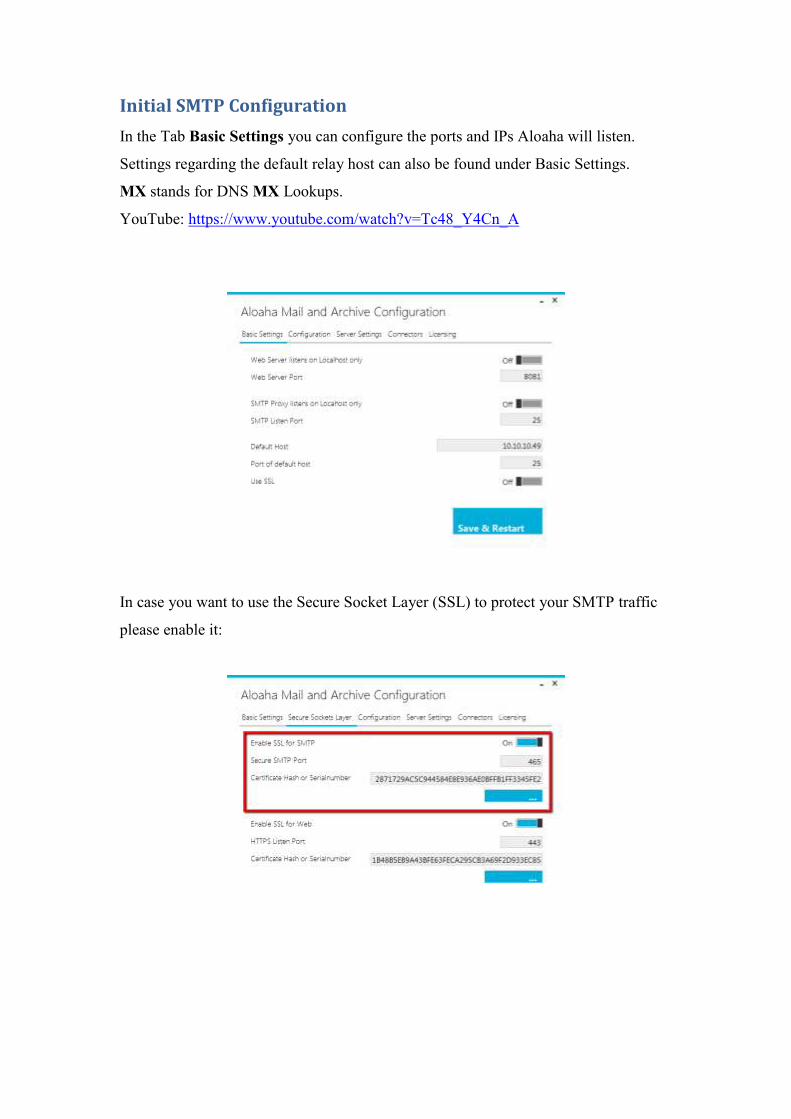
Initial SMTP Configuration
In the Tab Basic Settings you can configure the ports and IPs Aloaha will listen.
Settings regarding the default relay host can also be found under Basic Settings.
MX stands for DNS MX Lookups.
YouTube: https://www.youtube.com/watch?v=Tc48_Y4Cn_A
In case you want to use the Secure Socket Layer (SSL) to protect your SMTP traffic
please enable it:
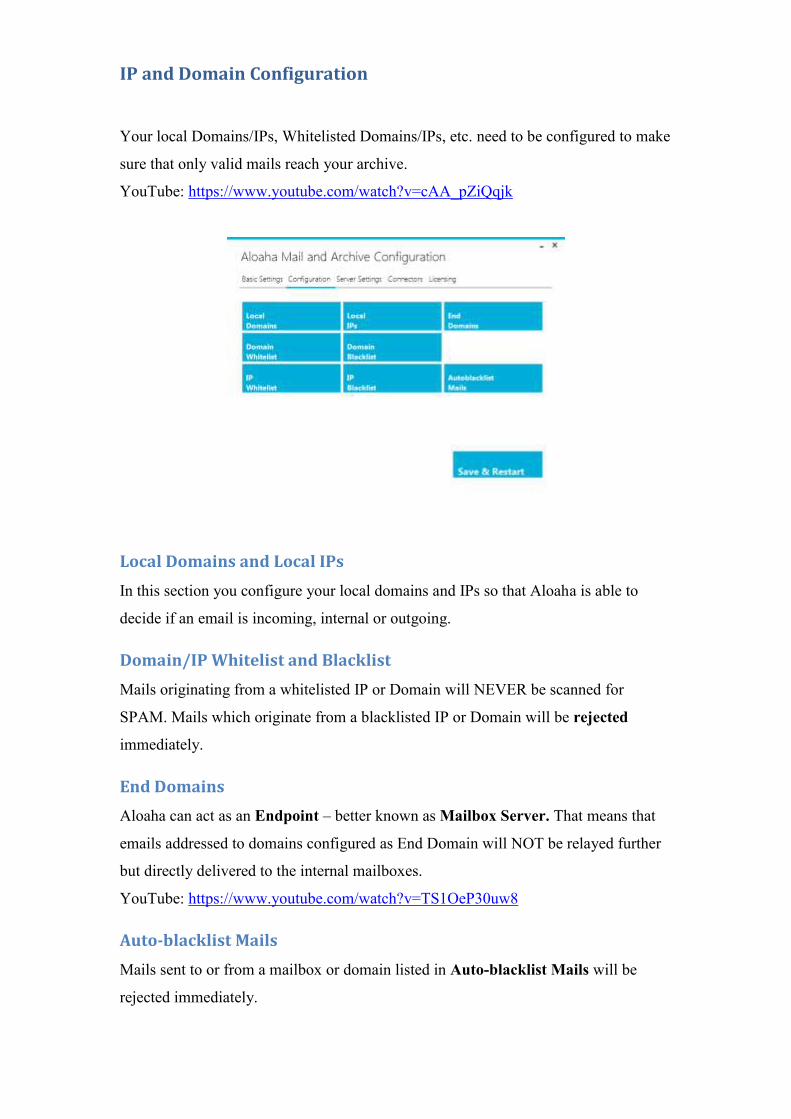
IP and Domain Configuration
Your local Domains/IPs, Whitelisted Domains/IPs, etc. need to be configured to make
sure that only valid mails reach your archive.
YouTube: https://www.youtube.com/watch?v=cAA_pZiQqjk
Local Domains and Local IPs
In this section you configure your local domains and IPs so that Aloaha is able to
decide if an email is incoming, internal or outgoing.
Domain/IP Whitelist and Blacklist
Mails originating from a whitelisted IP or Domain will NEVER be scanned for
SPAM. Mails which originate from a blacklisted IP or Domain will be rejected
immediately.
End Domains
Aloaha can act as an Endpoint – better known as Mailbox Server. That means that
emails addressed to domains configured as End Domain will NOT be relayed further
but directly delivered to the internal mailboxes.
YouTube: https://www.youtube.com/watch?v=TS1OeP30uw8
Auto-blacklist Mails
Mails sent to or from a mailbox or domain listed in Auto-blacklist Mails will be
rejected immediately.
Additionally the originating IP will be added to the IP Blacklist to make sure all
mails originating from the sender’s host are being rejected.
This is the ideal tool to create your own Honeypots or SPAMTraps.
Spamtraps are usually e-mail addresses that are created not for communication, but
rather to lure spam. In order to prevent legitimate email from being invited, the e-mail
address will typically only be published in a location hidden from view such that an
automated e-mail address harvester (used by spammers) can find the email address,
but no sender would be encouraged to send messages to the email address for any
legitimate purpose. Since no e-mail is solicited by the owner of this spamtrap e-mail
address, IPs of e-mail messages sent to this address are immediately considered
unsolicited and added to Aloaha’s IP Blacklist
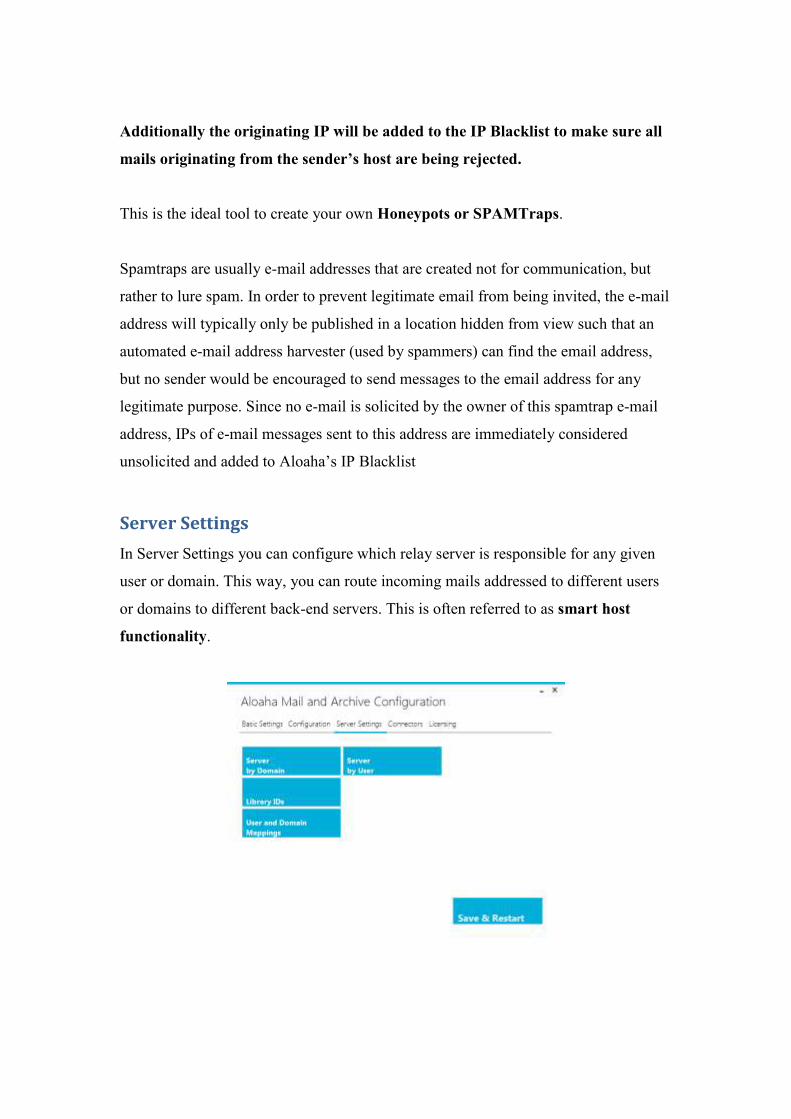
Server Settings
In Server Settings you can configure which relay server is responsible for any given
user or domain. This way, you can route incoming mails addressed to different users
or domains to different back-end servers. This is often referred to as smart host
functionality.
Server by Domain or User
It is possible to configure Aloaha FindMail.eMail to use different mail servers to
handle mails originating from different domains or different users. Such servers are
usually called smart host or SMTP relay.
YouTube: https://www.youtube.com/watch?v=kT3AmD9993Q
User and Domain Mappings
In some cases it might be useful to channel mails from different email addresses or
domains to one specific address, archive or domain. This is also known as email and
domain aliasing.
For example an organisation might have domains for two different product lines and
want people inside the organisation to be able to retrieve the different mails in one
mailbox. It could also be that an employee leaves the organisation and his email
address needs to be mapped to a different mailbox.
All this can be done with the User and Domain Mappings.
Please note that since ONLY the transport field will be changed, the email as
such remains untouched. That is very important to make sure that no digital
signatures are broken.
YouTube: https://www.youtube.com/watch?v=2pzrE8Gb62c
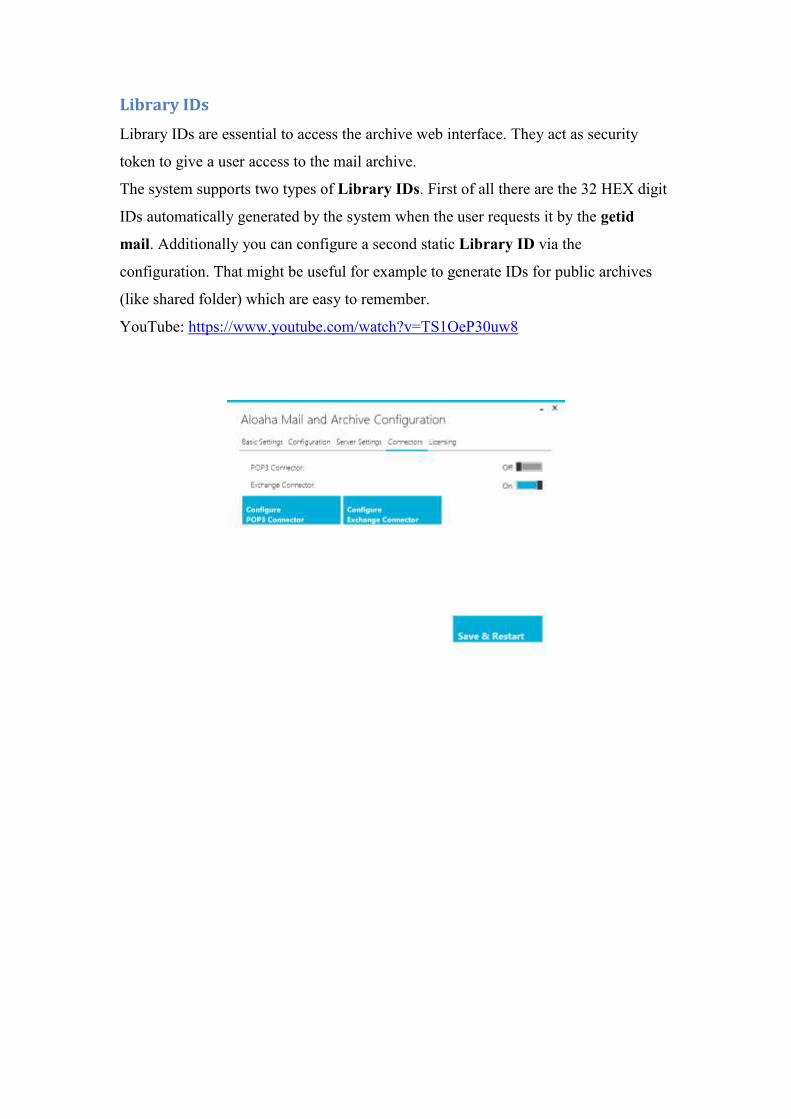
Library IDs
Library IDs are essential to access the archive web interface. They act as security
token to give a user access to the mail archive.
The system supports two types of Library IDs. First of all there are the 32 HEX digit
IDs automatically generated by the system when the user requests it by the getid
mail. Additionally you can configure a second static Library ID via the
configuration. That might be useful for example to generate IDs for public archives
(like shared folder) which are easy to remember.
YouTube: https://www.youtube.com/watch?v=TS1OeP30uw8
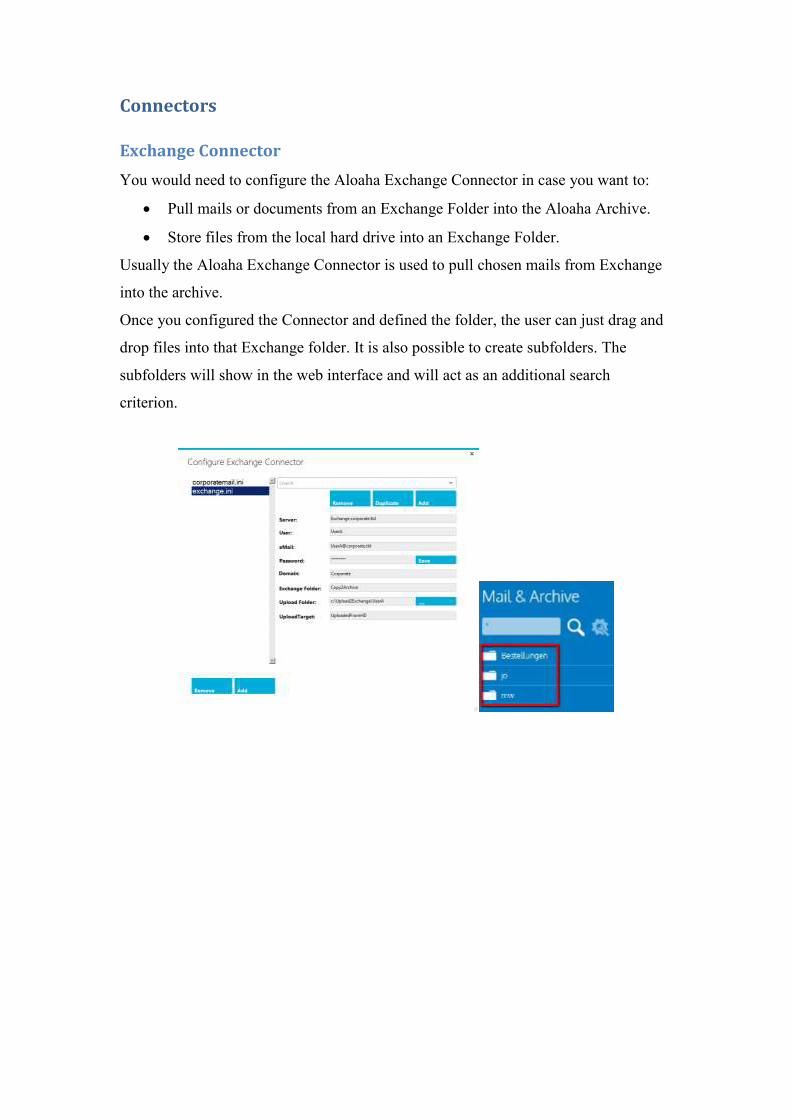
Connectors
Exchange Connector
You would need to configure the Aloaha Exchange Connector in case you want to:
Pull mails or documents from an Exchange Folder into the Aloaha Archive.
Store files from the local hard drive into an Exchange Folder.
Usually the Aloaha Exchange Connector is used to pull chosen mails from Exchange
into the archive.
Once you configured the Connector and defined the folder, the user can just drag and
drop files into that Exchange folder. It is also possible to create subfolders. The
subfolders will show in the web interface and will act as an additional search
criterion.
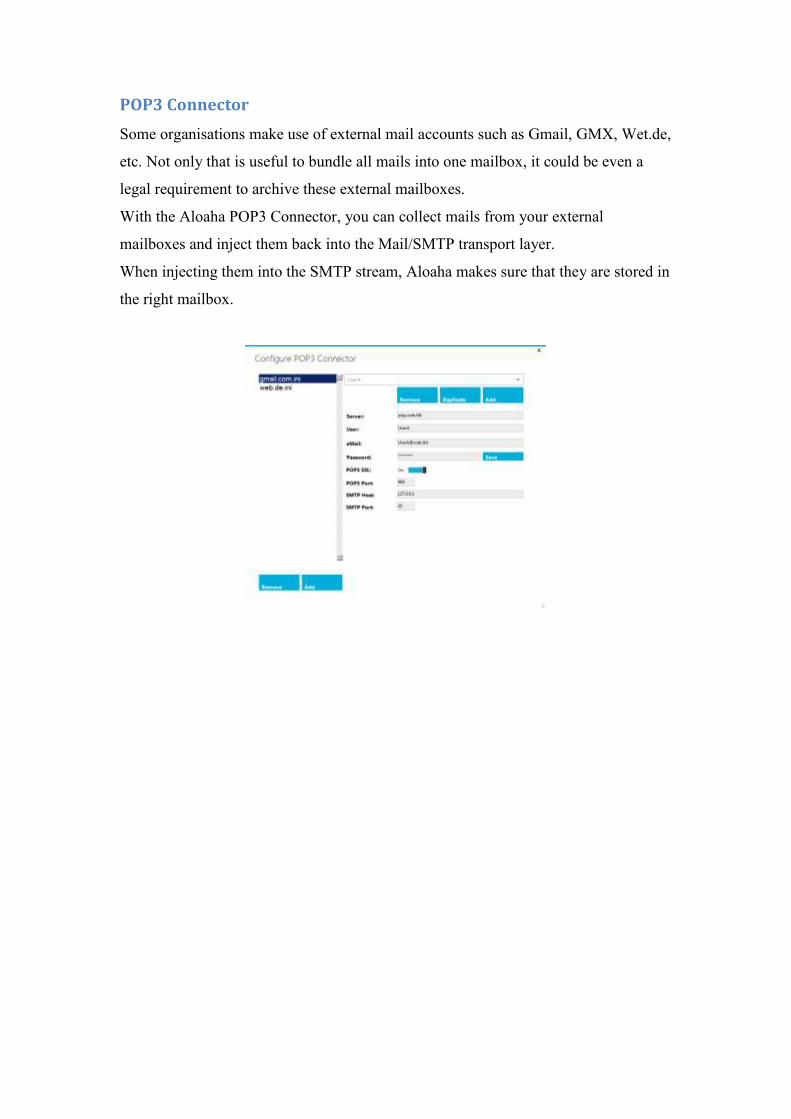
POP3 Connector
Some organisations make use of external mail accounts such as Gmail, GMX, Wet.de,
etc. Not only that is useful to bundle all mails into one mailbox, it could be even a
legal requirement to archive these external mailboxes.
With the Aloaha POP3 Connector, you can collect mails from your external
mailboxes and inject them back into the Mail/SMTP transport layer.
When injecting them into the SMTP stream, Aloaha makes sure that they are stored in
the right mailbox.
Registry Settings
Basic configuration settings are saved in the registry under:
HKLM\SOFTWARE\<Wow6432Node>\Aloaha\SMTP
Please note that Aloaha reads its registry settings only during the start-up. That means
that whenever you do any configuration changes you need to restart the windows
service: “Aloaha Workflow Engine” either with the Services Control Panel or better
with the Aloaha Configuration GUI.
Some settings are ONLY accepted in the licensed version of Aloaha. Please make
sure you own a valid license or request an evaluation license from [email protected].
Initial Settings
In the Configuration GUI the Tab “Initial Settings” will ONLY be shown if
HKLM\SOFTWARE\<Wow6432Node>\Aloaha\SMTP\ HideInitialTab is set to
0.
After EVERY Save & Restart the key is being set back to 1 to make sure nobody
re-configures by accident the data- and configuration folder.
Archive Location
Archived files are saved into the directory configured in AttachmentArchive.
ArchiveALL
If ArchiveALL is set to 1 (default) Aloaha will archive ALL emails passing through.
Obviously inbound mails will be archived in the archive library of the recipient and
outbound mails will be archived in the library of the sender.
Basic security settings
Aloaha can be configured to automatically remove and delete dangerous email
attachments. The list of dangerous attachment types can be configured as a comma
separated list in DangerousExtension.
Should you run Aloaha as a perimeter server you might have the unfortunate
experience of many SPAM emails. For this reason Aloaha includes basic AntiSPAM
features. The most important feature being the DNS based Remote Blacklists (RBL).
You can configure different RBLs as a comma separated list in RBLServerList.

Basic Settings
Enable SMTP Proxy
The SMTP Proxy will ONLY be started if enabled in
HKLM\SOFTWARE\<Wow6432Node>\Aloaha\SMTP is set to 1.
SMTP listen IP
After the initial installation, the SMTP Proxy of Aloaha listens on localhost
(127.0.0.1) only. In order to be able to receive mails from machines other than the
localhost, you need to configure Aloaha to listen to all IPs.
Once you applied a valid license or an evaluation key, you can change
ProxyListenLocalHostOnly from 1 to 0 to instruct Aloaha to listen on all IPs and not
only at localhost.
SMTP listen port
Some machines might have already a SMTP Server listening on port 25. For that
reason Aloaha is installed to listen on port 2525 per default. If you expect Aloaha to
receive mails you must re-configure it to listen on port 25. To do so please change
ProxyListenPort to 25.
RelayHost, RelayPort and RelayHostForceSSL
When forwarding mail to other hosts per default Aloaha uses DNS Lookups. If you
need to specify a relay host / smart host you can do that here.
In case you want to specify relay hosts / smart hosts based on specific recipients or
domains please use the configuration files ServerByDomain.ini and
ServerByUser.ini.
Allowed Domains
Aloaha rejects inbound emails from non-local IP addresses if they are NOT addressed
to a local domain or white listed domain. To allow the retrieval to your domain please
edit the comma separated list in AllowedDomains and add your local domains.
File based configuration settings
Many settings of Aloaha are saved in plain text files so as to make it easier for the
customer to save and backup configuration settings together with the mail archive on
one backup medium.
The location of the folder holding the configuration settings is configured in the
registry in MailConfigPath.
LocalDomains.txt
Additional to the comma separated list in
HKLM\SOFTWARE\<Wow6432Node>\Aloaha\SMTP\AllowedDomains Aloaha
evaluates the list in the file LocalDomains.txt to decide if it is responsible for an
inbound email or not.
LocalIPs.txt
Some of the Aloaha functions require it to be able to detect if an email is inbound or
outbound. Domain names cannot be used since they can easily forged by a potential
spammer or intruder. The only reliable sources are the IP addresses.
Aloaha pre-fills the file with local IPs detected. Additional IPs need to be added
manually.
BlacklistedIPs.txt
Emails sent from IPs entered here will never make it into your system. They will be
already rejected at the connection stage.
WhitelistedIPs.txt
Emails sent from IPs entered here will always make it into your system. They will
never be checked by any AntiSPAM Feature of Aloaha.
EndDomains.txt
Per default Aloaha acts as a transparent SMTP Proxy for outbound mails and inbound
mails addressed to domains defined in LocalDomains.txt.
In some cases it might be useful to configure Aloaha to additionally act as a mail
server for some configured domains.
For example:
The organisation does not operate its own mails server
The organisation decides to configure its mail server to forward all emails to
an internal domain as a copy for archiving reasons.
If Aloaha needs to be configured as a mail server, the domains need to be added to the
file EndDomains.txt. All mails sent to a domain configured in EndDomains.txt will
ONLY be archived and NOT be forwarded to any other server.
Creating a mailbox for a user in an EndDomain is very easy and straight forward. Just
choose a username and send an email with subject getid to username@<enddomain>.
Aloaha will create the mailbox and send the Library ID required accessing the
mailbox back to the sender. The first sender sending an email with the getid as its
subject will also be the owner of the mailbox.
Should the owner ever forget the Library ID he can just send an email to his mailbox
with subject getid. If his sender address matches the mail address of the owner,
Aloaha will generate a new ID and send it back via email.
The owner address is saved in the text file ownermail.txt. It can always be changed
by the system administrator manually.
DomainBlacklist.txt and DomainWhiteList.txt
Aloaha has an inbuilt AntiSPAM Engine. Domains to be actively rejected should be
entered into DomainBlacklist.txt. Domains which must never be classified as SPAM
should be entered in DomainWhitelist.txt.
AutoBlackListMails.txt
In AutoBlackListMails.txt you can configure email addresses or domains. Any mail
sent to or originates from such a user or domain will trigger Aloaha to enter the
originating IP into the IP Blacklist. This mechanism can be used to create your own
SPAM Honeypots. One could for example hide an email on a website; if a robot
harvests that email and sends SPAM, the robot will be automatically blacklisted.
ServerByDomain.ini and ServerByUser.ini
Per default, Aloaha uses DNS Lookups to deliver emails. In some cases it might be
useful to define a fixed server responsible for a specified domain or user. In IIS this is
called SmartHost.
The server configuration itself is saved in the path specified in
HKLM\SOFTWARE\<Wow6432Node>\Aloaha\SMTP\HostConfigPath
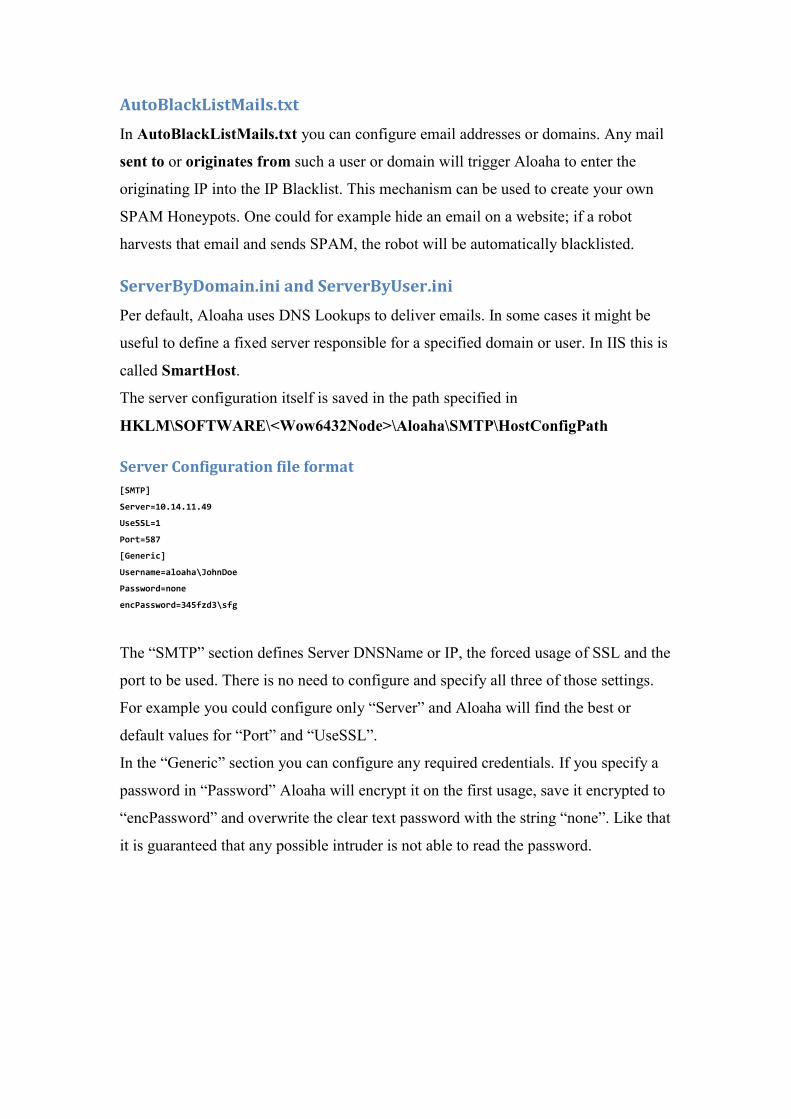
Server Configuration file format
[SMTP]
Server=10.14.11.49
UseSSL=1
Port=587
[Generic]
Username=aloaha\JohnDoe
Password=none
encPassword=345fzd3\sfg
The “SMTP” section defines Server DNSName or IP, the forced usage of SSL and the
port to be used. There is no need to configure and specify all three of those settings.
For example you could configure only “Server” and Aloaha will find the best or
default values for “Port” and “UseSSL”.
In the “Generic” section you can configure any required credentials. If you specify a
password in “Password” Aloaha will encrypt it on the first usage, save it encrypted to
“encPassword” and overwrite the clear text password with the string “none”. Like that
it is guaranteed that any possible intruder is not able to read the password.
Archiver Web Interface
Aloaha includes an ASP.NET compatible Web Server so that there is no need for the
administrator to configure any other Web Server. By default the Aloaha Webserver
listens to Port 8081 on localhost.
After the initial installation it can be changed via the Aloaha Configuration GUI or via
the registry key HKLM\SOFTWARE\<Wow6432Node>\Aloaha\WebServer.
The port can be changed in “Port” and the IP binding in “LocalHostOnly”. If the
archive needs to be accessed remotely the setting “LocalHostOnly” has to be
changed to 0 and the windows service “Aloaha Workflow Engine” needs to be
restarted.
Since the Aloaha Web Interface is ASP.NET compatible it can be integrated into
any running IIS instance with just a few clicks via the IIS Admin Console.
Usage of Archiver Web Interface
Library ID
To be able to access the Web Interface the user needs the Library ID of his archive.
Library IDs can be assigned manually by the system administrator or they can be
requested by mail. Internal user can just send an email with subject getid to
archive@<localdomain> and Aloaha will generate a new random Library ID and send
it to the owner of the archive.
Users of an Endpoint domain must send an email with subject getid to their own mail
address and Aloaha will send back the Library ID.
Keywords
The keywords field is used to search the email library for keywords. It supports
logical operators such as: and, or, not, !!, ||, && and of course the wildcard * which
retrieves all emails.
Max. search results
The user can limit the maximum search results to speed up the search operation. The
default setting is configured by the administrator in
HKLM\SOFTWARE\<Wow6432Node>\Aloaha\SMTP\MaxSearchResults.
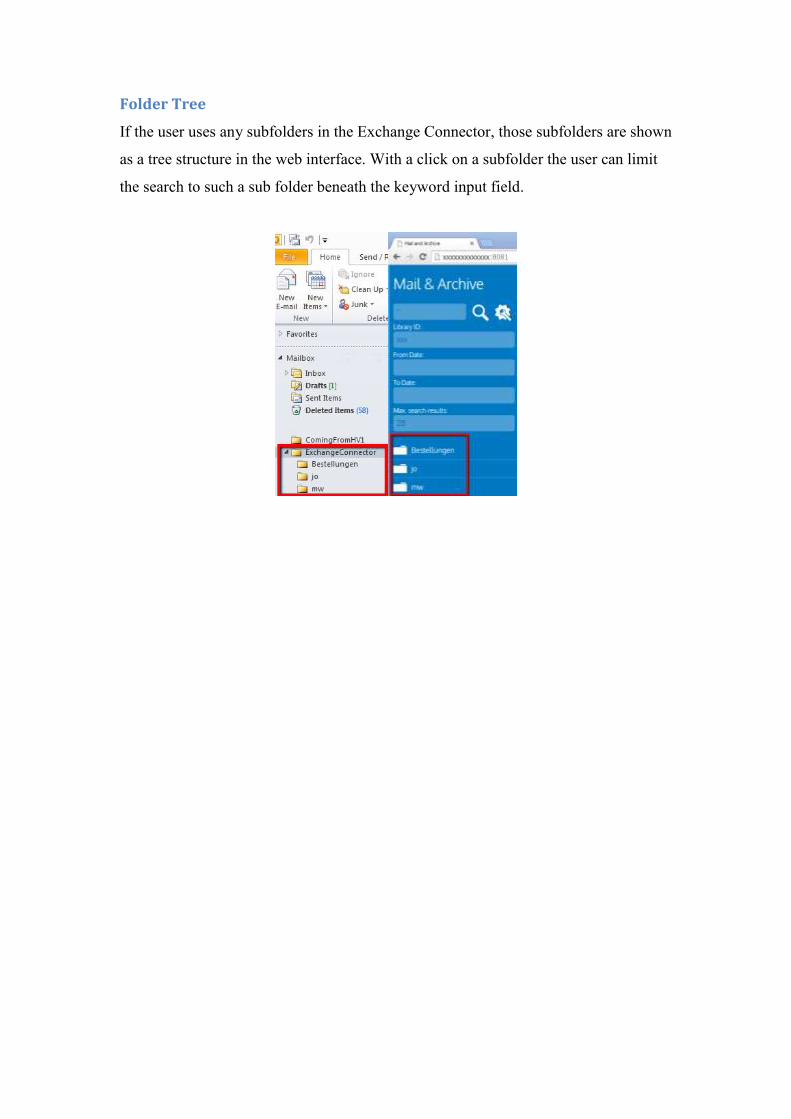
Folder Tree
If the user uses any subfolders in the Exchange Connector, those subfolders are shown
as a tree structure in the web interface. With a click on a subfolder the user can limit
the search to such a sub folder beneath the keyword input field.