Embed Size (px)
Citation preview
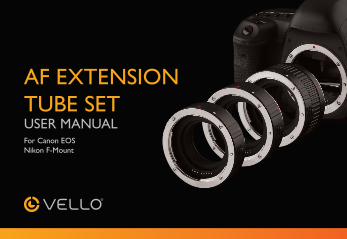
AF EXTENSION TUBE SETUSER MANUALFor Canon EOS Nikon F-Mount
2
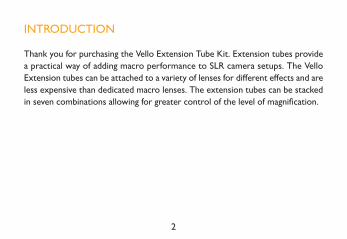
Thank you for purchasing the Vello Extension Tube Kit. Extension tubes provide a practical way of adding macro performance to SLR camera setups. The Vello Extension tubes can be attached to a variety of lenses for different effects and are less expensive than dedicated macro lenses. The extension tubes can be stacked in seven combinations allowing for greater control of the level of magnification.
INTRODUCTION
3
PRECAUTIONS
• Using an extension tube provides extremely close focus for your lens, but you will not be able to focus to infinity while the extension tube is attached to your lens.
• The amount of transmitted light is reduced when using an extension tube. The light is reduced more when multiple extension tubes are used together. This reduction in transmitted light can affect the camera’s ability to auto focus. Manual focusing is recommended if the lens begins to “hunt” for a focus point (when it’s not able to quickly lock onto the subject).
• Images are for illustrative purposes only.
• Please read this instruction manual before using the product.
4
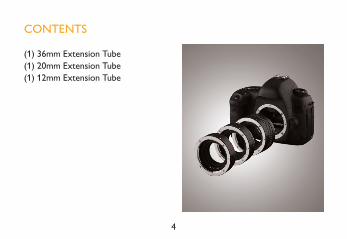
CONTENTS
(1) 36mm Extension Tube(1) 20mm Extension Tube(1) 12mm Extension Tube
5
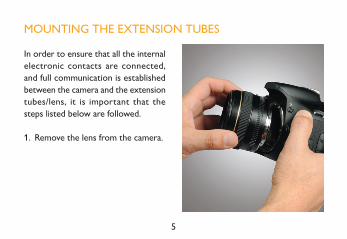
MOUNTING THE EXTENSION TUBES
In order to ensure that all the internal electronic contacts are connected, and full communication is established between the camera and the extension tubes/lens, it is important that the steps listed below are followed.
1. Remove the lens from the camera.

6
2. Align the Vello extension tube to the camera’s lens mount. The extension tube will mount in exactly the same manner as a standard SLR lens. Make sure to align the arrow on the tube with the circular alignment mark on your camera.
7
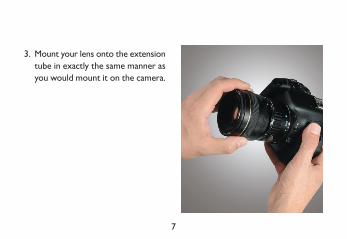
3. Mount your lens onto the extension tube in exactly the same manner as you would mount it on the camera.
8
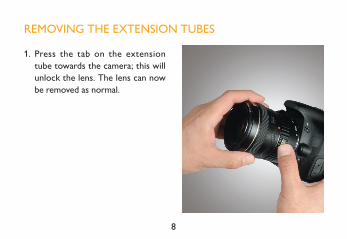
REMOVING THE EXTENSION TUBES
1. Press the tab on the extension tube towards the camera; this will unlock the lens. The lens can now be removed as normal.
9
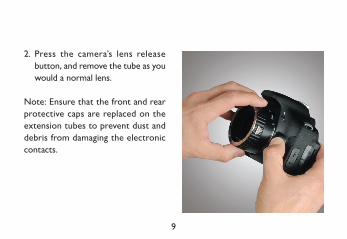
2. Press the camera’s lens release button, and remove the tube as you would a normal lens.
Note: Ensure that the front and rear protective caps are replaced on the extension tubes to prevent dust and debris from damaging the electronic contacts.
10
TIPS FOR USING THE VELLO EXTENSION TUBES
• As with all macro photography, images will have a very shallow depth of field. To increase the depth of field, select a smaller aperture.
• Due to increased exposure times, a tripod and cable release or remote control are always recommended for macro photography.
• Closer focusing can be achieved by using the larger extension tubes or by stacking the tubes.
• Due to the increased distance between the lens and the sensor, the camera’s TTL system may not always be accurate. Use a manual exposure mode if this happens.
11
• At extremely close distances, focus may be difficult to achieve, whetherusing auto or manual focus. If this is the case, use a macro focusing rail or set the lens manually to the desired focus point. Then, move the lensforward or back to achieve the sharpest focus.
• When using extension tubes, an on-camera flash is not recommended since it may result in unsightly shadows. For best results, use an off-camera flash, dedicated macro light, or another light source.
Note: There is no electronic aperture control when the extension tubes are used with Nikon AI lenses.
One-Year Limited WarrantyThis VELLO product is warranted to the original purchaser to be free from defects in materials and workmanship under normal consumer use for a period of one (1) year from the original purchase date or thirty (30) days after replacement, whichever occurs later. The warranty provider’s responsibility with respect to this limited warranty shall be limited solely to repair or replacement, at the provider’s discretion, of any product that fails during normal use of this product in its intended manner and in its intended environment. Inoperability of the product or part(s) shall be determined by the warranty provider. If the product has been discontinued, the warranty provider reserves the right to replace it with a model of equivalent quality and function.This warranty does not cover damage or defect caused by misuse, neglect, accident, alteration, abuse, improper installation or maintenance. EXCEPT AS PROVIDED HEREIN, THE WARRANTY PROVIDER MAKES NEITHER ANY EXPRESS WARRANTIES NOR ANY IMPLIED WARRANTIES, INCLUDING BUT NOT LIMITED TO ANY IMPLIED WARRANTY OF MERCHANTABILITY OR FITNESS FOR A PARTICULAR PURPOSE. This warranty provides you with specific legal rights, and you may also have additional rights that vary from state to state.To obtain warranty coverage, contact the Vello Customer Service Department to obtain a return merchandise authorization (“RMA”) number, and return the defective product to Vello along with the RMA number and proof of purchase. Shipment of the defective product is at the purchaser’s own risk and expense.For more information or to arrange service, visit www.vellogear.com or call Customer Service at 212-594-2353.Product warranty provided by the Gradus Group.www.gradusgroup.comVELLO is a registered trademark of the Gradus Group.All other trademarks are the property of their respective owners.
© 2019 Gradus Group LLC. All Rights Reserved.www.vellogear.comGG6