Embed Size (px)
Citation preview
LIPO CHARGER
RECEIVER
ANTENNA (175mm)
STAND ALONE VERSION
HOST TIMER VERSION
TRANSMITTER ANTENNA (175mm)
MICRO SERVO
RECEIVER BATTERY
Aeris Free Flight RDT system Version 2.0 – May 2009 - © M.U. 2008-2009 The Aeris RDT system makes it possible to add remote dethermalizing (RDT) to any Free Flight model of any class. The option to force model landing is a significant advantage in numerous situations like engine overrun, model trimming and strong wind or thermals
System Components
Signal + --
Aeris – RDT system
2/4
Getting Started Stand Alone Receiver Connect the micro servo (3 pin plug) first, then connect the battery (2 pin plug) to the Aeris receiver: the micro servo arm is moved to a neutral position and the red led starts blinking. When the RDT command is received, the micro servo arm rotates of an angle, keeps this position for a short time and then turns back to the neutral position. By doing that, the micro servo will activate the DT line release mechanism (not included). The Aeris receiver draws a little current while the battery is connected. An onboard circuitry protects the battery from deep discharging, however it must be disconnected at the end of a flight session.
Host Timer Receiver
Refer to the host timer instructions to make sure that it is enabled to handle the RDT signal. Connect the receiver plug to the RDT input plug of the host timer according to the pin out given in the picture above. Switch on the host timer and check that the red led light on the Aeris receiver starts blinking.
Transmitter Press the RDT pushbutton to transmit a DT command. A short 3-tone sound is also audible. The transmitter draws power only when the pushbutton is pressed, therefore it is not necessary to disconnect the internal battery.
Installation All the onboard components (Aeris receiver, micro servo and battery) can be placed anywhere in the pylon with the RDT antenna completely leaning out of it. The picture at the end of the document shows how to make a simple release mechanism (not included) to have the DT line released either by the timer or by the Aeris SA micro servo.
Aeris – RDT system
3/4
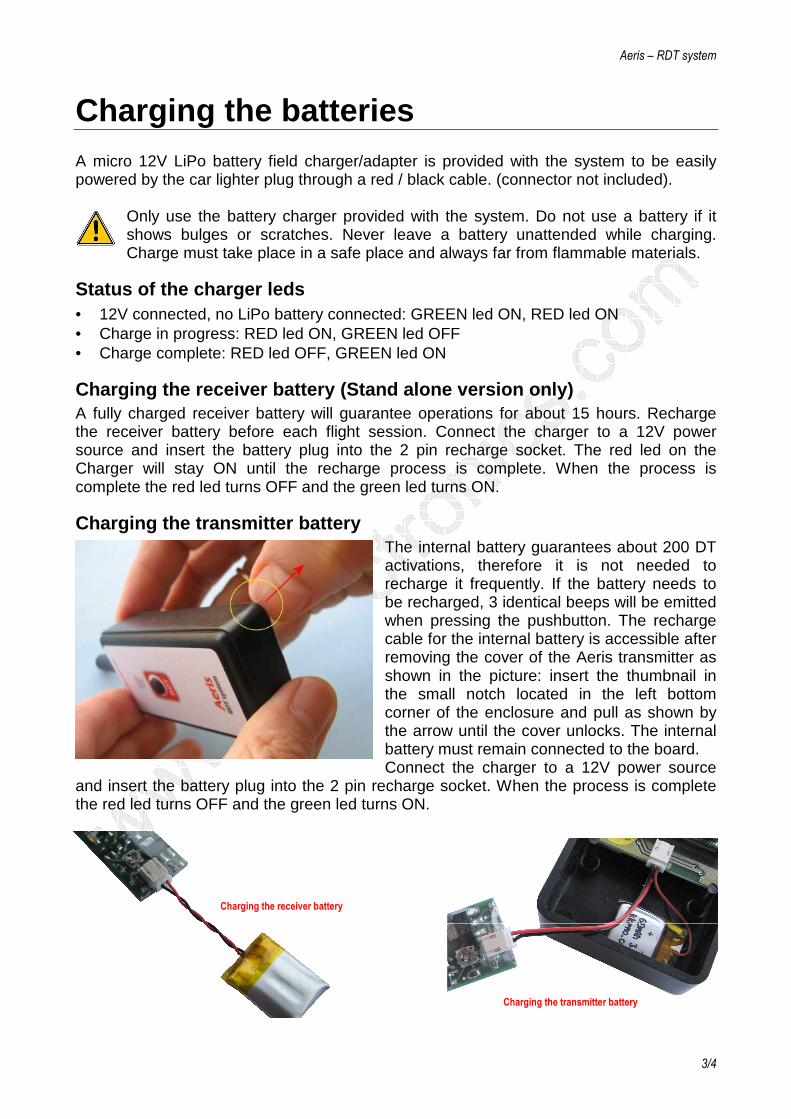
Charging the receiver battery
Charging the transmitter battery
Charging the batteries A micro 12V LiPo battery field charger/adapter is provided with the system to be easily powered by the car lighter plug through a red / black cable. (connector not included).
Only use the battery charger provided with the system. Do not use a battery if it shows bulges or scratches. Never leave a battery unattended while charging. Charge must take place in a safe place and always far from flammable materials.
Status of the charger leds • 12V connected, no LiPo battery connected: GREEN led ON, RED led ON • Charge in progress: RED led ON, GREEN led OFF • Charge complete: RED led OFF, GREEN led ON
Charging the receiver battery (Stand alone version only) A fully charged receiver battery will guarantee operations for about 15 hours. Recharge the receiver battery before each flight session. Connect the charger to a 12V power source and insert the battery plug into the 2 pin recharge socket. The red led on the Charger will stay ON until the recharge process is complete. When the process is complete the red led turns OFF and the green led turns ON.
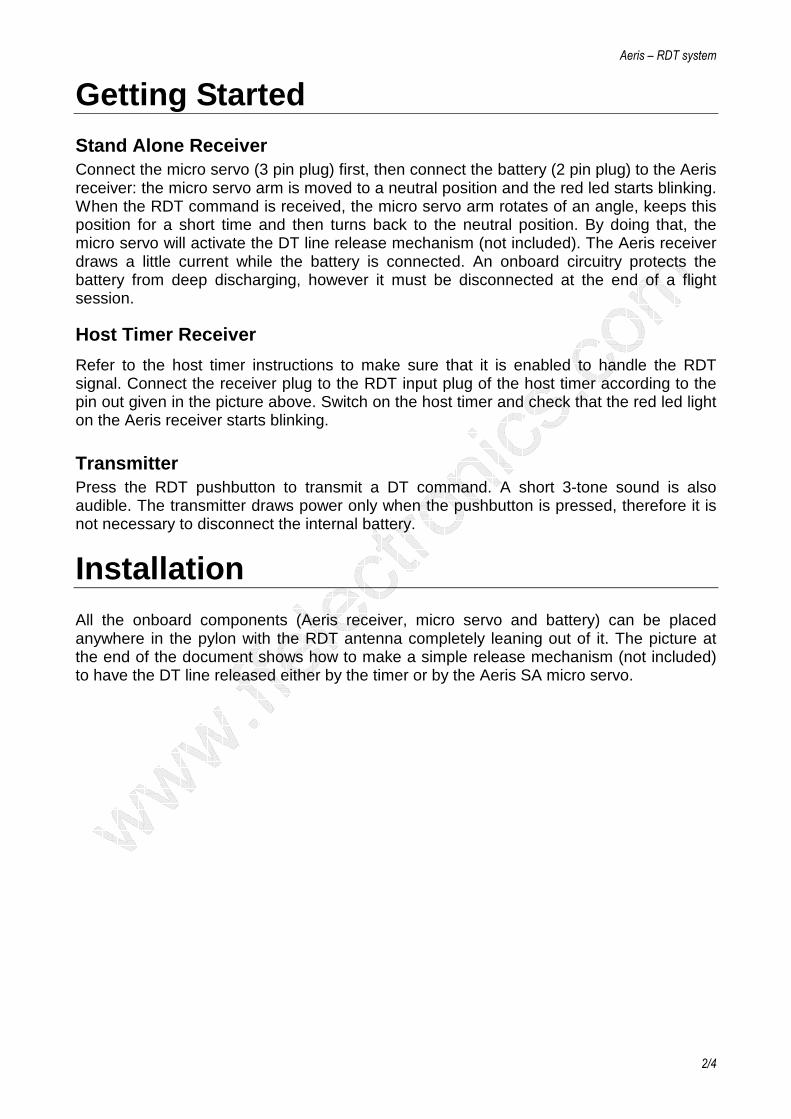
Charging the transmitter battery The internal battery guarantees about 200 DT activations, therefore it is not needed to recharge it frequently. If the battery needs to be recharged, 3 identical beeps will be emitted when pressing the pushbutton. The recharge cable for the internal battery is accessible after removing the cover of the Aeris transmitter as shown in the picture: insert the thumbnail in the small notch located in the left bottom corner of the enclosure and pull as shown by the arrow until the cover unlocks. The internal battery must remain connected to the board. Connect the charger to a 12V power source
and insert the battery plug into the 2 pin recharge socket. When the process is complete the red led turns OFF and the green led turns ON.
Aeris – RDT system
4/4
protruding edges: grab with nails to remove the plugs DO NOT PULL THE WIRES TO EXTRACT THE PLUGS
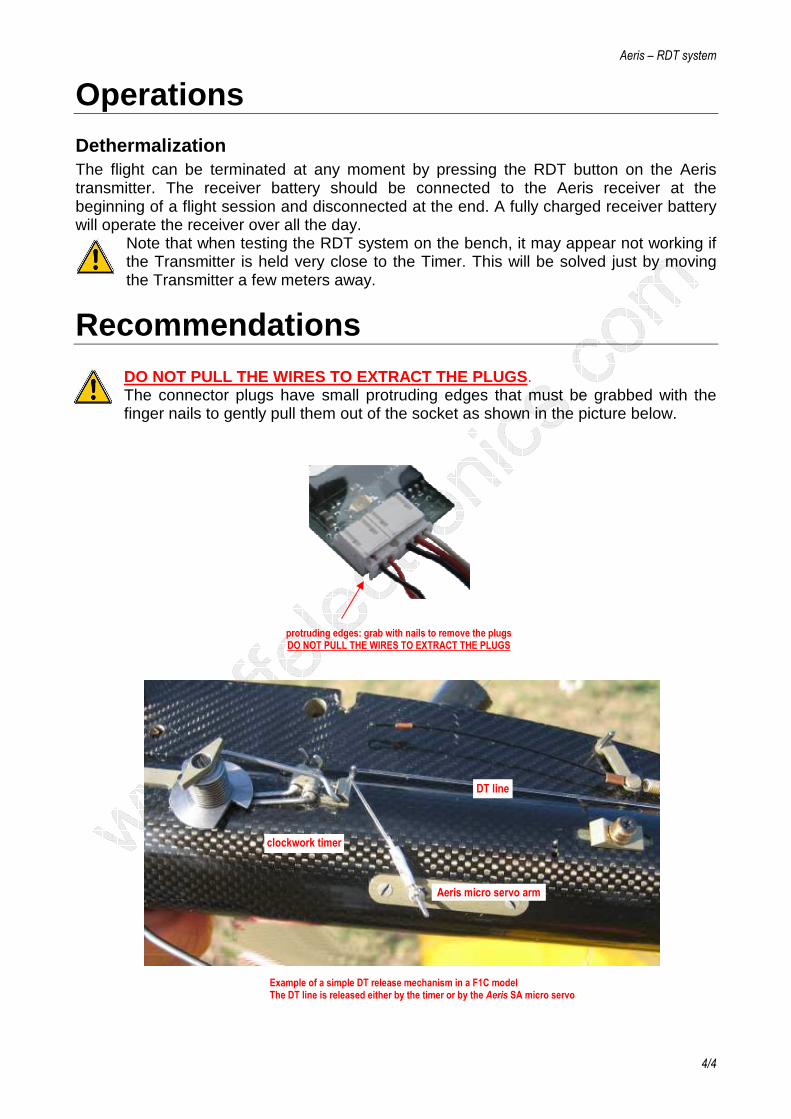
Example of a simple DT release mechanism in a F1C model The DT line is released either by the timer or by the Aeris SA micro servo
Operations Dethermalization The flight can be terminated at any moment by pressing the RDT button on the Aeris transmitter. The receiver battery should be connected to the Aeris receiver at the beginning of a flight session and disconnected at the end. A fully charged receiver battery will operate the receiver over all the day.
Note that when testing the RDT system on the bench, it may appear not working if the Transmitter is held very close to the Timer. This will be solved just by moving the Transmitter a few meters away.
Recommendations
DO NOT PULL THE WIRES TO EXTRACT THE PLUGS. The connector plugs have small protruding edges that must be grabbed with the finger nails to gently pull them out of the socket as shown in the picture below.
DT line
clockwork timer
Aeris micro servo arm