Embed Size (px)
Citation preview

Oracle® Retail Advanced Inventory Planning
Installation Guide Release 13.0
June 2008

Oracle® Advanced Inventory Planning Installation Guide, Release 13.0
Copyright © 2008, Oracle. All rights reserved.
Primary Author: Gary O’Hara
The Programs (which include both the software and documentation) contain proprietary information; they are provided under a license agreement containing restrictions on use and disclosure and are also protected by copyright, patent, and other intellectual and industrial property laws. Reverse engineering, disassembly, or decompilation of the Programs, except to the extent required to obtain interoperability with other independently created software or as specified by law, is prohibited.
The information contained in this document is subject to change without notice. If you find any problems in the documentation, please report them to us in writing. This document is not warranted to be error-free. Except as may be expressly permitted in your license agreement for these Programs, no part of these Programs may be reproduced or transmitted in any form or by any means, electronic or mechanical, for any purpose.
If the Programs are delivered to the United States Government or anyone licensing or using the Programs on behalf of the United States Government, the following notice is applicable:
U.S. GOVERNMENT RIGHTS Programs, software, databases, and related documentation and technical data delivered to U.S. Government customers are "commercial computer software" or "commercial technical data" pursuant to the applicable Federal Acquisition Regulation and agency-specific supplemental regulations. As such, use, duplication, disclosure, modification, and adaptation of the Programs, including documentation and technical data, shall be subject to the licensing restrictions set forth in the applicable Oracle license agreement, and, to the extent applicable, the additional rights set forth in FAR 52.227-19, Commercial Computer Software—Restricted Rights (June 1987). Oracle Corporation, 500 Oracle Parkway, Redwood City, CA 94065
The Programs are not intended for use in any nuclear, aviation, mass transit, medical, or other inherently dangerous applications. It shall be the licensee's responsibility to take all appropriate fail-safe, backup, redundancy and other measures to ensure the safe use of such applications if the Programs are used for such purposes, and we disclaim liability for any damages caused by such use of the Programs.
Oracle, JD Edwards, PeopleSoft, and Siebel are registered trademarks of Oracle Corporation and/or its affiliates. Other names may be trademarks of their respective owners.
The Programs may provide links to Web sites and access to content, products, and services from third parties. Oracle is not responsible for the availability of, or any content provided on, third-party Web sites. You bear all risks associated with the use of such content. If you choose to purchase any products or services from a third party, the relationship is directly between you and the third party. Oracle is not responsible for: (a) the quality of third-party products or services; or (b) fulfilling any of the terms of the agreement with the third party, including delivery of products or services and warranty obligations related to purchased products or services. Oracle is not responsible for any loss or damage of any sort that you may incur from dealing with any third party.

Value-Added Reseller (VAR) Language (i) the software component known as ACUMATE developed and licensed by Lucent Technologies Inc. of Murray Hill, New Jersey, to Oracle and imbedded in the Oracle Retail Predictive Application Server – Enterprise Engine, Oracle Retail Category Management, Oracle Retail Item Planning, Oracle Retail Merchandise Financial Planning, Oracle Retail Advanced Inventory Planning and Oracle Retail Demand Forecasting applications.
(ii) the MicroStrategy Components developed and licensed by MicroStrategy Services Corporation (MicroStrategy) of McLean, Virginia to Oracle and imbedded in the MicroStrategy for Oracle Retail Data Warehouse and MicroStrategy for Oracle Retail Planning & Optimization applications.
(iii) the SeeBeyond component developed and licensed by Sun MicroSystems, Inc. (Sun) of Santa Clara, California, to Oracle and imbedded in the Oracle Retail Integration Bus application.
(iv) the Wavelink component developed and licensed by Wavelink Corporation (Wavelink) of Kirkland, Washington, to Oracle and imbedded in Oracle Retail Store Inventory Management.
(v) the software component known as Crystal Enterprise Professional and/or Crystal Reports Professional licensed by Business Objects Software Limited (“Business Objects”) and imbedded in Oracle Retail Store Inventory Management.
(vi) the software component known as Access Via™ licensed by Access Via of Seattle, Washington, and imbedded in Oracle Retail Signs and Oracle Retail Labels and Tags.
(vii) the software component known as Adobe Flex™ licensed by Adobe Systems Incorporated of San Jose, California, and imbedded in Oracle Retail Promotion Planning & Optimization application.
(viii) the software component known as Style Report™ developed and licensed by InetSoft Technology Corp. of Piscataway, New Jersey, to Oracle and imbedded in the Oracle Retail Value Chain Collaboration application.
(ix) the software component known as WebLogic™ developed and licensed by BEA Systems, Inc. of San Jose, California, to Oracle and imbedded in the Oracle Retail Value Chain Collaboration application.
(x) the software component known as DataBeacon™ developed and licensed by Cognos Incorporated of Ottawa, Ontario, Canada, to Oracle and imbedded in the Oracle Retail Value Chain Collaboration application.
iii


Contents Preface ............................................................................................................................. vii
Audience ................................................................................................................................. vii Related Documents ................................................................................................................. vii Customer Support ................................................................................................................... vii Review Patch Documentation................................................................................................ viii Oracle Retail Documentation on the Oracle Technology Network........................................ viii Conventions ........................................................................................................................... viii
1 Introduction .................................................................................................................. 1 About the AIP Installation Process ............................................................................................1 About This Document................................................................................................................1
2 Preparing for Installation ............................................................................................ 3 Package Contents .......................................................................................................................3 Installation Setup .......................................................................................................................3
Preparing Your Windows Workstation...............................................................................3 Preparing Your UNIX Machine..........................................................................................4
Installation Overview.................................................................................................................4 3 Compatibility and Hardware Requirements .............................................................. 5
Supported Oracle Retail Products ..............................................................................................5 Server Operating Systems..........................................................................................................5 Server JRE .................................................................................................................................5 Database.....................................................................................................................................6 Application Server .....................................................................................................................6 Client PC and Web Browser Requirements ...............................................................................6
Client PC Requirements......................................................................................................6 Client Browser Requirements .............................................................................................6
4 Installing the AIP Online Database Server Components......................................... 7 Creating a UNIX User Account for Oracle and Retek...............................................................7 Creating a Staging Directory for AIP Online Database Files ....................................................7 Creating the Oracle 10g Database..............................................................................................7 Creating AIP Online Schema Owner .........................................................................................8 Preparing Your Server for Installation.......................................................................................8 Running the AIP Online Database Schema Installer .................................................................8
Resolving Errors Encountered During Database Schema Installation..............................13 5 Installing AIPOnlineApp on WAS 5.1.1.12............................................................... 15
Required WebSphere Application Server (WAS) Configurations...........................................15 WebSphere Application Server Requirements.........................................................................16 Configuring WAS 5.1.1.12 for AIP Online Application..........................................................16 Preparing Your Server for Installation.....................................................................................18 Installing AIP Online ...............................................................................................................19
Resolving Errors Encountered During Application Installation .......................................29 AIP Online Integration Directory (Optional)....................................................................30 Manual Deployment Tasks ...............................................................................................30 Testing the AIP Online Application .................................................................................30
Configuring the AIP Online Application .................................................................................31 Creating the AIP Online Enterprise .........................................................................................32 Creating AIP Online Users ......................................................................................................34
v

6 Installing AIPOnlineApp on OAS 10.1.3.3 ............................................................... 35 Creating a New OC4J Instance for AIP Online .......................................................................35 Preparing Your Server for Installation.....................................................................................36 Running the AIP Online Application Installer.........................................................................36
Resolving Errors Encountered During Application Installation .......................................46 AIP Online Integration Directory (Optional)....................................................................46 Manual Deployment Tasks ...............................................................................................47 Testing the AIP Online Application .................................................................................47 Starting and Stopping AIP Online ....................................................................................47
Configuring the AIP Online Application .................................................................................48 Creating the AIP Online Enterprise .........................................................................................49 Creating AIP Online Users ......................................................................................................51
7 Installing the AIP Integration Components............................................................. 53 Installing RETL .......................................................................................................................53 Extracting AIP Integration Files ..............................................................................................54 Configuring Your Environment ...............................................................................................54
Configuring the config.xml File .......................................................................................54 Editing the aip_env_online.sh to Run cron_export.sh and cron_import.sh Scripts .................55 Editing the .profile to Run cron_export.sh and cron_import.sh Scripts ...................................55
8 Installing AIP RPAS ................................................................................................... 57 The AIP RPAS Installer...........................................................................................................57
Before You Begin .............................................................................................................57 RPAS on HP Itanium........................................................................................................57
Running the AIP RPAS Installer .............................................................................................57 Post Installation Instructions....................................................................................................63
9 Installation Questions, Reinstallation, and Troubleshooting ............................... 65 Installation Questions...............................................................................................................65
About Installation URLs...................................................................................................65 Reinstallation ...........................................................................................................................66
Reinstalling in Silent Mode ..............................................................................................66 Troubleshooting .......................................................................................................................66
Database Installer Hangs on Startup .................................................................................66 Unreadable Buttons in the Installer...................................................................................66 “Unable to get a deployment manager” Message .............................................................67 Unresponsive Fields when Running Installer in GUI Mode.............................................67 “Could not create system preferences directory” Warning...............................................68 “Couldn't find X Input Context” Warnings ......................................................................68 ConcurrentModificationException in Installer GUI .........................................................68
A Appendix: Sample Oracle 10.2.0.3.0 Database Creation Script ............................ 69 crdb1.sql...................................................................................................................................69 crdb2.sql...................................................................................................................................70 crdb3.sql...................................................................................................................................71 Sample Database init.ora .........................................................................................................72 Sample Tablespace Creation Scripts........................................................................................73
create_aip_tablespaces.sql ................................................................................................73 B Appendix: RMS-AIP Transform Directory Contents............................................... 75
Transform Interface Scripts .....................................................................................................75 Input Schema Files...................................................................................................................75 Output Schema Files ................................................................................................................76 RETL Extracts (Data Files from RMS) ...................................................................................76 Post Execution Transform Interface Scripts ............................................................................77
C Appendix: Installation Order .................................................................................... 79
vi

Preface Oracle Retail Installation Guides contain the requirements and procedures that are necessary for the retailer to install Oracle Retail products.
Audience This Installation Guide is written for the following audiences: Database administrators (DBA) System analysts and designers Integrators and implementation staff
Related Documents For more information, see the following documents in the Oracle Retail Advanced Inventory Planning Release 13.0 documentation set: Oracle Retail Advanced Inventory Planning Release Notes Oracle Retail Advanced Inventory Planning Data Management Online - Online Help Oracle Retail Advanced Inventory Planning Data Management Online User Guide Oracle Retail Advanced Inventory Planning Order Management - Online Help Oracle Retail Advanced Inventory Planning Order Management User Guide Oracle Retail Advanced Inventory Planning Data Model Volume 1 Oracle Database Data
Model Oracle Retail Advanced Inventory Planning Data Model Volume 2 Measure Reference Guide Oracle Retail Advanced Inventory Planning Operations Guide Oracle Retail Advanced Inventory Planning Implementation Guide Oracle Retail Advanced Inventory Planning Administration Guide Oracle Retail Advanced Inventory Planning Warehouse Replenishment Planning User Guide Oracle Retail Advanced Inventory Planning Store Replenishment Planning User Guide
Customer Support https://metalink.oracle.com
When contacting Customer Support, please provide: Product version and program/module name. Functional and technical description of the problem (include business impact). Detailed step-by-step instructions to recreate. Exact error message received. Screen shots of each step you take.
vii

Review Patch Documentation For a base release (".0" release, such as 13.0), Oracle Retail strongly recommends that you read all patch documentation before you begin installation procedures. Patch documentation can contain critical information related to the base release, based on new information and code changes that have been made since the base release.
Oracle Retail Documentation on the Oracle Technology Network In addition to being packaged with each product release (on the base or patch level), all Oracle Retail documentation is available on the following Web site: http://www.oracle.com/technology/documentation/oracle_retail.htmlDocumentation should be available on this Web site within a month after a product release. Note that documentation is always available with the packaged code on the release date.
Conventions Navigate: This is a navigate statement. It tells you how to get to the start of the procedure and ends with a screen shot of the starting point and the statement “the Window Name window opens.”
Note: This is a note. It is used to call out information that is important, but not necessarily part of the procedure.
This is a code sample It is used to display examples of code A hyperlink appears like this.
viii

1 Introduction
About the AIP Installation Process This document provides the installation instructions for Advanced Inventory Planning™ (AIP) version 13.0. This release is being made available on the AIX, HP-UX, and Sun UNIX operating systems. The process described in this document begins after the .zip files have been properly downloaded from http://edelivery.oracle.com. License keys for licensed products must be obtained before beginning the installation process.
About This Document This document provides detailed instructions for how to install an AIP 13.0 solution. The AIP installation consists of the following components: The Oracle® Retail Predictive Applications Server (RPAS) version 12.1.2.21 domain
using a configuration established by Oracle Retail developers. An online component based on Java and Oracle.
Detailed instructions for unpacking the software and installing both the RPAS and the online portion of the AIP 13.0 solution appear in the following chapters of this document. Before you begin installing AIP, you should have read the RPAS Installation Guide. Additional documentation may be required during the installation process and is referenced where applicable. Please read this entire document before beginning the installation process to ensure you understand the installation process and have all the necessary documentation, hardware, and software available.
Note: AIP Java/Oracle, AIP on Oracle, and AIP Online are often used interchangeably to refer to those parts of AIP that access the Oracle relational database. This includes the Data Management and Order Management GUI components and a host of UNIX shell scripts and PL/SQL modules.
Introduction 1


2 Preparing for Installation
Package Contents A complete AIP 13.0 solution is delivered in the files listed below, which can be obtained from http://edelivery.oracle.com: AIP 13.0 Media Pack
1. Download the files and unpack the AIP Media Pack. The media pack contains an AIP-13.0-install zip file in the CDROM folder, which contains the following files when extracted: AIP-13.0-rpas-installer.zip AIP-13.0-online-appserver-installer.zip, which contains the following:
– AIP-13.0-online-appserver-rib11-installer.zip – Requires RIB 11.1 on WebSphere 5.1.1.12.
– AIP-13.0-online-appserver-rib13-installer.zip – Requires RIB 13.0 on Oracle Application Server 10.1.3.3.
AIP-13.0-dbserver-installer.zip, which contains the following:
– AIP-13.0-online-dbserver-rib11-installer.zip – Requires RIB 11.1 on WebSphere 5.1.1.12.
– AIP-13.0-online-dbserver-rib13-installer.zip – Requires RIB 13.0 on Oracle Application Server 10.1.3.3.
RPAS-12.1.2.21.zip 2. Verify that all files listed above appear in the AIP Media Pack.
Installation Setup
Preparing Your Windows Workstation 1. Unpack the AIP Media Pack to view the documentation. The AIP documentation is
located in the DOCS folder. RPAS-12.1.2.21.zip – This ZIP file contains the RPAS documentation within the
DOCS directory and the Windows client-side RPAS files that need to be installed in the CDROM\Clients.
2. Unpack the RPAS-12.1.2.21.zip documentation package. This contains the RPAS documentation.
Preparing for Installation 3

Installation Overview
Preparing Your UNIX Machine 1. Copy the following ZIP files to the UNIX machine that will house the server-side
RPAS, Oracle, and Java files. RPAS-12.1.2.21.zip – This ZIP file contains the RPAS installation files. AIP-13.0-rpas-installer.zip – This file contains the AIP Installer which is an
installation wizard that installs the following AIP components:
– AIP batch components
– Domains
– RMS transformation file It also provides the ability to define the AIP domain path and create the AIP domain.
AIP-13.0-online-appserver-installer.zip – This ZIP file contains the AIP 13.0 Online EAR file and binary license file for AIP Online. Inside this file is the AIP-13.0-online-integration.zip, which contains the AIP 13.0 Online integration files to exchange information between AIP Online, RPAS, and RMS (or an external system).
AIP-13.0-online-dbserver-installer.zip – This ZIP file contains the AIP 13.0 Online Oracle schema database files.
Some of these files will be unpacked as part of the RPAS 12.1.2.21 installation instructions.
Note: As the RPAS-12.1.2.21.zip file contains both client and server-side files, it must be copied to both the Windows and UNIX machines.
Installation Overview To install AIP Online, follow the instructions in Chapters 3 through 7. To install AIP Batch, follow the instructions in Chapter 8.
4 Oracle Retail Advanced Inventory Planning

3 Compatibility and Hardware Requirements
Supported Oracle Retail Products This version of AIP is compatible with the following Oracle Retail products:
Oracle Retail Merchandising System (RMS) 10.1.x and 11.0.x– Requires RIB 11.1. See RIB 11.1 requirements below for more information.
Oracle Retail Merchandising System (RMS) 13.0 – Requires RIB 13.0. See RIB 13.0 requirements below for more information.
Oracle Retail Demand Forecasting (RDF) 12.0 Oracle Retail Predictive Application Server (RPAS) 12.1.2.21 Oracle Retail Integration Bus (RIB) 11.1
– Can only be used in conjunction with WebSphere Application Server 5.1.1.12
– Can only be used in conjunction with SeeBeyond eGate 5.0.5
– Can only be used in conjunction with JVM 1.4.2_10 (server and client) Oracle Retail Integration Bus (RIB) 13.0
– Can only be used in conjunction with Oracle Application Server 10.1.3.3
– Can only be used in conjunction with SeeBeyond eGate 5.0.5
– Can only be used in conjunction with JVM 1.5.0_12 (server and client) Oracle Retail Extract Transform and Load (RETL) 11.3 or higher
Server Operating Systems This version of AIP is compatible with the following server operating systems: AIX 5.3 HP-UX 11.23 Integrity, which use Intel Itanium processors
Server JRE General requirements for the server Java Run Time Environment (JRE) are dependent upon the RIB version used and are as follows: JRE 1.4.2_11 – Required for RIB 11.1 implementations. RIB 11.1 must be used when
integrating with RMS 10.1.x or 11.0.x. JRE 1.5.0_12 – Required for RIB 13.0 implementations. RIB 13.0 must be used when
integrating with RMS 13.0.
Compatibility and Hardware Requirements 5

Database
Database This version of AIP is compatible with the following database: Oracle 10g Enterprise Edition Release 2 (version 10.2.0.3.0)
Application Server General requirements for an application server capable of running the AIP Online application include: IBM WebSphere Application Server (version 5.1.1.12) – Required when using RIB
11.1. Oracle Application Server (version 10.1.3.3) – Required when using RIB 13.0.
Note: AIP Online can be used with either WebSphere Application Sever or Oracle Application Server. It does not require both application servers.
Client PC and Web Browser Requirements
Client PC Requirements The client PC requirements are as follows: Windows XP operating system 1024x768 or higher display resolution 1GHz or higher processor 256 MB or higher memory Intranet network connectivity with at least 10Mbps data rate
Client Browser Requirements The client browser requirements are as follows: Microsoft Internet Explorer 5.5 or higher
General requirements for the client Java Run Time Environment (JRE) are dependent upon the RIB version used. General requirements for the server Java Run Time Environment (JRE) are as follows: JRE 1.4.2_11 – Required for RIB 11.1 implementations. RIB 11.1 must be used when
integrating with RMS 10.1.x or 11.0.x. JRE 1.5.0_12 – Required for RIB 13.0 implementations. RIB 13.0 must be used when
integrating with RMS 13.0.
6 Oracle Retail Advanced Inventory Planning

4 Installing the AIP Online Database Server
Components Creating a UNIX User Account for Oracle and Retek
Perform the following procedure to create the necessary UNIX user accounts: 1. Create the following UNIX group:
dba This account owns the Oracle RDBMS
2. Create the following UNIX users, using ksh as the default shell: oracle – dba group retek – dev group
Note: The oracle account is used to create the Oracle 10g database. The retek account is the owner of the AIP Online files that reside on the UNIX server.
Creating a Staging Directory for AIP Online Database Files Perform the following procedure to create the staging directory for your AIP Online database server files:
1. Log on to the UNIX server as the newly created retek user and determine where the AIP Online database files will be installed. There should be a minimum of 1MB disk space available for the database installation files.
2. Copy the AIP-online-dbserver-rib11.zip or AIP-online-dbserver-rib13.zip file from the CDROM directory to the newly created staging directory. Copy the AIP-online-dbserver-rib11.zip file if you are deploying AIP using RIB 11. Copy the AIP-online-dbserver-rib13.zip file if you are deploying AIP using RIB 13.
3. Change directories (cd) to the staging directory and extract the zip file. This location is referred to as <DBINSTALL_DIR>.
Creating the Oracle 10g Database Perform the following procedure to create the Oracle 10g database:
1. Install Oracle 10g Release 2 (version 10.2.0.3) with the Oracle UNIX account and apply the latest update.
2. Create a 10g database. Refer to Appendix: Sample Oracle 10.2.0.3.0 Database Creation Script in this document for a sample database creation script and sample init.ora files. These samples are stored in the following location: <DBINSTALL_DIR>/AIPOnlineDBServer130/samplefiles If these scripts are not used as a guide, a system tablespace of 500MB is required for each installation of the AIP Online schema.
Installing the AIP Online Database Server Components 7

Creating AIP Online Schema Owner
3. Create the retek_data tablespace and the retek_index tablespace. The size of these tablespaces will vary from client to client. For the initial installation, tablespaces of 500MB are recommended.
Creating AIP Online Schema Owner A script called create_user.sql in <DBINSTALL_DIR>/AIPOnlineDBServer130/utility can be used to create the schema owner. This script will prompt you for schema owner name, password, and a temporary tablespace. This script should be run as sys.
1. Create the Oracle db user that will be used for the AIP Online application. Log on to sqlplus as the user “sys” and enter the following commands, replacing the text brackets < > with appropriate names. SQL> create user <AIP Online Schema Owner> indentified by <password> default tablespace retek_data temporary tablespace <temporary tablespace name>;
2. Log on to sqlplus as the user “sys” and grant the Oracle user <AIP Online Schema Owner>, which serves as the owner of the database objects, the following permissions: SQL> grant connect, resource, create view to <AIP Online Schema Owner>;
SQL> alter user <AIP Online Schema Owner> quota unlimited on retek_data;
SQL> alter user <AIP Online Schema Owner> quota unlimited on retek_index;
Preparing Your Server for Installation Before you run the AIP Online Database Schema Installer, make sure you have performed the following: Set the ORACLE_HOME and ORACLE_SID environment variables with the values
for your Oracle RDBMS installation. The oraenv script can be used for this. Set the NLS_LANG variable for your locale.
Example: NLS_LANG=AMERICAN_AMERICA.UTF8; export NLS_LANG The JAVA_HOME variable should be set by the installer based on the
ORACLE_HOME that you have defined. In the event that it doesn’t, please make sure that your JAVA_HOME is set to 1.5 or above.
If you are going to run the Installer in GUI mode using an X server, which is the recommended installation method, you need to have the XTEST extension enabled. This setting is not always enabled by default in your X server. Verify the extension is enabled.
Running the AIP Online Database Schema Installer Perform the procedure below to use the AIP Online Database Schema Installer. Regardless of the RIB version being used, the AIP Online Database Schema installation process is identical. Depending on system resources, a typical installation takes anywhere from 2 minutes to 30 minutes.
1. Change directories (cd) to the <DBINSTALL_DIR>/ directory. 2. Run the install.sh script, as shown below, to start the Installer.
./install.sh
Note: The command must be executed with the preceding period and forward slash (./).
8 Oracle Retail Advanced Inventory Planning

Running the AIP Online Database Schema Installer
If this process is being run on an X-Windows emulator (such as Exceed), a graphical user interface (GUI) to the Installer appears. If you are running in console mode through a terminal emulator, the text interface to the Installer appears. To run the Installer in the GUI mode, which is the recommended installation method, adjust the DISPLAY environment variable. In both cases, the requested information is identical. In the GUI, you may be shown a checkbox to signal whether you want a component installed; in text mode, you will be prompted for a response of "true" or "false".
Note: In text mode, the default value will appear in square brackets []. To use the default value and continue, simply hit the Enter key. If you wish to use a different value, enter the new value. When prompted to create a directory, respond with "y" or "yes" and press the Enter key. Password fields will appear masked, but the previous and default values will appear in plain text when running in the text mode.
The Oracle Advanced Inventory Planning – DB Schema Installer screen appears and displays the components that will be installed during installation process, as well as the required components.
Oracle Advanced Inventory Planning – DB Schema Installer Screen
3. Click Next to continue. The Data Source Details screen appears.
Installing the AIP Online Database Server Components 9

Running the AIP Online Database Schema Installer
Data Source Details Screen
4. Enter the following information and click Next: AIP Schema Owner – Enter the AIP Schema owner’s name. AIP Schema Password – Enter the AIP Schema Owner’s password. AIP Oracle SID – Enter the name of the database where the AIP schema will be
installed. The Data Source Details URL screen appears. The default setting is thick client.
Data Source Details URL Screen
10 Oracle Retail Advanced Inventory Planning

Running the AIP Online Database Schema Installer
5. Enter the AIP JDBC URL and click Next. This is the URL that will be used by AIP to access the database. The expected format for the field appears on screen. The Installation Summary screen appears.
6. Click Next. The database connection is validated using the information provided. The Installation Summary screen appears.
Installation Summary Screen
7. Click Next to continue. The Installation Progress screen appears.
Installation Progress Screen
Installing the AIP Online Database Server Components 11

Running the AIP Online Database Schema Installer
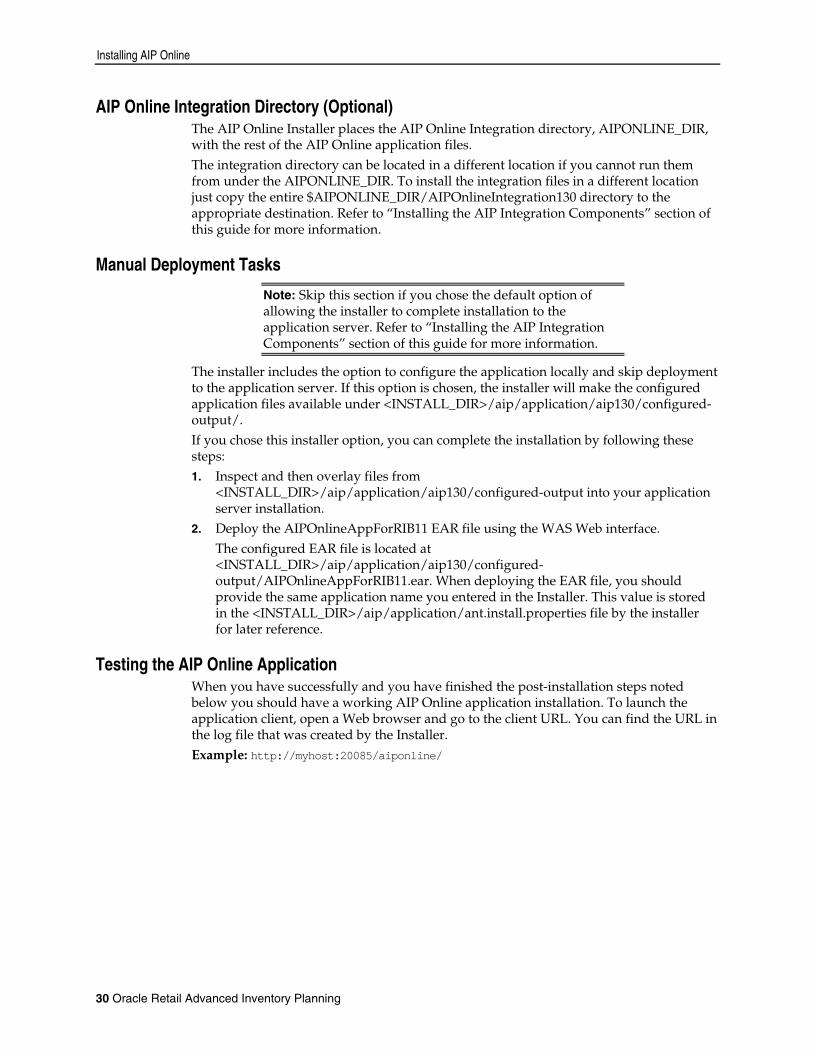
8. Once you are ready to begin the installation, click Install. This screen displays the progress of the installation routine. Select Show Details to view the log output as the installation is performed. If you do not choose to view the details, a graphical representation of the installation steps appears. You can toggle between detailed mode at any time during or after the installation. When the installation has finished, the Complete screen appears.
Complete Screen
9. Click OK to close the dialog box. 10. To view the installation details, select the Show Details button. The screen displays
two tabs, the Output tab and the Error tab. It is recommended that you review these tabs for any issues that may have occurred during the installation process. When the Installer is complete, a log file and a .dbhistory file appear in the installation directory. The log file is named aip-install-dbschema.<timestamp>.log, where <timestamp> is the date and time you ran the Installer. A .dbhistory file is also created, which contains a list of all the SQL scripts that were run by the installer. A .dberrors file is created if any errors were encountered. The Installer also generates an ant.install.properties file for future reference and repeat installations. This file contains all inputs you provided in the Installer screens, including passwords. As a security precaution, make sure that the file has restrictive permissions as shown in the example below. Example: chmod 600 ant.install.properties
11. Open the installation log file and record the database settings displayed at the end of the Installer log file, aip-install-dbschema.<timestamp>.log. You will need this information when performing the AIP Application Installation.
12. Click Exit to close the Installer.
12 Oracle Retail Advanced Inventory Planning

Running the AIP Online Database Schema Installer
Resolving Errors Encountered During Database Schema Installation If the database schema installer encounters any errors, it will halt execution immediately and print to the screen which SQL script it was running when the error occurred. It will also write the path to this script to the .dberrors file. When this happens, you must run that particular script using sqlplus. After you are able to complete execution of the script, delete the .dberrors file and run the Installer again. You can run the installer in silent mode so that you don’t have to retype the settings for your environment. Refer to “Reinstalling in Silent Mode” of this document for instructions on silent mode. Refer to “Troubleshooting” of this document for a list of common installation errors. Subsequent executions of the Installer will skip the SQL scripts that have already been executed in previous Installer runs. This is possible because the Installer maintains a .dbhistory file with a listing of the SQL scripts that have been run. If you have dropped the AIPOnline schema and want to start with a clean install, you can delete the .dbhistory file so that the Installer runs through all of the scripts again. It is recommended that you allow the Installer to skip the files that it has already run.
Installing the AIP Online Database Server Components 13


5 Installing AIPOnlineApp on WAS 5.1.1.12
AIP 13.0 is packaged as an EAR file, AIPOnlineAppRIB11.ear. Install the AIPOnlineAppRIB11.ear file on the J2EE application server according to the vendor's documentation. This chapter contains the typical steps for deploying an EAR file in WebSphere Application Server (WAS) version 5.1.1.12, assuming that WAS 5.1.1.12 is currently installed.
Note: The following patch MUST be applied to the WebSphere Application Server 5.1.1.12 for the AIP Online application to work properly:
Patch: PQ93388
URL: http://www-1.ibm.com/support/docview.wss?rs=0&uid=swg24007848
Note: In the event that a previous version of the AIP Online application is already installed on the WAS, AIP Online will need to be stopped and uninstalled before you install version 13.0 of the AIP 13.0 Online application. The existing data source and J2C Authentication Data Entry in the WAS can be re-used for the AIP 13.0 Online application installation (assuming these values remain unchanged for the AIP 13.0 schema). Any customizations made to previously installed version(s) of AIP Online application will need to be manually replicated in AIP 13.0 online application.
Required WebSphere Application Server (WAS) Configurations The AIP WAS installation configurations below have been tested. You are required to use one of these configurations when deploying the AIP Online application. Alternate configurations are not supported.
1. AIPOnlineApp and RIBforAIP are installed on separate WAS instances on separate physical servers.
2. AIPOnlineApp and RIBforAIP installed on separate WAS servers within a single WAS instance. RIBforAIP installation/configuration is required to integrate RMS 11.0.x or 10.1.x with AIP 13.0. For RIBforAIP installation and configuration instructions, refer to Chapter 6 in the Retail Integration Bus 11.1 Installation Guide (rib-111-ig).
Installing AIPOnlineApp on WAS 5.1.1.12 15

WebSphere Application Server Requirements
WebSphere Application Server Requirements Before preceding you must install WebSphere Application Server (WAS) 5.1.1.12, plus patch PQ93388 mentioned at the beginning of this chapter. AIP Online will be deployed to a server instance within the WAS framework. It is assumed Oracle RDBMS has already been configured and loaded with the appropriate AIP Online schema for your installation. The Oracle 10.2.0.3.0 classes12.jar driver file is required for AIP 13.0. This file can be obtained from the Oracle Technology Network Web site, and must be copied to a staging directory on the Web server where WAS 5.1.1.12 is installed. The classes12.jar driver file may also be copied from the Oracle RDBMS 10g Release 2 Enterprise Edition location ($ORACLE_HOME/jdbc/lib) on the database server.
Note: The JVM bundled with WebSphere 5.1.1.12 is supported for the AIP Online application.
Configuring WAS 5.1.1.12 for AIP Online Application Note: The following WAS configuration steps are not necessary if the AIP application has already been installed and the AIP Oracle schema has not changed. If this is the case, proceed to Installing AIP Online this chapter.
1. Open the WAS Administrative Console that is to be used for administering the AIP 13.0 online application – http://<server>:<port>/admin. Replace the text in brackets with the correct information stated below.
Replace With
<server> The name or IP address of the server where WAS 5.1.1.12 is running
<port> WAS Administration Console Port
Example: http://server:9090/adminIf the administrative console URL is unknown, consult the WAS 5.1.1.12 documentation for the correct URL.
2. Select Security – JAAS Configuration – J2C Authentication Data. 3. Under J2C Authentication Data Entries, click New and enter the following
information in the fields provided: a. In the Alias field, enter the alias for the Authentication Data Entry. b. In the UsedID field, enter the AIP database schema owner. c. In the Password field, enter the AIP database schema password. d. Click Apply. e. Click OK.
Example: Alias: AIPOnlineDBUser User ID: aip130 Password: MyPassword
16 Oracle Retail Advanced Inventory Planning

Configuring WAS 5.1.1.12 for AIP Online Application
4. Save your configuration settings. a. Select the Save link in the Message(s) section. b. Click Save in the Save to Master Configuration section.
5. Select Resources – JDBC Providers. 6. Under JDBC Providers, select the Server option and then click Apply. 7. Create a new JDBC Provider.
a. Click New to create a new JDBC provider. b. Select Oracle JDBC Driver (XA) from the JDBC Providers list. c. Click Apply.
8. In the General Properties section, set the Classpath field to the location of the Oracle driver archive file, classes12.jar, and click Apply. Make sure to include the file name and extension in the Classpath field. Example: /u00/websp/jdbc/classes12.jar
9. Under Additional Properties, select Data Sources and then click New. 10. Enter the following information in the Configuration – General Properties fields:
a. Enter AIPOnlineDB in the Name field. This value is case sensitive and must be entered as shown.
b. Enter jdbc/AIPOnlineDB in the JNDI Name. This value is case sensitive and must be entered as shown.
c. Select the Container managed persistence (CMP) option. d. From the Component-managed Authentication Alias option, select the J2C
Authentication Alias that was created in step 5 above. e. From the Container-managed Authentication Alias option, select the J2C
Authentication Alias that was created in step 5 above. f. Leave all other field as the defaults displayed. g. Click Apply. Example:
Name: AIPOnlineDB JNDI Name: jdbc/AIPOnlineDB Component-managed Authentication Alias: AIPOnlineDBUser Container-managed Authentication Alias: AIPOnoineDBUser
11. Under Additional Properties, select Custom Properties and perform the following: a. Remove all properties except for URL and transactionBranchesLooselyCoupled
by selecting the options all other properties and then clicking Delete. b. Select URL and enter the following information in the Value field:
Value: jdbc:oracle:thin:@<DB Server IP address>:<DB Listener Port>:<Database_name>
Example: jdbc:oracle:thin:@dbserver:1521:prod_db1c. Click Apply, and then click OK. d. Select transactionBranchesLooselyCoupled option and set the Value field to
true. e. Click Apply, and then click OK.
Installing AIPOnlineApp on WAS 5.1.1.12 17

Preparing Your Server for Installation
12. Save your configuration settings. a. Select the Save link in the Message(s) section. b. Click Save in the Save to Master Configuration section.
13. Verify the configuration by using the “Test Connection” option in the Data Sources configuration section (Resources – JDBC Providers – Oracle JDBC Driver (XA) – Data Sources – Data Source Name – Test Connection button). A successful message in the Message(s) section should appear. In the event of an unsuccessful connection test, review all previous steps to ensure that the configuration settings were defined correctly.
Preparing Your Server for Installation Before you run the AIP Application Server Installer, make sure you have performed the following: Log in to the UNIX server as the user who owns the WAS installation. Create a new
staging directory for the AIP Online application distribution (AIP-online-rib11-appserver-installer.zip). Example: /u00/websp/aiponline/aiponline_staging This location will be referred to as <INSTALL_DIR> for the remainder of this chapter.
Make sure there is a minimum of 500 MB disk space available for the application installation files.
Copy AIP-online-rib11-appserver-installer.zip to <INSTALL_DIR> and extract its contents.
If you are going to run the Installer in GUI mode using an X server, which is the recommended installation method, you need to have the XTEST extension enabled. This setting is not always enabled by default in your X server. Verify the extension is enabled.
Set the WAS_HOME and JAVA_HOME environment variables. WAS_HOME should point to your WAS installation. JAVA_HOME should point to $WAS_HOME/java.
18 Oracle Retail Advanced Inventory Planning

Installing AIP Online
Installing AIP Online Once you have a WAS server instance started, you can run the AIP Online Installer. This installer configures and deploys the AIP Online application and AIP Online Integration files. Perform the procedure below to use the AIP Online Installer. Depending on system resources, a typical installation can take up to 30 minutes.
1. Extract AIP-online-rib11-appserver-installer.zip to <INSTALL_DIR> directory. 2. Change directories (cd) to the <INSTALL_DIR>/AIPOnlineAppServer130 directory. 3. Run the install.sh script, as shown below, to start the Installer.
./install.sh
Note: The command must be executed with the preceding period and forward slash (./).
When the installation is complete, a detailed installation log file is created. This file is named aip130install-app.<timestamp>.log where <timestamp> represents the date and time the installation was performed. This file is located in the <INSTALL_DIR>/AIPOnlineAppServer130 directory. If this process is being run on an X-Windows emulator (such as Exceed), a graphical user interface (GUI) to the Installer appears. If you are running in console mode through a terminal emulator, the text interface to the Installer appears. To run the Installer in the GUI mode, which is the recommended installation method, adjust the DISPLAY environment variable. In both cases, the requested information is identical. In the GUI, you may be shown a checkbox to signal whether you want a component installed; in text mode, you will be prompted for a response of "true" or "false".
Note: In text mode, the default value will appear in square brackets []. To use the default value and continue, simply hit the Enter key. If you wish to use a different value, enter the new value. When prompted to create a directory, respond with "y" or "yes" and press the Enter key. Password fields will appear masked, but the previous and default values will appear in plain text when running in the text mode.
The AIP Online Installer screen appears and displays the components that will be installed during installation process, as well as the required components.
Installing AIPOnlineApp on WAS 5.1.1.12 19

Installing AIP Online
AIP Online Installer Screen
4. Click Next to continue. The Pre Configuration Details screen appears.
Pre Configuration Details Screen
5. Enter the application server name where AIP Online is being deployed and click Next. The Data Source Details screen appears.
20 Oracle Retail Advanced Inventory Planning

Installing AIP Online
Data Source Details Information Screen
6. Click Next to verify that your WebSphere Application Server has the proper settings to install the AIP Online components. If the proper settings are defined, the Data Source Details screen appears.
Note: If the AIP Online Installer discovers any issues, a message box appears with the issues encountered. Make the necessary changes to your WAS environment and run the AIP Online Installer again.
Installing AIPOnlineApp on WAS 5.1.1.12 21

Installing AIP Online
Data Source Details Screen
7. Enter the following information and click Next: AIP database host – Enter the AIP database host name. AIP database port – Enter the port number on which the database listens. AIP SID – Enter the AIP Online database SID. AIP DB Schema User – Enter the AIP database schema user name. AIP DB Schema Password – Enter the AIP database schema password.
The Data Source Confirmation screen appears.
22 Oracle Retail Advanced Inventory Planning

Installing AIP Online
Data Source Confirmation Screen
The AIP JDBC URL string that appears is defined by the information you have entered. This URL is used by the AIP Online application to access the AIP database schema.
8. Verify the AIP JDBC URL string is correct and click Next. The Manual Deployment Options screen appears.
Manual Deployment Option Screen
Installing AIPOnlineApp on WAS 5.1.1.12 23

Installing AIP Online
9. Select the appropriate option and click Next. If you have write access to the application server, select Yes. The Installer will install the necessary files to the AIPONLINE_DIR folder. If you are running the AIP Online Installer as user who does not have write permissions to the filesystem under the AIPONLINE_DIR, select No. The Installer will perform all the necessary configuration changes within the staging directory, but it will not install any files to the AIPONLINE_DIR. If you select No, you will need to manual complete the installation process. Even if you select No, you will still need to complete the subsequent Installer screens. The AIP Online Installation Directory screen appears.
AIP Online Installation Directory Screen
10. Enter the directory where AIP Online will be installed and click Next. The WebSphere Configuration screen appears.
24 Oracle Retail Advanced Inventory Planning

Installing AIP Online
Example of WebSphere Configuration Screen Settings
11. Enter the following information and click Next: WAS Home Directory – Enter the directory where WAS is installed. WAS Bootstrap Port – Enter the WAS bootstrap port number. WAS SOAP Port – Enter the WAS SOAP port number. AIP HTTP Port – Enter the HTTP port used in the AIP Online URL.
Example: http://www.mydomain.com:8080/aiponline/ WAS Cell – Enter the WAS cell. WAS Node – Enter the WAS node. WAS Server – Enter the WebSphere Application Server name. WAS Application Name – Enter AIPOnlineApp as the WAS application name. Oracle JAR Path – Enter the directory location where AIP will be installed,
which is referred to as <INSTALL_DIR> in this chapter. This is the location where you previous copied the JAR file. Please refer to WebSphere Application Server Requirements for information on where to obtain the classes12.jar or ojdbc14.jar file.
Note: Please refer to the WebSphere Administration Console and IBM WebSphere documentation for information on WAS specific information, such as WAS bootstrap, WAS cell, WAS node, etc.
The WebSphere Confirmation Page appears.
Installing AIPOnlineApp on WAS 5.1.1.12 25

Installing AIP Online
WebSphere Configuration Page 2 Screen
12. Select the appropriate installation option and click Next. Select Install if you want to install a new instance of AIP Online. Select Update to update or install over an existing installation of AIP Online. The AIP Online Integration screen appears.
AIP Online Integration Screen
26 Oracle Retail Advanced Inventory Planning

Installing AIP Online
13. Enter the directory where AIP Online Integration components will be installed and click Next. The AIP online Integration Home field defaults to AIPONLINE_DIR. You may choose to install the integration components to another location on the same server at this point, or you may choose to move the installed files once the installation process is complete. The AIP Online Integration Install screen appears.
AIP Integration Install Screen
The RETL interface process, which runs from a UNIX-based platform, is designed to be fully automated once configured. In addition to the environment variables display on the screen, config.xml is required when invoking the RETL scripts. This file should be located in the root integration directory on the UNIX server where the AIP Online application is installed. This configuration file (config.xml) contains the database connection information required by RETL when performing import and export operations. Refer to the RETL documentation for detailed descriptions of element definitions. There are two operator sections that need to be completed: oraread –The oraread section defines the properties required for all export
operations on the database. orawrite – The orawrite section defines these for all import operations.
Though both sections contain similar attributes, it is imperative that each section is defined as needed for the specific Oracle database installation. This information is also dependent on the following requirements All databases can be connected to using a properly defined tnsnames file. All databases are reachable by SQLPlus.
Installing AIPOnlineApp on WAS 5.1.1.12 27

Installing AIP Online
14. Enter the following information in the AIP Integration Install screen and click Next to continue: Array Size
Integration Read DB Host Name Integration Read DB Port Integration Read DB SID
Integration Read DB Connect String Integration Write DB Host Name Integration Write DB Port
Integration Write DB SID Integration Write DB Connect String Integration Write Method
Integration Online Schema Owner Please refer to the AIP Online Implementation Guide as well as the RETL Installation Guide for further details on the AIP integration fields. The Installation Progress screen appears.
Installation Progress Screen
15. Once you are ready to begin installation, click the Install button. This screen displays the progress of the installation routine. Select Show Details to view the log output as the installation is performed. If you do not select to view the details, a graphical representation of the installation steps appears. You can toggle between detailed mode at any time during or after the installation. When the installation has finished, the Complete screen appears.
28 Oracle Retail Advanced Inventory Planning

Installing AIP Online
Complete Screen
16. Click OK to close the dialog box. 17. To view the installation details, select the Show Details button. The screen displays
two tabs, the Output tab and the Error tab. It is recommended that you review these tabs for any issues that may have occurred during the installation process. When the installation is complete, a detailed installation log file is created. This file is named aip130install-app.<timestamp>.log where <timestamp> represents the date and time the installation was performed. This file is located in the <INSTALL_DIR>/ aip/application/logs directory.
Resolving Errors Encountered During Application Installation If the application installer encounters any errors, it will halt execution immediately. You can run the installer in silent mode so that you don’t have to retype the settings for your environment. Refer to “Reinstalling in Silent Mode” of this document for instructions on silent mode. Refer to “Troubleshooting” of this document for a list of common installation errors. Since the application installation is a full reinstall every time, any previous partial installs will be overwritten by the successful installation.
Installing AIPOnlineApp on WAS 5.1.1.12 29
Installing AIP Online
AIP Online Integration Directory (Optional) The AIP Online Installer places the AIP Online Integration directory, AIPONLINE_DIR, with the rest of the AIP Online application files. The integration directory can be located in a different location if you cannot run them from under the AIPONLINE_DIR. To install the integration files in a different location just copy the entire $AIPONLINE_DIR/AIPOnlineIntegration130 directory to the appropriate destination. Refer to “Installing the AIP Integration Components” section of this guide for more information.
Manual Deployment Tasks
Note: Skip this section if you chose the default option of allowing the installer to complete installation to the application server. Refer to “Installing the AIP Integration Components” section of this guide for more information.
The installer includes the option to configure the application locally and skip deployment to the application server. If this option is chosen, the installer will make the configured application files available under <INSTALL_DIR>/aip/application/aip130/configured-output/. If you chose this installer option, you can complete the installation by following these steps:
1. Inspect and then overlay files from <INSTALL_DIR>/aip/application/aip130/configured-output into your application server installation.
2. Deploy the AIPOnlineAppForRIB11 EAR file using the WAS Web interface. The configured EAR file is located at <INSTALL_DIR>/aip/application/aip130/configured-output/AIPOnlineAppForRIB11.ear. When deploying the EAR file, you should provide the same application name you entered in the Installer. This value is stored in the <INSTALL_DIR>/aip/application/ant.install.properties file by the installer for later reference.
Testing the AIP Online Application When you have successfully and you have finished the post-installation steps noted below you should have a working AIP Online application installation. To launch the application client, open a Web browser and go to the client URL. You can find the URL in the log file that was created by the Installer. Example: http://myhost:20085/aiponline/
30 Oracle Retail Advanced Inventory Planning

Configuring the AIP Online Application
Configuring the AIP Online Application A setup page is used to configure the properties files for AIP Online.
1. Load the new AIP Online application by entering the following URL in a Web browser: http://<server>:<http_port>/aiponline
Replace the text in brackets <>with the appropriate information described below.
Replace With
<server> The name or IP address of the server where WebSphere is running.
<http_port> The WAS HTTP port as defined by the HTTPTransport_1 value in the file WAS_HOME/config/cells/<cell>/nodes/<node>/servers/server1/server.xml.
Example: http://server:9080/aiponlineA page displaying a link to the setup page appears.
2. Click the setup page link. The AIP Online Setup page appears. 3. Configuration and Data directories are created by the AIP Online Application
Installer. Using the Install directory specified in the installer, please use the following values: Configuration Directory: INSTALL_DIR/config Data Directory: INSTALL_DIR/data Example: Configuration Directory: /u00/websp/aip130/config Data Directory: /u00/websp/aip130/data
4. Under Application Licensing, set the License file field to the license-aip.bin file as shown below. License file: INSTALL_DIR/AIPOnlineAppServer/license-aip.bin Example: License file: /u00/websp/aip130/AIPOnlineAppServer/license-aip.bin
5. Under Database setup, set the following values in the fields provided: Database type – Enter Oracle. Database name – Enter the Oracle database SID name. Username and password – Enter the Oracle AIP schema owner and password. Network host – Enter the IP address or name of server where the Oracle
database is running. Port Number – Enter the Oracle database port number.
Example:
Database type: Oracle Database name: prod_db1 Username: aip130 Password: MyPassword Network host: dbserver Port number: 1521
Installing AIPOnlineApp on WAS 5.1.1.12 31

Creating the AIP Online Enterprise
6. Under E-mail setup, retain the default settings for the following fields as this version of AIP Online does not provide e-mail functionality: Example:
External Host Name: localhost:http_port E-mail From Address: [email protected] SMTP Mail Server: localhost The AIP Online Setup: Part II: confirm settings page appears if no configuration errors were encountered.
7. Verify that all settings are correct. If any values are incorrect, click the Back button in the Web browser to go to the previous page and make the proper adjustments. If the settings are correct, click Next. The AIP Online Setup: Part III: installing page briefly appears, followed by the AIP Online: Part IV: status page. A message appears stating that the installation was successful and informs you to restart the application server to continue configuring AIP Online.
8. Review the installation log to ensure that no errors were encountered during the installation process.
9. Restart the WebSphere Application Server to apply the AIP Online configuration changes.
10. If necessary, start the AIP Online application through the WAS Administrative Console. To start the AIP online application, select the option next to the application on the Enterprise Applications page and click Start. Make sure that the status of the AIP Online application is now up, indicated by a green arrow.
Creating the AIP Online Enterprise This section provides the procedures to create an AIP Online enterprise and the initial administrator for the newly created enterprise.
1. Select the link displayed in the AIP Online Setup: Part IV (step 10 above) to load the AIP Online application System Administration. In the event that the page has timed out or been closed, enter the application URL in the Web browser as shown in the example below. Example: http://server:9080/aiponline/phantasm
2. Enter admin in User Name field and admin in the Password field to log on to the System Administration page. These are the default system administrator user name and password. The System Administration page appears.
Note: A Warning – Security window may appear asking if the signed applet that is to run the Enterprise Administration window can be trusted. If this window appears, click Yes.
3. Click Enterprises in the Enterprise Data section. The Enterprise Administration window appears.
4. Click New.
32 Oracle Retail Advanced Inventory Planning

Creating the AIP Online Enterprise
5. On the Company Info tab, enter the following information as shown below: Company name – Enter your company name. Enterprise code – Enter aiponline. Contact Email – Enter the AIP Administrator’s e-mail address.
The Industry and Company type fields are not required. Example:
Company Name: My Company Enterprise Code: aiponline Contact Email: [email protected]
6. On the initial Admin tab, enter the following information: First Name – Enter the AIP Administrator’s first name. Last Name – Enter the AIP Administrator’s last name. Username – Enter the AIP Administrator’s user name to be used when logging
into AIP Online. New Password – Enter the AIP Administrator’s AIP Online password.
When selecting a password, make sure it meets the following requirements:
– Minimum 6 characters; maximum 128 characters
– At least 5 different characters
– Must not be simple pattern of characters (such as ABCDEF or ABCXYZ)
– Must not be easily derivable from user name or full name
– Must not be easily derivable from previous password
– Must not be derivable from a dictionary entry
– Case sensitive Retype New Password – Retype your password. Remember, the password is
case sensitive, so you must type it exactly as it was entered in the Password field. Example:
First Name: John Last Name: Doe Username: doejohn New Password: aip130online Retype New Password: aip130online
7. Navigate to the Services tab. Two services are displayed, Core Administration and AIP Online. Perform the following: a. Click the Enabled cell of Core Administration. b. Double-click the User Limit cell of Core Administration and enter an integer
value in the cell. This integer value represents the number of users that can be created per application. If the exact number of users is not known, enter a large number such as 100. This number can be changed later by the system admin user.
c. Press the Enter key to accept your input. d. Click the Enabled cell of AIP Online.
Installing AIPOnlineApp on WAS 5.1.1.12 33

Creating AIP Online Users
e. Double-click the User Limit cell of AIP Online and enter an integer value in the cell. This integer value represents the number of users that can be created per application. If an exact number of users is not known, enter a large number such as 100. This number can be changed at a later time by the system admin user.
f. Press the Enter key to accept your input. 8. On the Enterprise Administration window, click Save. Close the Enterprise
Administration window when the save is complete. 9. On the System Administrator page, click the LOG OUT link located at the top right
of the page.
Creating AIP Online Users This section provides the procedures to create AIP online users. New users should be created using the administrator account created in the previous step.
1. Load the application URL in a browser to access the AIP Online application login page.
Example: http://server:9080/aiponline/index.jsp2. Input the administrator username and password, and click LOG IN. The Application
page appears. 3. Click the Core Administration link. The Administration page appears. 4. Click the Users button in the Application Setup section. The Core Administration:
User Administration window appears. 5. Select the Users tab and click New. A user information form is displayed. 6. In the Details tab, enter all relevant user information in the form.
Example: First Name: John Last Name: Doe Email: [email protected] Username: doejohn New Password: aip130online Retype New Password: aip130online Password Status: Normal
7. Click the Permissions tab. A user permissions form appears. 8. Select the Enabled cell of the AIP Online service. Available Types selection box is
populated with data. 9. Select All AIP Permissions from the Available Types selection box. Click > to move
this permission type to the Selected Types box, and then click Save. 10. Repeat steps 5 through 9 until you have added the necessary user accounts. 11. When you have added all the necessary user accounts, close the Core
Administration: User Administration window. 12. Click the LOG OUT link in the Administration page to exit the application.
34 Oracle Retail Advanced Inventory Planning

6 Installing AIPOnlineApp on OAS 10.1.3.3
This chapter contains the typical steps for installing the AIP Online application to your Oracle Application Server (OAS). Before proceeding, you must install Oracle Application Server 10g 10.1.3.3, plus the patches listed in the Chapter 1 of this document. AIP Online will be deployed to an OC4J instance within the Oracle Application Server 10g installation. It is assumed that Oracle RDBMS 10g has already been configured and loaded with the appropriate AIP Online schema for your installation.
Creating a New OC4J Instance for AIP Online Perform the procedure below to create a new OC4J instance for the AIP Online installation.
Note: If you are deploying to an existing OC4J instance, you can skip this step since your environment is already prepared for installing AIP Online.
1. Log in to the server which is running your OracleAS 10g installation. Set your ORACLE_HOME environment variable to point to this installation.
2. Choose a name for the new OC4J instance. Example: aiponline_oc4j
3. Create this OC4J instance as documented in the Oracle Application Server Administrator’s Guide. Sample Syntax: $ORACLE_HOME/bin/createinstance –instanceName aiponline_oc4j
4. When prompted for the oc4jadmin password, provide the same administrative password you used for the Oracle Application Server installation. All OC4J instances running Oracle Retail applications must have the same oc4jadmin password.
5. Start the OC4J instance. You can do this through the Enterprise Manager Web interface, or on the command line using the opmnctl utility using the sample syntax shown below. Sample Syntax: $ORACLE_HOME/opmn/bin/opmnctl startproc process-type=aiponline_oc4j
6. Verify that the OC4J instance was fully started. If you are using the Enterprise Manager Web interface, the instance should have a green arrow indicating that it is running. If you are using the command line, verify that the instance has a status of “Alive” as shown in the example below. Sample Syntax: $ORACLE_HOME/opmn/bin/opmnctl status
Note: If you are unable to start the OC4J instance after several attempts, try increasing the startup timeouts in ORACLE_HOME/opmn/conf/opmn.xml. If that does not help, consult the Oracle Application Server documentation for further assistance.
Installing AIPOnlineApp on OAS 10.1.3.3 35

Preparing Your Server for Installation
Preparing Your Server for Installation Before you run the AIP Application Server Installer, make sure you have performed the following: Log in to the UNIX server as the user who owns the OracleAS 10g installation. Create
a new staging directory for the AIP Online application distribution (AIP-online-rib13-appserver-installer.zip). Example: $ORACLE_HOME/j2ee/aiponline_oc4j/aiponline_staging This location will be referred to as <INSTALL_DIR> for the remainder of this chapter.
Make sure there is a minimum of 500 MB disk space available for the application installation files.
Copy AIP-online-rib13-appserver-installer.zip to <INSTALL_DIR> and extract its contents.
If you are going to run the Installer in GUI mode using an X server, which is the recommended installation method, you need to have the XTEST extension enabled. This setting is not always enabled by default in your X server. Verify the extension is enabled.
Set the ORACLE_HOME and JAVA_HOME environment variables. ORACLE_HOME should point to your Oracle Application Server 10g installation. JAVA_HOME should point to $ORACLE_HOME/jdk. The AIP Application Installer should set the JAVA_HOME variable during the installation process.
Running the AIP Online Application Installer Once you have an OC4J instance that is started, you can run the AIP Online application installer. This installer will configure and deploy the AIP Online application and AIP Online Integration files.
1. Extract AIP-online-rib13-appserver-installer.zip to <INSTALL_DIR> directory. 2. Change directories (cd) to the <INSTALL_DIR>/AIPOnlineAppServer130 directory. 3. Run the install.sh script, as shown below, to start the Installer.
./install.sh
Note: The command must be executed with the preceding period and forward slash (./).
When the installation is complete, a detailed installation log file is created. This file is named aip130install-app.<timestamp>.log where <timestamp> represents the date and time the installation was performed. This file is located in the <INSTALL_DIR>/AIPOnlineAppServer130 directory. If this process is being run on an X-Windows emulator (such as Exceed), a graphical user interface (GUI) to the Installer appears. If you are running in console mode through a terminal emulator, the text interface to the Installer appears. To run the Installer in the GUI mode, which is the recommended installation method, adjust the DISPLAY environment variable. In both cases, the requested information is identical. In the GUI, you may be shown a checkbox to signal whether you want a component installed; in text mode, you will be prompted for a response of "true" or "false".
36 Oracle Retail Advanced Inventory Planning

Running the AIP Online Application Installer
Note: In text mode, the default value will appear in square brackets []. To use the default value and continue, simply hit the Enter key. If you wish to use a different value, enter the new value. When prompted to create a directory, respond with "y" or "yes" and press the Enter key. Password fields will appear masked, but the previous and default values will appear in plain text when running in the text mode.
The AIP Online Installer screen appears and displays the components that will be installed during installation process, as well as the required components.
AIP Online Installer Screen
4. Click Next to continue. The Pre Configuration Details screen appears.
Installing AIPOnlineApp on OAS 10.1.3.3 37

Running the AIP Online Application Installer
Pre Configuration Details Screen
5. Enter the application server name where AIP Online is being deployed and click Next. The Data Source Details screen appears.
Data Source Details Screen
38 Oracle Retail Advanced Inventory Planning

Running the AIP Online Application Installer
6. Enter the following information and click Next: AIP database host – Enter the AIP database host name. AIP database port – Enter the port number on which the database listens. AIP SID – Enter the AIP Online database SID. AIP DB Schema User – Enter the AIP database schema user name. AIP DB Schema Password – Enter the AIP database schema password.
The Data Source Confirmation screen appears.
Example of Data Source Confirmation Screen
The AIP JDBC URL string that appears is defined by the information you have entered. This URL is used by the AIP Online application to access the AIP database schema.
7. Verify the AIP JDBC URL string is correct and click Next. The Manual Deployment Options screen appears.
Installing AIPOnlineApp on OAS 10.1.3.3 39

Running the AIP Online Application Installer
Manual Deployment Option Screen
8. Select the appropriate option and click Next. If you have write access to the application server, select Yes. The Installer will install the necessary files to the ORACLE_HOME folder. If you are running the AIP Online Installer as user who does not have write permissions to the filesystem under the ORACLE_HOME, select No. The Installer will perform all the necessary configuration changes within the staging directory, but it will not install any files to the ORACLE_HOME. If you select No, you will need to manual complete the installation process. Even if you select No, you will still need to complete the subsequent Installer screens. The Application Deployment Details: Server Details screen appears.
40 Oracle Retail Advanced Inventory Planning

Running the AIP Online Application Installer
Example of Application Deployment Details: Server Details Screen
9. Enter the following information and click Next: OPMN Request Port – Enter the OPMN request port found in
$ORACLE_HOME/opmn/conf/opmn.xml file. Example of Port Definitions in opmn.xml File: <port local="6100" remote="6200" request="6003">
OC4J Admin User – Enter the OC4J admin user name. OC4J Admin Password – Enter the OC4J admin user password.
The Application Deployment Details: Application Details screen appears.
Installing AIPOnlineApp on OAS 10.1.3.3 41

Running the AIP Online Application Installer
Application Deployment Details: Application Details Screen
10. Enter the following information and click Next: AIP Online OC4J Group – Enter the group name of the OC4J instance where
AIP Online application will be deployed. OC4J Instance – Enter the name of the OC4J instance where AIP Online
application will be deployed. AIP Online App Name – Enter the name that will be used by the application
server to identify the AIP Online application. Context Root – Enter the context root that the application will be using. For
example, http://myhost:7777/aiponline where aiponline represents the context root required for this field.
HTTP Port – Enter the HTTP port found in the application URL. For example, http://myhost:7777/aiponline where 7777 represents the HTTP Port required for this field.
The AIP Online Installation Directory screen appears.
42 Oracle Retail Advanced Inventory Planning

Running the AIP Online Application Installer
AIP Online Installation Directory Screen
11. Enter the directory where AIP Online will be installed and click Next. The AIP Online Integration screen appears.
AIP Online Integration Screen
12. Enter the directory where AIP Online Integration components will be installed and click Next. The AIP online Integration Home field defaults to AIPONLINE_DIR.
Installing AIPOnlineApp on OAS 10.1.3.3 43

Running the AIP Online Application Installer
You may choose to install the integration components to another location on the same server at this point, or you may choose to move the installed files once the installation process is complete. The AIP Online Integration Install screen appears.
Example of AIP Integration Install Screen
The RETL interface process, which runs from a UNIX-based platform, is designed to be fully automated once configured. In addition to the environment variables display on the screen, config.xml is required when invoking the RETL scripts. This file should be located in the root integration directory on the UNIX server where the AIP Online application is installed. This configuration file (config.xml) contains the database connection information required by RETL when performing import and export operations. Refer to the RETL documentation for detailed descriptions of element definitions. There are two operator sections that need to be completed: oraread –The oraread section defines the properties required for all export
operations on the database. orawrite – The orawrite section defines these for all import operations.
Though both sections contain similar attributes, it is imperative that each section is defined as needed for the specific Oracle database installation. This information is also dependent on the following requirements All databases can be connected to using a properly defined tnsnames file. All databases are reachable by SQLPlus.
44 Oracle Retail Advanced Inventory Planning

Running the AIP Online Application Installer
13. Enter the following information in the AIP Integration Install screen and click Next to continue: Array Size
Integration Read DB Host Name Integration Read DB Port Integration Read DB SID
Integration Read DB Connect String Integration Write DB Host Name Integration Write DB Port
Integration Write DB SID Integration Write DB Connect String Integration Write Method
Integration Online Schema Owner Please refer to the AIP Online Implementation Guide as well as the RETL 13.0 Installation Guide for further details on the AIP Integration fields. The Installation Progress screen appears.
Installation Progress Screen
14. Once you are ready to begin installation, click the Install button. This screen displays the progress of the installation routine. Select Show Details to view the log output as the installation is performed. If you do not select to view the details, a graphical representation of the installation steps appears. You can toggle between detailed mode at any time during or after the installation. When the installation has finished, the Complete screen appears.
Installing AIPOnlineApp on OAS 10.1.3.3 45
Running the AIP Online Application Installer
Complete Screen
15. Click OK to close the dialog box. 16. To view the installation details, select the Show Details button. The screen displays
two tabs, the Output tab and the Error tab. It is recommended that you review these tabs for any issues that may have occurred during the installation process. When the installation is complete, a detailed installation log file is created. This file is named aip130install-app.<timestamp>.log where <timestamp> represents the date and time the installation was performed. This file is located in the <INSTALL_DIR>/ aip/application/logs directory.
Resolving Errors Encountered During Application Installation If the application installer encounters any errors, it will halt execution immediately. You can run the installer in silent mode so that you don’t have to retype the settings for your environment. Refer to “Reinstalling in Silent Mode” of this document for instructions on silent mode. Refer to the “Troubleshooting” section of this document for a list of common installation errors. Since the application installation is a full reinstall every time, any previous partial installs will be overwritten by the successful installation.
AIP Online Integration Directory (Optional) The AIP Online Installer places the AIP Online Integration directory, AIPONLINE_DIR, with the rest of the AIP Online application files. The integration directory can be located in a different location if you cannot run them from under the AIPONLINE_DIR. To install the integration files in a different location, copy the entire $AIPONLINE_DIR/AIPOnlineIntegration130 directory to the appropriate destination. Refer to “Installing the AIP Integration Components” of this document for more information.
46 Oracle Retail Advanced Inventory Planning

Running the AIP Online Application Installer
Manual Deployment Tasks
Note: Skip this section if you chose the default option of allowing the installer to complete the installation to the application server. Refer to “Installing the AIP Integration Components” of this document for more information.
The Installer includes the option to configure the application locally and skip deployment to the application server. If this option is chosen, the installer will make the configured application files available under <INSTALL_DIR>/aip/application/aip130/configured-output/. If you chose this installer option, you can complete the installation by following these steps:
1. Inspect and then overlay files from <INSTALL_DIR>/aip/application/aip130/configured-output into your application server installation.
2. Deploy the AIPOnlineApp EAR file using the Enterprise Manager Web interface. The configured EAR file is located at <INSTALL_DIR>/aip/application/aip130/configured-output/AIPOnlineAppForRIB13.ear. When deploying the EAR file, you should provide the same application name you entered in the Installer. This value is stored in the <INSTALL_DIR>/aip/application/ant.install.properties file by the Installer for later reference.
Testing the AIP Online Application When you have successfully and you have finished the post-installation steps noted below you should have a working AIP Online application installation. To launch the application client, open a Web browser and go to the client URL. You can find the URL in the log file that was created by the Installer.
Example: http://myhost:7777/aiponline/
Starting and Stopping AIP Online AIP Online can be restarted by using the Enterprise Manager to restart the OC4J instance that contains AIP Online.
Installing AIPOnlineApp on OAS 10.1.3.3 47

Configuring the AIP Online Application
Configuring the AIP Online Application A setup page is used to configure the properties files for AIP Online. Perform the procedure below to configure the AIP Online Application.
1. Load the new AIP Online application by entering the URL in a Web browser, as shown in the example below.
Sample Path Syntax: http://<server>:<port>/aiponline Replace the text in brackets <>with the appropriate information described below.
Replace With
<server> The name or IP address of the server where OAS is running.
<port> The OAS HTTP port
Example: http://server:7778/aiponlineA page displaying a link to the setup page appears.
2. Click the setup page link. The AIP Online Setup page appears. Configuration and Data directories are created by the AIP Online Application Installer.
3. Using the Install directory specified in the installer, please use the following values: Configuration Directory: INSTALL_DIR/config Data Directory: INSTALL_DIR/data Example: Configuration Directory: /u00/oas/aip130/config Data Directory: /u00/oas/aip130/data
4. Under Application Licensing, set the License file field to the license-aip.bin file as shown below. License file: INSTALL_DIR/AIPOnlineAppServer/license-aip.bin Example: License file: /u00/oas/aip130/AIPOnlineAppServer/license-aip.bin
5. Under Database setup, set the following values in the fields provided: Database type – Enter Oracle. Database name – Enter the Oracle database SID name. Username and password – Enter the Oracle AIP schema owner and password. Network host – Enter the IP address or name of server where the Oracle
database is running. Port Number – Enter the Oracle database port number.
Example:
Database type: Oracle Database name: prod_db1 Username: aip130 Password: YourPassword Network host: dbserver Port number: 1521
48 Oracle Retail Advanced Inventory Planning

Creating the AIP Online Enterprise
6. Under E-mail setup, retain the default settings for the following fields as this version of AIP Online does not provide e-mail functionality: Example:
External Host Name: localhost:http_port E-mail From Address: [email protected] SMTP Mail Server: localhost The AIP Online Setup: Part II: confirm settings page appears if no configuration errors were encountered.
7. Verify that all settings are correct. If any values are incorrect, click the Back button in the Web browser to go to the previous page and make the proper adjustments. If the settings are correct, click Next. The AIP Online Setup: Part III: installing page briefly appears, followed by the AIP Online: Part IV: status page. A message appears stating that the installation was successful and informs you to restart the application server to continue configuring AIP Online.
8. Review the installation log to ensure that no errors were encountered during the installation process.
9. Restart the AIP Online Application from OAS Enterprise Manager to apply the AIP Online configuration changes. a. Log in to OAS Enterprise Manager console. b. Click on the instance that is hosting the AIP Online application. c. Select the Applications tab. d. Select the checkbox to the left of the AIP Online application. e. Click Stop. A Confirmation page appears. f. Click Yes. The Application tab appears with AIP Online application stopped. g. Make sure the checkbox to the left of AIP Online application is still selected and
click Start. A confirmation page appears. h. Click Yes. The AIP Online application restarts.
Creating the AIP Online Enterprise This section provides the procedures to create an AIP Online enterprise and the initial administrator for the newly created enterprise.
1. Select the link displayed in the AIP Online Setup: Part IV (step 10 from
Installing AIPOnlineApp on OAS 10.1.3.3 49

Creating the AIP Online Enterprise
Configuring the AIP Online Application) to load the AIP Online application System Administration. In the event that the page has timed out or been closed, enter the application URL in the Web browser as shown in the example below.
Example: http://<server>:<port>/<context root>/phantasm2. Enter admin in User Name field and admin in the Password field to log on to the
System Administration page. These are the default system administrator user name and password. The System Administration page appears.
Note: A Warning – Security window may appear asking if the signed applet that is to run the Enterprise Administration window can be trusted. If this window appears, click Yes.
3. Click Enterprises in the Enterprise Data section. The Enterprise Administration window appears.
4. Click New. 5. On the Company Info tab, enter the following information as shown below:
Company name – Enter your company name. Enterprise code – Enter aiponline. Contact Email – Enter the AIP Administrator’s e-mail address.
The Industry and Company type fields are not required. Example: Company Name: My Company Enterprise Code: aiponline Contact Email: [email protected]
6. On the initial Admin tab, enter the following information: First Name – Enter the AIP Administrator’s first name. Last Name – Enter the AIP Administrator’s last name. Username – Enter the AIP Administrator’s user name to be used when logging
into AIP Online. New Password – Enter the AIP Administrator’s AIP Online password.
When selecting a password, make sure it meets the following requirements:
– Minimum 6 characters; maximum 128 characters
– At least 5 different characters
– Must not be simple pattern of characters (i.e. ABCDEF or ABCXYZ)
– Must not be easily derivable from user name or full name
– Must not be easily derivable from previous password
– Must not be derivable from a dictionary entry
– Case sensitive Retype New Password – Retype your password. Remember, the password is
case sensitive, so you must type it exactly as it was entered in the Password field. Example: First Name: John Last Name: Doe Username: doejohn
50 Oracle Retail Advanced Inventory Planning

Creating AIP Online Users
New Password: aip130online Retype New Password: aip130online
7. Navigate to the Services tab. Two services are displayed, Core Administration and AIP Online. Perform the following: a. Click the Enabled cell of Core Administration. b. Double-click the User Limit cell of Core Administration and enter an integer
value in the cell. This integer value represents the number of users that can be created per application. If the exact number of users is not known, enter a large number such as 100. This number can be changed later by the system admin user.
c. Press the Enter key to accept your input. d. Click the Enabled cell of AIP Online. e. Double-click the User Limit cell of AIP Online and enter an integer value in the
cell. This integer value represents the number of users that can be created per application. If an exact number of users is not known, enter a large number such as 100. This number can be changed at a later time by the system admin user.
f. Press the Enter key to accept your input. 8. On the Enterprise Administration window, click Save. Close the Enterprise
Administration window when the save is complete. 9. On the System Administrator page, click the LOG OUT link located at the top right
of the page.
Creating AIP Online Users This section provides the procedures to create AIP online users. New users should be created using the administrator account created in the previous step.
1. Load the application URL in a browser to access the AIP Online application login page.
Example: http://server:9080/aiponline/index.jsp2. Input the administrator username and password, and click LOG IN. The Application
page appears. 3. Click the Core Administration link. The Administration page appears. 4. Click the Users button in the Application Setup section. The Core Administration:
User Administration window appears. 5. Select the Users tab and click New. A user information form is displayed. 6. In the Details tab, enter all relevant user information in the form.
Example: First Name: John Last Name: Doe Email: [email protected] Username: doejohn New Password: aip130online Retype New Password: aip130online Password Status: Normal
7. Click the Permissions tab. A user permissions form appears. 8. Select the Enabled cell of the AIP Online service. Available Types selection box is
populated with data.
Installing AIPOnlineApp on OAS 10.1.3.3 51

Creating AIP Online Users
9. Select All AIP Permissions from the Available Types selection box. Click > to move this permission type to the Selected Types box, and then click Save.
10. Repeat steps 5 through 9 until you have added the necessary user accounts. 11. When you have added all the necessary user accounts, close the Core
Administration: User Administration window. 12. Click the LOG OUT link in the Administration page to exit the application.
52 Oracle Retail Advanced Inventory Planning

7 Installing the AIP Integration Components
In order to exchange information between AIP Online, RPAS, and RMS (or an external system), the interface portion of the AIP Online suite must be installed, which consists of the following steps:
1. Installing RETL (Retail Extract Transform and Load) 2. Extracting the AIP integration/database files 3. Configuring the environment
Installing RETL Refer to the Retail Extract Transform and Load (RETL) Programmer’s Guide for detailed installation instructions on this product. Following the successful installation of RETL, test the application to verify the environment was set up properly and the RETL binary was installed correctly.
1. Log in to the UNIX server as the “rfx” user. 2. At the UNIX prompt, enter rfx. A command-line error appears if all environment
variables are setup properly, as shown in the example below. Example: /u00/retl> rfx
Error: Flow file argument ('-f') required!
3. Verify that the RETL binary is installed properly and the database environment variables are correct by executing the “verify_retl” script. This script runs a series of validation steps and displays a confirmation message if the environment is set up correctly. Upon confirmation, the RETL environment is now ready to be configured. Example: /u00/retl> verify_retl –doracle
Checking RETL Environment...found ORACLE environment...passed!
Checking RETL binary...passed!
Running samples...passed!
Congratulations! Your RETL environment and installation passed all tests.
See the programmer's guide for more information about how to further test your database installation (if applicable).
Exiting...saving output in /tmp/verifyretl-1843208.log
Note: The database parameter passed with the verify_retl script varies depending on the type of database to which RETL is configured. Refer to the RETL Programmer’s Guide for the specific parameters permitted in this script.
Installing the AIP Integration Components 53

Extracting AIP Integration Files
Extracting AIP Integration Files The integration files contain the necessary RETL flow and schema files that describe the integration process. In addition to the integration files, several batch shell scripts are required to transfer data between AIP Online, RPAS, and RMS (or an external system). The integration files must be extracted to the same server where RETL is installed. It is recommended that RETL and the integration files reside on the database server. Both online integration files and batch scripts are configured and installed through the AIP Online Application Server Installer during the Integration steps. If these files need to be moved to another server after completing the installation process, you need to perform the following:
1. ZIP the contents of the AIP Online Integration directory specified during the Application Server Installer.
2. Move the ZIP file to the desired server. 3. Proceed to “Editing the .profile to Run cron_export.sh and cron_import.sh Scripts”
section and perform the necessary tasks. 4. Once the integration files have been installed, you can use the rfx or retek UNIX user
account to run the integration/database scripts.
Configuring Your Environment The AIP Online Application Server Installer configures the following configuration files, which are discussed in the following sections: config.xml – The RETL configuration file. cron_import.sh – This script performs the necessary data imports and is run by the
scheduler. cron_export.sh – This script performs the necessary data exports and is run by the
scheduler.
Configuring the config.xml File This configuration file contains the database connection information for RETL for both import and export. Refer to the RETL documentation for detailed descriptions of element definitions. Essentially, the ‘oraread’ section describes the database for the export and ‘orawrite’ for the import; both would normally be the same. Databases can be local or remote, but if they are remote they must be reachable by normal means (i.e. should be an entry in tnsnames.ora and reachable by SQLPlus). The Oracle export "arraysize" needs to be set dynamically in the config.xml file depending on the server's capabilities. The recommended default "arraysize" value is 2000. Setting the value too high can cause an out of memory error. The value can be set up to 10,000 to maximize performance based on server capability.
54 Oracle Retail Advanced Inventory Planning
Editing the aip_env_online.sh to Run cron_export.sh and cron_import.sh Scripts
Editing the aip_env_online.sh to Run cron_export.sh and cron_import.sh Scripts
In order for the cron_export.sh and cron_import.sh to function correctly, the AIPOnline Application Server Installer configures the aip_env_online.sh file with the following environment variable ONL_SCHEMA_OWNER – This variable must be set to the owner of AIP online
schema. The following environment variables are also set in aip_env_online.sh: INTEGRATION_HOME – This is the path to the integration directory extracted
earlier (where the cron_export.sh and cron_import.sh shell scripts reside). Refer to the AIP Implementation Guide for information on the parameters to be set.
RETL_MAX_HEAP_SIZE – This parameter is used by the virtual machine. It is set to a default value of 500M. However, it can be changed dynamically to ‘xxxM’ or ‘yG’ to limit the memory usage by the virtual machine.
Note: A batch scheduler should be set up to run cron_export.sh and/or cron_import.sh.
Editing the .profile to Run cron_export.sh and cron_import.sh Scripts In order for cron_export.sh and cron_import.sh scripts to run correctly, the variables listed below must be modified in the UNIX user .profile file. Please refer to the AIP Implementation Guide for further details on how these values are used. RFX_HOME – This variable points to the RETL installation home. RFX_TMP – This variable points to the tmp directory under RFX_HOME. ORACLE_HOME – This variable points to the Oracle database home. TEST_ONL_INTEGRATION_HOME – This value should be the directory where
cron_import.sh and cron_export.sh reside. The INTEGRATION_HOME variable in aip_env_online.sh references this externally-defined variable by default. Using this externally-defined variable allows multiple testers to use the same aip_env_online.sh while working in different test directories. If the INTEGRATION_HOME variable in aip_env_online.sh is changed to reference a hardcoded directory, this variable is not needed.
TEST_RETL_CONFIG_FILE – This value should contain the fully-qualified path and filename of a RETL configuration file containing database connection information. The RETL_CONFIG_FILE variable in aip_env_online.sh references this externally-defined variable by default. Using this externally-defined variable allows multiple testers to use the same aip_env_online.sh while referencing different RETL configuration files. If the RETL_CONFIG_FILE variable in aip_env_online.sh is changed to contain a hardcoded value, this variable is not needed.
TEST_AIPDOMAIN – This value should contain the fully-qualified path of the AIP RPAS global domain. The AIPDOMAIN variable in aip_env_online.sh references this externally-defined variable by default. Using this externally-defined variable allows multiple testers to use the same aip_env_online.sh while working with different test domains. If the AIPDOMAIN variable in aip_env_online.sh is changed to reference a hardcoded domain, this variable is not needed.
Installing the AIP Integration Components 55

Editing the .profile to Run cron_export.sh and cron_import.sh Scripts
The source call to load the profile is to setup environment variables to enable programs to function correctly (for instance; setting ORACLE_HOME and paths so that sqlldr functions correctly). Example: The following code can be defined in user .profile file: export RFX_HOME=<path from root>/rfx/rfx-13.0 export RFX_TMP=$RFX_HOME/tmp export ORACLE_HOME=<path from root>/oracle/product/10.2.0.3.0 export TEST_ONL_INTEGRATION_HOME=<path to integration directory> export TEST_RETL_CONFIG_FILE=<path and filename of RETL config file> export TEST_AIPDOMAIN=<path of the AIP RPAS global domain> export PATH=$RFX_TMP:$RFX_HOME/bin:$ORACLE_HOME/bin:$BSA:$AIPONLINE_SCRIPTS:$PATH
56 Oracle Retail Advanced Inventory Planning

8 Installing AIP RPAS
The AIP RPAS Installer The AIP RPAS Installer is an installation wizard that installs the following AIP RPAS components: AIP batch components Domains RMS transformation file
It also provides the ability to define the AIP domain path and create the AIP domain.
Before You Begin Before starting the AIP Installer, the following software must be installed on your system: RPAS 12.1.2.21, which includes RPAS Server and RPAS Configuration Tools. Refer to
the RPAS documentation contained in the RPAS-12.1.2.21.zip file for information on installing and administering RPAS.
Java 1.4.2 – update 11 or later Unzip utility
RPAS on HP Itanium If you are installing any RPAS solution on HP Itanium, you need to set the 64-bit Configuration Tools environment variable for Java as shown below: export RIDE_OPTIONS=-d64
Running the AIP RPAS Installer Perform the following procedure to run the AIP Installer:
1. Locate and extract AIP-13.0-rpas-installer.zip into a newly created staging directory, which is referred to as <AIP_Installer>.
2. Make sure you have run the retaillogin.ksh script or set up RPAS_HOME and RIDE_HOME properly. The package contents will be installed to those locations during the installation process.
3. Begin the Installer by changing to the root of the <AIP_Installer> directory and by running the following command: ./install.sh
Note: The command must be executed with the preceding period and forward slash (./).
If this process is being run on an X-Windows emulator (such as Exceed) you will be presented with a graphical user interface to the Installer. If you are running in console mode through a terminal emulator, you will be presented with the text interface to the installer. In both cases, the requested information will be identical, but displayed differently. In the GUI, you may be shown a checkbox to signal whether you want a component installed. In text mode, you will be prompted for a response of "yes" or "no".
Installing AIP RPAS 57

Running the AIP RPAS Installer
Note: In text mode, the default value will appear in square brackets. To use the default value and continue, press the Enter key. If you want to use a different value, enter the new value. When prompted to create a directory, respond with "y" or "yes" and press the Enter key.
The AIP Installer window appears and displays the AIP requirements, which you should already have installed. If you have not installed these items, please perform the necessary installations before continuing.
AIP Installer Window
4. Click Next to continue. The Base Paths for Solution screen appears.
58 Oracle Retail Advanced Inventory Planning

Running the AIP RPAS Installer
Base Paths for Solution Screen
5. Enter the following path information and click Next: Dir to store configurations – Enter the target directory for your configurations,
or click the Select Folder button to navigate to the appropriate location. Dir to store created domains – Enter the target directory for the domains that
will be created by the AIP Installer, or click the Select Folder button to navigate to the appropriate location.
Dir to store RMS transform files – Enter the target directory for the RMS transformation files used by AIP, or click the Select Folder button to navigate to the appropriate location.
AIP Online Integration Home– Enter the AIP Online integration home path, or click the Select Folder button to navigate to the appropriate location.
Path to retaillogin.ksh script – Enter the target path where the retaillogin.hsh file resides on your system, or click the Select File button to navigate to and select the retaillogin.ksh file. The retaillogin.ksh script was created during RPAS installation.
The Domain installation paths screen appears.
Installing AIP RPAS 59

Running the AIP RPAS Installer
Domain Installation Paths Screen
6. Enter the path where your AIP domain will be installed, or click the Select Folder button to navigate to the appropriate location. Click Next to continue. The Install Tasks screen appears.
Install Tasks Screen
7. To have the AIP Installer create the AIP domain, make sure the Create AIP Domain option is selected and click Next. If you want to create the AIP domain later, deselect the Create AIP Domain option and click Next. The AIP Progress screen appears.
60 Oracle Retail Advanced Inventory Planning

Running the AIP RPAS Installer
Created as part of this process is the “make_domain.aip” file located in the [Configurations Install Dir] entered during the install. This file contains all of the required parameters needed to support the domain install. If necessary this file may be modified if the default parameters are not appropriate for your particular environment.
Note: The domain install process also includes post-install data loading scripts specific to the AIP configuration. These scripts may also be modified.
Installation Progress Screen
8. To display the progress of the components and tasks being performed by the AIP Installer, select Show Details. Click Install to start the installation process. When the installation process is complete, the Completed screen appears with Message dialog box.
Note: The installation process can vary depending on your environment. Installation time might take 30 to 60+ minutes depending on server.
Installing AIP RPAS 61

Running the AIP RPAS Installer
Complete Screen
9. Click OK to close the dialog box. 10. Review the installation details.
To view the installation details, select the Show Details button. The screen displays two tabs, the Output tab and the Error tab. It is recommended that you review these tabs for any issues that may have occurred during the installation process. If you wish to view the log again at a later date, a text copy was saved in the directory <AIP_Installer>. The log file will be named based on the product, aip, and a timestamp, followed by the ".log" extension.
11. Click Exit to close the AIP Installer window. 12. Run the transform scripts.
The RMS-AIP transform interface installation process is complete. What follows are brief instructions for how to run the RMS-AIP transform scripts. This step does not have to be performed during this installation process; rather, it is typically scheduled to run prior to the AIP RPAS daily batch process.
Note: This document does not provide instructions on how to create the raw RMS data files extracted from RMS by the RMS RETL scripts.
After the raw RMS data files have been extracted from RMS, using the schema files from the RMS package in $RMS_AIP_TRANSFORM/rms_schema_dir, the data files should be placed in the directory RAW_RMS_DATA_DIR. Once the data files are available in this directory, execute aip_t_master.ksh. This script executes the RMS-AIP transform interface scripts. When the aip_t_master.ksh is finished, the AIP loads/feeds have been created and are moved to $AIPDOMAIN/interface/config/rms, which is a location defined by $AIPRMS in the file $RPAS_HOME/bin/aip_constants_rpas.sh.
62 Oracle Retail Advanced Inventory Planning

Post Installation Instructions
Post Installation Instructions The domains are not usable for business application until measure data is loaded into them. That task is out of scope for this installation guide. Refer to the AIP Implementation Guide and AIP Operations Guide for information on loading data into the domains and for practical use of the AIP batch domains.
Installing AIP RPAS 63

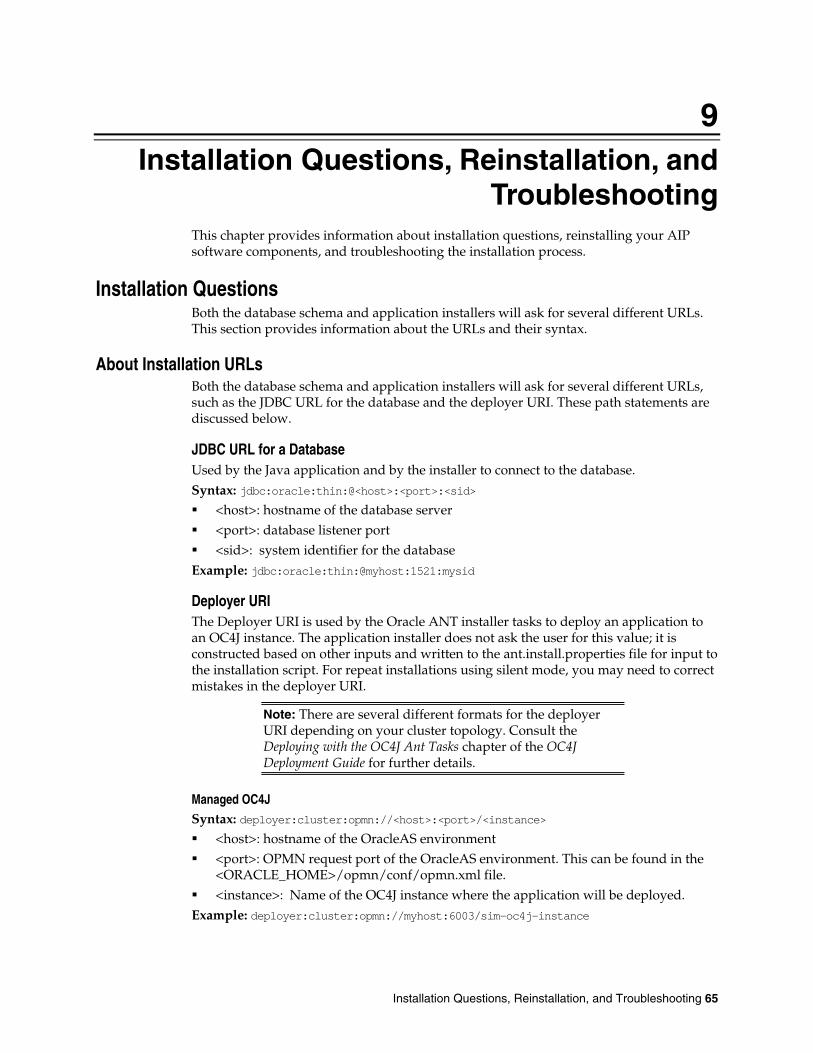
9 Installation Questions, Reinstallation, and
Troubleshooting This chapter provides information about installation questions, reinstalling your AIP software components, and troubleshooting the installation process.
Installation Questions Both the database schema and application installers will ask for several different URLs. This section provides information about the URLs and their syntax.
About Installation URLs Both the database schema and application installers will ask for several different URLs, such as the JDBC URL for the database and the deployer URI. These path statements are discussed below.
JDBC URL for a Database Used by the Java application and by the installer to connect to the database.
Syntax: jdbc:oracle:thin:@<host>:<port>:<sid> <host>: hostname of the database server <port>: database listener port <sid>: system identifier for the database
Example: jdbc:oracle:thin:@myhost:1521:mysid
Deployer URI The Deployer URI is used by the Oracle ANT installer tasks to deploy an application to an OC4J instance. The application installer does not ask the user for this value; it is constructed based on other inputs and written to the ant.install.properties file for input to the installation script. For repeat installations using silent mode, you may need to correct mistakes in the deployer URI.
Note: There are several different formats for the deployer URI depending on your cluster topology. Consult the Deploying with the OC4J Ant Tasks chapter of the OC4J Deployment Guide for further details.
Managed OC4J Syntax: deployer:cluster:opmn://<host>:<port>/<instance> <host>: hostname of the OracleAS environment <port>: OPMN request port of the OracleAS environment. This can be found in the
<ORACLE_HOME>/opmn/conf/opmn.xml file. <instance>: Name of the OC4J instance where the application will be deployed.
Example: deployer:cluster:opmn://myhost:6003/sim-oc4j-instance
Installation Questions, Reinstallation, and Troubleshooting 65

Reinstallation
Standalone OC4J Syntax: deployer:oc4j:<host>:<port> <host>: hostname of the OracleAS environment <port>: RMI port of the OC4J server. This can be found in the
ORACLE_HOME/j2ee/home/config/rmi.xml file. Example: deployer:oc4j:myhost:23791
Reinstallation
Reinstalling in Silent Mode Once you have successfully installed the various AIP software components, you may wish the repeat the installation. When the AIP installers run, they generate and store installation information to the ant.install.properties file. You can reinstall your AIP software using the stored in this file. When using this information, there is no need to enter any information on screen, since everything required is in the ant.installer.properties file, the reinstallation can be run from the command line and is referred to as reinstalling in “silent mode” since no prompts or data input is required. To reinstall your AIP software in silent mode using the information stored in the aip.install.properties file, perform the procedure below.
1. Edit the ant.install.properties file to correct or modify any settings. 2. Run the installer again from the installation directory using the command shown
below. ./install.sh silent
Troubleshooting This section provides information about potential issues that may be encountered during installation.
Database Installer Hangs on Startup Symptom: When the database schema installer is run, the following is written to the console and the installer hangs indefinitely: Running pre-install checks Running tnsping to get listener port
Solution: The installer startup script is waiting for control to return from the tnsping command, but tnsping is hanging. Type Control+C to cancel the Installer, and investigate and solve the problem that is causing the tnsping <sid> command to hang. This can be caused by duplicate database listeners running.
Unreadable Buttons in the Installer If you are unable to read the text within the installer buttons, it probably means that your JAVA_HOME is pointed to a pre-1.4.2 JDK. Set JAVA_HOME to a Java development kit of version 1.4.2 or later and run the installer again.
66 Oracle Retail Advanced Inventory Planning

Troubleshooting
“Unable to get a deployment manager” Message Symptom: The application installer quits with the following error message: [oracle:deploy] Unable to get a deployment manager. [oracle:deploy] [oracle:deploy] This is typically the result of an invalid deployer URI format being supplied, the target server not being in a started state or incorrect authentication details being supplied. [oracle:deploy] [oracle:deploy] More information is available by enabling logging -- please see the Oracle Containers for J2EE Configuration and Administration Guide for details.
Solution:
This error can be caused by any of the following conditions: OC4J instance provided is not running. Incorrect OC4J instance name provided Incorrect OC4J administrative username and/or password Incorrect OPMN request port provided.
Make sure that the OC4J instance is running, and then check the ant.install.properties file for entry mistakes. Pay close attention to the input.deployer.uri (refer to “Installation Questions, Reinstallation, and Troubleshooting” section of this document for more information on URL references), input.oc4j.instance, input.admin.user, and input.admin.password properties. If you need to make a correction, you can run the installer again with this file as input by running silent mode (refer to “Reinstalling in Silent Mode” of this document for more information).
Unresponsive Fields when Running Installer in GUI Mode Symptom: In GUI mode, you may click in a field and find it unresponsive, and the following message appears in the console window: XTEST extension not installed on this X server: Error 0 Solution: To run the AIP Online installer in GUI mode you must have the XTEST extension enabled in your X server. Perform the procedure below to enable XTEST in Exceed.
1. Open Xconfig to edit your Exceed configuration settings. 2. Go to the X Server Protocol settings. 3. Select the Extensions tab. 4. Make sure the XTEST extension is selected. 5. Restart the X Server and re-run the AIP Online Installer.
Installation Questions, Reinstallation, and Troubleshooting 67

Troubleshooting
“Could not create system preferences directory” Warning Symptom: The following text appears in the installer Errors tab: May 22, 2006 11:16:39 AM java.util.prefs.FileSystemPreferences$3 run WARNING: Could not create system preferences directory. System preferences are unusable. May 22, 2006 11:17:09 AM java.util.prefs.FileSystemPreferences checkLockFile0ErrorCode WARNING: Could not lock System prefs. Unix error code -264946424.
Solution: This is related to Java bug 4838770. The /etc/.java/.systemPrefs directory may not have been created on your system. See http://bugs.sun.com for details on this Java error. This is an issue with your installation of Java and does not affect the Oracle Retail product installation.
“Couldn't find X Input Context” Warnings Symptom: The following text appears in the console window during execution of the installer in GUI mode: Couldn't find X Input Context
Solution: This message is harmless and can be ignored.
ConcurrentModificationException in Installer GUI Symptom: In GUI mode, the errors tab shows the following error: java.util.ConcurrentModificationException at java.util.AbstractList$Itr.checkForComodification(AbstractList.java:448) at java.util.AbstractList$Itr.next(AbstractList.java:419) … etc
Solution: You can ignore this error. It is related to third-party Java Swing code for rendering of the installer GUI and does not affect the retail product installation.
68 Oracle Retail Advanced Inventory Planning

A Appendix: Sample Oracle 10.2.0.3.0
Database Creation Script crdb1.sql
Execute as: sysdba
Note: Modify file paths and “SID” for your environment. Adjust redo logs, TEMP and UNDO sizes accordingly.
spool SID.log startup nomount pfile=${ORACLE_HOME}/dbs/initSID.ora create database "SID" maxdatafiles 1000 character set UTF8 DATAFILE '/u00/oradata/SID/system01.dbf' SIZE 500M AUTOEXTEND ON NEXT 10M MAXSIZE 2000M LOGFILE group 1 ('/u00/oradata/SID/redo1a.log') size 1000M, group 2 ('/u00/oradata/SID/redo2a.log') size 1000M, group 3 ('/u00/oradata/SID/redo3a.log') size 1000M DEFAULT TEMPORARY TABLESPACE TEMP TEMPFILE '/u01/oradata/SID/temp01.dbf' SIZE 5000M EXTENT MANAGEMENT LOCAL UNIFORM SIZE 1M undo tablespace UNDO_TS DATAFILE '/u00/oradata/SID/undo_ts01.dbf' SIZE 5000M ; spool off exit
Appendix: Sample Oracle 10.2.0.3.0 Database Creation Script 69

crdb2.sql
crdb2.sql Execute as: sysdba This script installs the data dictionary views. spool crdb2.log REM # install data dictionary views: PROMPT Running catalog.sql @$ORACLE_HOME/rdbms/admin/catalog.sql PROMPT Running catproc.sql @$ORACLE_HOME/rdbms/admin/catproc.sql PROMPT Running catblock.sql @$ORACLE_HOME/rdbms/admin/catblock.sql create user oracle identified externally; grant dba to oracle; REM * These privs needed for users to run proper grant code when creating users. grant select on dba_jobs to public with grant option; grant select on dba_roles to public with grant option; grant select on dba_role_privs to public with grant option; grant execute on dbms_rls to public with grant option; REM * These privs needed to be granted to all due to 9i security changes. grant select_catalog_role to public; grant execute_catalog_role to public; grant execute on dbms_lock to public; grant execute on dbms_rls to public; REM * query rewrite privilege needed to create function-based indexes grant query rewrite to public; REM * dbms_system is needed for tracing grant execute on sys.dbms_system to public; connect system/manager PROMPT Running pupbld.sql @$ORACLE_HOME/sqlplus/admin/pupbld.sql PROMPT Creating PLAN table owned by SYSTEM @$ORACLE_HOME/rdbms/admin/utlxplan.sql PROMPT Creating public synonyn for the plan table create public synonym PLAN_TABLE for SYSTEM.PLAN_TABLE; disconnect exit
70 Oracle Retail Advanced Inventory Planning

crdb3.sql
crdb3.sql Execute as: sysdba This script installs Java and XML components. spool crdb3.log REM * Install XDK and XSU PROMPT altering system to set _system_trig_enabled to false ALTER SYSTEM SET "_system_trig_enabled"=FALSE SCOPE=MEMORY; PROMPT Running initjvm.sql to install Java objects @$ORACLE_HOME/javavm/install/initjvm.sql PROMPT Running initxml.sql to install XML and XSU @$ORACLE_HOME/rdbms/admin/initxml.sql PROMPT Running xmlja.sql to install NCOMP'ed XML Parser @$ORACLE_HOME/xdk/admin/xmlja.sql PROMPT Running catjava.sql to install catalog scripts for Java @$ORACLE_HOME/rdbms/admin/catjava.sql PROMPT Creating public synonyms and grants CREATE PUBLIC SYNONYM XMLQUERY for SYS.DBMS_XMLQUERY; GRANT EXECUTE ON XMLQUERY TO PUBLIC; GRANT EXECUTE ON XMLPARSER TO PUBLIC; GRANT EXECUTE ON XMLDOM TO PUBLIC; CREATE PUBLIC SYNONYM XSLPROCESSOR for SYS.XSLPROCESSOR; GRANT EXECUTE ON XSLPROCESSOR TO PUBLIC; PROMPT Revaliding invalid objects @$ORACLE_HOME/rdbms/admin/utlrp.sql spool off
Appendix: Sample Oracle 10.2.0.3.0 Database Creation Script 71

Sample Database init.ora
Sample Database init.ora The following code provides a sample database, init.ora. The commented code provides instructions about making the necessary modifications for your environment. ############################################################################### # Oracle 10.2.0.3.0 Parameter file # # NOTES: # 1. Change all file directory paths as necessary for your environment. # 2. Search and replace the string "SID" with your database name. Do not change SID in $ORACLE_SID. # 3. Search and replace "SID" in SID_01 and SID_02 with your database name. # 4. Modify parameters as necessary for your development, test, # and production environments. # # ------------------------------------------------------------------------ # MAINTENANCE LOG # # Date By Parameter Old/New Notes # +------+ +---------+ +-----------------+ +-------------+ +-------------+ # 07/01/04 Retek NA NA creation # ############################################################################### # ------------------------------------------------------------------------------- # The following SGA parameters are CRITICAL to the performance of the # database. The following settings are based off 1GB of allotted memory. # Adjust these parameters for your environment. # The SGA is composed of: # db_cache_size, log_buffer,java_pool_size, large_pool_size, shared_pool_size # ------------------------------------------------------------------------------- db_cache_size = 256M java_pool_size = 24M #150M or higher for applying oracle patchsets; 70M if using RMAN log_buffer = 10485760 shared_pool_size = 150M # -------------------------------------------------------------------------------- # The following parameters do not affect SGA size and should be adjusted for # your environment. # -------------------------------------------------------------------------------- background_dump_dest = $ORACLE_BASE/admin/$ORACLE_SID/bdump compatible = 9.2.0 control_files = (/u01/oradata/SID/SID_01.ctl ,/u01/oradata/SID/SID_02.ctl) core_dump_dest = $ORACLE_BASE/admin/$ORACLE_SID/cdump db_block_size = 8192 # default is 2k; adjust before db creation, cannot change after db is created db_files = 999 # default is 200; set to max number of database files db_file_multiblock_read_count = 16 # (max io size)/(block size); adjust as needed; platform specific db_name = SID db_writer_processes = 4 job_queue_processes = 9 # Retek required; number of cpu's +1 local_listener = "(ADDRESS=(PROTOCOL=TCP)(HOST=localhost)(PORT=1521))" nls_date_format = DD-MON-RR # Retek required nls_calendar = GREGORIAN nls_language = AMERICAN # default
72 Oracle Retail Advanced Inventory Planning

Sample Tablespace Creation Scripts
nls_territory = AMERICA # default open_cursors = 900 # Retek required (minimum=900); default is 50 optimizer_features_enable = 9.2.0 optimizer_mode = CHOOSE # Retek required processes = 500 # max number of os processes that can connect to oracle query_rewrite_enabled = TRUE # fct based indexes sessions = 1500 # ~(3*processes); session_cached_cursors = 100 # default is 0 undo_management = AUTO undo_tablespace = undo_ts # match with tablespace name used in your creation script undo_retention = 1800 # currently set for 30 minutes; set to avg length of transactions in secs user_dump_dest = $ORACLE_BASE/admin/$ORACLE_SID/udump utl_file_dir = $ORACLE_BASE/utl_file # *** Archive Logging, set if needed *** #log_archive_dest = 'location=$ORACLE_BASE/admin/$ORACLE_SID/arch/' #log_archive_format = $ORACLE_SIDarch%s.log #log_archive_min_succeed_dest = 1 #log_archive_start = TRUE #log_checkpoint_interval = 9999999999
Sample Tablespace Creation Scripts The tablespaces displayed in the following code example are required.
Note: Oracle Retail recommends the use of locally managed tablespaces with manual segment space management. These tablespaces are not sized for a production environment!
create_aip_tablespaces.sql Execute as: sysdba Modify file paths and "ORACLE_SID" for your environment. CREATE TABLESPACE RETEK_INDEX DATAFILE '/u01/oradata/$ORACLE_SID/retek_index01.dbf' SIZE 500M AUTOEXTEND ON NEXT 100M MAXSIZE 2000M EXTENT MANAGEMENT LOCAL SEGMENT SPACE MANAGEMENT MANUAL ; CREATE TABLESPACE RETEK_DATA DATAFILE '/u01/oradata/$ORACLE_SID/retek_data01.dbf' SIZE 500M AUTOEXTEND ON NEXT 100M MAXSIZE 2000M EXTENT MANAGEMENT LOCAL SEGMENT SPACE MANAGEMENT MANUAL ;
Appendix: Sample Oracle 10.2.0.3.0 Database Creation Script 73


B Appendix: RMS-AIP Transform Directory
Contents Transform Interface Scripts
Location: $RMS_AIP_TRAMSFORM/k_shell_scripts AIP uses the following RMS data transformation scripts: aip_t_master.sh aipt_item.ksh aipt_orghier.ksh aipt_sub_item.ksh aipt_str_prd_life.ksh aipt_future_delivery.ksh aipt_rename.ksh
These scripts are unpacked from AIP-12.0.rms-transformations.zip and moved to $RPAS_HOME/bin, as detailed in Chapter 8 of this Installation Guide.
Input Schema Files Location: $RMS_AIP_TRAMSFORM/rms_schema_dir Input Schema files are the schema files which are required by the transform interface scripts to read the RETL extracts from RMS. The $RMS_AIP_TRAMSFORM/rms_schema_dir directory must contain following input schema files, copied from the RMS package: rmse_aip_item_master.schema rmse_aip_item_retail.schema rmse_aip_item_supp_country.schema rmse_aip_merchhier.schema rmse_aip_purged_item.schema rmse_aip_dmx_bndprdasc.schema rmse_aip_store.schema rmse_aip_orghier.schema rmse_aip_substitute_items.schema rmse_aip_item_loc_traits.schema rmse_aip_future_delivery_order.schema rmse_aip_future_delivery_tsf.schema rmse_aip_tsf_in_well.schema rmse_aip_future_delivery_alloc.schema rmse_aip_alloc_in_well.schema rmse_aip_wh_dat.schema rmse_aip_wh.schema
Appendix: RMS-AIP Transform Directory Contents 75

Output Schema Files
Output Schema Files Location: $RMS_AIP_TRAMSFORM/aip_schema_dir Output Schema files are the schema files which are required by the transform interface scripts to write the AIP loads/feeds. The $RMS_AIP_TRAMSFORM/aip_schema_dir directory must contain following output schema files: aipt_item.schema dmx_dscdt_.schema aipt_loc.schema aipt_dm0_pmsstasrc.schema aipt_dm0_pmsendsrc.schema aipt_dmx_vadprdasc.schema aipt_str_prd_life.schema aipt_sr0_it_.schema aipt_sr0_oo_.schema aipt_wr1_it_.schema aipt_wr1_oo_.schema aipt_wr1_ow_.schema
RETL Extracts (Data Files from RMS) Location: $RMS_AIP_TRAMSFORM/raw_rms_data RETL extracts from RMS are used as AIP loads/feeds. There are two kinds of RETL extracts: extracts that require transformations before being fed into AIP and extracts that do not require any transformations. The $RMS_AIP_TRAMSFORM/raw_rms_data directory holds both types of RETL extracts. These extracts will be moved from RMS server to the $RMS_AIP_TRAMSFORM/raw_rms_data directory using a batch scheduler, which the user needs to configure. The batch scheduler is not part of the AIP application suite. The following RETL extracts are used by the RMS-AIP transform interface scripts to generate a new set of AIP loads/feeds: rmse_aip_item_master.dat rmse_aip_item_retail.dat rmse_aip_item_supp_country.dat rmse_aip_merchhier.dat rmse_aip_purged_item.dat dmx_bndprdasc.txt rmse_aip_store.dat rmse_aip_orghier.dat rmse_aip_substitute_items.dat rmse_aip_item_loc_traits.dat rmse_aip_future_delivery_order.dat rmse_aip_future_delivery_tsf.dat rmse_aip_tsf_in_well.dat rmse_aip_future_delivery_alloc.dat
76 Oracle Retail Advanced Inventory Planning

Post Execution Transform Interface Scripts
rmse_aip_alloc_in_well.dat rmse_aip_wh.dat rmse_aip_wh.txt
In addition, the following RETL extracts, which do not need to be transformed, are found in this location. These files make up Group 1 of the data that must be imported into the AIP RPAS domain: splr.txt dmx_dirspl.txt dmx_prdspllks.txt closed_order.txt received_qty.txt rmse_aip_wh_type.txt sr0_curinv.txt sr0_curinv_*.txt wr1_curinv.txt wr1_curinv_*.txt dm0_onseffdt_.txt dm0_ofseffdt_.txt
Note: sr0_curinv and wr1_curinv data feeds may be partitioned, e.g. sr0_curinv_1.txt, sr0_curinv_2.txt, etc.
Post Execution Transform Interface Scripts Executing the aip_t_master.ksh script runs the RMS-AIP transform interface scripts. Once this script has successfully completed, the following new AIP loads/feeds are created. These files represent Group 2 of the data that must be imported into the AIP RPAS domain: item.txt dmx_dscdt_.txt loc.txt dm0_pmsstasrc.txt dm0_pmsendsrc.txt dmx_vadprdasc.txt sr0_prdlfe.txt sr0_it_.txt sr0_oo_.txt wr1_it_.txt wr1_oo_.txt wr1_ow_.txt
Appendix: RMS-AIP Transform Directory Contents 77

Post Execution Transform Interface Scripts
The following file, which is used by the transform scripts, is also a direct AIP feed. It constitutes Group 3 of the data that must be imported into the AIP RPAS domain: dmx_bndprdasc.txt
The three Groups of data feeds mentioned above must be moved to $AIPDOMAIN/interface/config/rms, which is a location defined by $AIPRMS in $RPAS_HOME/bin/aip_constants.sh file, using a batch scheduler, which the user needs to configure. The batch scheduler is not part of the AIP application suite.
78 Oracle Retail Advanced Inventory Planning

C Appendix: Installation Order
This section provides a guideline for the order in which the Oracle Retail applications should be installed. If a retailer has chosen to use only some of the applications, the order is still valid, less the applications not being installed.
1. Oracle Retail Merchandising System (RMS), Oracle Retail Trade Management (RTM), Oracle Retail Sales Audit (ReSA)
2. Oracle Retail Service Layer (RSL) 3. Oracle Retail Extract, Transform, Load (RETL) 4. Oracle Retail Active Retail Intelligence (ARI) 5. Oracle Retail Warehouse Management System (RWMS) 6. Oracle Retail Allocation 7. Oracle Retail Invoice Matching (ReIM) 8. Oracle Retail Price Management (RPM)
Note: During installation of RPM, you are asked for the RIBforRPM provider URL. Since RIB is installed after RPM, make a note of the URL you enter. If you need to change the RIBforRPM provider URL after you install RIB, you can do so by editing the jndi_provider.xml file.
9. Oracle Retail Central Office (ORCO) 10. Oracle Retail Back Office (ORBO) or Back Office with Labels and Tags (ORLAT) 11. Oracle Retail Store Inventory Management (SIM)
Note: During installation of SIM, you are asked for the AIP provider URL. Since AIP is installed after SIM, make a note of the URL you enter. If you need to change the AIP provider URL after you install AIP, you can do so by editing the jndi_providers_ribclient.xml file.
12. Oracle Retail Predictive Application Server (RPAS) 13. Oracle Retail Advanced Inventory Planning (AIP) 14. Oracle Retail Integration Bus (RIB) 15. Oracle Retail Point-of-Service (ORPOS) 16. Oracle Retail Mobile Point-of-Service (ORMPOS) 17. Oracle Retail Analytics Applications 18. Oracle Retail Data Warehouse (RDW) 19. Oracle Retail Workspace (ORW)
Appendix: Installation Order 79