Embed Size (px)
Citation preview

Adobe Photoshop CC 2017
Resizing, Cropping and Deleting a picture’s background
STM Training Program Center for Teaching and Learning
By: Ginny Gonzalez (Instructional Design Assistant)
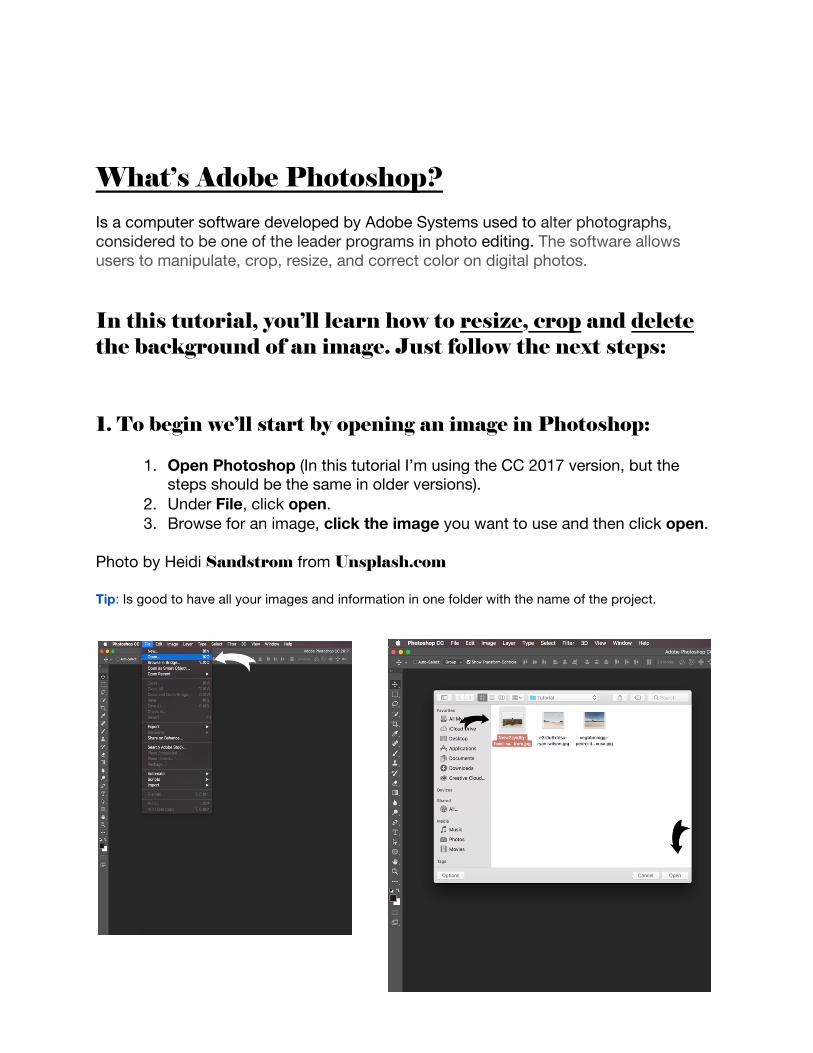
What’s Adobe Photoshop? Is a computer software developed by Adobe Systems used to alter photographs, considered to be one of the leader programs in photo editing. The software allows users to manipulate, crop, resize, and correct color on digital photos. In this tutorial, you’ll learn how to resize, crop and delete the background of an image. Just follow the next steps: 1. To begin we’ll start by opening an image in Photoshop:
1. Open Photoshop (In this tutorial I’m using the CC 2017 version, but the steps should be the same in older versions).
2. Under File, click open. 3. Browse for an image, click the image you want to use and then click open.
Photo by Heidi Sandstrom from Unsplash.com Tip: Is good to have all your images and information in one folder with the name of the project.
2. Resizing an image:
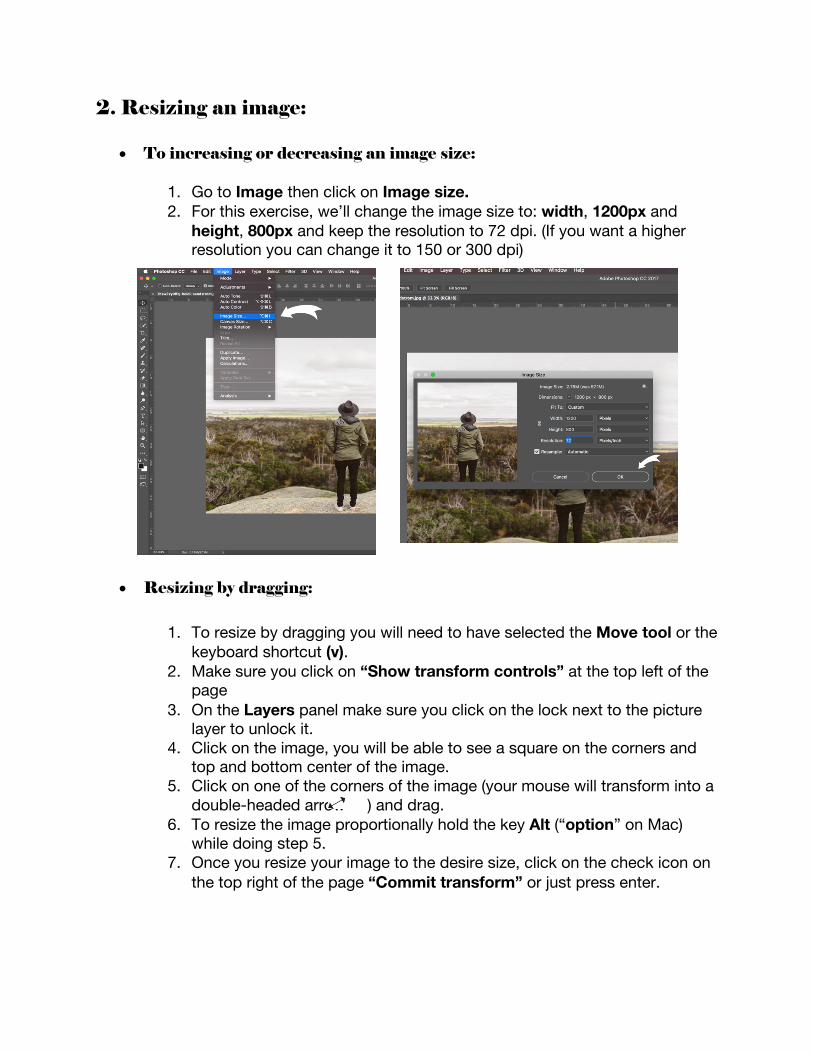
• To increasing or decreasing an image size:
1. Go to Image then click on Image size. 2. For this exercise, we’ll change the image size to: width, 1200px and
height, 800px and keep the resolution to 72 dpi. (If you want a higher resolution you can change it to 150 or 300 dpi)
• Resizing by dragging:
1. To resize by dragging you will need to have selected the Move tool or the keyboard shortcut (v).
2. Make sure you click on “Show transform controls” at the top left of the page
3. On the Layers panel make sure you click on the lock next to the picture layer to unlock it.
4. Click on the image, you will be able to see a square on the corners and top and bottom center of the image.
5. Click on one of the corners of the image (your mouse will transform into a double-headed arrow ) and drag.
6. To resize the image proportionally hold the key Alt (“option” on Mac) while doing step 5.
7. Once you resize your image to the desire size, click on the check icon on the top right of the page “Commit transform” or just press enter.
3. Cropping an image:
• There are many ways and tools that can be used to select specific areas of an image, these are some of the most useful tools for selection.
In this section, we will be using the “Quick selection tool” and the “Crop tool” Photo by Tatiana Lapina from Unsplash.com Tip: I encourage you to practice with all the other options, even if you don’t feel like you will need to use them.
• Quick Selection tool:
1. We’ll start by opening an image in Photoshop (see above).
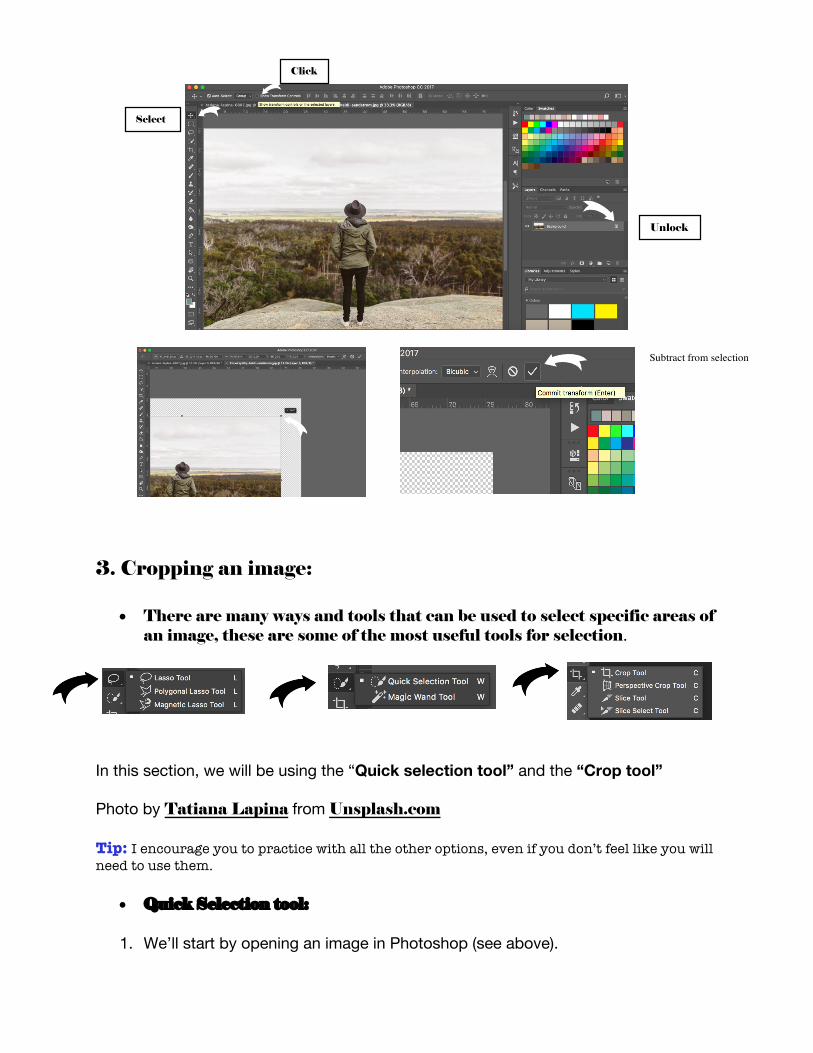
Unlock
Click
Select
Subtract from selection

2. Click on the Quick Selection tool on the left menu or the keyboard shortcut (W) 3. Start by selecting the picture background.
Tip: If you can try finding pictures with a solid background color, it will make it easier for you to select.
4. While selecting the background you might find that you selected parts you don’t want, in that case you will need to subtract from the selection by clicking on Quick Selection tool icon but with the minus sign next to it in the top left (see bottom image).
5. Once the selection is done you can easily remove the background by pressing delete on your keyboard. (Make sure the layer is unlocked, see above “Resizing by dragging” #3)
6. Now deselect by clicking on Select on the menu, then Deselect or keyboard shortcut Ctrl + D (command + D for mac)
7. Now we’ll create a background for this image on a new layer. To create a new layer go to the Layers panel and click on the icon “Create a new layer”
Subtract from selection
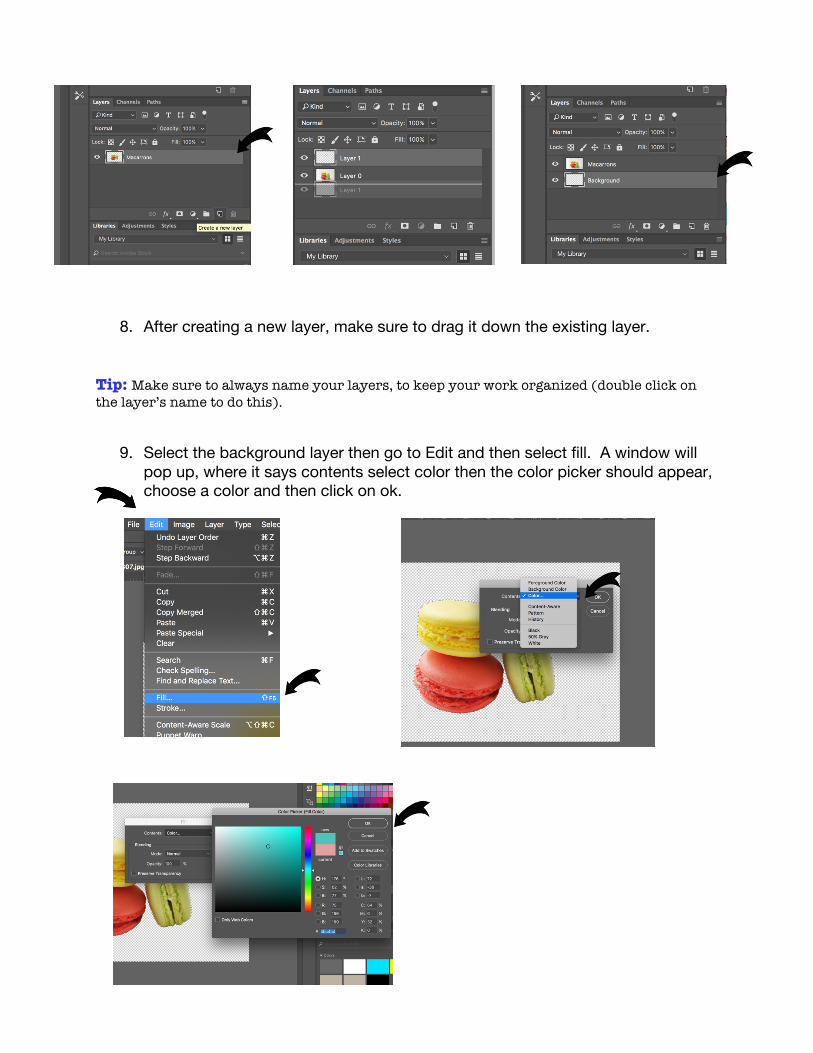
8. After creating a new layer, make sure to drag it down the existing layer. Tip: Make sure to always name your layers, to keep your work organized (double click on the layer’s name to do this).
9. Select the background layer then go to Edit and then select fill. A window will pop up, where it says contents select color then the color picker should appear, choose a color and then click on ok.

10. To add Drop Shadow double click on the layer, the Layer Style window should appear, then check Drop Shadow and modify the settings until you get the effect you are looking for.
11. To add text go in to the tool panel and find this Icon or use the keyboard shortcut (T), draw a box where you would like the text to appear, change the size, color and font as desire.
Saving a File Once you are done and happy with your results you can save your file. You can choose different files formats:
a. If you want to be able to modify the file you should save it as a .psd file which is the Photoshop format, this means you will be able to change it afterwards. I recommend having a Psd file just in case.
b. To get the final image you should save it as an JPEG file. c. If the image didn’t have a background and you will want it to be
transparent, you should save it as a .png file which will keep the background transparent.
Tip: There are many other files formats that you could save your file as, so make sure you know if you are require to save it with another format like PDF or EPS, if not use any of the previous formats.