Embed Size (px)
Citation preview

Last Updated: September 22, 2015 ©2015 Adobe Systems Incorporated. All Rights Reserved.
Adobe Document Cloud eSign Services
Quick Start Guide for Salesforce v17
Start sending agreements from eSign services for Salesforce in 15 minutes
Adobe Document Cloud eSign Services
Adobe Document Cloud eSign Services Quick Start Guide for Salesforce v17 2
Installing and Setting Up Adobe Document Cloud eSign Services for Salesforce 1. Install the Adobe Document Cloud eSign services (formerly EchoSign) for Salesforce integration package from the
Salesforce AppExchange. (See the installation and customization guide for complete instructions.)
Note: Be sure to select “Install for All Users” during installation.
2. Once the package is installed, the Setup Wizard should launch automatically. If it does not, click the eSign ServicesAdmin tab, click the Account Setup tab, then click the Launch Setup Wizard link as shown below. Make sure youcomplete both steps in the setup wizard.
It’s as simple as that! You are now set up to send agreements from the Agreements tab.
Adobe Document Cloud eSign Services
Adobe Document Cloud eSign Services Quick Start Guide for Salesforce v17 3
Setting Up Merge Mappings and Data Mappings You can easily set up a sample document with text tags to merge data from an Opportunity and push back data from signers into Salesforce. (See the Adobe Document Cloud eSign services Text Tag Documentation for more information).
You can use this sample document, which includes these two eSign services text tag fields:
• {{*mergeOppNameFromSalesForce}}—Field that the existing Opportunity name will merge into. • {{*updateOppNameInSalesForce}}—Field that the signer will update with the new Opportunity name.
You can add this sample document to Salesforce files, documents, or libraries. Or just save it on your computer.
To set up the merge mapping and data mapping that are required, do the following:
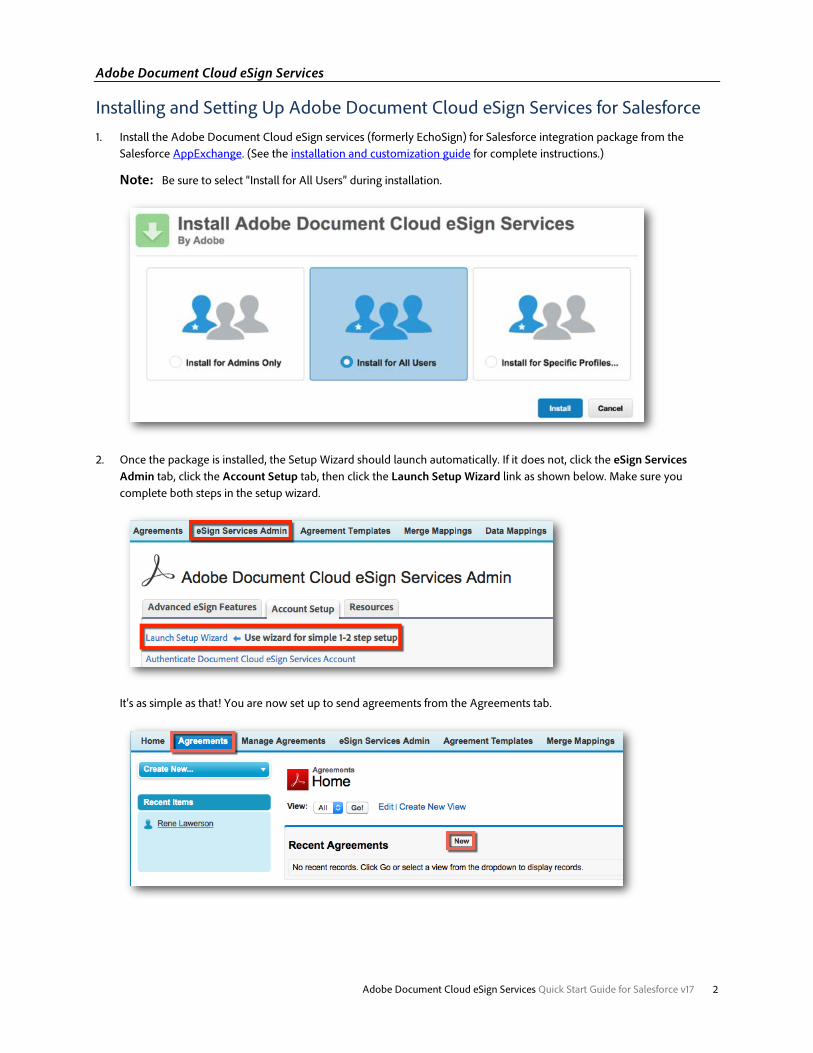
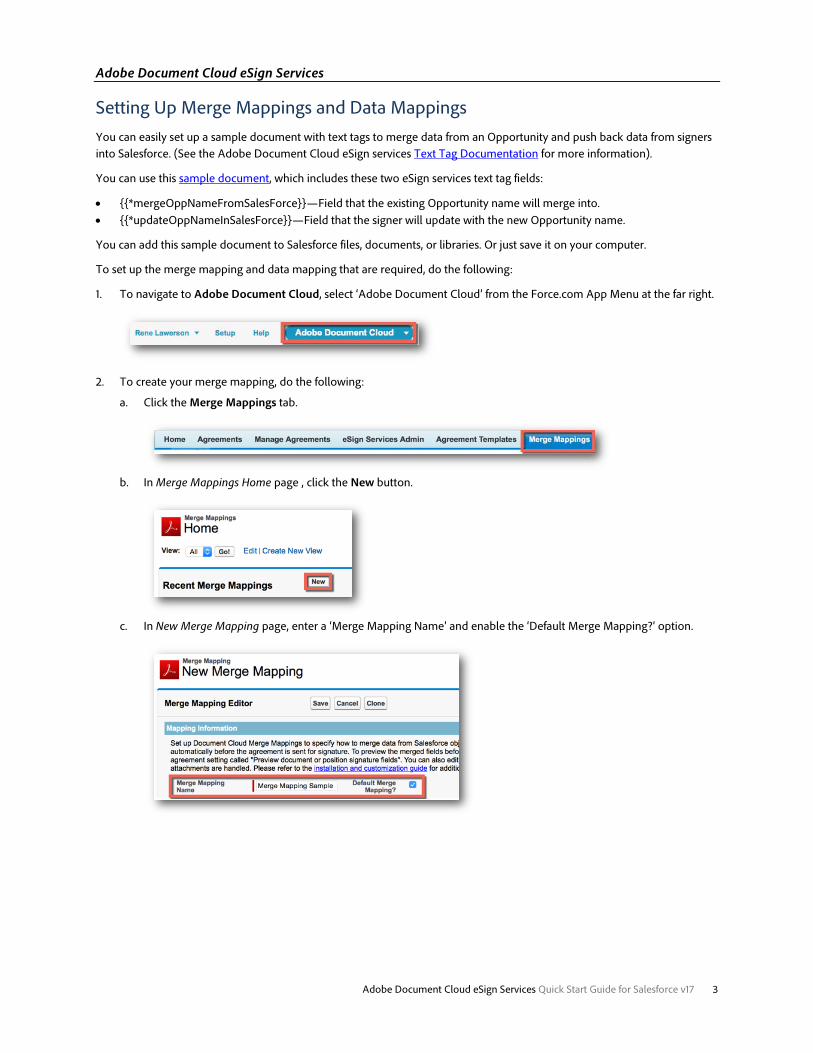
1. To navigate to Adobe Document Cloud, select ‘Adobe Document Cloud’ from the Force.com App Menu at the far right.
2. To create your merge mapping, do the following:
a. Click the Merge Mappings tab.
b. In Merge Mappings Home page , click the New button.
c. In New Merge Mapping page, enter a ‘Merge Mapping Name’ and enable the ‘Default Merge Mapping?’ option.
Adobe Document Cloud eSign Services
Adobe Document Cloud eSign Services Quick Start Guide for Salesforce v17 4
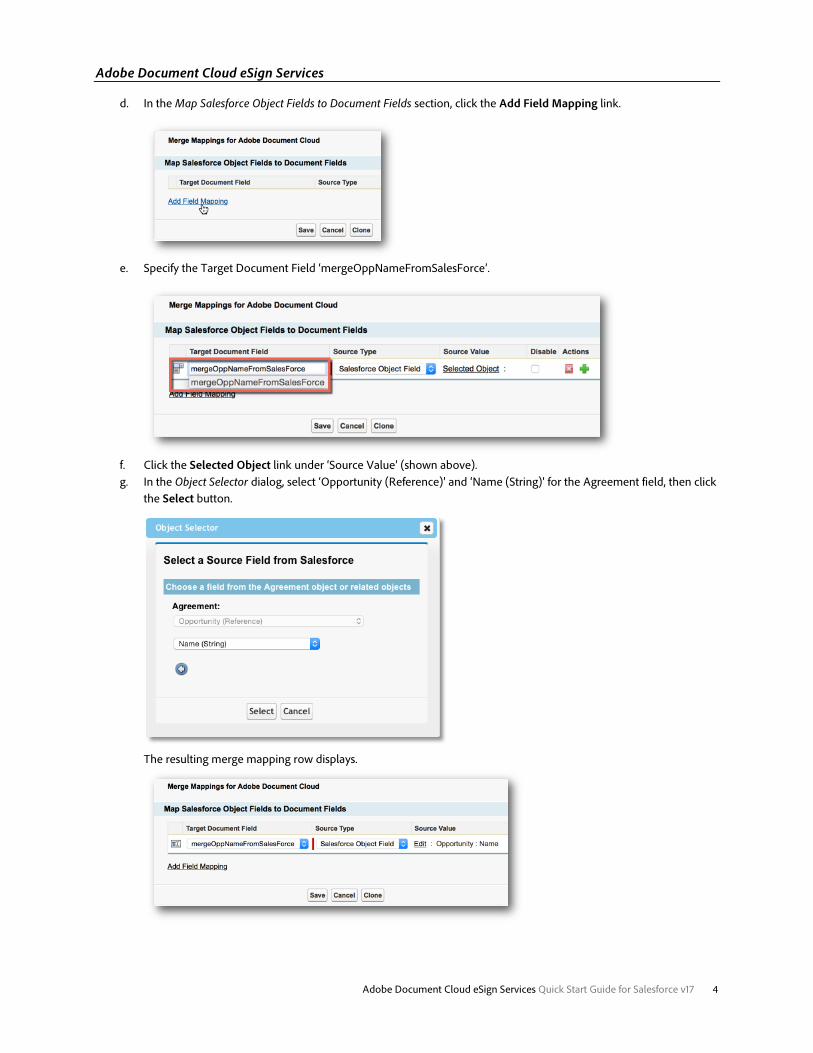
d. In the Map Salesforce Object Fields to Document Fields section, click the Add Field Mapping link.
e. Specify the Target Document Field ‘mergeOppNameFromSalesForce’.
f. Click the Selected Object link under ‘Source Value’ (shown above). g. In the Object Selector dialog, select ‘Opportunity (Reference)’ and ‘Name (String)’ for the Agreement field, then click
the Select button.
The resulting merge mapping row displays.
Adobe Document Cloud eSign Services
Adobe Document Cloud eSign Services Quick Start Guide for Salesforce v17 5
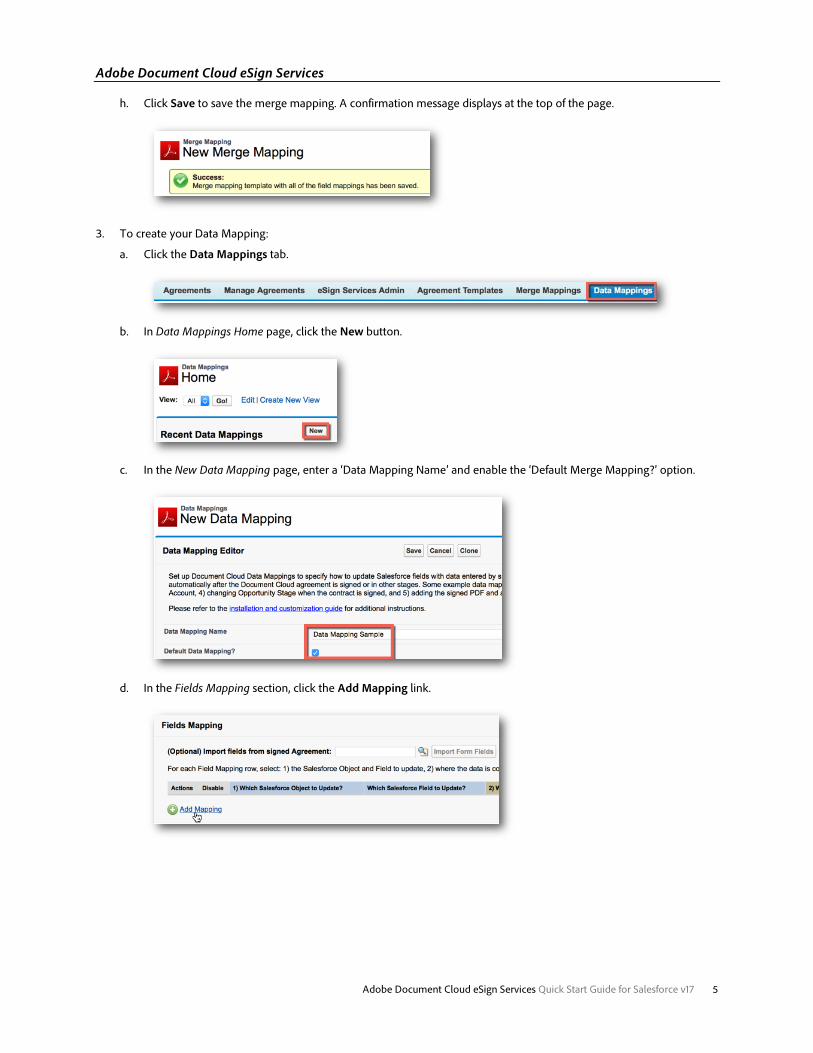
h. Click Save to save the merge mapping. A confirmation message displays at the top of the page.
3. To create your Data Mapping:
a. Click the Data Mappings tab.
b. In Data Mappings Home page, click the New button.
c. In the New Data Mapping page, enter a ‘Data Mapping Name’ and enable the ‘Default Merge Mapping?’ option.
d. In the Fields Mapping section, click the Add Mapping link.
Adobe Document Cloud eSign Services
Adobe Document Cloud eSign Services Quick Start Guide for Salesforce v17 6
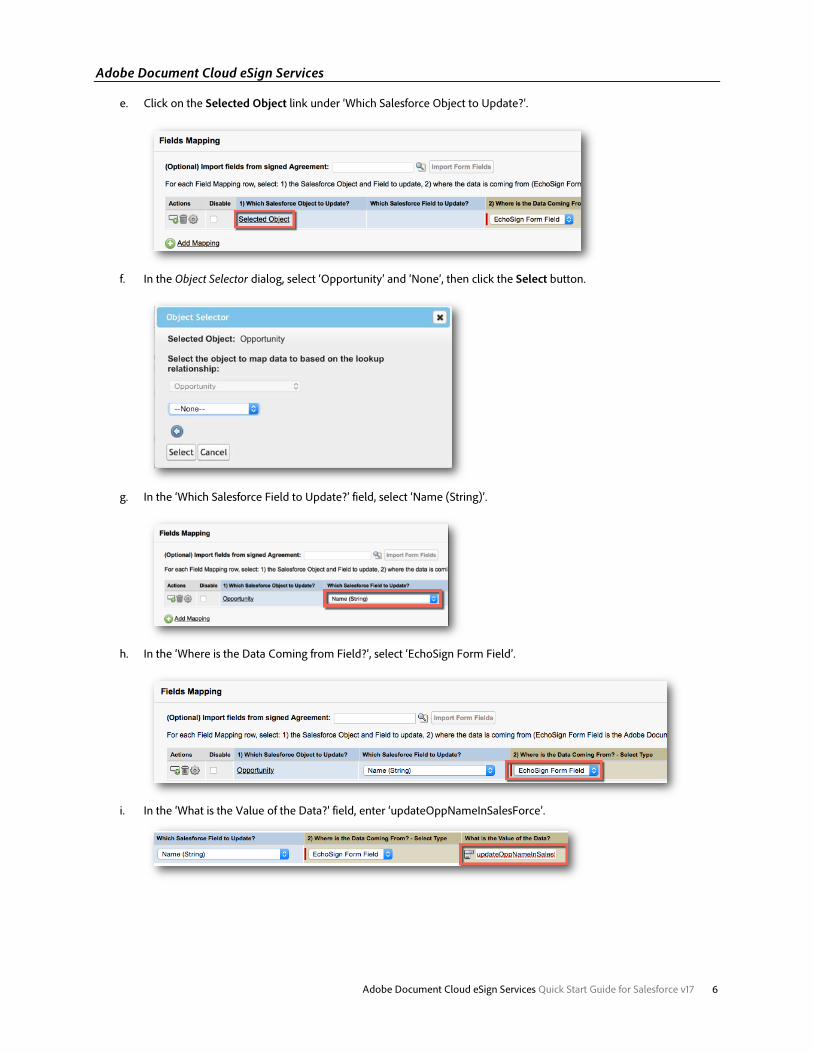
e. Click on the Selected Object link under ‘Which Salesforce Object to Update?’.
f. In the Object Selector dialog, select ‘Opportunity’ and ‘None’, then click the Select button.
g. In the ‘Which Salesforce Field to Update?’ field, select ‘Name (String)’.
h. In the ‘Where is the Data Coming from Field?’, select ‘EchoSign Form Field’.
i. In the ‘What is the Value of the Data?’ field, enter ‘updateOppNameInSalesForce’.
Adobe Document Cloud eSign Services
Adobe Document Cloud eSign Services Quick Start Guide for Salesforce v17 7
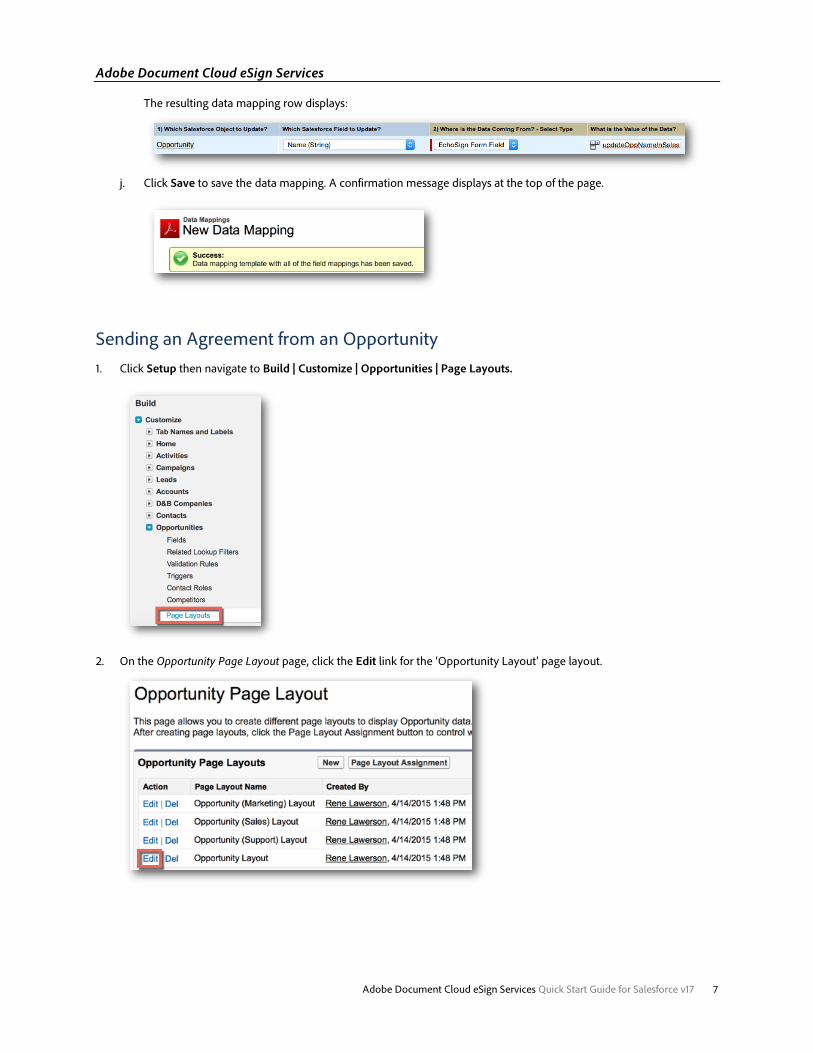
The resulting data mapping row displays:
j. Click Save to save the data mapping. A confirmation message displays at the top of the page.
Sending an Agreement from an Opportunity 1. Click Setup then navigate to Build | Customize | Opportunities | Page Layouts.
2. On the Opportunity Page Layout page, click the Edit link for the ‘Opportunity Layout’ page layout.
Adobe Document Cloud eSign Services
Adobe Document Cloud eSign Services Quick Start Guide for Salesforce v17 8
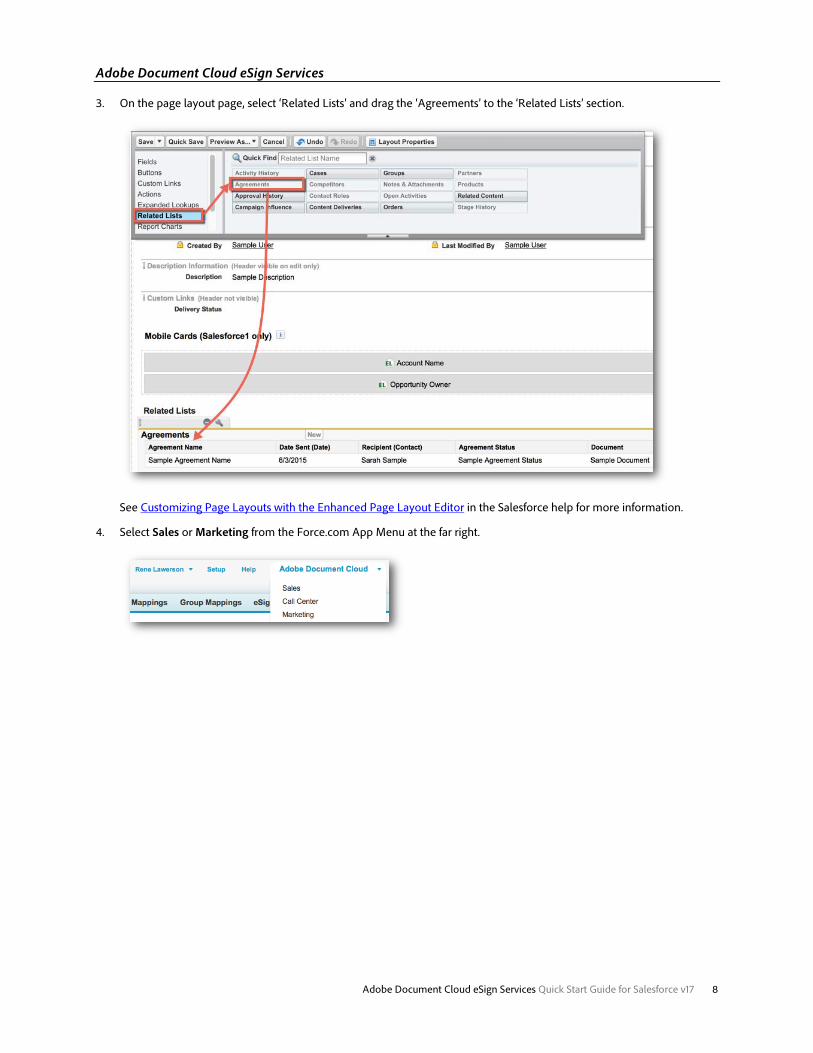
3. On the page layout page, select ‘Related Lists’ and drag the ‘Agreements’ to the ‘Related Lists’ section.
See Customizing Page Layouts with the Enhanced Page Layout Editor in the Salesforce help for more information.
4. Select Sales or Marketing from the Force.com App Menu at the far right.
Adobe Document Cloud eSign Services
Adobe Document Cloud eSign Services Quick Start Guide for Salesforce v17 9
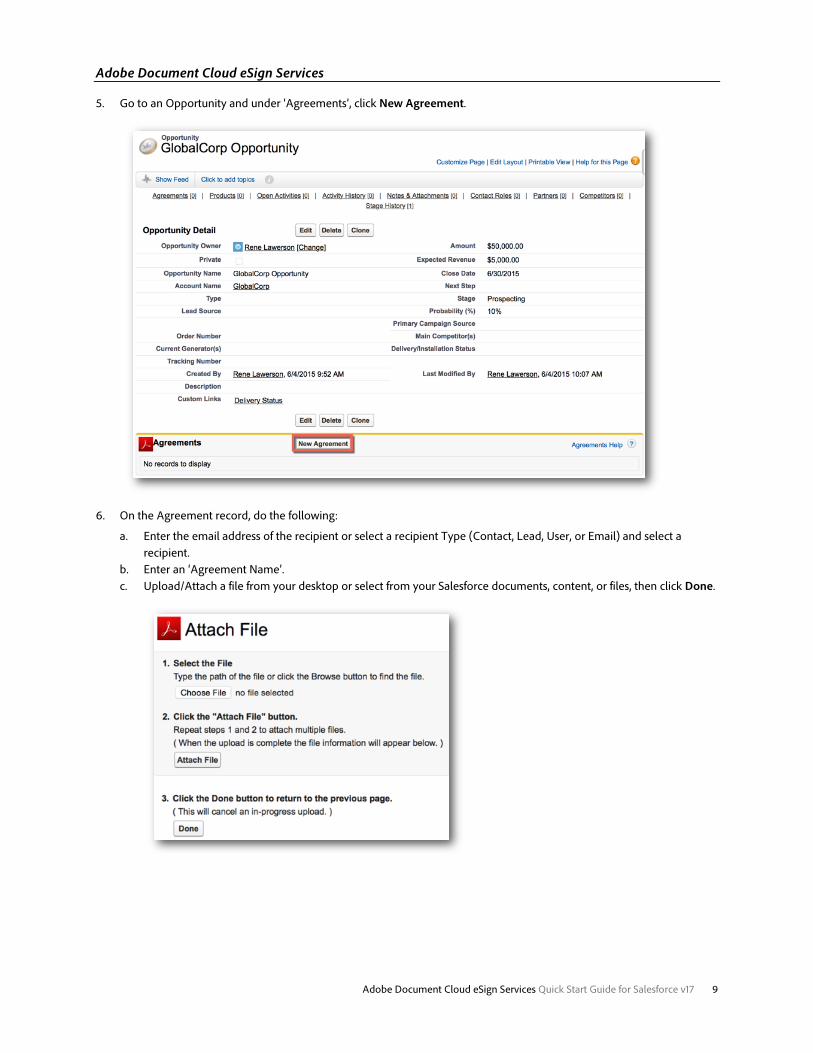
5. Go to an Opportunity and under ‘Agreements’, click New Agreement.
6. On the Agreement record, do the following:
a. Enter the email address of the recipient or select a recipient Type (Contact, Lead, User, or Email) and select a recipient.
b. Enter an ‘Agreement Name’. c. Upload/Attach a file from your desktop or select from your Salesforce documents, content, or files, then click Done.
Adobe Document Cloud eSign Services
Adobe Document Cloud eSign Services Quick Start Guide for Salesforce v17 10
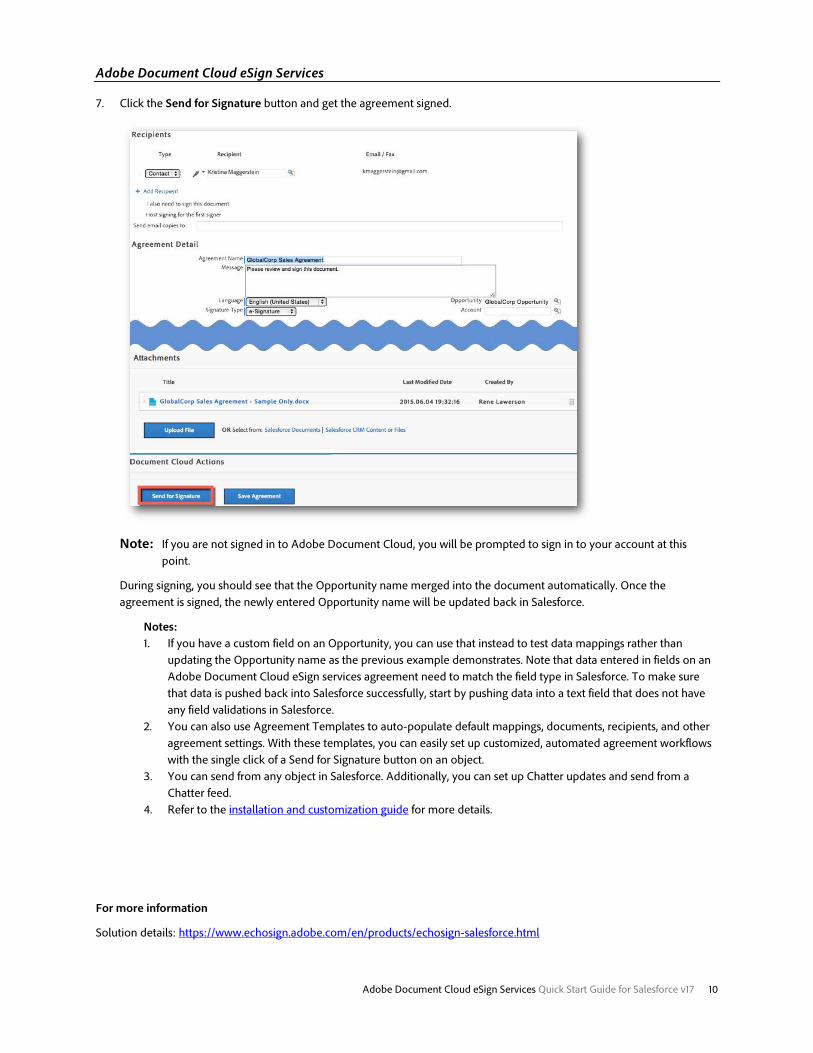
7. Click the Send for Signature button and get the agreement signed.
Note: If you are not signed in to Adobe Document Cloud, you will be prompted to sign in to your account at this point.
During signing, you should see that the Opportunity name merged into the document automatically. Once the agreement is signed, the newly entered Opportunity name will be updated back in Salesforce.
Notes: 1. If you have a custom field on an Opportunity, you can use that instead to test data mappings rather than
updating the Opportunity name as the previous example demonstrates. Note that data entered in fields on an Adobe Document Cloud eSign services agreement need to match the field type in Salesforce. To make sure that data is pushed back into Salesforce successfully, start by pushing data into a text field that does not have any field validations in Salesforce.
2. You can also use Agreement Templates to auto-populate default mappings, documents, recipients, and other agreement settings. With these templates, you can easily set up customized, automated agreement workflows with the single click of a Send for Signature button on an object.
3. You can send from any object in Salesforce. Additionally, you can set up Chatter updates and send from a Chatter feed.
4. Refer to the installation and customization guide for more details.
For more information
Solution details: https://www.echosign.adobe.com/en/products/echosign-salesforce.html