Embed Size (px)
Citation preview

Administering Adobe Creative Suite 5/5.5 with the Casper Suite
Technical PaperCasper Suite v9.0 or Later8 January 2014
JAMF Software, LLC© 2014 JAMF Software, LLC. All rights reserved.
JAMF Software has made all efforts to ensure that this guide is accurate.
JAMF Software301 4th Ave S Suite 1075Minneapolis, MN 55415-1039(612) 605-6625
Adobe, Adobe Acrobat, Adobe AIR, Adobe Creative Suite, and Photoshop are registered trademarks of Adobe Systems Incorporated in the United States and other countries.
Casper Admin, Casper Remote, the Casper Suite, Composer, JAMF Software, the JAMF Software logo, the JAMF Software Server (JSS), and Self Service are trademarks of JAMF Software, LLC, registered in the United States and other countries.
All other product and service names mentioned are the trademarks of their respective companies.
Contents
Page 4 Introduction What’s in This GuideImportant ConceptsBefore You BeginAdditional Resources
Page 6 Overview
Page 7 Requirements
Page 8 Deploying Adobe CS5/5.5Building an Adobe CS5/5.5 Deployment PackageAdding the Deployment Package to Casper AdminDeploying the Deployment PackageInstalling Products in the Exceptions Folder
Page 18 Reporting on Adobe CS5/5.5Creating a Licensed Software Record Updating Inventory
Evaluating License ComplianceViewing License Usage MatchesViewing Application Usage Logs
Page 24 Updating Adobe CS5/5.5Building an Adobe CS5/5.5 Update PackageAdding the Update Package to Casper AdminCreating a Smart Computer GroupDeploying the Update Package
3
Introduction
What’s in This GuideThis guide provides step-by-step instructions on how to deploy, update, and report on Adobe® Creative Suite® 5 or Adobe Creative Suite 5.5 with Adobe technologies and the Casper Suite.
Important ConceptsAdministrators using this guide should be familiar with the following Casper Suite-related concepts:
• Package and script management
• Policies and scope
• License management
• Application usage reporting
• Smart computer groups
Before You BeginBefore using the instructions in this guide, make sure you are familiar with the following concepts:
Adobe CS5/5.5 Deployment Planning
Adobe recommends that you do some planning before deploying Adobe CS5/5.5. For more information, see “Planning for Deployment“ in Adobe’s CS5 Enterprise Deployment Guide.
Adobe Application Manager Enterprise Edition 2.1
Deploying Adobe CS5/5.5 with the Casper Suite requires Adobe Application Manager Enterprise Edition (AAMEE) 2.1. Before installing AAMEE, make sure you are familiar with the installation guidelines and version requirements.
For more information, see “Deployment Tools” in the “Using the Adobe Application Manager for Enterprise Deployment” section of Adobe’s CS5 Enterprise Deployment Guide.
4
Additional ResourcesFor more information about the applications, concepts, and processes mentioned in this guide, see the following documentation:
• Casper Suite Administrator’s Guide
http://www.jamfsoftware.com/product-documentation/administrators-guides
• CS5 Enterprise Deployment Guide
http://www.adobe.com/content/dam/Adobe/en/devnet/creativesuite/pdfs/DeployGuide_CS5.pdf
5
Overview
In the past, Mac administrators have used the Casper Suite together with Adobe technologies to administer Adobe Creative Suite products in the enterprise. Similar workflows can now be used to administer Adobe Creative Suite 5 (CS5) and Adobe Creative Suite 5.5 (CS5.5).
Administrators can package Adobe CS5/5.5 products and updates with Adobe Application Manager Enterprise Edition (AAMEE) 2.1 and deploy them with the Casper Suite.
The Casper Suite’s reporting capabilities can also help administrators manage Adobe CS5/5.5 licenses. Administrators can evaluate license compliance, view and report on the licenses in use, and view how frequently Adobe CS5/5.5 is used.
6
To administer Adobe CS5/5.5 using the instructions in this guide, you need:
• The JAMF Software Server (JSS) v9.0 or later
• Casper Admin
• Composer
• Adobe Application Manager Enterprise Edition (AAMEE) 2.1 for Mac
You can download AAMEE 2.1 from Adobe at:
http://www.adobe.com/devnet/creativesuite/enterprisedeployment.html
• Adobe CS5/5.5 installer media
Requirements
7
Deploying Adobe CS5/5.5
Deploying Adobe CS5/5.5 involves the following steps:
1. Build a CS5/5.5 deployment package using AAMEE.
2. Add the deployment package to Casper Admin.
3. Deploy the deployment package.
4. Installing products in the Exceptions folder.
Building an Adobe CS5/5.5 Deployment PackageThe first step to deploying Adobe CS5/5.5 is to build a deployment package using Adobe’s custom enterprise deployment tool, AAMEE 2.1.
1. Open AAMEE.
2. If you are opening AAMEE for the first time, read and accept the License Agreement.
3. Choose to build a CS5/5.5 installation package.
4. Enter information on the panes to build the package. For complete instructions, see “Creating Deployment Packages” in Adobe’s CS5 Enterprise Deployment Guide.
JAMF Software makes the following recommendations for deployment packages:
• If you plan to deploy Acrobat® X Pro, include it in a package with other CS5/5.5 products instead of deploying it separately.
• Disable Adobe AIR® components in the package. (This option is displayed on the Configuration pane.)
Leaving AIR components enabled limits your deployment options. Packages with AIR components enabled can only be deployed with a login policy, during imaging, or using Self Service. Packages with AIR components disabled can be deployed at any time.
• Configure the package to ignore conflicting processes. (This option is displayed on the Configuration pane.)
When you are finished, AAMEE creates a folder in the location that you specified. (You specified the name and location for the folder on the Media and Package Identification pane in AAMEE.) This folder contains a Build folder that contains the deployment package.
8
Adding the Deployment Package to Casper AdminAdd the deployment package to Casper Admin so you can deploy it using a policy.
1. Open Casper Admin and authenticate to the JSS.
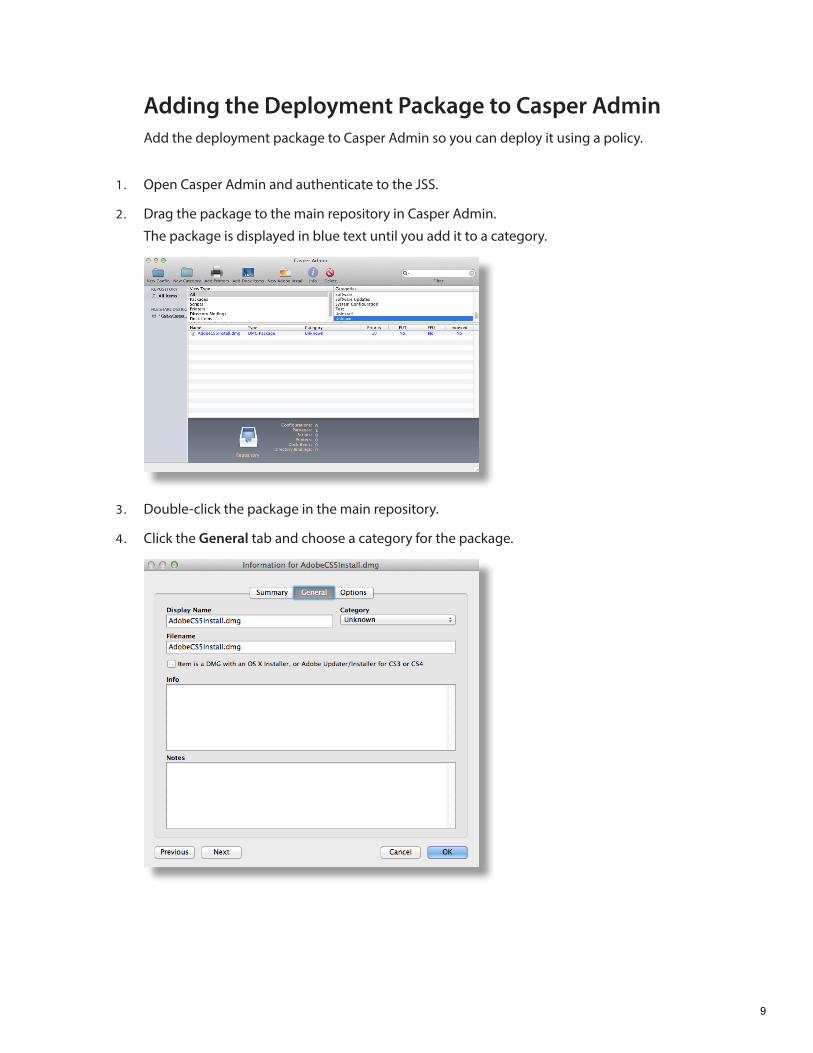
2. Drag the package to the main repository in Casper Admin.
The package is displayed in blue text until you add it to a category.
3. Double-click the package in the main repository.
4. Click the General tab and choose a category for the package.
9

5. Click the Options tab and choose a priority for the package.
The recommended priority for the deployment package is “10” .
6. Click OK.
Deploying the Deployment PackageAfter adding the deployment package to Casper Admin, you can deploy it using a policy.
Important: Do not use the deployment instructions in this guide if the master distribution point in your JSS is a file share distribution point that uses SMB. For deployment instructions in this case, see the following Knowledge Base article:
Deploying PKGs Created with AAMEE or Creative Cloud Packager
1. Log in to the JSS with a web browser.
2. Click Computers at the top of the page.
3. Click Policies.
On a smartphone, this option is in the pop-up menu.
4. Click New .
10
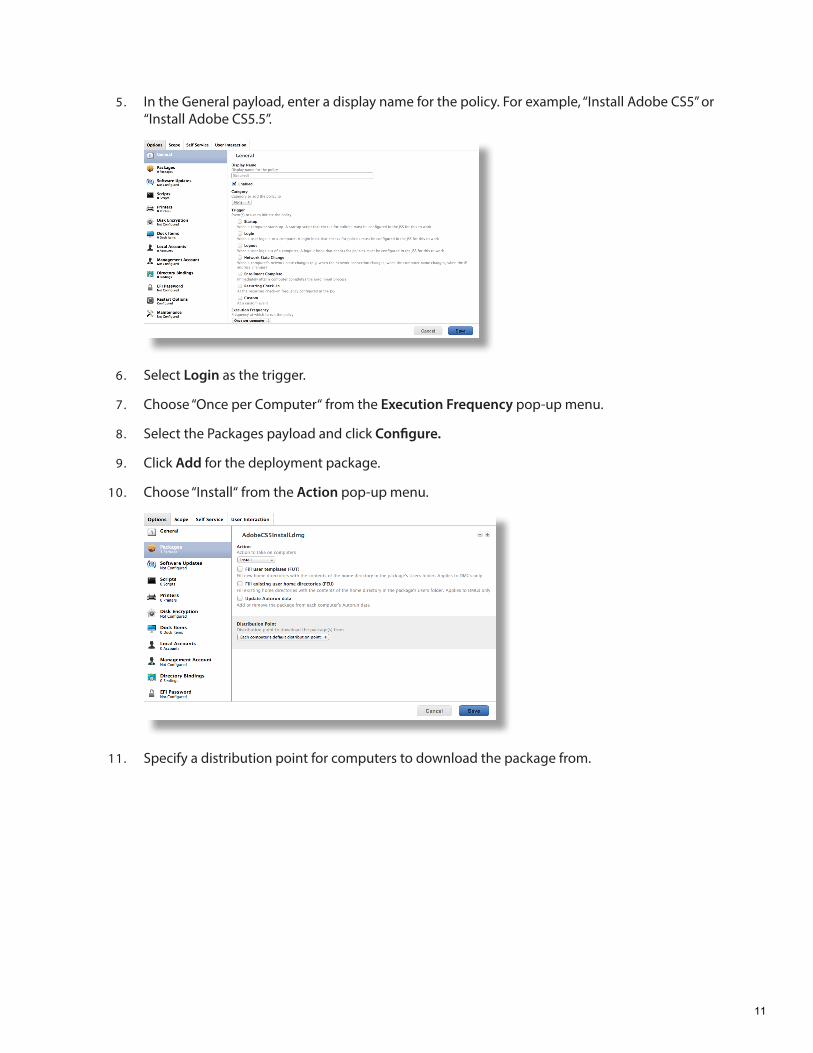
5. In the General payload, enter a display name for the policy. For example, “Install Adobe CS5” or “Install Adobe CS5.5”.
6. Select Login as the trigger.
7. Choose “Once per Computer“ from the Execution Frequency pop-up menu.
8. Select the Packages payload and click Configure.
9. Click Add for the deployment package.
10. Choose “Install“ from the Action pop-up menu.
11. Specify a distribution point for computers to download the package from.
11
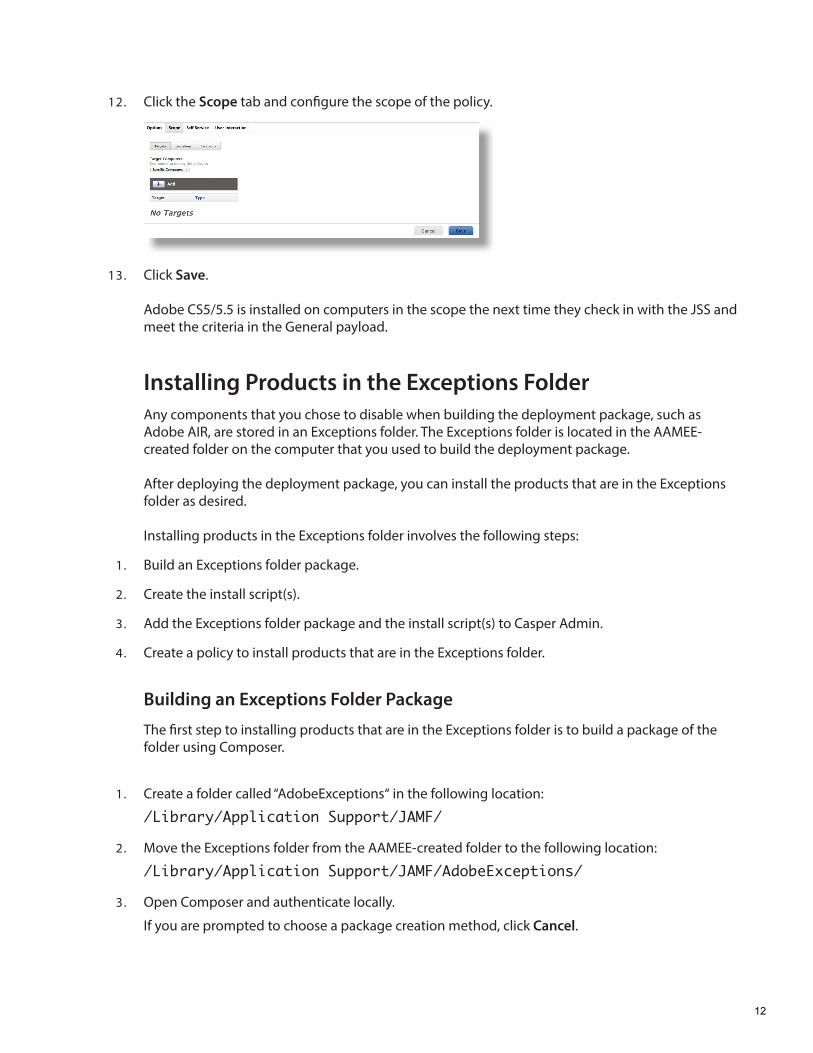
12. Click the Scope tab and configure the scope of the policy.
13. Click Save.
Adobe CS5/5.5 is installed on computers in the scope the next time they check in with the JSS and meet the criteria in the General payload.
Installing Products in the Exceptions FolderAny components that you chose to disable when building the deployment package, such as Adobe AIR, are stored in an Exceptions folder. The Exceptions folder is located in the AAMEE-created folder on the computer that you used to build the deployment package.
After deploying the deployment package, you can install the products that are in the Exceptions folder as desired.
Installing products in the Exceptions folder involves the following steps:
1. Build an Exceptions folder package.
2. Create the install script(s).
3. Add the Exceptions folder package and the install script(s) to Casper Admin.
4. Create a policy to install products that are in the Exceptions folder.
Building an Exceptions Folder Package
The first step to installing products that are in the Exceptions folder is to build a package of the folder using Composer.
1. Create a folder called “AdobeExceptions“ in the following location:
/Library/Application Support/JAMF/
2. Move the Exceptions folder from the AAMEE-created folder to the following location:
/Library/Application Support/JAMF/AdobeExceptions/
3. Open Composer and authenticate locally.
If you are prompted to choose a package creation method, click Cancel.
12
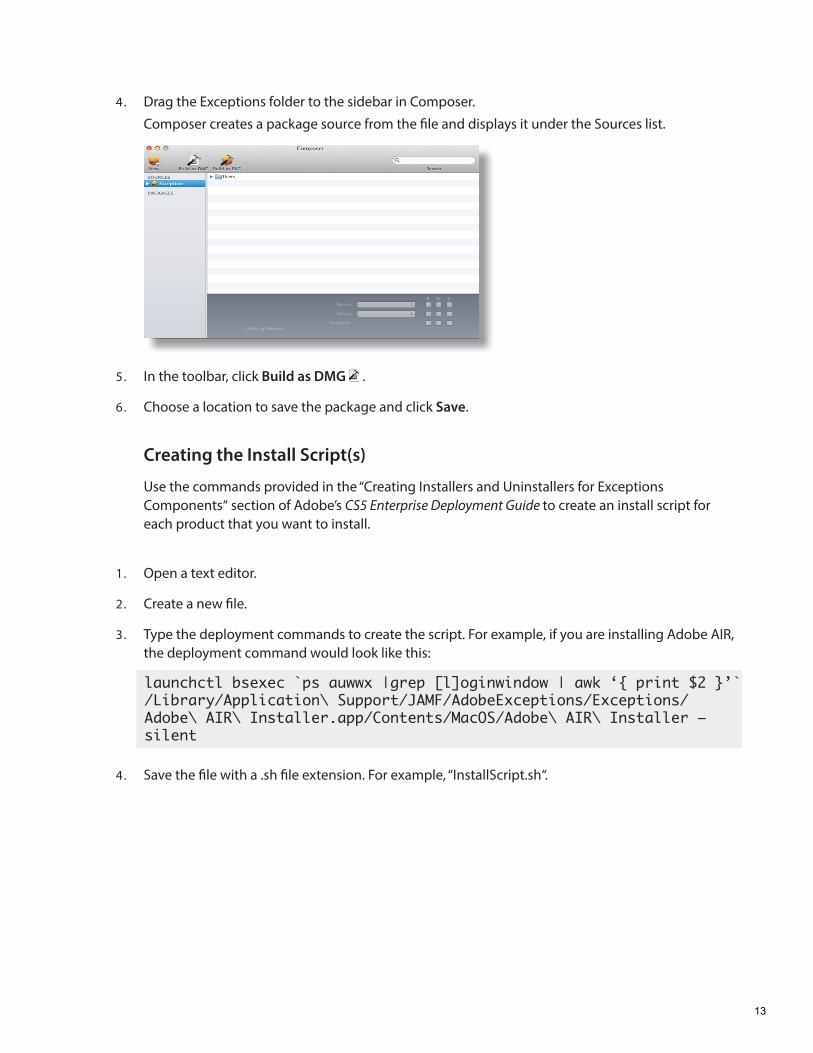
4. Drag the Exceptions folder to the sidebar in Composer.
Composer creates a package source from the file and displays it under the Sources list.
5. In the toolbar, click Build as DMG .
6. Choose a location to save the package and click Save.
Creating the Install Script(s)
Use the commands provided in the “Creating Installers and Uninstallers for Exceptions Components“ section of Adobe’s CS5 Enterprise Deployment Guide to create an install script for each product that you want to install.
1. Open a text editor.
2. Create a new file.
3. Type the deployment commands to create the script. For example, if you are installing Adobe AIR, the deployment command would look like this:
launchctl bsexec `ps auwwx |grep [l]oginwindow | awk ‘{ print $2 }’`/Library/Application\ Support/JAMF/AdobeExceptions/Exceptions/Adobe\ AIR\ Installer.app/Contents/MacOS/Adobe\ AIR\ Installer –silent
4. Save the file with a .sh file extension. For example, “InstallScript.sh“.
13
Adding the Exceptions Folder Package and the Install Script(s) to Casper Admin
Add the Exceptions folder package and the install script(s) so that you can deploy them using a policy.
1. Open Casper Admin and authenticate to the JSS.
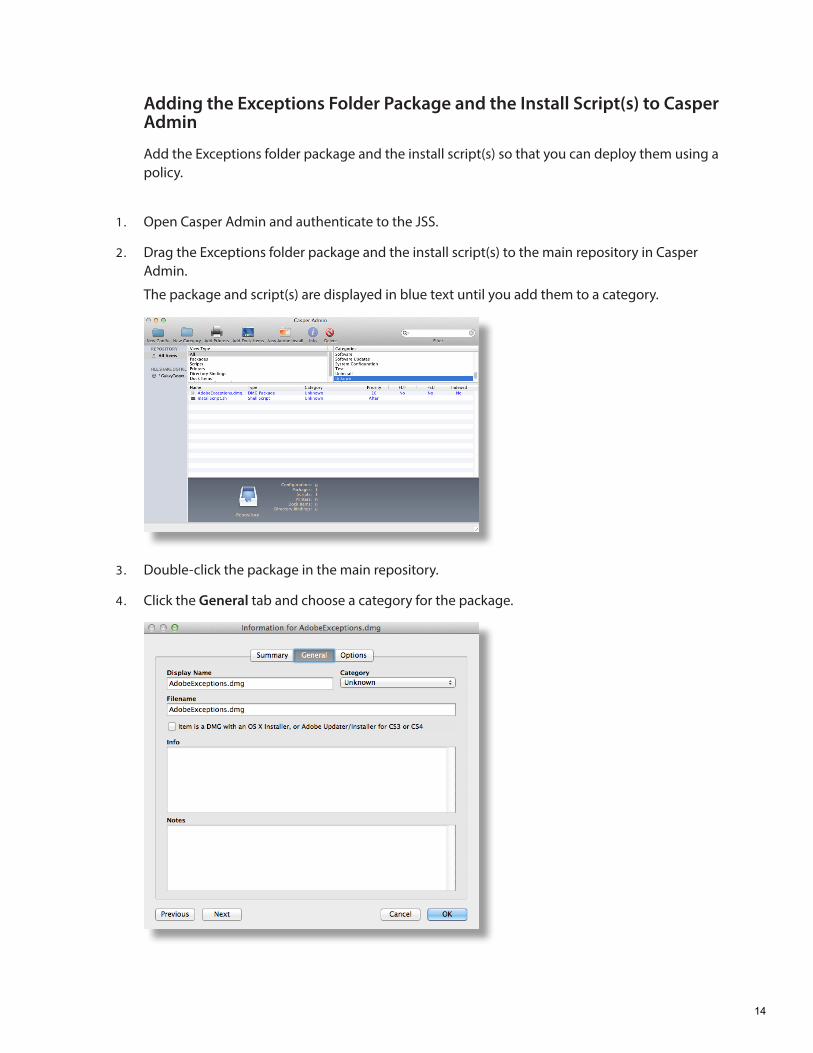
2. Drag the Exceptions folder package and the install script(s) to the main repository in Casper Admin.
The package and script(s) are displayed in blue text until you add them to a category.
3. Double-click the package in the main repository.
4. Click the General tab and choose a category for the package.
14

5. Click the Options tab and choose a priority for the package.
The recommended priority for the Exceptions folder package is “8“
6. Click OK.
7. Double-click the install script in the main repository.
8. Click the Options tab and verify that the priority is set to “After”.
9. Click OK.
10. Repeat steps 7-9 for any other install scripts.
15

Deploying the Exceptions Folder Package and Install Script(s)
After adding the Exceptions folder package and the install script(s) to Casper Admin, you can deploy them using a policy.
1. Log in to the JSS with a web browser.
2. Click Computers at the top of the page.
3. Click Policies.
On a smartphone, this option is in the pop-up menu.
4. Click New .
5. In the General payload, enter a display name for the policy. For example, “CS5 Exceptions“ or “CS5.5 Exceptions“.
6. Select Login as the trigger.
7. Choose “Once per Computer” from the Execution Frequency pop-up menu.
8. Select the Packages payload and click Configure.
9. Click Add for the Exceptions folder package.
10. Choose “Install“ from the Action pop-up menu.
16
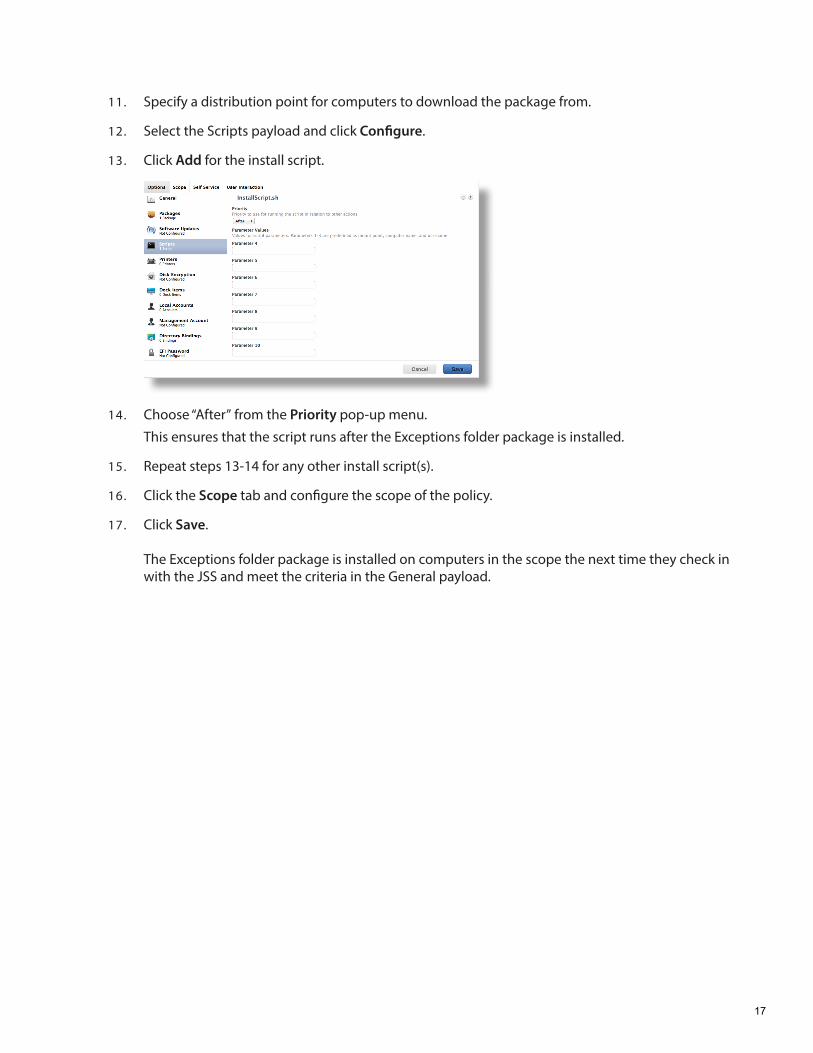
11. Specify a distribution point for computers to download the package from.
12. Select the Scripts payload and click Configure.
13. Click Add for the install script.
14. Choose “After” from the Priority pop-up menu.
This ensures that the script runs after the Exceptions folder package is installed.
15. Repeat steps 13-14 for any other install script(s).
16. Click the Scope tab and configure the scope of the policy.
17. Click Save.
The Exceptions folder package is installed on computers in the scope the next time they check in with the JSS and meet the criteria in the General payload.
17
Reporting on Adobe CS5/5.5
After deploying Adobe CS5/5.5, you can evaluate license compliance, view and report on the licenses in use, and view how frequently Adobe CS5/5.5 is used.
Reporting on Adobe CS5/5.5 involves the following steps:
1. Create a licensed software record.
2. Update inventory.
3. Evaluate license compliance.
4. View license usage matches.
5. View application usage logs.
Creating a Licensed Software Record The first step to reporting on Adobe CS5/5.5 is to create a licensed software record. Licensed software records allow you to store license information in the JSS.
There are two ways to create a licensed software record for Adobe CS5/5.5:
• Method 1: Create a Licensed Software Record Using a Licensed Software TemplateAdd the licensed software template that specifies software definitions according to the name and version of each application, font, and plug-in.
• Method 2: Create a Licensed Software Record Using Software Identification Tags Specify software definitions according to Software Identification Tags associated with each software title.
Method 1: Create a Licensed Software Record Using a Licensed Software Template
1. Download the licensed software template for the appropriate Adobe CS5/5.5 product from JAMF Nation at:
https://jamfnation.jamfsoftware.com/licensedSoftwareTemplates.html
2. Log in to the JSS with a web browser.
3. Click Computers at the top of the page.
18

4. Click Licensed Software.
On a smartphone, this option is in the pop-up menu.
5. Click Upload and upload the licensed software template.
6. Click the Licenses tab.
7. Click Add .
8. In the Serial Number 1 and Serial Number 2 fields, enter serial number(s) for the product as needed.
9. In the License Count field, enter the number of licenses owned.
10. Click Save, and then click Save again.
Method 2: Create a Licensed Software Record Using Software Identification Tags
1. Log in to the JSS with a web browser.
2. Click Computers at the top of the page.
3. Click Licensed Software.
On a smartphone, this option is in the pop-up menu.
4. Click New .
5. On the General pane, enter a display name for the licensed software record. For example, “Adobe Creative Suite 5“ or “Adobe Creative Suite 5.5“.
19
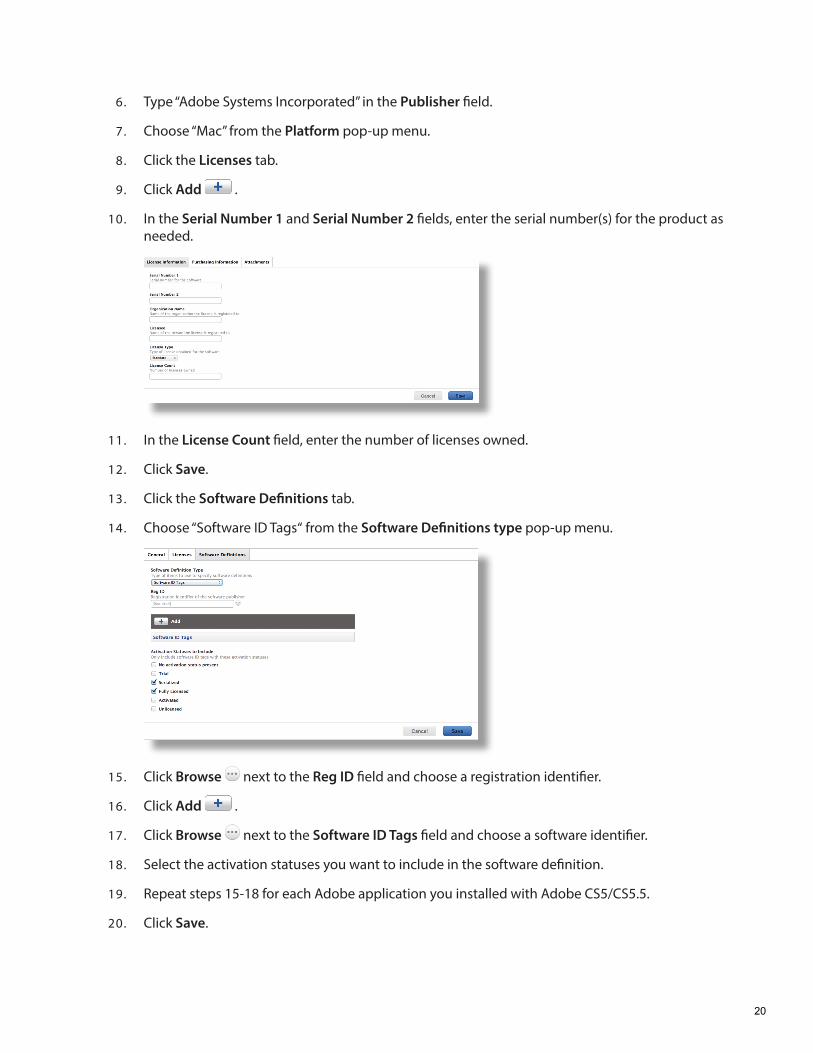
6. Type “Adobe Systems Incorporated” in the Publisher field.
7. Choose “Mac” from the Platform pop-up menu.
8. Click the Licenses tab.
9. Click Add .
10. In the Serial Number 1 and Serial Number 2 fields, enter the serial number(s) for the product as needed.
11. In the License Count field, enter the number of licenses owned.
12. Click Save.
13. Click the Software Definitions tab.
14. Choose “Software ID Tags“ from the Software Definitions type pop-up menu.
15. Click Browse next to the Reg ID field and choose a registration identifier.
16. Click Add .
17. Click Browse next to the Software ID Tags field and choose a software identifier.
18. Select the activation statuses you want to include in the software definition.
19. Repeat steps 15-18 for each Adobe application you installed with Adobe CS5/CS5.5.
20. Click Save.
20
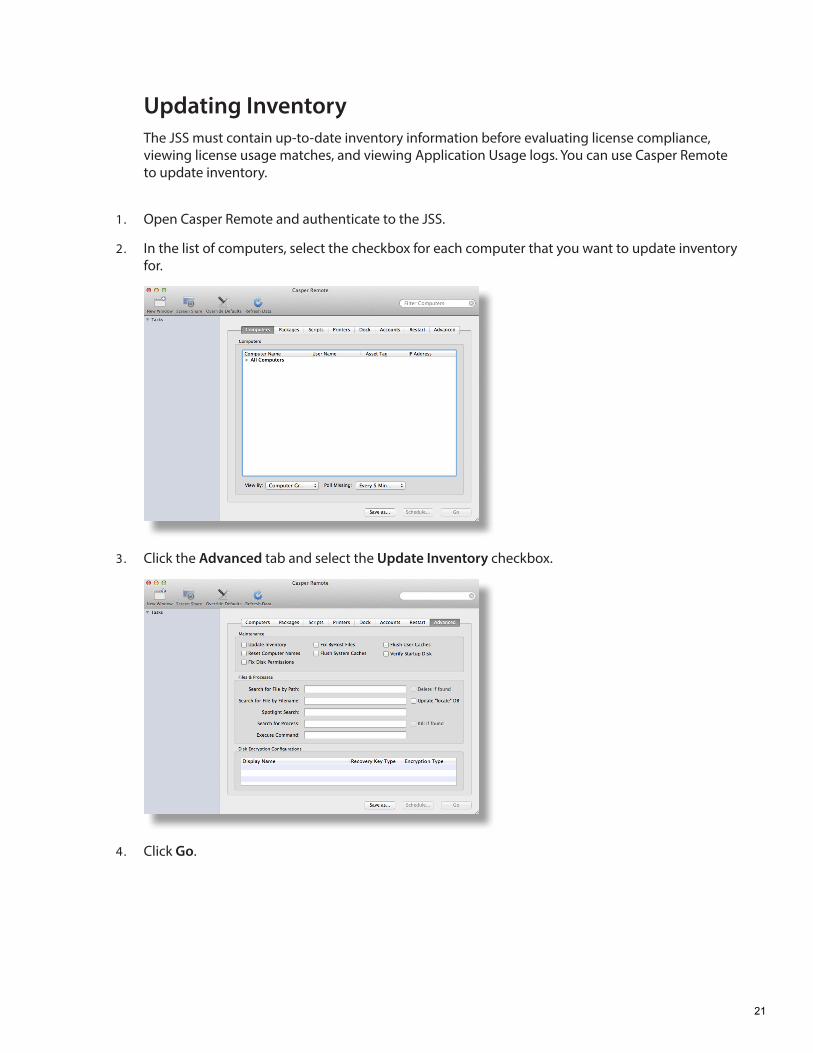
Updating InventoryThe JSS must contain up-to-date inventory information before evaluating license compliance, viewing license usage matches, and viewing Application Usage logs. You can use Casper Remote to update inventory.
1. Open Casper Remote and authenticate to the JSS.
2. In the list of computers, select the checkbox for each computer that you want to update inventory for.
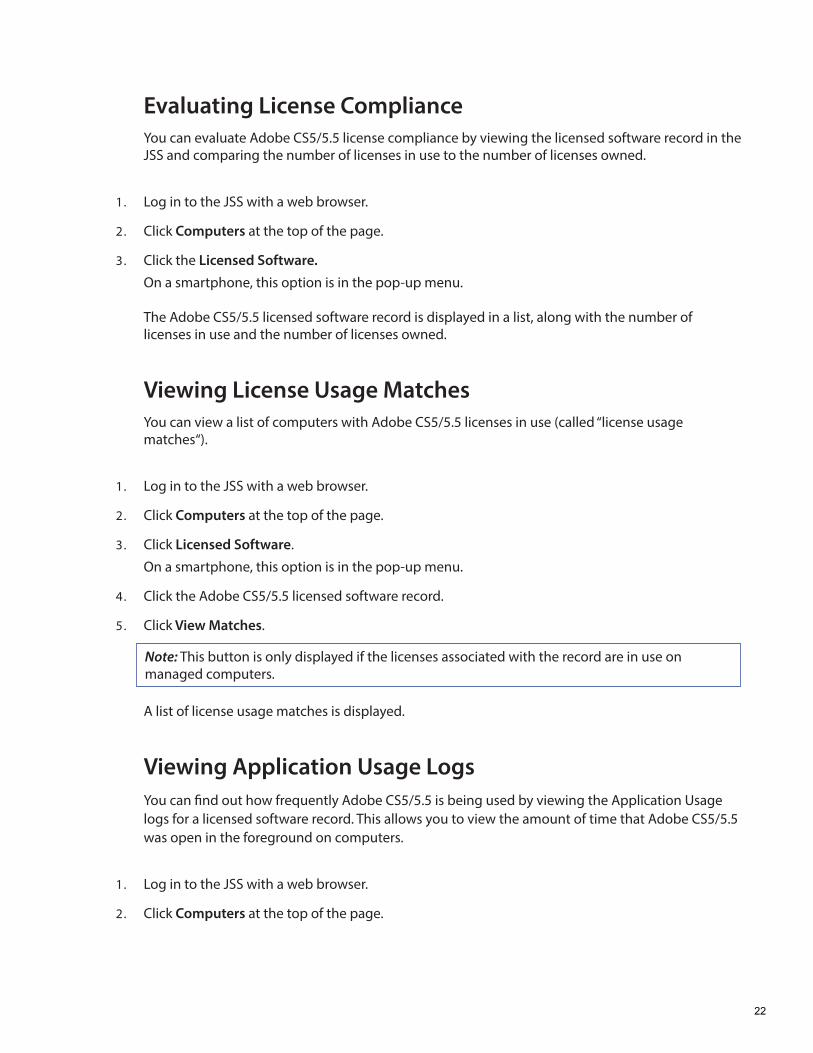
3. Click the Advanced tab and select the Update Inventory checkbox.
4. Click Go.
21
Evaluating License ComplianceYou can evaluate Adobe CS5/5.5 license compliance by viewing the licensed software record in the JSS and comparing the number of licenses in use to the number of licenses owned.
1. Log in to the JSS with a web browser.
2. Click Computers at the top of the page.
3. Click the Licensed Software.On a smartphone, this option is in the pop-up menu.
The Adobe CS5/5.5 licensed software record is displayed in a list, along with the number of licenses in use and the number of licenses owned.
Viewing License Usage MatchesYou can view a list of computers with Adobe CS5/5.5 licenses in use (called “license usage matches“).
1. Log in to the JSS with a web browser.
2. Click Computers at the top of the page.
3. Click Licensed Software.
On a smartphone, this option is in the pop-up menu.
4. Click the Adobe CS5/5.5 licensed software record.
5. Click View Matches. Note: This button is only displayed if the licenses associated with the record are in use on managed computers.
A list of license usage matches is displayed.
Viewing Application Usage LogsYou can find out how frequently Adobe CS5/5.5 is being used by viewing the Application Usage logs for a licensed software record. This allows you to view the amount of time that Adobe CS5/5.5 was open in the foreground on computers.
1. Log in to the JSS with a web browser.
2. Click Computers at the top of the page.
22
3. Click Licensed Software.On a smartphone, this option is in the pop-up menu.
4. Click the Adobe CS5/5.5 licensed software record.
5. Click View Logs.
6. Click View Matches.
Note: This button is only displayed if the licenses associated with the record are in use on managed computers.
Application Usage logs for the record are displayed.
23
Updating Adobe CS5/5.5
Updating Adobe CS5/5.5 involves the following steps:
1. Build a CS5/5.5 update package using AAMEE.
2. Add the update package to Casper Admin.
3. Create a smart computer group.
4. Deploy the update package.
Building an Adobe CS5/5.5 Update Package
1. Open AAMEE.
2. Choose to create a CS5/5.5 update package or modify an existing package. For complete instructions, see “Creating an Update-Only Package” in Adobe’s CS5 Enterprise Deployment Guide.
When you are finished, AAMEE creates a folder in the location that you specified at the beginning of the procedure.
Adding the Update Package to Casper AdminAdd the update package to Casper Admin so that you can deploy it using a policy.
1. Open Casper Admin and authenticate to the JSS.
24

2. Drag the package to the main repository in Casper Admin.
The package is displayed in blue text until you add it to a category.
3. Double-click the package in the main repository.
4. Click the General tab and choose a category for the package.
25
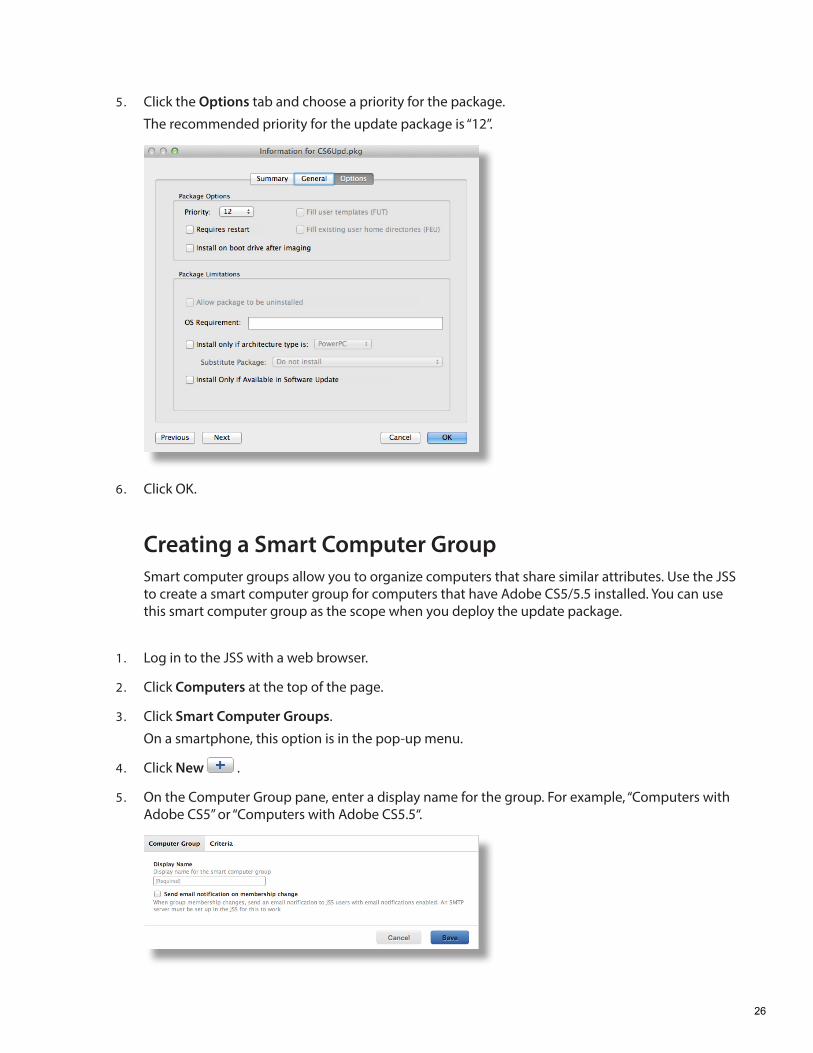
5. Click the Options tab and choose a priority for the package.
The recommended priority for the update package is “12”.
6. Click OK.
Creating a Smart Computer GroupSmart computer groups allow you to organize computers that share similar attributes. Use the JSS to create a smart computer group for computers that have Adobe CS5/5.5 installed. You can use this smart computer group as the scope when you deploy the update package.
1. Log in to the JSS with a web browser.
2. Click Computers at the top of the page.
3. Click Smart Computer Groups.
On a smartphone, this option is in the pop-up menu.
4. Click New .
5. On the Computer Group pane, enter a display name for the group. For example, “Computers with Adobe CS5” or “Computers with Adobe CS5.5“.
26
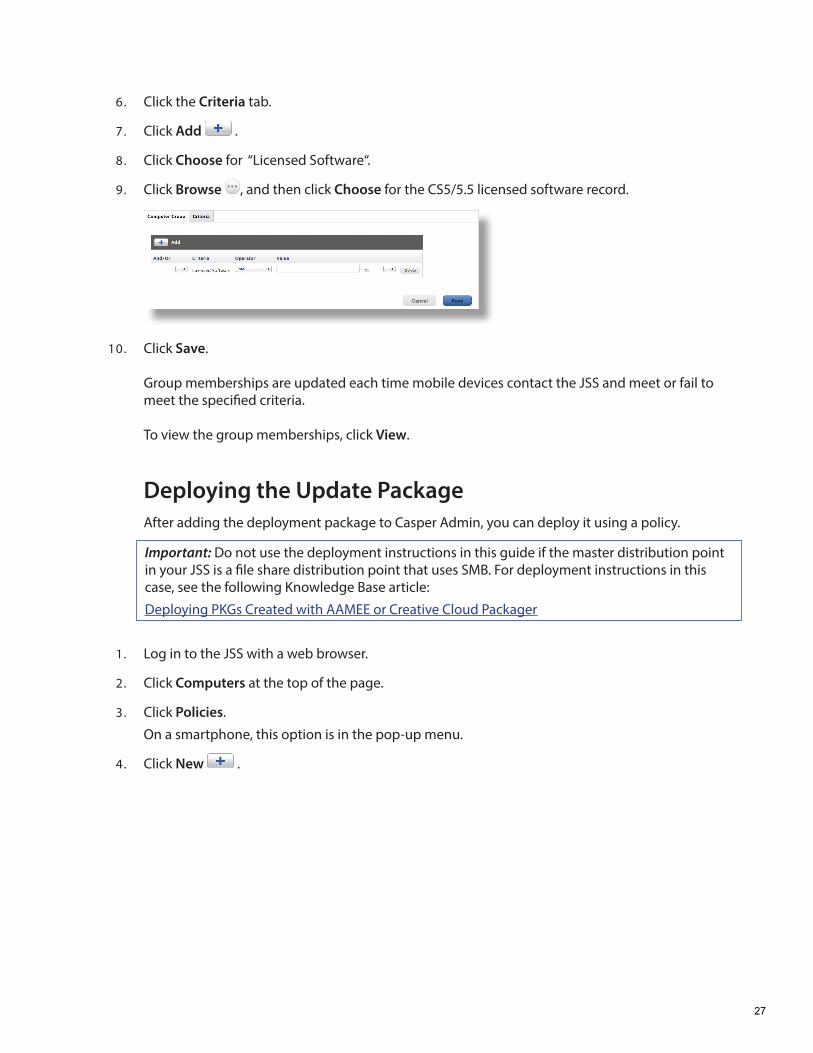
6. Click the Criteria tab.
7. Click Add .
8. Click Choose for “Licensed Software“.
9. Click Browse , and then click Choose for the CS5/5.5 licensed software record.
10. Click Save.
Group memberships are updated each time mobile devices contact the JSS and meet or fail to meet the specified criteria.
To view the group memberships, click View.
Deploying the Update PackageAfter adding the deployment package to Casper Admin, you can deploy it using a policy.
Important: Do not use the deployment instructions in this guide if the master distribution point in your JSS is a file share distribution point that uses SMB. For deployment instructions in this case, see the following Knowledge Base article:
Deploying PKGs Created with AAMEE or Creative Cloud Packager
1. Log in to the JSS with a web browser.
2. Click Computers at the top of the page.
3. Click Policies.
On a smartphone, this option is in the pop-up menu.
4. Click New .
27

5. In the General payload, enter a display name for the policy. For example, “Update Adobe CS5” or ”Update Adobe CS5.5”.
6. Select Login as the trigger.
7. Choose “Once per Computer” from the Execution Frequency pop-up menu.
8. Select the Packages payload and click Configure.
9. Click Add for the update package.
10. Choose “Install” from the Action pop-up menu.
11. Specify a distribution point for computers to download the package from.
28
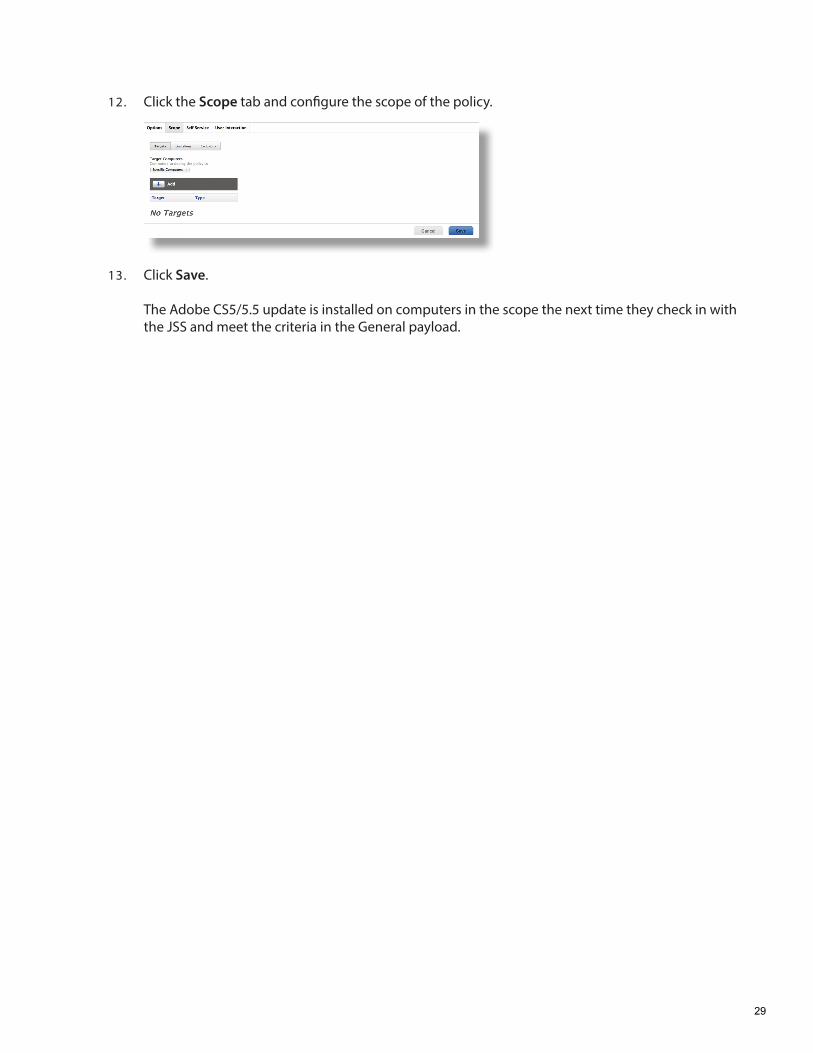
12. Click the Scope tab and configure the scope of the policy.
13. Click Save.
The Adobe CS5/5.5 update is installed on computers in the scope the next time they check in with the JSS and meet the criteria in the General payload.
29