Embed Size (px)
Citation preview

Addendum 26: Continuous-line Landscapes for Creative Fills
Addendum 26 - page 2© Michele Vangraan and Loes van der Heijden
About the Author: Michele Vangraan
Michele Vangraan is a certified educator with 40 years ofsewing experience, and 25 years of Graphic Designexperience. She is currently the business owner of Edge ToEdge Quilting, Inc., and also heads up the longarm trainingdepartment at a local sewing store. She writes manuals, andis a professional longarm quilter.
Michele was born in South Africa, and has been in the USAsince 1997. She uses Handi Quilter machines (the Avantéand the Infinity), and trains on the Baby Lock Crown Jewel aswell as Pro-Stitcher. She also uses a multi-needleprofessional embroidery machine. Her passion is Designing,and she loves to create new designs in Art and Stitch to useon her Pro-Stitcher software when she quilts and trains.
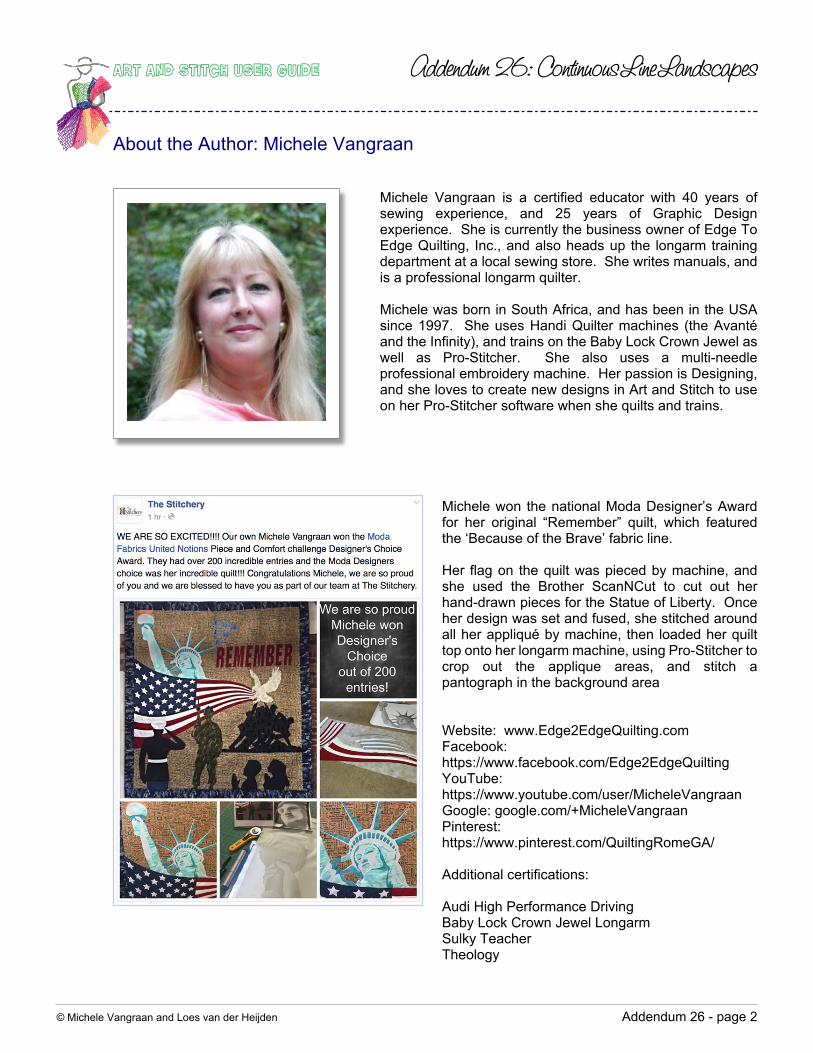
Michele won the national Moda Designer’s Awardfor her original “Remember” quilt, which featuredthe ‘Because of the Brave’ fabric line.
Her flag on the quilt was pieced by machine, andshe used the Brother ScanNCut to cut out herhand-drawn pieces for the Statue of Liberty. Onceher design was set and fused, she stitched aroundall her appliqué by machine, then loaded her quilttop onto her longarm machine, using Pro-Stitcher tocrop out the applique areas, and stitch apantograph in the background area
Website: www.Edge2EdgeQuilting.comFacebook:https://www.facebook.com/Edge2EdgeQuiltingYouTube:https://www.youtube.com/user/MicheleVangraanGoogle: google.com/+MicheleVangraanPinterest:https://www.pinterest.com/QuiltingRomeGA/
Additional certifications:
Audi High Performance DrivingBaby Lock Crown Jewel LongarmSulky TeacherTheology

Addendum 26 - page 3© Michele Vangraan and Loes van der Heijden
Introduction
What you will learn in this lesson:
You will learn how to simply trace multiple images, connecting them to form a free-flowing design, forminga continuous-line landscape pattern.
You will learn to save your landscape as either a Creative Fill, or for use as a full stitchout on your longarmmachine.
Definition of a Creative Fill:
A Creative Fill is a continuous line pattern, which can be used inside a shape by the function, “ApplyCreative Fill Effect”. Essentially, the computer will ‘cut out’ and place your Creative Fill inside the shape.
Advantage of a Creative Fill landscape design:
You can draw any continuous line pattern to be used as a Creative Fill. It will have the look and feel of afreehand background filler, with many elements and themes within one design.
You can sew any one of your creations on your computer guided system, or your embroidery machine.
It will be unique, and depending on which section of your design you insert your shape, you will have adifferent theme in your creative fill area.
TIP: The Creative Fill used in this Addendum is included in theArt and Stitch Library > Designers Collection:
“Michele Vangraan HeronBackgroundFill”
Addendum 26 - page 4© Michele Vangraan and Loes van der Heijden
Getting Started
A good place to start is to search online for “Lineart Images”
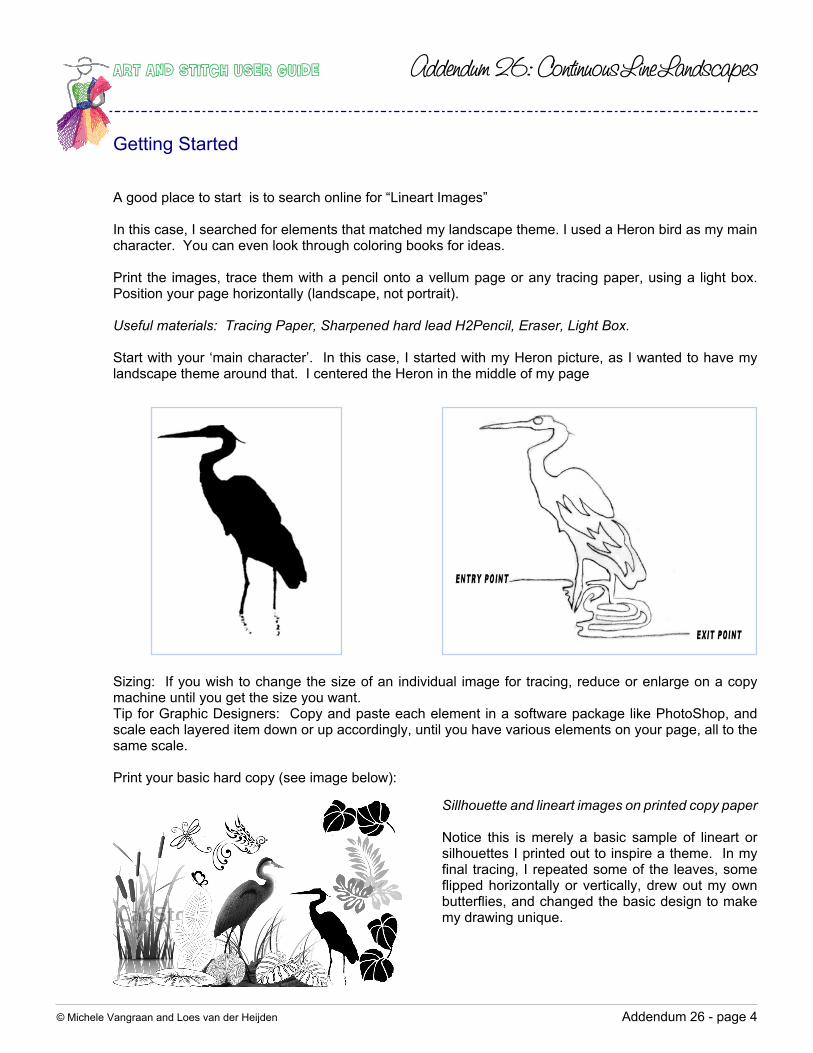
In this case, I searched for elements that matched my landscape theme. I used a Heron bird as my maincharacter. You can even look through coloring books for ideas.
Print the images, trace them with a pencil onto a vellum page or any tracing paper, using a light box.Position your page horizontally (landscape, not portrait).
Useful materials: Tracing Paper, Sharpened hard lead H2Pencil, Eraser, Light Box.
Start with your ‘main character’. In this case, I started with my Heron picture, as I wanted to have mylandscape theme around that. I centered the Heron in the middle of my page
Sizing: If you wish to change the size of an individual image for tracing, reduce or enlarge on a copymachine until you get the size you want.Tip for Graphic Designers: Copy and paste each element in a software package like PhotoShop, andscale each layered item down or up accordingly, until you have various elements on your page, all to thesame scale.
Print your basic hard copy (see image below):
Sillhouette and lineart images on printed copy paper
Notice this is merely a basic sample of lineart orsilhouettes I printed out to inspire a theme. In myfinal tracing, I repeated some of the leaves, someflipped horizontally or vertically, drew out my ownbutterflies, and changed the basic design to makemy drawing unique.

Addendum 26 - page 5© Michele Vangraan and Loes van der Heijden
Getting Started - Cont’d
Leaf Tracing example
Here is an example of how I changed the staggeredlines in the leaves to continuous line drawings.
Look for any lineart or silhouette designs that gowith your theme, and place them under your tracingpaper at different places, tracing the outline of yourimages only.
Getting prepared to freehand trace your printed design with a pencil:
Tip: Position yourself comfortably at a desk, where you will find it easy to draw freehand comfortably.
With your pencil, start tracing a CONTINUOUS LINE around your elements, adding definition whereneeded. Fill blank/white spaces with ECHOING around elements, moving your pencil continuously to thenext element, and so on. Don’t be shy to rub out and redraw lines you don’t like. It will all come togetheras you practice.
Sample of Continuous Line Drawing from lineart images
The key here, is to have ONE START POINT and ONE END POINT

Addendum 26 - page 6© Michele Vangraan and Loes van der Heijden
Trace in Art and Stitch
Is your drawn image ready for bringing into in Art and Stitch?
Option 1: Scanning
First scan your penciled image, save it as a jpeg file, bring into Art and Stitch as a Backdrop
With your image as a backdrop, trace your drawing, using Art and Stitch drawing tools in the ArtworkToolbar

Addendum 26 - page 7© Michele Vangraan and Loes van der Heijden
This is how your screen will look while tracing on a Wacom tablet. Use the Arc tool and Curve tool, wheresuitable:
Option 2: Drawing on a Tablet
I used a Wacom Tablet connected to my computer to draw straight into Art & Stitch:
Trace in Art and Stitch - Cont’d
Addendum 26 - page 8© Michele Vangraan and Loes van der Heijden
Tie objects together while drawing or afterwards
It will be difficult to finish an entire landscape in one run. It’s easier to draw it in segments: draw a part andright-click to finish that segment.Whenever you right-click between objects and start a new element, there are two options to tie the newobject to the existing drawing:
While drawing - use Connect to Path
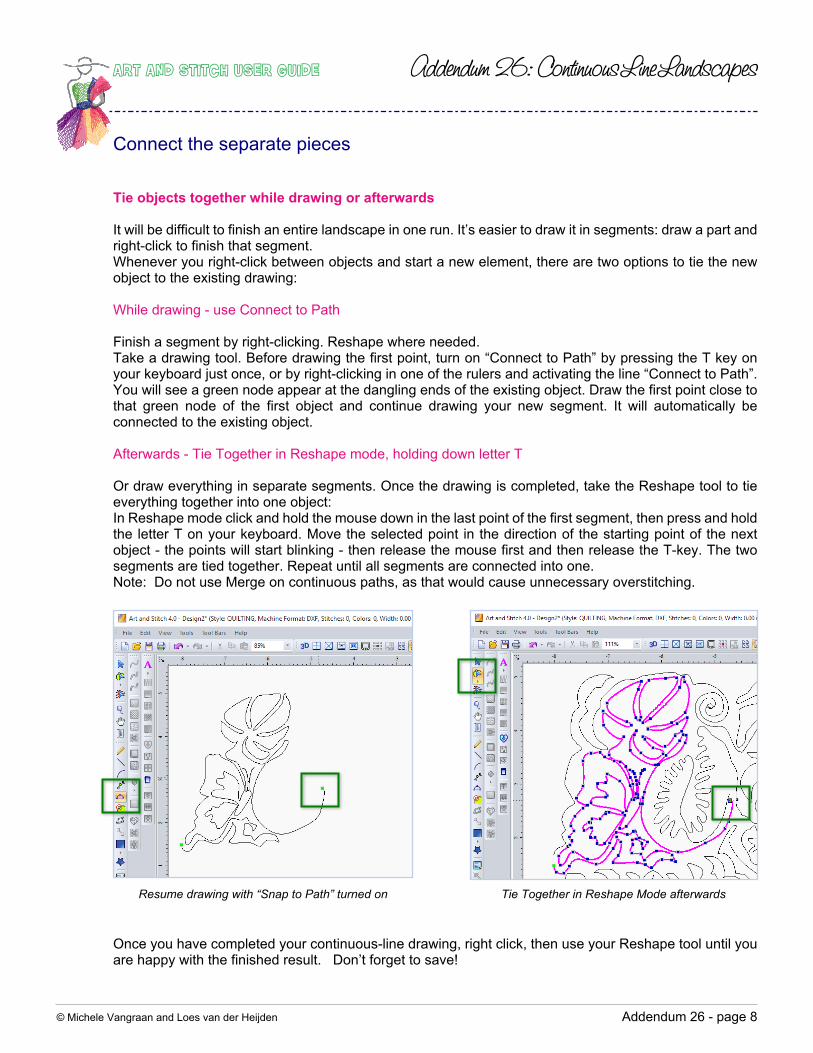
Finish a segment by right-clicking. Reshape where needed.Take a drawing tool. Before drawing the first point, turn on “Connect to Path” by pressing the T key onyour keyboard just once, or by right-clicking in one of the rulers and activating the line “Connect to Path”.You will see a green node appear at the dangling ends of the existing object. Draw the first point close tothat green node of the first object and continue drawing your new segment. It will automatically beconnected to the existing object.
Afterwards - Tie Together in Reshape mode, holding down letter T
Or draw everything in separate segments. Once the drawing is completed, take the Reshape tool to tieeverything together into one object:In Reshape mode click and hold the mouse down in the last point of the first segment, then press and holdthe letter T on your keyboard. Move the selected point in the direction of the starting point of the nextobject - the points will start blinking - then release the mouse first and then release the T-key. The twosegments are tied together. Repeat until all segments are connected into one.Note: Do not use Merge on continuous paths, as that would cause unnecessary overstitching.
Connect the separate pieces
Once you have completed your continuous-line drawing, right click, then use your Reshape tool until youare happy with the finished result. Don’t forget to save!
Resume drawing with “Snap to Path” turned on Tie Together in Reshape Mode afterwards

Addendum 26 - page 9© Michele Vangraan and Loes van der Heijden
Saving your created landscape design as an area fill
Select the landscape drawing and choose menu Tools > Save into Library. Save in the folder “MyShapes”. Also choose menu File > Save as, and save as a backdrop copy in your own folder, named“Backup My Library”.
Applying the Creative Fill Effect
Start a new Design Page and click on the Library button. Choose the creative fill you made.
Note:Rules for Applying your Creative FillRule 1: Creative Fills must be one continuous artwork pathRule 2: The ‘masking shape’ you choose (eg. a heart in this case), must be a closed artwork shape on topof the creative fill.Rule 3: Both artwork objects must be selected together (select ALL)
Click again on the Library button and choose a shape to be filled with your pattern. In this example, I useda Heart from the Shapes folder. Select the shape and make it a different color than the fill.Change the Pen width to 1.0 (right of screen in Properties), in order to see heart shape more clearly
Saving and using your landscape as Creative Fill
Press Ctrl+A to Select All and click on the Apply Creative Fill effect button.
Addendum 26 - page 10© Michele Vangraan and Loes van der Heijden
Saving and using your landscape as Creative Fill - cont’d
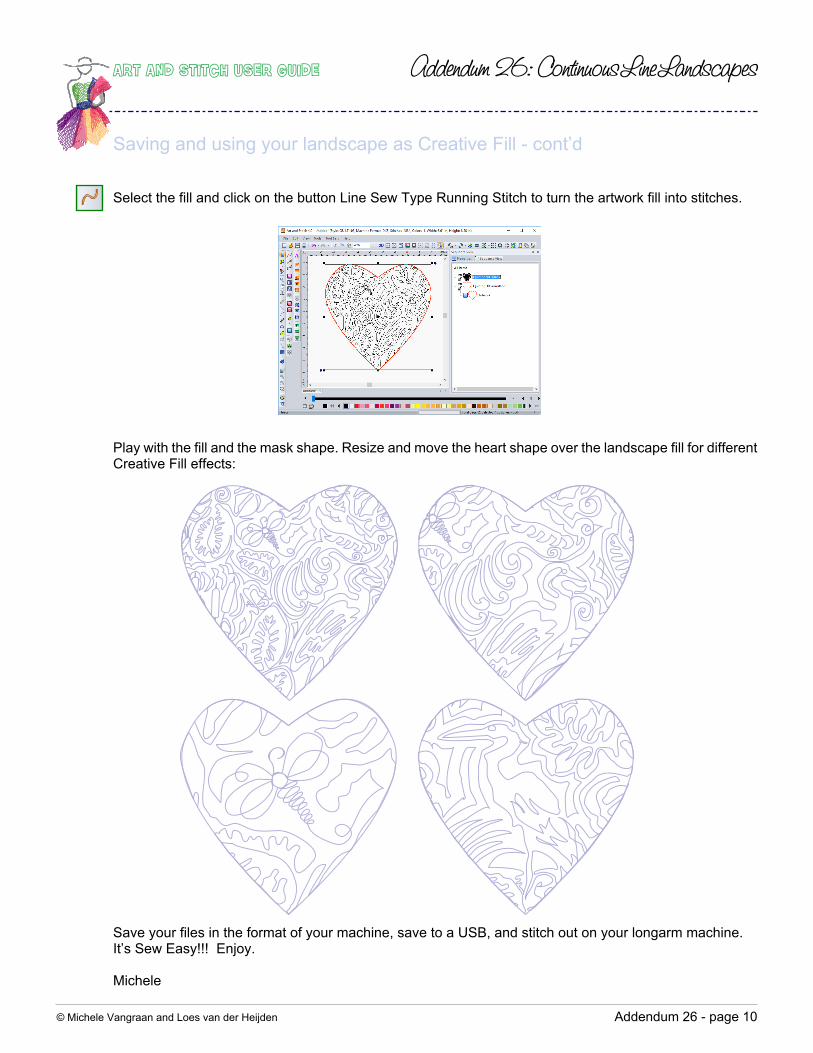
Select the fill and click on the button Line Sew Type Running Stitch to turn the artwork fill into stitches.
Save your files in the format of your machine, save to a USB, and stitch out on your longarm machine.It’s Sew Easy!!! Enjoy.
Michele
Play with the fill and the mask shape. Resize and move the heart shape over the landscape fill for differentCreative Fill effects: