Embed Size (px)
Citation preview

(P.N. 3136611622 - Revision D, Apr 2014) © Adam Equipment Company 2014
Adam Equipment
WARRIOR SERIES USER MANUAL
SW Ver. 1.24
Adam Equipment strives to be more environmentally focused and uses recycled materials and environmentally friendly packaging where possible. As part of this initiative we have developed a short manual that uses less paper and ink to describe the main functions of your new Adam product. A complete version is available at www.adamequipment.com. Thank you for your support of Adam Equipment.

(P.N. 3136611622 - Revision D, Apr 2014) © Adam Equipment Company 2014
ENGLISH: P 1 - 18
FRANÇAIS: P 19 - 37
DEUTSCH: P 38 - 55
ESPAÑOL: P 56 - 75
ITALIANO: P 76 - 94
EU DECLARATION: P 95

EN
© Adam Equipment Company 2014 1 (P.N. 3136611622 - Revision D, Apr 2014)
CONTENTS
1.0 INTRODUCTION .................................................................................................................................. 2 2.0 SPECIFICATIONS ................................................................................................................................ 3 3.0 INSTALLATION .................................................................................................................................... 4
3.1 UNPACKING .................................................................................................................................... 4 3.2 LOCATING ....................................................................................................................................... 4 3.3 SETTING UP THE SCALES ............................................................................................................ 5
4.0 KEY DESCRIPTIONS........................................................................................................................... 6 5.0 DISPLAYS ............................................................................................................................................ 7 6.0 OPERATION ......................................................................................................................................... 8
6.1 ZEROING THE DISPLAY................................................................................................................. 8 6.2 TARING ............................................................................................................................................ 8 6.3 WEIGHING A SAMPLE .................................................................................................................... 9 6.4 PARTS COUNTING ....................................................................................................................... 10 6.5 CHECK-WEIGHING ....................................................................................................................... 10 6.6 ACCUMULATED TOTAL ............................................................................................................... 11 6.7 PERCENTAGE WEIGHING ........................................................................................................... 11 6.8 ANIMAL (Dynamic) WEIGHING ..................................................................................................... 11
7.0 USER PARAMETERS ........................................................................................................................ 11 8.0 BATTERY OPERATION ..................................................................................................................... 12 9.0 RS-232 INTERFACE .......................................................................................................................... 12
9.1 INPUT COMMANDS FORMAT ...................................................................................................... 13 10.0 RELAY INTERFACE........................................................................................................................... 13 11.0 CALIBRATION .................................................................................................................................... 14 12.0 SERVICE PARAMETERS .................................................................................................................. 15
12.1 USING THE SERVICE PARAMETERS ......................................................................................... 15 13.0 ERROR CODES ................................................................................................................................. 16 WARRANTY INFORMATION ........................................................................................................................ 16

EN
© Adam Equipment Company 2014 2 (P.N. 3136611622 - Revision D, Apr 2014)
1.0 INTRODUCTION
• The WARRIOR series provide accurate, fast and versatile general
purpose type weighing scales with parts counting, percentage weighing and check-weighing functions.
• The WARRIOR has LED’s next to the display to indicate when a weight is below the low limit, in between the limits or above the high limit. These can work in conjunction with an audible alarm for check weighing as well as the display showing LO, OK and HI.
• The WARRIOR is supplied with a RS-232 bi-directional interface and real time clock (RTC).
• The WARRIOR has a sealed keypad with colour coded membrane switches, a large easy to read liquid crystal display (LCD) and a green backlight.
• Included functions are automatic zero tracking, semi-automatic tare and an accumulation facility that allows the weight to be stored and recalled as an accumulated total.

EN
© Adam Equipment Company 2014 3 (P.N. 3136611622 - Revision D, Apr 2014)
2.0 SPECIFICATIONS
Model # WSK 8 WSK 16a
WSK 16 WSK 35a
WSK 32 WSK 70a
WBK 32 WBK 70a
WBK 32H WBK70aH
WBK 75 WBK 165a
Maximum Capacity
8000g/16lb 16kg/35lb 32kg/70lb 32kg/70lb 32kg/70lb 75kg/165lb
Readability 0.5g/0.001lb 0.001kg/ 0.002lb
0.002kg/ 0.005lb
0.002kg/ 0.005lb
0.001kg/ 0.002lb
0.005kg/ 0.01lb
Resolution 1:16000 1:16000 1:16000 1:16000 1:32000 1:15000
Repeatability (Std. Dev)
1g/0.002lb 0.002kg/ 0.004lb
0.004kg/ 0.01lb
0.004kg/ 0.01lb
0.002kg/ 0.004lb
0.01kg/ 0.02lb
Linearity + 1g/0.002lb 0.002kg/ 0.004lb
0.004kg/ 0.01lb
0.004kg/ 0.01lb
0.002kg/ 0.004lb
0.01kg/ 0.02lb
Pan size w x d
250mm x 250mm/ 9.8in x 9.8in 300mm x 400mm/ 11.8in x 15.7in
Units of Measure
g / Kg / Lb / Lb:oz / Newtons / Ounces
Model # WFK 75 WFK 165a
WFK 75H WFK 165aH
WFK 150 WFK 330a
WLK 150 WLK 330a
Maximum Capacity
75kg/165lb 75kg/165lb 150kg/330lb 150kg/330lb
Readability 0.005kg/0.01lb 0.001kg/0.002lb 0.01kg/0.02lb 0.01kg/0.02lb
Resolution 1:15000 1:75000 1:15000 1:15000
Repeatability (Std. Dev)
0.01kg/0.02lb 0.002kg/0.004b 0.02kg/0.04lb 0.02kg/0.04lb
Linearity + 0.01kg/0.02lb 0.002kg/0.004lb 0.02kg/0.04lb 0.02kg/0.04lb
Pan size w x d
400mm x 500mm/ 15.7in x 19.7in 450mm x
600mm/ 17.7in x 23.6in
Units of Measure
g / Kg / Lb / Lb:oz / Newtons/Ounces
COMMON SPECIFICATIONS FOR ALL MODELS
Stabilization Time 2-3 Secs
Operating Temperature -10°C to +40°C / +32°F to +104°F
Power Supply + 6v 4.5Ah battery
12vDC 800mA External adaptor
Calibration External
Calibration Mass User Selectable
Display Backlit Green display 40mm high digits with capacity tracker
Balance Housing 304 Stainless steel housing, IP66 rated
EN
© Adam Equipment Company 2014 4 (P.N. 3136611622 - Revision D, Apr 2014)
3.0 INSTALLATION
3.1 UNPACKING
The WARRIOR scales have already been adjusted to work with a platform and have been configured for this application. The platform and indicator have been calibrated as a pair and must be used together.
3.2 LOCATING
• The scales should not be placed in a location that will reduce the accuracy.
• Avoid extremes of temperature. Do not place in direct sunlight or near air conditioning vents.
• Avoid unsuitable tables. The table or floor must be rigid and not vibrate.
• Avoid unstable power sources. Do not use near large users of electricity such as welding equipment or large motors.
• Do not place near vibrating machinery.
• Avoid high humidity that might cause condensation. Avoid direct contact with water. Do not spray or immerse the scales in water.
• Avoid air movement such as from fans or opening doors. Do not place near open windows or air-conditioning vents.
• Keep the scales clean. Do not stack material on the scales when they are not in use.

EN
© Adam Equipment Company 2014 5 (P.N. 3136611622 - Revision D, Apr 2014)
3.3 SETTING UP THE SCALES
• Remove the Indicator from its box and fix it to the U shaped bracket using the 2 x fixing handles. Take the Indicator and place it onto the pillar ensuring the slack cable is pushed inside. Fix the Indicator to the pillar using the screw provided.
• Remove all upper internal packaging, place the pillar into the base
bracket fitting and remove the complete machine from the box. Remove any plastic bags that may have been used for protection.
• Fix the pillar to the base bracket fitting using the screws provided
• Adjust the viewing angle of the Indicator to the ideal position and
tighten the 2 x locking handles.
• Level the scale by adjusting the five feet on the WSK/WBK or the four feet on the WFK/WLK. If the scale rocks re-adjust the feet. NOTE: Use of a food-safe grease is recommended on the threaded part of the feet to keep them turning freely.
• Attach the power to the indicator and press the [On/Off] key. The software revision number will be displayed followed by a self-test showing all digits before the zero is displayed along with the unit of weight that was last used.
• Optional connections to RS232 port and relay wiring port should be made if required.

EN
© Adam Equipment Company 2014 6 (P.N. 3136611622 - Revision D, Apr 2014)
4.0 KEY DESCRIPTIONS
Used to reset the display to zero. Tares the scale. Used to deduct and store the weight currently on the scale if it is not required as part of the final weighing result. A secondary function, is of an “Enter” key used when setting up a value for the Parameters.
Selects parts counting. Used to set the sample quantities while parts counting. A secondary function � is of incrementing the active digit when setting a value for Parameters.
Selects the weighing unit to be displayed from those which are enabled. See parameter S1 in the full manual.
A secondary function is to move the active/flashing digit to the left when setting values for Parameters.

EN
© Adam Equipment Company 2014 7 (P.N. 3136611622 - Revision D, Apr 2014)
Selects the Function parameters of the scale.
A secondary function (C) is to act as a clear key when clearing an accumulated total.
Sends the results to a PC or a Printer using the RS-232 interface. It also adds the value to the accumulation memory if the accumulation function is not automatic.
A secondary function (ESC) is to return to normal operation when the scale is in a Parameter setting mode.
To switch the Indicator on or off. The WARRIOR will store the weighing unit and the check weighing values currently in use if power is powered off. These will be re called when the Indicator is next powered on
5.0 DISPLAYS
The LCD display will show a value as well as the unit currently being used. In addition the LED’s above the display will show when a weight is below, inside or above the check-weighing limits.
Other symbols will show when a weight has been tared (NET), the scale is at zero and stable, if a value has been stored in memory, or when the animal weighing function has been enabled. A battery symbol will show the state of charge of the internal battery.

EN
© Adam Equipment Company 2014 8 (P.N. 3136611622 - Revision D, Apr 2014)
6.0 OPERATION
6.1 ZEROING THE DISPLAY
• You can press the [0/T] key at any time to set the display to zero. This will usually be when the platform is empty. When the zero point is obtained the display will show an indicator for zero.
• The scale has an automatic re-zeroing function to account for minor drifting or accumulation of material on the platform. However you may need to press the [0/T] key to re zero the scale if small amounts of weight are shown when the platform is empty.
6.2 TARING
• Zero the scale by pressing the [0/T] key if necessary. The “ZERO” indicator will be ON.
• Place a container on the platform and a value for its weight will be displayed.
EN
© Adam Equipment Company 2014 9 (P.N. 3136611622 - Revision D, Apr 2014)
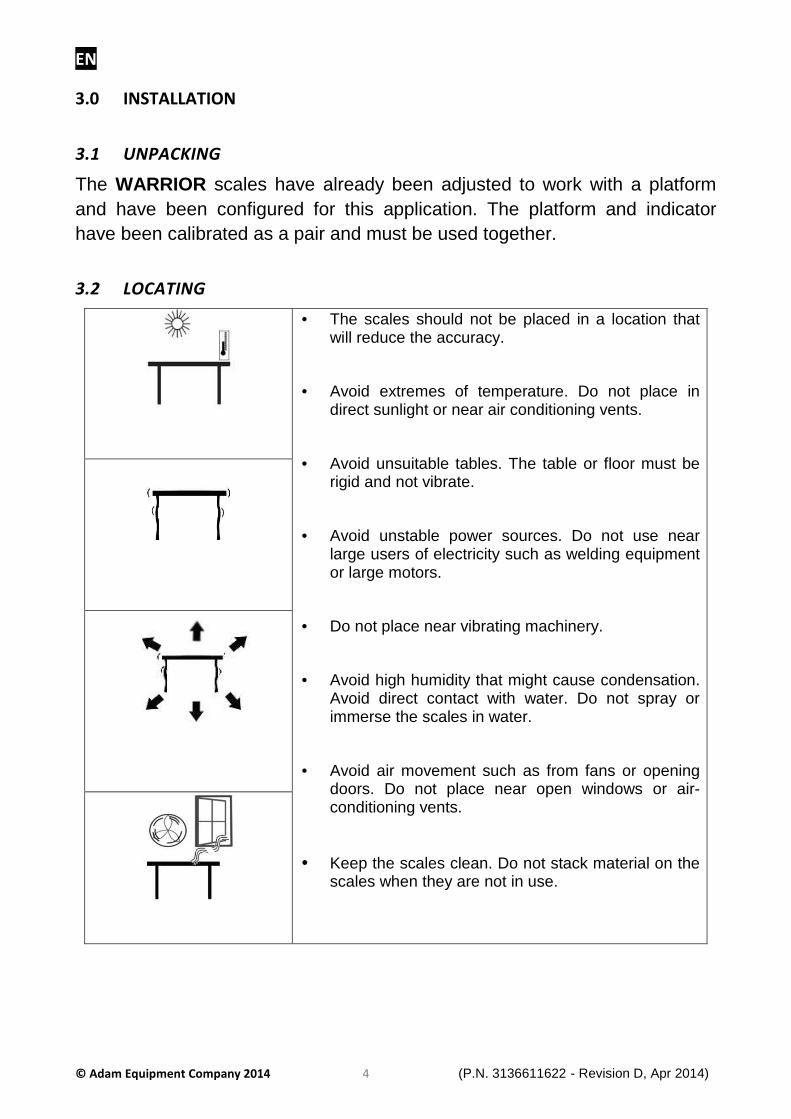
• Press the [0/T] key to tare the scale. The weight is deducted and stored as the tare value leaving zero on the display. The “NET” indicator will be ON and as a product is added only the net weight of the product will be shown. The scale could be tared a second time if another type of product was to be added to the first one. Again only the weight that is added after taring will be displayed.
NOTE: The “NET” indicator will only be ON when the tare weight
exceeds 4% (+/- 2weighing divisions) of the scale capacity.
• When the container is removed a negative value will be shown. If the scale was tared just before removing the container this value is the gross weight which includes the container and the entire product it contains. The “ZERO” indicator will be on to indicate that the platform is back to the same condition as it was when zero was last set.
• To delete a Tare value, press [0/T] when the pan is empty.
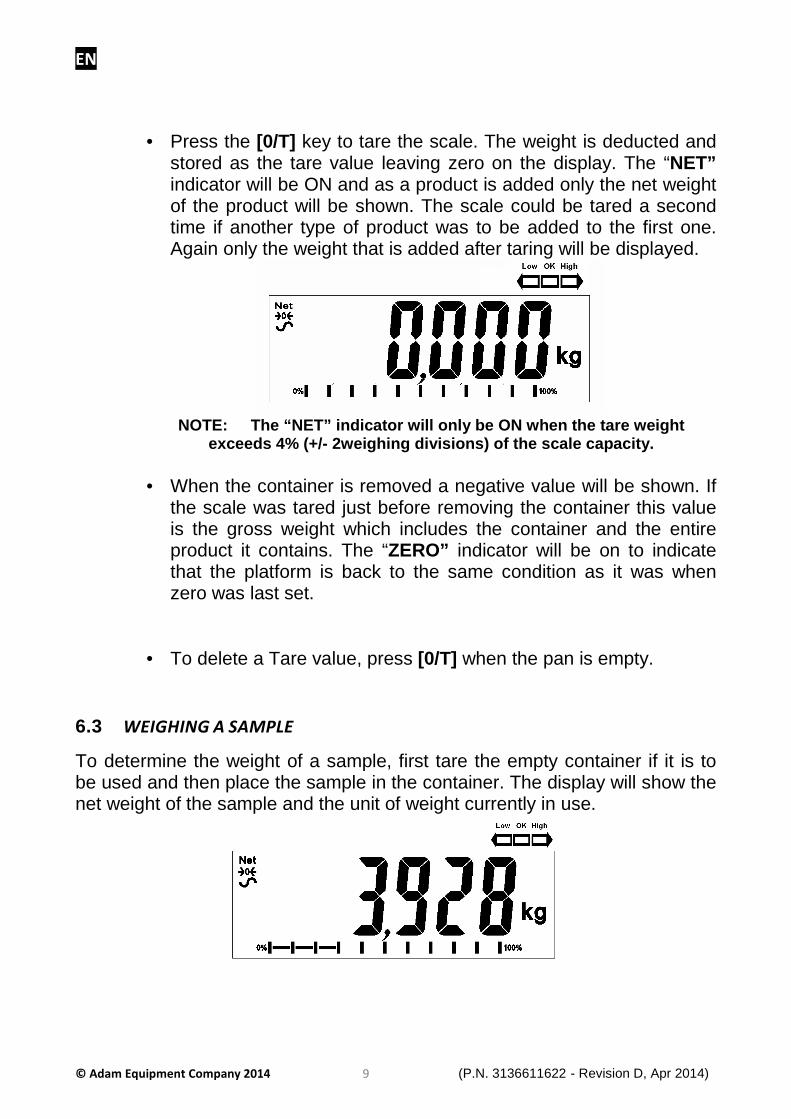
6.3 WEIGHING A SAMPLE
To determine the weight of a sample, first tare the empty container if it is to be used and then place the sample in the container. The display will show the net weight of the sample and the unit of weight currently in use.

EN
© Adam Equipment Company 2014 1 0 (P.N. 3136611622 - Revision D, Apr 2014)
6.4 PARTS COUNTING If parts counting is enabled (see section full user manual), it is possible to count parts using a sample of the parts to determine an average piece weight.
• If using an empty container, place the container on the top pan and press [0/T] to zero the display. Press the [PCS] key to enter parts counting mode.
• The scale will show “P 10”. Change the sample size to the desired
quantity by pressing the [PCS/�] key. It will cycle through the options: 10, 20, 50, 100, 200 and back to 10.
• Place the nominated sample size into the container and press
[0/T]. The sample number should match the sample amount options available for parts counting, i.e., 10, 20, 50, 100 or 200 pieces.
• The display will now show the amount of parts in the container,
and as more parts are added the display will increase to show the number of parts in the container at that time. (PCS).
Pressing the [Unit/ ] key will display the net weight (PCS and kg), pressing it a second time will display the unit weight (g/pcs), and the third time will display the count again (PCS).
• Press the [PCS/�] key to return to normal weighing. Press the [PCS/�] key again to start counting a different sample.
6.5 CHECK-WEIGHING Check-weighing is a procedure where the LED’s come on (and if enabled, an alarm to sound) when the weight on the scale meets values stored in memory. The memory holds the last values for a high and a low limit when the power is turned off. The user can set either one limit or both, see the full version of the user manual for details of the check weighing function.

EN
© Adam Equipment Company 2014 1 1 (P.N. 3136611622 - Revision D, Apr 2014)
6.6 ACCUMULATED TOTAL The scale can be set to accumulate manually by pressing the [Print/M+/Esc] key, or automatically when a weight is removed from the scale. See full version of the user manual for complete details. 6.7 PERCENTAGE WEIGHING The scale can be set to perform percentage weighing. See full version of the user manual for complete details. 6.8 ANIMAL (DYNAMIC) WEIGHING The scale can be set to animal (dynamic) weighing for weighing any items that are unstable or may move. See full version of the user manual for complete details.
7.0 USER PARAMETERS
Pressing the [Func/C] key during normal operation allows the user to access the parameters for customizing the scale. The parameters are split into 4 groups- 1. Check weighing parameters, 2. Percentage and Animal Weighing Functions 3. RS-232 parameters 4. Scale parameters
• When [Func/C] is pressed the display will first show “FunC 1” for Check weighing parameters.
• Press either the [Func/C] key or the [Pcs/����] to advance through
the groups “FunC 1”, “FunC 2” , “FunC 3” and “FunC 4”. When the required function is displayed, press [����0/T] to enter the sub-menu for setting desired parameters for this function.
• When in one of the sections press [Print/M+/Esc] to regress one
step each time. If you press [Print/M+/Esc] repeatedly, you will exit the User Parameter section and return to normal weighing.
Complete details of all parameters can be found in of the full version of the user manual.

EN
© Adam Equipment Company 2014 1 2 (P.N. 3136611622 - Revision D, Apr 2014)
8.0 BATTERY OPERATION
• The scales can be operated from the battery if desired. The battery life can be up to 70 hours depending on the load cells and how the backlight is used.
• A battery symbol is shown on the display which indicates the
current charge of the battery, 3 bars means fully charged. When just the outline of the battery and no bars are visible the battery needs to be re charged.
• To charge the battery, simply plug the adaptor into the mains
power, and also into the input connector on the rear of the Indicator marked DC 12V. The scale does not need to be turned on.
• The battery should be charged for 12 hours to reach full capacity.
• Near the display is an LED to indicate the status of battery
charging. When the scale is plugged into the mains power the internal battery will be charged. If the LED is green the battery has a full charge. If it is red the battery is nearly discharged and yellow indicates the battery is being charged.
9.0 RS-232 INTERFACE
The Warrior indicator is supplied with bi-directional RS-232 interface as standard. The scale, when connected to a printer or computer outputs the weight with the selected weighing unit through the RS-232 interface. Specifications:
RS-232 output of weighing data
ASCII code
600 - 19200 Baud (user selectable, default 9600)
8 data bits, No Parity, 1 stop bit, no flow control

EN
© Adam Equipment Company 2014 1 3 (P.N. 3136611622 - Revision D, Apr 2014)
The RS-232 serial interface is located inside the housing, access is gained by removing the 8 x case screws whereby connections can be made to COM 1 as shown below.
RXT Received Data
TXT Transmitted Data
GND Signal Ground
The cable used should be routed through the gland marked RS 232 on the case and tightened securely to ensure a watertight connection is made.
The scale can be set to print text in English, French, German or Spanish. See the RS-232 parameters section for details
9.1 INPUT COMMANDS FORMAT
The scale can be controlled with the following commands. Press the [Enter] key of the PC after each command.
T<cr><lf>
Tares the scale to display the net weight. This is the same as pressing [0/T] .
Z<cr><lf>
Sets the zero point for all subsequent weighing. The display shows zero.
P<cr><lf>
Prints the results to a PC or printer using the RS-232 interface. It also adds the value to the accumulation memory if the accumulation function is not set to automatic.
10.0 RELAY INTERFACE
The indicator is supplied with drivers to control external relays. The drivers could be used to control a number of different relays depending upon the users needs. The relay drivers are isolated outputs requiring the use of an external power supply and the relay option kit. See of the full version of the user manual for complete details.
EN
© Adam Equipment Company 2014 1 4 (P.N. 3136611622 - Revision D, Apr 2014)
11.0 CALIBRATION
The scale can be calibrated using the following procedure. To enter this procedure it is necessary to use Func 4 which is accessible using the [Func/C] key as described in section 7.4 in the full manual, or by using the passcode access as described in section 12.0.
The scales calibrate using either metric or pound weights depending on the weighing unit being used before calibration. The display will show either "kg" or "lb" to identify the weights expected.
PROCEDURE
• Enter the calibration section using Func 4, C8 CAL or using the passcode as described in section 12.0.
• The display will show "unLoAd".
• Remove any weight from platform and when the stable symbol is on press [0/T] .
• The display will show "Ld" then “0000XX” which shows the last calibration weight used. Place this calibration weight on the scale and press the [0/T] key. If the weight you put on the scale does not match the value displayed, press the [Func/C] key to clear the vale then use the [Unit/ ] key and [PCS/�] key to set the correct value. When it is correct press [0/T] .
• If the calibration is acceptable the scale will run a self-test during which the calibration weight should be removed. If an error message “FAiL L” is shown try calibration again as a disturbance may have prevented a successful calibration.
After calibration the scale should be checked to verify the calibration is correct. If necessary repeat the calibration making sure that the scale is stable before accepting any weight.

EN
© Adam Equipment Company 2014 1 5 (P.N. 3136611622 - Revision D, Apr 2014)
12.0 SERVICE PARAMETERS
The scales will allow entry to the parameters if the [Tare] key is pressed during the power on cycle. The passcodes work as explained earlier. In this case the display will show the passcode request screen, “ P - - - - “ . To continue enter a passcode as described below. Entering passcode 0000 will allow calibration as shown in section 11. Entering 1000 will allow access to a limited set of parameters described in section 12.1.
12.1 USING THE SERVICE PARAMETERS
Press the [0/T] key during the display countdown when turning on, When “Pn“ is displayed, enter the number 1000 using the [Unit/ ] and [PCS/�] keys and then press [0/T] . The display will show the first parameter called “F4 Int”. To select another parameter press the [PCS/�] key which will advance through the parameters available. Full details are in the full version of the user manual.

EN
© Adam Equipment Company 2014 1 6 (P.N. 3136611622 - Revision D, Apr 2014)
13.0 ERROR CODES
ERROR CODES
DESCRIPTION SUGGESTIONS
- -oL - - Over-range Remove weight from the scale. If the problem persists contact your dealer or Adam Equipment for assistance.
Err 1 Time Setting Error
Enter time using correct format and reasonable values. Format: hh:mm:ss
Err 2 Date Setting Error
Enter date using correct format and reasonable values. Format: yy:mm:dd
Err 4 Zero Setting Error
The scale was outside the normal zero setting range either when it was turned on, or when the [Zero] key was pressed. Remove weight from the scale and try re-zeroing again. Use the [0/T] key to set the display to zero value. If the problem persists contact your dealer or Adam Equipment for assistance.
Err 6 A/D out of range The values from the A/D converter are outside the normal range. Remove the weight from the scale if overloaded. Make sure the pan is fitted correctly. Indicates the load cell or the electronics may be faulty. If the problem persists contact your dealer or Adam Equipment for assistance.
Err 7 100% weight out of range
Weight value set as 100% for percentage weighing must be greater than 50 weighing divisions of the scale.
Err 9 Check weigh limits error
Shown if the low limit is set higher than the current high limit. Reset High limit or change the low limit.
FAIL Calibration error.
Improper calibration (should be within + 10% of the factory calibration). The old calibration data will be retained until the calibration process is complete. If the problem persists contact your dealer or Adam Equipment for assistance.

EN
© Adam Equipment Company 2014 1 7 (P.N. 3136611622 - Revision D, Apr 2014)
WARRANTY STATEMENT
Adam Equipment offers Limited Warranty (Parts and Labour) for any components that fail due to defects in materials or workmanship. Warranty starts from the date of delivery.
During the warranty period, should any repairs be necessary, the purchaser must inform its supplier or Adam Equipment Company. The company or its authorised Technician reserves the right to repair or replace the components at any of its workshops at no additional cost, depending on the severity of the problems. However, any freight involved in sending the faulty units or parts to the Service Centre should be borne by the purchaser.
The warranty will cease to operate if the equipment is not returned in the original packaging and with correct documentation for a claim to be processed. All claims are at the sole discretion of Adam Equipment.
This warranty does not cover equipment where defects or poor performance is due to misuse, accidental damage, exposure to radioactive or corrosive materials, negligence, faulty installation, unauthorised modifications or attempted repair, or failure to observe the requirements and recommendations as given in this User Manual.
This product may include a rechargeable battery that is designed to be removed and replaced by the user. Adam Equipment warrants that it will provide a replacement battery if the battery manifests a defect in materials or workmanship during the initial period of use of the product in which the battery is installed.
As with all batteries, the maximum capacity of any battery included in the product will decrease with time or use, and battery cycle life will vary depending on product model, configuration, features, use, and power management settings. A decrease in maximum battery capacity or battery cycle life is not a defect in materials or workmanship, and is not covered by this Limited Warranty.
Repairs carried out under the warranty do not extend the warranty period. Components removed during warranty repairs become company property.
The statutory rights of the purchaser are not affected by this warranty. The terms of this warranty is governed by the UK law. For complete details on Warranty Information, see the terms and conditions of sale available on our web-site.

EN
© Adam Equipment Company 2014 1 8 (P.N. 3136611622 - Revision D, Apr 2014)
This manual covers the details of operation. If you have a problem with the scale that is not directly addressed by this manual then contact your supplier for assistance. In order to provide further assistance, the supplier will need the following information which should be kept ready:
A. Details of your company
- Name of your company: - Contact person’s name: - Contact telephone, e-mail, - Fax or any other methods: B. Details of the unit purchased
(This part of information should always be available for any future correspondence. We suggest you to fill in this form as soon as the unit is received and keep a print-out in your record for ready reference.)
Model name of the scale:
Serial number of the unit:
Software revision number
(Displayed when power is first turned on):
Date of Purchase:
Name of the supplier and place:
C. Brief description of the problem
Include any recent history of the unit. For example:
-Has it been working since it’s delivered
-Has it been in contact with water
-Damaged from a fire
-Electrical Storms in the area
-Dropped on the floor, etc.

FR
© Adam Equipment Company 2014 1 9 (P.N. 3136611622 - Revision D, Apr 2014)
Adam Equipment
SERIE WARRIOR MANUEL D’UTILISATION
Adam Equipment s’efforce d’être plus axé sur l’environnement et utilise des matériaux recyclés et des emballages respectueux de l’environnement lorsque cela est possible. Dans le cadre de cette initiative, nous avons développé un manuel compact qui utilise moins de papier et d’encre pour décrire les principales fonctions des nouveaux produits Adam. Une version complète est disponible sur le site www.adamequipment.com. Nous vous remercions de soutenir Adam Equipment dans cette action.

FR
© Adam Equipment Company 2014 2 0 (P.N. 3136611622 - Revision D, Apr 2014)
SOMMAIRE
1.0 INTRODUCTION ................................................................................................................................. 21 2.0 CARACTERISTIQUES ........................................................................................................................ 22 3.0 INSTALLATION ................................................................................................................................... 24
3.1 DEBALLAGE ................................................................................................................................... 24 3.2 EMPLACEMENT ............................................................................................................................. 24 3.3 INSTALLATION DES BALANCES .................................................................................................. 25
4.0 DESCRIPTION DU CLAVIER.............................................................................................................. 26 5.0 AFFICHEUR ........................................................................................................................................ 27 6.0 FONCTIONNEMENT ........................................................................................................................... 28
6.1 REMISE A ZERO DE L’ECRAN ...................................................................................................... 28 6.2 TARE ............................................................................................................................................... 28 6.3 PESAGE D’UN ECHANTILLON ...................................................................................................... 29 6.4 COMPTAGE DE PIECES ................................................................................................................ 30 6.5 CONTROLE DE PESEE .................................................................................................................. 30 6.6 TOTAL ACCUMULE ....................................................................................................................... 31 6.7 PESAGE EN POURCENTAGE ....................................................................................................... 31 6.8 PESAGE D’ANIMAUX (Dynamique) .............................................................................................. 31
7.0 PARAMETRES UTILISATEUR............................................................................................................ 31 8.0 FONCTIONNEMENT DE LA BATTERIE ............................................................................................. 32 9.0 INTERFACE RS-232 ........................................................................................................................... 32
9.1 FORMAT D’ENTRÉE DES COMMANDES .................................................................................... 33 10.0 INTERFACE RELAIS ........................................................................................................................... 33 11.0 CALIBRAGE ........................................................................................................................................ 34 12.0 PARAMETRES DE SERVICE ............................................................................................................. 35
12.2 UTILISATION DES PARAMETRES DE SERVICE ......................................................................... 35 13.0 CODES ERREUR ................................................................................................................................ 36 INFORMATION A PROPOS DE LA GARANTIE .......................................................................................... 37

FR
© Adam Equipment Company 2014 2 1 (P.N. 3136611622 - Revision D, Apr 2014)
1.0 INTRODUCTION
• La série WARRIOR fournie précision, vitesse et polyvalence dans
une gamme de balances à usage général comprenant le comptage de pièces, le pesage en pourcentage et le contrôle de pesée.
• La WARRIOR possède des LED situées à côté de l’écran indiquant lorsqu’un poids est inférieur à la limite basse, entre les limites et supérieur à la limite haute. Elles peuvent fonctionner en coordination avec un signal sonore pour le contrôle de pesée de même qu’avec les symboles LO, OK et HI qui s’affichent sur l’écran.
• La WARRIOR est fournie avec une interface RS-232
bidirectionnelle et une heure en temps réelle (RTC).
• La WARRIOR possède un clavier étanche avec une membrane codée en couleur, un large écran à cristaux liquides (LCD) et un rétro éclairage vert.
• Les fonctions comprennent une recherche automatique du zéro, une tare semi-automatique et une fonction d’accumulation qui permet d’enregistrer le poids et de le rappeler comme un total accumulé

FR
© Adam Equipment Company 2014 2 2 (P.N. 3136611622 - Revision D, Apr 2014)
2.0 CARACTERISTIQUES
Modèle # WSK 8 WSK 16a
WSK 16 WSK 35a
WSK 32 WSK 70a
WBK 32 WBK 70a
WBK 75 WBK 165a
Capacité Maximum
8000g/16lb 16kg/35lb 32kg/70lb 32kg/70lb 75kg/165lb
Précision 0.5g/0.001lb 0.001kg/0.002lb 0.002kg/0.005lb 0.002kg/0.005lb 0.005kg/0.01lb
Résolution 1:16000 1:16000 1:16000 1:16000 1:15000
Reproductibilité (Dév.Std.)
1g/0.002lb 0.002kg/0.004lb 0.004kg/0.01lb 0.004kg/0.01lb 0.01kg/0.02lb
Linéarité + 1g/0.002lb 0.002kg/0.004lb 0.004kg/0.01lb 0.004kg/0.01lb 0.01kg/0.02lb
Taille du plateau l x p
250mm x 250mm/ 9.8in x 9.8in 300mm x 400mm/ 11.8in x 15.7in
Unités de Mesure
g / Kg / Lb / Lb:oz / Newtons/Ounces
Temps de stabilisation
2-3 Secondes
Température de fonctionnement
-10°C to +40°C / +32°F to +104°F
Alimentation Batterie + 6v 4.5Ah
Adaptateur externe 12vDC 800mA
Calibrage Externe
Masse de calibrage
Sélectionnable par l’utilisateur
Ecran Ecran rétro éclairé vert avec des chiffres de 40mm de haut et indicateur de capacité
Carter de la balance
Carter en inox 304 avec indice de protection IP66

FR
© Adam Equipment Company 2014 2 3 (P.N. 3136611622 - Revision D, Apr 2014)
Modèle # WFK 75 WFK 165a
WFK 150 WFK 330a
WLK 150 WLK 330a
Capacité Maximum
75kg/165lb 150kg/330lb 150kg/330lb
Précision 0.005kg/0.01lb 0.01kg/0.02lb 0.01kg/0.02lb
Résolution 1:15000 1:15000 1:15000
Reproductibilité (Dév.Std.)
0.01kg/0.02lb 0.02kg/0.04lb 0.02kg/0.04lb
Linéarité + 0.01kg/0.02lb 0.02kg/0.04lb 0.02kg/0.04lb
Taille du plateau l x p
400mm x 500mm/ 15.7in x 19.7in 450mm x 600mm/ 17.7in x 23.6in
Unités de Mesure
g / Kg / Lb / Lb:oz / Newtons/Ounces
Temps de stabilisation 2-3 Secondes
Température de fonctionnement
-10°C to +40°C / +32°F to +104°F
Alimentation Batterie + 6v 4.5Ah
Adaptateur externe 12vDC 800mA
Calibrage Externe
Masse de calibrage Sélectionnable par l’utilisateur
Ecran Ecran rétro éclairé vert avec des chiffres de 40mm de haut et indicateur de capacité
Carter de la balance Carter en inox 304 avec indice de protection IP66

FR
© Adam Equipment Company 2014 2 4 (P.N. 3136611622 - Revision D, Apr 2014)
3.0 INSTALLATION
3.1 DEBALLAGE
Les WARRIOR ont déjà été ajustées pour fonctionner avec une plateforme et ont été configurées pour cette application. La plateforme et l’indicateur ont été calibrés ensemble et doivent être utilisés ensemble.
3.2 EMPLACEMENT
• Les balances ne doivent pas être placées dans un endroit qui réduira la précision. • Évitez les températures extrêmes. Ne pas les placer en plein soleil ou près de climatisation. • Évitez les tables inadéquates. La table ou le sol doit être rigide et de ne pas vibrer. • Évitez les sources d'énergie instables. Ne pas utiliser à proximité de gros consommateurs d'électricité tels que les équipements de soudage ou de gros moteurs. • Ne pas placer près de vibration des machines. • Évitez un taux élevé d'humidité qui pourrait provoquer de la condensation. Eviter le contact direct avec de l'eau. Ne pas pulvériser ou plonger la balance dans l'eau. • Évitez les mouvements de l'air, tels que des ventilateurs ou l'ouverture des portes. Ne placez pas près d'ouvertures de fenêtres ou de climatisation d'air. • Gardez les balances propres. Ne pas empiler de documents sur la balance quand elles ne sont pas en usage

FR
© Adam Equipment Company 2014 2 5 (P.N. 3136611622 - Revision D, Apr 2014)
3.3 INSTALLATION DES BALANCES
• Retirez l’indicateur de son emballage et fixez-le au support en forme de U en utilisant les deux poignées de fixation. Prenez l’indicateur et mettez-le sur la colonne en vous s’assurant que le l’excédant de câble est mis à l’intérieur. Fixez l’indicateur sur la colonne en utilisant les deux vis fournies.
• Retirez la partie supérieure interne de l’emballage, mettez la
colonne dans son support de fixation au niveau de la base et retirez la complètement la machine de l’emballage. Retirez tous les emballages plastiques de protection restant.
• Fixez la colonne sur son support de fixation sur la base en
utilisant les deux vis fournies.
• Ajustez l’angle de vision de l’indicateur dans la position idéale et serrez les deux poignées de fixation.
• Mettez de niveau la balance en ajustant les cinq pieds sur les
WSK/WBK ou les quatre pieds sur les WFK/WLK. Si la balance est instable alors ajustez de nouveau les pieds.
• Connectez l’alimentation à l’indicateur et appuyez sur [On/Off] . Le numéro de révision du logiciel sera affiché suivi d’un test d’initialisation montrant tous les chiffres avant d’afficher le zéro avec l’unité de pesage précédemment utilisée.

FR
© Adam Equipment Company 2014 2 6 (P.N. 3136611622 - Revision D, Apr 2014)
4.0 DESCRIPTION DU CLAVIER
Remise à zéro de l’afficheur. Tare la balance. Elle déduit et enregistre le poids en cours sur la balance, si non requis parmi le résultat final de pesée. Cette fonction secondaire, est une touche “Entrer” utilisée pour le réglage des valeurs de paramètres.
Sélectionne le comptage de pièces. Règle la taille de l’échantillon lors du comptage de pièces. Cette fonction secondaire � permet d’incrémenter le chiffre actif lors du réglage d’une valeur d’un paramètre.
Sélectionne l’unité de pesage devant être affichée de celles qui sont activées. Voir le paramètre S1 en section 7.4 du manuel complet. Cette fonction secondaire, permet de déplacer le chiffre actif/clignotant vers la gauche lors du réglage des valeurs des paramètres.

FR
© Adam Equipment Company 2014 2 7 (P.N. 3136611622 - Revision D, Apr 2014)
Sélectionne la fonction des paramètres de la balance.
Cette fonction secondaire (C) permet d’effacer le total accumulé.
Envoi les résultats vers un PC ou une imprimante en utilisant l’interface RS-232. Ajoute également la valeur dans la mémoire d’accumulation si la fonction accumulation n’est pas automatique.
Cette fonction secondaire (ESC) permet de revenir au pesage normal lorsque la balance est dans un mode réglage de paramètre.
Pour éteindre ou allumer l’indicateur. La WARRIOR enregistrera l’unité de pesage et les valeurs de contrôle de pesée actuelles en utilisation si l’alimentation est coupée. Ces valeurs seront rappelées quand l’indicateur sera de nouveau allumé.
5.0 AFFICHEUR
L’écran LCD indiquera une valeur de même que l’unité actuellement utilisée. De plus les LED au dessus de l’écran indiqueront lorsqu’un poids est inférieur, entre ou supérieur aux limites du contrôle de pesée.
D’autres symboles indiqueront lorsqu’un poids a été taré (NET), quand l’écran est à zéro et stable, si une valeur a été enregistrée en mémoire ou quand la fonction de pesage d’animaux a été activée. Un symbole de batterie indiquera l’état de charge de la batterie interne.

FR
© Adam Equipment Company 2014 2 8 (P.N. 3136611622 - Revision D, Apr 2014)
6.0 FONCTIONNEMENT
6.1 REMISE A ZERO DE L’ECRAN • Vous pouvez appuyer sur [0/T] à n’importe quel moment afin de
remettre l’écran à zéro. Le cas se présente habituellement lorsque la plateforme est vide. Lorsque le zéro est obtenu l’écran affichera une indication du zéro.
• La balance a une fonction de remise à zéro automatique afin de prendre en compte les dérives mineures ou accumulation de matières sur la plateforme. Cependant vous pourriez avoir besoin d’appuyer sur [0/T] pour remettre la balance à zéro si de faible valeur de poids sont affichées quand la plateforme est vide.
6.2 TARE
• Mettre à zéro la balance en appuyant sur [0/T] si nécessaire. Le symbole “ZERO” sera allumé.
• Placez un récipient sur la plateforme et une valeur de son poids sera affichée.

FR
© Adam Equipment Company 2014 2 9 (P.N. 3136611622 - Revision D, Apr 2014)
• Appuyez sur [0/T] pour tarer la balance. Le poids est déduit et enregistré comme valeur de tare laissant le zéro sur l’écran. Le symbole “NET” sera allumé et lorsqu’un produit est ajouté seulement le poids net de celui-ci sera affiché. La balance peut être tarée une seconde fois si un autre type de produit devait être ajouté au premier. De nouveau seulement le poids ajouté après la tare sera affiché.
• Quand le récipient est retiré une valeur négative sera affichée. Si la balance avait été tarée juste avant de retirer le récipient alors cette valeur aurait été le poids brut comprenant le récipient et le produit entier qu’il contient. Le symbole “ZERO” sera allumé indiquant que la plateforme est de retour dans les mêmes conditions quelle était lors du dernier réglage.
• Pour effacer une valeur de Tare, appuyez sur [0/T] quand le
plateau est vide.
6.3 PESAGE D’UN ECHANTILLON Pour déterminer le poids d’un échantillon, faite d’abord la tare du récipient vide si celui-ci doit être utilisé et ensuite placez l’échantillon dans ce récipient. L’écran affichera le poids net de l’échantillon et l’unité de pesage actuellement en utilisation.

FR
© Adam Equipment Company 2014 3 0 (P.N. 3136611622 - Revision D, Apr 2014)
6.4 COMPTAGE DE PIECES Si le comptage de pièces est activé, voir section 7.4 du manuel complet, il est possible de compter des pièces en utilisant un échantillon des pièces pour déterminer le poids moyen d’une pièce.
• Si un récipient est utilisé, placez-le sur le plateau de pesée et appuyez sur [0/T] pour mettre l’affichage à zéro. Appuyez sur [PCS] pour entrer dans le mode de comptage de pièces.
• La balance affichera “P 10”. Modifier la taille d’échantillon vers la
quantité désirée en appuyant sur [PCS/�]. Vous verrez ainsi défiler les options : 10, 20, 50, 100, 200 et retour à 10.
• Placez la taille de l’échantillon correspondant dans le récipient et
appuyez sur [0/T] . Le nombre d’échantillon devra correspondre au nombre choisi parmi les options disponibles pour le comptage de pièces c’est à dire : 10, 20, 50, 100 ou 200 pièces
• L’écran affichera maintenant la quantité de pièces contenu dans
le récipient, au fur et à mesure que des pièces sont ajoutées l’écran augmentera la valeur affichée correspondant à la quantité dans le récipient au même moment (Pcs).
• En appuyant sur [Unit/ ] l’écran affichera le poids net (pcs et
kg), en appuyant une nouvelle fois l’écran affichera le poids unitaire (g/pcs), et une troisième fois l’écran affichera le nombre de pièces compté (pcs).
• Appuyez sur [Pcs/�] pour revenir au pesage normal. Appuyez de
nouveau sur [Pcs/�] pour commencer le comptage d’un nouvel échantillon.
6.5 CONTROLE DE PESEE Le contrôle de pesée est une procédure ou les LED s’allument (avec un signal sonore si activé,) lorsque le poids sur la balance correspond aux valeurs stockées en mémoire. La mémoire maintient les dernières valeurs pour une limite haute, basse lorsque l’alimentation est coupée. L’utilisateur peut régler soit une limite ou les deux, voir la version complète du manuel pour plus d’informations sur la fonction du contrôle de pesée.

FR
© Adam Equipment Company 2014 3 1 (P.N. 3136611622 - Revision D, Apr 2014)
6.6 TOTAL ACCUMULE
• La balance peut être réglée pour accumuler manuellement en appuyant sur [Print/M+/Esc] ou automatiquement lorsqu’un poids est retiré de la balance. Voir la section 7.3 du manuel complet pour plus d’informations.
6.7 PESAGE EN POURCENTAGE La balance peut être réglée pour accomplir le pesage en pourcentage. Voir la section 7.2 de la version complète du manuel pour plus d’informations. 6.8 PESAGE D’ANIMAUX (DYNAMIQUE) La balance peut être réglée pour le pesage d’animaux (dynamique) pour peser les objets instables ou en mouvement. Voir la section 7.4 de la version complète du manuel pour plus d’informations.
7.0 PARAMETRES UTILISATEUR
En appuyant sur [Func/C] lors du fonctionnement normal permet à l’utilisateur d’accéder aux paramètres de personnalisation de la balance. Les paramètres sont séparés en 4 groupes - 1. Paramètres de Contrôle de pesée, 2. Fonctions Pourcentage et Pesage d’Animaux 3. Paramètres RS-232 4. Paramètres de la Balance
• Lorsque [Func/C] est actionnée l’écran affichera d’abord “FunC
1” pour les paramètres du Contrôle de Pesée
• Appuyez sur soit [Func/C] ou [Pcs/�] pour avancer à travers les groupes “FunC 1”, “FunC 2” , “FunC 3” et “FunC 4”. Appuyez sur [0/T] pour entrer dans le groupe de paramètres sélectionné.
• Quand vous êtes dans l’une de ces sections appuyez sur
[Print/M+/Esc] pour revenir au groupe “FunC 1 ”. Si vous appuyez de nouveau sur [Print/M+/Esc] , la balance sortira de la section Paramètre Utilisateur et retournera au pesage normal.
Plus d’informations sur tous les paramètres sont disponibles sur la version complète du manuel d’utilisation.

FR
© Adam Equipment Company 2014 3 2 (P.N. 3136611622 - Revision D, Apr 2014)
8.0 FONCTIONNEMENT DE LA BATTERIE
• Les balances peuvent fonctionner à partir de la batterie si nécessaire. La durée de vie de la batterie est de 70heures selon les capteurs et de l’utilisation du rétro éclairage.
• Un symbole de batterie est affiché sur l’écran pour indiquer la
charge actuelle de la batterie, 3 barres signifient que la batterie est complètement chargée. Si seul l’encadrement du symbole sans les barres est visible alors cela signifie que la batterie a besoin d’être rechargée.
• Pour charger la batterie, reliez simplement l’adaptateur au
secteur, également au connecteur se trouvant à l’arrière de l’indicateur marquée DC 12V. La balance n’a pas besoin d’été allumée.
• La batterie devra être charge pendant 12 heures pour atteindre sa
pleine capacité.
• A côté de l’écran se trouve une LED qui indique le statu de charge de la batterie. Quand la balance est branchée au secteur la batterie interne se chargera. Si la LED est verte la batterie est pleinement chargée, rouge signifie que la batterie est presque vide et jaune qu’elle est en cours de chargement.
9.0 INTERFACE RS-232
La WARRIOR est fournie avec une interface bidirectionnelle RS-232 en standard. La balance peut envoyer les données du poids avec l’unité de pesage sélectionnée lorsqu’elle est connectée à une imprimante ou un ordinateur via son interface RS-232.
Caractéristiques:
RS-232 Sortie des données de pesage Code ASCII 9600 Baud (sélectionnable par utilisateur) 8 bits de données Aucune Parité

FR
© Adam Equipment Company 2014 3 3 (P.N. 3136611622 - Revision D, Apr 2014)
L’interface série RS-232 est située à l’intérieure du boitier, l’accès est possible en retirant les 8 vis du boitier ou les connexions peuvent être faite vers COM1 comme indiqué ci-dessous.
RXT Données reçues
TXT Données transmises
GND Signal de terre
Le câble utilisé devra passer à travers la presse étoupe RS-232 du boitier et être serré avec soin s’assurant ainsi de l’étanchéité de la connexion effectuée.
La balance peut être réglée pour imprimer le texte en Anglais, Français, Allemand et Espagnol. Voir la section des paramètres RS-232 pour plus d’informations.
9.1 FORMAT D’ENTRÉE DES COMMANDES
La balance peut être contrôlée avec les commandes suivantes. Appuyez sur [Enter] du PC après chaque commande.
T<cr><lf>
Tare la balance pour afficher le poids net. Equivalent à appuyer sur [0/T] .
Z<cr><lf>
Règle le point zéro pour toutes les pesées ultérieures. L’écran indique zéro.
P<cr><lf>
Imprime les résultats vers un PC ou imprime les données en utilisant l’interface RS-232. Aussi ajoute la valeur dans la mémoire d’accumulation si la fonction accumulation n’est pas réglée sur automatique.
10.0 INTERFACE RELAIS
L’indicateur est fourni avec les pilotes pour contrôler des relais externes. Les pilotes peuvent être utilisés pour contrôler un nombre différents de relais selon les besoins de l’utilisateur. Les pilotes relais sont des sorties isolées qui requièrent l’utilisation d’une source d’alimentation externes et du kit relais en option. Voir la version complète du manuel d’utilisation pour plus d’informations.

FR
© Adam Equipment Company 2014 3 4 (P.N. 3136611622 - Revision D, Apr 2014)
11.0 CALIBRAGE
La balance peut être calibrée en utilisant la procédure suivante. Pour entrer dans cette procédure il est nécessaire d’utiliser Func 4 qui est accessible en utilisant [Func/C] comme décrit dans la section 7.4 du manuel complet, ou en utilisant le mot de passe d’accès comme décrit en section 12.0.
Les balances se calibrent en utilisant soit un poids étalon métrique ou impérial selon l’unité de pesage sectionnée avant le calibrage. L’écran affiche soit "kg" ou "lb" pour identifier les poids requis.
PROCEDURE
• Entrez dans la section calibrage en utilisant Func 4, C8 CAL ou en utilisant le mot de passe comme décrit en section 12.0.
• L’écran affichera "unLoAd".
• Retirez tout poids de la plateforme et quand le symbole stable est allumé appuyez sur [0/T] .
• L’écran affichera "Ld" ensuite “0000XX” qui indique le dernier poids étalon utilisé. Mettez ce poids de calibrage sur la balance et appuyez sur [0/T]. Si le poids mis sur la balance ne correspond pas à la valeur affichée, appuyez sur [Func/C] pour effacer la valeur ensuite utilisez [Unit/ ] et [Pcs/�] pour saisir la valeur adéquate. Quand la valeur est correcte, appuyez sur [0/T].
• Si le calibrage est accepté la balance effectuera un auto test pendant lequel le poids de calibrage doit être retiré. Si un message d’erreur “FAiL L” apparait alors essayez de nouveau de calibrer car une contrainte pourrait être survenue et empêcher l’accomplissement correct du calibrage.
Après le calibrage, la balance devra être contrôlée pour vérifier la justesse de celui-ci. Si nécessaire répétez le calibrage en s’assurant que la balance soit stable avant d’accepter tout poids.
FR
© Adam Equipment Company 2014 3 5 (P.N. 3136611622 - Revision D, Apr 2014)
12.0 PARAMETRES DE SERVICE
Les paramètres de services de la balance seront accessibles si [Tare] est actionnée lors de la mise en marche. Le mot de passe fonctionne aussi comme décrit ci-dessus. Dans ce cas l’écran affichera la demande pour le mot de passe, “ P - - - - “. Pour continuer entrer un mot de passe comme décrit ci-dessous. En entrant le mot de passe 0000 celui-ci permettra de calibrer comme indiqué en section 11. En entrant le mot de passe 1000 celui-ci permettra d’accéder à un jeu de paramètres limités comme décrit en section 12.1.
12.2 UTILISATION DES PARAMETRES DE SERVICE
Appuyez sur [0/T] lors du décompte initial de la mise en marche, Quand “Pn“ est affiché, saisir le code 1000 en utilisant [Unit/ ] et [Pcs/�] et ensuite appuyez sur [0/T] . L’écran affichera le premier paramètre appelé “F4 Int”. Pour sélectionner un autre paramètre appuyez sur [Pcs/�] pour avancer à travers les paramètres disponibles. Plus de détails sont disponibles dans la version complète du manuel d’utilisation.

FR
© Adam Equipment Company 2014 3 6 (P.N. 3136611622 - Revision D, Apr 2014)
13.0 CODES ERREUR
CODES ERREUR
DESCRIPTION SUGGESTIONS
- -oL - - Surcharge Retirez le poids de la balance. Si le problème persiste contactez votre fournisseur ou Adam Equipment pour assistance.
Err 1 Erreur réglage de l’heure
Entrez l’heure en utilisant le format correct et des valeurs raisonnables. Format : hh:mm:ss
Err 2 Erreur réglage de la date
Entrez la date en utilisant le format correct et des valeurs raisonnables. Format: yy:mm:dd
Err 4 Erreur réglage du zéro
La balance est en dehors de la portée de réglage du zéro normal soit lors de la mise en marche ou lorsque [Zero] est actionnée. Retirez le poids de la balance et essayer une nouvelle remise à zéro. Utilisez [0/T] pour régler l’écran à valeur zéro. Si le problème persiste contactez votre fournisseur ou Adam Equipment pour assistance.
Err 6 A/D hors de portée
Les valeurs du convertisseur A/D sont en dehors de la portée normale. Retirez le poids de la balance si elle est en surcharge. Soyez sûr que le plateau soit correctement installé. Indique que soit le capteur ou l’électronique peut être en panne. Si le problème persiste contactez votre fournisseur ou Adam Equipment pour assistance.
Err 9 Erreur de saisie des limites pour le contrôle de pesée
Indique si la limite basse est supérieure à la limite haute réglée. Réglez de nouveau la limite haute ou la limite basse
FAIL Erreur de calibrage.
Calibrage incorrect (doit être dans + 10% du calibrage usine). Les données de l’ancien calibrage seront retenues jusqu’à que le calibrage soit accompli. Si le problème persiste contactez votre fournisseur ou Adam Equipment pour assistance.

FR
© Adam Equipment Company 2014 3 7 (P.N. 3136611622 - Revision D, Apr 2014)
INFORMATION A PROPOS DE LA GARANTIE Adam Equipment offre une Garantie Limitée (Pièces et main d’œuvre) pour tous les composants qui échouent à cause de défauts de matériaux ou de fabrication. La garantie commence à partir de la date de livraison. Au cours de la période de garantie, pour toutes les réparations nécessaires, l'acheteur doit informer son fournisseur ou Adam Equipment. La société ou son technicien agréé se réserve le droit de réparer ou de remplacer les composants sur le site de l'acheteur ou dans l'un de ses ateliers en fonction de la gravité des problèmes, sans frais supplémentaires. Cependant, tout frais de port engagé dans l'envoi des unités défectueuses ou pièces au centre de service sera supporté par l'acheteur. La garantie cessera de fonctionner si l'équipement n’est pas retourné dans son emballage d'origine avec la documentation qui convient afin que la réclamation soit traitée. Toutes les réclamations sont à la discrétion unique d'Adam Equipment. Cette garantie ne couvre pas l'équipement sur lequel des défauts ou des pauvres performances sont dû à une mauvaise utilisation, dommage accidentel, exposition à des matières radioactives ou corrosives, négligence, mauvaise installation, des modifications non autorisées ou tentative de réparation ou non-respect des exigences et recommandations comme citées dans cette notice d’utilisation. Ce produit peut comporter une batterie rechargeable qui est conçue pour être retirée et remplacée par l'utilisateur. Adam Equipment garantit qu'il fournira une batterie de remplacement si la batterie manifeste un défaut de matériaux ou de fabrication pendant la période initiale de l'utilisation du produit dans lequel la batterie est installée. Comme avec toutes les batteries, la capacité maximale de toute batterie inclus dans le produit va diminuer avec le temps ou l'utilisation, et la durée de vie de la batterie varie selon le modèle du produit, la configuration, les caractéristiques, l'utilisation et les paramètres de gestion de l'alimentation. Une diminution de la capacité maximale de la batterie ou de durée de vie de la batterie n’est pas un défaut de matériaux ou de fabrication, et n’est pas couvert par cette garantie limitée. La réparation effectuée en vertu de la garantie n’étend pas la période de garantie. Les composants enlevés durant les réparations de garantie deviennent la propriété de l'entreprise. Les droits légaux de l'acheteur ne sont pas affectés par cette garantie. En cas de litige alors les termes de cette garantie sont régis par la législation britannique. Pour plus de détails sur les Informations de garantie, voir les termes et conditions de vente disponibles sur notre site web. ADAM EQUIPMENT une entreprise internationale certifiée ISO 9001:2008 avec plus de 40 ans d’expérience dans la production et la vente d’équipement de pesage électronique. Les produits Adam sont principalement conçus pour les marchés du Laboratoire, l’enseignement, la santé et remise en forme, le commerce et l’industrie. La gamme de produits peut être décrite comme suit: -Balances Analytiques et de Précision -Balances Compactes et Portables -Balances de capacités importantes -Analyseur d’humidité -Balances mécaniques -Balances compteuses -Balances digitales/contrôle de pesée -Plate forme haute performance -Crochet peseur -Balances santé et remise en forme -Balances Poids Prix Pour un listing complet des produits Adam, veuillez visiter notre site: www.adamequipment.com © Copyright par Adam Equipment Co. Ltd. Tous droits réservés. Aucune partie de cette publication ne peut être reproduite ou traduite sous quelque forme ou par tout moyen, sans l'autorisation préalable d'Adam Equipment. Adam Equipment se réserve le droit d'apporter des modifications à la technologie, les caractéristiques, les spécifications et la conception de l'équipement sans préavis. Toutes les informations contenues dans cette publication sont au mieux de nos connaissances actuelles, complètes et précises lorsqu'elles sont publiées. Cependant, nous ne sommes pas responsables des erreurs d'interprétation qui peut résulter de la lecture de cette notice. La dernière version de cette publication peut être consultée sur notre site: www.adamequipment.com
DE
© Adam Equipment Company 2014 3 8 (P.N. 3136611622 - Revision D, Apr 2014)
Adam Equipment
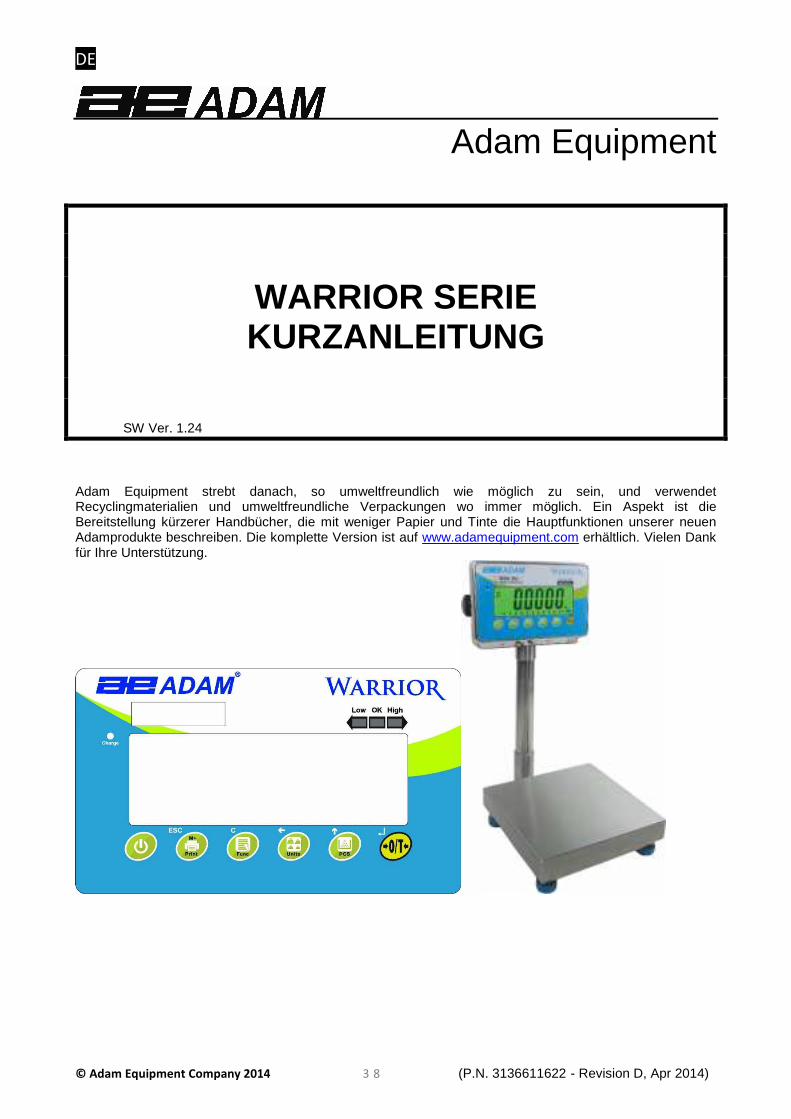
WARRIOR SERIE KURZANLEITUNG
SW Ver. 1.24 Adam Equipment strebt danach, so umweltfreundlich wie möglich zu sein, und verwendet Recyclingmaterialien und umweltfreundliche Verpackungen wo immer möglich. Ein Aspekt ist die Bereitstellung kürzerer Handbücher, die mit weniger Papier und Tinte die Hauptfunktionen unserer neuen Adamprodukte beschreiben. Die komplette Version ist auf www.adamequipment.com erhältlich. Vielen Dank für Ihre Unterstützung.

DE
© Adam Equipment Company 2014 3 9 (P.N. 3136611622 - Revision D, Apr 2014)
INHALT
1.0 EINLEITUNG ...................................................................................................................................... 40 2.0 TECHNISCHE DATEN ....................................................................................................................... 41 3.0 INSTALLATION .................................................................................................................................. 42
3.1 AUSPACKEN ................................................................................................................................. 42 3.2 AUFSTELLORT .............................................................................................................................. 42 3.3 AUFSTELLEN DER WAAGE ......................................................................................................... 43
4.0 TASTATUR ......................................................................................................................................... 44 5.0 ANZEIGE ............................................................................................................................................ 45 6.0 BETRIEB ............................................................................................................................................ 46
6.1 ZURÜCKSTELLEN DER ANZEIGE AUF NULL ............................................................................ 46 6.2 TARIEREN ..................................................................................................................................... 46 6.3 WÄGUNG ....................................................................................................................................... 47 6.4 STÜCKZÄHLUNG .......................................................................................................................... 48 6.5 KONTROLLWÄGUNG ................................................................................................................... 48 6.6 KUMULIERTE SUMME .................................................................................................................. 49 6.7 PROZENTWÄGUNG ...................................................................................................................... 49 6.8 TIER- (DYNAMISCHE) WÄGUNG ................................................................................................. 49
7.0 ANWENDERPARAMETER ................................................................................................................ 49 8.0 AKKUBETRIEB ................................................................................................................................... 50 9.0 RS-232 SCHNITTSTELLE ................................................................................................................. 50
9.1 FORMAT DER EINGABEBEFEHLE .............................................................................................. 51 10.0 RELAIS-SCHNITTSTELLE ................................................................................................................. 51 11.0 JUSTIERUNG ..................................................................................................................................... 52 12.0 SERVICE-PARAMETER .................................................................................................................... 53
12.1 ANDWENDEN DER SERVICEPARAMETER ................................................................................ 53 13.0 FEHLERMELDUNGEN....................................................................................................................... 54 GARANTIEHINWEIS ...................................................................................................................................... 55

DE
© Adam Equipment Company 2014 4 0 (P.N. 3136611622 - Revision D, Apr 2014)
3.0 EINLEITUNG
• Die WARRIOR Serie bietet genaue, schnelle vielseitige
Mehrzweckwaagen, mit Funktionen wie Stückzählung, Prozentwägung, und Kontrollwägung
• Die WARRIOR haben LED neben den Anzeigefenstern, die signalisieren, wann das Gewicht unter, zwischen, oder über den Zielwerten liegt. Sie können in Verbindung mit dem akustischen Alarm verwendet werden, und auch im Display wird ein Hinweis angezeigt, LO, OK und HI.
• Die WARRIOR sind mit RS-232 bidirektionaler Schnittstelle und Echtzeituhr (real time clock (RTC)) ausgestattet
• Die WARRIOR haben eine versiegelte Tastatur mit farbkodierten Membrantasten eine große, gut erkennbare Flüssigkristallanzeige (LCD), und eine grüne Hintergrundbeleuchtung.
• Funktionen beinhalten automatische Nullnachführung, halbautomatisches Tara, und eine Summierfunktion, mit der die Gewichtswerte gespeichert und als Gesamtwert aufgerufen werden können.

DE
© Adam Equipment Company 2014 4 1 (P.N. 3136611622 - Revision D, Apr 2014)
4.0 TECHNISCHE DATEN
Modell # WSK 8 WSK 16a
WSK 16 WSK 35a
WSK 32 WSK 70a
WBK 32 WBK 70a
WBK 75 WBK 165a
Höchstlast 8000g/16lb 16kg/35lb 32kg/70lb 32kg/70lb 75kg/165lb
Ablesbarkeit 0.5g/0.001lb 0.001kg/0.002lb 0.002kg/0.005lb 0.002kg/0.005lb 0.005kg/0.01lb
Auflösung 1:16000 1:16000 1:16000 1:16000 1:15000
Wiederholbarkeit (Std Dev)
1g/0.002lb 0.002kg/0.004lb 0.004kg/0.01lb 0.004kg/0.01lb 0.01kg/0.02lb
Linearität + 1g/0.002lb 0.002kg/0.004lb 0.004kg/0.01lb 0.004kg/0.01lb 0.01kg/0.02lb
Größe Wägeplatte
w x d 250mm x 250mm/ 9.8in x 9.8in 300mm x 400mm/ 11.8in x 15.7in
Wägeeinheiten g / Kg / Lb / Lb:oz / Newtons/Unzen
Modell # WFK 75 WFK 165a
WFK 150 WFK 330a
WLK 150 WLK 330a
Höchstlast 75kg/165lb 150kg/330lb 150kg/330lb
Ablesbarkeit 0.005kg/0.01lb 0.01kg/0.02lb 0.01kg/0.02lb
Auflösung 1:15000 1:15000 1:15000
Wiederholbarkeit (Std Dev)
0.01kg/0.02lb 0.02kg/0.04lb 0.02kg/0.04lb
Linearität + 0.01kg/0.02lb 0.02kg/0.04lb 0.02kg/0.04lb
Größe Wägeplatte w x d
400mm x 500mm/ 15.7in x 19.7in 450mm x 600mm/ 17.7in x 23.6in
Wägeeinheiten g / Kg / Lb / Lb:oz / Newton/Unzen
ALLGEMEINE DATEN FÜR ALLE MODELLE
Stabilisierungszeit 2-3 Sek.
Betriebs-temperatur
-10°C to +40°C / +32°F to +104°F
Stromversorgung + 6v 4.5Ah Akku
12vDC 800mA Externer Adapter
Kalibrierung Extern
Kalibriermasse Wählbar
Anzeige Grüne hinterleuchtete Anzeige, 40mm große Ziffern, Kapazitätsanzeige
Gehäuse Waage Edelstahl 304, IP66 klassifiziert

DE
© Adam Equipment Company 2014 4 2 (P.N. 3136611622 - Revision D, Apr 2014)
3.0 INSTALLATION
3.1 AUSPACKEN
Plattform und Anzeige der WARRIOR Waagen sind bereits füreinander konfiguriert. Sie wurden als Einheit kalibriert, und müssen entsprechend zusammen verwendet werden.
.
3.2 AUFSTELLORT
• Nicht in Umgebungen aufstellen, die Einfluss auf die Genauigkeit haben könnten.
• Extreme Temperaturen vermeiden. Nicht in direktem Sonnenlicht oder nahe Klimaanlagen aufstellen.
• Keine ungeeigneten Unterlagen verwenden. Der Tisch oder Boden muss fest sein und darf nicht vibrieren.
• Instabile Energiequellen beim Laden des Akkus vermeiden. Benutzen Sie die Waage nicht neben Maschinen mit hohem Stromverbrauch wie Schweißausrüstung oder große Motoren.
• Stellen Sie die Waage nicht neben vibrierende Maschinen auf.
• Hohe Feuchtigkeit, die Kondensation verursachen könnte, vermeiden. Direkten Kontakt mit Wasser vermeiden. Die Waagen nicht besprühen, kein Eintauchen ins Wasser.
• Direkten Luftzug durch Ventilatoren oder geöffnete Türen und Fenster vermeiden. Stellen Sie die Waage nicht am offenen Fenster oder neben Ventilatoren auf.
Halten Sie die Waage sauber. Entfernen Sie Gegenstände von der Wägeplatte, wenn die Waage nicht in Betrieb ist.

DE
© Adam Equipment Company 2014 4 3 (P.N. 3136611622 - Revision D, Apr 2014)
3.3 AUFSTELLEN DER WAAGE
• Nehmen Sie die Anzeige aus dem Karton, und befestigen Sie Ihn mit den 2 Sterngriffschrauben an der U-förmigen Klammer. Setzen Sie nun die Anzeige auf das Stativ, und achten Sie dabei darauf, dass das lose Kabel durch das Stativ geführt wird. Befestigen Sie die Anzeige mit den mitgelieferten Schrauben auf dem Stativ.
• Entfernen Sie alles Packmaterial innen, setzen Sie das Stativ in
die Halterung an der Plattform, und nehmen Sie nun die gesamte Waage aus dem Karton. Entfernen Sie sämtliches Verpackungs- und Schutzmaterial.
• Befestigen Sie das Stativ mit den mitgelieferten Schrauben an die
Halterung an der Plattform mit den mitgelieferten Schrauben.
• Stellen Sie den Anzeigewinkel auf die gewünschte Position ein, und ziehen Sie die 2 Schrauben wieder an.
• Richten Sie die Waage mit den verstellbaren Füßen, 5 bei den
WSK/WBK, 4 bei den WFK/WLK, eben aus. Wenn die Waage wackelt, korrigieren Sie die Fußhöhe.
Anmerkung: Wir empfehlen die Verwendung eines lebensmittelechten Schmierfetts für die Gewinde der Füße, damit diese leicht drehbar bleiben.
• Stecken Sie die Anzeige ein, und drücken Sie die [On/Off] -Taste. Die Software-Revisionnummer wird angezeigt, dann erfolgt ein Selbsttest, bei dem alle Ziffern angezeigt werden. Am Ende wird Null und die zuletzt verwendete Wägeeinheit angezeigt.

DE
© Adam Equipment Company 2014 4 4 (P.N. 3136611622 - Revision D, Apr 2014)
4.0 TASTATUR
Zum Zurückstellen der Anzeige auf Null. Tariert die Waage. Damit wird das Gewicht auf der Waage abgezogen und gespeichert, wenn es nicht im Ergebnis enthalten sein soll. Als Sekundärfunktion ist , die“Eingabe”-Taste, mit der ein Wert in den Parametern eingerichtet wird.
Wählt die Stückzählung. Während der Stückzählung wird mit dieser Taste außerdem die Probenmenge eingestellt. Die Sekundärfunktion ist � zum Erhöhen der aktiven Ziffer beim Einstellen eines Parameterwertes.
Wählt die erwünschte Wägeeinheit aus den zu Verfügung stehenden aktivierten Einheiten. Siehe dazu Parameter S1 in Abschnitt 7.4 in der ausführlichen Version des Handbuchs.
Als Sekundärfunktion ist zum Verschieben der aktiven Ziffer nach links beim Einstellen eines Parameterwertes.

DE
© Adam Equipment Company 2014 4 5 (P.N. 3136611622 - Revision D, Apr 2014)
Auswählen der Funktion Waagenparameter.
Als Sekundärfunktion (C) wird mit dieser Taste der Gesamtwert gelöscht.
Sendet die Ergebnisse über die RS232 Schnittestelle an einen PC oder Drucker. Ist die Funktion Summenspeicher nicht auf automatisch gestellt, wird mit dieser Taste auch ein Wert zur Gesamtsumme hinzugefügt.
Die Sekundärfunktion ist (ESC), mit der man aus den Parametereinstellungen zurück zur normalen Wägung gelangt.
Zum Ein- und Ausschalten der Anzeige. Die WARRIOR sichert beim Ausschalten die zuletzt benutzte Wägeeinheit und die gesetzten Kontroll-grenzwerte. Diese stehen dann beim nächsten Einschalten zur Verfügung.
5.0 ANZEIGE
Die LCD zeigt einen Wert sowie die momentan verwendete Wägeeinheit. Außerdem zeigen die LED über der Anzeige, ob das Gewicht über, innerhalb, oder über den gesetzten Grenzwerten liegt.
Weitere Symbole zeigen, ob das Gewicht tariert wurde (NET), die Waage auf Null oder stabil ist, ob ein Wert gespeichert ist, oder ob die Tierwägefunktion aktiviert ist. Die Batterieanzeige zeigt den Ladestand des Akku.

DE
© Adam Equipment Company 2014 4 6 (P.N. 3136611622 - Revision D, Apr 2014)
6.0 BETRIEB
6.1 ZURÜCKSTELLEN DER ANZEIGE AUF NULL
• Mit [0/T] kann die Anzeige jederzeit auf Null gestellt werden normalerweise bei leerer Wägeplatte. Ist der Nullpunkt erreicht, erscheint in der Anzeige ein Symbol für Null.
• Die Waage hat eine automatische Nullnachführung, um minimales Driften oder kleine Verunreinigungen auf der Wägeplatte auszugleichen. Es kann jedoch nötig sein, die Waage mit [0/T] auf Null zu stellen, wenn trotz leerer Wägeplatte noch ein kleiner Wert angezeigt wird.
6.2 TARIEREN
• Stellen Sie die Waage wenn nötig mit [0/T] auf Null. Das “ZERO” Symbol ist ON.
• Stellen Sie einen Behälter auf die Waage; dessen Gewicht wird nun angezeigt.

DE
© Adam Equipment Company 2014 4 7 (P.N. 3136611622 - Revision D, Apr 2014)
• Drücken Sie [0/T] , um die Waage zu tarieren. Das Gewicht, das
angezeigt wurde, wird als Tarawert gespeichert, und vom angezeigten Wert abgezogen, so dass nur noch Null angezeigt wird. Das Symbol "NET" für netto wird angezeigt. Wird nun ein Artikel hinzugefügt, wird nun netto nur dessen Gewicht angezeigt. Das Gerät kann bei Bedarf ein weiteres Mal tariert werden, falls ein andersartiger Artikel hinzugefügt werden soll. Wieder wird danach nur das Gewicht des nach dem Tarieren hinzugefügten Artikels angezeigt.
ANMERKUNG: Die Anzeige “NET” erscheint nur, wenn das tarierte Gewicht höher als 4% der Wägekapazität beträgt (+/-2x interne Wägeauflösung)
• Wenn der Behälter entfernt wird, wird ein negativer Wert
angezeigt. Wurde die Anzeige direkt vor Entfernen des Behälters tariert, entspricht dieser Wert dem Gewicht des Behälters plus aller darin enthaltenen Artikel. Das Null-Symbol erscheint, da die Waage nun im selben Zustand ist, indem zuletzt [Zero] gedrückt wurde.
• Durch Drücken von [0/T] bei leerer Wägeplatte kann der Tarawert
gelöscht werden.
6.3 WÄGUNG
Zum Bestimmen des Gewichts eines Objektes muss zunächst das Gewicht des Behälters tariert werden, falls einer verwendet wird. Geben Sie dann die Probe auf die Waage. Das Nettogewicht der Probe wird in der gewählten Einheit angezeigt.

DE
© Adam Equipment Company 2014 4 8 (P.N. 3136611622 - Revision D, Apr 2014)
6.4 STÜCKZÄHLUNG Bei aktivierter Stückzählung, siehe Abschnitt 7.4, ist es möglich, gleichwertige Stücke durch Ermittlung des durchschnittlichen Stückgewichts zu bestimmen.
• Soll ein Behälter verwendet werden, stellen Sie ihn auf die Wägeplatte, und stellen Sie mit [0/T] die Anzeige auf Null. Mit [PCS] starten Sie die Stückzählfunktion.
• “P 10” wird angezeigt. Ändern Sie die Probengröße mit [Pcs/�]
auf 10, 20, 50, 100, oder 200.
• Geben Sie die gewählte Probengröße in den Behälter, und stellen Sie diesen auf die Waage. Drücken Sie [0/T] . Die Anzahl der Teile muss der gewählten Probengröße entsprechen, also 10, 20, 50, 100 oder 200 Stück.
• Das Display zeigt nun die Stückzahl im Container an, und wenn
jetzt weitere Teile hinzu gegeben werden, erhöht sich entsprechend die angezeigte Stückzahl. (Pcs).
Mit [Unit/ ] können Sie erst das Nettogewicht (pcs und kg) anzeigen lassen, bei erneutem Drücken wird das Stückgewicht angezeigt (g/pcs), und als Drittes wird bei erneutem Drücken wieder die gezählte Stückzahl angezeigt. (pcs).
• Press the [PCS/�] key to return to normal weighing. Press the [PCS/�] key again to start counting a different sample.
6.5 KONTROLLWÄGUNG Bei der Kontrollwägung signalisieren Kontrollleuchten (und falls aktiviert, ein Alarm), ob das Gewicht auf der Waage einem bestimmten vorab gespeicherten Wert entspricht. Der Speicher behält den zuletzt eingegebenen Wert für Höchst- und Mindestwert auch bei Ausschalten der Waage. Es können entweder beide Werte gesetzt werden, oder nur einer. Für ausführliche Details zur Kontrollwägung ziehen Sie bitte die Vollversion des Handbuchs zu Rate.

DE
© Adam Equipment Company 2014 4 9 (P.N. 3136611622 - Revision D, Apr 2014)
6.6 KUMULIERTE SUMME Die Waage kann so eingestellt werden, das ein Gewichtswert manuell zum Summenspeicher hinzugefügt wird, sobald [Print/M+/Esc] betätigt wird, oder automatisch, sobald das Gewicht von der Waage genommen wird. Siehe Abschnitt 7.3 im ausführlichen Handbuch für weitere Details. 6.7 PROZENTWÄGUNG Die Waage kann für Prozentwägung eingestellt werden. Siehe Abschnitt 7.2 im ausführlichen Handbuch für weitere Details. 6.8 TIER- (DYNAMISCHE) WÄGUNG Die Waage kann für dynamische Wägung eingestellt werden, um instabile oder sich bewegende Objekte bzw. Subjekte zu wiegen. Siehe dazu Abschnitt 7.4 im ausführlichen Handbuch.
7.0 ANWENDERPARAMETER
Der Anwender kann im normalen Betrieb mit [Func/C] die Anwender-parameter zum Anpassen der Waage aufrufen. Die Parameter sind in 4 Gruppen unterteilt: 1. Kontrollwägung
2. Prozent- und Tierwägefunktionen 3. RS-232-Einstellungen 4. Waagenparameter
• Nach Drücken von [Func/C] wird zuerst “FunC 1” für die
Einstellungen der Kontrollwägung angezeigt.
• Mit [Func/C] oder [Pcs/�] können Sie zu den nächsten Parametergruppen springen, “FunC 1”, “FunC 2” , “FunC 3” und “FunC
4”. Mit [0/T] können Sie die gewünschte Parametergruppe öffnen.
• In den Parametern können Sie mit [Print/M+/Esc] zurück zum Obermenü “FunC 1” kommen, und mit erneutem Drücken von [Print/M+/Esc] können Sie die Parameter verlassen, und zum normalen Wägemodus zurückkehren.
Die vollständigen Details aller Parametereinstellungen finden Sie in der Vollversion des Handbuchs.
DE
© Adam Equipment Company 2014 5 0 (P.N. 3136611622 - Revision D, Apr 2014)
8.0 AKKUBETRIEB
• Die Waage können bei Bedarf über den internen Akku betrieben werden. Der Akku liefert bis zu 70 Std. Betriebsdauer, je nach Größe der Wägezelle, und Verwendung der Hintergrund-beleuchtung.
• Das Batteriesymbol im Display zeigt den Akkuladestand. Bei 3
Balken ist der Akku voll aufgeladen, wird nur der Umriss des Batteriesymbols angezeigt, muss der Akku aufgeladen werden.
• Zum Aufladen muss nur die Anzeige mit dem Netzadapter ans
Stromnetz angeschlossen werden. Der Anschluss befindet sich hinten an der Anzeige, und ist mit DC 12V beschriftet. Zum Laden des Akku muss die Waage nicht eingeschaltet werden.
• Der Akku braucht etwa 12 Stunden zum Erreichen er vollen
Ladung.
• Neben dem Display finden Sie eine LED, die den Ladevorgang anzeigt. Sobald die Waage ans Stromnetz angeschlossen wird, wird der Akku geladen. Bei grüner LED ist er voll geladen. Eine rote LED heißt, dass der Akku fast leer ist, und bei gelber LED wird der Akku geladen.
9.0 RS-232 SCHNITTSTELLE
Die WARRIOR wird mit bidirektionaler RS-232 Schnittstelle geliefert. Wird die Waage darüber an einen Drucker oder Computer angeschlossen, gibt sie das gewicht in der gewählten Wägeeinheit über die RS232 Schnittstelle aus.
Technische Daten:
RS-232 Ausgabe der Wägedaten
ASCII Code
600 - 19200 Baud (einstellbar, Standard ist 9600)
8 Datenbit, keine Parität, 1 Stopbit, kein Kontrollfluss

DE
© Adam Equipment Company 2014 5 1 (P.N. 3136611622 - Revision D, Apr 2014)
Die RS232 Schnittstelle ist innen im Gehäuse angebracht; man kann darauf zugreifen, indem man die 8 Schrauben am Gehäuse entfernt und das Gehäuse öffnet. Die Verbindung nach COM 1 ist wie folgt:
RXT Empfangene Daten
TXT Gesendete Daten
GND Signal Ground
Das verwendete Kabel sollte durch die mit RS232 gekennzeichnete Öffnung an der Rückseite geführt werden, und die Verschraubung fest angezogen werden, damit die Verbindung wasserundurchlässig bleibt.
Die Waage kann wahlweise in Deutsch, Englisch, Französisch, oder Spanisch drucken. Weitere Details hierzu finden Sie im Abschnitt zu den Schnittstellenparametern.
9.1 FORMAT DER EINGABEBEFEHLE
Die Waage kann mit den folgenden Befehlen kontrolliert werden. Drücken Sie nach jeder Eingabe die [Enter] Taste am PC.
T<cr><lf>
Tariert die Waage, um das Nettogewicht anzuzeigen. Entspricht der Verwendung der [0/T] Taste.
Z<cr><lf>
Setzt für alle folgenden Wägungen den Nullpunkt fest. Die Anzeige zeigt Null.
P<cr><lf>
Schickt die Ergebnisse über die RS232 an einen PC oder Drucker. Fügt außerdem den Wert zum Summenspeicher, wenn diese Funktion nicht auf automatisch gestellt ist.
10.0 RELAIS-SCHNITTSTELLE
Die Anzeige ist mit Treibern ausgestattet, um externe Relais zu steuern. Die Treiber können z.B. dazu verwendet werden, um eine Reihe verschiedener Relais zu kontrollieren, je nach Bedürfnis des Anwenders. Die Relaistreiber sind isolierte Ausgänge, für die eine externe Stromversorgung notwendig ist, und das optionale Relaisset. Die vollständigen Details finden Sie in der Vollversion des Handbuches.

DE
© Adam Equipment Company 2014 5 2 (P.N. 3136611622 - Revision D, Apr 2014)
11.0 JUSTIERUNG
Die Waage kann wie folgt beschrieben justiert werden. Zum Durchführen der Justierung muss man Func 4 aufrufen. Diese wird über die Taste [Func/C] aufgerufen, wie in Abschnitt 7.4 der Vollversion des Handbuches beschrieben, oder über den Passwortzugang, wie in Abschnitt 12.0 beschrieben. Die Waage justiert mit metrischen oder Pfund-Gewichten, je nachdem, welche Einheit vor Beginn des Justierprogramms eingestellt ist. In der Anzeige wird entweder mit „kg“ oder „lb“ gezeigt, welches Gewicht zu verwenden ist.
ABLAUF
• Rufen Sie den Abschnitt Func 4, C8 CAL auf, um mit der Justierung zu beginnen, oder benutzen Sie das Passwort wie in Abschnitt 12.0 beschrieben.
• In der Anzeige erscheint "unLoAd".
• Nehmen Sie alles Gewicht von der Waage herunter. Sobald die Waage das ‘stabil’-Symbol anzeigt, drücken Sie [Z/T] .
• In der Anzeige erscheint "Ld" , dann “0000XX”, welches das letzte verwendete Justiergewicht ist. Stellen Sie dieses Kalibriergewicht auf die Waage, und drücken Sie [0/T] . Entspricht das verwendete Justiergewicht nicht dem angezeigten Wert, können Sie den Wert mit [Func/C ] löschen, dann können Sie mit [Unit/ ] und [Pcs/�] den richtigen Wert eingeben. Wird der richtige Wert angezeigt, bestätigen Sie mit [0/T].
• Ist die Justierung erfolgreich, macht die Waage einen Selbsttest. Das Gewicht sollte heruntergenommen werden, während dieser läuft. Wir die Fehlermeldung “FAiL L” angezeigt, muss der Justiervorgang erneut vorgenommen werden, da die Justierung nicht erfolgreich war.
Nach erfolgter Justierung der Waage sollte die Waage überprüft werden, dass sie nun richtig anzeigt. Falls noch Abweichungen bestehen, wiederholen Sie den Justiervorgang erneut. Vergewissern Sie sich, dass die Waage stabil ist, bevor das Justiergewicht aufgelegt wird.
DE
© Adam Equipment Company 2014 5 3 (P.N. 3136611622 - Revision D, Apr 2014)
12.0 SERVICE-PARAMETER
Die Waage erlaubt Zugriff auf die Parameter, wenn während des Startprogramms auf [Tare] gedrückt wird. Die Passwörter funktionieren wie vorher beschrieben. In diesem Fall zeigt das Display die Aufforderung zur Eingabe der Anzeige,“ P
- - - - “ . Zum Fortfahren geben Sie nun ein Passwort ein wie folgt. Die Eingabe des Passworts 0000 erlaubt die Justierung wie in Abschnitt 11 beschrieben. Die Eingabe von 1000 erlaubt Zugriff auf eine begrenzte Anzahl von Parametern wie in Abschnitt 12.1. beschrieben.
12.3 ANDWENDEN DER SERVICEPARAMETER
Drücken Sie, während die Waage nach dem Einschalten rückwärts zählt, auf [0/T]. Geben Sie, sobald “Pn“ angezeigt wird, die Zahl 1000 mithilfe der Tasten [Unit/ ] und [Pcs/�] . Drücken Sie dann [0/T] . In der Anzeige wird der erste Parameter“F4 Int” angezeigt. Mit der Taste [Pcs/�] schalten Sie zu dem jeweils nächsten verfügbaren Parameter. Die vollständigen Informationen sind in der ausführlichen Version des Handbuchs erhältlich.

DE
© Adam Equipment Company 2014 5 4 (P.N. 3136611622 - Revision D, Apr 2014)
13.0 FEHLERMELDUNGEN
FEHLER-MELDUNG
BESCHREIBUNG LÖSUNGSVORSCHLÄGE
- -oL - - Überlastung Entfernen Sie das Gewicht von der Waage. Besteht das Problem weiterhin, kontaktieren Sie Ihren Händler oder Adam Equipment.
Err 1 Zeit falsch eingestellt
Geben Sie die Zeit im korrekten Format und mit sinnvollen Werten ein. Format: hh:mm:ss
Err 2 Datum falsch eingestellt
Geben Sie das Datum im korrekten Format und mit sinnvollen Werten ein: yy:mm:dd
Err 4 Null falsch eingestellt
Die Waage war entweder beim Einschalten oder bei Drücken von [Zero] außerhalb des normalen Nullbereichs. Entfernen Sie jedes Gewicht von der Waage, und versuchen Sie erneut, die Waage mit der [Z/T] Taste auf Null zu stellen. Besteht das Problem weiterhin, kontaktieren Sie Ihren Händler oder Adam Equipment.
Err 6 A/D nicht im zulässigen Bereich
Die Werte des A/D Wandlers sind außerhalb des zulässigen Bereiches. Entfernen Sie übermäßiges Gewicht von der Waage. Vergewissern Sie sich, dass die Lastplatte richtig aufgesetzt ist. Kann ein Hinweis auf beschädigte Wägezelle oder Elektronik sein. Besteht das Problem weiterhin, kontaktieren Sie Ihren Händler oder Adam Equipment.
Err 9 Falsche Grenzwerte
Wird angezeigt, wenn der unter Grenzwert größer ist als der obere. Setzen Sie den oberen Grenzwert zurück, oder ändern Sie den unteren.
FAIL Justierfehler Ungültige Justierung (muss innerhalb + 10% der Fabrikeinstellung liegen). Die alten Kalibrierwerte werden behalten, bis der Justiervorgang erfolgreich beendet wird. Besteht das Problem weiterhin, kontaktieren Sie Ihren Händler oder Adam Equipment.

DE
© Adam Equipment Company 2014 5 5 (P.N. 3136611622 - Revision D, Apr 2014)
GARANTIEHINWEIS Adam Equipment bietet eine beschränkte Garantie (Teile und Arbeitskraft) für Komponenten, die auf Grund von Material- oder Bearbeitungsmängeln ausgefallen sind. Die Garantie beginnt am Tag der Lieferung. Sollten während des Garantiezeitraums Reparaturen jeglicher Art von Nöten sein, so muss der Käufer seinen Händler oder Adam Equipment Company davon in Kenntnis setzen. Das Unternehmen bzw. die von ihr autorisierten Techniker behalten sich das Recht vor, Komponenten nach eigenem Ermessen, zu reparieren oder zu ersetzen. Frachtkosten, die durch das Zusenden fehlerhafter Teile an das Servicezentrum entstehen, müssen vom Käufer selbst getragen werden. Die Garantie wird nichtig, wenn das Gerät nicht in Originalverpackung und mit ordnungsgemäßer Dokumentation zur Bearbeitung eines Schadensersatzspruches zurückgesandt wurde. Sämtliche Ansprüche unterliegen dem Ermessen von Adam Equipment. Diese Garantie bezieht sich nicht auf Gerätschaften, bei denen Mängel oder unzulängliche Funktionen auf Grund falscher Anwendung, versehentlicher Beschädigung, Strahlenbelastung, Kontakt mit ätzenden Materialien, Fahrlässigkeit, falscher Installation, unbefugter Modifikation oder versuchter Reparatur, sowie Missachtung der Anweisungen dieser Bedienungsanleitung verursacht wurden. Reparaturen, die innerhalb der Garantie ausgeführt wurden, verlängern den Garantiezeitraum nicht. Komponenten, die im Rahmen der Garantie-Reparaturen entnommen werden, gehen in das Eigentum des Unternehmens über. Die satzungsgemäßen Rechte des Käufers werden durch diese Garantie nicht beeinflusst. Die Garantiebedingungen unterliegen dem Recht von England und Wales. Für ausführliche Einzelheiten und Informationen zur Garantie sehen Sie bitte die Geschäftsbedingungen auf unserer Webseite ein. ADAM EQUIPMENT ist ein nach ISO 9001:2008 zertifiziertes globales Unternehmen mit mehr als 40 Jahren Erfahrung in Herstellung und Vertrieb elektronischer Wägeapparatur. Die Adam-Produkte werden hauptsächlich für die Märkte Labor, Bildung, Medizin, Handel und Industrie entworfen. Der Umfang des Produktangebots kann wie folgt beschrieben werden:
-Analysen- und Präzisionswaagen -Kompakt- und tragbare Waagen -Waagen für hohe Lasten -Feuchtebestimmer -Mechanische Waagen -Zählwaagen -Digitales Wiegen / Waagen für Kontrollwägung -Hochleistungs-Plattformwaagen -Kranwaagen -Medizinische Waagen -Ladenwaagen zur Preisberechnung
Besuchen Sie unsere Website unter www.adamequipment.com zum Einsehen des kompletten Angebots aller Adamprodukte. © copyright Adam Equipment Co. Ltd. Alle Rechte vorbehalten. Kein Teil dieser Publikation darf ohne vorherige Genehmigung von Adam Equipment in irgendeiner Form nachgedruckt oder übersetzt werden. Adam Equipment behält sich das Recht vor, Technologie, Eigenschaften, Spezifikationen und Design der Apparatur ohne Vorankündigung zu verändern. Alle Informationen in dieser Publikation sind zum Zeitpunkt der Veröffentlichung nach bestem Wissen und Gewissen aktuell, vollständig und genau. Dennoch sind wir nicht verantwortlich für Mißdeutungen, die aus dem Lesen dieser Publikation resultieren können.
Die neueste Version dieser Publikation befindet sich auf unserer Webseite. Besuchen Sie uns auf www.adamequipment.com

ES
(P.N. 3136611622 - Revision B, April 2012) 56 © Adam Equipment Company 2012
Adam Equipment
MANUAL DE USO SERIE WARRIOR
Adam Equipment se enfoca ambientalmente y utiliza materiales reciclados y empaques seguros para el ambiente
donde sea posible. Como parte de esta iniciativa nosotros hemos desarrollado un manual de uso corto para utiliza
menos papel y tinta. Una versión completa está disponible en nuestra pagina Web www.adamequipment.com.
Gracias por su apoyo y esperamos que usted disfrute de su nueva balanza.

ES
(P.N. 3136611622 - Revision B, April 2012) 57 © Adam Equipment Company 2012
CONTENIDO
1.0 INTRODUCCIÓN .................................................................................................................................................. 58 2.0 ESPECIFICACIONES .............................................................................................................................................. 59 3.0 INSTALACIÓN ...................................................................................................................................................... 61
3.1 DESEMPAQUE ................................................................................................................................................ 61 3.2 SITUANDO Y PROTEGIENDO SU BALANZA ..................................................................................................... 61 3.3 ESTABLECIENDO SU BALANZA ...................................................................................................................... 62
4.0 DESCRIPCIÓN DE LAS TECLAS ............................................................................................................................. 63 5.0 DISPLAY ............................................................................................................................................................... 64 6.0 OPERACIÓN ........................................................................................................................................................ 65
6.1 COLOCANDO EL DISPLAY A CERO .................................................................................................................. 65 6.2 TARANDO ....................................................................................................................................................... 65 6.3 PESANDO UNA MUESTRA .............................................................................................................................. 66 6.4 RECUENTO DE PIEZAS .................................................................................................................................... 67 6.5 PESAJE DE CONTROL ...................................................................................................................................... 67 6.6 ACUMULACIÓN TOTAL .................................................................................................................................. 68 6.7 CÁLCULO DE PORCENTAJE ............................................................................................................................. 68 6.8 PESAJE DE ANIMALES (dinámico) .................................................................................................................. 68
7.0 PARÁMETROS DE USUARIO ................................................................................................................................ 68 8.0 OPERACIÓN DE BATERÍA .................................................................................................................................... 69 9.0 INTERFAZ RS-232 ................................................................................................................................................ 69
9.1 FORMATO DE COMANDOS DE ENTRADA ...................................................................................................... 70 10.0 INTERFAZ DE RELÉ .............................................................................................................................................. 71 11.0 CALIBRACIÓN ...................................................................................................................................................... 71 12.0 PARÁMETROS DE SERVICIO ................................................................................................................................ 73
12.1 USO DE LOS PARÁMETROS DE SERVICIO ....................................................................................................... 73 13.0 CÓDIGOS DE ERROR ........................................................................................................................................... 74 14.0 INFORMACIÓN SOBRE LA GARANTÍA ................................................................................................................. 75

ES
(P.N. 3136611622 - Revision B, April 2012) 58 © Adam Equipment Company 2012
1.0 INTRODUCCIÓN
• La serie WARRIOR ofrecer pesaje general exacto, rápida y versátil con funciones de recuento de piezas, cálculo de porcentaje y pesaje controlado.
• La WARRIOR contiene luces LED al lado de la pantalla para indicar cuando un peso está por debajo del límite inferior, entre los límites o por encima del límite alto. Estos pueden trabajar en conjunto con una alarma acústica para pesaje controlado, así como la pantalla que indica LO, OK y HI.
• La WARRIOR se suministra con un puerto interfaz RS-232 bidireccional y un reloj en tiempo real (RTC).
• La WARRIOR tiene un teclado de membrana sellado con teclas codificada de color, una gran pantalla retroiluminada de cristal líquido (LCD) fácil de leer.
• Las funciones incluidas son seguimiento automático del punto cero, tara semi-automática y centro de acumulación que permite que el peso se pueda almacenar y recuperar como un total acumulado.

ES
(P.N. 3136611622 - Revision B, April 2012) 59 © Adam Equipment Company 2012
2.0 ESPECIFICACIONES
Modelo WSK 8
WSK 16a WSK 16
WSK 35a WSK 32
WSK 70a WBK 32
WBK 70a WBK 75
WBK 165a Capacidad
máxima 8000g 16kg 32kg 32kg 75kg
Legibilidad 0.5g 0.001kg 0.002kg 0.002kg 0.005kg
Resolución 1:16000 1:16000 1:16000 1:16000 1:15000
Repetibilidad (Std Dev)
1g 0.002kg 0.004kg 0.004kg 0.01kg
Linealidad + 1g 0.002kg 0.004kg 0.004kg 0.01kg
Tamaño del Plato 250mm x 250mm 300mm x 400mm
Unidades de Pesaje
g / Kg / Lb / Lb:oz / Newton/Onzas
Tiempo de Estabilización
2-3 Segundos
Temperatura de Operación
-10°C a +40°C
Fuente de Energía + 6v 4.5Ah batería
12vDC 800mA adaptador externo
Calibración Externa
Masa de Calibración
Seleccionable por Usuario
Display Display retroiluminado con dígitos de 40mm y registrador de capacidad
Carcasa Base e indicador de acero inoxidable tipo 304, Protección IP66

ES
(P.N. 3136611622 - Revision B, April 2012) 60 © Adam Equipment Company 2012
Modelo WFK 75
WFK 165a WFK 150
WFK 330a WLK 150
WLK 330a
Capacidad máxima 75kg 150kg 150kg
Legibilidad 0.005kg 0.01kg 0.01kg
Resolución 1:15000 1:15000 1:15000
Repetibilidad (Std Dev)
0.01kg 0.02kg 0.02kg
Linealidad + 0.01kg 0.02kg 0.02kg
Tamaño del Plato 400mm x 500mm 450mm x 600mm
Unidades de Pesaje g / Kg / Lb / Lb:oz / Newton/Onzas
Tiempo de Estabilización
2-3 Segundos
Temperatura de Operación
-10°C to +40°C
Fuente de Energía + 6v 4.5Ah batería
12vDC 800mA adaptador externo
Calibración Externa
Masa de Calibración Seleccionable por Usuario
Display Display retroiluminado con dígitos de 40mm y registrador de capacidad
Carcasa Base e indicador de acero inoxidable tipo 304, Protección IP66

ES
(P.N. 3136611622 - Revision B, April 2012) 61 © Adam Equipment Company 2012
3.0 INSTALACIÓN
3.1 DESEMPAQUE
Las básculas WARRIOR ya han sido ajustadas para trabajar con su plataforma y se
han configurado para esta aplicación. La plataforma y el indicador se han calibrado
como un par y se deben de utilizarse juntas.
3.2 SITUANDO Y PROTEGIENDO SU BALANZA
Para mantenerle la balanza funcionando en su mejor forma sugerimos que usted haga lo siguiente:
• La balanza no se debe colocar en un lugar que va a reducir la precisión..
• Evite extremos de temperatura. No la coloque en la luz directa del sol ni cerca de aberturas de aire acondicionado
• Aseguré que la balanza este situada sobre una mesa libre de vibración.
• Evite fuentes de alimentación inestables. No utilice cerca de usuarios grandes de electricidad como equipos de soldar ni motores grandes.
• Mantenga libre de la vibración. No la coloque cerca de maquinaria pesada ni vibrante.
• No la coloque cerca ventanas abiertas, aberturas de aire acondicionado o ventiladores que pueden causar lecturas inestables..
• Mantenga la balanza limpia. No amontone material sobre la balanza/báscula cuando no está en el uso.

ES
(P.N. 3136611622 - Revision B, April 2012) 62 © Adam Equipment Company 2012
3.3 ESTABLECIENDO SU BALANZA
• Remueva el indicador de su caja y móntelo en el soporte en forma U utilizando las 2x asas de fijación. Coloque el indicador en el pilar asegurando que el cable restante sea insertado hacia dentro. Fije el indicador a la columna con el tornillo suministrado.
• Remueva todo el embalaje interno superior, coloque el pilar en el soporte de la base y remueva la unidad completa de la caja. Remueva el plástico que se utilizo para la protección.
• Fijar el pilar al soporte de la base utilizando los tornillos suministrados
• Ajustar el ángulo de visión del indicador en la posición ideal y apriete las 2x manejas de seguridad.
• Nivele la balanza mediante el ajuste de las cinco patas de los modelos WSK / WBK o las cuatro patas de los modelos WFK / WLK.
• Conecte la alimentación del indicador y pulse la tecla [ON / OFF]. El número de revisión del software será indicado seguido por un auto-test de cuenta regresiva antes de que cero junto con la unidad de peso utilizados por última vez sean indicados.

ES
(P.N. 3136611622 - Revision B, April 2012) 63 © Adam Equipment Company 2012
4.0 DESCRIPCIÓN DE LAS TECLAS
Se utiliza para restablecer la pantalla a cero. Tara la balanza. Se utiliza para deducir y guardar el peso actual en la báscula si no se requiere como parte del resultado final de pesaje. Una función secundaria, es de la tecla "Enter" cuando se utiliza la creación de un valor para los parámetros.
Selecciona cuenta piezas. Utilizado para establecer las cantidades de muestra, durante el recuento de piezas. Una función secundaria, � es de incrementar el dígito activo cuando se establezca el valor de los parámetros.
Seleccione que la unidad de pesaje sea indiada de las que están habilitadas. Véase el parámetro S1 en la sección 7.4. Una función secundaria, es mover el dígito activo/intermitente a la izquierda cuando estableciendo los valores de los parámetros.

ES
(P.N. 3136611622 - Revision B, April 2012) 64 © Adam Equipment Company 2012
Seleccione las funciones de la báscula. Una función secundaria (C) actúa como una tecla para borrar el total acumulado.
Enviando resultados a un PC o impresora mediante la interfaz RS-232. También agrega el valor a la memoria de acumulación si la función de acumulación no es automática. Una función secundaria (ESC) es para volver al funcionamiento normal si la báscula se encuentra en modo de ajuste de parámetros.
Para encender y apagar el indicador. La WARRIOR almacenará la unidad de peso en uso y los valores del pesaje controlado actualmente en la memoria al apagarla.
5.0 DISPLAY
El display LCD indicará un valor y unidad actualmente en uso. Además, los LED’s encima de la pantalla indicarán si el peso está por debajo o por encima de los límites del pesaje controlado.
Otros símbolos indicarán cuando un peso se ha tarado (NET), la báscula está en cero y estable, si un valor se ha almacenado en la memoria o cuando la función de pesaje de animales ha sido habilitada. Un símbolo de la batería mostrará el estado de carga de la batería interna.

ES
(P.N. 3136611622 - Revision B, April 2012) 65 © Adam Equipment Company 2012
6.0 OPERACIÓN
6.1 COLOCANDO EL DISPLAY A CERO
• Se puede pulsar la tecla [0/T] en cualquier momento para ajustar el punto cero. Esto es normalmente necesario cuando la plataforma está vacía. Cuando el punto cero se obtiene la pantalla indicará cero.
• La báscula tiene una función automática de reducción a re-cero para dar cuenta a derivados menores o acumulación de material en la plataforma. Sin embargo es posible que necesite pulsar la tecla [0/T] para re-cero de la báscula si pequeñas cantidades de peso son indicados cuando la plataforma está vacía.
6.2 TARANDO
• Para poner la báscula en cero pulse la tecla [0/T] si es necesario. El indicador "CERO" se encenderá.
• Coloque un contenedor sobre la plataforma, un valor por su peso será indicado.

ES
(P.N. 3136611622 - Revision B, April 2012) 66 © Adam Equipment Company 2012
• Pulse la tecla [0/T] para tarar la báscula. El peso que se indico es almacenado como el valor de tara y ese valor es restado del display, dejando cero en el display. El indicador "NET” estará en ON. Cunado un producto se agrega, solo el peso neto del producto será indicado. La báscula puede ser tarada por segunda vez si otro tipo de producto es añadido al primero. Una vez más, sólo el peso que se agrega después de tarar será indicado.
• Cuando se retira el contenedor, un valor negativo será indicado. Si la balanza se tara antes de retirar el recipiente, este valor es el peso bruto del contenedor más todos los productos que se retiraron. El indicador "CERO" se encenderá para indicar que la plataforma a regresado a la misma condición en que estaba cuando fue puesta a cero la última vez.
• Para borrar los valores de Tara, pulse [0/T] cuando el plato esta vacío.
6.3 PESANDO UNA MUESTRA
Para determinar el peso de una muestra, en primer lugar tarar el contenedor vacío si se va a utilizar y luego colocar la muestra en el contenedor. El display indicará el peso neto de la muestra y las unidades de peso actualmente en uso.

ES
(P.N. 3136611622 - Revision B, April 2012) 67 © Adam Equipment Company 2012
6.4 RECUENTO DE PIEZAS Si el recuento de piezas es habilitado, véase la sección 7.4, es posible contar las piezas utilizando una muestra de las partes para determinar el peso unitario medio.
• Si utiliza un contenedor vacío, coloque el contenedor sobre el plato y pulse la tecla [0/T] para poner la pantalla a cero. Pulse la tecla [PCS] para entrar al modo de recuento de piezas.
• La balanza indicará "P 10". Cambie el tamaño de la muestra a la cantidad deseada pulsando la tecla [Pcs/�]. Hará un ciclo a través de las siguientes opciones: 10, 20, 50, 100, 200 y de nuevo a 10.
• Coloque el tamaño de la muestra nominada en el contenedor y pulse la tecla [0/T]. El número de muestra debe coincidir con las opciones disponibles para la cantidad de muestra de recuento de piezas, es decir, 10, 20, 50, 100 o 200 piezas.
• La pantalla ahora indicará la cantidad de piezas en el contenedor, y mientras más piezas se añaden, el número de piezas en la pantalla aumentará indicando el numero de piezas en el contenedor (PCS).
Pulsando la tecla [Unit/] indicará el peso neto (pcs y kg), al pulsar por segunda vez, indicará la unidad de peso (g/pcs), y una tercera vez indicará la cuenta una vez más (pcs).
• Pulse la tecla [Pcs/�] para regresar al modo de pesaje. Pulse la tecla [Pcs/�] de Nuevo para comenzar el recuento de una muestra.
6.5 PESAJE DE CONTROL Pesaje controlado es un procedimiento donde lámparas LED se encienden (y si activada, una alarma acústica) cuando el peso sobre la báscula cumple con los valores almacenados en la memoria. La memoria mantiene los últimos valores del límite alto y bajo, al apagar la báscula. El usuario puede establecer o limitar uno o ambos, véase la versión completa del manual del usuario para obtener detalles sobre la función de pesaje controlado.

ES
(P.N. 3136611622 - Revision B, April 2012) 68 © Adam Equipment Company 2012
6.6 ACUMULACIÓN TOTAL
• La báscula se puede configurar para acumular manualmente pulsando la tecla [Print/M+/Esc] o automáticamente al remover el peso de la báscula. Véase la sección 7.3 para más detalles.
6.7 CÁLCULO DE PORCENTAJE La báscula se puede configurar para realizar cálculos en porcentaje. Véase la sección 7.2. 6.8 PESAJE DE ANIMALES (DINÁMICO) La báscula se puede configurar para pesaje de animales (dinámico) para el pesaje de elementos que son inestables o se pueda mover. Véase la sección 7.4 de la versión completa del manual del uso para obtener más detalles.
7.0 PARÁMETROS DE USUARIO
Al pulsar la tecla [Func/C] durante el funcionamiento normal le permite al usuario acceder a los parámetros para la personalización de la báscula. Los parámetros se dividen en 4 grupos: 1. Parámetros de pesaje controlado, 2. Funciones de pesaje para animales y determinación del porcentaje 3. Parámetros del RS-232 4. Parámetros de la báscula
• Cunado [Func/C] es pulsado, el display indicará primero “FunC 1” para los parametros del pesaje controlado.
• Pulse la tecla [Func/C] o [Pcs/] para avanzar a través de los grupos "FunC 1", "FunC 2", "FunC 3" y "FunC 4". Pulse [0/T] para entrar en el grupo de parámetros deseado.
• Cuando en una de las secciones de pulse [Print/M+/Esc] para volver al grupo "FunC 1". Si pulsa [Print/M+/Esc] de nuevo, la báscula saldrá de la sección de parámetros de usuario y regresará a pesaje normal.
Los detalles completos de todos los parámetros se pueden encontrar en la versión completa del manual del usuario.

ES
(P.N. 3136611622 - Revision B, April 2012) 69 © Adam Equipment Company 2012
8.0 OPERACIÓN DE BATERÍA
• Las básculas pueden ser operadas con batería si desea. La duración de la batería es de hasta 70 horas dependiendo de las celdas de carga utilizadas y cómo se utiliza la retroiluminación.
• El símbolo de la batería es indicado en la pantalla el cual indica la carga actual de la batería, 3 barras indica una carga completa. Cuando solo el perfil de la batería es indicado, y las barras no son visibles, de la batería necesita ser cargada de nuevo.
• Para cargar la batería, simplemente conectar el adaptador a la red eléctrica y también en el conector en la parte posterior del indicador marcado DC 12V. La báscula no tiene que estar encendida.
• La batería se debe cargar por 12 horas para la capacidad máxima.
• Cerca de la pantalla hay un LED que indica el estado de carga de la batería. Cuando la báscula está conectada a la red eléctrica la batería interna se cargará. Si el LED esta en verde de la batería tiene una carga completa. Si está en rojo la batería está casi descargada y el amarillo indica que la batería se está cargando.
9.0 INTERFAZ RS-232
La WARRIOR es suministrada con RS-232 bidireccional de serie. La báscula cuando se conecta a una impresora o PC del provee el peso de la unidad seleccionada a través de la interfaz RS-232. Especificaciones:
RS-232 salida de datos de pesaje
Código ASCII
9600 baudios (seleccionable por el usuario)
8 bits de datos
Sin paridad

ES
(P.N. 3136611622 - Revision B, April 2012) 70 © Adam Equipment Company 2012
La interfaz serial RS-232 se encuentra dentro la carcasa, el acceso se obtiene removiendo los 8 tornillos en el que se pueden hacer conexiones a COM 1 como indicado a continuación. RXT Datos Recibidos TXT Datos Transmitidos GND Señal de Tierra El cable utilizado debe ser enrutado a través de la glándula marcada RS 232 y apretado correctamente para asegurar una conexión protegida contra el agua.
La báscula se puede configurar para imprimir el texto en Inglés, francés, alemán o español. Véase la sección de parámetros RS-232 para obtener más detalles.
9.1 FORMATO DE COMANDOS DE ENTRADA
La báscula se puede controlar con los siguientes comandos. Pulse la tecla [Enter] de la computadora después de cada comando.
T<cr><lf>
Tara la báscula para mostrar el peso neto. Este es el mismo que pulsar [0/T].
Z<cr><lf>
Establece el punto cero para todos los pesajes posteriores. El display indica cero.
P<cr><lf>
Imprime los resultados a una computadora o una impresora mediante la interfaz RS-232. También agrega el valor a la memoria de acumulación si la función de acumulación no está definida como automático.

ES
(P.N. 3136611622 - Revision B, April 2012) 71 © Adam Equipment Company 2012
10.0 INTERFAZ DE RELÉ
El indicador es suministrado con controladores para controlar relés externos. Los controladores se pueden utilizar para controlar una serie de relés diferentes dependiendo de la necesidad de los usuarios. Los controladores de relé están aislados y requieren el uso de una fuente de alimentación externa para los relés. véase la versión completa del manual del usuario para obtener detalles.
11.0 CALIBRACIÓN
La báscula se puede calibrar mediante el siguiente procedimiento. Para entrar a este procedimiento es necesario el uso de Func 4 accesible mediante la tecla [Func/C] como se describe en el punto 7.4 o utilizando la contraseña como se describe en la sección 12. La báscula se calibran usando masas métricas o libras, dependiendo de la unidad de peso en uso antes de la calibración. El display indicará "kg" o "libra" para identificar los pesos requeridos. PROCEDIMIENTO
• Introduzca la sección de calibración utilizando Func 4, CAL C8 o el uso de la contraseña como se describe en la sección 12.
• El display indicará "unLoAd".
• Remueva todo el peso sobre la plataforma, cuando el símbolo de estabilidad se encienda, pulse [0/T].
• El display indicará el mensaje "Ld", el "0000XX" para mostrar el peso de calibración utilizado por última vez. Coloque el peso de calibración sobre el plato. Pulse la tecla [0/T]. Si el peso colocado sobre el plato no coincide con el valor que aparece, pulse la tecla [Func/C] para borrar el valor a continuación, utilice las teclas [Unit/] y [PC/����] para establecer el valor correcto. Cuando este correcto pulse [0/T].
• Si la calibración es aceptable la báscula ejecutará una prueba automática durante el cual debe ser removido el peso de calibración. Si el mensaje de error “FAiL L” es indicado pruebe la calibración de nuevo, una perturbación pudo haber causado el fallo de la calibración.

ES
(P.N. 3136611622 - Revision B, April 2012) 72 © Adam Equipment Company 2012
Después de la calibración, la báscula debe ser controlada para verificar que la calibración es correcta. Si es necesario repita la calibración, asegúrese de que la báscula se estabilice antes de aceptar cualquier peso.

ES
(P.N. 3136611622 - Revision B, April 2012) 73 © Adam Equipment Company 2012
12.0 PARÁMETROS DE SERVICIO
Las básculas permitirán la entrada a los parámetros si la tecla [Tara] se pulsa durante el ciclo de encendimiento. Las contraseñas funcionan como encima. En este caso, el display indicará la solicitud de la contraseña de acceso, "P - - - -". Para continuar entre una contraseña como se describe a continuación. Introduciendo la contraseña de acceso 0000 permitirá la calibración como se indica en la sección 11. Introduciendo de 1000 permitirá el acceso a un conjunto limitado de parámetros descritos en la sección 12.1.
12.1 USO DE LOS PARÁMETROS DE SERVICIO
Pulse la tecla [0/T] durante el conteo en el display al encender la unidad, Cuando "Pn" es indicado, introduzca el número 1000 utilizando las teclas [Unit/] y [Pcs/����] y pulse [0/T]. El display indicará los primeros parámetros, denominado "F4" "Int". Para seleccionar otro parámetro pulse la tecla [Pcs/����] para avanzar a través de los parámetros. véase la versión completa del manual del usuario para obtener detalles.

ES
(P.N. 3136611622 - Revision B, April 2012) 74 © Adam Equipment Company 2012
13.0 CÓDIGOS DE ERROR
CÓDIGOS DE ERROR
DESCRIPCIÓN SUGERENCIAS
- -oL - - Rango Alto Remueva el peso sobre la báscula. Si el problema persiste contacte a su distribuidor o Adam Equipment para asistencia.
Err 1 Ajustando el tiempo de error
Introduzca la hora utilizando el formato correcto y los valores razonables. Formato: hh: mm: ss
Err 2 Ajustando la fecha de error
Ingrese la fecha usando el formato correcto y los valores razonables. Formato: aa: mm: dd
Err 4 Ajustando el cero de error
La báscula estaba fuera del rango de ajuste normal de cero al encenderla o cuando el [Zero] se ha pulsado. Remueva el peso sobre la báscula y tratar de volver la a cero de nuevo. Utilice la tecla [Z/T] para configurar el display al valor cero. Si el problema persiste contacte a su distribuidor o Adam Equipment para asistencia.
Err 6 A/D fuera de rango Los valores del convertidor A/D están fuera del rango normal. Remueva el peso sobre la báscula en caso de sobrecarga. Asegúrese de que el plato este adjunto. Indica que la celda de carga o la electrónica pueden estar defectuosas. Si el problema persiste contacte a su distribuidor o Adam Equipment para asistencia.
Err 9 Errores de los limites de pesaje controlado
Indica si el límite inferior ajustado por encima del límite superior. Restablezca el límite alto o un límite bajo diferente.
FAIL Errores de calibración.
asístanse Calibración incorrecta (debe de estar dentro de + 10% de la calibración de fábrica). Los datos de calibración anteriores se mantendrán hasta que el proceso de calibración se ha completado. Si el problema persiste contacte a su distribuidor o Adam Equipment para asistencia.

ES
(P.N. 3136611622 - Revision B, April 2012) 75 © Adam Equipment Company 2012
14.0 INFORMACIÓN SOBRE LA GARANTÍA Adam Equipment ofrece Garantía Limitada (Partes y Mano de obra) para los componentes que fallan debido a defectos en materias o ensamblaje. La garantía comienza de la fecha de entrega. Durante el período de garantía, si cualquier reparación es necesaria, el cliente debe informar el suministrador o a Adam Equipment. La compañía o su Técnico autorizado reservan el derecho de reparar o reemplazar cualquier componente a su propia discreción. Cualquier costo de envíos implicados en la envía de las unidades defectuosas a un centro de reparaciones son la responsabilidad de clientes. La garantía será anulada si el equipo no es devuelto en el embalaje original y con la documentación correcta para ser un reclamo procesado. Todos reclamos están en la única discreción de Adam Equipment. Esta garantía no cubre equipos donde defectos o el rendimiento bajo es debido maltrato, daño accidental, exposición a materiales radioactivos o corrosivos, la negligencia, instalación defectuosa, modificaciones sin autorización, reparación o fallo de seguir los requisitos y las recomendaciones procuradas como están en al Manual de Usuario. Las reparaciones llevadas a cabo bajo la garantía no extiende el período de garantía. Los componentes removidos durante las reparaciones de garantía llegan a ser la propiedad de la compañía. El derecho reglamentario del comprador no es afectado por esta garantía. Los términos de esta garantía son gobernados por la ley de Inglaterra. Para detalles completos en la Información de Garantía, vea los términos y las condiciones de venta disponible en nuestra página Web.
ADAM EQUIPMENT es una organización global certificada con un ISO 9001:2008 con más de 40 años de experiencia en la producción y venta de equipo electrónico para cálculo de peso. Los productos son vendidos a través de una red mundial de distribuidores apoyada por las localizaciones de la compañía en el Reino Unido, Alemania, Estados Unidos y Sudáfrica. Los productos de ADAM están predominantemente diseñados para los siguientes segmentos de Mercado: Laboratorios, Educativo, Médico y Industrial. El abanico de productos es el siguiente: - Balanzas Analíticas y de Precisión para Laboratorios. - Balanzas de precisión para centros educativos. - Balanzas de conateje para aplicaciones industriales y en almacenes. - Balanzas digitales de pesaje y de control de peso. - Balanzas y plataformas de alta calidad con caracerísticas de programación extensa incluyendo cuenta de partes, peso en porcentaje, etc. - Balanzas digitales electrónicas para uso médico. - Balanzas comerciales. © Copyright by Adam Equipment Co. Ltd. Todos los derechos reservados. Ninguna parte de esta publicación puede ser reimpresa o traducida de ninguna forma o a través de ningún medio sin la previa autorización de Adam Equipment. Adam Equipment se reserva el derecho de hacer cambios en la tecnología, características, especificaciones y diseño de su equipamiento sin previo aviso. Toda la información contenida en esta publicación está al máximo de actualizada, completa y precisa. No obstante, no nos responsabilizamos de los errores de interpretación que pueden resultar de leer este material. La última versión de esta publicación puede ser encontrada en nuestra página web.
Visítenos a www.adamequipment.co

IT
(P.N. 3136611622 - Revision B, April 2012) 76 © Adam Equipment Company 2012
Adam Equipment
SERIE “WARRIOR”
MANUALE D’ISTRUZIONI
SW Ver. 1.24
ADAM Equipment si impegna a protezione dell’ambiente ad usare materiali riciclati e imballaggi ecologici il piu’ possible. Come parte di questa iniziativa abbiamo sviluppato un breve manuale che utilizza meno carta e inchiostro per descrivere le funzioni principali dei prodotti nuovo ADAM. La versione completa è disponibile all'indirizzo www.adamequipment.com. ADAM Equipment apprezza il vostro sostegno.

IT
© Adam Equipment Company 2014 - 77 - (P.N. 3136611622 - Revision D, Apr 2014)
INDICE
INDICE ............................................................................................................................................................. 77 1.0 INTRODUZIONE ................................................................................................................................. 78 2.0 SPECIFICAZIONI ................................................................................................................................ 79 3.0 INSTALLAZIONE ................................................................................................................................. 80
3.1 RIMOZIONE IMBALLO .................................................................................................................... 80 3.2 POSIZIONE DELLA BILANCIA ....................................................................................................... 80 3.3 MONTAGGIO DELLA BILANCIA...................................................................................................... 81
4.0 DESCRIZIONI DEI TASTI ................................................................................................................... 82 5.0 DISPLAY .............................................................................................................................................. 83 6.0 FUNZIONAMENTO ............................................................................................................................. 84
6.1 AZZERARE IL DISPLAY ................................................................................................................. 84 6.2 TARATURA...................................................................................................................................... 84 6.3 PESATURA DI UN CAMPIONE ...................................................................................................... 85 6.4 CONTEGGIO DI PEZZI ................................................................................................................... 86 6.5 PESATURA DI CONTROLLO ......................................................................................................... 86 6.6 TOTALIZZAZIONE .......................................................................................................................... 86 6.7 PESATURA PERCENTUALE .......................................................................................................... 87 6.8 PESATURA ANIMALE (DINAMICA) ............................................................................................... 87
7.0 PARAMETRI UTENTE. ....................................................................................................................... 87 8.0 FUNZIONAMENTO della BATTERIA .................................................................................................. 88 9.0 INTERFACCIA RS-232 ........................................................................................................................ 88
9.1 FORMATO D’ INGRESSO AI COMANDI ...................................................................................... 89 10.0 CONNESSIONE RELÈ ....................................................................................................................... 89 11.0 CALIBRATUR ...................................................................................................................................... 90 12.0 PARAMETRI DI SERVIZIO ................................................................................................................. 91
12.1 USO DEI PARAMETRI DI SERVIZIO ............................................................................................. 91 13.0 CODICI DI ERRORE ........................................................................................................................... 92 INFORMAZIONI DI GARANZIA ...................................................................................................................... 93

IT
© Adam Equipment Company 2014 - 78 - (P.N. 3136611622 - Revision D, Apr 2014)
1.0 INTRODUZIONE
• Le WARRIOR garantiscono precisione, velocita’ e versatilita’ per
impieghi generali di bilance per conteggio pezzi, pesatatura di
percentuale e pesatura di controllo.
• Le WARRIOR hanno diversi led VICINO al display per indicare quando il
peso è inferiore al limite minimo, tra i limiti o al di sopra del limite
superiore. Questi possono lavorare in congiunzione con un allarme
acustico per la pesatura di controllo nonché il display che visualizza LO,
OK e HI.
• Le WARRIOR sono fornite con una RS-232 interfaccia a doppia direzione
e orologio a tempo reale (RTC).
• Le WARRIOR hanno una tastiera sigillata con interruttori a colori
codificati, un grande display a cristalli liquidi (LCD) con una
retroilluminazione verde facile a leggere.
• Incluse funzioni di tracciabilita’ zero, taratura semi automatica, facilita’
di immagazzinare e richiamare il peso come totale accumulo.

IT
© Adam Equipment Company 2014 - 79 - (P.N. 3136611622 - Revision D, Apr 2014)
2.0 SPECIFICAZIONI
Modello WSK 8 WSK 16a
WSK 16 WSK 35a
WSK 32 WSK 70a
WBK 32 WBK 70a
WBK 32H WBK70aH
WBK 75 WBK 165a
Capacita’ massima 8000g/16lb 16kg/35lb 32kg/70lb 32kg/70lb 32kg/70lb 75kg/165lb
Precisione 0.5g/0.001lb 0.001kg/ 0.002lb
0.002kg/ 0.005lb
0.002kg/ 0.005lb
0.001kg/ 0.002lb
0.005kg/ 0.01lb
Divisione 1:16000 1:16000 1:16000 1:16000 1:32000 1:15000
Ripetibilita’ (Std. Dev)
1g/0.002lb 0.002kg/ 0.004lb
0.004kg/ 0.01lb
0.004kg/ 0.01lb
0.002kg/ 0.004lb
0.01kg/ 0.02lb
Linearita’ + 1g/0.002lb 0.002kg/ 0.004lb
0.004kg/ 0.01lb
0.004kg/ 0.01lb
0.002kg/ 0.004lb
0.01kg/ 0.02lb
Misura Piatto w x d
250mm x 250mm/ 9.8in x 9.8in 300mm x 400mm/ 11.8in x 15.7in
Unita’ di Peso g / Kg / Lb / Lb:oz / Newtons / Ounces
Modello WFK 75 WFK 165a
WFK 75H WFK 165aH
WFK 150 WFK 330a
WLK 150 WLK 330a
Capacita’ massima
75kg/165lb 75kg/165lb 150kg/330lb 150kg/330lb
Precisione 0.005kg/0.01lb 0.001kg/0.002lb 0.01kg/0.02lb 0.01kg/0.02lb
Divisione 1:15000 1:75000 1:15000 1:15000
Ripetibilita’ (Std. Dev)
0.01kg/0.02lb 0.002kg/0.004b 0.02kg/0.04lb 0.02kg/0.04lb
Linearita’ + 0.01kg/0.02lb 0.002kg/0.004lb 0.02kg/0.04lb 0.02kg/0.04lb
Misura di Piatto w x d
400mm x 500mm/ 15.7in x 19.7in 450mm x
600mm/ 17.7in x 23.6in
Units di Peso g / Kg / Lb / Lb:oz / Newtons/Ounces
Specificazioni per tutti i modelli
Tempo di stabilizzazione 2-3 Secs
Temperature di funzionamento
-10°C to +40°C / +32°F to +104°F
Alimentazione (esterna) + 6v 4.5Ah batteria o
12vDC 800mA
Calibratura Esterna
Peso di calibratura Scelto da utente
Display Numeri digitali di altezza 40mm con retroilluminazione verde e indicatore
di capacita’
Custodia Acciaio inossidabile - IP66
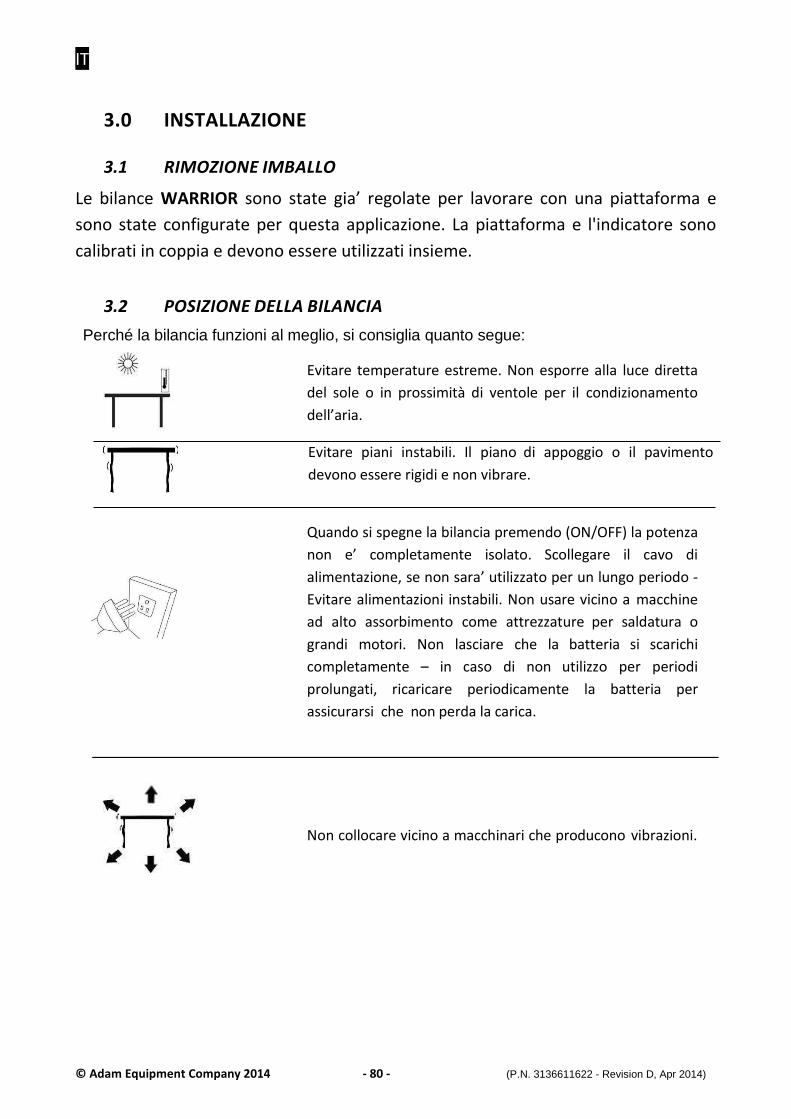
IT
© Adam Equipment Company 2014 - 80 - (P.N. 3136611622 - Revision D, Apr 2014)
3.0 INSTALLAZIONE
3.1 RIMOZIONE IMBALLO
Le bilance WARRIOR sono state gia’ regolate per lavorare con una piattaforma e
sono state configurate per questa applicazione. La piattaforma e l'indicatore sono
calibrati in coppia e devono essere utilizzati insieme.
3.2 POSIZIONE DELLA BILANCIA
Perché la bilancia funzioni al meglio, si consiglia quanto segue:
Evitare temperature estreme. Non esporre alla luce diretta
del sole o in prossimità di ventole per il condizionamento
dell’aria.
Quando si spegne la bilancia premendo (ON/OFF) la potenza
non e’ completamente isolato. Scollegare il cavo di
alimentazione, se non sara’ utilizzato per un lungo periodo -
Evitare alimentazioni instabili. Non usare vicino a macchine
ad alto assorbimento come attrezzature per saldatura o
grandi motori. Non lasciare che la batteria si scarichi
completamente – in caso di non utilizzo per periodi
prolungati, ricaricare periodicamente la batteria per
assicurarsi che non perda la carica.
Non collocare vicino a macchinari che producono vibrazioni.
Evitare piani instabili. Il piano di appoggio o il pavimento
devono essere rigidi e non vibrare.

IT
© Adam Equipment Company 2014 - 81 - (P.N. 3136611622 - Revision D, Apr 2014)
3.3 MONTAGGIO DELLA BILANCIA
• Estrarre l'indicatore dalla sua scatola e fissarlo al supporto a U usando le 2 x maniglie di fissaggio. Prendere l'Indicatore e posizionarlo sul pilastro garantendo che il cavo sia spinto verso l'interno. Fissare l'Indicatore al pilastro con la vite.
• Rimuovere tutto l’imballo superiore, mettere il pilastro all'interno della mensola di base e rimuovere la macchina completa dalla scatola. Rimuovere eventuali sacchetti di plastica che potrebbero essere stati usati come protezione.
• Fissare il pilastro alla mensola di base usando le viti fornite
• Regolare l'angolo di visualizzazione ideale dell'indicatore di posizione e serrare le 2 x maniglie di fissaggio.
• Livellare la bilancia regolando i cinque piedi del WSK/WBK o i quattro piedi del WFK/WLK. Se la bilancia dondola regolare nuovamente i piedi.
NOTA: Si consiglia l’uso di un grasso innocuo all’alimentazione per mantenere i piedi girevoli.
• Collegare il cavo di alimentazione all’indicatore e premere il tasto [On/Off]. Il numero di revisione del software sarà seguito da un self-test che mostra tutti i caratteri prima che lo zero venga visualizzato con l'unità di peso che è stato utilizzato per ultimo.
• Se necessario un connessione al RS-232 e filo relay devono essere richiesti.
Non collocare vicino a finestre aperte o ventole per il
condizionamento dell’aria che potrebbero causare letture
instabili a causa delle correnti d’aria.
Tenere la bilancia pulita. Non abbandonare materiale sulla
bilancia/piatto della bilancia quando non è in uso.

IT
© Adam Equipment Company 2014 - 82 - (P.N. 3136611622 - Revision D, Apr 2014)
4.0 DESCRIZIONI DEI TASTI
Utilizzato per azzerare il display. Tarare la bilancia. Usato per dedurre e memorizzare il peso attualmente sulla bilancia se non è richiesto come parte del risultato di pesatura finale. Una funzione secondaria, è sul tasto invio "Enter" utilizzato per l'impostazione di un valore di parametri.
Seleziona conteggio di pezzi. Utilizzato per impostare la quantità di campione per il conteggio. Una funzione secondaria � è di incrementare la cifra attiva durante l'impostazione di un valore per i parametri.
Seleziona un’unita’ di peso da esporre tra le unita’ attivate. (Vedere il parametro S1 nel manuale completo. Una funzione secondaria è di movere la cifra activa/lampante verso sinistra durante l'impostazione di un valore per i parametri.

IT
© Adam Equipment Company 2014 - 83 - (P.N. 3136611622 - Revision D, Apr 2014)
Seleziona i parametri di funzione della bilancia. Una funzione secondaria (C) è di agire come un tasto quando si cancella un totale accumulato.
Invia i risultati a un PC o una stampante utilizzando l'interfaccia RS-232. Inoltre, aggiunge il valore per l'accumulo memoria se la funzione di accumulo non è automatico. Una funzione secondaria (ESC) per ritornare al funzionamento normale quando la bilancia è in un modo di parametro
Per attivare o disattivare l'indicatore. Il WARRIOR conserva l'unità di pesatura e la pesatura di controllo attualmente in uso se l'alimentazione è spenta. Questi sarrano rechiamati quando l'indicatore è acceso nuovamente.
5.0 DISPLAY
Il display LCD mostra un valore e l’unita attualmente in uso. Inoltre il LED al di sopra del display mostra quando il peso è inferiore, entro o sopra il limite della pesatura
di controllo
Altri simboli indicheranno quando un peso e’ stato tarato (NET), la bilancia è a zero e stabile se un valore è stato memorizzato, o quando la funzione pesatura

IT
© Adam Equipment Company 2014 - 84 - (P.N. 3136611622 - Revision D, Apr 2014)
animale è stata attivata. Con Il simbolo della batteria viene visualizzato lo stato di carica della batteria interna.
6.0 FUNZIONAMENTO
6.1 AZZERARE IL DISPLAY
• Potete premere [0/T] in qualsiasi momento per impostare il display a zero.
Ciò si verifica in genere quando la piattaforma è vuota. Quando si ottiene il punto zero il display visualizzera’ un indicatore zero.
• La bilancia ha una funzione automatica di azzeramento per compensare a
piccole fluttuazioni e accumulo di materiale sulla piattaforma. Tuttavia, potrebbe essere necessario premere il tasto [0/T] e rimettere a zero la bilancia se si presentano piccole aumenti di peso sulla piattaforma vuota.
6.2 TARATURA
• Portare la bilancia a zero premendo il tasto [0/T] se necessario. L’
indicatore "ZERO" si accendera’.
• Posizionare un contenitore sulla piattaforma e un valore del suo peso

IT
© Adam Equipment Company 2014 - 85 - (P.N. 3136611622 - Revision D, Apr 2014)
verra’ indicato.
• Premere il tasto [0/T] per tarare la bilancia. Il peso è dedotto e memorizzato come valore di tara lasciando zero sul display. L’ indicatore "NET" si accende (ON) e quando un prodotto viene aggiunto, solo il peso netto del prodotto viene mostrato. La blancia può essere tarata una seconda volta se un altro tipo di prodotto deve essere aggiunto al primo, ma solo il peso che viene aggiunto dopo la taratura viene visualizzato.
NOTA: l’ indicatore "NET" sarà soltanto presente quando il peso eccede il 4% (+ /- peso 2 divisioni) della capacita della bilancia.
• Quando il contenitore viene rimosso un valore negativo sara’ indicato. Nel caso in cui la bilancia è stata tarata poco prima di togliere il contenitore questo valore è il peso lordo che comprende il contenitore e il suo intero prodotto. I’ indicatore "ZERO" si accendera’ per indicare la piattaforma è tornata all’ultima taratura.
• Per eliminare un valore di tara, premere il tasto [0/T] quando il piatto è vuoto.
6.3 PESATURA DI UN CAMPIONE
Per determinare il peso di un campione, prima tarare il contenitore vuoto se e’ utilizzato e quindi porre il campione nel contenitore. Il display visualizzera’ il peso netto del campione e l'unità di peso attualmente in uso.
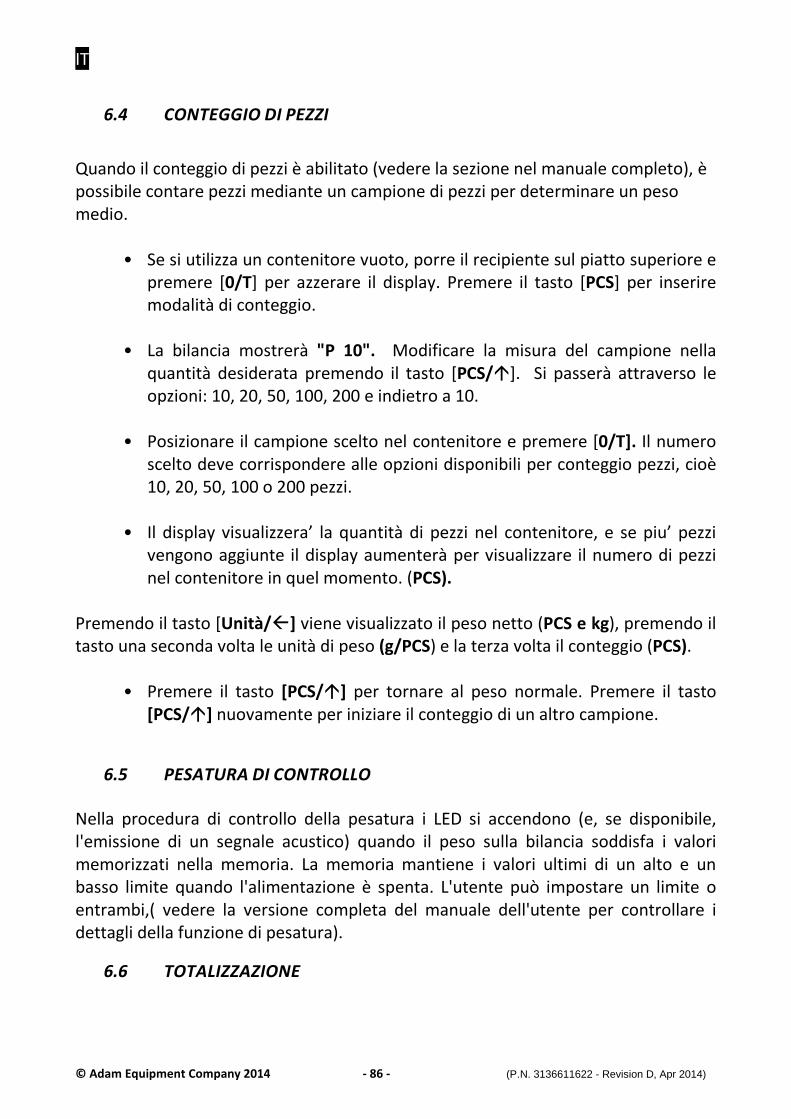
IT
© Adam Equipment Company 2014 - 86 - (P.N. 3136611622 - Revision D, Apr 2014)
6.4 CONTEGGIO DI PEZZI
Quando il conteggio di pezzi è abilitato (vedere la sezione nel manuale completo), è possibile contare pezzi mediante un campione di pezzi per determinare un peso medio.
• Se si utilizza un contenitore vuoto, porre il recipiente sul piatto superiore e
premere [0/T] per azzerare il display. Premere il tasto [PCS] per inserire modalità di conteggio.
• La bilancia mostrerà "P 10". Modificare la misura del campione nella quantità desiderata premendo il tasto [PCS/�]. Si passerà attraverso le opzioni: 10, 20, 50, 100, 200 e indietro a 10.
• Posizionare il campione scelto nel contenitore e premere [0/T]. Il numero scelto deve corrispondere alle opzioni disponibili per conteggio pezzi, cioè 10, 20, 50, 100 o 200 pezzi.
• Il display visualizzera’ la quantità di pezzi nel contenitore, e se piu’ pezzi vengono aggiunte il display aumenterà per visualizzare il numero di pezzi nel contenitore in quel momento. (PCS).
Premendo il tasto [Unità/] viene visualizzato il peso netto (PCS e kg), premendo il tasto una seconda volta le unità di peso (g/PCS) e la terza volta il conteggio (PCS).
• Premere il tasto [PCS/�] per tornare al peso normale. Premere il tasto
[PCS/�] nuovamente per iniziare il conteggio di un altro campione.
6.5 PESATURA DI CONTROLLO
Nella procedura di controllo della pesatura i LED si accendono (e, se disponibile, l'emissione di un segnale acustico) quando il peso sulla bilancia soddisfa i valori memorizzati nella memoria. La memoria mantiene i valori ultimi di un alto e un basso limite quando l'alimentazione è spenta. L'utente può impostare un limite o entrambi,( vedere la versione completa del manuale dell'utente per controllare i dettagli della funzione di pesatura).
6.6 TOTALIZZAZIONE

IT
© Adam Equipment Company 2014 - 87 - (P.N. 3136611622 - Revision D, Apr 2014)
La bilancia può essere impostata per accumulare il peso manualmente premendo il
tasto [Print/M+/Esc] o automaticamente quando un peso viene rimosso dalla
bilancia. (Vedi versione completa del manuale dell'utente per i dettagli completi.)
6.7 PESATURA PERCENTUALE
La bilancia può essere impostata per eseguire pesatura di percentuale. (Vedi
versione completa del manuale d'istruzione per dettagli completi.)
6.8 PESATURA ANIMALE (DINAMICA)
La BILANCIA può essere impostat A per pesare animali (dinamica) e qualsiasi
pesatura di oggetti che sono instabili o possono muoversi.( Vedi versione completa
del manuale d'istruzione per i dettagli completi).
7.0 PARAMETRI UTENTE.
Premendo il tasto [Func/C] durante il normale funzionamento consente all'utente di accedere ai parametri per la personalizzazione della bilancia. I parametri sono suddivisi in 4 gruppi:
1. Parametri di controllo peso 2. Funzioni di pesatura Percentuale e pesatura animali 3. Parametri RS-232 4. Parametri della bilancia.
• Quando [Func/C] è premuto il display visualizza la scritta "FunC 1" per i
parametri di pesatura di controllo.
• Premere il tasto [Func/C] o [PCS/����] per avanzare attraverso i gruppi "FunC 1 ", "FunC 2 ", "FunC 3" e "FunC 4 ". Quando la funzione richiesta viene visualizzata, premere [����0/T] per inserire il sub-menu per impostare i parametri desiderati per questa funzione.
• Quando in una delle sezioni scelte premere [Print/M+ /Esc] per regredire un passo alla volta. Premendo [Print/M+/Esc] più volte si uscira’ dalla sezione parametro utente e si tornara’ al peso normale.
(I dettagli completi di tutti i parametri possono essere trovati in nella versione completa del manuale d'istruzione.)

IT
© Adam Equipment Company 2014 - 88 - (P.N. 3136611622 - Revision D, Apr 2014)
8.0 FUNZIONAMENTO DELLA BATTERIA
• La bilancia può essere utilizzato con la batteria se lo si desidera. La
durata della batteria può essere di 70 ore, a seconda delle cellula di
carico e l’uso fatto della retroilluminazione.
• Il simbolo che indica il livello di carica della batteria viene
visualizzato sul display, 3 righe significano carica completa. Quando
solo il simbolo della batteria appare e’ tempo di ricarica.
• Per caricare la batteria, basta collegare l'adattatore alla presa di
corrente e anche in un connettore di ingresso sul retro
dell'indicatore contrassegnato DC 12V. La bilancia non dovrà
necessariamente essere accesa.
• La batteria deve essere caricata per 12 ore per raggiungere la piena
capacità.
• Vicino al display è un LED che indica lo stato di carica della batteria.
Quando la bilancia è collegata alla rete elettrica la batteria interna
viene caricata . Se il LED è verde la batteria è completamente carica,
se è rosso la batteria è quasi scarica e giallo indica che la batteria sta
caricando.
9.0 INTERFACCIA RS-232
I’indicatore del WARRIOR è fornito con S-232 bidirezionale come
standard. La bilancia, quando collegata a una stampante o ad un
computer emette il peso con il selezionato gruppo di pesatura tramite
l'interfaccia RS-232.
Specificazione: Uscita RS-232 per data di pesatura ACCII codice 600-19200 Baud (selezionabili dall'utente default 9600) 8 bits di dati, nessuna Parita’, 1 stop bit, nessun controllo di flusso Si accede all’interfaccia serial RS-232 che si trova all'interno della custodia, rimuovendo le viti 8x, a questo punto possono essere fatti i collegamenti con COM

IT
© Adam Equipment Company 2014 - 89 - (P.N. 3136611622 - Revision D, Apr 2014)
1, come indicato di seguito. RXT Dati ricevuti
TXT Dati trasmessi
GND Segnale di connessione a terra
Il cavo usato deve essere inoltrato attraverso l’entrata contrassegnata RS 232 sulla custodia e ben serrato, per garantire un collegamento a tenuta stagna. La bilancia può essere impostata per stampare il testo in Inglese, Francese, Tedesco e Spagnolo (Vedere la sezione parametri RS-232 per i dettagli).
9.1 FORMATO D’ INGRESSO AI COMANDI
La bilancia può essere controllata con i seguenti comandi: Premere il tasto [Enter] del PC dopo ogni comando.
T<cr><lf>
Tara la bilancia per visualizzare il peso netto. Questo lo si ottiene anche premendo [0/T].
Z<cr><lf>
Imposta il punto zero per tutte le successive pesature. Il display mostra zero.
P<cr><lf>
Stampa i risultati a un PC o ad una stampante utilizzando l'interfaccia RS-232. Inoltre, aggiunge il valore al l'accumulo memoria se la funzione di accumulo non è impostato su automatico.
10.0 CONNESSIONE RELÈ
L'indicatore è fornito di conduttori per controllare i relè esterni. I conduttori
possono essere utilizzati per controllare un numero differente di relè a seconda
delle esigenze degli utenti. I relè sono uscite isolate che richiedono l'uso di un
alimentatore esterno e un assortimento di rele’ opzionale (vedere dettagi nel
manuale d’istruzione completo).

IT
© Adam Equipment Company 2014 - 90 - (P.N. 3136611622 - Revision D, Apr 2014)
11.0 CALIBRATURA
Le bilance possono essere calibrate con la seguente procedura. Per accedere a
questa procedura, è necessario utilizzare Func 4, accessibile mediante il tasto
[Func/C] come descritto nella sezione 7.4 del manuale completo, oppure utilizzando
l'accesso tramite password (parola d’ordine)come descritto nella sezione 12.0 .
Le bilance vengono calibrate in unita’ di peso metriche o libbra secondo l’unita di
peso usata prima della calibratura. Il display visualizzera "kg" o "lb" per identificare il
peso previsto.
PROCEDURA
• Inserire la sezione di calibrazione utilizzando Func 4, C8 CAL o utilizzando il codice come descritto nella sezione 12.0.
• Il display mostrerà "unLoAd".
• Rimuovere qualsiasi peso dalla piattaforma e quando il simbolo stabile è presente premere [0/T].
• Il display mostrerà "Ld" poi "0000XX" che mostra l'ultima calibratura di peso usato. Mettere il peso di caibratura sulla bilancia e premere [0/T]. Se il peso che è messo sulla bilancia non corrisponde al valore visualizzato, premere il tasto [Func/C] per cancellare il valore quindi utilizzare [Unit/] e [PCS/�] per impostare il valore corretto. Quando questo è avvenuto, premere [0/T].
• Se la calibratura è accettabile la bilancia farà un controllo automatico durante il quale il peso di calibratura deve essere rimosso. Se viene visualizzato un messaggio di errore, "FAil L" è indicato rifare la calibratura dato che un disturbo puo’ aver prevenuto una calibrazione giusta.
Dope la calibratura la bilancia deve essere controllata per verificare che la calibratura sia coretta. Se necessario repetere la calibratura, assicurando che la bilancia sia stabile primo di accettare qualsiasi peso.

IT
© Adam Equipment Company 2014 - 91 - (P.N. 3136611622 - Revision D, Apr 2014)
12.0 PARAMETRI DI SERVIZIO
Le bilance consentono l’entrata ai parametri se il [Tara] viene premuto durante il ciclo di accensione. I codici funzionano come spiegato in precedenza. In questo caso il display mostra lo schermo col codice richiesto " P - - - - " . Per continuare inserire il codice come descritto sotto: L’inserimento del codice "0000" consentira’ la calibratura come mostrato nella sezione 11. L’inserimento “1000” consentirà l'accesso ad un insieme limitato di parametri descritti nella sezione 12.1
12.1 USO DEI PARAMETRI DI SERVIZIO
Al tempo di accensione pressare [0/T] durante lo scorrere del display.
Quando "Pn" viene visualizzato, entrare il numero “1000” utilizzando la [Unit/ ] e
[PCS/�] e premere [0/T].
Il display visualizza il primo parametro chiamato "F4 Int".
Per selezionare un altro parametro premete [PCS/�] che farà progredire attraverso
i parametri disponibili. (Per maggiori informazioni consultare la versione completa
del manuale dell'utente.)

IT
© Adam Equipment Company 2014 - 92 - (P.N. 3136611622 - Revision D, Apr 2014)
13.0 CODICI DI ERRORE ERROR CODES
DESCRIPTION SUGGESTIONS
- -oL - - Portata superiore Rimuovere il peso dalla bilancia. Se il problema persiste, contattare il rivenditore o ADAM per assistenza.
Err 1 Errore di messa a punto dell orario
Inserire l’orario con formato corretto e valori ragionevoli. Formato: hh:mm:ss
Err 2 Errore di messa a punta della data.
Inserire la data con formato corretto e valori ragionevoli. Formato: yy:mm:dd
Err 4 Errore di messa a punto dello Zero
La bilancia era situata al di fuori della normale gamma di impostazione zero quando si è accesa, o quando lo [ZERO] è stato premuto. Rimuovere il peso dalla bilancia e provare a riazzerare nuovamente. Utilizzare il tasto [0/T] per impostare il display sul valore zero. Se il problema persiste, contattare il rivenditore o ADAM per assistenza.
Err 6 A/D fuori dalla sfera di normalita’
I valori del convertitore A/D sono al di fuori della gamma normale. Rimuovere il peso dalla bilancia se sovraccaricato. Assicurarsi che il piatto sia correttamente montato. Indicare se la cellula di carico o l'elettronica possono essere difettosi. Se il problema persiste, contattare il rivenditore o ADAM per assistenza.
Err 7 100% peso fuori dalla sfera di normalita’.
Il Peso di valore impostato a 100% per pesatura percentuale deve essere superiore a 50 divisioni di peso della bilancia.
Err 9 Errori dei limiti di peso di controllo
Vedere se il limite inferiore è più alto rispetto all'attuale limite superiore. Rimettere l’imite superiore o modificare il limite inferiore.
FAIL Errore di calibratura.
Calibratura errata (dovrebbe essere entro il 10% di calibratura di fabbrica). Il vecchio dato di calibratura sarà conservato fino a quando il processo è completo. Se il problema persiste, contattare il rivenditore o ADAM Equipmment per assistenza.

IT
© Adam Equipment Company 2014 - 93 - (P.N. 3136611622 - Revision D, Apr 2014)
INFORMAZIONI DI GARANZIA ADAM Equipment offre una Garanzia Limitata (Parti di ricambio e mano d’opera) per i component che non funzionano a causa di difetti in materiale o di lavorazione. La garanzia decorre dalla data di consegna. Durante il periodo di garanzia qualora si renda necessaria una riparazione l’acquirente deve informare il fornitore o ADAM Equipment. L’impresa o il suo tecnico autorizzato si riservano il diritto di riparare o sostituire I componenti sul posto dell’acquirente o in una delle officine ADAM a seconda della gravita’ dei problemi a nessun costo aggiuntivo. Tuttavia le spese relative all’invio delle parti difettose al centro di assistenza sono a carico dell’acquirente. La garanzia cesserebbe di funzionare se l’apparecchiatura non venisse restituita in confezione originale e con una corretta documentazione per validare il reclamo.Tutti i reclami sono alla sola discrezione di ADAM Equipment. Questa garanzia non si applica ad apparecchiature con difetti dovuti ad un uso improprio, danni accidentali, esposizione a materiali radioattivi, negligenze, installazione difettosa, modifiche non autorizzate o tentativi di riparazione, il mancato rispetto delle prescrizioni o raccomandazioni fornite in questo manuale. Il prodotto puo’ contenere una batteria ricaricabile che e’ stata progettata per essere rimossa e sostituita da parte dell’utente. ADAM Equipment garantisce la fornitura di una batteria di ricambio se quest’ultma si manifesta difettosa di materiale o di fabbricazione durante il periodo iniziale di utilizzo del prodotto nel quale sia stata installata una batteria. Come in tuttte le batterie, la capacita’ massima diminuisce con il tempo o l’uso e il ciclo di vita di una batteria puo’ variare a seconda del modello, la configurazione, utilizzazione e della corrente d’alimentazione. Una diminuzione della capicita’ massima della batteria o ciclo di vita della stessa non e’ un difetto del materiale o di lavorazione e non e’ coperta dalla garanzia limitata. Riparazione effettuata durante la garanzia non estende la garanzia. Componenti rimossi durante le riparazioni diventano proprieta’ dell’azienda. I diritti legali del cliente non vengono influenzati da questa garanzia. In caso di disputa i termini di questa garanzia sono governati dalla legge del Regno Unito (UK). Per dettagli completi della garanzia consultare i termini e le condizioni di vendita disponibili sul nostro sito: www.adamequipment.com
ADAM EQUIPMENT è un'azienda con certificazione ISO 9001:2008 globale con più di 40 anni di esperienza nella produzione e vendita di apparecchiature elettroniche. I prodotti sono venduti attraverso una rete di distribuzione mondiale sopportati da aziende ADAM in UK (Ufficio Centrale), Germania, USA, Sud Africa, Australia e Cina. I prodotti ADAM sono venduti prevalentemente per laboratorio, educazione, sanitari e segmenti industriali. La gamma dei prodotti può essere descritta come segue: · Bilance analitiche e di precisione · Bilance compatte e portatili · Bilance ad alta capacita’ · Bilance per analisi di umidità · Bilance meccaniche · Bilance contapezzi · Bilance per controllo peso digitale · Piattaforme per elevate prestazioni · Bilance gru · Bilance peso persone e animali · Bilance commerciali Per l'elenco completo di tutti i prodotti ADAM visitate il nostro sito www.adamequipment.com © Copyright di ADAM Equipment Ltd. Nessuna parte di questa pubblicazione può essere ristampata o tradotta in qualsiasi forma o con alcun mezzo senza la previa autorizzazione di Adam. Adam Equipment si riserva il diritto di apportare modifiche alla tecnologia, caratteristiche, specifiche e progettazione delle apparecchiature senza alcun preavviso. Tutte le informazioni contenute in questa pubblicazione sono al meglio della nostra conoscenza attuale, completa e precisa al momento del rilascio. Tuttavia, noi non siamo responsabili per interpretazioni che potrebbero derivare dalla lettura di questo materiale.

IT
© Adam Equipment Company 2014 - 94 - (P.N. 3136611622 - Revision D, Apr 2014)
CERTIFICATO DI CALIBRATURA.
La bilancie fabbricate e distribuite da ADAM Equipment, al momento della fabbricazione ha superato le prove di calibratura per le tolleranze indicate in questo manuale.Le influenze esterne possono influenzane la calibratura, in quanto il tempo può determinare un cambiamento dei dati. Si raccomanda pertanto che venga eseguita una calibratura sul posto e periodicamente Peso di calibratura: I pesi utilizzati dalla fabrica per calibrare corrispondono allo standard ASTM/OIML e corrispondono alla OIML classe M1/ASTM classe 4 Standard di calibratura: La calibratura dalla fabbrica è stata effettuata come descritto in sezione calibratura di questo manuale.

© Adam Equipment Company 2014 - 95 - (P.N. 3136611622 - Revision D, Apr 2014)
EU Declaration of Conformity / Déclaration de conformité / Konformitätserklärung
Declaración de Conformidad / Dichiarazione di conformità
16
Year CE marking was first affixed to declared product
WARRIOR DIGITAL ELECTRONIC WEIGHING SCALE SERIES
Adam Equipment Co. Ltd.
Maidstone Road, Kingston Tel: +44 (0) 1908 274545
Milton Keynes, MK10 0BD Fax: +44 (0) 1908 641339
United Kingdom Email: [email protected]
www.adamequipment.com
We declare under our sole responsibility that the balance models listed below marked with “CE” are in conformity with the directives and standards mentioned. Nous déclarons sous notre seule responsabilité, que les types de balance cités ci-dessous munis de la mention "CE" sont conformes aux directives et aux normes mentionnées ci-après. Wir erklären in alleiniger Verantwortung, dass die untenstehenden Waagentypen gekennzeichnet mit "CE" mit den genannten Richtlinien und Normen übereinstimmen. Nosotros declaramos bajo responsabilidad exclusiva que los modelos de balanzas indicados a continuación con el distintivo "CE" son conformes con las directivas y normas citadas. Noi dichiariamo sotto nostra unica responsabilità che i tipi di bilance specificati di seguito contrassegnati con la marcatura “CE” sono conformi alle direttive e norme citate.
Adam Equipment Model WARRIOR / WSK / WBK / WFK / WLK xxxx balances.
2014/30/EU EN61326-1:2013 – Part 1
2014/35/EU EN61010-1:2010 – Part 1:
2011/65/EC, RoHS 2 EN50581: 2012,
Signed for and on behalf of: Adam Equipment Company Ltd. United Kingdom, 20 Feb 2016
Clive Jones, Quality & Product Manager.
© Adam Equipment Company 2014 - 96 - (P.N. 3136611622 - Revision D, Apr 2014)
WEEE 2012/19/EU
This device may not be disposed of in domestic waste. This also applies to countries outside the EU, per their specific requirements. Disposal of batteries (if fitted) must conform to local laws and restrictions.
Cet appareil ne peut être éliminé avec les déchets ménagers. L’élimination de la batterie doit être effectuée conformément aux lois et restrictions locales.
Dieses Gerät nicht mit dem Hausmüll entsorgt.
Dispositivo no puede ser desechado junto con los residuos domésticos
Dispositivo non può essere smaltito nei rifiuti domestici.
FCC / IC CLASS A DIGITAL DEVICE EMC VERIFICATION STATEMENT NOTE: This equipment has been tested and found to comply with the limits for a Class A digital device, pursuant to Part 15 of the FCC rules and Canadian ICES-003/NMB-003 regulation. These limits are designed to provide reasonable protection against harmful interference when the equipment is operated in a commercial environment. This equipment generates, uses and can radiate radio frequency energy and, if not installed and used in accordance with the instruction manual, may cause harmful interference to radio communications. Operation of this equipment in a residential area is likely to cause harmful interference in which case the user will be required to correct the interference at his own expense.
CALIFORNIA PROPOSITION 65 - MANDATORY STATEMENT WARNING: This product includes a sealed lead-acid battery which contains chemicals known to the State of California to cause cancer and birth defects or other reproductive harm.
Adam Equipment products have been tested with, and are always supplied with mains power adaptors which meet all legal requirements for the intended country or region of operation, including electrical safety, interference and energy efficiency. As we often update adaptor products to meet changing legislation it is not possible to refer to the exact model in this manual. Please contact us if you need specifications or safety information for your particular item. Do not attempt to connect or use an adaptor not supplied by us.

© Adam Equipment Company 2014 - 97 - (P.N. 3136611622 - Revision D, Apr 2014)

© Adam Equipment Company 2014
ADAM EQUIPMENT is an ISO 9001:2008 certified global company with more than 40 years’ experience in the production and sale of electronic weighing equipment. Adam products are predominantly designed for the Laboratory, Educational, Health and Fitness, Retail and Industrial Segments. The product range can be described as follows:
-Analytical and Precision Laboratory Balances -Compact and Portable Balances -High Capacity Balances -Moisture analysers / balances -Mechanical Scales -Counting Scales -Digital Weighing/Check-weighing Scales -High performance Platform Scales -Crane scales -Mechanical and Digital Electronic Health and Fitness Scales -Retail Scales for Price computing
For a complete listing of all Adam products visit our website at
www.adamequipment.com
Adam Equipment Co. Ltd . Maidstone Road, Kingston
Milton Keynes MK10 0BD
UK Phone:+44 (0)1908 274545 Fax: +44 (0)1908 641339
e-mail: [email protected]
Adam Equipment Inc.
1, Fox Hollow Rd. 06478
USA
Phone: +1 203 790 4774 Fax: +1 203 792 3406
e-mail: [email protected]
AE Adam GmbH.
Instenkamp 4 D-24242 Felde
Germany
Phone +49 (0)4340 40300 0 Fax: +49 (0)4340 40300 20
e-mail: [email protected]
Adam Equipment S.A. (Pty) Ltd.
7 Megawatt Road, Spartan EXT 22 Kempton Park, Johannesburg,
Republic of South Africa
Phone +27 (0)11 974 9745 Fax: +27 (0)11 392 2587
e-mail: [email protected]
Adam Equipment (S.E. ASIA) PTY Ltd
2/71 Tacoma Circuit CANNING VALE 6155
Perth Western Australia
Phone: +61 (0) 8 6461 6236 Fax +61 (0) 8 9456 4462
e-mail: [email protected]
Adam Equipment (Wuhan) Co. Ltd.
A Building East Jianhua Private Industrial Park Zhuanyang Avenue
Wuhan Economic & Technological Development Zone
430056 Wuhan P.R.China
Phone: + 86 (27) 59420391 Fax + 86 (27) 59420388
e-mail: [email protected]
© Copyright by Adam Equipment Co. All rights reserved. No part of this publication may be reprinted or translated in any form or by any means without the prior permission of Adam Equipment. Adam Equipment reserves the right to make changes to the technology, features, specifications and design of the equipment without notice.
All information contained within this publication is to the best of our knowledge timely, complete and accurate
when issued. However, we are not responsible for misinterpretations which may result from the reading of this material.
The latest version of this publication can be found on our Website.
www.adamequipment.com