Embed Size (px)
Citation preview
www.stabilo.co.uk
In association with:
STABILO ‘s move easy
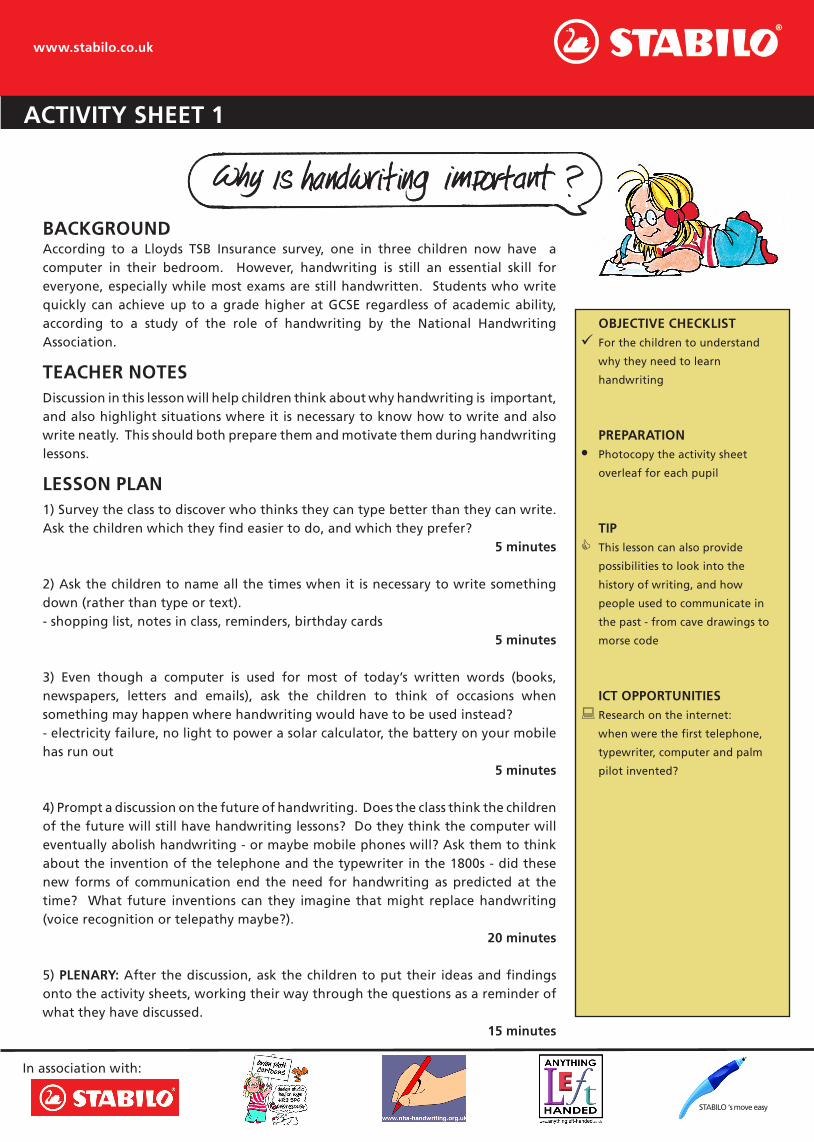
BACKGROUNDAccording to a Lloyds TSB Insurance survey, one in three children now have a computer in their bedroom. However, handwriting is still an essential skill for everyone, especially while most exams are still handwritten. Students who write quickly can achieve up to a grade higher at GCSE regardless of academic ability, according to a study of the role of handwriting by the National Handwriting Association.
TEACHER NOTES Discussion in this lesson will help children think about why handwriting is important, and also highlight situations where it is necessary to know how to write and also write neatly. This should both prepare them and motivate them during handwriting lessons.
LESSON PLAN 1) Survey the class to discover who thinks they can type better than they can write. Ask the children which they find easier to do, and which they prefer? 5 minutes
2) Ask the children to name all the times when it is necessary to write something down (rather than type or text).- shopping list, notes in class, reminders, birthday cards
5 minutes
3) Even though a computer is used for most of today’s written words (books, newspapers, letters and emails), ask the children to think of occasions when something may happen where handwriting would have to be used instead?- electricity failure, no light to power a solar calculator, the battery on your mobile has run out
5 minutes
4) Prompt a discussion on the future of handwriting. Does the class think the children of the future will still have handwriting lessons? Do they think the computer will eventually abolish handwriting - or maybe mobile phones will? Ask them to think about the invention of the telephone and the typewriter in the 1800s - did these new forms of communication end the need for handwriting as predicted at the time? What future inventions can they imagine that might replace handwriting (voice recognition or telepathy maybe?).
20 minutes
5) PLENARY: After the discussion, ask the children to put their ideas and findings onto the activity sheets, working their way through the questions as a reminder of what they have discussed.
15 minutes
OBJECTIVE CHECKLISTFor the children to understand
why they need to learn
handwriting
PREPARATIONPhotocopy the activity sheet
overleaf for each pupil
TIPThis lesson can also provide
possibilities to look into the
history of writing, and how
people used to communicate in
the past - from cave drawings to
morse code
ICT OPPORTUNITIESResearch on the internet:
when were the first telephone,
typewriter, computer and palm
pilot invented?
•
ACTIVITY SHEET 1
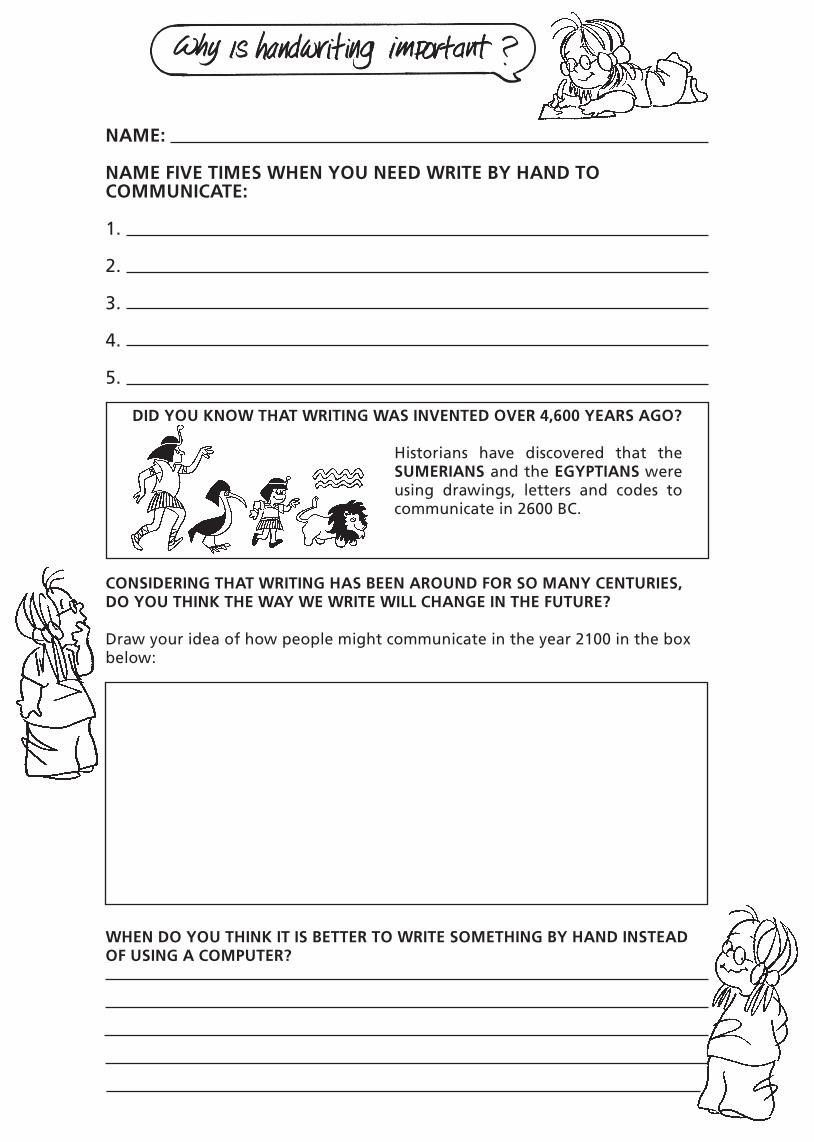
NAME:
NAME FIVE TIMES WHEN YOU NEED WRITE BY HAND TO COMMUNICATE:
1.
2.
3.
4.
5.
DID YOU KNOW THAT WRITING WAS INVENTED OVER 4,600 YEARS AGO?
Historians have discovered that the SUMERIANS and the EGYPTIANS were using drawings, letters and codes to communicate in 2600 BC.
CONSIDERING THAT WRITING HAS BEEN AROUND FOR SO MANY CENTURIES, DO YOU THINK THE WAY WE WRITE WILL CHANGE IN THE FUTURE?
Draw your idea of how people might communicate in the year 2100 in the box below:
WHEN DO YOU THINK IT IS BETTER TO WRITE SOMETHING BY HAND INSTEAD OF USING A COMPUTER?
www.stabilo.co.uk
In association with:
STABILO ‘s move easy
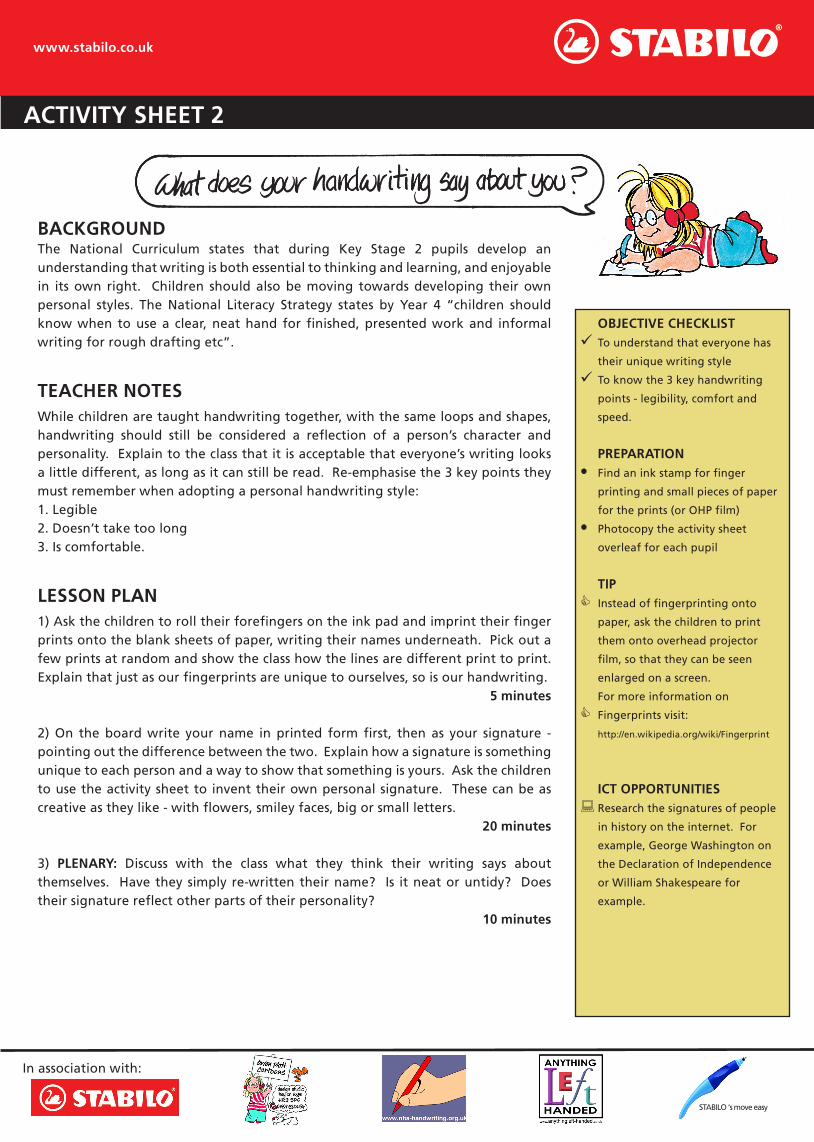
BACKGROUNDThe National Curriculum states that during Key Stage 2 pupils develop an understanding that writing is both essential to thinking and learning, and enjoyable in its own right. Children should also be moving towards developing their own personal styles. The National Literacy Strategy states by Year 4 “children should know when to use a clear, neat hand for finished, presented work and informal writing for rough drafting etc”.
TEACHER NOTES While children are taught handwriting together, with the same loops and shapes, handwriting should still be considered a reflection of a person’s character and personality. Explain to the class that it is acceptable that everyone’s writing looks a little different, as long as it can still be read. Re-emphasise the 3 key points they must remember when adopting a personal handwriting style:1. Legible 2. Doesn’t take too long 3. Is comfortable.
LESSON PLAN 1) Ask the children to roll their forefingers on the ink pad and imprint their finger prints onto the blank sheets of paper, writing their names underneath. Pick out a few prints at random and show the class how the lines are different print to print. Explain that just as our fingerprints are unique to ourselves, so is our handwriting. 5 minutes
2) On the board write your name in printed form first, then as your signature - pointing out the difference between the two. Explain how a signature is something unique to each person and a way to show that something is yours. Ask the children to use the activity sheet to invent their own personal signature. These can be as creative as they like - with flowers, smiley faces, big or small letters. 20 minutes
3) PLENARY: Discuss with the class what they think their writing says about themselves. Have they simply re-written their name? Is it neat or untidy? Does their signature reflect other parts of their personality? 10 minutes
•
•
OBJECTIVE CHECKLISTTo understand that everyone has
their unique writing style
To know the 3 key handwriting
points - legibility, comfort and
speed.
PREPARATIONFind an ink stamp for finger
printing and small pieces of paper
for the prints (or OHP film)
Photocopy the activity sheet
overleaf for each pupil
TIPInstead of fingerprinting onto
paper, ask the children to print
them onto overhead projector
film, so that they can be seen
enlarged on a screen.
For more information on
Fingerprints visit:
http://en.wikipedia.org/wiki/Fingerprint
ICT OPPORTUNITIESResearch the signatures of people
in history on the internet. For
example, George Washington on
the Declaration of Independence
or William Shakespeare for
example.
ACTIVITY SHEET 2
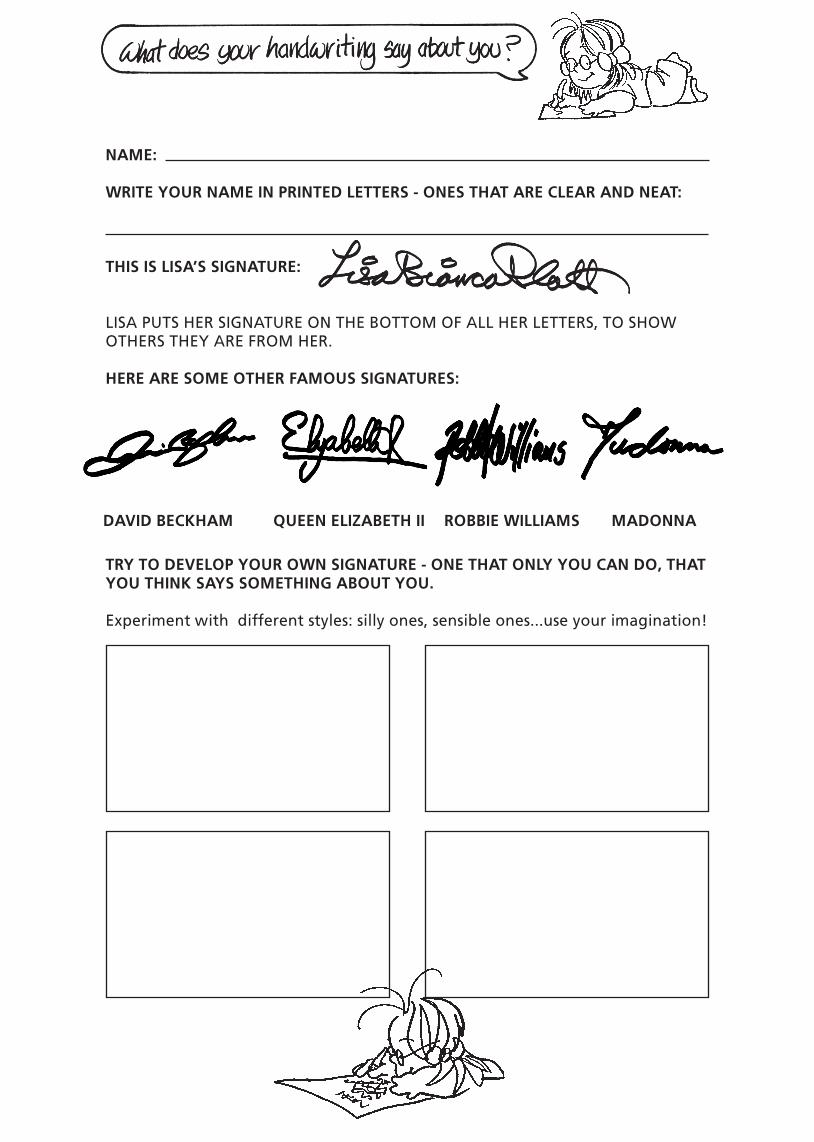
NAME:
WRITE YOUR NAME IN PRINTED LETTERS - ONES THAT ARE CLEAR AND NEAT:
THIS IS LISA’S SIGNATURE:
LISA PUTS HER SIGNATURE ON THE BOTTOM OF ALL HER LETTERS, TO SHOW OTHERS THEY ARE FROM HER.
HERE ARE SOME OTHER FAMOUS SIGNATURES:
TRY TO DEVELOP YOUR OWN SIGNATURE - ONE THAT ONLY YOU CAN DO, THAT YOU THINK SAYS SOMETHING ABOUT YOU.
Experiment with different styles: silly ones, sensible ones...use your imagination!
DAVID BECKHAM QUEEN ELIZABETH II ROBBIE WILLIAMS MADONNA
www.stabilo.co.uk
In association with:
STABILO ‘s move easy
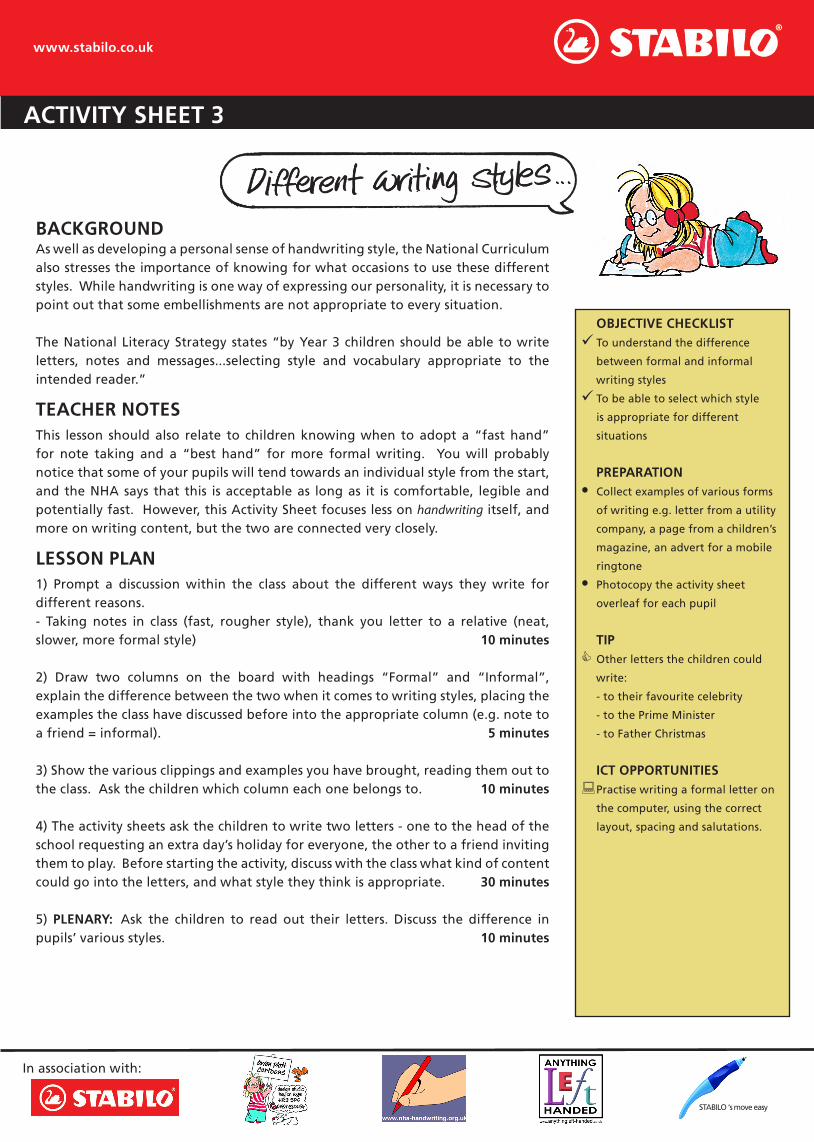
BACKGROUNDAs well as developing a personal sense of handwriting style, the National Curriculum also stresses the importance of knowing for what occasions to use these different styles. While handwriting is one way of expressing our personality, it is necessary to point out that some embellishments are not appropriate to every situation.
The National Literacy Strategy states “by Year 3 children should be able to write letters, notes and messages...selecting style and vocabulary appropriate to the intended reader.”
TEACHER NOTES This lesson should also relate to children knowing when to adopt a “fast hand” for note taking and a “best hand” for more formal writing. You will probably notice that some of your pupils will tend towards an individual style from the start, and the NHA says that this is acceptable as long as it is comfortable, legible and potentially fast. However, this Activity Sheet focuses less on handwriting itself, and more on writing content, but the two are connected very closely.
LESSON PLAN 1) Prompt a discussion within the class about the different ways they write for different reasons.- Taking notes in class (fast, rougher style), thank you letter to a relative (neat, slower, more formal style) 10 minutes
2) Draw two columns on the board with headings “Formal” and “Informal”, explain the difference between the two when it comes to writing styles, placing the examples the class have discussed before into the appropriate column (e.g. note to a friend = informal). 5 minutes
3) Show the various clippings and examples you have brought, reading them out to the class. Ask the children which column each one belongs to. 10 minutes
4) The activity sheets ask the children to write two letters - one to the head of the school requesting an extra day’s holiday for everyone, the other to a friend inviting them to play. Before starting the activity, discuss with the class what kind of content could go into the letters, and what style they think is appropriate. 30 minutes
5) PLENARY: Ask the children to read out their letters. Discuss the difference in pupils’ various styles. 10 minutes
OBJECTIVE CHECKLISTTo understand the difference
between formal and informal
writing styles
To be able to select which style
is appropriate for different
situations
PREPARATIONCollect examples of various forms
of writing e.g. letter from a utility
company, a page from a children’s
magazine, an advert for a mobile
ringtone
Photocopy the activity sheet
overleaf for each pupil
TIPOther letters the children could
write:
- to their favourite celebrity
- to the Prime Minister
- to Father Christmas
ICT OPPORTUNITIESPractise writing a formal letter on
the computer, using the correct
layout, spacing and salutations.
•
•
ACTIVITY SHEET 3
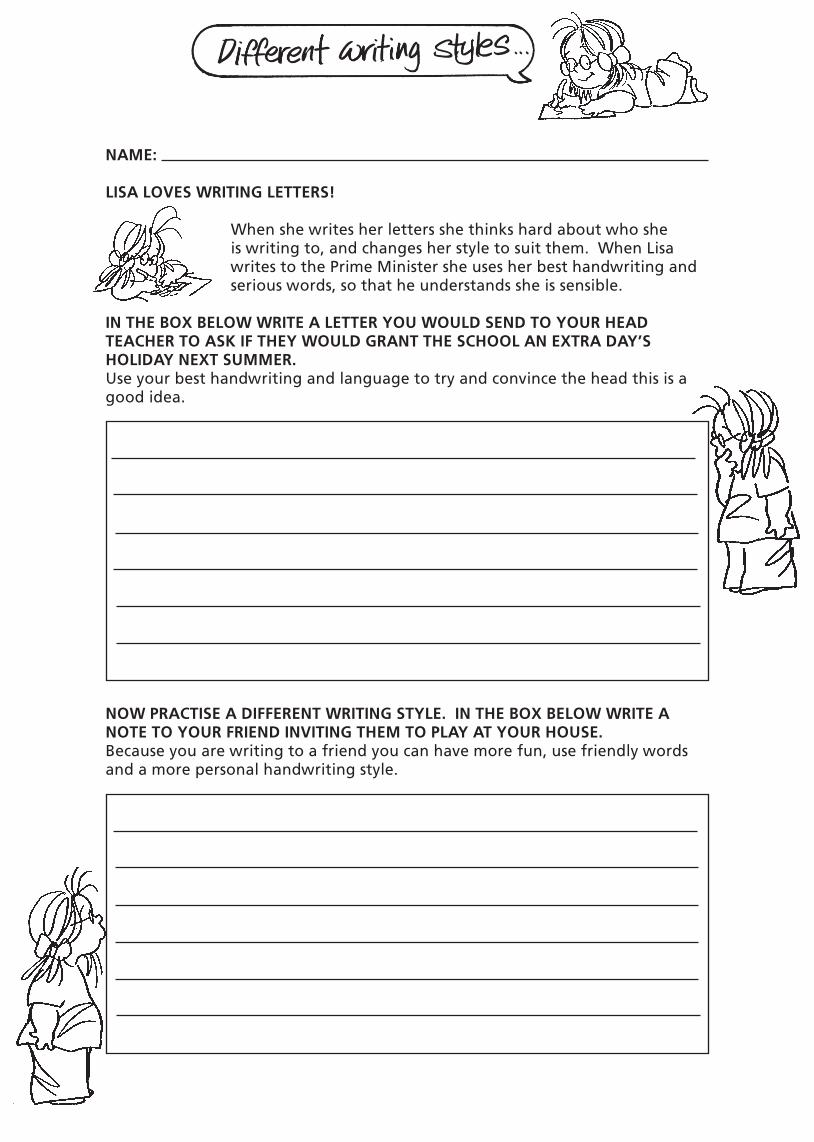
NAME:
LISA LOVES WRITING LETTERS!
When she writes her letters she thinks hard about who she is writing to, and changes her style to suit them. When Lisa writes to the Prime Minister she uses her best handwriting and serious words, so that he understands she is sensible.
IN THE BOX BELOW WRITE A LETTER YOU WOULD SEND TO YOUR HEAD TEACHER TO ASK IF THEY WOULD GRANT THE SCHOOL AN EXTRA DAY’S HOLIDAY NEXT SUMMER.Use your best handwriting and language to try and convince the head this is a good idea.
NOW PRACTISE A DIFFERENT WRITING STYLE. IN THE BOX BELOW WRITE A NOTE TO YOUR FRIEND INVITING THEM TO PLAY AT YOUR HOUSE.Because you are writing to a friend you can have more fun, use friendly words and a more personal handwriting style.
www.stabilo.co.uk
In association with:
STABILO ‘s move easy
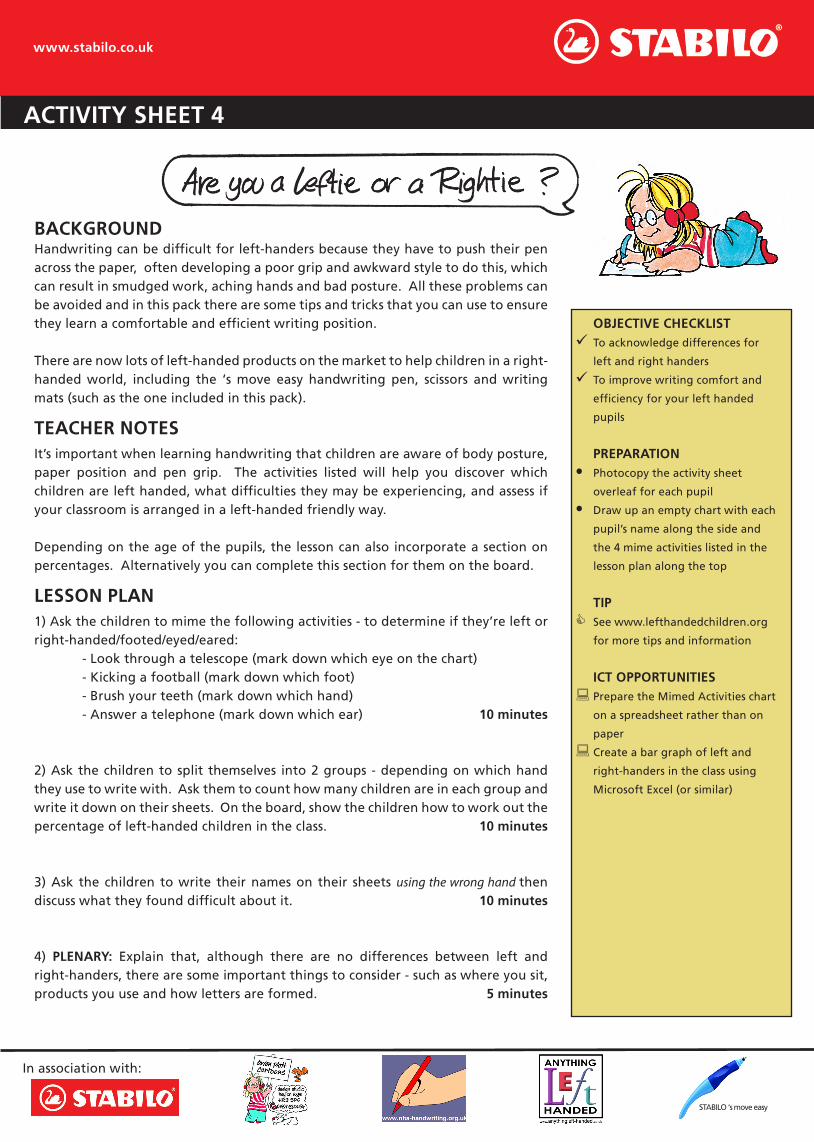
BACKGROUNDHandwriting can be difficult for left-handers because they have to push their pen across the paper, often developing a poor grip and awkward style to do this, which can result in smudged work, aching hands and bad posture. All these problems can be avoided and in this pack there are some tips and tricks that you can use to ensure they learn a comfortable and efficient writing position.
There are now lots of left-handed products on the market to help children in a right- handed world, including the ‘s move easy handwriting pen, scissors and writing mats (such as the one included in this pack).
TEACHER NOTES It’s important when learning handwriting that children are aware of body posture, paper position and pen grip. The activities listed will help you discover which children are left handed, what difficulties they may be experiencing, and assess if your classroom is arranged in a left-handed friendly way.
Depending on the age of the pupils, the lesson can also incorporate a section on percentages. Alternatively you can complete this section for them on the board.
LESSON PLAN 1) Ask the children to mime the following activities - to determine if they’re left or right-handed/footed/eyed/eared: - Look through a telescope (mark down which eye on the chart) - Kicking a football (mark down which foot) - Brush your teeth (mark down which hand) - Answer a telephone (mark down which ear) 10 minutes
2) Ask the children to split themselves into 2 groups - depending on which hand they use to write with. Ask them to count how many children are in each group and write it down on their sheets. On the board, show the children how to work out the percentage of left-handed children in the class. 10 minutes
3) Ask the children to write their names on their sheets using the wrong hand then discuss what they found difficult about it. 10 minutes
4) PLENARY: Explain that, although there are no differences between left and right-handers, there are some important things to consider - such as where you sit, products you use and how letters are formed. 5 minutes
OBJECTIVE CHECKLISTTo acknowledge differences for
left and right handers
To improve writing comfort and
efficiency for your left handed
pupils
PREPARATIONPhotocopy the activity sheet
overleaf for each pupil
Draw up an empty chart with each
pupil’s name along the side and
the 4 mime activities listed in the
lesson plan along the top
TIPSee www.lefthandedchildren.org
for more tips and information
ICT OPPORTUNITIESPrepare the Mimed Activities chart
on a spreadsheet rather than on
paper
Create a bar graph of left and
right-handers in the class using
Microsoft Excel (or similar)
•
•
ACTIVITY SHEET 4
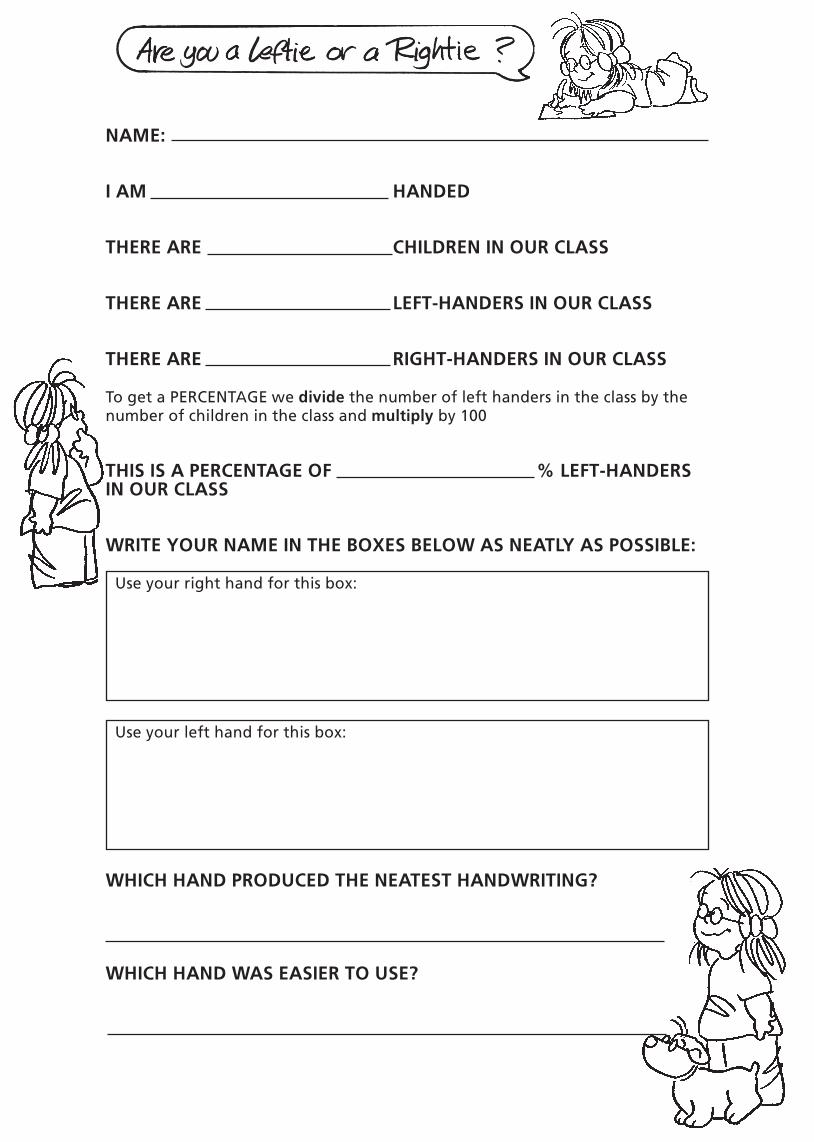
NAME:
I AM HANDED
THERE ARE CHILDREN IN OUR CLASS
THERE ARE LEFT-HANDERS IN OUR CLASS
THERE ARE RIGHT-HANDERS IN OUR CLASS
To get a PERCENTAGE we divide the number of left handers in the class by the number of children in the class and multiply by 100
THIS IS A PERCENTAGE OF % LEFT-HANDERS IN OUR CLASS
WRITE YOUR NAME IN THE BOXES BELOW AS NEATLY AS POSSIBLE:
Use your right hand for this box:
Use your left hand for this box:
WHICH HAND PRODUCED THE NEATEST HANDWRITING?
WHICH HAND WAS EASIER TO USE?
www.stabilo.co.uk
In association with:
STABILO ‘s move easy
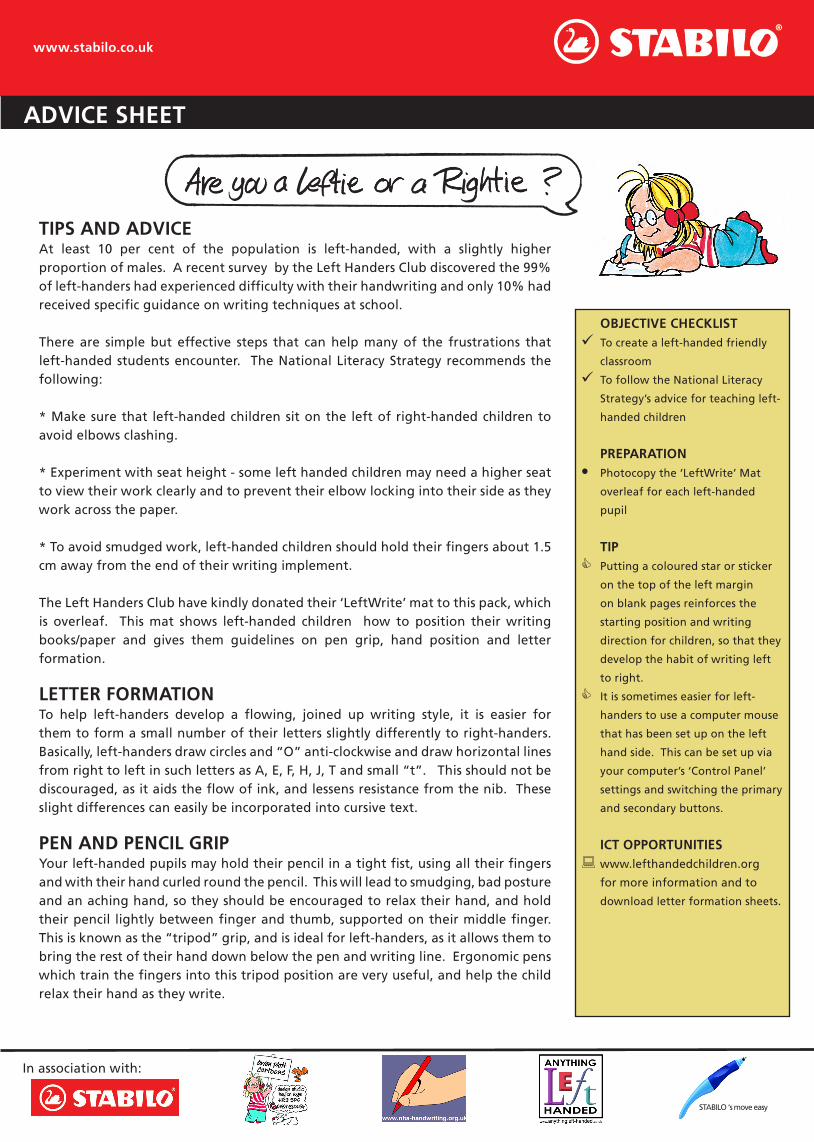
TIPS AND ADVICEAt least 10 per cent of the population is left-handed, with a slightly higher proportion of males. A recent survey by the Left Handers Club discovered the 99% of left-handers had experienced difficulty with their handwriting and only 10% had received specific guidance on writing techniques at school.
There are simple but effective steps that can help many of the frustrations that left-handed students encounter. The National Literacy Strategy recommends the following:
* Make sure that left-handed children sit on the left of right-handed children to avoid elbows clashing.
* Experiment with seat height - some left handed children may need a higher seat to view their work clearly and to prevent their elbow locking into their side as they work across the paper.
* To avoid smudged work, left-handed children should hold their fingers about 1.5 cm away from the end of their writing implement.
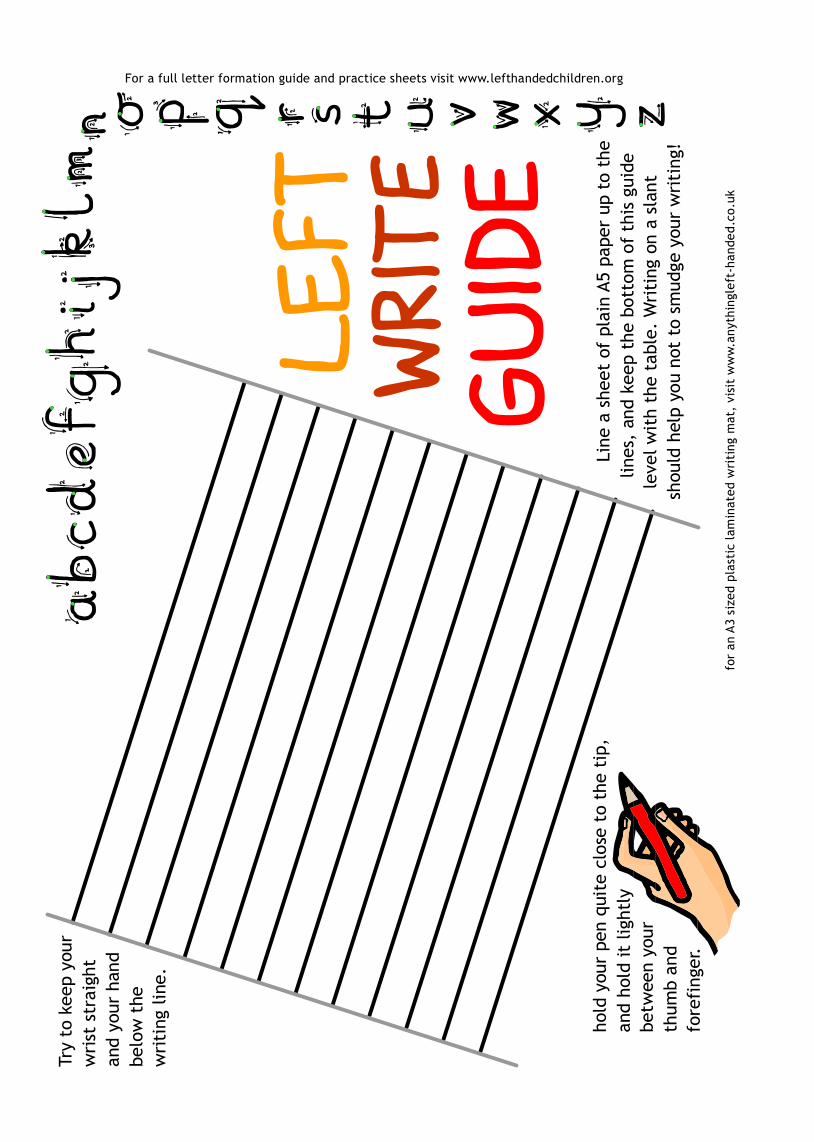
The Left Handers Club have kindly donated their ‘LeftWrite’ mat to this pack, which is overleaf. This mat shows left-handed children how to position their writing books/paper and gives them guidelines on pen grip, hand position and letter formation.
LETTER FORMATIONTo help left-handers develop a flowing, joined up writing style, it is easier for them to form a small number of their letters slightly differently to right-handers. Basically, left-handers draw circles and “O” anti-clockwise and draw horizontal lines from right to left in such letters as A, E, F, H, J, T and small “t”. This should not be discouraged, as it aids the flow of ink, and lessens resistance from the nib. These slight differences can easily be incorporated into cursive text.
PEN AND PENCIL GRIPYour left-handed pupils may hold their pencil in a tight fist, using all their fingers and with their hand curled round the pencil. This will lead to smudging, bad posture and an aching hand, so they should be encouraged to relax their hand, and hold their pencil lightly between finger and thumb, supported on their middle finger. This is known as the “tripod” grip, and is ideal for left-handers, as it allows them to bring the rest of their hand down below the pen and writing line. Ergonomic pens which train the fingers into this tripod position are very useful, and help the child relax their hand as they write.
•
OBJECTIVE CHECKLISTTo create a left-handed friendly
classroom
To follow the National Literacy
Strategy’s advice for teaching left-
handed children
PREPARATIONPhotocopy the ‘LeftWrite’ Mat
overleaf for each left-handed
pupil
TIPPutting a coloured star or sticker
on the top of the left margin
on blank pages reinforces the
starting position and writing
direction for children, so that they
develop the habit of writing left
to right.
It is sometimes easier for left-
handers to use a computer mouse
that has been set up on the left
hand side. This can be set up via
your computer’s ‘Control Panel’
settings and switching the primary
and secondary buttons.
ICT OPPORTUNITIESwww.lefthandedchildren.org
for more information and to
download letter formation sheets.
ADVICE SHEET
��������
����
����
����������������
������
������
����������
����
����
������
���
����
����
��������� �
����
����
������
��������������
����
������������
����
������
����
������
���������������������
�����
�������������������
������
����������
������
����������
����
���������
������
���������
��
����������
����
���
�������������
����
����
������
����
�������
��������
�����
��
���������������������������������������������������������������������������������������
������
��������
�������������������
��������
�������������������
������������
����
������

www.stabilo.co.uk
In association with:
STABILO ‘s move easy
BACKGROUNDIn the National Curriculum it states that in Key Stage 1 children should be taught how to develop a legible style of writing. By Key Stage 2 children should be able to write in both joined and printed styles with increasing fluency and speed.
Pupils need to understand from an early stage that much of their handwriting will be read by other people and therefore needs to be accurate, legible and set out in an appropriate way.
TEACHER NOTES While some children take pride in making their handwriting as neat as possible, others can struggle (or do not care!). By getting children to discuss why neat handwriting is important, they will hopefully give their own more thought.
LESSON PLAN 1) In your messiest(!) handwriting, write the sentence “Why is neat handwriting important?” on the board. Try to make the words as illegible as possible, then ask the children to try and read what it says. Ask them what would happen if you always wrote like this - how would this affect their learning? Prompt a discussion about other occasions when it is important to have neat handwriting - Thank you letters, homework, birthday cards, exams. Ask the children to fill in these examples or others of their own on the sheets. 5 minutes
2) Using the activity sheets and ask them to write first in what they consider to be their messiest handwriting, and then again in their best handwriting. 5 minutes
3) Still using the activity sheets, ask the children to fill in what they think Lisa is saying to her friends inside the speech bubble. This will require them to write both neatly , and in a constrained area. As they will be showing their answers to the class later, they also need to make their writing as neat as possible to others can read it. 20 minutes
4) PLENARY: Ask the children to show their cartoons to the class. As a group, discuss whose is the easiest to read and why. (Are the letters all the same size? Are the letters aligned correctly? Are the letters formed the right way?) 10 minutes
OBJECTIVE CHECKLISTNational Literacy Strategy states
“Literate primary children should
write with confidence, fluency and
have legible handwriting”
Children should understand why
neat handwriting is important
PREPARATIONPhotocopy the activity sheet
overleaf for each pupil
TIPTo encourage neatness, have a
small prize available to the child
who is judged by the others to
have the neatest writing in their
cartoon bubble.
As some children worker faster
than others, suggest that once
they finish their speech bubbles
they can colour in the cartoon
ICT OPPORTUNITIESVisit www.stabilo.co.uk to
investigate the different types of
pens that are available - including
some that are designed specifically
to help with handwriting.
•
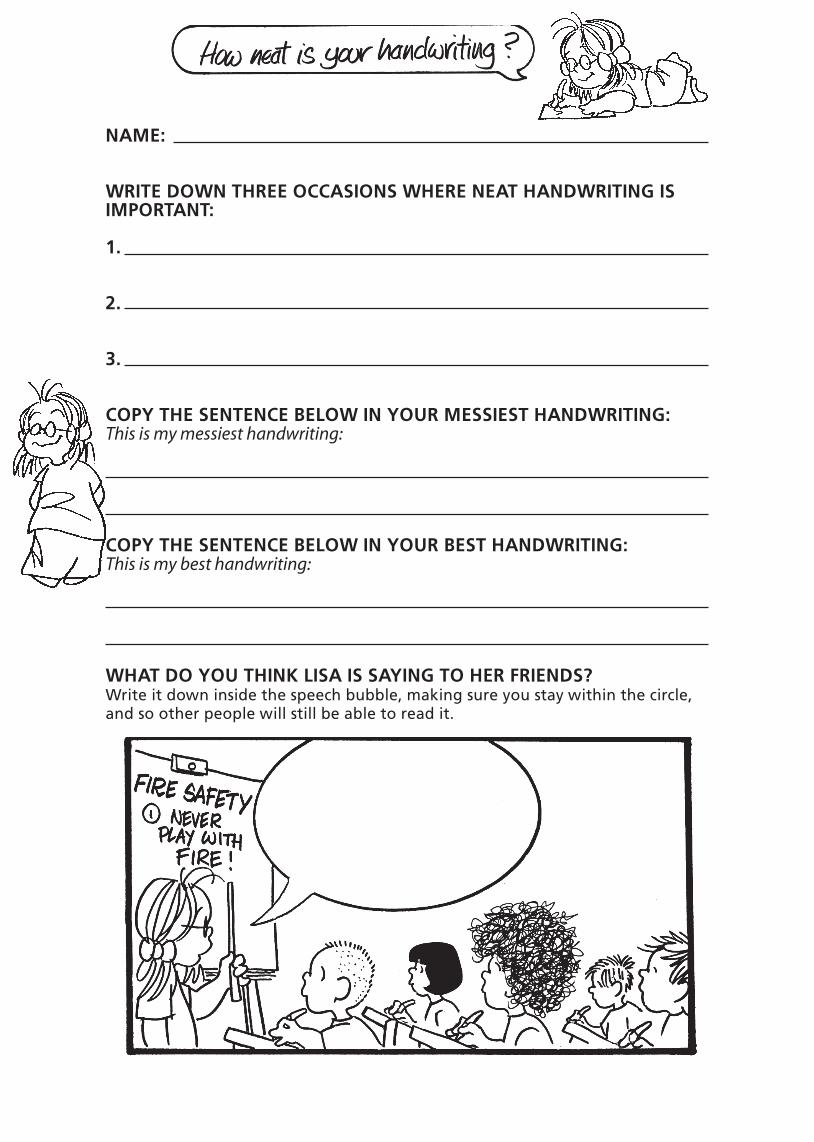
ACTIVITY SHEET 5
NAME:
WRITE DOWN THREE OCCASIONS WHERE NEAT HANDWRITING IS IMPORTANT:
1.
2.
3.
COPY THE SENTENCE BELOW IN YOUR MESSIEST HANDWRITING:This is my messiest handwriting:
COPY THE SENTENCE BELOW IN YOUR BEST HANDWRITING:This is my best handwriting:
WHAT DO YOU THINK LISA IS SAYING TO HER FRIENDS?Write it down inside the speech bubble, making sure you stay within the circle, and so other people will still be able to read it.
www.stabilo.co.uk
In association with:
STABILO ‘s move easy
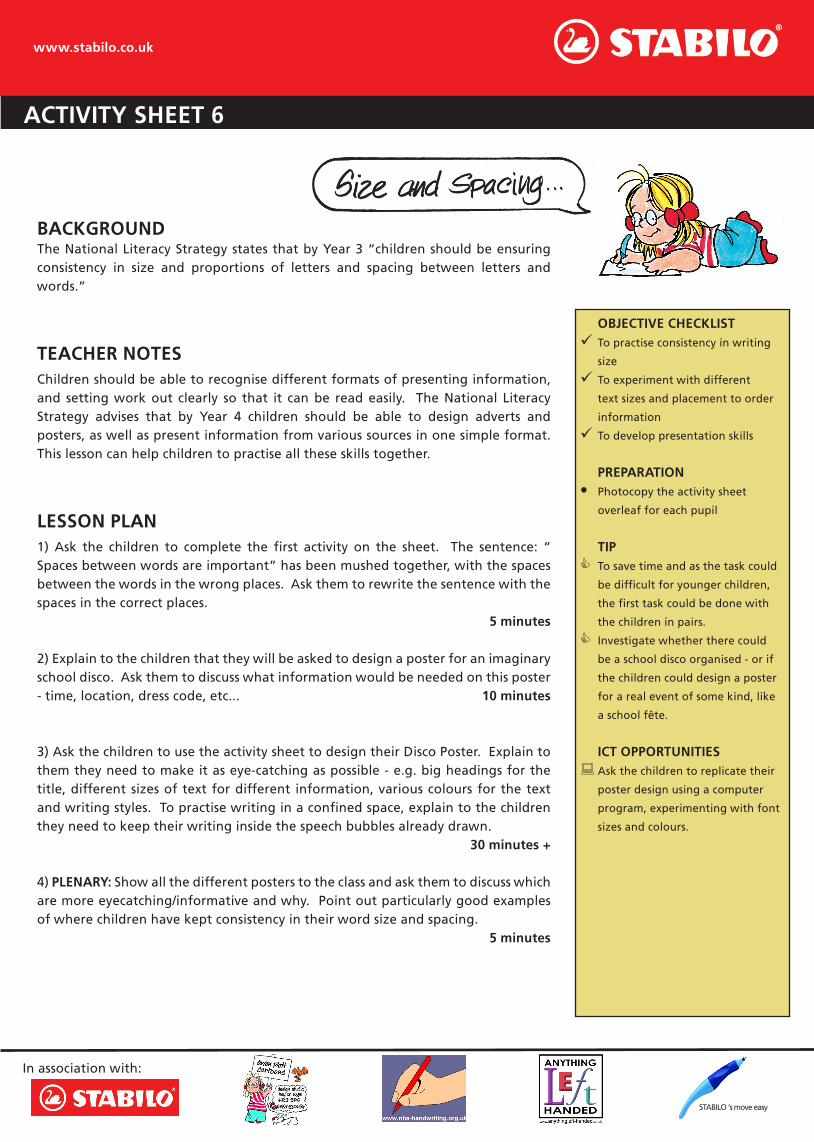
BACKGROUNDThe National Literacy Strategy states that by Year 3 “children should be ensuring consistency in size and proportions of letters and spacing between letters and words.”
TEACHER NOTES Children should be able to recognise different formats of presenting information, and setting work out clearly so that it can be read easily. The National Literacy Strategy advises that by Year 4 children should be able to design adverts and posters, as well as present information from various sources in one simple format. This lesson can help children to practise all these skills together.
LESSON PLAN 1) Ask the children to complete the first activity on the sheet. The sentence: “ Spaces between words are important” has been mushed together, with the spaces between the words in the wrong places. Ask them to rewrite the sentence with the spaces in the correct places. 5 minutes
2) Explain to the children that they will be asked to design a poster for an imaginary school disco. Ask them to discuss what information would be needed on this poster - time, location, dress code, etc... 10 minutes
3) Ask the children to use the activity sheet to design their Disco Poster. Explain to them they need to make it as eye-catching as possible - e.g. big headings for the title, different sizes of text for different information, various colours for the text and writing styles. To practise writing in a confined space, explain to the children they need to keep their writing inside the speech bubbles already drawn. 30 minutes +
4) PLENARY: Show all the different posters to the class and ask them to discuss which are more eyecatching/informative and why. Point out particularly good examples of where children have kept consistency in their word size and spacing. 5 minutes
•
OBJECTIVE CHECKLISTTo practise consistency in writing
size
To experiment with different
text sizes and placement to order
information
To develop presentation skills
PREPARATIONPhotocopy the activity sheet
overleaf for each pupil
TIPTo save time and as the task could
be difficult for younger children,
the first task could be done with
the children in pairs.
Investigate whether there could
be a school disco organised - or if
the children could design a poster
for a real event of some kind, like
a school fête.
ICT OPPORTUNITIESAsk the children to replicate their
poster design using a computer
program, experimenting with font
sizes and colours.
ACTIVITY SHEET 6
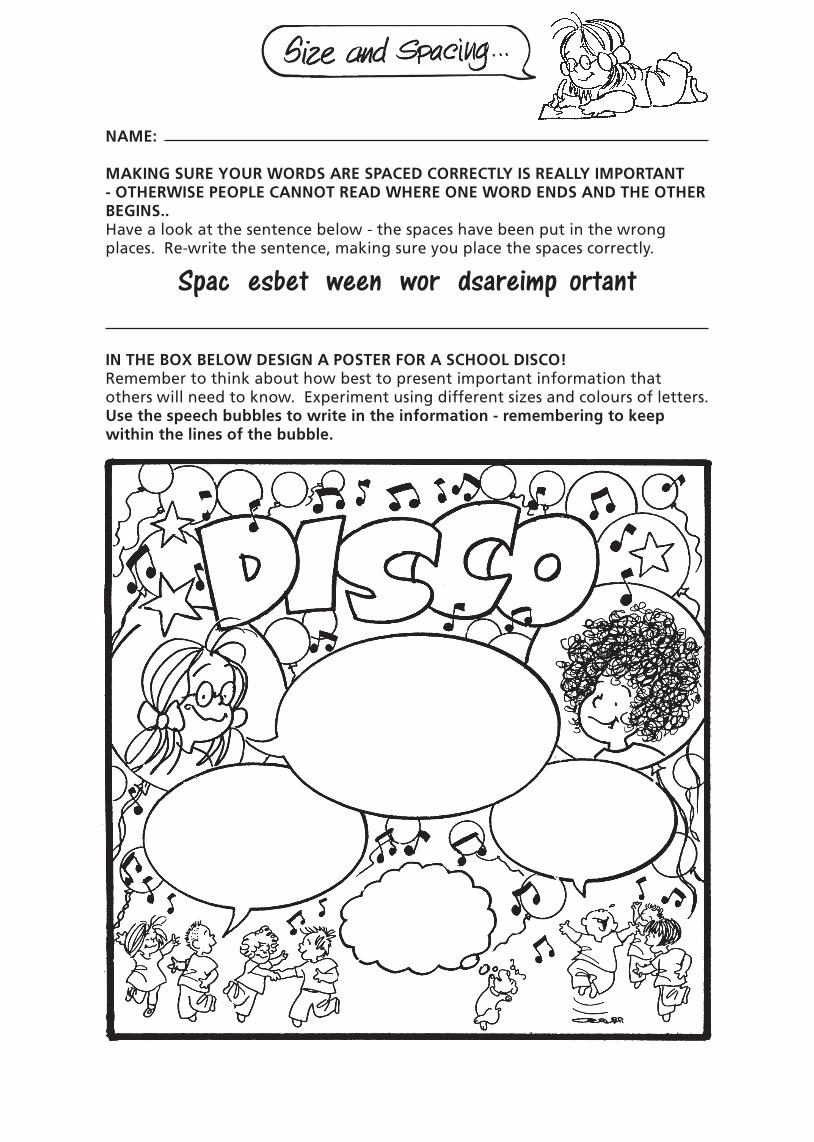
NAME:
MAKING SURE YOUR WORDS ARE SPACED CORRECTLY IS REALLY IMPORTANT - OTHERWISE PEOPLE CANNOT READ WHERE ONE WORD ENDS AND THE OTHER BEGINS..Have a look at the sentence below - the spaces have been put in the wrong places. Re-write the sentence, making sure you place the spaces correctly.
Spac esbet ween wor dsareimp ortant
IN THE BOX BELOW DESIGN A POSTER FOR A SCHOOL DISCO!Remember to think about how best to present important information that others will need to know. Experiment using different sizes and colours of letters.Use the speech bubbles to write in the information - remembering to keep within the lines of the bubble.
www.stabilo.co.uk
In association with:
STABILO ‘s move easy
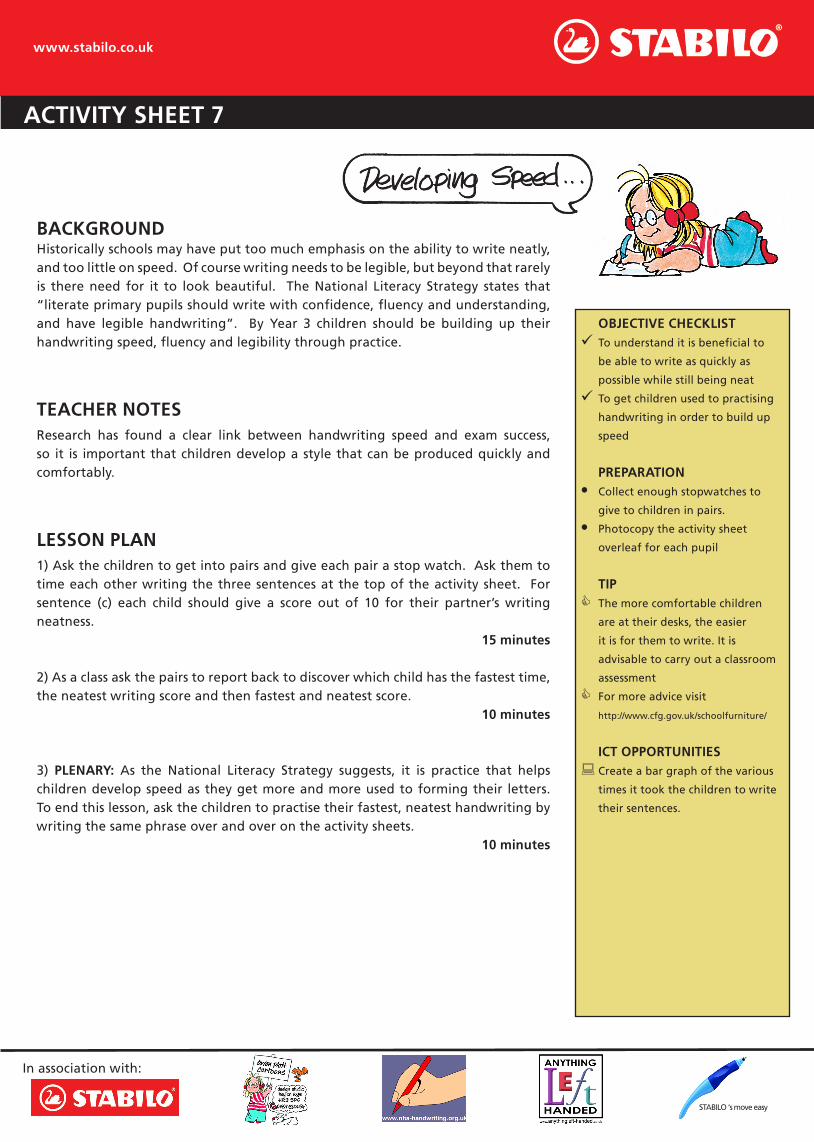
BACKGROUNDHistorically schools may have put too much emphasis on the ability to write neatly, and too little on speed. Of course writing needs to be legible, but beyond that rarely is there need for it to look beautiful. The National Literacy Strategy states that “literate primary pupils should write with confidence, fluency and understanding, and have legible handwriting”. By Year 3 children should be building up their handwriting speed, fluency and legibility through practice.
TEACHER NOTES Research has found a clear link between handwriting speed and exam success, so it is important that children develop a style that can be produced quickly and comfortably.
LESSON PLAN 1) Ask the children to get into pairs and give each pair a stop watch. Ask them to time each other writing the three sentences at the top of the activity sheet. For sentence (c) each child should give a score out of 10 for their partner’s writing neatness. 15 minutes
2) As a class ask the pairs to report back to discover which child has the fastest time, the neatest writing score and then fastest and neatest score. 10 minutes
3) PLENARY: As the National Literacy Strategy suggests, it is practice that helps children develop speed as they get more and more used to forming their letters. To end this lesson, ask the children to practise their fastest, neatest handwriting by writing the same phrase over and over on the activity sheets. 10 minutes
•
•
OBJECTIVE CHECKLISTTo understand it is beneficial to
be able to write as quickly as
possible while still being neat
To get children used to practising
handwriting in order to build up
speed
PREPARATIONCollect enough stopwatches to
give to children in pairs.
Photocopy the activity sheet
overleaf for each pupil
TIPThe more comfortable children
are at their desks, the easier
it is for them to write. It is
advisable to carry out a classroom
assessment
For more advice visit
http://www.cfg.gov.uk/schoolfurniture/
ICT OPPORTUNITIESCreate a bar graph of the various
times it took the children to write
their sentences.
ACTIVITY SHEET 7
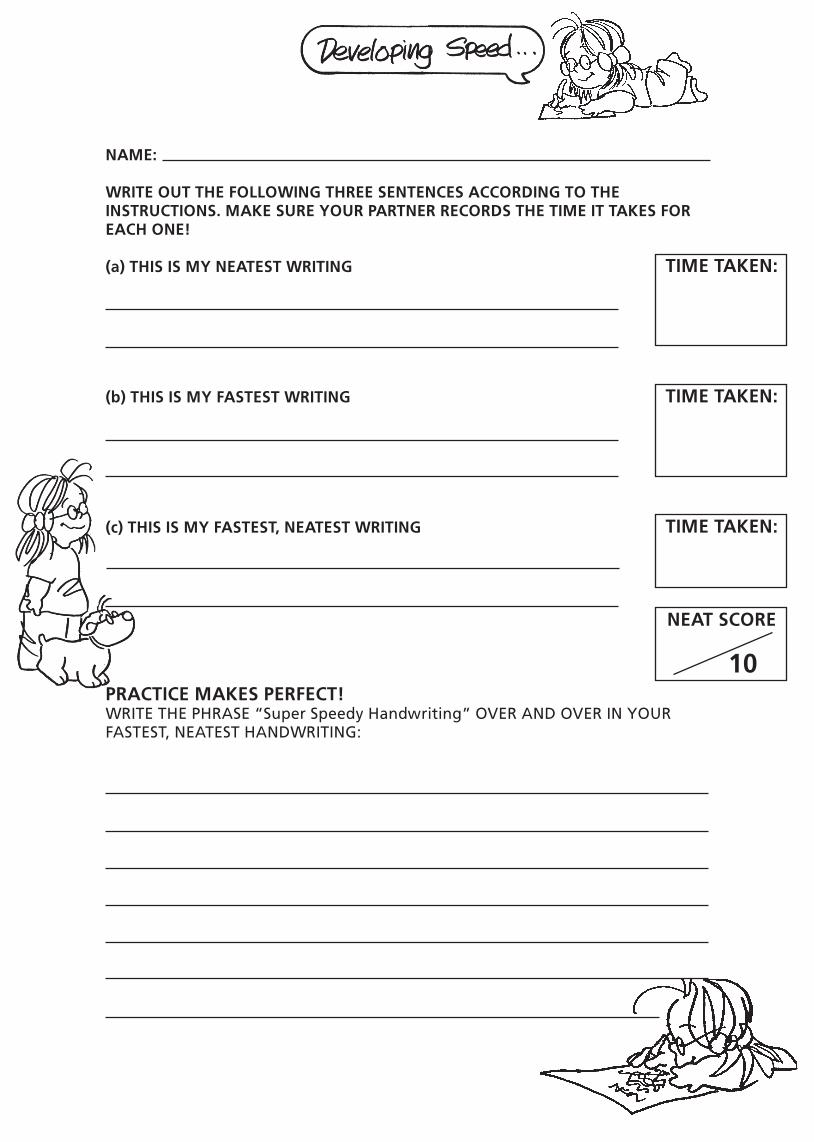
NAME:
WRITE OUT THE FOLLOWING THREE SENTENCES ACCORDING TO THE INSTRUCTIONS. MAKE SURE YOUR PARTNER RECORDS THE TIME IT TAKES FOR EACH ONE!
(a) THIS IS MY NEATEST WRITING
(b) THIS IS MY FASTEST WRITING
(c) THIS IS MY FASTEST, NEATEST WRITING
TIME TAKEN:
TIME TAKEN:
TIME TAKEN:
NEAT SCORE
10PRACTICE MAKES PERFECT!WRITE THE PHRASE “Super Speedy Handwriting” OVER AND OVER IN YOUR FASTEST, NEATEST HANDWRITING: