Embed Size (px)
Citation preview
Activity Compilation2005 – 2006
Compiled by Merlin and theSan Joaquin Outdoor School Staff
This activity compilation was created as a resource for both incoming and returning naturalists at the San Joaquin Outdoor School. It contains a wide variety of activities that cover numerous ecological and scientific topics. The index at the back of this guide will help you search for activities by concept such as adaptations, food chains, gardening, and even night activities. This is by no means a finished project – and it is my hope that it never will be. Please continue to add your own activities to this compilation, and share them with as many people as you can. Use them to teach students and each other alike. For in the words of Baba Dioum, “In the end, we will only conserve what we love, we will only love what we understand, and we will only understand what we are taught.” Best of luck to all of you.
-Myles Maland/Merlin
Acorn and Squirrel
Concepts: Mutualism; interdependence
Purpose: To teach students how important the acorns are to squirrels as a food source as well as how squirrels are important to oaks because its little storage caches can turn into seedlings

Vocabulary: Mutualism; cache
Materials: 3 acorns or small rocks
Activity: Pick one player (the squirrel or scrub jay if you like) to stand in the middle of the circle. You have three acorns (or small rocks if it is spring and you can’t find any acorns). The group passes the acorns in the same direction and the squirrel tries to find where the acorns are. The people on the outside are the "holes" where acorns might be. The passing is done very secretly without showing the acorn to the squirrel so that he'll "forget" and a new tree can grow. The cool part is that lots of "fake passing" goes on to confuse the squirrel. I give the squirrel three incorrect guesses to find the acorns. The students love this game and will play for hours. I also tell the kids they must pass along (not hold) the acorns so that they are constantly moving.
Variations: Bob the Rock
Adapt or Die
Concepts: Adaptations; checking for understanding
Purpose: To show students a variety of animal adaptations and have them think critically about how adaptations are linked to environmental conditions
Vocabulary: Adaptation
Materials: Adapt or Die cards
Activity: This activity is a great one to check for understanding. (The students must have some background knowledge of adaptations.) Split the students up into two groups. Have each group separate themselves and choose one representative. While they are doing this, spread out the “Adapt or Die” cards in any fashion that you would like (i.e. in two straight lines, in a square, in a circle, or randomly). Next, read out one of the environmental changes, such as, “All of the polar ice caps melt.” When you say “Go!” the representatives from each group will race to the cards and find one that has an adaptation on it that will help them best survive in the new environmental conditions (e.g. “You grow gills to breathe,” and “You grow webbed hands and feet.” Once they have their card, they will race back to their team. Then, each team will read what their person chose and discuss how to present their case to the judges (i.e. you and the cabin leaders). After a minute or two, each representative will plead their case to the judges. The winners receive one point in the game. In the event of

a tie, the team whose representative made it back first will win the round. Continue the activity through eight to ten rounds.
Adaptation Relay
Concepts: Adaptations; competition
Purpose: To show students how adaptations are natural advantages for survival
Vocabulary: Adaptation
Materials: 2 basketballs; 2 softballs; 2 tennis balls; 2 golf balls
Activity: Divide the students into 2 groups. Each group should line up in a single file line facing the balls, which are lined up about 10 – 20 yards away. The balls should be ordered – basketball, softball, tennis ball, golf ball. Explain to the students that each team represents a different organism, and that the balls represent different foods – and that the organisms will be racing each other to gather the food and bring in back to their lines. However, each organism has different adaptations for gathering the food. Group 1 only has one leg, and therefore has to hop on one foot to get the food and bring it back. Group 2 has both legs, but it does not have any hands. Therefore, Group 2 will have to clasp their hands behind their necks and grab the food by squeezing their elbows together. When the students finish asking questions, begin the race. The first team to successfully bring all of the balls back to their line wins the race. In most cases, Group 2 will break out to an early lead, since it’s easier to grab the bigger balls and they can run. However, Group 1 usually begins to catch up as Group 2 moves to the smaller balls. When the race is over debrief the activity , by getting students to think about the following questions:
-Who won? Why? -Who did you think was going to win at the beginning of the race? -What is competition? -Who would have survived? -What food is Organism 1 adapted best for? Organism 2? -What are some examples in the real world?
Variations: If you have a lot of students you can adapt the game to have 4 lines – Organism 1 in two lines facing each other, and Organism 2 in two lines facing each other. All the balls must make it over to one line, and then back to win the game.
Adaptation Swap

Concepts: Adaptations
Purpose: To get students to start thinking about how adaptations help organisms survive in their environment
Vocabulary: Adaptation
Materials: Flat open space to allow running; sticks or other items to mark spots on circle
Activity: 1) After discussing what adaptations are, have each student choose an animal to be in the game.2) Have everyone stand in a circle and have him or her place a stick or
some other kind of marker where they are standing.3) One person is in the middle of the circle and shouts out an adaptation,
such as “sharp claws”4) The students that have that adaptation must run to a different spot in
the circle. They cannot simply run to the two spots right beside them.5) Whoever ends up without a space in the circle must be in the center of
the circle and call out another adaptation.6) Continue the game until students begin running out of adaptations to
shout out.
Variations: You may also play this game as a game of tag. Have all students lined up in a straight line facing you. Make sure there is a landmark to signify a safety line. Allow a large amount of space between the students and yourself. Place one student in-between; this person is “it” and is in charge of tagging the others. Again, have each student choose an animal to represent. When you call out an adaptation their animal has, they must run to where you are. They are “safe” once they reach you. If the person in the middle tags anyone, they must freeze and stay where they are. They can then try to tag others who run by them and can only pivot on one foot. The students keep running back and forth between the lines until all but one animal remains. This student is then declared the winner. This game requires a larger space and more running time.
Animal Game
Concepts: Adaptations; checking for understanding
Purpose: To review zoology or animal ecology with the students
Materials: 4 pieces of webbing

Activity: Form two equal teams. Each team should choose an animal and then think up six to eight riddle clues for that animal. The clues should be progressively easier, proceeding from general to specific. When both teams have their clues ready, have them face each other across two lines about three feet apart made with the webbing. Fifteen feet behind each team draw another line with webbing (or sticks), which will be the team’s home base. The teams take turns giving clues. (Each team should decide beforehand which members will give which clothes.) Team A gives its clue first; then Team B tries to identify Team A’s animal. If it’s wrong, nothing happens. Now Team B gives its first clue, and Team A tries to guess Team B’s animal, but they also guess wrong, so still nothing happens. As the clues become more and more obvious, the tension mounts. This continues until one of the teams guesses correctly. For example, Team A says, “I have a white tip on my tail,” and Team B guesses, “Are you a red fox?”The members of Team A says “Yes!” and they turn and run toward home base, while Team B chases after them.Example:1. I have four feet and my body temperature stays the same.2. I use my tail as a rudder.3. My habitat is the forest.4. My front teeth are constantly growing, so I gnaw a lot.5. Owls are one of the few animals that can catch me.6. I have skin flaps that extend along each side of my body between my ankles and wrists.
Answer: Flying Squirrel
Animal Parts
Concepts: Adaptations
Purpose: To encourage the students to think about how animals move and behave
Vocabulary: Adaptation
Materials: Optional: give students props to use, such as a tin can with rocks in it to mimic the sound of a rattlesnake
Activity: Split students into groups of four or five, and then have each group choose a different animal that lives in the area. Tell them that each group will have to imitate the body of the animal. Then they will have to appear before an “animal expert” or “panel of experts” who will try to guess their identity on the basis of the movements and behavior they act out. No

noise is allowed, except what they can make with props (optional). Give students about 5 minutes to work on their acts.
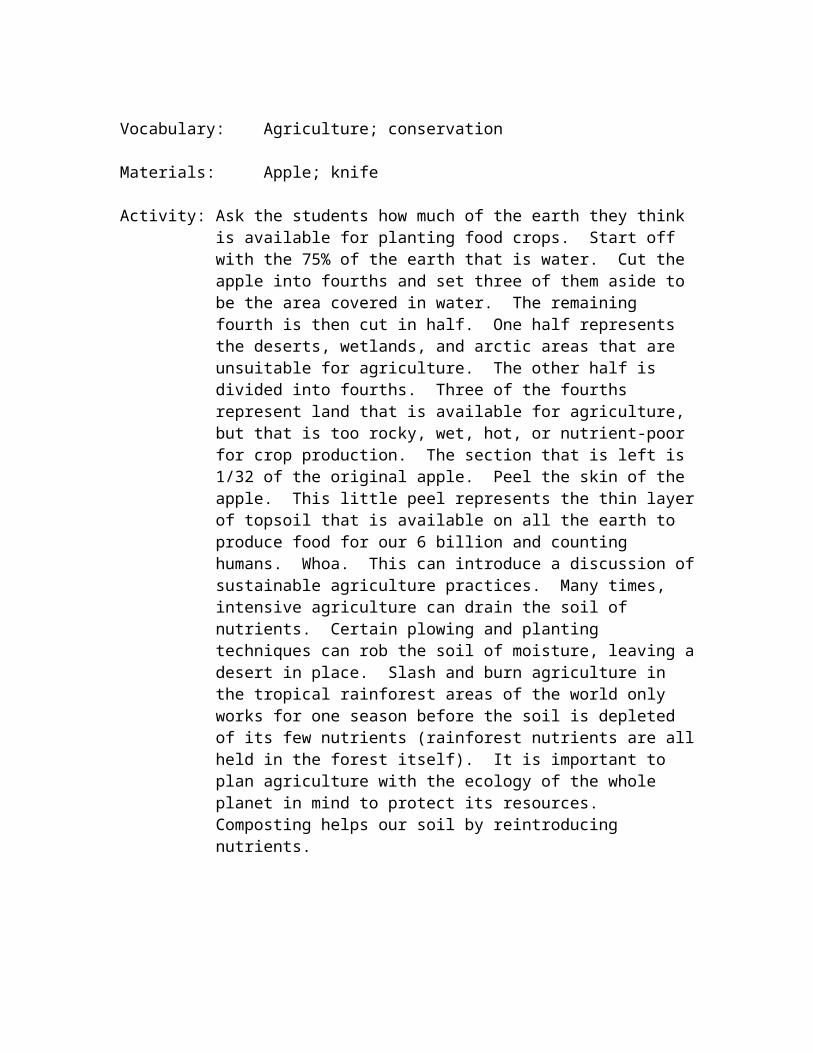
Apple Earth
Concepts: Gardening; conservation
Purpose: To illustrate to students the percentage of fertile land on Earth
Vocabulary: Agriculture; conservation
Materials: Apple; knife
Activity: Ask the students how much of the earth they think is available for planting food crops. Start off with the 75% of the earth that is water. Cut the apple into fourths and set three of them aside to be the area covered in water. The remaining fourth is then cut in half. One half represents the deserts, wetlands, and arctic areas that are unsuitable for agriculture. The other half is divided into fourths. Three of the fourths represent land that is available for agriculture, but that is too rocky, wet, hot, or nutrient-poor for crop production. The section that is left is 1/32 of the original apple. Peel the skin of the apple. This little peel represents the thin layer of topsoil that is available on all the earth to produce food for our 6 billion and counting humans. Whoa. This can introduce a discussion of sustainable agriculture practices. Many times, intensive agriculture can drain the soil of nutrients. Certain plowing and planting techniques can rob the soil of moisture, leaving a desert in place. Slash and burn agriculture in the tropical rainforest areas of the world only works for one season before the soil is depleted of its few nutrients (rainforest nutrients are all held in the forest itself). It is important to plan agriculture with the ecology of the whole planet in mind to protect its resources. Composting helps our soil by reintroducing nutrients.

Bat and Moth
Concepts: Adaptations; sensory awareness
Purpose: To help students understand the importance of echolocation as an adaptation
Vocabulary: Echolocation; predator; prey; adaptation
Materials: Blindfold
Activity: Set up boundaries marking an area approximately ten feet long and wide. Choose a student to be the bat and blindfold her. All the other students are moths and must remain within the boundaries. Explain that bats hunt at night and therefore do not use their eyes but their ears to find their prey. In fact, they use a technique called "echolocation," in which they send out high-pitched calls and listen for the sound to bounce back off an object. In this game, every time the bat calls out "bat!" the moths must all answer with "moth!" Using her sense of hearing, the bat tries to locate and tag each of the moths, calling out "bat!" whenever she chooses. The moths may take three steps - but no more! - every time the bat calls out. After that, the moths' only options are to dodge the searching hands of the bat without moving their feet. Once a moth is tagged, he must step outside the boundaries and wait quietly for the next round. The last moth to survive can be the next bat.
- What did it feel like to be the moth? The bat?- How do you think the bat has adapted to catch the moth? How do you
think the moth has adapted to avoid the bat? What did you do?- What are some other examples of predators and their prey?
NOTE: There are numerous variations on this game...try designating two or three children to act as trees; when the bat calls out, these children answer "tree" instead of "moth" and remain stationary. If the bat bumps into a tree, she is "dead" (it may help to start the bat with three "lives")...or use one bat and just one moth, both of whom are blindfolded; the rest of the students can stand in a circle to form the boundaries. The rules are the same as the original game, with the twist of neither player being able to see!
Bear, Salmon, Mosquito
Concepts: Food chain; interdependence
Purpose: To introduce students to the food chain, using the basis of a game that they already know (paper, rock, scissors)

Vocabulary: Food chain; interdependence
Materials: N/A
Activity: Everyone has a partner and they begin with their backs to each other. When naturalist says “food chain” they turn around and make either egret trout or mosquito symbol. Egret eats trout, trout eats mosquito and mosquito eats egret.Debrief by talking to the students about different types of organisms, and their role in the food chain. What would happen if there weren’t many mosquitoes? Too many bears? Etc.
Bird Beak Buffet
Concepts: Adaptations; competition
Purpose: To create awareness of how animals adapt to their environment to acquire what is necessary for survival – specifically, how birds adapt to obtain food that is available in their ecosystem
Vocabulary: Adaptation; ecosystem; competition; competitive advantage; migration
Materials: 4 – 6 pairs of scissors; 4 – 6 sets of chopsticks; 4 – 6 clothespins; 4 – 6 spoons; 1 bag dried beans; 1 bag rubber bands; 1 box toothpicks; 1 box paperclips; whiteboard
Activity: The scissors, chopsticks, clothespins, and spoons represent different bird beaks. The other supplies represent the food source, which can vary depending what supplies are available. Divide the students into two sides. Each side should be seated and arranged shoulder to shoulder, facing each other. Divvy up bird beaks, separating them as best as possible. Students can only use the beaks to grab their food source. Spread the food out in the middle of the two sides. Give the students 1 – 2 minutes to gather as much food as they can. Students should remain in their position until food is exhausted, then they can move to another location. After time has expired, separate groups by beak type and have them count the amount of food acquired. Tally totals on the board, listing the beak type versus the amount of each food gathered.The students will see that, based on the totals, that certain beak types are more adapted to different food sources. This is a great opportunity to discuss bird adaptations and the relation to food in an ecosystem. For example, wader have long, sharp beaks to catch fish, so where would you be inclined to find these birds? Some of the beaks will show the children that certain birds have an advantage in acquiring more than one food type – a great segue into understanding how competition takes shape. After
debriefing, put all of the food in the middle and play one more round to let them observe what happens – the result should be the pairing of beaks with the appropriate food type.
Bird Migration Hop Scotch
Concepts: Migration; conservation
Purpose: To outline importance of marshes to many migrating bird species and to discuss benefits of marshes and consequences if they are destroyed
Vocabulary: Migration; marsh
Materials: Chalk
Activity: Draw a hopscotch field on any smooth surface (concrete, etc.) with chalk. Tell the students that this represents the migration route for many birds (give examples of birds – ask students which birds they would like to be). The actual location of the Pacific Flyway may be discussed. Have students’ line up at the start of the field and instruct them to reach the end by hopping on one foot. Only one foot may be placed in each square. All students should have a fairly easy time getting through the field. Have them get back in line as they finish. Before they go through again, explain that you are a developer and that there are many people in your city that need homes. You are going to build an apartment complex on one of these marshlands. To signify the construction, draw an X through one hopscotch square. Let the students know that, as birds, they can no longer stop here for food. Draining of marshes as a prerequisite to building may be discussed. Have the students try to get through the migration path again, and discuss which time was easiest. If a student does not make it through, they did not find a place to land for food and they did not survive the season.
Variations: 1)Many rounds can be played, and each time you can X out another marsh because you have to build restaurants for those people to eat, power plants so they have food, hospitals, schools, etc, etc. Discuss possible alternatives to building on the marsh or solutions that might help both people and birds survive. (Solutions include building in a more sustainable place, high-density building, etc.)2)Another variation is to play this activity right on the beach if chalk is not available. Find a smooth section of beach that has relatively wet sand and use a stick to draw the "hopscotch" board
Birds on a Stick

Concepts: Observation
Purpose: To teach patience, and inter species interaction
Materials: Drab colored blanket, tall stick.
Activity: Have a student cover her/himself as much as possible with a blanket, while still being able to see. Have him/her sit with a tall stick in hand and make a “pssh” sound in an attempt to attract birds to the stick. Some considerations: 1) Birds are most active in the morning. 2) Birds are less likely to shy away from drab-colored blankets and sheets. 3) Birds are more likely to approach you in a thicket or forest, where your presence is less obtrusive. 4) Choose a place where you can hear sounds of bird activity. 5) Position your self in a clearing, so that the birds will have no other place to land but on your stick. 6) Hold the stick motionless.
Variations: Have students hold onto small trees.
Blind Trail
Concepts: Sensory awareness
Purpose: To have students experience moving in nature without their sense of sight
Materials: Blindfolds; (rope)
Activity: Divide the students into pairs and blindfold one of each pair. Ask the unblindfolded student to lead her partner along a section of the trail, being careful to point out logs, rocks, and other hazards. When the students have walked a while, ask the partners to switch roles and continue.
-How did you feel when you were blindfolded? When you were the leader?
-What are some other senses we can use beside sight? -How do nocturnal animals find their way in the dark?
Variations: Set up rope which winds around trees, over logs, etc. and allow students to follow the trail blindfolded. You may want to hang objects from the rope and ask students to figure out what each object is as they come across it. A specific theme helps link the different experiences together.
Build a River
Concepts: Watersheds; conservation
Purpose: To show students how pollution enters a watershed and affects all life downstream
Vocabulary: Watershed; point-source pollution; run-off
Materials: Sheets of paper; markers; scotch tape; trash
Activity: This activity takes a little preparation before you introduce it to the students. You should have enough paper for every person (or pair) in you group. Each piece of paper should be numbered – all of odd numbers should be colored blue on the bottom three inches and all of the even numbers should be colored blue on the top three inches. The blue represents a river.Begin you discussion with the students by talking about the water cycle. Then introduce key vocabulary terms, such as watershed, point-source pollution, and run-off. Then, tell the students that each of them(or pair of them) have been given a piece of waterfront property and $1 million dollars to develop it. They must explain how waste is removed from their land. Hand out the sheets of paper and a piece of trash to each person (or pair), and have the students draw their development so that the number on the bottom is facing up. Tell the students that the trash they hold represents the pollution that is produced on their land. After the students have finished drawing, hang the pictures on the wall so that the parts of the river are combined to form a large section of the river. Then, have each group come up to explain their development. When each group finishes presenting they should hand their trash to the next (downstream) group.Conclude by comparing the amount of pollution that they first group had versus the last. Each piece of trash represents an example of point-source pollution. The pollution enters the water cycle by run-off. Also, how is the river’s overall health affected, both upstream and downstream?
Build a Town
Concepts: Adaptation; conservation; sustainability
Purpose: To have students work together to plan a city, while incorporating key ecological concepts
Vocabulary: Conservation; sustainability; community
Materials: Large sheets of paper; crayons; markers

Activity: Divide students into groups (groups of 3 or 4 work best). Each group represents a family that is starting a new community. First have them draw a water source for their community, as well as a mountain, and then have them add their family’s house. Once a group has done this they can send a representative to you to get the first card. They must read the card to the group and draw what it asks for. Once they have finished with the first card, they then send a representative to return it and get the second card. When they finish, have them name their town and present it to the rest of the group.Make sure to leave enough time at the end (at least fifteen minutes) to process their drawings and the choices they made for their community. There are countless ways to process this depending on what you want to emphasize. You will most likely notice the patterns among the different groups drawings (i.e. they all run out of space, their own houses are enormous, while the others are crammed together, the sewage plants or factories are next to the water, etc.). In order to make this activity relevant, in conclusion ask them about particular issues in their own communities and talk to them about ways that they can express their opinions about these issues (i.e., town meeting, letter writing, petitions, etc.). You may also let the students know that some of them may chose to become politicians, land planners, developers, or town council members and the these are the types of decisions that they may be presented with in the future.
Example cards: (1)Ten families decide to move to the area. They need housing. Draw housing for these ten families to live in. (2) These families need to buy food. A grocery store was opened. Draw a grocery store.The rest of the cards involve a town hall, place of worship, factory, more housing, railroad, school, restaurant, gas station, interstate, more housing.
Build a Tree
Concepts: Anatomy of a tree; photosynthesis
Purpose: To explain the various parts of a tree and their roles and importance
Vocabulary: Heartwood; sapwood (xylem); cambium; inner bark (phloem); outer bark; roots
Materials: N/A
Activity: Have the students form a human tree with all its parts and teach them to act out the various roles. Choose a few students to act as heartwood, the center of the tree, which provides structural support for the tree. Ask them to stand strong and tall with their arms flexed. Next find more students to stand holding hands in a circle around the heartwood to act as the
sapwood, or xylem, which carries minerals and water up from the roots. Ask them to yell out “Going up!” as they lift their hands in the air. Next, find more students to stand in another circle facing out to act as the cambium, which is the growth layer of the tree. Ask them to hold hands in front of them and push with a simultaneous “Ugh!” Form yet another circle with students holding their hands in the air as leaves to act as the inner bark, or phloem, which carries sugar down from the leaves. Ask them to yell out, “Going down!” as they lower their hands to the ground. Form one last circle to make the outer bark, which protects the tree from disease, fire, and injury. Ask them to stand facing out and hold hands as tightly as they can. Lastly, take the remaining students and ask them to lie on the ground, feet facing toward the tree to act as the roots. Once everyone is set up and understands their role, help them coordinate their actions together to form a living tree. To make things more exciting, you may choose to act as a bark beetle or forest fire and attempt to break through the bark and get to the heartwood of the tree!
-Why is every tree important? -What is the tree’s role in the forest? -How can you tell the age of a tree?
Camera
Concepts: Observation; sensory exploration
Purpose: To have students work together to reveal the beauty of an ecosystem
Vocabulary: Sensory exploration
Materials: Blindfolds
Activity: Begin by telling the students about observation, and what it takes to be a good observer. Then, have them all find a partner. In this activity , one student will be blindfolded and the other lead them around the designated area. It is nice to use a rather large, covered area so that the students can spread themselves out quite a bit. Tell the students that the blindfolded person is the “camera” and their partner is the “photographer.” The photographer must slowly and quietly walk around the ecosystem and take pictures of beautiful or interesting things. To take a picture the photographer will get in position and then aim the camera at the scene – or “aim” their partner so that they can observe the scene, by having them sit, stand, squat, or turn their head. They must do all of this by either whispering quietly or by physically moving the camera (depending on the maturity of the group.) When the photographer wants to snap the picture, she must tap the camera on the shoulder. The camera then has about 30 seconds to observe. When the photographer is ready to move to take

another picture, she will tap the camera on the shoulder again to tell him to retie the blindfold.Once the photographer has had a chance to take between five and ten pictures, bring the group together and talk about the pictures, where they were taken, and why. Focus on observations made by both the photographer and the camera. Then, switch roles and play again.
Camouflage
Concepts: Predator/Prey relationships; adaptations
Purpose: To show students what camouflage is and how important an adaptation it can be for both predators and prey
Vocabulary: Camouflage; predator; prey
Materials: Construction paper; scissors; crayons
Activity: (1) Have the student cut out ten to twenty mice from different colors of construction paper and color them. Divide the students into two teams and send one group into a designated area, such as a section of forest or meadow. Ask this group to place the mice within this area so that they are hidden yet visible. When they are finished, send the other team to find as many of the mice as possible. After five minutes, the first team may reveal the remaining hidden mice. The teams can then switch roles. Afterward, discuss camouflage and its purpose in nature.
-Which mice were easy to find? Which were hard? -What does the word "camouflage" mean? -How does camouflage help an animal? -What are some examples of animals with good camouflage? -How can we better camouflage ourselves to see more wildlife?
(2) Divide the students so that one student is the “prey” and the rest are the “predators.” Have the prey stand in one spot and blindfold them for one minute while the predators “camouflage” (not hide – they must be able to see the prey at all times) themselves in the surrounding area (behind trees, shrubs, and rocks). Unblinfold the prey and tell them that they cannot move from their position; however, they can rotate to look 360 degrees. Have them find as many predators as they can in one minute. Reblindfold the prey and have all the predators move in 10 feet. After one minute unblindfold them, and have them find as many predators as they can. Repeat this process until there are only a handful of students left. In the last round, the last/closest predator “survives” and can be the prey for the next time the activity is played.
-What were some strategies of successful/unsuccessful predators? -How did the prey spot predators?

Capture the Critter
Concepts: Food chains; energy pyramid; cycles
Purpose: To experience the food chain in the forest and to more deeply understand the relationships between herbivores, omnivores, and carnivores; and to demonstrate some possible human impacts on the forest and discuss he consequences those impacts have on the food chain
Materials: Stomachs (squares of paper, see appendix); rubber bands; crayons or markers (4 blue, 4 green, 1 orange); headbands (two colors)
Activity: Before leaving, introduce the four respects. Yourself: safety is important for everyone to have a fun time. Point out to the students that animals don’t travel through the forest loudly, but instead sneak quietly. Others: be aware of the people around you and their safety as well. Nature : respect the area when making decisions about where to run in the game. Equipment: be sure that all materials are returned and that markers are not moved.To inspire thinking about the game as they students what animals need to survive: shelter, food, water, air. Ask what different things animals eat and discuss herbivores, carnivores, and omnivores. Have the students name different animals in the forest that fit into those categories. Ask the students what they know about predator/prey relationships.Then, explain the boundaries of the course and split the students into groups. 1/15 of the group should get a red headband and be a carnivore. 2/15 of the group should get a blue headband to be an omnivore. The rest of the students are herbivores. Gather the herbivores and explain the rules, then send them out on the course. While you explain rules, the cabin leaders can hand out the rubber bands. Then, explain the rules to the omnivores and carnivores and release them to the course.RULES and OBJECT: On the course, there are four blue markers and four green markers. Blue represents water and green represent plants for food. During the game, the students will have to find food or water. When they find the food or water, they should mark the color on their stomach in the appropriate box.Carnivores, Omnivores, and Herbivores have different numbers of lives symbolized by the rubber bands on their wrist. If a player is tagged by a predator, they give one of their lives to that person. Point out clear and distinct boundaries for this game. If the players get out of bounds, they lose a life to the teachers.

The game is over when you howl like a coyote and the group meets back at a designated spot. If the animals do not have what they need to survive they will have to act out their death scene and move to one side.SURVIVAL is the objects of the game. The key is to think like an animal (i.e. Moving quietly through the woods or hunting like an animal).REQUIRED FOR SURVIVALCarnivore (start with 1 life) 0 plant food, 4 water, 10-15 livesOmnivore (start with 4 lives) 2 food, 4 water, 8 lives.Herbivore (start with 4 lives) 4 food, 4 water, 1 lifeDEBRIEF: Gather the group and ask about their experience. I like to find out who survived and separate those from the others. Then, ask what made them the most successful at survival. Have the rest of the group share what sort of things they did to survive. (often, they were really good at one aspect, but couldn’t run fast enough to keep lives or were running too much to find food) Talk about the difficult life of animals. Some interesting things come up in most of my games. Ask if players were tagged while eating or drinking. Did anyone work in groups? Did anyone use the orange crayon, which was pollution? (oops, you’re dead.) Did anyone use camouflage? Is it more important for the predator or prey?
Card Hike
Concepts: General
Purpose: To give students some quiet time with nature and have them read about a specific subject matter independently
Materials: Informational cards; a teaching assistant
Activity: This is a great activity to give the students some independence and to cover some ground while teaching them at the same time! Prepare a set of fifteen to twenty five index cards, each with pieces of information based on a certain theme, such as redwoods or the water cycle. You may choose to write a question on the front of the card with the answer on the back. Explain to the students that you will go ahead of them on the trail, placing cards evenly spaced on the ground. Ask a cabin leader to dismiss the students approximately every minute, either individually or in pairs. The students must follow the trail, stopping at each card to read the information, answer the questions, etc. then place the card back exactly as they found it for the next person. When all the students have been dismissed, the cabin leader can follow behind and collect the cards. Make the hike entertaining and exciting with bright colors, illustrations, and jokes!
- Who can tell me something he or she learned for the first time on the card

hike?- Did you see anything interesting? hear anything interesting?- How did you feel walking along the trail by yourself?
Note: You may also choose to make directional cards with arrows pointing which way to go for confusing sections of the trail!Note: A great follow-up activity is Owls and Crows!
Catch the Horse
Concepts: Cultural history; conservation
Purpose: To understand an aspect of pioneer life on the prairie, and spark a desire to protect the prairie
Materials: Brightly colored piece of material to be used as a signal flag
Activity: In pioneer days on the prairie, often a horse would become loose and run away across the prairie. In order to recover the horse, someone would have to climb a tree to direct the others in finding the horse. In this activity, have one student climb a tree with the signal flag, high enough to see the entire playing field. Choose on person to be the horse, and send him/her off to hide. Next send all of the students running to find and chase the horse. They will have to utilize the help of the lookout in the tree, and probably use some teamwork strategy to capture the “horse.” This game works best on rolling terrain in high grass prairie.
Variations: After the game, ask the students how they would feel if the prairie had to be burned.

Caterpillar Walk
Concepts: Sensory awareness; interdependence
Purpose: To increase awareness of the surroundings without using vision.
Vocabulary: Observation; interdependence
Materials: Blindfolds (Optional)
Activity: Arrange students in a single-file line with the naturalist at the front. Instruct the students to put their hands on the shoulders of the person in front of them. Once everyone is in position, either blindfold them, or tell them all to close their eyes. There should be no talking. The goal is to have everyone use their other senses to determine what is around them. Have them listen, smell, and feel their surroundings as you stop at different points along the trail. Have them walk for a short distance, and then untie their blindfolds and allow them to discover the difference between perception and reality.
Variations: This activity can be done to access a magical place, or can be done on its own to illustrate the observational qualities of the “other” senses.
Compost Lasagna
Concepts: Gardening; composting; cycles
Purpose: To teach students what it takes to use natural cycles to grow plants
Vocabulary: Organic gardening; compost; decomposers
Materials: Shovels; pitchfork; compost ingredient cards (carbon, nitrogen, bacteria source; enough for each student); fresh food scraps
Activity: In this activity, students will learn how to build a compost pile, and what requirements the decomposers within need to turn food scraps into nutrient-rich soil. Have the students smell the "Fresh Food Scraps" compost bin. It should smell sweetly acidic and generally gross. Would you want to pick up the slimy rotting food inside? The first bin is where our compost starts and where we add in fresh new food scraps. The smell in this bin tells us that decomposers, mainly microscopic bacteria, are hard at work starting to break down the food. When they break down food and don't have enough oxygen (as often happens in a pile of rotting food), they produce acids and that contributes to the smell. Then have the students smell (and hold) the compost from the "Finished" compost bin. How does

it smell different? The bacteria are no longer at work in this bin, as they have used up all that they needed from the fresh food, leaving only nutrients behind in a form that plants can use. While pill bugs, banana slugs, and earthworms are more charismatic decomposers, it is the microbes that do most of the decomposition in a compost pile. Composting is basically growing bacteria, fungus and other microorganisms as pets. Therefore, we want to give these organisms everything they need to survive and live productive microscopic lives. We do this by making a "compost lasagna" on which they can feast. Pass out lasagna cards at random. Have all students stand in a circle, and using students' hands as a demonstration, begin to create the layers of your compost pile. First, have all carbon students put in their right hand. Dry straw is a good source of carbon. Next, add a layer of nitrogen (nitrogen people put in right hand). Any green or fresh food material has a lot of nitrogen in it. Then add some bacteria; a common source is adding manure (scat!), so bacteria people put in their right hands. Then we make another layer; carbon people put in left hand on top, nitrogen put left hands in and then bacteria put left hands in. After a while, the bacteria, which can't move around much on their own, need to find more food. What can we do? Turn the pile by having everyone throw up their hands. Use this demonstration to introduce how the students will help turn the compost pile today. There is limited space, so make sure you set up tasks for students and teams, or have some students working on a Compost Exploration while others are transferring compost. Use shovels to move compost from the "Fresh Food Scraps" bin to the middle bin. When the first bin is empty, start a new layer of compost with the day's compost scraps from the dining hall and a layer of straw.A great song to compliment this activity is “Compost Cake!”
Cookie Geology
Concepts: Geology
Purpose: To show students the basic processes by which rocksare formed
Vocabulary: Geology; mineral; rock; sedimentary; metamorphic; igneous
Materials: Cookies
Activity: Give each student a cookie. Don’t eat it! Explain to them that each cookie is a rock. What are the ingredients in our rocks? once the students have named all the ingredients, explain the similarities between actual rocks and our “cookie rocks.” Actualrocks are composed of ingredients also, we call these ingredients

minerals. Just like a cookie, how the minerals come together determinesthe type of rock. For example, you could have the same ingredientsorganized in a different fashion and have a granola bar. Well, rocksare formed in different ways as well. Explain sedimentary, metamorphic,and igneous formations.
Variations: This is a great intro activity for other geology exercises. Try it in preparation for the Geological Splat activity.
Crab Tag
Concepts: Regeneration, Adaptations of marine animals
Purpose: To have students understand the idea of regeneration of body parts as a mechanism for survival
Vocabulary: Adaptations; regeneration
Materials: A flat, open space for running
Activity: 1) Begin with discussion on tide pool living conditions. What do animals need to survive in this ecosystem?2) Discuss adaptations of crabs, specifically their ability to defend themselves and gather food with their claws3) What would happen to a crab if they lost their claw? How would they defend themselves and gather food?4) Explain how crabs can regenerate their claws if lost.5) Set up the game as follows: Everyone is a crab with two claws (both arms) and the goal is to cause other crabs to lose their claws. Everyone is “it” in the sense that anyone can chase after anyone.6) Tell the students the only way they can lose a claw or cause another crab to lose a claw is by gently pinching someone in the arm between their elbow and wrist.7) If they do get pinched, they have lost that claw and must place their arm behind their backs. As long as they have one claw left, they may continue running and playing the game.8) As soon as a crab loses both claws by being pinched on both arms, they must place both arms behind their backs and freeze for 10 seconds. They are regenerating their claws when they are standing still and may return to the game with both claws intact after the 10 seconds are up.9) You may end the game whenever you wish, though it is important to try and have each student regenerate claws at least once.10) Debrief: How did it feel to be a crab with one claw? No claws? Compare answers and have students reach conclusion that this is in fact an
essential adaptation of this animal. You may also choose to talk about other animals that regenerate (e.g. sea stars, amphibians, lizards).
Variations: Introduce gulls that can tag the crabs to make them lose one of their “pinchers” or can eat the entire crab.So that no one will have to sit out permanently designate a decomposition area for crabs to go when they have lost both of their claws. Tell them they must stay here until they count to 30. This can represent the time it takes for crabs to regenerate.
Creative Writing
Concepts: General
Purpose: To allow students to express their feelings in writing
Materials: Paper; colored pencils
Activity: Take the students to a quiet area where they can spread themselves out and spend some time writing. Be sure to give them some direction to help them get started, and give them plenty of time. When everyone is finished, encourage the students to read what they've written aloud. Here are some ideas:
- Imagine you are an Ohlone Indian, and create a story to explain something you have seen in nature (Good examples include "How California Was Made" and "How Buzzard Got His Feathers")
- Sit quietly and describe the area around you...maybe from the perspective of an ant...or an alien who just landed on this planet.
- Write poetry about something in nature.Haiku: Three lines - five syllables, seven syllables, five syllablesExample: Magnificent trees
Branches high above my headReaching for the sun
Variations: Secret spots
Creature Kin
Concepts: General; zoology
Purpose: To illustrate how animals are categorized based on their characteristics and to get the students moving around
Vocabulary: Mammal, Bird, Reptile, Fish
Materials: Four designated corners marked A, B, C, D, somehow- with an index card or paper, etc.
Activity: 1) Designate four corners or nearby landmarks that students will go to during the game. Label one corner A, another corner B, C, and D.
2) The leader will ask a question and offer four possible answers. Each participant decides their answer. If a participant decides to go with answer B, s/he will walk to corner b. If A, go to corner A, etc.
3) After all questions have been asked, have participants return to the corner where they spent the most time.
Questions:1. Would you rather:
a. runb. flyc. swimd. crawl
2. When you go from one place to another, do you like to:a. walk at a steady paceb. runc. run for a bit, then stop, then run some mored. walk until something interests or frightens you, then run
3. What would you rather eat:a. a cheeseburgerb. spaghettic. a tuna fish sandwichd. popcorn shrimp
4.Would you rather sleep somewhere:a. soft and cuddlyb. on the top bunkc. warm and on the groundd. a place from which you could quickly escape
5. Would you rather have:a. furb. feathersc. scalesd. fins
6. If you were cold would you:a. get closer to a warm personb. puff up your jacket and trap the warm air insidec. lay on a rock that was still hot from earlier in the dayd. find a warmer area
7. When the dust storms come, do you:a. move to a sheltered areab. hurry home before it hitsc. keep your inner eyelids closed, but otherwise stay as you ared. not worry about it, dust storms never bother you
Conclusion:
Corner that participants spent the most time in: Animal:A Mammal B Bird C Reptile D Fish
Variations: You could mix up the classifications, e.g. Amphibians, Invertebrate, etc.
Decomposer Tag
Concepts: Cycles; composting
Purpose: To show students the natural cycles that allow ecosystems to survive
Vocabulary: Decomposers
Materials: Students; 2 different color blindfolds
Activity: This is never ending tag. One student is "death" who can wear a colored blindfold on her/his arm. Another student gets to be a decomposer (bacteria? banana slug? fungus?) and wears the other colored blindfold. The other students can be any forest organism they want (live oaks! newts! slime molds!). When death tags an organism, they have to die and fall to the ground in some sort of dramatic manner. The decomposer can then tag those organisms that have died and bring them back to life. Use this game to introduce how life in the forest and garden is cyclical. No nutrients are wasted, and everything is recycled into new life. Decomposers are the essential organisms that help our garden and the forest survive!
Dichotomous Keys
Concepts: Plant identification
Purpose: To teach students how to observe differences in trees and shrubs to identify the plants in an ecosystem
Vocabulary: Simple leaves; compound leaves
Materials: Dichotomous keys
Activity: This is a great activity to have split the students up so that they can make observations on their own. You can either have the students work
individually or in pairs. Give each student a dichotomous key (or tree and shrub guide). Pick a tree or shrub in the area and have all of the students make observations about it (Is it tall or short? Does it have leaves? Does it have needles? ) Then, walk through how to use the keys as a group to determine what kind of plant it is. Next, pick another tree or shrub. Have the student work independently to figure out what it is. Continue through five or six different plants. Note: Build a plant is a great activity to lead into this one
It helps to start with plants that are relatively easy to identify to move to more difficult ones.
Try giving students interesting fact about plants (e.g. Native American uses) after successfully identifying
Dream Catchers
Concepts: Cultural history
Purpose: To teach students about Native American culture and customs.
Materials: Willow sticks or rings; yarn; beads; feathersActivity: Begin by reading the “Ojibwe Dream Catcher History”, or any other
legends about dream catcher that you know - there are several. Show the students a sample dream catcher, and then give them the step-by-step instructions.1. Twist one end of colored yarn onto a 4- to 5-inch round willow ring. The yarn needs to be fairly tight.
2. Take the yarn across the ring to a point opposite the wraps you just made.
3. Wrap the yarn around at that point so that the wire has crossed the circle.
4. Choose another point near the original starting point and repeat the process. You should now have a crooked V shape.
5. Wrap the yarn tight so that it will stay taut. 6. Then wrap the yarn about 45 degrees from the first wrap you made. 7. Repeat the above steps except this time, as you cross parts of the
original V, make a tight loop around it and string a bead on the wire. You can change direction slightly at that point. This will create a web effect.
8. Make a third set, again adding beads at random intervals. 9. Add a feather or fetish and a couple of leather strips to the top.
Variations: Also see Appendix for alternate instructions
Drumming Sensations
Concepts: Sensory awareness; adaptations; predator/prey relationships
Purpose: To have students rely primarily on a sense other than sight, namely hearing, and to connect their experiences to animal adaptations
Vocabulary: Adaptations; senses; predator; prey
Materials: Drum; blindfolds
Activity: This activity is a great way to have students experience the world using only their sense of hearing, and is especially effective when played at night to highlight nocturnal animal adaptations. Start by giving each student a blindfold, and having them tie it around their heads. Then tell them to push it up to their foreheads so that the
students can easily pull it over their eyes when the activity begins. Talk to the students about adaptations and how some predators uses hearing to find prey, while some prey uses their hearing to elude predators. After you have introduced the activity thoroughly, have the students spread themselves out in a large field and pull the blindfolds over their eyes. Begin weaving in and out of the students beating the drum every 10 seconds or so. The object is for the students to listen to the drumming, and find (and tag) you. It is very important that you tell students that they must WALK SLOWLY with their hands directly out in front of them. This is NOT a race. You can change the speed and volume of your drumming to shorten or lengthen the activity. Once the students tag you, you tell them to remove their blindfolds, and stand still.After playing one or two rounds, debrief the students as to how this game parallels predator/prey relationships in the wild.
Duplication
Concepts: General; checking for understanding
Purpose: To have students use recall and observation skills to find natural objects
Materials: 2 handkerchiefs
Activity: Before this activity starts, secretly collect approximately ten natural objects in the area, such as rocks, seeds, cones, plant parts, and some sign of animal activity. Place the objects on a handkerchief and cover them up with another handkerchief. Call the students together and tell them that underneath the handkerchief are ten natural objects, which they will be able to find nearby. Lift the handkerchief for thirty seconds and allow the students to take a good look and remember as much as they can. Then ask the students to spread out and collect (from the ground) as many identical items as they can. After five minutes of searching, call them back and let them share what they found. You may choose to discuss each item and tell interesting facts. If the students forgot any items, reveal them from under the handkerchief. This activity works very successfully when repeated too!
-How many objects did you find the first time? The second time? -What do you know about these objects? -Are there other interesting objects in the area that you found?
Earth Windows
Concepts: Observation; sensory awareness
Purpose: To give students reflective time to observe and appreciate the forest from a new perspective
Materials: Forest humus
Activity: Have the students lie down on the forest floor by themselves and, with the other students, bury them one at a time with the leaves and debris from the forest floor, even up to their heads. Have them close their eyes and put clean leaves over their face so that just their eyes are exposed. Have them watch and listen to the forest above them.
Fire Wood
Concepts: Adaptations; predator/prey relationship
Purpose: To use senses other than sight and understand predator and prey relationships
Vocabulary: Predator; prey; adaptations
Materials: 3 sticks; blindfold
Activity: 1) Have group sit in a circle2) Guard sits in the center of the circle with blindfold on and three sticks in front of him3) Participants will try to sneak up on the guard and silently take one of the pieces of firewood4) The guard will listen and try to feel for vibrations in the floor as people are trying to come take the wood. The guard may reach out if he senses that someone is near. If the guard tags the thief, that person is out. The game ends when all of the wood is gone or all of the thieves are out.
Variations: Foxwalk
Flower Anatomy and Pressing
Concepts: Gardening; classification; anatomy of plants
Purpose: To teach students the parts of plants and flower using a creative, artistic medium
Vocabulary: Stamen; anther; filament; pistil; stigma; styles; ovary; petal; sepal; pollen

Materials: Picture of labeled flower parts (see appendix); large flower press; white paper (for blotter sheets - at least two for each student); cardboard dividers; flowers from the garden (flat/small varieties work best); books, bricks, rocks (to weight press)
Activity: Use this activity in accompaniment with lessons about pollination and flower anatomy. Dried flowers make a great decoration for other paper projects (greeting cards, thank you/get well notes for naturalists, bookmarks). It takes at least a week for flowers to dry, especially in a foggy redwood forest, so this project requires some fragmented time investment during the week.Using a large flower sample from the garden and the flower part diagram (see appendix) and/or your whiteboard, show the students the different parts of a flower. The purpose of a flower is pollination so that the plant can produce seeds (reproduction!). Explain how there are male parts of the flower (stamen) that produce pollen, and female parts of the flower (pistil) that receive the pollen and develop into seeds (ovary). Some plants have separate male and female flowers on the same plant (monoecious, redwoods are one example), or on different plants (dioecious). Most garden plants have flowers that have male and female parts included in the same structure. Ask the students why they think this may help or not help the plant. Explain how it is easier for the pollen to get to the pistil/stamen, but that it increases the risk of self-pollination, which may not be good for the species’ gene pool. With the flower parts' labels covered up on the flower diagram, have students play "pin the part on the flower" to guess the terms for different flower structures. One student is blindfolded and the rest of the group guides that student to place a label on the proper part. Take turns so different students get a chance to be blindfolded.Have students select flowers in the garden to dry. Daisies, forget-me-not, pansies, violets, rosemary, and other small or flat flowers work best since it takes less time for them to dry out. Give each student one cardboard divider and two sheets of paper. Have students write their name on their "top" sheet of white paper with a pencil and set aside. Place the other sheet of paper on top of the cardboard and have students arrange the flowers how they wish them to dry. Students place the other sheet of paper on top and the naturalist stacks all sheets (with a divider between every set of two sheets) between the two wooden ends of the press. Tighten press with the straps and leave in a dry place for a few days. You can weight the top with a book or stone for additional pressing. Remove press straps and check on flowers at the end of the week. If dry, students can carefully remove their flattened flowers and glue to projects using white PVA glue (Elmer's works well - can thin with a bit of water and apply with a paintbrush).

Food as World’s Resource Allotment
Concepts: Resources
Purpose: To show students the inequity in the current distribution of the world’s resources, and to discuss the fairness and possible solutions
Vocabulary: Renewable; non-renewable
Materials: Goldfish and/or trail mix
Activity: Distribute your group’s lunch (or a portion of it, such as goldfish or trail mix) according to the following ratio of population to natural resources usage. (List is for a group of approximately 21.)
1 person USA gets 1/2 the food4 people China gets 1/15 the food3 people South America gets 1/20 the food1 person Europe gets 1/8 the food4 people Africa gets 1/25 the food4 people India gets 1/25 the food3 people Russia/Eurasia gets 1/8 the food1 person Australia/Pacifica gets 1/20 the food
Debrief by getting reactions and talk about fairness issues and solutions for amending the situation
Variations: This activity may also be used with groups smaller than about 20 students if you use the following approximate continent populations as a percentage of the world population:
Africa 14%Asia 60%Europe 11%North America 5%South America 8%Australia 3%
Foxes, Rabbits, and Clovers
Concepts: Interdependence; Food Chain; Energy Pyramid
Purpose: To illustrate a food chain, how energy in transferred in an ecosystem, and how interdependent organisms are in an ecosystem

Vocabulary: Food chain; energy pyramid; carrying capacity; interdependence; niche
Materials: Blindfolds (to act as rabbit tails)
Activity: This is an energetic game that works better if two trail groups play together. At least six students are needed to make the game work. This game is rather complicated to learn and requires time to set up, but it is an excellent activity that connects many important concepts. Give each student a number from one to six. The students who are ones will be the foxes, twos and threes will be rabbits, and fours, fives, and sixes will be the clovers. Notice how the number of students in each role mirrors the energy pyramid! The object of the game is to survive by eating. The foxes eat the rabbits, the rabbits eat the clovers, and the clovers photosynthesize. The rabbits face the clovers on opposite boundaries, separated by a large running area at least twenty-five yards across. The rabbits' goal is to tag a clover in order to eat. When the naturalist yells "Go!" the rabbits run over to the clovers and try to tag one of them. The clovers cannot move, so they wait to be tagged. If a rabbit does not tag a clover then that rabbit dies, its body decomposes and helps more clovers to grow. Thus, that rabbit becomes a clover in the next round. If the rabbit does tag a clover, that clover becomes a rabbit, because it is helping the rabbit population to grow. The game is complicated by the presence of several foxes, who run around inside the boundaries attempting to catch a rabbit. In order to catch a rabbit, the fox must pull the rabbit's tail, which is a blindfold that the rabbit tucks into the back of his pants! If the fox catches a rabbit, the rabbit becomes a fox, because it is helping the fox population to grow. If the fox starves, then the fox becomes a clover just as the rabbit did. The game is played in rounds. The round begins when the naturalist says "Go!" and ends when all the rabbits have either crossed the clover boundary or have been eaten by a fox. At the end of the round the students go to their new line. No one can be eaten on the way to his or her new line. If they have been eaten or died from starvation they will need to switch to the appropriate line. While the rounds are being played, the other naturalist, or cabin leader, graphs the three populations and charts the changes in number of organisms over each round, which may represent a year or season. Discuss the following questions with students:
- How did it feel to be a clover? A rabbit? A fox?- What are some advantages to being a clover? A rabbit? A fox?- What are some disadvantages?- How are the different populations dependent on each other?- What does the word "interdependence" mean? Can you think of another
example?It is possible to manipulate the game to depict different situations that occur in nature. For example, the naturalist may invent a disease that spreads through the fox population, which causes them to get very sick.

The naturalist could then make the fox hop on one foot when it hunts to show this weakness. Make sure you note these changes on the graph to explain strange numbers. This game enables the naturalist to tie in several different ecological concepts, including food chains, energy pyramids, limiting factors for populations, carrying capacity, interdependence, and niches. It is a good wrap-up game for the end of the week.
Variations: This activity is similar to “Bear, Salmon, Mosquito”
Foxwalk/Mountain Lion-Deer
Concepts: Sensory awareness; adaptations
Purpose: To introduce the idea of stalking and how predators hunt their prey
Vocabulary: Stalk; predator; prey
Materials: A single blindfold
Activity: Ask participants how we normally walk (heel to toe). Is this way quiet or loud? Can you hear most animals as they walk? How do most mammals walk (toe to heel)? Do animals sound quiet or loud when they walk? Think of nocturnal and crepuscular animals such as foxes, coyotes, rabbits, deer, or raccoons. Have students practice walking as a fox would; step first lightly on your heel, and then follow the outside edge of your foot around to your toe. Keep your heel and toes pulled slightly up while you feel for objects that may make a sound or that could be difficult to walk on. If the ground feels clear, slowly let your heel and toes fall and transfer your weight. Repeat the process with you next step. Take purposeful, careful steps. To really move silently each step should take about 1 MINUTE! For the game to test foxwalking skills, have one person be the rabbit who will be blindfolded. Everyone else will be foxes, and will take turns walking a line between two established landmarks. If the rabbit hears a fox crossing, they will raise their hands or give a signal and the fox must go to the end of the line to try again later. The game ends when everyone has successfully crossed.Discuss with students the following questions. Why does a predator need to be quiet? Why does the prey need to be able to listen well? What other animals in the forest behave like this?
Variations: You could have all of your students gather in a circle. The rabbit is in the
middle of the circle and blindfolded. The leader asks, “Who would like to stalk?” Silently, students can raise their hands. The leader chooses students who will one at a time stalk the rabbit in the circle, who cannot move except to point. If the rabbit hears a sound, they can point to where

the sound is coming from. If the leader decides that the rabbit pointed to the person who was stalking, the person stalking returns to their place in the circle and another round is played until the fox successfully tags the rabbit in the middle.Another walk is called the “weasel walk” and involves walking lightly on just the toes, so that one can pivot and turn around “on a dime.” These tactics are great to use in other activities, including camouflage, mountain lion/deer, etc.The Ohlone’s used a walk similar to the fox walk when they were stalking deer. Deer were a very important food source to this Native American group and an important part of Ohlone culture. Ohlone hunters would dress in deer skins and antlers and were supposedly so skilled in the fox walk that they could walk up to a deer and touch it. This game is also sometimes called “Mountain Lion/Deer”
Geological Splat
Concepts: Cycles/change; geology
Purpose: To develop understanding of the processes by which different rocks are formed
Vocabulary: Igneous; metamorphic; sedimentary; magma; geology
Materials: N/A
Activity: Discuss the formation of rocks and the meaning of geology with students. Geology is the study of rocks and how they are formed and changed. Explain to them how sedimentary, metamorphic, and igneous rocks are formed, assigning the following hand motions and chants for each rock type. Sedimentary: “Layers, layers, layers!” and stack hands on top of each otherIgneous: “Cooling magma!” and raise hands up like a volcano eruptingMetamorphic: “Heat and pressure, heat, heat, and pressure…” and press hands togetherAfter you’ve introduced the phrases and motions associated with each rock type, point at one student in the circle and call out one of the three rock categories. The student must then remember how that rock is formed and do the appropriate motion and phrase. If a student is unable to recall a motion or phrase, it is their turn to be “it”, and attempt to stump a fellow classmate.
Variations: You can alter the format of this game, making it a quick response test, and it is a great time filler while waiting for bathroom breaks, etc.
Graham Cracker Plate Tectonics
Concepts: Cycles/change; geology
Purpose: To illustrate the theory of plate tectonics to students and show the effects of plate collisions
Vocabulary: Plate tectonics; core; mantle; crust; magma; lava; volcano; subduction; divergence; lateral slipping (transform boundary)
Materials: 1 box graham crackers; 1 container icing; 1 knife
Activity: This activity is a great for younger or hungry students! Give the students a solid lesson on the interior layers of the earth and plate tectonics . Explain how the lighter crust of the earth almost “floats” on the semi-liquid mantle. The crust is broken up into pieces called plates, and sometimes these plates “float” into each other. Except that it’s more of a massive continental car crash! Here on the coast, the plate that is the Pacific Ocean is heavier (denser) than the continental North American Plate. The Pacific Plate subducts, or sinks, under the North American Plate. The graham crackers and icing are going to demonstrate how this affects the land around us.Give all of the students two graham crackers with icing on them. One should have a thick layer of icing (the thicker icing representing the denser continental plate), the other should have a thinner layer of icing (representing the lighter, more buoyant, continental plate). Talk to the students about these plates, and what will happen when they collide. How are mountains formed? How would the divergence and lateral slipping be affect the plates and crust differently?
Variations: Combine this activity with “volcano making.” The combination can be part of a geology elective.
Green Burritos and Salads
Concepts: Gardening
Purpose: To connect students to the food they eat
Vocabulary: Organic gardening
Materials: Garden edibles
Activity: One of the best parts about working in the garden is that you get to be so close to how your food is grown. It is important to let the kids taste items in the garden to directly make that connection between the plants' growth and food and to provide a more sensory experience. Here are two quick ways to get your students eating things in the garden.Have students take a tour of the garden with the naturalist, and contribute different items to a group salad. Students can be involved in harvesting materials, and preparing and adding them to the salad. Place all salad ingredients in a bowl (can toss with oil, vinegar, and herbs from the garden if available) and enjoy!Students can make a green burrito by taking a piece of kale or lettuce and wrapping up inside whatever ingredients they want (tomatoes, cilantro, carrots, radish, basil, etc.)
Guess the Color
Concepts: Adaptations
Purpose: Students will have a hands-on experience of the limitations of cone photoreceptors in low light levels
Vocabulary: Photoreceptor; rod; cone; retina; rhodopsin; tapetum lucidem (See Pirate Eyes)
Materials: Primary color crayons; white paper; red cellophane (to cover flashlight)
Activity: Discuss rods and cones while passing out the supplies. A human eye contains 6 million cone cells and over 100 million rod cells. These cells have different functions based on their position and sensitivities to light levels. Rod cells are located on the periphery of the retina (the light sensitive membrane on the back “wall” of an eyeball closest to the brain) and are, therefore, more sensitive to peripheral movement. Rods function best in low light levels and can only process in black and white . You can have your students stare at a red light produced by a flashlight covered in cellophane and then marvel at how night vision is not lost. The cones are located more centrally in the retina and function best in bright light conditions. The cones are the cells that are sensitive to color. Rhodopsin is the chemical in the membrane of both rods and cones that helps to change these cells activity levels if light levels change. Have students guess which type of photoreceptor cell is more active during their night hike (rods). Do you think that you will be able to guess the color of a crayon at night then? Have them guess the color of crayon they have by writing the name of the color on a sheet of paper (if it is faintly lit you may want to mark out the name of the color on the crayon to thwart cheaters) . Have them save the paper until the group has returned to a lit

area to see if they are correct. Nocturnal animals’ eyes are further adapted than ours with a tapetum lucidem, a layer in the eye that reflects light (this is why animals’ eyes shine at night when you see them in car headlights or your flashlight). The reflecting helps animals to use any available light more efficiency when it is dark.
Variations: This activity works well in conjunction with Pirate Eyes.
Habitat Wanted Ads
Concepts: Communities; interdependence
Purpose: To develop an understanding of what animals need to survive in their environment
Materials: Paper; pencils; a space in the woods with plenty of trees
Vocabulary: Habitat; survival; predator; prey; defense; camouflage
Activity: You can begin this activity in a variety of ways, though I find an effective way to do is to read the students a story that allows them to enter the mind of an animal. An example of this would be the book, Hey Little Ant, though there are plenty of others that would work. After reading the book you can discuss the ideas the students have in terms of how the animal felt in the book. Tell the students that today is their chance to imagine what life would be like as an animal living in this forest.Discuss what animals need for survival (food, water, shelter, space, etc.) and allow the students to chose what animal they want to pretend to be for this activity. Tell them they cannot share this with anyone yet.Pass out pencils and paper to each student and tell them they will be choosing a home in the designated area. Remember to set up boundaries that keep the children within your line of vision at all times.Once they have chosen a good spot for a home, they will draw what they see and create an advertisement for their ideal home, or a “want ad”. In other words, they will be trying to create an ad for their ideal home as that particular animal. They can describe the home they have found in as much detail as they would like but they must not give away what kind of animal they are. Once all instructions have been given, send the children out to find a spot and tell them not to return to the starting point until they hear you call them back. It is also important to stress the fact that they should be finding a private spot away from others and that there is to be no talking.Once everyone is finished, collect the cards and begin reading the ads and showing the pictures. The goal is for the students to guess what kind of animal would want to live in that particular habitat. After each one has

been guessed correctly you can discuss why certain animals would want certain habitats.Try to incorporate the following concepts into the discussion on the various habitats animals have: camouflage from predators, shelter from weather, protecting young, proximity of shelter to water and food, etc.
Heartbeat of a Tree
Concepts: Observation; sensory awareness
Purpose: To learn physiology of trees through experience and to gain empathy for other species
Vocabulary: Xylem; phloem
Materials: Stethoscopes
Activity: Explain to the students that trees are living creatures that eat, rest, drink, breathe, and circulate “blood” just like we do. Have the students listen for the heartbeat of the forest by pressing the stethoscope firmly and as motionlessly as possible against the trunks of several trees. For best results, do this activity in the spring when the trees are sending up their first surges of sap. Choose a tree that is at least six inches in diameter and has thin bark. Deciduous trees are generally better than conifers.
Variations: This activity could compliment Build A Tree or Meet A Tree.Incredible Journey
Concepts: Cycles; water; interdependence
Purpose: To teach students about the water cycle and to teach how all living things are dependent upon the water cycle to survive.
Vocabulary: Evaporation; condensation; precipitation; percolation; transpiration
Materials: Wooden or paper blocks (dice) with words such as: River, Lake, Ocean, Clouds, Ground Water, Glacier, Plants, Soil, and Animal written on them (One word per side). On some of the blocks (6 sides total) there should be some sides that say the same thing. For example with the Glacier block, 3 sides say: Stay at Glacier 1 side says: Go to Clouds 1 side says: Go to Ocean 1 side says: Go to Animal

Each block should sit on a base, which is a durable kind of paper stating “River”, “Lake”, “Ocean”, “Clouds, “Ground Water”, “Glacier”, “Plants”, “Animal” and “Soil”. This can be written on cardboard, card stock or a laminated sheet. Then spread the sheets- or bases- out, with the dice on top of them, so the students will have to run from base to base.
Activity: Give students a pencil and a sheet of paper (I usually have them write in The blank pages of their journals) and tell them they are about to go on an incredible journey as a water droplet. The pencils and paper are there
for them to document their journey. Next, have students stand at a block that is sitting on one of the paper’s stating “River,” “Lake,” etc. This
is the very beginning of their incredible journey. Have them write down where they began. To figure out where to go next, they will roll the ‘dice’ and whatever side the dice rolls on: “River,” “Lake,” etc. is where they go. When they get to their destination, they write it down then roll the ‘dice’ again to see where they will go next. All the while the students are keeping a written record of their journey.
The goal for the student is to make it to all of the places in the water cycle in the allotted time, usually about 8- 10 minutes. Because there isn’t much time the students have to run from sheet to sheet.
Breakdown: After the 8- 10 minutes are up, have the students come together and share where they went as a water droplet. You’ll find that some student were ‘stuck’ at the “Glacier,” for three or more times, or maybe they were in the “Ocean,” or “Clouds,” for three or more times. This is a great time to talk about how long the evaporation process takes. Also, when students are sharing, I’ll ask them how they think they got from the “Clouds” to the “Ocean”. If they say ‘precipitation’, I’ll have them say a specific way they got to the ocean. Also, some kids will go from an “Animal” into the “Soil.” Many times they won’t know to think it was because an animal went to the bathroom! This is a great time to talk about animal systems, as well.
Variations: This activity is also known as The Water Cycle Game, The Amazing Journey, Water Droplet Journey
Journal Entries
Concepts: General; checking for understanding
Purpose: To give students a chance to synthesize the material and their experiences through writing.
Materials: Paper; pencils
Activity: Have students write guided poetry based on what they’ve learned about animals, Trees, water, etc. I usually read some poems before dismissing them. Before I Dismiss them, I tell them what the assignment is. I tell them to pick a spot where they are solo, safe, silent, and where they will stay.
1) Write a “How To” poemYou could write a poem telling how to track an animal, how to move a banana slug, how to hear birds in the forest, how to walk down a hill, or even how to write a poem in the woods. It may help to assume that your reader is completely naive and has no understanding of the process. Keep your poem between 9 and 15 lines long.

2) ‘Use These Words ‘ PoemWrite a poem of 4 to 9 lines containing the words (for example) "duff," "raven," "wishing tree," "wind," "environment." Etc. Another variation: make a five-word list and swap it with a partner. Then you can each make a poem using the other person's list.3) Make a snapshotMake a word photo of the scene in front of you, not a formal portrait, but a quick candid shot of the scene engaged in some characteristic activity—the wind blowing through the trees, a raven calling out on the highest branch, a banana slug inching along the duff…In your snapshot include some reference to an animal, a color, a time of year, the weather, and a plant. Be sure to include plenty of concrete, specific details. Your finished poem should be no more than 12 lines long.4) Talk to animalsWrite a poem addressed to some animal that is wild. You could write to acougar, a deer, a raven, a salamander or…Keep your poem between 6- 16 lines long.
Juncos and Jays
Concepts: Adaptations; interdependence; communities
Purpose: To teach students the role of behavioral adaptations of animals in an ecosystem, as well as to illustrate how animals are connected in food chains
Vocabulary: Adaptation; interdependence; food chain
Materials: Dried beans (many); reusable Dixie cups; blue permanent marker
Activity: Select one Jay for every 7 Juncos (so usually have 14 Juncos and two jays). The goal for everyone one is to GET SEEDS so they can MAKE BABIES. Isn't that the goal of every species? Obtaining five seeds equals the healthy survival of one baby. The juncos have to acquire their seeds from the tree, which is the person handing out the seeds (usually a teacher, cabin leader, or naturalist). Give about 30 seconds for the Juncos to hide their nests anywhere they want. Once the Juncos have hidden their nests, they cannot move it and it cannot be placed in a place attached to them, e.g. their pocket. The Jays, however, get to run around with their nest (color two cups blue so that the Juncos can readily see who the jays are). When you reach thirty seconds, signal for Jays to open their eyes. Jays get their seeds by robbing Junco nests. The Juncos, because they are smaller, cannot physically stop the Jays but can try to trick them by using any sneaky behaviors they can devise. After

a few minutes, yell stop, and everyone counts their seeds and determines the number of babies that they successfully raised (five beans = one baby). You can keep track of this on a graph to show them some population trends. After a round or two you can add another player as a hawk. The hawk (use only one) can steal Jays' seeds by tagging Jays and claiming the contents of their cups. This sets up a difficult dynamic for the Jays because they are still nest robbing but they have to worry about the hawk. Thus, the Juncos have an easier time and see the importance of the hawk to smaller critters. The big AH HA is that all the creatures are connected even if they don't appear to be at first. It's fun to watch the Juncos call the hawk over if they see the Jay is near. This makes a great introduction into listening for the alarm and contact calls that birds make in the forest.
Variations: This activity can also be called Snowy Plovers and Coyotes
Kite Making
Concepts: Change/cycles
Purpose: To observe wind strength using kites and to understand how convection of air creates wind patterns we observe on the earth
Vocabulary: Convection
Materials: 1 bamboo skewer; 2 pieces of string (18” & 3 yards); pencil (or stick); masking tape; kite template ; scissors; 2 lengths of ribbon (each
1’); crayons; markers; paint (materials listed are for one kite, multiply by
number of students)Activity: This activity works well as either an elective or as a part of Beach Day.
Discuss with students how wind is formed; what is wind exactly? Wind is the movement of air particles. The reason that air moves on earth is due to the uneven heating of the earth’s surface. What is doing all this heating up on the earth’s surface? THE SUN! Some areas heat up quickly and that warm air rises. Other areas heat up more slowly and this colder air can move to replace the warm air that has risen. Once high in the atmosphere, the air cools and sinks to replace the air that had moved to replace the air that had risen. This cyclic movement of air is called convection. Wind and the principles of convection are especially pertinent to discuss at Beach Day because the air over the ocean is colder than the air over the land’s surface. This means there is almost constant movement of air towards land; the onshore winds you feel at the beach. For detailed assembly instructions for kites, see appendix.
Leaf Prints
Concepts: Classification
Purpose: To inspire creative thinking about plants to aid in identification
Vocabulary: Photosynthesis; transpiration
Materials: Paper; crayons; leaves
Activity: A good lesson to use after teaching about plant identification or photosynthesis. Collect flat, not crunchy, leaves. Arrange them on a flat surface in an aesthetically pleasing way. Place a piece of paper over the arrangement. Use the flat side of the crayons to rub over the leaves until the entire leaf is illuminated.
Variations: Create a book with students’ leaf rubbings to remember how the different leaves looked.
Magic Mountain
Concepts: Change/cycles; geology
Purpose: To illustrate to students to ways that soils are moved through the processes of erosion
Vocabulary: Erosion; deposition; transport
Materials: 3 – 4 water bottles
Activity: Begin by breaking the students into groups of three or four. Give each group about 15 minutes to construct a mountain using soil, duff, etc. Encourage the students to make their mountains as unique as possible. After student have finished building their mountains, go around to each mountain and have the students explain what they did and why. Focus on transport and deposition (i.e. the movement of soil and where soil is moved to). Then, introduce erosion (i.e. the carrying away of soil). What is erosion ? What causes erosion (i.e. wind, water, foot traffic, etc.)? Have each group destroy their mountains using the forces of erosion. Afterwards, talk to the students about the importance of vegetation (root systems) and staying on trail.
Variations: You can also use milk cartons or other light objects to represent a house on the mountain. What happens to the house during the erosion process? Where is the best/safest location to place the house?
Marsh Tag
Concepts: Interdependence; communities; adaptations
Purpose: To introduce members of the marsh food chain and discuss different interactions along the food chain
Vocabulary: Interdependence; food chain; egret; steelhead trout; camouflage
Materials: N/A
Activity: Tell students that they will be taking on the roles of some common marsh animals. Have students form a circle, and have students link arms in pairs. Have two students stand in the middle. One will be an egret; one will be a trout. The students around the circle will be hiding spots for the trout (rocks or aquatic plants). The object of the game is for the egret to “eat”, or tag, the trout. The trout may defend itself by finding a place to hide among the marsh grasses (the people standing along the circle). To do

that, the trout can run and link arms with a pair of plant students. However, the hiding spots are not big enough for all the fish out there, so when the trout links arms, the person on the opposite side of the trio becomes the trout and must run from the egret. Plants must always be in pairs, in other words, whenever the trout links arms the person on the other side of the middle person becomes the trout. The egret and trout must stay within the circle. The game goes on until the trout is eaten or the instructor calls it.
Variations: The “habitat” (circle) can be made larger or smaller, and amount of egrets and trout can be changed. Discuss how this may correspond to changes in the marsh habitat or populations of animals that live there.Another way to play is to have the marsh grass pair scattered throughout an area (not in a circle). You may choose to have more than one trout and/or egret. In one round, have half of the plant students sit out to symbolize development of the marsh. Since there is now development where there used to be a marsh, there is less habitat for both the trout and egrets.
Meet a Tree
Concepts: Sensory awareness; observation
Purpose: To have students use senses other than their sense of sight to make observations about the natural world
Materials: Blindfolds
Activity: Divide the students into partners and blindfold one of each pair. Instruct the unblindfolded students to lead her “blind” partner to any tree within the designated boundaries. The “blind” partner must learn as much about the tree as possible using senses other than sight. The unblindfolded student must then lead the “blind” student back to the starting place (using an indirect route, of course!). The “blind” partner may then remove her partner’s blindfold and attempt to find the chosen tree. When everyone has finished, the partners may switch roles.
-Did you find your tree? How? -Is there anything unique about your tree? -How can you tell the age of a tree? -What were the most helpful questions your partner asked?
Variations: Interview A Tree is another activity that works well with Meet A Tree
Mermaids and Manatees
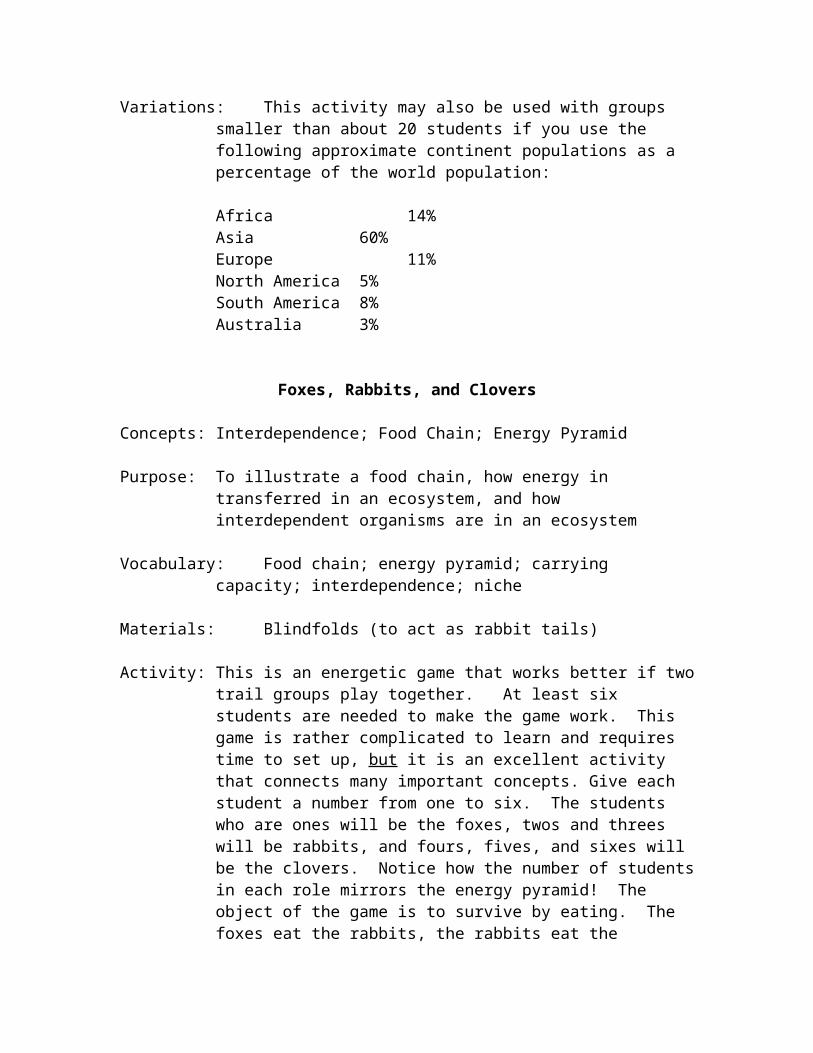
Concepts: Observation; adaptations
Purpose: To have students observe and describe the physical features and adaptations of an organism
Materials: Photographs of organisms; paper; pens, crayons, markers
Activity: This activity is great to use indoors during rainy days. First, divide the students into groups of two or three. Hand each group a picture of an organism (a Big Wooly Mammoth for instance). It is very important that the groups are separated enough so that they cannot see the other photos. Then, have each group describe what they see in the photograph using prose, and making sure not to give away the animal. The should be as specific as they can. (For example, 1) This organism is very large with brown fur. 2) It has four thick legs. 3) It has a very long nose. 4) There are two white bone-like structures, about 4 feet long, that come out of the organism’s head on either side of its nose (note that the word “tusks” was omitted. 5) Etc.) Once every group is satisfied that they’ve properly described the animal in the photo, collect each groups paper.Next, gave every group someone else’s description and a clean sheet of paper. Their task is to draw what the description says – which can be very amusing! When they are finished, have each group present and guess what the organism is. Were they correct? Why/why not? How do scientists classify organisms? Is it easy?
Micro Hike
Concepts: Observation; sensory awareness
Purpose: To get students to notice what is taking place on the forest, or any ecosystem floor
Materials: 3 to 5 foot sections of string (one for each student); magnifying glasses
Activity: Have students set down their string on the most interesting looking section of ground they see, and crawl the length of their string on their bellies, seeing as much as possible along the way. Give them each a magical magnifying glass that will shrink them down to the size of an ant. They must keep their eyes no higher than one foot off of the ground. Ask them questions to stimulate their imagination: What kind of world are you travelling through right now? Who are your neighbors? What do they do all day? Are they friendly? What is it like to be that beetle or spider you see?

Variations: No magnifying glass.
Monkey See, Monkey Do
Concepts: Interdependence
Purpose: To show kids how the interdependence of teamwork is similar to the interdependence of an ecosystem
Vocabulary: Interdependence; (biotic; abiotic; producer; herbivore; carnivore; decomposer)
Materials: 2 blindfolds; 2 water bottles
Activity: Begin by talking about the importance of teamwork. What does in take to be a good leader? A team player? Next, pick two volunteers who you think will not be easily frustrated (because their role in this activity can be potentially stressful). Then, give each of the remaining students (and cabin leaders) a number or name to remember. I use “red,” “wood,” “banana,” slug.” Have all of the “reds” stand shoulder to shoulder facing towards an open field or meadow. Have the “woods” stand shoulder to shoulder facing the “reds.” And then, position the “bananas” and “slugs” in the same manner next to the “redwood” team about 30 feet away.Explain to the groups that team “redwood” will be working with volunteer 1 and team “banana slug” will be working with volunteer 2 to complete the following challenge. Volunteers 1 and 2 will be blindfolded, and a water container will be placed behind each of them in the field somewhere. Their teams will be helping them to find the water bottles. However, the “reds” and the “bananas” cannot make any sound – they must silently communicate with their teammates . In addition, while the “woods” and the “slugs” can speak, they cannot turn around to look at where the water bottles or teammates are – the must keep their backs turned. Next, give the teams about 2 minutes to talk it over while you blindfold the volunteers and place the water bottles. Emphasize that this is NOT a race between teams. When you begin the activity, make sure that you walk with the students and have them move slowly with their hands in front of them. Once both teams have found their water bottles bring everyone together in a large circle to debrief.The debrief is VERY important. Start by asking each of the three different groups (the group who was blindfolded, the group who could not talk, and the group who could not look) what was challenging about the activity and how they overcame the challenges. Then, ask the students which group was most important. (Answers are usually the blindfolded people.) Then ask the blindfolded people if they could’ve found the water bottle without the people shouting directions – of course not. Ask again, which group is
most important. (Some people will now think that it is the group that could speak). Could the people who were shouting directions have given the directions without their silent partners? Most students will now understand that EVERYONE is the most important.Finally, shift to the ecosystem. What is the most important part of the (redwood forest)? What could you not have a (redwood forest) without? Talk about how every part of the ecosystem is important. Even decomposers, or things that are abiotic. Make the connection tangible to the students!
The Mountain Survival Problem
Concepts: Survival
Purpose: To have students think critically about a survival situation, and how to prioritize items that will help them to survive
Vocabulary: Need; want
Materials: Lists of items or the actual items themselves
Activity: Split the students into groups of 3 or 4. Give each group the problem and list of the survival items, or present the actual survival items to all of the groups. Then, discuss how each item might be used (i.e., What is the primary use? Are there any alternative uses?) Next, have each group rate the items 1 through 15, and them bring the groups back together to discuss the differences in their ratings.The problem: You are flying over the mountains in the WINTER in an airplane. The plane experiences mechanical difficulties and crashes. FOUR of you survive; no one has life threatening injuries. The plane is COMPLETELY destroyed by fire. The items below are the only things you salvage from the wreckage.The items: Sectional air map of the area, flashlight (4 battery size), four wool blankets, one rifle with ammunition, one pair of cross-country skis, two fifths of liquor, one cosmetic mirror, jackknife, four pairs of sunglasses, 3 books of matches, one metal coffee pot, first aid kit, one dozen packages of cocktail nuts, 1 clear plastic tarpaulin (9’ x 12’), and 1 large, gift-wrapped decorative candle.

Mystery Algae
Concepts: Observation
Purpose: To have kids use their observational skills to learn about algae and some of its uses
Vocabulary: Algae; blades; float; stipe; holdfast
Materials: 3 – 4 different kinds of algae; toothpaste; marshmallows; pudding; whipped cream, 2 whiteboards
Activity: This is an entertaining activity to get kids to use their observation skills and to show them how algae is used commercially. First, show the students some algae and ask them to give you some observations. Give a brief lesson on algae, including eukaryotic (clear nucleus), photosynthetic, size (microscopic to 50m), common parts (blades, float, stipe, holdfast), nonvascular, reds, browns, greens. Then, split the students up into two groups. For every round of the activity each group will select a representative. This representative will come forward and turn their back to the group. Next, give the representative s the same kinds of algae (place it in their hands behind their back so that they can’t see it, but that the group can). Give the students about 30 seconds to feel the algae, noting its shape, texture, size, etc. Then, take the algae back from the students. Then give each representative a whiteboard and marker. Have them (1) draw what they felt, (2) describe texture using only 2 words, and (3) give their algae a creative name. Then, have the students present their work to the entire group. Based upon, cheers of the students’ and cabin leaders decide which student “won” the round. Continue through all of the algae, and then move on to the commercial uses (which will draw a lot of laughter!). Debrief, by talking about the importance of algae commercially, but also in the food chain and as habitats in the ocean.

Mystery Plant
Concepts: Gardening; observation
Purpose: To get students to use their observation skills in the garden
Vocabulary: Plant families
Materials: Paper; pencils; colored pencils, paint, markers, crayons (optional)
Activity: The principle of this game is similar to "Meet a Tree" and “Mermaids and Manatees,” with emphasis on observation skills and recording details. Students work in pairs, however the first part of the activity is done independently. Students select a "mystery plant' in the garden and draw the plant in detail. If they know the plant's name, instruct the students to not write it on the paper or draw from memory. After students finish their drawings, have students switch drawings with their partner. Their partner must now find the plant that was drawn in the garden. Use this activity to emphasize how individual plants have characteristics that distinguish them just like humans (not all carrots are the same!). What characteristics determine then, what makes a carrot different from a beet? Or broccoli from a pea? This activity can be used as an introduction to different plant families that may be found in the garden (e.g. Who drew a member of the Brassicaceae family? broccoli, kale, cabbage, bok choy, etc.).
Variations: Mermaids & Manatees
Noah’s Ark
Concepts: Adaptations
Purpose: To generate awareness for how animal’s communicate, attract mates, and use their adaptations to survive
Vocabulary: Behavior; communication; survival
Materials: Index cards; pencils, pens
Activity: Count the number of students in your group, and create a card with the names of different animals for half of the total number of students, (each animal will be written twice, so that each student will have a card) shuffle, and pass out a card to each student. Once each student is aware of their animal, collect the cards, and begin. Each student has the responsibility of becoming their animal, and trying to find their partner. Only animal sounds and movements may be used. No talking. Once everyone has
found their partner, re-convene, and discuss animal behavior and strategies for finding a mate.
Non/Renewable Resources
Concepts: Renewable resources; non-renewable resources
Purpose: To give students a better understanding of non/renewable resources and the use of resources
Vocabulary: Renewable resource; nonrenewable resources
Materials: Bag of goldfish; something for students to use as a plate
Activity: Explain the difference between non/renewable resources and have students list examples of each. Then give the bag to the students and tell them to take what they want for an activity and that they can take as many as they want. After the students have finished passing around the goldfish, tell them that this was the activity. The goldfish that they hold represent a non-renewable resource. Did all of the students get goldfish? Why not? Is this fair? What about the next generation? How is this situation like our world today?Now divide the goldfish so that each group of four has 16. Explain that these represent a renewable resource. Each person in the group has to eat at least one goldfish each round. At the end of each round, each group will get 50% of their remaining goldfish. What is the best way to maximize the resource? What happens if you ruin all of the resource that you have now? What about next generations?
Oh Deer!
Concepts: Population trends; carrying capacity; interdependence
Purpose: To show students the relationship between resources and population change
Vocabulary: Population; carry capacity; interdependence
Materials: An open area for the students to run
Activity: Introduce this game by reminding the students of the three resources all animals need to survive: FOOD, WATER, and SHELTER. Teach the students hand signals for each resource: FOOD - hands held over stomach; WATER - hands cupped over mouth; SHELTER - hands held together over head. Divide the students into two groups in lines facing each other

approximately fifteen feet apart from each other. Explain that one group represents deer, which are looking for food, water, and shelter in order to survive, and the other group represents those resources. Ask both groups to turn around so that they are facing away from each other. Each person must choose one of the three hand signals, and when the leader says "go!" both lines face each other, making their individual signals. Those in the deer group must find someone in the resource group who is making the same hand signal they are and run to tag that person (resources remain in their original line). Each deer who is successful in tagging a matching resource "survives" that round and may bring the tagged resource (representing an offspring) back to the deer line. Those deer that are unable to find a matching resource do not "survive" that round and become part of the resource line. Repeat the game for several rounds. Players may choose any hand signal for each round but cannot change in the middle of a round! Make a simple line graph with the number of deer at the start of each round on the Y-axis and the number of rounds (symbolizing seasons or years) on the X-axis. Afterward, discuss the relationship between deer population and resource availability.
- Look at the graph: Did the number of deer stay constant during the game or did it change? How did it change?
- When there is plenty of food, water, and shelter, what happens to the deer population?
- When there is a large deer population, what happens to the available resources? Then what happens to the deer?
- What do you think would happen to the deer if all the resources were taken away? Does that ever happen in our world today?
- What does the word "extinct" mean?
Ohlone Shopping List
Concepts: Cultural history; observation
Purpose: To explore uses Native Americans have for plant and animal species in the forest; and to learn how Native Americans depended directly upon the land for all their needs
Materials: Ohlone Shopping List Cards (see appendix)
Activity: Divide students into pairs/teams or have them work individually, depending on group size. Give each student/team a Shopping List. Ask the students: how do we get clothes, food, and other things we need to survive? Go shopping at the grocery store or mall! Explain how for the Native American groups who lived here the forest was like a store. They didn’t have places to go buy the things they need; they found everything they needed here from the forest, ocean, and land around. Review with
students the items on your shopping lists – are they things that you would use today? Have students take guesses about what they might use from the forest in place of these things. As you hike with your students, stop when you find plants or animals that can be used for these items.
Flour: tan and live oak acorns, soaked, roasted and ground into powderThread: cordage out of reeds and irisCough medicine: bay laurel leaves as a steamSalad: cooked nettles, miner’s lettucePotatoes: tubers of cattail or soap rootMatches: dry sticks (nettle stalks), bow drill, hand drillFruit: blackberries, elderberries, toyon and madrone berriesVitamin C: Douglas fir needlesBand aids: yarrow poulticePlastic bags: baskets made out of reeds, grasses, willowSoap: ceanothus blossoms in waterFish: steelhead trout, salmonSteak: deerEggs: ducks, birdsJewelry: shells or stones
Variations: Can be done as a card or professor hike.
Owls and Crows
Concepts: Checking for understanding
Purpose: To review information in a fun and energetic way
Materials: Field, home base markers
Activity: This is an excellent review game for the end of a hike or activity. Divide the students into two teams - owls and crows. Ask them to stand in two lines facing each other approximately three feet apart. Mark a home base line fifteen feet behind each team. Stand at the end of the lines and make a statement aloud; if the statement is true, the owls chase the crows back to their home base; if the statement is false, the crows chase the owls back to their home base. Anyone tagged while being chased by the other team must join that team. Continue with true or false statements until one line is depleted or you run out of statements!
Paper Making
Concepts: Conservation; recycling
Purpose: To allow students to have a hand in creating something while teaching them the importance of reducing waste and reusing products
Materials: Colored paper, water, blender, plastic containers , large plastic bins, wooden frames and wire netting, plastic sheets (paper covers work well), sponges/ Optional: glitter, small objects to put in paper
Activity: Prior to activity with children: Cut pieces of colored paper into small squares and allow them to soak in a container of water overnight. Once the paper has soaked, it is ready to blend in the blender with water. It is up to you whether you want to blend prior to the arrival of students or after.1) Begin with discussion on conservation. What does it mean to conserve? How can we conserve at home everyday? Where does paper come from? Why is it important not to waste paper?2) Explain that they will be making their own paper from other paper. Rather than throwing the colored paper away once you’ve used it, you can use it to make more paper. Can emphasize recycling at this point.3) Blend paper in blender with water until the paper is in tiny, mushy pieces.4) Pour paper and water mixture into plastic bin.5) Demonstrate how the rest of the procedure will go for the students.6) Take two of the wooden “frames” and place a piece of the wire netting in between. Dip the whole “frame” into the plastic bin with the water and paper mixture. This is the point where you can add glitter or other object to the mixture. Simply sprinkle some into the area enclosed by the frame, while it still under water.7) Slowly lift the frame out of the water and allow excess water to drain into the bin. 8) Place frame on table and remove the top side of the wooden frame (top square). 9) Place plastic sheet on top of the exposed side of the wet paper and flip over so the plastic sheet is now resting on the table. 10) Remove the other wooden frame piece, but keep wire netting in place.11) Using a sponge, gently blot the wire netting to soak up excess water from the paper.12) Remove wire netting but keep wet paper on plastic sheet. Place name on plastic and set aside to dry overnight.13) If there is still plenty of time remaining once the children have made the paper, you can read a story such as The Lorax or Just a Dream to highlight the importance of conservation. If there is not much time remaining, simply debrief with a short discussion on conservation and what they can do at home to save our resources.

Variation: Can use any color paper or add things such as glitter or things from nature (like leaves ) to the mix
Pirate Eyes
Concepts: Nocturnal adaptations
Purpose: To have students understand how eyes adapt to light and dark
Vocabulary: Rods: are photoreceptor cells in the retina of the eye that can function in less intense light than can the other type of photoreceptorCones: are cells in the retina of the eye which only function in relatively bright lightRhodopsin: A photoreceptor cell contains a membranous photoreceptor protein called an opsin which contains a pigment molecule called retinal. In rod cells these together are called rhodopsin(in cones there are three different kind of proteins in the cell)Tapetum lucidum: a layer in the choroid chiefly of nocturnal mammals that reflects light causing the eyes to glow when light strikes them at night; this allows nocturnal animals to utilize any small light that is available more efficiently
Nocturnal: animals that are mostly active in the night
Materials: Candle; lighter/matches; ( optional - eye patch)
Activity: Have all the students cover one of their eyes with a hand, then light the candle. With their uncovered eye, the students should stare at the candle while you tell the story of the Pirate Rhodopsin: he wanted to be a pirate; he had to prove his pirate worthiness to the pirate captain; he couldn’t steal the booty the first time because it was too dark; then he started wearing an eye patch like the rest of the pirates and was able to see with that covered eye the next time he tried to get the booty. After the story, blow out the candle and have the students switch their eye patch. Have them compare the two eyes. Then explain how rhodopsin in the chemical in our eye that helps us see at night and how nocturnal animals have much better night vision than us, which is helped by the tapetum (a reflective membrane in the eye which reflects light) that many nocturnal animals have. Introducing rods (which are sensitive mostly to black, white, gray, and blue) and cones (which are sensitive to all colors) provides a good segue into Guess the Color.
Planimals
Concepts: Adaptations
Purpose: To have students use their understanding of adaptations, along with their imaginations to create an organism that can successfully survive in an specific environment
Vocabulary: Adaptation
Materials: Paper; crayons; markers; scissors
Activity: This is an opportunity for students to design their own animals! First discuss what "equipment" all animals need to meet their survival needs, such as feeding, drinking, moving, breathing, resting, etc. Also talk about how different animals have different kinds of equipment (called "adaptations") to meet these needs. Once the students have a good understanding of animal adaptations, give them paper and pencils or crayons or markers and let them create an animal which is adapted to survive on earth. You may choose to narrow the range down to a specific habitat, such as the pond, or expand it to even include other planets! For example, creatures living on Mars would have to be adapted to survive in polar ice caps, frequent wind storms, warmer temperatures, and no oxygen! Ask the students to decide the name of their animals, and allow them enough time to show each other their masterpieces.
-Could these animals survive on earth (or wherever you chose)? -What are some of their adaptations?
-Can you think of "real" animals that are adapted to their environment?
Variations: You can also have students rotate planimals to make this into a fun group activity. Fold each paper into thirds and have the first person draw the head, the second person draw the body, and the last person draw the feet. Then, have the group present their planimal to the rest of the students.
Plant Succession Crawl
Concepts: Plant identification; observation
Purpose: To teach students about the process of plant succession by having them make direct observations
Vocabulary: Succession
Materials: Area close to pond or other bodies of freshwater
Activity: Have the students start a few hundred feet from the pond, and crawl toward the pond on their hands and knees. They will be able to observe several plant types in successive rings around the pond. By crawling and
closely examining the ground, they will get a feeling for the different soil conditions needed by the different types of plants in the rings. Ask the students to share their discoveries as they find them. One discovery might be coming across a new ring with its special kinds of trees, shrubs, plants and grasses, or wetter and stronger smelling soil. When the children reach the water, have each one of them draw a map of the pond and it surrounding area, with the successive circles of plant life. Label each ring from wettest to driest, and list the plants that grow there. Ask the children to imagine how big the pond will be in fifty or even one hundred years.
Pollination Relay
Concepts: Gardening; photosynthesis; pollinators
Purpose: To show students how a plant grows and reproduces, and the struggles that they face
Vocabulary: Photosynthesis; pollen; pollinator
Materials: 20+ of each: Yellow (sun), blue (water), white (carbon dioxide) and brown (nutrient) construction paper cards (laminated and/or plastic is best for longevity); 5+ of each: cards with pictures of pollinators on them (bees, butterflies, moth, bat, etc.)
Activity: Divide your students into two teams, and can have teams name themselves after a plant or animal in the garden. Each team has to create a healthy plant by gathering what each plant needs to survive. What does every plant need to survive, you may ask? Sun (yellow cards), water (blue cards), carbon dioxide (white cards), and nutrients from the soil (brown cards) are all needed to make a healthy plant. Explain how plants can make their own food to survive from these four elements through photosynthesis. The last thing a plant needs, however, is to reproduce. At this point you can mention annual plants, that only live for one year and need to produce seeds in order for their genes to survive another year. Plants are pollinated by many creatures, most of them insects, and pollination is what a plant needs in order to develop seeds. Pollen from male flowers fertilizes the ova in a female flower's ovary and the ova develop into seeds (the ovary becomes the fruit that contains the seeds). Ask students to brainstorm different ways pollen can get from the male flower to the female flower. Wind, water, and animals can all transfer pollen (pollinator cards). In order for each team to make one whole plant, you need one of each of the sun/water/carbon dioxide/nutrient cards and one pollinator card (five cards of each kind equals one plant). Line up each team and scatter all
cards in an area 20-50 yards from the teams. Team members take turns to go and retrieve one (and only one) card for their team. Teams must cooperate to determine what resources they need next to complete a plant. At the end, have students compile their resources and the team who made the most plants wins!Ask the students how many plants they made, not counting pollinator cards. Some teams should have made more plants, but only one or two were pollinated. Discuss whether or not it was easy to find pollinators. There were fewer pollinator cards, which mirrors how plants struggle to reproduce in the wild and the garden. Talk about how the use of pesticides such as DDT killed many insect pollinators and made it harder for farmers to have crops produce fruit (see Deadly Links). What kinds of fruits do you eat? Apples, oranges, strawberries, etc. - celebrate your pollinators!
Predator and Prey
Concepts: Predator/Prey relationships
Purpose: To show students the adaptations that animals use in a predator/prey relationship
Vocabulary: Predator; prey; camouflage; stalking; adaptation
Materials: Blindfold; fairly dense area
Activity: This activity is great to play after having already played “camouflage,” “foxwalk,” and “mountain lion/deer,” since it is a combination of the three activities. In this activity one person will be the “prey” and stand inside a small circle that you create (with duff or sticks). Every other student will be a “predator.” Blindfold the prey and have the predators scatter out within the boundaries that you set up. All of the predators must “camouflage” themselves - THEY CANNOT HIDE – this means that they should be able to see the prey at all times. Then begin the first round. In this round the prey is unblindfolded and she must stand in the same place (only able to rotate) to spot predators. If she sees a predator, that person is out of the game, and must sit on the ground. Once the prey has spotted about half of the predators, reblindfold her. Then, the second round begins. In this round, the prey must use her sense of hearing to get a predator out. Every predator left in the activity will stalk the prey (using the foxwalk) in an attempt to tag her, or successfully predate upon her. Whenever the prey hears a predator, she must point. When she points, you yell, “Freeze!” and every predator must stop moving. Then, to see how accurately the prey heard the predator, walk in line with where she is pointing asking, “Is this where you heard the predator? Or is this where
you heard it?” Once the prey feels you are standing within arms reach of the predator, she will tell you. If you are in fact standing within arms reach of the predator who made the sound, then that predator is out, and must sit down where they are. If you are not standing within arms reach of the predator, then the he is still in. The first predator to tag the prey wins the activity , and will become the prey for the next game.
-What strategies did the winning predator use? Where did they camouflage themselves? What color are they wearing? How did they move?
-What about the predator who started very far from the prey – did they survive the first round? How about the second?
Professor Hike
Concepts: General
Purpose: To have students teach each other, and to give them some quiet time with nature
Materials: A teaching assistant
Activity: A professor hike is similar to a card hike; in this activity, however, instead of using written cards to teach the students, you will give each student one piece of information to teach to the others. As with the card hike, ask the students to wait with a cabin leader, who will dismiss them individually approximately every minute. Place the first student near something of interest at the beginning of the trail, and tell her some information regarding that object. For example: "Look at this tree stump - how do you think it died?" or "There is poison oak nearby - can you find it?" Once the student understands the information/question, instruct her to relay that information to each person as they come down the trail. When the second student has been dismissed, he will first stop to listen to the first student then will continue down the trail to you. Place this student near another object of interest, tell him some information about that object, and instruct him to share this information with each person who comes down the trail. Continue in this manner until all the students have reached the previous stations and have been given a station of their own. When all of the students have been dismissed, the cabin leader may dismiss the first student, who may then continue down the trail to hear the information that followed hers. The cabin leader should continue to dismiss each consecutive student until all have reached the last station. In this way, everyone hears all of the information!(See discussion questions for Card Hike)Note: Have an activity planned for the students at the beginning of the hike, as well as at the end.

Pyramid of Life
Concepts: Food chain; food pyramid
Purpose: To teach students the order of the food chain and the pyramid
Materials: N/A
Vocabulary: Herbivore; carnivore; omnivore; decomposer
Activity: Have students write the name of a plant or animal that occurs in the area on a sheet of paper. Prep the students by asking where the earth gets its energy (sun), then who is the first to utilize that energy (plants). Then tell them that they are to build a pyramid, with the plants on the bottom because all animals depend on them either directly or indirectly. As you read the slips of paper, have the students tell you whether they are herbivores or carnivores. Have the herbivores stand in a line behind the plants, then carnivores in a line behind the herbivores. Then have them build a pyramid in that order (plants, herbivores, carnivores). Inevitably there will be more carnivores than can be supported by the pyramid, so after they try once, challenge them to try again to build a stable pyramid, and allow them to change from carnivores to plants if they wish. Ask why the pyramid did not work the first time. Ask what they needed to change in order for the pyramid to be stable.
Variations: Demonstrate the importance of plants by pretending to pull one out from the bottom. You may also choose to have the students try to build a vertical cheerleader pyramid to illustrate the point.

Race for the Sun
Concepts: Photosynthesis; adaptation
Purpose: To help students understand the process of photosynthesis, and adaptations of different types of plants (e.g. height of a redwood vs. crookedness of an oak)
Vocabulary: Abiotic, biotic, photosynthesis, chlorophyll
Materials: An open area to run
Activity: Before you start this game, help the students to list the items which all plants need in order to grow and produce food (a process called photosynthesis): SUNLIGHT, SOIL, WATER, and AIR. The chemical that combines all these elements to make food is CHLOROPHYLL. Explain that in the forest, all the plants are racing for the sun, trying to get as much sunlight as possible. In this game, students will build two trees, which will race to reach the sun first. You will need: one student as the SUN, two students as ROOTS, and two students as CHLOROPHYLL. Divide the rest of the students into three groups representing SOIL, WATER, and AIR. Set up the groups so that they are equally distant from and behind the two roots. The job of the chlorophyll is to run to the soil group, each grab the hand of one person from that group, and lead them to their respective roots. The roots and soil join hands and stretch toward the sun. The chlorophyll then run to the water group; each grabs a person by the hand and leads them to their roots, weaves them under the roots and soil's arms, and then connects them to the soil. The chlorophyll’s do the same with the air group, weaving the air through the arms of the growing trees and then connecting them to the end. However, the process of photosynthesis occurs mainly when the sun is up in the sky; so, the person playing the sun signals when the game may start by raising her arms over her head. When she lowers her arms, all work must stop - this is a good time to replace people playing chlorophyll, as they will tire quickly! Also, the trees must be careful never to stretch so much that they let go of each other's hands and therefore "break". If this happens, all parts of the tree above the break must return to their original groups. To add a twist to the game, you may choose to act as a lumberjack, looking for weak links in the tree and pushing down on the links, causing the tree to "break."
-How are plants in competition with each other? -What happens to the plants that lose the race for the sun?
-What are some adaptations plants use to survive?
Recipe for a Forest
Concepts: Cycle; interdependence; sustainability; checking for understanding
Purpose: To teach students about the different “ingredients” of a forest, and how an ecosystem can sustain itself
Vocabulary: Interdependence; sustainability
Materials: Paper; crayons; markers
Activity: Give each student an imaginary deed to one square mile of land. On this plot, they are free to create their own dream forest, complete with whatever plants and animals, rocks and rivers, hills and valleys they choose! Ask them to list the "ingredients" for their forest on a piece of paper and draw a picture on the back.
- What are the ingredients in your recipe for a forest?- Have you ever seen a forest like yours?- Would your forest be able to maintain itself for hundreds of years?
- If not, what else does it need? (EX: decomposers)
Reckon-Hike
Concepts: Observation; adaptations
Purpose: To increase a child’s awareness of his/her environment , and learn to stalk and observe wildlife.
Vocabulary: Camouflage
Materials: Quiet walking shoes, non-rustling clothing that is colored like the surroundings.
Activity: Set the stage by telling students that they are about to undertake a special mission, and that it is their job to search the area thoroughly, missing nothing. They are to observe and remember all of the physical features and life forms. There have been predators spotted in the area, so they must remain unseen. Guidelines to follow during the hike: 1. Always try to stay under or near cover. 2. Move slowly, pausing every few steps to look around. 3. Avoid walking in the same direction as the wind, so your scent won’t be carried ahead of you.
Redwood Family Circle
Concepts: Sustainability; conservation

Purpose: To introduce the concept of logging, and facilitate a discussion about the pros/cons and different strategies of logging. Also to introduce the concept of redwood family circles (redwood trees grow from – “with the help of” – other trees in their families. They grow from burls on the roots of other redwoods, so a circle of young trees will grow around an older one. Their roots interconnect for further support.)
Vocabulary: Sustainability; conservation; clear cutting; selective cutting; burl
Materials: An open area for students to run
Activity: Tell students that they are going to become redwood trees. Ask for some observations about how redwoods grow, and discuss the family circle concept. One student will be a logger, and the rest will be redwoods. Define your boundaries before starting game. The logger must “cut down” (tag) redwood trees. When trees are cut, they must become a stump (squat down on your knees and freeze). When this happens, the other redwoods can help out. Two redwoods can run to either side of the stump, grab arms over the stump’s head, and say “Redwood family circle, redwood family circle, redwood family circle!” The stump can then grow into a tree and continue to run from the logger. The logger can still cut down trees while they are helping the stump grow, so they must watch out for this. The game continues until you stop it.Next, try the game with two loggers, then three? What happens to the forest as the number of loggers goes up? Is this sustainable?
Rock Necklaces
Concepts: Geology
Purpose: To teach students about the different types of rocks and the rock cycle, and to have them connect with a rock on a more personal level
Materials: Metal wire; needle nose pliers; yarn; rocks
Activity: Before students start constructing rock necklaces, it is important that you sufficiently introduce the concepts of the activity. Go to a stream bed where rocks are commonly found. Why are they all here? Or have a large selection of rocks for the students to choose from. Where might these have been found? This will lead to a variety of ideas about what rocks are and where they came from. Don’t give answers yet. You may also want to start with the Secret Rock Sorting activity to introduce the rock cycle.Display diagram of Rock Soup (see appendix) and briefly point out how a rock might go from “rock soup” to any type of rock. What happens to magma to make it different types of rock? Point out, or ask, where
sandstone and granite (or whatever you have) fit into the rock cycle. Have students describe how they might have been formed. Also, ask if they know how water fits into the rock cycle. Guide students through the rock cycle guided imagery “Rock to Rock.” Or tell “Grandfather Rock” from one of The Keepers of the Earth.Now you’re ready to begin making the necklaces. Have each student choose one nice rock. Show your sample and demonstrate how you made it. (Welcome students to create their own methods and share with others.) Basically, wrap a rock with metal wire in such a way that it won’t fall out. Make sure to leave a loop at one end for the yarn to fit through. The yarn will act as a necklace; the rock will be the pendant.
Role Playing
Concepts: General
Purpose: To allow children to experience the environment through the perspective of an animal, plant, or different kind of person (imagination is key in this activity; allow students to be creative as they embark on their new adventure)
Materials: Dependent upon the manner in which you approach activity-can use paper, pencils, books, materials from natural environment
Activity: There are many ways to approach this activity. The most basic and easiest way to incorporate role playing into any lesson on trail is to have children imagine they are certain animals or plants.
The following are several examples of how to develop the roles for the children: 1) Have each student imagine they are a seed of a plant and have them act out the stages of growth all the way through death and rotting 2) Have them pretend to be banana slugs wriggling on the ground searching for food to decompose 3) Have them pretend to be different types of animals based on food gathering skills (herbivores, carnivores, scavengers etc) 4) Develop predator and prey relationships by having different students chasing each other
Variations: 1)You can use this activity to highlight any key environmental concept. One that benefits greatly from role playing is conservation. A good idea is to have children pretending to be different types of people supporting a particular environmental action. You can begin a role playing activity such as this by reading a book like The Lorax, Just a Dream, or any other that invokes controversial feelings towards the connection of people to the environment. Once the book has been read, assign roles to the students, such as characters from the book or groups who might be involved in the situation (environmental protection agency, workers who cut down the

trees, factory workers etc). You can then hold a mock town meeting where each character discusses their role in the problem, accuses others of having a hand in it, and develops potential solutions to the problems. 2)Another way to approach this activity is to have small groups of students develop towns within the natural environment. For example, begin by having each group draw different ecosystems, such as a marsh, mountains, forest, river etc. on their paper. Then tell the students they are going to pretend to be different types of developers for their town. Some can build houses, others factories, others roads etc. They can then begin to draw their town however they would like it to look. Afterwards, come together as a large group and discuss the environmental impact each town would have on the natural ecosystems nearby. Then try to develop solutions to prevent these problems from occurring.
Scarecrow Making
Concepts: Gardening
Purpose: To teach students creative, friendly ways to protect plants in the garden
Vocabulary: Organic gardening; pests
Materials: Clothes from old lost and found or thrift store (pants, shirt, hats, boots/shoes); straw; string, jute twine, or baling twine; scissors; cardboard head cut-outs; crayons; yarn
Activity: Explain to students that since our garden is organic, we don't use any chemical pesticides to kill insects and other animals that want to eat our crops. Therefore, you have to find creative ways to discourage all the herbivores from the forest from eating the plants that we want to grow for food. Birds can dig up planted seeds and eat fruits and seeds from crops. Usually, seeds are treated with a poison that tastes bad to birds. Describe how a scarecrow can discourage birds from visiting the garden without harming them. Students should work in a team of 3-4 (this helps conserve the number of clothing items you'll need). Tie the sleeves of shirts and legs of pants off first with twine. Have students stuff the pants and shirt with straw. Leave part of the shirt UN-stuffed, and then stuff the shirt into waistband of the pants, securing with twine. Students can decorate the cardboard head with crayons (crayons are water-resistant), and yarn for hair. Use hats, ties, socks, earrings, boots or other accessories. Have each group find a place to let their scarecrow hang out in the garden (sitting is the best, or you can prop up standing scarecrows with stakes).This activity can be combined with a pest hunt in the garden. When not with kids, naturalists may do what they will with pests in any organic manner they see fit, however, with students it is important to reinforce
treating organisms with respect. Be sure to explain that some of the insects in the garden are helpful (spiders, earthworms, butterflies, sow bugs) and should not be removed. Give each student (or teams of students) a plastic container and have each collect as many slugs, potato beetles, cutworms, beetle larvae, etc. as they can find. Then take students on a hike to "return" these critters to the forest away from the garden
Scavenger Hunt
Concepts: Sensory awareness; general
Vocabulary: Varies depending on the situation
Materials: A list of items to find
Activity: Create a list of items likely to be found in the area, and give each group of two or three students an amount of time and boundaries within which to locate as many items as possible. For example, you could make a list of plants and animals found in the area, a list of objects to be found using different senses (i.e. a smooth rock, a sweet smell), a list of unnatural or man-made objects to be located, etc. Encourage each group to keep a record of what they find without removing it from its natural surroundings (unless, of course, it’s trash!).
- How many things did you find? - What new discoveries did you make about…? - How could you have found more things? - Should we keep looking?
Variations: Endless (including, Spider’s Ohlone Shopping List)

Secret Rock Sorting
Concepts: Geology
Purpose: To get students to think about scientific classification systems; to introduce the rock cycle
Vocabulary: Rock cycle; sedimentary; metamorphic; igneous
Materials: Rocks; note cards; pencils
Activity: Break the students into groups of two or three. Have each group select a small handful of rocks. Students may sort the rocks into whatever (and as many) categories they wish. Students write the key to how they sorted their rocks on a 3x5 card, and then place the card upside down beside their rocks. All students rotate through stations inspecting other students’ rock samples to try to figure out how the rocks were sorted. Once they know, the students can look at the card to see if they are right.Ask students to share their sorting methods with the group. Then ask, “How do scientists sort rocks?” Three types. Igneous, Sedimentary, Metamorphic – see appendix.
Secret Spots
Concepts: Sensory awareness; general
Purpose: To give students independent time to journal, write, or make art; to inspire personal connection to a special spot in the forest.
Vocabulary: N/A
Materials: Journals; writing/drawing implements; watercolors (depending on activity)Activity: A Secret Spot can be used for any quiet, independent, reflective activity
that a naturalist chooses. They work especially well for journalizing and writing exercises. Introduce the activity that you wish the students to do while in their secret spots. Pass out needed materials such as journals and pencils. Give the students the following five rules (the five S’s) as guidelines for finding a perfect secret spot:
Solo: a secret spot is a spot for you and you alone! Do not sit within 10 feet of anyone else!Sit: find a spot that you can sit comfortably in for a long time. Silent: every other hour of the day is for talking to your friends except now. Do not yell across to other people!
Safe: find your spot quickly, but do not run! Don’t pick a spot on a cliff’s edge, or up high in a tree. Do not pick spots so far away you cannot hear the signal!Stay: remain in your spot until you hear the signal from your naturalist. If you are done with the assignment, you may explore around your spot or draw a picture of it. Take a nature nap!
Students must close their eyes and imagine a perfect spot in the forest waiting for them. When the naturalist taps each student on their head, the student may go quietly find their magic spot. Naturalist must make sure to monitor students as they find spots and adjust students as needed (split up friends, reminders to keep quiet). Naturalist calls students back to the group using a signal, and then he/she reviews the activity assigned for the secret spot time.
Variations: Also known as Sit Spots or Magic Spots
Silent Sharing Walk
Concepts: Sensory awareness
Purpose: The purpose of a silent walk is to experience nature first hand without the distraction of human voices and noises.
Materials: N/A
Activity: This activity establishes a connection between children and nature without using games or props. The only props you need are a trail and a silent group. It works well any time of the day, but is especially effective in the early morning hours, dusk, or night time. Before you begin hiking, let the students know that this is their time to really listen and look closely at everything that surrounds them. Have them walk slowly in a straight line. Stop and listen often for animal noises, as well as other natural sounds. If you or a student locate something interesting, take the time to stop and really observe it. Save discussions for the end of the hike. Many times, students notice that they observe more during a silent hike, than when they are making noise. Talk about how animals respond to people depending on the actions of the humans. If you are loud and moving quickly you are more likely to frighten the animal than if you are walking slowly and being silent. Silent night hikes are especially effective since students must rely on their sense of hearing and touch to safely walk the trail.
Skunk and Spray
Concepts: Adaptation; predator/prey relationships
Purpose: To teach students about unique animal adaptations, specifically the skunk’s primary defense
Vocabulary: Adaptation; predator; prey; foxwalk
Materials: Water bottle (or pairs of socks); blindfold(s); handkerchief
Activity: This activity is very similar to mountain lion/deer, and is an exciting way to teach kids about unique adaptations. First, get the group to form a large circle; these students will represent predators. Have one student stand in the middle to represent the skunk. Blindfold the skunk and place the handkerchief at their feet. The object of the activity is to have the predators sneak up (using the foxwalk) on the skunk, and steal the handkerchief (to represent preying on the skunk, or stealing a baby). The skunk, in return, has three (to five) sprays of the water bottle to hit the approaching predators. Either the first predator to take the handkerchief, or that last predator to be sprayed, will become the next skunk.
Variations: Tank tag - Have group break into partners of two. Tell that one will be the "head" and the other will be the "spray". You can talk about adaptations. Then have one rolled up sock or something soft (we used tied-together sweatshirts) and a blindfold per group. The "spray" player gets both blindfolded and the soft item which will represent his/her spray. The head can only do one thing -- talk. She can talk to the "spray" player. The goal of the game is to spray the other teams. I always ask players to throw the socks underhand and fairly softly as they are blindfolded and could nail some other player in the head with their hands. Once the "spray" has thrown the first sock they are to retrieve it but only with the help of the "head" player who can only use words (not allowed to touch sock or "spray" player). My rule is that you can only use the sock that your threw (this stops groups from hoarding socks). You can change it by saying they can get any open socks but that they can only have one or two pairs at any one time (it's fun to watch two sprays trying to get the same sock). After a few minutes you can stop the game and do a short debrief about what it was like to be the different players. There's always good comments about how important DETAILED directions are much more helpful. Then you can change positions to give each partner a new perspective.
Small World
Concepts: Cycles; interdependence; observation
Purpose: To have students observe nature closely and take note of the small things all around them. This activity also helps make connections between various things in nature.
Vocabulary: Cycles; interdependence; observation
Materials: Rope in 6-8 feet lengths (enough for every two people to have one); an area to have up to 10 pairs spread out to form rope circles on the ground
Activity: 1) In pairs, have students using rope or string, mark off a circular piece of ground about a foot or two in diameter.2) Have students stand and look into their circular piece of land for a minute or so, noting what is within the rope.3) Next, have students kneel down and look4) What new things can be seen now that were not seen before?5) Finally, have students lie down next to the area, looking closely.6) After 10 minutes or so, bring the group together again and ask some
questions. Why cycles are you seeing? Do you see seeds? Small plants sprouting? Dead grass or plants? Insects or spiders? Scat?
7) Go around the group and have them report what they saw and how it fits into the cycles/interdependence theme. Once each group does this, have them return to their plots and rotate to a new plot so they can compare circles.
Solo Hike
Concepts: Sensory awareness; general
Purpose: To give students the opportunity to experience walking alone in nature
Materials: A teaching assistant
Activity: Go several hundred yards ahead of the students along a clearly marked trail. Ask another adult to send the students one-by-one down the trail. The students should be separated enough to experience the sensation of walking alone in the outdoors. Students who are anxious about walking alone can choose to walk with a partner (if they can promise to remain quiet!). The teaching assistant will be the last person down the trail to ensure that all of the students made it the entire way. Afterwards, discuss the students' experiences and reactions.
- How did you feel walking alone in the woods?- Is there anything to be afraid of out here?
- Do you believe that the most dangerous animal out here is you?
Variations: Lay cards with pertinent information along the trail. These serve as educational tools and signify the correct trail. The information can enhance your lessons or can introduce a new topic.
Sounds and Colors
Concepts: Observation; sensory awareness
Purpose: To expose children to the many sounds and colors present in nature
Vocabulary: Biotic; abiotic
Materials: Comfortable, secluded spot in nature; Optional: paper, pencils, crayons
Activity: Begin activity by introducing students to the ecosystem they are in. Ask them what type of animals and plants might live there as well as abiotic factors that are present. There are many variations for this activity, especially when it comes to focusing on sounds. The following are ideas you may use to concentrate on sounds in nature.1) Have students close their eyes and listen carefully. Make sure all
students are sitting still to prevent the sound of footsteps from interrupting. Have them hold up a finger to represent each animal sound they here. Come back together as a group after a few minutes of quiet time and discuss what was heard.
2) Another alternative is to have them focus on sounds coming from abiotic factors such as wind and water. They can then compare the number of sounds possibly coming from biotic vs. abiotic things.
3) You can also have them mix it up by counting how many seconds are in between each bird they hear or between the times of falling twigs etc.
4) You may also incorporate listening activities with drawing and/or writing. Have each student find a quiet spot in the woods and listen carefully to everything around them. They can then draw what they hear or write a poem about the sounds.
Having them focus on colors is effective as well. You can simply ask them to stand still in one spot and count the number of different colors within their range of vision. Is there one color that appears more than others? Why might this be so? You can also incorporate drawing in this activity as well. Have the students find a secluded spot and draw what they see. They can use colored pencils or crayons or simply label the color of the object.
Spaceship Earth
Concepts: Interdependence; resources
Purpose: To introduce the earth as a system and the fragility of that system
Vocabulary: Interdependence

Materials: Large board; paper; crayons, markers, etc.
Activity: Begin by describing and drawing a picture on the board: “There is a spaceship floating in space. The spaceship is divided in half. One half contains 10% of the people on board, but they have 90% of the food and supplies. The other half of the ship has 90% of the people on board and only 10% of the food and supplies.”“There is a computer on board, but no one is using it. Chemicals, oxygen, and life support are controlled by anyone who wants to play at the computer. Both halves of the ship are very dirty, smoky, and polluted. No one is in charge. Both halves also have guns and bombs aboard.”“The half with 90% of the people on board is in trouble. Some of them are trying to break into the other side of the ship. The have decided to bomb their way into the other side knowing that they risk destroying the ship.”“Students, how long is the ship going to last under current conditions?”Young students will be shocked to realize that this is the earth. They will be amazed when you tell them that they just predicted that earth only has days or hours to exist.Discuss the scenario, have students list five world problems and five local problems. Use the spaceship analogy for any ecological or world system activities, including population bomb, terrorism, world hunger, world planning, pollution problems, greenhouse effect, nuclear war, etc.
Stepping Stones
Concepts: Gardening; geology
Purpose: To create beautiful and long-lasting stepping stones in the garden
Materials: Cement (can purchase a small bag at landscaping or hardware store); small gravel or sand (to mix with cement for consistency); medium-sized bucket; pieces of shattered pottery, rocks found at camp, or fish tank glass marbles (can buy marbles at craft stores Michael's and Joan’s); 8 or 9" aluminum pie tins (one for each student)
Activity: Stepping stones are a general garden beautification project that can be done as an elective. This activity is rewarding because the students are leaving something behind for future outdoor school students. Naturalist mixes concrete with sand and water in a bucket shortly prior to activity (sand or fine gravel is necessary, stones are brittle and crumble). Students then place marbles or pottery in the bottom of the pie tin. The naturalist pours concrete (about 2-3") over the arranged items. An alternate decorating method is to pour the concrete into the tins first and then press the decorative items into the top (however, the pieces tend to break off more easily with this method). Let stones dry for up for a few days, then carefully remove from the aluminum.
Variations: Another way to make them is to pour the cement and let it set and dry, and then later spread a thin layer of grout on top and place on the decorations.
Still Hunting
Concepts: Sensory awareness
Purpose: To observe nature while being a part of the action
Materials: N/A
Activity: Still hunting was practiced by American Indians. They would find a place they knew well and sit as still as possible, observing everything that was around. If the arrival of the individual or group disturbed the natural world, they would wait until everything settled back to normal. This activity works well with a small, mellow group. Have them find sit spots and make themselves comfortable. Tell the students to stay in their spot until you call them back. (Some sort of musical instrument usually works best to call your group) After time passes, call the group back and allow them to share what they observed with the group. The group should be respectful and sensitive to allow for true sharing.

Sun, Soil, Water, Air
Concepts: Interdependence; photosynthesis
Purpose: To introduce sun, soil, water and air as being the building blocks for all living things, (everything we eat and everything we wear)
Vocabulary: Abiotic; biotic; photosynthesis
Materials: Three black film containers with lids. One contains soil and one should contain water.
Activity: Tell the students, “I have in these three jars the four mysteries of life. Without these four mysteries there wouldn’t be any food, I wouldn’t have this shirt, there wouldn’t be anything alive, we wouldn’t even be here. Everything on earth depends on these four mysteries.”Ask, “Who would like to look in mystery jar #1?” Toss the jar to them and instruct them to shake the jar and to think about what is in it and then pour out the contents into their hand so that everyone can see. It’s dirt or another name for it is soil.Then, ask “Who would like to look in jar #2?” Repeat the same procedure only this time instruct the student to fling the contents of the jar into the air. Water!Ask again, “Who would like to look in jar #3? Remember that this jar has two mysteries in it and when you open it you may have to think a little bit about what is in it. Yes! Air is one of the mysteries now quick put the top back on. The last mystery isn’t there. Take the top off. It just rushed in. Yes! it’s light. Where does our light come from? The sun.”Finally, Teach the sun, soil, water and air chant. The chant is a call and response with each line.
Chant: Sun, soil, water and air (group repeats after each line)Sun, soil, water and airEverything we eatAnd everything we wearEverything comes from sun, soil, water, and air
Variations: A great way to immediately connect kids is to tell them that you were looking on ebay and saw a listing for “Four things you have
to have!!! You can’t live without them!!!” So you ordered the package and it was just delivered today.
Survival Hike

Concepts: Survival
Purpose: To understand basic animal needs
Vocabulary: Survival; habitat
Materials: An open area with plenty of shelter building materials
Activity: What would you do if you were lost in the forest with limited supplies? How would you adapt? This activity allows children to tap into their instinctual desire to build shelter. Start by discussing what things are necessary to survive. (Should focus on attaining food, water, and shelter). Once an adequate preface to the activity has taken place, divide the group into quarters. Give the groups ample time to build as good of a shelter as they can. Once complete, re-convene, and dissect each shelter as a group. Ask questions to stimulate awareness for surroundings. Where is the nearest water source? What would happen if it rained? Is there food here? Etc.. Once you’ve come up with a list of what should be considered when building a shelter, have the students rate each shelter based on this list. A point system can be devised by the naturalist (if desired). Once every shelter has been rated, time permitting, you can have the students try again in light of what’s been discussed.
Variations: Shelter building
Survive the Predators
Concepts: Adaptations; predator/prey relationships
Purpose: An energetic way to get students to understand how adaptations help organisms survive being predated upon
Vocabulary: Adaptation; predator; prey; ecosystem
Materials: A large field
Activity: In this game get all the kids into a circle. Talk about predators and how they play an important role in the health of any ecosystem. Then talk about what animals might have to help them protect themselves from predators – i.e. "survival gear" or ADAPTATIONS! I always ask for a few examples. Ask each player to secretly pick one person in the group to be their "predator". Then I have them secretly pick another player who will represent their "adaptation". The goal of the game is to keep your "adaptation" between you and the predator (in order to protect you from
the predator). Then yell "GO!" and it's really fun to watch the craziness as everyone is running around to get into a safe position. You need a large field like space to do this game and the more people who play the better. After a minute or two, I yell "FREEZE!" I have them ask themselves if they would've survived (if the predator is BETWEEN them and their adaptation they would die in the wild). Then I tell them to switch it and make their predator their adaptation and vise versa. After a minute I yell "FREEZE" again and then point at who their predators and adaptations were. This is a crazy fun game if you have an energetic group that needs a release.

Symbol Poem
Concepts: Observation, sensory awareness
Purpose: To enjoy nature by relating to it using poetry and the senses
Materials: Pencils; pens; paper
Activity: 1. Think of two objects that could symbolize you- for e.g. A tree, A cloud,
2. Think of one object to stand for the way you used to be when you were younger, and one to represent the way you think you are now.
3. Once you’ve decided on the two symbols you will use, write your poem by following the steps below.
Step One: For the first line of your poem, write down either “I used to be” or “Once I was.”Step Two: For the next line, write down the name of the object you chose to stand for yourself when you were younger.Step Three: Describe something about the object you just named that made it like you.Step four: For the next line, write either “But now I am” or simply “Now I am.”Step Five: For the next line, write down the name of the object you chose to stand for yourself right now.Step Six: In a line or two, describe something about this object that makes it seem like you.
Example 1 Example 2 I used to be a caterpillar, Once I wasInching along. A leaf floatingBut now I am on the wind.A butterfly, Now I am Floating free. A tree with roots
that go down.
Tide Pool Charade
Concepts: Adaptations
Purpose: To increase awareness of how animals adapt to their environment for survival
Vocabulary: Tide pool; ecosystem; adaptation;

Materials: Index cards with tidepool animal names (Not required)
Activity: Divide the group in half. Each group is a team trying to acquire the most points. For each round, the teams will send a representative forward to receive their animal. Let’s call the teams, Team A and Team B. Team A will go first, and they have a specified amount of time to act out their animal’s behavior to the other members of their team. If they guess correctly during that time, they receive 1 point. If they are unable to guess the animal, then Team B has one opportunity to name the animal. If they are successful, they receive 1 point, and it is now their turn to act. The game continues until the naturalist deems it appropriate to stop.
Variations: This game works well as a prep for beach day (to be done during sea lab), or at the tidepools (once the students have had a chance to explore).
Tide Pool Tag
Concepts: Predatory/Prey relationships; adaptations
Purpose: To teach students predator/prey relationships of tide pool animals and how the are adapted to feed
Vocabulary: Adaptation; predator; prey; tide pool; sculpin; anemone
Materials: N/A
Activity: This is another predator-prey game involving tide pool animals! Set up boundaries approximately twenty feet by twenty feet and ask the students to line up along one edge. Tell the students that they are all sculpin living in a tide pool, which is marked by the boundaries. Choose one volunteer (or two depending on group size) to be an octopus. Set the octopus in the middle of the playing area, and explain that the goal for the sculpins is to run to the opposite end of the tide pool without being "eaten" (tagged) by the octopus. Each round begins when the octopus yells out, "Fishies, fishies in the sea, please, please come to me!" Those sculpin who are tagged while crossing the tidepool drop to their knees where they were tagged and become sea anemones. While sea anemones cannot move from their original position, they can reach out with their "tentacles" (hands) to tag passing sculpin, who then join these sea anemones. Those sculpin who survive line up along the opposite boundary to prepare for the second round. The game continues until only one sculpin is left - he becomes the new octopus, and the game starts again!
Variations: Adaptation tag

Toll Bridge
Concepts: Check for understanding
Purpose: To review concepts of lessons taught early in the day and evaluate students’ understanding of material
Materials: A bridge, fallen log, or any obstacle
Activity: Naturalist makes up a story (of their own choosing) about a deranged troll, forest sprite or other vindictive fictional forest denizen that will not allow students to pass over a bridge or obstacle unless given one fact that they learned about ________ during the day. The facts can relate to any lesson that the naturalist has taught (i.e. facts about the water cycle, adaptations, redwoods, etc.). Students cross the bridge one at a time and shout the fact they learned as they cross. Students can only use facts that no one else has already stated. Give students a high five as they cross. Or don’t. Your choice.
Town Meeting
Concepts: Sustainability; Interdependence
Purpose: To show students how different groups may have different interests and opinions on the same project
Vocabulary: Activism
Materials: N/A
Activity: Set up a mock "town meeting" in which the students will discuss and attempt to resolve an environmental issue. The students should be divided into several groups representing different parties involved in the issue. Each group should express their opinions and concerns with you acting as a moderator. You may also choose to place several students on a "town officers panel," which makes the final decision. Below is an example of a relevant environmental issue and the parties involved: There has been an earthquake, and 100 people in La Honda have been left homeless. The community leaders of La Honda have requested that the Department of Forestry allow them to cut down twenty redwoods to provide homes for these residents. The parties involved, include: HOMELESS PEOPLE, COMMUNITY LEADERS, DEPARTMENT OF FORESTRY STAFF, REDWOOD TREES, BANANA SLUGS or DEER

or ACORN WOODPECKERS.- How did it feel to be homeless? A redwood? A deer?- Did you come to any solutions?
- What does the word "interdependence" mean? How do we depend on nature?
Variations: Another good topic would be whether to build an amusement park in the marsh.Note: It’s helpful to give each group a card with their interest group on it, as well as a description of how the project will affect them.
Trash Timeline
Concepts: Conservation; resources
Purpose: To create awareness about the length of time it takes common garbage to decompose
Materials: Objects listed below or cards with the objects written on them
Activity: Show students some of the cards and ask what will happen to the object when people no longer want to use it (it will end up in a landfill). Have the students think about what will happen to it once it is in the landfill. (How long will it last? Will it completely disappear? How much space will each object utilize?) Then, give each student a card and have each student think about how long it will take the object to decompose in a landfill. Have the students line up according to how long the object will take to decompose. (If I have extra students, I let those students go down the line to create the final line-up) After the line is set, tell the students the actual order and have them re-organize. Then, have each student guess how long it will take the objects to decompose. After each guess, tell them the correct answer. Debrief by talking about Reduce, Reuse, Recycle. List of Objects in Order:banana -- 3 to 4 weeks paper bag -- 1 month cotton rag -- 5 months wool sock -- 1 year cigarette butt -- 2 to 5 years leather boot -- 40 to 50 years rubber sole (of the boot) -- 50 to 80 years tin can (soup or vegetable can) -- 80 to 100 years aluminum can (soda pop can) -- 200 to 500 years plastic 6-pack rings -- 450 years plastic jug -- 1 million years Styrofoam cup -- unknown? forever? glass bottle -- unknown? forever?
Variations: Have students collect garbage at the beach and use the garbage instead of the cards. Refer to the time estimates on these objects to figure out about how long each piece of trash will take to decompose.
Tree Silhouettes
Concepts: Classification
Purpose: To examine the shape of different trees to aid identification
Vocabulary: Tree identification: redwood, doug fir, madrone, etc.
Materials: N/A
Activity: Find a place where there are a few different types of trees. Have a student shape their body like one of the species of trees. The other students should guess which type of tree the student is by either saying the name or pointing at the tree.
Variations: This game can also be played in groups if the students are feeling uncomfortable. The students can also impersonate animals or anything else the group is trying to identify.
Tree Tag
Concepts: Adaptations
Purpose: To illustrate that protective adaptations of trees
Vocabulary: Cambium; phloem; xylem; bark
Materials: N/A
Activity: Talk about the role of bark as a protector for trees, especially for the cambium layer where the nutrients are moving up and down the tree. Have the kids get in groups of four (or five if you have an extra odd person). One will be a "bark beetle" (or sapsucker), another will be the "cambium" (or phloem or xylem), and the rest (2-3) will be the bark. All except the "bark beetle" hold hands to form a circle. The goal of the game is for the "bark beetle" to tag the "cambium" player. The "bark" players try to defend the "cambium" by shielding the "bark beetle" from tagging it. This game is also high energy and can get rowdy so you need a good amount of flat ground to play it safely. It's fun to give each player about a minute to be a "bark beetle" and then switch it so each player gets to be each part of the game. This teaches them about the importance of bark as well as what things are trying to get at the cambium. Plus, it's a perfect high energy game for a plant hike, which tend to be mellower than other hikes.
Unnatural Hike
Concepts: Conservation; sensory awareness
Purpose: To have students understand the difference between natural and man-made objects and to have students brainstorm the impact (positive and negative) of man-made objects on our world
Materials: Unnatural Items (e.g. a light bulb, a gum wrapper, a soda can, etc.)
Activity: Place several “unnatural” items along a short section of the trail. Allow the students to walk along the trail and silently count (without pointing or touching) how many unnatural items they see. This may be done as a group, partner, or solo hike depending on the group. When they reach the end of the trail, ask each student how many items she was able to find. When everyone has walked the trail, assure them that there are no more items to be found, and then each try again. After the second try, you may reveal the number of unnatural items actually along the trail and then collect them as a group. Be sure not to leave anything behind!
- How could you have found more items? - What are some good observation techniques to use in nature?
- Is trash natural or unnatural? - How do these things affect our environment (both positively and
negatively)?
Volcano Making
Concepts: Geology
Purpose: To teach students about plate tectonics and three different types of volcanoes
Vocabulary: Volcano; plate tectonics; core; mantle; crust; magma; lava
Materials: Paper bowls (with good lip); film canisters without lids; film canister with lids; film canisters with lids with a small hole in them; water;
denture cleanser; baking soda; vinegar with red food coloring; plaster of paris
Activity: Introduce the activity by talking about volcanoes. See appendix. Why do we have them? Where do we find them? How do they affect plants, animals, and humans? Can you name a volcano? Then, have students work in partners to build a volcano. Each group should have a paper bowl, turned upside down with a hole cut in the bottom of the bowl. Poke the film canister through the hole so that the canister is open. Have the students’ collect dead leaves, sticks, ash, etc. to decorate their volcanoes. Next, mix together the plaster of paris with a small amount of water. You want a thick creamy consistency. Pour it around the film canister on the upside down bowl. The students can

spread it out with their fingers and decorate their volcano. Then, set them aside to dry.This is a good time to talk about the three types of volcanoes. See appendix.Hand each pair one film canister with a hole poked in the lid and one film canister with a solid lid. They should also receive two denture tablets. Fill each film canister full of water, leaving only a small amount of space at the top. Have the put one denture tablet in the film canister, and put the lid with a hole in it on tightly. Lean back and watch. Did the students form a hypothesis about what was going to happen? What type of volcano is this?Next, have the students repeat the process except this time have them put on the solid lid. What do they think will happen this time? Which type of volcano is this?Go back to the plaster of paris volcano and put approximately one teaspoon of baking soda in the bottom of the film canister. Give the students another film canister full of vinegar and let them pour it into the volcano. What type is this?
Watcher of the Road
Concepts: Sensory awareness
Purpose: To create awareness of student listening ability and to practice moving though the woods silently
Vocabulary: Fox Walk
Materials: Flashlight; road or open field
Activity: One student is the watcher of the road. This student sits in the middle of the road with a flashlight and attempts to stop the other students from reaching a base. The other students line up at the head of the road and try to pass the watcher without being heard. If the watcher hears a student he shines the light at the noise. Anyone touched by the light must freeze. The first one to reach the base gets to be the new watcher.
Waves Come from Wind
Concept: Geology; water
Purpose: Student will understand how waves form in the ocean by acting out the motion of a wave, and the role that weather patterns play in that formation
Vocabulary: Crest: the highest part of the waveTrough: the lowest part of the waveWave height: the distance from the crest to the troughWave length: the distance from either crest to crest or trough to trough, also sometimes referred to as periodRip current: strong flow of water returning seaward from the shore, often found between two sand barsLong shore current: when waves hit the shore at an angle, they cause water to move along the shoreUndertow: when waves crash on the beach head-on, the water the moved through flows back to the ocean underneath new incoming wavesWhitecaps: steep waves that break before they get to shoreSwell: sustained wind over a large fetch of the sea causes whitecaps to come together into organized lines. These lines of swell often travel 1000's of miles, losing little energy eventually breaking on shore. WOW!
Materials: A long sandy beach that does not have any large rocks nearby as the students will be falling to the ground
Activity: 1) Have students get completely silent and watch the action of the waves, ask for observations.2) Talk about weather patterns in the Pacific: winter storms near Alaska causes swell in the to generally come from the NW and prevailing westerly winds often bring these storm ashore. These storms dissipate in the summer months and is replaced by the North Pacific High, and weather is characterized by mostly high pressure systems. Swell during the summer months comes storms near the equator and are generally much smaller than the winter NW swells.3) Give the definition of chop and swell and how energy from wind during storms is transferred to the ocean. As the wave moves from deep to shallow water the water particles slow down and build up forcing more water towards the crests and increasing wave height. Gravity eventually causes them to crash to the ocean floor as breakers.4) Explain that now the students are going to become a wave. Have the students line up shoulder to shoulder. Then draw a line on the beach at an angle to the students that represents the shore: A. (students) B.(Line that represents shore)5) Have students run around in a disorganized manner when you yell the word "CHOP" Then have the students get back in the line shoulder to shoulder in an organized manner when you yell the word "SWELL."6) Once the students have formed the line once again tell them that they are a wave about to encounter the shore. The students are to fall/do a somersault when they encounter the shore(stress that they must be under control and fall in a safe manner). The students nearest to "B" in the figure will encounter the shore first and therefore fall before the students
nearest to "A" in the figure above. The way that the students fall is characteristic of a wave breaking onto a rocky shore(i.e. a point break)7) Have the students once again observe the waves in silence and again ask for observations
Variations: 1) Make the line parallel to the students and have them move towards the "shore." In this case they will all fall at the same time. Now the way that the students fall is characteristic of a wave breaking on sandy beach
2) Split the students into two groups to represent two waves. Draw two lines to represent sand bars and then have students move towards the sand bars and break(i.e. fall) Then have the students move to the space in between the sand bars and run back to where they started. This movement represents a rip current.
Web of Life
Concepts: Food chain; energy pyramid; interdependence
Purpose: To show students how energy is passed from the sun through a food chain, and how all organisms are connected in an ecosystem
Vocabulary: Abiotic; biotic; producers; consumers; decomposers; interdependence
Materials: Plant and animal cards; yarn
Activity: This activity is most effective when preceded by a few rounds of "Who Am I?" If you choose to do this activity alone, assign each student the name of a plant or animal within an ecosystem. Otherwise, ask the students to sit in a circle with their animal and plant cards from "Who Am I?" hanging in front; put a sign representing the sun around your own neck and join the circle. Explain that all the animals and plants represented in the circle are connected to each other by a "food web." To demonstrate, take a ball of yarn and hold it in front of you, reminding them that all energy on earth (including food energy!) originates with the sun. Ask them who in the circle could take the energy from the sun to make food; all of the students with plant cards should raise their hands - these are the PRODUCERS. Wrap the end of the yarn around your index finger and toss the ball to one of the plants, who must then wrap the yarn around his finger. Now ask who in the circle might eat that particular plant - this is a CONSUMER. The first child then tosses the ball of yarn to the second, who also wraps the yarn around her finger. Ask again who in the circle might eat that particular animal - this is also a consumer. Continue to pass the ball of yarn around the circle in this manner until an animal is found that is not eaten by anyone in the circle. Remind the students that all
animals eventually die and are then broken down and returned to the soil by animals and plants called DECOMPOSERS and pass the ball of yarn to a decomposer. The decomposer returns the ball of yarn to you as the sun, and the whole cycle begins again until everyone in the circle is holding onto the yarn. You've now completed a food web!
- Let's review: What is a producer? a consumer? a decomposer? - What would happen if all the [redwoods] were destroyed? (Ask the
redwood to give a gentle tug on the yarn and then ask the students who felt the tug to raise their hands)
- What does the word "interdependence" mean? Can you think of another example?
Who Am I?
Concepts: Identification ; classification; observation
Purpose: To teach kids the importance of asking good questions and to help them identify and classify local flora and fauna
Vocabulary: Abiotic; biotic; producer; consumer; decomposer; carnivore; herbivore; omnivore
Materials: Pictures or written names of plants and animals
Activity: Prepare cards with either pictures or written names of plants and animals within an ecosystem. For example, a set of cards for the redwood forest might include Coastal Redwoods, Poison Oak, Redwood Sorrel, Blacktail Deer, Banana Slugs, Western Garter Snakes, Coyotes, and Red-tailed Hawks. Attach strings to the cards and hang one card around each student's neck so that the card is in back and thus invisible to that student. Explain that the students must figure out who they are by asking their peers questions that can be answered with a "yes" or "no." Give examples of good questions to ask, such as "Am I big?", "Do I have fur?", or "Do I have leaves?". Each student is allowed to ask a peer up to three questions and must then move on to someone else. Once a student has guessed who she is, she may turn the card around to the front and continue to answer questions until everyone is finished.
- What were the most helpful questions to ask?- How are animals and plants divided into groups?- Can you think of some examples?This activity is a great segue into Web of Life!
Wild Animal Scrabble

Concepts: Classification; animal ecology
Purpose: To create awareness for classification
Vocabulary: Diurnal/nocturnal; herbivore/carnivore/omnivore; cold-blooded/warm-blooded;mammal/reptile/amphibian/invertebrate/etc…/Kingdom/Phylum/Class/Order/Family/Genus/Species
Materials: Index cards with animal names and pictures (if possible); clothespins
Activity: Each student will receive a card with an animal. The cards are placed on the child’s back so that they are unable to see what is on their card. The students then mingle with one another, asking each other yes and no questions to figure out their animal. Once they feel confident in what animal they have, each student will write down their guess and hand it to the naturalist. After all the students have completed this portion of the activity, you conclude with the award ceremony. During the ceremony each student comes up to the front, with their back facing the group. The naturalist reads the guess, and the crowd responds with cheering. (Remember to keep it positive, i.e. no booing). Once all of the students have guessed their animal correctly, the naturalist should debrief by classifying the animals based on similarities.
Variations: Hollywood Party; Who am I?
Wildmen in the Alders
Concepts: Sensory awareness, predator /prey relationships; survival
Purpose: To become more aware of the surroundings, to create apathy for prey animals
Vocabulary: Predator; Prey
Materials: Rubber Bands (or something to demonstrate number of trials); Gory props; noise makers
Activity: Pick 5-8 clever students to be the “wildmen.” The rest of the students will be prey. The point of the game is to travel through the area without being caught by the wildmen. Find a place in the woods that has thick cover, but plenty of space for running around. Give each of the prey four rubber bands to represent their lives. Assemble everyone on the boundaries of the playing space and yell to the wildmen to “make some noise so we know you are in there!” After
the wildmen screech, blow whistles, and bang on pans, allow the prey to enter the forest.
*Instead of aiming to catch the prey, the wildmen should try to create narrow misses and extravagant catches to make the game more fun. The atmosphere of gore and noise makers are important for creating the best environment for the game.
Variations: Set goals for the students, such as: find water or food for survival, or get to a number of bases.

X-Stream Ecology
Concepts: Food chain; water
Purpose: To teach students the role that macroinvertebrates play in the food chain, and how they can be used as an indicator species to determine water quality.
Vocabulary: Benthic: pertaining to organisms that occupy the bottom surface of a body of waterMacroinvertebrate: an animal without a backbone that can be seen with the naked eyePool: A deep reach of a stream. The reach of a stream between two riffles. Natural streams often consist of a succession of pools and riffles.Riffle: a rapid in a stream, usually much more shallow than a pool and characterized by large cobbles as the substrateIndicator species: a species whose presence, absence, or relative well-being in a given environment is indicative of the health of its ecosystem as a whole
Materials: Stream ecology data sheet – see appendix; Crazy Creek Crawl hand-out –
see appendix; 3 frisbees; water strainer; three clip boards; aquatic insect ID sheets or books
Activity: 1. Begin with the game Egret, Trout, Mosquito (or Bear, Salmon Mosquito). Everyone has a partner and they begin with their backs to each other. When naturalist says “food chain” they turn around and make either egret trout or mosquito symbol. Egret eats trout, trout eats mosquito and mosquito eats egret. During debrief explain that mosquitoes and many other inverts. Begin their life as aquatic larva. Go over aquatic food chain (plankton, benthic macroinverts, small fish, reptiles, amphibians , mammals , birds, and fish )2. Once you arrive at the stream go over the Creek Crawl handout. Find a spot on the stream where you can clearly point out a pool and a riffle. After discussion ask why benthic macroinverts. are important: Important part of the food chainCan be used as an indicator species to determine water qualityExplain that we will be collecting benthic macroinverts. from pools and riffles. Form two hypothesis:Where will be the greatest abundance? – pool or riffleWhat is the pollution level of the stream – high or low3. Divide the class into three groups. One person from each group must be designated as the data recorder. Each group will be assigned to a reach(specified length of stream) that will be either a pool or a riffle. Macroinverts. will be collected in frisbees and identified using last two pages of Creek Crawl handout and aquatic insect id. sheets. Allow each

group to collect from all reaches of stream, switching every 10-15 minutes and have each group keep their collection frisbees as they switch sites.4. Bring group back together and bring what was collected back to a central meeting spot and discuss specific organisms that were found. Then make two graphs to interpret data collected, a) one for pollution tolerance and b) one for substrate: graph "a)" will have the pollution tolerances on the x-axis (i.e. High, fair, moderate, low) and the number of macroinvertebrates found on the y-axis. Graph "b)" will have "pool" and "riffle" on the x-axis and again the number of macroinverts. on the y-axis.
- From the graphs have students determine the quality of the stream tested and where there is a greater abundance of organisms(pool or riffle) and why. While not always the case, riffles usually have more abundance and diversity because they have more dissolved oxygen and a more heterogeneous substrate (i.e. more places to hide)
Variations: - Another addition to this activity would be to do the same steps as listed above and then take a few samples of water from the creek and perform tests on the water with the water quality kit and compare the results. Were the results consistent?
- At Jones Gulch this activity could be modified to monitor the quality of the lake.
- This procedure could be repeated at various spots on the stream to determine if there is any variation in the water quality