Embed Size (px)
Citation preview
Activity 1.5.5b Pegboard Toy Presentation (.ipn) DrawingIntroduction
There's more to designing and engineering than making 2D drawings and 3D parts. After putting in hours of hard work in designing and modeling, there is nothing more frustrating than to hear someone say, "There are problems with the final assembly." As designs become more sophisticated, the detailed prints become more complex. Fortunately, Autodesk Inventor® offers a way to convey assembly instructions to those who will build the device. Inventor's presentation (.ipn) files allow you to create exploded assembly drawings and animations intended for assembly and maintenance of products.
You have used Autodesk Inventor to create individual part (.ipt) files, assembly (.iam) files, and working drawing (.idw) files. Another file that is often used by engineers and designers is a presentation (.ipn) file. Presentation files show how components interact with other parts within an assembly. In this activity you will create a presentation file of the Pegboard Toy.
Equipment PLTW Gateway notebook Pencil Completed Pegboard Toy Assembly File (file extension .iam) Computer with 3D modeling program
ProcedureIn this activity you will use Inventor’s Presentation feature to create an exploded view of an assembly. The exploded view is used to show how an assembly goes together. Along with a parts list and balloons, the exploded view is typically included as part of the assembly drawing.
1. Open your 3D modeling program.
2. Select New, and then select Standard.ipn. Your screen will look like Figure 1 below.
© 2011 Project Lead The Way, Inc.PLTW Gateway – Design and Modeling Activity 1.5.5b Pegboard Toy Presentation (.ipn) Drawing – Page 1
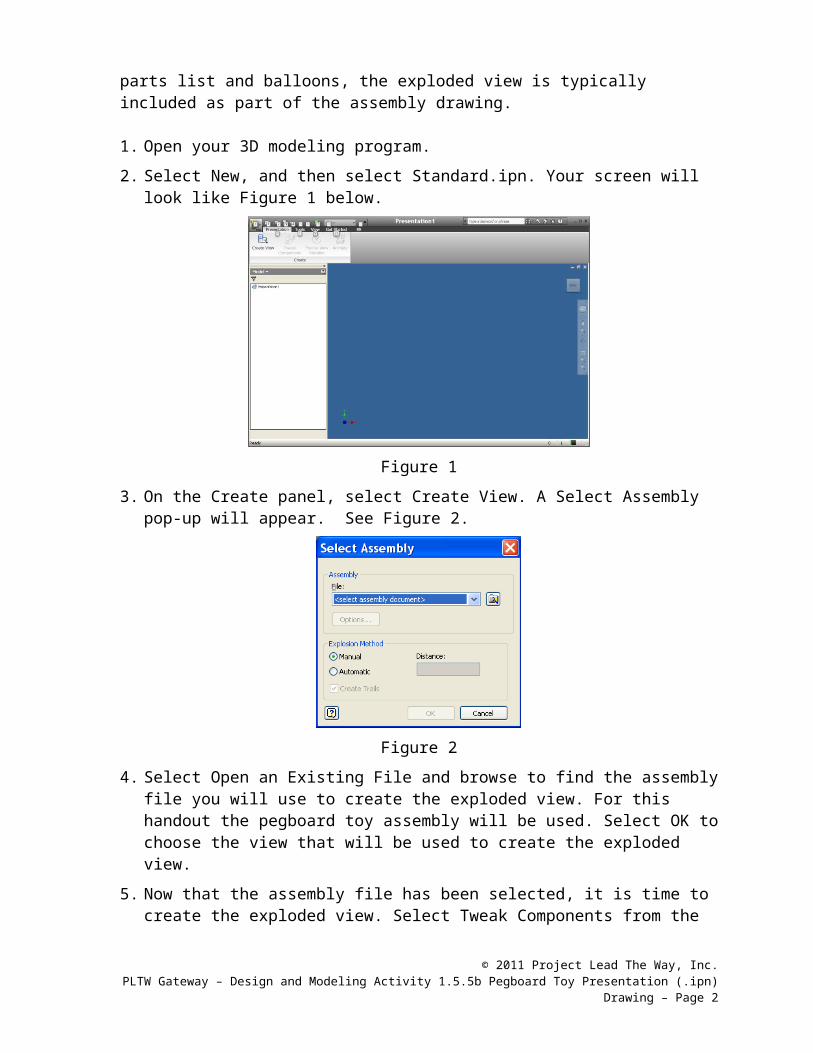
Figure 1
3. On the Create panel, select Create View. A Select Assembly pop-up will appear. See Figure 2.
Figure 2
4. Select Open an Existing File and browse to find the assembly file you will use to create the exploded view. For this handout the pegboard toy assembly will be used. Select OK to choose the view that will be used to create the exploded view.
5. Now that the assembly file has been selected, it is time to create the exploded view. Select Tweak Components from the Presentation panel. A Tweak Component pop-up will appear. See Figure 3.
Figure 3
© 2011 Project Lead The Way, Inc.PLTW Gateway – Design and Modeling Activity 1.5.5b Pegboard Toy Presentation (.ipn) Drawing – Page 2
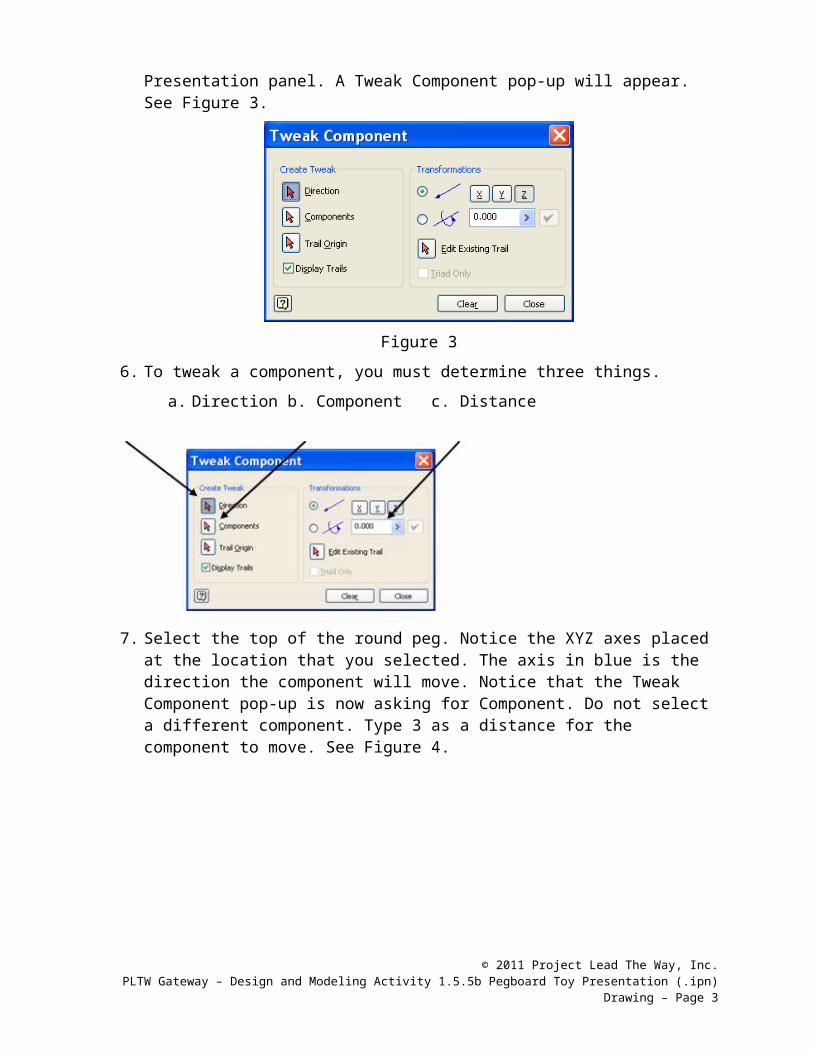
6. To tweak a component, you must determine three things.
a. Direction b. Component c. Distance
7. Select the top of the round peg. Notice the XYZ axes placed at the location that
you selected. The axis in blue is the direction the component will move. Notice that the Tweak Component pop-up is now asking for Component. Do not select a different component. Type 3 as a distance for the component to move. See Figure 4.
Figure 4
8. Select the check mark and then select Clear. Your screen should look similar to Figure 5.
© 2011 Project Lead The Way, Inc.PLTW Gateway – Design and Modeling Activity 1.5.5b Pegboard Toy Presentation (.ipn) Drawing – Page 3
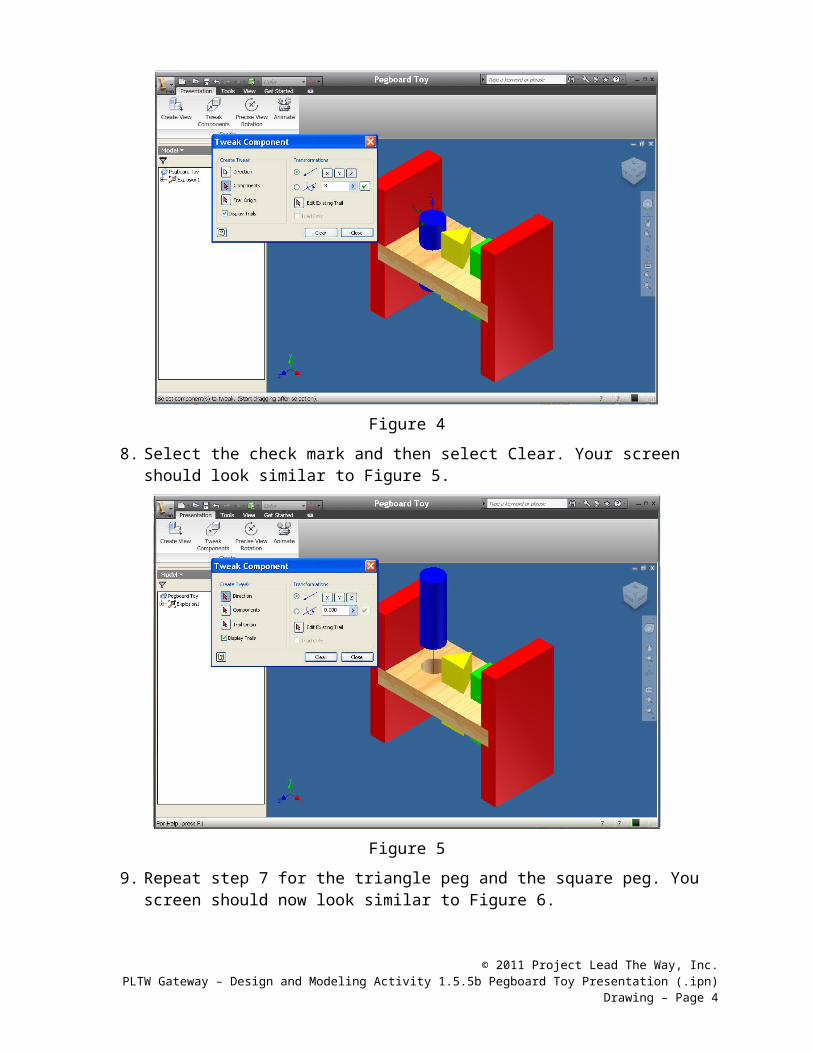
Figure 5
9. Repeat step 7 for the triangle peg and the square peg. You screen should now look similar to Figure 6.
Figure 6
10.Select the side of the leg and enter a tweak distance of 3. See Figure 7.
© 2011 Project Lead The Way, Inc.PLTW Gateway – Design and Modeling Activity 1.5.5b Pegboard Toy Presentation (.ipn) Drawing – Page 4
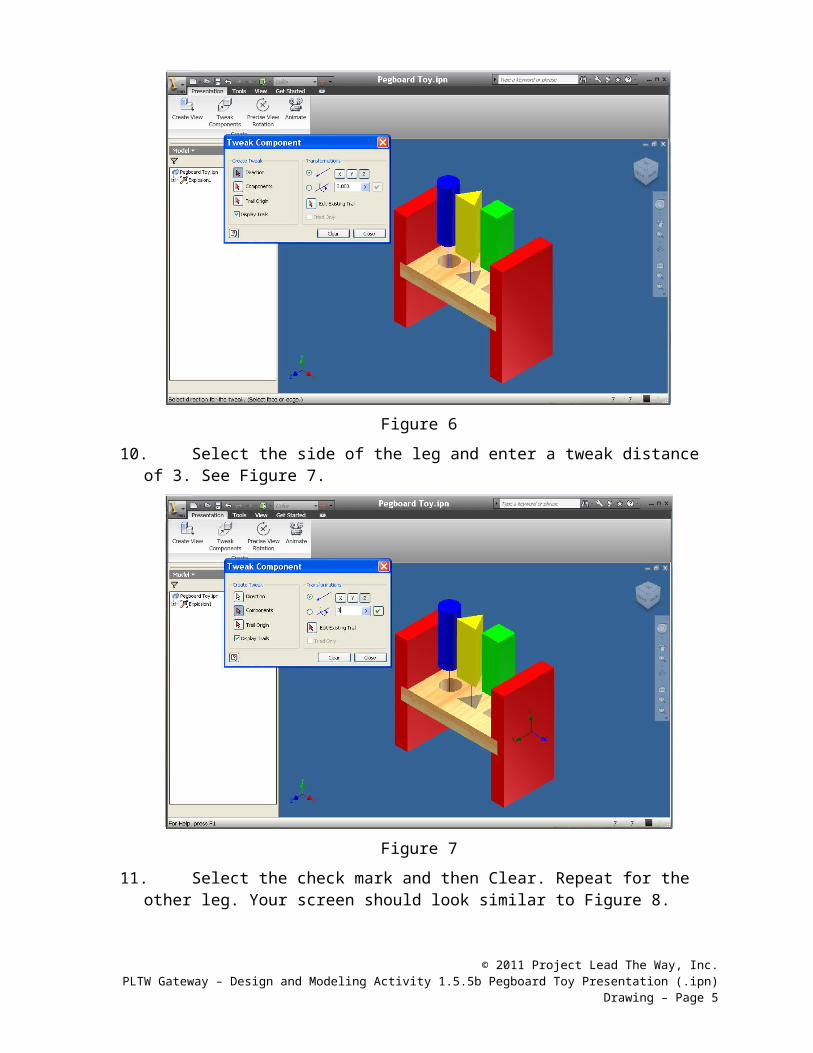
Figure 7
11.Select the check mark and then Clear. Repeat for the other leg. Your screen should look similar to Figure 8.
Figure 8
12.Now that the exploded view has been created, use the Animate option to put it together. Select Animate from the Create panel. An Animation pop-up will appear. See Figure 9. Press the Play button to animate the presentation.
© 2011 Project Lead The Way, Inc.PLTW Gateway – Design and Modeling Activity 1.5.5b Pegboard Toy Presentation (.ipn) Drawing – Page 5
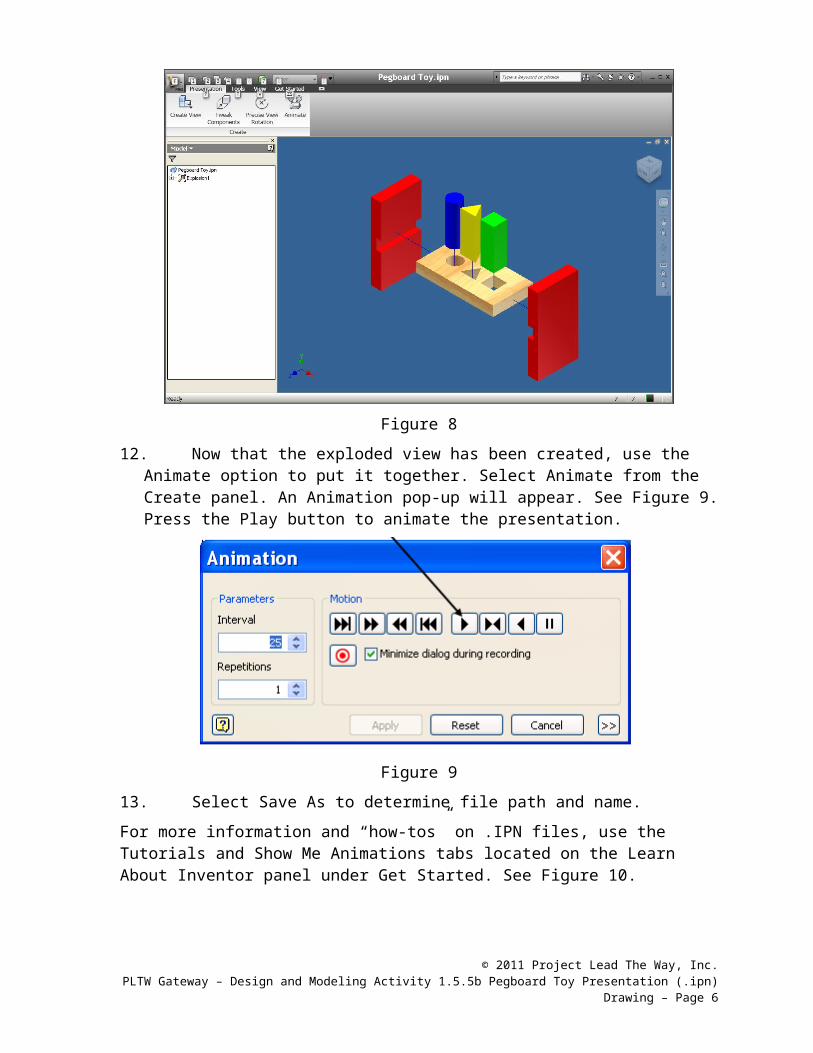
Figure 9
13.Select Save As to determine file path and name.
For more information and “how-tos” on .IPN files, use the Tutorials and Show Me Animations tabs located on the Learn About Inventor panel under Get Started. See Figure 10.
Figure 10
© 2011 Project Lead The Way, Inc.PLTW Gateway – Design and Modeling Activity 1.5.5b Pegboard Toy Presentation (.ipn) Drawing – Page 6

![jameslitsinger.files.wordpress.com · Web viewWe developed a sequential samplingplan and designed a simple pegboard for recording LF, planthopper (brown planthopper [BPH] and whitebacked](https://img.pdfslide.us/doc/110x75/5adc51327f8b9a595f8b5ffe/viewwe-developed-a-sequential-samplingplan-and-designed-a-simple-pegboard-for-recording.jpg)


![Student Records Inquiry€¦ · Web viewSelect [Explore] button; In the Madison folder, double click on the ‘UW-Madison Query Library’ MS Word file. Student Record Inquiry 5/16/17](https://img.pdfslide.us/doc/110x75/5f7aacace8e8803dc45a1352/student-records-inquiry-web-view-select-explore-button-in-the-madison-folder.jpg)