Embed Size (px)
Citation preview
The Australian Centre for International Agricultural Research (ACIAR) was established in June 1982 by an Act of the Australian Parliament. Its mandate is to help identify agricultural problems in developing countries and to commission collaborative research between Australia and developing country researchers in fields where Australia has a special research competence.
Where trade names are used this constitutes neither endorsement of nor discrimination against any product by the Centre.
ACIAR TECHNICAL REPORTS SERIES
This series of publications contains technical information resulting from ACIAR-supported programs, projects, and workshops (for which proceedings are not being published), reports on Centre-supported fact-finding studies, or reports on other useful topics resulting from ACIAR activities. Publications in the series are distributed internationally to a selected audience.
© Australian Centre for International Agricultural Research, GPO Box 1571, Canberra, ACT 2601
Beetham, P., and Mason, A. 1992. Production of pathogen-tested sweet potato. ACIAR Teehnical Reports No. 21, 47p.
ISBN 1 86320 063 0
Technical editing by Apword Partners, Canberra, Australia.
Typeset and laid out by Arawang Information Bureau Ply Ltd, Canberra, Australia.
Printed by Goanna Print Pty Ltd, Canberra, Australia.
Cover: Harvesting a sweet potato trial at Laloki Research Station, Papua Ncw Guinea
Production of Pathogen-Tested Sweet Potato
Peter Beetham and AngeJa Mason Department of Agriculture Bumley Gardens Swan Street Bumley, Vie. 3121 Australia
Australian Centre for International Agricultural Research Canberra 1992
Contents
Acknowledgments 4
1. Introduction 5
2. Production oC Pathogen-Tested Germplasm 7 Heat treatment 7 Meristcm culture 8 Tissue culture multiplication for transfer to the glasshouse 11 Transfer of tissue cultures to the glasshouse or insect-proof screenhouse 12
planting out Maintenance of plants grown for disease indexing 13
3. Indexing oCMeristem Cultured Clones for Viruses and Mycoplasma-Like 14 Organisms Summary of the disease indexing program 14 Additional information on important viruses 18 Virus indexing tests 20
4. Sweet Potato Enzyme-Linked Immunosorbent Assay (ELISA) 29 Reagents and equipment 29 ELISA protocol 30 Titration plates 30 Sweet potato feathery mottle virus (SPFMV) ELISA 31 Sweet potato caulimo-like virus (SPCL V) ELISA 33 General notes for all sweet potato ELISAs 33
References 35
Appendix. Plant Tissue Culture Micropropagation Laboratory Manual 37
3

Acknowledgments
The authors wish to thank the following people for technical support: Mr Darren RussellCroucher, who assisted in the developmental work and contributed greatly to the projectand Ms Lisa Kellock, Ms Fiona Constable and Ms Gail Brammar, all of whom assisted with large quantities of sweet potato tissue culture.
We would like to thank also both the Virology Section at the Institute of Plant Sciences, Bumley and the Plant Quarantine Nursery at B umley Gardens. Without their encouragement and support this manual would not have been possible.
4
CHAPTER!
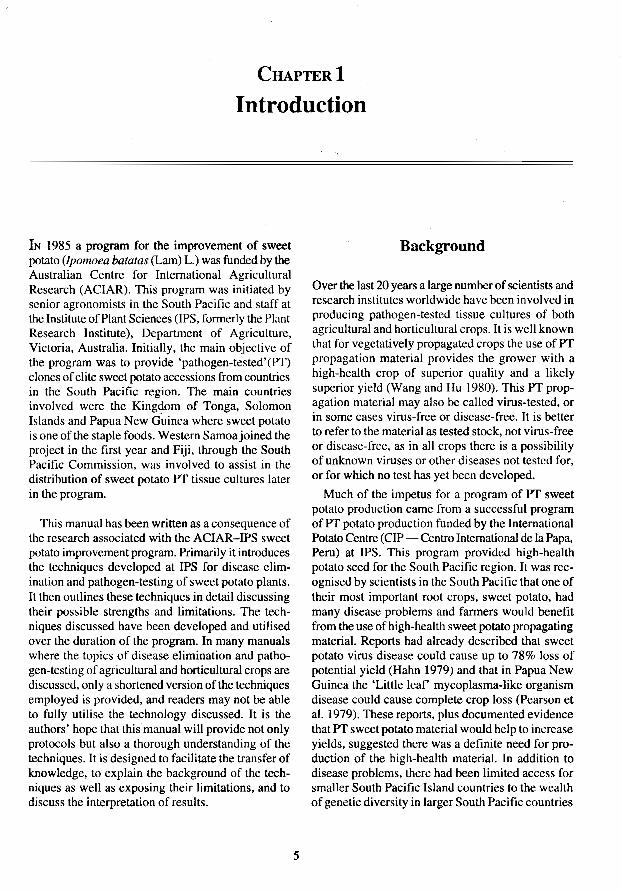
Introduction
IN 1985 a program for the improvement of sweet potato (Ipomoea batatas (Lam) L.) was funded by the Australian Centre for International Agricultural Research (ACIAR). This program was initiated by senior agronomists in the South Pacific and staff at the Institute of Plant Sciences (IPS, formerly the Plant Research Institute), Department of Agriculture, Victoria, Australia. Initially, the main objective of the program was to provide 'pathogen-tested' (PT) clones of elite sweet potato accessions from countries in the South Pacific region. The main countries involved were the Kingdom (:)f Tonga, Solomon Islands and Papua New Guinea where sweet potato is one of the staple foods. Western Samoa joined the project in the first year and Fiji, through the South Pacific Commission, was involved to assist in the distribution of sweet potato PT tissue eultures later in the program.
This manual has been written as a consequence of the research associated with the ACIAR-IPS sweet potato improvement program. Primarily it introduces the techniques developed at IPS for disease elimination and pathogen-testing of sweet potato plants. It then outlines these techniques in detail discussing their possible strengths and limitations. The techniques discussed have been developed and utilised over the duration of the program. In many manuals where the topics of disease elimination and pathogen-testing of agricultural and horticultural crops are discussed, only a shortened version of the teehniques employed is provided, and readers may not be able to fully utilise the technology discussed. It is the authors' hope that this manual will provide not only protocols but also a thorough understanding of the techniques. It is designed to facilitate the transfer of knowledge, to explain the background of the techniques as well as exposing their limitations, and to discuss the interpretation of results.
5
Background
Over the last 20 years a large number of scientists and research institutes worldwide have been involved in producing pathogen-tested tissue cultures of both agricultural and horticultural crops. It is well known that for vegetatively propagated crops the use of PT propagation material provides the grower with a high-health crop of superior quality and a likely superior yield (Wang and Hu 1980). This PT propagation material may also be called virus-tested, or in some cases virus-free or disease-free. It is better to refer to the material as tested stock, not virus-free or disease-free, as in all crops there is a possibility of unknown viruses or other diseases not tested for. or for which no test has yet been developed.
Much of the impetus for a program of PT sweet potato production came from a successful program of PT potato production funded by the International Potato Centre (CIP - Centro International de la Papa, Peru) at IPS. This program provided high-health potato seed for the South Pacific region. It was recognised by scientists in the South Pacific that one of their most important root crops, sweet potato, had many disease problems and farmers would benefit from the usc of high-health sweet potato propagating material. Reports had already described that sweet potato virus disease could cause up to 78% loss of potential yield (Hahn 1979) and that in Papua New Guinea the 'Little leaf mycoplasma-like organism disease could cause complete crop loss (Pearson et al. 1979). These reports, plus documented evidence that PT sweet potato material would help to increase yields. suggested there was a definite need for production of the high-health material. In addition to disease problems, there had been limited access for smaller South Pacific Island countries to the wealth of genetic diversity in larger South Pacific countries
like Papua New Guinea because of strict quarantine restrictions. The production of PT sweet potato tissue cultures was accepted as the only way to overcome the quarantine restrictions on important clonal material.
Since the beginning of the program in 1985 over 200 accessions have been introduced into the disease-elimination scheme from both the South Pacific and Southeast Asian regions. At the completion of the project about 150 of these will be designated PT and it is hoped the rest will be released as PT as part of another sweet potato program linked to the Pacific Regional Agricultural Project (PRAP). The majority of the accessions have been imported from Papua New Guinea; however, all collaborating countries have selected their 'elite' cultivars to send to IPS for disease elimination. It is important to note that these 'elite' cultivars were selected based on the selection criteria of each country.
Another major objective of the ACIAR-IPS program was to assess PT material in the field. Although
6
this work is not discussed it is important to report initial findings of field trials to support the advantages of PT propagation material and how this material is already utilised. The program collaborated with Tonga, Papua New Guinea and Solomon Islands to perform agronomic trials to compare the yields of PT planting material with field-grown planting material, assess yield decline of planting material over time, and to study the rates ofre-infection of viruses. So far, information collected in Papua New Guinea and Tonga provides initial results of the comparison of PT and field planting material and yicld decline. Results show that PT planting material in some accessions can increase storage root fresh-weight yields by 250%. They also show that PT material is quickly re-infected by viruses, but over two generations yields are still significantly higher in some accessions.
It should be noted that this information is reported as preliminary results, which hopefully, as more trials are completed, will be further supported.

CHAPTER 2
Production of Pathogen-Tested Germplasm
A combination of heat treatment of plants followed by the culturing of plant meristems has proved the most successful method of eradicating viruses from plants. Due to the fact that the viruses occur inside the living plant cells a treatment is required which adversely affects the virus without killing the plant. It has been found that sustained high temperatures appear to prevent multiplication of the virus and enhance virus breakdown. Normally, as the virus replicates, new virus particles invade other plant cells. However, after heat treatment it is usually found that the actively dividing cells of the plant meristematic region are free of virus. This region does not contain vascular tissue so the virus is unable to spread into meristematic tissue via the vascular route.
Heat Treatment
Equipment
(I) A 'heat treatment cabinet'. A growth room large enough to grow fully established sweet potato plants and which is able to maintain a constant temperature of 38°C is needed. At IPS, Bumley, we have designed a large growth room suitable for other crops as well as sweet potato. This room is a converted 'walk-in' coolroom (dimensions 2.5 m x 3 m x 2.5 m height). The room has electronically controlled heating and cooling with an accuracy of maintaining the temperature to ± 1°C. It has an adapted 'sports ground floodlight' containing a metal halide lamp as its light source. This lamp has an exeellent spectral composition for plant photosynthetic activity providing at least 20% full sunlight (5151JE m-z s-l) for all plants. The cabinet also has a filtered drip watering system and efficient drainage system servicing approximately 7 m2•
(2) 15-20 cm ceramic pots.
7
(3) Pasteurised soil mix for heat treatment - use three stocks.
• Standard soil medium (1 m3)
0.125 m3 sand 0.125 m3 sandy loam (i.e. good mulched soil)
- 0.75 m3 well composted pine bark (could possibly use composted coconut husks)
- 1 kg of 3-4 month Osmocote® or Nutricote®
- I kg of Micromax® (micronutrients) - 2 kg of Dolomite lime
• Vermiculite® • Perlite®
Mix these three stocks in equal quantities and pasteurise. This mix is based on that used at IPS, though other mixes can be used. The soil mix for heat treatment must be very porous. Essentially what is needed is 1/3 good soil with slow-release fertilizer, porous material with good waterretention properties, e.g. coconut fibre, rice husks.
(4) Stakes-bamboo stakes on which to train sweet potato vines.
Procedure
Tip cuttings of sweet potato are taken from actively growing vines from the glasshouse (note: at IPS sweet potato plants are grown routinely in a tropical glasshouse. However, tip cuttings may also be selected from the field or screenhouse sweet potato plants) and potted up in heat-treatment soil mix in ceramic pots. Once these cuttings have rooted and have 4-6 mature leaves they are placed in the heat-treatment room at 38°C. In many cases plants do not survive well at 38°C. Therefore it is essential to adjust
watering to ensure soil in the pots does not dry out subjecting the plant to water stress. This is also important as many short intervals of watering when using ceramic pots provide an evaporative cooling of the soil and roots of the plants. This watering technique improves the growth of the plants at 38°C and reduces instances of root rot.
Pots are maintained in the room at 38°C for 8-12 weeks before shoot tips are removed for meristem culture. During this 8-12 weeks it is critical that plants are well cared for. Plants should be cut back regularly every 3-4 weeks and trained along bamboo stakes. This helps to provide new physiologically young growth and many shoot tips. They should also be closely monitored (daily) for insects or possible fungal or bacterial disease, and at times given additional liquid fertilizer, usually every two weeks depending on soil mix. If spraying for pests or fungal disease control, cabinet temperature controls should be turned off (or the temperature reduced to the optimal temperature required for the spray), watering turned off, and protective clothing and breathing gear used when re-entering the cabinet, until the cabinet has been well ventilated.
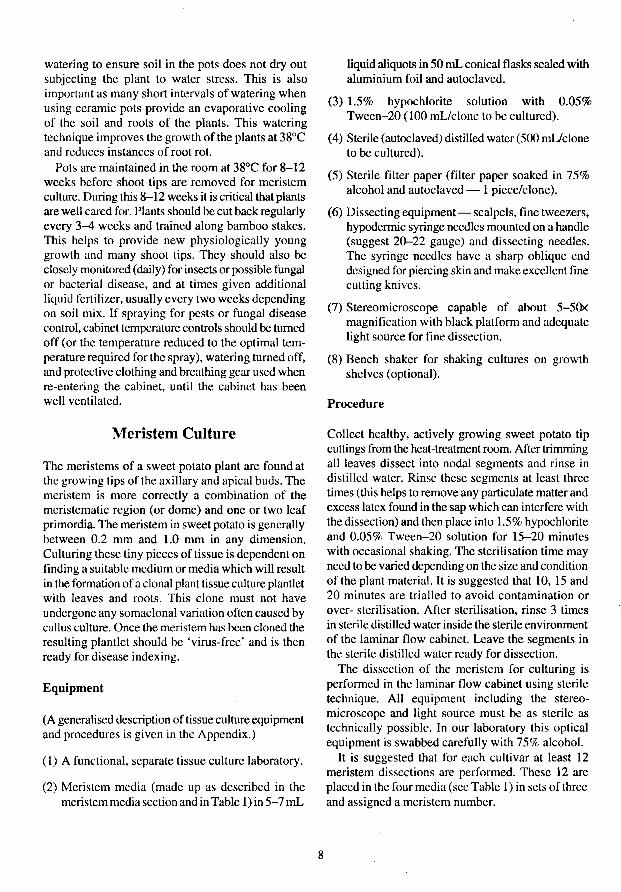
Meristem Culture
The meristems of a sweet potato plant are found at the growing tips of the axillary and apical buds. The meristem is more correctly a combination of the meristematic region (or dome) and onc or two leaf primordia. The meristem in sweet potato is generally between 0.2 mm and 1.0 mm in any dimension. Culturing these tiny pieces of tissue is dependent on finding a suitable medium or media which will result in the fonnation of a clonal plant tissue culture plantIet with leaves and roots. This clone must not have undergone any somaclonal variation often caused by callus culture. Once the meristem has been cloned the resulting plantIet should be 'virus-free' and is then ready for disease indexing.
Equipment
(A generalised description of tissue culture equipment and procedures is given in the Appendix.)
(1) A functional, separate tissue culture laboratory.
(2) Meristem media (made up as described in the meristem media section and in Table 1) in 5-7 mL
8
liquid aliquots in 50 mL conical flasks sealed with aluminium foil and autoclaved.
(3) 1.5% hypochlorite solution with 0.05% Tween-20 (lOO mUcJone to be cultured).
(4) Sterile (autoclaved) distilled water (500 mUclone to be cultured).
(5) Sterile filter paper (filter paper soaked in 75% alcohol and autoclaved - 1 piece/clone).
(6) Dissecting equipment - scalpels, fine tweezers, hypodermic syringe needles mounted on a handle (suggest 20-22 gauge) and dissecting needles. The syringe needles have a sharp oblique end designed for piercing skin and make excellent fine cutting knives.
(7) Stereomicroscope capable of about 5-5Cb< magnification with black platform and adequate light source for fine dissection.
(8) Bench shaker for shaking cultures on growth shelves (optional).
Procedure
Collect healthy, actively growing sweet potato tip cuttings from the heat -treatment room. After trimming all leaves dissect into nodal segments and rinse in distilled water. Rinse these segments at least three times (this helps to remove any particulate matter and excess latex found in the sap which can interfere with the dissection) and then place into 1.5% hypochlorite and 0.05% Tween-20 solution for 15-20 minutes with occasional shaking. The sterilisation time may need to be varied depending on the si7£ and condition of the plant material. It is suggested that 10, 15 and 20 minutes are trialled to avoid contamination or over- sterilisation. After sterilisation, rinse 3 times in sterile distilled water inside the sterile environment of the laminar flow cabinet. Leave the segments in the sterile distilled water ready for dissection.
The dissection of the meristem for culturing is performed in the laminar flow cabinet using sterile technique. All equipment including the stereomicroscope and light source must be as sterile as technically possible. In our laboratory this optical equipment is swabbed carefully with 75% alcohol.
It is suggested that for each cultivar at least 12 meristem dissections are performed. These 12 are placed in the four media (see Table 1) in sets ofthree and assigned a meristem number.
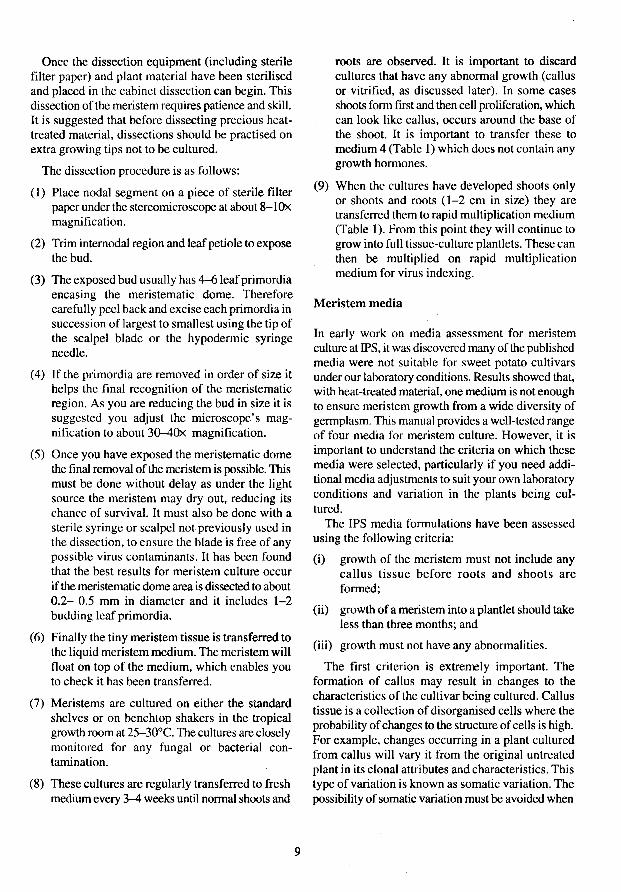
Once the dissection equipment (including sterile filter paper) and plant material have been sterilised and placed in the cabinet dissection can begin. This dissection of the meristem requires patience and skill. It is suggested that before dissecting precious heattreated material, dissections should be practised on extra growing tips not to be cultured.
The dissection procedure is as follows:
(l) Place nodal segment on a piece of sterile filter paper under the stereomicroscope at about 8-1 Ox magnification.
(2) Trim internodal region and leaf petiole to expose the bud.
(3) The exposed bud usually has 4-6 leaf primordia encasing the meristematic dome. Therefore carefully peel back and excise each primordia in succession of largest to smallest using the tip of the scalpel blade or the hypodermic syringe needle.
(4) If the primordia are removed in order of size it helps the final recognition of the meristematic region. As you are reducing the bud in size it is suggested you adjust the microscope's magnification to about 30-4Ox magnification.
(5) Once you have exposed the meristematic dome the final removal of the meristem is possible. This must be done without delay as under the light source the meristem may dry out, reducing its chance of survival. It must also be done with a stcrile syringe or scalpel not previously used in the dissection, to ensure the blade is free of any possible virus contaminants. It has been found that the best results for meristem culture occur if the meristematic dome area is dissected to about 0.2- 0.5 mm in diameter and it includes 1-2 budding leaf primordia.
(6) Finally the tiny meristem tissue is transferred to the liquid meristem medium. The meristem will float on top of the medium, which enables you to check it has been transferred.
(7) Meristems are cultured on either the standard shelves or on benchtop shakers in the tropical growth room at 25-30°C. The cultures are closely monitored for any fungal or bacterial contamination.
(8) These cultures are regularly transferred to fresh medium every 3-4 weeks until normal shoots and
9
roots are observed. It is important to discard cultures that have any abnormal growth (callus or vitrified, as discussed later). In some cases shoots [onn flrst and then cell proliferation. which can look like callUS, occurs around the base of the shoot. It is important to transfer these to medium 4 (Table 1) which does not contain any growth hormones.
(9) When the cultures have developed shoots only or shoots and roots (1-2 cm in size) they are transferred them to rapid multiplication medium (Table 1). From this point they will continue to grow into full tissue-culture plantIets. These can then be multiplied on rapid multiplication medium for virus indexing.
Meristem media
In early work on media assessment for meristem culture at IPS, it was discovered many of the published media were not suitable for sweet potato cultivars under our laboratory conditions. Results showed that, with heat-treated material, one medium is not enough to ensure meristem growth from a wide diversity of germplasm. This manual provides a well-tested range of four media for meristem culture. However, it is important to understand the criteria on which these media were selected, particularly if you need additional media adjustments to suit your own laboratory conditions and variation in the plants being cultured.
The IPS media formulations have been assessed using the following criteria:
(i) growth of the meristem must not include any callus tissue before roots and shoots are formed;
(ii) growth of a meristem into a plantlet should take less than three months; and
(Hi) growth must not have any abnormalities.
The first criterion is extreJrely important. The formation of callus may result in changes to the characteristics of the cultivar being cultured. Callus tissue is a collection of disorganised cells where the probability of changes to the structure of cells is high. For example, changes occurring in a plant cultured from callus will vary it from the original untreated plant in its clonal attributes and characteristics. This type of variation is known as somatic variation. The possibility of somatic variation must be avoided when
culturing plants that are part of a germplasm collection. The germpJasm in a collection must retain its original characteristics unchanged by somatic variation, therefore any callus stage is avoided.
The second criterion is important to ensure that meristem culturing is not too time-consuming. If the length of time for a meristem to grow into a plantIet is greater than three months the culture medium is not satisfactory, and the medium is rejected.
The third criterion refers to possible growth abnormalities not associated with somatic variation. These abnormalities may include vitrification which is observed as a swelling ofleaves and stems resulting in a 'wet glassy' appearance. It seems that the major factor responsible for vitrification is not the medium but the high humidity of the atmosphere in the tissue culture container.
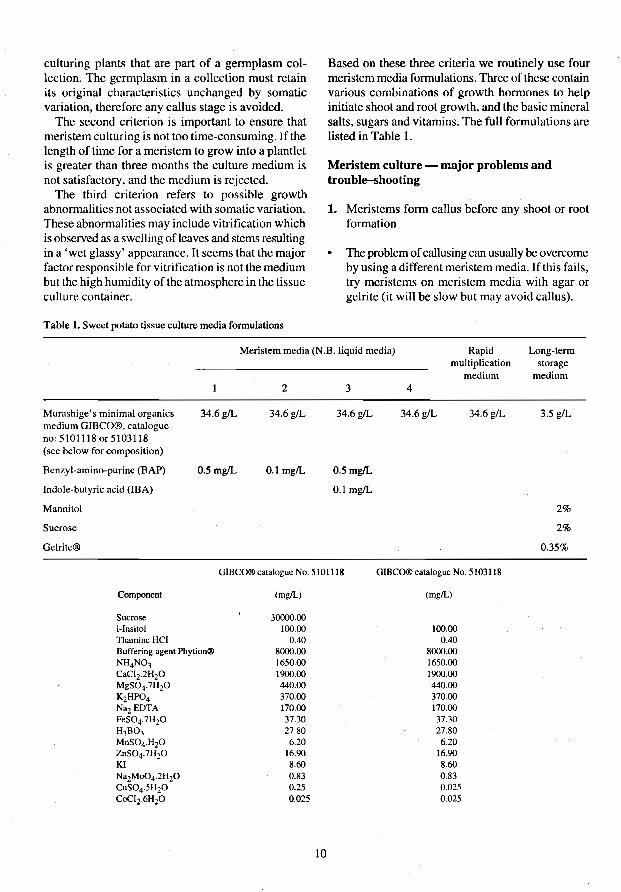
Table 1. Sweet potato tissue culture media formulations
Based on these three criteria we routinely use four meristem media formulations. Three of these contain various combinations of growth hormones to help initiate shoot and root growth, and the basic mineral salts, sugars and vitamins. The full formulations are listed in Table 1.
Meristem culture - major problems and trouble-shootiug
1. Mcristems form callus before any shoot or root formation
• The problem of callusing can usually be overcome by using a different meristem media. If this fails, try meristcms on meristem media with agar or gelrite (it will be slow but may avoid callus).
Meristem media (N.B. liquid media) Rapid Long-term
Murashige's minimal organics medium GIBCO®. catalogue no: 5101118 or 5103118 (see below for composition)
BenzyI~amino-purine (BAP)
Indole-butyric acid (IBA)
Mannitol
Sucrose
Gelrile®
34.6g/L
0.5mgIL
2
34.6glL
0.1 mgIL
3
34.6gIL
0.5mgIL
0.1 mgIL
GlBCO® catalogue No. 510 1118
Component (mgIL)
Sucrose 30000.00 i-Insilol 100.00 Thamine HCI 0.40 Buffering agent Phytion® 8000.00 NH4N03 1650.00 CaCIZ·2HZO 1900.00 MgS04·7HZO 440.00 K2HP04 370.00 NaZ EDTA 170.00 FeS04·7HZO 37.30 H3B03 27.80 MnS04·HzO 6.20 ZnS04·7H20 16.90 KI 8.60 NaZMo04·2H20 0.83 CuS04·5HzO 0.25 CoCIZ·6HzO 0.025
10
multiplication storage
4
34.6glL
medium medium
34.6gIL 3.5 gIL
2%
2%
0.35%
GIBCO® catalogue No. 5103118
(mgIL)
100.00 0.40
8000.00 1650.00 1900.00 440.00 370.00 170.00 37.30 27.80 6.20
16.90 8.60 0.83 0.025 0.025
2. Meristems growing slowly
• This can be prevented by changing the meristem medium every 14 days (remember to use only 5 mL of meristem medium in 50 mL conical flasks).
• Check that lighting is adequate and if possible use a shaker to agitate the medium.
3. Meristem cultures with growth abnormalities
• When a range of media is used, abnormalities may occur with particular sweet potato varieties. If this occurs, throw them out do not persist with these cultures. Some growth abnormalities occur if there is more than 5 mL liquid medium in the culture vessel. (Remember to check that growth-room temperature and light conditions are stable, if abnormalities continue.)
4. Meristems do not grow
• Is the medium correct for sweet potato meristem culture?
The most common reason for meristems not growing is that they have been dissected from old plant material. Make sure young, actively growing vines for your meristem culture are used.
• Either you have not dissected the actual meristem or it is too small or the meristem was not transferred to the medium, e.g. it has possibly stuck to the hypodermic needle.
Tissue Culture Multiplication for Transfer to the Glasshouse
Tissue culture rapid multiplication of the plantlets derived from meristem cultures is carried out by a simple form of rapid nodal regeneration. This bulking-up of each line is essential to maintain the 'mother stock' cultures and to provide cultures for planting in the glasshouse for disease indexing.
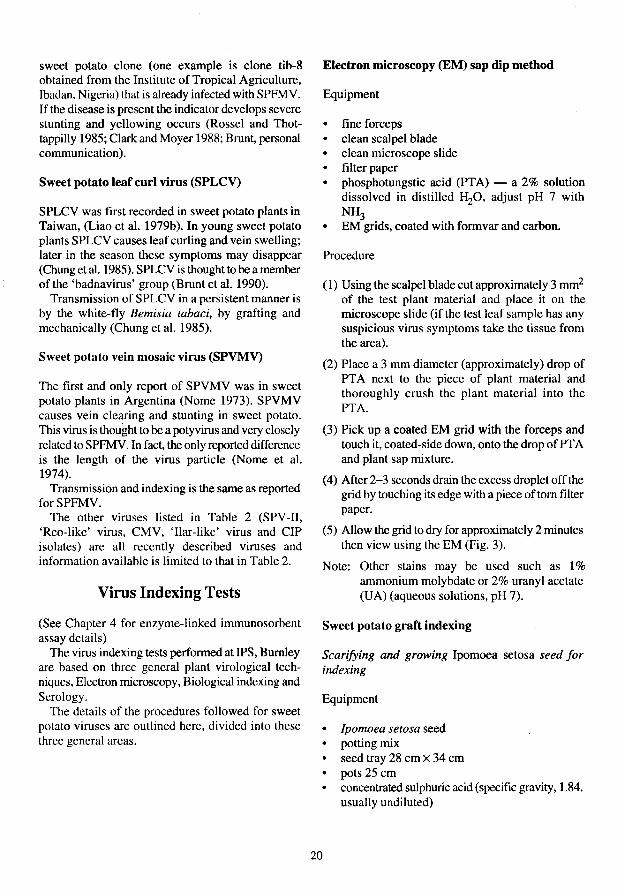
The original tissue culture can be dissected into nodal pieces which are then further cultured on rapid multiplication medium. These cultures grow rapidly and a full planllet will grow in 3-4 weeks (see Fig. 1: Figs 1-8 appear on pages 23-26).
11
Equipment
(A generalised description of tissue culture equipment and procedures is given in theAppendix.)
(1) A functional separate tissue culture laboratory.
(2) Rapid multiplication medium (made as described in Table 1) in 10-20 mL a1iquots in 250 mL plastic vials and autoclaved.
(3) Dissection equipment scalpels, long-handled forceps.
(4) Growth shelves.
Procedure
Once a sterile culture has been established from meristem culture all work must be done in the laminar flow cabinet to reduce risk of re-infection.
(1) The first step before rapid multiplication of cultures is to double-check for the presence of any infections. These may appear as a cloudiness in the liquid (usually yeast or bacteria) or a range of coloured growths (usually fungi). It is also important to check that plant growth looks normal. Plantlets should not have thickened stems, abnormal leaves or other distortions or any callusing. Discard any cultures which do not look normal- remember that one plantlet is often the basis for large-scale multiplication, so any problem will also be multiplied.
(2) After normal preparation to ensure that the cabinet, equipment, operator etc. are as sterile as possible, a planllet is removed from its vial using sterile forceps and cut into single nodal sections. At the first subdivision only the top 2-3 nodes are kept as the lower nodes can harbour yeast or bacterial infections. At later subdivisions all nodes are used.
(3) Nodes are placed in fresh vials of medium and reincubated. Nodes may be placed into separate vials or several single-node pieces may be placed in the same vial. Culturing of several nodal pieces together saves space in the growth room and uses less media. However. during the final subdivision, nodal pieces should be placed in separate vials or with a maximum of two nodes per vial beeause. if more than one or two plantlets are placed in one vial, the roots become entangled and planting-out
of the plantlets into soil becomes difficult to perfonn without causing root damage.
Nodal pieces in fresh liquid medium are returned to the growth room and after 2-3 weeks are ready for further subdivision or planting-out.
Rapid multiplication - Major problems and trouble-shooting
1. Nodal pieces do not grow, or grow very slowly. If this occurs there are a number of possible reasons.
• Check your medium. Is your medium the right one for sweet potatoes? Is the pH correct? Is the medium overcooked? (it is usually a yellow colour if you have autoclaved the medium for more than 20 minutes.) Has the powdered medium become wet in the jar? Is the volume of your medium more than 7.5 mL?
Normally, if these problems occur, all nodal pieces in a certain batch of medium will be affected. If the medium is not correct, make up fresh medium.
Check your growth shelf conditions.
Is the temperature correct and constant? (Variation of±5°C from the set temperature is acceptable.) Is the light inadequate? (usually the plantlet will have yellow leaves if this is the case). Are some areas of your growth shelves hot from the fluorescent lights?
Growth shelf condition problems can be avoided easily by monitoring the conditions daily.
• Check the plantlet material used for npid multiplication.
Are the nodal pieces from an old plantlet? (With some varieties old plantIets do not multiply quickly). Is the apical bud the only tissue piece developing? (Some varieties of plantlets do not develop axillary buds unless young plantlets 4-6 weeks old are used for mUltiplication.)
2. Cultures are contaminated with fungi or bacteria.
This problem occurs in all tissue culture laboratories. It is extremely important that contamination is stopped it usually begins with poor sterile technique.
• Is your laboratory clean? Is there a constant flow of air from outside into the laboratory? (This can often be prevented by restricting access of people not associated with tissue culture, or by having a double door or air lock).
• Have you cleaned down the benches with alcohol or bleach recently? Is your sterile technique not efficient? Is your laminar flow cabinet (if you have one) working? Remember laminar flow cabinet filters must be checked every year, if possible.
• Have you tried to identify the contaminant? Often if you know with what bacteria or fungi your cultures are contaminated, you can identify the source. If possible it is good practice to check the laboratory for fungal spores occasionally. Ask a mycologist to prepare some potato dextrose agar plates for you. Then place these around the laboratory for one hour. Collect the plates and replace their lids and then incubate them (not in the tissue culture lab). This will help to identify problem areas.
It is important to differentiate between random infections and ongoing infections possibly being transferred from culture to culture. If the spread of infection is ongoing the source of infection must be found and eradicated.
Transfer of Tissue Cultures to the Glasshouse or Insect~Proof
Screenhouse
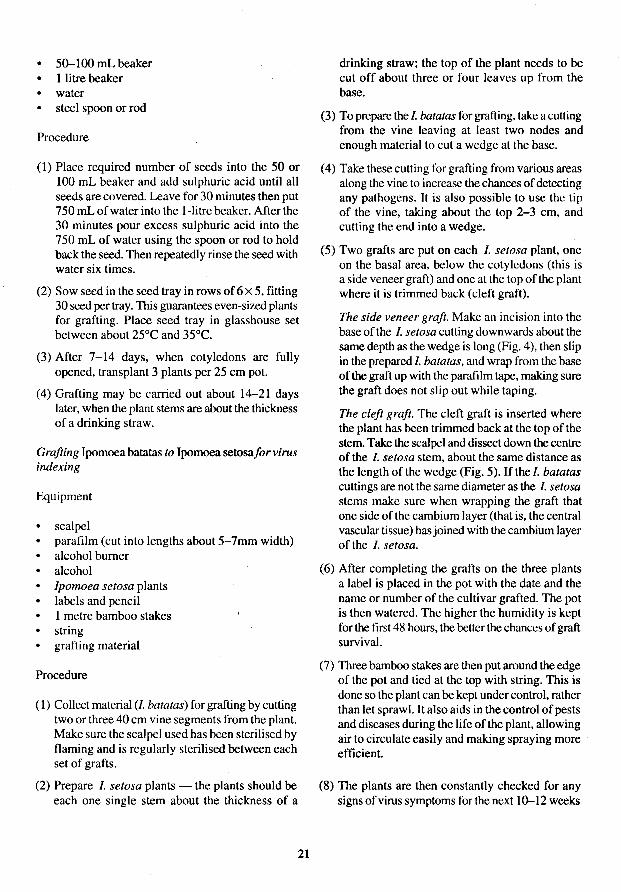
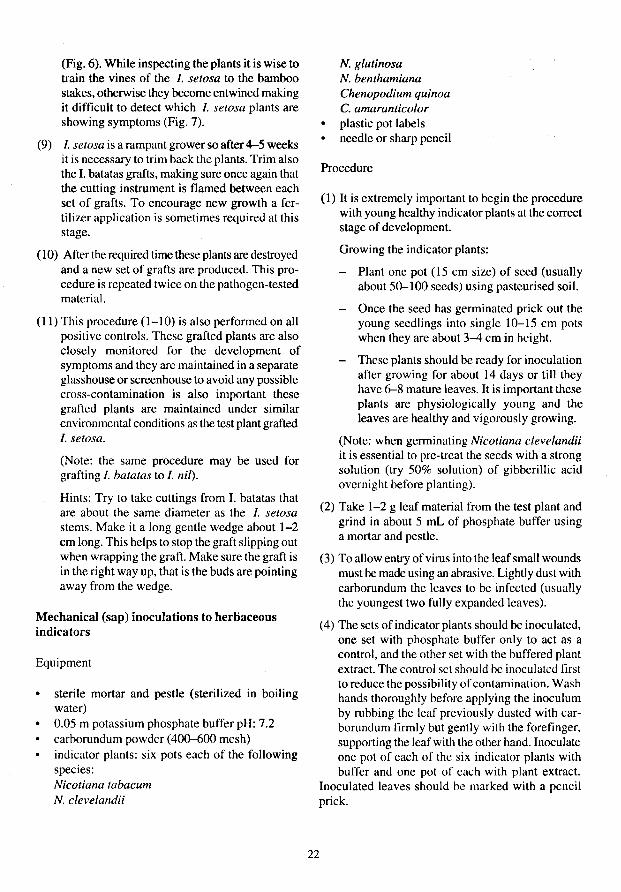
Planting of in vitro plantlets must be done maintaining pathogen-free conditions, if possible. for as long as possible. All planting of tissue cultures should be done in either an insect-proof glasshouse or an insect-proof screenhouse, to avoid any immediate pathogen reinfection by insect vectors. Generally plantlets between 5 and 10 cm in height, with fully developed roots and stems, are selected for this further propagation (see Fig. 2).
Equipment
(1) An 'insect -proof glasshouse or screcnhouse with adequate drainage and available light, benches separate from any other plants of unknown health status.
(2) Sterilised pots or planting beds (2~ 30 cm plastic pots).
12
(3) Pasteurised soil mix.
(4 Alcohol burner for flame sterilising.
(5) Forceps for removing plantlets from vials.
Procedure
It has been shown that sweet potato tissue cultures can be easily transferred from in vitro to a soil-based medium in glasshouse or screenhouse.
We have found the most efficient and successful method is to transfer the whole tissue-culture plantlet (i.e. no need to trim the long roots) directly into a two-thirds full pot of pasteurised soil. There is usually no need for a mist bed or any plastic covering for hardening-off the plantlet. But the plantiet must be watered well so the soil is saturated. It is important that the delicate roots are surrounded by water and that there are no air pockets. Watering must be carefully monitored to reduce wilting of the plantlet, particularly in the first 48 hours.
The transplanting of the tissue-culture plantlet into soil is dependent on a clean, insect-free tropical glasshouse or screenhouse with adequate available light. If problems occur when planting out tissuecultured plants. They usually are directly related to the horticultural conditions.
The planting-out procedure is as follows:
(1) Select 4-5-week-old tissue cultures that have a well-developed root system.
(2) Transfer whole tissue-culture plantlets to pots of soil using long-handled forceps. Remember to flame instruments between plants.
(3) Ensure the root system is well covered with soil and then press firmly around the base of the plant before watering-in well. It is important to note that plants will often wilt soon after planting. These leaves may not recover and eventually die back. However, the new tip growth will grow rapidly if the glasshouse or screenhouse conditions are favourable.
Planting out - major problems and trouble-shooting
1. Soil compaction
Soil compaction can cause plantlets to wilt and die and is a common problem in planting
13
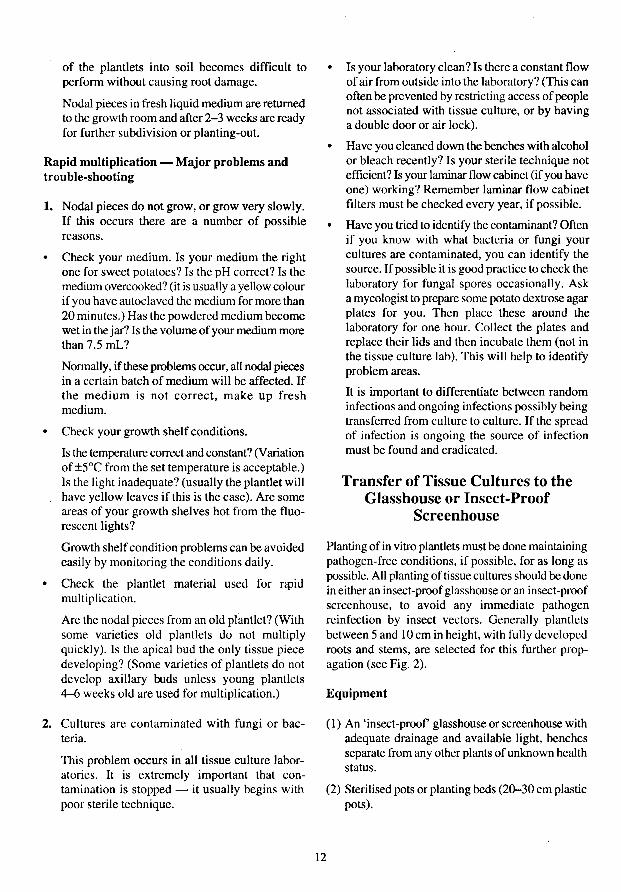
tissue-culture plantiets. The soft roots of the tissue-culture plantlet need a well-aerated soil mix that will not compact or become waterlogged.
2. Hot weather
If you are planting tissue cultures in a screenhouse in hot weather you must take extra care with new plantlets. It is best to plant out the cultures in the late afternoon and to add extra shadecloth for a few days until they are established.
3. Etiolation
shaded or have little available light plants can be etiolated - i.e. thin vines with long internodes and small yellowing leaves.
Maintenance of Plants Grown for Disease Indexing
Once the tissue-culture plantlets are established in the insect-proof screenhouse or glasshouse there are a number of important horticultural practices that must be performed routinely. The following points are important to optimise the disease indexing procedure and to ensure there is no cross-contamination between clones being indexed.
(1) Keep the glasshouse or screenhouse free of all insects. You may need to employ a regular spray program. It is essential to monitor the plants dail y for insects, (note: always check the glasshouse or screenhouse first before going to the field to minimise the risk of carrying insects, possibly aphids carrying virus, in or on your clothing).
(2) Keep the pots on benches which are well drained.
(3) All cutting tools must be flame-sterilised between plants. Note: (All tissue cultured plants must be treated as potentially infected with disease even after they are pathogen-tested).
(4) Once tissue-culture plantlets have established remove the shoot tips so the axillary buds form many young shoots for graft indexing.
(5) Do not allow plants to twine together, keep them separate at all times.
CHAPTER 3
Indexing of Meristem Cultured Clones for Viruses and Mycoplasma-Like Organisms (MLO)
Testing plants for the presence of viruses is known as virus indexing. At IPS, the virus indexing procedure for sweet potatoes involves a combination of three general indexing techniques.
Electron microscopy
Leaf sap preparations are viewed using the electron microscope to detect the presence of viruses.
Indicator plants
Often host plants infected with a virus or viruses do not show many visible or easily identifiable symptoms. Indicator plants are other species of plants which give consistent well-defined symptoms when infected with a particular virus. The test is conducted by grafting material from the sweet potato test clone to the indicator species or by mechanically inoculating the indicator plant with sweet potato sap. It is possible to determine whether or not virus is present in a sweet potato host plant by the development or absence of symptoms on the indicator plant.
Serological tests
Plant viruses can be purified and injected into an animal such as a rabbit whose immune system then produces antibodies to the virus. Blood is collected from the animal and the antibody fraction separated and used in tests to determine whether or not plant viruses are present in the plant sap. The binding of the antigen (in this case virus) with its specific antibody is the basis of a whole range of serological tests.
A combination of all the above techniques is used to test for a possible 16 sweet potato viruses. Table 2 lists these viruses, their morphology, methods available for disease indexing including possible transmission to indicator plants, and serological tests
used at IPS. The table presents selected documented information on all the viruses currently known to infect sweet potato plants, though more viruses are likely to be found as work is conducted on the crop. More detailed information on the viruses is given in later sections.
In the past, very little research has been conducted to improve sweet potato virus indexing techniques. However, at least 10 laboratories are now working on aspects of sweet potato virus research which over the last few years has highlighted many problems. It has been found that the viruses are often in low concentration in the sap, that the concentration of virus varies throughout the plant, and that some factor in the sweet potato plant sap inhibits the inoculation of indicator plants with sweet potato sap. Sweet potato viruses also appear to have a narrow host range and this restricts the number of species which can be used as indicator plants.
Considering these problems, an indexing program was developed at IPS, Bumley, for testing for sweet potato viruses, aimed at maximizing opportunities for detecting the largest range of viruses:
Summary of the Disease Indexing Program
Following heat treatment and meristem tissue culture, in vitro plantlets are screened for rod viruses by viewing a sap dip preparation using the electron microscope. If no virus particles are found the plantlets are planted in the glasshouse.
Cuttings from established glasshouse plants are then grafted onto Ipomoea setosa. Each I. setosa plant is grafted with two vine segments of the sweet potato test clone. A total of six grafts are made to three I. setosa plants. Sweet potato tip cuttings and older vine pieces are used for a basal graft (side veneer) and a tip graft (cleft) on each I. setosa plant. The
14
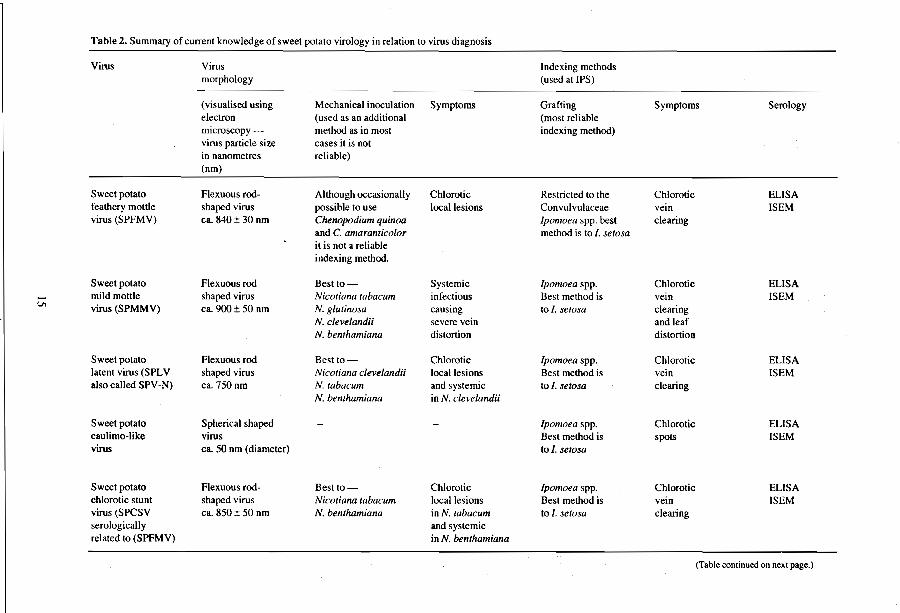
Table 2. Summary of current knowledge of sweet potato virology in relation to virus diagnosis
Virus Virus Indexing methods morphology (used at IPS)
(visualised using Mechanical inoculation Symptoms Grafting Symptoms Serology electron (used as an additional (most reliable microscopy method as in most indexing method) virus particle size cases it is not in nanometres reliable)
Sweet potato Ae:mous rod- Although occasionally Chlorotic Restricted to the Chlorotic ELlSA feathery mottle shaped virus possible to use local lesions Convulvulaceae vein ISEM virus (SPFMV) ca. 840 ± 30 nm Chenopodium quinoa Ipomoea spp. best clearing
and C. amaranticolor method is to I. setosa it is not a reliable indexing method.
Sweet potato Aexuousrod Bestto- Systemic Ipomoea spp. Chlorotic ELlSA - mild mottle shaped virus Nicotiana labacum infectious Best method is vein ISEM VI virus (SPMMV) ca. 900 ± 50 nm N. glutmosa causing to I. setosa clearing
N. clevelandii severe vein and leaf N. benthamiana distortion distortion
Sweet potato Aexuousrod Best to- Chlorotic Ipomoea spp. Chlorotic ELlSA latent virus (SPL V shaped virus Nicotiana clevelandii local lesions Best method is vein ISEM also called SPY -N) ca. 750nm N. tabacum and systemic to l. setosa clearing
N. benthamiana in N. clevelandii
Sweet potato Spherical shaped Ipomoea spp. Chlorotic ELlSA caulimo-like virus Best method is spots ISEM virus ca. 50 nm (diameter) to/. setosa
Sweet potato Aexuous rod- Bestto- Chlorotic Ipomoea spp. Chlorotic ELlSA chlorotic stunt shaped virus Nicotiana tabacum local lesions Best method is vein ISEM virus (SPCSV ca. 850 ± 50 nm N. benlhamiana in N. lubacum to I. serosa clearing serologically and systemic related to (SPFMV) in N. benthamiana
(Tablc continued on next page.)
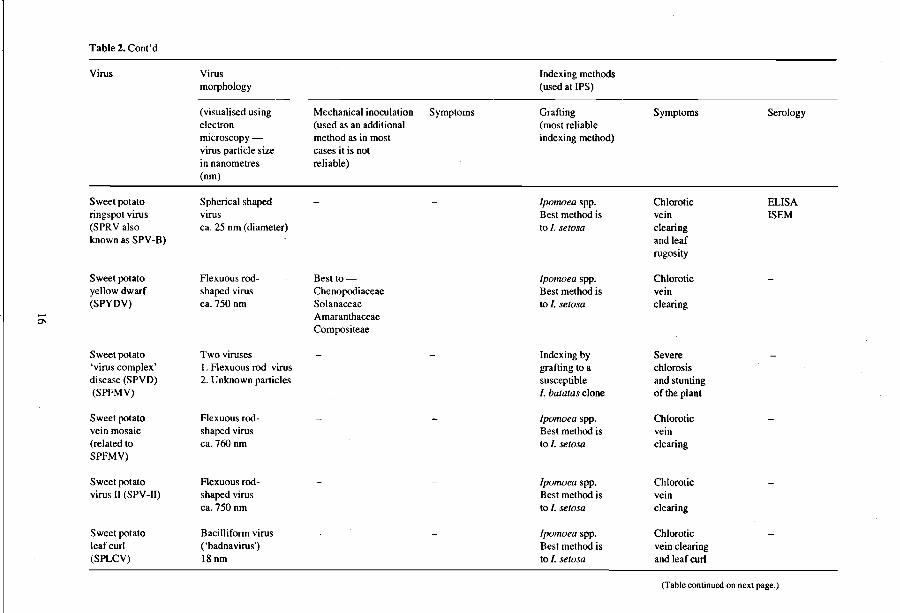
Table 2. Cont'd
Virus Virus Indexing methods morphology (used at IPS)
(visualised using Mechanical inoculation Symptoms Grafting Symptoms Serology electron (used as an additional (most reliable microscopy - method as in most indexing method) virus particle size cases it is not in nanometres reliable) (nm)
Sweet potato Spherical shaped Ipomoea spp. Chlorotic ELISA ringspot virus virus Best method is vein ISEM (SPRValso ca. 25 nm (diameter) to I. setosa clearing known as SPY-B) and leaf
rugosity
Sweet potato F1exuous rod- Best to- Ipomoea spp. Chlorotic yellow dwarf shaped virus Chenopodiaceae Best method is vein (SPYDV) ca. 750 nm Solanaceae to I. setosa clearing - Amaranthaceae
0\ Compositeae
Sweet potato Two viruses Indexing by Severe 'virus complex' I. F1exuous rod virus grafting to a chlorosis disease (SPVD) 2. Unknown particles susceptible and stunting (SPFMV) I. batatas clone of the plant
Sweet potato F1exuous rod- Ipomoea spp. Chlorotic vein mosaic shaped virus Best method is vein (related to ca. 760 nm to I. setosa clearing SPFMV)
Sweet potato F1exuous rod- Ipomoea spp. Chlorotic virus 11 (SPV -11) shaped virus Best method is vein
ca. 750 nm to I. setosa clearing
Sweet potato Bacilliform virus Ipomoea spp. Chlorotic leaf curl ( 'badnavirus') Best method is vein clearing (SPLCV) 18nm to I. setosa and leaf curl
(Table continued on next page.)
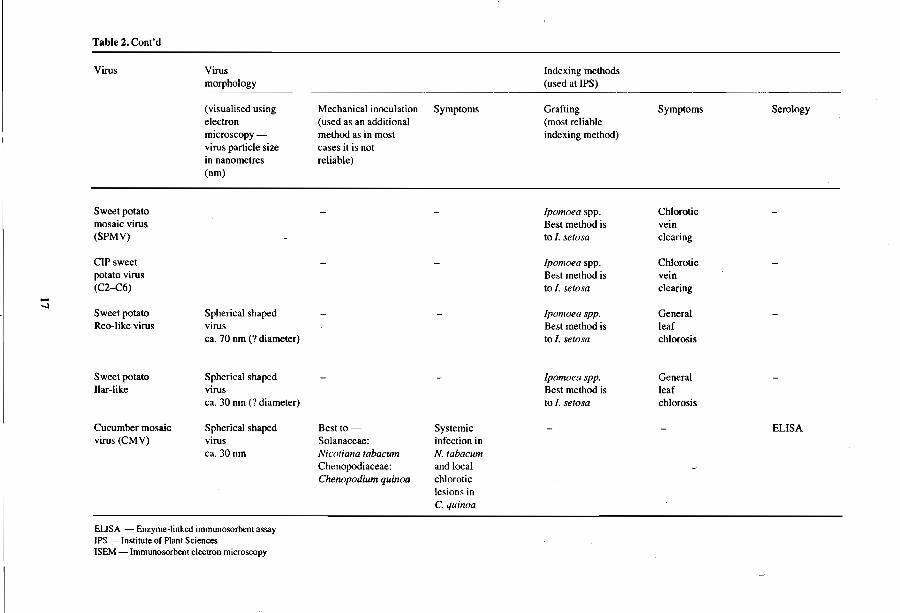
Table 2. Cont'd
Virus Virus Indexing methods morphology (used at !PS)
(visualised using Mechanical inoculation Symptoms Grafting Symptoms Serology electron (used as an additional (most reliable microscopy - method as in most indexing method) virus particle size cases it is not in nanometres reliable) (nm)
Sweet potato Ipomoea spp. Chlorotic mosaic virus Best method is vein (SPMV) to I. setosa clearing
CIP sweet Ipomoea spp. Chlorotic potato virus Best method is vein (C2-C6) to I. setosa clearing ....
-I Sweet potato Spherical shaped Ipomoea spp. General Reo-like virus virus Best method is leaf
ca. 70 nm (7 diameter) to l. setosa chlorosis
Sweet potato Spherical shaped Ipomoea spp. Gcneral liar-like virus Best method is leaf
ca. 30 nm (7 diameter) to I. setosa chlorosis
Cucumber mosaic Spherical shaped Best to Systemic ELlSA virus (CMV) virus Solanaceae: infection in
ca.30nm Nicotiana tabacum N.tabacum Chenopodiaceae: and local Cherwpodium quinoa chlorotic
lesions in C. quinoa
EUSA - Enzyme-linked immunosorbcnt assay IPS - Institute of Plant Sciences ISEM - Immunosorbent electron microscopy
grafted l. setosa plants are viewed for virus symptoms for 12 weeks. This graft indexing is then repeated resulting in a total of 12 grafts for each test sweet potato clone over a 4-6-month period. If any symptoms develop when compared with healthy controls further grafting will be done to I. nil and mechanical inoculations will be tested on a range of herbaceous indicators. This testing is also followed by serological indexing.
Once the grafts to l. selosa have taken and virus symptoms are observed on all positive controls, samples from the test clone and grafted I. selosa are tested for viruses using serological indexing. Enzyme-linked immunosorbent assays (ELISA) are conducted to test for the presence of SPFMV, SPMMV, SPCL V, SPL V and SPRY. These tests are repeated on I. setosa material from the second round of graft indexing.
The sweet potato test clone is also tested for the 'Little Leaf' disease caused by a myeoplasma-like organism (MLO). A method using fluorescence microscopy is conducted on sections of sweet potato phloem tissue from the leaf midrib.
Sweet potato clones are screened again for the rod viruses by viewing a sap dip preparation using the electron microscope.
If plants yield negative results to all the above tests they are designated 'pathogen-tested' and maintained as tissue cultures on long-term storage medium.
Additional Information on Important Viruses
Table 2 presents a summary of the current knowledge of sweet potato virology in relation to virus diagnosis. It is important to present further notes on the sweet potato viruses to understand fully some of the problems and complexities of diagnostic virus testing. Important references are also listed for complementary reading information.
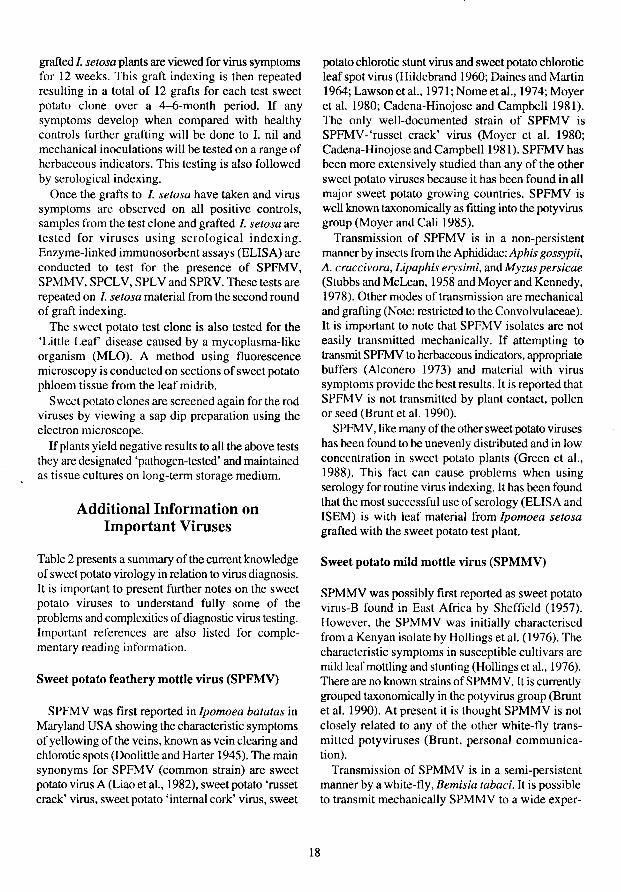
Sweet potato feathery mottle virus (SPFMV)
SPFMV was first reported in Ipomoea batalas in Maryland USA showing the characteristic symptoms of yellowing of the veins, known as vein clearing and chlorotic spots (Dooliltle and Harter 1945). The main synonyms for SPFMV (common strain) are sweet potato virus A (Liao et aI., 1982), sweet potato 'russet crack' virus, sweet potato 'internal cork' virus, sweet
18
potato chlorotic stunt virus and sweet potato chlorotic leaf spot virus (Hildcbrand 1960; Daines and Martin 1964; Lawsonet aL, 1971; Nomeetal., 1974; Moyer et al. 1980; Cadena-Hinojose and CampbellI981). The only well-documented strain of SPFMV is SPFMV - 'russet crack' virus (Moyer et aL 1980; Cadena-Hinojose and CampbellI981). SPFMV has been more extensively studied than any of the other sweet potato viruses because it has been found in all major sweet potato growing countries. SPFMV is well known taxonomically a'l fitting into the potyvirus group (Moyer and Cali 1985).
Transmission of SPFMV is in a non-persistent manner by insects from the Aphididae: Aphis gossypii. A. craccivora, Upaphis erysimi, and Myzus persicae (Stubbs and McLean, 1958 and Moyer and Kennedy. 1978). Other modes of transmission are mechanical and grafting (Note: restricted to the Convolvulaceac). It is important to note that SPFMV isolates are not easily transmitted mechanically. If attempting to transmit SPFMV to herbaceous indicators, appropriate buffers (Alconero 1973) and material with virus symptoms provide the best results. It is reported that SPFMV is not transmitted by plant contact, pollen or seed (Brunt et aL 1990).
SPFMV, like many of the other sweet potato viruses has been found to be unevenly distributed and in low concentration in sweet potato plants (Green et aI., 1988). This fact can cause problems when using serology for routine virus indexing. It has been found that the most successful use of serology (ELISA and ISEM) is with leaf material from Ipomoea setosa grafted with the sweet potato test plant.
Sweet potato mild mottle virus (SPMMV)
SPMMV was possibly first reported as sweet potato virus-B found in East Africa by Sheffield (1957). However, the SPMMV was initially characterised from a Kenyan isolate by Hollings et al. (1976). The characteristic symptoms in susceptible cultivars are mild leaf mottling and stunting (Hollings et aI., 1976). There are no known strains of SPMMV. It is currently grouped taxonomically in the potyvirus group (Brunt et al. 1990). At present it is thought SPMMV is not closely related to any of the other white-fly transmitted potyviruses (Brunt, personal communication).
Transmission of SPMMV is in a semi-persistent manner by a white-fly, Bemisia tabaci. It is possible to transmit mechanically SPMMV to a wide exper-

imental host range (HoIlings et aI., 1976). However, there is no recorded transmission by seed (Brunt et aI., 1990).
Although SPMMV has a wide experimental host range it can be difficult to mechanically transmit to other herbaeeous hosts not in the Convulvulaceae. When mechanically transmitting SPMMV directly from sweet potato the frequency of transmission can be as low as 1 in 100.
Sweet potato latent virus (SPL V)
SPL V was first recorded as sweet potato virus-N (SPV-N) in Taiwan (Liao 1979a). In most sweet potato cultivars there are no symptoms associated with SPL V infection. SPL V has only been reported to infect sweet potato crops in Taiwan (Liao et al. 1982). It is currently thought to be grouped in the potyvirus group (Green et al. 1988; Brunt et al. 1990).
There have been no reports of insect transmission; SPL V transmission is by grafting or mechanical inoculation (Liao et al. 1982).
SPL V, like SPFMV, is often unevenly distributed in the sweet potato plant, (Green et al. 1988) and therefore problems may occur when attempting to detect SPL V directly from swect potato plants. As discussed above it is best to perform serological diagnostic tests using leaf material from Ipomoea setosa plants grafted with the test sweet potato plant. Much ofthe field research work on SPL V (and other sweet potato viruses) has been done in conjunction with the Plant Pathology group at the Asian Vegetable Research and Development Centre (A VRDC), Shanhua, Tainan 74199, Taiwan.
Sweet potato caulimo-like virus (SPCL V)
SPCL V was first recorded in sweet potato plants from Puerto Rico that had been sent to Glasshouse Crops Research Institute (Atkey and Brunt 1987). Sweet potato plants infected with SPCL V show no obvious viral symptoms. SPCL V has been found throughout the South Pacifie Region (including Kingdom of Tonga, Papua New Guinea, Solomon Islands, Australia and New Zealand), Kenya and Madeira. SPCL V is possibly a member of the caulimovirus group (Brunt et aI. 1990).
There are no reports of insect vector transmission of SPCL V and it is only recorded as transmissible
19
by grafting to plants in the Convulvulaceae (Alkey and Brunt 1987).
At IPS, Burnley, ELISA-testing using graftinfected Ipomoea setosa has provided excellent results. The SPCL V infection produces excellent chlorotic spot symptoms on 1. setosa plants. Isolates of SPCL V from the South Pacific region are easily detected using this method.
Sweet potato ringspot virus (SPRV)
SPRY was first recorded in sweet potato plants from Papua New Guinea that had been sent to Glasshouse Crops Research Institute (Brunt et al. 1990). Sweet potato plants infected with SPRY may show chlorotic ringspots but in most infected cultivars plants are symptomless. SPRY is possibly a nepovirus (Brunt et al. 1990)
There are no reports of insect transmission of SPRV. Possible transmission of SPRY is by grafting, mechanical and seed (Brunt et al. 1990).
This virus is still to be fully characterised. At present graft transmission to Ipomoea setosa and possibly ELISA are the best methods of diagnosis.
Sweet potato yellow dwarf virus (SPYDV)
SPYDV was first recorded in sweet potato plants from Taiwan (Liao et al. 1979b). Infected sweet potato plants are stunted and show a yellowing of the leaves (Liao et al. 1979). SPYDV is possibly a member of the potyvirus group (Brunt et al. 1990).
Transmission of SPYDV is in a persistent manner by the white-fly Bemisia tabaci; non-vector transmission is by grafting and mechanical means (Chung et al. 1986).
Sweet potato 'virus complex' disease (SPVD)
SPVD is an infection caused by the combination of SPFMV (known as the 'aphid transmitted component') and a virus-like agent transmitted by white-fly (Bemisia tabaci) (Rossel and Thottappilly 1985). This disease causes severe stunting in sweet potato plants. This syndrome is thought to be restricted to Nigeria (Clark and Moyer 1988).
Indexing for this disease can cause problems because when the 'white-fly transmitted component' is graft-transmitted to Ipomoea setosa only very mild chlorotic symptoms occur. The best method of diagnosis is to graft the test clone to very susceptible
sweet potato clone (one example is clone tib-8 obtained from the Institute of Tropical Agriculture, Ibadan, Nigeria) that is already infected with SPFMV. If the disease is present the indicator develops severe stunting and yellowing occurs (Rossel and Thottappilly 1985; Clark and Moyer 1988; Brunt, personal communication).
Sweet potato leaf curl virus (SPLCV)
SPLCV was first recorded in sweet potato plants in Taiwan, (Liao et al. 1979b). In young sweet potato plants SPLCV causes leaf curling and vein swelling; later in the season these symptoms may disappear (Chung et al. 1985). SPLCV is thought to be a member of the 'badnavirus' group (Brunt et al. 1990).
Transmission of SPLCV in a persistent manner is by the white-fly Bemisia tabaci, by grafting and mechanically (Chung et al. 1985).
Sweet potato vein mosaic virus (SPVMV)
The first and only report of SPVMV was in sweet potato plants in Argentina (Nome 1973). SPVMV causes vein clearing and stunting in sweet potato. This virus is thought to be a potyvirus and very closely rclated to SPFMV. In fact, the only reported difference is the length of the virus particle (Nome et al. 1974).
Transmission and indexing is the same as reported forSPFMV.
The other viruses listed in Table 2 (SPV-H, 'Reo-like' virus, CMV, 'Ilar-like' virus and CIP isolates) are all recently described viruses and information available is limited to that in Table 2.
Virus Indexing Tests
(See Chapter 4 for enzyme-linked immunosorbent assay details)
The virus indexing tests performed at !PS, Bumley are based on three general plant virological techniques, Electron microscopy, Biological indexing and Serology.
The details of the procedures followed for sweet potato viruses are outlined here, divided into these three general areas.
Electron microscopy (EM) sap dip method
Equipment
• fine forceps clean scalpel blade
• clean microscope slide filter paper phosphotungstic acid (PTA) - a 2% solution dissolved in distilled H20, adjust pH 7 with NH3 EM grids, coated with formvar and carbon.
Procedure
(1) Using the scalpel blade cut approximately 3 mm2
of the test plant material and place it on the microscope slide (if the test leaf sample has any suspicious virus symptoms take the tissue from the area).
(2) Place a 3 mm diameter (approximately) drop of PTA next to the piece of plant material and thoroughly crush the plant material into the PTA.
(3) Pick up a coated EM grid with the forceps and touch it, coated-side down, onto the drop of PTA and plant sap mixture.
(4) After 2-3 seconds drain the excess droplet off the grid by touching its edge with a piece of tom filter paper.
(5) Allow the grid to dry for approximately 2 minutes then view using the EM (Fig. 3).
Note: Other stains may be used such as 1 % ammonium molybdate or 2% uranyl acetate (UA) (aqueous solutions, pH 7).
Sweet potato graft indexing
Scarifying and growing Ipomoea setosa seed for indexing
Equipment
Ipomoea setosa seed potting mix
• seed tray 28 cm X 34 cm pots 25 cm
20
concentrated sulphuric acid (specific gravity, 1.84, usually undiluted)
• 50-100 mL beaker 1 litre beaker water
• steel spoon or rod
Procedure
(1) Place required number of seeds into the 50 or 100 mL beaker and add sulphuric acid until all seeds are covered. Leave for 30 minutes then put 750 mL of water into the I-litre beaker. After the 30 minutes pour excess sulphuric acid into the 750 mL of water using the spoon or rod to hold back the seed. Then repeatedly rinse the seed with water six times.
(2) Sow seed in the seed tray in rows of 6 X 5, fitting 30 seed per tray. This guarantees even-sized plants for grafting. Place seed tray in glasshouse set between about 25°C and 35°C.
(3) After 7-14 days, when cotyledons are fully opened, transplant 3 plants per 25 cm pot.
(4) Grafting may be carried out about 14-21 days later, when the plant stems are about the thickness of a drinking straw.
Grafting Ipomoea batatas to Ipomoea setosafor virus indexing
Equipment
• scalpel parafilm (cut into lengths about 5-7mm width) alcohol burner
• alcohol Ipomoea setosa plants labels and pencil 1 metre bamboo stakes string grafting material
Procedure
(1) Collect material (I. batatas) for grafting by cutting two or three 40 cm vine segments from the plant. Make sure the scalpel used has been sterilised by flaming and is regularly sterilised between each set of grafts.
(2) Prepare I. setosa plants the plants should be each one single stem about the thickness of a
21
drinking straw; the top of the plant needs to be cut off about three or four leaves up from the base.
(3) To prepare the I. balalas for grafting, take a cutting from the vine leaving at least two nodes and enough material to cut a wedge at the base.
(4) Take these cutting for grafting from various areas along the vine to increase the chances of deteeting any pathogens. It is also possible to use the tip of the vine, taking about the top 2-3 cm, and cutting the end into a wedge.
(5) Two grafts are put on each I. setosa plant, one on the basal area, below the cotyledons (this is a side veneer graft) and one at the top of the plant where it is trimmed back (cleft graft).
The side veneer graft. Make an incision into the base ofthe I. setosa cutting downwards about the same depth as the wedge is long (Fig. 4), then slip in the prepared l. batatas, and wrap from the base of the graft up with the parafilm tape, making sure the graft does not slip out while taping.
The cleft graft. The cleft graft is inserted where the plant has been trimmed back at the top of the stem. Take the scalpel and dissect down the centre of the I. setosa stem, about the same distance as the length of the wedge (Fig. 5). If the I. batatas cuttings are not the same diameter as the I. setosa stems make sure when wrapping the graft that one side of the cambium layer (that is, the central vascular tissue) has joined with the cambium layer of the I. setosa.
(6) After completing the grafts on the three plants a label is placed in the pot with the date and the name or number of the cultivar grafted. The pot is then watered. The higher the humidity is kept for the fIrst 48 hours, the better the chances of graft survival.
(7) Three bamboo stakes are then put around the edge of the pot and tied at the top with string. This is done so the plant can be kept under control, rather than let sprawl. It also aids in the control of pests and diseases during the life ofthe plant, allowing air to circulate easily and making spraying more efficient.
(8) The plants are then constantly checked for any signs of virus symptoms for the next 10-12 weeks
(Fig. 6). While inspecting the plants it is wise to train the vines of the I. setosa to the bamboo stakes, otherwise they become entwined making it difficult to detect which I. setosa plants are showing symptoms (Fig. 7).
(9) I. setosa is a rampant grower so after 4-5 weeks it is necessary to trim back the plants. Trim also the I. batatas grafts, making sure once again that the cutting instrument is flamed between each set of grafts. To encourage new growth a fertilizer application is sometimes required at this stage.
(10) After the required time these plants are destroyed and a new set of grafts are produced. This procedure is repeated twice on the pathogen-tested material.
(11) This procedure (1-10) is also performed on all positive controls. These grafted plants are also closely monitored for the development of symptoms and they are maintained in a separate glasshouse or screenhouse to avoid any possible cross-contamination is also important these grafted plants are maintained under similar environmental conditions as the test plant grafted I. setosa.
(Note: the same procedure may be used for grafting I. batatas to I. nil).
Hints: Try to take cuttings from I. batatas that are about the same diameter as the I. setosa stems. Make it a long gentle wedge about 1-2 cm long. This helps to stop the graft slipping out when wrapping the graft. Make sure the graft is in the right way up, that is the buds are pointing away from the wedge.
Mechanical (sap) inoculations to herbaceous indicators
Equipment
sterile mortar and pestle (sterilized in boiling water) 0.05 m potassium phosphate buffer pH: 7.2 carborundum powder (400--600 mesh) indicator plants: six pots each of the following species: Nicotiana tabacum N. clevelandii
N. glutinosa N. benthamiana Chenopodium quinoa C. amaranticolor plastic pot labels needle or sharp pencil
Procedure
(1) It is extremely important to begin the procedure with young healthy indicator plants at the correct stage of development.
Growing the indicator plants:
- Plant one pot (15 cm size) of seed (usually about 50-lOO seeds) using pasteurised soil.
- Once the seed has germinated prick out the young seedlings into single 10-15 cm pots when they are about 3-4 cm in height.
- These plants should be ready for inoculation after growing for about 14 days or till they have 6-8 mature leaves. It is important these plants are physiologically young and the leaves are healthy and vigorously growing.
(Note: when germinating Nicotiana clevelandii it is essential to pre-treat the seeds with a strong solution (try 50% solution) of gibberillic acid overnight before planting).
(2) Take 1-2 g leaf material from the test plant and grind in about 5 mL of phosphate buffer using a mortar and pestle.
(3) To allow entry of virus into the leaf small wounds must be made using an abrasive. Lightly dust with carborundum the leaves to be infected (usually the youngest two fully expanded leaves).
(4) The sets of indicator plants should be inoculated, one set with phosphate buffer only to act as a control, and the other set with the buffered plant extract. The control set should be inoculated first to reduce the possibility of contamination. Wash hands thoroughly before applying the inoculum by rubbing the leaf previously dusted with carborundum firmly but gently with the forefinger, supporting the leaf with the other hand. Inoculate one pot of each of the six indicator plants with buffer and one pot of each with plant extract.
Inoculated leaves should be marked with a pencil prick.
22
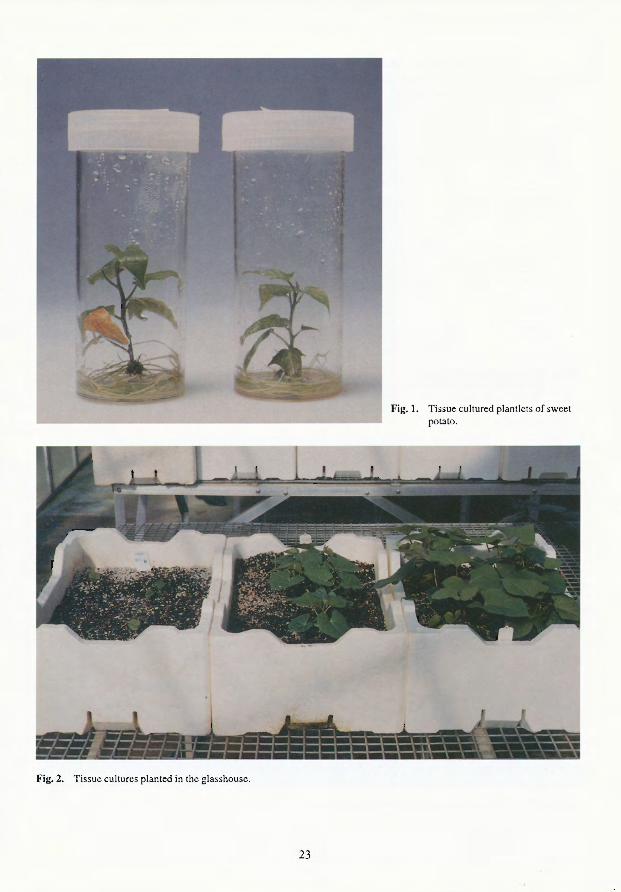
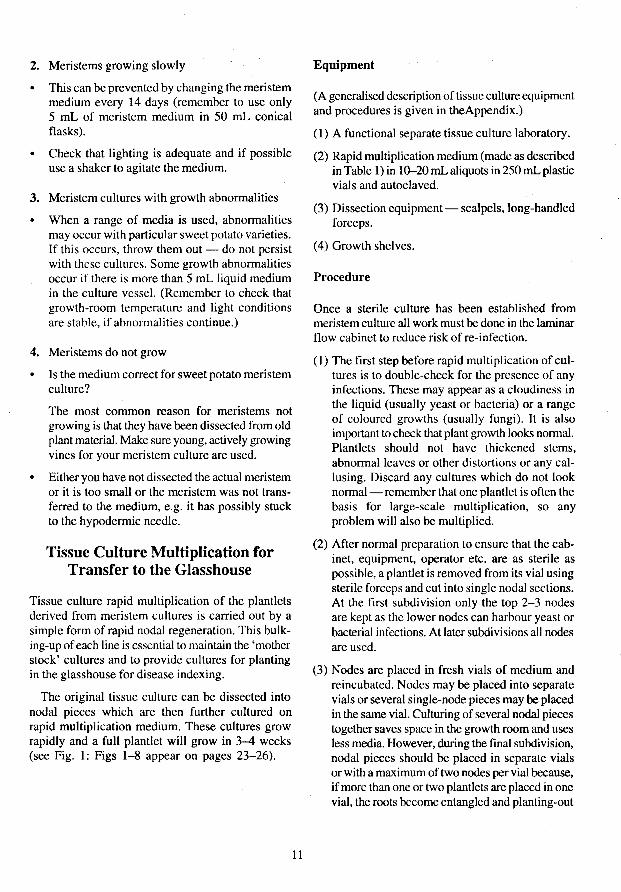
Fig. 2. Tissue cultures planted in the glasshouse.
23
Fig. 1. Tissue cultured plant1cts of sweet potato.
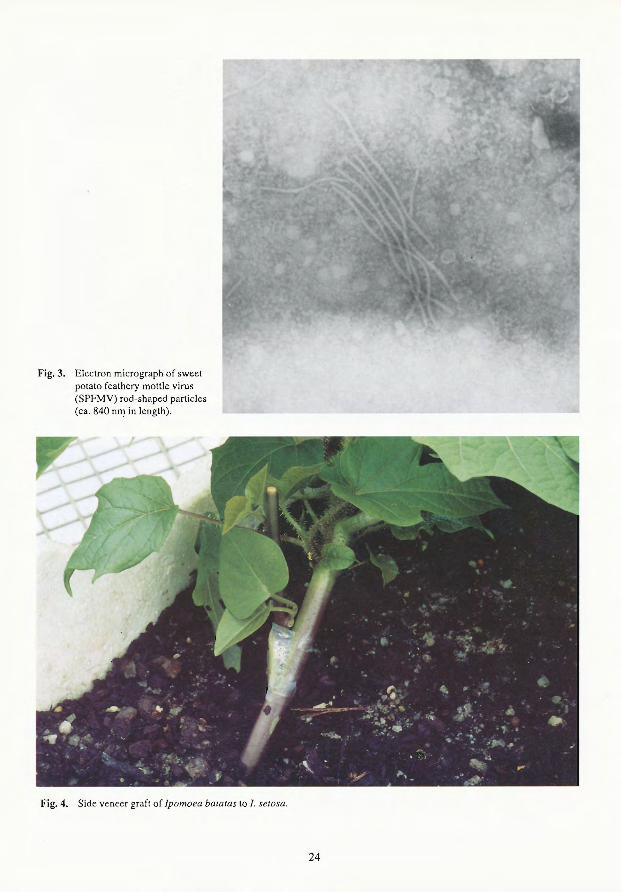
Fig. 3. Electron micrograph of sweet potato feathery mottlc virus (SPFMV) rod-shaped particles (ca. 840 nm in length).
Fig. 4. Side veneer graft of Ipomoea ba/a/as to I. se/oSQ.
24
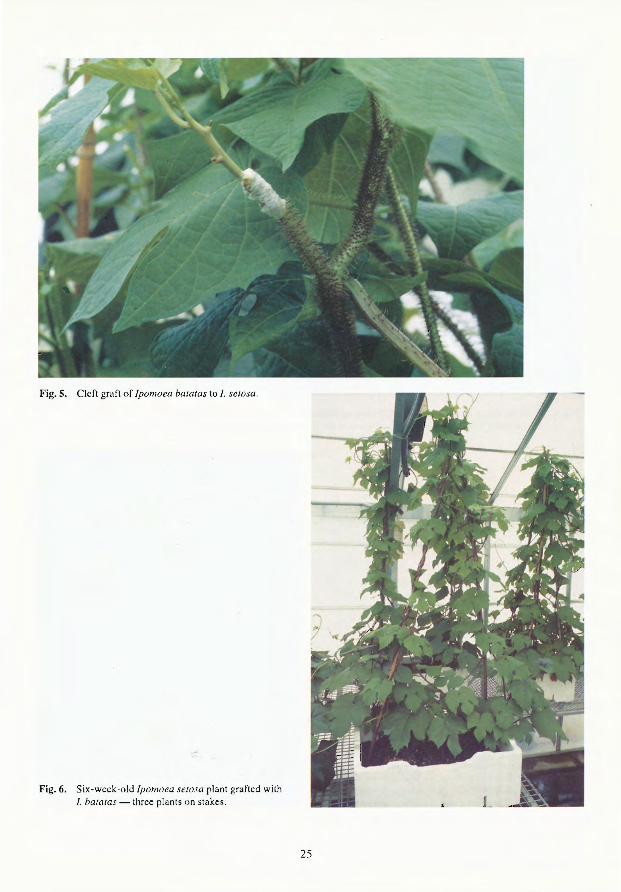
Fig. 5. Cleft graft of Ipomoea bQ/alas to I. selosa.
Fig. 6. Six-week-old Ipomoea selosa plant grafted with I. balalas - three plants on stakes.
25
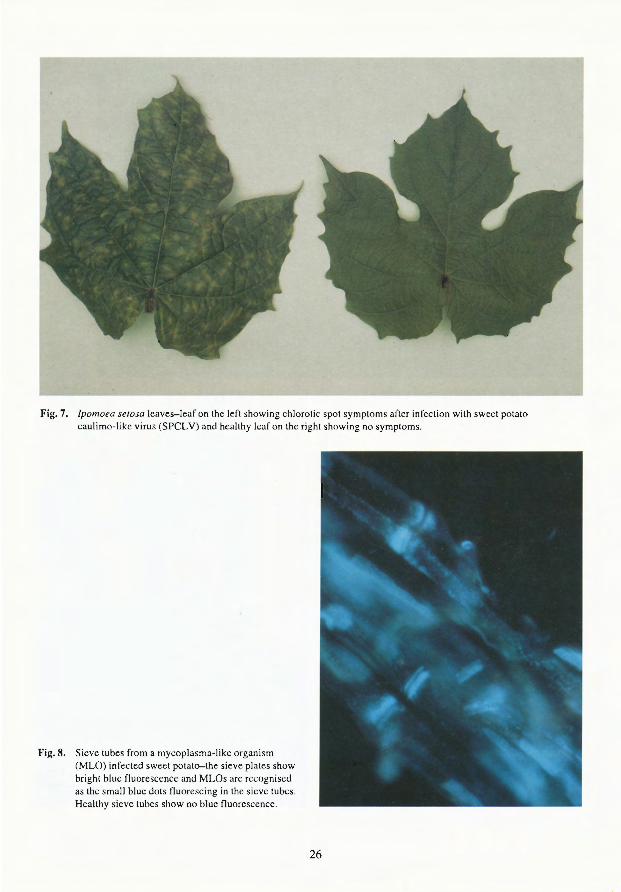
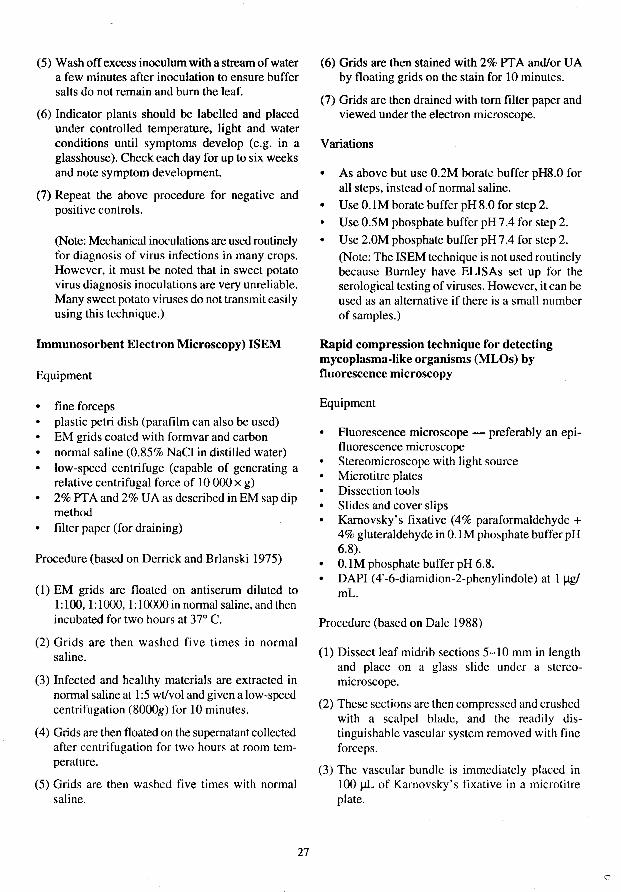
Fig. 7. Ipomoea selOsa leaves-leaf on the left showing chlorotic spot symptoms after infection with sweet potato caulimo-like virus (SPCLV) and healthy leaf on the right showing no symptoms.
Fig. 8. Sieve tubes from a mycoplasma-like organism (MLO) infected sweet potato-the sieve plates show bright blue fluorescence and MLOs are recognised as the small blue dots fluorescing in the sieve tubes. Healthy sieve tubes show no blue fluorescence.
26
(5) Wash off excess inoculum with a stream of water a few minutes after inoculation to ensure buffer salts do not remain and burn the leaf.
(6) Indicator plants should be labelled and placed under controlled temperature, light and water conditions until symptoms develop (e.g. in a glasshouse). Check each day for up to six weeks and note symptom development.
(7) Repeat the above procedure for negative and positive controls.
(Note: Mechanical inoculations are used routinely for diagnosis of virus infections in many crops. However, it must be noted that in sweet potato virus diagnosis inoculations are very unreliable. Many sweet potato viruses do not transmit easily using this technique.)
Immunosorbent Electron Microscopy) ISEM
Equipment
• fine forceps plastic petri dish (parafilm can also be used) EM grids coated with formvar and carbon normal saline (0.85% NaCI in distilled water) low-speed centrifuge (capable of generating a relative centrifugal force of 10 000 X g) 2% PT A and 2% UA as described in EM sap dip method
• filter paper (for draining)
Procedure (based on Derrick and Brlanski 1975)
(1) EM grids are floated on antiserum diluted to l; 100, I: 1000, I:] 0000 in nonnal saline, and then incubated for two hours at 370 C.
(2) Grids are then washed five times in normal saline.
(3) Infected and healthy materials are extracted in nonnal saline at 1:5 wtlvol and given a low-speed centrifugation (80oog) for 10 minutes.
(4) Grids are then floated on the supernatant collected after centrifugation for two hours at room temperature.
(5) Grids are then washed five times with normal saline.
27
(6) Grids are then stained with 2% PTA and/or UA by floating grids on the stain for 10 minutes.
(7) Grids are then drained with tom filter paper and viewed under the electron microscope.
Variations
• As above but use 0.2M borate buffer pHS.O for all steps, instead of normal saline.
• Use O.lM borate buffcr pH 8.D for step 2. Use O.5M phosphate buffer pH 7.4 for step 2.
Use 2.DM phosphate buffer pH 7.4 for step 2. (Note: The ISEM technique is not used routinely because Bumley have ELISAs set up for the serological testing of viruses. However, it can be used as an alternative if there is a small number of samples.)
Rapid compression technique for detecting mycoplasma-like organisms (MLOs) by fluorescence microscopy
Equipment
Fluorescence microscope - preferably an epifluorescence microscope Stereomicroscope with light source Microtitre plates Dissection tools Slides and cover slips Karnovsky's fixative (4% paraformaldehyde + 4% gluteraldehyde in D.l M phosphate buffer pH 6.8).
• D.IM phosphate buffer pH 6.8. DAPI (4'-6-diamidion-2-phenylindole) at 1 Ilg/
mL.
Procedure (based on Dale 1988)
(1) Dissect leaf midrib sections 5-10 mm in length and place on a glass slide under a stereomicroscope.
(2) These sections are then compressed and crushed with a scalpel blade, and the readily distinguishable vascular system removed with fine forceps.
(3) The vascular bundle is immediately placed in 100 J.IL of Karnovsky's fixative in a microtitre plate.

(3) The vascular bundle is immediately placed in 100 IlL of Karnovsky's fixative in a microtitre plate.
(4) The bundle is fixed for at least 20 minutes to ensure adequate fixation.
(5) After fixation the tissue is rinsed for 5 minutes in O.IM phosphate buffer pH 6.8.
(6) After rinsing the tissue is further teased apart to ensurc phloem tissue can be identified under the fluorescent microscope.
(7) This tissue is then mounted in a drop ofDAPI on a glass slide.
28
(8) Slides are examined using a UG excitation filter, a dichroic mirror (DM-400 + lA20) and additional barrier filter L-435. Figure 8 shows a positive sweet potato sample viewed using fluorescent microscopy.
(Note: This technique is only successful with a sound knowledge of fluorescence microscopy and plant anatomy. It is important to understand optimisation procedures for fluorescent microscopy using the DAPI stain.)
CHAPTER 4
Sweet Potato Enzyme-Linked Immunosorbent Assay (ELISA)
Reagents and Equipment
Reagents
ButTers
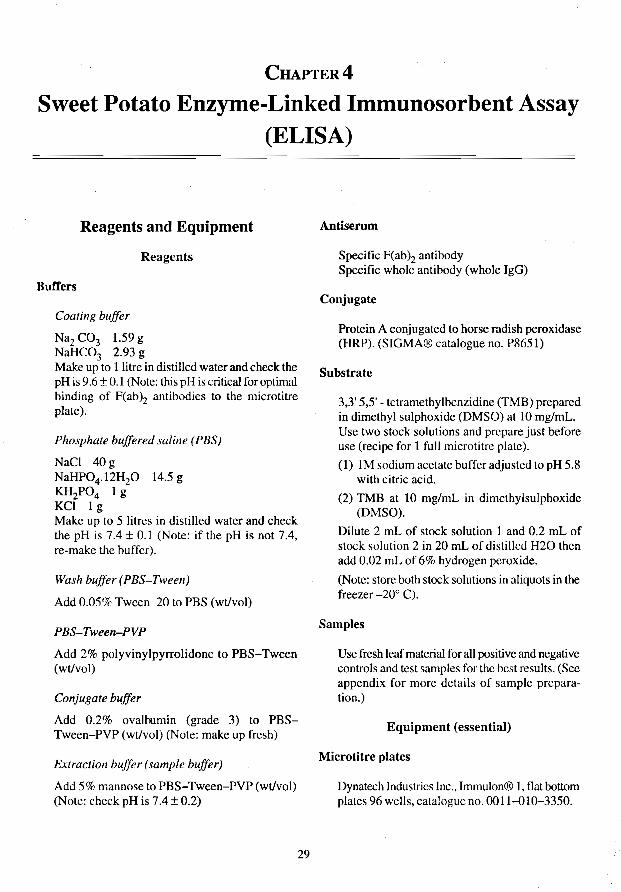
Coating buffer
N~ C03 1.59 g NaHC03 2.93 g Make up to 1 litre in distilled water and check the pH is 9.6 ± 0.1 (Note: this pH is critical for optimal binding of F(ab}z antibodies to the microtitre plate).
Phosphate buffered saline ( P BS)
NaCI 40g NaHP04.12HzO 14.5 g KH2P04 1 g KCI 19 Make up to 5 litres in distilled water and check the pH is 7.4 ± 0.1 (Note: if the pH is not 7.4, re-make the buffer).
Wash buffer (PBS-Tween)
Add 0.05% Tween-20 to PBS (wtlvol)
PBS-Tween-PVP
Add 2% polyvinylpyrrolidone to PBS-Tween (wtlvol)
Conjugate buffer
Add 0.2% ovalbumin (grade 3) to PBSTween-PVP (wtlvol) (Note: make up fresh)
Extraction buffer (sample buffer)
Add 5% mannose to PBS-Tween-PVP (wtlvol) (Note: check pH is 7.4 ± 0.2)
29
Antiserum
Specific F(ab)2 antibody Specific whole antibody (whole JgG)
Conjugate
Protein A conjugated to horse radish peroxidase (HRP). (SIGMA® catalogue no. P865 1)
Substrate
3,3' 5,s' - tetramethylbenzidine (TMB) prepared in dimethyl sulphoxide (DMSO) at 10 mglmL. Use two stock solutions and prepare just before use (recipe for 1 full microtitre plate).
(1) IM sodium acetate buffer adjusted to pH 5.8 with citric acid.
(2) TMB at 10 mglmL in dimethylsulphoxide (DMSO).
Dilute 2 mL of stock solution 1 and 0.2 mL of stock solution 2 in 20 mL of distilled H20 then add 0.02 mL of 6% hydrogen peroxide.
(Note: store both stock solutions in aliquots in the freezer -200 C).
Samples
Use fresh leaf material for all positive and negative controls and test samples for the best results. (Sce appendix for more details of sample preparation.)
Equipment (essential)
Microtitre plates
Dynatech Industries Inc., Irnmulon® 1, flat bottom plates 96 wells, catalogue no. 0011-010-3350.
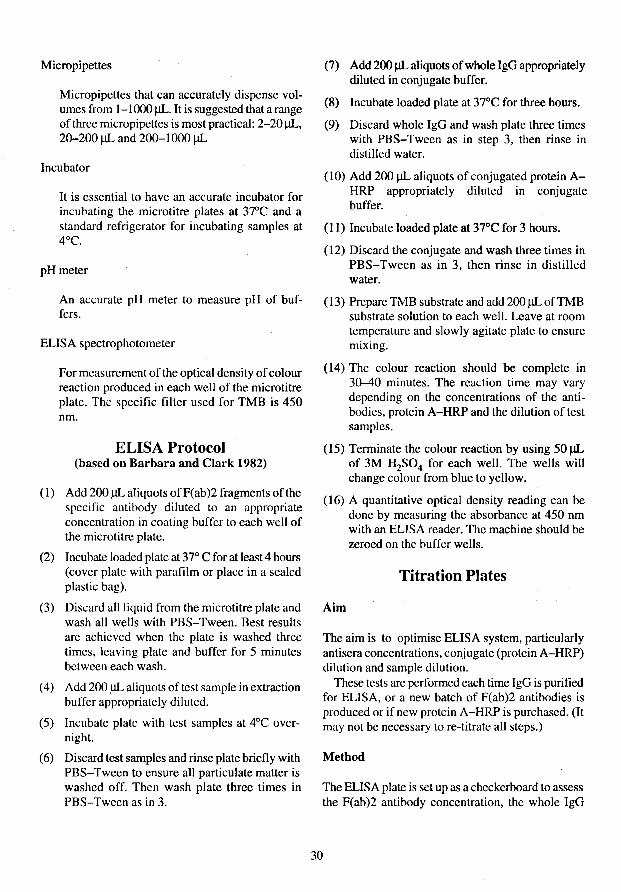
Micropipeues
Micropipeues that can accurately dispense volumes from 1-1000 J.lL. It is suggested that a range of three micropipettes is most practical: 2-20 J.lL, 20-200 J.lL and 200-1000 J.lL
Incubator
It is essential to have an accurate incubator for incubating the microtitre plates at 37"C and a standard refrigerator for incubating samples at 4°C.
pH meter
An accurate pH meter to measure pH of buffers.
ELISA spectrophotometer
For measurement of the optical density of colour reaction produced in each well of the microtitre plate. The specific filter used for TMB is 450 nm.
ELISA Protocol (based on Barbara and Clark 1982)
(1) Add 200 J.lL aliquots ofF(ab)2 fragments of the spccific antibody diluted to an appropriate concentration in coating buffer to each well of the microtitre plate.
(2) Incubate loaded plate at 37° C for at least 4 hours (covcr plate with parafilm or place in a sealed plastic bag).
(3) Discard all liquid from the microtitre plate and wash all wells with PBS-Tween. Best results are achieved when the plate is washed three times, leaving plate and buffer for 5 minutes betwecn each wash.
(4) Add 200 J.lL aliquots of test sample in extraction buffer appropriately diluted.
(5) Incubate plate with test samples at 4°C overnight.
(6) Discard test samples and rinse plate briefly with PBS-Tween to ensure all particulate matter is washed off. Then wash plate three times in PBS-Tween as in 3.
(7) Add 200 J.lL aliquots of whole IgG appropriately diluted in conjugate buffer.
(8) Incubate loaded plate at 37°C for three hours.
(9) Discard whole IgG and wash plate three times with PBS-Tween as in step 3, then rinse in distilled water.
(10) Add 200 J.lL aliquots of conjugated protein AHRP appropriately diluted in conjugate buffer.
(11) Incubate loaded plate at 37°C for 3 hours.
(12) Discard the conjugate and wash three timcs in PBS-Tween as in 3, then rinse in distilled water.
(13) Preparc TMB substrate and add 200 J.lL ofTMB substrate solution to each well. Leave at room temperature and slowly agitate plate to ensure mixing.
(14) The colour reaction should be complete in 30-40 minutes. The reaction time may vary depending on the concentrations of the antibodies, protein A-HRP and the dilution of test samples.
(IS) Terminate the colour reaction by using 50 J.lL of 3M H2S04 for each well. The wells will change colour from blue to yellow.
(16) A quantitative optical density reading can be done by measuring the absorbance at 450 nm with an ELISA reader. The machine should be zeroed on the buffer wells.
Titration Plates
Aim
The aim is to optimise ELISA system, particularly antisera concentrations, conjugate (protein A-HRP) dilution and sample dilution.
These tests are performed each time IgG is purified for ELISA, or a new batch of F(ab)2 antibodies is produced or if new protein A-HRP is purchased. (It may not be necessary to re-titrate all steps.)
Method
The ELISA plate is set up as a checkerboard to assess the F(ab)2 antibody concentration, the whole IgG
30

concentration and the sample dilution. Only the inner wells of the microtitre plate are used to ensure readings are accurate and there is no 'edge effect'. This is often seen in ELISA plates as a substantial difference in OD readings in the perimeter wells.
Table 3 gives a good starting point for grid concentrations for all sweet potato antisera.
So each sample dilution (l in 5, I in 10 and 1 in 100) is tested at 1,5 and 10 j.lg/mL F(ab)2 coating and 2,5 and 10 lJg/mL whole IgG.
To assess the results of this plate you must study it carefully. Theoretically you are looking for a point of saturation (that is when the increase in coating F(ab)2 concentration does not relate to an increase in OD reading). Similarly you look for the saturation point of the second antibody (whole IgG), when an increase in concentration does not cause an increase in OD reading.
It is important that the high OD readings for the positive sample at the point of saturation provide low OD readings for the negative control (see Appendix on positive and negative ELISA readings and thresholds). That is, try to maximise the difference in reading for negative and positive controls.
In some cases it may be necessary to re-titrate the antisera using either higher or lower concentrations depending on the point of saturation. However, it has
Table 3. Suggested grid concentrations for sweet potato antisera
been shown that this plate design provides the best optimisation starting-point.
In general, it is best to select the optimal combination that provides the weakest negative reaction combined with a good positive reaction; but not necessarily selecting the strongest possible positive reaction. Once you have selected the optimum sample dilutions and concentrations of reagents based on this titration plate, it is important to monitor the variability of OD readings for positive and negative controls.
Repeat plate reading of optimal concentrations and further repeats of the controls.
Sweet Potato Feathery Mottle Virus (SPFMV) ELISA
Specifics of ELlS A protocol for SPFMV
Antisera
Antisera produced from Tongan-'Kaloti' of SPFMV, IPS, 1990.
F(ab)2
You will need to titrate the antiserum to determine the optimal concentration, but it is normally used at about 5 lJg/mL.
Concentration of coating F( ab)z IgO
1~/mL 5 ~g/mL 1O~/mL
Sample dilution 2 3 4 5 6 7 8 9
x x x x x x x x x
Positive 15 x Positive 110 x Positive 11 00 x Healthy 15 x Healthy 110 x Buffer control x
x x x x x x x x x
2 5 10 2 5 10 2 5
Concentration of second antibody - whole IgO ~/mL
31
10
x
x
10
Substrate only
11
x
x
Substrate only
12
x
x x x x x x
x
WholeIgG·
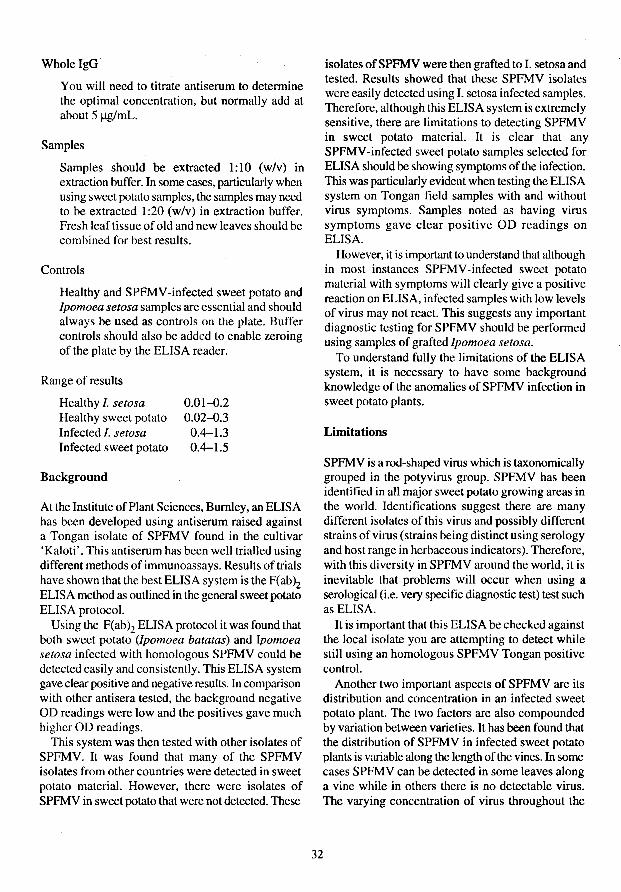
You will need to titrate antiserum to determine the optimal concentration, but normally add at about5~mL.
Samples
Samples should be extracted 1:10 (w/v) in extraction buffer. In some cases, particularly when using sweet potato samples, the samples may need to be extractcd 1:20 (w/v) in extraction buffer. Fresh leaf tissue of old and new leaves should be combined for best results.
Controls
Healthy and SPFMV-infected sweet potato and Ipomoea setosa samples are essential and should always be used as controls on the plate. Buffer controls should also be added to enable zeroing of the plate by the ELISA reader.
Range of results
Healthy I. setosa Healthy sweet potato Infected I. setosa Infected sweet potato
Background
0.01-0.2 0.02-0.3 0.4-1.3 0.4-1.5
At the Institute of Plant Sciences. Bumley, an ELISA has been developed using antiserum raised against a Tongan isolate of SPFMV found in the cultivar 'Kaloti' . This antiserum has been well trialled using different methods of immunoassays. Results of trials have shown that the best ELISA system is the F(abh ELISA method as outlined in the general sweet potato ELISA protocol.
Using the F(ab)2 ELISA protocol it was found that both sweet potato (Ipomoea balatas) and Ipomoea setosa infected with homologous SPFMV could be detected easily and consistently. This ELISA system gave clear positive and negative results. In comparison with other antisera tested, the background negative OD readings were low and the positives gave much higher OD readings.
This system was then tested with other isolates of SPFMV. It was found that many of the SPFMV isolates from other countries were detected in sweet potato material. However, there were isolates of SPFMV in sweet potato that were not detected. These
isolates ofSPFMV were then grafted to I. setosa and tested. Results showed that these SPFMV isolates were easily detected using I. setosa infected samples. Therefore, although this ELISA system is extremely sensitive. there are limitations to detecting SPFMV in sweet potato material. It is clear that any SPFMV-infected sweet potato samples selected for ELISA should be showing symptoms of the infection. This was particularly evident when testing the ELISA system on Tongan field samples with and without virus symptoms. Samples noted as having virus symptoms gave clear positive OD readings on ELISA.
However, it is important to understand that although in most instances SPFMV-infected sweet potato material with symptoms will clearly give a positive reaetion on ELISA, infected samples with low levels of virus may not react. This suggests any important diagnostic testing for SPFMV should be performed using samples of grafted Ipomoea setosa.
To understand fully the limitations of the ELISA system, it is necessary to have some background knowledge of the anomalies of SPFMV infection in sweet potato plants.
Limitations
SPFMV is a rod-shaped virus which is taxonomically grouped in the potyvirus group. SPFMV has been identified in all major sweet potato growing areas in the world. Identifications suggest there are many different isolates of this virus and possibly different strains of virus (strains being distinct using serology and host range in herbaceous indicators). Therefore. with this diversity in SPFMV around the world, it is inevitable that problems will occur when using a serological (i.e. very specific diagnostic test) test such as ELISA.
It is important that this ELISA be checked against the local isolate you are attempting to detect while still using an homologous SPFMV Tongan positive control.
Another two important aspects of SPFMV are its distribution and concentration in an infected sweet potato plant. The two factors are also compounded by variation between varieties. It has been found that the distribution of SPFMV in infected sweet potato plants is variable along the length of the vines. In some cases SPFMV can be detected in some leaves along a vine while in others there is no detectable virus. The varying concentration of virus throughout the
32
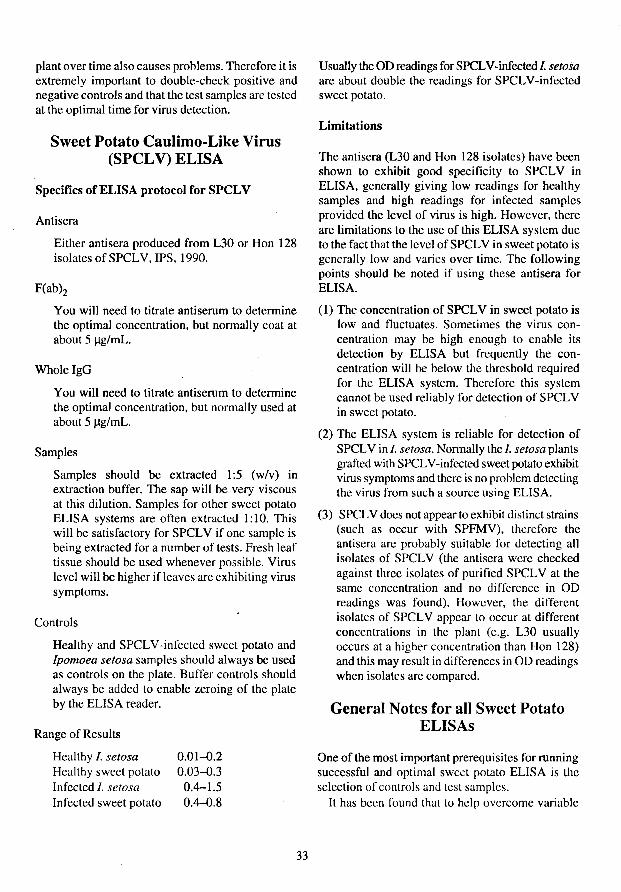
plant over time also causes problems. Therefore it is extremely important to double-check positive and negative controls and that the test samples arc tested at the optimal time for virus detection.
Sweet Potato Caulimo-Like Virus (SPCLV) ELISA
Specifics ofELISA protocol for SPCLV
Antisera
Either antisera produced from L30 or Hon 128 isolates of SPCL V, IPS, 1990.
F(ab)2
You will need to titrate antiserum to determine the optimal concentration, but normally coat at about 5 IJ.g/mL.
Whole IgG
You will need to titrate antiserum to determine the optimal concentration, but normally used at about 5 IJ.g/mL.
Samples
Samples should be extracted 1:5 (w/v) in extraction buffer. The sap will be very viscous at this dilution. Samples for other sweet potato ELISA systems are often extracted 1: 10. This will be satisfactory for SPCL V if one sample is being extracted for a number of tests. Fresh leaf tissue should be used whenever possible. Virus level will be higher ifleaves are exhibiting virus symptoms.
Controls
Healthy and SPCLV-infected sweet potato and Ipomoea setosa samples should always be used as controls on the plate. Buffer controls should always be added to enable zeroing of the plate by the ELISA reader.
Range of Results
Healthy I. setosa Healthy sweet potato Infected I. setosa Infected sweet potato
0.01-0.2 0.03-0.3 0.4-1.5 0.4-0.8
33
Usually the OD readings for SPCLV-infeeted l. setosa are about double the readings for SPCLV-infected sweet potato.
Limitations
Tbe antisera (L30 and Hon 128 isolates) have been shown to exhibit good specificity to SPCL V in ELISA, generally giving low readings for healthy samples and high readings for infected samples provided the level of virus is high. However, there are limitations to the use of this ELISA system due to the fact that the level of SPCL V in sweet potato is generally low and varies over time. The following points should be noted if using these antisera for ELISA.
(1) The concentration of SPCL V in sweet potato is low and fluctuates. Sometimes the virus concentration may be high enough to enable its detection by ELISA but frequently the concentration will be below the threshold required for the ELISA system. Therefore this system cannot be used reliably for detection of SPCL V in sweet potato.
(2) The ELISA system is reliable for detection of SPCL V in I. setosa. Normally the I. setosa plants grafted with SPCLV-infected sweet potato exhibit virus symptoms and there is no problem detecting the virus from such a source using ELISA.
(3) SPCL V docs not appear to exhibit distinct strains (such as occur with SPFMV), therefore the antisera are probably suitable for detecting all isolates of SPCL V (the antisera were checked against three isolates of purified SPCL V at the same concentration and no difference in OD readings was found). However, the different isolates of SPCL V appear to occur at different concentrations in the plant (e.g. L30 usually occurs at a higher concentration than Hon 128) and this may result in differences in OD readings when isolates are compared.
General Notes for all Sweet Potato ELISAs
One of the most important prerequisites for running successful and optimal sweet potato ELISA is the selection of controls and lest samples.
It has been found that to help overcome variable
results with ELISA it is essential to have consistent positive and negative controls.
It should bc kept in mind that the ELISA system for virus diagnosis within the sweet potato pathogen-tested scheme has been developed mainly for testing the sap of I. setosa (the universal graft virus indicator species).
The use of I. setosa provides the best sample system because the virus infections in I. setosa are less likely to slow fluctuation in virus concentration and distribution than in sweet potato. In fact I. selosa is extremely susceptible to sweet potato viruses and the virus level is usually high enough to detect easily.
But the ELISA system has also been developed for testing sweet potato plant material.
When using either plant sap systems (I. setosa or I. batatas) it is essential to have a positive plant that has obvious virus symptoms and that has previously been shown by serology and electron microscopy to have the virus.
These positive samples do not necessarily have to be the homologous virus (i.e. the virus agent which the antiserum was raised against) although this is
preferable. but it is important to have a known sample of virus-infected plant material which reacts to this antiserum.
Because l. setosa tends to have higher virus concentration than swcet potato and the virus level is more consistent it is always included as a control as a eheck on the ELISA system (i.e. that the physical steps of the system are all correct as errors in making up buffers, omission of steps, etc. may have occurred).
The levels of virus in the sweet potato positive controls sometimes drops so low that it is not certain if the test has worked unless l. setosa shows a positive check as well.
The variation in the readings for a known sweet potato virus positive sample should also act as a warning that low readings for sweet potato samples may indicate a low level of virus in the plant and not a negative sample. A clear positive is a positive but a low reading should be treated with caution as virus levels in sweet potato often drop below the level detectable with ELISA. Important samples can be grafted to I. setosa for re-checking if low reading occurs.
34
References
Alconero. R. 1973 Mechanical transmission of viruses from sweet potato. Journal of Phytopathology, 63. 377-80.
Atkey, P.T. and Brunt, A.A. 1987 Electron microscopy of an isometric caulimo-like virus from sweet potato (Ipomoea batatas). Journal of Phytopathology, 118,370--76.
Barabra, D.l. and C1ark, M F. 1982 A simple indirect ELISA using F(abl)2 fragments of immunoglobulin. Journal of General Virology, 58, 315-22.
Brunt, A .• Crabtree, K. and Gibbs, A. 1990 Viruses of Tropical Plants. Commonwealth Agricultural Bureau International, UK. in association with Australian Centre for International Agricultural Research.
Cadena-Hinojose, M.A. and Campbell, R.N. 1981 Characterization of isolates of four aphid- transmitted sweet potato viruses. Phytopathology, 71,1086-89.
Chung, M.L., Liao, C.H .• Chen, MJ. and Chiu RJ. 1985 The isolation, transmission and host range of sweet potato leaf and disease agent in Taiwan. Plant Protection Bulletin, Taiwan (R.D.C.) 27, 333 (in Chinese with English summary).
Chung, M.L. Hsu, Y.H. and Chen, M.J. 1986 Virus diseases of sweet potato in Taiwan. Pages 85-90 in: Plant Virus Diseases of Horticultural Crops in the Tropics and Subtropics. Food and Fertilizer Technology Center for the Asian and Pacific Region, Taipei, Taiwan, R.D.C. Book Series No. 33.
Clark, C.A. and Moyer, 1.W. 1988. Compendium of Sweet Potato Diseases. A.P.S. Press The American Phytopathological Society USA.
Daines, R.H. and Martin, W.J. 1964. Russett crack, a new virus disease of sweet potatoes. Plant Disease Report. 48, 149-51.
Dale. 1. L 1988. Rapid compression technique for detecting mycoplasma-like organisms in leaf midrib sieve tubes by fluorescent microscopy. Phytopathology. 78.118-20.
Derrick, K.S. and Brlansky, R.H. 1975. Assay for viruses and mycoplasmas using serological specific electron microscopy. Phytopathology. 66,815-20
Doolittlc. S.P. and Harter. L. L. 1945. A graft transmissible virus of sweet potato. Phytopathology, 35.695-704.
Green, S.K.. Kuo, YJ. and Lee, D.R. 1988. Uneven distribution of two potyviruses (feathery mottle virus and sweet potato latcnt virus) in sweet potato plants and its implication on virus indexing of meristem derived plants. Tropical Pest Management, 34 (3). 298-302.
Hahn S.K. 1979 Effect of viruses (SPVD) on growth and yield of sweet potato. Experimental Agriculture. 15.253-56.
Hildebrand, E.M. 1960. The feathery motile virus complex of sweet potato. Phytopathology. 50, 751-57.
Hollings, M .• Stone, D.M. and Bock. K.R. 1976. Purification and properties of sweet potato mild mottle. a white-fly borne
35
virus from sweet potato (Ipomoea batatas) in East Africa. Annals of applied Biology, 82,511-28.
Lawson, R.H .• Hearon. S.S. and Smith, F.E 1971. Development of pinwheel inclusions associated with sweet potato russett crack virus. Virology. 46, 453-{i3.
Liao, C.H .• Chien, LC .• Chung, M.L .• Chiu, RJ. and Han. Y.H. 1979a. A study of sweet potato virus diseases in Taiwan. I. Yellow spot virus disease. Journal of Agricultural Research of China (Taiwan, R.o.C.) 28. 127-38. (in Chinese with English summary)
-1979b. A study of sweet potato viruses in Taiwan 1. Yellow dwarf disease. Journal of Agricultural Research of China. 28,121. (in Chinese with English summary).
Liao. e.H .• Say. H.S. and Lu. ye. 1982. Studies on eradication of SPFMV and SPL V viruses from infected sweet potato. Journal of Agricultural Research of China (Taiwan, RD.C.) 31,239-45.
Moyer, I. W. and Kennedy, G. G. 1978 Purification and properties of sweet potato feathery mottle virus. Phytopathology. 68, 998-1004.
Moyer, I.W., Cali, B.B., Kennedy, G.G. and Abou-ghadir, M.F. 1980 Identification of two sweet potato feathery motlle virus strains in North Carolina. Plant Disease. 64, 762-64.
Moyer. lW. and Cali. G.G. 1985. Properties of sweet potato feathery motile virus RNA and capsid protein. Journal of General Virology, 66,1185-89.
Name, S.F. 1973. Sweet potato vein mosaic virus in Argentina. Phytopathology Z. 77, 44-45.
Nome, S.F., Shalla. T.A. and Peterson, L. . 1974. Comparison of virus particles and intercellular inclusions associated with vein mosaic, feathery mottie, and russett crack diseases of sweet potato. Phytopathology Z. 79.169-78.
Pearson, M.N., Keane. PJ. and Thiagalingham, K. 1984. Liltle leaf: a disease of sweet (Xltato in Papua New Guinea probably caused by a mycoplasma-like organisms. Phytopathology Z. 190.269-76.
Rossel. H.W. and Thottappilly. G. 1985. In: Virus diseases of important food crops in tropical Africa. LI.T.A. lbadan. Nigeria, 10--13.
Sheffield. F.M.L. 1957. Virus diseases of sweet potato in East Africa. I. Identification of the viruses and their insect vectors. Phytopathology, 47. 582-90
Stubbs, L.L. and McLean. D.L. 1958. A note on aphid transmission of a feathery mottle virus of sweet potato. Plant Disease Report. 42 (2). 216.
Wang, PJ. and Hu, C. Y. 1980. Regeneration of virus-free plants through in-vitro culture. In: A. Fiechter (Ed.). Advances in Biochemical Engineering. Springer Verlag, Hcidelberg. 61-99.
---------- --------;------------- ............. - .... .
ApPENDIX
Plant Tissue Culture Micropropagation Laboratory Manual*
Angela Mason and Peter Beetham
'" This material was first published in June 1986, in Technical Report Series No. 127. Department of Agriculture, Victoria, Australia (ISBN 0 7306 03156).
37
Contents
Preface and acknowledgments
Introduction
The setting up of a tissue culture laboratory
Preparation of mcdia
Sterilisation of media
Optimal use of the laminae flow cabinet
Source and preparation of material for rapid multiplication of vegetatively propagated crops
Establishment, subdivision and maintenance of in vitro plant cultures
Planting of tissue culture plantlets
38
Preface and Acknowledgments
This manual is designed to give a brief outline of the use of micropropagation for the multiplication of vegetatively propagated crops and to set out the steps involved in the procedures used in tissue culture multiplication.
It is not meant to be a complete or exhaustive guide to tissue culture, rather a simple manual for use in the laboratory. It is suggested that anyone who is considering using tissue culture techniques obtain a more detailed guide to the subject such as 'Tissue Culture for Plant Propagators' by R. A. de Fossard (1976), University of New England Printing.
We would like to acknowledge that much information for this manual was g.med from de Fossard's informative book, and also to thank Emil Bjarnason and Roger Osborn of the Institute of Plant Sciences for their assistance.
Angela Mason is employed as a plant pathologist as part of a contract between the Victorian Department of Agriculture and the International Potato Centre (CIP) Peru, to produce pathogen-tested potato germplasm for Southeast Asia and the Pacific region.
Peter Beetham is employed as a plant pathologist as part of a contract bctween the Victorian Department of Agriculture and the Australian Centre for International Agricultural Research (ACIAR) to produce pathogen-tested sweet potatoes for thc Pacific region.
39
Introduction
Plant tissue culture involves the culturing of plants, plant parts or organs or plant cells under aseptic conditions in a stcrile nutrient medium.
Plant tissuc culture is most commonly used to propagate and maintain plant lines or as one of the steps in the 'clean-up' of, or pathogen eradication from, desirable plant lines.
Plant tissue culture is a particularly useful technique when dealing with vegetatively propagated crops such as potato, sweet potato and a number of ornamental species. Two of the main disadvantages of producing a vegetatively propagated crop are that the planting material is expensive to produce and that diseases are carried through from generation to generation resulting in the gradual decline of the crop.
Generally speaking, plants may be infected by a range of pathogens unless they have been put through some sort of 'clean-up' program. These pathogens include viruses, mycoplasmas, fungi and bacteria. Of these pathogens, the viru~es (and to a lesser degree, the mycoplasmas) are the most difficult to eradicate as they cannot be eradicated by the use of chemicals. Most pathogens are not seedborne so the problems of carryover of disease from one season to the next are largely avoided in crops propagated from seed. However, vegetatively propagated crops need to be put through a number of 'clean-up' steps to produce clean planting materiaL
Material which is thought to be infected with pathogens is normally heat-treated and the plant meristems cultured in liquid medium. The combination of the adverse effect of heat on virus replication, the rapid multiplication of the meristematic cells and the fact that the meristem does not contain vascular tissue (a common route for the spread of pathogens) results in the meristems usual! y being free of pathogens after a period of heat treatment (38°C, 4-12 weeks).
The meristems develop into plantlets after being dissected from the parent plant and placed in the eulture medium. These plantlets can then be indexed for the presence of pathogens. The presence of fungi or bacteria is usually easy to determine because they grow and multiply in the culture medium and are apparent when they turn the medium 'cloudy' or form a floating colony within the culture vessel. However, viruses are obligate parasites and live in the plant cells and it is usually not possible to determine their presence visually. A range of different types of tests including electron microscopy, serological tests and the use of indicator plants is carried out to detect the presence of viruses.
If material is found to be free of pathogens it can be maintained indefinitely in tissue culture to provide a source of pathogen-tested material of a particular plant cultivar. In other words, the 'clean-up' procedure need be carried out once only.
The clean material held in tissue culture can be multiplied by subdividing plantiets into nodal pieces, each of which develops into a new plantlet.
The maintenance of germplasm in vitro has some advantages over conventional field maintenance including the ability to maintain the material in a pathogen-tested state without risk of field infections and often, the greatly reduced time required to multiply large quantities of material. This multiplication is not dependent on the season as it is in the field, and often labour costs are greatly reduced with this type of operation.
In this manual, emphasis will be placed on the establishment, multiplication and maintenance of plant tissue cultures of vegetatively propagated crops, with the aim of introducing the operator to the concept of using tissue culture micropropagation for their multiplication.
Setting Up a Tissue Culture Laboratory
The most imponant factor contributing to success in using tissue culture techniques is the maintenance of sterile conditions in the plant cultures. This is achieved by maintaining the highest level of hygiene possible in the work area and by employing two essential pieces of equipment: the autoclave, for sterilising the medium in its containers, and the laminar flow cabinet which allows the preparation and transfer of material into the medium under aseptic conditions, thus avoiding contamination.
The basic requirements of the work area are:
surfaces that can be cleaned properly;
dust free and din free;
preferably an airlock between the room and outside;
preferably what it is not in a pathology laboratory where there are spores and olher pathogens which could lead to contamination; and
an air-conditioner, to maintain culture growth area at required temperature.
The Equipment
(I) For media preparation:
40
normal laboratory glassware, balance, pH meter, ete.
vials, flasks or other containers which can withstand autoclaving and which are suitable for the culturing of plants a dispenser for filling vials with the medium, or alternatively syringes or pipettes an autoclave or pressure cooker baskets, trays, etc. for holding containers of medium refrigerator or cold room for storing media.
(2) For plant propagation: laminar flow cabinet fOf preparing plant material and placing in the vials of sterile medium spirit burner for flaming instruments and bench area of laminar flow cabinet instruments such as scalpels, forceps, needles, etc. for preparing plant material labels for vials.
(3) For maintenance of cultures: an area which has good light and which can be held at a constant temperature (e.g. shelves with fluorescent lights above or a growth room).
Preparation of :Media
Knowledge of what is required in plant tissue culture growth media has developed quickly throughout the short history of plant tissue culture. The discovery of auxins, kinetin and cytokinins, all plant hormones used in tissue culture, has allowed manipulations of tissue culture techniques to be used in many areas of botanical research. The ability to promote shoot and root growth using plant hormones has enabled cell and organ culture to be developed for a huge range of genera.
A large and varied range of tissue culture media has been developed to meet the nutrient needs of this wide range of plants. It is generally considered that approximately 16 elements are essential to the growth of most plants. These are arbitrarily divided into the macronutrients (those needed in relatively large quantities) and micronutrients (those needed in eonsiderably smaller amounts). The macronutrients include carbon, hydrogen, oxygen, nitrogen, phosphorus, calcium, sulfur, potassium and magnesium. The micronutrients include chlorine, iron, manganese, boron, zinc, copper and molybdenum. These micro- and macronutrients form the basis of most media used in tissue culture. In addition to essential nutrients, other nutrients can be added which enhance specific areas of growth for specific plant species. Also, in many media, sucrose is added as a carbon source when the tissue culture has poor photosynthesis. Poor photosynthesis can be caused by lack of chlorophyll in the cell culture or, in many cases, by the intensity of illumination
41
in incubators being insufficient. Another important addition to media ean be growth regulators. These range from naturally occurring plant hormones such as auxins to man-made synthetic hormones, and several vitamins. Growth regulators are included in medla for varying reasons. In cultures of meristems, for example, auxins might be included to initiate root formation and in such a ease much experimentation will reveal which auxin to use and its optimum concentration. Agar is one other additive which may be an important constituent of media. Agar is often added to solidify media, and whether liquid or solid media are used depends on the plant to be tissue cultured, and personal preference. In addition to choosing the quantity and type of nutrients and the use of a solid or liquid medium, the pH of the medium must also be eonsidered. The pH of the medium can innuence the availability of certain elements dissolved in the medium and, most importantly, the pH must eoincide closely with the pH of plant cells, usually between pH 5 and pH 8. Generally, plant tissue culture media pH are adjusted to pH 5.6.
Finally, and most importantly, tissue culture media must undergo sterilisation. Media must be sterilised to ensure a pathogen-free environment in which plant tissue can be cultured. It is also important that this sterilisation is performed in such a way that the integrity of the medium is maintained. Often problems occur if media arc 'overcooked' or a compound is added that is heat-labile (unstable) causing the compound to be inactivated. Therefore the method for sterilisation must be followed carefully if tissue culture is to succeed.
Materials
Vials, plastic or glass flasks (50 mL) Laboratory glassware (large beakers, flasks, measuring cylinders, pipettes) Aluminium foil (thick) pH meter (or litmus paper) Nutrients, hormones etc. preferably in stock solutions or powdered media (e.g. see Practical Note II) Balance Volume dispenser Autoclave, pressure cooker Space in a refrigerator for storage Labels
Method
Arrange and label flasks or vials, preferably in autoclavable racks, or a spacious table. Dissolve medium-containing nutrients, hormones, ete. in distilled water, e.g. Murashige and Skoog Minimal Organies Medium (see Practical Note 1). Once dissolved, check pH with pH meter (or litmus paper). It should be pH 5.5 to 5.8.
Dispense medium into vials, usually 5 mUvial or flask. Seal tops of containers with small squares of aluminium foil (double thickness) or with non-absorbent cotton plugs or polypropylene caps. Autoclave the racks of sealed medium (the standard sterilisation is 15 p.s.i. (121 DC) for 10-20 minutes). After sterilisation media must be refrigerated (usually 4-6°C). This minimises the growth of any contaminant and assists in maintaining the integrity of the media.
Practical Note 1
Preparation of media can often be confusing when a number of units of concentration are commonly used. This note tries to avoid confusion by providing a few definitions and conversions.
Mole: A mole of a substance is the gram-molecular weight.
For example: I mole of sucrose ClzH22011
Formula weights" are: C = 12.01 H= 1.008 0= 16.00
"From chemical tables
Sucrose formula weight C (12 X 12.01) + H (22 x 1.(08) + 0(11 x 16) 342.30 grams
Therefore, 1 mole of sucrose weighs 342.30 g, and:
I millimole (mmol) = 0.34230 g sucrose 1 micromole <I.unol) = 0.00034230 g sucrose
Molarity (M): The molarity of a solution is the number of moles in one litre of solution.
For example : 1 M sucrose = 342.30 g dissolved in 1 litre H20
1 mM sucrose = 0.34230 g dissolved in 1 litre H20
1 J.IM sucrose 0.00034230 g dissolved in I litre H20
From the above we also find the unit J.lmol L -I and mmol L -I used.
NB: 1 J.lmol L -I = 0.00034230 g sucrose in llitre H20 or 1()-6 M
1 mmol L -I = 0.34230 g sucrose in 1 litre H20 or 1(}-3 M
Parts per million (ppm)
One in a million solution = 1 ppm
For example: 1 ppm
or I ppm
Percentage solution (% )
I mg of sucrose in I litre of H20 I j.lg of sucrose in 1 millilitre of H20
A percentage solution contains I gram per 100 mL of H20.
For example: 5% sucrose solution
or 5% sucrose solution
Practical Note 2
5 g in lOOmL H20 50gin 1 LH20
Murashigc Minimal Organic Medium Without Sucrose
This may be purchased already prepared from Gibeo Laboratories Pty Lld (Catalogue number: 510-3118. powdered media). Alternatively, it may be prepared in the laboratory and essentially comprises four stock solutions shown in detail below:
A: salts B: MgS04 C: iron D: vitamins (to which inositol is added)
Slock solution A:
NH4N03 KN03 CaCI2.2HzO KH2P04 H3B03
MnS04·4H20 or MnS04.H20
ZnS04·7H20 or ZnS04.H20
KI Na2Mo04·2H20 CuS04·5H20 CoClz·6HzO
g in 200 mL distilled water
33.0 38.0 8.8 3.4 0.124
0.446 0.338 0.172 0.123 0.017 0.005 0.0005 0.005
Total volume of A will be 2200 mL after mixing these 11 components.
42
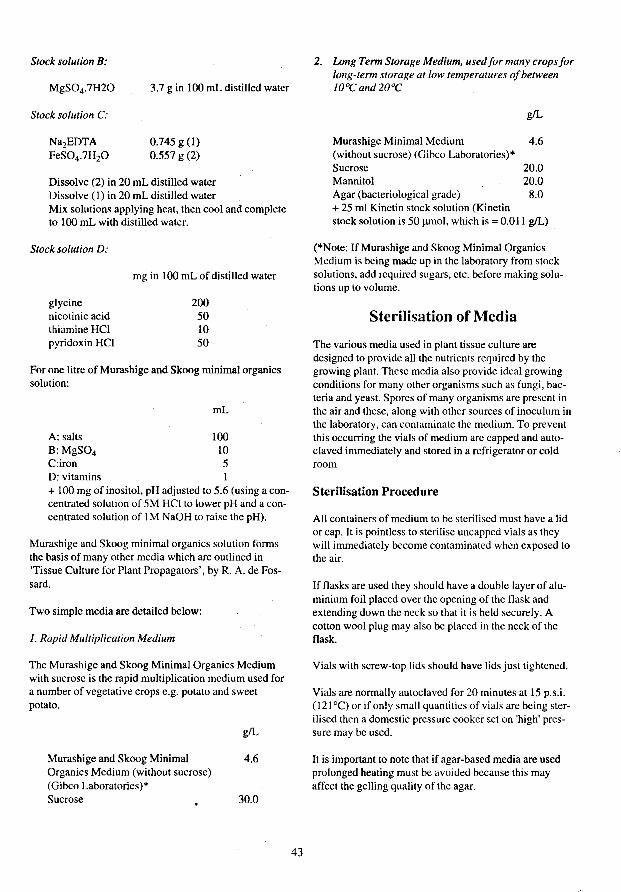
Stock solution B:
MgS04·7H20 3.7 g in 100 mL distilled water
Stock solution C:
NazEDTA FeS04·7H20
0.745 g (1) 0.557 g (2)
Dissolve (2) in 20 mL distilled water Dissolve (I) in 20 mL distilled water Mix solutions applying heat, then cool and complete to 100 mL with distilled water.
Stock solution D:
mg in 100 mL of distilled water
glycine nicotinic acid thiamine HCI pyridoxin HCI
200 50 10 50
For one litre of Murashige and Skoog minimal organics solution:
A: salts B:MgS04 C:iron D: vitamins
mL
100 10 5
+ 100 mg of inositol, pH adjusted to 5.6 (using a concentrated solution of 5M HCI to lower pH and a concentrated solution of IM NaOH to raise the pH).
Murashige and Skoog minimal organics solution forms the basis of many other media which are outlined in 'Tissue Culture for Plam Propagators' , by R. A. de Fossard.
Two simple media are detailed below:
1. Rapid Multiplication Medium
The Murashige and Skoog Minimal Organics Medium with sucrose is the rapid multiplication medium used for a number of vegetative crops e.g. potato and sweet potato.
Murashige and Skoog Minimal Organics Medium (without sucrose) (Gibeo Laboratories)'" Sucrose
gIL
4.6
30.0
43
2. Long Term Storage Medium, used for many crops for long-term storage at low temperatures of between lO"C and 20"C
Murashige Minimal Medium (without sucrose) (Gibco Laboratories)* Sucrose Mannitol Agar (bacteriological grade) + 25 ml Kinetin stock solution (Kinetin
g/L
4.6
20.0 20.0
8.0
stock solution is 50 J.Ullol, which is O.Dll gIL)
("'Note: If Murashige and Skoog Minimal Organics Medium is being made up in the laboratory from stock solutions, add required sugars, etc. before making solutions up to volume.
Sterilisation of Media
The various media used in plant tissue culture are designed to provide all the nutrients required by the growing plant. These media also provide ideal growing conditions for many other organisms sueh as fungi, bacteria and yeast. Spores of many organisms are present in the air and these, along with other sources of inoculum in the laboratory, can contaminate the medium. To prevent this occurring the vials of medium are eapped and autocJaved immediately and stored in a refrigerator or cold room
Sterilisation Procedure
All containers of medium to be sterilised must have a lid or cap. It is pointless to sterilise uncapped vials as they will immediately become contaminated when exposed to the air.
If flasks are used they should have a double layer of aluminium foil placed over the opening of the flask and extending down the neck so that it is held securely. A cotton wool plug may also be placed in the neck of the flask.
Vials with screw-top lids should have lids just tightened.
Vials are normally autocJaved for 20 minutes at 15 p.s.i. (121 QC) or if only small quantities of vials are being sterilised then a domestic pressure cooker set on 'high' pressure may be used.
It is important to note that if agar-based media are used prolonged heating must be avoided because this may affect the gelling quality of the agar.
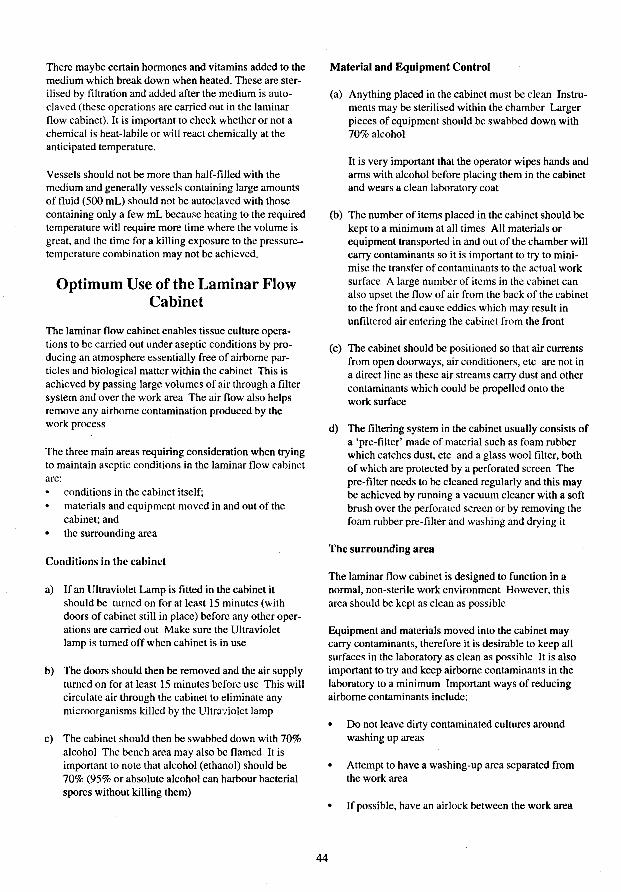
There maybe certain hormones and vitamins addcd to the medium which break down when heated. Thcse are sterilised by filtration and added after the medium is autoc1aved (these operations are carried out in the laminar flow cabinet). It is important to check whether or not a chemical is heat-labile or will react chemically at the anticipated temperature.
Vessels should not be more than half-filled with the medium and generally vessels containing large amounts of fluid (500 mL) should not be autoclaved with those containing only a few mL because heating to the required temperature will require more time where the volume is great, and the time for a killing exposure to the pressuretemperature combination may not be achieved,
Optimum Use of the Laminar Flow Cabinet
The laminar flow cabinet enables tissue culture operations to be carried out under aseptic conditions by producing an atmosphere essentially free of airborne particles and biological matter within the cabinet This is achieved by passing large volumes of air through a filter system and over the work area The air flow also helps remove any airborne contamination produced by the work process
The three main areas requiring consideration when trying to maintain aseptic conditions in the laminar flow cabinet are:
conditions in the cabinet itself; materials and equipment moved in and out of the cabinet; and the surrounding area
Conditions in the cabinet
a) If an Ultraviolet Lamp is fitted in the cabinet it should be turned on for at least 15 minutes (with doors of cabinet still in place) before any other operations are carried out Make sure the Ultraviolet lamp is turned off when cabinet is in use
b) The doors should then be removed and the air supply turned on for at least 15 minutes before use This will circulate air through the cabinet to eliminatc any microorganisms killed by the Ultra'liolet lamp
c) The cabinet should then be swabbed down with 70% alcohol The bench area may also be flamed It is important to note that alcohol (ethanol) should be 70% (95% or absolute alcohol can harbour bacterial spores without killing them)
Material and Equipment Control
(a) Anything placed in the cabinet must be clean Instruments may be steriliscd within the chamber Larger pieces of equipment should be swabbed down with 70% alcohol
It is very important that the operator wipes hands and arms with alcohol before placing them in the cabinet and wears a clean laboratory coat
(b) The number of items placed in the cabinet should be kept to a minimum at all times All materials or equipment transported in and out of the chamber will carry contaminants so it is important to try to minimise the transfer of contaminants to the actual work surfacc A large number of items in the cabinet can also upset the flow of air from the back of the cabinet to the front and cause eddies which may result in unfiltered air entering the cabinet from the front
(c) The cabinet should be positioned so that air currents from open doorways, air conditioners, etc are not in a direct line as these air streams carry dust and other contaminants whieh could be propelled onto the work surface
d) The filtering system in the cabinet usually consists of a 'pre-filter' made of material sueh as foam rubber which catches dust, ete and a glass wool filter, both of which are protected by a perforated screen The pre-fiIter needs to be cleaned regularly and this may be achieved by running a vacuum cleaner with a soft brush over the perforated screen or by removing the foam rubber pre-fiIter and washing and drying it
The surrounding area
The laminar flow cabinet is designed to function in a normal, non-sterile work environment However, this area should be kept as clean as possible
Equipment and materials moved into the cabinet may carry contaminants, therefore it is desirable to keep all surfaces in the laboratory as clean as possiblc It is also important to try and keep airborne contaminants in the laboratory to a minimum Important ways of reducing airborne contaminants include:
44
Do not leave dirty contaminated cultures around washing up areas
Attempt to have a washing-up area separated from the work area
If possible, have an airlock between the work area
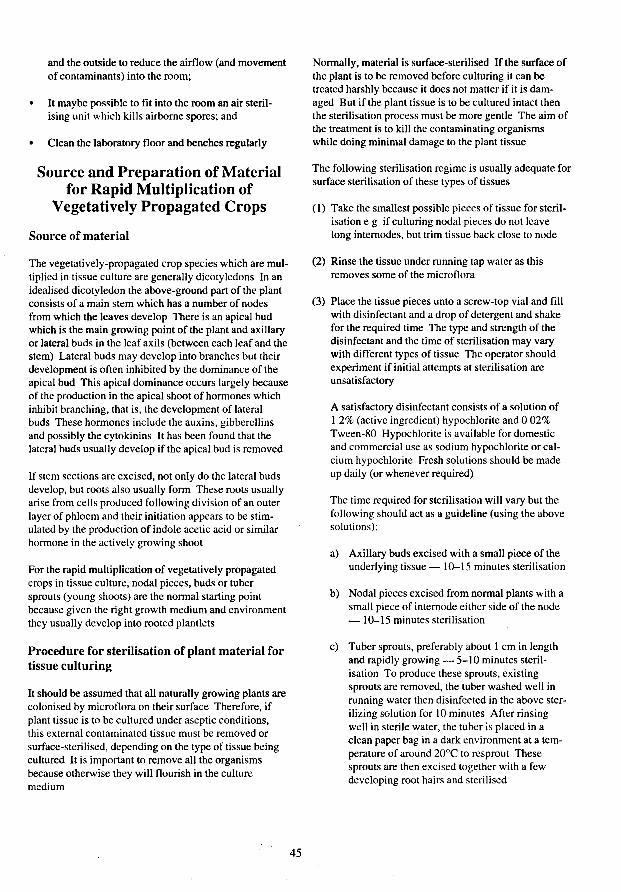
and the outside to reduce the airflow (and movement of contaminants) into the room;
It maybe possible to fit into the room an air sterilising unit which kills airborne spores; and
• Clean the laboratory floor and benches regularly
Source and Preparation of Material for Rapid Multiplication of
Vegetatively Propagated Crops
Source of material
The vegetatively-propagated crop species which are multiplied in tissue culture are generally dicotyledons In an idealised dicotyledon the above-ground part of the plant consists of a main stem which has a number of nodes from which the leaves develop There is an apical bud which is the main growing point of the plant and axillary or lateral buds in the leafaxils (between each leaf and the stem) Lateral buds may develop into branches but their development is often inhibited by the dominance of the apical bud This apical dominance occurs largely because of the production in the apical shoot of hormones which inhibit branching, that is, the development oflateral buds These hormones include the auxins, gibberellins and possibly the cytokinins It has been found that the lateral buds usually develop if the apical bud is removed
If stem sections are excised, not only do the lateral buds develop, but rools also usually form These roots usually arise from cells produced following division of an outer layer of phloem and their initiation appears to be stimulated by the production of indole acetic acid or similar hormone in the actively growing shoot
For the nlpid multiplication of vegetatively propagated crops in tissue culture, nodal pieces, buds or tuber sprouts (young shoots) are the normal starting point because given the right growth medium and environment they usually develop into rooted plantlets
Procedure for sterilisation of plant material for tissue culturing
It should be assumed that all naturnlly growing plants are colonised by microflora on their surface Therefore, if plant tissue is to be cultured under aseptic conditions, this external contaminated tissue must be removed or surface-sterilised, depending on the type of tissue being cultured It is important to remove all the organisms because otherwise they will flourish in the culture medium
45
Normally, material is surface-sterilised If the surface of the plant is to be removed before culturing it can be treated harshly beeause it does not matter if it is damaged But if the plant tissue is to be cultured intact then the sterilisation process must be more gentle The aim of the treatment is to kill the contaminating organisms while doing minimal damage to the plant tissue
The following sterilisation regime is usually adequate for surface sterilisation of these types of tissues
(1) Take the smallest possible pieces of tissue for sterilisation e g if culturing nodal pieces do not leave long internodes, but trim tissuc back close to node
(2) Rinse the tissue under running tap water as this removes some of the micro flora
(3) Place the tissue pieces unto a screw-top vial and fill with disinfectant and a drop of detergent and shake for the required time The type and strength of the disinfectant and the time of sterilisation may vary with different types of tissue The operator should experiment if initial attempts at sterilisation are unsatisfactory
A satisfactory disinfectant consists of a solution of 1 2% (active ingredient) hypochlorite and 002% Tween-80 Hypochlorite is available for domestic and commercial use as sodium hypochlorite orcalcium hypochlorite Fresh solutions should be made up daily (or whenever required)
The time required for sterilisation will vary but the following should act as a guideline (using the above solutions):
a) Axillary buds excised with a small piece of the underlying tissue - 10-15 minutes sterilisation
b) Nodal pieces excised from normal plants with a small piece of internode either side of the node
10-15 minutes sterilisation
e) Tuber sprouts, preferably about 1 cm in length and rapidly growing - 5-10 minutes sterilisation To produce these sprouts, existing sprouts are removed, the tuber washed well in running water then disinfected in the above sterilizing solution for 10 minutes After rinsing well in sterile water, the tuber is plaeed in a clean paper bag in a dark environment at a temperature of around 20°C to resprout These sprouts are then excised together with a few developing root hairs and sterilised
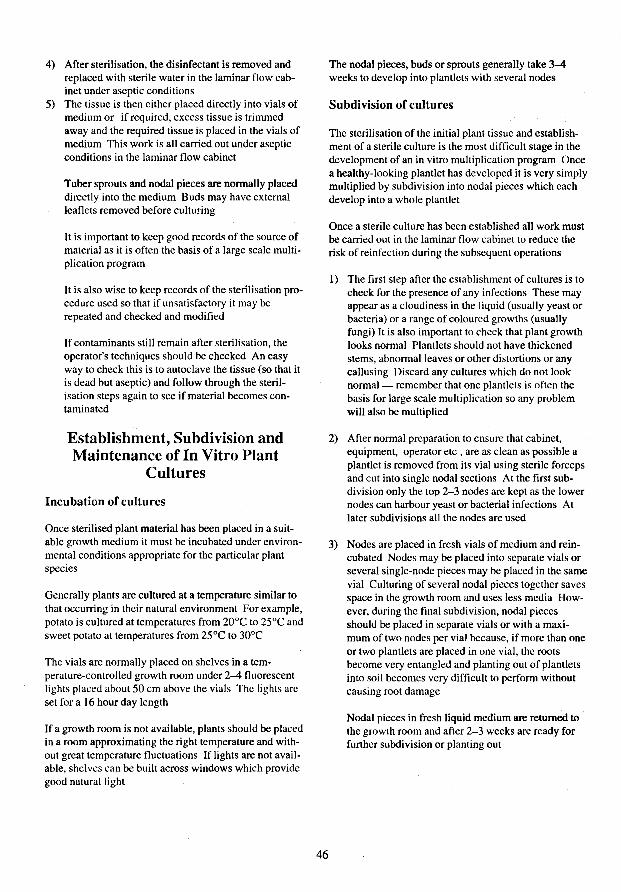
4) After sterilisation, the disinfectant is removed and replaced with sterile water in the laminar flow cabinet under aseptic conditions
5) The tissue is then either placed directly into vials of medium or if required, excess tissue is trimmed away and the required tissue is placed in the vials of medium This work is all carried out under aseptic conditions in the laminar flow cabinet
Tuber sprouts and nodal pieces are normally placed directly into the medium Buds may have external leaflets removed before culturing
It is important to keep good reeords of the souree of material as it is often the basis of a large scale multiplication program
It is also wise to keep records of the sterilisation procedure used so that if unsatisfactory it may be repeated and checked and modified
If contaminants still remain after sterilisation, the operator's techniques should be checked An easy way to check this is to autoclave the tissue (so that it is dead but aseptic) and follow through the sterilisation steps again to see if material becomes contaminated
Establishment, Subdivision and Maintenance of In Vitro Plant
Cultures
Incubation of cultures
Once sterilised plant material has been placed in a suitable growth medium it must be incubated under environmental conditions appropriate for the particular plant species
Generally plants are cultured at a temperature similar to that occurring in their natural environment For example, potato is cultured at temperatures from 20°C to 25°C and sweet potato at temperatures from 25°C to 30°C
The vials are normally placed on shelves in a temperature-controlled growth room under 2-4 fluorescent lights placed about 50 cm above the vials The lights arc set for a 16 hour day length
If a growth room is not available, plants should be placed in a room approximating the right temperature and without great temperature fluctuations If lights are not available, shelves can be built across windows which provide good natural light
The nodal pieces, buds or sprouts generally take 3--4 weeks to develop into plantlets with several nodes
Subdivision of cultures
The sterilisation of the initial plant tissue and establishment of a sterile culture is the most difficult stage in the development of an in vitro multiplication program Once a healthy-looking plantiet has developed it is very simply multiplied by subdivision into nodal pieces which each develop into a whole plantlet
Once a sterile culture has been established all work must be carried out in the laminar flow cabinet to reduce the risk of reinfection during the subsequent operations
1) The first step after the establishment of cultures is to check for the presence of any infections These may appear as a cloudiness in the liquid (usually yeast or bacteria) or a range of coloured growths (usually fungi) It is also important to check that plant growth looks normal Plantlets should not have thickened stems, abnormal leaves or other distortions or any callusing Discard any cultures which do not look normal remember that one planUets is often the basis for large seale multiplication so any problem will also be multiplied
2) After normal preparation to ensure that cabinet, equipment, operator etc , are as clean as possible a plantlet is removed from its vial using sterile forceps and cut into single nodal sections At the first subdivision only the top 2-3 nodes are kept as the lower nodes can harbour yeast or bacterial infections At later subdivisions all the nodes are used
3) Nodes are placed in fresh vials of medium and reincubated Nodes may be placed into separate vials or several single-node pieces may be placed in the same vial Culturing of several nodal pieces together saves space in the growth room and uses less media However, during the final subdivision, nodal pieces should be placed in separate vials or with a maximum of two nodes per vial because, if more than one or two plantlets are placed in one vial, the roots become very entangled and planting out of plantlets into soil becomes very difficult to perform without causing root damage
46
Nodal pieces in fresh liquid medium are returned to the growth room and after 2-3 weeks are ready for further subdivision or planting out
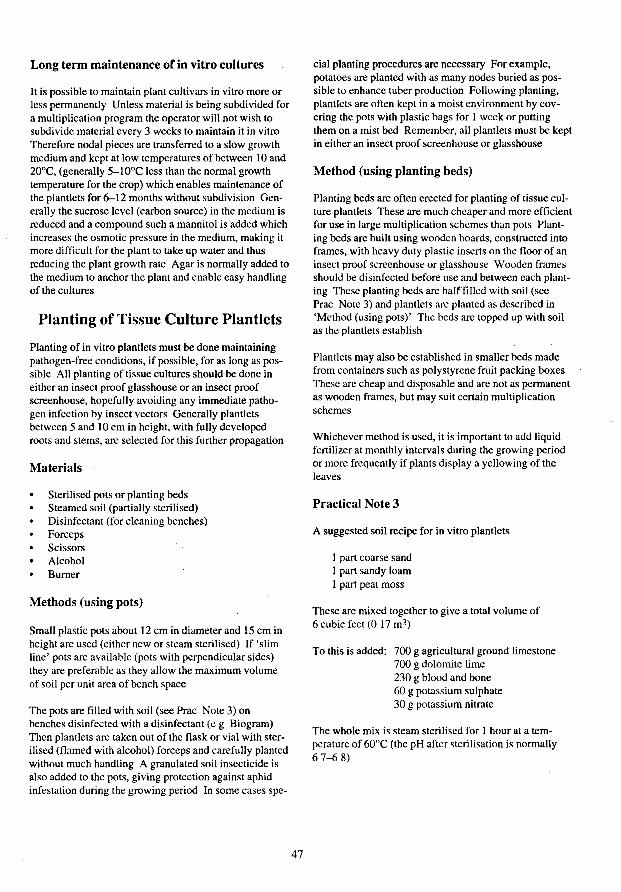
Long term maintenance ofin vitro cultures
It is possible to maintain plant cultivars in vitro more or less permanently Unless material is being subdivided for a multiplication program the operator will not wish to subdivide material every 3 weeks to maintain it in vitro Therefore nodal pieces are transferred to a slow growth medium and kept at low temperatures of between 10 and 20"C, (generally 5-lOoC less than the normal growth temperature for the crop) which enables maintenance of the plantlets for 6-12 months without subdivision Generally the sucrose level (carbon source) in the medium is reduced and a compound such a mannitol is added which increases the osmotic pressure in the medium, making it more difficult for the plant to take up water and thus reducing the plant growth rate Agar is normally added to the medium to anchor the plant and enable easy handling of the cultures
Planting of Tissue Culture Plantlets
Planting of in vitro plantlets must be done maintaining pathogen-free conditions, if possible, for as long as possible All planting of tissue cultures should be done in eithcr an insect proof glasshouse or an insect proof screenhouse, hopefully avoiding any immediate pathogen infection by insect vectors Generally plantlets between 5 and 10 cm in height, with fully developed roots and stems, are selected for this funher propagation
Materials
Sterilised pots or planting beds Steamed soil (partially sterilised) Disinfectant (for cleaning benches) Forceps Scissors Alcohol Burner
Methods (using pots)
Small plastic pots about 12 cm in diameter and 15 cm in height are used (either new or steam sterilised) If 'slim line' pots are available (pots with perpendicular sides) they are preferable as they allow the maximum volume of soil per unit area of bench space
The pots are filled with soil (see Prac Note 3) on benches disinfected with a disinfectant (e g Biogram) Then plantlets are taken out of the flask or vial with sterilised (flamed with alcohol) forceps and carefully planted without much handling A granulated soil insecticide is also added to the pots, giving protection against aphid infestation during the growing period In some cases spe-
47
cial planting procedures are necessary For example, potatoes are planted with as many nodes buried as possible to enhance tuber production Following planting, plantlets are often kept in a moist environment by covering the pots with plastic bags for I week or putting them on a mist bed Remember, all plantlets must be kept in either an insect proof screenhouse or glasshouse
Method (using planting beds)
Planting beds are often erected for planting of tissue culture plantlets These are much cheaper and more efficient for use in large multiplication schemes than pots Planting beds are built using wooden boards, constructed into frames, with heavy duty plastic inserts on the floor of an insect proof sereenhouse or glasshouse Wooden frames should be disinfected before use and between each planting These planting beds are halffiIled with soil (see Prac Note 3) and plantlcts arc planted as described in 'Method (using pots)' The beds are topped up with soil as the plantlets establish
Plantlets may also be established in smaller beds made from containers such as polystyrene fruit packing boxes These are cheap and disposable and are not as permanent as wooden frames, but may suit cenain multiplication schemes
Whichever method is used, it is important to add liquid fertilizer at monthly intervals during the growing period or more frequently if plants display a yellowing of the leaves
Practical Note 3
A suggested soil recipe for in vitro plantlets
1 part coarse sand 1 part sandy loam I part peat moss
These are mixed together to give a total volume of 6 cubic feet (0 17 m3)
To this is added: 700 g agricultural ground limestone 700 g dolomite lime 230 g blood and bone 60 g potassium sulphate 30 g potassium nitrate
The whole mix is steam sterilised for I hour at a temperature of 60°C (the pH after sterilisation is normally 67-68)
-~-------~-----~- ..... --.~.-~ ..... --.~-- ....... --.--- .... -~----~~---
".
A CIAR Technical Reports
No. I. ACIAR Grain Storage Research Program: research report 1983-84, 63p., 1985.
No. 2. Pastures in Vanuatu, D. Macfarlane and M. Shclton, 32p., 1986.
No. 3. ACIAR Grain Storage Research Program: research report 1984-85, 85p., 1986.
No. 4. Coconut germplasm in the South Pacific Islands, M.A. Foale, 23p., 1987.
No. 5. South Pacific agriculture: challenges and opportunities for ACIAR and its research partners, G.J. Persley and P. Ferrar, 87p., 1987.
No. 6. ACIAR Grain Storage Reseach Program: research report 1985-86, 96p., 1987.
No. 7. Building on success: agricultural research, technology, and policy for development: report of a symposium held at Canberra, 14 May 1987, J.G. Ryan, 39p., 1987.
No. 8. New technologies for rainfed rice-based farming systems in the Philippines and Sri Lanka: report of a workshop held at Iloilo, Philippines, 20-24 July 1987, 39p., 1988.
No. 9. Gaseous nitrogen loss from urea fertilizers in Asian cropping systems, J.R. Freney, J.R. Simpson, Zhu Zhao-liang and Aziz Bidin, 16p., 1989.
No. 10. Bulk handling of paddy and rice in Malaysia: an economic analysis, G.J. Ryland and K.M. Menz, 32p., [989.
No. 11. Economic prospects for vanilla in the South Pacific, K.M. Mcnz and E.M. Fieming, 14p., 1989.
No. 12. Biological control of Salvinia molesta in Sri Lanka: an assessment of costs and benefits, J.A. Doeleman, 14p., 1989.
No. 13. Rainfed rice production in the Philippines: a combined agronomic economic study of Antique Province, K.M. Menz, 90p., 1989.
No. 14. Transport and storage of fruit and vegetables in Papua New Guinea, K.J. Scott and G. Atkinson, 22p., 1989.
No. 15. Marketing perspectives on a potential Pacific spice industry, Grant Vinning, 59p., 1990.
No. 16. Mineral nutrition of food legumes in Thailand with particular reference to micronutrients, R.W. Bell et aI., 52p., 1990.
No. 17. Rice production in Sri Lanka, K.M. Menz (cd.) 5Ip., 1990.
No. 18. Post-flask management of tissue-cultured bananas, Jeff Daniells and Mike Smith, 8p., 1991.
No. 19 The utilisation of remote sensing in the South Pacific, D. van R. Claasen, 59p., 1992.
No.20 Hybridisation techniques for acacias, M. Sedgley, J. Harbard and R.-M. Smith, lip., 1992.