Embed Size (px)
Citation preview
ACE Online Step-by-Step Tutorial
Account Creation
In order to play ACE Online you must first have an account with Suba Games. To do this, please head to
the main site at http://www.subagames.com and register a new account. Please input the following
information on the account registration page to complete the account creation process.
Download ACE Online
After creating a new account, new users must download the game client. The client can be downloaded
at http://ace.subagames.com . Just click on the downloads tab at the top of the screen and then click on
one of the Full Game Client Installer links.
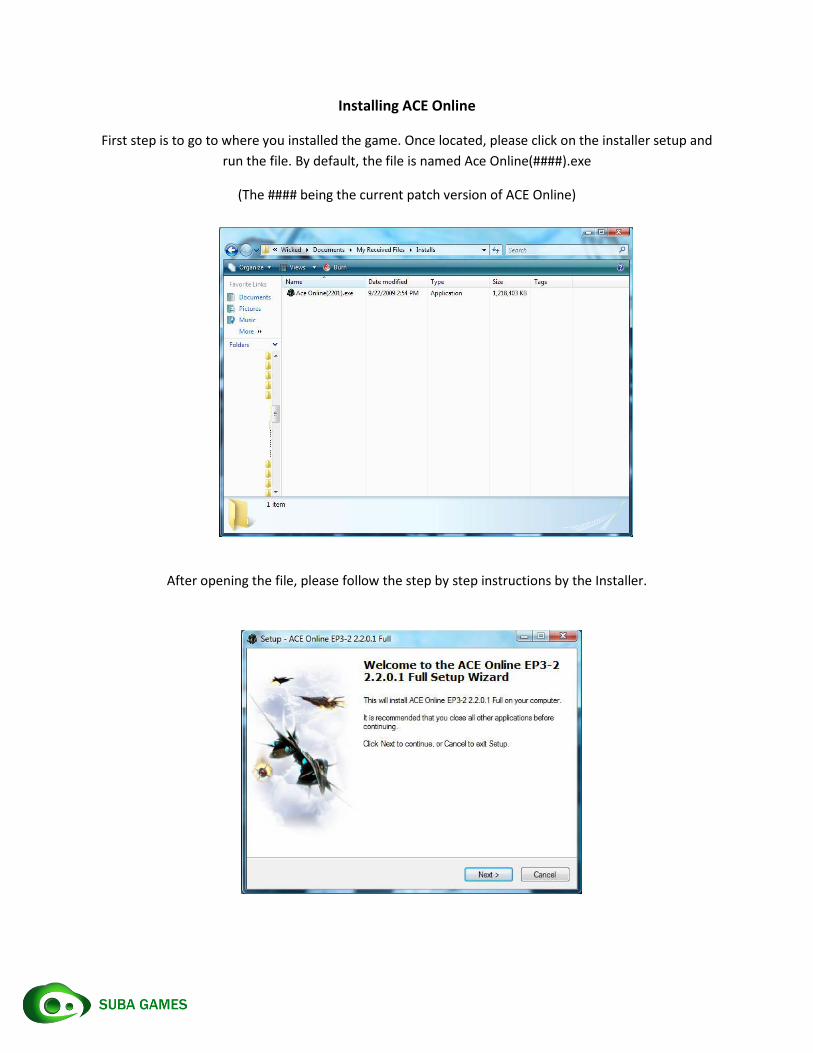
Installing ACE Online
First step is to go to where you installed the game. Once located, please click on the installer setup and
run the file. By default, the file is named Ace Online(####).exe
(The #### being the current patch version of ACE Online)
After opening the file, please follow the step by step instructions by the Installer.
Please note that by default, the installer will install the game into
C:\Program Files\Subagames\ACE Online
If you wish to change the install location, you can change the destination folder through the installer.
Minimum Requirements
OS: Windows XP / Vista / ME / 98
CPU: 1 GhZ Pentium 3 or Equivalent
RAM: 256 MB
HDD: 2.0 GB Free Space
Graphics Card: Any 32MB VGA Card
Recommended Requirements
OS: Windows XP / Vista / ME / 98
CPU: 1.5 GhZ Pentium 4 or Better
RAM: 1 GB RAM
HDD: 2.0 GB Free Space
Graphics Card: Any 128MB VGA Card
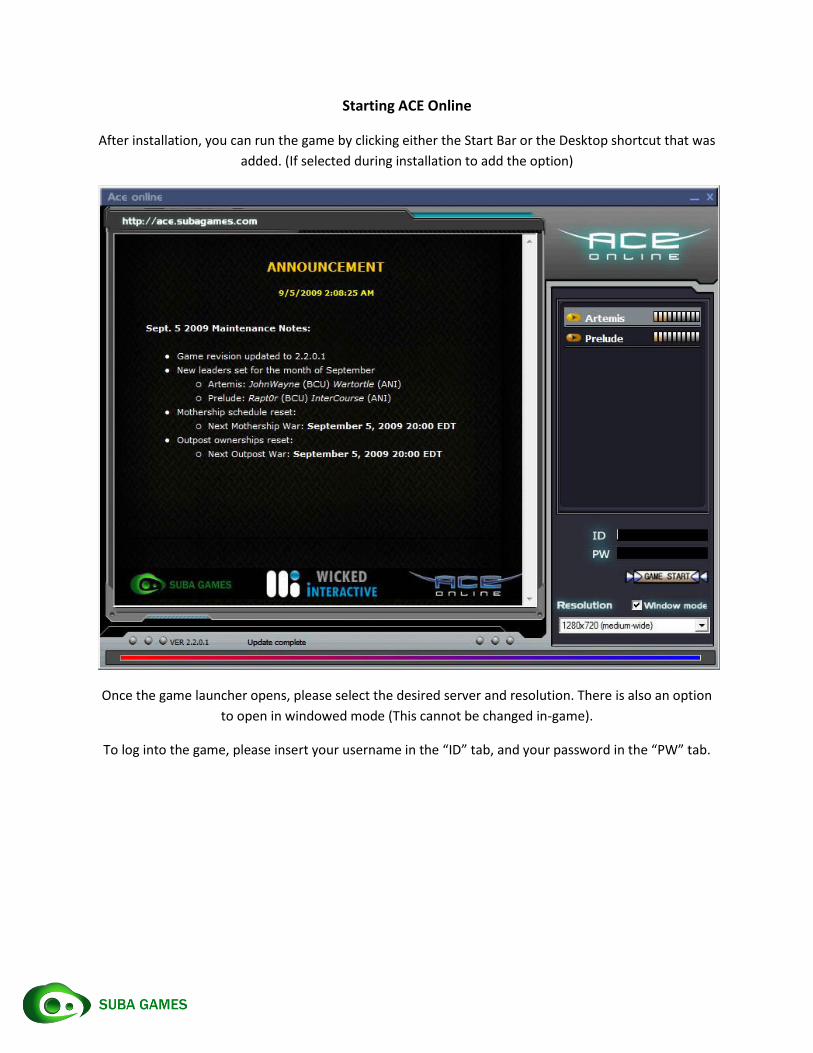
Starting ACE Online
After installation, you can run the game by clicking either the Start Bar or the Desktop shortcut that was
added. (If selected during installation to add the option)
Once the game launcher opens, please select the desired server and resolution. There is also an option
to open in windowed mode (This cannot be changed in-game).
To log into the game, please insert your username in the “ID” tab, and your password in the “PW” tab.
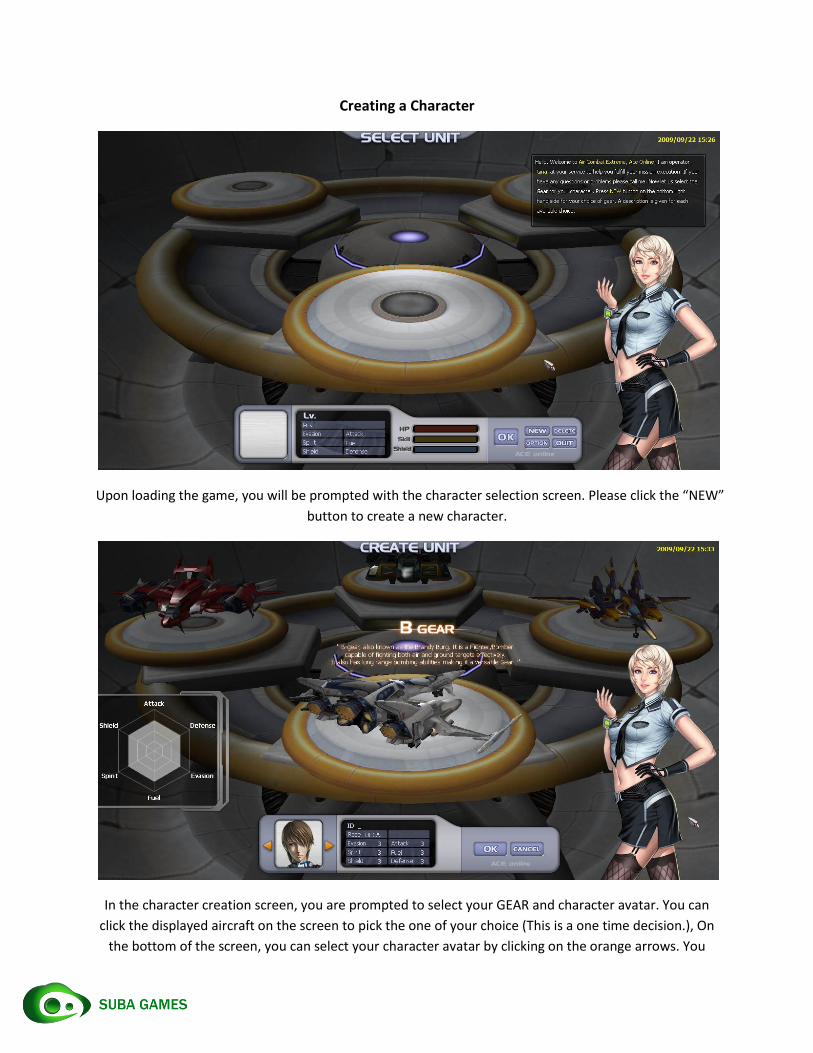
Creating a Character
Upon loading the game, you will be prompted with the character selection screen. Please click the “NEW”
button to create a new character.
In the character creation screen, you are prompted to select your GEAR and character avatar. You can
click the displayed aircraft on the screen to pick the one of your choice (This is a one time decision.), On
the bottom of the screen, you can select your character avatar by clicking on the orange arrows. You
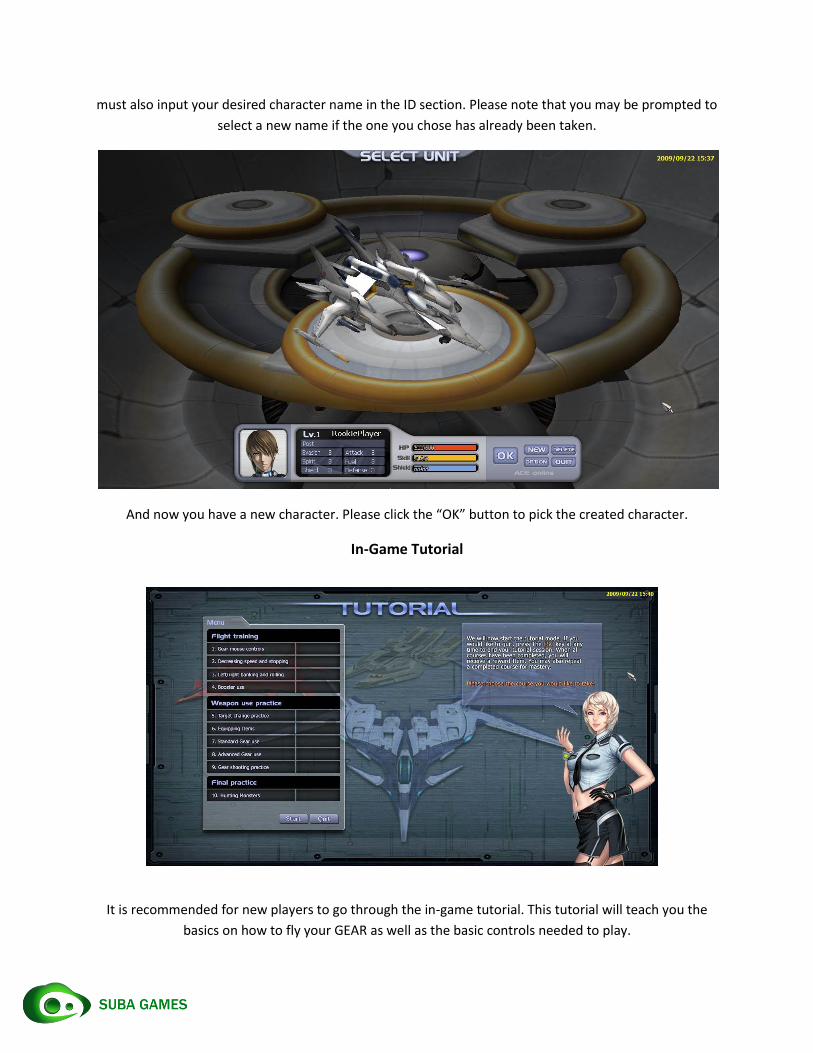
must also input your desired character name in the ID section. Please note that you may be prompted to
select a new name if the one you chose has already been taken.
And now you have a new character. Please click the “OK” button to pick the created character.
In-Game Tutorial
It is recommended for new players to go through the in-game tutorial. This tutorial will teach you the
basics on how to fly your GEAR as well as the basic controls needed to play.
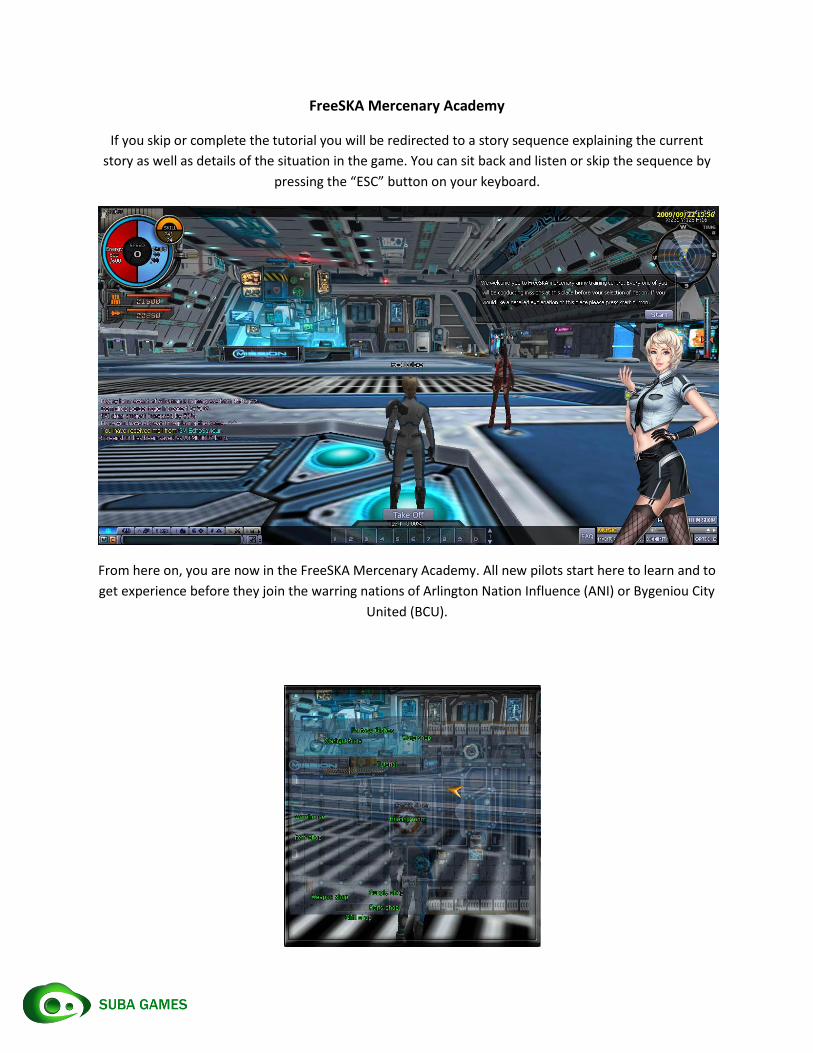
FreeSKA Mercenary Academy
If you skip or complete the tutorial you will be redirected to a story sequence explaining the current
story as well as details of the situation in the game. You can sit back and listen or skip the sequence by
pressing the “ESC” button on your keyboard.
From here on, you are now in the FreeSKA Mercenary Academy. All new pilots start here to learn and to
get experience before they join the warring nations of Arlington Nation Influence (ANI) or Bygeniou City
United (BCU).
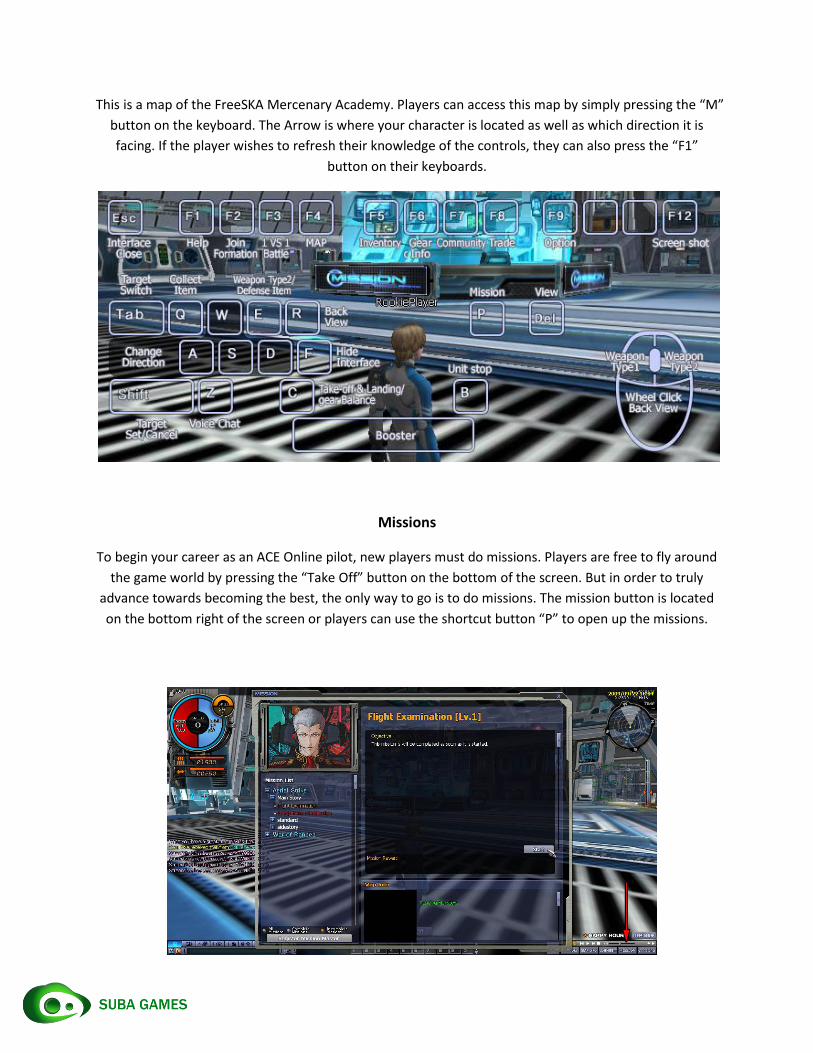
This is a map of the FreeSKA Mercenary Academy. Players can access this map by simply pressing the “M”
button on the keyboard. The Arrow is where your character is located as well as which direction it is
facing. If the player wishes to refresh their knowledge of the controls, they can also press the “F1”
button on their keyboards.
Missions
To begin your career as an ACE Online pilot, new players must do missions. Players are free to fly around
the game world by pressing the “Take Off” button on the bottom of the screen. But in order to truly
advance towards becoming the best, the only way to go is to do missions. The mission button is located
on the bottom right of the screen or players can use the shortcut button “P” to open up the missions.
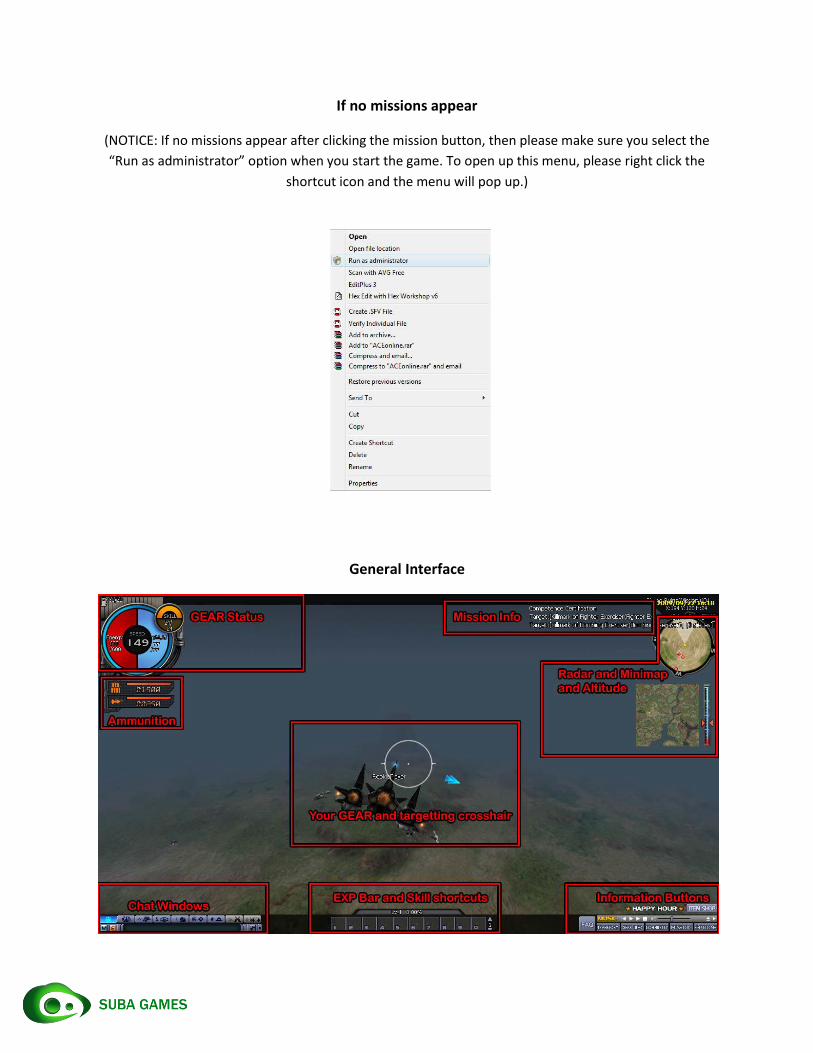
If no missions appear
(NOTICE: If no missions appear after clicking the mission button, then please make sure you select the
“Run as administrator” option when you start the game. To open up this menu, please right click the
shortcut icon and the menu will pop up.)
General Interface
Above is the general interface while flying.
The GEAR Status area will show what skills and power ups are active as well as your hitpoints and SP.
Mission Info section shows what mission you are on, as well as the targets you need to kill and how
many you have killed.
The Radar / Minimap / Altitude area helps give you an idea of your location as well as what’s around you.
The Ammunition area shows how many missiles and bullets you have on your GEAR.
The middle area shows your actual GEAR as well as your targeting crosshair.
The bottom left shows the Chat Window buttons. Click on them to show only the desired chat.
The bottom middle shows how much experience needed until the next level, as well as your active
shortcut skills.
The Information Buttons area will show information about your character or about the game in general.
This is also where the game options as well as the Item Shop button are located.
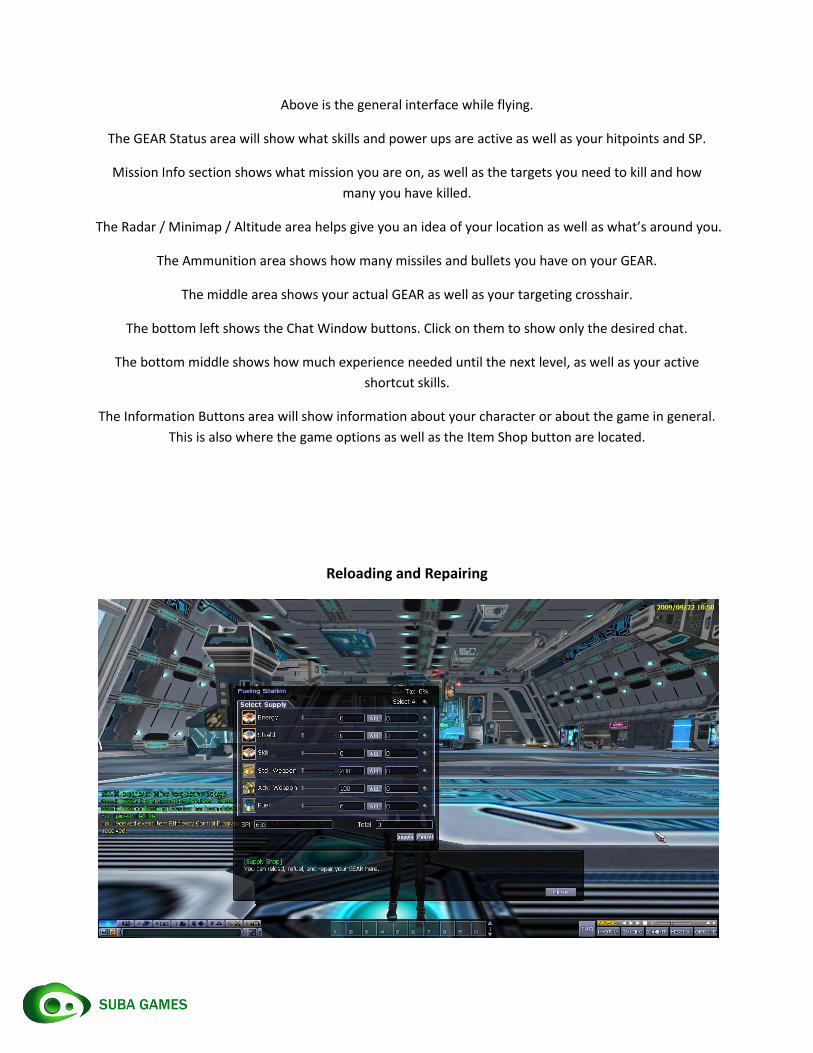
Reloading and Repairing
To reload fuel or ammunition, players must return to town, access the supply shop in town, or land on a
supply pad while on the field. The above window will appear, allowing players to choose if they want to
repair, refuel, or rearm their GEAR. While in town or while on a supply pad, your GEAR will slowly be
repaired. This is useful if you are low on SPI but need to get repaired.
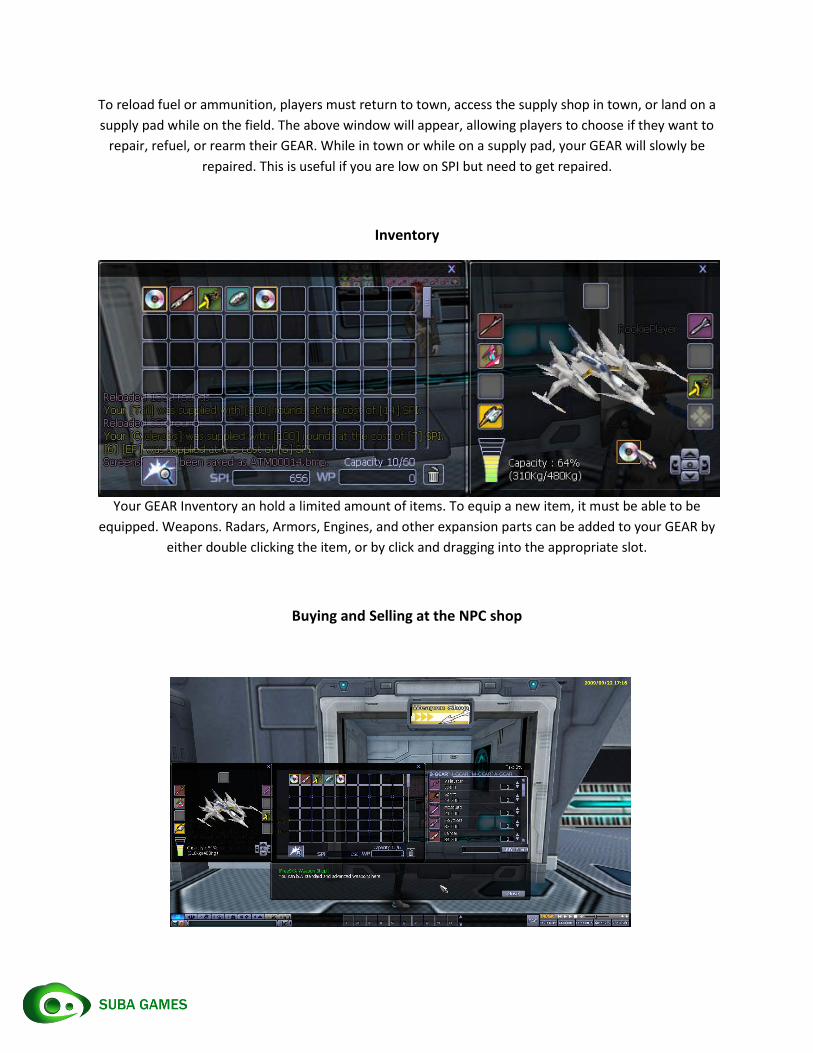
Inventory
Your GEAR Inventory an hold a limited amount of items. To equip a new item, it must be able to be
equipped. Weapons. Radars, Armors, Engines, and other expansion parts can be added to your GEAR by
either double clicking the item, or by click and dragging into the appropriate slot.
Buying and Selling at the NPC shop
To buy and sell items, players must go to one of the NPC shops and must click on the counter to bring up
the shop screen. Here players can buy or sell stuff to and from the NPC. To buy an item, just select the
item and choose the quantity, then click the “Buy” button. To sell an item, you can click and drag the
item into the shop list, or right click an item. Players can also select multiple items by hold the “Ctrl”
button.
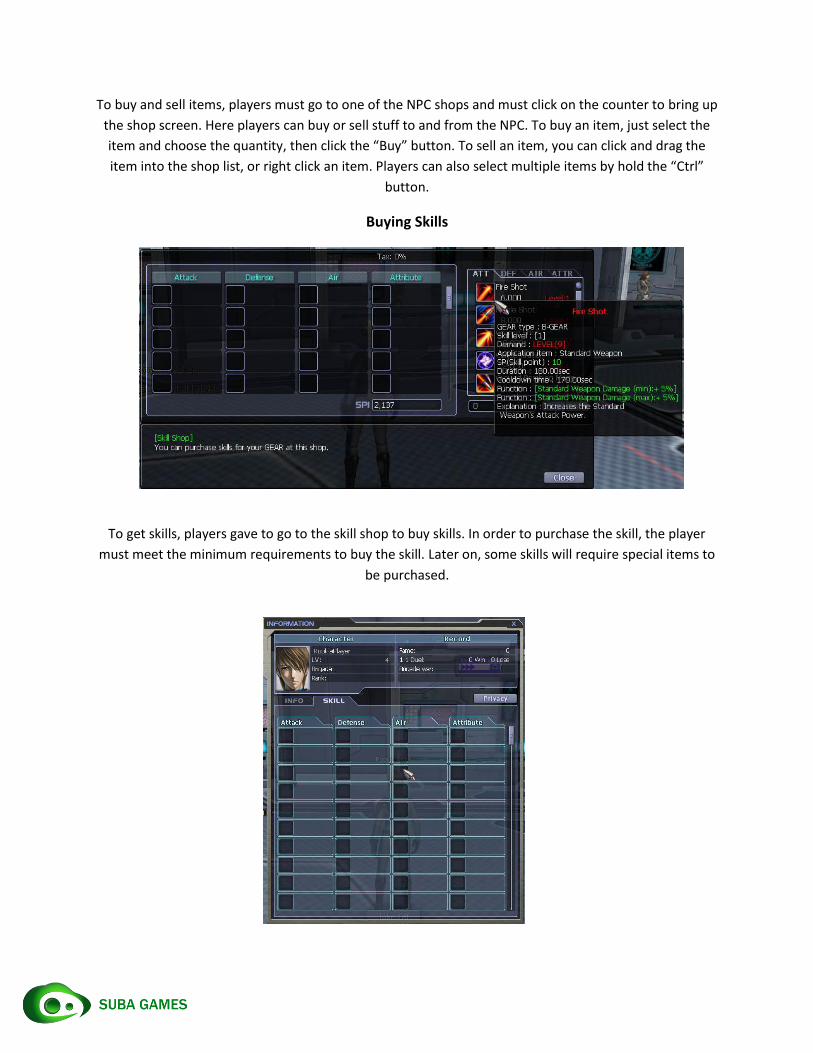
Buying Skills
To get skills, players gave to go to the skill shop to buy skills. In order to purchase the skill, the player
must meet the minimum requirements to buy the skill. Later on, some skills will require special items to
be purchased.
After purchasing the skills, the skill will appear in the skill section in the GEAR INFO button, located at
the bottom right of the screen. The player can active the skills by double clicking them in the skill
window, or by dragging the skill icon into the shortcut bar, and then clicking the appropriate button.
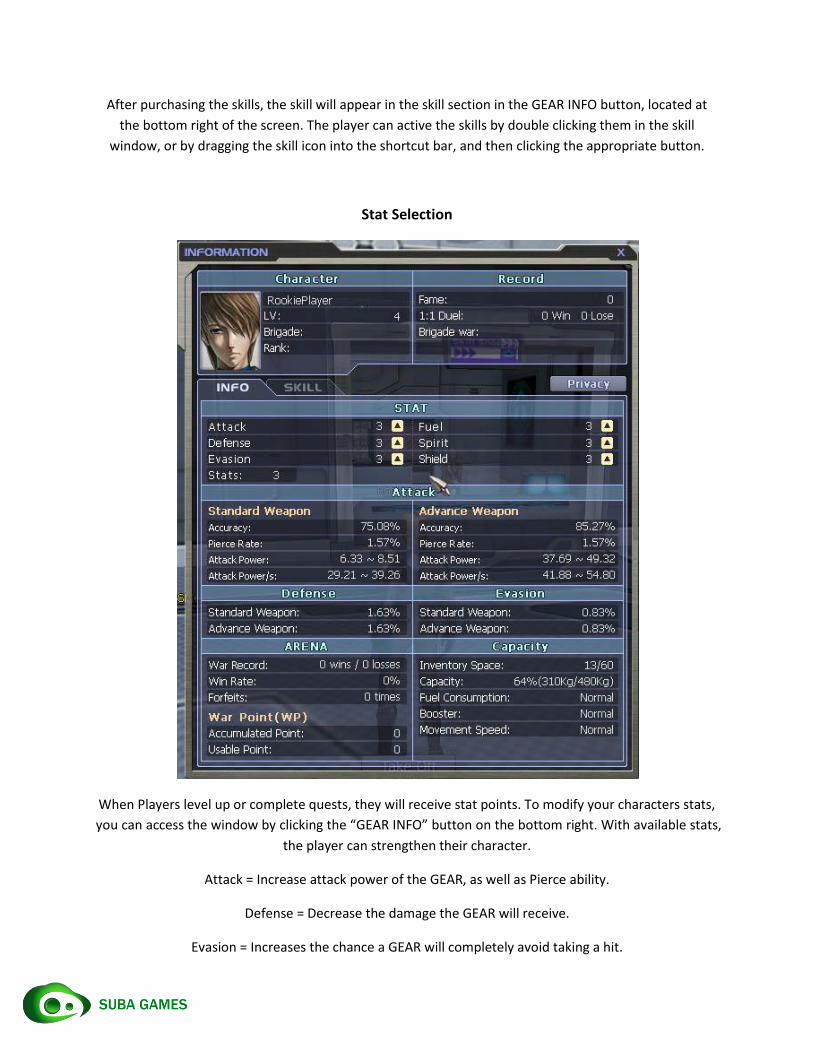
Stat Selection
When Players level up or complete quests, they will receive stat points. To modify your characters stats,
you can access the window by clicking the “GEAR INFO” button on the bottom right. With available stats,
the player can strengthen their character.
Attack = Increase attack power of the GEAR, as well as Pierce ability.
Defense = Decrease the damage the GEAR will receive.
Evasion = Increases the chance a GEAR will completely avoid taking a hit.
Fuel = Increases the Capacity of the GEAR.
Sprit = Increase the amount of SP the GEAR has.
Shield = Increase the amount of Shield the GEAR has.
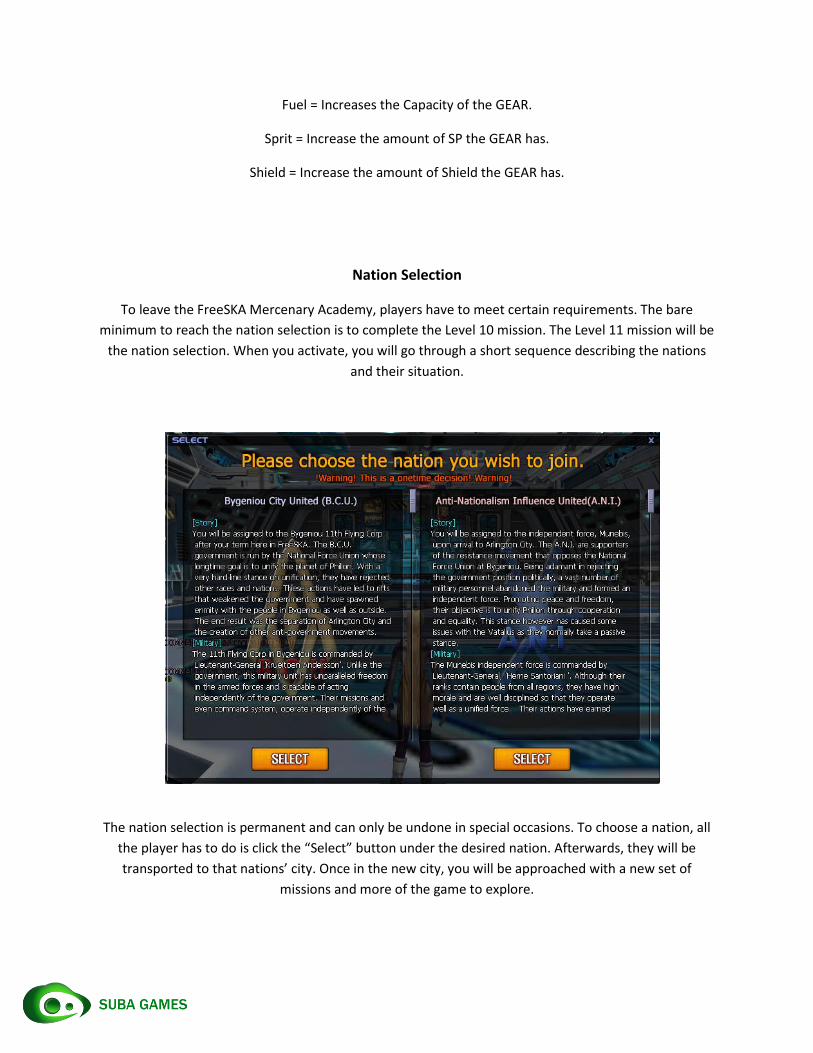
Nation Selection
To leave the FreeSKA Mercenary Academy, players have to meet certain requirements. The bare
minimum to reach the nation selection is to complete the Level 10 mission. The Level 11 mission will be
the nation selection. When you activate, you will go through a short sequence describing the nations
and their situation.
The nation selection is permanent and can only be undone in special occasions. To choose a nation, all
the player has to do is click the “Select” button under the desired nation. Afterwards, they will be
transported to that nations’ city. Once in the new city, you will be approached with a new set of
missions and more of the game to explore.
Enjoy the world of ACE Online
http://ace.subagames.com