Embed Size (px)
Citation preview
1EN
GEN
GLISH
ACCESSING INSTALLATION MENU
Accessing Installation Menu
1 Press and hold the SETTINGS button for more than 5 seconds.
PICTURE OPTION
NETWORK
TIME
MY MEDIAINPUT
orPICTURE
OPTION
AUDIO
NETWORK
TIME
MY MEDIA
2 Press the 0 button four times. Press the OK button.
or
HDMI
DTV
No Signal
HDMI (DTV)
No Signal
3 When the Installation Menu is displayed, select the item you want.
LG Digital Signage Setup
USB Cloning
Password Change
Set ID Setup
Configuration Setup
Lock Mode
Fail Over
SuperSign Server Setup
Easy Brightness Control
S/W : xx.xx.xx.xx Micom : x.xx.x OK
Installation Menu (V 3.0)
LG Digital Signage Setup
2
ENG
ENG
LISH
ACCESSING INSTALLATION MENU
Installation MenuNOTE
yy Default values may differ by region.
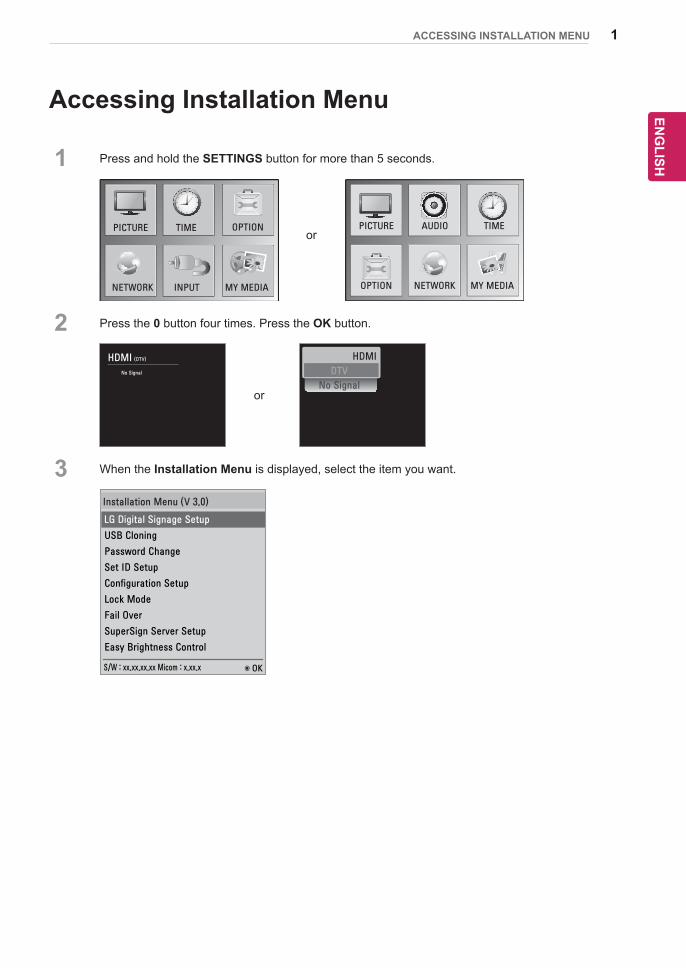
The LG Digital Signage Setup menuThis menu is used after installation to configure the Digital Signage.
LG Digital Signage Setup
USB Cloning
Password Change
Set ID Setup
Configuration Setup
Lock Mode
Fail Over
SuperSign Server Setup
Easy Brightness Control
S/W : xx.xx.xx.xx Micom : x.xx.x OK
LG Digital Signage Setup
Signage Mode Operation
• Power On Status
• Key Operation
• IR Operation
• Local Key Operation
• Limited Mode
• Input Source Change
• Menu Display
• OSD Display
STD
No
Normal
Normal
No
Yes
Yes
Yes
Yes
LG Digital Signage Setup
• Power On Default
• Input Source
• A/V Setting(Video setting)
• Aspect Ratio
• Wake On LAN
• DPM
• Digital Audio Input
• Speaker
No
Disable
Off
OKPrevious
Installation Menu (V 3.0)
LG Digital Signage Setup
LG Digital Signage Setup
Confirm
• Sync Mode
• Power On Delay
• Pivot mode
• OSD Portrait Mode
• Intelligent Auto
• Factory Reset
On
Off
Off
OKPrevious
No
Off
10min.
Analog
On
OKPrevious
Slave
Off
Signage Mode Operationyy Decide to work all functions of Signage Mode Operation or not by setting Signage Mode Operation as Yes (Work) or No (Do Not Work)yy When Signage Mode Operation is set to Yes(Work), all functions of Signage Mode apply.yy When Signage Mode Operation is set to No(Do Not Work), all functions of Signage Mode Do Not apply and runs on initial value. (It may not work depending upon the model.)
Power On Statusyy Select the status of the monitor set when turning on the main power. yy You can set with PWR, STD, or LST.yy PWR always turns the monitor ON with the main power. yy STD turns the monitor on in the STAND-BY mode. yy LST turns the monitor to its previous status. If the main power were turned off in POWER ON status, the monitor would power up in POWER ON. If it were turned off in STAND-BY status, it would power up in STAND-BY. (This may not function, depending upon the model.)
3EN
GEN
GLISH
ACCESSING INSTALLATION MENU
Key Operationyy This feature manages the usability of the local/front keys and your remote control with regard to their operations. This feature works according to the IR Operation and Local Key Operation settings. (It may not work depending upon the model.)
IR Operationyy Set LG IR Operation to On (Work) or Off (Do Not Work) to enable or disable the remote control. (0 - Normal, 1 - Use PWR Only, 2 - Block All)yy Selecting Block All sets your monitor to block all key signals coming from general LG remote controls.yy Selecting Use PWR Only sets your monitor to block all key signals coming from general LG remote controls except for the Power key signal.yy Selecting Normal sets your monitor to receive all key signals coming from LG remote controls normally.yy There are keys that must be operated in Service mode when Use PWR Only or Block All is selected. (In-Start, In-Stop, Power-Only, ADJ, Installation Menu, P-Check, S-check) (It may not work depending upon the model.)
NOTE
yy When all IR key signals or all local key signals are blocked, the Power On Status value switches to PWR. Changing this value has been made impossible to ensure the operation of powering on. (To pre-vent mistakes by the user)
Limited Modeyy This feature enables you to inhibit particular operations of the Signage functions. This feature works according to the Input Source Change, Menu Display or OSD Display settings. (It may not work depending upon the model.)
Input Source Changeyy Decide to change input source or not by setting Input Source Change as On(Change possible) or Off (Change impossible).yy When Input Source Change is set to Off (Change impossible) INPUT key doesn't work.yy When Input Source Change is set to On (Change possible), then changing input source is available. (It may not work depending upon the model.)
Menu Displayyy Set On (Work) or Off (Do Not Work).yy Even if it is set to Off, press the Menu button for five seconds or more to go back to the Installation Menu. (It may not work depending upon the model.)
OSD Displayyy Decide to display OSD or not by setting OSD Display as On (Mark) or Off (Off Mark).yy When OSD Display is set to Off (Off Mark), all OSD is not displayed except installaion menu. (It may not work depending upon the model.)
4
ENG
ENG
LISH
ACCESSING INSTALLATION MENU
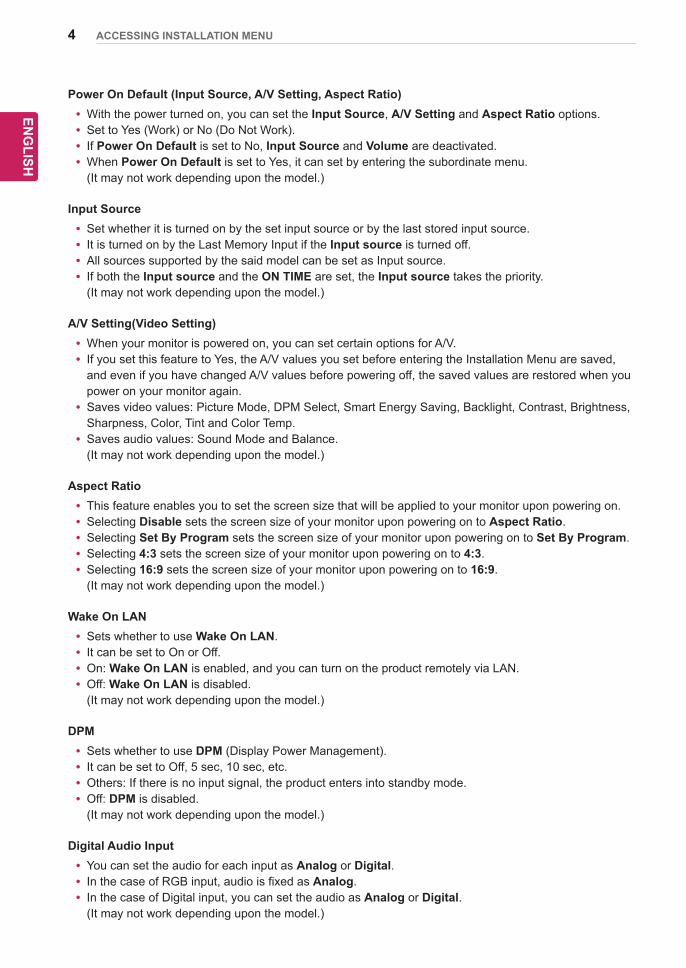
Power On Default (Input Source, A/V Setting, Aspect Ratio)yy With the power turned on, you can set the Input Source, A/V Setting and Aspect Ratio options.yy Set to Yes (Work) or No (Do Not Work).yy If Power On Default is set to No, Input Source and Volume are deactivated.yy When Power On Default is set to Yes, it can set by entering the subordinate menu. (It may not work depending upon the model.)
Input Sourceyy Set whether it is turned on by the set input source or by the last stored input source.yy It is turned on by the Last Memory Input if the Input source is turned off.yy All sources supported by the said model can be set as Input source. yy If both the Input source and the ON TIME are set, the Input source takes the priority. (It may not work depending upon the model.)
A/V Setting(Video Setting)yy When your monitor is powered on, you can set certain options for A/V.yy If you set this feature to Yes, the A/V values you set before entering the Installation Menu are saved, and even if you have changed A/V values before powering off, the saved values are restored when you power on your monitor again.yy Saves video values: Picture Mode, DPM Select, Smart Energy Saving, Backlight, Contrast, Brightness, Sharpness, Color, Tint and Color Temp.yy Saves audio values: Sound Mode and Balance. (It may not work depending upon the model.)
Aspect Ratioyy This feature enables you to set the screen size that will be applied to your monitor upon powering on.yy Selecting Disable sets the screen size of your monitor upon powering on to Aspect Ratio.yy Selecting Set By Program sets the screen size of your monitor upon powering on to Set By Program.yy Selecting 4:3 sets the screen size of your monitor upon powering on to 4:3.yy Selecting 16:9 sets the screen size of your monitor upon powering on to 16:9. (It may not work depending upon the model.)
Wake On LANyy Sets whether to use Wake On LAN.yy It can be set to On or Off.yy On: Wake On LAN is enabled, and you can turn on the product remotely via LAN.yy Off: Wake On LAN is disabled. (It may not work depending upon the model.)
DPMyy Sets whether to use DPM (Display Power Management). yy It can be set to Off, 5 sec, 10 sec, etc. yy Others: If there is no input signal, the product enters into standby mode.yy Off: DPM is disabled. (It may not work depending upon the model.)
Digital Audio Inputyy You can set the audio for each input as Analog or Digital.yy In the case of RGB input, audio is fixed as Analog.yy In the case of Digital input, you can set the audio as Analog or Digital. (It may not work depending upon the model.)
5EN
GEN
GLISH
ACCESSING INSTALLATION MENU
Speakeryy You can inhibit the audio settings by setting whether or not to use speakers.yy If you set this feature to Off, audio is not outputted and you cannot enter the Audio menu.yy If you set this feature to On, audio is outputted and you can enter the Audio menu. (It may not work depending upon the model.)
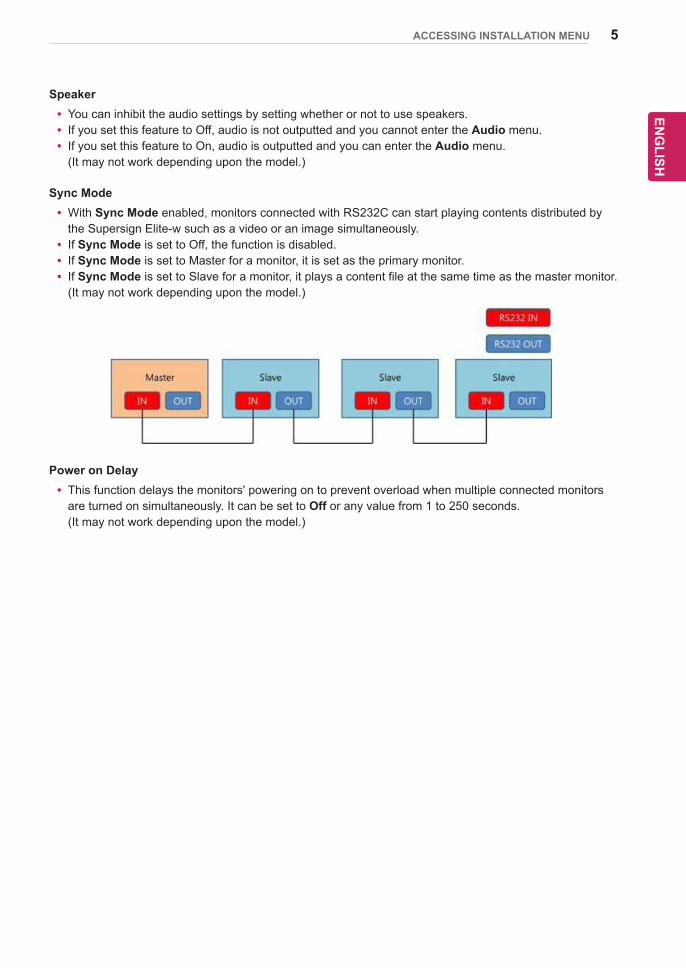
Sync Modeyy With Sync Mode enabled, monitors connected with RS232C can start playing contents distributed by the Supersign Elite-w such as a video or an image simultaneously.yy If Sync Mode is set to Off, the function is disabled.yy If Sync Mode is set to Master for a monitor, it is set as the primary monitor.yy If Sync Mode is set to Slave for a monitor, it plays a content file at the same time as the master monitor.(It may not work depending upon the model.)
Power on Delayyy This function delays the monitors' powering on to prevent overload when multiple connected monitors are turned on simultaneously. It can be set to Off or any value from 1 to 250 seconds. (It may not work depending upon the model.)
6
ENG
ENG
LISH
ACCESSING INSTALLATION MENU
Pivot Modeyy It Inverts the screen display 180 degrees.yy It inverts both Input video signal and OSD.yy The available options are Off, On.yy If it is set to Off, the function is disabled.yy If it is set to On, the screen display is inverted 180 degrees.yy Pivot Mode is applied after rebooting. (It may not work depending upon the model.)
OSD Portrait Mode (Off, 90, 270)yy Rotate the OSD clockwise.yy The available options are Off, 90° or 270°.yy If set to Off, the function is deactivated.yy If set to 90, the OSD rotates clockwise by 90 degrees.yy If set to 270, the OSD rotates clockwise by 270 degrees. (It may not work depending upon the model.)
Intelligent Autoyy Set to On (Work) or Off (Do Not Work).yy If the setting is On, Display is automatically arranged through resolution size when you change the resolution at the first. (It may not work depending upon the model.)
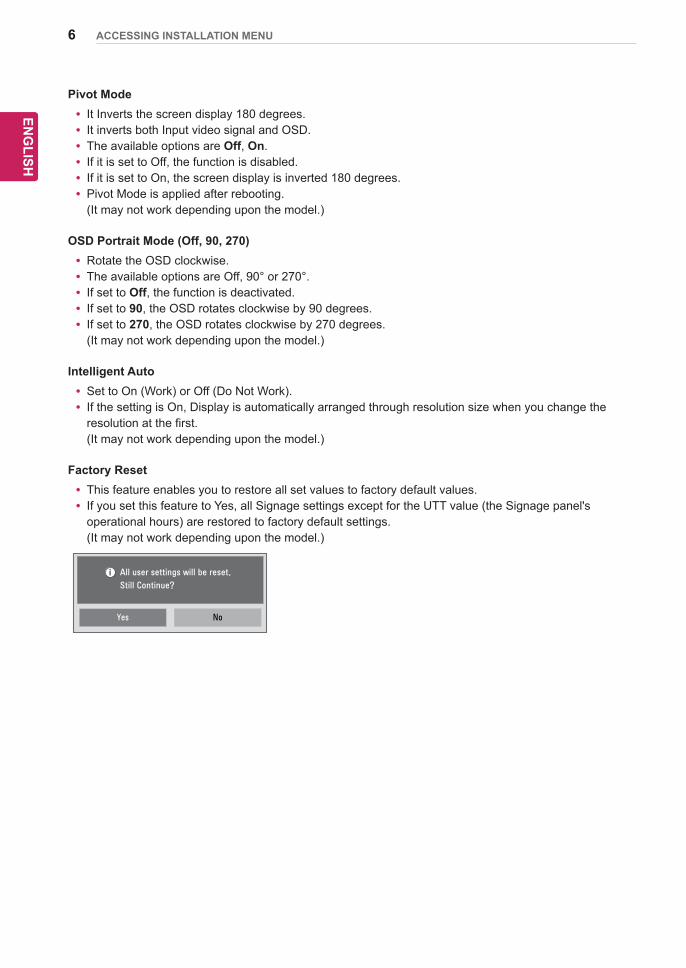
Factory Resetyy This feature enables you to restore all set values to factory default values.yy If you set this feature to Yes, all Signage settings except for the UTT value (the Signage panel's operational hours) are restored to factory default settings. (It may not work depending upon the model.)
Yes No
All user settings will be reset.
Still Continue?
7EN
GEN
GLISH
ACCESSING INSTALLATION MENU
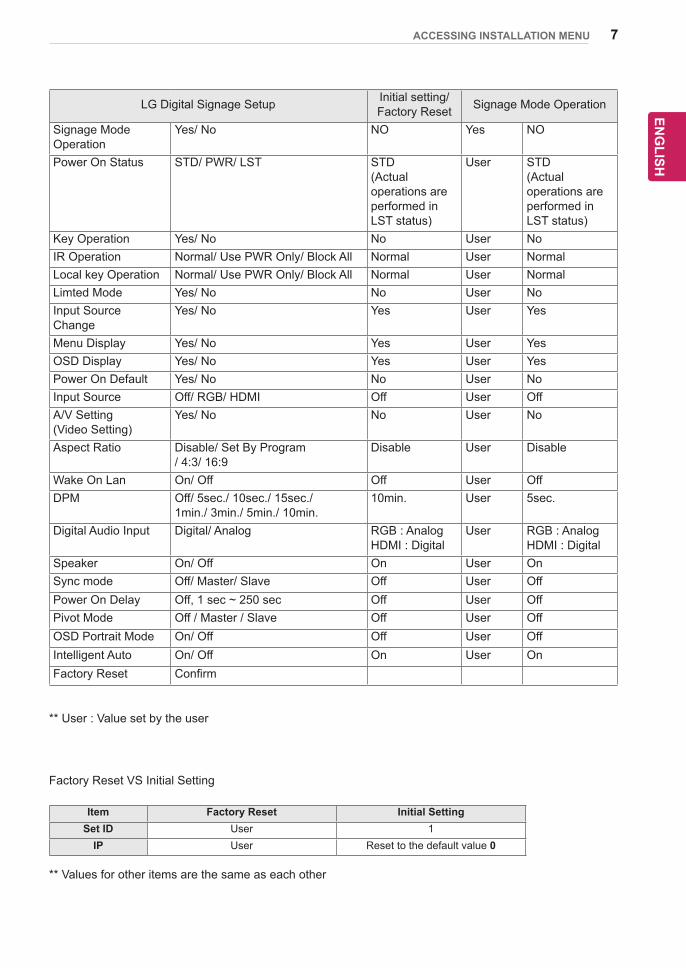
LG Digital Signage Setup Initial setting/Factory Reset Signage Mode Operation
Signage Mode Operation
Yes/ No NO Yes NO
Power On Status STD/ PWR/ LST STD (Actual operations are performed in LST status)
User STD (Actual operations are performed in LST status)
Key Operation Yes/ No No User NoIR Operation Normal/ Use PWR Only/ Block All Normal User NormalLocal key Operation Normal/ Use PWR Only/ Block All Normal User NormalLimted Mode Yes/ No No User NoInput Source Change
Yes/ No Yes User Yes
Menu Display Yes/ No Yes User YesOSD Display Yes/ No Yes User YesPower On Default Yes/ No No User NoInput Source Off/ RGB/ HDMI Off User OffA/V Setting(Video Setting)
Yes/ No No User No
Aspect Ratio Disable/ Set By Program / 4:3/ 16:9
Disable User Disable
Wake On Lan On/ Off Off User OffDPM Off/ 5sec./ 10sec./ 15sec./
1min./ 3min./ 5min./ 10min.10min. User 5sec.
Digital Audio Input Digital/ Analog RGB : Analog HDMI : Digital
User RGB : Analog HDMI : Digital
Speaker On/ Off On User OnSync mode Off/ Master/ Slave Off User OffPower On Delay Off, 1 sec ~ 250 sec Off User OffPivot Mode Off / Master / Slave Off User OffOSD Portrait Mode On/ Off Off User OffIntelligent Auto On/ Off On User OnFactory Reset Confirm
** User : Value set by the user
Factory Reset VS Initial Setting
Item Factory Reset Initial SettingSet ID User 1
IP User Reset to the default value 0
** Values for other items are the same as each other
8
ENG
ENG
LISH
ACCESSING INSTALLATION MENU
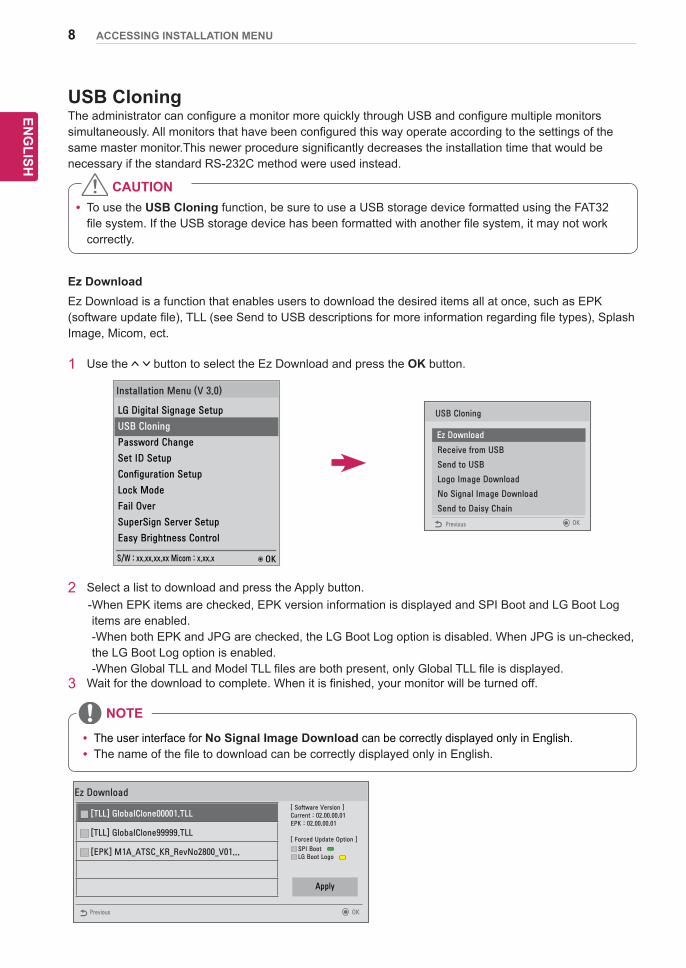
USB CloningThe administrator can configure a monitor more quickly through USB and configure multiple monitors simultaneously. All monitors that have been configured this way operate according to the settings of the same master monitor.This newer procedure significantly decreases the installation time that would be necessary if the standard RS-232C method were used instead.
yy To use the USB Cloning function, be sure to use a USB storage device formatted using the FAT32 file system. If the USB storage device has been formatted with another file system, it may not work correctly.
CAUTION
Ez DownloadEz Download is a function that enables users to download the desired items all at once, such as EPK (software update file), TLL (see Send to USB descriptions for more information regarding file types), Splash Image, Micom, ect.
1 Use the button to select the Ez Download and press the OK button.
USB Cloning
Ez Download
Receive from USB
Send to USB
Logo Image Download
No Signal Image Download
Send to Daisy Chain
OKPrevious
S/W : xx.xx.xx.xx Micom : x.xx.x OK
Installation Menu (V 3.0)
LG Digital Signage Setup
USB Cloning
Password Change
Set ID Setup
Configuration Setup
Lock Mode
Fail Over
SuperSign Server Setup
Easy Brightness Control
2 Select a list to download and press the Apply button. - When EPK items are checked, EPK version information is displayed and SPI Boot and LG Boot Log
items are enabled. -When both EPK and JPG are checked, the LG Boot Log option is disabled. When JPG is un-checked, the LG Boot Log option is enabled. -When Global TLL and Model TLL files are both present, only Global TLL file is displayed.
3 Wait for the download to complete. When it is finished, your monitor will be turned off.
NOTE
yy The user interface for No Signal Image Download can be correctly displayed only in English.yy The name of the file to download can be correctly displayed only in English.
Ez Download
Previous
Apply
[ Software Version ]Current : 02.00.00.01EPK : 02.00.00.01
[ Forced Update Option ]
SPI Boot LG Boot Logo
[TLL] GlobalClone00001.TLL
[TLL] GlobalClone99999.TLL
[EPK] M1A_ATSC_KR_RevNo2800_V01...
OK
9EN
GEN
GLISH
ACCESSING INSTALLATION MENU
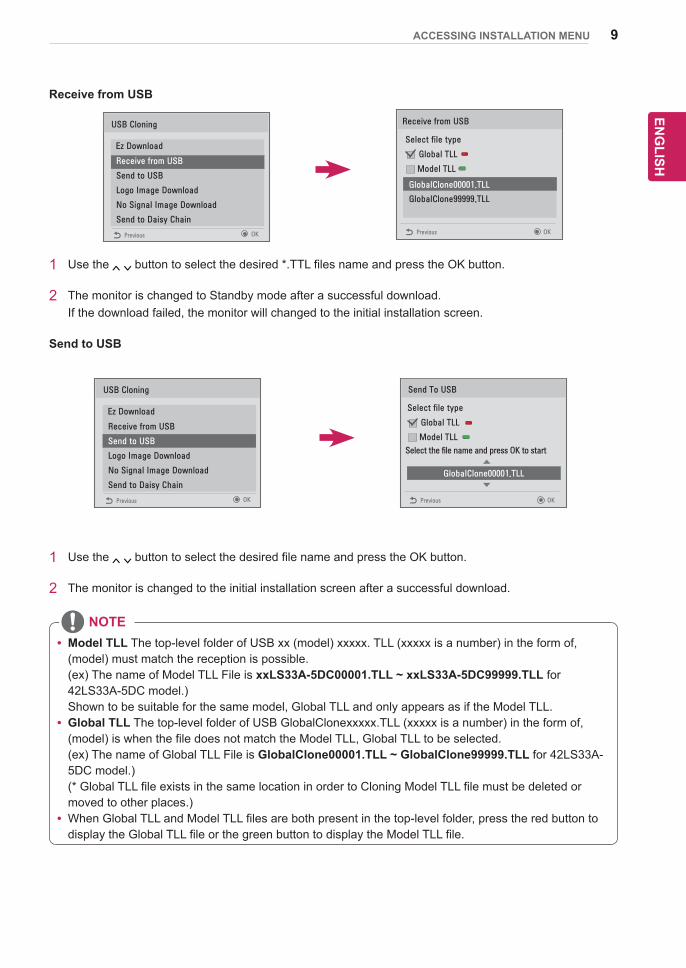
Receive from USB
Receive from USB
GlobalClone00001.TLL
GlobalClone99999.TLL
Select file type
Global TLL
Model TLL
OKPrevious
USB Cloning
Ez Download
Receive from USB
Send to USB
Logo Image Download
No Signal Image Download
Send to Daisy Chain
OKPrevious
1 Use the button to select the desired *.TTL files name and press the OK button.
2 The monitor is changed to Standby mode after a successful download. If the download failed, the monitor will changed to the initial installation screen.
Send to USB
Send To USB
GlobalClone00001.TLL
Select file type
Global TLL
Model TLL
OKPrevious
Select the file name and press OK to start
ꔠ
ꔡ
USB Cloning
Ez Download
Receive from USB
Send to USB
Logo Image Download
No Signal Image Download
Send to Daisy Chain
OKPrevious
1 Use the button to select the desired file name and press the OK button.
2 The monitor is changed to the initial installation screen after a successful download.
NOTEyy Model TLL The top-level folder of USB xx (model) xxxxx. TLL (xxxxx is a number) in the form of, (model) must match the reception is possible. (ex) The name of Model TLL File is xxLS33A-5DC00001.TLL ~ xxLS33A-5DC99999.TLL for 42LS33A-5DC model.) Shown to be suitable for the same model, Global TLL and only appears as if the Model TLL.yy Global TLL The top-level folder of USB GlobalClonexxxxx.TLL (xxxxx is a number) in the form of, (model) is when the file does not match the Model TLL, Global TLL to be selected. (ex) The name of Global TLL File is GlobalClone00001.TLL ~ GlobalClone99999.TLL for 42LS33A-5DC model.) (* Global TLL file exists in the same location in order to Cloning Model TLL file must be deleted or moved to other places.)yy When Global TLL and Model TLL files are both present in the top-level folder, press the red button to display the Global TLL file or the green button to display the Model TLL file.
10
ENG
ENG
LISH
ACCESSING INSTALLATION MENU
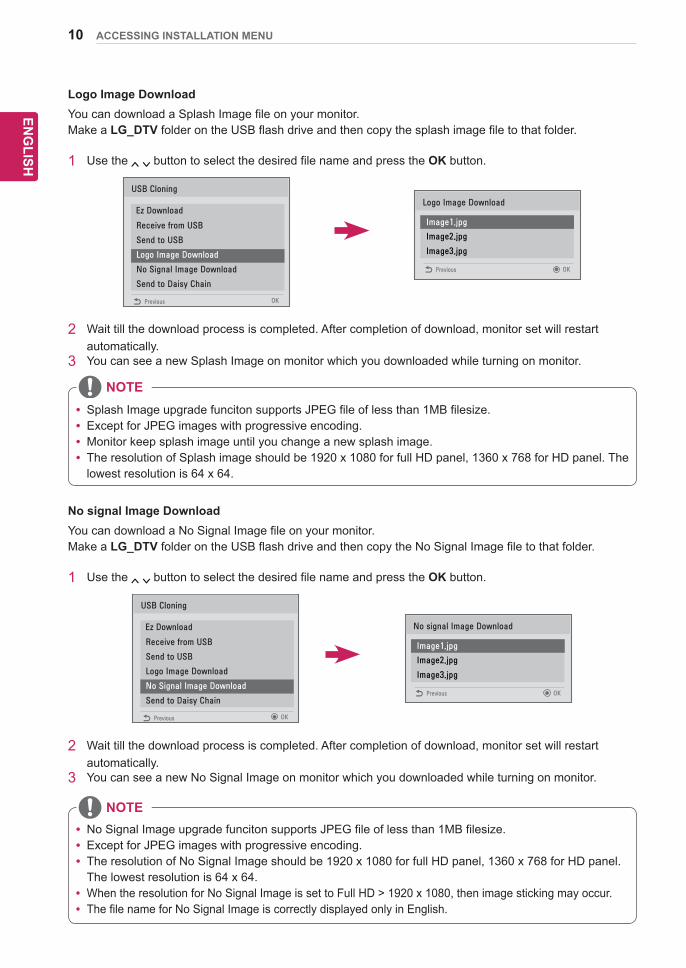
Logo Image Download You can download a Splash Image file on your monitor. Make a LG_DTV folder on the USB flash drive and then copy the splash image file to that folder.
1 Use the button to select the desired file name and press the OK button.
Logo Image Download
Image1.jpg
Image2.jpg
Image3.jpg
OKPrevious
USB Cloning
Ez Download
Receive from USB
Send to USB
Logo Image Download
No Signal Image Download
Send to Daisy Chain
OKPrevious
2 Wait till the download process is completed. After completion of download, monitor set will restart automatically.
3 You can see a new Splash Image on monitor which you downloaded while turning on monitor.
NOTEyy Splash Image upgrade funciton supports JPEG file of less than 1MB filesize.yy Except for JPEG images with progressive encoding.yy Monitor keep splash image until you change a new splash image.yy The resolution of Splash image should be 1920 x 1080 for full HD panel, 1360 x 768 for HD panel. The lowest resolution is 64 x 64.
No signal Image Download You can download a No Signal Image file on your monitor. Make a LG_DTV folder on the USB flash drive and then copy the No Signal Image file to that folder.
1 Use the button to select the desired file name and press the OK button.
No signal Image Download
Image1.jpg
Image2.jpg
Image3.jpg
OKPrevious
USB Cloning
Ez Download
Receive from USB
Send to USB
Logo Image Download
No Signal Image Download
Send to Daisy Chain
OKPrevious
2 Wait till the download process is completed. After completion of download, monitor set will restart automatically.
3 You can see a new No Signal Image on monitor which you downloaded while turning on monitor.
NOTEyy No Signal Image upgrade funciton supports JPEG file of less than 1MB filesize.yy Except for JPEG images with progressive encoding.yy The resolution of No Signal Image should be 1920 x 1080 for full HD panel, 1360 x 768 for HD panel. The lowest resolution is 64 x 64.yy When the resolution for No Signal Image is set to Full HD > 1920 x 1080, then image sticking may occur.yy The file name for No Signal Image is correctly displayed only in English.
11EN
GEN
GLISH
ACCESSING INSTALLATION MENU
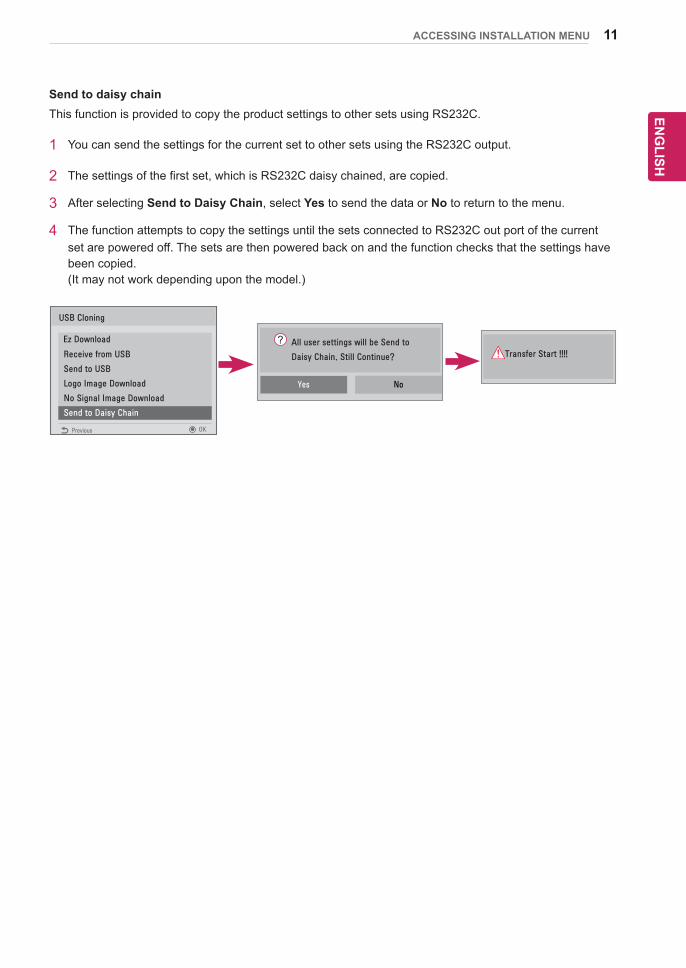
Send to daisy chain This function is provided to copy the product settings to other sets using RS232C.
1 You can send the settings for the current set to other sets using the RS232C output.
2 The settings of the first set, which is RS232C daisy chained, are copied.
3 After selecting Send to Daisy Chain, select Yes to send the data or No to return to the menu.
4 The function attempts to copy the settings until the sets connected to RS232C out port of the current set are powered off. The sets are then powered back on and the function checks that the settings have been copied. (It may not work depending upon the model.)
All user settings will be Send to
Daisy Chain. Still Continue?
Yes No
Transfer Start !!!!
USB Cloning
Ez Download
Receive from USB
Send to USB
Logo Image Download
No Signal Image Download
Send to Daisy Chain
OKPrevious
12
ENG
ENG
LISH
ACCESSING INSTALLATION MENU
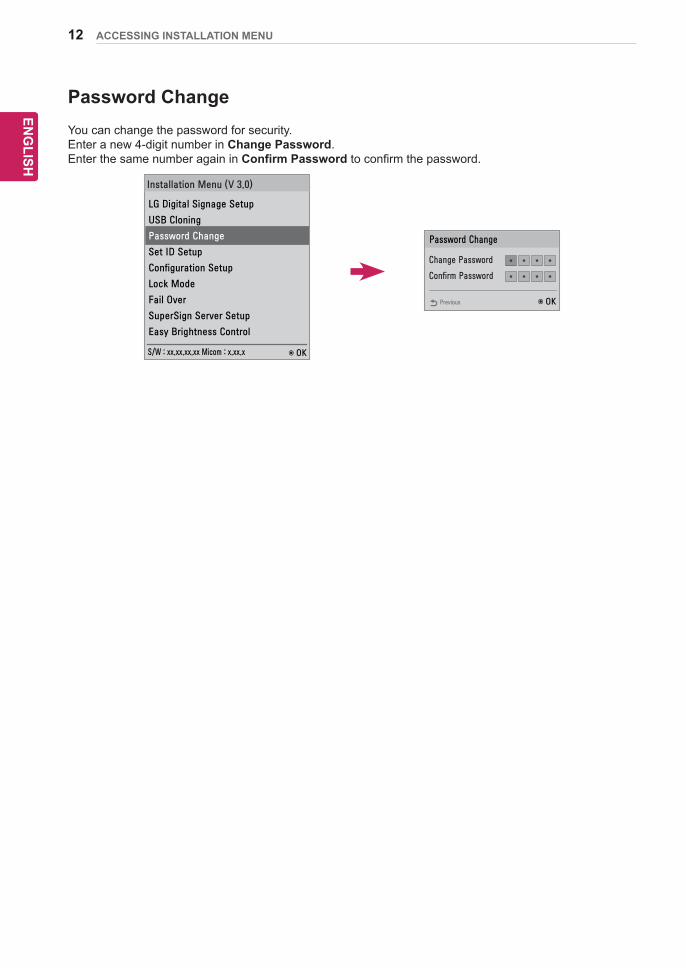
Password ChangeYou can change the password for security.Enter a new 4-digit number in Change Password.Enter the same number again in Confirm Password to confirm the password.
Password Change
Change Password
Confirm Password
*
*
*
*
*
*
*
*
OKPrevious
S/W : xx.xx.xx.xx Micom : x.xx.x OK
Installation Menu (V 3.0)
LG Digital Signage Setup
USB Cloning
Password Change
Set ID Setup
Configuration Setup
Lock Mode
Fail Over
SuperSign Server Setup
Easy Brightness Control
13EN
GEN
GLISH
ACCESSING INSTALLATION MENU
Password ChangeYou can change the password for security.Enter a new 4-digit number in Change Password.Enter the same number again in Confirm Password to confirm the password.
Set ID Setup
Set ID Lock
Set ID
Auto Set ID
Reset ID
Press OK
No
OKPrevious
Press OK
1
S/W : xx.xx.xx.xx Micom : x.xx.x OK
Installation Menu (V 3.0)
LG Digital Signage Setup
USB Cloning
Password Change
Set ID Setup
Configuration Setup
Lock Mode
Fail Over
SuperSign Server Setup
Easy Brightness Control
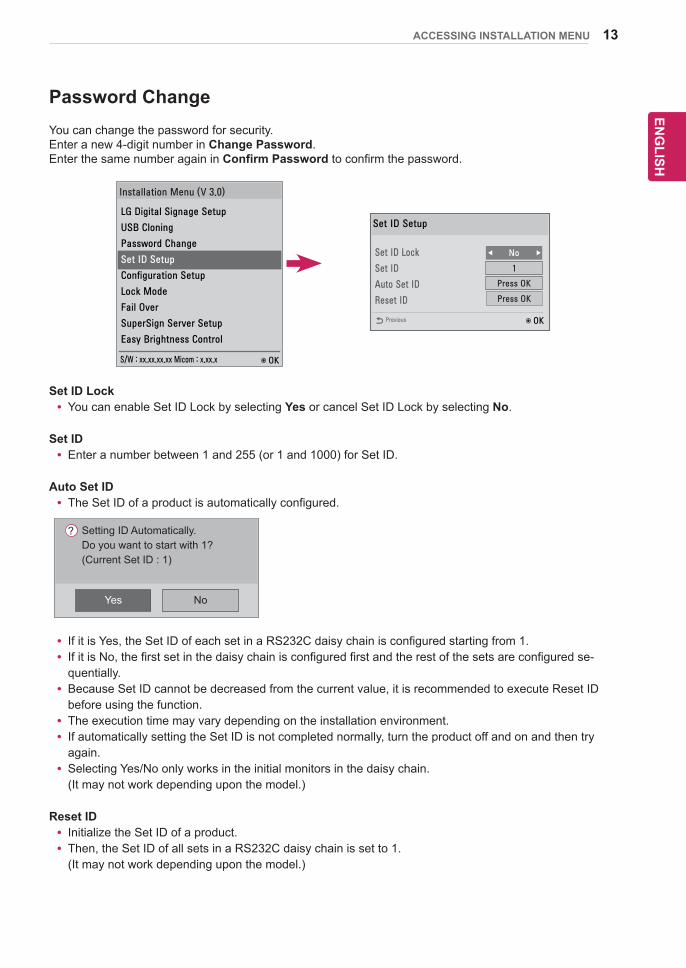
Set ID Lockyy You can enable Set ID Lock by selecting Yes or cancel Set ID Lock by selecting No.
Set IDyy Enter a number between 1 and 255 (or 1 and 1000) for Set ID.
Auto Set IDyy The Set ID of a product is automatically configured.
Yes No
Setting ID Automatically.Do you want to start with 1?(Current Set ID : 1)
yy If it is Yes, the Set ID of each set in a RS232C daisy chain is configured starting from 1.yy If it is No, the first set in the daisy chain is configured first and the rest of the sets are configured se-quentially.yy Because Set ID cannot be decreased from the current value, it is recommended to execute Reset ID before using the function.yy The execution time may vary depending on the installation environment.yy If automatically setting the Set ID is not completed normally, turn the product off and on and then try again.yy Selecting Yes/No only works in the initial monitors in the daisy chain. (It may not work depending upon the model.)
Reset IDyy Initialize the Set ID of a product.yy Then, the Set ID of all sets in a RS232C daisy chain is set to 1. (It may not work depending upon the model.)
14
ENG
ENG
LISH
ACCESSING INSTALLATION MENU
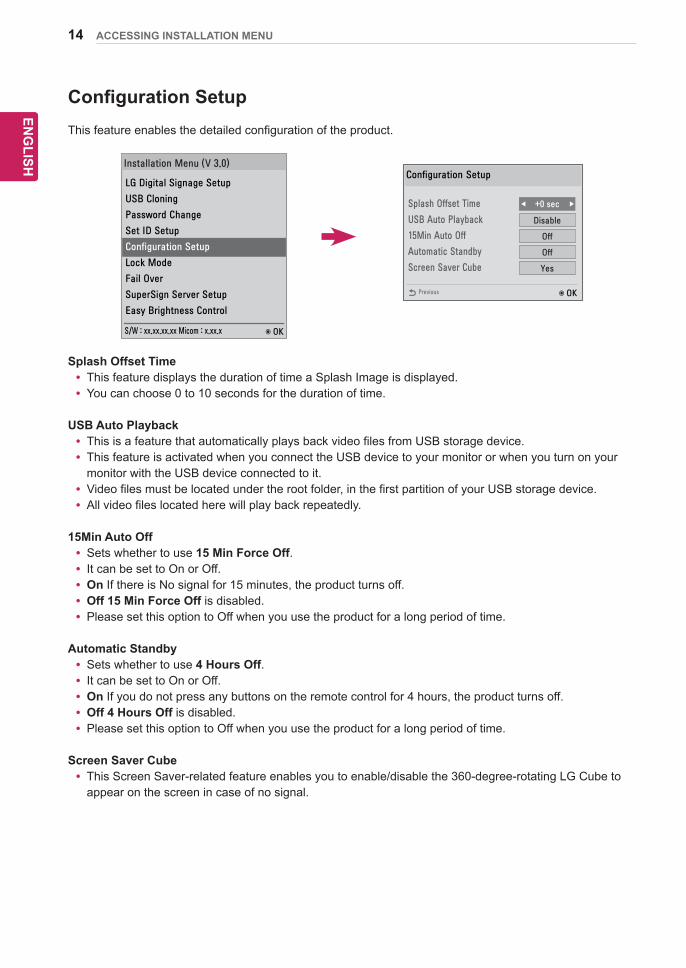
Configuration SetupThis feature enables the detailed configuration of the product.
Configuration Setup
Splash Offset Time
USB Auto Playback
15Min Auto Off
Automatic Standby
Screen Saver Cube
Disable
Off
Off
Yes
+0 sec
OKPrevious
S/W : xx.xx.xx.xx Micom : x.xx.x OK
Installation Menu (V 3.0)
LG Digital Signage Setup
USB Cloning
Password Change
Set ID Setup
Configuration Setup
Lock Mode
Fail Over
SuperSign Server Setup
Easy Brightness Control
Splash Offset Timeyy This feature displays the duration of time a Splash Image is displayed.yy You can choose 0 to 10 seconds for the duration of time.
U SB Auto Playbackyy This is a feature that automatically plays back video files from USB storage device.yy This feature is activated when you connect the USB device to your monitor or when you turn on your monitor with the USB device connected to it.yy Video files must be located under the root folder, in the first partition of your USB storage device.yy All video files located here will play back repeatedly.
15Min Auto Offyy Sets whether to use 15 Min Force Off.yy It can be set to On or Off.yy On If there is No signal for 15 minutes, the product turns off.yy Off 15 Min Force Off is disabled.yy Please set this option to Off when you use the product for a long period of time.
Automatic Standbyyy Sets whether to use 4 Hours Off.yy It can be set to On or Off.yy On If you do not press any buttons on the remote control for 4 hours, the product turns off.yy Off 4 Hours Off is disabled.yy Please set this option to Off when you use the product for a long period of time.
Screen Saver Cubeyy This Screen Saver-related feature enables you to enable/disable the 360-degree-rotating LG Cube to appear on the screen in case of no signal.

15EN
GEN
GLISH
ACCESSING INSTALLATION MENU
Lock ModeLock Mode feature allows the user to establish whether any outside input limits, thus limiting each of the ex-ternal input and automatically.
Lock Mode
USB
Initial Setting Enable
Enable
OKPrevious
S/W : xx.xx.xx.xx Micom : x.xx.x OK
Installation Menu (V 3.0)
LG Digital Signage Setup
USB Cloning
Password Change
Set ID Setup
Configuration Setup
Lock Mode
Fail Over
SuperSign Server Setup
Easy Brightness Control
USByy You can enable/disable USB input. The following will happen when USB input is disabled.yy The pop-up window that appears when a USB disk is connected to your monitor is blocked.yy You cannot enter My Media in the menu.yy You cannot enter USB Input on the Input List.yy The set value for the USB Auto Playback function changes to No and no input is available. (* As exceptions, you can download software updates and Welcome Screens.)
Initial Settingyy You can enable/disable Initial Setting.yy If it is set to Disable, Factory Reset under OPTION is disabled. (It may not work depending upon the model.)
16
ENG
ENG
LISH
ACCESSING INSTALLATION MENU
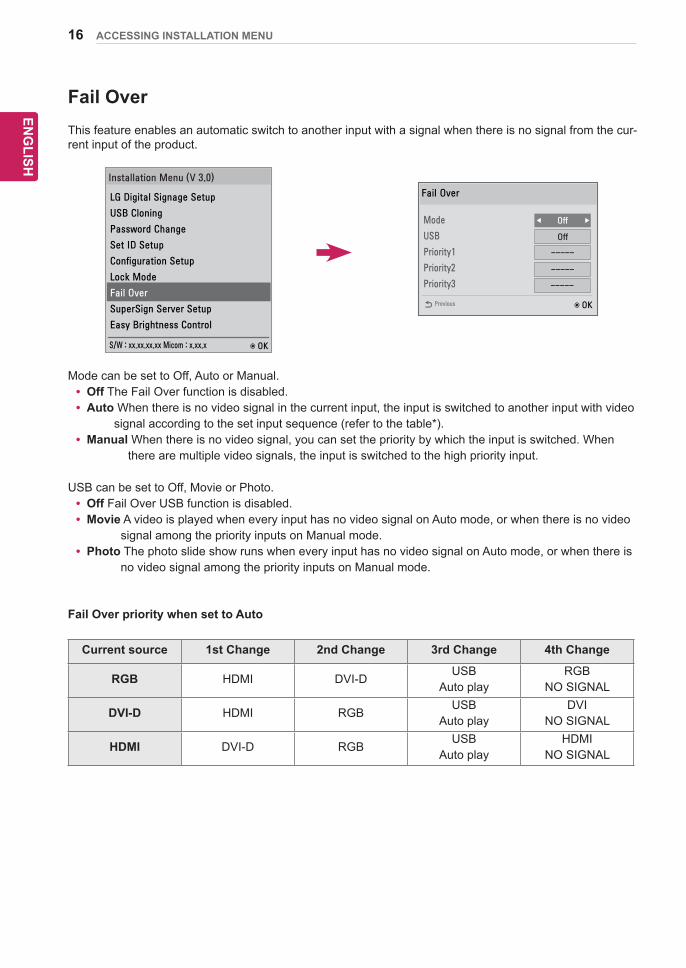
Fail OverThis feature enables an automatic switch to another input with a signal when there is no signal from the cur-rent input of the product.
Fail Over
Mode
USB
Priority1
Priority2
Priority3
-----
-----
Off
OKPrevious
-----
Off
S/W : xx.xx.xx.xx Micom : x.xx.x OK
Installation Menu (V 3.0)
LG Digital Signage Setup
USB Cloning
Password Change
Set ID Setup
Configuration Setup
Lock Mode
Fail Over
SuperSign Server Setup
Easy Brightness Control
Mode can be set to Off, Auto or Manual.yy Off The Fail Over function is disabled.yy Auto When there is no video signal in the current input, the input is switched to another input with video
signal according to the set input sequence (refer to the table*).yy Manual When there is no video signal, you can set the priority by which the input is switched. When
there are multiple video signals, the input is switched to the high priority input.
USB can be set to Off, Movie or Photo.yy Off Fail Over USB function is disabled.yy Movie A video is played when every input has no video signal on Auto mode, or when there is no video
signal among the priority inputs on Manual mode.yy Photo The photo slide show runs when every input has no video signal on Auto mode, or when there is
no video signal among the priority inputs on Manual mode.
Fail Over priority when set to Auto
Current source 1st Change 2nd Change 3rd Change 4th Change
RGB HDMI DVI-DUSB
Auto playRGB
NO SIGNAL
DVI-D HDMI RGBUSB
Auto playDVI
NO SIGNAL
HDMI DVI-D RGBUSB
Auto playHDMI
NO SIGNAL
17EN
GEN
GLISH
ACCESSING INSTALLATION MENU
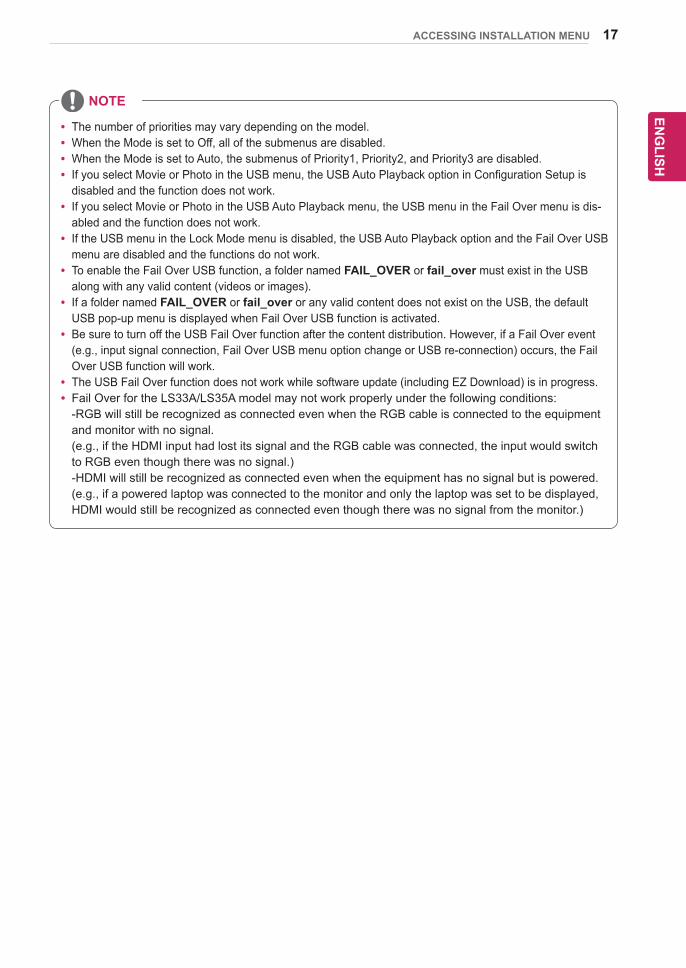
yy The number of priorities may vary depending on the model.yy When the Mode is set to Off, all of the submenus are disabled.yy When the Mode is set to Auto, the submenus of Priority1, Priority2, and Priority3 are disabled.yy If you select Movie or Photo in the USB menu, the USB Auto Playback option in Configuration Setup is disabled and the function does not work.yy If you select Movie or Photo in the USB Auto Playback menu, the USB menu in the Fail Over menu is dis-abled and the function does not work.yy If the USB menu in the Lock Mode menu is disabled, the USB Auto Playback option and the Fail Over USB menu are disabled and the functions do not work.yy To enable the Fail Over USB function, a folder named FAIL_OVER or fail_over must exist in the USB along with any valid content (videos or images).yy If a folder named FAIL_OVER or fail_over or any valid content does not exist on the USB, the default USB pop-up menu is displayed when Fail Over USB function is activated.yy Be sure to turn off the USB Fail Over function after the content distribution. However, if a Fail Over event (e.g., input signal connection, Fail Over USB menu option change or USB re-connection) occurs, the Fail Over USB function will work.yy The USB Fail Over function does not work while software update (including EZ Download) is in progress.yy Fail Over for the LS33A/LS35A model may not work properly under the following conditions: -RGB will still be recognized as connected even when the RGB cable is connected to the equipment and monitor with no signal. (e.g., if the HDMI input had lost its signal and the RGB cable was connected, the input would switch to RGB even though there was no signal.) -HDMI will still be recognized as connected even when the equipment has no signal but is powered. (e.g., if a powered laptop was connected to the monitor and only the laptop was set to be displayed, HDMI would still be recognized as connected even though there was no signal from the monitor.)
NOTE
18
ENG
ENG
LISH
ACCESSING INSTALLATION MENU
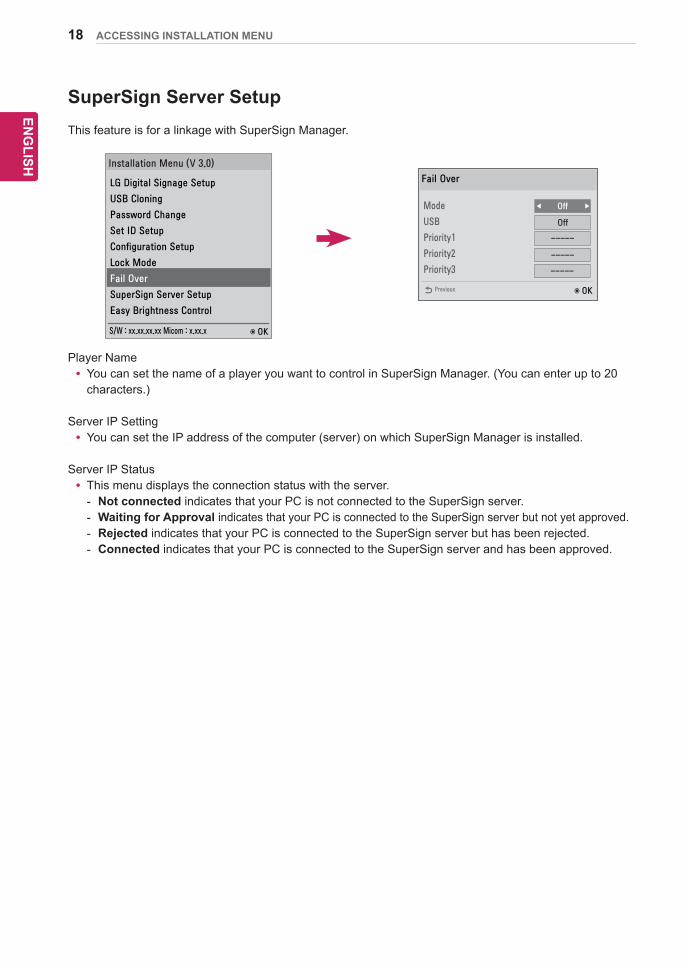
SuperSign Server SetupThis feature is for a linkage with SuperSign Manager.
Fail Over
Mode
USB
Priority1
Priority2
Priority3
-----
-----
Off
OKPrevious
-----
Off
S/W : xx.xx.xx.xx Micom : x.xx.x OK
Installation Menu (V 3.0)
LG Digital Signage Setup
USB Cloning
Password Change
Set ID Setup
Configuration Setup
Lock Mode
Fail Over
SuperSign Server Setup
Easy Brightness Control
Player Nameyy You can set the name of a player you want to control in SuperSign Manager. (You can enter up to 20 characters.)
Server IP Settingyy You can set the IP address of the computer (server) on which SuperSign Manager is installed.
Server IP Statusyy This menu displays the connection status with the server.
- Not connected indicates that your PC is not connected to the SuperSign server. - Waiting for Approval indicates that your PC is connected to the SuperSign server but not yet approved. - Rejected indicates that your PC is connected to the SuperSign server but has been rejected. - Connected indicates that your PC is connected to the SuperSign server and has been approved.
19EN
GEN
GLISH
ACCESSING INSTALLATION MENU
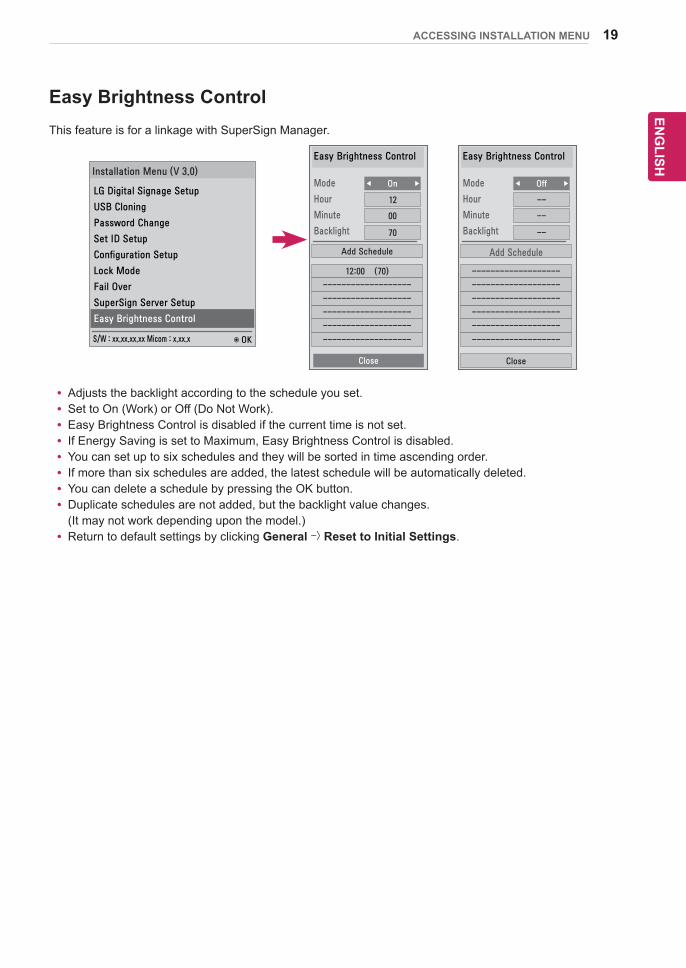
Easy Brightness ControlThis feature is for a linkage with SuperSign Manager.
S/W : xx.xx.xx.xx Micom : x.xx.x OK
Installation Menu (V 3.0)
LG Digital Signage Setup
USB Cloning
Password Change
Set ID Setup
Configuration Setup
Lock Mode
Fail Over
SuperSign Server Setup
Easy Brightness Control
Easy Brightness Control
Mode
Hour
Minute
Backlight
Add Schedule
00
70
On
12
12:00 (70)
-------------------
-------------------
-------------------
-------------------
-------------------
Close
Easy Brightness Control
Mode
Hour
Minute
Backlight
Add Schedule
--
--
Off
--
-------------------
-------------------
-------------------
-------------------
-------------------
-------------------
Close
yy Adjusts the backlight according to the schedule you set.yy Set to On (Work) or Off (Do Not Work).yy Easy Brightness Control is disabled if the current time is not set.yy If Energy Saving is set to Maximum, Easy Brightness Control is disabled.yy You can set up to six schedules and they will be sorted in time ascending order.yy If more than six schedules are added, the latest schedule will be automatically deleted.yy You can delete a schedule by pressing the OK button.yy Duplicate schedules are not added, but the backlight value changes. (It may not work depending upon the model.)yy Return to default settings by clicking General -> Reset to Initial Settings.
20
ENG
ENG
LISH
ACCESSING INSTALLATION MENU
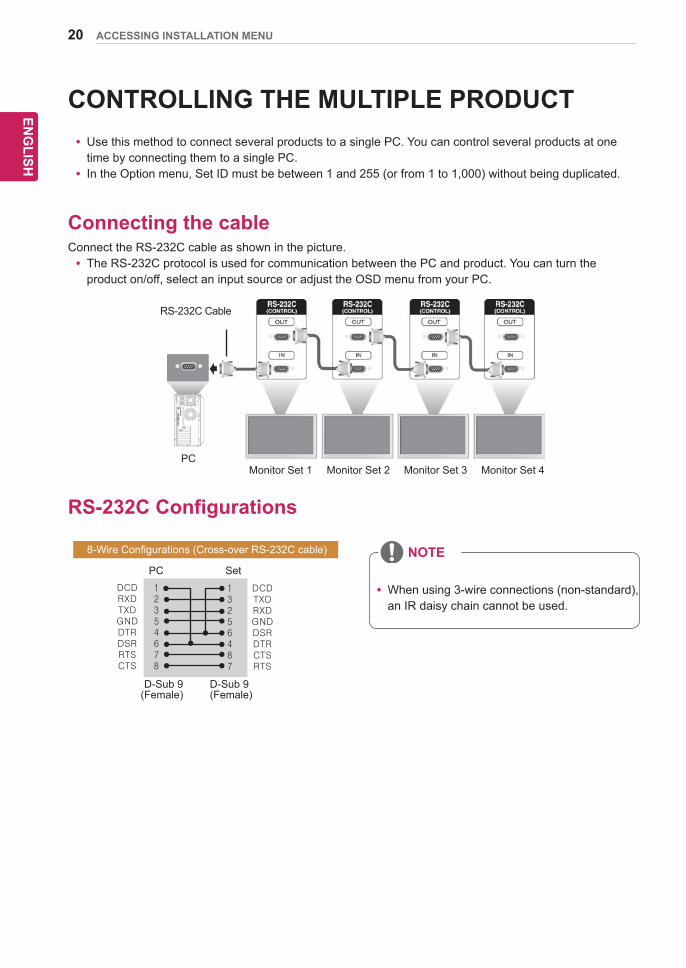
CONTROLLING THE MULTIPLE PRODUCTyy Use this method to connect several products to a single PC. You can control several products at one time by connecting them to a single PC.yy In the Option menu, Set ID must be between 1 and 255 (or from 1 to 1,000) without being duplicated.
Connecting the cableConnect the RS-232C cable as shown in the picture.yy The RS-232C protocol is used for communication between the PC and product. You can turn the product on/off, select an input source or adjust the OSD menu from your PC.
Monitor Set 1 Monitor Set 2 Monitor Set 3 Monitor Set 4 PC
RS-232C Cable
RS-232C Configurations
8-Wire Configurations (Cross-over RS-232C cable)
PC Set
D-Sub 9 D-Sub 9 (Female) (Female)
DCDRXDTXDGNDDTRDSRRTSCTS
DCDTXDRXDGNDDSRDTRCTSRTS
12354678
13256487
yy When using 3-wire connections (non-standard), an IR daisy chain cannot be used.
NOTE