Embed Size (px)
DESCRIPTION
How to update an A320 Nav database
Citation preview
7/18/2019 A320 NAV Database Update
http://slidepdf.com/reader/full/a320-nav-database-update 1/6
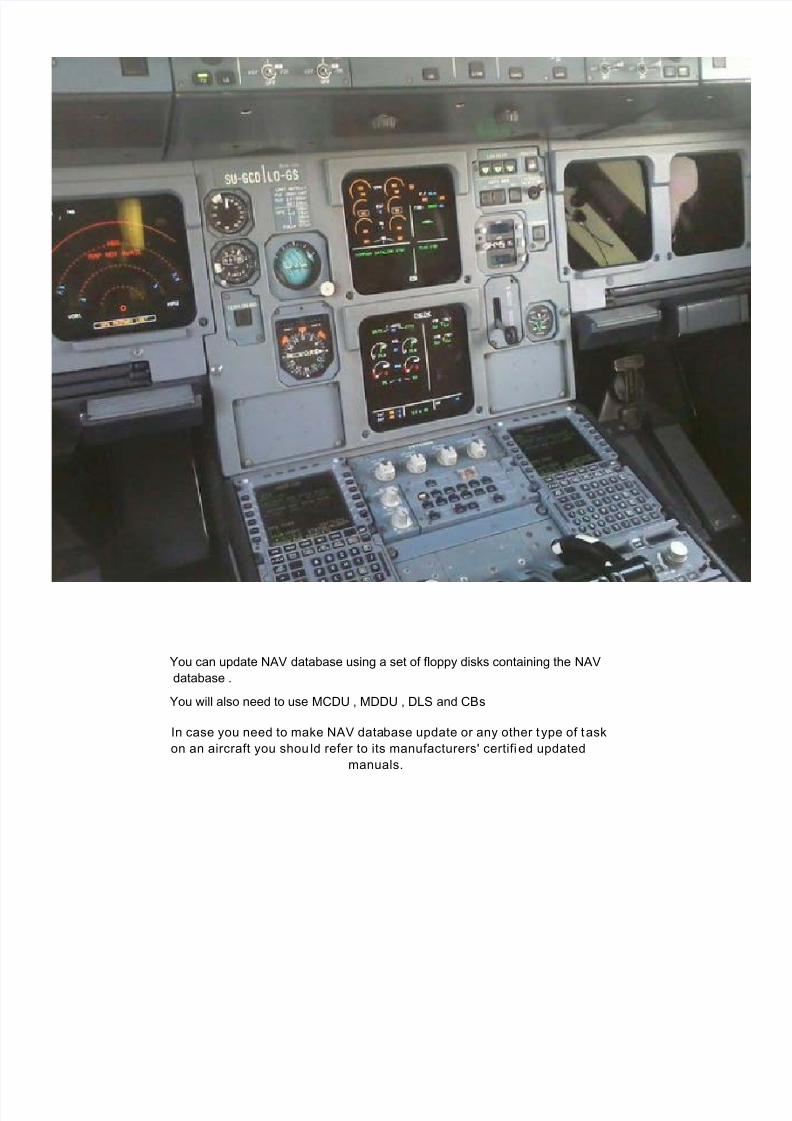
You can update NAV database using a set of floppy disks containing the NAV
database .
You will also need to use MCDU , MDDU , DLS and CBs
In case you need to make NAV database update or any other t ype of task
on an aircraft you shou ld refer to its manufacturers' certifi ed updated
manuals.
7/18/2019 A320 NAV Database Update
http://slidepdf.com/reader/full/a320-nav-database-update 2/6
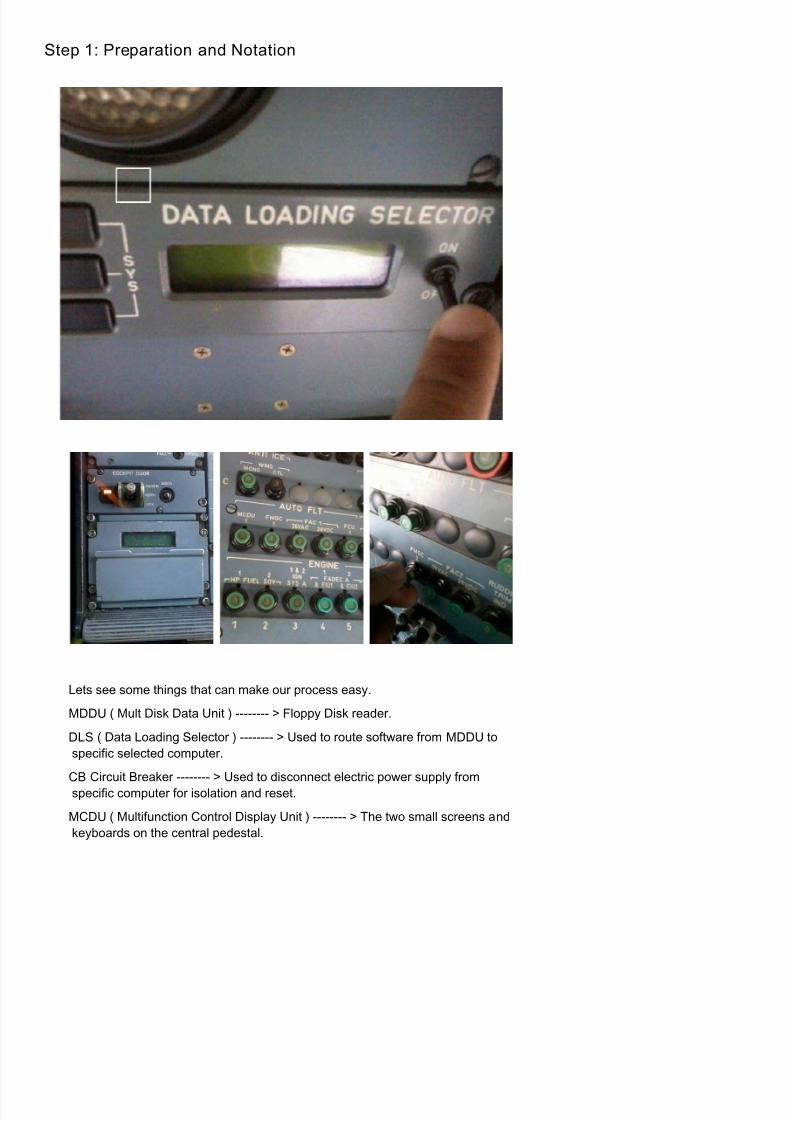
Step 1: Preparation and Notation
Lets see some things that can make our process easy.
MDDU ( Mult Disk Data Unit ) -------- > Floppy Disk reader.
DLS ( Data Loading Selector ) -------- > Used to route software from MDDU to
specific selected computer.
CB Circuit Breaker -------- > Used to disconnect electric power supply from
specific computer for isolation and reset.
MCDU ( Multifunction Control Display Unit ) -------- > The two small screens and
keyboards on the central pedestal.
7/18/2019 A320 NAV Database Update
http://slidepdf.com/reader/full/a320-nav-database-update 3/6
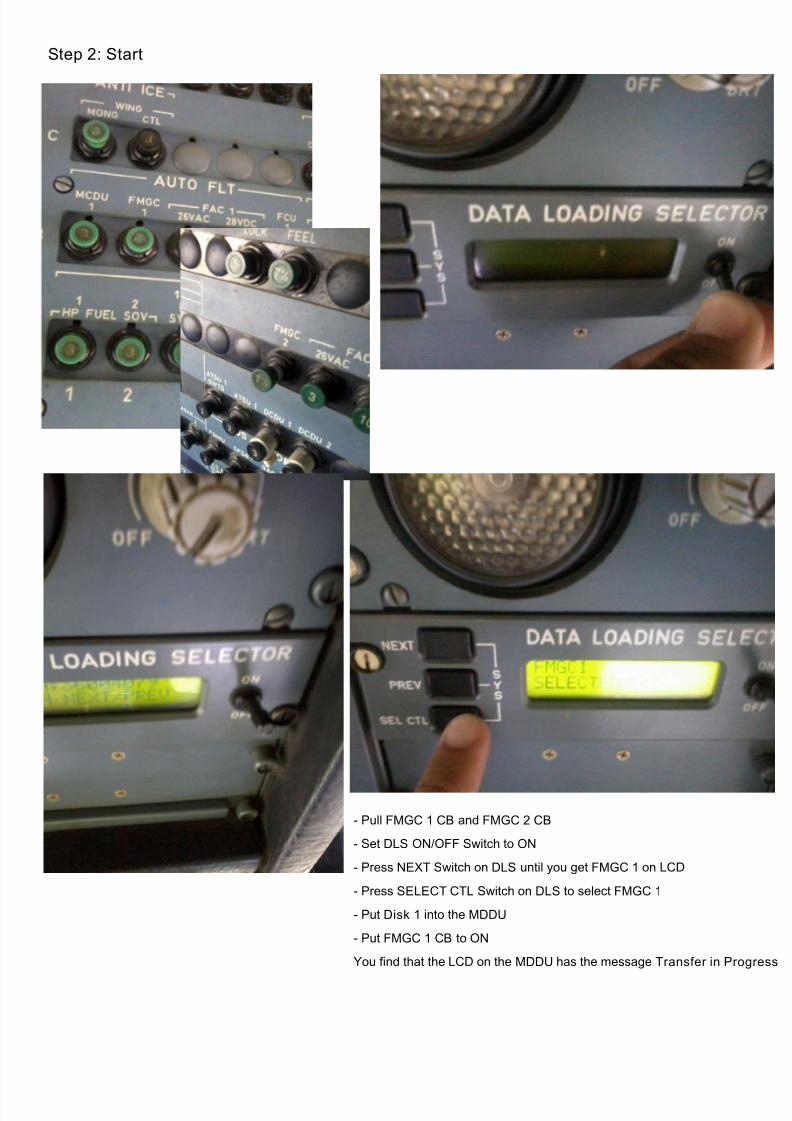
Step 2: Start
- Pull FMGC 1 CB and FMGC 2 CB
- Set DLS ON/OFF Switch to ON
- Press NEXT Switch on DLS until you get FMGC 1 on LCD
- Press SELECT CTL Switch on DLS to select FMGC 1
- Put Disk 1 into the MDDU
- Put FMGC 1 CB to ON
You find that the LCD on the MDDU has the message Transfer in Progress
7/18/2019 A320 NAV Database Update
http://slidepdf.com/reader/full/a320-nav-database-update 4/6
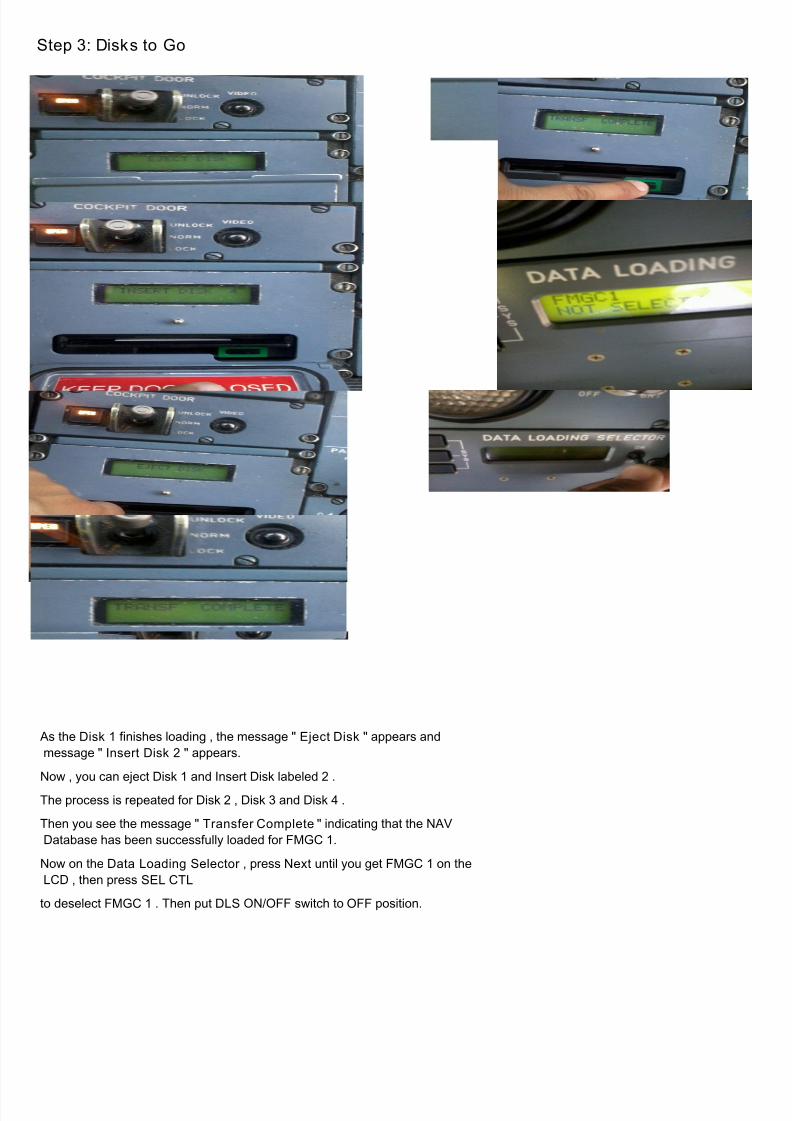
Step 3: Disks to Go
As the Disk 1 finishes loading , the message " Eject Disk " appears and
message " Insert Disk 2 " appears.
Now , you can eject Disk 1 and Insert Disk labeled 2 .
The process is repeated for Disk 2 , Disk 3 and Disk 4 .
Then you see the message " Transfer Complete " indicating that the NAV
Database has been successfully loaded for FMGC 1.
Now on the Data Loading Selector , press Next until you get FMGC 1 on the
LCD , then press SEL CTL
to deselect FMGC 1 . Then put DLS ON/OFF switch to OFF position.
7/18/2019 A320 NAV Database Update
http://slidepdf.com/reader/full/a320-nav-database-update 5/6
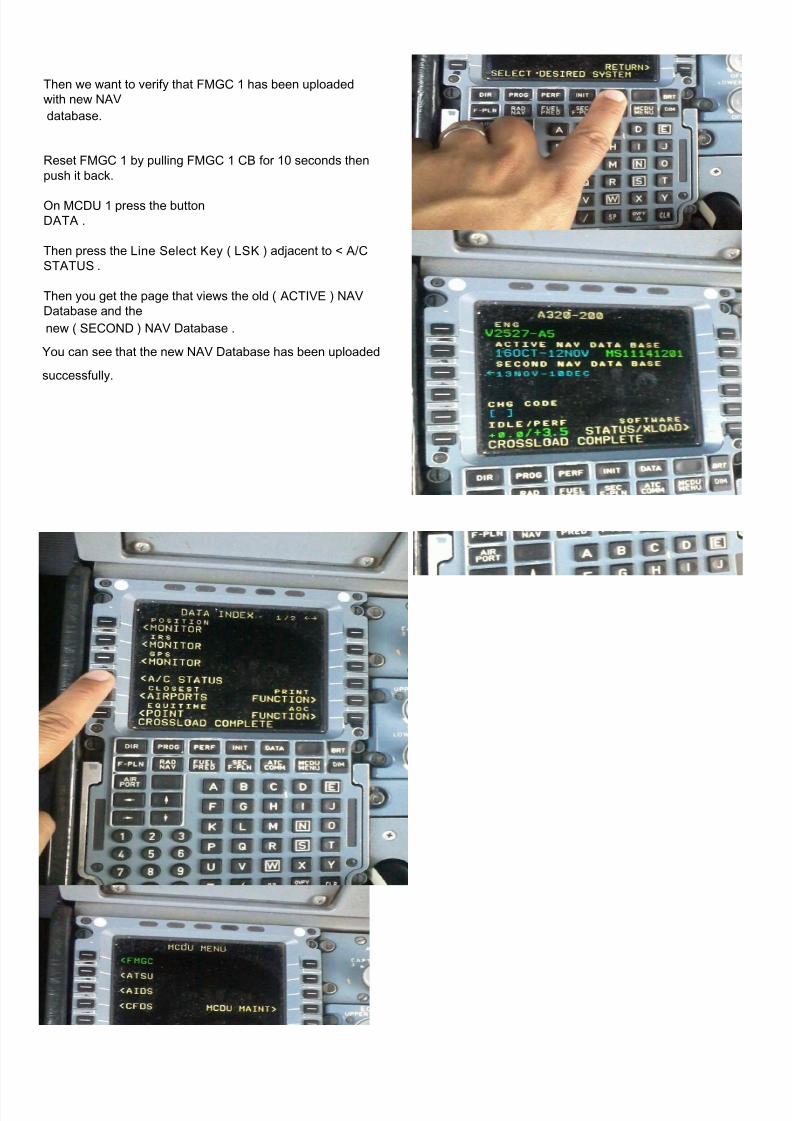
Then we want to verify that FMGC 1 has been uploaded
with new NAV
database.
Reset FMGC 1 by pulling FMGC 1 CB for 10 seconds then
push it back.
On MCDU 1 press the button
DATA .
Then press the Line Select Key ( LSK ) adjacent to < A/C
STATUS .
Then you get the page that views the old ( ACTIVE ) NAV
Database and the
new ( SECOND ) NAV Database .
You can see that the new NAV Database has been uploaded
successfully.
7/18/2019 A320 NAV Database Update
http://slidepdf.com/reader/full/a320-nav-database-update 6/6
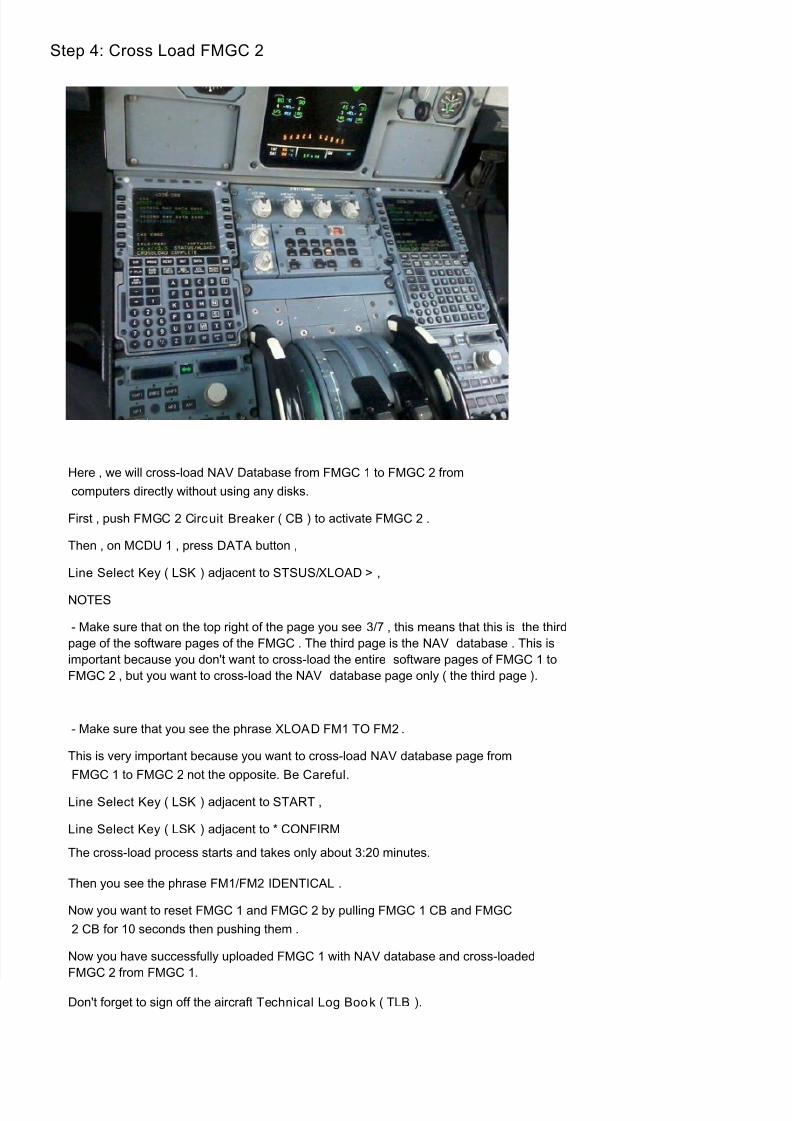
Step 4: Cross Load FMGC 2
Here , we will cross-load NAV Database from FMGC 1 to FMGC 2 from
computers directly without using any disks.
First , push FMGC 2 Circuit Breaker ( CB ) to activate FMGC 2 .
Then , on MCDU 1 , press DATA button ,
Line Select Key ( LSK ) adjacent to STSUS/XLOAD > ,
NOTES
- Make sure that on the top right of the page you see 3/7 , this means that this is the third
page of the software pages of the FMGC . The third page is the NAV database . This is
important because you don't want to cross-load the entire software pages of FMGC 1 to
FMGC 2 , but you want to cross-load the NAV database page only ( the third page ).
- Make sure that you see the phrase XLOAD FM1 TO FM2 .
This is very important because you want to cross-load NAV database page from
FMGC 1 to FMGC 2 not the opposite. Be Careful.
Line Select Key ( LSK ) adjacent to START ,
Line Select Key ( LSK ) adjacent to * CONFIRM
The cross-load process starts and takes only about 3:20 minutes.
Then you see the phrase FM1/FM2 IDENTICAL .
Now you want to reset FMGC 1 and FMGC 2 by pulling FMGC 1 CB and FMGC
2 CB for 10 seconds then pushing them .
Now you have successfully uploaded FMGC 1 with NAV database and cross-loaded
FMGC 2 from FMGC 1.
Don't forget to sign off the aircraft Technical Log Book ( TLB ).


![A320 [AirlineEconomics]](https://img.pdfslide.us/doc/110x75/544c7f15b1af9fca498b4605/a320-airlineeconomics.jpg)