Embed Size (px)
Citation preview

Iowa State University - Department of Electrical and Computer Engineering
A TEST CHIP FOR ELECTROMIGRATION STUDIES
DESIGN DOCUMENT
Karl Peterson, Emmanuel Owusu, Joshua Ellis
Faculty Advisor: Prof. Randall Geiger
Senior Design May 2010, Project #27
Submitted: 4/28/2010

Contents Executive Summary ................................................................................................................................ 4
Acknowledgements ................................................................................................................................ 5
List of Figures .......................................................................................................................................... 6
List of Tables ........................................................................................................................................... 7
Technical Definitions .............................................................................................................................. 8
1 Background & Project Definition ................................................................................................ 10
1.1 Problem Statement ................................................................................................................. 10
1.2 Proposed Solution ................................................................................................................... 10
1.3 Operating Environment .......................................................................................................... 11
1.3.1 Temperature ................................................................................................................... 11
1.3.2 Voltage ............................................................................................................................ 12
1.3.3 Reference signal .............................................................................................................. 12
1.4 Intended Uses ......................................................................................................................... 12
1.5 Intended Users ........................................................................................................................ 14
1.6 Assumptions, Limitations, and Constraints ............................................................................. 14
1.6.1 Assumptions .................................................................................................................... 14
1.6.2 Constraints ...................................................................................................................... 15
1.7 Project Deliverables ................................................................................................................ 16
2 Chapter 2 – Project Approach & Design Flows ........................................................................... 17
2.1 Scope ....................................................................................................................................... 17
2.2 Team Coordination & Collaboration ....................................................................................... 17
2.3 System Design Approach ........................................................................................................ 18
2.4 Analog Design Approach ......................................................................................................... 18
2.5 Digital Design Approach .......................................................................................................... 19
2.6 Verification Approach ............................................................................................................. 21
2.6.1 Analog Verification .......................................................................................................... 21
2.6.2 Digital Verification ........................................................................................................... 21
2.6.3 System Verification ......................................................................................................... 21
3 Technical Design Description ...................................................................................................... 23
3.1 System-Level Design ............................................................................................................... 23
3.2 Digital Subsystem .................................................................................................................... 24
3.3 Test Structure .......................................................................................................................... 25
3.4 Temperature Sensor ............................................................................................................... 26

3.5 Current-Steering DAC .............................................................................................................. 29
3.5.1 Design details .................................................................................................................. 29
3.5.2 Range, Acceleration Factor, and Specification ................................................................ 30
3.6 Auxiliary Circuits ...................................................................................................................... 34
3.7 Physical Design ........................................................................................................................ 34
4 Simulated Testing Results ........................................................................................................... 36
4.1 Temperature sensor ................................................................................................................ 36
4.2 DAC .......................................................................................................................................... 37
4.3 Current Distribution Network ................................................................................................. 39
4.4 Digital Testing .......................................................................................................................... 39
4.5 Top-level Functional Testing ................................................................................................... 39
5 Project Management .................................................................................................................. 41
5.1 Resource requirements ........................................................................................................... 41
5.2 Schedule .................................................................................................................................. 42
6 Team Information ....................................................................................................................... 43
6.1 Geiger, Randall L (Faculty Advisor) ......................................................................................... 43
6.2 Ellis, Joshua K. ......................................................................................................................... 43
6.3 Owusu, Emmanuel O............................................................................................................... 43
6.4 Peterson, Karl D. ..................................................................................................................... 43
7 Closing Summary ......................................................................................................................... 44
References ............................................................................................................................................ 45
Appendix ............................................................................................................................................... 46
Interface Protocol ............................................................................................................................. 46
Reference System ............................................................................................................................. 47
Misc. Operation Notes...................................................................................................................... 48
Temperature sensor calibration ................................................................................................... 48
DAC characterization .................................................................................................................... 48
Concerns & Suggestions ................................................................................................................... 48

Executive Summary This report documents, in detail, a design project entitled A Test Chip for Electromigration Studies.
This was Project #27 of the F2009/S2010 Iowa State University ECE Senior Design sequence (EE491 & EE492). The goal of the project was the complete design of an integrated circuit (IC) for use in testing activities to be performed by an ISU research group in support of their ongoing research in the area of thermal management for high-performance ICs. The primary deliverable for this project is a design library containing abstract, transistor-level, and layout descriptions of the chip and all of its sub-blocks. This library will be passed off to a student member of the research group who will submit the design for fabrication and oversee its eventual utilization.
As the speed and feature-density of high-performance integrated circuits such as digital processors have grown steadily, so have power-densities and heat-related problems. In these ICs, on-die temperatures must be managed to balance reliability and performance. While sophisticated dynamic thermal management is a growing area of research, the successful application of these methods requires accurate predictive models for reliability under realistic, time-varying use-conditions.
There has been much research on the physical phenomena which drive integrated circuit reliability, and particularly on the failure mechanism of electromigration. However, a practical model which predicts the distribution of IC interconnect lifetimes under time-varying current and temperature conditions is still lacking. The development and experimental verification of such a model is one goal of an NSF- and SRC-supported research project currently underway at ISU. The test chip here described was specifically designed to be used in experiments related to that effort.
Generally, data concerning the long-term reliability of ICs is gathered using accelerated lifetime testing methods. Because the actual target lifetime for a practical IC may be 10 years or greater, experiments must be artificially sped up by conducting them under electrothermal conditions which are much more stressful than those observed during actual operation. In this way, failures can be observed in a reasonably time-frame – perhaps days or weeks. An equivalency factor is then established, allowing the observed time-to-failure to be mapped to a corresponding lifetime under normal electrothermal conditions.
The test chip designed for this project is a sophisticated vehicle for accelerated lifetime testing of electromigration in IC interconnects. Each die contains 8 identical interconnect test structures. The electrothermal conditions of each test structure can be independently controlled and monitored and failures can be detected. A serial digital interface allows the test units to be separately addressed for this purpose. The test chip supports a large range of experiments which could be conducted manually or – if combined with a programmable controller such a PC – automatically, in accordance with a pre-determined script.
This report is organized so as to present the details of the project in a logical order. Section 1 provides a clear problem statement and a description of the considerations and functional specifications that guided the formulation and implementation of the design. Section 2 captures the project approach and outlines critical design flows. The technical details of the system as well as the implementation of each sub-block are contained in Section 3. In Section 4, simulated testing results are presented for the relevant performance and functional parameters of each sub-block and the system as a whole. Project management details can be found in Section 5, which is followed by team information and a closing summary. An appendix provides an ‘operating manual’ with all the additional information required by the user of the system – that is, the researcher who will take over the design.

Acknowledgements
First we would like to thank the Department Electrical and Computer Engineering at Iowa State University for providing the resources necessary to carry out this project. A special thanks goes to Dr. Manimaran Govindarasu and Dr. Daji Qiao for their flexibility and understanding in allowing us to carry out this effort as a sanctioned Senior Design project despite extenuating circumstances and the unique and complex nature of the design task.
We would also like to acknowledge Dr. Randall Geiger for the help and support he has provided on every level. In addition to his technical guidance, Dr. Geiger has been supportive of our original ideas and concepts and trusted us to make the major decisions not only in the implementation of the design but in its conceptualization and definition. This made the project an exciting learning experience unlike any other!

List of Figures
FIGURE 1: SYSTEM DESIGN APPROACH .................................................................................................................................. 18 FIGURE 2 - DIGITAL DESIGN FLOW ....................................................................................................................................... 20 FIGURE 3: SYSTEM BLOCK DIAGRAM ..................................................................................................................................... 23 FIGURE 4: DIGITAL INTERFACE BLOCK DIAGRAM ..................................................................................................................... 24 FIGURE 5: INTERCONNECT TEST STRUCTURE DESIGN................................................................................................................. 25 FIGURE 6: DETAIL OF TEST STRUCTURE CORNER REINFORCEMENT ............................................................................................... 26 FIGURE 7: TEMPERATURE SENSOR SCHEMATIC ........................................................................................................................ 28 FIGURE 8: THERMAL LINEARITY OF TEMPERATURE SENSOR IN NORMAL TEMPERATURE RANGE .......................................................... 29 FIGURE 9: TSMC 018 PROCCESS PARAMETERS [7] ................................................................................................................ 31 FIGURE 10: CURRENT-STEERING DAC SCHEMATIC .................................................................................................................. 33 FIGURE 11: CURRENT-DISTRIBUTION NETWORK SCHEMATIC ...................................................................................................... 34 FIGURE 12: TOP-LEVEL LAYOUT ........................................................................................................................................... 35 FIGURE 13: AN EXAMPLE OF CONTACT AND INTERCONNECT REDUNDANCY ................................................................................... 35 FIGURE 14: INTEGRATED THERMAL NON-LINEARITY AND THERMAL CHARACTERISTIC OF NOMINAL SENSOR DESIGN ............................... 36 FIGURE 15: TEMPERATURE SENSOR STATISTICAL SIMULATION RESULTS ........................................................................................ 37 FIGURE 16: DAC STATISTICAL SIMULATION RESULTS ................................................................................................................ 38 FIGURE 17: CURRENT DISTRIBUTION NETWORK STATISTICAL SIMULATION RESULTS ........................................................................ 39 FIGURE 18: TOP-LEVEL FUNCTIONAL SIMULATION ................................................................................................................... 40 FIGURE 19: PROJECT GNATT CHART ..................................................................................................................................... 42 FIGURE 20: INTERFACE PROTOCOL TIMING DIAGRAM ............................................................................................................... 46

List of Tables
TABLE 1: TECHNICAL DEFINITIONS .......................................................................................................................................... 9 TABLE 2: OPERATING TEMPERATURE SPECIFICATION ................................................................................................................ 11 TABLE 3: SUPPLY VOLTAGE SPECIFICATION ............................................................................................................................. 12 TABLE 4: CURRENT REFERENCE SPECIFICATION ........................................................................................................................ 12 TABLE 5: POSSIBLE EXPERIMENTS ......................................................................................................................................... 14 TABLE 6: DESIGN ASSUMPTIONS .......................................................................................................................................... 15 TABLE 7: TEST STRUCTURE SPECIFICATIONS ............................................................................................................................ 26 TABLE 8: CURRENT DENSITY ............................................................................................................................................... 32 TABLE 9: DAC SPECIFICATIONS ............................................................................................................................................ 32 TABLE 10: TEMPERATURE SENSOR TEST RESULT SUMMARY ....................................................................................................... 37 TABLE 11: DAC TEST RESULT SUMMARY ............................................................................................................................... 38 TABLE 12: ENGINEERING LABOR COSTS ................................................................................................................................. 41 TABLE 13: ESTIMATED SOFTWARE COSTS............................................................................................................................... 41 TABLE 14: TIMING PARAMETER SPECIFICATIONS ..................................................................................................................... 46

Technical Definitions Term Definition
Analog A system that uses continuous signal values Analog to Digital Converter (ADC) A device that converts an analog signal (voltage, current) to a digital
signal (i.e. binary code) Bit-banging Bit-banging is a serial communication technique in which IO states are
explicitly set by software at each clock period CMOS CMOS, or Complementary-Metal-Oxide-Semiconductor, is a popular type
of process used to implement integrated circuits. It is currently the dominant technology in industry, especially for digital circuits.
Demultiplexer (DMUX) A device that allows one input to select one of several output paths Design Rule Checking (DRC) Design Rule Checking (DRC) is used to determine if the physical design of
integrated circuit satisfies the design rules of a process technology. Die Integrated circuits are fabricated on large wafers which can contain
anywhere from dozens to thousand of individual units, called die, which are cut apart and used separately.
Digital A system that uses discrete values which can be represented by a finite binary code
Digital to Analog Converter (DAC) A device that converts a digital signal (i.e. binary code) to an analog signal (voltage, current)
Electromagnetic Interference (EMI) A disturbance that effects electrical circuits due to electrical conductance or radiation
Electromigration An important thermoelectric failure mechanism in metal interconnects which affects the long-term reliability of modern ICs; it is caused by the gradual displacement of material in the interconnect.
Electrostatic Discharge (ESD) Momentary unwanted current flow caused by direct contact or induced by electrostatic fields
Fabrication The process of producing a functional circuit from a physical mask design Hardware Descriptive Languages (HDL)
Hardware Descriptive Languages are a class of programming languages used for a formal description of digital logic (e.g. Verilog and VHDL).
Integrated Circuit (IC) A miniaturized electronic circuit that has been manufactured in the surface of a thin substrate of semiconductor material. An IC is sometimes also called a chip or a microchip.
Interconnect The continuous metal paths which connect semiconductor devices within an integrated circuit
Layout The representation of a circuit in terms of planar geometric shapes that mask the process steps that determine the physical integrated circuit. This is the most concrete level of IC design.
Layout Versus Schematic (LVS) Layout Versus Schematic (LVS) checking is used to determine if an integrated circuit's layout matches the corresponding circuit schematic.
Mean (Median) Time to Failure (MTF or MTTF)
The predicted elapsed time until failure in system or component due to regular operation. There is discrepancy in the literature as to whether MTF should refer to mean-time-to-failure or median-time-to-failure
[2][3].
Mixed-Signal IC Mixed-Signal Integrated Circuit refers to any integrated circuit that has both analog circuits and digital circuits on a single die.
Multicore System A digital processor system composed of two or more independent cores Multiplexer (MUX) A circuit block that makes it possible for several signals to utilize a shared
resource Process A process refers to a standardized procedure which is used to fabricate
integrated circuits in a reliable manner. Each process has a unique set of

parameters and rules which define how devices can be implemented and how they will operate.
Register-Transfer-Level (RTL) Register-Transfer-Level is a way of describing a digital circuit in terms of signals between registers and combinational logic on a digital circuit.
Tape-out An informal phrase used to refer the final mask file creation - the symbolic last step before a design is submitted for fabrication
Thermal Management Strategies and techniques employed to control temperatures so as to insure reliability while maximizing system performance. This is a broad term which could include temperature measurement and dynamic system control techniques.
Table 1: Technical definitions

1 Background & Project Definition
1.1 Problem Statement The Iowa State University VLSI Research Group recently obtained funding from several sources to
research technical challenges associated with thermal measurement and management in high-performance integrated circuits (ICs) and multi-core processors in particular[1]. The current research activities of the group include 1) the development of high-accuracy, compact analog temperature-sensing circuits appropriate for small-feature CMOS technology, and 2) modeling of time-dependent/temperature-dependent failure mechanisms in semiconductor processes and their effects on IC reliability. Electromigration – a complex physical phenomenon which can cause the metal interconnects in ICs to fail – has been identified as a subject of particular interest.
The rate at which electromigration causes an interconnect to fail has a strong, non-linear dependence on its temperature and current density[2]. While simple models predicting the rate of failures caused by electromigration have been proposed, the effect of time-varying conditions such as those observed in the practical operation of processors has not been fully addressed. The ISU research group is interested in contributing to the development of new, useful models to fill this need.
The data required for the development and verification of electromigration models must be gathered using accelerated lifetime methods and observing test structures composed of actual IC interconnects. An experimental vehicle is required in the form of a test chip which contains an array of such test structures; the chip must be able to interface with a programmable controller allowing electrothermal conditions in the chip to be varied and monitored in accordance with the desired experimental procedure.
1.2 Proposed Solution The proposed test-chip contains 8 identical interconnect test structures. The test-structures are in
the form of a single-layer metal interconnect with a serpentine pattern. The corners are reinforced to mitigate current-crowding effects[3], allowing the structure to be theoretically modeled as a single, linear interconnect with an equivalent length that can be adjusted by the user before fabrication. In addition to the test structures, the chip contains the following auxiliary modules which facilitate experimental control and observation:
Current-steering Digital-to-Analog Converter: Each interconnect has an accompanying DAC, allowing the current in the structure to be separately programmed by the external controller. The DAC has a 7-bit resolution and can provide anywhere from 0 to 25 mA of current.
Analog Temperature Sensors: An array of compact CMOS sensors provides an output signal proportional to the on die-temperature at several locations. With proper calibration, the on-die thermal conditions – including spatial gradients caused by self-heating – can be evaluated and recorded as experimental data.
Open-Circuit Detection: For each test-structure there is an open-circuit detection module which allows the external controller to test whether a failure has occurred in that test-unit.

Control Logic: The on-chip logic facilitates independent control and observation of each of the test-units. Using a serial interface with the external controller, the pin-count is kept low while independent control of the 8 test units is possible.
Process Technology: The design is realized in a popular 0.18 µm standard CMOS process. This process was selected to provide experimental results for interconnects representative of those found in modern ICs.
1.3 Operating Environment
1.3.1 Temperature
For long-term reliability testing, an acceleration factor is generally used so that failures can be observed in a reasonable time-frame. In the case of electromigration, acceleration can be achieved by increasing the test structure’s current density, the die temperature, or a combination of both. It is desirable to accelerate the test substantially, so that failures can be observed in a reasonable time frame. However, as the acceleration factor is made higher, it becomes difficult to establish a valid equivalency[4]. Furthermore, if the temperature is increased too much, failure mechanisms other than electromigration begin to dominate (e.g. at very high temperatures, the metal will simply melt). The subject of electrothermal acceleration factors is addressed in more detail in Section 3.5.2.
In the experience of team members, long-term reliability testing of practical ICs in industry may be performed at temperatures around 150°C. Based on this figure, an operating temperature range – summarized in Table 2 – was established for the test chip.
Table 2: Operating temperature specification
Min Typical Max
Temperature 110°C 150°C 170°C
This operating range is much higher than specifications for typical IC designs, imposing a number of challenges on the design. Most importantly, while the test structures are designed to fail during normal use of the IC, the auxiliary circuits must continue to function even with prolonged use. With this in mind, all of the functional modules were physically designed for extreme reliability even under the dramatic electrothermal stress conditions associated with accelerated lifetime testing. This was achieved by incorporating substantial redundancy and reinforcement for all interconnects and contacts, as detailed in Section 3.7.
Another unique challenge associated with the chip’s thermal operating condition is the temperature gradient caused by self-heating. Spatial gradients cause device mismatch effects; this is a common concern in IC design, and layout techniques exist to mitigate the problem. However, for this test chip, there is the additional concern of experimental control; thermal gradients due to self heating must affect each of the test-units identically to avoid introducing unwanted experimental variables. To this end, the layout floor plan features radial symmetry with respect to the test units and major on-chip heat sources.

1.3.2 Voltage
Supply voltage is another environmental variable which must be considered in any circuit design. The power source for our test IC will be a well-regulated laboratory supply. The specification for a typical supply is less than +/- 2%. However, current from the supply may be substantial for some test setups: to account for possible resistive losses in cables or within the IC itself, all internal circuits have been designed to perform correctly within a +/- 10% range. Given the process’ nominal supply voltage of 1.8V, the resulting operating range is specified as shown in Table 3.
Table 3: Supply voltage specification
Min Typical Max
Supply Voltage 1.62 V 1.80 V 1.98 V
1.3.3 Reference signal
As is generally the case for complex circuits, some analog circuitry in the IC will utilize a reference signal. For our chip, an accurate reference current is required and must be generated off-chip. This reference is used to set the LSB current for the current-steering DAC, as detailed in Section 3.5.2. The nominal current value is 100 µA, which can be generated by a precision laboratory supply or by a dedicated reference-generating IC. Since the current on the reference line is very low, resistive losses in on- and off-chip connectors will be negligible and accuracy should be limited by the reference generator itself. Any error in the reference signal will be reflected directly in the accuracy of the DAC, so a specification for the reference should be assigned by the user based on the accuracy requirement of the DAC. This tolerance should be no greater than 2%; all internal circuits have been tested within this range to insure good biasing conditions.
Table 4: Current reference specification
Min Typical Max
Current reference 98 µA 100 µA 102 µA
1.4 Intended Uses During the initial conceptualization and specification phase of the project, a major priority was given
to making the system as versatile as possible. We recognized that, in this way, a single chip could be employed in a variety of experimental testing scenarios. This was especially important given that, up until the writing of this report, the research group has not focused on the detailed design of electromigration experiments, leaving the actual end-use of the test-chip somewhat ill-defined.
As a result, it was decided that sophisticated testing functionality (e.g. automation) should be realized by an off-chip controller that could be easily and dynamically programmed according to a specific experimental design. Thus, the goal in designing the test-chip itself was to provide an effective

and well-controlled test environment and to incorporate the ability to easily interface with the external controller. The final design can support any experimental test that falls within the following limitations:
Structure geometry – since the test-structure was designed to emulate a single, linear metal line, models which incorporate complex interconnect geometries cannot be tested with this chip.
Thermal conditions – only experiments using temperatures in the temperature range specified in Section 1.3.1 are possible. Thermal conditions can be altered using external equipment such as an instrumentation oven or a controlled air-flow heater.
Electrical conditions – the current density in the test structure is limited by the range of the current-steering DAC, as discussed in Section 3.5.2.
Time-dependent conditions – experiments with static electrothermal conditions are possible, as are experiments in which the temperature and current density are varied as a function of time. The rate of this variation is limited by the digital interface speed and the complexity of the pattern, in accordance with the timing diagram found in the appendix to this document. In practice, temperature variations are likely to be limited by the heat source.
The external components and system setup needed to use the chip are detailed in the appendix of this report. However, the basic use scenario is summarized as follows:
1. The test chip is incorporated on a custom PCB and hooked up to the appropriate voltage supplies and current reference. It is placed in an oven or other instrument which allows temperature control.
2. The digital interface pins of the chip are connected to an external controller with 1.8 V logic levels. If the controller is a PC, a commercial IC bus adapter will likely be used. The controller is preprogrammed according to the specific experiment – it controls the test-chip and possibly other automated equipment (such as the oven) according to a script.
3. The test chip is turned on by the controller, but the master current switch remains off. The temperature setting of the oven is adjusted and the on-die temperature sensor is monitored until the chip temperature settles at the desired value. At this point, the master current switch is enabled and the experiment begins.
4. The controller executes a test loop which is repeated throughout the experiment. It addresses the first test structure on the chip, polls the open-circuit detector and records the status of the interconnect to a data file along with a timestamp. It then adjusts the DAC setting for that unit, if necessary. Next, the controller addresses the second test structure, checks its status, and again adjusts the current as necessary. The controller continues like this, rotating through the test-structures to poll their status and make adjustments to the current. The controller may also record the temperature-sensor output, which could be digitized using an off-chip ADC.
5. The test-loop continues until all the units that were expected to fail have done so. The temperature / current history and the precise time-of-failure of each test structure can be extracted from the data file produced by the controller.

Throughout the design process, our decisions were guided by consideration of a number of likely experimental scenarios in which the test-chip could be utilized. Several examples are given in Table 5.
Table 5
Table 5: Possible experiments
Possible experiment Description
Fitting observed MTF to a traditional, first-order model
8 different sets of time-invariant temperature / current settings are used and failure times are recorded for each unit. The results are fitted to a first-order MTF model for electromigration.
Measuring additional descriptive statistics for time-to-failure
The statistical distribution of time-to-failure is also recorded, supplementing the limited scalar metric of MTF. The dependence of this distribution on time-invariant electrothermal conditions could also be studied.
Observation of MTF and other failure statistics under time-variant conditions
The operating temperature and current-density in each unit are varied according to some predefined pattern and the time-to-failure is recorded for each. The data is used to test proposed models for electromigration under time-varying conditions.
1.5 Intended Users The end-users of this IC will be researchers in the VLSI Research Group mentioned in Section 1.1.
Specifically, the group is composed of Dr. Randall Geiger, Dr. Degang Chen, and their students. The group will utilize the IC to realize tests or experiments that they have personally designed. An eligible student will be responsible for setting up and carrying out the experiment. This student is assumed to have some knowledge of test automation and laboratory techniques. Additionally, they can be assumed to have a good understanding of thermal effects in ICs.
Since the IC will need to be interfaced with an external controller such as a PC, we also assume that the user has some experience in test automation and IC integration, including basic serial communication. Advanced knowledge of this topic will not be required, however, as resources are provided in the appendix to this report.
1.6 Assumptions, Limitations, and Constraints
1.6.1 Assumptions
The following assumptions were made during the specification and design of the test-chip.

Table 6: Design assumptions
# Description of assumption
1 Basic lab equipment will be available for test activities utilizing the IC. This includes a regulated DC power supply capable of delivering up to 0.5W at 1.8 V with ±5% regulation; a current reference generator capable of delivering a 100 µA reference signal with ±2% maximum variability; and a reliable temperature-control solution such as a laboratory oven or a forced-air heater.
2 For automated testing, an external controller will be available. Although there is no lower limit on the frequency used for synchronous communication between this controller and the test IC, the maximum supported by the test chip is 100 kHz. For full utilization of the IC’s communication bus, 5 serial digital outputs and 1 digital input pin must be available from the controller. The controller must have ‘bit-banging’ capabilities in order accommodate the test-chip’s custom interface protocol.
3 The temperature sensor can be calibrated over the desired temperature range by careful characterization using an extremely accurate reference temperature sensor and avoiding self-heating issues. If a digital temperature signal is required, an off-chip ADC with sufficient accuracy will be available.
4 Rigorous design and testing for electro-magnetic interference (EMI) and electro-static discharge (ESD) requirements will not be performed. It is thus assumed that severe EMI problems do not exist in the experimental environment and that ESD cells with the necessary protection will be made available or designed by someone outside the group.
5 The failure mechanism of interest for all testing activities is electromigration in metal interconnects.
6 The failure mechanism research will focus on predicting failure in a linear metal line with uniform current density. The results of this testing, we assume, could be applied to complex interconnect structures (those including corners and non-uniform widths) using a detailed finite-element model of their spatially-variant current density.
7 Calculation of the failure acceleration-factor includes a number of important assumptions regarding the available process characterization data. These assumptions are further discussed in Section 3.5.2.
1.6.2 Constraints
The following is a list of important constraints on our project. Because we had substantial freedom to develop the concept of our project and specify it ourselves, they are relatively few.
# Description of constraint
1 As in any IC design, the most important source of constraints is the fabrication process which will be used to realize the design. Our design will be realized in the popular TSMC 0.18 µm standard CMOS process. The constraints imposed by this silicon process are defined implicitly and

explicitly in the extensive test data, process documentation, and design kit associated with this process. Design rules and process parameters constrain the IC design at every level of the design. Because the nature of these constraints is highly technical and a detailed treatment of our particular case would involve proprietary data, further discussion is not included here. However, our consideration of process constraints is reflected in the discussion of the sub-block designs found in Section 3. Suffice to say that the speed, accuracy, area, and reliability of every part of the design are directly constrained by the fabrication process.
2 The maximum die size for this IC was self-imposed as 1 mm2 (without a padframe and ESD structures). It was further assumed that packages would be available with up to 20 pins but no more. Since a padframe and ESD structures were not designed, it is assumed that one will be made available by the foundry or otherwise obtained.
3 As discussed in the operational environment section, sub-circuits excluding the interconnect-under-test should operate reliably and robustly over the temperature range of 110°C to 170°C.
1.7 Project Deliverables The primary deliverable for this project is a design library containing abstract, transistor-level, and
layout descriptions of the chip and all of its sub-blocks. This library will be passed off to a student member of the research group who will submit the design for fabrication when the opportunity arises. Additional deliverables include:
Test benches – included in the library are fully functional test-benches (in the form of saved schematics and Analog Design Environment states) which can be used to replicate any of the simulated test data included in this document. This will be important to verify the validity of the device models used during the design when silicon samples become available. The test benches can also be utilized if future revisions are made to the design.
Documentation – clear documentation which provides sufficient resources for the intended user to implement and use the test IC in a complete test system which couples the chip with an external controller for practical testing activities. This information is included in the appendix to this report.
Poster – a poster has been created to share our project with students, faculty, and professional engineers.
Website – our group website contains information about the project and an archive of relevant documentation.

2 Chapter 2 – Project Approach & Design Flows
2.1 Scope Defining the scope of this project proved to be an ongoing challenge. Initially, our intention was
to submit the design masks for fabrication before the end of the academic year. However, arranging an opportunity to fabricate through an academic program (and thus avoiding the some of the high costs of fabrication) was problematic. Furthermore, we felt it was important to fabricate in a modern process that would provide experimental results for interconnects representative of those found in modern ICs. For this reason, the target process was switched several times during the system design and even during transistor-level implementation efforts.
In addition to logistical challenges related to fabrication, the project was delayed many times by difficulties in addressing theoretical questions related to electromigration modeling. Electromigration continues to be a very active area of research, with many unanswered questions and unresolved contradictions. Some decisions related to the test structure design and current scaling seemed to require information that simply could not be found in the literature or obtained from the foundry. In some cases, assumptions or rough approximations had to be used. This is reflected in the discussions found in Section 3.5.2 and the appendix to this report.
In an industrial setting, characterization of long-term reliability for a process is performed by teams of engineers dedicated exclusively to that task. The design of a test chip such as the one described in this document is an extremely complex task and it is likely that, without extensive experience and expertise, a satisfactory result may require several silicon revisions. Recognizing this, we can see this project as part of ongoing effort at ISU to develop the ability to conduct electromigration studies. While every effort was made to maximize the functionality of our test chip and mitigate the risk of unintended problems, it may ultimately be the case that this design is the first in a series leading up to a satisfactory solution.
The project began with the somewhat vague idea of designing a test chip that could support electromigration studies. The scope of the project included everything from the conceptualization and specification of a system that could serve that purpose to the complete implementation of a design that met those specifications. In the weeks following the final presentation of this project, the design will get passed off to a student in the research group who will likely submit it for fabrication after some minor revisions and use it as a starting point for electromigration studies at ISU. This hand-off represents the boundary of our project’s scope.
2.2 Team Coordination & Collaboration The student design team for this project consisted of the following members (detailed team
information can be found in Section 6):
Emmanuel Owusu – A computer engineering student with some HDL experience Karl Peterson – An electrical engineering student with a focus in analog and mixed-signal IC design
Joshua Ellis – An electrical engineering student with a focus in analog and mixed-signal IC design who was studying at a university in Taiwan during the course of the project

Having a team member abroad made coordination of the project challenging at times. Collaboration required extensive use of ‘virtual meeting’ tools and design libraries needed to be passed back and forth frequently. In some cases, there were frustrations due to the time-zone difference and conflicts between the respective software environments at the two universities. However, the opportunity to experience this type of international collaboration was a valuable one, as many engineering teams in industry today have members in different parts of globe working closely together on a single project.
2.3 System Design Approach As described in Section 2.1, there were a number of theoretical and logistical challenges that held
up the design at times. Because of uncertainty regarding the target silicon process, available area, etc., the system design was completed through an iterative process which is represented schematically in Figure 1.
Figure 1: System design approach
2.4 Analog Design Approach The design flow for the analog sub-blocks of the IC was as follows:
1. Detailed specification: Because system-level considerations did not explicitly dictate some of the sub-block specifications (the range of the current DAC, linearity of the temperature sensor, etc.), the individual designers had to define some target specifications, based on personal experience and estimated complexity, to constrain the design.
2. Choice of architecture: Based on the complete specification, circuit architectures were chosen which would allow the required functionality to be realized.
3. Transistor-level design: Initial transistor-level implementation of the circuit, including device sizing, was realized using Cadence schematic capture.
4. Simulation: The transistor-level implementations were then simulated using the spectre simulator and the process design kit models. Parametric and functional testing was performed and the circuit design was adjusted as necessary.
Discussion with
AdvisorResearch
Proposed System
Practical / Time Constraints

5. Statistical simulation: Once the simulated performance of the nominal transistor-level circuit was satisfactory, statistical simulations were performed to verify that the design was robust to process variations. Variations included local mismatch and global process variations as defined in the TSMC design kit. Supply voltage and temperature variations were also included in the statistical simulation to insure performance over the entire PVT (process, voltage, temperature) range.
6. Layout: The physical design of the circuit was performed using Cadence Virtuoso layout editor. Assura physical verification tools were used to perform design rule check (DRC) and layout-versus-schematic (LVS) check and to extract parasitic components.
7. Post-Layout Simulation: The parasitic-extracted netlist, generated from the final layout, includes parasitic resistances and capacitances and allows more realistic simulation results. After layout, simulation steps were performed again using the extracted netlist.
2.5 Digital Design Approach The design of digital sub-blocks in mixed-signal ICs is generally broken down into three stages: RTL
Design, Physical Design, and Analog/Digital Co-Design. During the RTL stage, the system's functional specifications are used to develop register-transfer-level (RTL) descriptions. RTL descriptions encompass the input/output interconnections between modules and the functional behavior of the digital circuit. Physical design is the process of taking a RTL design and a process library – in this case the TSMC 0.18 μm CMOS process -- to create a chip design. Co-design refers to the integration of analog and digital modules on the chip. Testing and evaluation tasks are found in all of these stages, with high-level stages focusing on functional testing and lower-level stages focusing on timing and power tests. Digital testing tasks are described in more detail in the Digital Verification section.
Figure 2 outlines the general digital design flow which was used as a template in this project. It is very common to conduct a logical verification of the proposed system in Matlab or C/C++ environment before moving on to HDL; however, our design flow began directly with development of the Verilog scripts that define the input/output signals and describe the behavior of each module. The functional requirements for the digital sub-blocks were based on the expected use scenarios described in the section 1.4 (Intended Uses) and on the interface requirements expected of an off-chip controller and the internal analog modules. Register-transfer-level designs are often written in hardware descriptive languages (HDL), such as Verilog or VHDL, to create a high-level description of the behavior of a digital circuit in terms of the flow of signals between registers and combination logic units. The digital sub-blocks developed for this project were written in Verilog. The RTL phase involves functional verification, circuit RTL design, and logic and timing simulations.
Physical design involves synthesis, floorplanning, placement, routing, design rule checks, and tape-out. Synthesis takes the RTL and maps it to a gate-level netlist from the target technology. Floorplanning involves assigning the RTL of the module to a region of the chip and plotting its associated input/output pin locations. Placement and routing is the process of assigning regions and wiring to all of the design modules. The design then has to run through a series of verifications that ensure its manufacturability. Finally a mask is produced for handoff to the fabricator in the tape-out stage. The figure includes the associated software programs used at each stage of the digital flow. Please note that in practice these procedures were handled in an iterative manner, where earlier stages were revisited as needed.

Figure 2 - Digital Design Flow
Customized Digital Design Flow
Every digital design flow has to be customized for a particular process and the available software. Our desire was to reduce development time by using a standard-cell library. However, developing a new standard cell library is a very involved task often assigned to specialized engineers. Due to the project’s resource and time constraints, it was desirable to use a publicly available standard cell library. We found a scalable standard cell library provided for research use by researchers at Oklahoma State University[13]. However, simply scaling these cells produced layouts that that were not compatible with the design rules of the specific target process. The cells had to be manually adjusted and design rule checking (DRC) was performed to ensure that they satisfy the requirements of the foundry’s process technology.
The digital sub-blocks were first synthesized using the full set of standard cells to identify the subset which should be edited for use in the project. The identified cells were then individually edited, DRC, and LVS checked. The layout editing tasks involved a significant engineering effort due to the large number of design rule violations. The majority of the edits involved adjusting metal widths, spacing, and
Mask Generation
Digital & Analog Co-Design Simulation (Cadence ICFB)
Import to Cadence
Logic CheckTiming Check
Power Check
DRC Check LVS Check
Digital Layout (Encounter SOC)
Floorplanning Placement Routing DRC Check LVS Check
Synthesis (Synopsys Design Vision)
Gate-Level Simulation
Logic Check Timing Check Power Check
RTL-Level Design (ModelSim)
Logic Check Timing Check
System-Level Design (Matlab, C, SystemC )
Logic Simulation

enclosure parameters in Cadence's Virtuoso layout editor. Once the cells were edited and cleaned, the digital sub-blocks were then re-synthesized using the edited cells.
2.6 Verification Approach
2.6.1 Analog Verification
Verification of the IC’s analog sub-blocks was performed in accordance with a regimen similar to that used in industry, to the best of the members’ knowledge. The verification tasks were an integral part of the design flow and have thus already been mentioned in Section 2.4. Verification included:
Nominal design testing: Simulations were performed to verify that the nominal transistor-level design for each block met all the functional and parametric specifications.
Statistical simulation: Statistical testing of performance parameters over the specified range of PVT (process, voltage, temperature) variations was performed to verify that the circuit was robust. 500-iteration statistical runs were used to verify the distribution of parametric performance measures and insure the specification was met at the 3σ limits.
Post-layout simulation with extracted parasitics: A shorter statistical run was performed to verify that parasitic components extracted from the layout did not degrade the performance predicted by schematic simulation.
The specific parameters of interest were different for each sub-block. For a given type of analog sub-block, the relevant sets of parameters are widely recognized among designers and these were the ones used. An explanation of testing parameters for each analog module is included in the testing discussion, which can be found in Section 4.
2.6.2 Digital Verification
As mentioned previously, verification tasks were an integral part of the design flow itself and were conducted at each stage. Verification included:
Functional Verification: Simulations were performed to verify that the logic design conforms to the specification. These logic simulations took the form of Verilog testbenches in the RTL design stage and transient analysis simulation in the physical design stages.
Timing Verification: Simulations were performed to verify that the timing parameters conform to the specification. We based the timing specifications on common I2C serial communication specifications.
The post-layout analog verification tasks were repeated on the digital sub-blocks as they moved to the co-design stage.
2.6.3 System Verification
For this project, system verification was carried out in the form of a single extended functional simulation of the entire top-level schematic. Because of the complexity of the top-level design, this step was performed for the nominal design only (e.g no PVT variations were incorporated). The top-level module was tested with a series of stimuli designed to emulate an extended sequence of

operations for a realistic use scenario. The exact sequence used for system verification is presented in Section 4.5 along with waveforms showing the results.

3 Technical Design Description
3.1 System-Level Design The system-level design is shown as a block-diagram in Figure 3. The major sub-blocks, outlined in
Section 1.2, are all identified in the figure. The digital input signals I_WR_EN, I_DATA, ADDR_WR_EN, and ADDR_DATA allow the different test units to be individually addressed and the current levels to be set. The serial communication protocol used is detailed in the appendix to this document. A digital output signal, FAIL, indicates if the test interconnect which is currently addressed is in an open circuit condition.
The control logic interfaces externally with the controller and internally with the DAC and open-circuit detector of each test interconnect. The binary codes corresponding to the desired current levels are stored in the control logic and routed to each DAC with a 7-bit parallel bus. A single logic signal from the open-circuit detector allows the control logic to poll the condition of the test interconnect. A master switch signal, I_EN, must be pulled high in order for current to flow in any of the test structures. The function of this switch is described in Section 3.6. Temperature sensors, of which there are 5 in the final design, function independently from the control logic; their analog outputs are each directly available for measurement off-chip.
DAC #2 DAC #3 DAC #4DAC #1
Test
Structure
#1
Test
Structure
#2
Test
Structure
#3
Test
Structure
#4
I<2>
Open-Circuit
Detect
Open-Circuit
Detect
Open-Circuit
Detect
Open-Circuit
Detect
I<3> I<4>I<1>
FAIL<1> FAIL<2> FAIL<3> FAIL<4>
Control Logic
...
I_EN
GND
VDD
I_WR_EN
I_DATA
ADDR_WR_EN
ADDR_DATA
FAIL
Temperature Sensor
Temperature Sensor
Temperature Sensor
...
TEMP_1
TEMP_2
TEMP_3
Figure 3: System block diagram

3.2 Digital Subsystem
Figure 4: Digital Interface Block Diagram
The digital logic and controller interface, depicted in Figure 4, was designed to balance the need for a low pin count while using simple digital circuits to access each of the test circuit’s unit. The serial input address register allows the controller to address any one of the test units by writing serial data on ADDR_DATA while holding ADDR_EN high to window the serial operation. CTRL_ADDR and CTRL_EN are a similar set of signals used to write data to the DAC whose address is currently in MUX_ADDR_REG.
During every test cycle, the controller logic can read in status updates from any test unit and write out new control signals to any test unit. All components in the interface run synchronously on a common clock. This interface supports a variety of possible thermal management tests by allowing each unit to be individually addressable and maintaining a short interval per read and write operations. The interface also maintains a relatively low pin count through the use of serial shift registers. The following is a brief description of each of the modules that make up the digital interface.
STATE_OUT_MUX is a 8:1 multiplexer used to specify which unit the controller will receive status updates from. The mux is composed of 8 single bit input channels, 3 input select bits, and 1 output bit.
MUX_ADDR_REG is a 3-Bit shift register used to select the target test unit for read in and write out per iteration
CURRENT_CTRL_DEMUX is a 1:8 demultiplexer used to route current values to the selected CURRENT_DAC unit.

DAC_VALUE_REG is a 7-Bit shift register used for storing corresponding CURRENT_DAC values for adjusting the current through the interconnects
3.3 Test Structure The physical design of the interconnect test structure is shown in Figure 5. The interconnect zig-zags
back and forth so that the effective length can be made very long while its aspect ratio is not unwieldy. To insure that that structure can be modeled as one long interconnect and insure that failures do not occur where the interconnect changes direction, the corners are reinforced as shown in Figure 6. Because the ideal equivalent length of the test-structure depends on the detailed nature of the experiment, it needs to be set by the user before fabrication. This can be done in a very straightforward manner by placing the ground contact at the desired location on the serpentine structure.
Figure 5: Interconnect test structure design

Figure 6: Detail of test structure corner reinforcement
The specifications of the test structure are summarized in Table 7.
Table 7: Test structure specifications
Metal layer M1
Width 0.23 µm
Equivalent length (min-max)
0-11.5 mm
Thickness 210 nm
Material Cu
3.4 Temperature Sensor The schematic of the analog sensor used for on-chip temperature measurement is shown in Figure
7. This circuit resemblances the widely known Widlar current-mirror[5] except that the resistor has been replaced with a diode-connected MOSFET. This architecture has the advantage that all node-voltages can be expressed as a function of MOS threshold voltages. The goal of the circuit is to reproduce a linear function of a threshold voltage or weighted sum of threshold voltages (which are highly linear with temperature) at the output.
This particular circuit was part of a series of sensors designed in January, 2010 for a test chip allowing the performance of some novel MOS-based temperature sensors to be evaluated in silicon.

The design parameters were optimized for thermal linearity in the temperature range of -20°C to 100°C. The simulated performance in this range is very good. The thermal linearity, which translates to sensing accuracy if a precise two-point calibration is used to generate a voltage-to-temperature lookup table, is shown in Figure 8. The plot is a histogram of maximum integral thermal non-linearity values measured in a 250-run statistical simulation with process and mismatch variations.
Unfortunately, this accuracy cannot be expected for the sensor under the operating conditions specified for this project. There are several reasons for this:
1. In the experience of the designers, a sensor design which has been optimized for accuracy in one range of temperatures may not, and in fact is not likely to, exhibit similar accuracy in a different temperature range.
2. The simulation results have not been verified in silicon. Because this circuit exploits thermal device effects that may not be modeled with great accuracy, the actual performance of the sensor may be considerably worse than the simulations suggest.
3. Even if the device models provided by the foundry do a good job of modeling thermal effects in typical temperature ranges below 150°C, model parameter fitting performed during process characterization is not optimized for high temperatures (i.e. the temperatures of interest in this design)
Given this last point, we must recognize that optimizing the sensor for exceptional accuracy in the specified temperature range for this design (110°C to 170°C) is not possible due to model limitations. For this reason, the sensor was used as-is rather than re-optimizing it. As a result, it must not be assumed that a two-temperature calibration will be sufficient to calibrate this temperature for better than 1°C practical accuracy. The thermal linearity of the sensor output in the 110°C to 170°C temperature range has been characterized and the results are presented in Section 3.4. These results suggest that one calibration point for every 10°C of the range over which the sensor is to be used will allow better than 1°C practical accuracy. For example, to sense temperatures between 120°C and 160°C, 4 calibration points would be required to generate a lookup table. The calibration procedure is further discussed in the appendix to this report.

Figure 7: Temperature sensor schematic
Another important note regarding the sensor is that the output is referenced to VDD rather than to ground. Furthermore, while the linearity has been characterized over supply voltage variations and does not show excessive sensitivity, DC supply variations which occur between calibration and measurement will cause accuracy problems. A supply variation on the order of 1 mV can cause a 1°C offset in the sensor reading! For this reason, the same supply (be it an integrated regulator or a lab instrument) should be used with same settings both when the sensor is calibrated and when it used to realize temperature measurement. Furthermore, the stability of the supply voltage during testing should be insured and verified.

Figure 8: Thermal linearity of temperature sensor in normal temperature range
3.5 Current-Steering DAC
3.5.1 Design details
The current-steering DAC was implemented as shown in Figure 10. The current sources are realized using binary-weighted low-voltage cascode current mirrors. The binary inputs are translated to an analog current by steering rather than switching the current sources. This is extremely important in this design, not because of the well documented speed advantages of this architecture[6] but because of thermal considerations.
The load resistance of the DAC is low enough that it is essentially dissipating power equal to the supply voltage times the current being delivered by the binary-weighted sources. If the current sources were simply turned off according to the digital input code, the power dissipated in each DAC would be different according to its setting. This would disturb the radial symmetry of the chip’s thermal gradients (which are further discussed in Section 3.7) and introduce an unwanted experimental variable to the test being performed. By steering the current between the test interconnect and a ‘current dump node’ which is at the electrical ground, the total power consumed by the DAC is not code-dependent and the desired thermal gradient symmetry is maintained.
As shown in the schematic, strong inverters are used to generate the complementary digital signals which drive the current-steering differential pair. Two more strong inverters, attached to the output node, realize the open-circuit detection functionality. If the current source is on (i.e. the digital code is 1 LSB or greater), the output node will be very close to ground and the FAIL signal will be a logic 0. If an open-circuit condition occurs in the test interconnect, then the transistors in that leg of the binary-weighted current-source array will go into saturation and the output node will eventually settle to VDD. This will translate to a logic 1 in the FAIL signal. It is important to note that a digital input code of 0 (i.e. the DAC is turned off) will cause the FAIL signal to go high regardless. Thus, open-circuit polling should only be performed when the digital input code is greater than zero.

3.5.2 Range, Acceleration Factor, and Specification
The importance of acceleration factor has been stressed in earlier sections. Here we address the issue in more detail as it relates to the range (i.e. maximum current) of the DAC.
As stated in Section 1.1, the end use for this IC is testing the statistics of the lifetime of an interconnect test structure. A DAC with a wide current range is needed to provide a sufficient amount of current to the test structure to produce an open-circuit failure within a certain time constraint and operating temperature. The user is expected to perform accelerated testing in order to produce failures in the span of 1 day to 2 weeks and at operating temperatures from 110-170˚C.
The most common metric for circuit reliability is MTF (Mean Time to Failure), a statistical measure of the expected lifetime of a circuit or component. A popular first-order model for the MTF of an interconnect with fixed length was first proposed by Black[2] and is still used by many designers. The model is:
𝑀𝑇𝐹 = 𝐴𝑗−𝑛𝑒𝐸𝑎𝑘𝑇
where: n is an empirical constant whose value is often given as 2 A is a process constant dependent on material and geometry j is the current density Ea is the activation energy for atomic motion K is the Boltzmann constant T is the temperature of the interconnect
This model informs us that MTF decreases with higher current densities and temperatures. In order to determine an appropriate current range for the DAC, we considered the scaling factor of MTF introduced by making specific changes to the current density and temperature. The data that we used to determine these constants is confidential foundry data, so we cannot show detailed calculations here. However, the important results can be summarized as follows:
For an interconnect of 0.23 µm, a minimum 10-year lifetime is expected at a constant operating
temperature of 110°C with a current density on the order of 250 µA. If the value of n is assumed to be 2, then a current density of 25 mA will result in an expected time-to-failure that is 10,000 times shorter. 10,000 is said to be the acceleration factor due to increased current density.
We feel that 10,000 will be a sufficient acceleration factor, causing the minimum lifetime – as
predicted by Black’s equation – to drop to less than one day. Depending on the statistical distribution of failures in the foundries test data (which, unfortunately, we were not able to access), the likelihood of observing a failure in less than a week, even with a small number of samples, should be very high. This is without even considering the thermal acceleration factor which, if the temperature is increased from 110°C to the test chip’s specified maximum of 170°C, will be even larger than that associated with the current.
The feasibility that electromigration effects will occur within the desired time period given this
current range can be further verified by cross-checking with published electromigration experiment

data. First we determine the current density in the test structure for the maximum DAC setting. This can be calculated from the total current and the cross-sectional area of the interconnect. The cross-sectional area is the width*depth of metal line. The depth is a process parameter which we must calculate using the sheet resistance, which can be found in publicly available process data found in Figure 9.
Figure 9: TSMC 018 Proccess Parameters [7]
A general formula for the resistance of a material is:
R = ρ ∗ l
A
…where l is length, A is cross-sectional area, and ρ is resistivity. The resistivity of copper at room temperature is 1.68 x 10⁻⁸ Ω-m. Sheet resistance, the parameter given in the table above, is defined as:
R∎ =R
lw
Substituting, we have:
1 = R∎ ∗
lw
ρ ∗l
w ∗ d
→ d = ρ
R∎
d = 1.68 ∗ 10−8 Ω ∗ m
0.08 Ω= 210 nm
Now the cross-sectional area can be calculated:
w*d = 0.12 µm * 210 nm = 0.0252 µm2 = 0.252*10-9 cm2
The current density in the interconnect is given by:
J = I
A
Table 8 shows the current density when the DAC is set to full-range, half-range, and one-LSB inputs.
Previous EM works have used current densities ranging from 0.5 to 5 MA/cm2 in tests that would last over a week[8][9]. According to the ITRS[10], intermediate interconnects should have a maximum current density of around 1.56 MA/cm2 to prevent early electromigration. This implies that modern technology is expected to support this current density without suffering from early electromigration

failures. The cross-references suggests that our DAC current range will be sufficient for tests lasting a week or less.
Table 8: Current Density
J (MA/cm2) I (mA)
99 25
49 12.4
0.79 0.2
Another factor to consider in determining electromigration MTF is the length of the interconnect. Research has been conducted showing that there is a minimum length of interconnect below which electromigration failures will not occur[11]. This threshold is discussed in the literature using the Blech Product:
Blech Product = jL
…where j is the current density and L is the length of the interconnect. Reported empirical values for the threshold Blech Product below which EM failures have not been observed in copper interconnects range from 3600 to 4100 A/cm[12]. The interconnect in our design has a maximum effective length of 11.5 mm. The calculated minimum length for electromigration based on a threshold Blech Product of 4000 A/cm and the half-scale current density of 49 MA/ cm2 is less than 1 µm. As our design allows lengths over 10,000 times greater than this, we expect that rapid electromigration failures will be possible.
With 7-bit resolution and a maximum current of 25 mA, the LSB current of the DAC is 200 µA, which is less than the current specified for a 10-year lifetime at 110°C. This is likely to be more than enough resolution for electromigration studies. The final specifications of the DAC are summarized in Table 9.
Table 9: DAC specifications
Resolution 7 bits
LSB Current 200 µA
Max current 25.6 mA

Figure 10: Current-steering DAC schematic

3.6 Auxiliary Circuits One important auxiliary analog circuit which does not appear in Figure 3 is the current distribution
network used to mirror the external reference current to each of the DAC’s. The circuit, shown in Figure 11, is composed of wide-swing cascode current mirrors[6] which minimize output-impedance effects and mirror the reference current with exceptional accuracy.
Figure 11: Current-distribution network schematic
An additional auxiliary analog function is the current enable switch, which is pictured in Figure 1. This switch allows the external controller to insure that no current flows in the test structure (or the DAC, since the current dump node is also switched) when testing is not actively being performed. It should also be used when new values are being written to the DAC to prevent transients and when the temperature sensor is being calibrated to avoid self-heating.
3.7 Physical Design The top-level layout, captured in a nearly complete state, is shown in Figure 12. The total area is
860 µm by 860 µm. The DAC’s have been arranged in a radial pattern around the center of the chip. They are the dominant source of self-heating on the chip, so this configuration should insure identical thermal gradients over all of the test structures. To reduce the severity of thermal gradients within each test structure, the test structures have been separated from DAC’s by 75 µm. The space between is occupied by metal lines including the major power lines and a large digital bus which connects each DAC to the control logic.
The temperature sensors are placed so as to allow the thermal gradient pattern on the chip to be
evaluated. One is inside of the ring of DACs, near the current distribution network. There are two at different locations alongside one of the DACs. There are also two sensors near the experimental test structures – one near the inner-most point and one near the outer-most point.

The control logic inhabits one of the die corners and the opposite corner houses the large master current switches. Large extra spaces have been filled with MOS capacitors for supply filtering as well as filtering of the current reference distribution network’s bias voltages.
A detailed look at any portion of the physical design reveals that great effort has been made to make the chip robust to electrothermal stress. Contacts and even many important metal lines are fully redundant. The current density in every metal line of the DAC is over 15 times less than that in the test structure.
Figure 12: Top-level layout
Figure 13: An example of contact and interconnect redundancy

4 Simulated Testing Results
4.1 Temperature sensor The important parameters of the analog temperature sensors are:
1. Thermal linearity: A plot of the thermal linearity, analogous in many ways to the INL of a data converter, is generated by subtracting the thermal transfer characteristic (output voltage as a function of temperature) from its straight-line approximation. If the result is divided by the (average) temperature coefficient of the output voltage, the linearity can be expressed as a temperature. If a precise two-point calibration of the temperature sensor were performed at its minimum and maximum temperatures and temperature measurements were made by referencing a linear interpolation of these two points, then the linearity figure would describe the accuracy of the sensor. Like the INL of a data-converter, the highest integral non-linearity is used as the summarizing scalar metric.
2. Offset: The output voltage at the lowest temperature in the range can be said to be the ‘offset’ of the thermal transfer characteristic.
3. Temperature coefficient: This is the average change in output voltage for a 1°C change in temperature. Temperature coefficient and offset are of interest because they constrain the accuracy of the instruments used to make measurements from the sensor and because changes in these values, if they are not calibrated out, cause measurement errors.
The Integrated thermal non-linearity and thermal characteristic of nominal sensor design (i.e. with no random process variations) are shown in Figure 14 at three voltage supply levels. Note that the sensor output here is referenced to VDD rather than to ground! The linearity is less than 0.6°C over the specified supply voltage range. The thermal characteristic curve demonstrates the sensitivity of the output offset to the supply voltage.
Figure 14: Integrated thermal non-linearity and thermal characteristic of nominal sensor design

Figure 15: Temperature sensor statistical simulation results
Figure 12 shows the result of a statistical simulation in which supply voltage was varied uniformly between the specified limits; global process variations as well as local mismatch effects were also included in this analysis, providing a blanket characterization of performance over PVT variations. The 3σ limits extracted from these histograms are shown in Table 10.
Table 10: Temperature sensor test result summary
Min Typical Max
INL (max, °C) 0.152 0.527 0.902
Offset (V) 0.399 0.447 0.495
Temp. coefficient (mv/°C) 1.037 1.149 1.260
These results suggest that < 1°C can be achieved with a two-point calibration. However, a more rigorous calibration will be required to verify the simulation models. Suggestions for calibration are given in the appendix to this document.
4.2 DAC The relevant specifications for the current-steering data converter are those most often used for
instrumentation data converters. Specifically, we give results for the following parameters, detailed definitions of which are given in any comprehensive circuit design text such as [6]:
1. Offset error 2. Gain error 3. INL
The settling time was also tested to discover how long the master current switch should remain open after writing a new value to the DAC register.
A 500-run statistical simulation including process / mismatch variations as well as temperature and supply voltage variations was performed. The results are shown in the form of histograms in Figure 16.

Figure 16: DAC statistical simulation results
The 3σ limits extracted from these histograms are shown in Table 11. While the linearity is excellent, the maximum gain error is 10 LSB. However, in most experimental activities, the relationship between the current in each test structure is likely to be much more important than their absolute values, thus gain errors are probably not a major concern, especially if currents much greater than 1 LSB are being tested. The settling time results suggest that master current switch needs to be disabled no longer than 1 µs after a new value has been written in to prevent transients.
Table 11: DAC test result summary
Min Typical Max
INL (LSB) - 0.052 .113
Offset (LSB) 0.001 0.006 0.011
Gain Error (LSB) - 2.89 9.94
1% Settling Time (ns) 22.3 54.3 86.3

4.3 Current Distribution Network The performance of the reference current-distribution network, discussed in Section 3.6, was also
tested. The minimum output impedance was found to be 165 kΩ. Full statistical simulation was performed; the worst case error (%) with respect to the input reference was used as the parameter. The results are shown in Figure 17. This error is quite high from a precision circuit design perspective. However, the high operation temperature has to be taken into account, as it exacerbates many of the second-order effects which degrade matching in current mirrors. Additionally, it is important to note that the majority of this variation comes from global process variations that affect each of the outputs equally. As with the DAC, the relative accuracy rather than the absolute accuracy of the outputs is most important.
Figure 17: Current Distribution network statistical simulation results
4.4 Digital Testing Testing of the digital sub-blocks was conducted primarily in two environments. Logic testing was
performed on all the digital modules. Logic testing took the form of Verilog testbench scripts which were run immediately before and after synthesis. After the digital modules went through placement and routing, the module underwent transient analysis both as a regression test and to extract minimum values for timing parameters. These test were performed to ensure that the digital sub-block met the specifications described in the appendix to this document.
4.5 Top-level Functional Testing Top-level functional testing was performed by running an extended simulation including the startup
sequence and a basic series of operations, which are annotated on the resulting waveform in Figure 18.

Figure 18: Top-level functional simulation
#1 VDD rises
#2 Reference current starts
#3 <000> written to address reg.
#4 <0101010> written to address reg.
#5 master current switch enabled
#6 test current settles at predicted value

5 Project Management
5.1 Resource requirements Integrated circuit design is performed in a software environment. Since fabrication costs are outside
the scope of this project, the fixed costs of design are limited to the cost of the software and the labor required to complete the design. In the case of our project, the software environment was provided at no cost to the project by the Department of Electrical and Computer Engineering at Iowa State University. The final fabrication process and subsequent system setup of the IC is outside the scope of our project. So there truly were no additional resource requirements for the project itself. We expect future research budgets to support the final steps involved in setting up a working test-system (e.g. PCB, lab equipment, cost of parts etc.)
The software packages used in the implementation of this project are listed in Table 13 with rough estimations of their list prices, which are not publicly available. Based on these values, the estimated 1-year depreciation cost plus maintenance is around $120,000. Additionally, the cost of engineering labor by the three team members is summarized in Table 12. The team based our hourly wages on the average salaries of entry-level circuit design engineers.
Table 12: Engineering labor costs
Project Member Hourly Rate Hours Total Cost
Emmanuel $30 280 $8,400
Josh $30 150 $4,500
Karl $30 450 $13,500
Consultation / Other $50 50 $2,500
TOTAL $28,900
Table 13: Estimated software costs
Software Estimated List Price
ModelSim $30,000
Digital Flow Software $200,000
Cadence Analog Toolset (1 seat) $50,000
Verification & Misc. Tools $100,000
TOTAL $380,000

5.2 Schedule The project schedule underwent several major adjustments due to both the evolving direction of
the project and factors outside of the team’s control. Specifically, identifying a foundry and process and subsequently setting a tape-out deadline for the project was a constant source of schedule changes. The initial project plan called for tape-out of the test chip around mid January of 2010. A striped-down test circuit, designed to evaluate high-precision temperature sensors, was submitted for fabrication on February 1st. The remainder of the project – i.e. the design which has been discussed in detail in this report – was completed during the remainder of the Spring semester. Figure 19 is a Gnatt chart showing the actual design schedule as it occurred.
2009 2010
Oct Nov Dec Jan Feb Mar Apr May
Literature Review
System Design
Sensor Design
Digital HDL
Design
Test-chip #1
Layout
DAC Design
Final Layout
Documentation
Top-level
Verification
Figure 19: Project Gnatt chart

6 Team Information
6.1 Geiger, Randall L (Faculty Advisor) Electrical and Computer Engineering
Office: 2133 Coover Hall Ames, IA 50011-2252
Phone: 515-294-7745 515-294-1152 fax
E-mail: [email protected]
6.2 Ellis, Joshua K. Electrical Engineering
Address: 7112 W Park Rd NE Cedar Rapids, IA 52402 Phone: 319-378-6959 E-mail: [email protected]
6.3 Owusu, Emmanuel O. Computer Engineering
Address: 4910 Hemingway Drive Ames, IA 50014
Phone: 515-450-4428 E-mail: [email protected]
6.4 Peterson, Karl D. Electrical Engineering
Address: 2126 Stevenson Dr. Ames, IA 50010
Phone: 515-231-7667 E-mail: [email protected]

7 Closing Summary A project involving the complete design of a custom IC for electromigration studies was presented.
The goals of the project, as well as the relevant constraints and limitations were outlined and the proposed solution was explained. The team’s approach to the project was outlined as were the critical design flows. Technical details of the system and all its sub-blocks were presented. Finally, simulated testing results were given for every module and for the system, allowing verification of the functional and parametric performance of the entire system.
As a result of the efforts made during the course of this project, an IC has been designed which is expected to enable a variety of electromigration research studies. The design, in the form a complete library including schematic and layout descriptions of the top-level system and all its modules, will be passed off to a student researcher who will oversee its fabrication and eventual utilization. It is expected that this IC will represent a significant step towards developing the ability to carry out advanced electromigration research at ISU.
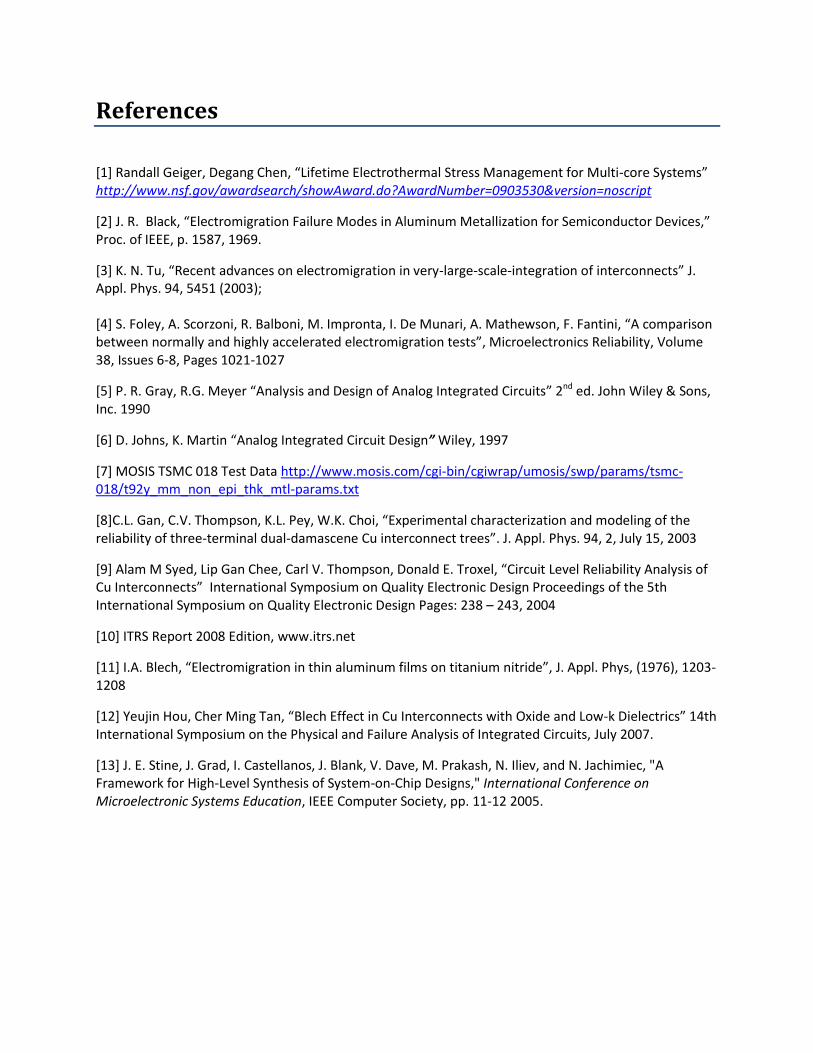
References
[1] Randall Geiger, Degang Chen, “Lifetime Electrothermal Stress Management for Multi-core Systems” http://www.nsf.gov/awardsearch/showAward.do?AwardNumber=0903530&version=noscript
[2] J. R. Black, “Electromigration Failure Modes in Aluminum Metallization for Semiconductor Devices,” Proc. of IEEE, p. 1587, 1969.
[3] K. N. Tu, “Recent advances on electromigration in very-large-scale-integration of interconnects” J. Appl. Phys. 94, 5451 (2003); [4] S. Foley, A. Scorzoni, R. Balboni, M. Impronta, I. De Munari, A. Mathewson, F. Fantini, “A comparison between normally and highly accelerated electromigration tests”, Microelectronics Reliability, Volume 38, Issues 6-8, Pages 1021-1027
[5] P. R. Gray, R.G. Meyer “Analysis and Design of Analog Integrated Circuits” 2nd ed. John Wiley & Sons, Inc. 1990
[6] D. Johns, K. Martin “Analog Integrated Circuit Design” Wiley, 1997
[7] MOSIS TSMC 018 Test Data http://www.mosis.com/cgi-bin/cgiwrap/umosis/swp/params/tsmc-018/t92y_mm_non_epi_thk_mtl-params.txt
[8]C.L. Gan, C.V. Thompson, K.L. Pey, W.K. Choi, “Experimental characterization and modeling of the reliability of three-terminal dual-damascene Cu interconnect trees”. J. Appl. Phys. 94, 2, July 15, 2003
[9] Alam M Syed, Lip Gan Chee, Carl V. Thompson, Donald E. Troxel, “Circuit Level Reliability Analysis of Cu Interconnects” International Symposium on Quality Electronic Design Proceedings of the 5th International Symposium on Quality Electronic Design Pages: 238 – 243, 2004
[10] ITRS Report 2008 Edition, www.itrs.net
[11] I.A. Blech, “Electromigration in thin aluminum films on titanium nitride”, J. Appl. Phys, (1976), 1203-1208
[12] Yeujin Hou, Cher Ming Tan, “Blech Effect in Cu Interconnects with Oxide and Low-k Dielectrics” 14th International Symposium on the Physical and Failure Analysis of Integrated Circuits, July 2007.
[13] J. E. Stine, J. Grad, I. Castellanos, J. Blank, V. Dave, M. Prakash, N. Iliev, and N. Jachimiec, "A Framework for High-Level Synthesis of System-on-Chip Designs," International Conference on Microelectronic Systems Education, IEEE Computer Society, pp. 11-12 2005.

Appendix
Interface Protocol Figure 20 shows the interface protocol for addressing one of the test-structures and setting the DAC
current. The timing of the FAIL signal, indicating an open circuit, is also shown for correct sample timing. Table 14 gives specifications for the critical timing parameters.
0 1 2 3 4 5 6 7 8 9 10 Cycle #
CLK
ADDR_EN
ADDR_DAT
A CTRL_EN
CTRL_DATA
C0- C7 [6:0]
FAIL
11 12
DATA
DATA
I_EN
DATA
tS
A
tR tF
tPF tSC tH
C
tP
C
tH
A
DATA
tSI tHI
Figure 20: Interface protocol timing diagram
Timing Parameter Value
tR 250 ns
tF 250 ns
tSA 0.8 µs
tHA 0.8 µs
tSC 1.2 µs
tHC 1.2 µs
tPF 0.7 µs
tPC 0.6 µs
tSI 1 µS
tHI 1 µS
fmax 100 kHz
Table 14: Timing parameter specifications

Reference System A reference system schematic, showing suggested passive components and digital interface
connections, can be found in the Cadence library; the cell name is REFERENCE_SYSTEM.
It is suggested that experimental control be realized with a PC for ease in programming and troubleshooting. The following resources will be helpful in finding a combination of software and hardware that will facilitate the use of a PC as the test controller:
TCL (http://www.tcl.tk/) – Tool Command Language is a scripting language with simple syntax that is well documented and suited for use in automated testing setups. TCL libraries exist to interface with a variety of hardware, including the GPIB standard (see below). Alternative scripting languages are Perl and Python.
GPIB-TCL (http://gpib-tcl.sourceforge.net/GPIB-Tcl.html) GPIB-TCL is an open source library for TCL which allows the control of GPIB-enabled test equipment. As most laboratory equipment (including automated ovens) is compatible with the GPIB standard, this is a good way to coordinate control of the IC with the other test equipment.
The Bus Pirate (http://code.google.com/p/the-bus-pirate/) The Bus Pirate is a universal bus interface designed specifically to link a variety of IC’s with a PC. The Bus Pirate supports bit-banging, is an open hardware project with excellent documentation, and can be purchased – fully assembled – for less than $40. According to the web site, The Bus Pirate currently supports scripting in Perl, Python, and other common languages.
I2C Tools (http://www.i2ctools.com/products.html) This website provides a comparison of commercial solutions for USB to IC interfacing.
Automation on OSU VLSI Wiki (https://secure.engr.oregonstate.edu/wiki/ams/index.php/LabTesting/Automation) this article, on the Oregon State VLSI Wiki, provides an introduction to test automation and outlines some possible software/hardware solutions.
National Instruments LabView (http://www.ni.com/labview/) Labview is available in the ISU labs and provides a graphical alternative for test automation. Drivers are available for some PC -> IC interface hardware as well as common test equipment which supports GPIB.

Misc. Operation Notes
Temperature sensor calibration
The temperature sensor design, which is experimental in nature, must be carefully calibrated before it is used to realize measurement of on-die thermal conditions. Initially, calibration should be performed in accordance with the following considerations:
To prevent self-heating, the chip should be completely turned off while the environmental temperature (in the oven or other heat source) settles.
Once the environmental temperature settles, the temperature measurement should be realized as soon as the sensor output settles after turning the chip on.
The master current-enable switch should remained closing during the entire calibration procedure.
An extremely accurate temperature sensor should be used as the reference value. For many high-accuracy IC temperature sensors, Platinum Resistance Thermometers (PRT) are used in calibration.
The ADC used to digitize the sensor reading should have instrumentation-level accuracy and resolution and an input range which matches the output characteristics of the sensor given in the testing section.
Linear interpolation can be used to generate a lookup table (or algorithm). One data point is suggested for at least every 5 increments of the required accuracy (e.g. for 1°C accuracy, one point for each 5°C is suggested).
DAC characterization
The DAC could be characterized with reasonable accuracy by sensing the current out of the two dump nodes and adjusting the digital value of one DAC at a time.
Concerns & Suggestions There are a number of subjects and issues that we did not have enough time to investigate fully. These will be explained in detail as part of the project hand-off. However, in order to be comprehensive, we provide a list here:
Strange test results for current distribution network – The equation for the output impedance of the current-distribution network did not give variable results during statistical simulation. It is likely that something is wrong with the parameter equation; however, this issue could be investigated further to make sure it is not indicative of some bigger problem with the circuit or simulation environment.
Digital is not DRC clean as of this writing – Contact overlap in the custom standard cells is causing numerous DRC errors in the digital layout. These could be cleaned up manually, otherwise the LEF file for the standard cells could be edited to make more room for aligning the contact as they were in the original OSU cell layouts.
Resistance of test interconnect has not been extracted – this is a parameter which really should be known, but because of the apparent impossibility of LVS checking a single wire, we have been unable to do this. The result could be back-annotated into the simulations of the DAC and the top-level simulation

to make these more realistic. There may be problems with the output impedance of the DAC current sources and variable threshold voltage in the inverters, which would result in different failure criteria in different cases.
LVS issue with standard cells in analog blocks – there is an LVS issue with VDD and GND nodes of standard cells that were used in the analog blocks. There should be a band-aid for this, but none has been found yet.
Physical simulation of test-interconnect – an FEM simulator or other numerical field solver could be used to better evaluate the test-interconnect and make sure that current-crowding effects have been sufficiently suppressed by the corner reinforcement.
Transient current during master switch transition – Are the transient currents produced when the master switch is toggled to great? This should be investigated before fabrication.
Thermal simulation – it may be possible to do a thermal simulation of the die to evaluate the expected gradients more completely. A software tool with this capability has not been identified, but likely exists.
Idiosyncrasies in test bench setups – there are a number of idiosyncrasies with the test bench setups, which in some cases were very complex. Several custom spectre scripts were used and some ASCII files are referenced in output equations. These will be passed off along with the final library and their use will be explained to the user.
Deciding the length of the interconnect – the appropriate interconnect length will probably be much less than the maximum of 11.5 mm. It must be chosen based on the saturation requirements of the DAC current sources, the relationship between the open-circuit-detecting inverter threshold and the desired resistance change, as well as other experimental considerations.