Embed Size (px)
DESCRIPTION
909 3/4”-2”. Modification Overview. Production began in 1979 and is current. The 909M1 (1989) in the 11/4”-2” sizes only. Change was in the body only- internal components are the same. Check Cover Removal. Cover is o-ring sealed. - PowerPoint PPT Presentation
Citation preview
909 909 3/4”-2”3/4”-2”

Modification OverviewModification Overview
Production began in 1979 and is current.Production began in 1979 and is current.
The 909M1 (1989) in the 11/4”-2” sizes The 909M1 (1989) in the 11/4”-2” sizes only. Change was in the body only- only. Change was in the body only- internal components are the same.internal components are the same.
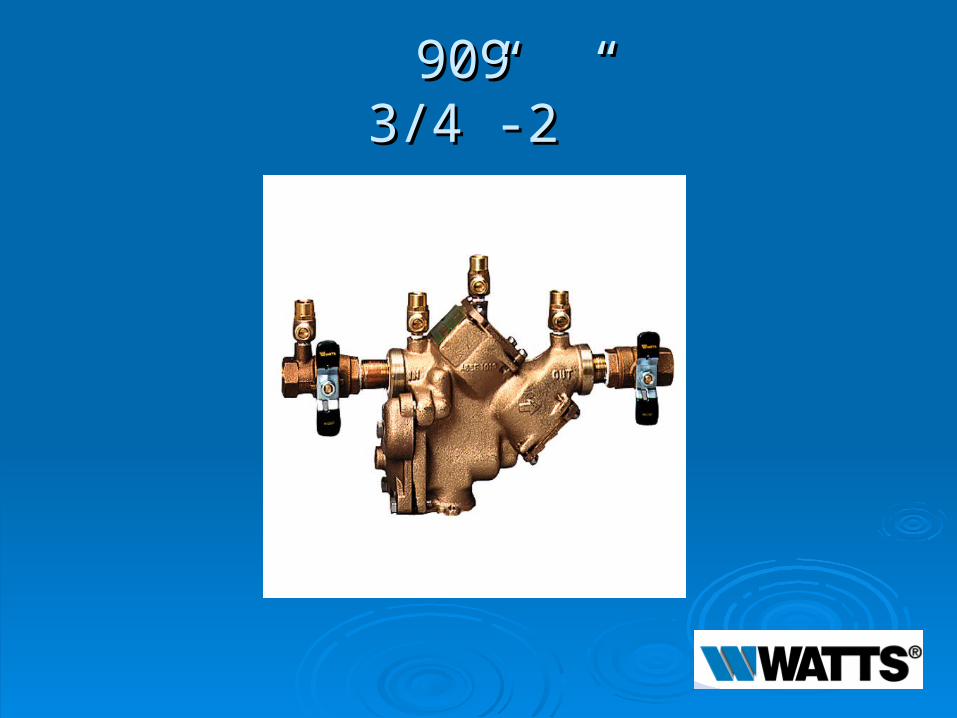
Check Cover RemovalCheck Cover Removal
Cover is o-ring Cover is o-ring sealed.sealed.
Check valve Check valve assembly is attached assembly is attached to the cover and to the cover and spring is contained.spring is contained.
Pull cover and Pull cover and assembly straight out assembly straight out of the body. (Do not of the body. (Do not twist)twist)
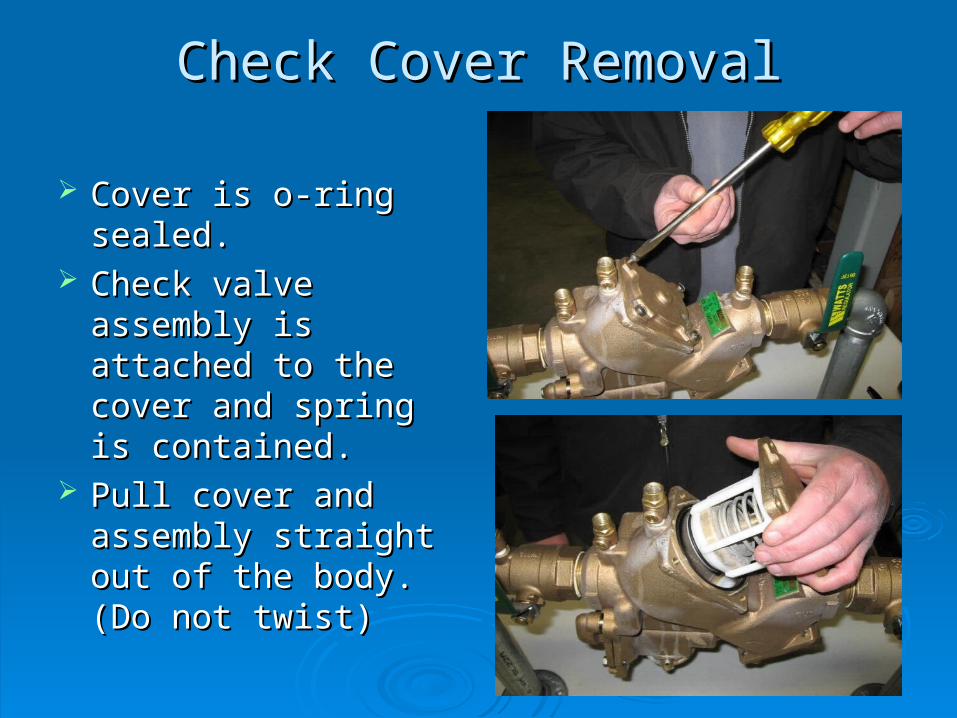
Check Valve RemovalCheck Valve Removal
The check valve is The check valve is attached to the cover attached to the cover with a bayonet locking with a bayonet locking system.system.
Check valve assembly Check valve assembly is spring loaded.is spring loaded.
Holding the assembly Holding the assembly in both hands, rotate in both hands, rotate the seat (cage) ¼ turn.the seat (cage) ¼ turn.
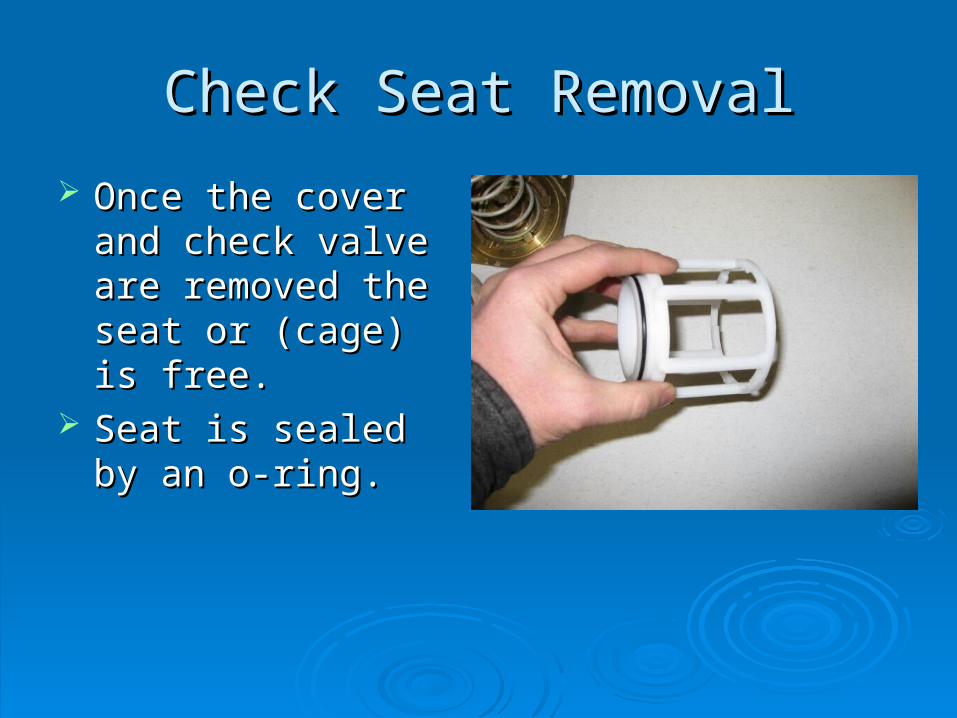
Check Seat RemovalCheck Seat Removal
Once the cover and Once the cover and check valve are check valve are removed the seat or removed the seat or (cage) is free.(cage) is free.
Seat is sealed by an Seat is sealed by an o-ring.o-ring.
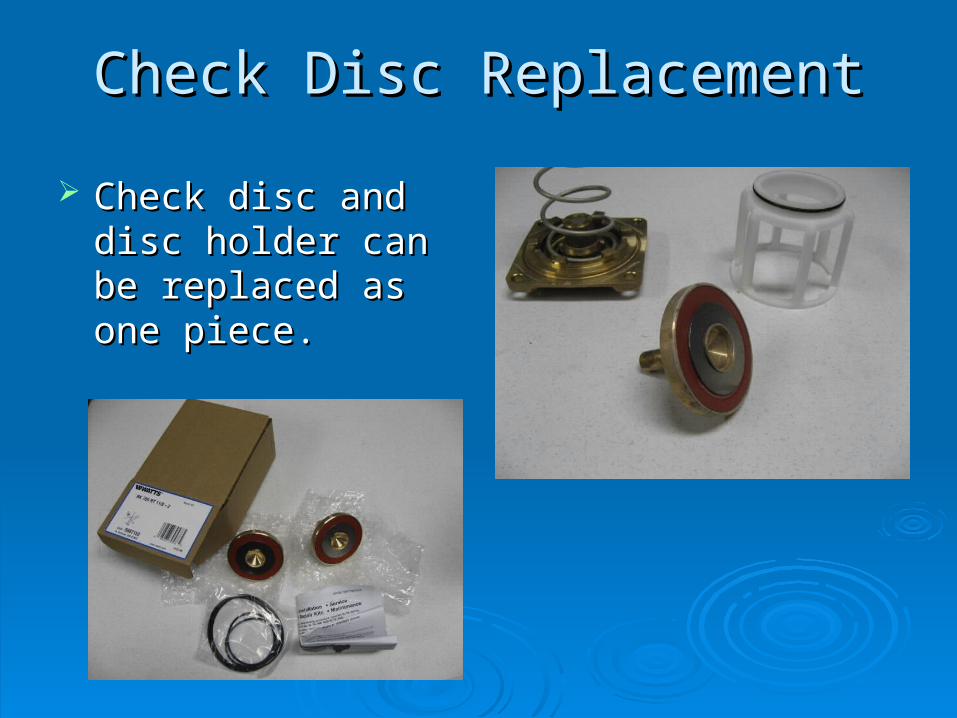
Check Disc ReplacementCheck Disc Replacement
Check disc and disc Check disc and disc holder can be holder can be replaced as one replaced as one piece.piece.
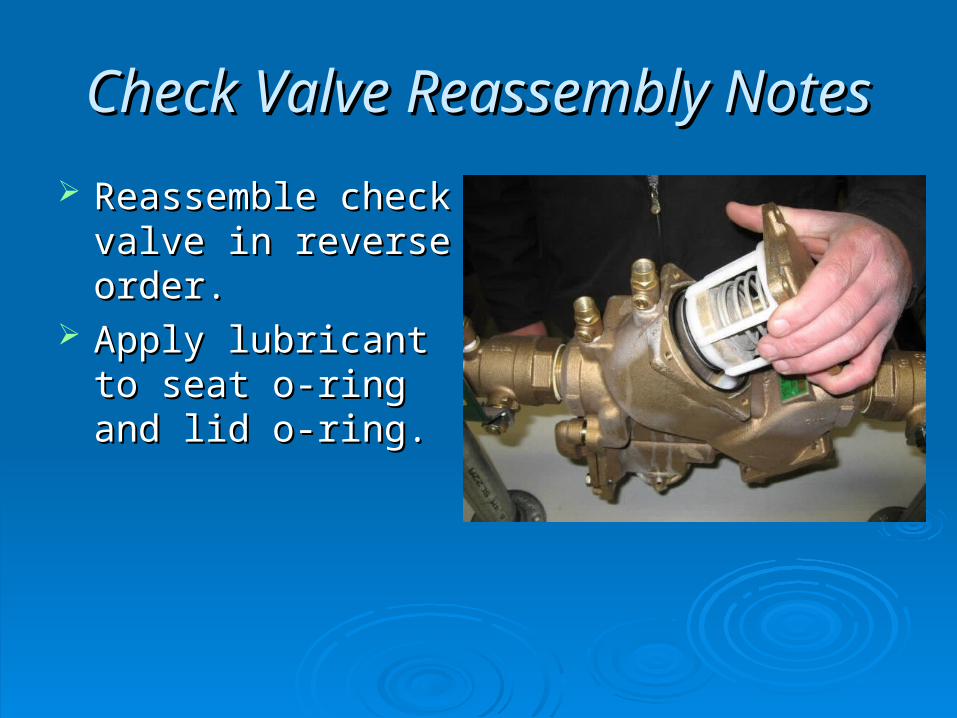
Check Valve Reassembly NotesCheck Valve Reassembly Notes
Reassemble check Reassemble check valve in reverse valve in reverse order.order.
Apply lubricant to seat Apply lubricant to seat o-ring and lid o-ring.o-ring and lid o-ring.
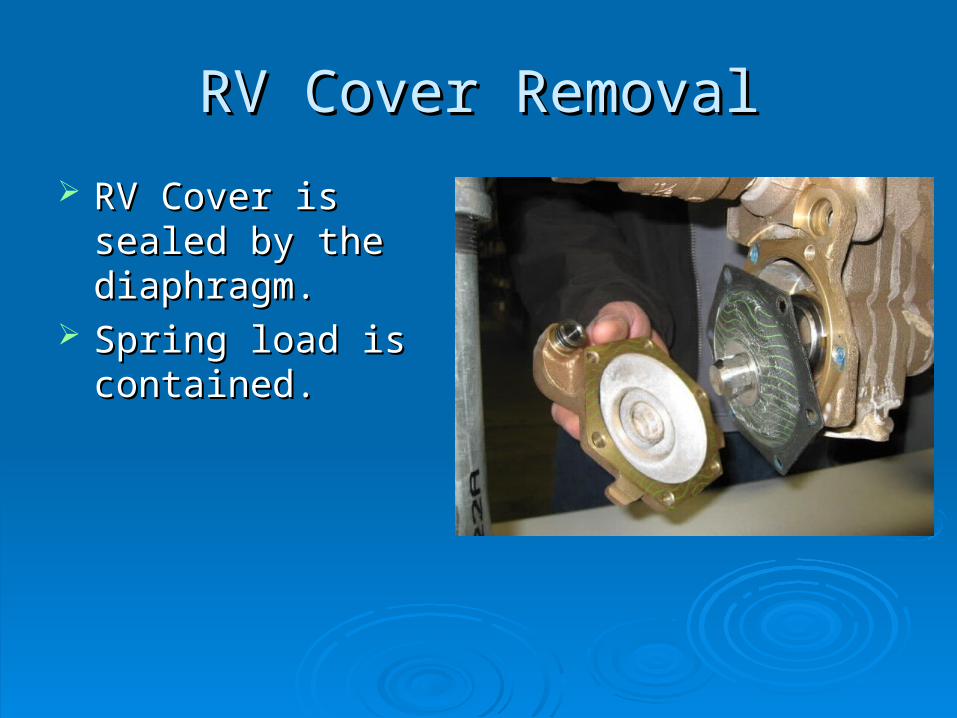
RV Cover RemovalRV Cover Removal
RV Cover is sealed RV Cover is sealed by the diaphragm.by the diaphragm.
Spring load is Spring load is contained.contained.
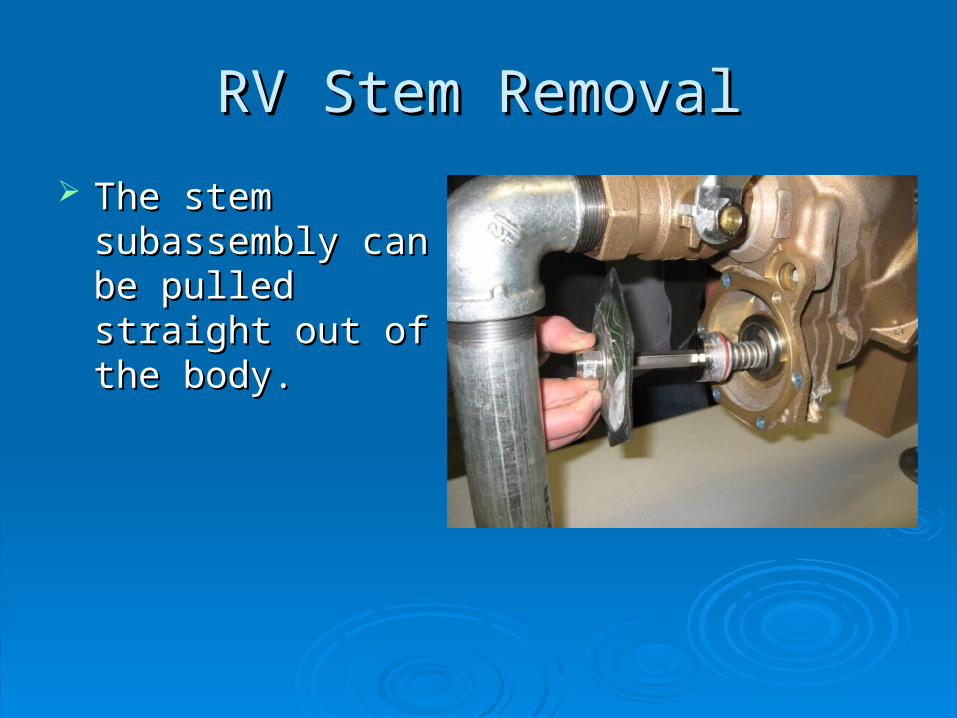
RV Stem RemovalRV Stem Removal
The stem The stem subassembly can be subassembly can be pulled straight out of pulled straight out of the body.the body.
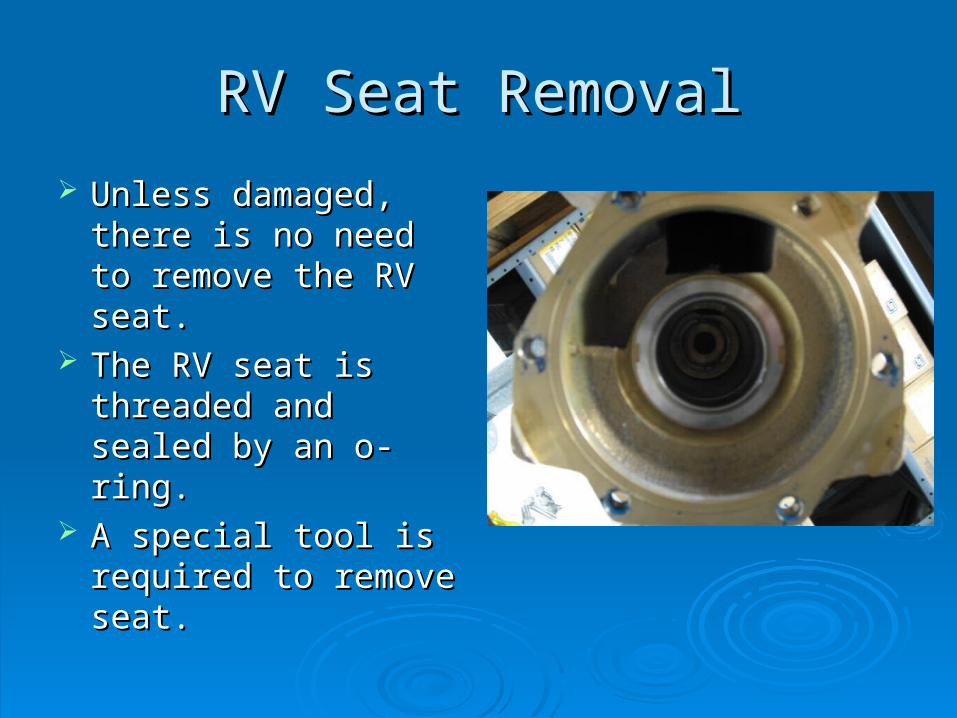
RV Seat RemovalRV Seat Removal
Unless damaged, Unless damaged, there is no need to there is no need to remove the RV seat.remove the RV seat.
The RV seat is The RV seat is threaded and sealed threaded and sealed by an o-ring.by an o-ring.
A special tool is A special tool is required to remove required to remove seat.seat.
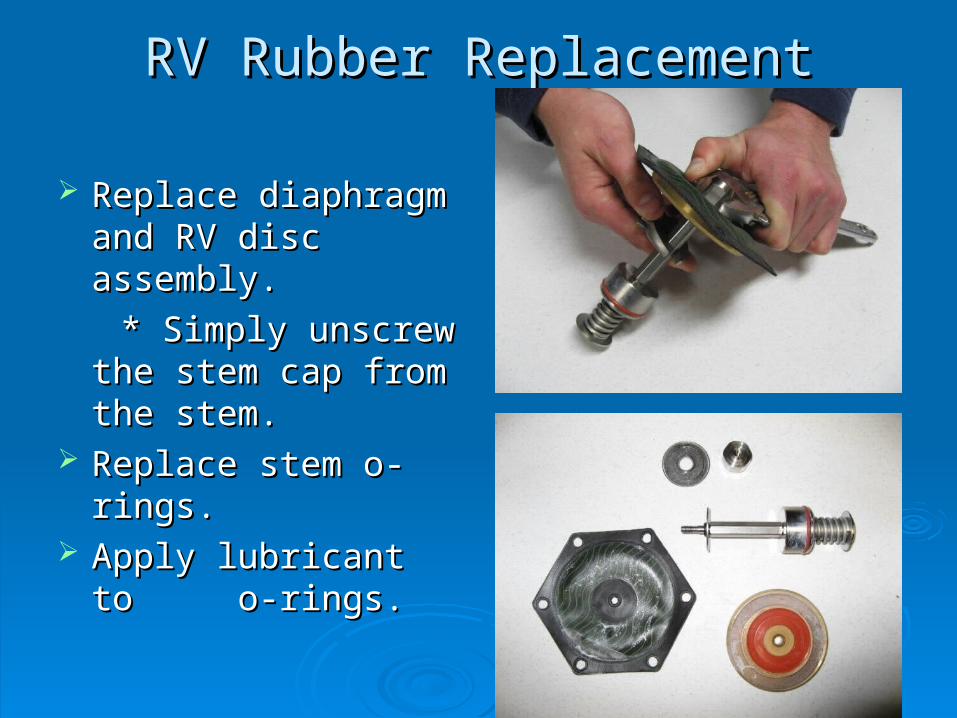
RV Rubber ReplacementRV Rubber Replacement
Replace diaphragm Replace diaphragm and RV disc and RV disc assembly.assembly.
* Simply unscrew the * Simply unscrew the stem cap from the stem cap from the stem.stem.
Replace stem o-rings.Replace stem o-rings. Apply lubricant to Apply lubricant to
o-rings.o-rings.
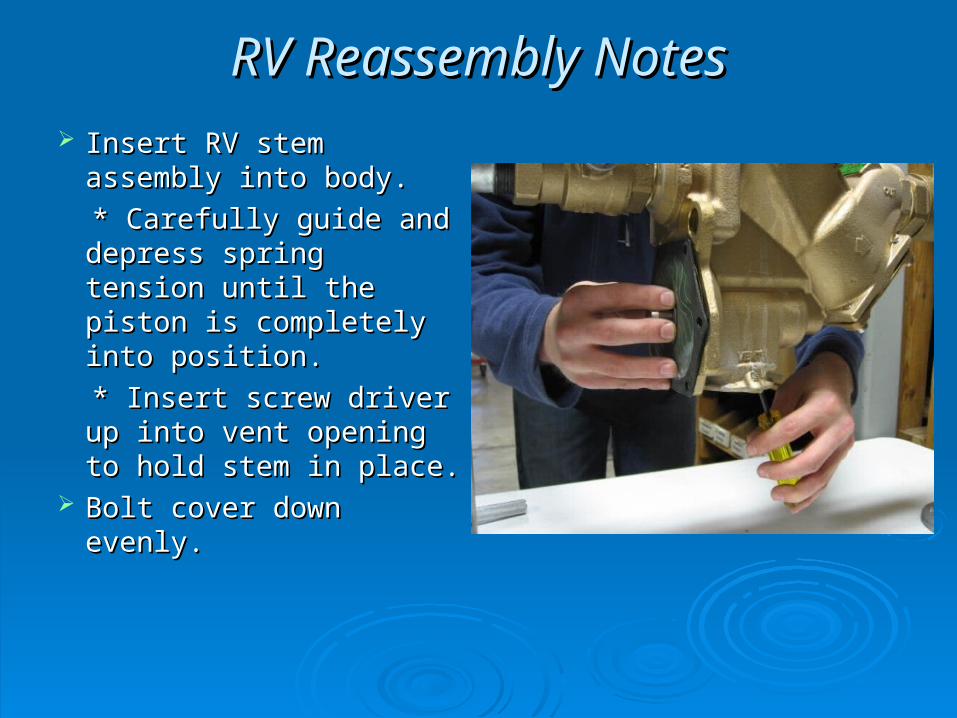
RV Reassembly NotesRV Reassembly Notes
Insert RV stem Insert RV stem assembly into body.assembly into body.
* Carefully guide and * Carefully guide and depress spring tension depress spring tension until the piston is until the piston is completely into position.completely into position.
* Insert screw driver up * Insert screw driver up into vent opening to into vent opening to hold stem in place.hold stem in place.
Bolt cover down evenly.Bolt cover down evenly.