Embed Size (px)
Citation preview

5/17/2018 9 0 With 8 98 4 Standalone Installation Using OUI With OEE Rev2 - slidepdf.com
http://slidepdf.com/reader/full/9-0-with-8-98-4-standalone-installation-using-oui-with-oee-rev2 1/75
JD Edwards EnterpriseOne 9.0/8.98
Standalone Client Using OracleUniversal Installer (OUI) and OracleEnterprise Edition (OEE) Database
Installation Guide
May 2011
5/17/2018 9 0 With 8 98 4 Standalone Installation Using OUI With OEE Rev2 - slidepdf.com
http://slidepdf.com/reader/full/9-0-with-8-98-4-standalone-installation-using-oui-with-oee-rev2 2/75
Copyright Notice
Copyright © 2011, Oracle and/or its affiliates. All rights reserved.
Trademark Notice
Oracle is a registered trademark of Oracle Corporation and/or its affiliates. Other names may be trademarks of their respectiveowners.
License Restrictions Warranty/Consequential Damages Disclaimer
This software and related documentation are provided under a license agreement containing restrictions on use and disclosure and
are protected by intellectual property laws. Except as expressly permitted in your license agreement or allowed by law, you may
not use, copy, reproduce, translate, broadcast, modify, license, transmit, distribute, exhibit, perform, publish or display any part,
in any form, or by any means. Reverse engineering, disassembly, or decompilation of this software, unless required by law for
interoperability, is prohibited.
Subject to patent protection under one or more of the following U.S. patents: 5,781,908; 5,828,376; 5,950,010; 5,960,204;
5,987,497; 5,995,972; 5,987,497; and 6,223,345. Other patents pending.
Warranty Disclaimer
The information contained herein is subject to change without notice and is not warranted to be error-free. If you find any errors,
please report them to us in writing.
Restricted Rights Notice
If this software or related documentation is delivered to the U.S. Government or anyone licensing it on behalf of the U.S.
Government, the following notice is applicable:
U.S. GOVERNMENT RIGHTS
Programs, software, databases, and related documentation and technical data delivered to U.S. Government customers
are “commercial computer software” or “commercial technical data” pursuant to the applicable Federal Acquisition
Regulation and agency-specific supplemental regulations. As such, the use, duplication, disclosure, modification, andadaptation shall be subject to the restrictions and license terms set forth in the applicable Government contract, and, to
the extent applicable by the terms of the Government contract, the additional rights set forth in FAR 52.227-19,
Commercial Computer Software License (December 2007). Oracle USA, Inc., 500 Oracle Parkway, Redwood City, CA
94065.
Hazardous Applications Notice
This software is developed for general use in a variety of information management applications. It is not developed or intended
for use in any inherently dangerous applications, including applications which may create a risk of personal injury. If you use this
software in dangerous applications, then you shall be responsible to take all appropriate fail-safe, backup, redundancy and other
measures to ensure the safe use of this software. Oracle Corporation and its affiliates disclaim any liability for any damages
caused by use of this software in dangerous applications.
Third Party Content, Products, and Services Disclaimer
This software and documentation may provide access to or information on content, products and services from third parties.
Oracle Corporation and its affiliates are not responsible for and expressly disclaim all warranties of any kind with respect to third
party content, products and services. Oracle Corporation and its affiliates will not be responsible for any loss, costs, or damages
incurred due to your access to or use of third party content, products or services.
Contains GNU libgmp library; Copyright 1991 Free Software Foundation, Inc. This library is free software which can be
modified and redistributed under the terms of the GNU Library General Public License.
Includes Adobe® PDF Library, Copyright 1993-2001 Adobe Systems, Inc. and DL Interface, Copyright 1999-2008 Datalogics
5/17/2018 9 0 With 8 98 4 Standalone Installation Using OUI With OEE Rev2 - slidepdf.com
http://slidepdf.com/reader/full/9-0-with-8-98-4-standalone-installation-using-oui-with-oee-rev2 3/75
Inc. All rights reserved. Adobe® is a trademark of Adobe Systems Incorporated.
Portions of this program contain information proprietary to Microsoft Corporation. Copyright 1985-1999 Microsoft Corporation.
Portions of this program contain information proprietary to Tenberry Software, Inc. Copyright 1992-1995 Tenberry Software,
Inc.
Portions of this program contain information proprietary to Premia Corporation. Copyright 1993 Premia Corporation.
This product includes code licensed from RSA Data Security. All rights reserved.
This product includes software developed by the OpenSSL Project for use in the OpenSSL Toolkit (http://www.openssl.org/).
This product includes cryptographic software written by Eric Young ([email protected]).
This product includes software written by Tim Hudson ([email protected]). All rights reserved.
This product includes the Sentry Spelling-Checker Engine, Copyright 1993 Wintertree Software Inc. All rights reserved.
Open Source Disclosure
Oracle takes no responsibility for its use or distribution of any open source or shareware software or documentation and disclaims
any and all liability or damages resulting from use of said software or documentation. The following open source software may
be used in Oracle's JD Edwards EnterpriseOne products and the following disclaimers are provided.
This product includes software developed by the Apache Software Foundation (http://www.apache.org/). Copyright (c) 1999-
2000 The Apache Software Foundation. All rights reserved. THIS SOFTWARE IS PROVIDED “AS IS’’ AND ANY
EXPRESSED OR IMPLIED WARRANTIES, INCLUDING, BUT NOT LIMITED TO, THE IMPLIED WARRANTIES OF
MERCHANTABILITY AND FITNESS FOR A PARTICULAR PURPOSE ARE DISCLAIMED. IN NO EVENT SHALL THE
APACHE SOFTWARE FOUNDATION OR ITS CONTRIBUTORS BE LIABLE FOR ANY DIRECT, INDIRECT,
INCIDENTAL, SPECIAL, EXEMPLARY, OR CONSEQUENTIAL DAMAGES (INCLUDING, BUT NOT LIMITED TO,
PROCUREMENT OF SUBSTITUTE GOODS OR SERVICES; LOSS OF USE, DATA, OR PROFITS; OR BUSINESS
INTERRUPTION) HOWEVER CAUSED AND ON ANY THEORY OF LIABILITY, WHETHER IN CONTRACT, STRICT
LIABILITY, OR TORT (INCLUDING NEGLIGENCE OR OTHERWISE) ARISING IN ANY WAY OUT OF THE USE OF
THIS SOFTWARE, EVEN IF ADVISED OF THE POSSIBILITY OF SUCH DAMAGE.

5/17/2018 9 0 With 8 98 4 Standalone Installation Using OUI With OEE Rev2 - slidepdf.com
http://slidepdf.com/reader/full/9-0-with-8-98-4-standalone-installation-using-oui-with-oee-rev2 4/75
5/17/2018 9 0 With 8 98 4 Standalone Installation Using OUI With OEE Rev2 - slidepdf.com
http://slidepdf.com/reader/full/9-0-with-8-98-4-standalone-installation-using-oui-with-oee-rev2 5/75
Copyright © 2011, Oracle. All rights reserved Rev2
Table of Contents
CHAPTER 1. INTRODUCTION ...............................................................................................................................1
CHAPTER 2. PREREQUISITES ...............................................................................................................................3
MINIMUM TECHNICAL REQUIREMENTS ......................................................................................................................3
ADDITIONAL CONSIDERATIONS ..................................................................................................................................4
CHAPTER 3. INSTALLATION METHODS ...........................................................................................................6
COPYING THE INSTALLATION DVD ............................................................................................................................7
DOWNLOADING FROM THE ORACLE E-DELIVERY WEBSITE .......................................................................................8
CHAPTER 4. INSTALLING THE STANDALONE CLIENT .............................................................................. 12
UNDERSTANDING DESTINATION PATHS .................................................................................................................... 13
INSTALLING THE LOCAL DATABASE ......................................................................................................................... 14
INSTALLING THE ENTERPRISEONE CLIENT ............................................................................................................... 22
TROUBLESHOOTING THE INSTALLATION................................................................................................................... 3
CHAPTER 5. POST INSTALLATION TASKS ..................................................................................................... 33
UPDATING THE TNSNAMES.ORA FILE......................................................................................................................... 33
CHAPTER 6. STARTING THE STANDALONE CLIENT .................................................................................. 35
TROUBLESHOOTING STANDALONE CLIENT STARTUP ERRORS.................................................................................. 37
General ................................................................................................................................................................ 37
Cannot Connect to the Security Server ................................................................................................................ 39
Still Cannot Connect to the Security Server ......................................................................................................... 40
CHAPTER 7. STARTING THE STANDALONE WEB CLIENT ........................................................................ 41
TROUBLESHOOTING STANDALONE WEB CLIENT STARTUP ERRORS ......................................................................... 41
General ................................................................................................................................................................ 42
Cannot Connect to the Security Server ................................................................................................................ 44
CHAPTER 8. REPLACING THE JD EDWARDS ENTERPRISEONE TOOLS RELEASE COMPONENT 46
CHAPTER 9. DEINSTALLING THE STANDALONE CLIENT ........................................................................ 59
DEINSTALLING THE STANDALONE CLIENT................................................................................................................ 59
DEINSTALLING THE OEE DATABASE (OPTIONAL) ..................................................................................................... 60
GLOSSARY ................................................................................................................................................................ 67

5/17/2018 9 0 With 8 98 4 Standalone Installation Using OUI With OEE Rev2 - slidepdf.com
http://slidepdf.com/reader/full/9-0-with-8-98-4-standalone-installation-using-oui-with-oee-rev2 6/75
5/17/2018 9 0 With 8 98 4 Standalone Installation Using OUI With OEE Rev2 - slidepdf.com
http://slidepdf.com/reader/full/9-0-with-8-98-4-standalone-installation-using-oui-with-oee-rev2 7/75
Copyright © 2011, Oracle. All rights reserved GA.Rev2 1
Chapter 1. Introduction
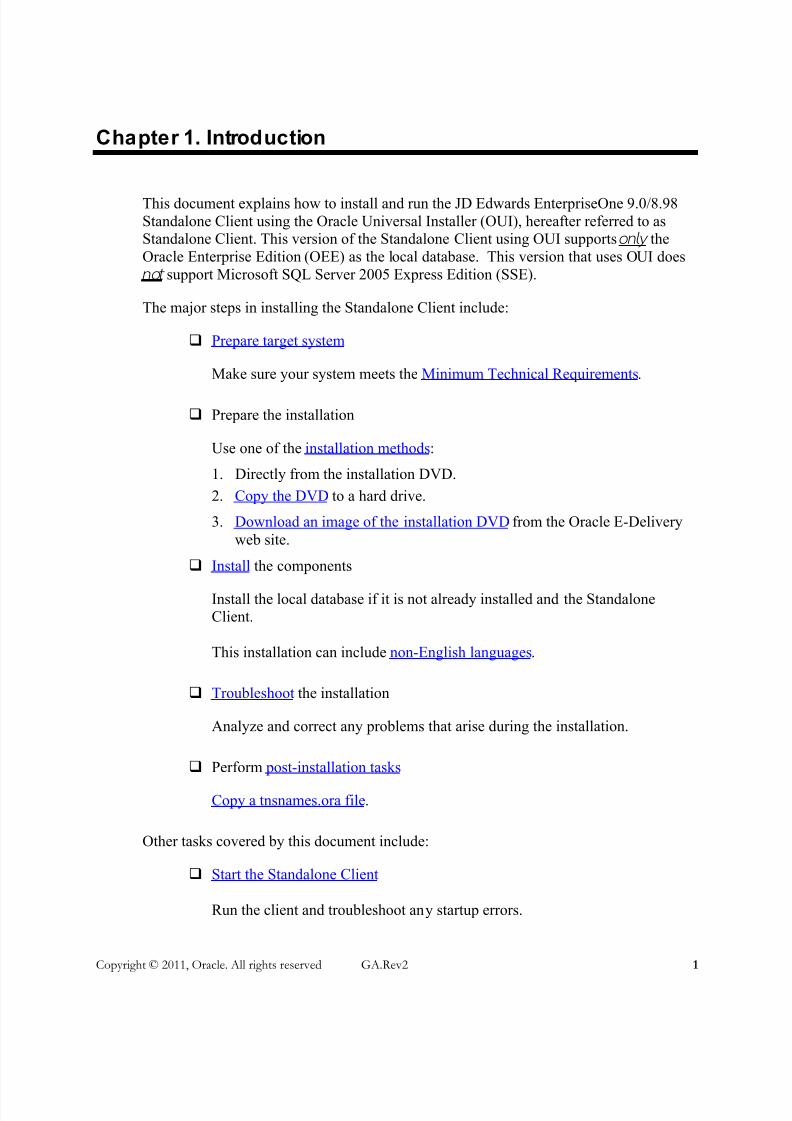
This document explains how to install and run the JD Edwards EnterpriseOne 9.0/8.98
Standalone Client using the Oracle Universal Installer (OUI), hereafter referred to as
Standalone Client. This version of the Standalone Client using OUI supports only the
Oracle Enterprise Edition (OEE) as the local database. This version that uses OUI does
not support Microsoft SQL Server 2005 Express Edition (SSE).
The major steps in installing the Standalone Client include:
Prepare target system
Make sure your system meets the Minimum Technical Requirements.
Prepare the installation
Use one of the installation methods:
1. Directly from the installation DVD.
2. Copy the DVD to a hard drive.
3. Download an image of the installation DVD from the Oracle E-Delivery
web site.
Install the components
Install the local database if it is not already installed and the Standalone
Client.
This installation can include non-English languages.
Troubleshoot the installation
Analyze and correct any problems that arise during the installation.
Perform post-installation tasks
Copy a tnsnames.ora file.
Other tasks covered by this document include:
Start the Standalone Client
Run the client and troubleshoot any startup errors.

5/17/2018 9 0 With 8 98 4 Standalone Installation Using OUI With OEE Rev2 - slidepdf.com
http://slidepdf.com/reader/full/9-0-with-8-98-4-standalone-installation-using-oui-with-oee-rev2 8/75
Chapter 1. Introduction
Copyright © 2011, Oracle. All rights reserved Rev2 2
Start the Web Client
Run the web client as part of the Standalone Client and troubleshoot any
startup errors.
Replace the JD Edwards EnterpriseOne Tools component
Replace the JD Edwards EnterpriseOne Tools Release component (also
known as “system” code) when a new JD Edwards EnterpriseOne ToolsRelease becomes available.
Deinstall (Uninstall) the Standalone Client
Remove the client and the local database, if desired.
Refer to the Glossary in this document for definitions of terms and acronyms.
Note: Microsoft Windows Slash Characters. Microsoft Windows syntax allows
either a slash or backslash to separate directory names. If you are specifying
directory names from this document, you may use either slash character.
5/17/2018 9 0 With 8 98 4 Standalone Installation Using OUI With OEE Rev2 - slidepdf.com
http://slidepdf.com/reader/full/9-0-with-8-98-4-standalone-installation-using-oui-with-oee-rev2 9/75
Chapter 2. Prerequisites
Copyright © 2011, Oracle. All rights reserved Rev2 3
Chapter 2. Prerequisites
Minimum Technical Requirements
Customers must conform to the supported platforms for the release as detailed in the JD
Edwards EnterpriseOne Minimum Technical Requirements, as described in this
document on My Oracle Support:
JD Edwards EnterpriseOne Tools 8.9x Minimum Technical Requirementsfor Clients (Doc ID 705409.1)https://support.us.oracle.com/oip/faces/secure/km/DocumentDisplay.jspx?id=705409.1
The MTRs are contained in an attachment within document 705409.1 that is entitled JDE E1
Tools 8.9x Client.
The computer on which you are installing the Standalone Client needs to meet the MTRs of
all types of clients described in this section. Therefore you should review and ascertain that
your machine meets the requirements listed in these topics of the client MTR document:
Information Common for all Clients
Web Client
Windows Client
Development Client
In addition, JD Edwards EnterpriseOne may integrate, interface, or work in conjunctionwith other Oracle products. Refer to these links:
Oracle Contracts Home Page
http://www.oracle.com/corporate/contracts/index.html
Oracle has a consistent contract model for all programs and services globally. Thestandard contracts often refer to other sites or policies that may be relevant to a
specific order or provide more information on policy. Links to the specified
policies are available here.
Oracle License and Service Agreement (OLSA)http://www.oracle.com/corporate/contracts/olsa_main.html
The Oracle License and Services Agreement (OLSA) is the standard agreement
that is used to license Oracle programs and acquire related services.
5/17/2018 9 0 With 8 98 4 Standalone Installation Using OUI With OEE Rev2 - slidepdf.com
http://slidepdf.com/reader/full/9-0-with-8-98-4-standalone-installation-using-oui-with-oee-rev2 10/75
Chapter 2. Prerequisites
Copyright © 2011, Oracle. All rights reserved Rev2 4
Oracle Program Documentation
http://www.oracle.com/technology/documentation/index.html
Access current and previously released Oracle program documentation.
PeopleSoft / JD Edwards Program Table
From the above OLSA page, refer to the below verbiage which contains links to
available PDFs as applicable.
Your license for the program(s) may include additional license rights, which
varies according to your order date. Review the applicable tables.
Notes: EnterpriseOne Releases. The release of the JD Edwards EnterpriseOne
Applications for this Standalone Client is 9.0. The release of the JD Edwards
EnterpriseOne Tools for this Standalone Client is 8.98. The MTRs refer tothe Tools release level.
Third-party software. Read the section entitled: Additional Considerations
before installing any additional third-party software.
Deinstall versus uninstall. OUI uses the term “deinstall” to mean removal of an Oracle product. This document will do the same.
Additional Considerations
1. Be sure the MTRs are met before starting the Standalone Client installation.
2. JDK 1.5 is supplied with the installation. Do not replace this with another versionof the JDK because JDK 1.6 and higher have not been validated with
EnterpriseOne Tools Release 8.98. Also, do not replace this JDK with a 64-bit
version because EnterpriseOne is a 32-bit program which requires a 32-bit version
of the JDK even when running on a 64-bit version of Microsoft Windows.
3. Microsoft Visual Studio is not required unless you are building businessfunctions. The installation of the Standalone Client installs the Microsoft libraries
that are necessary to run EnterpriseOne, but if you plan to build business
functions, you will need the compiler and additional libraries that Visual Studioprovides.
4. Verify that all previous releases of JD Edwards EnterpriseOne (StandaloneClients and normal clients) have been completely deinstalled or saved via
Snapshot before installing the Standalone Client. For instructions on how to
5/17/2018 9 0 With 8 98 4 Standalone Installation Using OUI With OEE Rev2 - slidepdf.com
http://slidepdf.com/reader/full/9-0-with-8-98-4-standalone-installation-using-oui-with-oee-rev2 11/75
Chapter 2. Prerequisites
Copyright © 2011, Oracle. All rights reserved Rev2 5
deinstall the Standalone Client, refer to the section of this guide entitled:
Deinstalling the Standalone Client.
5. Standalone Client does not require Software Protection Codes (SPCs) to run soyou will not need to perform the steps for applying SPCs that previous
EnterpriseOne releases required.
6. This version of the Standalone Client using OUI supports only the Oracle
Enterprise Edition (OEE) as the local database.
This version of Standalone Client using OUI does not support Microsoft SQL
Server 2005 Express Edition (SSE).
7. This release of the Standalone Client contains Oracle Enterprise Edition (OEE)
11gR2. If you previously had installed OEE 11gR2 as the local database and you
are reinstalling the Standalone Client, you do not have to deinstall the database
first. However, if you previously had installed OEE 10g or you need to reinstall
the 11gR2 database for some reason, follow the instructions in the section of thisguide entitled: Deinstalling the OEE Database (optional).
8. If you need to install the OEE database and the Microsoft Windows environment
variable ORACLE_HOME exists, the Standalone Client installer will delete itduring the installation.

5/17/2018 9 0 With 8 98 4 Standalone Installation Using OUI With OEE Rev2 - slidepdf.com
http://slidepdf.com/reader/full/9-0-with-8-98-4-standalone-installation-using-oui-with-oee-rev2 12/75
Copyright © 2010, Oracle. All rights reserved GA.Rev2 6
Chapter 3. Installation Methods
Depending on several factors, you can install the Standalone Client using one of these
methods:
Method Method Requirements
Directly from a DVD You have a DVD
Use the procedures described in the section in thischapter entitled: Chapter 4. Installing the StandaloneClient.
From a copy of a DVD You have a DVD
Use the procedures described in the section in thischapter entitled: Copying the Installation DVD.
From an E-Deliverydownload
You have access to the Oracle E-Delivery website
Use the procedures described in the section in thischapter entitled: Downloading from the Oracle E-Delivery Website.

5/17/2018 9 0 With 8 98 4 Standalone Installation Using OUI With OEE Rev2 - slidepdf.com
http://slidepdf.com/reader/full/9-0-with-8-98-4-standalone-installation-using-oui-with-oee-rev2 13/75
Chapter 3. Installation Methods
Copyright © 2011, Oracle. All rights reserved Rev2 7
Copying the Installation DVD
Perform these steps if you are copying the installation DVD to a hard drive, either locally
or to a network location. You may want to do this so additional users can install from asingle location.
► To copy the installation DVD
1. On the hard drive onto which you want to copy the installation DVD, create a
temporary installation directory. The recommended name is:
\Standalone_9.00
2. Copy the contents of the installation DVD to the temporary installation directory
you created in Step 1 above.
5/17/2018 9 0 With 8 98 4 Standalone Installation Using OUI With OEE Rev2 - slidepdf.com
http://slidepdf.com/reader/full/9-0-with-8-98-4-standalone-installation-using-oui-with-oee-rev2 14/75
Chapter 3. Installation Methods
Copyright © 2011, Oracle. All rights reserved Rev2 8
Downloading from the Oracle E-Delivery Website
Complete these instructions if you are downloading the Standalone Client software from
the Oracle E-Delivery web site:
http://edelivery.oracle.com
If you are installing the Standalone Client from DVD or a network share location,
and therefore have performed the steps in the preceding section of this chapter,
you can skip this section and proceed to Chapter 4. Installing the StandaloneClient.
► To download the Standalone Client from the Oracle E-Delivery website
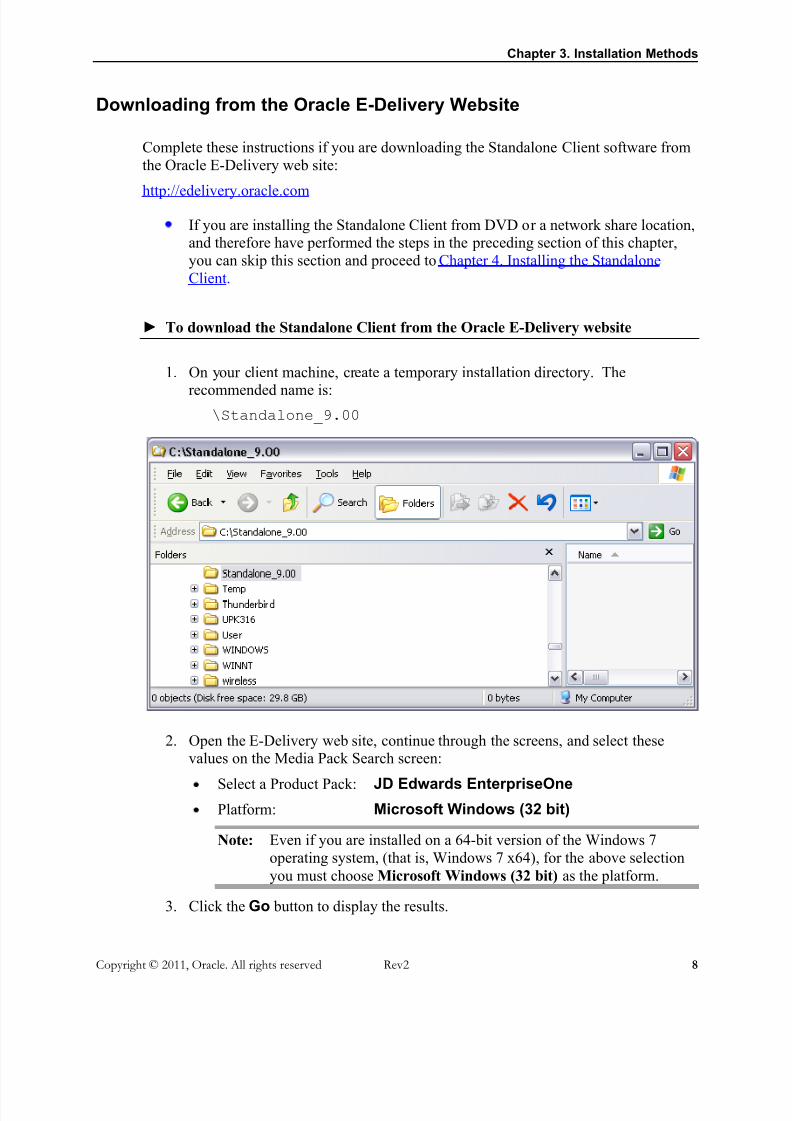
1. On your client machine, create a temporary installation directory. The
recommended name is:\Standalone_9.00
2. Open the E-Delivery web site, continue through the screens, and select these
values on the Media Pack Search screen:
Select a Product Pack: JD Edwards EnterpriseOne
Platform: Microsoft Windows (32 bit)
Note: Even if you are installed on a 64-bit version of the Windows 7
operating system, (that is, Windows 7 x64), for the above selection
you must choose Microsoft Windows (32 bit) as the platform.
3. Click the Go button to display the results.

5/17/2018 9 0 With 8 98 4 Standalone Installation Using OUI With OEE Rev2 - slidepdf.com
http://slidepdf.com/reader/full/9-0-with-8-98-4-standalone-installation-using-oui-with-oee-rev2 15/75
Chapter 3. Installation Methods
Copyright © 2011, Oracle. All rights reserved Rev2 9
4. In the results grid, click the radio button next to the proper description.
For English, select this:
JD Edwards EnterpriseOne 9.0 Applications/8.98 Tools Media Pack
for Microsoft Windows (32-bit)
For languages other than English, select this:
JD Edwards EnterpriseOne 9.0 Applications and 9.0 UpdateApplications/8.98 Tools and Technology Foundation withTranslations Media Pack for Microsoft Windows (32-bit)
5. Click Continue.
6. Locate the item with the description:
JD Edwards EnterpriseOne 9.0 Update 2 and 8.98.4 Standalone withEnglish and Language Translation
Note: Language. If the description of the download item does not contain the
word Language, the language of the Standalone Client is English.
If the description of the download item contains the word Language, thelanguage of the Standalone Client includes both English and other supported
languages.
7. Click the Download button next to the item that you wish to download.
Note: Multiple Part Downloads. Due to the maximum file size restrictions for
downloads on E-Delivery, you will need to download multiple parts for a
selected part number.

5/17/2018 9 0 With 8 98 4 Standalone Installation Using OUI With OEE Rev2 - slidepdf.com
http://slidepdf.com/reader/full/9-0-with-8-98-4-standalone-installation-using-oui-with-oee-rev2 16/75
Chapter 3. Installation Methods
Copyright © 2011, Oracle. All rights reserved Rev2 10
8. Save the .zip file to the temporary installation directory you created in Step 1.
If you followed the recommendation, the directory is named
\Standalone_9.00
9. After you finish downloading the first item, labeled (Part 1 of 2), select thecorresponding row for the second item labeled (Part 2 of 2) and click the
Download button.
10. Again, save the .zip file to the same directory where you saved the previous
.zip file.
11. After you finish downloading all parts of your item, use your favorite unzip
program to extract the contents of the downloaded files to the temporaryinstallation directory that you created in Step 1. If you followed the
recommendation, the directory is named:
\Standalone_9.00
Note: Extract Option. When extracting, be sure to click in the checkbox to enable
this option:
Use folder names
12. In the same manner, extract the remaining .zip file(s).
Note: JDBC Drivers. All files necessary to perform the installation, includingJDBC drivers, now reside in the temporary installation directory. If you
followed the recommendation, the directory is named:
Standalone_9.00
5/17/2018 9 0 With 8 98 4 Standalone Installation Using OUI With OEE Rev2 - slidepdf.com
http://slidepdf.com/reader/full/9-0-with-8-98-4-standalone-installation-using-oui-with-oee-rev2 17/75
Chapter 3. Installation Methods
Copyright © 2011, Oracle. All rights reserved Rev2 11
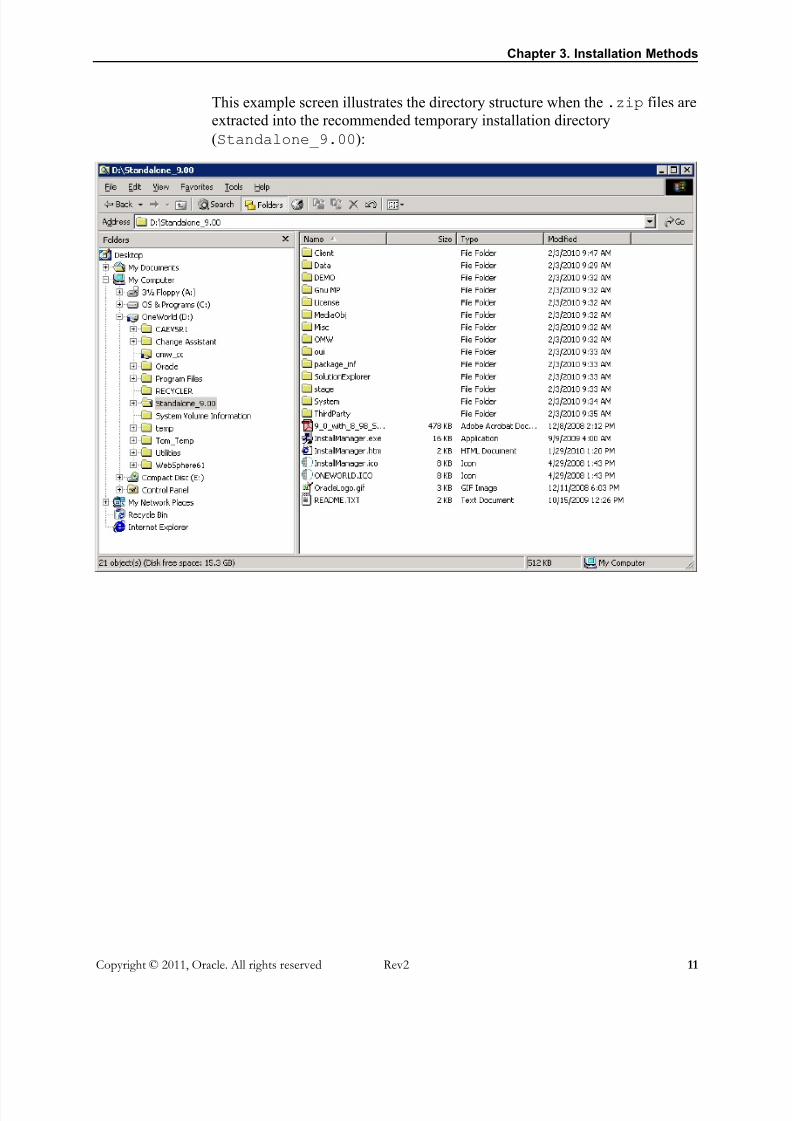
This example screen illustrates the directory structure when the .zip files are
extracted into the recommended temporary installation directory
(Standalone_9.00):
5/17/2018 9 0 With 8 98 4 Standalone Installation Using OUI With OEE Rev2 - slidepdf.com
http://slidepdf.com/reader/full/9-0-with-8-98-4-standalone-installation-using-oui-with-oee-rev2 18/75
Chapter 4. Installing the Standalone Client
Copyright © 2011, Oracle. All rights reserved Rev2 12
Chapter 4. Installing the Standa lone Client
Before You Begin
Verify that your system meets the Minimum Technical Requirements.
You can install the Standalone Client directly from a DVD or from a copy of the DVD or
a download from E-Delivery. Refer to Chapter 3. Installation Methods for additional
details.
Notes: Assumptions. The instructions in this chapter assume that you are installingdirectly from the DVD. In this case, the installation program will be located
in the root directory of the DVD.
If you are installing from a copy of the DVD or a download from E-Delivery,the installation program will be in the directory into which you copied the
DVD or into which you expanded the downloaded files. If you followed the
recommendation, this directory is:
C:\Standalone_9.00
As is the case with all installations on Microsoft Windows machines(including Microsoft Windows XP and Vista), in order to run the installer for
the Standalone Client, you must be logged onto Microsoft Windows as a userwith Administrator rights.
Installing the Standalone Client involves first installing a local database and then
installing the actual E1 Standalone Client. Follow the instructions in the next two
sections to install the database and client.
5/17/2018 9 0 With 8 98 4 Standalone Installation Using OUI With OEE Rev2 - slidepdf.com
http://slidepdf.com/reader/full/9-0-with-8-98-4-standalone-installation-using-oui-with-oee-rev2 19/75
Chapter 4. Installing the Standalone Client
Copyright © 2011, Oracle. All rights reserved Rev2 13
Understanding Destination Paths
Each Oracle product that is installed on a machine has what is termed an
Oracle Home directory or path. This is a directory that contains all the filesassociated with the product. This path has a name as well. You can specify aname that is intuitive so you do not have to remember the path.
When you install the OEE database engine, two Oracle Homes will be created:
1) Top-level Oracle Home, and
2) Oracle Home of the database.
For these instructions, the top-level Oracle Home is referred to as the
Parent Oracle Home. For example, you may specifyC:\JDEdwards
as the
Oracle Home with the name JDE_Local_DB_Home when installing the
database. This is the Parent Oracle Home and will contain the subdirectory
C:\JDEdwards\E1Local. This subdirectory is the Oracle Home of the
database instance called E1Local. The name of this Oracle Home is always
E1Local.
When you install the E1 Standalone Client, you specify an Oracle Home and
name for that installation as well. For example, you may enter
C:\JDEdwards\E900 as the Oracle Home path and
JDE_Standalone_Home as the Oracle Home name.
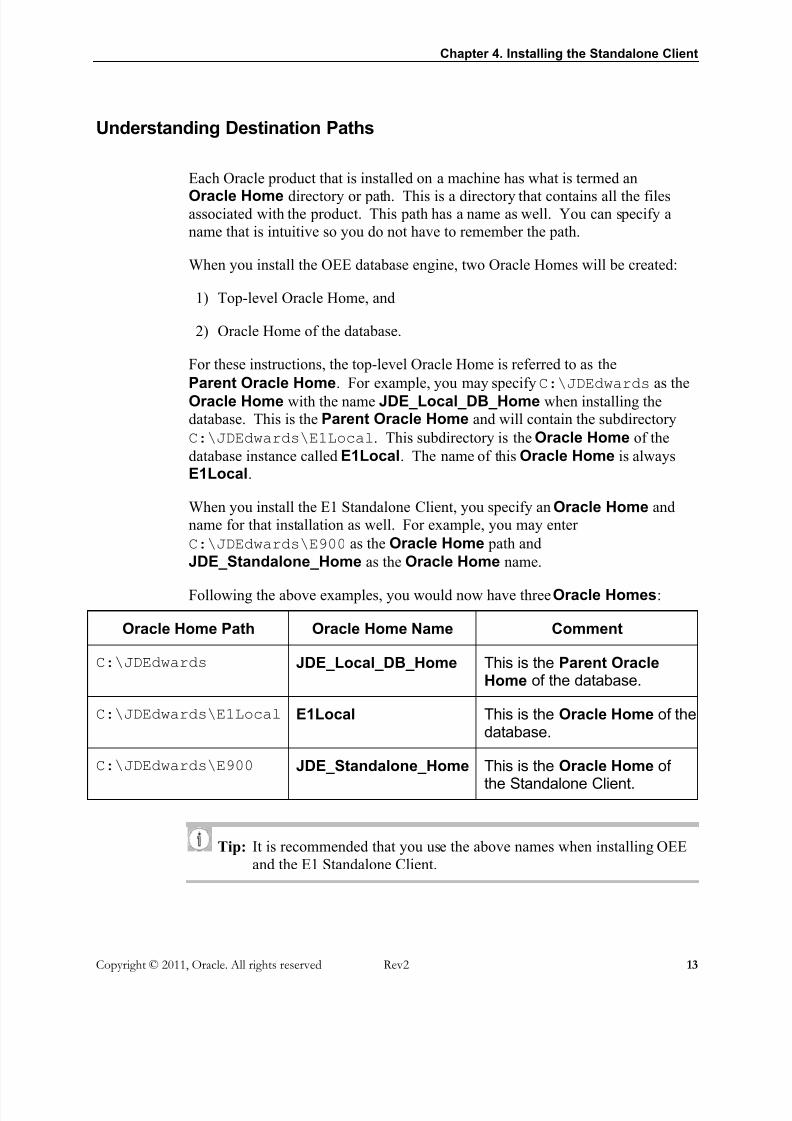
Following the above examples, you would now have three Oracle Homes:
Oracle Home Path Oracle Home Name Comment
C:\JDEdwards JDE_Local_DB_Home This is the Parent OracleHome of the database.
C:\JDEdwards\E1Local E1Local This is the Oracle Home of thedatabase.
C:\JDEdwards\E900 JDE_Standalone_Home This is the Oracle Home of
the Standalone Client.
Tip: It is recommended that you use the above names when installing OEE
and the E1 Standalone Client.

5/17/2018 9 0 With 8 98 4 Standalone Installation Using OUI With OEE Rev2 - slidepdf.com
http://slidepdf.com/reader/full/9-0-with-8-98-4-standalone-installation-using-oui-with-oee-rev2 20/75
Chapter 4. Installing the Standalone Client
Copyright © 2011, Oracle. All rights reserved Rev2 14
Installing the Local Database
This release of the Standalone Client contains Oracle Enterprise Edition (OEE) 11gR2. If
you previously had installed OEE 11gR2 as the local database and you are reinstalling theStandalone Client, you do not have to deinstall the database first. However, if youpreviously had installed OEE 10g or you need to reinstall the 11gR2 database for some
reason, follow the instructions in the section of this guide entitled: Deinstalling the OEE
Database (optional).
► To run the local database installer
1. Launch InstallManager.exe from the root folder of the installation DVD.
Note: Vista and Greater on Microsoft Windows. When running the installation programon Vista and higher versions of Microsoft Windows, you must right click on theexecutable and select Run as Administrator.
2. On JD Edwards Install Manager, click this link:
EnterpriseOne E90 Standalone – OUI 11g

5/17/2018 9 0 With 8 98 4 Standalone Installation Using OUI With OEE Rev2 - slidepdf.com
http://slidepdf.com/reader/full/9-0-with-8-98-4-standalone-installation-using-oui-with-oee-rev2 21/75
Chapter 4. Installing the Standalone Client
Copyright © 2011, Oracle. All rights reserved Rev2 15
3. On Welcome, click Next.
5/17/2018 9 0 With 8 98 4 Standalone Installation Using OUI With OEE Rev2 - slidepdf.com
http://slidepdf.com/reader/full/9-0-with-8-98-4-standalone-installation-using-oui-with-oee-rev2 22/75
Chapter 4. Installing the Standalone Client
Copyright © 2011, Oracle. All rights reserved Rev2 16
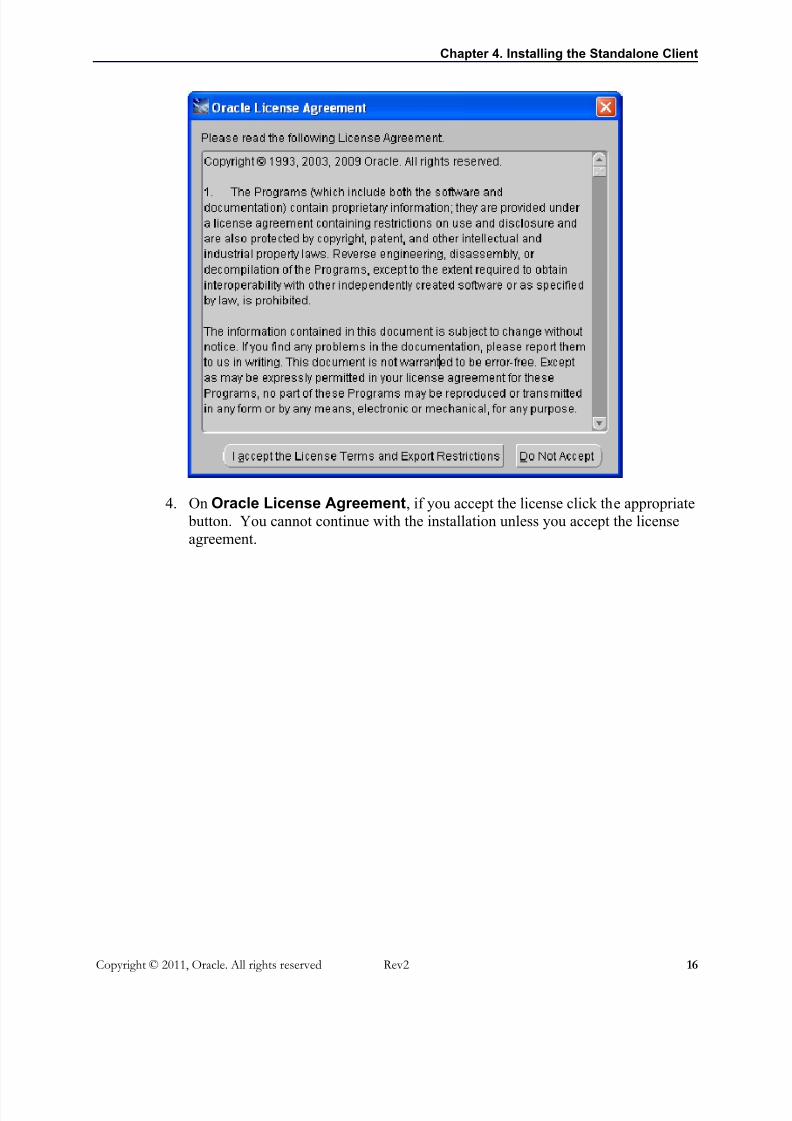
4. On Oracle License Agreement, if you accept the license click the appropriate
button. You cannot continue with the installation unless you accept the licenseagreement.
5/17/2018 9 0 With 8 98 4 Standalone Installation Using OUI With OEE Rev2 - slidepdf.com
http://slidepdf.com/reader/full/9-0-with-8-98-4-standalone-installation-using-oui-with-oee-rev2 23/75
Chapter 4. Installing the Standalone Client
Copyright © 2011, Oracle. All rights reserved Rev2 17
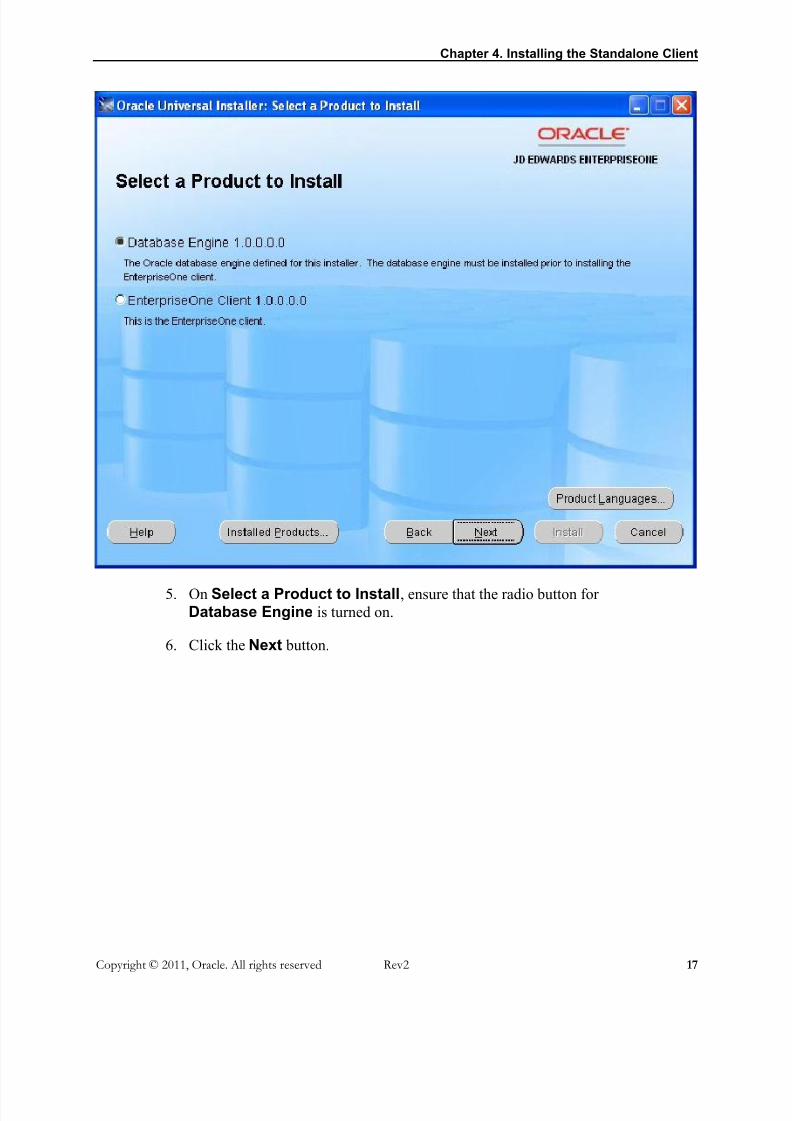
5. On Select a Product to Install, ensure that the radio button for
Database Engine is turned on.
6. Click the Next button.

5/17/2018 9 0 With 8 98 4 Standalone Installation Using OUI With OEE Rev2 - slidepdf.com
http://slidepdf.com/reader/full/9-0-with-8-98-4-standalone-installation-using-oui-with-oee-rev2 24/75
Chapter 4. Installing the Standalone Client
Copyright © 2011, Oracle. All rights reserved Rev2 18
7. On Specify Home Details, you must specify an Oracle Home path and a namefor that path.
For more information about Oracle Homes and recommendations for naming
the Oracle Homes for the E1 Standalone Client, see the section in this guideentitled: Understanding Destination Paths.
On Specify Home Details, enter a path and name for the Parent Oracle Homepath under which the local OEE database will be installed.
During installation, the database will be copied to a subdirectory under the
Parent Oracle Home path. This subdirectory is E1Local and is the OracleHome for the database. The name of this Oracle Home is E1Local as well.
In summary, you will have two Oracle Homes for the database:
The Parent Oracle Home is the path that you specify on this screen.
Likewise its name will be the name that you enter on this screen. For
example:

5/17/2018 9 0 With 8 98 4 Standalone Installation Using OUI With OEE Rev2 - slidepdf.com
http://slidepdf.com/reader/full/9-0-with-8-98-4-standalone-installation-using-oui-with-oee-rev2 25/75
Chapter 4. Installing the Standalone Client
Copyright © 2011, Oracle. All rights reserved Rev2 19
o Path: C:\JDEdwards
o Name: JDE_Local_DB_Home
An Oracle Home where the cloned database resides. The subdirectory is
E1Local and its name is E1Local. For example:
o Path: C:\JDEdwards\E1Local
o Name: E1Local
8. Click the Next button.
9. On Summary, verify that what is to be installed is correct.
10. Click the Install button.
5/17/2018 9 0 With 8 98 4 Standalone Installation Using OUI With OEE Rev2 - slidepdf.com
http://slidepdf.com/reader/full/9-0-with-8-98-4-standalone-installation-using-oui-with-oee-rev2 26/75
Chapter 4. Installing the Standalone Client
Copyright © 2011, Oracle. All rights reserved Rev2 20
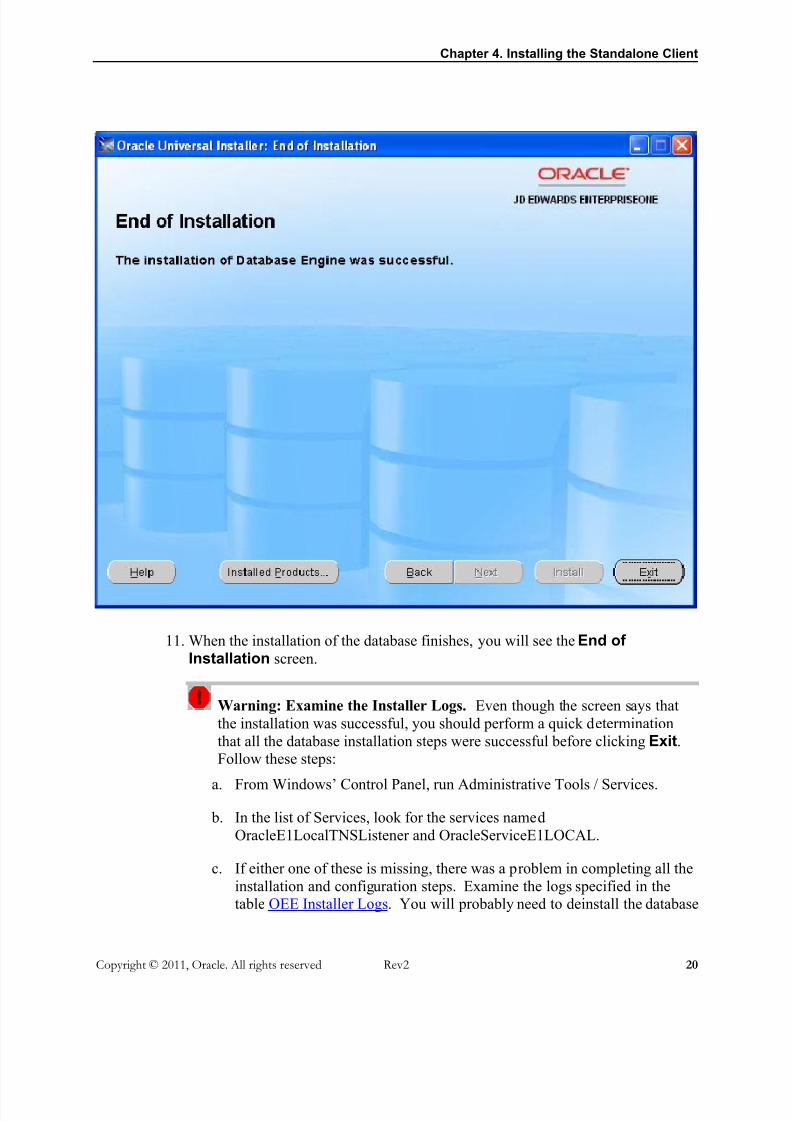
11. When the installation of the database finishes, you will see the End ofInstallation screen.
Warning: Examine the Installer Logs. Even though the screen says that
the installation was successful, you should perform a quick determination
that all the database installation steps were successful before clicking Exit.Follow these steps:
a. From Windows’ Control Panel, run Administrative Tools / Services.
b. In the list of Services, look for the services namedOracleE1LocalTNSListener and OracleServiceE1LOCAL.
c. If either one of these is missing, there was a problem in completing all theinstallation and configuration steps. Examine the logs specified in the
table OEE Installer Logs. You will probably need to deinstall the database
5/17/2018 9 0 With 8 98 4 Standalone Installation Using OUI With OEE Rev2 - slidepdf.com
http://slidepdf.com/reader/full/9-0-with-8-98-4-standalone-installation-using-oui-with-oee-rev2 27/75
Chapter 4. Installing the Standalone Client
Copyright © 2011, Oracle. All rights reserved Rev2 21
engine using the steps in the section Deinstalling the OEE Database,
reboot, and then reinstall the OEE database.
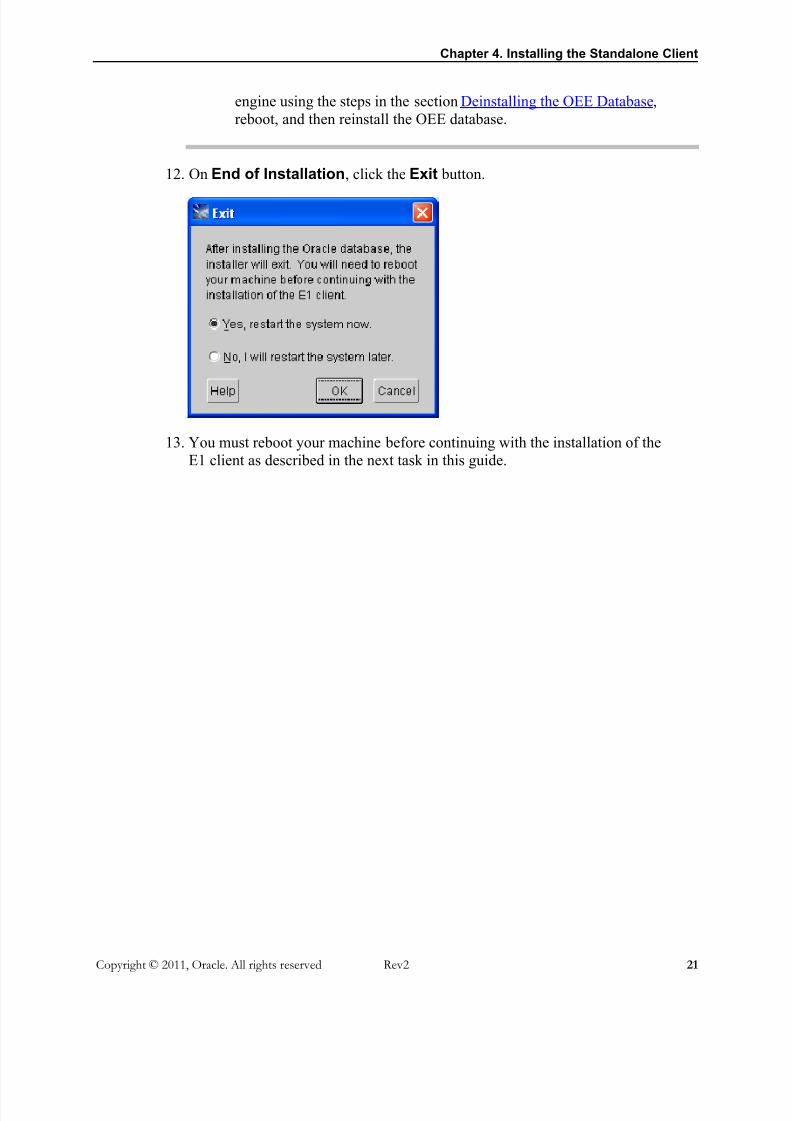
12. On End of Installation, click the Exit button.
13. You must reboot your machine before continuing with the installation of theE1 client as described in the next task in this guide.

5/17/2018 9 0 With 8 98 4 Standalone Installation Using OUI With OEE Rev2 - slidepdf.com
http://slidepdf.com/reader/full/9-0-with-8-98-4-standalone-installation-using-oui-with-oee-rev2 28/75
Chapter 4. Installing the Standalone Client
Copyright © 2011, Oracle. All rights reserved Rev2 22
Installing the EnterpriseOne Client
► To run the EnterpriseOne client installer
1. Launch InstallManager.exe from the root folder of the installation DVD.
Note: Vista and Greater on Microsoft Windows. When running the installation programon Vista and higher versions of Microsoft Windows, you must right click on theexecutable and select Run as Administrator.
2. On JD Edwards Install Manager, click this link:
EnterpriseOne E90 Standalone – OUI 11g
5/17/2018 9 0 With 8 98 4 Standalone Installation Using OUI With OEE Rev2 - slidepdf.com
http://slidepdf.com/reader/full/9-0-with-8-98-4-standalone-installation-using-oui-with-oee-rev2 29/75
Chapter 4. Installing the Standalone Client
Copyright © 2011, Oracle. All rights reserved Rev2 23
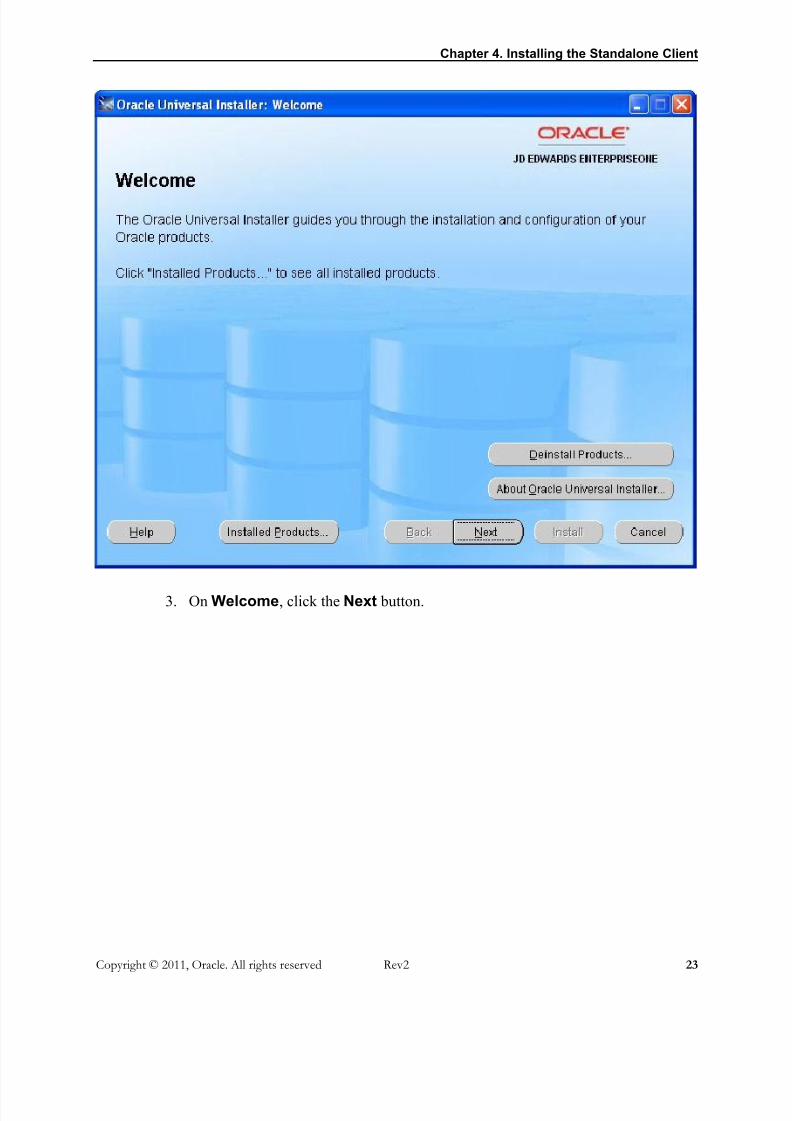
3. On Welcome, click the Next button.

5/17/2018 9 0 With 8 98 4 Standalone Installation Using OUI With OEE Rev2 - slidepdf.com
http://slidepdf.com/reader/full/9-0-with-8-98-4-standalone-installation-using-oui-with-oee-rev2 30/75
Chapter 4. Installing the Standalone Client
Copyright © 2011, Oracle. All rights reserved Rev2 24
4. On Oracle License Agreement, if you accept the license click the appropriate
button. You cannot continue with the installation unless you accept the licenseagreement.

5/17/2018 9 0 With 8 98 4 Standalone Installation Using OUI With OEE Rev2 - slidepdf.com
http://slidepdf.com/reader/full/9-0-with-8-98-4-standalone-installation-using-oui-with-oee-rev2 31/75
Chapter 4. Installing the Standalone Client
Copyright © 2011, Oracle. All rights reserved Rev2 25
5. On Select a Product to Install, ensure that the radio button forEnterpriseOne Client is turned on.
6. Click the Next button.
5/17/2018 9 0 With 8 98 4 Standalone Installation Using OUI With OEE Rev2 - slidepdf.com
http://slidepdf.com/reader/full/9-0-with-8-98-4-standalone-installation-using-oui-with-oee-rev2 32/75
Chapter 4. Installing the Standalone Client
Copyright © 2011, Oracle. All rights reserved Rev2 26
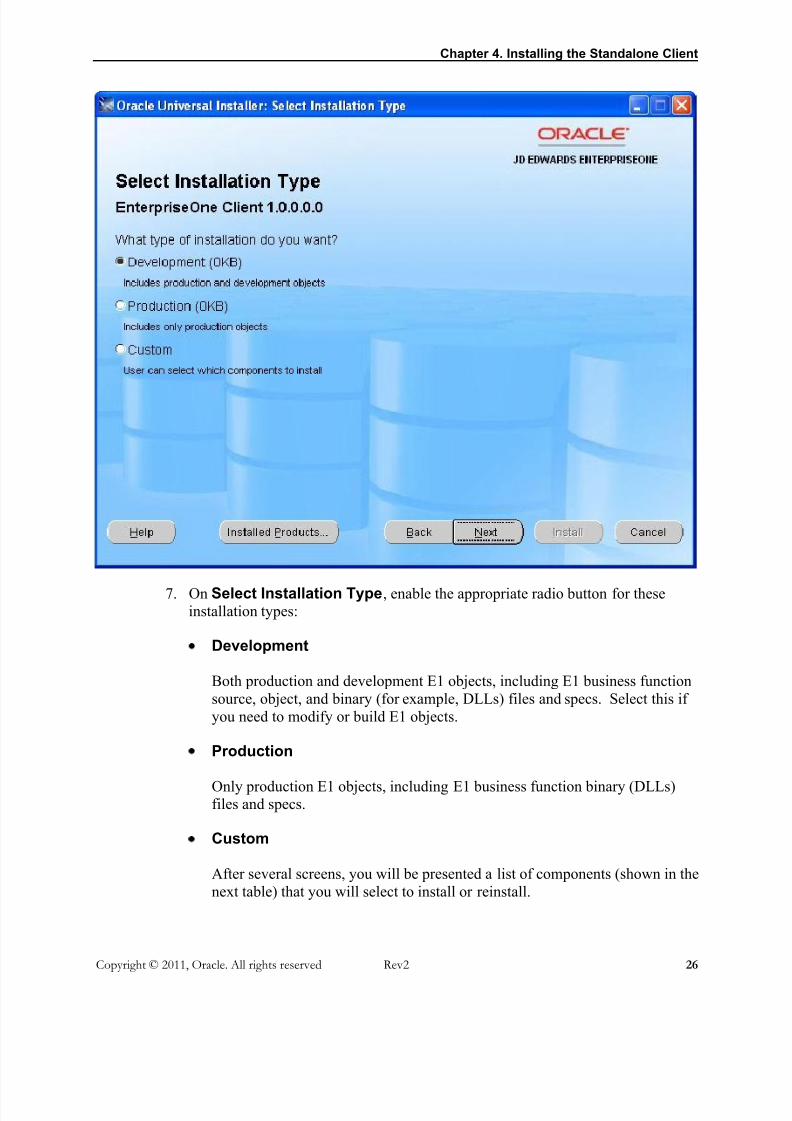
7. On Select Installation Type, enable the appropriate radio button for theseinstallation types:
Development
Both production and development E1 objects, including E1 business function
source, object, and binary (for example, DLLs) files and specs. Select this if you need to modify or build E1 objects.
Production
Only production E1 objects, including E1 business function binary (DLLs)files and specs.
Custom
After several screens, you will be presented a list of components (shown in thenext table) that you will select to install or reinstall.

5/17/2018 9 0 With 8 98 4 Standalone Installation Using OUI With OEE Rev2 - slidepdf.com
http://slidepdf.com/reader/full/9-0-with-8-98-4-standalone-installation-using-oui-with-oee-rev2 33/75
Chapter 4. Installing the Standalone Client
Copyright © 2011, Oracle. All rights reserved Rev2 27
The Oracle Universal Installer provides the segmentation of the E1 Standalone
Client into components. Those components are shown in the following table aswell as two columns indicating which components will be installed for the various
installation types.
ComponentName
Description Included inDevelopmentInstallation?
Included inProductionInstallation?
EnterpriseOneClient
This is a parent to all the other components. Yes Yes
Foundation E1 Foundation; also known as System Code orTools Release
Yes Yes
Production
Objects
E1 objects in a pathcode that are required to run
E1. Also includes E1 system data that will bestored in the local database.
Yes Yes
DevelopmentObjects
E1 objects in a pathcode that are required toperform development tasks.
Yes No
E1 Local Data E1 non-system data that will be stored in thelocal database. This includes
Training data
Control data
Data Dictionary
Object Librarian
Versions
Yes Yes
Features Features defined for the E1 package. Yes Yes
E1 Client BPMBroker
BPM Broker Yes Yes
E1 ClientWorkflowModeler
Workflow Modeler Yes Yes
E1 Client WebDevelopment
The web-enabled E1 client. Yes Yes
8. After you have selected an installation type, click the Next button.

5/17/2018 9 0 With 8 98 4 Standalone Installation Using OUI With OEE Rev2 - slidepdf.com
http://slidepdf.com/reader/full/9-0-with-8-98-4-standalone-installation-using-oui-with-oee-rev2 34/75
Chapter 4. Installing the Standalone Client
Copyright © 2011, Oracle. All rights reserved Rev2 28
9. On Specify Home Details, you must specify an Oracle Home path and aname for that path.
Each Oracle product that is installed on a machine has what is termed an
Oracle Home path. This path contains all the files for each Oracle product.
This path has a user-specified name as well.
The path you enter here is for the Oracle Home path where the E1 StandaloneClient will be installed.
Warning: Do not specify the same Oracle Home name or path into which you installedthe local database; however, you can specify a path that is a subdirectory of the
database’s Parent Oracle Home.
10. Click the Next button.
5/17/2018 9 0 With 8 98 4 Standalone Installation Using OUI With OEE Rev2 - slidepdf.com
http://slidepdf.com/reader/full/9-0-with-8-98-4-standalone-installation-using-oui-with-oee-rev2 35/75
Chapter 4. Installing the Standalone Client
Copyright © 2011, Oracle. All rights reserved Rev2 29
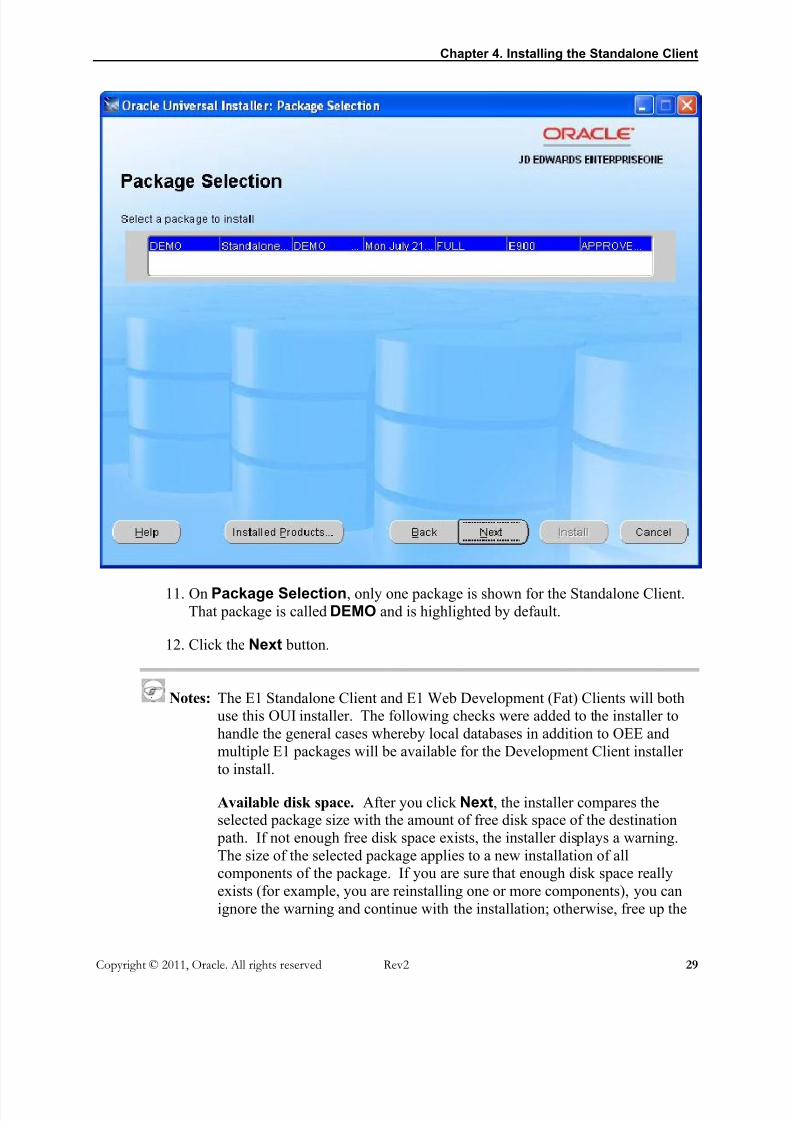
11. On Package Selection, only one package is shown for the Standalone Client.
That package is called DEMO and is highlighted by default.
12. Click the Next button.
Notes: The E1 Standalone Client and E1 Web Development (Fat) Clients will both
use this OUI installer. The following checks were added to the installer tohandle the general cases whereby local databases in addition to OEE and
multiple E1 packages will be available for the Development Client installer
to install.
Available disk space. After you click Next, the installer compares theselected package size with the amount of free disk space of the destination
path. If not enough free disk space exists, the installer displays a warning.The size of the selected package applies to a new installation of all
components of the package. If you are sure that enough disk space really
exists (for example, you are reinstalling one or more components), you canignore the warning and continue with the installation; otherwise, free up the
5/17/2018 9 0 With 8 98 4 Standalone Installation Using OUI With OEE Rev2 - slidepdf.com
http://slidepdf.com/reader/full/9-0-with-8-98-4-standalone-installation-using-oui-with-oee-rev2 36/75
Chapter 4. Installing the Standalone Client
Copyright © 2011, Oracle. All rights reserved Rev2 30
necessary disk space or use the Back button to back up to the SpecifyHome Details screen to select a different drive onto which the StandaloneClient will be installed. You can then continue with the installation.
Available database. In addition, until you select the package to install, the
installer has not had enough information to determine which database engineis required. If you have not installed the OEE database engine prior toattempting to install the Standalone Client and you select a package that
requires OEE, you will receive an error message at this time. If that occurs,
use the Back buttons to back up to Select a Product to Install and selectthe option to install the Database Engine. When that installation completes,you will need to reboot your machine and then rerun the Standalone Client
installer.
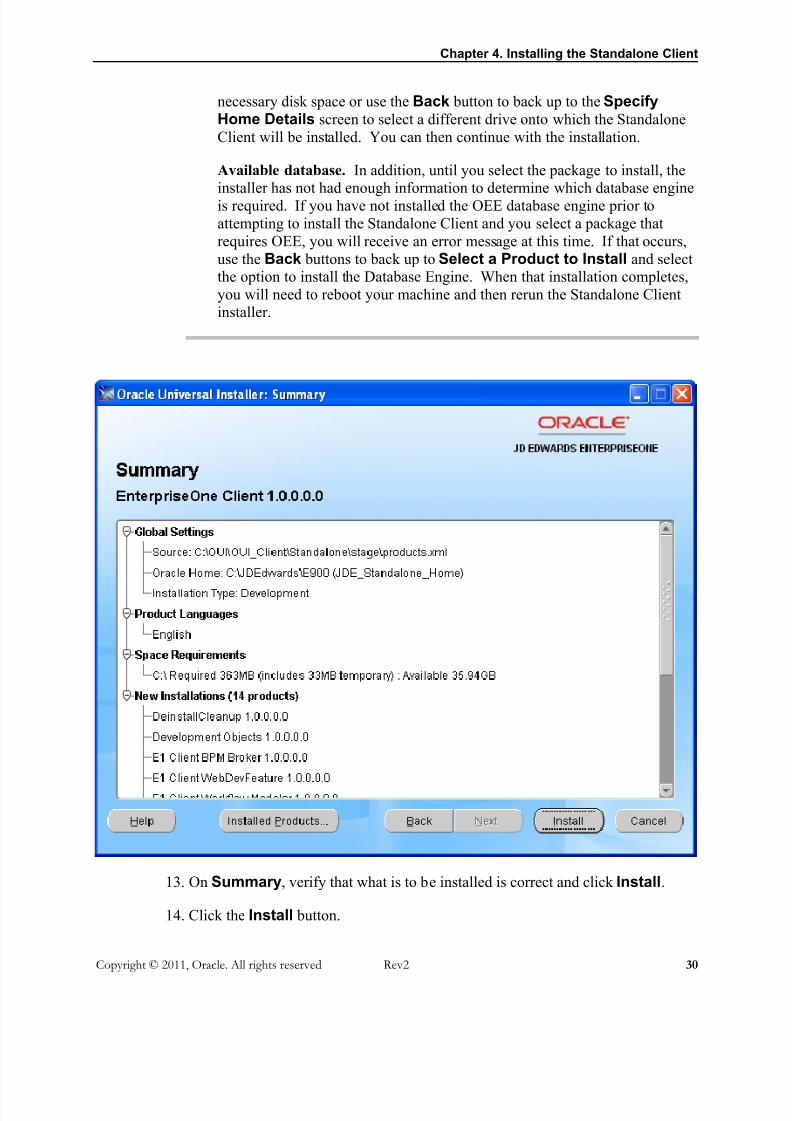
13. On Summary, verify that what is to be installed is correct and click Install.
14. Click the Install button.

5/17/2018 9 0 With 8 98 4 Standalone Installation Using OUI With OEE Rev2 - slidepdf.com
http://slidepdf.com/reader/full/9-0-with-8-98-4-standalone-installation-using-oui-with-oee-rev2 37/75
Chapter 4. Installing the Standalone Client
Copyright © 2011, Oracle. All rights reserved Rev2 31
15. When the installation of the E1 client finishes, you will see the
End of Installation screen.
Warning: Examine the Installer Logs. Regardless of whether you get the above message
indicating the Standalone Client installer succeeded, you should always check the logs before you attempt to run the Standalone Client. Examine the logs
specified in the table Standalone Client Installer Logs.
16. Click the Exit button.
17. Perform the tasks in the section of this guide entitled: Chapter 5. Post InstallationTasks.
5/17/2018 9 0 With 8 98 4 Standalone Installation Using OUI With OEE Rev2 - slidepdf.com
http://slidepdf.com/reader/full/9-0-with-8-98-4-standalone-installation-using-oui-with-oee-rev2 38/75
Chapter 4. Installing the Standalone Client
Copyright © 2011, Oracle. All rights reserved Rev2 32
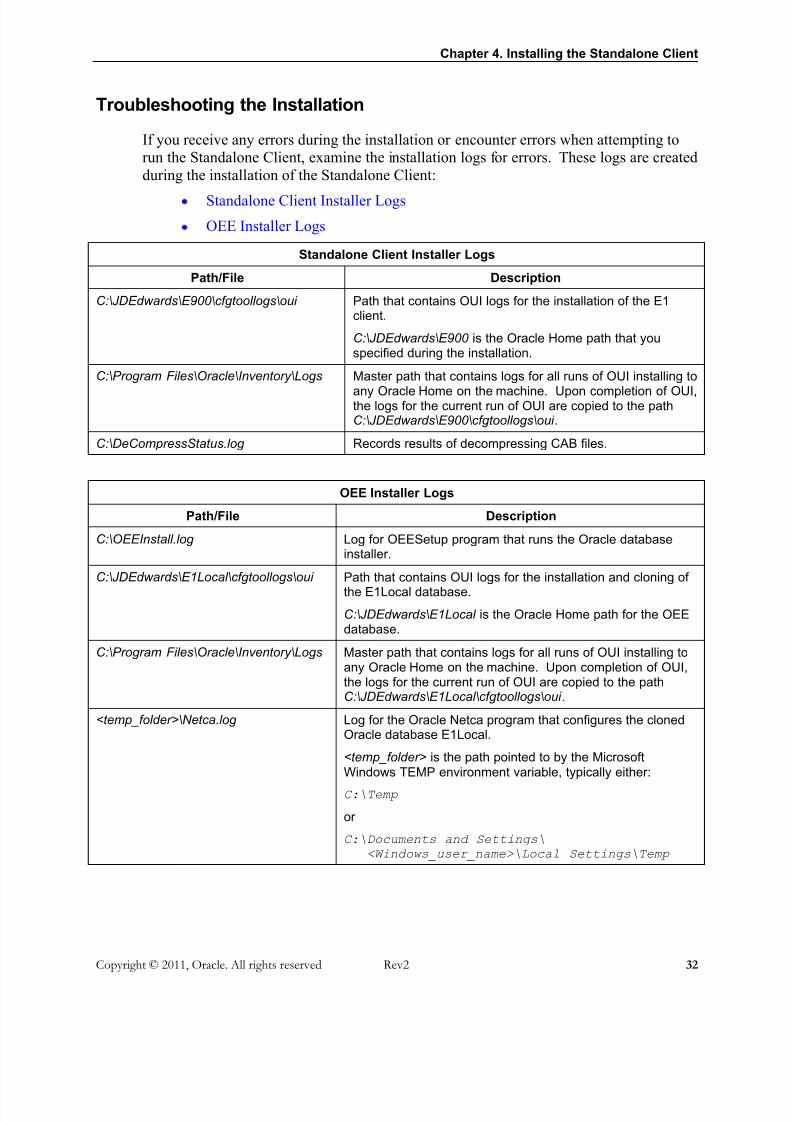
Troubleshooting the Installation
If you receive any errors during the installation or encounter errors when attempting to
run the Standalone Client, examine the installation logs for errors. These logs are created
during the installation of the Standalone Client:
Standalone Client Installer Logs
OEE Installer Logs
Standalone Client Installer Logs
Path/File Description
C:\JDEdwards\E900\cfgtoollogs\oui Path that contains OUI logs for the installation of the E1client.
C:\JDEdwards\E900 is the Oracle Home path that youspecified during the installation.
C:\Program Files\Oracle\Inventory\Logs Master path that contains logs for all runs of OUI installing to
any Oracle Home on the machine. Upon completion of OUI,the logs for the current run of OUI are copied to the pathC:\JDEdwards\E900\cfgtoollogs\oui .
C:\DeCompressStatus.log Records results of decompressing CAB files.
OEE Installer Logs
Path/File Description
C:\OEEInstall.log Log for OEESetup program that runs the Oracle databaseinstaller.
C:\JDEdwards\E1Local\cfgtoollogs\oui Path that contains OUI logs for the installation and cloning of
the E1Local database.
C:\JDEdwards\E1Local is the Oracle Home path for the OEEdatabase.
C:\Program Files\Oracle\Inventory\Logs Master path that contains logs for all runs of OUI installing toany Oracle Home on the machine. Upon completion of OUI,the logs for the current run of OUI are copied to the pathC:\JDEdwards\E1Local\cfgtoollogs\oui .
<temp_folder>\Netca.log Log for the Oracle Netca program that configures the clonedOracle database E1Local.
<temp_folder> is the path pointed to by the MicrosoftWindows TEMP environment variable, typically either:
C:\Temp
or
C:\Documents and Settings\<Windows_user_name>\Local Settings\Temp

5/17/2018 9 0 With 8 98 4 Standalone Installation Using OUI With OEE Rev2 - slidepdf.com
http://slidepdf.com/reader/full/9-0-with-8-98-4-standalone-installation-using-oui-with-oee-rev2 39/75
Copyright © 2010, Oracle. All rights reserved GA.Rev2 33
Chapter 5. Post Installation Tasks
After installing the Standalone Client, you must perform the following post installation
task:
Updating the tnsnames.ora file
Updating the tnsnames.ora file
Note: Dependencies. This process is applicable only if this machine is used toconnect to other Oracle databases, that is, Oracle databases that were not
installed as part of the Standalone Client installation.
The name of the OEE database that is installed with the Standalone Client is E1Local. It
has its own tnsnames.ora file, which is used to define how a connection to the
database is made. For example, this tnsnames.ora defines the port number and SID
for E1Local.
If you have other Oracle databases installed on this machine, or if you access remote
Oracle databases, you will have other tnsnames.ora files to define those connection
parameters.
By design, the tnsnames.ora for the last installed Oracle database is used by any
software running on your local machine to access all the Oracle databases. Because the
E1Local database is normally installed during the installation of the Standalone Client, it
is likely that will be the last database installed. Therefore, in order to regain connectivity
to other Oracle databases, you must update the tnsnames.ora file used by E1Local
with the database connection information that is stored in the other tnsnames.ora
files on your machine.
5/17/2018 9 0 With 8 98 4 Standalone Installation Using OUI With OEE Rev2 - slidepdf.com
http://slidepdf.com/reader/full/9-0-with-8-98-4-standalone-installation-using-oui-with-oee-rev2 40/75
Chapter 5. Post Installation Tasks
Copyright © 2011, Oracle. All rights reserved Rev2 34
► To update the tnsnames.ora file
1. Edit the new tnsnames.ora file located in this path:
C:\JDEdwards\E1Local\NETWORK\ADMIN\tnsnames.ora
Note: OEE Install Location. OEE for the Standalone Client is always installed in
a subdirectory called E1Local under the path that you specified when
installing OEE.
2. Edit the tnsnames.ora files on your machine for any other Oracle databases
that you may access (whether remote or local databases). These tnsnames.ora
files will be located in the NETWORK\ADMIN path under the installation paths of
the Oracle database clients. For example:
C:\Apps\db\oracle102\NETWORK\ADMIN\tnsnames.ora
3. Copy the contents of these other tnsnames.ora files and append them to the
version of the file that is being used by the E1Local database (for example,
C:\JDEdwards\E1Local\NETWORK\ADMIN\tnsnames.ora).
5/17/2018 9 0 With 8 98 4 Standalone Installation Using OUI With OEE Rev2 - slidepdf.com
http://slidepdf.com/reader/full/9-0-with-8-98-4-standalone-installation-using-oui-with-oee-rev2 41/75
Copyright © 2010, Oracle. All rights reserved GA.Rev2 35
Chapter 6. Starting the Standa lone Client
► To start the Standalone Client
1. Launch the Standalone Client by double clicking the shortcut EnterpriseOne
Solution Explorer either on your desktop or under this navigation:
Start > All Programs > Oracle - JDE_Standalone_Home
where JDE_Standalone_Home is the name of the Oracle Home that you
designated when installing the E1 client.
Note: Vista and Greater on Microsoft Windows. When running the installation programon Vista and higher versions of Microsoft Windows, you must right click on theshortcut or executable and select Run as Administrator.
Optionally, you can double click the program activConsole.exe from this
path:
C:\JDEdwards\E900\system\bin32
5/17/2018 9 0 With 8 98 4 Standalone Installation Using OUI With OEE Rev2 - slidepdf.com
http://slidepdf.com/reader/full/9-0-with-8-98-4-standalone-installation-using-oui-with-oee-rev2 42/75
Chapter 6. Starting the Standalone Client
Copyright © 2011, Oracle. All rights reserved Rev2 36
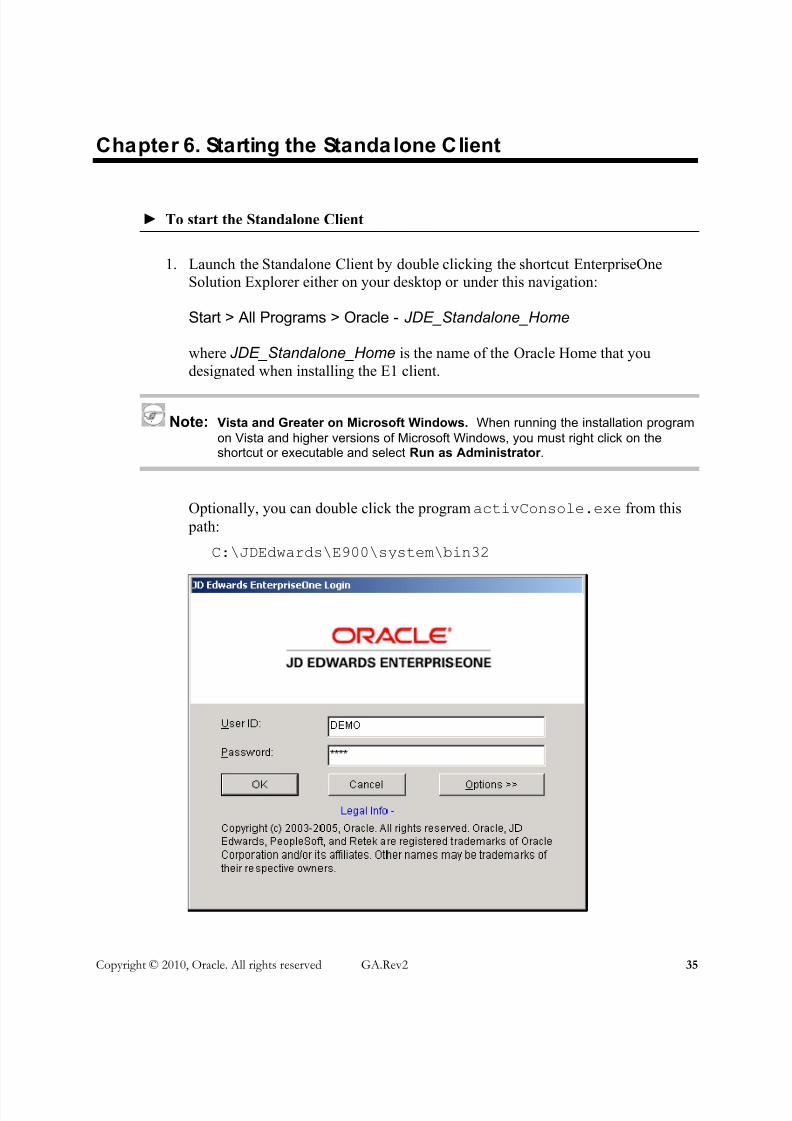
2. On JD Edwards EnterpriseOne Login, enter the default user ID, which is
DEMO and the default password, which is also DEMO. If the environment androle fields are shown, you can accept the defaults, which are environment
DEMO900 and role *ALL.
3. If you have installed any Oracle Business Accelerators (OBA), click the Optionsbutton to display the environment and role fields. In this case, you should enter
the role: DEMOROLE and take the default environment: DEMO900.
4. Click the OK button to login into the Standalone Client.
Note: Startup Time. You should allow sufficient startup time for the JD
Edwards EnterpriseOne background process jdenet_n.exe,
which acts as the security server on the Standalone Client. Ensure
this program has completed its initialization steps before you click
OK on the logon screen.
Depending on machine resources, you may have to wait up to 30seconds before signing in. If you get an error indicating failure to
connect to the Security Server, exit from EnterpriseOne and then retry
running activConsole.exe giving a bit more time before
clicking OK on the logon screen.

5/17/2018 9 0 With 8 98 4 Standalone Installation Using OUI With OEE Rev2 - slidepdf.com
http://slidepdf.com/reader/full/9-0-with-8-98-4-standalone-installation-using-oui-with-oee-rev2 43/75
Chapter 6. Starting the Standalone Client
Copyright © 2011, Oracle. All rights reserved Rev2 37
Troubleshooting Standalone Client Startup Errors
This section describes these troubleshooting tasks:
General
Cannot Connect to the Security Server
Still Cannot Connect to the Security Server
General
If you have any trouble running the Standalone Client, turn on additional logging and
rerun the Standalone Client.
1. Run the Microsoft Windows Task Manager.
2. Click the Processes tab.
3. If the column titled PID is not displayed, use this procedure to turn it on:
a. In the menu, go to View > Select Columns…
b. Turn on the checkbox next to PID (Process Identifier).
c. Click OK.
4. Kill these processes if they are running:
activConsole.exe
jdenet_n.exe
5. Edit this file:
c:\Windows\jde.ini
6. In the [DEBUG] section, change the value of the Output key to FILE, as shown
below:
[DEBUG]
Output=FILE
7. Note the names of the log files specified for the JobFile and DebugFile keys in the
Debug section so you can locate them when needed.
8. Run activConsole.exe from this directory:
C:\JDEdwards\E900\system\bin32

5/17/2018 9 0 With 8 98 4 Standalone Installation Using OUI With OEE Rev2 - slidepdf.com
http://slidepdf.com/reader/full/9-0-with-8-98-4-standalone-installation-using-oui-with-oee-rev2 44/75
Chapter 6. Starting the Standalone Client
Copyright © 2011, Oracle. All rights reserved Rev2 38
9. Attempt to sign into the Standalone Client.
Logs are generated in the directory specified by the JobFile and DebugFile
keys in the [DEBUG] section of the jde.ini. However, the names of the files
will be of the forms jde_pid_mmddyy.log and
jdedebug_pid_mmddyy.log where:
pid is the ID of the process generating the log.
mmddyy is the month, day, and year in which the log was generated.
You can determine which process ID belongs to each EnterpriseOne process bynoting the process IDs and names shown in the Microsoft Windows Task
Explorer and by examining the first few lines of the generated logs.
5/17/2018 9 0 With 8 98 4 Standalone Installation Using OUI With OEE Rev2 - slidepdf.com
http://slidepdf.com/reader/full/9-0-with-8-98-4-standalone-installation-using-oui-with-oee-rev2 45/75
Chapter 6. Starting the Standalone Client
Copyright © 2011, Oracle. All rights reserved Rev2 39
Cannot Connect to the Security Server
Problem:
You get an error (either in a pop-up window or in the logs) indicating that the StandaloneClient could not connect to the security server.
Resolution:
Try the following:
1. Try again to sign on. The security server (process jdenet_n.exe) may have
simply been slow in starting causing the activConsole.exe to time out.
2. By default, the Standalone Client attempts to start the web client at the same time
that activConsole.exe starts. This could cause the security server (processjdenet_n.exe) to take too long to start causing the activConsole.exe to
time out.
You can specify that the web client should start only when you attempt to bring
up the Web menu (described in the next section entitled: Still Cannot Connect to
the Security Server
). To do so, follow these steps:
a. Run the Microsoft Windows Task Manager.
b. Kill these processes if they are running:
activConsole.exe
jdenet_n.exe
c. Edit the c:\windows\jde.ini file.
d. Change the value of the StartAppServer key in the [LOCALWEB]
section to ONDEMAND. For example:
[LOCALWEB]StartAppServer=ONDEMAND
e. Rerun activConsole.exe.

5/17/2018 9 0 With 8 98 4 Standalone Installation Using OUI With OEE Rev2 - slidepdf.com
http://slidepdf.com/reader/full/9-0-with-8-98-4-standalone-installation-using-oui-with-oee-rev2 46/75
Chapter 6. Starting the Standalone Client
Copyright © 2011, Oracle. All rights reserved Rev2 40
Still Cannot Connect to the Security Server
Problem:
After doing the above, you again get an error (either in a pop-up window or in the logs)indicating that the Standalone Client could not connect to the security server.
Resolution:
Verify that the local database service(s) is running using this procedure:
1. Go to Start > Control Panel > Administrative Tools > Services.
2. Verify that the statuses of these services are Started:
OracleServiceE1LOCALOracleE1LocalTNSListener
If not, for each stopped service click Action > Start in the menu.
3. Try to sign in again by following these steps:
a. Run the Microsoft Windows Task Manager.
b. Kill these processes if they are running:
activConsole.exe
jdenet_n.exe
c. Rerun activConsole.exe .
5/17/2018 9 0 With 8 98 4 Standalone Installation Using OUI With OEE Rev2 - slidepdf.com
http://slidepdf.com/reader/full/9-0-with-8-98-4-standalone-installation-using-oui-with-oee-rev2 47/75
Copyright © 2010, Oracle. All rights reserved GA.Rev2 41
Chapter 7. Starting the Standa lone Web Client
► To start Standalone Client Web Applications
1. Follow the steps in the section Starting the Standalone Client.
2. Select Tools > EnterpriseOne Menu.
The Standalone Client should automatically sign you into the Standalone Web
Client.
Troubleshooting Standalone Web Client Startup Errors
This section discusses these troubleshooting topics:
General
Cannot Connect to the Security Server
5/17/2018 9 0 With 8 98 4 Standalone Installation Using OUI With OEE Rev2 - slidepdf.com
http://slidepdf.com/reader/full/9-0-with-8-98-4-standalone-installation-using-oui-with-oee-rev2 48/75
Chapter 7. Starting the Standalone Web Client
Copyright © 2011, Oracle. All rights reserved Rev2 42
General
If you have any trouble running the Web Client, look at the Web Client logs.
1. In Microsoft Windows Explorer, drill down to the location of the Web Client
logs. By default, the logs are located in this directory:
C:\JDEdwards\E900\system\OC4J\j2ee\home\log
2. Examine any logs that were recently created, especially logs that are prefixed witheither:
jas
jde
3. If you do not find any logs with the above prefixes, the logs may be in another
folder. Use this procedure to determine the location of those logs:
a. In Microsoft Windows Explorer, drill down to this directory:
C:\JDEdwards\E900\system\OC4J\j2ee\home\applications\webclient.ear\webclient\WEB-INF\classes
b. Edit the file jdelog.properties.
Note: The information at the top of the jdelog.properties file
explains the uses and possible values of all the keys in the file.
Search through the file and note the value of the FILE key. In each of thesections that describe a log file there are section headers that are enclosed in
square brackets ([ and ]). If a section header or the FILE key is commentedout with a pound sign (#), you can ignore that section. For example:
#[E1LOG]
or
# File=log\jderoot.log
The value of the FILE key in each section is the name and path of a log file
associated with that section. For example:
File=log\jderoot.log
5/17/2018 9 0 With 8 98 4 Standalone Installation Using OUI With OEE Rev2 - slidepdf.com
http://slidepdf.com/reader/full/9-0-with-8-98-4-standalone-installation-using-oui-with-oee-rev2 49/75
Chapter 7. Starting the Standalone Web Client
Copyright © 2011, Oracle. All rights reserved Rev2 43
The actual file name will be the value of the FILE key with an underscore andthe current date appended. For example:
jderoot_090109.log
If a log file name and path starts with a drive letter followed by a colon and
slash, the path is absolute. This means that the log file will be located on thespecified drive in the specified directory. For example:
File=c:\standalone_logs\jas_090109.log
If a log file name and path starts with a slash, the path is also absolute. Thismeans that the log file will be located on the drive on which the E1
Standalone Client is installed and in the specified directory. For example:
File=\log\jderoot_090109.log
If a log file name and path start with neither a drive letter nor a backslash, thepath is relative to this folder:
C:\JDEDwards\E900\system\OC4J\j2ee\home
For example, if the value for the FILE key is log\jas.log and the
Standalone Client is installed in C:\JDEdwards\E900, the log file is
written to:
C:\JDEdwards\E900\system\OC4J\j2ee\home\log
5/17/2018 9 0 With 8 98 4 Standalone Installation Using OUI With OEE Rev2 - slidepdf.com
http://slidepdf.com/reader/full/9-0-with-8-98-4-standalone-installation-using-oui-with-oee-rev2 50/75
Chapter 7. Starting the Standalone Web Client
Copyright © 2011, Oracle. All rights reserved Rev2 44
Cannot Connect to the Security Server
Problem:
After starting the Standalone Web Client from the Standalone Client, you get an error onthe screen indicating that the Web Client could not connect to the security server.
Resolution:
Verify that the local database services are running using this procedure:
1. Go to Start > Control Panel -> Administrative Tools -> Services.
2. Verify that the statuses of these services are Started:
OracleServiceE1LOCALOracleE1LocalTNSListener
If not, for each stopped service click Action > Start in the menu.
3. Try to sign in again by following these steps:
a. Exit from the Standalone Web Client and Standalone Client.
b. Run the Microsoft Windows Task Manager.
c. Wait for these processes to die:
activConsole.exe
jdenet_n.exe
java.exe
5/17/2018 9 0 With 8 98 4 Standalone Installation Using OUI With OEE Rev2 - slidepdf.com
http://slidepdf.com/reader/full/9-0-with-8-98-4-standalone-installation-using-oui-with-oee-rev2 51/75
Chapter 7. Starting the Standalone Web Client
Copyright © 2011, Oracle. All rights reserved Rev2 45
Note: The java.exe program is used by a variety of programs
written in the Java programming language. One of these
programs is the Standalone Web Client; however, it could be
running for any number of other Java programs. It is difficult to
tell in Microsoft Windows Task Manager if the java.exe isassociated with the Standalone Web Client or with some other
program. If you wait for a minute or more and a java.exe
remains running, you can assume that it is associated with a Javaprogram other than the Standalone Web Client. In that case,
continue to the next step.
d. Rerun activConsole.exe to restart the Standalone Client, sign in,
and start the Standalone Web Client (select Tools > EnterpriseOne Menu
from the Standalone Client).
5/17/2018 9 0 With 8 98 4 Standalone Installation Using OUI With OEE Rev2 - slidepdf.com
http://slidepdf.com/reader/full/9-0-with-8-98-4-standalone-installation-using-oui-with-oee-rev2 52/75
Copyright © 2010, Oracle. All rights reserved GA.Rev2 46
Chapter 8. Replacing the JD Edwards EnterpriseOne Tools
Release Component
The JD Edwards EnterpriseOne 9.0/8.98 Standalone Client is shipped with a specific
release of the Tools component, for example, 8.98.4. (The Tools component of the
Standalone Client is also known as "system.") You can determine this particular releaseby examining the contents of this file:
C:\JDEdwards\E900\system\bin32\ptf.log
If Global Customer Support instructs you to update the Tools component to a newerrelease, follow the instructions in this chapter.
Notes: Because you are replacing files that the Standalone Client installer uses, you
will need to either copy the installer from a DVD to a hard drive or
download the installer from E-Delivery. Follow the instructions in thesection Copying the Installation DVD or Downloading from the Oracle E-
Delivery Website.
For the following instructions, it is assumed that the folder where the
Standalone Client installer resides is:
<drive> :\Standalone_9.00

5/17/2018 9 0 With 8 98 4 Standalone Installation Using OUI With OEE Rev2 - slidepdf.com
http://slidepdf.com/reader/full/9-0-with-8-98-4-standalone-installation-using-oui-with-oee-rev2 53/75
Chapter 8. Replacing the JD Edwards EnterpriseOne Tools Release Component
Copyright © 2011, Oracle. All rights reserved Rev2 47
► To Replace the Tools component
1. If EnterpriseOne is running, stop it.
2. Use Task Manager to verify these processes are stopped:
activConsole.exe jdenet_n.exe
If either or both of these processes are running, either wait for them to finish or
kill them via Task Manager.
3. Because the entire system directory is to be replaced, you should backup your
existing system directory in your installed Standalone Client. To do so, rename
the directory. For example:
ren C:\JDEdwards\E900\system C:\JDEdwards\E900\system_old
Note: Unable to Rename. If Microsoft Windows does not allow you to
rename the directory, one or more running java.exe processes may
have the directory locked. In this case, either reboot your machine or
use Microsoft Windows Task Manager to kill the java.exe
process(es).
4. Download the appropriate Tools Release WINCLIENT from the Update Center.
The download is transferred to your machine as a .par file. This file may be
opened with the standard WinZip program.
Warning: Improper Unzipping. You should not open the .par file by
double clicking on it. It is a self-extracting file that is normallyinstalled on a deployment server. If you double-click on it, it
will assume that your workstation is a deployment server and
attempt to install it in an incompatible manner.
5. Open the .par file with WinZip.

5/17/2018 9 0 With 8 98 4 Standalone Installation Using OUI With OEE Rev2 - slidepdf.com
http://slidepdf.com/reader/full/9-0-with-8-98-4-standalone-installation-using-oui-with-oee-rev2 54/75
Chapter 8. Replacing the JD Edwards EnterpriseOne Tools Release Component
Copyright © 2011, Oracle. All rights reserved Rev2 48
6. Inside the .par file are multiple .CAB files in the Disk1\System folder. The
files are called SystemX .CAB where X is either nonexistent or a whole number.
Extract these .CAB files into the “system” folder where you placed the temporary
installation directory (for example, \Standalone_9.00).
7. Launch InstallManager.exe from the root folder of the copy of the DVD
(for example, \Standalone_9.00\InstallManager.exe).
Note: Vista and Greater on Microsoft Windows. When running the installation programon Vista and higher versions of Microsoft Windows, you must right click on theexecutable and select Run as Administrator.
8. On JD Edwards Install Manager, click this link:
EnterpriseOne E90 Standalone – OUI 11g

5/17/2018 9 0 With 8 98 4 Standalone Installation Using OUI With OEE Rev2 - slidepdf.com
http://slidepdf.com/reader/full/9-0-with-8-98-4-standalone-installation-using-oui-with-oee-rev2 55/75
Chapter 8. Replacing the JD Edwards EnterpriseOne Tools Release Component
Copyright © 2011, Oracle. All rights reserved Rev2 49
9. On Welcome, click the Next button.
5/17/2018 9 0 With 8 98 4 Standalone Installation Using OUI With OEE Rev2 - slidepdf.com
http://slidepdf.com/reader/full/9-0-with-8-98-4-standalone-installation-using-oui-with-oee-rev2 56/75
Chapter 8. Replacing the JD Edwards EnterpriseOne Tools Release Component
Copyright © 2011, Oracle. All rights reserved Rev2 50
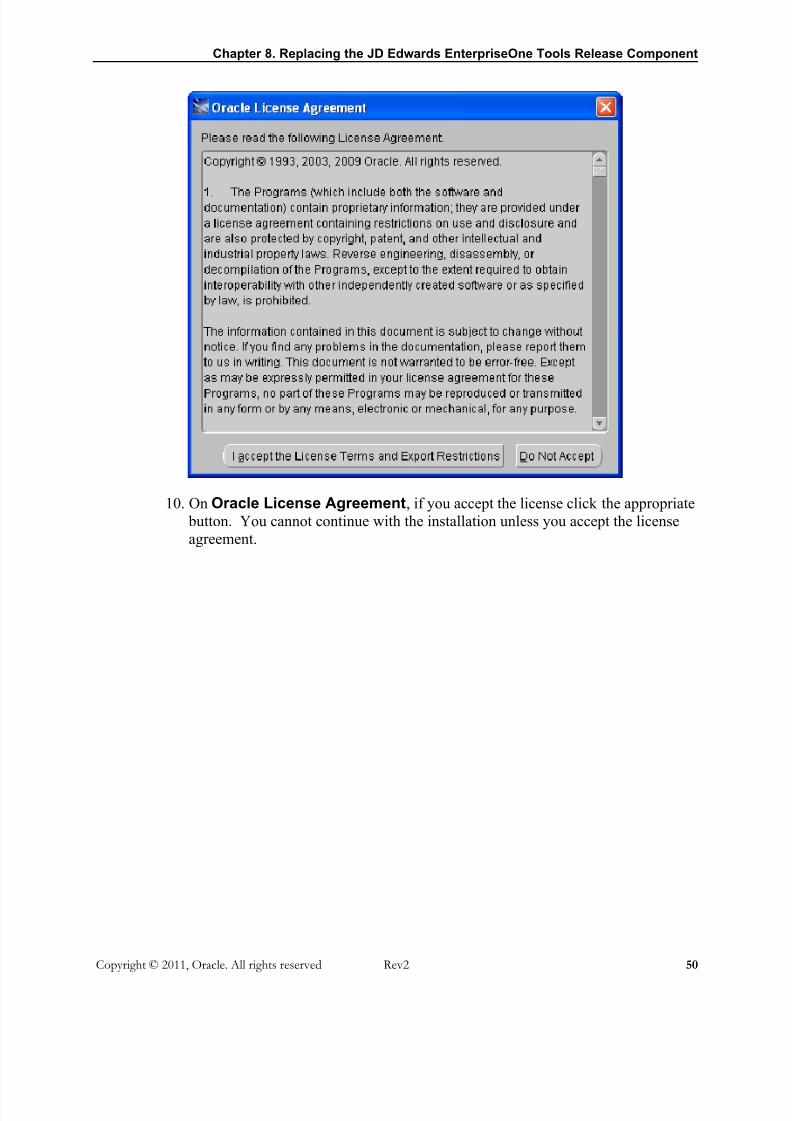
10. On Oracle License Agreement, if you accept the license click the appropriate
button. You cannot continue with the installation unless you accept the licenseagreement.
5/17/2018 9 0 With 8 98 4 Standalone Installation Using OUI With OEE Rev2 - slidepdf.com
http://slidepdf.com/reader/full/9-0-with-8-98-4-standalone-installation-using-oui-with-oee-rev2 57/75
Chapter 8. Replacing the JD Edwards EnterpriseOne Tools Release Component
Copyright © 2011, Oracle. All rights reserved Rev2 51
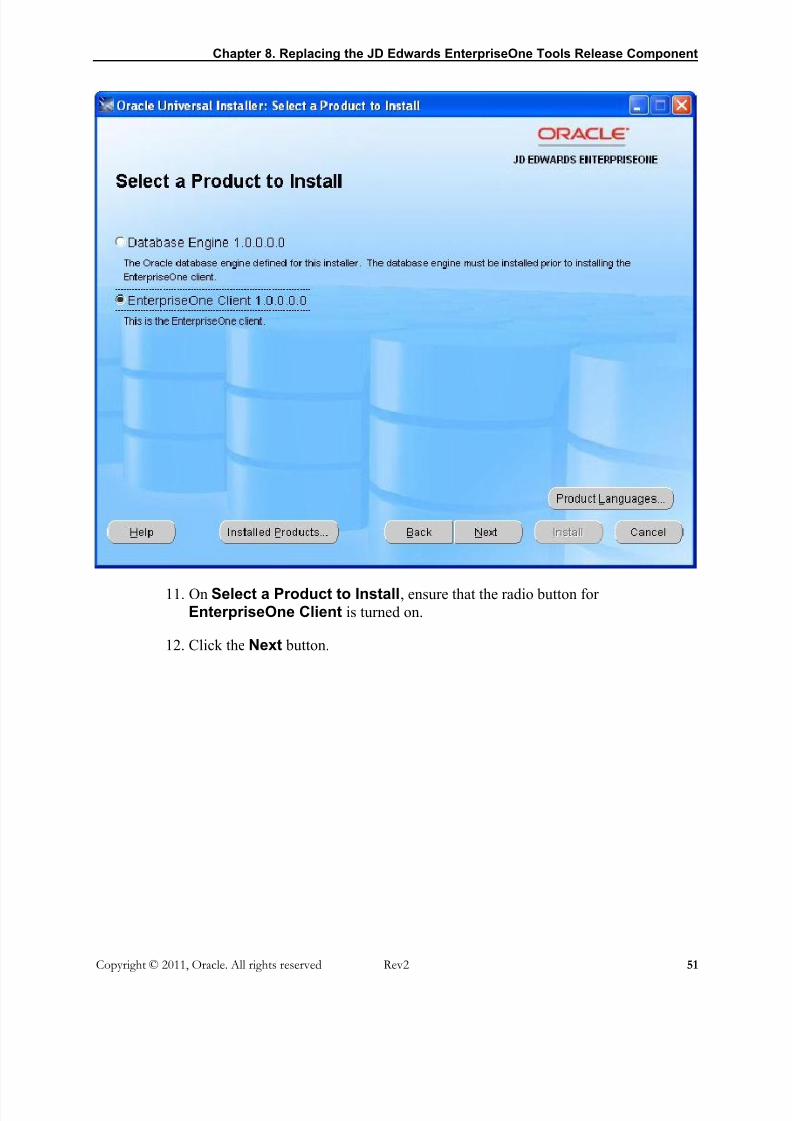
11. On Select a Product to Install, ensure that the radio button for
EnterpriseOne Client is turned on.
12. Click the Next button.
5/17/2018 9 0 With 8 98 4 Standalone Installation Using OUI With OEE Rev2 - slidepdf.com
http://slidepdf.com/reader/full/9-0-with-8-98-4-standalone-installation-using-oui-with-oee-rev2 58/75
Chapter 8. Replacing the JD Edwards EnterpriseOne Tools Release Component
Copyright © 2011, Oracle. All rights reserved Rev2 52
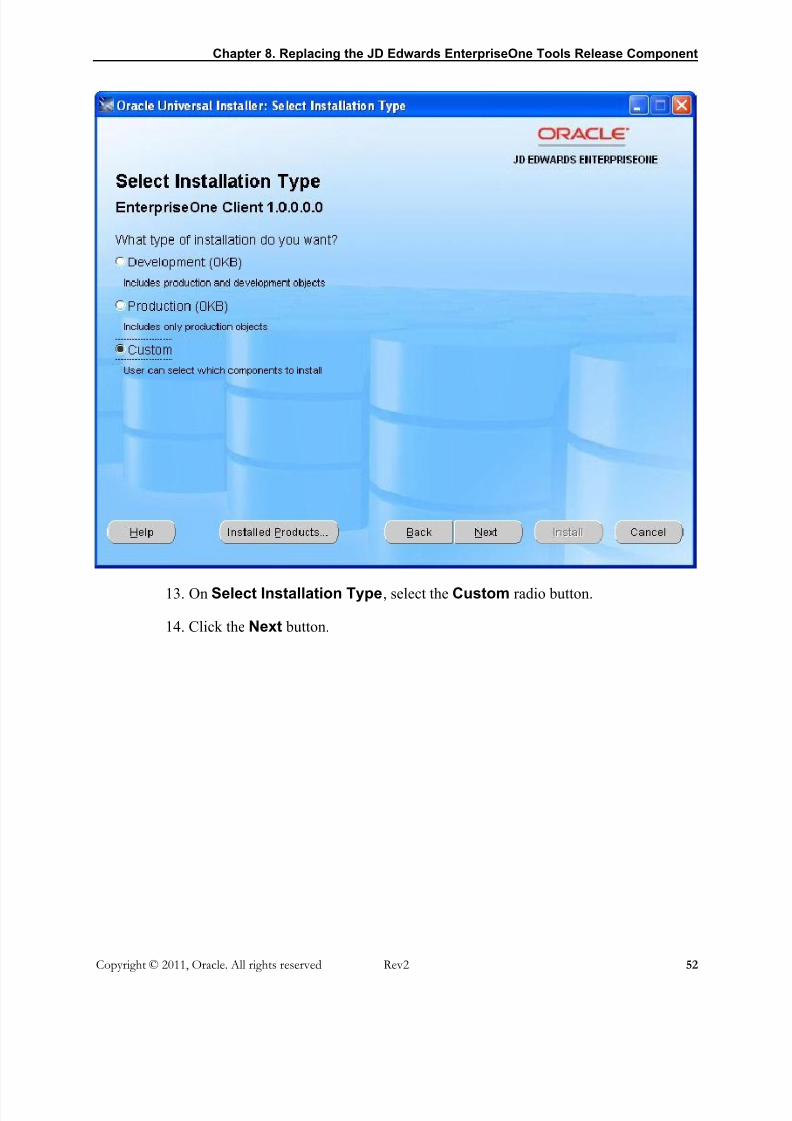
13. On Select Installation Type, select the Custom radio button.
14. Click the Next button.
5/17/2018 9 0 With 8 98 4 Standalone Installation Using OUI With OEE Rev2 - slidepdf.com
http://slidepdf.com/reader/full/9-0-with-8-98-4-standalone-installation-using-oui-with-oee-rev2 59/75
Chapter 8. Replacing the JD Edwards EnterpriseOne Tools Release Component
Copyright © 2011, Oracle. All rights reserved Rev2 53
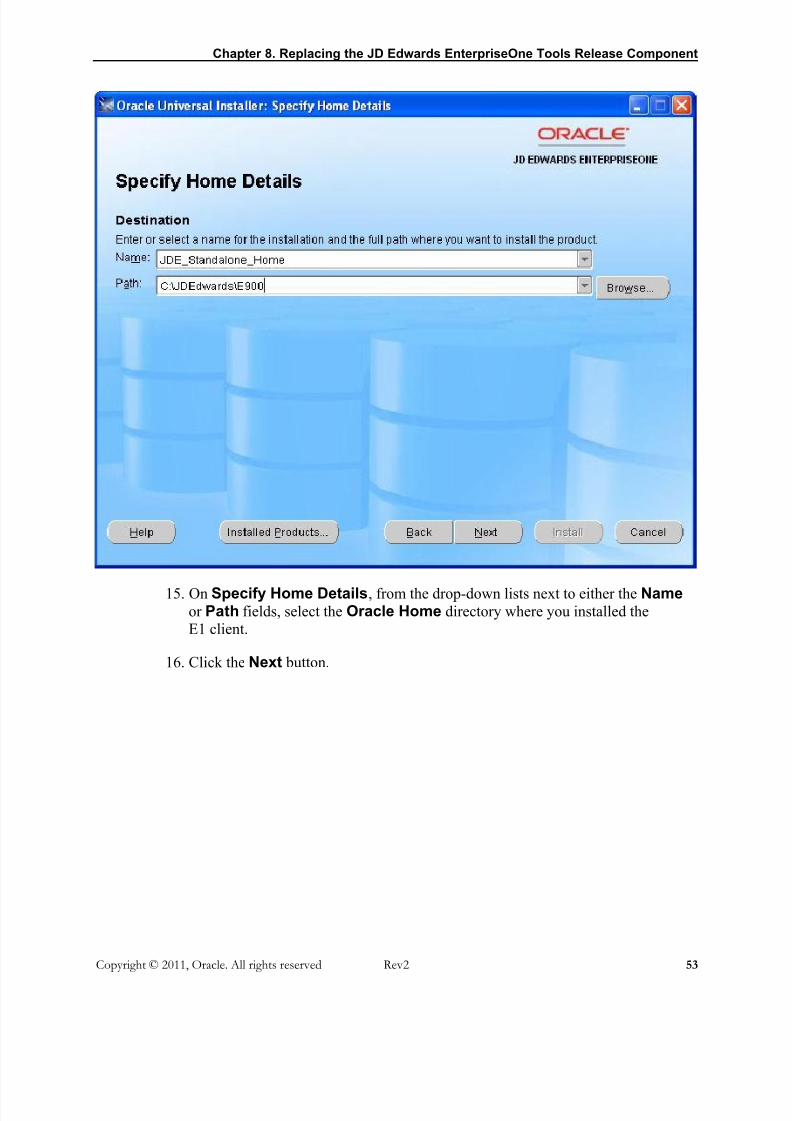
15. On Specify Home Details, from the drop-down lists next to either the Name
or Path fields, select the Oracle Home directory where you installed the
E1 client.
16. Click the Next button.
5/17/2018 9 0 With 8 98 4 Standalone Installation Using OUI With OEE Rev2 - slidepdf.com
http://slidepdf.com/reader/full/9-0-with-8-98-4-standalone-installation-using-oui-with-oee-rev2 60/75
Chapter 8. Replacing the JD Edwards EnterpriseOne Tools Release Component
Copyright © 2011, Oracle. All rights reserved Rev2 54
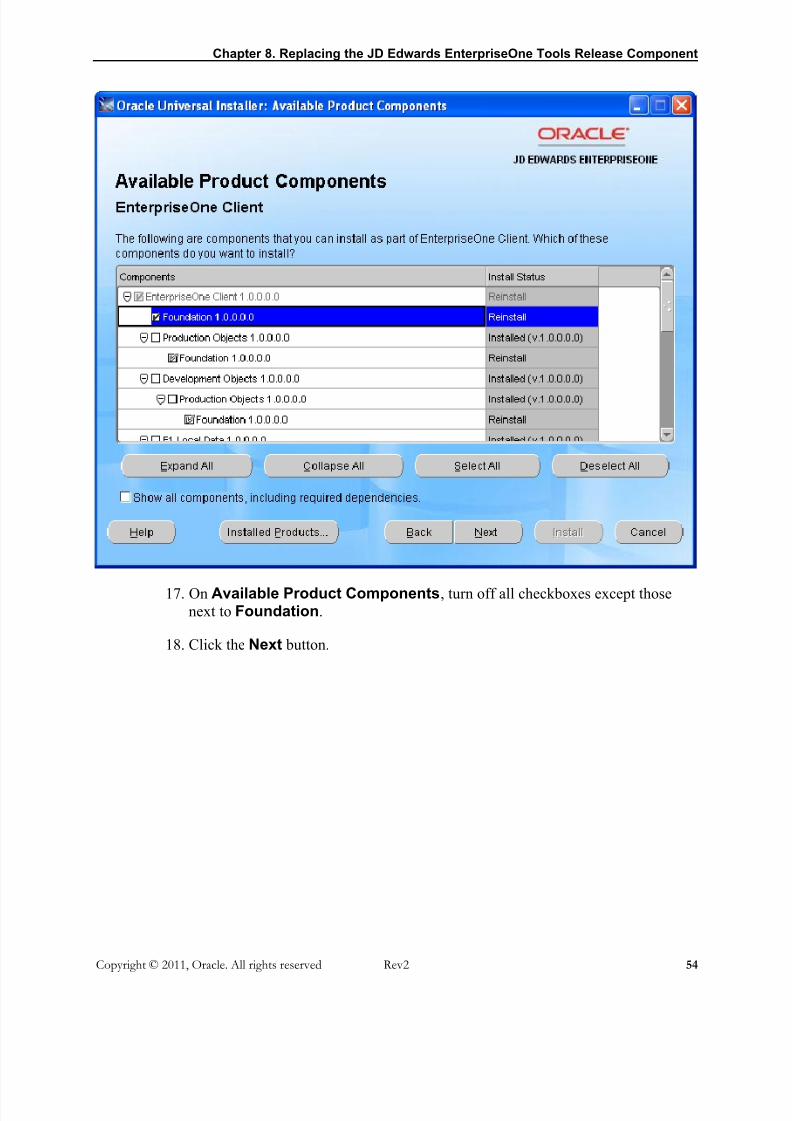
17. On Available Product Components, turn off all checkboxes except those
next to Foundation.
18. Click the Next button.
5/17/2018 9 0 With 8 98 4 Standalone Installation Using OUI With OEE Rev2 - slidepdf.com
http://slidepdf.com/reader/full/9-0-with-8-98-4-standalone-installation-using-oui-with-oee-rev2 61/75
Chapter 8. Replacing the JD Edwards EnterpriseOne Tools Release Component
Copyright © 2011, Oracle. All rights reserved Rev2 55
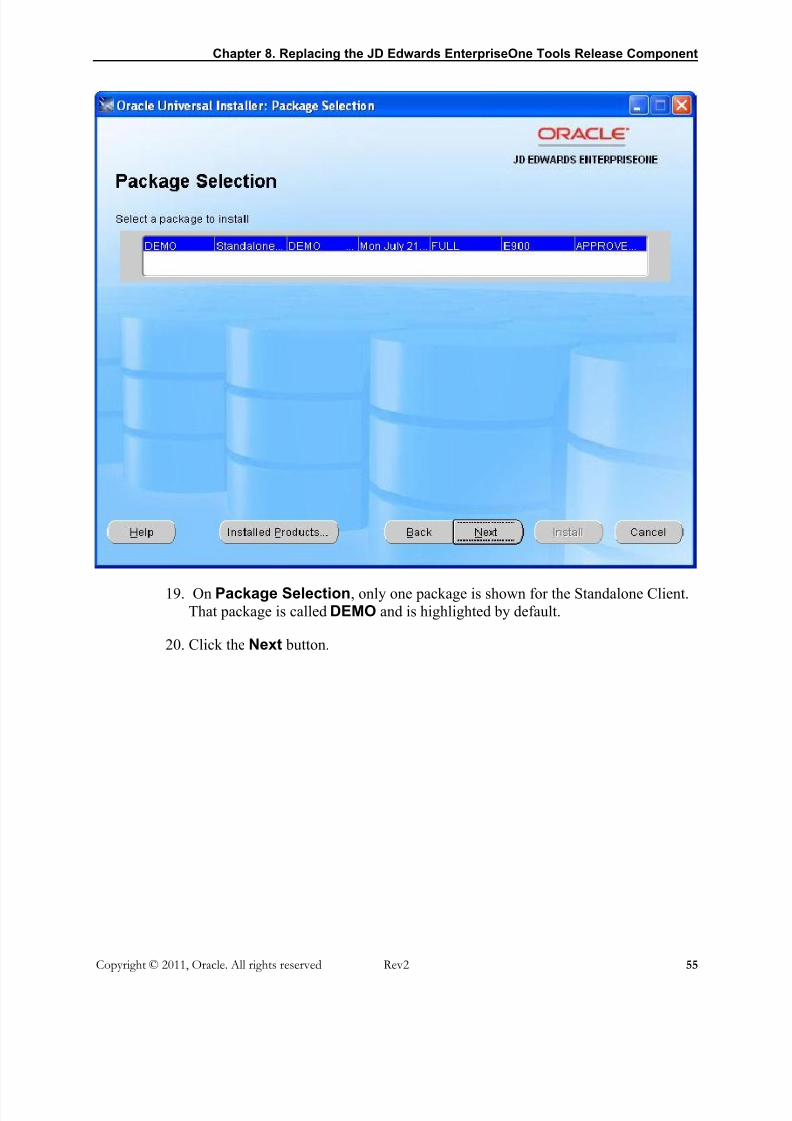
19. On Package Selection, only one package is shown for the Standalone Client.
That package is called DEMO and is highlighted by default.
20. Click the Next button.

5/17/2018 9 0 With 8 98 4 Standalone Installation Using OUI With OEE Rev2 - slidepdf.com
http://slidepdf.com/reader/full/9-0-with-8-98-4-standalone-installation-using-oui-with-oee-rev2 62/75
Chapter 8. Replacing the JD Edwards EnterpriseOne Tools Release Component
Copyright © 2011, Oracle. All rights reserved Rev2 56
21. On Summary, verify that what is to be installed is correct.
22. Click the Install button.

5/17/2018 9 0 With 8 98 4 Standalone Installation Using OUI With OEE Rev2 - slidepdf.com
http://slidepdf.com/reader/full/9-0-with-8-98-4-standalone-installation-using-oui-with-oee-rev2 63/75
Chapter 8. Replacing the JD Edwards EnterpriseOne Tools Release Component
Copyright © 2011, Oracle. All rights reserved Rev2 57
23. When the installation of the E1 client finishes, you will see the
End of Installation screen.
24. Click the Exit button.
25. Clear the cache in your browser using these browser-dependent procedures:
Microsoft Internet Explorer
a. Go to Tools > Internet Options.
b. On the General tab, click the Delete Files... button.
c. Click the OK button.
d. Click the OK button.
e. Exit Internet Explorer.
5/17/2018 9 0 With 8 98 4 Standalone Installation Using OUI With OEE Rev2 - slidepdf.com
http://slidepdf.com/reader/full/9-0-with-8-98-4-standalone-installation-using-oui-with-oee-rev2 64/75
Chapter 8. Replacing the JD Edwards EnterpriseOne Tools Release Component
Copyright © 2011, Oracle. All rights reserved Rev2 58
Mozilla Firefox
a. Go to Tools > Options.
b. On the Network tab and in the Cache section, click the Clear Now button.
c. Click the OK button.
d. Exit Mozilla Firefox.
26. Launch EnterpriseOne by following the instructions in the section of this guide
entitled: Starting the Standalone Client.
5/17/2018 9 0 With 8 98 4 Standalone Installation Using OUI With OEE Rev2 - slidepdf.com
http://slidepdf.com/reader/full/9-0-with-8-98-4-standalone-installation-using-oui-with-oee-rev2 65/75
Copyright © 2010, Oracle. All rights reserved GA.Rev2 59
Chapter 9. Deinstalling the Standa lone Client
Deinstalling the Standalone Client consists of these tasks:
Deinstalling the Standalone Client
Deinstalling the OEE Database (optional)
Deinstalling the Standalone Client
► To deinstall the Standalone Client
1. If EnterpriseOne is running, stop it.
2. Use Task Manager to verify these processes are stopped:
activConsole.exe
jdenet_n.exe
If either or both of these processes are running, either wait for them to finish or
kill them via Task Manager.
3. Go to Start > All Programs > Oracle – JDE_Standalone_Home > Oracle
Installation Products > Universal Installer.
4. Click this link entitled:
Deinstall Products…
5. Put a check mark next to the item with the Oracle Home name that you gave toyour E1 client.
6. Alternatively, you can drill down to select individual components to remove.
7. Click Remove and follow the prompts.
8. When the deinstall is complete, exit from the Oracle Universal Installer.

5/17/2018 9 0 With 8 98 4 Standalone Installation Using OUI With OEE Rev2 - slidepdf.com
http://slidepdf.com/reader/full/9-0-with-8-98-4-standalone-installation-using-oui-with-oee-rev2 66/75
Chapter 9. Deinstalling the Standalone Client
Copyright © 2011, Oracle. All rights reserved Rev2 60
Deinstalling the OEE Database (optional)
Note: Ensure Standalone Client is Deinstalled. If the Standalone Client isinstalled, you must deinstall it before deinstalling the database. Refer to thesection in this guide entitled: Deinstalling the Standalone Client.
This section contains these tasks:
To deinstall the OEE 11gR2 database
To deinstall the OEE 10g database
To complete the database deinstallation
► To deinstall the OEE 11gR2 database
Follow these steps to deinstall an OEE 11gR2 database.
1. Open a command prompt window.
If running on Windows Vista or later, be sure to run this by right-clicking on the
Command Prompt icon (an example navigation is: Start > All Programs >
Accessories > Command Prompt) and selecting Run as administrator.
2. Run this command:
<E1Local_Oracle_Home >\deinstall\deinstall.bat
where <E1Local_Oracle_Home> is the directory where the database is
installed. If you followed the earlier recommendations in this guide, the directoryis:
c:\JDEdwards\E1Local
Note: Do not navigate to the <E1Local_Oracle_Home>\deinstall directory (using the cd command) and run the batch file from there.
If you do so, the deinstaller will not be able to delete the
<E1Local_Oracle_Home> directory.

5/17/2018 9 0 With 8 98 4 Standalone Installation Using OUI With OEE Rev2 - slidepdf.com
http://slidepdf.com/reader/full/9-0-with-8-98-4-standalone-installation-using-oui-with-oee-rev2 67/75
Chapter 9. Deinstalling the Standalone Client
Copyright © 2011, Oracle. All rights reserved Rev2 61
Note: The OEE installation program should have created some artifact filesfor us by the deinstaller. These files provide answers to prompts that
the database deinstaller would normally prompt a user. If for some
reason, those files were not created during OEE installation, or
otherwise cannot be located by the deinstaller, you are prompted forinformation when you perform the deinstall. In most cases, you can
take the default values. These are the prompts:
a) Specify all Single Instance listeners that are to be de-configured[LISTENER]:
Take the default.
b) Specify the list of database names that are configured in thisOracle home [E1LOCAL]:
Take the default.
c) Specify the type of this database (1.Single InstanceDatabase|2.Oracle Restart Enabled Database) [1]:
Take the default.
d) Specify the diagnostic destination location of the database
[C:\Oracle\diag\rdbms\e1local]:
Take the default.
e) Specify the storage type used by the Database ASM|FS []:Enter FS.
f) Specify the list of directories if any database files exist on ashared file system. If 'E1LOCAL' subdirectory is found, then itwill be deleted. Otherwise, the specified directory will be deleted.
Alternatively, you can specify list of database files with full path[]:
Take the default.
g) Specify the flash recovery area location, if it is configured on thefile system. If 'E1LOCAL' subdirectory is found, then it will be
deleted. []:
Take the default.
h) Specify the database spfile location [ ]:
Take the default.
5/17/2018 9 0 With 8 98 4 Standalone Installation Using OUI With OEE Rev2 - slidepdf.com
http://slidepdf.com/reader/full/9-0-with-8-98-4-standalone-installation-using-oui-with-oee-rev2 68/75
Chapter 9. Deinstalling the Standalone Client
Copyright © 2011, Oracle. All rights reserved Rev2 62
i) Do you want to continue (y - yes, n - no)? [n]:
Enter y.
Upon completion of steps a-i, you may get some errors indicating that not all of the directories could be deleted. This will be addressed as a later step in the
section entitled: To complete the database deinstallation. At this point you can
continue in sequence with the current section.
3. The above steps are used to remove the OEE 11gR2 database engine. To removethe Parent Oracle Home, continue with the next. For more information regarding
the Parent Oracle Home, refer to Understanding Destination Paths.
4. Go to Start > All Programs > Oracle – Parent_Oracle_Home_Name > OracleInstallation Products > Universal Installer. In this case,
Parent_Oracle_Home_Name is the name that you specified for the Parent Oracle
Home when you installed the database. If you used the recommended names, this
would be “JDE_Local_DB_Home.”
5. Click the link entitled:
Deinstall Products…
6. Put a check mark next to the Oracle Home for:
JDE_Local_DB_Home
7. Click the Remove button and follow the prompts.
8. When the deinstall is complete, exit from the Oracle Universal Installer.
9. Perform the steps in the section below entitled: To complete the database
deinstallation.
5/17/2018 9 0 With 8 98 4 Standalone Installation Using OUI With OEE Rev2 - slidepdf.com
http://slidepdf.com/reader/full/9-0-with-8-98-4-standalone-installation-using-oui-with-oee-rev2 69/75
Chapter 9. Deinstalling the Standalone Client
Copyright © 2011, Oracle. All rights reserved Rev2 63
► To deinstall the OEE 10g database
Follow these steps to deinstall an OEE 10g database.
1. Go to Start > All Programs > Oracle – E1Local > Oracle Installation Products >Universal Installer.
2. Click this link entitled:
Deinstall Products…
3. Put a check mark next to the Oracle Homes for these items:
JDE_Local_DB_Home
This is the Oracle Home Name that you provided when installing OEE. If youare not sure which name you used, expand the tree for each listed Oracle
Home by clicking on the plus sign next to each Oracle Home Name. The one
that you need to deinstall is titled Database Engine followed by a version
number. Place a check mark next to the parent of the line containing the
Database Engine.
E1Local
This is the Oracle Home Name of the cloned copy of the database.
4. Click the Remove button and follow the prompts.
5. When the deinstall is complete, exit from the Oracle Universal Installer.
6. Use this procedure to verify that the proper keys were removed from the registry:
a. Go to Start > Run….
b. In the Open field, enter this command to start the Registry Editor:
regedit
c. Make a backup of the registry:
i. Click on My Computer in the left-hand pane.
ii. Click File > Export …
iii. Choose a location and provide a filename for the registry backup.
iv. Click Save.

5/17/2018 9 0 With 8 98 4 Standalone Installation Using OUI With OEE Rev2 - slidepdf.com
http://slidepdf.com/reader/full/9-0-with-8-98-4-standalone-installation-using-oui-with-oee-rev2 70/75
Chapter 9. Deinstalling the Standalone Client
Copyright © 2011, Oracle. All rights reserved Rev2 64
d. Click on and expand this key:
HKEY_LOCAL_MACHINE\SOFTWARE\Oracle
e. If the sub-key KEY_E1Local exists, delete it.
f. Click on and expand this key:
HKEY_LOCAL_MACHINE\SYSTEM\CurrentControlSet\Services
g. If the keys OracleE1LocalTNSListener or OracleServiceE1LOCAL
exist, delete them.
h. Exit the regedit program.
i. Reboot the computer.
j. Delete this folder:
C:\JDEdwards\E1Local
Note: No Files Can Exist In This Folder. It is very important that no files
exist in this folder when you next attempt to install the OEE database.
If any files do exist, the OEE installation will probably fail.
k. If you cannot delete the folder because a file in that folder is locked, follow
these steps:
i. Determine which file is locked and which process has the lock on the file.
A freeware program called Process Explorer can be helpful in
determining this information. You can obtain a free copy of ProcessExplorer from this web site:
www.sysinternals.com
ii. Either kill the locking process with Process Explorer or MicrosoftWindows Task Manager or, if the process was started as a MicrosoftWindows service, change the Startup Type to Manual and reboot the
computer again.
iii. Try again to delete the folder.
7. Perform the steps in the section below entitled: To complete the database
deinstallation.

5/17/2018 9 0 With 8 98 4 Standalone Installation Using OUI With OEE Rev2 - slidepdf.com
http://slidepdf.com/reader/full/9-0-with-8-98-4-standalone-installation-using-oui-with-oee-rev2 71/75
Chapter 9. Deinstalling the Standalone Client
Copyright © 2011, Oracle. All rights reserved Rev2 65
► To complete the database deinstallation
Use this procedure to verify that the proper keys were removed from the registry:
1. Go to Start > Run….
2. In the Open field, enter this command to start the Registry Editor:
regedit
3. Make a backup of the registry:
a. Click on My Computer in the left-hand pane.
b. Click File > Export …
c. Choose a location and provide a filename for the registry backup.
d. Click Save.
4. Depending on your Microsoft Windows operating system, click on and
expand this key:
32-bit version of Windows:
HKEY_LOCAL_MACHINE\SOFTWARE\Oracle
64-bit version of Windows:
HKEY_LOCAL_MACHINE\SOFTWARE\Wow6432Node\Oracle
5. If the sub-key KEY_E1Local exists, delete it.
6. Click on and expand this key:
HKEY_LOCAL_MACHINE\SYSTEM\CurrentControlSet\Services
7. If the keys OracleE1LocalTNSListener or OracleServiceE1LOCAL exist, delete them.
8. Exit the regedit program.
9. Reboot the computer.

5/17/2018 9 0 With 8 98 4 Standalone Installation Using OUI With OEE Rev2 - slidepdf.com
http://slidepdf.com/reader/full/9-0-with-8-98-4-standalone-installation-using-oui-with-oee-rev2 72/75
Chapter 9. Deinstalling the Standalone Client
Copyright © 2011, Oracle. All rights reserved Rev2 66
10. Delete this folder:
C:\JDEdwards\E1Local
Note: No Files Can Exist In This Folder. It is very important that no filesexist in this folder when you next attempt to install the OEE database.
If any files do exist, the OEE installation will probably fail.
11. If you cannot delete the folder because a file in that folder is locked, followthese steps:
a. Determine which file is locked and which process has the lock on the file.
A freeware program called Process Explorer can be helpful in
determining this information. You can obtain a free copy of Process
Explorer from this web site:
www.sysinternals.com
b. Either kill the locking process with Process Explorer or MicrosoftWindows Task Manager or, if the process was started as a MicrosoftWindows service, change the Startup Type to Manual and reboot the
computer again.
c. Try again to delete the folder.
12. Perform the steps in the section below entitled: To complete the database
deinstallation.

5/17/2018 9 0 With 8 98 4 Standalone Installation Using OUI With OEE Rev2 - slidepdf.com
http://slidepdf.com/reader/full/9-0-with-8-98-4-standalone-installation-using-oui-with-oee-rev2 73/75
Copyright © 2010, Oracle. All rights reserved GA.Rev2 67
Glossary
This glossary provides descriptions of terms and acronyms used in this document.
Database driver
A set of code used to connect to a database.
E-Delivery
An Oracle web site from which applications can be downloaded.
H4A (HTML for Applications)
The Standalone Web Client.
Install Manager
The JD Edwards EnterpriseOne program that starts the Standalone Client installer. The
actual program name is:
InstallManager.exe
Java Developme nt Kit (JDK)
A set of tools and Java code used to develop Java applications.
Java Runtime Environment (JRE)
A set of tools used when running Java applications.
JDBC driver
A database driver that is used by Java programs to connect to a database.
Local databa se
A database that resides on the client workstation on which the Standalone Client is
installed.
5/17/2018 9 0 With 8 98 4 Standalone Installation Using OUI With OEE Rev2 - slidepdf.com
http://slidepdf.com/reader/full/9-0-with-8-98-4-standalone-installation-using-oui-with-oee-rev2 74/75
Glossary
Copyright © 2011, Oracle. All rights reserved Rev2 68
Minimum Technica l Requirements (MTRs)
The minimum software and hardware requirements needed to install and run the
Standalone Client.
My Oracle Support
The Oracle web site at which support and documentation for Oracle products may be
obtained. As of this writing the URL is:
https://support.oracle.com
Oracle Enterprise Edition (OEE)
A version of the Oracle database product. The particular version of OEE that is used and
installed by the Standalone Client is a stripped down version intended only for JDEdwards EnterpriseOne client and deployment server installations.
Oracle Universal Installer (OUI)
A program that is used to install Oracle products. This version of the Standalone Clientis installed using OUI. OEE is also installed by OUI.
Root folder
The base-level folder of a computer drive whether that drive is a hard drive or a DVD. It
is designated by the drive letter, a colon, and a backslash or, if the drive letter can be
assumed, simply by a single backslash.
Snapshot
A JD Edwards EnterpriseOne tool used to save and restore installations of JD Edwards
EnterpriseOne products such as standalone clients, development clients, and deploymentservers.
Software Protection Codes (SPCs)
Encrypted alphanumeric strings used to designate the number and expiration date of
licenses used to run previous versions of JD Edwards EnterpriseOne, includingstandalone clients, development clients, and deployment servers. The 9.0 release of the
Standalone Client does not require SPCs.
Spec database

5/17/2018 9 0 With 8 98 4 Standalone Installation Using OUI With OEE Rev2 - slidepdf.com
http://slidepdf.com/reader/full/9-0-with-8-98-4-standalone-installation-using-oui-with-oee-rev2 75/75
Glossary
Copyright © 2011, Oracle. All rights reserved Rev2 69
A database that contains information (“specifications” or descriptions) about JD Edwards
EnterpriseOne objects such as database tables, applications, and components of applications (forms, event rules, etc.).
SQL Server 2005 Express Edition (SSE or SSEE)The version of the Microsoft SQL Server database product intended to run on individual
client Microsoft Windows workstations.
Standalone Client
A JD Edwards EnterpriseOne 9.0/8.98 client that does not require any of these associated
EnterpriseOne servers:
Deployment Server
Enterprise Server (also known as host or logic server)
HTML Web Server
Database Server
Standalone Web Client
The web browser based component of the JD Edwards EnterpriseOne Standalone Client.
Tools component
The JD Edwards EnterpriseOne component of the Standalone Client that provides mid-
level functionality to the EnterpriseOne applications. Also known as JD EdwardsEnterpriseOne Tools Release or “system” code.