Embed Size (px)
Citation preview

© 2013-2014 Accelerate Learning - All Rights Reserved
How tall are you? How do you know? Do you have friends who are taller? Do you have friends who are shorter?
How do we tell things apart? What are some ways we can describe things?
We can describe things in different ways.
We describe some things by their sizes or shapes. We describe some things by how they feel or what they taste like. These are the object’s properties.
We group things together based on their properties. This is called classifying. We put things in different categories based on what we can see or observe.
reflect
CLASSIFYING MATTER
property: the look, feel, taste, sound, or smell of an object
These objects are all bowling balls. Fill in the blanks to classify the other pictures below.
HINT: Think about how the things in each picture are alike.
These things are all
.
These animals are both
.
These things are all
.
1
STEM_1.5A_MatterEnergy_ClassifyingMatter_Eng.indd 1STEM_1.5A_MatterEnergy_ClassifyingMatter_Eng.indd 1 11/18/13 2:36 PM11/18/13 2:36 PM
Sample

© 2013-2014 Accelerate Learning - All Rights Reserved
Objects have many different properties.
Remember, properties are how things look, feel, taste, sound, or smell.
Look at this picture. We can classify all the objects as balls. They all have the same round shape. But the balls also have different properties. Can you name some? How are these balls different?
Properties
ColorThe balls are different colors. One ball is red. Another is green. Another one is orange. There is a white ball, too. The marble has no color. It is clear.
SizeThe balls are different sizes. The tennis ball is biggest. The marble is smallest. The orange ball and the white ball are about the same size.
Texture
Texture is how something feels. A tennis ball has a fuzzy texture. A marble has a smooth, hard texture. The red and orange balls also feel smooth. They are softer than the marble. The white ball has the softest texture. You might crush it if you squeezed it.
Objects are made of different materials. A bouncy ball is made of rubber. A marble is made of glass. A table-tennis ball is made of plastic. Things have different properties because of what they are made of.
look out!
CLASSIFYING MATTER
2
STEM_1.5A_MatterEnergy_ClassifyingMatter_Eng.indd 2STEM_1.5A_MatterEnergy_ClassifyingMatter_Eng.indd 2 11/18/13 3:01 PM11/18/13 3:01 PM
Sample

© 2013-2014 Accelerate Learning - All Rights Reserved
We can use tools to measure objects. A ruler can measure length. Length is how long something is. A scale can measure weight. That’s how heavy something is. A tape measure can measure distance. That’s how far something is.
The numbers on a ruler tell you how long something is.
Put an object in each pan of a balance scale. The object that sinks is heavier. The object that rises is lighter.
There are many other tools to measure objects. Some tools we may have in our homes. We may have measuring cups in our kitchen. Other tools, like scales, are often found in science labs.
Everyday Life: Measuring with Everyday Objects
You don’t have to have a ruler or a scale to measure something. You can use everyday objects. For example, you can measure a pencil in paperclips!
The pencil is about fi ve paperclips long.
Find a book, and then ask your teacher for some paperclips. How many paperclips long is the book? What else can you measure with the paperclips?
what do you think?
CLASSIFYING MATTER
3
STEM_1.5A_MatterEnergy_ClassifyingMatter_Eng.indd 3STEM_1.5A_MatterEnergy_ClassifyingMatter_Eng.indd 3 11/18/13 2:36 PM11/18/13 2:36 PM
Sample

© 2013-2014 Accelerate Learning - All Rights Reserved
CLASSIFYING MATTER
What do you know?
The objects in these pictures are the same in certain ways. They are different in other ways. How can you classify these objects?
Rocks You can say the objects are all rocks.
You can say the rocks have the same textures. They are all smooth.
You can say the rocks have different colors. Many rocks are gray. Some rocks are brown.
You can say the rocks have different sizes. Some are larger than others.
Marbles Complete the blanks to describe the marbles. Use the words DIFFERENT or THE SAME.
The marbles have texture.
The marbles have colors.
The marbles have sizes.
What other properties do the marbles have? Do you think they have the same mass?
4
STEM_1.5A_MatterEnergy_ClassifyingMatter_Eng.indd 4STEM_1.5A_MatterEnergy_ClassifyingMatter_Eng.indd 4 11/18/13 3:52 PM11/18/13 3:52 PM
Sample
© 2013-2014 Accelerate Learning - All Rights Reserved
CLASSIFYING MATTER
Classifying Common Objects
Discuss with your child the different ways in which we classify objects. Having a basic grasp of this concept will help your child understand how to classify matter.
Begin by selecting a common household item and helping your child to see the different ways in which the object might be classifi ed. For example, consider the utensils you eat with. Point out that they all can be classifi ed as utensils—the things we use to eat. They are probably all made from the same material (e.g., steel). That material makes them feel the same and have the same color. All the utensils may even be marked with the same pattern, which would be another property they all have in common.
After you have discussed the ways in which all of the utensils (or other household items) are similar, ask your child to consider the properties that make them different. For example, the utensils will have different shapes: some are spoons, some are knives, and some are forks. Some are larger and some are smaller—you may even have different sizes of the same type of utensil, such as soup and sugar spoons. If possible, have your child hold two of the objects—one in each hand. Can your child feel a difference in mass?
Finally, ask your child to list all the properties the items have in common and all the properties that are different.
Here are some questions to discuss with your child:
1. What things can we observe that allow us to classify objects?
2. How can we use properties to describe objects?
3. How can we use properties to identify objects?
connecting with your child
5
STEM_1.5A_MatterEnergy_ClassifyingMatter_Eng.indd 5STEM_1.5A_MatterEnergy_ClassifyingMatter_Eng.indd 5 11/18/13 2:37 PM11/18/13 2:37 PM
Sample

STEM_1.5A_MatterEnergy_ClassifyingMatter_Eng.indd 6STEM_1.5A_MatterEnergy_ClassifyingMatter_Eng.indd 6 11/18/13 2:44 PM11/18/13 2:44 PM
Sample
© 2013-2014 Accelerate Learning - All Rights Reserved
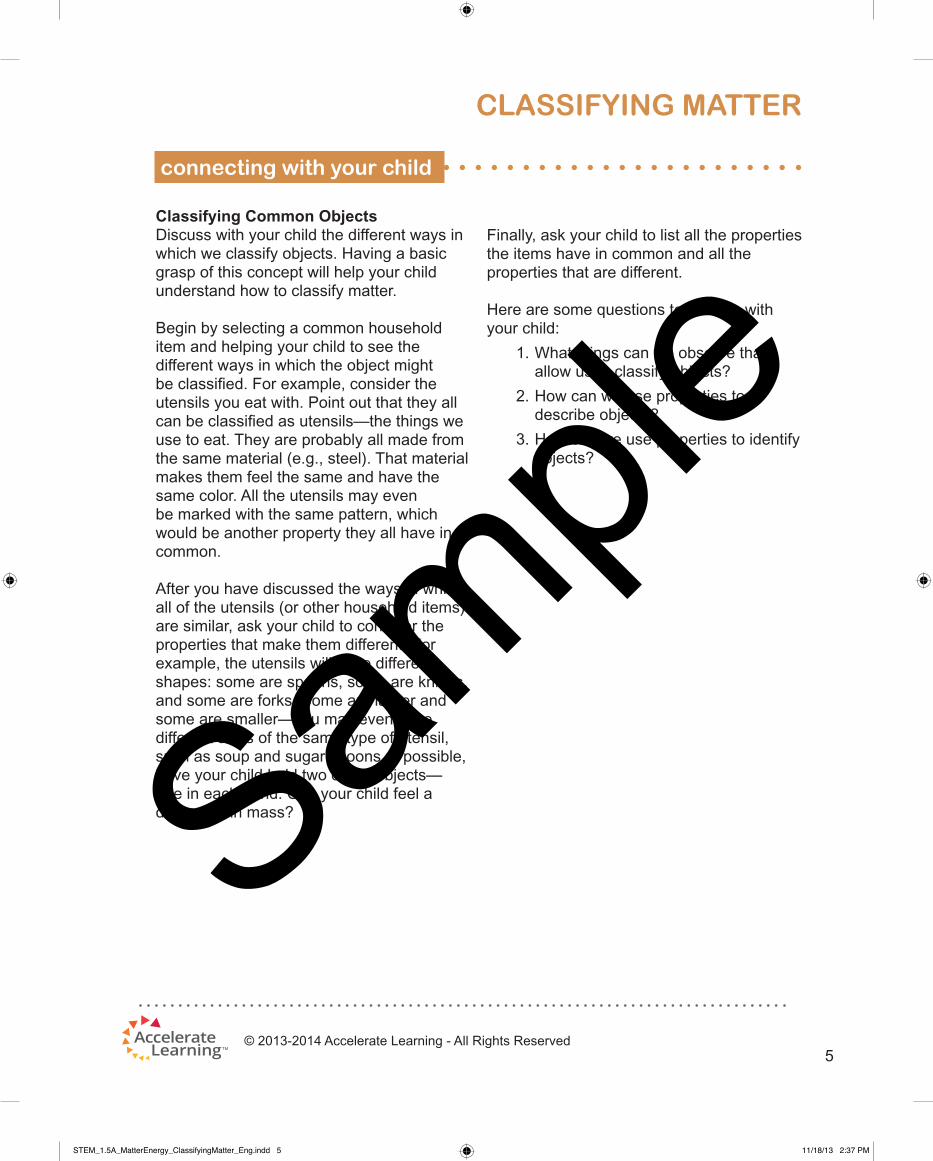
Have you ever seen something melt? What things have you seen melt? Have you seen something freeze? Where have you seen something freeze?
Take a look at the picture here. What is happening to the ice cream and ice pop? Are they melting or freezing? Why do you think so?
Heating things can make them change. One important change from heat is melting. Heating ice cream makes it melt. The ice cream changes from solid to liquid.
Heating ice makes it melt, too. The solid ice changes to liquid water.
Another change from heat is evaporation. Suppose you leave a bowl of water alone in the Sun. If you come back the next day, the water will seem to have disappeared. It has evaporated. When water evaporates, it moves into the air.
reflect
CHANGES FROM HEAT
The ice is melting.
Heat causes the water in the puddle to evaporate. Fill in the blanks about the other pictures below.
Hint: Use the words MELT or EVAPORATE.
Heat causes the ice cream to
.
Heat causes the coffee to
.
7
STEM_1.5B_2.0_Explain_STEMscopedia_Eng.indd 7STEM_1.5B_2.0_Explain_STEMscopedia_Eng.indd 7 11/18/13 2:39 PM11/18/13 2:39 PM
Sample

© 2013-2014 Accelerate Learning - All Rights Reserved
Scientist in the Spotlight: Making a Microwave Oven
In 1945, a scientist named Percy Spencer noticed his chocolate bar had melted. He wasn’t outside in the hot sunlight, though. He was actually in his lab. What happened?
A tube in the lab was giving off microwaves. Microwaves are energy. Spencer realized that microwaves could be used to heat food. He turned this idea into the fi rst microwave oven. What would happen if you put ice cubes in a microwave oven? Complete the sentence below.
If we put ice cubes in a microwave, they would…
Cooling things can make them change. When something cools, it loses heat.
Cooling water can make it freeze. When liquid water freezes, it becomes solid ice. Other liquids like juice can also freeze when cooled. You can make ice pops by putting juice in the freezer!
CHANGES FROM HEAT
A snowfl ake is frozen water.
8
STEM_1.5B_2.0_Explain_STEMscopedia_Eng.indd 8STEM_1.5B_2.0_Explain_STEMscopedia_Eng.indd 8 11/18/13 2:39 PM11/18/13 2:39 PM
Sample

© 2013-2014 Accelerate Learning - All Rights Reserved
Let’s cool some water. What do you think will happen?
1. Fill a balloon with water.
2. Observe what is in the balloon. Draw your observations in the chart.
3. Put the balloon in a freezer.
4. Take the balloon out after two hours.
5. Observe what is in the balloon. Draw your observations in the chart.
try now
CHANGES FROM HEAT
Balloon Before It Freezes
Balloon After It Freezes
Ice Cream Bar
Butter
Berries
Ice pop
Carrots
9
STEM_1.5B_2.0_Explain_STEMscopedia_Eng.indd 9STEM_1.5B_2.0_Explain_STEMscopedia_Eng.indd 9 11/18/13 2:39 PM11/18/13 2:39 PM
Sample
© 2013-2014 Accelerate Learning - All Rights Reserved
CHANGES FROM HEAT
Heating and Cooling Food Items
To help students learn more about how heating and cooling affects everyday materials, provide them with multiple hands-on experiences in the kitchen. Invite your child to spend some time helping you prepare food.
Pay special attention to items that melt such as ice, butter, and chocolate. Also make a point to highlight how foods change when they are put in the freezer by making ice cubes, ice pops, or freezing some leftovers. Baking is also a wonderful opportunity to notice how heating changes foods. In addition to pointing out foods that melt, such as cheese, point out other ways that heating changes food—for example, bread dough rises and becomes fi rmer, and meat changes color.
Here are some questions to discuss with students:
• What would happen to this food if we heated it in the oven?
• What would happen to this food if we cooled it in the freezer?
• How has this food (e.g., cake mix, cookie dough, bread dough, etc.) changed after baking it?
connecting with your child
10
STEM_1.5B_2.0_Explain_STEMscopedia_Eng.indd 10STEM_1.5B_2.0_Explain_STEMscopedia_Eng.indd 10 11/18/13 2:39 PM11/18/13 2:39 PM
Sample
© 2013-2014 Accelerate Learning - All Rights Reserved
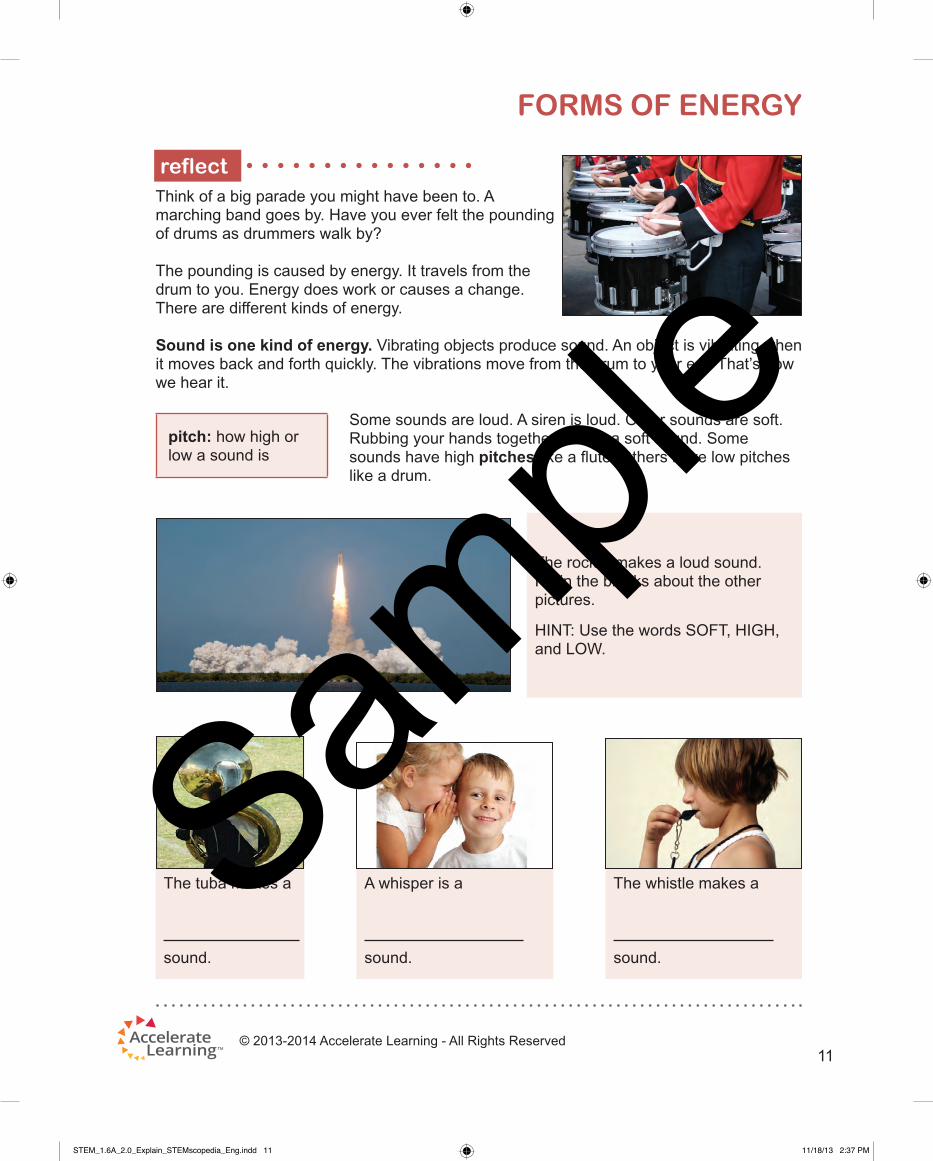
Think of a big parade you might have been to. A marching band goes by. Have you ever felt the pounding of drums as drummers walk by?
The pounding is caused by energy. It travels from the drum to you. Energy does work or causes a change. There are different kinds of energy.
Sound is one kind of energy. Vibrating objects produce sound. An object is vibrating when it moves back and forth quickly. The vibrations move from the drum to your ear. That’s how we hear it.
Some sounds are loud. A siren is loud. Other sounds are soft. Rubbing your hands together makes a soft sound. Some sounds have high pitches like a fl ute. Others have low pitches like a drum.
reflect
FORMS OF ENERGY
pitch: how high or low a sound is
The rocket makes a loud sound. Fill in the blanks about the other pictures.
HINT: Use the words SOFT, HIGH, and LOW.
The tuba makes a
sound.
A whisper is a
sound.
The whistle makes a
sound.
11
STEM_1.6A_2.0_Explain_STEMscopedia_Eng.indd 11STEM_1.6A_2.0_Explain_STEMscopedia_Eng.indd 11 11/18/13 2:37 PM11/18/13 2:37 PM
Sample

© 2013-2014 Accelerate Learning - All Rights Reserved
Light is also a kind of energy. Some light energy comes from the Sun. Light energy also comes from a lamp or a candle. You can see objects because this light energy bounces off the objects. Think of when it’s dark—can you see anything? No! This is because we need light energy to see.
Discover Science: Light Bulbs
You can fl ick a switch to turn on a light. This was not always true. People used candles a long time ago. They also used lamps that burned oil to make light.
In 1879, Thomas Edison invented the fi rst useful light bulb. Other people tried, but their light bulbs didn’t work as well. Edison’s light bulb gave off a lot of light. The light bulb changed people’s lives. Doing things at night or in dark places got much easier! Do you use light bulbs at home every day? Many people depend on this energy after dark to light their homes.
Heat is a form of energy. You can feel heat energy. It feels warm. The Sun produces heat energy. So does a fi re or a heater. We can measure heat with temperature. Thermometers help us measure temperature.
FORMS OF ENERGY
The Sun gives off light energy.
You see a fl ower when light bounces off it to your eye.
12
STEM_1.6A_2.0_Explain_STEMscopedia_Eng.indd 12STEM_1.6A_2.0_Explain_STEMscopedia_Eng.indd 12 11/18/13 2:37 PM11/18/13 2:37 PM
Sample

© 2013-2014 Accelerate Learning - All Rights Reserved
Everyday objects use energy. A television produces light energy on the screen. You can watch a movie. You can hear the movie because of sound energy. Televisions can get warm, too. They produce heat energy. Many objects like televisions produce more than one kind of energy.
FORMS OF ENERGY
Heat energy warms the air inside a hot air balloon. The balloon rises.
A telephone produces sound energy you can hear.
Thermometers measure temperature.
A lamp produces light energy you can see.
A stove produces heat energy that can cook food.
13
STEM_1.6A_2.0_Explain_STEMscopedia_Eng.indd 13STEM_1.6A_2.0_Explain_STEMscopedia_Eng.indd 13 11/18/13 2:37 PM11/18/13 2:37 PM
Sample

© 2013-2014 Accelerate Learning - All Rights Reserved
FORMS OF ENERGY
You depend on energy every day. Think about three objects in your home or school. Name one object that produces each kind of energy. Write the name in the chart on the next page. Draw a picture next to the name.
Sound Name of object: Picture of object:
Light Name of object: Picture of object:
Heat Name of object: Picture of object:
14
STEM_1.6A_2.0_Explain_STEMscopedia_Eng.indd 14STEM_1.6A_2.0_Explain_STEMscopedia_Eng.indd 14 11/18/13 2:37 PM11/18/13 2:37 PM
Sample
© 2013-2014 Accelerate Learning - All Rights Reserved
FORMS OF ENERGY
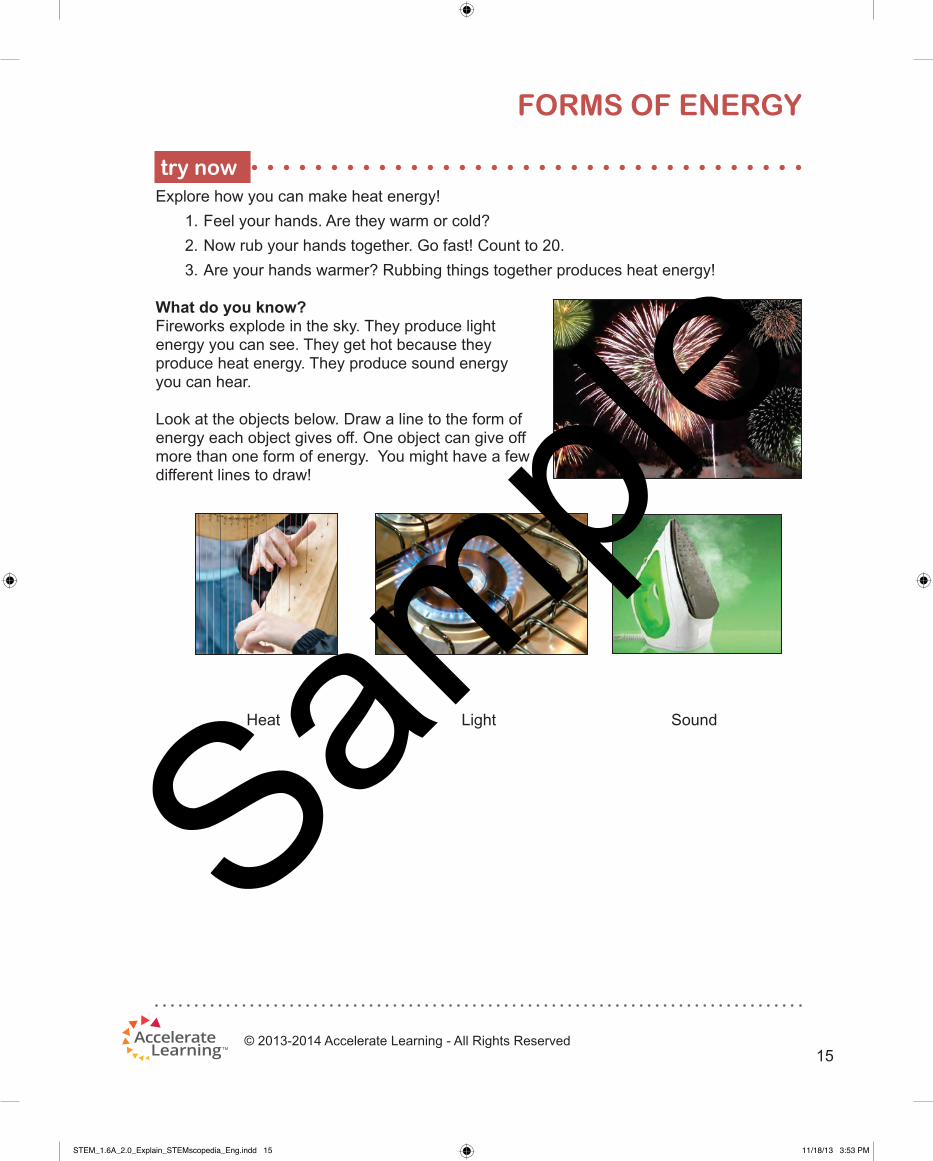
Explore how you can make heat energy!
1. Feel your hands. Are they warm or cold?
2. Now rub your hands together. Go fast! Count to 20.
3. Are your hands warmer? Rubbing things together produces heat energy!
What do you know?
Fireworks explode in the sky. They produce light energy you can see. They get hot because they produce heat energy. They produce sound energy you can hear.
Look at the objects below. Draw a line to the form of energy each object gives off. One object can give off more than one form of energy. You might have a few different lines to draw!
Heat Light Sound
try now
15
STEM_1.6A_2.0_Explain_STEMscopedia_Eng.indd 15STEM_1.6A_2.0_Explain_STEMscopedia_Eng.indd 15 11/18/13 3:53 PM11/18/13 3:53 PM
Sample

© 2013-2014 Accelerate Learning - All Rights Reserved
FORMS OF ENERGY
Energy Hunt
Work with your child to sketch a simple map of two or three rooms in your home. Then go on a scavenger hunt to identify useful objects in those rooms that produce energy. Beginning in the fi rst room, ask your child to name an object and identify the form(s) of energy it produces. For example, your child might name a hair dryer in the bathroom and state that it produces heat energy. Have your child draw the object in the correct location on the map. Help your child label the object on the map by writing the name of the object and the energy it produces. Now you can name an object and the form(s) of energy it produces. This time you draw and label the object on the map. Repeat the process until you have at least three objects in each room. Challenge your child to look for as many different kinds of objects as he or she can. You do the same.
If you fi nd the activity is completed very quickly, you can add rooms to your map to increase the variety of objects shown. For example, you will fi nd different objects in the kitchen than you will in the bedroom or bathroom. You can also increase the number of objects you look for in each room to provide a greater challenge. Another option is to make the activity into a contest to discover who can list the greatest number of objects in a given amount of time. At the end of the specifi ed time, you can compare your lists to determine which objects you both found and which objects differed between the two lists.
Limit your search to sound energy, light energy, and heat energy. Sound energy relates to any sounds you can hear. Light energy relates to any kind of light you can see. Heat energy relates to any warmth you can feel given off by an object. Caution students to be careful and not touch sources of heat such as a stove or an iron, as they can get burned. They can identify the energy in these objects through visual observation alone.
Here are some questions to discuss with your child:
1. Which kind of energy did you list most often? Why do you think this type of energy was most common?
2. How might your day be different without these objects? Choose one object as an example.
3. Which object on your list do you think is the most useful to you? Which is the least?
4. How do you think people accomplished the same tasks long ago before these objects were invented? Choose one object as an example.
connecting with your child
16
STEM_1.6A_2.0_Explain_STEMscopedia_Eng.indd 16STEM_1.6A_2.0_Explain_STEMscopedia_Eng.indd 16 11/18/13 2:37 PM11/18/13 2:37 PM
Sample

© 2013-2014 Accelerate Learning - All Rights Reserved
Look at this picture. The bug sticks to the refrigerator door. Why does the bug stick to the door? We know it’s not a real bug, so something else must be making the bug stick there.
Magnets stick to certain things. A magnet gives off a force you can’t see. The force pulls things made of iron to the magnet. The refrigerator door is made
of iron. The bug has a magnet attached to its bottom. The magnet in the bug sticks to the door.
Magnets stick to certain things only. Magnets stick to objects made of iron. Magnets also stick to objects made of steel. Steel and iron are both metals. But magnets do not stick to all metals. For example, magnets don’t stick to aluminum foil or copper pennies. Magnets also don’t stick to objects made of plastic or wood.
This picture shows another magnet. The paper clips stick to the magnet because they are made of steel.
On the next page are some pictures of other objects. Circle each object that would stick to a magnet.
reflect
look out!
MAGNETS
force: a push or a pull
Wooden Matchstick Iron Nail Plastic Blocks
17
STEM_1.6B_2.0_Explain_STEMscopedia_Eng.indd 17STEM_1.6B_2.0_Explain_STEMscopedia_Eng.indd 17 11/18/13 2:37 PM11/18/13 2:37 PM
Sample

© 2013-2014 Accelerate Learning - All Rights Reserved
Magnets can pull and push.
What happens when two magnets come near each other? Sometimes they pull together. Sometimes they push apart.
This picture shows many magnets. Do you see the letters “N” and “S”? The letter “N” means north pole. The letter “S” means south pole. A pole is an end. Every magnet has two poles.
MAGNETS
If the poles are different, the magnets pull together. A north pole pulls toward a south pole. A south pole pulls toward a north pole.
If the poles are the same, the magnets push apart. A north pole pushes away a north pole. A south pole pushes away a south pole.
18
STEM_1.6B_2.0_Explain_STEMscopedia_Eng.indd 18STEM_1.6B_2.0_Explain_STEMscopedia_Eng.indd 18 11/18/13 3:53 PM11/18/13 3:53 PM
Sample

© 2013-2014 Accelerate Learning - All Rights Reserved
Find two magnets. Slowly push one magnet toward the other magnet. Watch what happens. Now turn one of the magnets halfway around. Bring the magnets together again. Watch what happens. Could you make the magnets pull together and then push apart?
You can make predictions about magnets. You can predict whether a magnet will pull an object if you know what the object is made of. You can also use magnets to do work for you.Look at the toy train. Each car has a magnet at each end. The magnets hold the cars together. They stick because a north pole and a south pole are touching. The cars would not stay together if the same poles were touching.
How can you use magnets to have a race?
try now
what do you think?
MAGNETS
Will the magnet push or pull the car? Draw an arrow to show where the car will move.
Will the magnet push or pull the car? Draw an arrow to show where the car will move.
19
STEM_1.6B_2.0_Explain_STEMscopedia_Eng.indd 19STEM_1.6B_2.0_Explain_STEMscopedia_Eng.indd 19 11/18/13 2:37 PM11/18/13 2:37 PM
Sample

© 2013-2014 Accelerate Learning - All Rights Reserved
MAGNETS
Looking to the Future: Electricity from Wind
You may have seen windmills. Today people use windmills to make electricity. The wind spins the windmill. When the windmill spins, it causes magnets to move past wires. This helps to make electricity.
People think there may be other ways to get electricity from wind. For example, you could place little magnets on strips of plastic. When the strips move back and forth, you can make electricity.
What Do You Know?
Here are three pairs of magnets. Will they pull together or push apart?
• Write PULL between the magnets if you think they will pull together.
• Write PUSH between the magnets if you think they will push apart.
Spinning windmills make electricity.
20
STEM_1.6B_2.0_Explain_STEMscopedia_Eng.indd 20STEM_1.6B_2.0_Explain_STEMscopedia_Eng.indd 20 11/18/13 2:37 PM11/18/13 2:37 PM
Sample

© 2013-2014 Accelerate Learning - All Rights Reserved
MAGNETS
Magnetic Lines of Force
Your child has learned that magnetic force is invisible. This activity presents evidence that magnetic force exists, even though it is invisible. It will also show your child the patterns that force lines form around a permanent magnet.
When a magnetic object such as iron is placed in a magnetic fi eld, it takes on some of the properties of the magnet and becomes a temporary magnet. In this demonstration, you will allow small iron fi lings to become magnetized. These fi lings will then orient themselves along the magnetic force lines radiating from the permanent magnet. You will need these materials:
• A thin, ridged sheet of any material ex-cept iron or steel. The area of the sheet should be at least as large as a standard sheet of paper.
• Iron fi lings. These can be obtained from a metalworking shop or you can make them yourself. To make them, apply a rasp, fi le, or belt sander to any soft iron object, like a large nail.
• A permanent magnet. Any shape will work, but only a bar magnet will produce the patterns in the photograph above.
Spread the fi lings evenly over the surface of the sheet. Hold the sheet at waist level while the student slowly raises the magnet up to the center of the underside of the sheet. Observe and discuss the pattern of magnetic lines of force produced. Explain that the poles of the magnet are the centers from which the lines radiate. You can spread out the fi lings and do it again to observe similar patterns.
Here are some questions to discuss with your student:
1. How did the magnet change the iron fi lings?
2. How would another permanent magnet arrange itself if you laid it on top of the sheet?
3. Could you use aluminum fi lings or wood shavings for this experiment? Why or why not?
connecting with your child
Iron fi lings line up with magnetic lines of force.
21
STEM_1.6B_2.0_Explain_STEMscopedia_Eng.indd 21STEM_1.6B_2.0_Explain_STEMscopedia_Eng.indd 21 11/18/13 2:37 PM11/18/13 2:37 PM
Sample

STEM_1.6B_2.0_Explain_STEMscopedia_Eng.indd 22STEM_1.6B_2.0_Explain_STEMscopedia_Eng.indd 22 11/18/13 2:44 PM11/18/13 2:44 PM
Sample

© 2013-2014 Accelerate Learning - All Rights Reserved
How did you get to school today? Did you walk? Did you come in a car? Did you see other cars? How did the cars move? In straight lines? In zigzags? In circles?
How do you move down the hall at school? Do you move back and forth? Do you move in only one direction?
Things move in different ways. Some things move closer to us. Some things move away from us. Some things move past us.
reflect
PATTERNS OF MOVEMENT
The birds are moving past you. Fill in the blanks about the other pictures.
HINT: Use words like AWAY FROM, CLOSER TO, or PAST to help you.
The people are moving
you.
The ball is moving
you.
The horses are moving
you.
23
STEM_1.6CD_2.0_Explain_STEMscopedia_Eng.indd 23STEM_1.6CD_2.0_Explain_STEMscopedia_Eng.indd 23 11/18/13 2:37 PM11/18/13 2:37 PM
Sample

© 2013-2014 Accelerate Learning - All Rights Reserved
Moving things follow different paths. Some things move in a straight line. Other things move in circles.
PATTERNS OF MOVEMENT
When she lets go, the arrow goes in a straight line.
The tennis ball moves back and forth.
The girl moves up and down.
A turtle moves slowly.
The horses on the merry-go-round travel in a circle.
The car zigzags.
A rabbit moves quickly.
Things also move at different speeds. Some things move quickly. Other things move slowly.
Some things move up and down. Other things move back and forth. Some things zigzag.
24
STEM_1.6CD_2.0_Explain_STEMscopedia_Eng.indd 24STEM_1.6CD_2.0_Explain_STEMscopedia_Eng.indd 24 11/18/13 2:37 PM11/18/13 2:37 PM
Sample

© 2013-2014 Accelerate Learning - All Rights Reserved
You are watching things move. You want to tell someone what you see. How can you do that? One way is to draw arrows.
Draw an X on a piece of paper. This is your starting point. Draw arrows to show your path.
1. Move in a straight line toward the top of the paper.
2. Turn to the right.
3. Zigzag four times.
4. Move in a complete circle.
5. Move in a straight line back to the X.
Career Corner: Toy Car Designer
Some toy cars have a remote control. You can make the car go forward or backward. You can also make the car go in circles or zigzag.
Some people make toy cars. Imagine you had a job making toy cars. How would your toy cars move? Write your answer on the lines below.
PATTERNS OF MOVEMENT
remote control: a tool that lets you move something without touching it
The animals that made these tracks moved in different directions.
25
STEM_1.6CD_2.0_Explain_STEMscopedia_Eng.indd 25STEM_1.6CD_2.0_Explain_STEMscopedia_Eng.indd 25 11/18/13 3:53 PM11/18/13 3:53 PM
Sample

© 2013-2014 Accelerate Learning - All Rights Reserved
PATTERNS OF MOVEMENT
What do you know?
The boy blows a pinwheel. The pinwheel moves in a circle. The red arrow shows how the pinwheel moves.
Draw arrows to show how each person moves.
The man hikes. The girl swings.
26
STEM_1.6CD_2.0_Explain_STEMscopedia_Eng.indd 26STEM_1.6CD_2.0_Explain_STEMscopedia_Eng.indd 26 11/18/13 3:53 PM11/18/13 3:53 PM
Sample

© 2013-2014 Accelerate Learning - All Rights Reserved
PATTERNS OF MOVEMENT
Directions on a Map
Find a road map of the area where you and your child live. The map should be fairly detailed and complicated enough that alternate routes for getting from one point to another present themselves. One-way streets, freeways, and interchanges are good features. The map may be of city, suburbs, or country, as long as your child is familiar with some landmarks that you will point out.
Show your child two points on the map, and ask your child to draw a line that represents the best route from the fi rst point to the second point. Try to fi nd points that are relevant to your child’s everyday life, like home and school. After picking a route, your child should describe the type of motion, including any changes in speed, along the route. Compare alternate routes. Progress from simple routes to more complicated ones.
Here are some questions to discuss with your child:
1. Which parts of the map are places where cars travel fast?
2. What kind of motion lets you travel the shortest distance between two places?
3. Where on the map do you travel in a zigzag path?
connecting with your child
27
STEM_1.6CD_2.0_Explain_STEMscopedia_Eng.indd 27STEM_1.6CD_2.0_Explain_STEMscopedia_Eng.indd 27 11/18/13 2:37 PM11/18/13 2:37 PM
Sample

STEM_1.6CD_2.0_Explain_STEMscopedia_Eng.indd 28STEM_1.6CD_2.0_Explain_STEMscopedia_Eng.indd 28 11/18/13 2:44 PM11/18/13 2:44 PM
Sample
© 2013-2014 Accelerate Learning - All Rights Reserved
Have you ever splashed in some mud after it rains? You might have even made mud by mixing dirt and water. Did you know some people make their homes out of mud? Other people make homes out of rock.
Plants like to live in rocks and dirt and water, too. The dirt that plants live in is called soil.
Rocks, soil, and water are important resources. A resource is something that we use. Can you think of where you might have seen rocks, soil, and water? Do you think we can use these resources? You bet! Let’s fi gure out how we can use rocks, soil, and water.
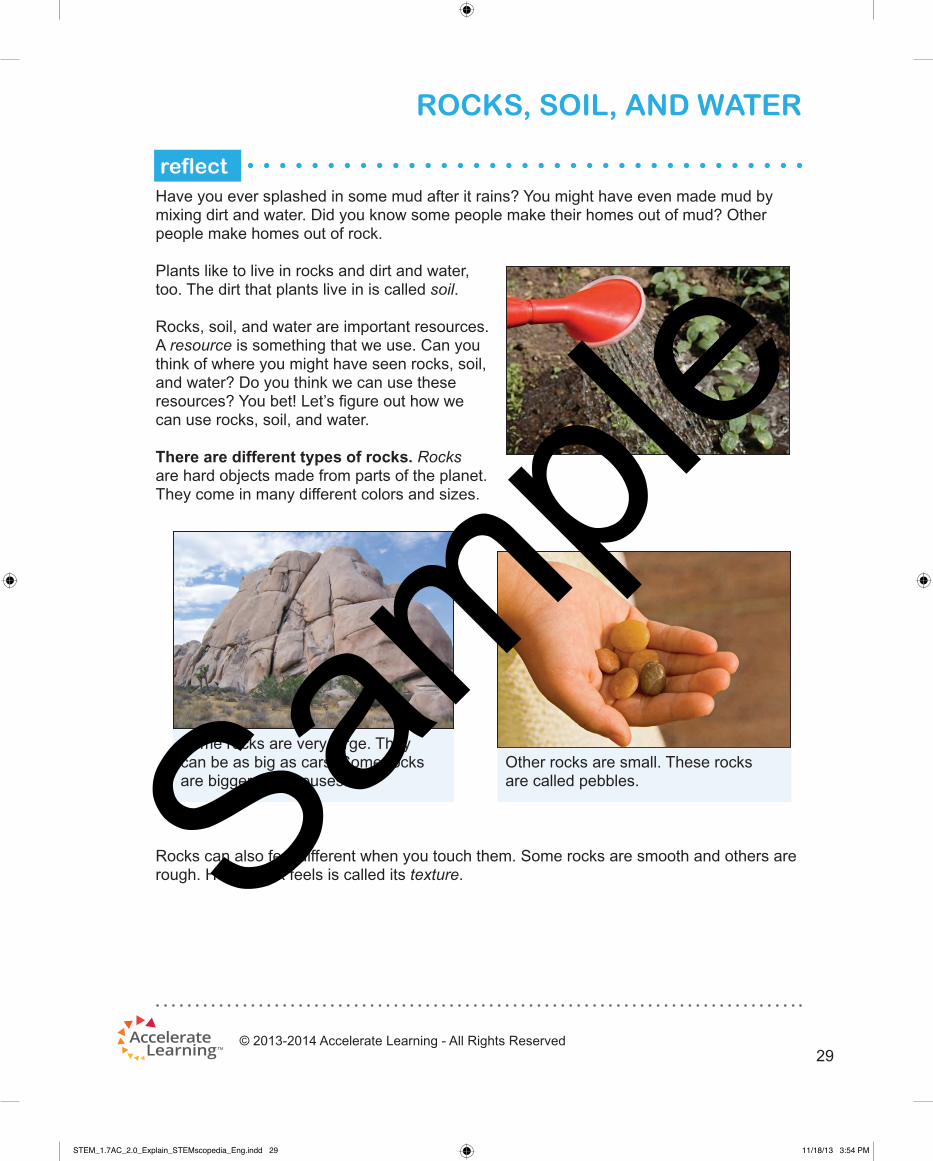
There are different types of rocks. Rocks are hard objects made from parts of the planet. They come in many different colors and sizes.
Rocks can also feel different when you touch them. Some rocks are smooth and others are rough. How a rock feels is called its texture.
reflect
ROCKS, SOIL, AND WATER
Some rocks are very large. They can be as big as cars. Some rocks are bigger than houses!
Other rocks are small. These rocks are called pebbles.
29
STEM_1.7AC_2.0_Explain_STEMscopedia_Eng.indd 29STEM_1.7AC_2.0_Explain_STEMscopedia_Eng.indd 29 11/18/13 3:54 PM11/18/13 3:54 PM
Sample

© 2013-2014 Accelerate Learning - All Rights Reserved
ROCKS, SOIL, AND WATER
Soil can also be sorted by color, texture, and size. Soil covers the land on Earth. It is made of many different things. Soil can be smooth or rough. It can be made of large bits or small bits.
Let’s look at some different types of soil.
• Sandy soil is made of sand. Water can pass easily through this type of soil.
Sandy soil does not have many living things in it. What texture do you think this soil has?
The texture of this rock is
.
The texture of this rock is
.
The texture of this rock is
.
This rock is colorful and shiny. It has a smooth texture.
How would you describe the textures of the rocks below? Use the words ROUGH, SMOOTH, and SHARP.
30
STEM_1.7AC_2.0_Explain_STEMscopedia_Eng.indd 30STEM_1.7AC_2.0_Explain_STEMscopedia_Eng.indd 30 11/18/13 2:37 PM11/18/13 2:37 PM
Sample

© 2013-2014 Accelerate Learning - All Rights Reserved
ROCKS, SOIL, AND WATER
See what kind of soil there is where you live.
1. Go outside and fi nd a spot of soil.
2. Look at the soil up close. Use a hand lens if you need it.
3. Look at the color of the soil. What color is it?
4. Feel the soil in your hand. What is its texture?
5. Look at one single grain. How big is it?
6. What kind of soil do you think you found?
try now
hand lens: a tool with a piece of glass that makes things look bigger than they are
Topsoil has many good things in it for plants and animals. These good things are called nutrients.
Clay soils come in many colors. The color of this soil is
________________________________.
• Clay soil is very smooth. The bits in clay soil are small. Water does not pass easily through clay.
• Topsoil has big and small bits mixed together. It feels soft and squishy. It is also good at holding water. Lots of plants can grow in topsoil. Many creatures live in topsoil, too.
31
STEM_1.7AC_2.0_Explain_STEMscopedia_Eng.indd 31STEM_1.7AC_2.0_Explain_STEMscopedia_Eng.indd 31 11/18/13 2:37 PM11/18/13 2:37 PM
Sample

© 2013-2014 Accelerate Learning - All Rights Reserved
Everyday Life: Rocks, soil, and water are very useful.
People have used rocks, soil, and water for thousands of years. We still use them today. Many houses and buildings are made from rocks. Tools, jewelry, and even baby powder are made from rocks, too. People mix clay soil with water. Then they bake it in sunlight or in an oven. The clay soil gets hard. People use it to make pots, statues, and other things.
Remember that topsoil has many nutrients. People use topsoil to grow fruits, vegetables, and fl owers. People also use topsoil to pot plants for their homes.
ROCKS, SOIL, AND WATER
These pots are made from clay soil. The soil was mixed with water and baked.
Topsoil helps plants grow indoors as well as outdoors.
This building is made from rocks.
32
STEM_1.7AC_2.0_Explain_STEMscopedia_Eng.indd 32STEM_1.7AC_2.0_Explain_STEMscopedia_Eng.indd 32 11/18/13 2:37 PM11/18/13 2:37 PM
Sample

© 2013-2014 Accelerate Learning - All Rights Reserved
Water is also very important to people. We must have water to drink and bathe. We also use water for fun. You might go swimming or boating in water. Water can also help make electricity that we use in our homes.
ROCKS, SOIL, AND WATER
People could not live without water.
Water helps to make electricity at this dam.
33
STEM_1.7AC_2.0_Explain_STEMscopedia_Eng.indd 33STEM_1.7AC_2.0_Explain_STEMscopedia_Eng.indd 33 11/18/13 2:37 PM11/18/13 2:37 PM
Sample

© 2013-2014 Accelerate Learning - All Rights Reserved
ROCKS, SOIL, AND WATER
What Do You Know?
The pictures on the next page show different uses of soil, rocks, and water. For example, we use soil to grow plants. The line connects the picture of the plants to the word “soil.”
How else do we use soil? How do we use rocks and water? Draw lines from each picture to the resource used.
Rocks Water
Fishermen catch fi sh on the ocean.
People make arrowheads for hunting.
Plants grow on a farm.
People build statues of animals.
Soil
34
STEM_1.7AC_2.0_Explain_STEMscopedia_Eng.indd 34STEM_1.7AC_2.0_Explain_STEMscopedia_Eng.indd 34 11/18/13 3:54 PM11/18/13 3:54 PM
Sample
© 2013-2014 Accelerate Learning - All Rights Reserved
ROCKS, SOIL, AND WATER
Rocks, Soil, and Water Around the Home
Make a list of four rooms in your home; include the yard as well. Visit each of the places on the list with your child. In each room help your child to determine how you use rocks, soil, or water in that room. For example, in the family room a fi replace may be made out of rock, a potted plant may be using soil to grow, and someone may be drinking a glass of water while watching television. Encourage your child to look and feel the objects in the room to help determine if they are made out of these materials. Rock and water may be easier for your child to discover in most rooms. You may need to help your child fi nd clay soil objects that have been baked into pottery. Clay pots, china dishes, tiles, and porcelain toilets are all made from clay soil. Another example of soil used in the home is soap scrubs, which include sand particles for exfoliation.
For an added activity, have your child take pictures with a digital camera of each of the objects he or she fi nds around the house. Afterward, print out the pictures so that your child can use them to make a collage of ways that rocks, soil, and water are used in everyday life.
Here are some questions to discuss with your child:
1. How can you tell the different types of soil apart?
2. Why are soil and water important to living things?
3. What makes rock a useful resource for people?
connecting with your child
35
STEM_1.7AC_2.0_Explain_STEMscopedia_Eng.indd 35STEM_1.7AC_2.0_Explain_STEMscopedia_Eng.indd 35 11/18/13 2:37 PM11/18/13 2:37 PM
Sample

STEM_1.7AC_2.0_Explain_STEMscopedia_Eng.indd 36STEM_1.7AC_2.0_Explain_STEMscopedia_Eng.indd 36 11/18/13 2:45 PM11/18/13 2:45 PM
Sample

© 2013-2014 Accelerate Learning - All Rights Reserved
You just played outside all afternoon. You’re hot and tired. You’re thirsty, too. You really want a drink. Where do you fi nd water? Maybe you go to a water fountain. Maybe you go to your kitchen sink.
People use water every day. We drink water. We use water to stay clean. But where does water come from? How can we describe, or talk about, different types of water?
We fi nd water in nature. Let’s visit some natural sources of water.
reflect
BODIES OF WATER
This is a lake. Unlike an ocean, it has land all around it.
Can you see land on the other side of this ocean?
First, we’ll visit an ocean. An ocean is a large body of salt water. If you have ever been to a beach you likely saw an ocean. Oceans are very large. Most of Earth’s water is in oceans.
Next, we’ll visit a lake. A lake is much smaller than an ocean. A lake has land all around it. At many lakes, you can see land on the other side. That’s not true of an ocean!
37
STEM_1.7B_2.0_Explain_STEMscopedia_Eng.indd 37STEM_1.7B_2.0_Explain_STEMscopedia_Eng.indd 37 11/18/13 3:54 PM11/18/13 3:54 PM
Sample

© 2013-2014 Accelerate Learning - All Rights Reserved
Where do oceans and lakes get water? From rivers and streams. A river is a body of fresh water. It fl ows along land into a lake or an ocean. When you cross a long bridge, look down! You may see a river. That river takes water to a lake or an ocean.
A stream is also a body of fresh water. But a stream is smaller than a river. Streams carry water into rivers. Next time you are hiking, listen for moving water. You may fi nd a stream!
BODIES OF WATER
This picture shows Earth from space. The blue part is water. Look at all the blue at the bottom of the picture. Is this an ocean, a lake, a river, or a stream? Write your answer below:
what do you think?
This river fl ows through a city.This stream fl ows through the woods.
38
STEM_1.7B_2.0_Explain_STEMscopedia_Eng.indd 38STEM_1.7B_2.0_Explain_STEMscopedia_Eng.indd 38 11/18/13 2:37 PM11/18/13 2:37 PM
Sample
© 2013-2014 Accelerate Learning - All Rights Reserved
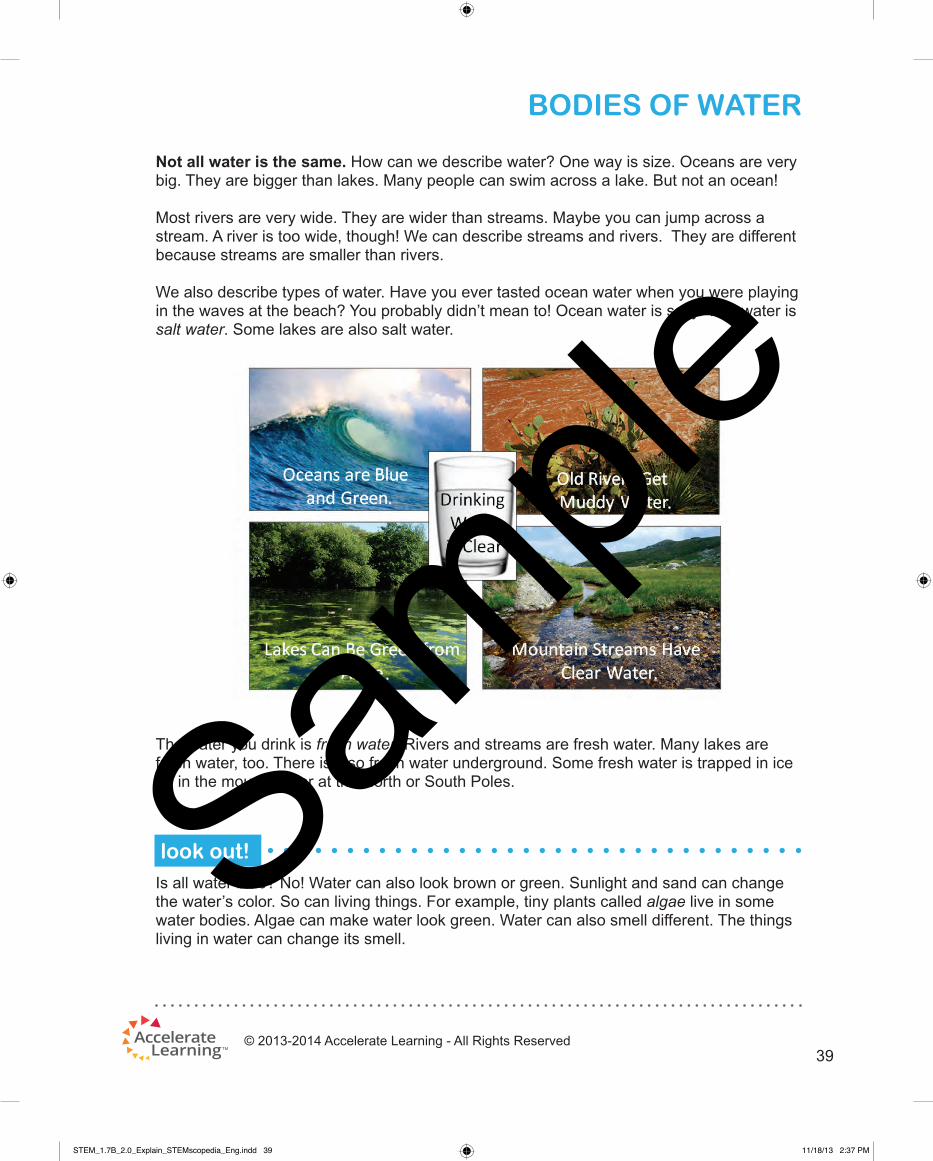
Not all water is the same. How can we describe water? One way is size. Oceans are very big. They are bigger than lakes. Many people can swim across a lake. But not an ocean!
Most rivers are very wide. They are wider than streams. Maybe you can jump across a stream. A river is too wide, though! We can describe streams and rivers. They are different because streams are smaller than rivers.
We also describe types of water. Have you ever tasted ocean water when you were playing in the waves at the beach? You probably didn’t mean to! Ocean water is salty. This water is salt water. Some lakes are also salt water.
The water you drink is fresh water. Rivers and streams are fresh water. Many lakes are fresh water, too. There is also fresh water underground. Some fresh water is trapped in ice up in the mountains or at the North or South Poles.
Is all water blue? No! Water can also look brown or green. Sunlight and sand can change the water’s color. So can living things. For example, tiny plants called algae live in some water bodies. Algae can make water look green. Water can also smell different. The things living in water can change its smell.
look out!
BODIES OF WATER
39
STEM_1.7B_2.0_Explain_STEMscopedia_Eng.indd 39STEM_1.7B_2.0_Explain_STEMscopedia_Eng.indd 39 11/18/13 2:37 PM11/18/13 2:37 PM
Sample

© 2013-2014 Accelerate Learning - All Rights Reserved
BODIES OF WATER
We can describe how water moves. In oceans, water moves in waves. The water moves up and down and also back and forth. Some lakes have waves, too. But lake waves are much smaller than ocean waves. Sometimes lakes are very still.
In rivers and streams, water fl ows downhill. It moves in one direction. It does not move in waves like in oceans.
Discover Science: The Rio Grande River
The water in Texas comes from many sources. One source is the Rio Grande River. But how did such a big river form? Did streams have anything to do with how this river formed?
Think of a dinner roll. What if you slowly pulled the roll apart? The crust would crack. That’s kind of what happens with the surface of Earth. The Rio Grande moves through a crack like that.
Water runs down from mountains into the crack that forms the Rio Grande. This is because the big crack is the lowest point. The water then fl ows all the way to the Gulf of Mexico! Water fl ows downhill until it ends up in the ocean.
An ocean wave carries this surfer up in the air.
Where does the Rio Grande begin? Where does the Rio Grande end? Use arrows to draw the direction the river fl ows on the map. (Hint: The Gulf of Mexico is part of the Atlantic Ocean.)
40
STEM_1.7B_2.0_Explain_STEMscopedia_Eng.indd 40STEM_1.7B_2.0_Explain_STEMscopedia_Eng.indd 40 11/18/13 2:37 PM11/18/13 2:37 PM
Sample

© 2013-2014 Accelerate Learning - All Rights Reserved
BODIES OF WATER
What do you know?
Look at the pictures on this page. Label each picture as an ocean, a lake, a river, or a stream. Then, look at the words in the box below. Match each set of words with the correct picture.
Words to Describe Water SourcesA:
• Big waves
• Beaches around it
• Very large
• Salt water
C:
• Small
• Flows to a river
• Fresh water
B:
• Can have small waves
• Land all around it
• Usually fresh water
D:
• Flows into a lake or ocean
• Fresh water
• Wide body of water
41
STEM_1.7B_2.0_Explain_STEMscopedia_Eng.indd 41STEM_1.7B_2.0_Explain_STEMscopedia_Eng.indd 41 11/18/13 2:37 PM11/18/13 2:37 PM
Sample

© 2013-2014 Accelerate Learning - All Rights Reserved
BODIES OF WATER
Bodies of Water Close to Home
To help your child learn more about bodies of water, visit a nearby stream, river, lake, or ocean. If possible, visit several different natural water sources. Have your child observe each body of water, decide what type of water source it is, and explain the reasoning behind this decision.
Next, have your child describe in a journal characteristics of each body of water that you visited. (Students have learned to describe bodies of water by size, type of water, movement, color, and smell.) If you know the water is clean, allow your child to touch and smell the water and to add those observations to their descriptions. Do not allow your child to taste the water. If you were able to visit several water sources, encourage your child to compare and contrast them in terms of size and appearance. (For example: What color is the water? How is the water moving?)
Here are some additional questions to discuss with your child:
• How does the type of water in this water source (e.g., fresh or salty, wavy or still) affect how people use it?
• How are rivers different from streams and lakes different from oceans?
• What water sources have fresh water, and why is this important for humans?
connecting with your child
42
STEM_1.7B_2.0_Explain_STEMscopedia_Eng.indd 42STEM_1.7B_2.0_Explain_STEMscopedia_Eng.indd 42 11/18/13 2:37 PM11/18/13 2:37 PM
Sample

© 2013-2014 Accelerate Learning - All Rights Reserved
What did the air outside feel like on your way to school today? Did you wear a coat because it was cold? Did you wear shorts because it was warm? Did you need an umbrella because it was raining?
You may not realize it, but you are describing the weather. Weather is what the air outside is like at a certain time. Do you remember what the weather was like yesterday?
We can learn about weather by observing. We observe using our senses. We can see if it is sunny or if there are clouds in the sky. We can feel if it is hot or cold. We can hear if wind is blowing or if rain is falling.
reflect
WEATHER AND AIR
The way the fl owers are moving shows us it is windy. Fill in the blanks about the other pictures.
HINT: Use the words CLOUDY, RAINY, or CLEAR.
The weather is
.
The weather is
.
The weather is
.
43
STEM_1.8AD_2.0_Explain_STEMscopedia_Eng.indd 43STEM_1.8AD_2.0_Explain_STEMscopedia_Eng.indd 43 11/18/13 2:37 PM11/18/13 2:37 PM
Sample

© 2013-2014 Accelerate Learning - All Rights Reserved
The wind is made of air. Wind is moving air. Sometimes air moves at a high speed, and sometimes it moves at a low speed. Air is always around us. It is always changing and moving. When air is moving slowly, we say the weather is calm. When air is moving quickly, we say the weather is windy.
Read on to learn how we can observe the wind.
Getting Technical: Windsock
A windsock is a cloth tube. It is attached to a pole. When the wind is blowing, it stretches out the windsock.
We can use a windsock to fi gure out which way the wind is blowing. We call this the wind direction. The direction of the wind is opposite the direction the windsock is pointing. If the windsock is pointing south, the wind is blowing from the north. If the windsock is pointing east, the wind is blowing from the west.
Windsocks are used at airports. Where else is it important to know wind direction?
WEATHER AND AIR
air: the gases that surround Earth
Even on a calm day, wind can carry light objects. A windy day is a good time to fl y a kite.
44
STEM_1.8AD_2.0_Explain_STEMscopedia_Eng.indd 44STEM_1.8AD_2.0_Explain_STEMscopedia_Eng.indd 44 11/18/13 2:37 PM11/18/13 2:37 PM
Sample
© 2013-2014 Accelerate Learning - All Rights Reserved
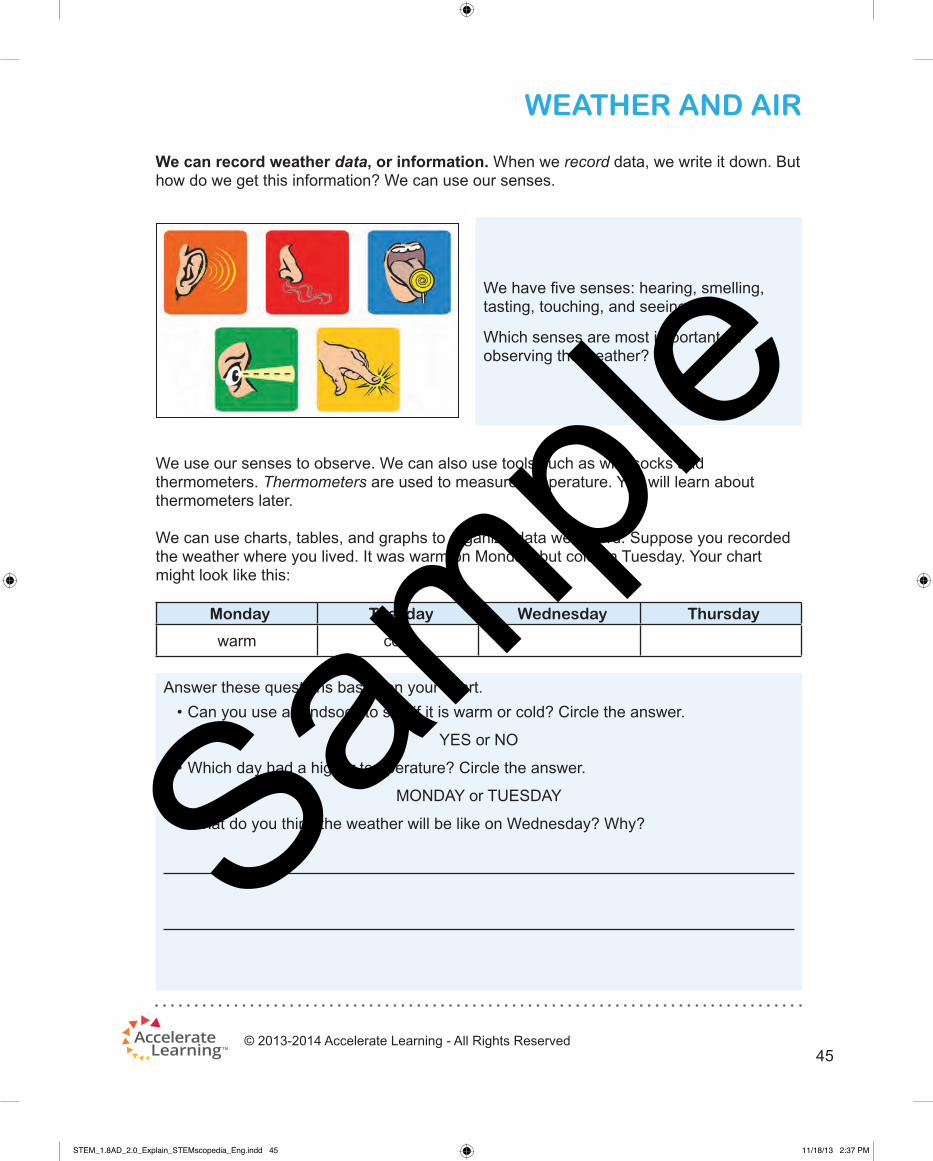
We can record weather data, or information. When we record data, we write it down. But how do we get this information? We can use our senses.
We use our senses to observe. We can also use tools such as windsocks and thermometers. Thermometers are used to measure temperature. You will learn about thermometers later.
We can use charts, tables, and graphs to organize data we record. Suppose you recorded the weather where you lived. It was warm on Monday, but cold on Tuesday. Your chart might look like this:
Monday Tuesday Wednesday Thursday
warm cold
WEATHER AND AIR
Answer these questions based on your chart.
• Can you use a windsock to see if it is warm or cold? Circle the answer.
YES or NO
• Which day had a higher temperature? Circle the answer.
MONDAY or TUESDAY
• What do you think the weather will be like on Wednesday? Why?
We have fi ve senses: hearing, smelling, tasting, touching, and seeing.
Which senses are most important for observing the weather?
45
STEM_1.8AD_2.0_Explain_STEMscopedia_Eng.indd 45STEM_1.8AD_2.0_Explain_STEMscopedia_Eng.indd 45 11/18/13 2:37 PM11/18/13 2:37 PM
Sample

© 2013-2014 Accelerate Learning - All Rights Reserved
WEATHER AND AIR
What Do You Know?
A thermometer is fi lled with a liquid. When the weather gets hotter, the liquid goes up. When the weather gets colder, the liquid goes down. The number next to the top of the liquid is the temperature.
You can measure temperature in degrees Fahrenheit (°F).
Which thermometer shows a warmer temperature? Circle it.
Put an “X” on the thermometer that shows a colder temperature.
This thermometer shows a temperature of about 72 degrees Fahrenheit.
Now look at the two thermometers below.
46
STEM_1.8AD_2.0_Explain_STEMscopedia_Eng.indd 46STEM_1.8AD_2.0_Explain_STEMscopedia_Eng.indd 46 11/18/13 2:37 PM11/18/13 2:37 PM
Sample
© 2013-2014 Accelerate Learning - All Rights Reserved
WEATHER AND AIR
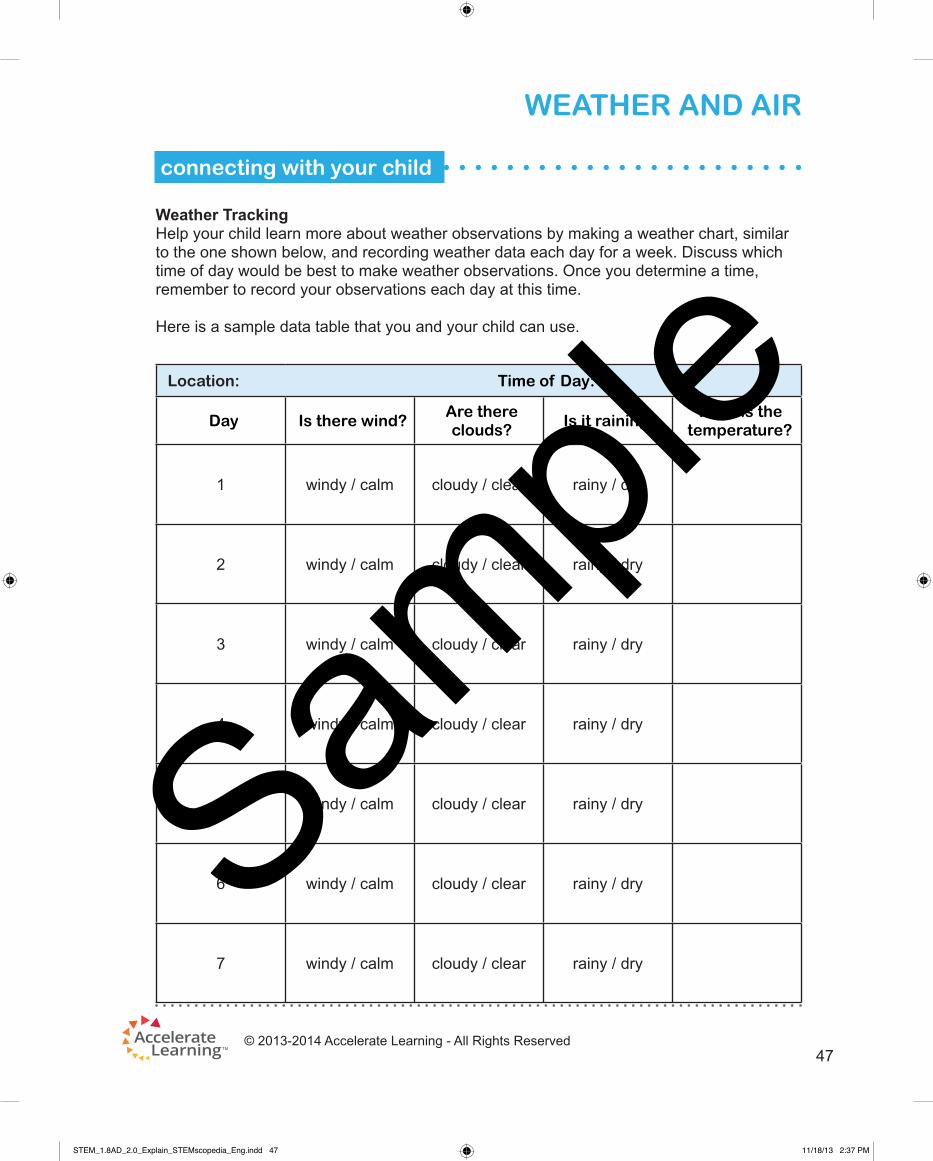
Weather Tracking
Help your child learn more about weather observations by making a weather chart, similar to the one shown below, and recording weather data each day for a week. Discuss which time of day would be best to make weather observations. Once you determine a time, remember to record your observations each day at this time.
Here is a sample data table that you and your child can use.
Location: Time of Day:
Day Is there wind?Are there clouds?
Is it raining?What is the
temperature?
1 windy / calm cloudy / clear rainy / dry
2 windy / calm cloudy / clear rainy / dry
3 windy / calm cloudy / clear rainy / dry
4 windy / calm cloudy / clear rainy / dry
5 windy / calm cloudy / clear rainy / dry
6 windy / calm cloudy / clear rainy / dry
7 windy / calm cloudy / clear rainy / dry
connecting with your child
47
STEM_1.8AD_2.0_Explain_STEMscopedia_Eng.indd 47STEM_1.8AD_2.0_Explain_STEMscopedia_Eng.indd 47 11/18/13 2:37 PM11/18/13 2:37 PM
Sample

© 2013-2014 Accelerate Learning - All Rights Reserved
Each day, encourage your child to make observations and to circle the term that best matches each observation. Use an outdoor thermometer to record the temperature. If you do not have a thermometer, your child may record “hot” or “cold” rather than the temperature. (Technically, the air feels hot or cold. Temperatures are measurements—they may be high or low but not hot or cold.) Another option for obtaining the temperature is to watch the weather report on a local news channel. Point out when the weather forecaster provides the day’s high and low temperatures. Make sure your child consistently records one or the other, or both.
Here are some questions to discuss with your child:
1. How can you collect weather data?
2. Other than your own observations, how else might you get information about the weather?
3. Is the weather the same all day long or does it change through the day?
WEATHER AND AIR
48
STEM_1.8AD_2.0_Explain_STEMscopedia_Eng.indd 48STEM_1.8AD_2.0_Explain_STEMscopedia_Eng.indd 48 11/18/13 2:37 PM11/18/13 2:37 PM
Sample

© 2013-2014 Accelerate Learning - All Rights Reserved
What do you see when you look up at the sky? If it is day, you see the Sun. If it is night, you see stars and the Moon. You might also see the Moon during the day. You can see clouds during the day or at night.
Why do we see some objects in the sky during the day? Why do we see other objects in the sky at night?
The Sun is a star. It looks like a big ball of fi re because it is close to Earth. The Sun lights Earth during the day. The Sun also gives us heat.
Other stars also shine during the day. But we cannot see them from Earth. The Sun is too bright.
Sometimes we cannot see any stars. Why? Something else makes too much light. City lights can block the stars. But they are still there! Objects can also block starlight. Clouds can keep us from seeing the stars.
reflect
look out!
OBJECTS IN THE SKY
During the day we see the Sun. Do not look directly at the Sun. It is so close it could hurt your eyes.
From Earth, stars look like tiny dots of light.
49
STEM_1.8B_Explain_STEMscopedia_Eng.indd 49STEM_1.8B_Explain_STEMscopedia_Eng.indd 49 11/18/13 3:54 PM11/18/13 3:54 PM
Sample
© 2013-2014 Accelerate Learning - All Rights Reserved
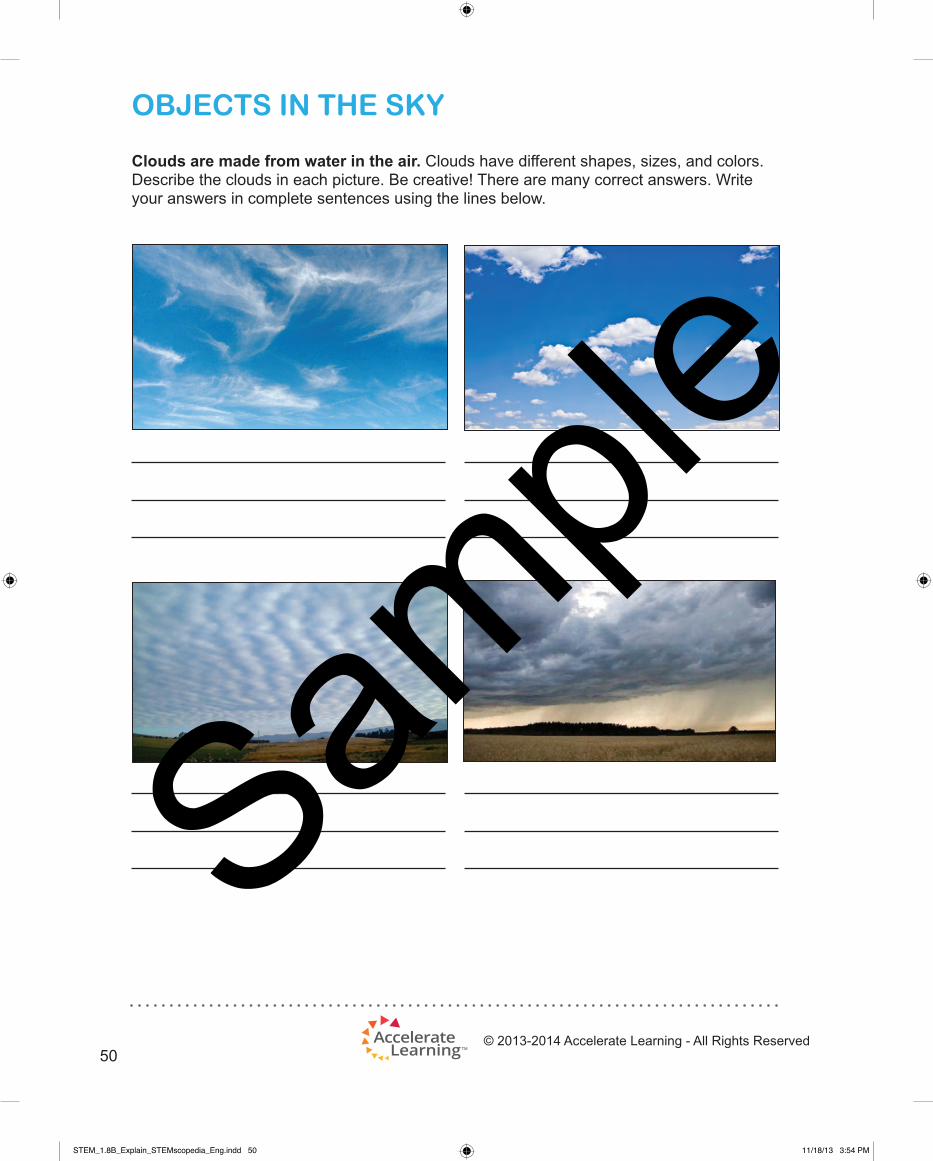
Clouds are made from water in the air. Clouds have different shapes, sizes, and colors. Describe the clouds in each picture. Be creative! There are many correct answers. Write your answers in complete sentences using the lines below.
OBJECTS IN THE SKY
50
STEM_1.8B_Explain_STEMscopedia_Eng.indd 50STEM_1.8B_Explain_STEMscopedia_Eng.indd 50 11/18/13 3:54 PM11/18/13 3:54 PM
Sample

© 2013-2014 Accelerate Learning - All Rights Reserved
Here is a fun way to study clouds. Lie on your back outside. Watch the clouds in the sky. Pick one cloud. Look at its color, shape, and size. Count to ten as you watch it.
Did the cloud move across the sky? Was it fast or slow? Did it join other clouds? Did it get bigger or smaller? Did it change its shape? Did it change its color?
Objects in the sky move over time. The wind blows clouds across the sky. The Sun seems to move across the sky during the day. It rises in the morning and sets at night. Stars move across the sky at night. The Moon also rises and sets. How else does the Moon change?
The Moon is a giant rock. It cannot create light. So where does the Moon get its light? The Sun lights up the Moon!
The Moon moves around Earth. As it moves, we see different amounts of lighted Moon.
When the unlighted part of the Moon faces Earth, we call this a new moon.
try now
OBJECTS IN THE SKY
The Sun sets.
Sometimes we see only a small part of the lighted Moon, like in this crescent moon.
The Moon rises.
When we see all of the lighted part of the Moon, we call this a full moon.
51
STEM_1.8B_Explain_STEMscopedia_Eng.indd 51STEM_1.8B_Explain_STEMscopedia_Eng.indd 51 11/18/13 2:37 PM11/18/13 2:37 PM
Sample

© 2013-2014 Accelerate Learning - All Rights Reserved
OBJECTS IN THE SKY
Discover Science: Patterns in the Sky
The Moon seems to change shape through the month. The different shapes are called phases. The moons phases follow a pattern.
Sometimes the Moon seems to be big and round. We call this phase the full moon. Over time the Moon seems to grow smaller and smaller until it seems to disappear. Then is seems to grow big again. This pattern takes about one month.
The Sun also follows a pattern. The Sun is low in the sky when it rises each morning. It moves directly overhead at noon. In the afternoon, the Sun looks like it moves down toward Earth. When the Sun sets, it is nighttime.
When the Sun shines on objects, it creates shadows. When the Sun is low in the sky, shadows are long. When the Sun is high in the sky, shadows are short. We can use shadows to tell time.
A sundial uses shadows to show the time of day. According to this sundial, it is 3 o’clock in the afternoon.
Where will the shadow point when it is 11 o’clock in the morning?
Where will the shadow point when it is 6 o’clock at night?
Draw your answers on the sundial.
The shape of the Moon seems to change over time. The Moon takes one month to go through all its phases.
52
STEM_1.8B_Explain_STEMscopedia_Eng.indd 52STEM_1.8B_Explain_STEMscopedia_Eng.indd 52 11/18/13 2:37 PM11/18/13 2:37 PM
Sample

© 2013-2014 Accelerate Learning - All Rights Reserved
OBJECTS IN THE SKY
What do you know?
Look at each picture. Circle YES or NO to answer each question.
Look at the Moon. Is it a new Moon?
YES / NO
Look at the shadow the umbrella makes.Is it early in the morning?
YES / NO
Are there clouds in the sky?
YES / NO
53
STEM_1.8B_Explain_STEMscopedia_Eng.indd 53STEM_1.8B_Explain_STEMscopedia_Eng.indd 53 11/18/13 3:54 PM11/18/13 3:54 PM
Sample

© 2013-2014 Accelerate Learning - All Rights Reserved
OBJECTS IN THE SKY
Stargazing with Your Child
Children always learn better if they can watch a phenomenon instead of just reading about it. You can give your child a memorable stargazing experience while enjoying a mini-vacation—particularly if you live in an area with a lot of artifi cial lights, such as a city.
Take your child camping or go for an evening ride somewhere away from human-made lights. Before you go, ask your child to look up the times for the sunset and moonrise in the newspaper or online. Choose an evening when there will be a new moon—typically during the fi rst week of the month—so that light refl ecting off the Moon won’t interfere with your stargazing. The night before you go, take your child outside to examine the night sky and try to count the stars in the sky.
The next day, leave home well before the Sun sets and set up a campsite or viewing chairs in a good location. Then watch the sunset together, and ask your child why the Sun is setting. Watch the stars appear, and ask your child to count them again. This will likely be much more diffi cult because many more stars will be visible than during the previous night. Ask your child whether there are more stars in the sky. (There is the same number of stars in the sky, but you can see more of them when other lights are not obstructing them.)
connecting with your child
54
STEM_1.8B_Explain_STEMscopedia_Eng.indd 54STEM_1.8B_Explain_STEMscopedia_Eng.indd 54 11/18/13 2:37 PM11/18/13 2:37 PM
Sample

© 2013-2014 Accelerate Learning - All Rights Reserved
Some things you do during the day. Other things you do at night.
Some things you do only in the winter. Other things you do only in the summer.
Why do we do different things at different times?
Day and night are different. We notice it is daytime when the Sun comes out. But when it’s daytime where you live, it’s nighttime somewhere else! That’s because the Sun always shines on half of Earth. It is daytime for you when the Sun shines on your half. The sky is bright blue. It is easy to see clouds and birds.
It is nighttime for you when the Sun shines on the other half of Earth. The sky is dark, and you can see the stars. It usually becomes cooler at night.
reflect
SEASONS AND DAY AND NIGHT
The Sun shines on half of Earth. It is day on that half. It is night on the other half.
55
STEM_1.8C_Explain_STEMscopedia_Eng.indd 55STEM_1.8C_Explain_STEMscopedia_Eng.indd 55 11/18/13 2:37 PM11/18/13 2:37 PM
Sample
© 2013-2014 Accelerate Learning - All Rights Reserved
People do many things during the day. Children go to school. Grown-ups go to work. Light from the Sun allows you to see while playing or working outside. Owls, raccoons, and other animals are awake during the night. They have special eyes for seeing in the dark. They often hunt at night for food. People see better during the day. We spend much of the night sleeping.
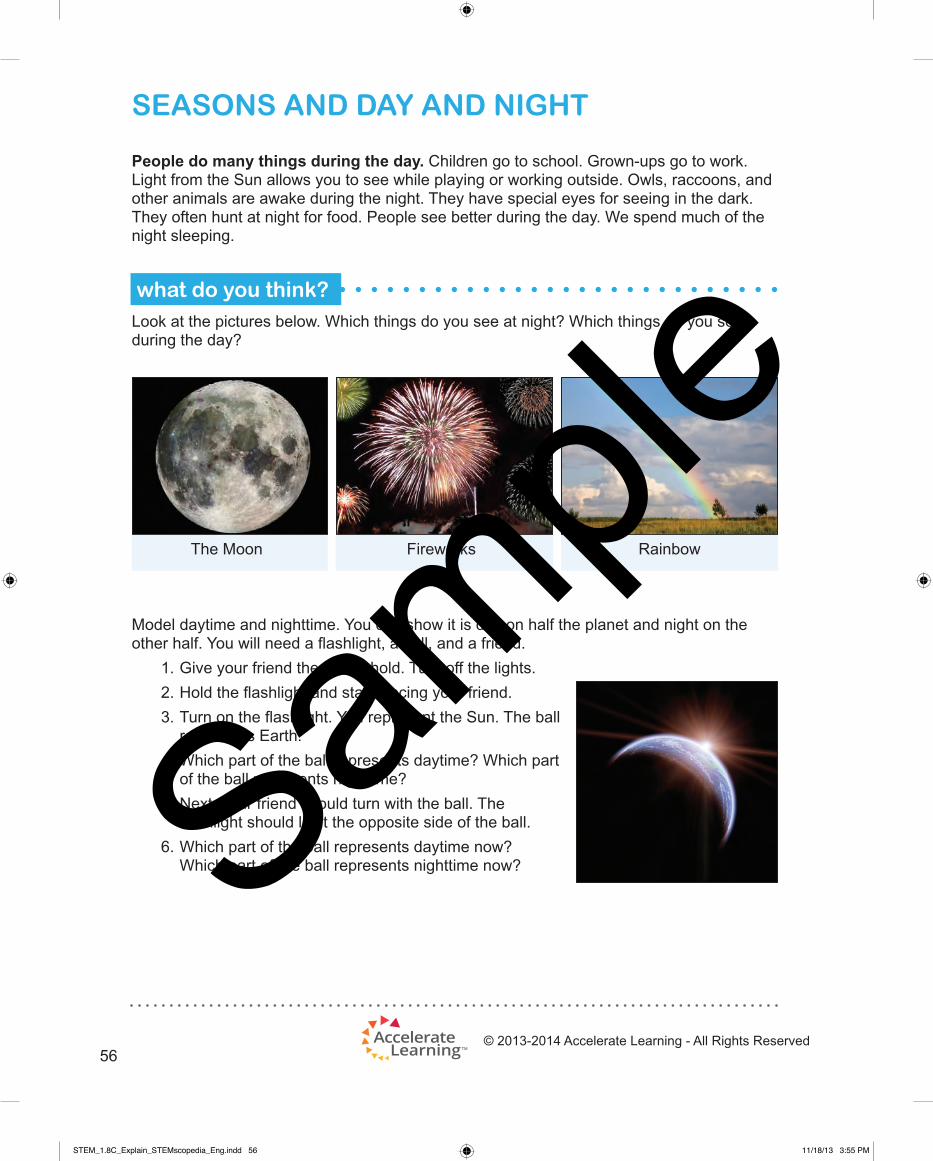
Look at the pictures below. Which things do you see at night? Which things do you see during the day?
Model daytime and nighttime. You can show it is day on half the planet and night on the other half. You will need a fl ashlight, a ball, and a friend.
1. Give your friend the ball to hold. Turn off the lights.
2. Hold the fl ashlight and stand facing your friend.
3. Turn on the fl ashlight. You represent the Sun. The ball represents Earth.
4. Which part of the ball represents daytime? Which part of the ball represents nighttime?
5. Next, your friend should turn with the ball. The fl ashlight should light the opposite side of the ball.
6. Which part of the ball represents daytime now? Which part of the ball represents nighttime now?
what do you think?
SEASONS AND DAY AND NIGHT
The Moon Fireworks Rainbow
56
STEM_1.8C_Explain_STEMscopedia_Eng.indd 56STEM_1.8C_Explain_STEMscopedia_Eng.indd 56 11/18/13 3:55 PM11/18/13 3:55 PM
Sample

© 2013-2014 Accelerate Learning - All Rights Reserved
SEASONS AND DAY AND NIGHT
There are four seasons: winter, spring, summer, and fall. What is each season like? What do you like to do during each season?
Winter starts in December and ends in March. Nights are longer. The weather is colder. In some places it snows. If it gets cold enough, some plants stop growing. Some animals go to sleep, or hibernate, all winter. Other animals migrate, or go someplace warmer.
Summer starts in June and ends in September. Summer is the hottest season. Days are long, and nights are short. Plants continue growing. Animals fi nd shade to keep cool.
Spring starts in March and ends in June. Days get longer. The weather gets warmer and the snow melts. Plants start growing again. Farmers plant their crops. Many animals have their babies in the spring.
Fall starts in September and ends in November. The air gets colder. Leaves change color and fall off the trees. The days become shorter. People and animals prepare for the winter.
57
STEM_1.8C_Explain_STEMscopedia_Eng.indd 57STEM_1.8C_Explain_STEMscopedia_Eng.indd 57 11/18/13 2:37 PM11/18/13 2:37 PM
Sample

© 2013-2014 Accelerate Learning - All Rights Reserved
SEASONS AND DAY AND NIGHT
Career Corner: Astronomer
Astronomers are scientists. They study space. Some of the things they look at are planets and stars. They use big telescopes to see far into space. Have you noticed stars in the sky? Did you notice the stars in the daytime or nighttime?
Sunlight makes it diffi cult to see other stars. So, astronomers do much of their work at night. They can see stars when the Sun is not in the sky. When you saw stars, it was most likely nighttime!
Can you think of other jobs that are done at night?
What Do You Know?
Day and night change as different parts of Earth face the Sun. The seasons also change over time.
• Write a poem about what you learned about the seasons. Use the letters in “Season” to start each line of your poem.
• Write another poem about what you learned about day and night. Use the letters of “Day” and “Night” for your second poem.
The fi rst line of each poem has been done for you. In the fi rst poem, you can fi nish the sentences. Then make up your own sentences for the next poem.
Summer is one season. Every summer I Autumn is Spring seems On most winter days New fl owers
Dark happens at night.A
Y
N
I
G
H
T
58
STEM_1.8C_Explain_STEMscopedia_Eng.indd 58STEM_1.8C_Explain_STEMscopedia_Eng.indd 58 11/18/13 3:55 PM11/18/13 3:55 PM
Sample
© 2013-2014 Accelerate Learning - All Rights Reserved
Moving Through the Seasons at Home
To help students learn more about the changing seasons throughout the year, have them make their own calendar. Buy or make a blank calendar including all twelve months of the year. (To make a calendar, gather twelve sheets of blank construction paper and pile them together. Fold the stack in half vertically and staple the sheets across the middle fold. Use a marker to divide the bottom half of the page into seven columns and four to fi ve rows. The columns represent the days and the rows represent the weeks in each month. Number each month according to the correct dates, which you can fi nd by referencing another calendar.)
Once you have a complete blank calendar, review each of the months with your child. Go through the year and mark important dates in your family’s lives. Here are some examples you might include: holidays, the fi rst day of school, birthdays, and vacation dates. Once you’ve completed the whole year, go back through the months again, but this time have your child discuss the various activities, weather conditions, daylight hours, holiday traditions, and other events that occur each month. Your child will use these ideas to create a picture on the top half of each calendar page that refl ects that month. For example, a picture of a mitten might decorate one of the winter months, while a fl ower could be included for a spring month.
When complete, hang up the calendar in your home. Encourage your child to add to the calendar throughout the year.
Here are some questions to discuss with your child:
• What are the four seasons? What order do they come in?
• What season are we in now? What activ-ities do we do in this season?
• What do animals and plants do during this season?
connecting with your child
SEASONS AND DAY AND NIGHT
59
STEM_1.8C_Explain_STEMscopedia_Eng.indd 59STEM_1.8C_Explain_STEMscopedia_Eng.indd 59 11/18/13 2:37 PM11/18/13 2:37 PM
Sample

STEM_1.8C_Explain_STEMscopedia_Eng.indd 60STEM_1.8C_Explain_STEMscopedia_Eng.indd 60 11/18/13 2:45 PM11/18/13 2:45 PM
Sample

© 2013-2014 Accelerate Learning - All Rights Reserved
If you are cold, what can you do to get warm? You could put on a coat and hat. You can jump in place. These are ways you might react to the cold.
Now think about a rock. What if a rock is somewhere cold? Can a rock do anything to get warm? Does it need to be warm?
Living things, like humans, can react to the cold. This helps them stay alive. But rocks cannot react to the cold. Rocks are not alive.
How do we know if something is alive?
Living things have basic needs. Living things must have certain things to stay alive. Nonliving things do not have needs.
One basic need of living things is energy. Living things use food and water to get energy.
What are two things you eat for energy? Write your answers below.
reflect
LIVING AND NONLIVING
living: has life; is alive
nonliving: not living
The deer is living. It eats grass for energy.
The bird is living. It eats fi sh for energy.
The balloon is nonliving. It does not need energy.
61
STEM_1.9A_Explain_STEMscopedia_Eng.indd 61STEM_1.9A_Explain_STEMscopedia_Eng.indd 61 11/18/13 3:55 PM11/18/13 3:55 PM
Sample

© 2013-2014 Accelerate Learning - All Rights Reserved
Living things also grow and change. This is part of their life
cycle. Nonliving things do not grow by themselves.
Which of these things grows? Circle your answer.
Living things react to the world around them. This helps them stay safe and healthy. Nonliving things cannot react to the world around them.
LIVING AND NONLIVING
life cycle: the stages of a living thing from birth to death
Plants are living things. This plant gets taller over time. You can see how it grows and changes.
The tree’s leaves react to seasons. They change color.
The cat reacts to danger. It hisses at something to keep danger away.
62
STEM_1.9A_Explain_STEMscopedia_Eng.indd 62STEM_1.9A_Explain_STEMscopedia_Eng.indd 62 11/18/13 2:37 PM11/18/13 2:37 PM
Sample
© 2013-2014 Accelerate Learning - All Rights Reserved
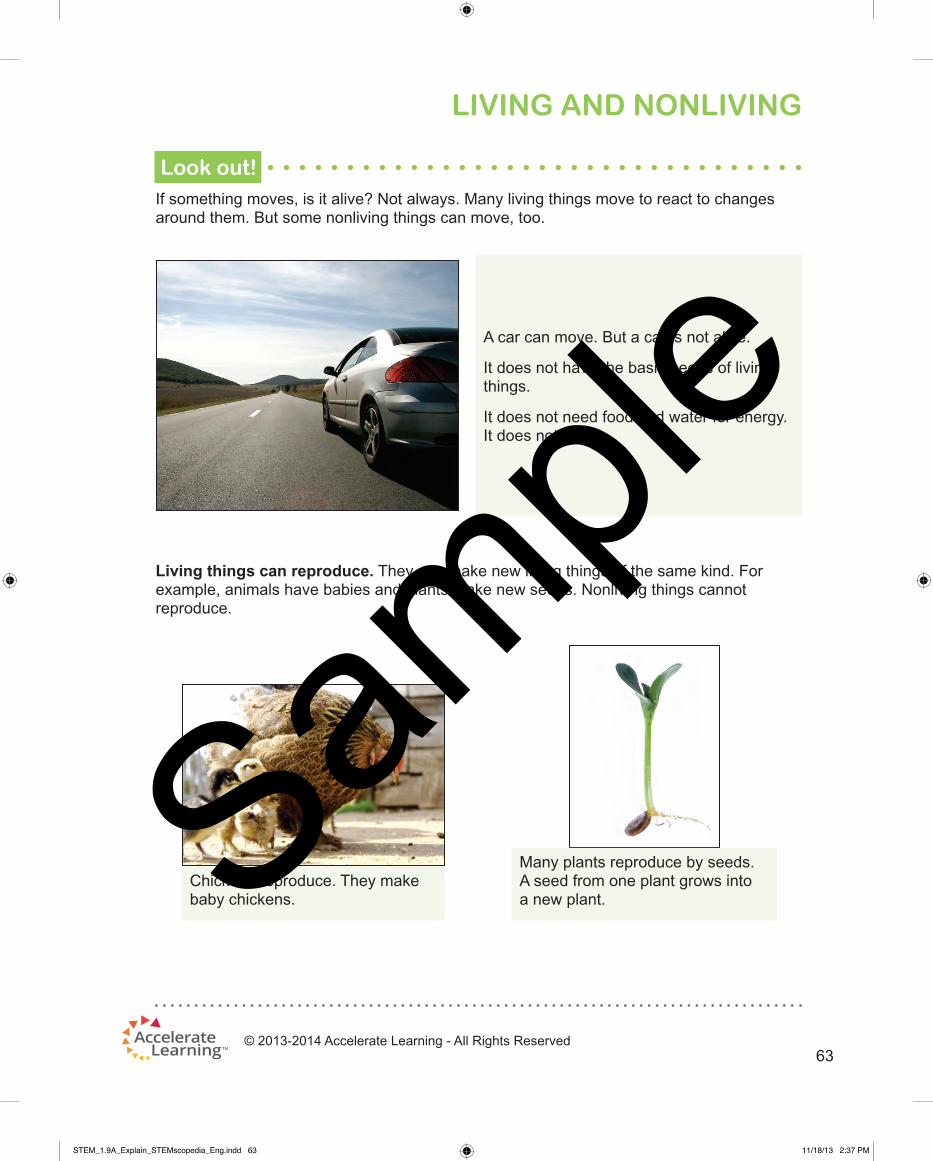
If something moves, is it alive? Not always. Many living things move to react to changes around them. But some nonliving things can move, too.
Look out!
LIVING AND NONLIVING
A car can move. But a car is not alive.
It does not have the basic needs of living things.
It does not need food and water for energy. It does not grow.
Chickens reproduce. They make baby chickens.
Many plants reproduce by seeds. A seed from one plant grows into a new plant.
Living things can reproduce. They can make new living things of the same kind. For example, animals have babies and plants make new seeds. Nonliving things cannot reproduce.
63
STEM_1.9A_Explain_STEMscopedia_Eng.indd 63STEM_1.9A_Explain_STEMscopedia_Eng.indd 63 11/18/13 2:37 PM11/18/13 2:37 PM
Sample

© 2013-2014 Accelerate Learning - All Rights Reserved
LIVING AND NONLIVING
We can sort living and nonliving things. To sort something, think about these questions:
• Does it have basic needs?
• Can it reproduce?
Look at these items. Are they living or nonliving? Now sort them using the chart below!
Living Nonliving
A giraffe and a tree are living things. They need energy. They grow and react to the world around them. They can reproduce.
A clock is a nonliving thing. It does not have basic needs. It cannot reproduce.
sort: put into groups
clock tree giraffe
64
STEM_1.9A_Explain_STEMscopedia_Eng.indd 64STEM_1.9A_Explain_STEMscopedia_Eng.indd 64 11/18/13 3:55 PM11/18/13 3:55 PM
Sample

© 2013-2014 Accelerate Learning - All Rights Reserved
LIVING AND NONLIVING
What do you know?
Now it’s time for you to try sorting living and nonliving things. Look at the pictures. Which ones are living? Which ones are nonliving? Write your answers on the lines.
Living Nonliving
bottle
airplane
snake
butterfl y
65
STEM_1.9A_Explain_STEMscopedia_Eng.indd 65STEM_1.9A_Explain_STEMscopedia_Eng.indd 65 11/18/13 3:55 PM11/18/13 3:55 PM
Sample
© 2013-2014 Accelerate Learning - All Rights Reserved
LIVING AND NONLIVING
Can Plants React to the Environment?
Help your child learn more about living things by growing a plant and observing its reactions to its environment. For this activity, you will need a small cardboard box, a green potted plant (that fi ts under the box), and a sunny windowsill. Bean plants work well for this activity.
Begin by asking your child whether the plant is living or nonliving, and why. Students have learned that living things have basic needs and can reproduce, and that nonliving things do not have basic needs and cannot reproduce. Some basic needs are getting energy, growing, and reacting to the environment. Once you have established the plant is a living thing, ask your child how the plant reacts to the environment. Explain that you will do an activity to observe how the plant reacts to sunlight.
With your child, cut a hole in one of the corners of the cardboard box. Place the plant on a sunny windowsill. Then place the box over the plant so the hole is at the top. The hole will allow sunlight to reach the plant. Observe the plant each day for two weeks, removing the box for a few minutes as needed. The plant should begin to grow toward the light source. In this way, the plant is reacting to its environment. Have your child sketch the plant each day in order to record any changes that occur.
Here are some questions to discuss with your child:
1. How do you know that a plant is a living thing?
2. Plants cannot move from one place to another. Can they still react to the environment?
3. What are some ways you react to sunlight?
connecting with your child
66
STEM_1.9A_Explain_STEMscopedia_Eng.indd 66STEM_1.9A_Explain_STEMscopedia_Eng.indd 66 11/18/13 2:37 PM11/18/13 2:37 PM
Sample

© 2013-2014 Accelerate Learning - All Rights Reserved
Pets need people to feed and play with them. Houseplants need people to give them water. You need someone to make you dinner. In fact, all living things depend on each other to survive!
How do you think plants and animals depend on each other?
Animals need plants for shelter.
Birds make their nests in trees. Squirrels and insects also live in trees. They live in the trunk, or middle part, of the tree.
Plants help keep animals safe. Plant leaves protect animals from the weather like rain or hot Sun. Plants also help smaller animals hide from other bigger animals.
reflect
Interdependency
survive: stay alivedepend: rely on, or need
The bird lives in a tree. It uses branches to build a nest.
The fi sh hide in the plants. Bigger fi sh can’t fi nd them!
67
STEM_1.9BC_Explain_STEMscopedia_Eng.indd 67STEM_1.9BC_Explain_STEMscopedia_Eng.indd 67 11/18/13 2:37 PM11/18/13 2:37 PM
Sample

© 2013-2014 Accelerate Learning - All Rights Reserved
Animals need plants and other animals for food. Some animals eat leaves or twigs. Others eat tiny plant parts called pollen. Some animals eat other animals.
Many animals eat meat. Meat comes from animals. Some animals eat plants. Plants can make their own food. Can you see how the fi sh below depends on plants, even if it doesn’t eat them? A food chain shows how food moves from one creature to the next. The food chain starts with plants. Beetles eat plants. Fish eat beetles. What do you think eats fi sh?
Look out!
Interdependency
The bee eats plant parts called pollen. The spider eats other animals.
68
STEM_1.9BC_Explain_STEMscopedia_Eng.indd 68STEM_1.9BC_Explain_STEMscopedia_Eng.indd 68 11/18/13 2:37 PM11/18/13 2:37 PM
Sample

© 2013-2014 Accelerate Learning - All Rights Reserved
Every food chain starts with a plant. Look at the pictures of animals eating. Fill in the blanks about food chains. Then circle the word “plants” in both sentences.
Plants need animals too. Animals give off a gas when they breathe out. We can’t see the gas. But plants need that gas to grow. They take the gas from the air. They use it to make food. So plants even depend on us!
Looking to the Future: Removing Part of a System
Plants and animals work together. They make up a system. What if part of a system was removed? The rest of the system would be hurt.
Deer eat plants. They also hide in plants. What if people cut down all the plants? What would happen to the deer? Fill in the blank spaces.
Interdependency
People eat hamburgers. Hamburgers are made from cows. Cows eat
______________________.
Insects eat plants. Fish eat insects. Then, bears eat
_____________________________.
The deer would ___________________
because they need plants for
______________ and _____________.
69
STEM_1.9BC_Explain_STEMscopedia_Eng.indd 69STEM_1.9BC_Explain_STEMscopedia_Eng.indd 69 11/18/13 2:37 PM11/18/13 2:37 PM
Sample

© 2013-2014 Accelerate Learning - All Rights Reserved
Interdependency
What Do You Know?
Look at the picture of the shark. What does it depend on? Think about what it eats. The shark depends on fi sh for food.
Now you try. Look at the pictures below. Decide how each animal or plant depends on another living thing. Use a word from the word box to answer. Use each word one time. Write your answers in the blank spaces.
Word Box
shelter food gas people
The bird depends on fi sh for _________. The fi sh depend on ___________ for food.
The grass depends on _______ given off by the cow
The frog depends on plants for________.
70
STEM_1.9BC_Explain_STEMscopedia_Eng.indd 70STEM_1.9BC_Explain_STEMscopedia_Eng.indd 70 11/18/13 2:37 PM11/18/13 2:37 PM
Sample

© 2013-2014 Accelerate Learning - All Rights Reserved
Interdependency
Build a Terrarium
Help your child learn more about the interdependency of organisms by building a terrarium. You can build a terrarium out of nearly any container. A clear container works best so that you and your child can more clearly observe the interactions among the plants and animals. Suggestions include glass jars, water pitchers, aquariums, two-liter soda bottles, or large glass bowls. Before beginning, you can take your child outside to observe a few pieces of a local habitat, such as plants, dirt, and insects, or whatever you come across. Have your child make a list of all the things you will need to include in the terrarium to make a ‘mini’ habitat. As you make the list together, ask your child to explain why each item is being added to the list. Some items will be nonliving, so steer the conversation toward how these things are related to living things. For example, your child may say that soil should be included in the terrarium.
Point out that soil is nonliving, and follow up by telling your child that animals like earthworms add nutrients to the soil that are benefi cial to plant growth. Your child might say rocks provide animals with shelter. Point out that logs and other plant parts can provide shelter, too.
After making your list, gather the materials with your child. It is best to build a terrarium with both plants and animals in order to see the interdependency. Animals can include insects, worms, or small lizards. If necessary, conduct research to fi nd out what the animals you include eat. You might decide to keep the terrarium for a very long time, but if not, be sure to come up with a plan for the living things that you decide to use before building the terrarium. For example, you might decide to re-plant the grasses outside in a garden and release native insects or earthworms back into the wild. Please remember that many animals like frogs, turtles, and lizards that are sold in pet stores cannot be released into the wild. If you decide to use these kinds of animals, plan to keep them as pets for a very long time.
connecting with your child
71
STEM_1.9BC_Explain_STEMscopedia_Eng.indd 71STEM_1.9BC_Explain_STEMscopedia_Eng.indd 71 11/18/13 3:55 PM11/18/13 3:55 PM
Sample

© 2013-2014 Accelerate Learning - All Rights Reserved
Assemble the terrarium with your child. Allow students to use creativity when putting it together, but stress the importance of building the terrarium so that the living things can interact best. Ask questions such as, “Are there enough leaves for the animal to have shelter? Is there food for the animals? Can air get into the container for the animals to breathe? Can plants get the gas (carbon dioxide) they need?”
When completed, set the terrarium in a place where your child can often revisit it and look for interdependency between the living things. Stress the importance of caring for the living things by making sure the resources like food and water remain available.
Here are some questions to discuss with your child:
1. Why does the terrarium need both plants and animals?
2. Why do the plants and animals in the terrarium need you?
3. What happens if one of the living things in the terrarium is removed?
Interdependency
72
STEM_1.9BC_Explain_STEMscopedia_Eng.indd 72STEM_1.9BC_Explain_STEMscopedia_Eng.indd 72 11/18/13 2:37 PM11/18/13 2:37 PM
Sample

© 2013-2014 Accelerate Learning - All Rights Reserved
What are you wearing today? Are you wearing shorts? Or long pants? You might choose your clothes knowing how warm or cold it is outside. We get dressed depending on the weather. Our clothes keep us dry and warm. They can even help us survive. But think about animals. Do they wear clothes? Of course not! Animals have external characteristics that might be similar to our clothes. These characteristics help animals survive in their habitats.
Body covering is an external characteristic. Some animals have fur. Fur keeps animals warm. Other animals have scales. Scales help keep water inside animals, which means their insides can stay moist. Scales also protect animals. They are like armor. Birds have feathers. Feathers help keep birds dry on the outside. They also help birds fl y. In cold places, feathers keep birds warm.
reflect
ANIMAL CHARACTERISTICS
survive: stay alive
habitat: natural home
external: on the outside
The lizard has _______________.
This body covering keeps the
lizard
________________________.
The duck has ________________.
This body covering keeps the duck
________________________.
The polar bear has fur. The fur keeps the bear warm. Fill in the blanks about the other animals below.
HINT: Use the words FEATHERS, SCALES, MOIST, and DRY.
73
STEM_1.10A_Explain_STEMscopedia_Eng.indd 73STEM_1.10A_Explain_STEMscopedia_Eng.indd 73 11/18/13 3:56 PM11/18/13 3:56 PM
Sample

© 2013-2014 Accelerate Learning - All Rights Reserved
Color is an external characteristic. Color can keep animals safe. It can help them hide from danger. Color can even scare away other animals.
ANIMAL CHARACTERISTICS
The bright color is a warning. It keeps other animals away.
The giraffe is tall. It can eat tree leaves.
Green color helps the insect hide. Other animals can’t see it.
The squirrel is small. It can hide from large animals. It can eat tiny seeds.
74
STEM_1.10A_Explain_STEMscopedia_Eng.indd 74STEM_1.10A_Explain_STEMscopedia_Eng.indd 74 11/18/13 2:37 PM11/18/13 2:37 PM
Sample

© 2013-2014 Accelerate Learning - All Rights Reserved
Size and shape are external characteristics. Some animals are large. They might hunt other animals. Some animals are tall. They can reach high for food. Other animals are small. Bigger animals can hunt them, but they can stay safe by hiding! They can also fi nd food in tiny spaces.
Some characteristics help animals move. Dolphins have fl ippers. Flippers help dolphins swim. Birds have wings. Wings help birds fl y. Many land animals have legs. Legs help animals walk, run, and hop.
ANIMAL CHARACTERISTICS
The fi sh have fi ns. They help the fi sh swim. Fill in the blanks about the other animals.
HINT: Use words like SWIM, FLY, and JUMP.
The sea bird has webbed feet that help
it _________________.
The bat has wings that help it
____________________.
The kangaroo has strong legs that help
it ________________.
75
STEM_1.10A_Explain_STEMscopedia_Eng.indd 75STEM_1.10A_Explain_STEMscopedia_Eng.indd 75 11/18/13 2:37 PM11/18/13 2:37 PM
Sample

© 2013-2014 Accelerate Learning - All Rights Reserved
ANIMAL CHARACTERISTICS
Some land animals have hooves. Others have paws. Hooves and paws make prints. Prints change when an animal moves. See how your footprints change when you move.
1. Take off your shoes.2. Pick a sandy area. A slightly muddy area will work, too.3. Take ten steps across the sand. Go slow. 4. Look at your footprints.5. Then go back to the beginning next to your fi rst tracks.6. Run across the sand. Stop at the same place. 7. Look at the difference.
You can try this without sand. Use long sheets of paper. Ask an adult to help. Dip your feet in a tray of poster paint. Walk across the paper. Then run across. Clean your feet each time, and watch where you step!
Some characteristics help animals hunt and eat. Look at the two birds. Each bird is hunting fi sh. Which bird uses its claws to grab? Which one uses its beak to scoop?
Some animals have special eyes. They can see things from very far away. Some animals can even see in the dark. These animals are great hunters!
try now
76
STEM_1.10A_Explain_STEMscopedia_Eng.indd 76STEM_1.10A_Explain_STEMscopedia_Eng.indd 76 11/18/13 3:56 PM11/18/13 3:56 PM
Sample

© 2013-2014 Accelerate Learning - All Rights Reserved
ANIMAL CHARACTERISTICS
Many animals have teeth. Different teeth are good for eating different foods. Some teeth are sharp. Sharp teeth tear meat. Other teeth are fl at. Flat teeth grind up plants. Some animals have both kinds of teeth. What do you think these animals eat?
Career Corner: Zookeepers
Zookeepers work with animals. They know about animal characteristics, or animal parts. Zookeepers feed the animals. They build shelters for animals. Look at the monkey. It uses its arms to move. Zookeepers built a shelter for the monkey. They used ropes and poles. The monkey can swing. The monkey uses his arms, legs, or even his tail to swing!
Lions have sharp teeth. They eat meat.Cows have fl at teeth. They eat plants.
77
STEM_1.10A_Explain_STEMscopedia_Eng.indd 77STEM_1.10A_Explain_STEMscopedia_Eng.indd 77 11/18/13 3:56 PM11/18/13 3:56 PM
Sample

© 2013-2014 Accelerate Learning - All Rights Reserved
What Do You Know?
Characteristics help animals live in their habitats. Look at the animals. Decide where each one lives. Draw a line to match the animal to its habitat. The fi rst one is done.
ANIMAL CHARACTERISTICS
78
STEM_1.10A_Explain_STEMscopedia_Eng.indd 78STEM_1.10A_Explain_STEMscopedia_Eng.indd 78 11/18/13 3:56 PM11/18/13 3:56 PM
Sample
© 2013-2014 Accelerate Learning - All Rights Reserved
Invent an Animal
To help your child learn more about animal characteristics, have your child invent an animal that has special external features. First ask them to name some parts of animals, and then link those parts to how they move or survive in their habitats. Spend a little time brainstorming together, and think about features the animal has such as its body covering, shape, size, and color. Also consider how the animal moves and what it eats. Next, have your child use crayons or colored pencils to draw a picture of the animal on poster board or construction paper, paying close attention to its external features that help it survive in its habitat. Students may feel more comfortable looking at a picture to get started. Your child should draw the animal in its habitat. Encourage creativity, but make sure your child focuses on realistic characteristics and how these characteristics relate to where the animal lives, what it eats, and how it moves.
Discuss the following questions with your child:
• Where does your animal live?
• What type of body covering does your animal have? How would you describe is its size? Does your animal have an interesting body shape? What is it?
• What kind of teeth does your animal have? Does it have claws?
• How do these characteristics help your animal survive?
• How does your animal move?
connecting with your child
ANIMAL CHARACTERISTICS
79
STEM_1.10A_Explain_STEMscopedia_Eng.indd 79STEM_1.10A_Explain_STEMscopedia_Eng.indd 79 11/18/13 2:37 PM11/18/13 2:37 PM
Sample
STEM_1.10A_Explain_STEMscopedia_Eng.indd 80STEM_1.10A_Explain_STEMscopedia_Eng.indd 80 11/18/13 2:47 PM11/18/13 2:47 PM
Sample

© 2013-2014 Accelerate Learning - All Rights Reserved
What did you eat today? Did you eat any fruit? How about vegetables? If so, you ate some plant parts! Fruits and vegetables come from plants.
What are other parts of plants? How do these parts help plants live and grow?
Plants have roots. Roots are like tiny sponges. They soak up water from the soil. They also take in nutrients. Roots anchor a plant, too. That means roots help keep a plant in one place
so it doesn’t fall over. Roots grow underground. Sometimes they also grow just above the ground.
The plant roots are circled in red.
Look at the plants below. Circle the roots.
reflect
PLANT PARTS
nutrients: substances that help plants grow
81
STEM_1.10B_Explain_STEMscopedia_Eng.indd 81STEM_1.10B_Explain_STEMscopedia_Eng.indd 81 11/18/13 2:38 PM11/18/13 2:38 PM
Sample

© 2013-2014 Accelerate Learning - All Rights Reserved
Plants have stems. Stems are like elevators. They bring things up and down. They move water to the rest of the plant. Remember all that water soaked up by the roots? Stems help move that water around to the rest of the plant. Stems also move food to all parts of a plant. Some stems are woody. Others are soft.
Plants have leaves. Plants can make their own food. The leaves use water, sunlight, and air to make that food. Plants can use the food to grow.
Where do we fi nd leaves? Many leaves grow from soft stems. But tree leaves do not. They grow from hard branches. Branches are smaller stems that grow from tree trunks.
Look at the pictures below. Circle the picture that shows leaves growing from stems. Draw a square around the picture that shows leaves growing from branches.
PLANT PARTS
Tree trunks are hard, woody stems.
This plant has a soft stem that can bend.
82
STEM_1.10B_Explain_STEMscopedia_Eng.indd 82STEM_1.10B_Explain_STEMscopedia_Eng.indd 82 11/18/13 2:38 PM11/18/13 2:38 PM
Sample

© 2013-2014 Accelerate Learning - All Rights Reserved
Watch how a stem takes in water.
1. You need a celery stem, a jar, and red food coloring. You also need a spoon and some water.
2. Fill the jar almost full with water.
3. Squeeze 10 drops of food coloring in the water.
4. Stir the water to mix it with the food coloring.
5. Place the celery stem in the jar.
6. Let the celery soak for a day.
7. Check the celery. Are any parts red?
You don’t see the roots, right? But water can still travel up the stem. You can see that the water moves up the plant. The stem and leaves are red!
Many plants have fl owers. Flowers have colorful petals and seeds. Seeds grow into new plants.
try now
PLANT PARTS
The fl ower has yellow petals. There are small seeds in the center of the fl ower.
Some seeds grow inside fruits. The fruits protect the seeds.
83
STEM_1.10B_Explain_STEMscopedia_Eng.indd 83STEM_1.10B_Explain_STEMscopedia_Eng.indd 83 11/18/13 3:56 PM11/18/13 3:56 PM
Sample
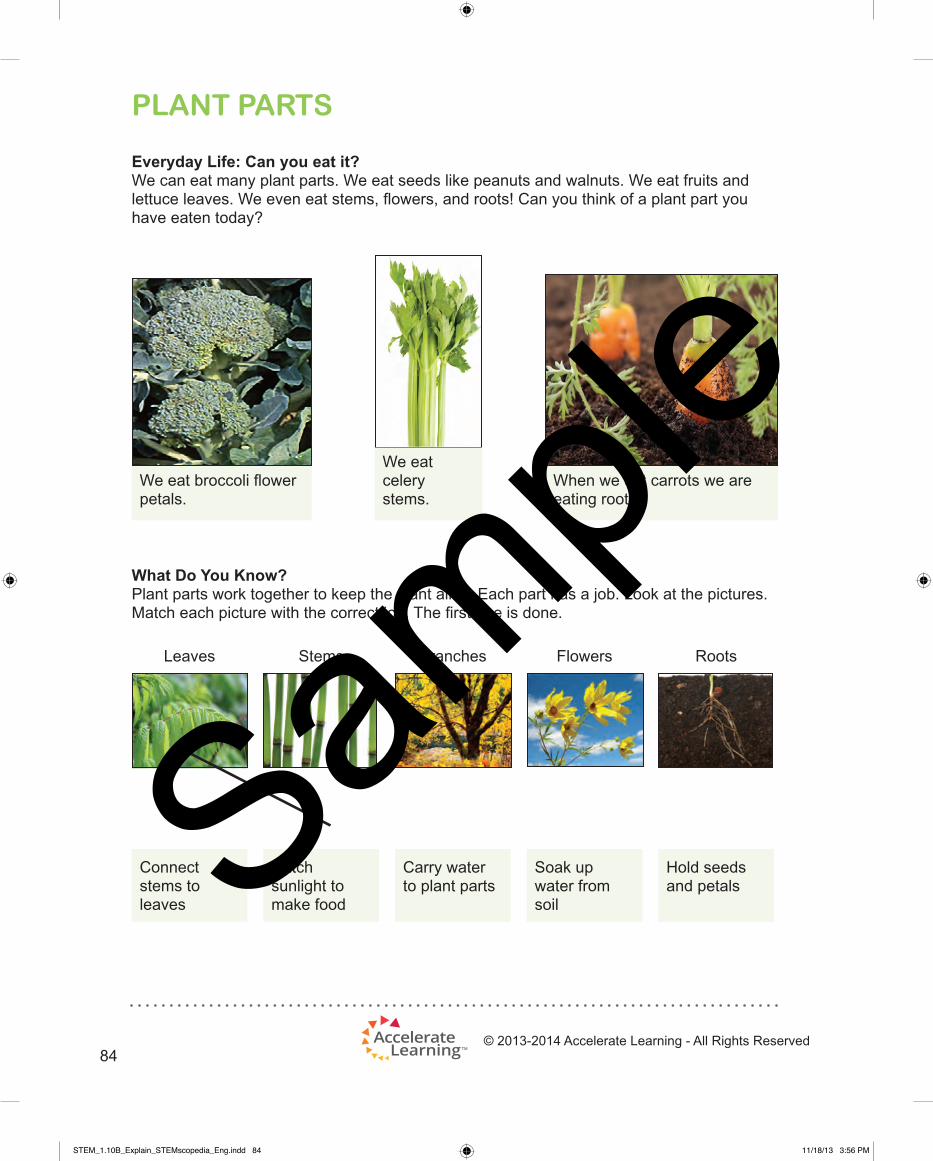
© 2013-2014 Accelerate Learning - All Rights Reserved
PLANT PARTS
Everyday Life: Can you eat it?
We can eat many plant parts. We eat seeds like peanuts and walnuts. We eat fruits and lettuce leaves. We even eat stems, fl owers, and roots! Can you think of a plant part you have eaten today?
What Do You Know?
Plant parts work together to keep the plant alive. Each part has a job. Look at the pictures. Match each picture with the correct job. The fi rst one is done.
Leaves Stems Branches Flowers Roots
Connect stems to leaves
Catch sunlight to make food
Carry water to plant parts
Soak up water from soil
Hold seeds and petals
We eat broccoli fl ower petals.
We eat celery stems.
When we eat carrots we are eating roots.
84
STEM_1.10B_Explain_STEMscopedia_Eng.indd 84STEM_1.10B_Explain_STEMscopedia_Eng.indd 84 11/18/13 3:56 PM11/18/13 3:56 PM
Sample

© 2013-2014 Accelerate Learning - All Rights Reserved
PLANT PARTS
Edible Plants
To help your child learn more about plant parts, examine various edible plant parts from the grocery store, including fruits and vegetables. Purchase as many examples as possible, but try to buy at least one root vegetable, one edible leafy plant, one edible stem, and one edible fl ower. Common root vegetables include carrots and radishes; common leafy plants include basil, kale, spinach, and lettuce; common edible stems include celery and asparagus; and common edible fl owers include broccoli and caulifl ower. Once you have gathered the plants, lay them out on a table and have your child identify as many plant parts as possible. Some types of lettuce and celery may still have the roots attached, and many herbs like basil and oregano will have leaves that are still attached to stems. If you examine a potato, explain to your child that potatoes are unique and the part we eat is actually a stem. If possible, cut open the fruits and examine the seeds. Once you have completed the activity, you and your child can wash and then eat the edible plant parts.
If purchasing edible plants is not possible, observe and discuss houseplants or pictures of different plants.
Here are some questions to ask students:
• Which plants have edible roots, stems, leaves, or fl owers? Make a list.
• Did any of the plants contain seeds? Can we eat the seeds?
• Which plant part do you most often eat? What is the function of that part?
connecting with your child
85
STEM_1.10B_Explain_STEMscopedia_Eng.indd 85STEM_1.10B_Explain_STEMscopedia_Eng.indd 85 11/18/13 2:38 PM11/18/13 2:38 PM
Sample

STEM_1.10B_Explain_STEMscopedia_Eng.indd 86STEM_1.10B_Explain_STEMscopedia_Eng.indd 86 11/18/13 2:47 PM11/18/13 2:47 PM
Sample

© 2013-2014 Accelerate Learning - All Rights Reserved
Look at the boy and his father. How do they look the same? They both have two arms and two legs. They both have eyes and a nose. They look a lot alike! People can look like their parents. We get bigger when we grow up. Maybe our hair changes. We go through a life cycle. But we don’t change our body shapes. We just look like smaller adults.
What about other living things? Do all animals look the same as their parents?
Many animal parents and their young look kind of the
same. These babies are born with the same parts as their parents. Some babies and parents are even the same color.
reflect
ANIMAL LIFE CYCLES
life cycle: the stages of life from birth to death
The young lion and the parent both have ears and paws.
Write about the other animals. Find two ways that the young animal (or baby) looks like its parent.
The young and parent koala both have
_______________________
and
______________________.
The young and parent dolphin both have
____________________
and
___________________.
87
STEM_1.10CD_Explain_STEMscopedia_Eng.indd 87STEM_1.10CD_Explain_STEMscopedia_Eng.indd 87 11/18/13 2:38 PM11/18/13 2:38 PM
Sample

© 2013-2014 Accelerate Learning - All Rights Reserved
Even babies that look like their parents are different somehow. The baby might be a lot smaller. The baby may not have all the parts the parent has. Babies may grow these parts as they get older.
Some young look very different from their parents. An animal like a frog goes through many big changes in its life cycle. Look at the picture below. A frog starts as an egg. Then the egg hatches. Out comes a tadpole! The tadpole grows legs. It gets bigger. But it still doesn’t look like an adult frog! It grows bigger legs and then becomes a froglet. Then what happens? The new adult frog lays eggs. The life cycle goes on.
try now
ANIMAL LIFE CYCLES
A froglet becomes an adult.
How is the adult different than the froglet? Write your answer below. Describe TWO differences.
The adult frog is different
because _____________________
and _________________________.
The baby elephant is smaller than the mother elephant.
The baby elephant does not have tusks. They will grow later.
88
STEM_1.10CD_Explain_STEMscopedia_Eng.indd 88STEM_1.10CD_Explain_STEMscopedia_Eng.indd 88 11/18/13 2:38 PM11/18/13 2:38 PM
Sample

© 2013-2014 Accelerate Learning - All Rights Reserved
Not all animals that hatch from eggs change as much as frogs. Chickens hatch from eggs. Fish do too. Once they hatch, they look a lot like their parents.
Some characteristics help animals move. Dolphins have fl ippers. Flippers help dolphins swim. Birds have wings. Wings help birds fl y. Many land animals have legs. Legs help animals walk, run, and hop.
Discover Science: Baby Duck Feathers
Have you ever seen a baby duck? The baby duck has fl uffy feathers called down. Down feathers are different than the mother duck’s feathers. They help keep the baby warm. Down feathers are replaced with adult feathers as the baby grows.
try now
ANIMAL LIFE CYCLES
Chickens are born with legs, feet, and a beak like their parents.
But something looks a little different.
Are the young chickens the same color as the parent?
A mother duck and baby ducks have different types of feathers. Can you see something that all the ducks have?
89
STEM_1.10CD_Explain_STEMscopedia_Eng.indd 89STEM_1.10CD_Explain_STEMscopedia_Eng.indd 89 11/18/13 2:38 PM11/18/13 2:38 PM
Sample

© 2013-2014 Accelerate Learning - All Rights Reserved
ANIMAL LIFE CYCLES
What Do You Know?
The pictures are mixed up. You can use numbers to show how animals change as they grow. Start with the number 1. End with the number 3 to show the adult.
Fish
3
2
1
Now you try. Write the correct number in each box to show how the animals change.
Robin
Cat
90
STEM_1.10CD_Explain_STEMscopedia_Eng.indd 90STEM_1.10CD_Explain_STEMscopedia_Eng.indd 90 11/18/13 3:57 PM11/18/13 3:57 PM
Sample

© 2013-2014 Accelerate Learning - All Rights Reserved
ANIMAL LIFE CYCLES
Life Cycles Around Us
To help students learn more about life cycles, have your child create a poster to illustrate the stages of life cycles for two different animals. Choose animals that were not covered in the lesson such as a salamander, a white-tailed deer, or a snake. Try to choose animals your child is interested in but may not have explored before. Avoid insects, as this topic is not covered until later grades. However, if your child is curious about butterfl y and/or other insect metamorphosis, encourage questions and conduct research together as an extension activity.
To create the poster, begin by choosing the two animals to work with. Then, fi nd pictures of the different life cycle stages in magazines or on the Internet. Copy or print out the pictures, and have your child arrange them in the correct order, creating a life cycle for each animal. Glue the pictures onto a piece of poster board, and help your child label each stage. Draw arrows to connect the parts of the cycle. Finally, below each life cycle, have your child write or complete a sentence comparing the appearance of the young and the parent. For example, your child may write the following sentences about a young deer and its parent: The young deer and its parent both have four legs. The young deer has white spots and the parent does not.
If possible, take your child to a farm or zoo that has a chicken hatchery where they can observe eggs in an incubator, baby chickens, and adults.
Here are some questions to discuss with students:
• What is a life cycle?
• Do all animals have life cycles?
• Are the life cycles of the animals on your poster similar? If not, how are they different?
connecting with your child
91
STEM_1.10CD_Explain_STEMscopedia_Eng.indd 91STEM_1.10CD_Explain_STEMscopedia_Eng.indd 91 11/18/13 2:38 PM11/18/13 2:38 PM
Sample