Embed Size (px)
Citation preview
Captiv8-256
Captiv8 Engineering Manual Eng00 Issue 1a 03/06/04 1
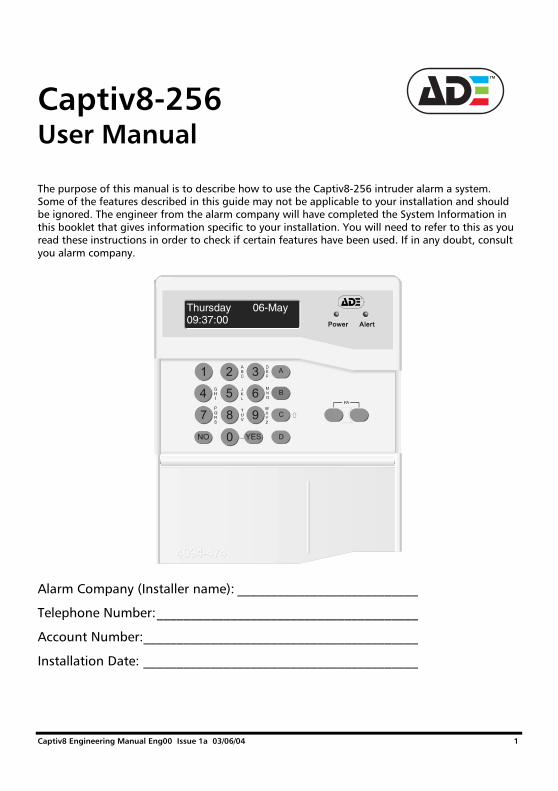
Captiv8-256 User Manual The purpose of this manual is to describe how to use the Captiv8-256 intruder alarm a system. Some of the features described in this guide may not be applicable to your installation and should be ignored. The engineer from the alarm company will have completed the System Information in this booklet that gives information specific to your installation. You will need to refer to this as you read these instructions in order to check if certain features have been used. If in any doubt, consult you alarm company.
Alarm Company (Installer name): ___________________________
Telephone Number:_______________________________________
Account Number:_________________________________________
Installation Date: _________________________________________
Thursday 06-May 09:37:00

Engineering Manual
2 Captiv8 Engineering Manual Eng00 Issue 1a 03/06/04
Contents
Contents 2
1) Introduction 4
a) The Captiv8 Keypad 4 b) Warning Indications 6 c) Using Tags 6 d) Leaving the Building 7
i) Timed Exit 7 ii) Manual Setting 9
2 Using the Keypad with PIN Code or Tag 10
a) Security Checks 10 i) Faults When Switching On 10
b) Leaving the Building 11 c) Entering the Building 11 d) Part-Setting the System 11
i) Smart Set 11 e) Staying in the Building 12
3 When Problems Arise 13
a) Silencing Alarms 13 b) Engineer Reset 13
4 Setting Individual Areas 14
a) Codes with Flexi-Set 14 b) Flexi-Set 15
5 More Advanced Functions 16
a) Ignoring an Open Door or Window 16 b) Omitting a Zone when Leaving the Building 17 c) Keypad Personal Attack 18
6 Manager Menu 19
a) Omit Zones 20 b) Changing Date and Time 21
Captiv8-256
Captiv8 Engineering Manual Eng00 Issue 1a 03/06/04 3
c) Changing or Adding PIN Codes or Tags 22 d) Changing or Adding PIN Codes or Tags 23 e) Changing or Adding New PIN Codes or Tags 24 f) Review History Logs 26 g) Check all Detectors are Working 27 h) Testing the Alarm Sounders 27
7 SMS Messaging System 29
a) Menu Exit 29
8 Service Information 31
a) User Codes 32
Engineering Manual
4 Captiv8 Engineering Manual Eng00 Issue 1a 03/06/04
1) Introduction
a) The Captiv8 Keypad
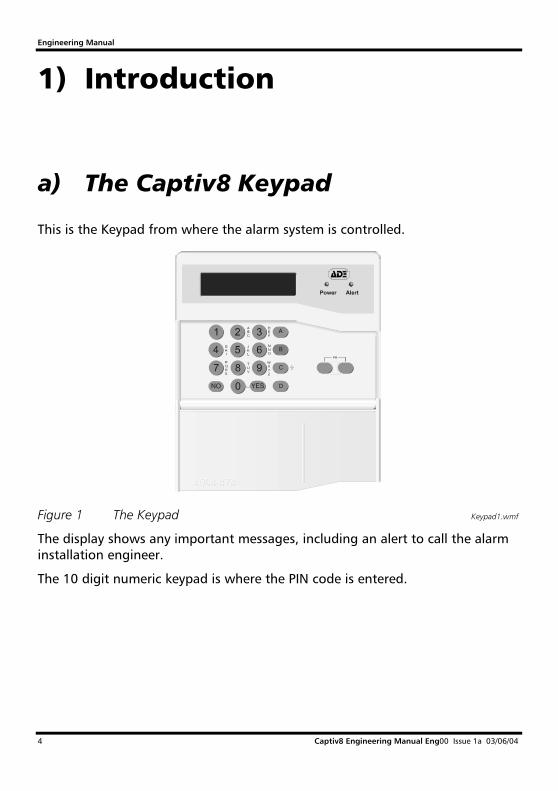
This is the Keypad from where the alarm system is controlled.
Figure 1 The Keypad Keypad1.wmf
The display shows any important messages, including an alert to call the alarm installation engineer.
The 10 digit numeric keypad is where the PIN code is entered.
Captiv8-256
Captiv8 Engineering Manual Eng00 Issue 1a 03/06/04 5
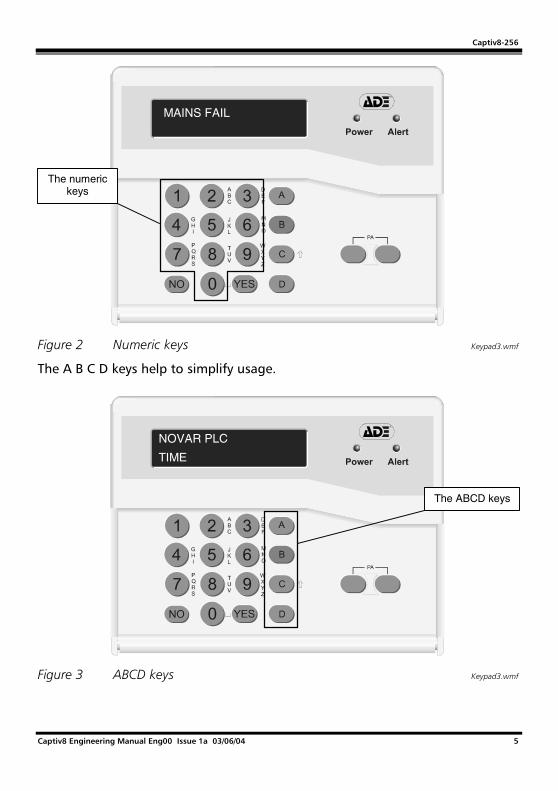
Figure 2 Numeric keys Keypad3.wmf
The A B C D keys help to simplify usage.
Figure 3 ABCD keys Keypad3.wmf
MAINS FAIL
The numeric keys
NOVAR PLC
TIME
The ABCD keys

Engineering Manual
6 Captiv8 Engineering Manual Eng00 Issue 1a 03/06/04
The illustration below shows the ward reader where the tag is offered up.
Figure 4 Ward Reader WardReader2.wmf
b) Warning Indications
All setting points (keypads or ward readers) have lamps to indicate the current status.
Lamp Indicatiing
Power The lamp will flash if the mains supply fails
Alarm The lamp will flash if an alarm occurs.
Set/Unset The lamp will light for 5 seconds if the system is completely unset (steady) or if some areas remain set (flashing). It will also light during the setting procedure and go off once set.
c) Using Tags
The high security proximity tag will set or unset the alarm system in a straightforward manner.
The bottom panel. Tags are offered up
here to be read.
The top panel. This is where the LED indicators are located.
Captiv8-256
Captiv8 Engineering Manual Eng00 Issue 1a 03/06/04 7
The tag contains no batteries and is completely maintenance free.
Offer the tag to the bottom panel on the ward reader for it to be read, when the reader will beep to acknowledge the tag.
Before activating the system…
Ensure that all doors and windows are securely closed and any pets or people are excluded from areas protected by movement sensors.
d) Leaving the Building
If leaving the building, key in the PIN code on the keypad or present the tag at the reader.
On completion, the exit tone will sound.
There are now two possible procedures that can be used to set the system.
• Timed Exit
• Manual Setting
Whichever method is used, this will be referred to as the setting procedure in later text.
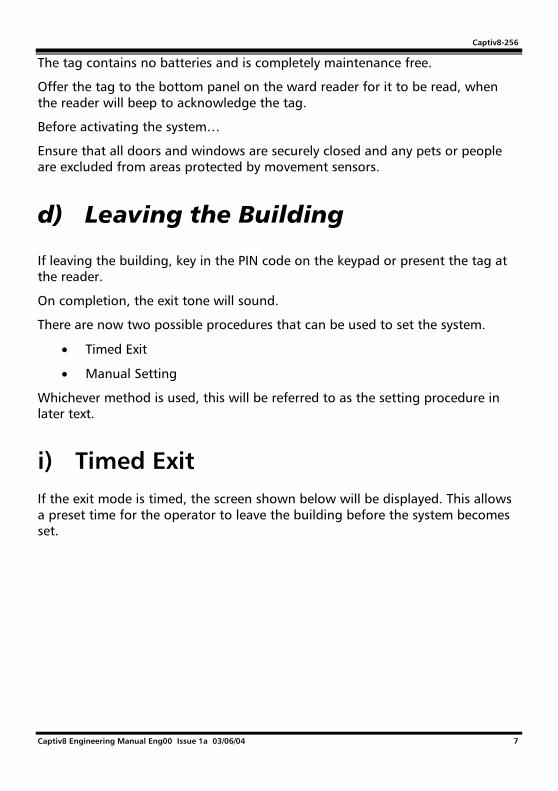
i) Timed Exit If the exit mode is timed, the screen shown below will be displayed. This allows a preset time for the operator to leave the building before the system becomes set.
Engineering Manual
8 Captiv8 Engineering Manual Eng00 Issue 1a 03/06/04
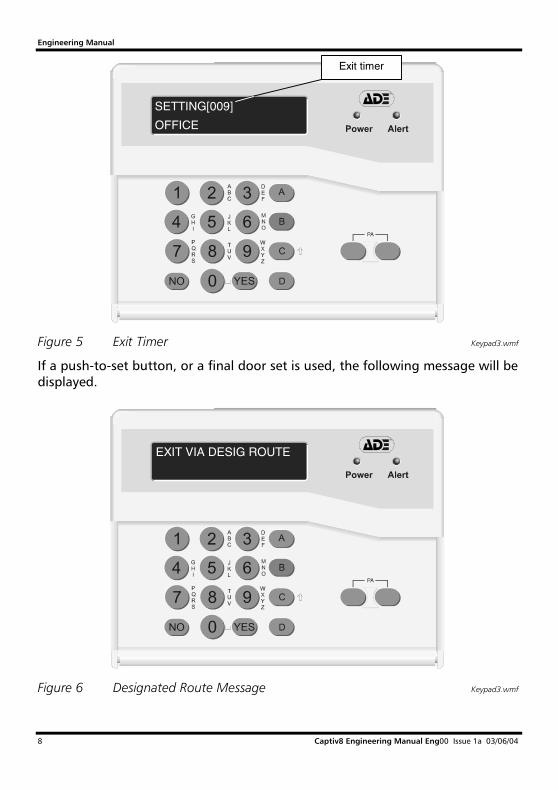
Figure 5 Exit Timer Keypad3.wmf
If a push-to-set button, or a final door set is used, the following message will be displayed.
Figure 6 Designated Route Message Keypad3.wmf
SETTING[009]
OFFICE
Exit timer
EXIT VIA DESIG ROUTE
Captiv8-256
Captiv8 Engineering Manual Eng00 Issue 1a 03/06/04 9
If flexi-set is enabled, the settable areas will be selectable. (See chapter 5 More Advanced Functions on page 16.)
ii) Manual Setting With this method, the system is set by closing the final exit door, or by pressing a push-to-set button outside the building, near the final door. The message displayed is …
EXIT VIA DESIG ROUTE

Engineering Manual
10 Captiv8 Engineering Manual Eng00 Issue 1a 03/06/04
2 Using the Keypad with PIN Code or Tag
a) Security Checks
If a warning tone sounds when the PIN code is keyed in or the tag is presented, a message will show the nature of the problem.
The tone will cease after about 10 seconds.
Press the NO key.
The system will remain unset, so that the problem can be resolved.
For example, a door may have been left open. If this is the case, close the door.
With the problem corrected, repeat the setting procedure.
i) Faults When Switching On If the exit tone continues to sound an interrupted tone... "beep - beep - beep - " after the setting procedure has been completed, there is probably a protected door left open on the exit route.
Return to the keypad and note the message on the display. E.g.
EXIT VIA HALLWAY
Stop the setting procedure by entering the PIN code, or offering up the tag.
Close the open door and repeat the setting procedure.
Captiv8-256
Captiv8 Engineering Manual Eng00 Issue 1a 03/06/04 11
b) Leaving the Building
If leaving the building, go to the Keypad and key in the PIN code, or present the tag. The exit tone will start.
Leave by the agreed exit route and close and lock the final exit door.
If fitted, press the 'Push to Set' button and the exit tone will cease. Captiv8-256 is now set.
c) Entering the Building
To enter the building the agreed entry route must be used, moving directly to the keypad.
Entry tone will sound, “Beep - beep - beep -…”
ENTRY [020]
TIME
Key in the PIN code or present the tag and the entry tone will cease.
Captiv8-256 is now unset.
d) Part-Setting the System
i) Smart Set To set the system while personnel remain in the building (e.g. to set the alarm at night), the Smart operating system will recognise the level of security required and will set only part of the system.
If partial setting is required the Push-to-Set button will not need to be used.
Engineering Manual
12 Captiv8 Engineering Manual Eng00 Issue 1a 03/06/04
e) Staying in the Building
To part-set the system, enter the PIN code at the keypad or present the tag to the ward reader and the exit tone will start.
Leave the protected area and go immediately to the un-protected area (e.g. upstairs).
After a preset time the exit tone will cease.
The system is now part set.

Captiv8-256
Captiv8 Engineering Manual Eng00 Issue 1a 03/06/04 13
3 When Problems Arise
a) Silencing Alarms
If an alarm tone sounds, key in the PIN code or present the tag and the alarm will stop sounding.
The display will indicate the problem.
ALARM SILENCE
LOW VOLTS
Press the 'YES' Key
The system will advise any action that is needed.
b) Engineer Reset
When an alarm has been cancelled, a random 5-digit code may be displayed, along with the message…
ENGINEER RESET REQUIRED 21055
Under these circumstances, it is normally necessary for an engineer from the installation company to check the installation and reset the system.
If the alarm has been triggered in error, the alarm receiving centre may permit a reset of the system without an engineer being present.
The centre will need to be notified of the 5-digit code by telephone (advising the agent that the system is a Captiv8-256). The alarm receiving centre will then issue a one-use code that can be used to reset the system.
Engineering Manual
14 Captiv8 Engineering Manual Eng00 Issue 1a 03/06/04
4 Setting Individual Areas
Sometimes, security needs will be a little more complex and the A B C D keys will need to be used.
The Installer can identify to all of the A B C D areas.
For example…
A Reception or All Set
B Warehouse or Bedtime Set
C Office or Cat in Lounge
D Storeroom or Dog in Study
SETTING
RECEPTION
In addition, names can be given to the whole system. E.g. 'ALL AREAS'.
SETTING
ALL AREAS
These will be displayed when setting the system.
a) Codes with Flexi-Set
For greater flexibility in setting parts of the system, choices can be made at the keypad.
SET AREAS
[ABCD]
Key in the PIN code or present the tag.
If only some of the areas assigned to the tag or PIN number are to be set, select those required by pressing the relevant A, B, C D keys.
Captiv8-256
Captiv8 Engineering Manual Eng00 Issue 1a 03/06/04 15
To alter the selection, press the relevant A B C D keys again.
Press the Yes key to accept the selection.
Setting areas will be displayed.
SETTING
ALL AREAS
Captiv8-256 will now set the selected areas.
b) Flexi-Set
When the system is already set and it is required to unset it…
Key in the PIN code or present the tag.
NOVAR PLC
TIME:
All areas for which the tag or PIN is valid will be Unset. Any areas set for which the code is not valid will remain set. E.g. if A and B are set…
If an 'A' tag is presented, only area A will be unset.
If an 'A B' tag is presented, both A & B will be unset.
An 'A B C' tag will unset A & B, leaving C unset.
If there are no areas set for which the code is valid, the system will set as described in chapter 5 More Advanced Functions on page 16.
Engineering Manual
16 Captiv8 Engineering Manual Eng00 Issue 1a 03/06/04
5 More Advanced Functions
a) The Chime FacilityThe 'C' key can be used to select the 'chime' facility while the system is Unset.
For example, an alert is to sound if someone enters through a particular door during the day.
NOVAR PLC
TIME:
Press the 'C' key.
The display will show a 'C'
NOVAR PLC
TIME: C
If the door opens the 'chime' tone will occur.
To cancel the 'Chime' function, press 'C' again.
NOVAR PLC
TIME:
a) Ignoring an Open Door or Window
In a domestic setting it may be necessary to ignore windows deliberately left open in the summer-time.
Enter the PIN code or present the tag.
Captiv8-256
Captiv8 Engineering Manual Eng00 Issue 1a 03/06/04 17
The display will ask if a window is to be left open.
To omit the window Press 'YES' (or 'NO' if it is not to be omitted.)
LEAVE OPEN?
BEDRM WINDOW
The system will then set as normal.
The window will be omitted for this one arming period only.
Only doors or windows already open can be omitted in this way.
b) Omitting a Zone when Leaving the Building
It may be occasionally necessary to isolate a detector if a room is occupied.
To do this, enter the PIN code or tag.
NOVAR PLC
TIME:
While the exit tone is sounding press the 'YES' key.
OMIT ZONE?
When the 'OMIT ZONE' menu is displayed…
Key in the number of the zone to omit and press 'YES'.
Always use a leading zero; e.g. 02 is zone 2. On larger systems 002 is zone 2.
Accepted zones will be displayed on the screen.
Repeat for any other zones that need to be omitted.
Engineering Manual
18 Captiv8 Engineering Manual Eng00 Issue 1a 03/06/04
After 10 seconds Captiv8-256 will begin to set.
Zones set in this way will be omitted for this one period only.
c) Keypad Personal Attack
Captiv8-256 allows personal assistance to be summoned in an emergency.
To do this, press the two PA keys at the same time.
To reset…
Enter the PIN code or present the tag.
This facility is only available if it has been enabled by the alarm installer. It can also send a signal to the Alarm Receiving Centre.
Captiv8-256
Captiv8 Engineering Manual Eng00 Issue 1a 03/06/04 19
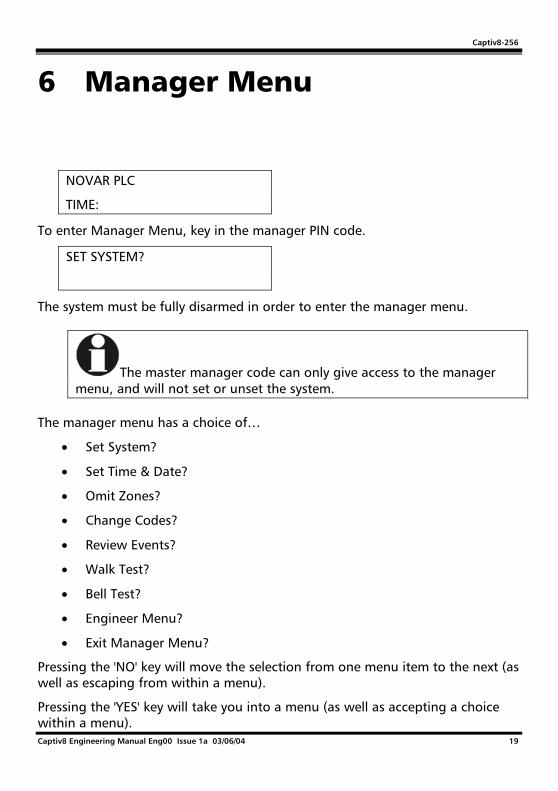
6 Manager Menu
NOVAR PLC
TIME:
To enter Manager Menu, key in the manager PIN code.
SET SYSTEM?
The system must be fully disarmed in order to enter the manager menu.
The master manager code can only give access to the manager menu, and will not set or unset the system.
The manager menu has a choice of…
• Set System?
• Set Time & Date?
• Omit Zones?
• Change Codes?
• Review Events?
• Walk Test?
• Bell Test?
• Engineer Menu?
• Exit Manager Menu?
Pressing the 'NO' key will move the selection from one menu item to the next (as well as escaping from within a menu).
Pressing the 'YES' key will take you into a menu (as well as accepting a choice within a menu).
Engineering Manual
20 Captiv8 Engineering Manual Eng00 Issue 1a 03/06/04
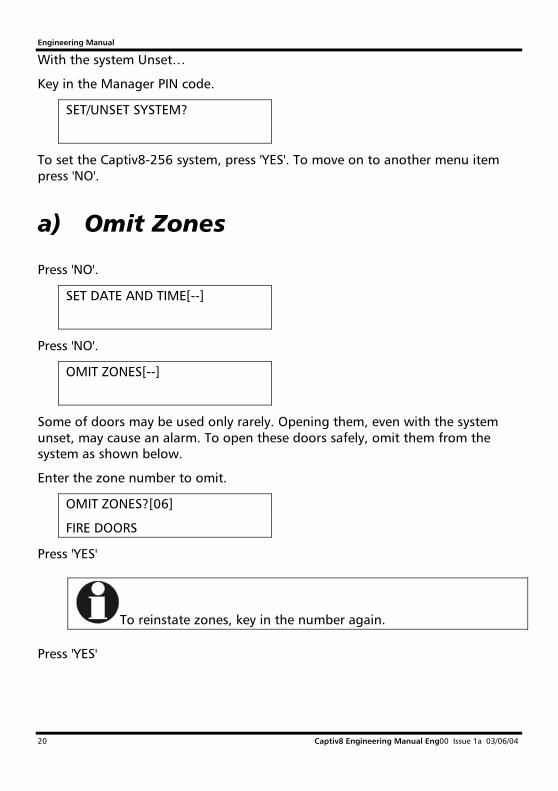
With the system Unset…
Key in the Manager PIN code.
SET/UNSET SYSTEM?
To set the Captiv8-256 system, press 'YES'. To move on to another menu item press 'NO'.
a) Omit Zones
Press 'NO'.
SET DATE AND TIME[--]
Press 'NO'.
OMIT ZONES[--]
Some of doors may be used only rarely. Opening them, even with the system unset, may cause an alarm. To open these doors safely, omit them from the system as shown below.
Enter the zone number to omit.
OMIT ZONES?[06]
FIRE DOORS
Press 'YES'
To reinstate zones, key in the number again.
Press 'YES'
Captiv8-256
Captiv8 Engineering Manual Eng00 Issue 1a 03/06/04 21
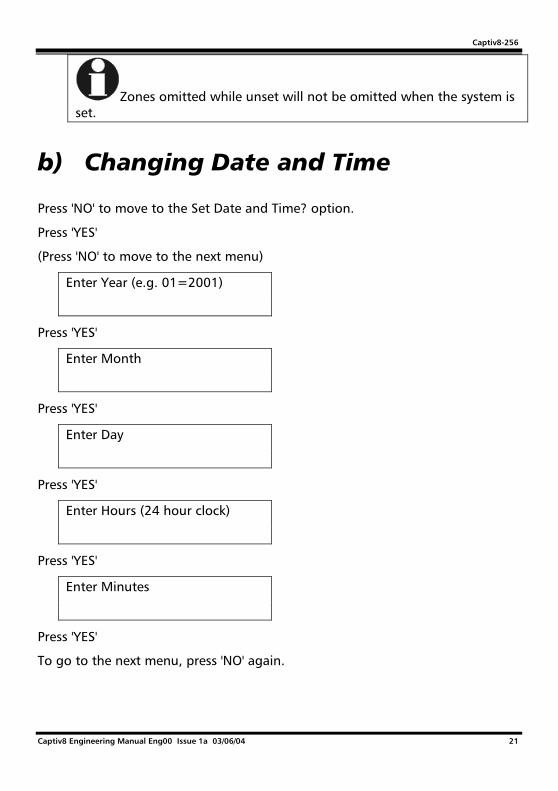
Zones omitted while unset will not be omitted when the system is set.
b) Changing Date and Time
Press 'NO' to move to the Set Date and Time? option.
Press 'YES'
(Press 'NO' to move to the next menu)
Enter Year (e.g. 01=2001)
Press 'YES'
Enter Month
Press 'YES'
Enter Day
Press 'YES'
Enter Hours (24 hour clock)
Press 'YES'
Enter Minutes
Press 'YES'
To go to the next menu, press 'NO' again.
Engineering Manual
22 Captiv8 Engineering Manual Eng00 Issue 1a 03/06/04
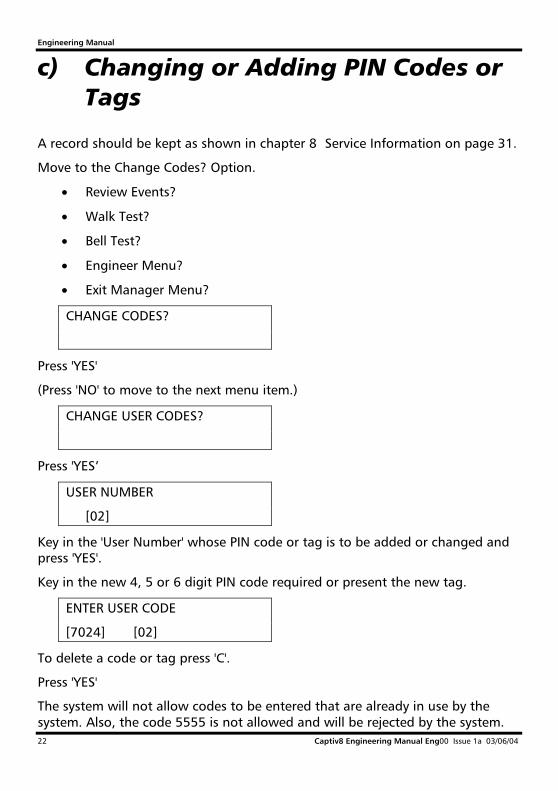
c) Changing or Adding PIN Codes or Tags
A record should be kept as shown in chapter 8 Service Information on page 31.
Move to the Change Codes? Option.
• Review Events?
• Walk Test?
• Bell Test?
• Engineer Menu?
• Exit Manager Menu?
CHANGE CODES?
Press 'YES'
(Press 'NO' to move to the next menu item.)
CHANGE USER CODES?
Press 'YES’
USER NUMBER
[02]
Key in the 'User Number' whose PIN code or tag is to be added or changed and press 'YES'.
Key in the new 4, 5 or 6 digit PIN code required or present the new tag.
ENTER USER CODE
[7024] [02]
To delete a code or tag press 'C'.
Press 'YES'
The system will not allow codes to be entered that are already in use by the system. Also, the code 5555 is not allowed and will be rejected by the system.
Captiv8-256
Captiv8 Engineering Manual Eng00 Issue 1a 03/06/04 23
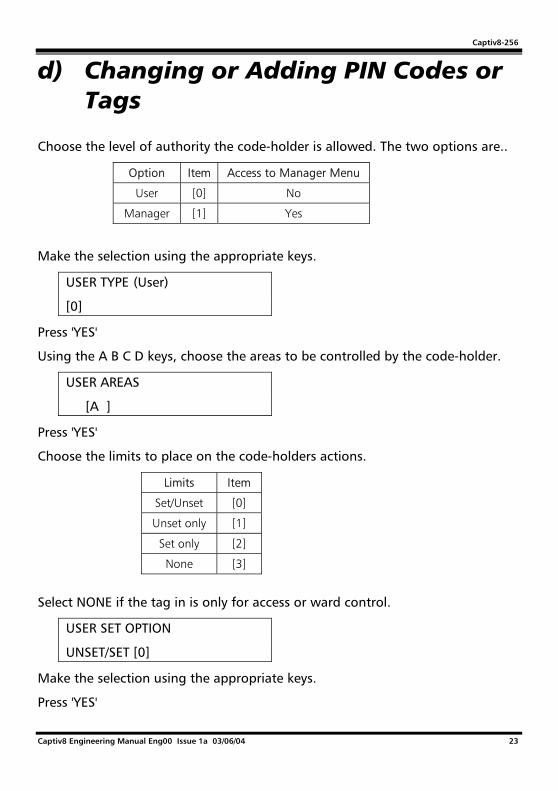
d) Changing or Adding PIN Codes or Tags
Choose the level of authority the code-holder is allowed. The two options are..
Option Item Access to Manager Menu
User [0] No
Manager [1] Yes
Make the selection using the appropriate keys.
USER TYPE (User)
[0]
Press 'YES'
Using the A B C D keys, choose the areas to be controlled by the code-holder.
USER AREAS
[A ]
Press 'YES'
Choose the limits to place on the code-holders actions.
Limits Item
Set/Unset [0]
Unset only [1]
Set only [2]
None [3]
Select NONE if the tag in is only for access or ward control.
USER SET OPTION
UNSET/SET [0]
Make the selection using the appropriate keys.
Press 'YES'
Engineering Manual
24 Captiv8 Engineering Manual Eng00 Issue 1a 03/06/04
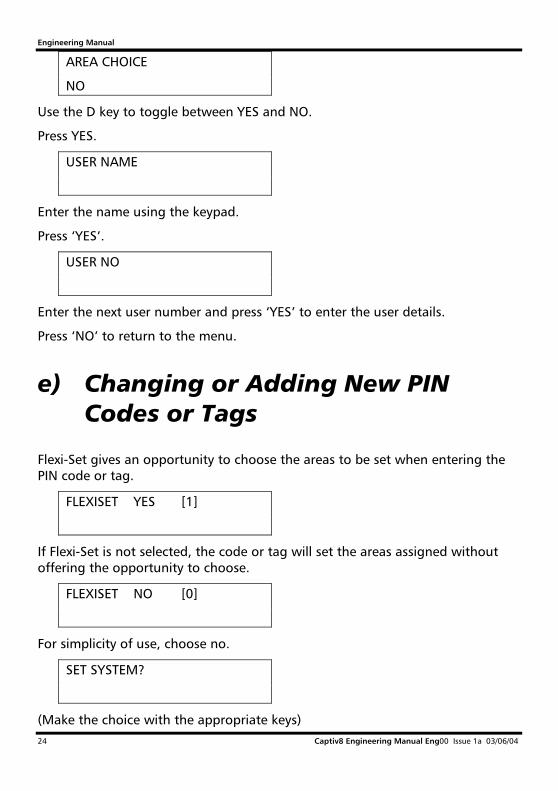
AREA CHOICE
NO
Use the D key to toggle between YES and NO.
Press YES.
USER NAME
Enter the name using the keypad.
Press ‘YES’.
USER NO
Enter the next user number and press ‘YES’ to enter the user details.
Press ‘NO’ to return to the menu.
e) Changing or Adding New PIN Codes or Tags
Flexi-Set gives an opportunity to choose the areas to be set when entering the PIN code or tag.
FLEXISET YES [1]
If Flexi-Set is not selected, the code or tag will set the areas assigned without offering the opportunity to choose.
FLEXISET NO [0]
For simplicity of use, choose no.
SET SYSTEM?
(Make the choice with the appropriate keys)
Captiv8-256
Captiv8 Engineering Manual Eng00 Issue 1a 03/06/04 25
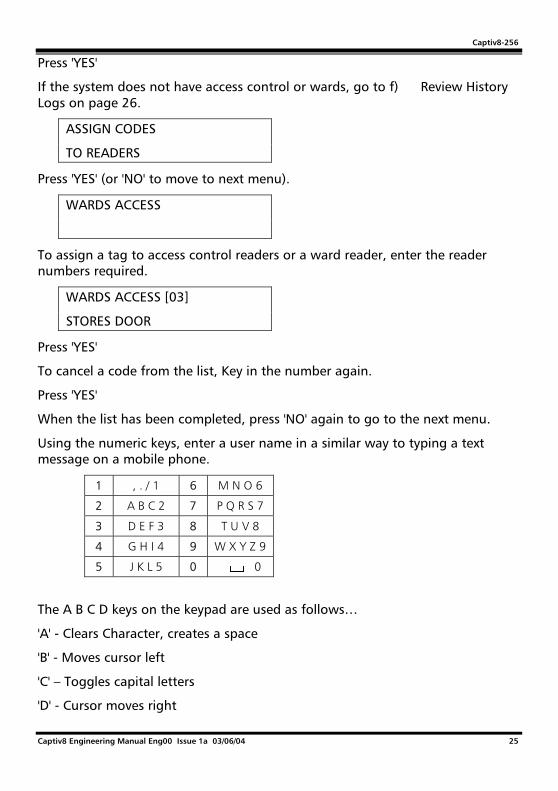
Press 'YES'
If the system does not have access control or wards, go to f) Review History Logs on page 26.
ASSIGN CODES
TO READERS
Press 'YES' (or 'NO' to move to next menu).
WARDS ACCESS
To assign a tag to access control readers or a ward reader, enter the reader numbers required.
WARDS ACCESS [03]
STORES DOOR
Press 'YES'
To cancel a code from the list, Key in the number again.
Press 'YES'
When the list has been completed, press 'NO' again to go to the next menu.
Using the numeric keys, enter a user name in a similar way to typing a text message on a mobile phone.
1 , . / 1 6 M N O 6
2 A B C 2 7 P Q R S 7
3 D E F 3 8 T U V 8
4 G H I 4 9 W X Y Z 9
5 J K L 5 0 0
The A B C D keys on the keypad are used as follows…
'A' - Clears Character, creates a space
'B' - Moves cursor left
'C' – Toggles capital letters
'D' - Cursor moves right
Engineering Manual
26 Captiv8 Engineering Manual Eng00 Issue 1a 03/06/04
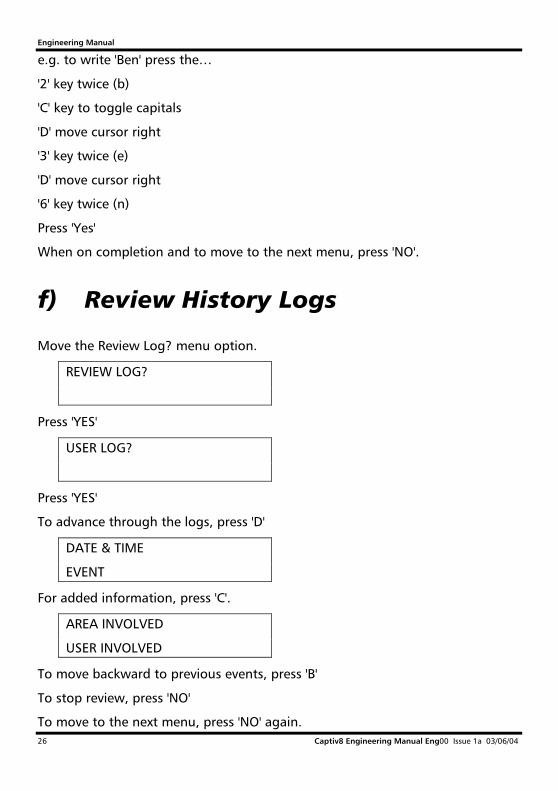
e.g. to write 'Ben' press the…
'2' key twice (b)
'C' key to toggle capitals
'D' move cursor right
'3' key twice (e)
'D' move cursor right
'6' key twice (n)
Press 'Yes'
When on completion and to move to the next menu, press 'NO'.
f) Review History Logs
Move the Review Log? menu option.
REVIEW LOG?
Press 'YES'
USER LOG?
Press 'YES'
To advance through the logs, press 'D'
DATE & TIME
EVENT
For added information, press 'C'.
AREA INVOLVED
USER INVOLVED
To move backward to previous events, press 'B'
To stop review, press 'NO'
To move to the next menu, press 'NO' again.
Captiv8-256
Captiv8 Engineering Manual Eng00 Issue 1a 03/06/04 27
If the access control facility is in use, a separate log is available, dedicated to events using this function.
Follow the same procedure as described above, but press 'NO' to choose between 'USER LOG' and 'ACCESS LOG'.
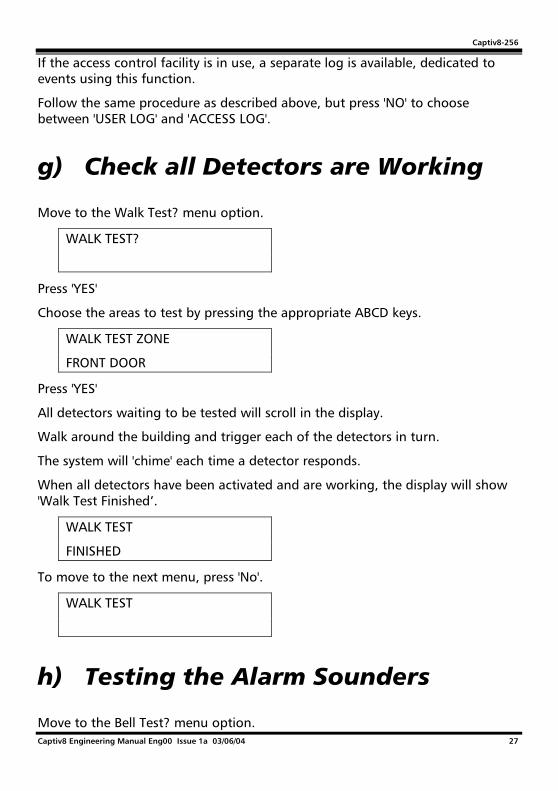
g) Check all Detectors are Working
Move to the Walk Test? menu option.
WALK TEST?
Press 'YES'
Choose the areas to test by pressing the appropriate ABCD keys.
WALK TEST ZONE
FRONT DOOR
Press 'YES'
All detectors waiting to be tested will scroll in the display.
Walk around the building and trigger each of the detectors in turn.
The system will 'chime' each time a detector responds.
When all detectors have been activated and are working, the display will show 'Walk Test Finished’.
WALK TEST
FINISHED
To move to the next menu, press 'No'.
WALK TEST
h) Testing the Alarm Sounders
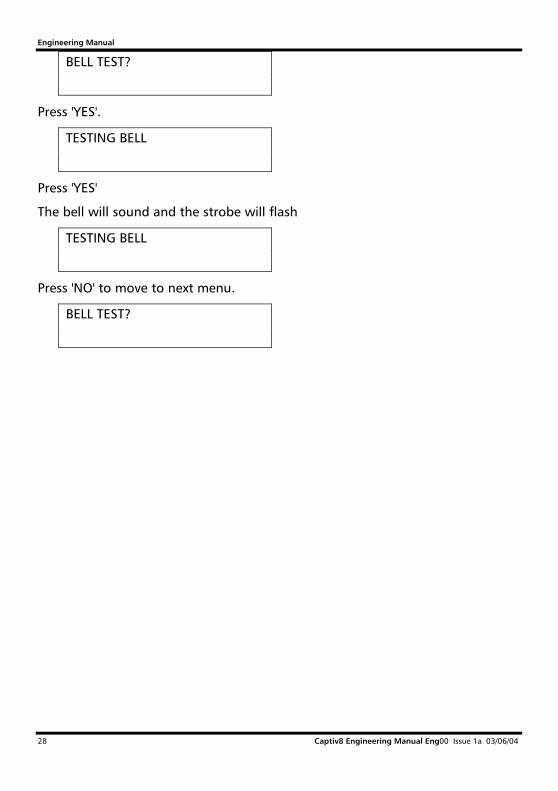
Move to the Bell Test? menu option.
Engineering Manual
28 Captiv8 Engineering Manual Eng00 Issue 1a 03/06/04
BELL TEST?
Press 'YES'.
TESTING BELL
Press 'YES'
The bell will sound and the strobe will flash
TESTING BELL
Press 'NO' to move to next menu.
BELL TEST?
Captiv8-256
Captiv8 Engineering Manual Eng00 Issue 1a 03/06/04 29
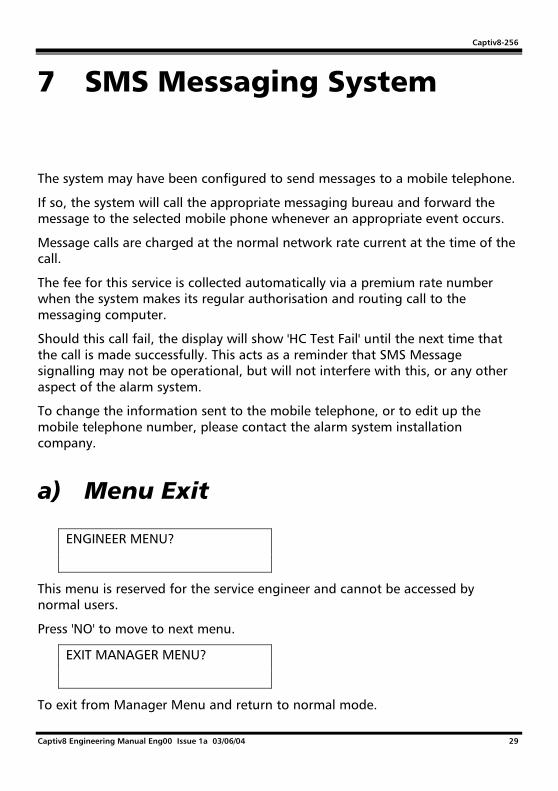
7 SMS Messaging System
The system may have been configured to send messages to a mobile telephone.
If so, the system will call the appropriate messaging bureau and forward the message to the selected mobile phone whenever an appropriate event occurs.
Message calls are charged at the normal network rate current at the time of the call.
The fee for this service is collected automatically via a premium rate number when the system makes its regular authorisation and routing call to the messaging computer.
Should this call fail, the display will show 'HC Test Fail' until the next time that the call is made successfully. This acts as a reminder that SMS Message signalling may not be operational, but will not interfere with this, or any other aspect of the alarm system.
To change the information sent to the mobile telephone, or to edit up the mobile telephone number, please contact the alarm system installation company.
a) Menu Exit
ENGINEER MENU?
This menu is reserved for the service engineer and cannot be accessed by normal users.
Press 'NO' to move to next menu.
EXIT MANAGER MENU?
To exit from Manager Menu and return to normal mode.

Engineering Manual
30 Captiv8 Engineering Manual Eng00 Issue 1a 03/06/04
Press 'YES'
If you wish to select any of the Manager Menu items again press the 'NO' key until your choice is displayed (see F2).
Captiv8-256
Captiv8 Engineering Manual Eng00 Issue 1a 03/06/04 31
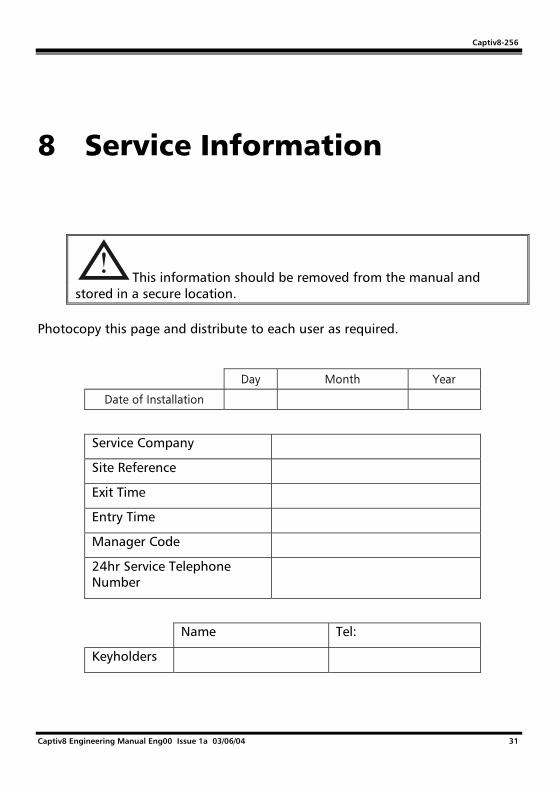
8 Service Information
This information should be removed from the manual and stored in a secure location.
Photocopy this page and distribute to each user as required.
Day Month Year
Date of Installation
Service Company
Site Reference
Exit Time
Entry Time
Manager Code
24hr Service Telephone Number
Name Tel:
Keyholders
Engineering Manual
32 Captiv8 Engineering Manual Eng00 Issue 1a 03/06/04
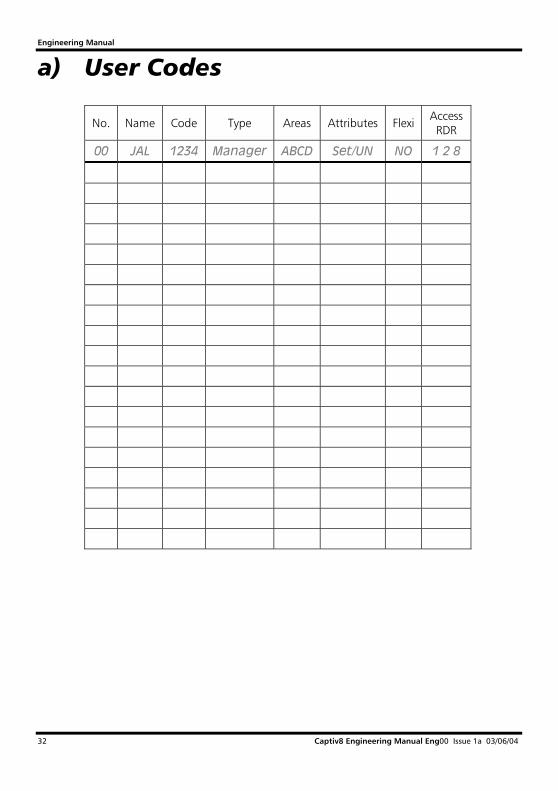
a) User Codes
No. Name Code Type Areas Attributes FlexiAccess RDR
00 JAL 1234 Manager ABCD Set/UN NO 1 2 8

Captiv8-256
Captiv8 Engineering Manual Eng00 Issue 1a 03/06/04 33
Notes

Engineering Manual
34 Captiv8 Engineering Manual Eng00 Issue 1a 03/06/04
Notes

Captiv8-256
Captiv8 Engineering Manual Eng00 Issue 1a 03/06/04 35
Notes

Engineering Manual
36 Captiv8 Engineering Manual Eng00 Issue 1a 03/06/04
Novar PLC reserves the right to revise this publication from time to time and make changes to the content hereof without obligation to notify any person of such revision changes.
The Arnold Centre, Paycocke Road, Basildon. SS14 3EA
For technical support… Telephone…+44 (0906) 302 0999
Website www.ade.co.uk User Manual Part No: 4188-794 Registered Office Novar House 24 Queens Road Weybridge Surrey KT13 9UX Registered No 189291
This panel conforms to the requirements of the European EMC and Low Voltage directives, and carries the CE mark.

![[4188]-1 - Savitribai Phule Pune · PDF file[4188]-1 P. G. D. M. M. (Semester - I) ... What is Marketing Mix ? ... Also suggest suitable Promotional Mix for the Company](https://img.pdfslide.us/doc/110x75/5a6fe45e7f8b9ab6538b7c25/4188-1-savitribai-phule-pune-universitywwwunipuneacinuniversityfilespdfoldpapersapril2012pdf.jpg)