Embed Size (px)
Citation preview

40V LITHIUM-ION AIR COMPRESSOR4100102
Read all safety rules and instructions carefully before operating this tool.
Owner’s ManualTOLL-FREE HELPLINE: 1-888-90WORKS (888.909.6757)
www.GreenWorksTools.com
Some Greenworks Lithium-Ion products are sold with or without battery and charger.(sold separately)

2 3
CONTENTS
Contents .............................................................................................................................. 2Product specifications .......................................................................................................... 2 Symbols ............................................................................................................................... 3General safety rules .........................................................................................................4-9Know your air compressor ................................................................................................. 10Assembly instruction......................................................................................................... 11-12Operation ...................................................................................................................... 13-14Maintenance............................................................................................................................15Environmentally safe battery disposal(sold separately).........................................................16Troubleshooting..................................................................................................................17-18Warranty..................................................................................................................19 Exploded View ..................................................... ...........................................................20-21 Parts List....................................................................................................................... 22-23Notes ................................................................................................................................. 24
PRODUCT SPECIfICATIONS40V LITHIUM-ION AIR COMPRESSORMotor..........................................................................................................................................40 V Running horsepower....................................................................................................................1/3 Tank size....................................................................................................0.5 U.S.GALLONS(1.9L) Air delivery (SCfM*) @ 40 PSI....................................................................................................1.0 Air delivery (SCfM*) @ 90 PSI....................................................................................................0.7 Cut-in pressure (PSI)....................................................................................................................85 Cut-out pressure (PSI)................................................................................................................115 Pump-up time from empty..............................................................................................60 SecondsPump-up cycles per full charge....................................................................................................40Pump-up time from 85 psi (Cut-in pressure)..................................................................20 SecondsNoise level @ 20ft (dBA)...............................................................................................................85Power ...............................................................................................................................260 Watts Weight with battery (sold separately).................................................................................14.56 lbs
* for use with 40V 2Ah Greenworks battery only. Model # 29462 (sold separately)* for use with 40V Greenworks charger only, Model # 29482(sold separately)
Some of the following symbols may be used on this product. Please study them and learn their meaning. Proper interpretation of these symbols will allow you to operate the product better and safer.
SyMBOLS
The following signal words and meanings are intended to explain the levels of risk associated with this product.
DANGER Indicates an imminently hazardous situation, which, if not avoided, will result in death or serious injury.
WARNING Indicates a potentially hazardous situation, which, if not avoided, could result in death or serious injury.
CAUTION Indicates a potentially hazardous situation, which, if not avoided, may result in minor or moderate injury.
CAUTION (Without Safety Alert Symbol) Indicates a situation that may result in property damage.
SYMBOL SIGNAL MEANING
SYMBOL NAME
Safety Alert
Please read the instructions carefully beforestarting the product.
Wear ear protection
Risk of electric shock.Caution: before doing any work on the compressor it must be disconnected from the power supply.Waste electrical products should not bedisposed of with household waste. Please recycle where facilities exist. Check with your local authority or retailer for recycling advice.
1
4 5
GENERAL SAfETy RULES
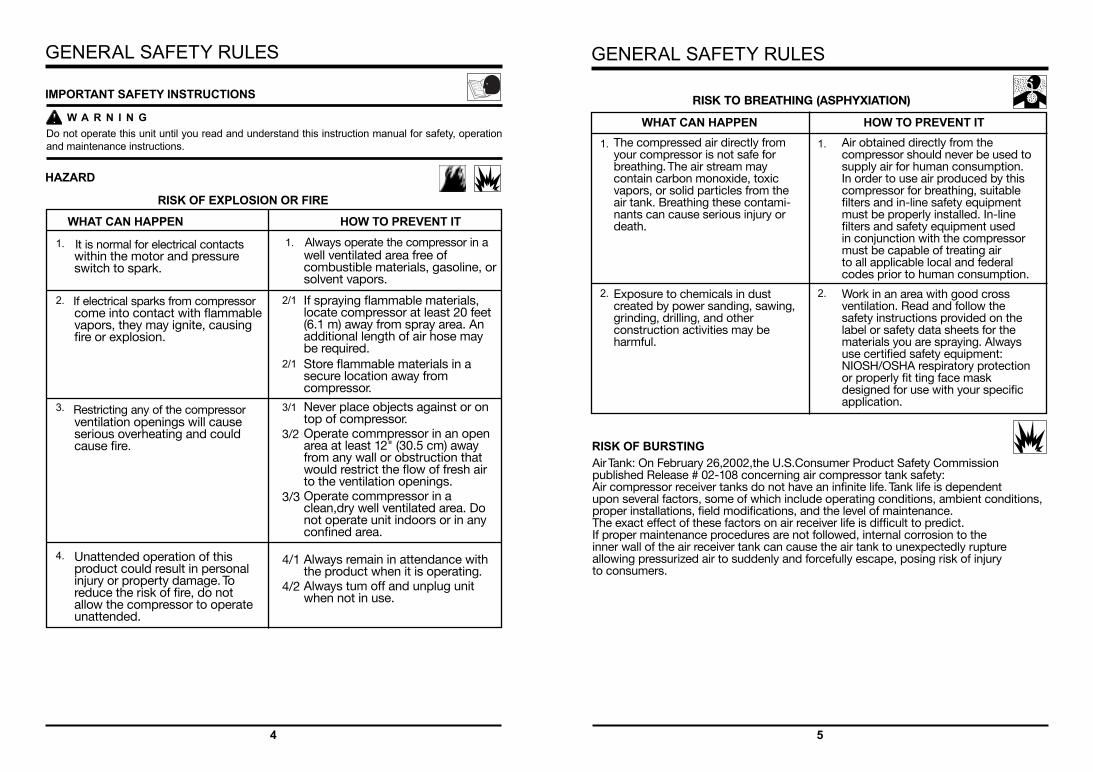
W A R N I N GDo not operate this unit until you read and understand this instruction manual for safety, operation and maintenance instructions.
IMPORTANT SAFETY INSTRUCTIONS
RISK OF EXPLOSION OR FIRE
WHAT CAN HAPPEN HOW TO PREVENT IT
HAZARD
within the motor and pressureswitch to spark.
come into contact with flammablevapors, they may ignite, causing fire or explosion.
ventilation openings will cause serious overheating and could cause fire.
Unattended operation of this product could result in personal injury or property damage. To reduce the risk of fire, do not allow the compressor to operate unattended.
well ventilated area free of combustible materials, gasoline, or solvent vapors.
If spraying flammable materials,locate compressor at least 20 feet(6.1 m) away from spray area. Anadditional length of air hose may be required.Store flammable materials in a secure location away from compressor.Never place objects against or on top of compressor.Operate commpressor in an open area at least 12" (30.5 cm) awayfrom any wall or obstruction thatwould restrict the flow of fresh air to the ventilation openings.Operate commpressor in a clean,dry well ventilated area. Do not operate unit indoors or in any confined area.
Always remain in attendance with the product when it is operating.Always tum off and unplug unit when not in use.
1.
2.
3.
4.
1.
2/1
2/1
3/1
3/2
3/3
4/1
4/2
GENERAL SAfETy RULES
WHAT CAN HAPPEN
RISK OF BURSTING
HOW TO PREVENT IT
1. 1.
2. 2.
The compressed air directly from your compressor is not safe forbreathing. The air stream maycontain carbon monoxide, toxicvapors, or solid particles from theair tank. Breathing these contami-nants can cause serious injury or death.
Exposure to chemicals in dust created by power sanding, sawing,grinding, drilling, and other construction activities may be harmful.
Air obtained directly from the compressor should never be used to supply air for human consumption.In order to use air produced by thiscompressor for breathing, suitablefilters and in-line safety equipmentmust be properly installed. In-linefilters and safety equipment usedin conjunction with the compressormust be capable of treating airto all applicable local and federalcodes prior to human consumption.
Work in an area with good cross ventilation. Read and follow thesafety instructions provided on thelabel or safety data sheets for thematerials you are spraying. Alwaysuse certified safety equipment:NIOSH/OSHA respiratory protectionor properly fit ting face maskdesigned for use with your specificapplication.
Air Tank: On February 26,2002,the U.S.Consumer Product Safety Commission published Release # 02-108 concerning air compressor tank safety:Air compressor receiver tanks do not have an infinite life. Tank life is dependentupon several factors, some of which include operating conditions, ambient conditions,proper installations, field modifications, and the level of maintenance.The exact effect of these factors on air receiver life is difficult to predict.If proper maintenance procedures are not followed, internal corrosion to theinner wall of the air receiver tank can cause the air tank to unexpectedly ruptureallowing pressurized air to suddenly and forcefully escape, posing risk of injuryto consumers.

6 7
GENERAL SAfETy RULES
Attachments & accessories:
Tires:
WHAT CAN HAPPEN HOW TO PREVENT IT
1.
1.
1.
1.
1.
1.
2.
3.
Failure to properly drain condensedwater from air tank, causing rustand thinning of the steel air tank.
Exceeding the pressure rating ofair tools, spray guns, air operatedaccessories, tires, and otherinflatables can cause them toexplode or fly apart, and couldresult in serious injury.
Over inflation of tires could result inserious injury and property damage.
Modifications or attempted repairsto the air tank.
Unauthoriaed modifications tothe safety valve or any othercomponents which control air tankpressure.
Drain air tank daily or after each use. If air tank develops a leak,replace it immediately with anew air tank or replace the entirecompressor.
Follow the equipmentmanufacturers recommendationand never exceed the maximumallowable pressure rating ofattachments. Never use compressorto inflate small low pressure objectssuch as children’s toys, footballs,basketballs, etc.
Use a tire pressure gauge to checkthe tires pressure before each useand while inflating tires; see the tiresidewall for the correct tire pressure.
NOTE: Air tanks, compressors andsimilar equipment used to inflate tirescan fill small tires very rapaidly. Adjustpressure regulator on air supply tono more than the rating of the tirepressure. Add air in small incrementsand frequently use the tire gauge toprevent over inflation.
2. Never drill into,weld,or make anymodifications to the air tank or itsattachments. Never attempt torepair a damaged or leaking airtank. Replace with a new air tank.
3. The air tank is designed towithstand specific operatingpressures. Never make adjustmentsor parts substitutions to alter thefactory set operating pressures.
The following conditions could lead to a weakening of the air tank, and result ina violent air tank explosion:
GENERAL SAfETy RULES
WHAT CAN HAPPEN
RISK FROM FLYING OBJECTS
HOW TO PREVENT IT
1. 1/1
1/2
1/3
The compressed air stream can cause soft tissue damage toexposed skin and can propel dirt,chips, loose particles, and smallobjects at high speed, resulting in property damage or personal injury. Never point any nozzle or sprayer
toward any part of the body or atother people or animals.Always turn the compressor off and bleed pressure from the airhose and air tank before attemptingmaintenance, attaching tools oraccessories.
Always wear certified safety equipment: ANSI Z87.1 eye protection (CAN/CSA Z94.3) with side shields when using the compressor.
WHAT CAN HAPPEN
RISK OF HOT SURFACES
HOW TO PREVENT IT
1. 1/1
1/2
Touching exposed metal such asthe compressor head, engine head,engine exhaust or outlet tubes, canresult in serious burns.
Never touch any exposed metal parts on compressor during orimmediately after operation.Compressor will remain hot forseveral minutes after operation.Do not reach around protective shrouds or attempt maintenanceuntil unit has been allowed to cool.

8 9
GENERAL SAfETy RULES
WHAT CAN HAPPEN
WHAT CAN HAPPEN
RISK FROM MOVING PARTS
RISK OF UNSAFE OPERATION
HOW TO PREVENT IT
HOW TO PREVENT IT
1.
1.
1/1
1
2
3
45
6
7
8
1/2
Moving parts such as the pulley, flywheel, and belt can cause seriousinjury if they come into contact with you or your clothing.
Unsafe operation of your air compressor could lead to serious injury or death to you or others.
2. 2.Attempting to operate compressor with damaged or missing parts orattempting to repair compressorwith protective shrouds removedcan expose you to moving partsand can result in serious injury.
Any repairs required on this productshould be performed by authorizedservice center personnel.
Never operate the compressor with guards or covers which are damaged or removed.
Review and understand all insructions and warnings in this manual.Become familiar with the operation and controls of the air compressor.Keep operating area clear of all persons, pets, and obstacles.Keep children away from the air compressor at all times.Do not operate the product when fatigued or under the influence ofalcohol or drugs. Stay alert at all times.Never defeat the safety features of this product.Equip area of operation with a fire extinguisher.Do not operate machine with missing, broken, or unauthorized parts.
Keep your hair, clothing,and glovesaway from moving parts. Looseclothes, jewelry, or long hair can be caught in moving parts.
1/3 Air vents may cover moving parts and should be avoided as well.
GENERAL SAfETy RULES
WHAT CAN HAPPEN
WHAT CAN HAPPEN
RISK OF FALLING
RISK FROM NOISE
GLOSSARY
ACCESSORIES
SAVE THESE INSTRUCTIONSFOR FUTURE USE
HOW TO PREVENT IT
HOW TO PREVENT IT
1
1
1
1
A portable compressor can fall from a table, workbench, or roofcausing damage to the compressorand could result in seriousinjury or death to the operator.
Cut-In Pressure: While the motoris off, air tank pressure drops as youcontinue to use your accessory. Whenthe tank pressure drops to a certainlow level the motor will restart automatically.The low pressure at whichthe motor automatically restarts iscalled "cut-in" pressure.Cut-Out Pressure: When an air compressoris turned on and begins torun, air pressure in the air tank beginsto build. It builds to a certain highpressure before the motor automaticallyshuts off, protecting your air tankfrom pressure higher than its capacity.The high pressure at which the motorshuts off is called "cut-out" pressure.Branch Circuit: Circuit carrying electricityfrom electrical panel to outlet.
Become familiar with these termsbefore operating the unit.CFM: Cubic feet per minute.SCFM: Standard cubic feet per minute;a unit of measure of air delivery.PSI: Pounds per square inch gauge;a unit of measure pressure.Code Certification: Products thatbear one or more of the followingmarks: UL®*, CUL, ETL®*, CETL, havebeen evaluated by OSHA certifiedindependent safety laboratories andmeet the applicable Standards forSafety.*UL® is a registered trademark ofUnderwriters Laboratories and ETL®is a registered trademark of ElectricalTesting Laboratories.
Includes: Recoil Hose, Blow gun, 1/4" Quick connector, Tire chuck, Inflation needleBlow gun adaptor, Tapered nozzle, Plumber's tape
Under some conditions and duration of use, noise from this product may contribute to hearing loss.
Always operate commpressor in a stable secure position to preventaccidental movement of the unit.Never operate compressor on aroof or other elevated position.Use additional air hose to reach high locations.
Always wear certified safety equipment: ANSI S12.6 (S3.19) hearing protection.

10 11
KNOW yOUR AIR COMPRESSOR
The safe use of this product requires an understanding of the information on the tool and in this operator’s manual as well as a knowledge of the project you are attempting. Before use of this product, familiarize yourself with all operating features and safety rules. (See Fig. 1)
CHARGER (sold separately)
40V LITHIUM-ION BATTERy(sold separately)
AIR TANK PRESSURE GAUGETOOL OUTLET PRESSURE GAUGE
fEMALE QUICK CONNECT
OUTLET PRESSURE REGULATOR KNOB
AUTO ON/Off SWITCH
AIR TANK
AIR TANK DRAIN VALVE
SAfETy VALVE
fig. 1
RECOIL HOSE
TIRE CHUCK
END Of HOSE
OR BLOW GUN
OR QUICK CONNECTOR
PLUG
BLOW GUNADAPTOR
OR TAPERED NOZZLE
INfLATION NEEDLE
ASSEMBLy INSTRUCTION
ATTACHING AIR HOSE TO COMPRESSOR1, Using your left hand push quick connect towards the body of the compressor.2, Firmly press fit the male quick connect portion on the air hose into the female quick connect and release female quick connect locking hose in place.
NOTE: When connecting or disconnecting air hose remove air from tank.
ASSEMBLE ACCESSORIESThe unit supplied with an accessory kit, choose the accessory needed.Assemble Accessory Kit1. Assemble female tire chuck/blow gun/quick coupler to the end of hose and tighten securely with wrenches.2, Assemble Plug to the quick coupler3, Assemble tire chuck/ blow gun to the plug4, Assemble blow gun adaptor to the blow gun.5, Assemble inflation needle/tapered nozzle to the blow gun adaptor.
fig. 2
RECOIL HOSE
fig. 3 TIRE CHUCK
END Of HOSE
OR BLOW GUN
OR QUICK CONNECTOR
PLUG
BLOW GUNADAPTOR
OR TAPERED NOZZLE
INfLATION NEEDLE

12 13
UNPACKING• This product requires assembly.
W A R N I N GDo not use this product if any parts on the Packing List are already assembled to your product when you unpack it. Parts on this list are not assembled to the product by the manufacturer and require customer installation. Use of a product that may have been improperly assembled could result in serious personal injury.
• Carefully remove the product and any accessories from the box. Make sure that all items listed in the packing list are included.
• Inspect the product carefully to make sure no breakage or damage occurred during shipping.
• Do not discard the packing material until you have carefully inspected and satisfactorily operated the product.
• If any parts are damaged or missing, please call 1-888- 909-6757 for assistance.
PACKING LIST• Air Compressor• Battery Pack P/N: 31101976 (sold separately)• Battery Charger P/N: 31102998 (sold separately)• Recoil Hose P/N: 3790175A• Accessory Kit
ASSEMBLy INSTRUCTION
• Operator’s Manual
W A R N I N GIf any parts are damaged or missing do not operate this product until the parts are replaced. failure to heed this warning could result in serious personal injury
W A R N I N GDo not attempt to modify this product or create accessories not recommended for use with this product. Any such alteration or modification is misuse and could result in a hazardous condition leading to possible serious personal injury.
1 Blow gun, P/N:379051101 1/4” Quick connector, P/N:3790150-1A1 Tire chuck, P/N:379041101 Inflation needle, P/N:37902110 1 Blow gun adaptor, P/N:37911110 1 Tapered nozzle, P/N:379041102 Male plug P/N:37909110
BATTERY(SOLD SEPARATELY)
IMPORTANT! The battery pack is not charged when it is purchased. Before using the air compressor for the first time, place the battery pack in the battery charger and charge. Make sure to read all safety precautions, and follow the instructions in the Battery Charger section.(sold separately) To install (See Figure 4.)1. Align the tongue (3) of the battery pack with the cavity (4) in the air compressor housing.(sold separately)2. Grasp the air compressor (2) firmly.3. Push the battery pack into the handle until the latch locks into place.(sold separately)4. Do not use force when inserting the battery pack. It should slide into position and “click”.(sold separately)To remove (See Figure 4.)1. Press the latch button (1) on the battery pack down and hold.(sold separately)2. Grasp the air compressor (2) firmly, and pull the battery pack out of the housing.(sold sepa-rately)
OPERATION
W A R N I N GFollow these instructions in order to avoid injury and to reduce the risk of electric shock or fire:• Replace the battery pack or the charger immediately if the battery case or charger cord is damaged.(sold separately)• Verify that the switch is in the OFF position before inserting or removing the battery pack.(sold separately)• Verify that the battery pack is removed and the switch is in the OFF position before inspecting, adjusting, or performing maintenance on any part of the blower.• Read, understand, and follow the instructions contained in the section entitled Charging Procedure.
NOTE: The battery pack fits into the handle snugly in order to prevent accidental dislodging. It may require a strong pull to remove it.(sold separately)
fig. 4
4
1
2
3

14 15
fig. 5
STARTUP1. Before each startup,make sure the power switch is in the Off position2. Place air compressor on a flat,level surface.3. Release pressure from the system. Drain moisture from the air tank by slowly opening the
air tank drain valve by turning clockwise.Once all the moisture has drained out, close the fitting securely.
4. Turn the pressure regulator knob fully counterclockwise to close airflow from air outlet port.
5. Attach air hose and accessories.
6. Insert the battery pack to the air compressor securely. (sold separately)7. Turn the compressor ON by moving the switch to the AUTO/ON position and allow the
tank pressure to build.Once the air pressure reaches the maximum preset pressure(“cut-out “pressure) it will automatically shut off.
8. Slowly turn the pressure regulator knob clockwise to open airflow from air outlet port until desired output pressure is reached.
W A R N I N G
OPERATION
NOTE: Air tank will not pressurize while drain valve is open.
NOTE: The air compressor will automatically restart once the pressure in the air tank drops below the minimum preset pressure ( "cut-in" pressure).
Too much air pressure causes a hazardous risk of bursting. Check the manufacturer’s maximum pressure rating for air tools and accessories.The regulator outlet pressure must never exceed the maximum pressure rating.
OPEN
AIR TANK PRESSURE GAUGE
TOOL OUTLET PRESSURE GAUGE
W A R N I N GDisconnect air compressor from power source and bleed off all air pressure before attempting any maintenance or repair.
SHUTDOWN AND STORAGE:
MAINTENANCE
NOTE: NEVER stop the air compressor by pulling the battery pack from the compressor housing as this may result in damage to the compressor.(sold separately)
1. Turn the switch to the Off position2. Pull the battery pack out of the air compressor housing.(sold separately)3. Turn the pressure regulator knob fully counterclockwise to close airflow from air outlet port. Check the outlet pressure gauge to ensure that it reads 0 PSI.4. Remove the air hose and any air accessories.5. Drain moisture from the air tank by slowly opening the air tank drain valve by turning counter clockwise. Tilt tank to remove all moisture. Once all the moisture has drained out, close the fitting securely.6. Allow the compressor to cool down.7. Wipe the air compressor clean and store it in a clean, dry, and non-freezing location.
WHEN PERFORMING ANY MAINTENANCE OR SERVICE:1. The air compressor must be turned off.2. Pull the battery pack out of the air compressor housing.(sold separately)3. Open tank drain to bleed off all air pressure before attempting any maintenance or repair.4. Allow compressor to fully cool before attempting any maintenance or repair.Check the air compressor frequently for any visible problems and follow maintenanceprocedures each time the compressor is used.
MAINTENANCE CHECKLIST:Daily:• Drain accumulated liquid from tank.• Check for unusual noise and/or vibrations.• Check that all fasteners are secure.• Wipe compressor clean.
Monthly:• Check for air leaks.

16 17
ENVIRONMENTALLy SAfE BATTERy DISPOSAL(SOLD SEPARATELy)
The following toxic and corrosive materials are in the batteries used in this compressor battery pack: Lithium-Ion, a toxic material.(sold separately)
W A R N I N G
W A R N I N G
All toxic materials must be disposed of in a specified manner to prevent contamination of the environment. Before disposing of damaged or worn out Lithium-Ion battery packs, contact your local waste disposal agency, or the local Environmental Protection Agency for information and specific instructions. Take the batteries to a local recycling and/or disposal centre, certified for lithium-ion disposal.(sold separately)
If the battery pack cracks or breaks, with or without leaks, do not recharge it and do not use. Dispose of it and replace with a new battery pack. DO NOT ATTEMPT TO REPAIR IT!(sold sepa-rately)To avoid injury and risk of fire, explosion, or electric shock, and to avoid damage to the environ-ment:
• Cover the battery's terminals with heavy-duty adhesive tape.(sold separately)• DO NOT attempt to remove or destroy any of the battery pack components. • DO NOT attempt to open the battery pack.(sold separately)• If a leak develops, the released electrolytes are corrosive and toxic. DO NOT get the
solution in the eyes or on skin, and do not swallow it.• DO NOT place these batteries in your regular household trash.• DO NOT incinerate.• DO NOT place them where they will become part of any waste landfill or municipal solid
waste stream.• Take them to a certified recycling or disposal centre.
(sold separately)
TROUBLESHOOTING

18 19
TROUBLESHOOTING
PROBLEM POSSIBLE CAUSES SOLUTIONS
The regulator does not regulate the pressure.
The regulator or its internal parts are dirty or damaged.
Replace the regulator.
The pressure is low, or there is not enough air.
There is a leak at one of the
threads). Do not overtighten.The tank drain valve is open. Close the drain valve.
The air intake is restricted.Clean the ventilation openings on the motor's enclosure.
Prolonged excessive use of air ecrease the amount of air used.There is a hole in the air hose. Check the air hose and replace it if necessary.
The tank leaks.Replace the tank Immediately. Do not attempt to repair it.
The valve is leaking.Check for worn parts, and replace them if necessary.
There is moisture in the discharge air.
There is condensation in the air tank caused by a high level of atmospheric humidity or because the air compressor has not been running long enough.
Drain the air tank after each use. Drain the air tank more often in humid weather and use an
The compressor overheats.
The ventilation is inadequate.Relocate the compressor to an area with cool, dry and well-circulated air.
Cooling surfaces are dirty.Clean all cooling surfaces on the pump and the motor thoroughly.
The valve is leaking.Replace worn parts and reassemble using new
. D
LIMITED ONE-yEAR WARRANTy
1
GREENWORKS™ hereby warranties this product, to the original purchaser with proof of purchase, for a period of one (1) year against defects in materials, parts or workmanship. GREENWORKS™, at its own discretion will repair or replace any and all parts found to be defective, through normal use, free of charge to the customer. This warranty is valid only for units which have been used for personal use that have not been hired or rented for industrial/commercial use, and that have been maintained in accordance with the instructions in the owners’ manual supplied with the product from new.
ITEMS NOT COVERED BY WARRANTY:
GREENWORKS HELPLINE (1 888 90WORKS): Warranty service is available by calling our toll-free helpline, at 1-888-909-6757 (1-888-90WORKS).
TRANSPORTATION CHARGES: Transportation charges for the movement of any power equipment unit or attachment are the responsibility of the purchaser. It is the purchaser’s responsibility to pay transportation charges for any part submitted for replacement under this warranty unless such return is requested in writing by GREENWORKS.
This warranty applies only to the original purchaser at retailand may not be transferred. This warranty only coversdefects arising under normal usage and does not cover any malfunction, failure or defect resulting from misuse, abuse, neglect, alteration, modification or repair by other than an authorized service center for GREENWORKS™ branded air compressors. Consumable accessories provided with the tool such as, but not limited to, blades, bits and sand paper are not covered.

20
EXPLODED VIEW
34
33
35
36
37
38
40
41 39
42
21
EXPLODED VIEW

22 23
PARTS LIST
123456789101112131415161718192021222324252627282930313233343536373839404142
1111111114101214111111121144111111111111121
ITEM NO. PART NO. DESCRIPTION QTYGW 40V 2Ah Li-Ion Battery (29842)(sold separately)
insert base of housingdrain valve0.5US gallon tankbellow spring rubber cushiontube connectorright housingscrew ST2.9*15polyfoam footscrew 4.2*15-faluminum tubeφ6O ringMale-threaded quick couplerscrew 6*25 GW 40V Regulator assywasherregulator control panelregulator knobInternal-tooth washer screw M5*10 power switchclamping φ14Motor pump assy. 40V compressor GWsilicone tube wire sleeverubber padinner plastic tubeconnectorleft housingscrew ST2.9*1540V PCB boardGW 40V Li-Ion Charger - tool (29862)(sold separately)Recoil HoseTapered nozzleInflation needleBlow gun adaptorBlow gun1/4” Quick connectorTire chuckMale plugPlumber’s tape
3110197634101994329027533302755329025234101523750150A341027603220111334901755322061103390275534202744332091153220252A31102755322031133410376034108755-1329065132205753630150339047531101760342075313421712134104744341101133320297-1341017603220174436200581311029983790175A3790411037902110379111103790511037905110379031103790111037909110
PARTS LIST
16.116.216.316.416.516.616.716.816.916.1016.1116.1216.1316.1416.1516.1616.1716.1816.19
24.124.224.324.424.524.624.724.824.924.10 24.1124.1224.1324.1424.1524.1624.1724.1824.1924.20 24.21
3390311333306110-133209110-133208110-13330711032204393340252-234110115-13420352-137502503420452-134208523340152-3342055231901753339017523390175363027503320297-1
32201252A3310250-134903503310252-23490350-133105503490150-13420352349065032202301A3410150-1329065033101523210174533203503220152-2361017603410350-6A329045232202053750150A
1111111121111121111
411111114411111111111
ITEM NO.
ITEM NO.
PART NO.
PART NO.
DESCRIPTION
DESCRIPTION
QTY
QTY
regulator coverwasherboltscrew
locking nut M5springregulator piston
hex. Nutseal ring rubber gasketbellow ring
pressure gaugeregulator bodysafety valve (150PSI)pressure controllerconnector
screw M4x35cylinder coversilicone ring 31.5x1.8cylinder gasketsilicone ring 31.x2cylinder piston ringsilicone ring 21.2gasketscrew ST2.9x10sound insulation boardclamp 8connecting rodbearing 608 2RScounterweightscrew M5x1040V compressor motormotor fan
screw M4x10tube connector
24
NOTES
TOLL-FREE HELPLINE: 1-888-90WORKS (888.909.6757)
Rev: 00 (07-22-14) Printed in China on 100% Recycled Paper