Embed Size (px)
Citation preview
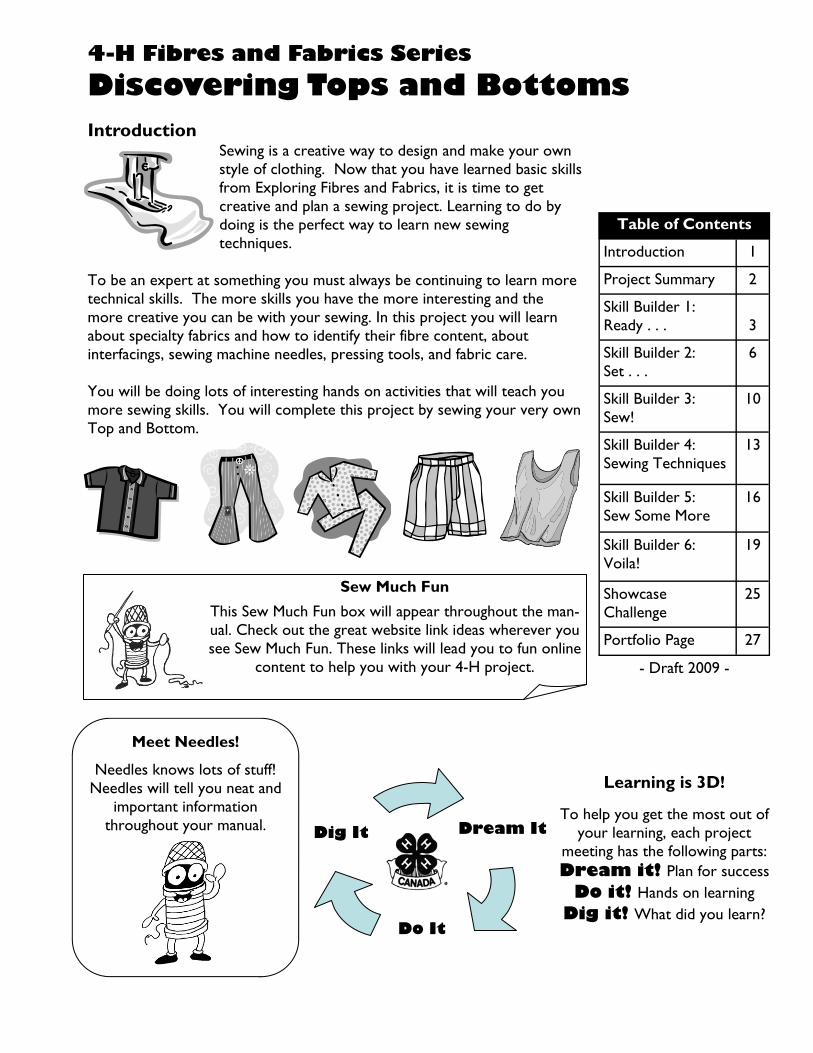
Table of Contents
Introduction 1
Project Summary 2
Skill Builder 1: Ready . . .
3
Skill Builder 2: Set . . .
6
Skill Builder 3: Sew!
10
Skill Builder 4: Sewing Techniques
13
Skill Builder 5: Sew Some More
16
Skill Builder 6: Voila!
19
Showcase Challenge
25
Portfolio Page 27
- Draft 2009 -
4-H Fibres and Fabrics Series
Discovering Tops and Bottoms Introduction
Sewing is a creative way to design and make your own style of clothing. Now that you have learned basic skills from Exploring Fibres and Fabrics, it is time to get creative and plan a sewing project. Learning to do by doing is the perfect way to learn new sewing techniques.
To be an expert at something you must always be continuing to learn more technical skills. The more skills you have the more interesting and the more creative you can be with your sewing. In this project you will learn about specialty fabrics and how to identify their fibre content, about interfacings, sewing machine needles, pressing tools, and fabric care. You will be doing lots of interesting hands on activities that will teach you more sewing skills. You will complete this project by sewing your very own Top and Bottom.
Learning is 3D!
To help you get the most out of your learning, each project
meeting has the following parts: Dream it! Plan for success
Do it! Hands on learning Dig it! What did you learn?
Do It
Dig It
Dream It
Sew Much Fun
This Sew Much Fun box will appear throughout the man-ual. Check out the great website link ideas wherever you see Sew Much Fun. These links will lead you to fun online
content to help you with your 4-H project.
Meet Needles!
Needles knows lots of stuff! Needles will tell you neat and
important information throughout your manual.
2
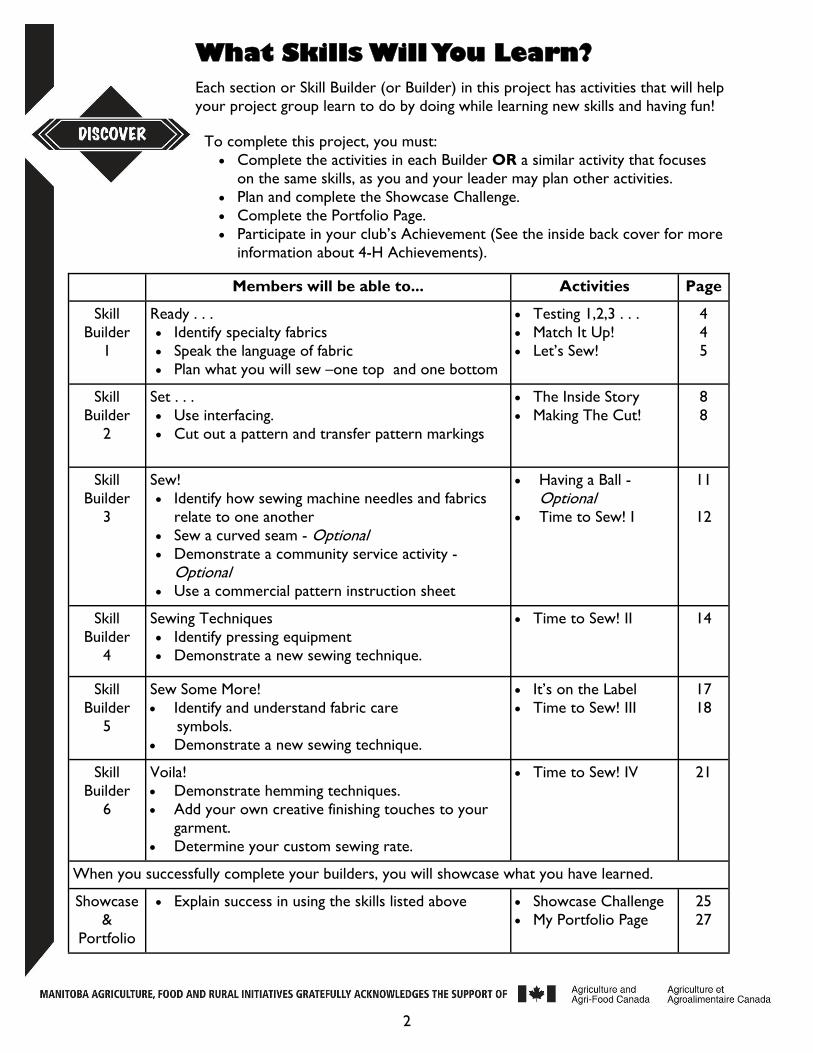
Each section or Skill Builder (or Builder) in this project has activities that will help your project group learn to do by doing while learning new skills and having fun!
What Skills Will You Learn?
To complete this project, you must: Complete the activities in each Builder OR a similar activity that focuses
on the same skills, as you and your leader may plan other activities. Plan and complete the Showcase Challenge. Complete the Portfolio Page. Participate in your club’s Achievement (See the inside back cover for more
information about 4-H Achievements).
Members will be able to... Activities Page
Skill Builder
1
Ready . . . Identify specialty fabrics Speak the language of fabric Plan what you will sew –one top and one bottom
Testing 1,2,3 . . . Match It Up! Let’s Sew!
4 4 5
Skill Builder
2
Set . . . Use interfacing. Cut out a pattern and transfer pattern markings
The Inside Story Making The Cut!
8 8
Skill Builder
3
Sew! Identify how sewing machine needles and fabrics
relate to one another Sew a curved seam - Optional Demonstrate a community service activity -
Optional Use a commercial pattern instruction sheet
Having a Ball - Optional
Time to Sew! I
11
12
Skill Builder
4
Sewing Techniques Identify pressing equipment Demonstrate a new sewing technique.
Time to Sew! II 14
Skill Builder
5
Sew Some More! Identify and understand fabric care symbols. Demonstrate a new sewing technique.
It’s on the Label Time to Sew! III
17 18
Skill Builder
6
Voila! Demonstrate hemming techniques. Add your own creative finishing touches to your
garment. Determine your custom sewing rate.
Time to Sew! IV 21
When you successfully complete your builders, you will showcase what you have learned.
Showcase &
Portfolio
Explain success in using the skills listed above Showcase Challenge My Portfolio Page
25 27
Skill Builder 1: Ready . . .
SKILLS CHECKLIST
Identify specialty fabrics Speak the language of fabric Plan what you will sew -one top and one bottom
3
Needles Says…
There are many specialty fabrics available. Nap - corduroy, velvet, terry, fur, ultrasuede Stretch- lycra, spandex Transparent - chiffon, batiste, lace, organza, netting Shine- satin, taffeta, metallic, sequined Designs-plaid, stripe, checks, diagonal designs, prints Specific Purpose-vinyl, oil cloth, pillow ticking
Important words
Watch for these important words throughout this
builder: Ease, Fitted, Drape
Dream it!
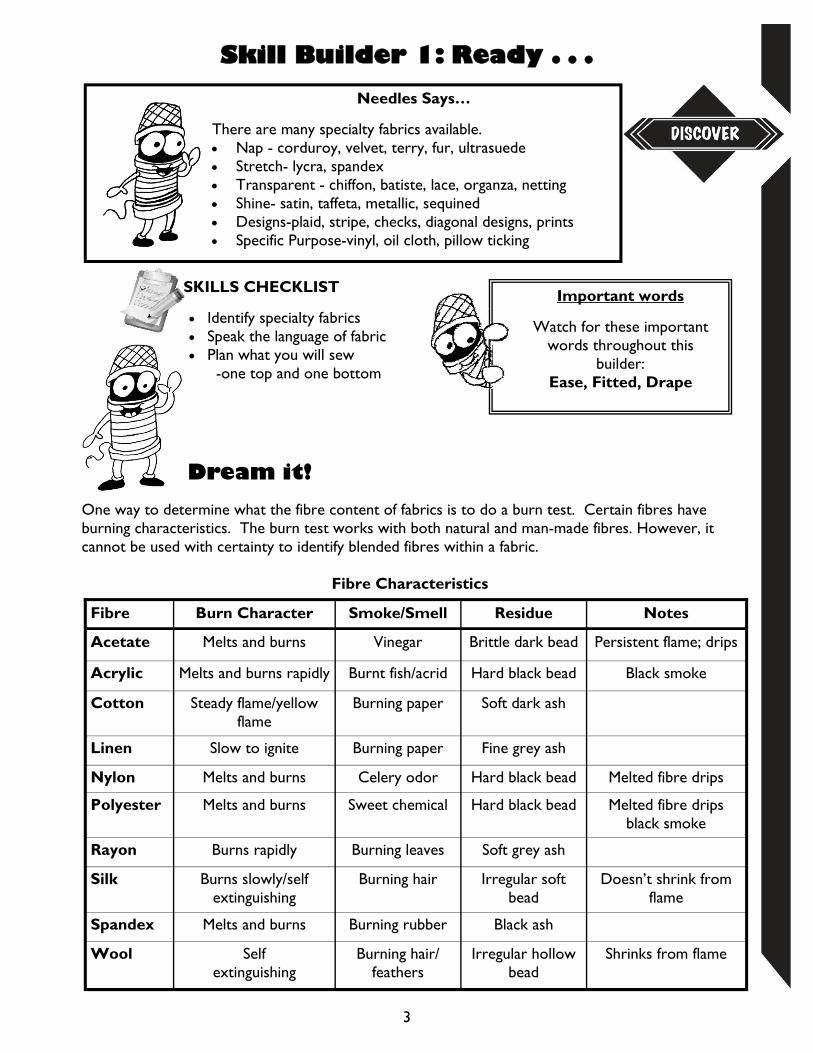
One way to determine what the fibre content of fabrics is to do a burn test. Certain fibres have burning characteristics. The burn test works with both natural and man-made fibres. However, it cannot be used with certainty to identify blended fibres within a fabric.
Fibre Characteristics
Fibre Burn Character Smoke/Smell Residue Notes
Acetate Melts and burns Vinegar Brittle dark bead Persistent flame; drips
Acrylic Melts and burns rapidly Burnt fish/acrid Hard black bead Black smoke
Cotton Steady flame/yellow flame
Burning paper Soft dark ash
Linen Slow to ignite Burning paper Fine grey ash
Nylon Melts and burns Celery odor Hard black bead Melted fibre drips
Polyester Melts and burns Sweet chemical Hard black bead Melted fibre drips black smoke
Rayon Burns rapidly Burning leaves Soft grey ash
Silk Burns slowly/self extinguishing
Burning hair Irregular soft bead
Doesn’t shrink from flame
Spandex Melts and burns Burning rubber Black ash
Wool Self extinguishing
Burning hair/feathers
Irregular hollow bead
Shrinks from flame
1. Hold the fabric sample with the tweezers. Gently move the swatch into the flame and quickly out of it. If the fabric is flaming blow it out. Test 3 different fabrics.
2. Make note of : While in the flame does the fabric melt readily, smoulder, or extinguish itself? What happens to the flame on the fabric when it is removed from the open
flame? Does the fabric form a melted bead or does it leave ash? Does the burnt fabric produce a distinct odor or smoke colour?
3. Refer to the Fabric identity chart on page 3 to identify what the fabrics are. Match it Up!
Match up the definition number with the word it represents in the box below.
1. The fullness included in a pattern to create a fashion look, and a comfortable fit. 2. Clothing that follows the body’s form. 3. The fullness added by the pattern designer. It can create a garment that is full and flowing or
fitted. 4. The ease in a pattern that makes the garment possible to wear. Various pattern companies
allow different amounts of wear ease to create their own fashion statements. 5. The starch or stiffening added to fabric to withstand the stress of weaving and to increase
fabric weight. 6. The ability of a fabric to fold and flow when held loosely. These fabrics hang smoothly when
sewn into garments with pleats. Ticks or gathers. 7. The ability of fabric to regain its original form after stretching or
creasing. 8. A garment with wear ease and design ease. These garments often fit at
the shoulder and flow over the rest of the body. 9. A garment with a lot of ease is often referred to as an unstructured
style or full cut.
4
Do it! Testing 1,2,3. . .
Learn how to do a burn test to identify fabrics
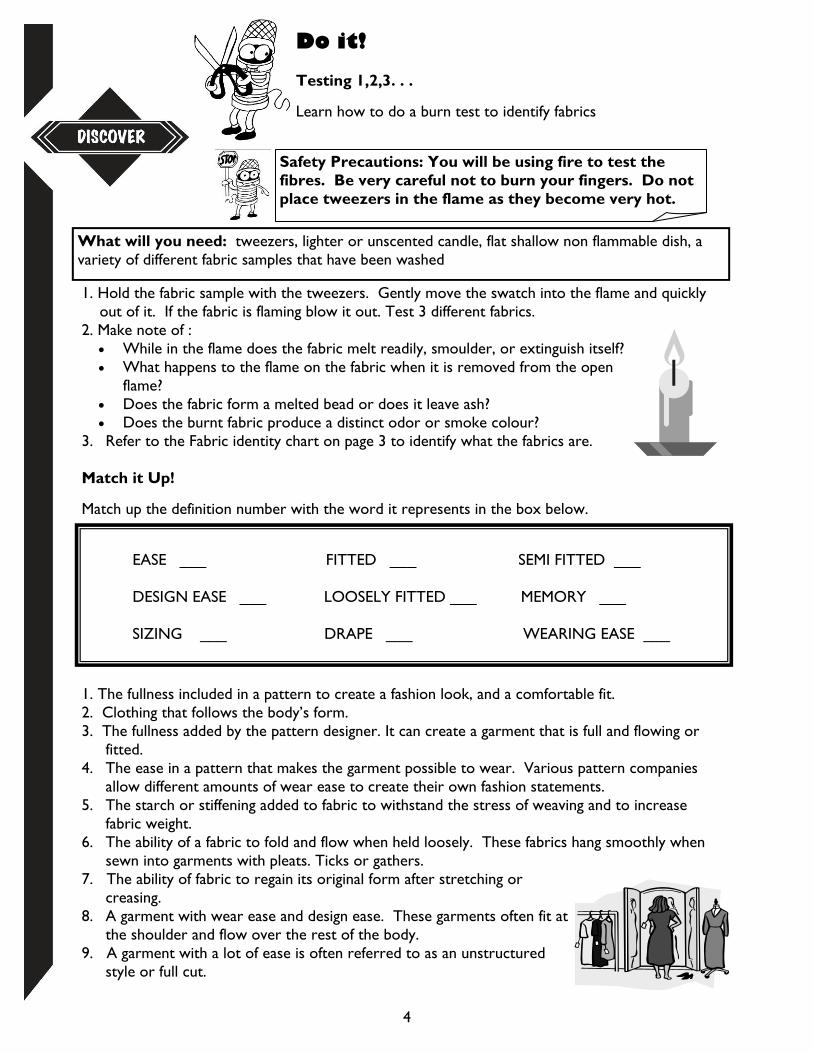
What will you need: tweezers, lighter or unscented candle, flat shallow non flammable dish, a variety of different fabric samples that have been washed
Safety Precautions: You will be using fire to test the fibres. Be very careful not to burn your fingers. Do not place tweezers in the flame as they become very hot.
EASE ___ FITTED ___ SEMI FITTED ___ DESIGN EASE ___ LOOSELY FITTED ___ MEMORY ___ SIZING ___ DRAPE ___ WEARING EASE ___
Let’s Sew!
1. Building upon what you learned in Explore Sewing choose a commercial pattern you would like to sew for a top and a bottom. Pay attention to size, fabric type, interfacing required etc.
2. Use your creativity and select any buttons that depict your style and think about using trim (ribbon, braid, etc) that you will apply in builder 6 to give your garment finishing touches.
3. By following the instruction paper in the pattern you will learn new sewing techniques. Select patterns that include a minimum of 4 of the techniques listed below: * Button holes * Darts, gathers, pleats * Stay stitching * Zipper Closure * Facings * Set in Sleeves * Interfacing * Trimming, clipping, notching 4. Get ready for the next meeting by cutting out the tissue pattern pieces and pre-shrinking
your fabric.
5
Dig it!
What’s next?
In the next builder you will learn about interfacing. Also, you will learn how to adjust pattern pieces to fit your body and you will cut out the pattern pieces. Think about what you know about interfacing. What parts of a garment would require interfacing? Make a list of the supplies needed for the next meeting.
Think about this builder and the activities you did …
Review the Skills Checklist on page 3. What skills have you developed? Do you need more practice?
Record it . . .
Discuss what you have learned with your leader so that the information can be recorded on your Portfolio Page.
Apply it . . .
How could you explain to others how a sewing machine works?
Sew Much Fun
This fabric glossary contains detailed descriptions of many different fabrics, weaves, and manufacturing techniques. http://www.nyfashioncenterfabrics.com/fabric-glossary.html
Needles’ Fun Facts!
Corduroy was a name coined during King Louis of France’s reign. The king insisted everyone around him be dressed in splendor. Even his servants were instructed to have a polished look.. So they traded in their cottons and woolens for a new cotton fabric with a more luxurious looking nap – dubbed “cord du roi”, or in English “Cords of the King?
What will you need: commercial patterns, scissors, washing machine, fabric, notions

SKILLS CHECKLIST
Use interfacing Cut out a pattern and transfer markings.
Skill Builder 2: Set . . .
6
Dream it! Interfacing
Interfacing is an important part of most garments. It is an additional layer of fabric placed between the outer shell and the facing or hem. Interfacings add support, body, and shape or eliminate stretch. Interfacings are used to prevent sagging at necklines and button closures; to add softness to hemlines; to add body, shape or wrinkle resistance to entire garments or garment sections; and to stabilize and emphasize details, such as collars, cuffs, and pockets.
Your pattern will tell you if you need interfacing and how much. It will tell you how to lay out your interfacing. Choose the type according to where it is going to be used and the effect you want.
There are two types of interfacing. Sew-in interfacings are stitched by hand or machine to your garment, while fusible interfacing have a resin coating on the back that fuses to the fabric when steam, heat, and pressure are applied.
When selecting an interfacing consider what type of fabric will be used, how will the finished garment be used and what are your sewing skills, time available and personal preference.
Needles Says….
Knowing about interfacing is an important next step. Interfacing helps give your garment the shape that you want. Get set to sew!
Important Words
Look out for these important words in this
builder: Interfacing, Nap
Fabric and Use Interfacing
For a soft effect For a crisp effect
Very light to lightweight fabrics. (voile, gauze, crepe, challis, calico, chambray, interlock knit, jersey, single knit, batiste) Blouses, shirts and dresses
Batiste, Organza, Sew-in sheer, regular or stretch very lightweight nonwoven: self fabric
Organdy; sew-in or fusible light weight or sheer (nonwoven or woven); fusible knit.
Do not use fusibles on chiffon or seersucker
Medium weight fabrics (linen, denim, poplin, flannel, gabardine, satin, duck, chino, velour, stretch terry, double knit, sweater knit.) Dresses, lightweight suits, active sportswear.
Sew-in or fusible medium weight woven; regular or stretch light to medium weight nonwoven; fusible knit
Sew-in or fusible lightweight hair canvas; Sew-in or fusible medium weight (woven or nonwoven).
Do not use fusibles on rainwear fabrics.
Heavyweight fabrics (corduroy, tweed, worsted, camel hair, melton, sailcloth, canvas, gabardine, coatings). Jackets, suits, coats
Soft, lightweight canvas; sew-in or fusible medium weight nonwoven
Sew-in or fusible lightweight hair canvas; sew-in or fusible medium weight (woven or nonwoven)
Leather types (suede, suede cloth) Do not use fusibles on real leather
Crisp or soft canvas; fusible or sew-in medium weight nonwoven or woven
Waistbands Fusible nonwoven precut strips; woven stiffener sold by the width; sew-in or fusible medium to heavyweight (woven or nonwoven)
Crafts (belts, hats, bags, camping gear, home decorating items)
Sew-in nonwovens in all weights; fusible medium to heavyweight (woven or nonwoven)
Simplicity’s Simply the Best Sewing Book, New York, NY; Simplicity Pattern Co., Inc. 1988, p.173
Pattern Layout and Marking
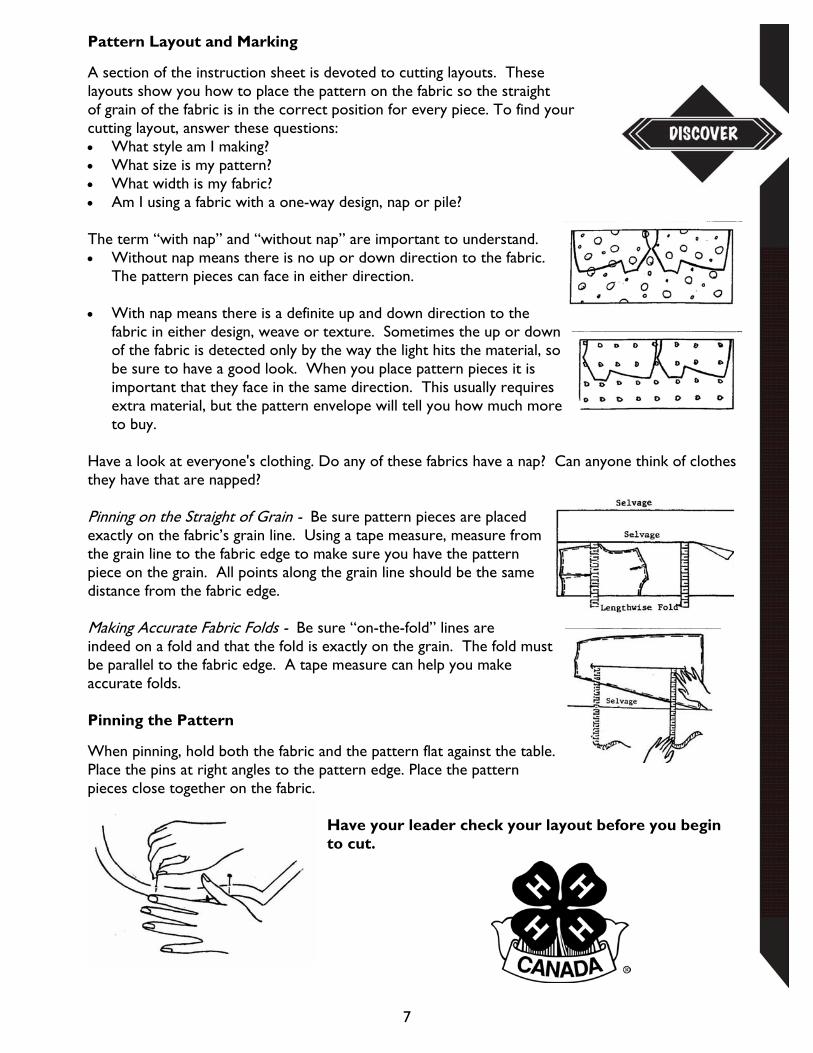
A section of the instruction sheet is devoted to cutting layouts. These layouts show you how to place the pattern on the fabric so the straight of grain of the fabric is in the correct position for every piece. To find your cutting layout, answer these questions: What style am I making? What size is my pattern? What width is my fabric? Am I using a fabric with a one-way design, nap or pile? The term “with nap” and “without nap” are important to understand. Without nap means there is no up or down direction to the fabric.
The pattern pieces can face in either direction. With nap means there is a definite up and down direction to the
fabric in either design, weave or texture. Sometimes the up or down of the fabric is detected only by the way the light hits the material, so be sure to have a good look. When you place pattern pieces it is important that they face in the same direction. This usually requires extra material, but the pattern envelope will tell you how much more to buy.
Have a look at everyone's clothing. Do any of these fabrics have a nap? Can anyone think of clothes they have that are napped? Pinning on the Straight of Grain - Be sure pattern pieces are placed exactly on the fabric’s grain line. Using a tape measure, measure from the grain line to the fabric edge to make sure you have the pattern piece on the grain. All points along the grain line should be the same distance from the fabric edge. Making Accurate Fabric Folds - Be sure “on-the-fold” lines are indeed on a fold and that the fold is exactly on the grain. The fold must be parallel to the fabric edge. A tape measure can help you make accurate folds. Pinning the Pattern
When pinning, hold both the fabric and the pattern flat against the table. Place the pins at right angles to the pattern edge. Place the pattern pieces close together on the fabric.
Have your leader check your layout before you begin to cut.
7
8
Marking the Fabric - Transferring pattern markings to your fabric is an important step. It must be done before unpinning the pattern because you cannot get accurate markings after you start sewing. There are several good marking methods. These include chalk and pins, tracing paper and wheel, “wipe away with water” marking pens and tailors tacks.
When marking fabric remember: Not all methods will work on all fabrics; Test a “wipe away with water” pen on your
fabric by first making a small mark then seeing if it comes out easily; Test carbon paper on a fabric scrap to make sure it will not show through
to the right side; Markings only have to last until the garment is finished.
Do it! The Inside Story
Finding the right interfacing for your sewing project
1. While following the instructions that come with the interfacing, apply each interfacing to your garment fabric. 2. Observe the performance of each interfacing on the fabric. Would it be suitable for what you want it to do?
3. Attached the interfacing sample you will be using in your
sewing project. Name: _______________________________________ How to Apply: _________________________________ _____________________________________________ _____________________________________________
Making the Cut
Time to cut out your pattern pieces!
1. Hold the pattern pieces up to your body and make any adjustments to length that are necessary. The pattern piece will be marked where to make the adjustments.
2. Following the instruction sheet layout your pattern pieces and pin. 3. Cut out your garment being careful to cut around all notches. 4. Get ready for the next builder by winding the bobbin and threading the sewing machine with the
thread that matches your fabric.
What You Will Need: Swatches of 2 sew-in interfacings one woven and one non-woven and 2 swatches of fusible interfacings. Each one should be a 10 cm square. Four 10 cm squares of the fabrics you’re using for your top and bottom project and an iron.
What You Will Need: pattern, garment fabric, interfacing, pins, fabric scissors, measuring tape
What’s next?
In the next builder you will learn about sewing machine needles and what needle to use with what fabric. You will also begin to sew your garments. Discuss with your leader what the first steps will be to start to sew your project. How important do you think having the right sewing machine needle for the type of fabric is? What supplies do you need to bring to the next meeting. Make a list of supplies to bring to the next meeting.
9
Dig It! How Did it Go? - Answer these questions:
What have your learned about the importance of using interfacing?
What is the proper way to pin a pattern to fabric? How will these new skills help you in the future?
Sew Much Fun
An awesome interfacing guide. www.fiber-images.com/Free_Things/Refernce_Charts/free_reference_charts_interfacing_guide.html Many fabric fibres come from agricultural products. Check out this interesting site on natural fabrics. www.fabrics.net/natural.asp
Needles’ Fun Facts!
In 1863, Ebeneezer Butterick changed the face of home sewing forever by creating the first graded sewing pattern. Before the introduction of the graded pattern for home sewing, fashion was exclusive to ladies who could pay for the latest styles from Paris. Most women took apart old, worn out dresses to use as a model for a new one.
With the introduction of Butterick patterns, not only did dressmaking become easier, fashion became available to men, women and children of all classes all over the world.
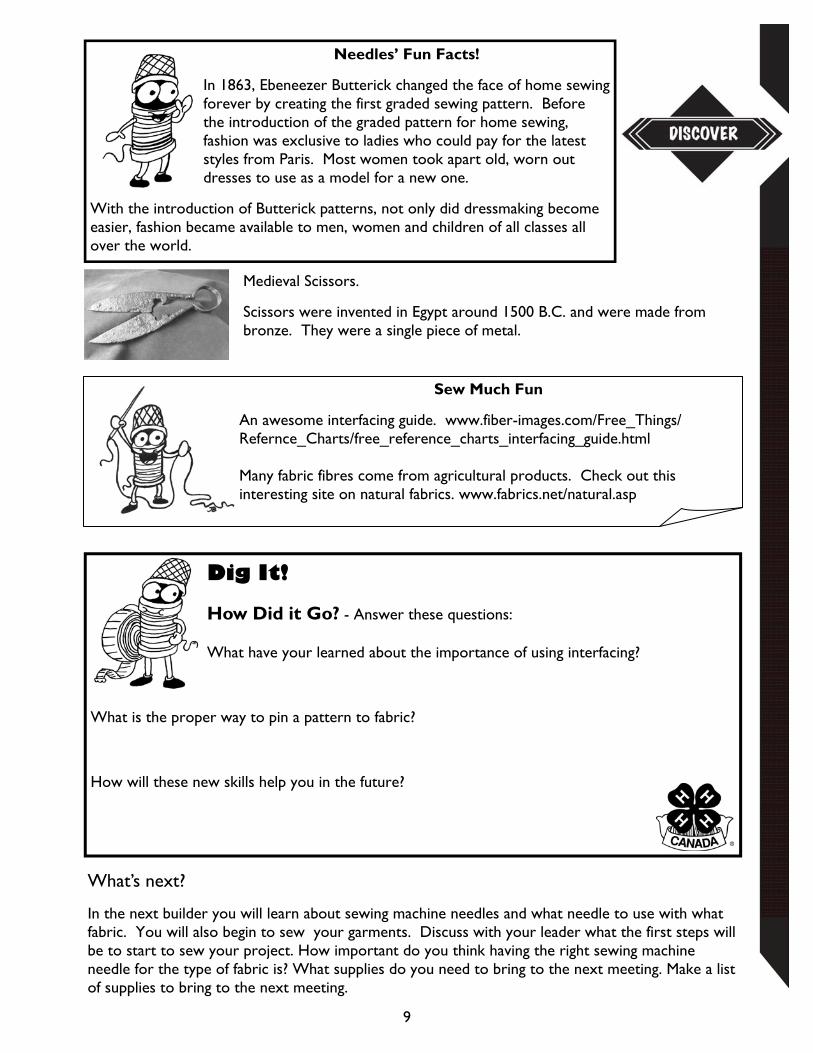
Medieval Scissors.
Scissors were invented in Egypt around 1500 B.C. and were made from bronze. They were a single piece of metal.
SKILLS CHECKLIST
Identify how sewing machine needles and fabrics relate to one another.
Sew a curved seam. - Optional Demonstrate a community service activity. -
Optional Use a commercial pattern instruction sheet.
Skill Builder 3: Sew!
10
Dream it! Sewing Machine Needles
Now that you may be choosing to sew with different fabrics it’s important to recognize the differ-ences in sewing machine needles. The size of needle used in the machine should relate to the fabric weight and type of thread you are using. The needle should be small enough to pierce the fabric without leaving a hole, yet have a large enough eye for the thread.
Needles Says…
It is time to get sewing! Knowing what size of sewing machine needle works best with different types of fabrics will ensure a well sewn project. Go one step further and use your sewing skills for a community service project. Have fun sewing and making cool balls for your local daycare or kindergarten class.
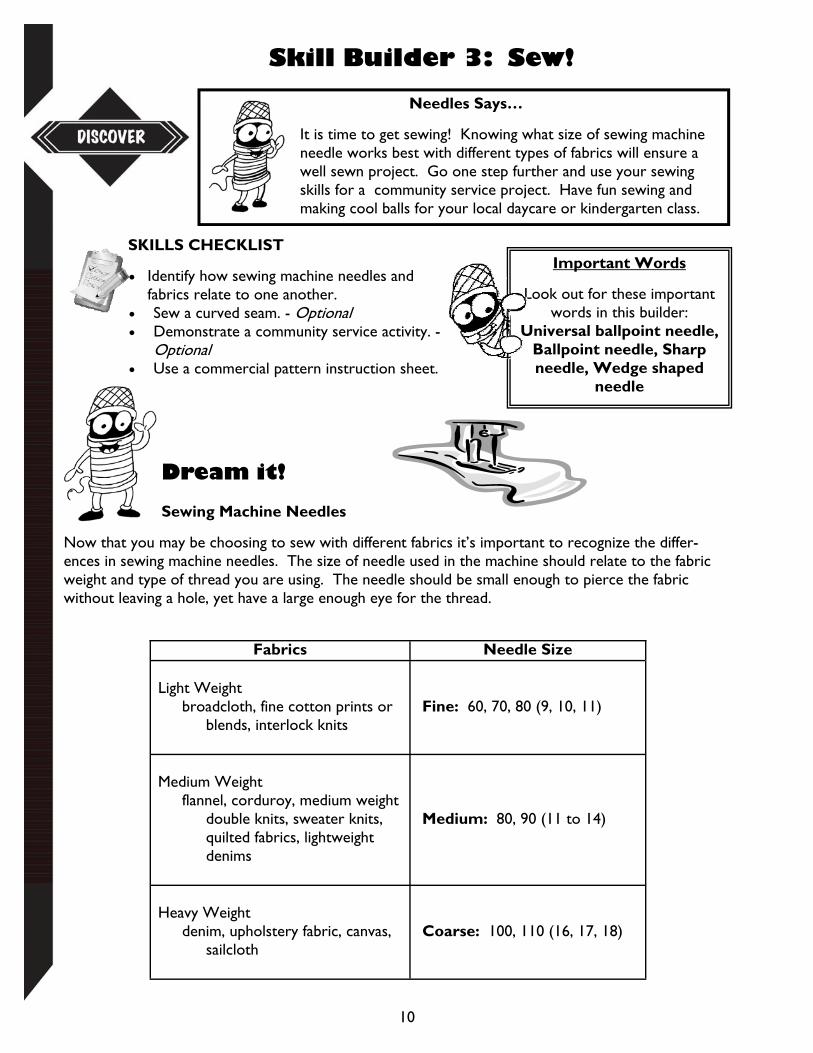
Fabrics Needle Size Light Weight
broadcloth, fine cotton prints or blends, interlock knits
Fine: 60, 70, 80 (9, 10, 11)
Medium Weight
flannel, corduroy, medium weight double knits, sweater knits, quilted fabrics, lightweight denims
Medium: 80, 90 (11 to 14)
Heavy Weight
denim, upholstery fabric, canvas, sailcloth
Coarse: 100, 110 (16, 17, 18)
Important Words
Look out for these important words in this builder:
Universal ballpoint needle, Ballpoint needle, Sharp needle, Wedge shaped
needle
Types of sewing machine needles include:
Universal ballpoint – specially tapered for both knits and woven fabrics Ballpoint – A rounded point pushes aside fabric threads instead of piercing them.
Used for knits Stretch – for sewing knits and knit fabrics containing lycra. Sharp – for general sewing on woven fabrics. Wedge-shaped – for leather and leather like fabrics. Twin and Triple – for decorative stitching on some machines; double needles are
also ideal for hemming T-shirts and fleece skirts.
Do it! Having a Ball - Optional
Learn to sew curved seams while making balls to donate to your local daycare, preschool or kindergarten class.
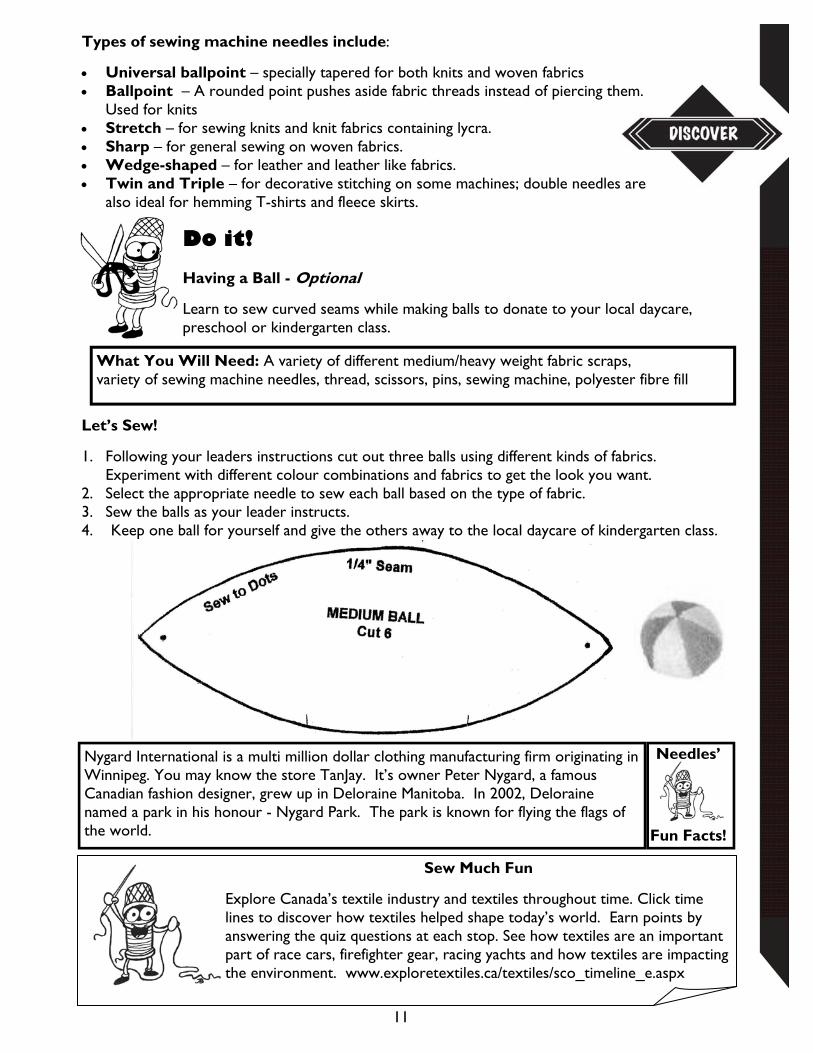
Let’s Sew!
1. Following your leaders instructions cut out three balls using different kinds of fabrics. Experiment with different colour combinations and fabrics to get the look you want.
2. Select the appropriate needle to sew each ball based on the type of fabric. 3. Sew the balls as your leader instructs. 4. Keep one ball for yourself and give the others away to the local daycare of kindergarten class.
What You Will Need: A variety of different medium/heavy weight fabric scraps, variety of sewing machine needles, thread, scissors, pins, sewing machine, polyester fibre fill
Nygard International is a multi million dollar clothing manufacturing firm originating in Winnipeg. You may know the store TanJay. It’s owner Peter Nygard, a famous Canadian fashion designer, grew up in Deloraine Manitoba. In 2002, Deloraine named a park in his honour - Nygard Park. The park is known for flying the flags of the world.
Needles’
Fun Facts!
11
Sew Much Fun
Explore Canada’s textile industry and textiles throughout time. Click time lines to discover how textiles helped shape today’s world. Earn points by answering the quiz questions at each stop. See how textiles are an important part of race cars, firefighter gear, racing yachts and how textiles are impacting the environment. www.exploretextiles.ca/textiles/sco_timeline_e.aspx
Time to Sew! I
Which will you sew first? The top or the bottom?
1. Learn as you sew by reading and following the instruction sheet. 2. Remember to backstitch, seam finish and to press as you go. 3. Your leader will guide you through the new sewing techniques
you have chosen to learn in this project. 4. Have fun!
Sewing Machine Needle Used In My Project __________________
12
What’s next?
In the next builder you will learn about pressing tools and how they contribute to a well made garment. You will also continue to sew your top and bottom. What do you know about pressing tools. Have you seen other sewers use them? What sewing techniques will you use at the next lesson? Make a list of supplies to bring to the next meeting.
What You Will Need: cut out pattern pieces, notions, instruction sheet, sewing tools, sewing machine, iron and ironing board.
Dig It!
Think about this builder and the activities you did …
Review the Skills Checklist on page 10. What skills have you developed? Do you need more practice?
Record it . . .
Discuss what you have learned with your leader so that the information can be recorded on your Portfolio Page.
Apply it . . .
What type of sewing machine needle would be suitable for a medium weight woven fabric?
SKILLS CHECKLIST
Identify pressing equipment. Demonstrate a new sewing
technique.
Skill Builder 4: Sewing Techniques
13
Dream it!
Pressing Equipment
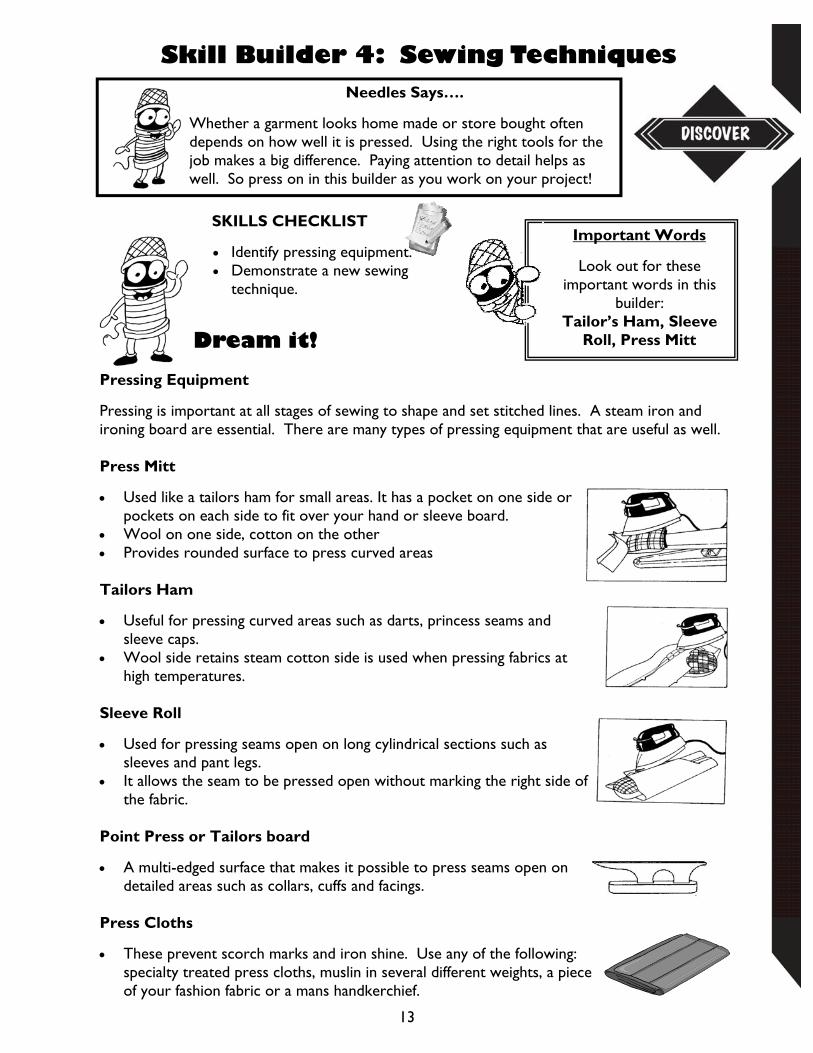
Pressing is important at all stages of sewing to shape and set stitched lines. A steam iron and ironing board are essential. There are many types of pressing equipment that are useful as well. Press Mitt
Used like a tailors ham for small areas. It has a pocket on one side or pockets on each side to fit over your hand or sleeve board.
Wool on one side, cotton on the other Provides rounded surface to press curved areas Tailors Ham
Useful for pressing curved areas such as darts, princess seams and sleeve caps.
Wool side retains steam cotton side is used when pressing fabrics at high temperatures.
Sleeve Roll
Used for pressing seams open on long cylindrical sections such as sleeves and pant legs.
It allows the seam to be pressed open without marking the right side of the fabric.
Point Press or Tailors board
A multi-edged surface that makes it possible to press seams open on detailed areas such as collars, cuffs and facings.
Press Cloths
These prevent scorch marks and iron shine. Use any of the following: specialty treated press cloths, muslin in several different weights, a piece of your fashion fabric or a mans handkerchief.
Needles Says….
Whether a garment looks home made or store bought often depends on how well it is pressed. Using the right tools for the job makes a big difference. Paying attention to detail helps as well. So press on in this builder as you work on your project!
Important Words
Look out for these important words in this
builder: Tailor’s Ham, Sleeve
Roll, Press Mitt
Time to Sew II
Continue to sew your garments.
1. Learn as you sew by reading and following the instruction sheet. 2. Remember to backstitch, seam finish and to press as you go. 3. Your leader will guide you through the new sewing techniques you have chosen to learn in
this project. 4. Have fun! Draw or insert a picture of the pressing tools you have used to make your project.
Do it!
What You Will Need: cut out pattern pieces, notions, instruction sheet, sewing tools, sewing machine, iron and ironing board.
14
What’s next?
In the next builder you will learn about clothing care and continue to sew your garments. What do you know about doing laundry? Do you check the tags to see how to wash clothes? Is it important to take note of how to wash a length of fabric purchased at the store? What sewing techniques will you in the next step of your project? Make a list of supplies to bring to the next meeting.
15
Dig It!
How Did it Go? - Answer these questions:
1. Why are pressing tools so important? 2. What new sewing technique did you learn in this builder? 3. What has been the easiest part of sewing your garments, what has been the hardest?
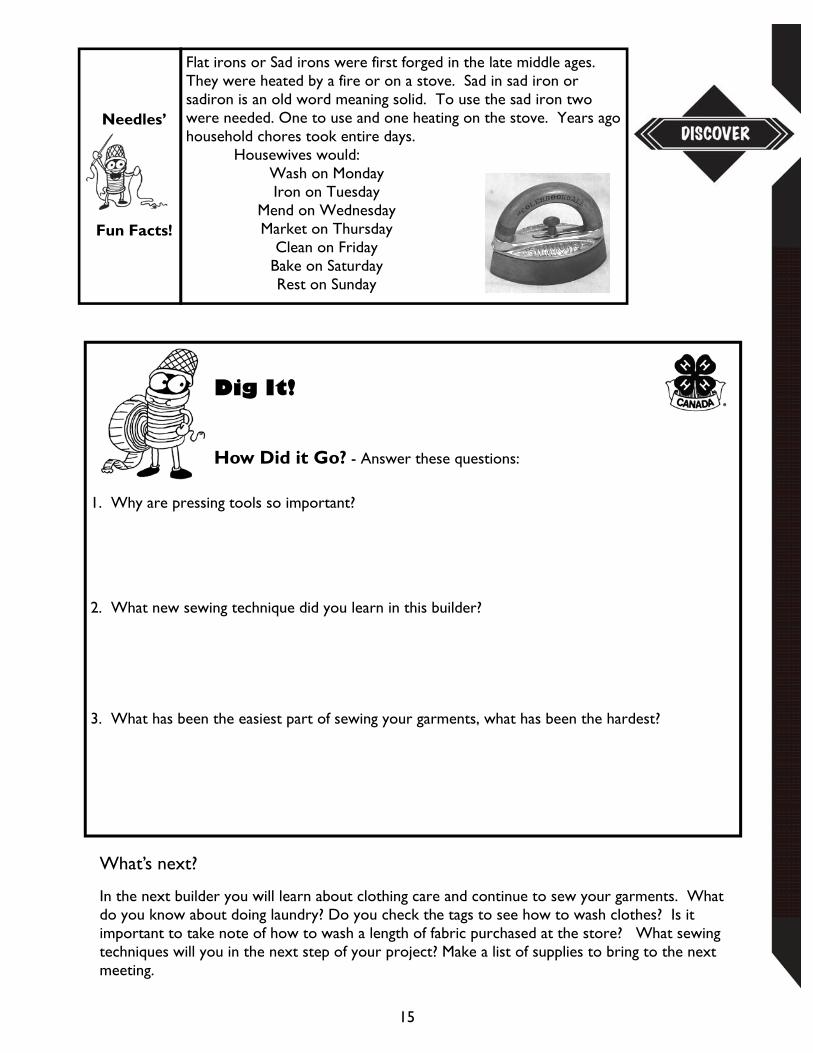
Flat irons or Sad irons were first forged in the late middle ages. They were heated by a fire or on a stove. Sad in sad iron or sadiron is an old word meaning solid. To use the sad iron two were needed. One to use and one heating on the stove. Years ago household chores took entire days. Housewives would:
Wash on Monday Iron on Tuesday
Mend on Wednesday Market on Thursday
Clean on Friday Bake on Saturday Rest on Sunday
Needles’
Fun Facts!
SKILLS CHECKLIST
Identify and understand fabric care symbols.
Demonstrate a new sewing technique.
Skill Builder 5: Sew Some More!
16
Dream it!
Preparing your Fabric
Whatever, fabric you choose, remember to “treat” the fabric before you begin sewing as you will once the garment is made. For example, if you pre-wash gabardine in cold water, hang it to dry and press it with a warm iron, it will not react the same after you make the garment if washed in hot water, dried in a hot dryer and pressed on a cotton setting. If your fabric is washable, preshrink it by washing according to instructions from the fabric bolt in the store. If your fabric is dry cleanable only preshrinking is not necessary. It is important to preshrink notions as well. Clothing Care
Easy Laundry - Keeping clothing in good condition involves fairly simple steps. Many people are not aware of these, so before your favourite white sweatshirt gets thrown in the wash with red socks, you need to learn the following steps: 1. Know What is Washable - How to wash a garment depends on fibre content, yarn and
fabric construction, dyes, finishes and decorative details. The best guide on how to wash an article is on the care label sewn into the item of clothing. Learn what these labels mean and how to follow their instructions.
2. Sort and Separate - To keep that white sweatshirt white and those dirty jeans you wore to change the oil in good condition, you need to learn how to sort laundry. Laundry needs to be sorted according to colour, fabric weight and construction, and the amount of soil on a garment. Mending may be necessary at this stage as well.
3. Removing Spots - Whether it’s ketchup or car grease, spots need to be removed to keep garments looking good. Learning how to pre-treat specific stains will keep garments great for many more wearings.
Needles Says….
After all the work you put into sewing a garment you need to know how to take care of it. A few simple steps will ensure you are wearing it for a long time.
Important Words
Look out for these important words in this builder:
Washing, Bleaching, Dry Cleaning
4. Detergent and Water Temperature - Use the right amount of detergent and the best water temperature for your garments. Just follow the instructions on the laundry soap package. The temperature of the wash water affects cleaning, wrinkling and durability of colours and the fabric finish. Using the right water temperature for a particular article will help you get the best results. 5. Do Your Wash the Right Way - Learning to load and set the washer
properly makes a difference in the results. 6. Dry With Care - Maintain the quality of your clothing by using the right drying
method for the type of laundry you are doing.
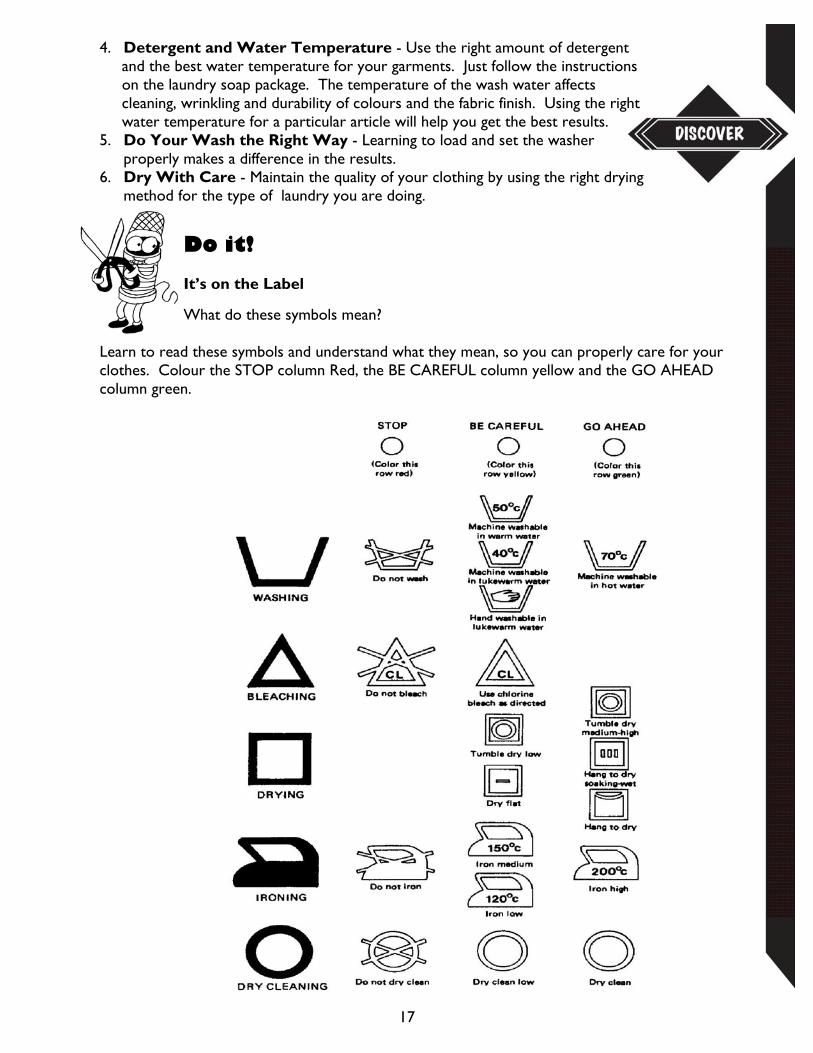
Do it! It’s on the Label
What do these symbols mean?
Learn to read these symbols and understand what they mean, so you can properly care for your clothes. Colour the STOP column Red, the BE CAREFUL column yellow and the GO AHEAD column green.
17
What’s next?
So far you have learned about specialty fabric, interfacing, sewing machine needles, and pressing tools. In the next builder you will learn how to finish a garment to make it your own. What unique sewing techniques would you like to try? What supplies are need for the next meeting? Make a list of supplies to bring to the next meeting.
18
Time to Sew! III Continue to sew your garments.
1. Learn as you sew by reading and following the instruction sheet. 2. Remember to backstitch, seam finish and to press as you go.
3. Your leader will guide you through the new sewing techniques you have chosen to learn in this project.
4. Have fun!
What You Will Need: cut out pattern pieces, notions, instruction sheet, sewing tools, sewing machine, iron and ironing board.
Dig It!
Think about this builder and the activities you did …
Review the Skills Checklist on page 16. What skills have you developed? Do you need more practice?
Record it . . .
Discuss what you have learned with your leader so that the information can be recorded on your Portfolio Page.
Apply it . . .
How will you wash your new top and bottom?
Sew Much Fun
Stain Removal Guide - offers tips and uses normal household cleaning items. http://www.chemistry.co.nz/stain.htm
Needles’
Fun Facts!
Ancient peoples cleaned their clothes by pounding them on rocks or rubbing them with abrasive sands; and washing the dirt away in local streams. The earliest washing "machine" was the scrub board invented in 1797. American, James King patented the first washing machine to use a drum in 1851, the drum made King's machine resemble a modern machine, however it was still hand powered.
SKILLS CHECKLIST
Demonstrate hemming techniques.
Add your own creative finishing touches.
Determine your custom sewing rate.
Skill Builder 6: Voila!
19
Dream it!
Finishing Touches
Paying attention to the finishing touches truly makes your garment your own. In addition to the fabric and pattern that you have used you can be creative with trim, buttons, top stitching, hemming techniques etc. How you choose to finish your garment determines how professional it looks. The quality is in the details. Making sure the garment is well pressed is important. This builder will look at how to hem, add decorative buttons and how to apply trim. Hemming
Do the hemming in one of the following ways: Narrow Machine Stitched Hem - Turn the hem up and machine stitch. This hem is very
durable and is used on tops, shirts, shorts, casual pants and casual skirts. The stitching will show on the right side of the garment.
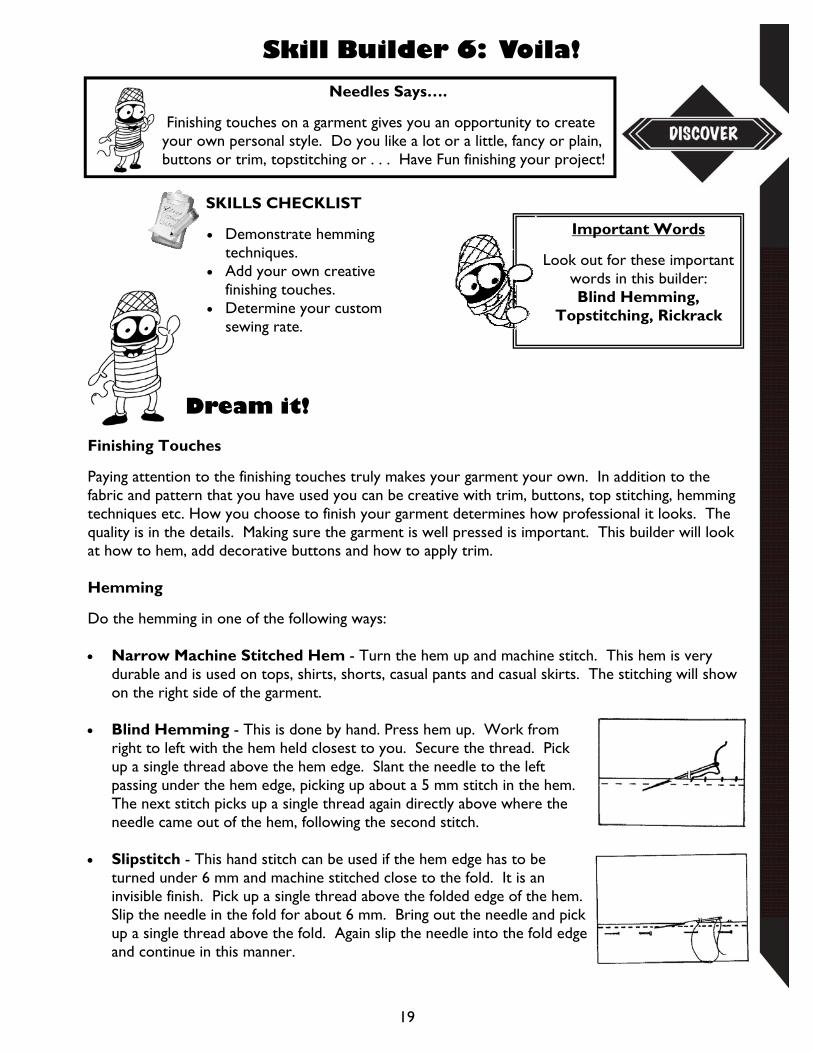
Blind Hemming - This is done by hand. Press hem up. Work from
right to left with the hem held closest to you. Secure the thread. Pick up a single thread above the hem edge. Slant the needle to the left passing under the hem edge, picking up about a 5 mm stitch in the hem. The next stitch picks up a single thread again directly above where the needle came out of the hem, following the second stitch.
Slipstitch - This hand stitch can be used if the hem edge has to be
turned under 6 mm and machine stitched close to the fold. It is an invisible finish. Pick up a single thread above the folded edge of the hem. Slip the needle in the fold for about 6 mm. Bring out the needle and pick up a single thread above the fold. Again slip the needle into the fold edge and continue in this manner.
Needles Says….
Finishing touches on a garment gives you an opportunity to create your own personal style. Do you like a lot or a little, fancy or plain, buttons or trim, topstitching or . . . Have Fun finishing your project!
Important Words
Look out for these important words in this builder: Blind Hemming,
Topstitching, Rickrack
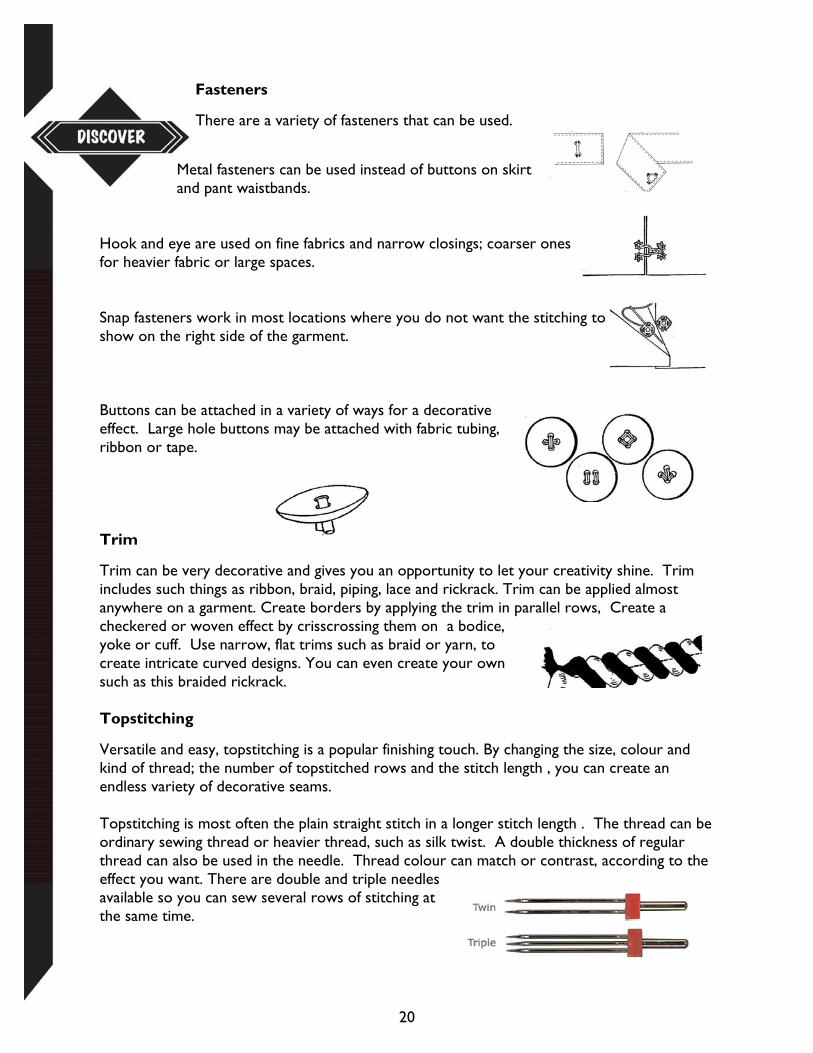
Fasteners
There are a variety of fasteners that can be used.
Metal fasteners can be used instead of buttons on skirt and pant waistbands.
Hook and eye are used on fine fabrics and narrow closings; coarser ones for heavier fabric or large spaces.
Snap fasteners work in most locations where you do not want the stitching to show on the right side of the garment. Buttons can be attached in a variety of ways for a decorative effect. Large hole buttons may be attached with fabric tubing, ribbon or tape. Trim
Trim can be very decorative and gives you an opportunity to let your creativity shine. Trim includes such things as ribbon, braid, piping, lace and rickrack. Trim can be applied almost anywhere on a garment. Create borders by applying the trim in parallel rows, Create a checkered or woven effect by crisscrossing them on a bodice, yoke or cuff. Use narrow, flat trims such as braid or yarn, to create intricate curved designs. You can even create your own such as this braided rickrack. Topstitching
Versatile and easy, topstitching is a popular finishing touch. By changing the size, colour and kind of thread; the number of topstitched rows and the stitch length , you can create an endless variety of decorative seams. Topstitching is most often the plain straight stitch in a longer stitch length . The thread can be ordinary sewing thread or heavier thread, such as silk twist. A double thickness of regular thread can also be used in the needle. Thread colour can match or contrast, according to the effect you want. There are double and triple needles available so you can sew several rows of stitching at the same time.
20

Do it!
21
Time to Sew! IV
Complete your garments by adding the finishing touches!
Let’s Sew!
1. Add any finishing touches -hems, buttons, trims and topstitching to your top and bottom. 2. Fill in the garment Cost Sheet and help determine what your custom sewing rate would be. 3. Take a picture of you modeling your final project. Try out different poses.
What You Will Need: cut out pattern pieces, notions, instruction sheet, sewing tools, sewing machine, iron and ironing board.
Sew Much Fun
How to hem dress pants video http://www.youtube.com/watch?v=u2GiRf6iFu0 How to sew a hem by machine video http://www.youtube.com/watch?v=UFuQxWJU_zU&feature=related
Needles’
Fun Facts!
During the 1800’s in France and England, the use of ribbons represented nobility. At one point, English parliament reserved the wearing of ribbons by only nobil-ity. At the height of their popularity as a fashion embellishment in the 17th and 18th century, ribbons were favoured by men and women. Garments were ex-cessively embroidered and embellished with ribbons of silk and gold. In fact, one male garment in the Victoria and Albert museum in England is trimmed with 250 yards of ribbons.
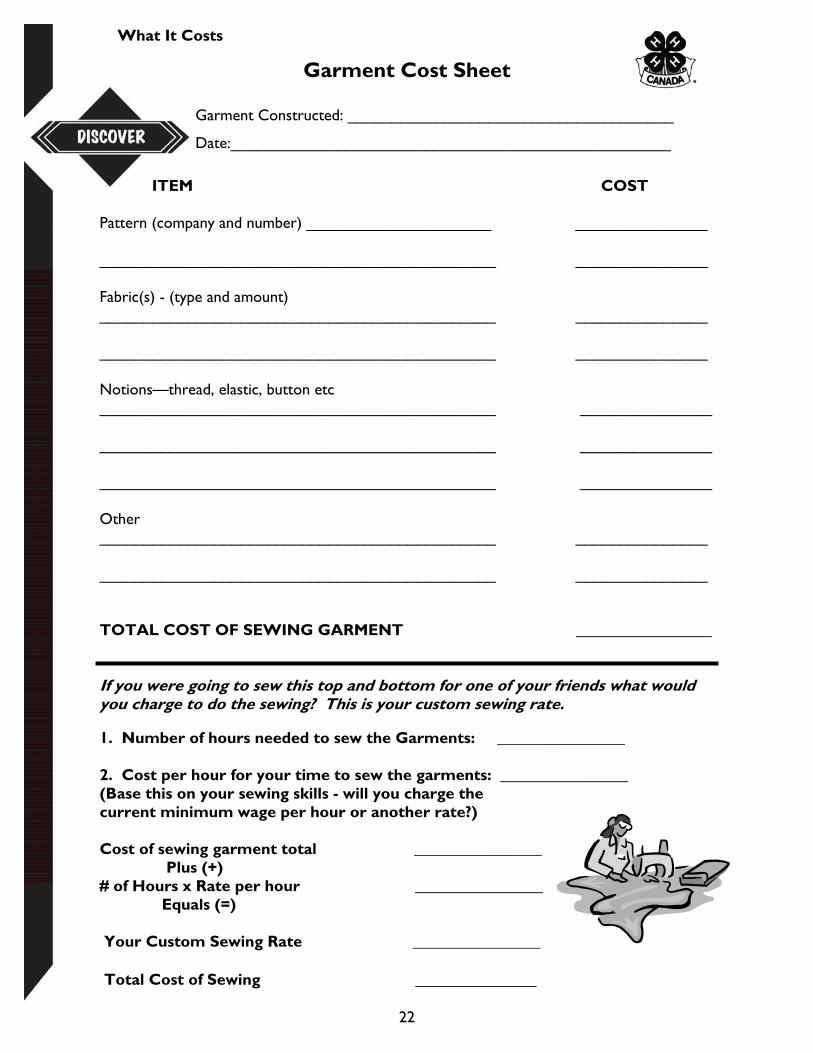
Garment Cost Sheet
Garment Constructed: _____________________________________
Date:__________________________________________________
ITEM COST Pattern (company and number) _____________________ _______________ _____________________________________________ _______________ Fabric(s) - (type and amount) _____________________________________________ _______________ _____________________________________________ _______________ Notions—thread, elastic, button etc _____________________________________________ _______________ _____________________________________________ _______________ _____________________________________________ _______________ Other _____________________________________________ _______________ _____________________________________________ _______________ TOTAL COST OF SEWING GARMENT _________________ If you were going to sew this top and bottom for one of your friends what would you charge to do the sewing? This is your custom sewing rate. 1. Number of hours needed to sew the Garments: ________________ 2. Cost per hour for your time to sew the garments: ________________ (Base this on your sewing skills - will you charge the current minimum wage per hour or another rate?) Cost of sewing garment total ________________ Plus (+) # of Hours x Rate per hour ________________ Equals (=) Your Custom Sewing Rate ________________ Total Cost of Sewing ______________
22
What It Costs
What’s next?
Now that you have finished all the builders in this project it is time to think about and plan for the Showcase Challenge. Be sure to complete your Portfolio Page where you can make sure your Discovering Tops and Bottoms Project Skills Chart is complete.
23
Dig it!
Picture this…(Paste a photo of yourself modeling your outfit.
In this picture I am ________________________________________________
Think about this builder and the activities you did… Review the skills checklist on page 19.
What skills have you developed? Do you need more practice?
Share your experiences with friends and family In this picture I want you to notice : ____________________________________________
_______________________________________________________________________
I want to explain to you : What interfacing is and how to use it. _______________________________________________________________________
_______________________________________________________________________
Member’s Notes
24
Now that you have finished this project, it is time to think about how you will share your experiences and knowledge with others. You may put your new skills to work by helping at a community event or at your club Achievement or teaching others about your topic. The goal of the Showcase Challenge is to help highlight your new skills and help you understand how you can use them. It can be an opportunity to receive feedback from others on your project. So go back through your manual and find some highlights of your learning (what you are proud of) and think about how you will “showcase” it.
Showcase Challenge Bringing it all together!
Demonstrate something you made or learned about
Make a poster or display
Make a pamphlet Make a computer presentation (e.g. PowerPoint)
Give a speech Write a report
Use your new skills to help with the Club Achievement plans
Or come up with your own idea. It is up to you and your leader!
Dream It!
Here are some Showcase Challenge Suggestions:
My Showcase Challenge Plan My showcase idea: __________________________________________________________
________________________________________________________________________
What materials and resources do I need? _________________________________________
________________________________________________________________________
Who do I need to help me? ___________________________________________________
________________________________________________________________________
When do I need to have things done by? _________________________________________
________________________________________________________________________
25
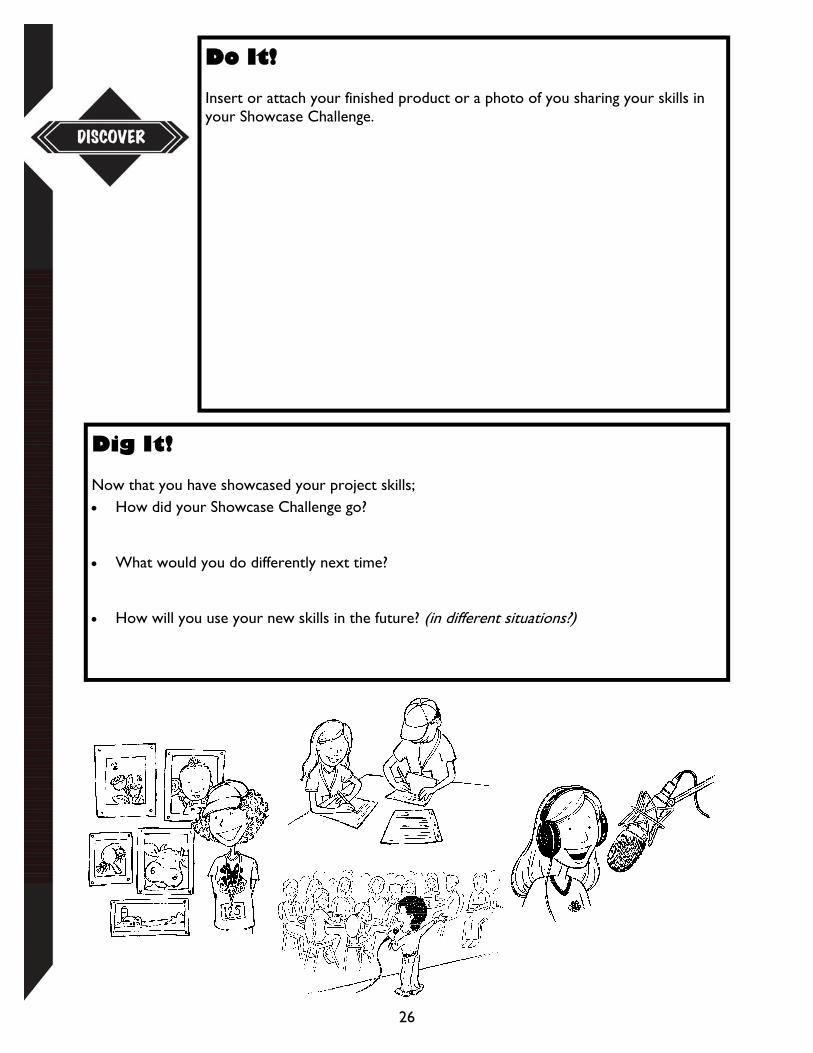
Do It! Insert or attach your finished product or a photo of you sharing your skills in your Showcase Challenge.
Dig It! Now that you have showcased your project skills; How did your Showcase Challenge go?
What would you do differently next time?
How will you use your new skills in the future? (in different situations?)
26
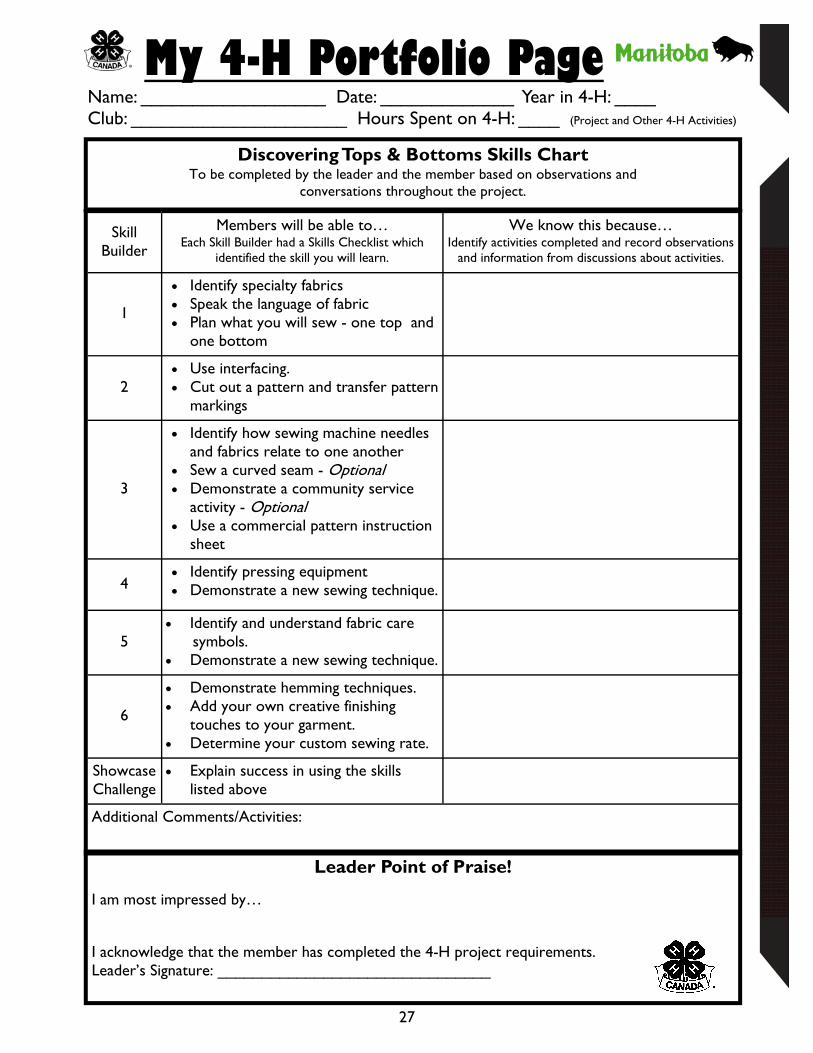
Name: __________________ Date: _____________ Year in 4-H: ____ Club: _____________________ Hours Spent on 4-H: ____ (Project and Other 4-H Activities)
Discovering Tops & Bottoms Skills Chart To be completed by the leader and the member based on observations and
conversations throughout the project.
Skill Builder
Members will be able to… Each Skill Builder had a Skills Checklist which
identified the skill you will learn.
We know this because… Identify activities completed and record observations
and information from discussions about activities.
1
Identify specialty fabrics Speak the language of fabric Plan what you will sew - one top and
one bottom
2 Use interfacing. Cut out a pattern and transfer pattern
markings
3
Identify how sewing machine needles and fabrics relate to one another
Sew a curved seam - Optional Demonstrate a community service
activity - Optional Use a commercial pattern instruction
sheet
4 Identify pressing equipment Demonstrate a new sewing technique.
5 Identify and understand fabric care symbols. Demonstrate a new sewing technique.
Additional Comments/Activities:
6
Demonstrate hemming techniques. Add your own creative finishing
touches to your garment. Determine your custom sewing rate.
Showcase Challenge
Explain success in using the skills listed above
My 4-H Portfolio Page
Leader Point of Praise!
I am most impressed by… I acknowledge that the member has completed the 4-H project requirements. Leader’s Signature: _______________________________
27
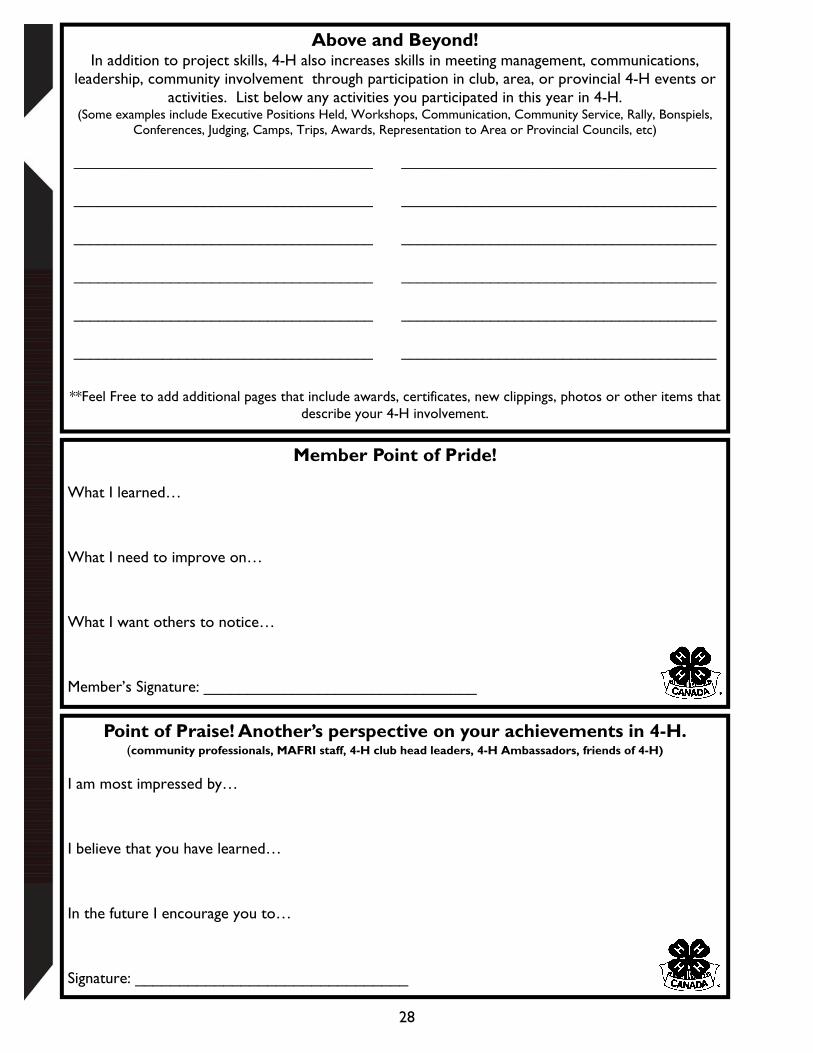
Member Point of Pride!
What I learned… What I need to improve on… What I want others to notice… Member’s Signature: _______________________________
Above and Beyond! In addition to project skills, 4-H also increases skills in meeting management, communications,
leadership, community involvement through participation in club, area, or provincial 4-H events or activities. List below any activities you participated in this year in 4-H.
(Some examples include Executive Positions Held, Workshops, Communication, Community Service, Rally, Bonspiels, Conferences, Judging, Camps, Trips, Awards, Representation to Area or Provincial Councils, etc)
_____________________________________ _______________________________________
_____________________________________ _______________________________________
_____________________________________ _______________________________________
_____________________________________ _______________________________________
_____________________________________ _______________________________________
_____________________________________ _______________________________________
**Feel Free to add additional pages that include awards, certificates, new clippings, photos or other items that describe your 4-H involvement.
Point of Praise! Another’s perspective on your achievements in 4-H. (community professionals, MAFRI staff, 4-H club head leaders, 4-H Ambassadors, friends of 4-H)
I am most impressed by… I believe that you have learned… In the future I encourage you to… Signature: _______________________________
28

4-H Achievement
4-H Achievement is… a 4-H club celebration when members have completed their projects. Achievements are planned by the club to give recognition to members and leaders for their accomplishments in their 4-H projects and club activities.
A 4-H Achievement can take many different formats: from choosing a theme, to member project displays, to members using their new skills for the event (entertainment, food, decorating, photographer, etc.), to members presenting their project to the whole group, the options are endless and open to the creativity of the members and leaders in each club! Clubs may also plan their Achievement to promote 4-H to the community or to recognize sponsors and others who have helped the club. Members and leaders - be sure to check your project books for the project completion requirements, so you will be ready for your club’s Achievement celebration!
For more information about 4-H and the many 4-H opportunities available please visit
http://www.gov.mb.ca/agriculture/4-h/
If you have any questions, comments or suggestions for this or other 4-H projects contact:
Manitoba 4-H Projects
Manitoba Agriculture Food and Rural Initiatives 1129 Queens Avenue
Brandon, MB R7A 1L9
Email: [email protected]
Phone: 204-726-6613 Fax: 204-726-6260
29
This manual is for educational use only and is not intended as professional advice.
4-H Motto
“Learn To Do by Doing” 4-H Pledge
I pledge, My HEAD to clearer thinking, My HEART to greater loyalty, My HANDS to greater service, My HEALTH to better living, For my club, my community, and my country.
What is 4-H?
4-H is an international youth organization involving more than 7 million members in 80 countries around the world. In Canada, 4-H began in 1913 in Roland, Manitoba as a community-based organization dedicated to growth and development of rural youth. Today’s 4-H program reaches both farm and non-farm youth across Canada. The motto of “Learn to Do by Doing” is embodied in the program, as 4-H focuses on skill development as well as personal development of life skills such as communications, leadership and citizenship.
Manitoba 4-H project material is developed by
Manitoba Agriculture, Food and Rural Initiatives (MAFRI)
4-H Quality Equation Principles
Quality People Promote responsibility, respect, trust, honesty, fairness,
sportsmanship, citizenship, teamwork and caring. Quality Experiences
Provide members with personal development and skill development experiences.
Quality Projects Promote and value quality effort. Promote high quality, safe food production within industry standards.
30