Embed Size (px)
Citation preview

4-H Crafts Project Record Book Cloverbud - Ages 6 & 7 years
Name: Address: 4-H Club: 4-H Leader: Age (as of January first): Years in Crafts Project:
To enrich education through diversity the University of Idaho is an equal opportunity/affirmative action employer and educational institution.
63044

2
The 4-H Emblem is:
A green four-leaf clover with the letter “H” on each leaf is the emblem. Each “H” stands for a part of the pledge - Head, Heart, Hands, Health
The 4-H Colors are:
Green and White. Green symbolizes nature’s most common color. White symbolizes purity.
The 4-H Motto is:
“To Make The Best Better” This motto challenges everyone involved in 4-H to do the very best job they can.

3
Flag Pledges
The American Flag Pledge: “I pledge allegiance to the flag of the United States of America, and to the republic for which is stands, one nation under God, indivisible, with liberty and justice for all.” (When repeating the pledge, your right hand should be placed over your heart which is on the left side.)
The National 4-H Pledge: I Pledge: My Head to clearer thinking My Heart to Greater loyalty My Hands to larger service, and My Health to better living for my club, my community, my country, and my world.

4
Twin Falls County 4-H Cloverbuds Discover new strengths and talents. Learn cooperation. Practice making good choices. Strengthen the family unit. Gain confidence and self-reliance. Things to Remember My Club Leader’s Name My Club Leader’s Phone # My Meeting Time My Meeting Place
4-H Cloverbuds

5
Cloverbud Project Record
Name: This is my ______ year in Cloverbuds. We had ______ Cloverbud meetings/trips. I went to ______ of these Cloverbud meetings/trips. I went to ______ regular 4-H club meetings. What did you take to the fair? (list) ___________________________________________________________________________________________________________________________ Parent/Guardian Comments: ___________________________________________________________________________________________________________________________ Parent/Guardian Signature: ____________________ Date: ___________

6
Objectives of the 4-H Cloverbud Crafts Project
1. To gain experience making crafts. 2. To explore types of crafts and crafting materials. 3. To participate in group activities within your 4-H club. NOTE: ☺ Cloverbud projects are for the child to explore and discover project areas. ☺ Cloverbud projects are not to be judged or placed in any 4-H activity. ☺ Safety of the child should be the primary concern of the cloverbud project.
7
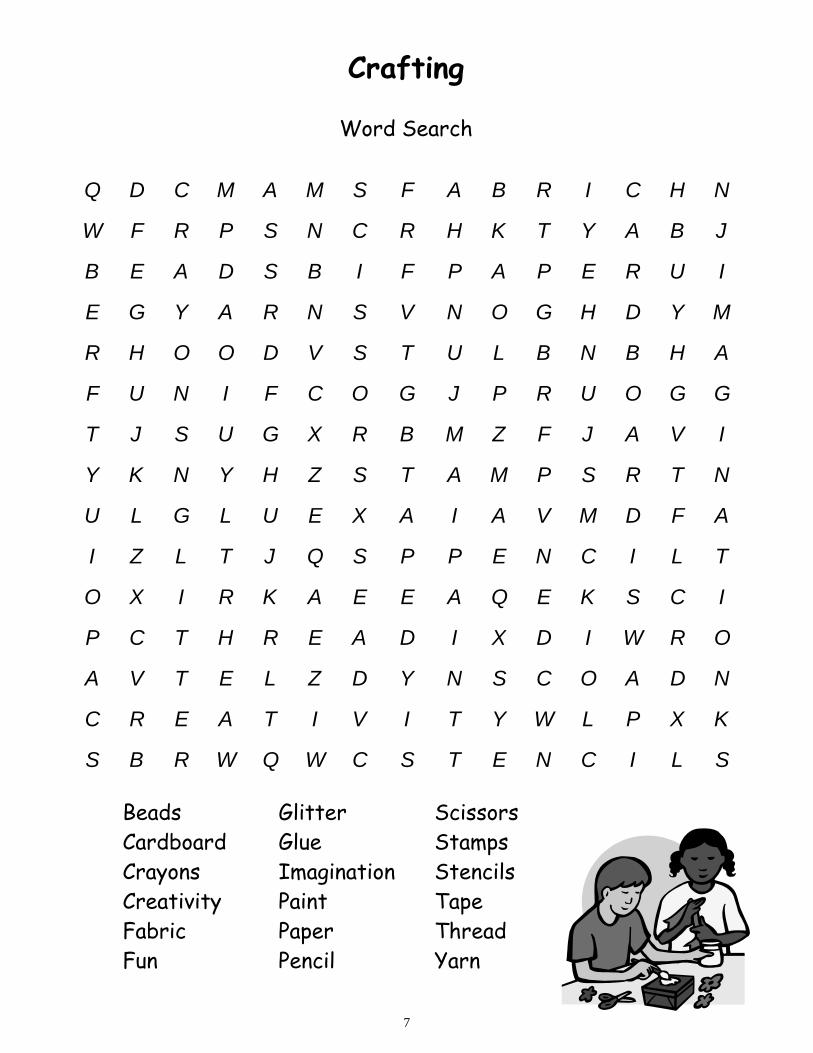
Crafting
Word Search
Q D C M A M S F A B R I C H
W F R P S N C R H K T Y A B
B E A D S B I F P A P E R U
E G Y A R N S V N O G H D Y
R H O O D V S T U L B N B H
F U N I F C O G J P R U O G
T J S U G X R B M Z F J A V
Y K N Y H Z S T A M P S R T
U L G L U E X A I A V M D F
I Z L T J Q S P P E N C I L
O X I R K A E E A Q E K S C
P C T H R E A D I X D I W R
A V T E L Z D Y N S C O A D
C R E A T I V I T Y W L P X
S B R W Q W C S T E N C I L
N
J
I
M
A
G
I
N
A
T
I
O
N
K
S
Beads Cardboard Crayons Creativity Fabric Fun
Glitter Glue Imagination Paint Paper Pencil
Scissors Stamps Stencils Tape Thread Yarn
8
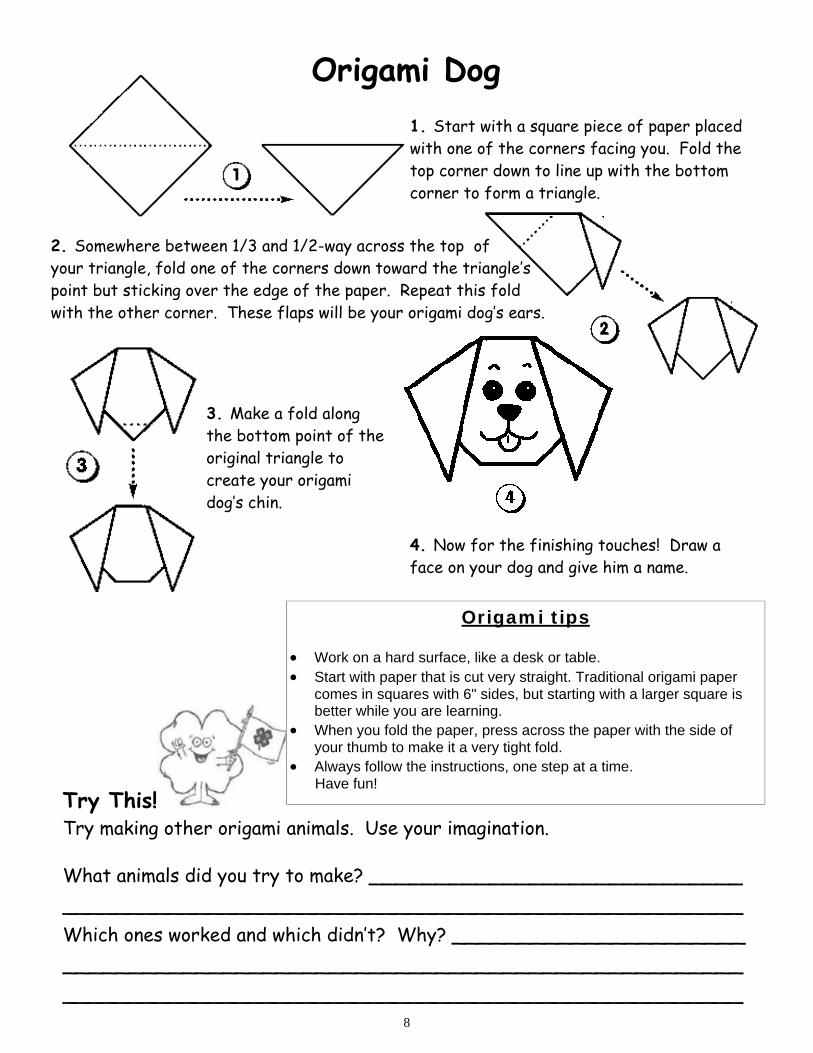
Origami Dog 1. Start with a square piece of paper placed with one of the corners facing you. Fold the top corner down to line up with the bottom corner to form a triangle.
3. Make a fold along the bottom point of the original triangle to create your origami dog’s chin.
2. Somewhere between 1/3 and 1/2-way across the top of your triangle, fold one of the corners down toward the triangle’s point but sticking over the edge of the paper. Repeat this fold with the other corner. These flaps will be your origami dog’s ears.
Try This! Try making other origami animals. Use your imagination.
What animals did you try to make? ____________________________ ___________________________________________________ Which ones worked and which didn’t? Why? ______________________ ___________________________________________________ ___________________________________________________
Origami tips
• Work on a hard surface, like a desk or table. • Start with paper that is cut very straight. Traditional origami paper
comes in squares with 6" sides, but starting with a larger square is better while you are learning.
• When you fold the paper, press across the paper with the side of your thumb to make it a very tight fold.
• Always follow the instructions, one step at a time. Have fun!
4. Now for the finishing touches! Draw a face on your dog and give him a name.

9
Heart Mice
Try This! Try making other animals out of basic heart shapes. Use your imagination. What animals did you try to make? ____________________________ ___________________________________________________ Which ones worked and which didn’t? Why? ______________________ ___________________________________________________ ___________________________________________________
What you need: 2 Colors of Construction Paper or Felt Heart Pattern Glue, Fabric Glue or Stick Glue Lollipop Black Marker White or Black Thread/Yarn Sewing Needle
What you do:
1. Make a heart shaped pattern (it should measure about five inches at the widest point) and trace it onto one color of the construction paper or felt.
2. Cut out the heart. 3. Fold the heart in half to form the mouse's body, then glue together the edges from the tip of the nose to the top of the back, but leave the tail end open for the sucker to fit. 4. Use the black marker to draw on the eyes. 5. Using the needle and thread/yarn, make the whiskers, by putting the needle and thread/yarn through the construction paper at the pointed end of the heart. Tie off the thread. 6. For the ears, cut out a small heart from the other color of construction paper or felt. Fold the small heart in half and glue onto the mouse. 7. Insert a lollipop in between the open end of the mouse’s body, leaving the stick out for the mouse’s tail.

10
Maze
Lead the girl to her crayons

11
Name Art
What you do: 1. On a piece of paper, print your first name in large, neat letters. 2. Looking at the letters, what shapes does each letter remind you of? A small “b” might be a baseball with a bat standing next to it or an “s” might be a snake or a pair of monkey arms. 3. Try turning each letter into an object or an animal so that your name looks like the things that interest you. 4. Color in your drawings to make an original piece of name art.
What you need: Pencil Paper Colored Pencils or Crayons
Try This! Try writing out the entire alphabet and making each letter into an object, now do the same with the numbers 1-10.
Were you able to finish the whole alphabet? Which letters were the hardest to work with? Why? ________________________________________ ___________________________________________________ Did you try using the numbers? Was it harder or easier than using the letters? Why? _______________________________________________ ___________________________________________________

12
Sun Prints
What you need: A Sunny Day Construction Paper (darker colors will work the best) Objects from Nature or from Around the House (flatter items work best)
Try This! Try experimenting with different colors of construction paper and different objects.
What colors of paper did you try? Which worked best? Why? ___________ ________________________________________________________________________________________________________ What objects did you use? Which worked best? Why? ________________ ________________________________________________________________________________________________________
What you do: 1. Lay the construction paper outside in the sun. 2. Arrange the items on the paper so their silhouettes (outlines) will be how you want them on the finished project. 3. Wait about an hour and remove the items. 4. You will see that the sun has faded the paper around the objects.

13
Paper Flower Bouquet
What you need: Construction Paper or Card Stock (any color or print you like) Patterns of Flowers, Hearts, Circles, and Stars Patterns of Leaves Glue Scissors Straws Colored Lace and/or Ribbon Clean, Empty Container Styrofoam
What you do: 1. Trace and cut out the flowers, hearts, circles, stars, and leaves on
the construction paper, or card stock. 2. Glue layers of hearts, stars, circles, and flowers together to make the blossoms. Be creative. 3. Using the glue, attach the blossoms to the straws; add the leaves. 4. Glue some paper around the empty container. Decorate with paper shapes, lace, and/or ribbon. 5. Glue the Styrofoam to the inside bottom of the container and arrange the flowers in the Styrofoam.

14
Color the Crafty Kids

15
What you do:
1. Cut the pipe cleaner in half (save the other half for another project) 2. Bend one end of the pipe cleaner into an “L” (about 1/4-inch), this will help keep the beads on the pipe cleaner. 3. String and stack all the beads onto the pipe cleaner. 4. Bend the other end of the pipe cleaner into an “L” shape. 5. Twist the two end “L” shapes together. Clip off any extra wire, be sure to bend in any sharp edges. 6. Bend into a heart shape. 7. Add ribbon for a necklace, a key ring for a backpack charm, or an ornament hook for a hanging decoration.
Try This! Try making the following shapes with tri-beads and pipe cleaner: Star Flower Wreath Candy Cane 4 Leaf Clover Snowflake Which shapes did you try? ______________________________________ Which worked best? Why? _________________________________ ______________________________________________________________________________________________________
Tri-Bead Heart
What you need: 12-inch Pipe Cleaner, Chenille Stem (red or any color that corresponds with the color of your beads) 30 Translucent Tri-Beads, non translucent beads may be used (red or any color combination you choose) Wire Cutter, or a good pair of scissors Keychain, Ribbon, Ornament Hooks (optional)

16
Puzzle Frames
Try This! Try making more unique and personal frames by using the following items instead of puzzle pieces: Beads Buttons Shells Crayons Fabric Small Stones Dried Leaves/Flowers Pictures from a Magazine What items did you try? __________________________________________ Which worked best? Why? ___________________________________ __________________________________________________________________________________________________________
Tip: You can make theme frames to match the theme in your photograph.
What you do: 1. Pick out the most common color in your puzzle pieces and paint your
cardboard frame a similar color. This will make any part of the frame not covered by puzzle pieces still match.
2. Glue the puzzle pieces to the frame randomly - any direction, on top of each other, etc.
3. Each frame you make will be unique. 4. Wait until the glue is totally dry, then place your favorite picture in your
new frame.
What you need: Old Puzzle Pieces Cardboard Frames Poster Paint Paint Brush Glue

17
Potato Prints What you need: 3 Large Baking Potatoes Tempera Paints Saucers (to hold paints) Paper Pens or Markers Scissors Kitchen Knife (adult use only)
What you do:
1. Cut each potato in half width-wise, and wipe dry. The raw surface will be used as the stamp for your prints.
2. Draw shapes on a piece of paper (no larger than the diameter of the raw potato surfaces), these will be the designs for your stamps. Some good shapes are: star, fish, heart, moon, sun, smiley face, peace symbol, clover, etc. 1. Cut the shapes out and trace them on the raw surface of the
potatoes. Then have an adult help you use the kitchen knife to carve the background away from your shapes. (Don’t carve out the shape itself) Wipe the fresh cut edges dry.
2. Pour various colors of paint into the saucers. Dip the potato stamps into the paint and print them on the paper.
3. Once your prints have dried, you can highlight your designs with markers, glitter, or other decorations.
4. You can use potato prints to make homemade cards and even wrapping paper!
Try This! Use an apple to make stamps the same way you would a potato or cut out fun shaped stamps from old kitchen sponges.
What other items did you use to make stamps? __________________________ Which worked the best? Why?__________________________________ ______________________________________________________ _____________________________________________________________

18
Project Story
With the help of your leader, teen leader, parent or adult helper, answer the following questions about your project.
1. The most important thing I learned was: _____________ ___________________________________________________________________________________________________________________________ 2. Things I want to learn more about are: ______________ ___________________________________________________________________________________________________________________________ 3. Mark which craft projects you did. __ Origami Dog __ Heart Mice __ Name Art __ Sun Prints __ Paper Flower Bouquet __ Tri-Bead Heart __ Puzzle Frames __ Potato Prints 4. Did you finish all of the craft projects you started? ______ 5. List all the crafts you started but didn’t finish and why. _________________________________________ ___________________________________________________________________________________________________________________________

19
Photos
Photos of your different craft projects can be attached to this page.

20
The University of Idaho provides equal opportunity in education and employment on the basis of race, color, religion, national origin, gender, age, disability, or status as a Vietnam-era veteran, as required by state and federal laws.
Information adapted from Adams County, Colorado State University Extension, and various other sources.