Embed Size (px)
DESCRIPTION
All about 3D
Citation preview

3DToolbox - Version. 2009 Page 1
Copyright © 2003 – 2007 - http://www.3DToolbox.biz
Full_Suite
Version 2009
User Reference Manual
Revised : October 29, 2007
3DToolbox - Version. 2009 Page 2
Copyright © 2003 – 2007 - http://www.3DToolbox.biz
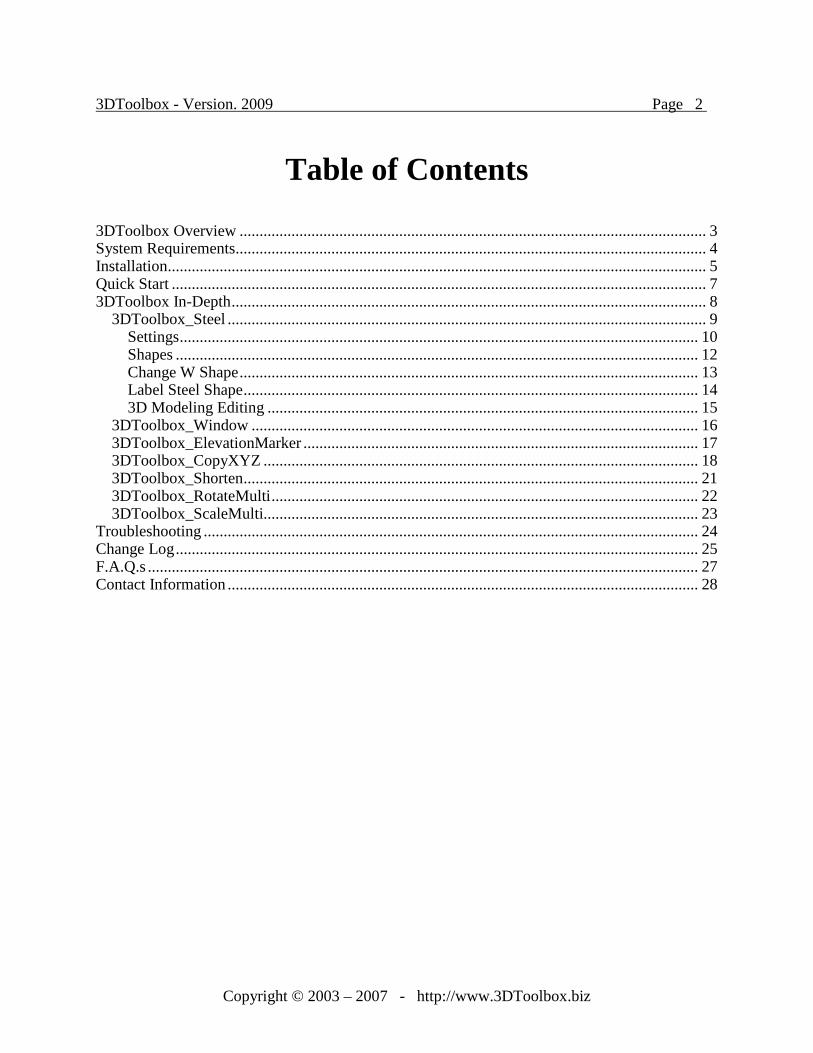
Table of Contents
3DToolbox Overview ..................................................................................................................... 3 System Requirements...................................................................................................................... 4 Installation....................................................................................................................................... 5 Quick Start ...................................................................................................................................... 7 3DToolbox In-Depth....................................................................................................................... 8
3DToolbox_Steel ........................................................................................................................ 9 Settings.................................................................................................................................. 10 Shapes ................................................................................................................................... 12 Change W Shape................................................................................................................... 13 Label Steel Shape.................................................................................................................. 14 3D Modeling Editing ............................................................................................................ 15
3DToolbox_Window ................................................................................................................ 16 3DToolbox_ElevationMarker ................................................................................................... 17 3DToolbox_CopyXYZ ............................................................................................................. 18 3DToolbox_Shorten.................................................................................................................. 21 3DToolbox_RotateMulti........................................................................................................... 22 3DToolbox_ScaleMulti............................................................................................................. 23
Troubleshooting ............................................................................................................................ 24 Change Log................................................................................................................................... 25 F.A.Q.s .......................................................................................................................................... 27 Contact Information ...................................................................................................................... 28

3DToolbox - Version. 2009 Page 3
Copyright © 2003 – 2007 - http://www.3DToolbox.biz
3DToolbox Overview 3DToolbox includes many time saving routines for AutoCAD® designers. 3DToolbox is:
� a subscription service for the design and maintenance of several AutoCAD® tools. � a forum where premium members can ask for, and receive custom AutoCAD® tools. � add-on software for AutoCAD® � custom blocks and details for AutoCAD® � a full drop down menu & settings dialog box for several AutoCAD® tools.
3DToolbox includes: 3DToolbox_Steel -Dynamic Structural Steel Modeling 3DToolbox_Window - 2D Architectural Window Generator 3DToolbox_ElevationMarker - Auto Updating Elevation Call Out Marker 3DToolbox_CopyXYZ – Copy objects locking their X, Y, or Z value 3DToolbox_MoveXYZ – Move objects locking their X, Y, or Z value 3DToolbox_StretchXYZ – Stretch objects locking their X, Y, or Z value 3DToolbox_Shorten – Shorten a line on both sides by a specified value 3DToolbox_RotateMulti – Rotate multiple objects by a set rotation angle 3DToolbox_ScaleMulti – Scale multiple objects by a set scale

3DToolbox - Version. 2009 Page 4
Copyright © 2003 – 2007 - http://www.3DToolbox.biz
System Requirements 3DToolbox requires AutoCAD® 2000, 2000i, 2002, 2004, 2005, 2006, 2007, 2008, or 2009. AutoCAD® LT will not work with 3DToolbox. The minimum system requirements are the same as the requirements for AutoCAD®, but the 3D modeling capabilities included may be more than some computers can handle. Recommended Minimum System Requirements: 500mhz or faster processor 256mb RAM 32mb 3D OpenGL Capable Video Card AutoCAD® set to WOpenGL Display Driver

3DToolbox - Version. 2009 Page 5
Copyright © 2003 – 2007 - http://www.3DToolbox.biz
Installation 1. Download and extract (unzip) the files into a folder of your choice. The default option is to
extract into c:/3DToolbox. 2. The folder that you extract 3DToolbox into must be added to your AutoCAD support file
search path. To do this: In AutoCAD select the Tools menu, then select Options. When the options dialog box appears, highlight Support File Search Path. Click on the Add button, and then the Browse button. Browse to the folder that you extracted 3DToolbox into.
3. To install 3DToolbox, simply select the Tools menu from AutoCAD, and then Load Application . Press the Startup Suite Contents button, and browse to the 3DToolbox.vlx file. Once that file is loaded, you may need to re-start AutoCAD for the 3DToolbox pull down menu to appear.
4. 3DToolbox will start in demonstration mode. To activate 3DToolbox, please see the next section labeled Activation.

3DToolbox - Version. 2009 Page 6
Copyright © 2003 – 2007 - http://www.3DToolbox.biz
Activation 1. Premium members will receive an e-
mail with an Activation Username and Code to unlock the demonstration version of 3DToolbox.
2. Install 3DToolbox according to the instructions above.
3. Select the 3DToolbox menu from AutoCAD. Select the Structural section of 3DToolbox, and then the last option, Settings.
4. The Settings dialog will appear.
5. Type in your Activation User and Activation Code exactly as received in your e-mail, punctuation does count.
6. When the Activation is successful, 3DToolbox will alert you.
7. Click on the Save as Default button to have 3DToolbox remember your Activation User and Activation Code or you will have to re-type it into 3DToolbox.
Upgrade 1. Download the current 3DToolbox version from the Premium Members download area. 2. Unzip the files and overwrite your existing 3DToolbox software. 3. Delete the 3DToolbox_Steel.cui file. 4. Restart AutoCAD
Uninstall 1. Remove 3DToolbox.vlx from your Startup Suite Contents. (See installation for location) 2. Remove the folder location of 3DToolbox from your Support File Search Path. 3. Delete all 3DToolbox files from your computer.

3DToolbox - Version. 2009 Page 7
Copyright © 2003 – 2007 - http://www.3DToolbox.biz
Quick Start
After successfully installing 3DToolbox, AutoCAD will display the 3DToolbox menu at the end of your drop down menus (An AutoCAD restart may be required). Select any of the options from the menu to start working with that tool. Everything under the Structural section of the menu is dependent on the settings for that group as shown above. The Structural settings are explained in greater detail in the 3DToolbox_Steel section of this manual. AutoCAD will prompt the user with all the questions to complete the tool selected. See each individual tool in this manual for further instruction.

3DToolbox - Version. 2009 Page 8
Copyright © 2003 – 2007 - http://www.3DToolbox.biz
3DToolbox In-Depth In this section, we will discover and explain each tool that is included with 3DToolbox_Full_Suite. With your subscription, premium members have access to the latest build of 3DToolbox available.
3DToolbox - Version. 2009 Page 9
Copyright © 2003 – 2007 - http://www.3DToolbox.biz
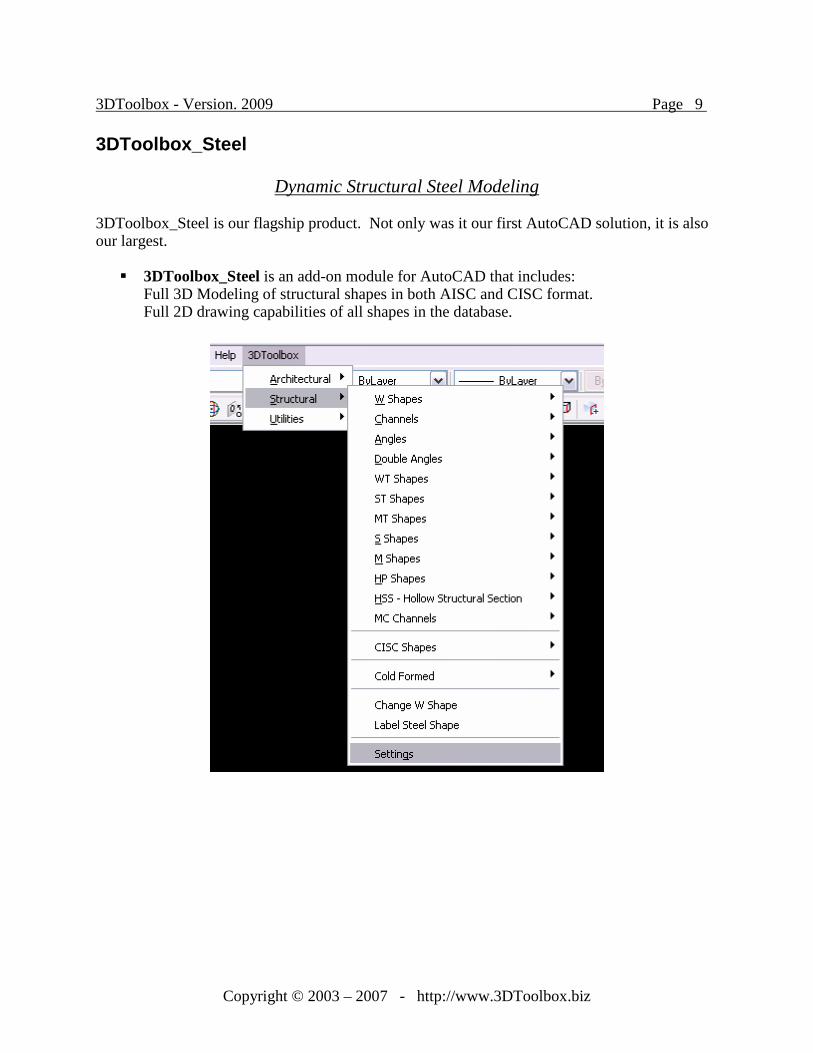
3DToolbox_Steel
Dynamic Structural Steel Modeling 3DToolbox_Steel is our flagship product. Not only was it our first AutoCAD solution, it is also our largest.
� 3DToolbox_Steel is an add-on module for AutoCAD that includes: Full 3D Modeling of structural shapes in both AISC and CISC format. Full 2D drawing capabilities of all shapes in the database.

3DToolbox - Version. 2009 Page 10
Copyright © 2003 – 2007 - http://www.3DToolbox.biz
Settings After selecting Settings from the Structural section of 3DToolbox, the structural settings dialog will appear. Let’s review all the options that are available. 3D Mode - 2D Mode - The top two buttons in the settings dialog are 3D Mode and 2D Mode. Notice the options listed under 2D Mode are unavailable. This shows that 3DToolbox_Steel is set to 3D Mode at this time. To change to 2D Mode, simply click the 2D Mode button. 3D - Beam Creation Method – Select either Top of Steel or Center of Steel. Top of steel option is normally used to create beams in a floor or roof. Center of Steel is normally used when creating columns or bracing that will be dimensioned from its center line. 3D - Point Selection Method – Select either Two Point or Select Line. Two Point method will ask for a starting point and an end point, and create the 3D structural shapes based on those two points with the Z axis of the shape pointing down. Change the UCS axis around to change the orientation of the shape, or use the standard rotate command to rotate it about its axis. Select Line method is TIME SAVING. Create a wireframe, or lines that represent the center of beams. Use the Select Line method to convert those lines to 3D Structural shapes, with the Z axis of the shape pointing down.

3DToolbox - Version. 2009 Page 11
Copyright © 2003 – 2007 - http://www.3DToolbox.biz
2D – Point Selection Method One Point will create a structural shape by asking for a single point One Point and End View – Create an end view of a shape with 0 degrees of rotation One Point and Top View – Create a top view of a shape that is 12” long, and 0 degrees One Point and Side View – Create a side view of a shape that is 12” long, and 0 degrees Two Point will create a structural shape by asking for two points Two Point and End View – Create an end view of a shape and asks for rotation angle Two Point and Top View – Create a top view of a shape with second point for length and angle Two Point and Side View – Create a side view of a shape with second point for length and angle General Settings – The General Settings modify settings that work for either 3D or 2D. Smart Object Layers – Creates objects using two layers: 3DToolbox and 3DToolboxSolids Individual Layers – Creates objects on their own layer, for example: W18x35 or L4x4x4 Use Current Layer – Creates objects on the current layer, for example: 0 or Steel Square Corners – Creates structural shapes with no radius. HIGHLY suggested when creating 3D models to keep the file size down. Radius Corners – Creates structural shapes that have radius corners. Check Install – This button will check to make sure all the files that are required for 3DToolbox to work properly are found. OK / Cancel – The OK and Cancel buttons will either accept, or cancel the settings. Save as Default – This button will save all of the settings to a txt file (3DTbox_presets.txt). If this file is not found, then it will error out. If you Save as Default, then each time you open AutoCAD or a new drawing, the default values will be loaded. Build 20071017 – This is the date of your current version of 3DToolbox. The year is the first four digits (year 2007) followed by the two digit month (10 or October) and finally the day (17). So this version was built on October 17, 2007. 3DToolbox is constantly updating, and adding new functions to 3DToolbox_Full_Suite. You can expect a new version of 3DToolbox about every two weeks.

3DToolbox - Version. 2009 Page 12
Copyright © 2003 – 2007 - http://www.3DToolbox.biz
Shapes W-Shapes Channels Angles Double Angles WT Shapes ST Shapes MT Shapes S Shapes M Shapes HP Shapes HSS – Hollow Structural Section, or known as Tube Steel MC Channels CISC Shapes Cold Form “Z” or Zee Shapes “C” or Cee shapes are coming soon 3DToolbox is prepared to add additional shapes to the database as needed. Any company that is using a different standard than the AISC should contact 3DToolbox with their desire to add the additional shapes to the database.
3DToolbox - Version. 2009 Page 13
Copyright © 2003 – 2007 - http://www.3DToolbox.biz
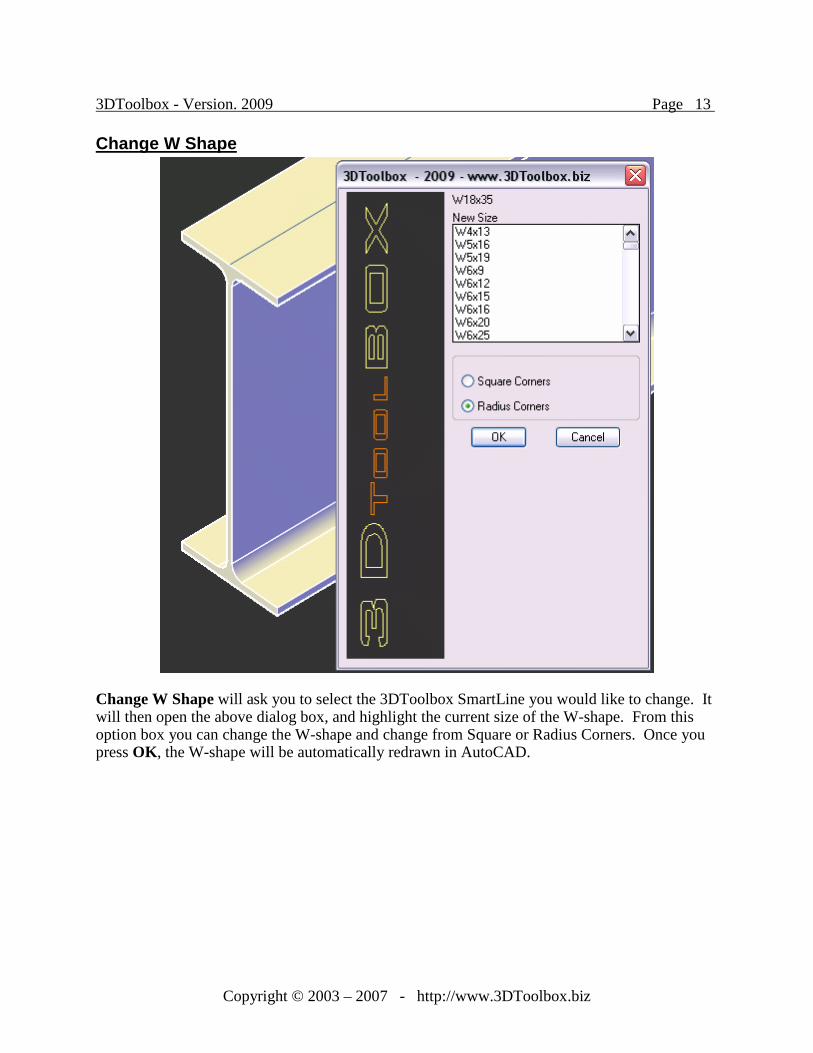
Change W Shape
Change W Shape will ask you to select the 3DToolbox SmartLine you would like to change. It will then open the above dialog box, and highlight the current size of the W-shape. From this option box you can change the W-shape and change from Square or Radius Corners. Once you press OK , the W-shape will be automatically redrawn in AutoCAD.

3DToolbox - Version. 2009 Page 14
Copyright © 2003 – 2007 - http://www.3DToolbox.biz
Label Steel Shape The Label Steel Shape menu item, will prompt you to select the 3DToolbox SmartLine you would like to label.
1. Start the Label Steel Shape Routine 2. You are prompted to select the 3DToolbox SmartLine you would like to label. 3. After selection, 3DToolbox will display some basic information about the shape to the
command prompt, such as Name and Layer. If you are just looking for this information you can ESC out of the program at this point.
4. 3DToolbox asks you to Select Text Base Point: 5. Then Select Text Height: 6. and finally, Select Text Rotation 7. 3DToolbox will automatically label the structural shape for you.

3DToolbox - Version. 2009 Page 15
Copyright © 2003 – 2007 - http://www.3DToolbox.biz
3D Modeling Editing You can stretch, move, rotate, copy, mirror, ..etc the 3DToolbox SmartLine, and the shapes will automatically update their length and position. The shapes are drawn in standard AutoCAD solids, so there is no need to worry about compatibility. When using the copy command, only copy the SmartLine or you will have too many solids in the drawing. Our database includes OVER 1200 AISC structural shapes. Every shape in the AISC book, and a few not in the book. Our database also includes some CISC shapes.

3DToolbox - Version. 2009 Page 16
Copyright © 2003 – 2007 - http://www.3DToolbox.biz
3DToolbox_Window
2D Architectural Window Generator Currently 3Dtoolbox_Window will draw a 2D architectural window in plan view, and ask for the exterior and interior lines for the window, and break them out to the window width. Future Plans 1. Create an elevation
view of the window from the dialog box.
2. Link the plan view and the elevation view together, so that when the plan view is double clicked, it will re-open the dialog box to allow the user to change the size in both plan view and elevation view.
3. Currently it is only capable of drawing a window with two equal sections. Additional sizes and styles of windows will be available soon.

3DToolbox - Version. 2009 Page 17
Copyright © 2003 – 2007 - http://www.3DToolbox.biz
3DToolbox_ElevationMarker Architectural/Structural Elevation Marker Automatically updates when moved, copied, etc Very simple to use. All of the settings to each block are saved in individual attributes. As you edit the attributes you have the following settings: Y Value: DO NOT CHANGE. This will automatically update as the block is moved. If it does get changed, it will automatically recreate the correct value when moved or updated. Add Factor: In the example above, we are adding -800 inches to the Y Value of the block insertion point. (Subtracting 800 inches) Times Factor: In the example above, we are multiplying the location by a factor of one (1). Multiplying by one(1) is good when working in model space, but if we want to use them in paperspace, we need to be able to scale the value by the paper space scale to get a valid result. Prefix: In the example above, we are using a prefix of "EL." to designate that this is an elevation of 112'-0". Any prefix can be specified. Suffix: Like the prefix option, the suffix option will add any text to the end of the callout. In the example above, we do not have any suffix. Right Hand vs. Left Hand: The example above only shows the Right Hand version of the block. The Left Hand version of the block is a mirror of the Right Hand version and works identical to the Right Hand version. Advanced Feature: The call-out does NOT have to look like this. Once the block has been inserted, you can refedit the block to look like your companies block. To use your new company block instead of the 3DToolbox block, simply insert your modified block into a new drawing, and then run the program. The program will insert the modified block and attach the smarts. The program must be run to insert the block and attach the smarts. A copy and paste from another drawing will not copy the smarts to the new drawing. Also, a highly customized block can be created. The block can be absolutely anything a company requires it to be as long as the first 5 attributes are identical to the example first 5 attributes. After the first 5 attributes, the block can contain as many attributes as desired. Of course the block name has to remain constant. 3DTbox10Elmark01Right -or- 3DTbox10Elmark01Left

3DToolbox - Version. 2009 Page 18
Copyright © 2003 – 2007 - http://www.3DToolbox.biz
3DToolbox_CopyXYZ
Copy objects locking their X, Y, or Z value Copy X: Only copy items in the X direction (lock the Y and Z direction) Copy Y: Only copy items in the Y direction (lock the X and Z direction) Copy Z: Only copy items in the Z direction (lock the X and Y direction, great for 3D designers) Copy XY: Only copy items in the X and Y direction (lock the Z direction, great for 3D designers) Copy XZ: Only copy items in the X and Z direction (lock the Y direction) Copy YZ: Only copy items in the Y and Z direction (lock the X direction)

3DToolbox - Version. 2009 Page 19
Copyright © 2003 – 2007 - http://www.3DToolbox.biz
3DToolbox_MoveXYZ
Move objects locking their X, Y, or Z value Move X: Only move items in the X direction (lock the Y and Z direction) Move Y: Only move items in the Y direction (lock the X and Z direction) Move Z: Only move items in the Z direction (lock the X and Y direction, great for 3D) Move XY: Only move items in the X and Y direction (lock the Z direction, great for 3D) Move XZ: Only move items in the X and Z direction (lock the Y direction) Move YZ: Only move items in the Y and Z direction (lock the X direction)

3DToolbox - Version. 2009 Page 20
Copyright © 2003 – 2007 - http://www.3DToolbox.biz
3DToolbox_StretchXYZ
Stretch objects locking their X, Y, or Z value This set of routines will stretch entities while only allowing one variable to change. It will stretch the X value of the entities, or the Y value, or the Z value.
3DToolbox - Version. 2009 Page 21
Copyright © 2003 – 2007 - http://www.3DToolbox.biz
3DToolbox_Shorten
Shorten a line on both sides by a specified value
3DToolbox_Shorten will shorten 2D lines by a specified value. After selecting the shorten command, 3DToolbox_Shorten will ask for the amount to shorten each line. Then it will ask to select lines to shorten. 3DToolbox_Shorten can shorten many lines at the same time by a specified distance.

3DToolbox - Version. 2009 Page 22
Copyright © 2003 – 2007 - http://www.3DToolbox.biz
3DToolbox_RotateMulti
Rotate multiple objects by a set rotation angle 3DToolbox_RotateMulti will rotate objects by a set rotation angle. Once the angle is set, it is not required to set the angle again. Simply select the objects that you want to rotate, and then a base point. 3DToolbox will rotate the objects by the set angle. Once those objects have been rotated, 3DToolbox_RotateMulti will ask for the next set of objects to rotate and their base point. 3DToolbox already has the rotation angle set, and will rotate the objects. An example where this may be useful is when rotating a plan view 90 or 180 degrees and needing to rotate all of the text, annotation, and call-outs by the set angle so that the text is right side up.

3DToolbox - Version. 2009 Page 23
Copyright © 2003 – 2007 - http://www.3DToolbox.biz
3DToolbox_ScaleMulti
Scale multiple objects by a set scale
3DToolbox_ScaleMulti will scale multiple objects by a set scale, once the scale has been set. It will ask for the objects to scale, and then their base point. It will repeat and ask for the next set of objects and their base point, scaling the objects by the set scale. A useful example for 3DToolbox_ScaleMulti is when scaling a 2D drawing from one scale to another for example ¼ scale to ½ scale. All of the text, annotation and call-outs will need to be scaled as well. One object can be selected at a time such as the grid call-outs, and scaled with their base point. 3DToolbox_ScaleMulti will continue to repeat until you have scaled all of the grid call-outs.

3DToolbox - Version. 2009 Page 24
Copyright © 2003 – 2007 - http://www.3DToolbox.biz
Troubleshooting
1. 3DToolbox has loaded successfully, but the 3DToolbox menu does not load. a. Ensure that c:\3DToolbox has been added to the AutoCAD® Support File
Search Path. See installation instructions for help. b. Check that the menu bar has enough room to display the 3DToolbox menu. It
may have forced it off the edge of the screen. Rearrange the menu items on the AutoCAD® menu bar.

3DToolbox - Version. 2009 Page 25
Copyright © 2003 – 2007 - http://www.3DToolbox.biz
Change Log The following list is the changes to 3DToolbox in the last (60) sixty days according to when this manual was last updated. To find the current Change Log, please visit our website, http://www.3DToolbox.biz. 2007-10-23 - Activation changed from AutoCAD serial number to a Username and Activation Code 2007-10-22 - Bugfix - When using LL2 1/2 or LL3 1/2 "Error-Exiting 3DToolbox at: Code 20getshape-12 bad argument type:" has been fixed 2007-10-17 - Release 3DToolbox v.2009_20071017 2007-10-15 - Added - 3DToolbox_Window will place text at a specified height 2007-10-15 - Added - 3DToolbox_Window will place text and window on user selected layer 2007-10-15 - Added - 3DToolbox_Window will add text under plan view window i.e. 48.0 x 48.0 2007-10-15 - Release 3DToolbox v.2009_20071015 2007-10-12 - Added - 3DToolbox_Window will break two lines away from plan view window 2007-10-12 - Added - 3DToolbox_Window dialog box will now preset to last input values 2007-10-11 - Bugfix - 3DToolbox will "Cleanup" better during 3D modeling while changing a 3DToolbox_Smartline 2007-10-10 - Added - Coldform "Z" sections (Girts and Purlins) 2007-10-10 - Added - HSS12x3x3/16, HSS12x3x1/4, HSS12x3x5/16 2007-10-08 - Release 3DToolbox v.2009_20071008 2007-10-08 - Added - 3DToolbox_Window will now draw a plan view of a window 2007-10-02 - Fixed - Some shapes were being created upside down 2007-10-02 - Added - HSS-Shapes NOW have smarts, Renamed from TS to HSS 2007-10-01 - Added - Angles, Channels, ST-Shape, MT-Shape, S-Shape, MC-Channels NOW have smarts 2007-09-29 - Release 3DToolbox v.2009_20070929 2007-09-28 - Added - WT-shapes NOW have the same smarts as W-shapes 2007-09-26 - Added - M-shapes and HP-shapes NOW have the same smarts as W-shapes 2007-09-26 - Update to main program. Starting to work on additional shapes other than W-Shape 2007-09-25 - Added - Change Beam Routine will now pre-select the W-shape that it already is when starting the dialog box. 2007-09-24 - Added - Change Beam Routine. 2007-09-19 - Bugfix: When trying to draw 2D shapes in top view, the following error "Error-Exiting 3DToolbox at: Create Shape!" has been fixed 2007-09-19 - Bugfix: When trying to draw 2D shapes in side view, the following error "Error-Exiting 3DToolbox at: Create Shape!" has been fixed 2007-09-18 - Added - 3DToolbox_ElevationMarker

3DToolbox - Version. 2009 Page 26
Copyright © 2003 – 2007 - http://www.3DToolbox.biz
2007-09-12 - Release 3DToolbox v.2009_20070912 2007-09-12 - Added - Core updates in database handling to enable TONS more features 2007-09-12 - Added - Copy Wshapes NOW has SMARTS 2007-09-07 - Minor database changes in the radius of Wide Flange shapes 2007-08-30 - Added - Better program control over modified structural members 2007-08-29 - Added - Better program control over beam radius between k and k1 dim's 2007-08-29 - Bugfix: W6x9, W10x12, and others radius was out of drawing area 2007-08-27 - Bugfix: Error writing/closing file 2007-08-27 - Bugfix: Multiply owned object 2007-08-24 - Initial Release 3DToolbox v.2009

3DToolbox - Version. 2009 Page 27
Copyright © 2003 – 2007 - http://www.3DToolbox.biz
F.A.Q.s Q 1. What are the requirements for installing 3DToolbox?
A. 3DToolbox requires AutoCAD® 2000, 2000i, 2002, 2004, 2005, 2006, 2007, 2008, or 2009. AutoCAD® LT will not work with 3DToolbox. The minimum system requirements are the same as the requirements for AutoCAD®, but the 3D modeling capabilities included may be more than some computers can handle.
Recommended Minimum System Requirements: 500mhz or faster processor 128mb RAM 32mb 3D OpenGL Capable Video Card AutoCAD® set to WOpenGL Display Driver
Q 2. Does 3DToolbox_Steel use AISC standard steel shapes?
A. Yes. 3DToolbox_Steel was created using standard AISC tables. 3DToolbox_Steel also has some CISC shapes available for use.
Q 3. Does 3DToolbox_Steel use parametric solids?
A. Yes. 3DToolbox_Steel was created by structural designers, for structural designers. The parametric and auto-updating features will only work on a computer that has installed 3DToolbox. On computers that do not have 3DToolbox installed, the drawing can be viewed, edited, erased, copied, manipulated, and used as a standard AutoCAD® solid without any auto-updating features.
Q 4. What AutoCAD® entities are produced in 3DToolbox_Steel?
A. In 2D mode, 3DToolbox_Steel creates closed polylines. In 3D mode, 3DToolbox_Steel creates closed polylines, and then extrudes them to create standard AutoCAD solids. 3DToolbox_Steel has no blocks, all entities are created from AISC or CISC tables.

3DToolbox - Version. 2009 Page 28
Copyright © 2003 – 2007 - http://www.3DToolbox.biz
Contact Information
All 3DToolbox Inquiries:All 3DToolbox Inquiries:All 3DToolbox Inquiries:All 3DToolbox Inquiries: [email protected]
AutoCAD® is a registered trademark of AutoDesk Inc. For more information, please visit http://www.AutoDesk.com.