Embed Size (px)
Citation preview
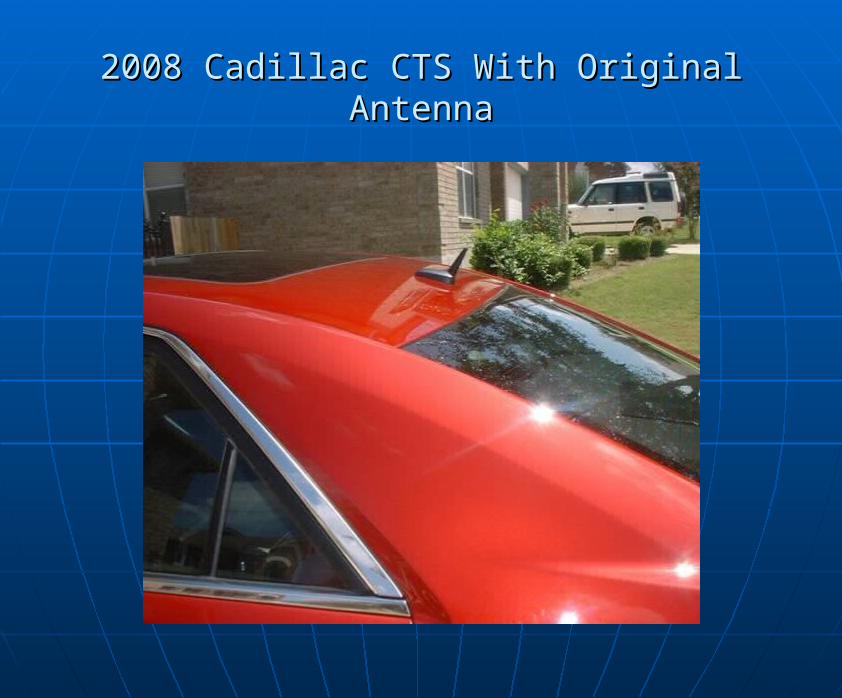
2008 Cadillac CTS With Original Antenna2008 Cadillac CTS With Original Antenna
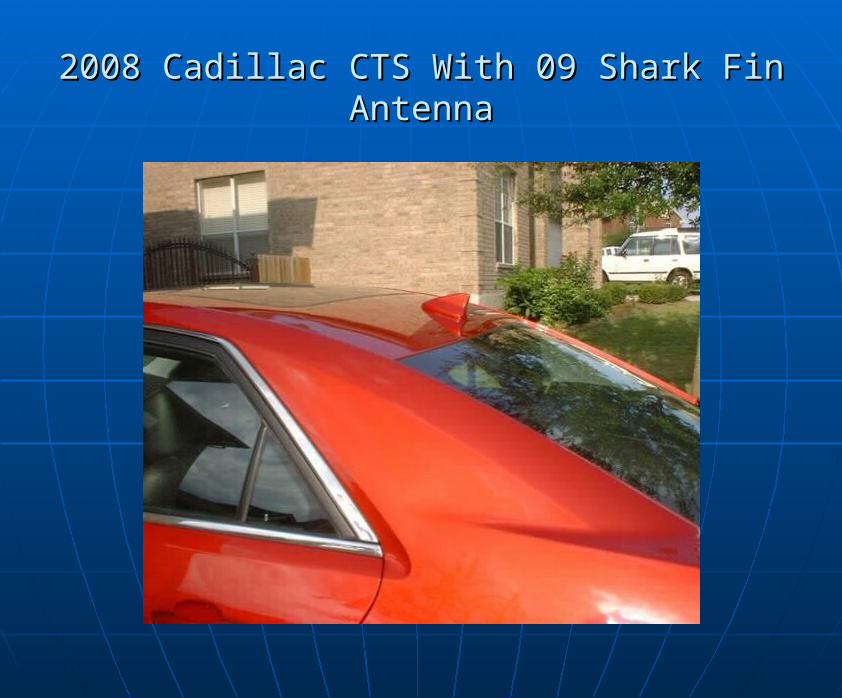
2008 Cadillac CTS With 09 Shark Fin Antenna2008 Cadillac CTS With 09 Shark Fin Antenna
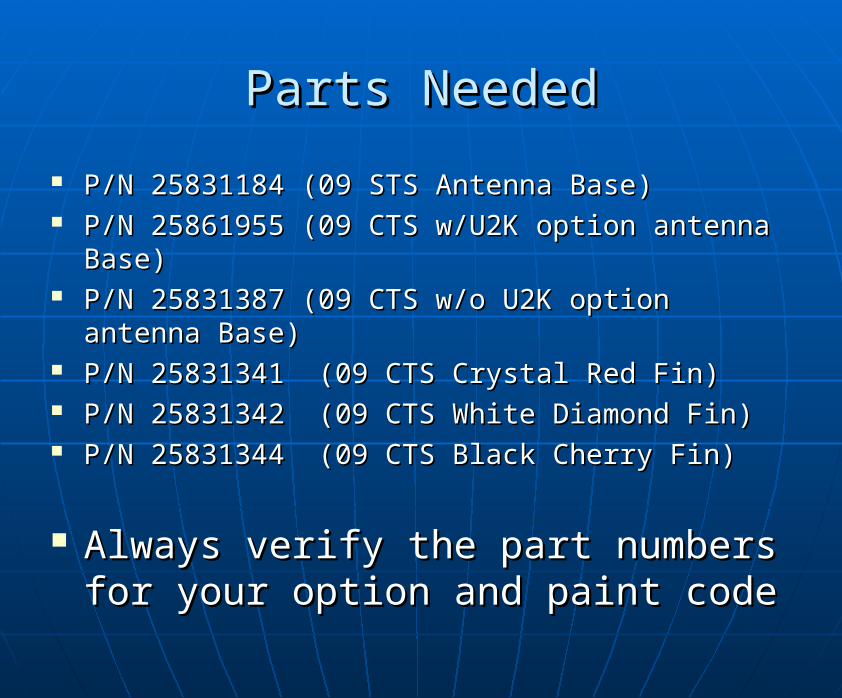
Parts NeededParts Needed
P/N 25831184 (09 STS Antenna Base) P/N 25831184 (09 STS Antenna Base) P/N 25861955 (09 CTS w/U2K option antenna P/N 25861955 (09 CTS w/U2K option antenna
Base) Base) P/N 25831387 (09 CTS w/o U2K option antenna P/N 25831387 (09 CTS w/o U2K option antenna
Base) Base) P/N 25831341 (09 CTS Crystal Red Fin)P/N 25831341 (09 CTS Crystal Red Fin) P/N 25831342 (09 CTS White Diamond Fin)P/N 25831342 (09 CTS White Diamond Fin) P/N 25831344 (09 CTS Black Cherry Fin)P/N 25831344 (09 CTS Black Cherry Fin)
Always verify the part numbers for Always verify the part numbers for your option and paint codeyour option and paint code
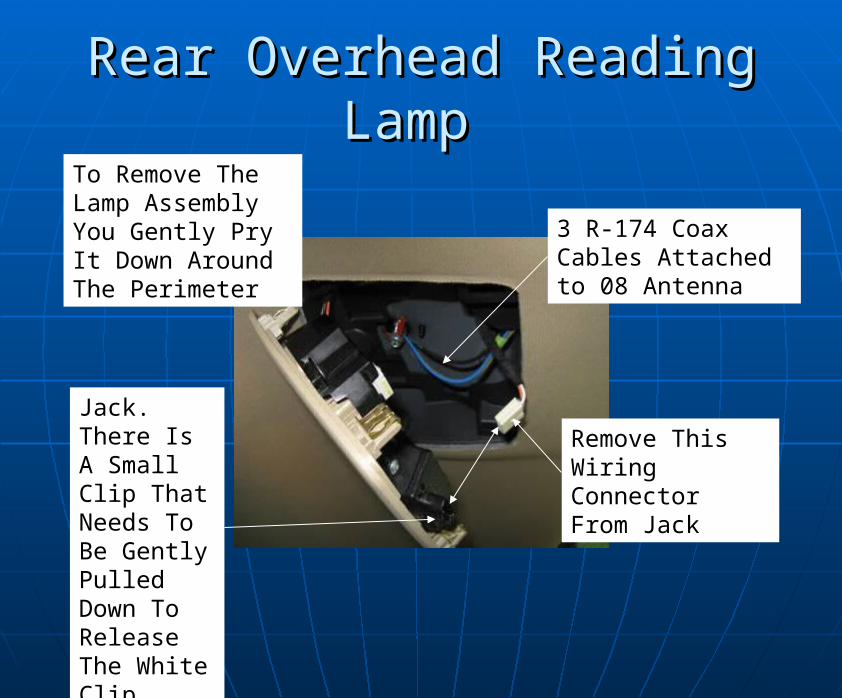
Rear Overhead Reading Lamp Rear Overhead Reading Lamp
3 R-174 Coax Cables Attached to 08 Antenna
Remove This Wiring Connector From Jack
Jack. There Is A Small Clip That Needs To Be Gently Pulled Down To Release The White ClipConnector
To Remove The Lamp Assembly You Gently Pry It Down Around The Perimeter

Removal Of Original AntennaRemoval Of Original Antenna
Alignment Pin (Not Used on Fin Antenna)
Remove this 9/16” Bolt and Orange Clip
3 Coax Cables That Will Be Disconnected At Rear Of Headliner
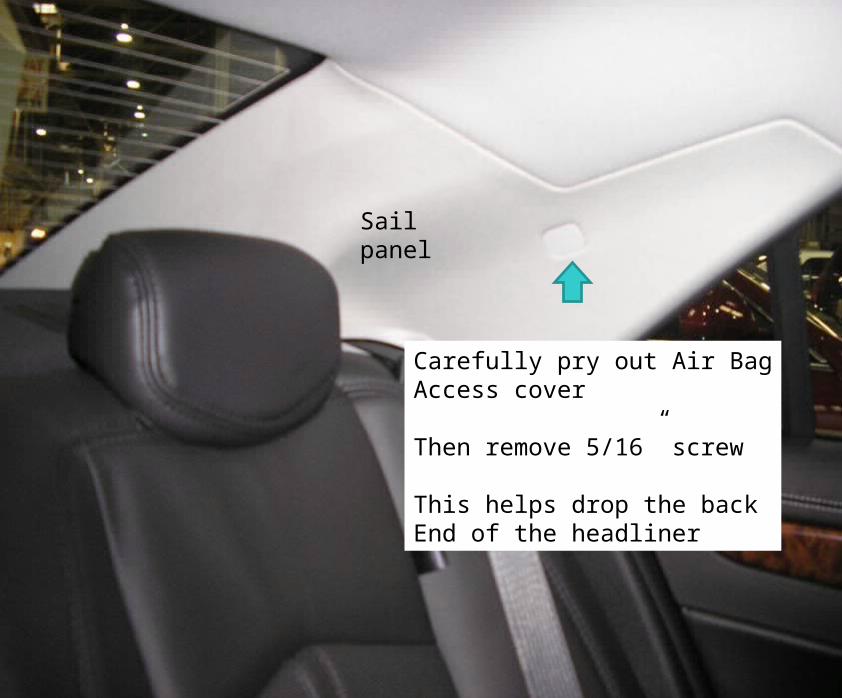
Carefully pry out Air BagAccess cover
Then remove 5/16” screw
This helps drop the back End of the headliner
Sail panel
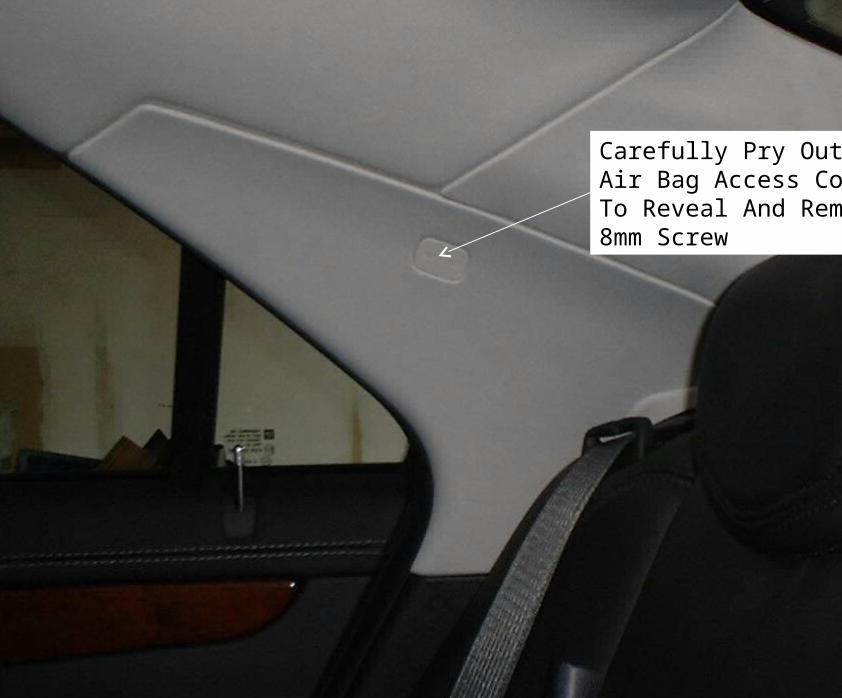
Carefully Pry Out Air Bag Access Cover To Reveal And Remove 8mm Screw
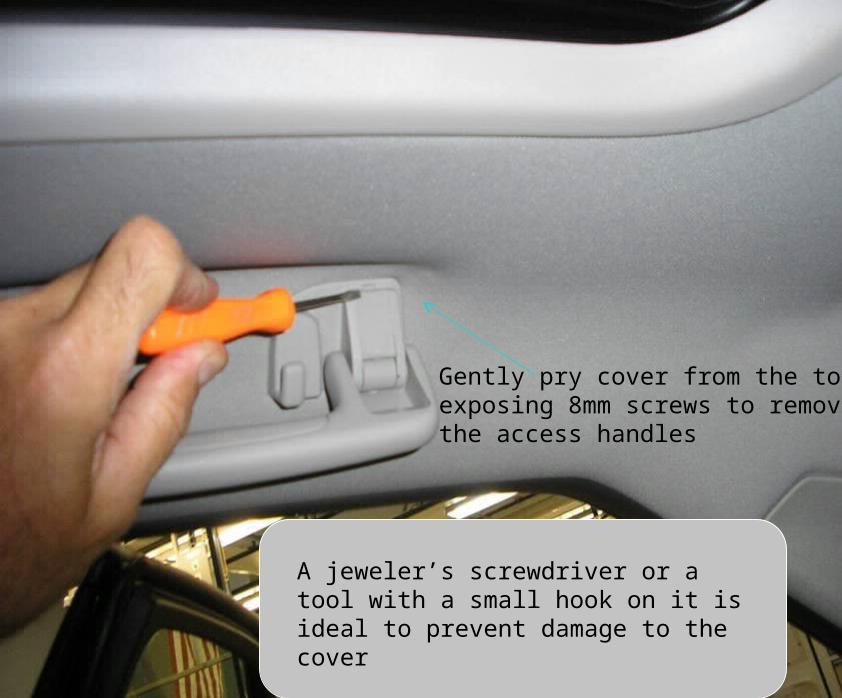
Gently pry cover from the top outexposing 8mm screws to removethe access handles
A jeweler’s screwdriver or a tool with a small hook on it is ideal to prevent damage to the cover
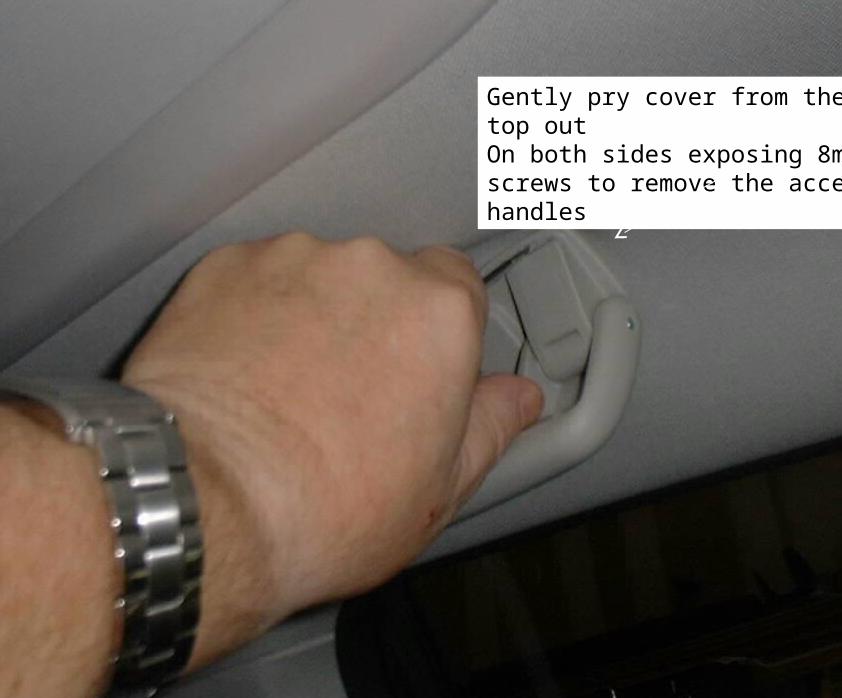
Gently pry cover from the top outOn both sides exposing 8mm screws to remove the access handles
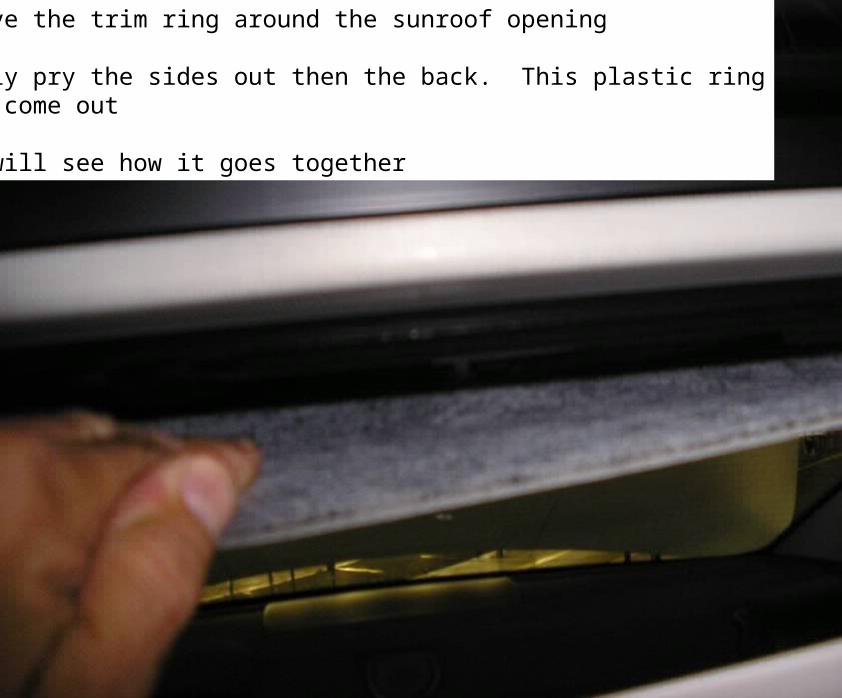
Remove the trim ring around the sunroof opening
Gently pry the sides out then the back. This plastic ringwill come out
You will see how it goes together

Pull down right in middle of rear headliner
There is a “rosebud” clip right here that attaches the headliner to the roof. Just pull down gently to bring rear headliner down. It goes back in very easily.
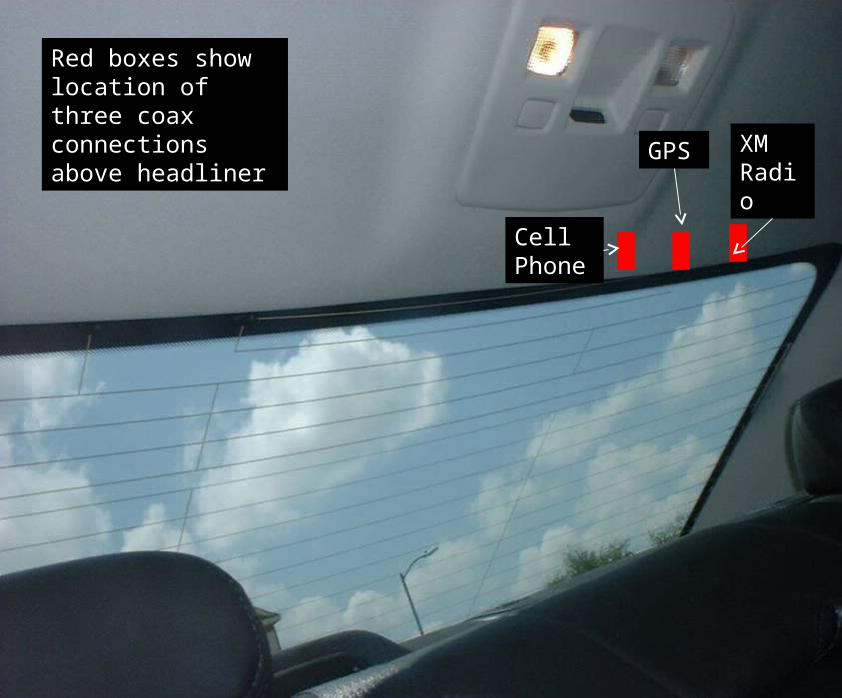
Red boxes show location of three coax connections above headliner
Cell Phone
XM Radio
GPS
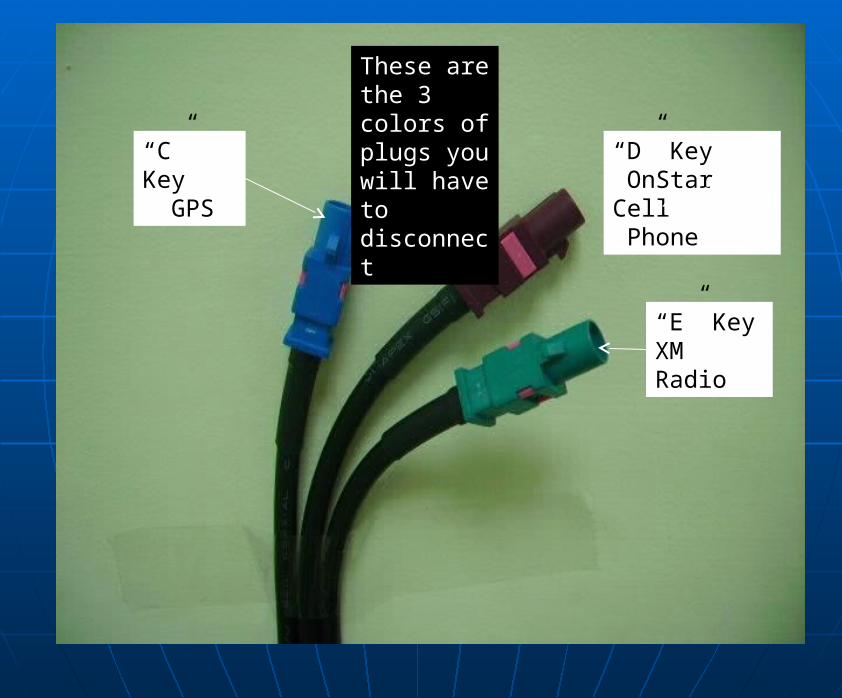
These are the 3 colors of plugs you will have to disconnect
“C” Key GPS
“D” Key OnStar Cell Phone
“E” KeyXM Radio
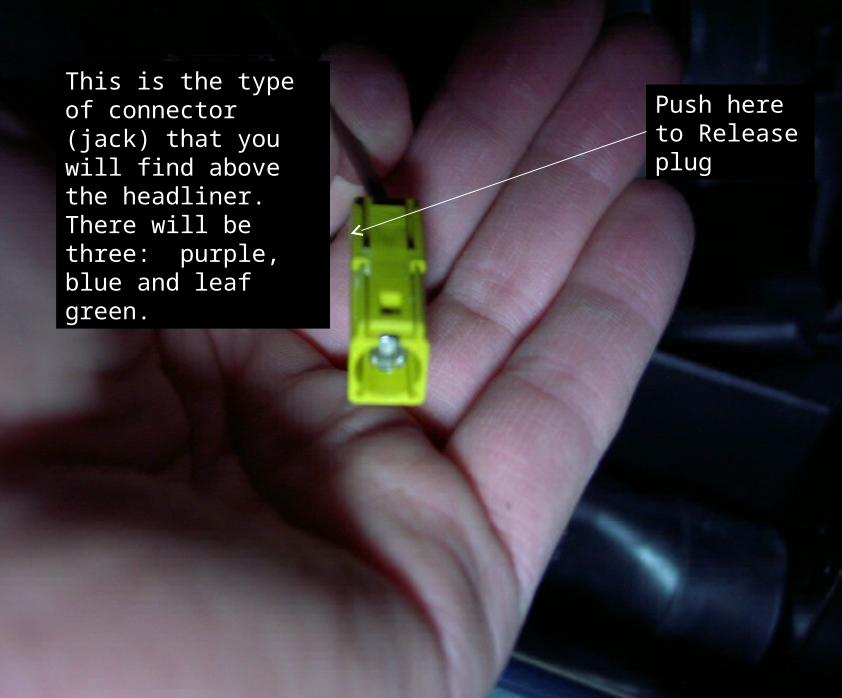
This is the type of connector (jack) that you will find above the headliner. There will be three: purple, blue and leaf green.
Push here to Release plug
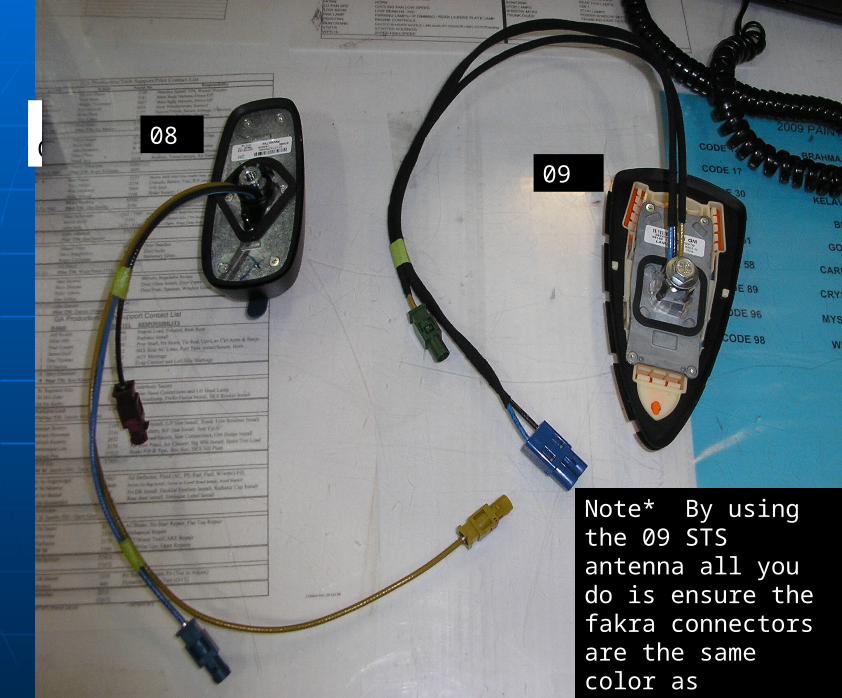
This is an ‘08 CTS with the three leads.You must transfer these connector Ends to the 09. The colors of the Wires match. Just remove theconnector ends and swap end per end Ensuring the wiring colors match
08 CTS 09
CTS
Note* By using the 09 STS antenna all you do is ensure the fakra connectors are the same color as originally
09
08
Fakra Removal - Tab TypeFakra Removal - Tab Type1. Carefully pry out the locking tab using a jewelers 1. Carefully pry out the locking tab using a jewelers screwdriverscrewdriver
2. 2. Carefully pull cable out towards the 2. 2. Carefully pull cable out towards the rear of the connector. rear of the connector.
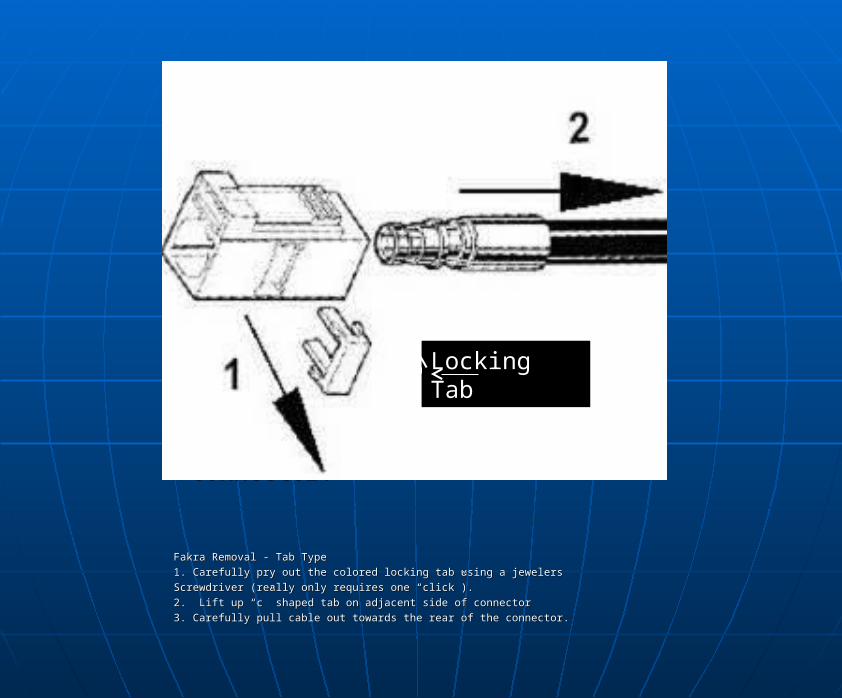
Fakra Removal - Tab TypeFakra Removal - Tab Type
1. Carefully pry out the colored locking tab using a jewelers 1. Carefully pry out the colored locking tab using a jewelers
Screwdriver (really only requires one “click”).Screwdriver (really only requires one “click”).
2. Lift up “c” shaped tab on adjacent side of connector 2. Lift up “c” shaped tab on adjacent side of connector
3. Carefully pull cable out towards the rear of the connector. 3. Carefully pull cable out towards the rear of the connector.
Locking Tab
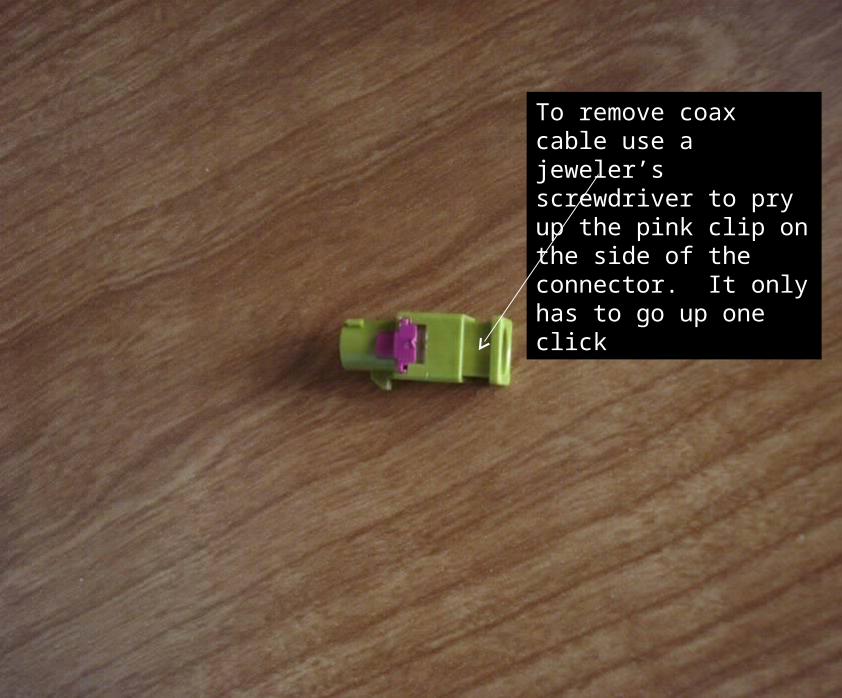
‘‘09 STS Antenna Base09 STS Antenna BaseTo remove coax cable use a jeweler’s screwdriver to pry up the pink clip on the side of the connector. It only has to go up one click
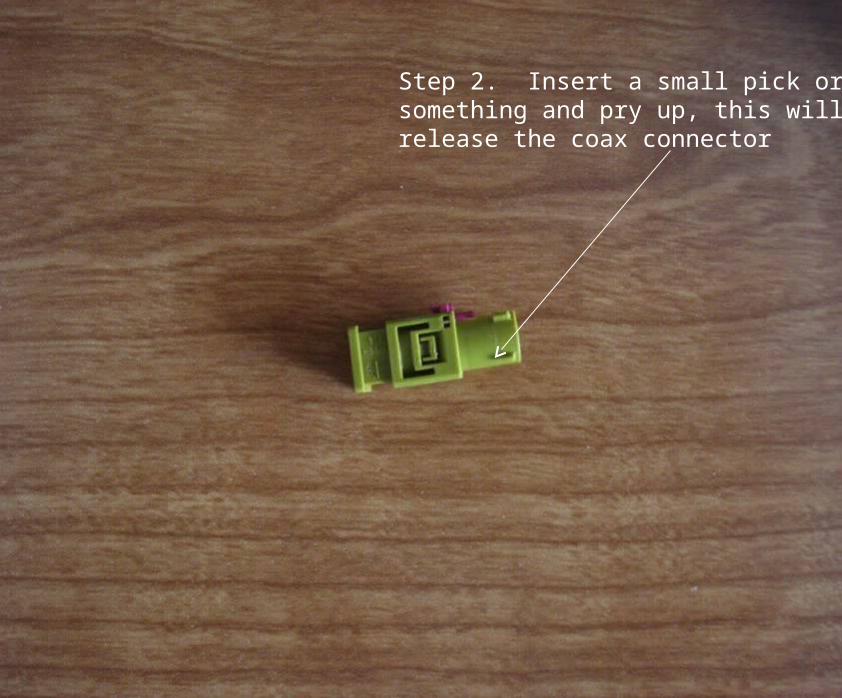
Step 2. Insert a small pick orsomething and pry up, this will release the coax connector
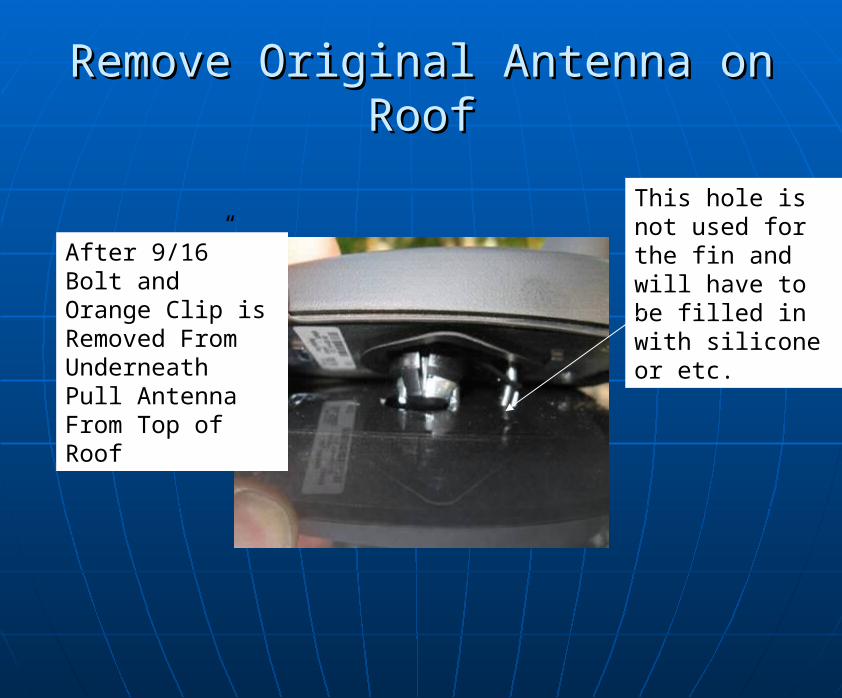
Remove Original Antenna on RoofRemove Original Antenna on Roof
This hole is not used for the fin and will have to be filled in with silicone or etc.
After 9/16” Bolt and Orange Clip is Removed From Underneath Pull Antenna From Top of Roof
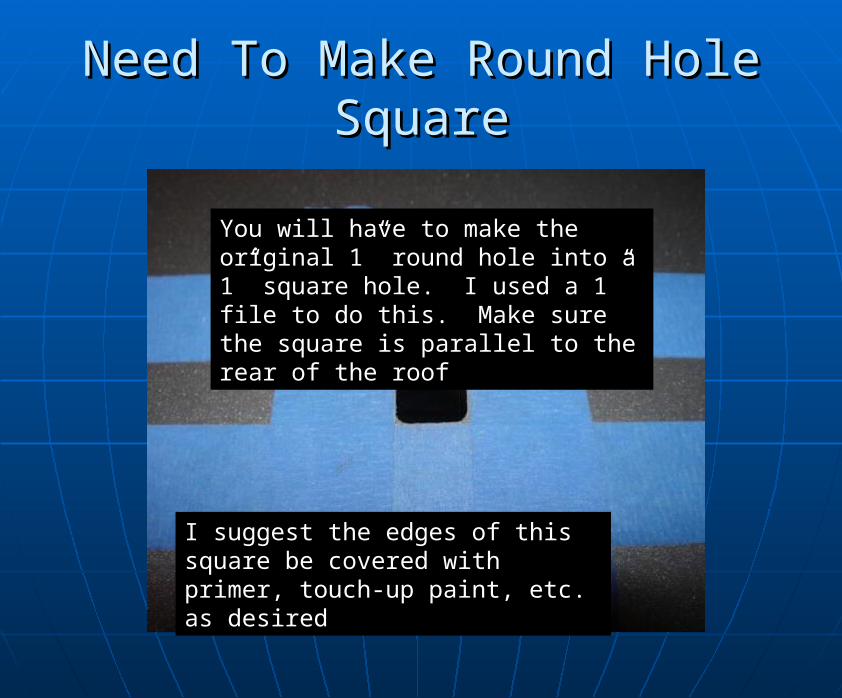
Need To Make Round Hole Need To Make Round Hole SquareSquare
I suggest the edges of this square be covered with primer, touch-up paint, etc. as desired
You will have to make the original 1” round hole into a 1” square hole. I used a 1” file to do this. Make sure the square is parallel to the rear of the roof

Install Replacement AntennaInstall Replacement Antenna
Alignment Pin (Not Used on Fin Antenna)
Tighten this 9/16” Bolt and Mounting Clip. Note: 09 Clip is slightly different but works the same
3 Coax Cables That Will Be Re-connected At Rear Of Headliner
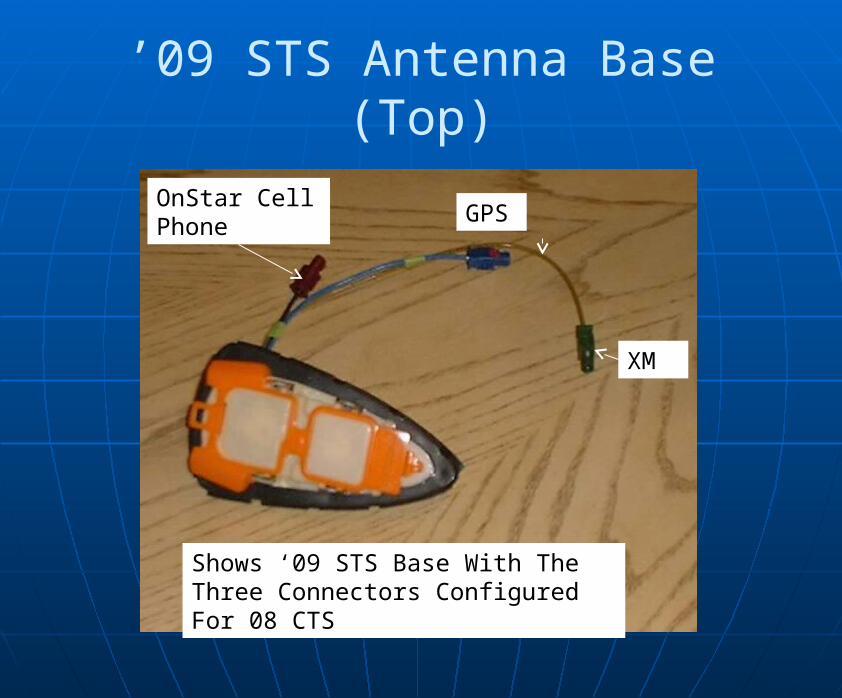
’09 STS Antenna Base (Top)
Shows ‘09 STS Base With The Three Connectors Configured For 08 CTS
GPS
XM
OnStar Cell Phone
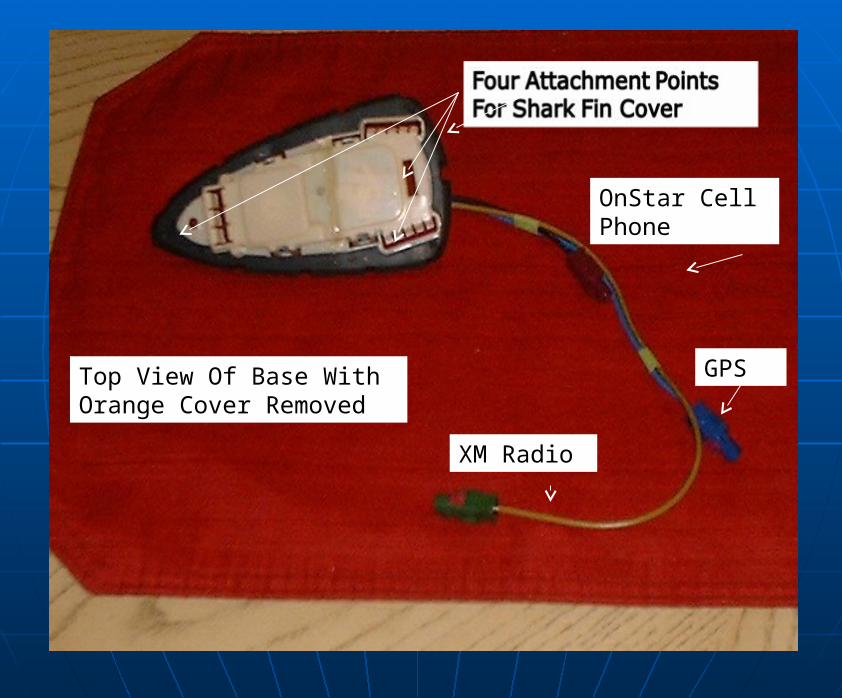
Top View Of Base With Orange Cover Removed
XM Radio
GPS
OnStar Cell Phone
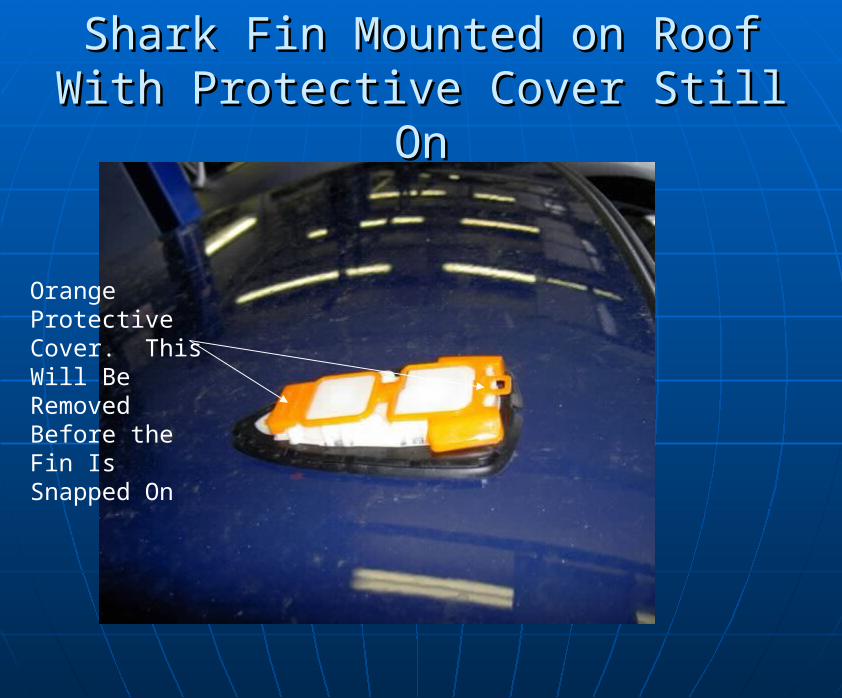
Shark Fin Mounted on RoofShark Fin Mounted on RoofWith Protective Cover Still OnWith Protective Cover Still On
Orange Protective Cover. This Will Be Removed Before the Fin Is Snapped On
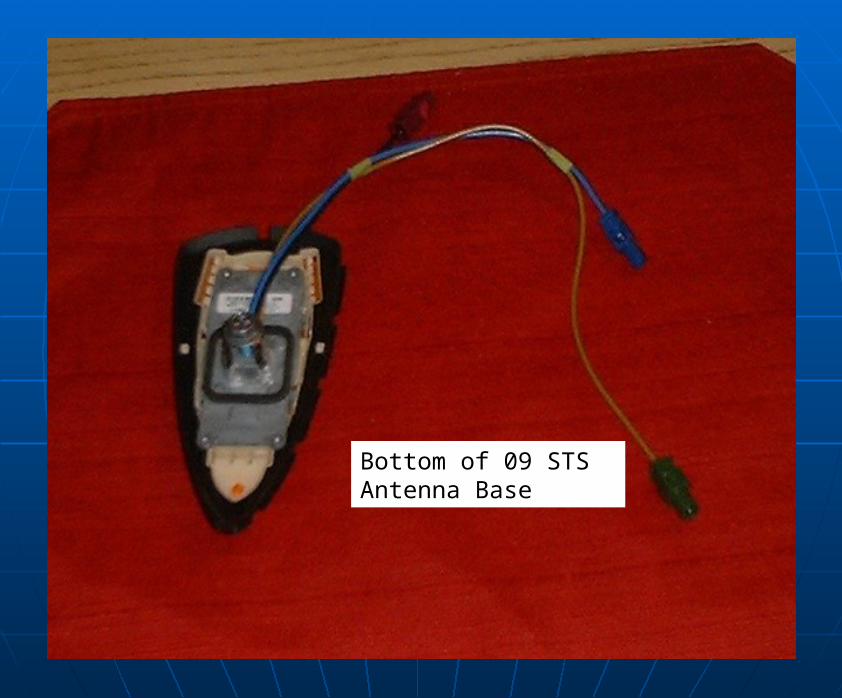
Bottom of 09 STS Antenna Base
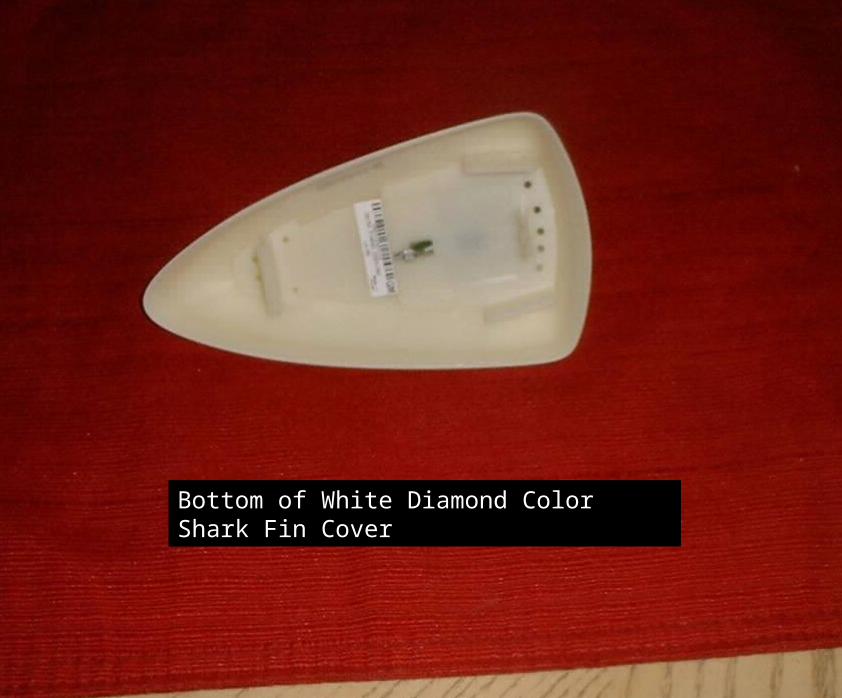
Bottom of White Diamond Color Shark Fin Cover
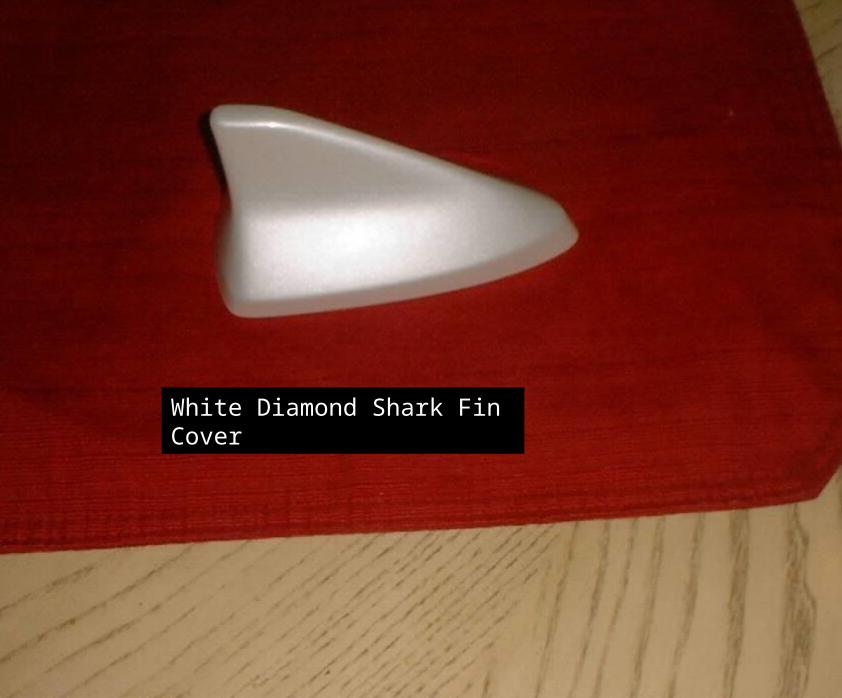
White Diamond Shark Fin Cover
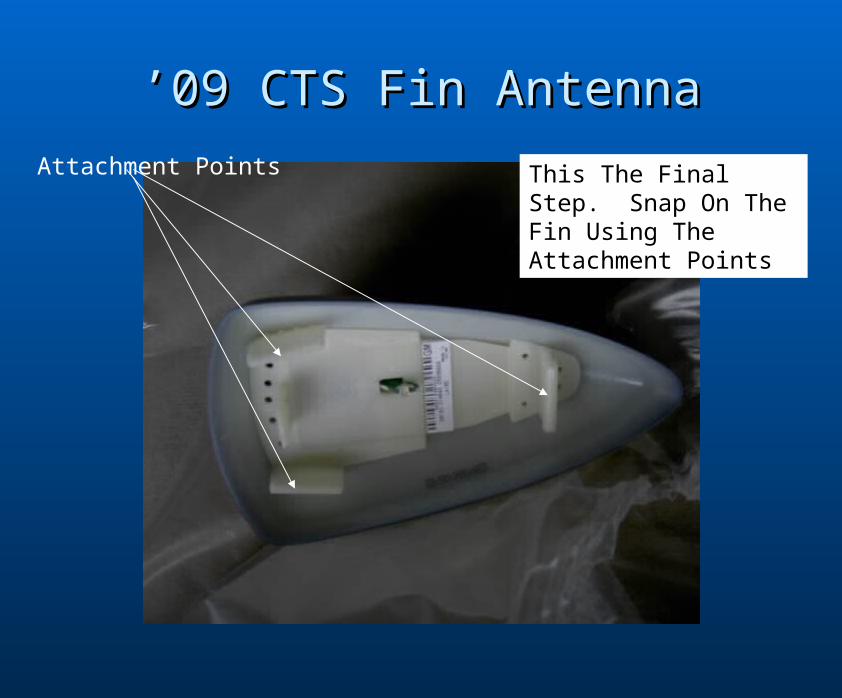
’’09 CTS Fin Antenna09 CTS Fin Antenna
Attachment Points This The Final Step. Snap On The Fin Using The Attachment Points