Embed Size (px)
Citation preview
2. Printer assemblyWritten By: Jakub Dolezal
2. Printer assembly
© 2018 manual.prusa3d.com/ Page 1 of 7
Step 1 — Assembling the RAMBo-cover-base
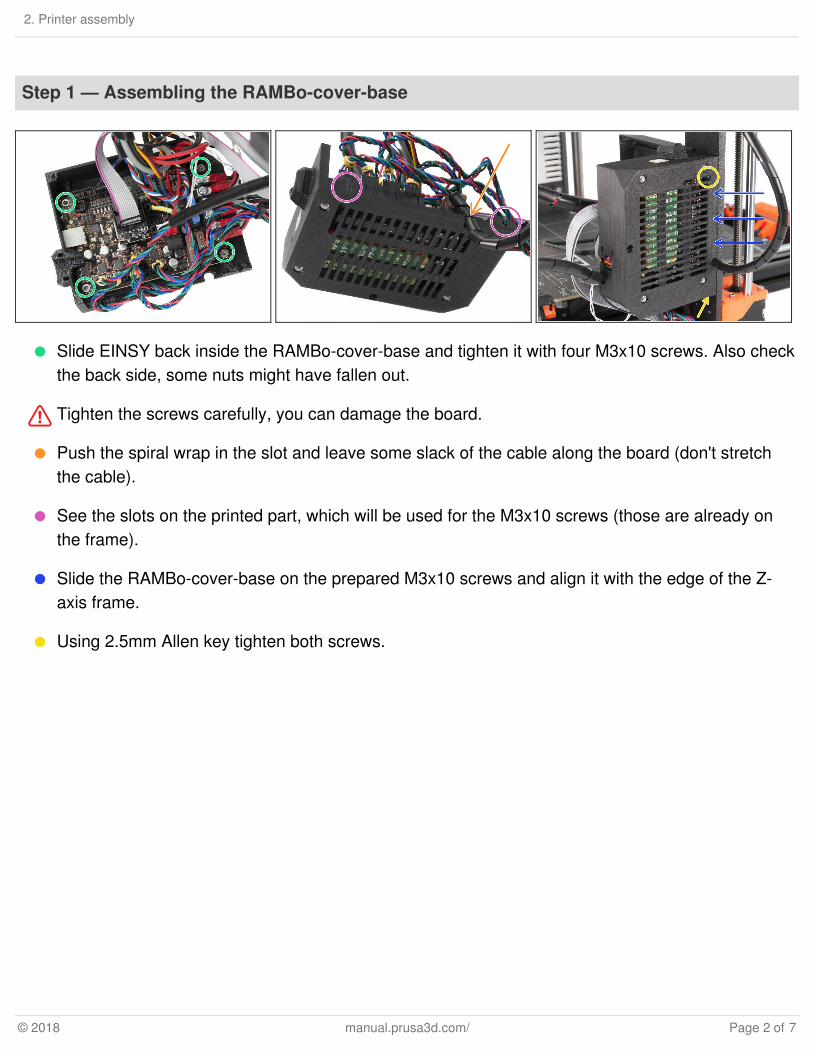
Slide EINSY back inside the RAMBo-cover-base and tighten it with four M3x10 screws. Also checkthe back side, some nuts might have fallen out.
Tighten the screws carefully, you can damage the board.
Push the spiral wrap in the slot and leave some slack of the cable along the board (don't stretchthe cable).
See the slots on the printed part, which will be used for the M3x10 screws (those are already onthe frame).
Slide the RAMBo-cover-base on the prepared M3x10 screws and align it with the edge of the Z-axis frame.
Using 2.5mm Allen key tighten both screws.
2. Printer assembly
© 2018 manual.prusa3d.com/ Page 2 of 7
Step 2 — Returning the heatbed cable bundle
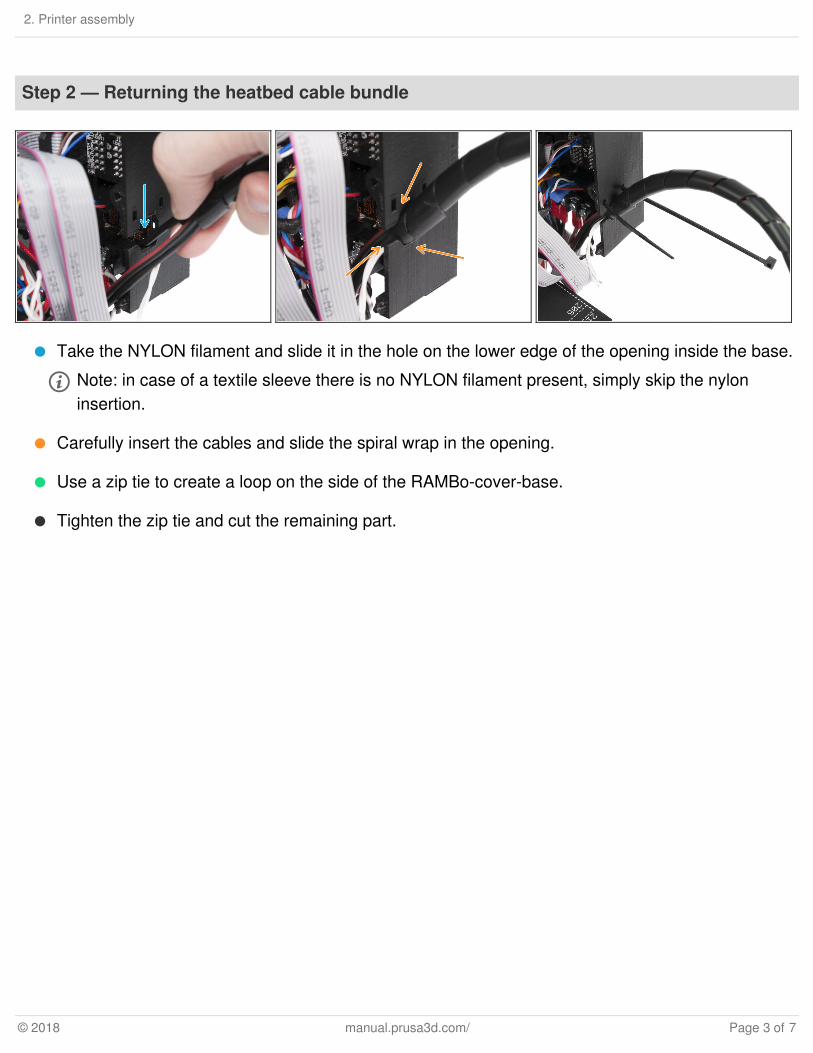
Take the NYLON filament and slide it in the hole on the lower edge of the opening inside the base.
Note: in case of a textile sleeve there is no NYLON filament present, simply skip the nyloninsertion.
Carefully insert the cables and slide the spiral wrap in the opening.
Use a zip tie to create a loop on the side of the RAMBo-cover-base.
Tighten the zip tie and cut the remaining part.
2. Printer assembly
© 2018 manual.prusa3d.com/ Page 3 of 7
Step 3 — Returning the extruder cable bundle (part 1)
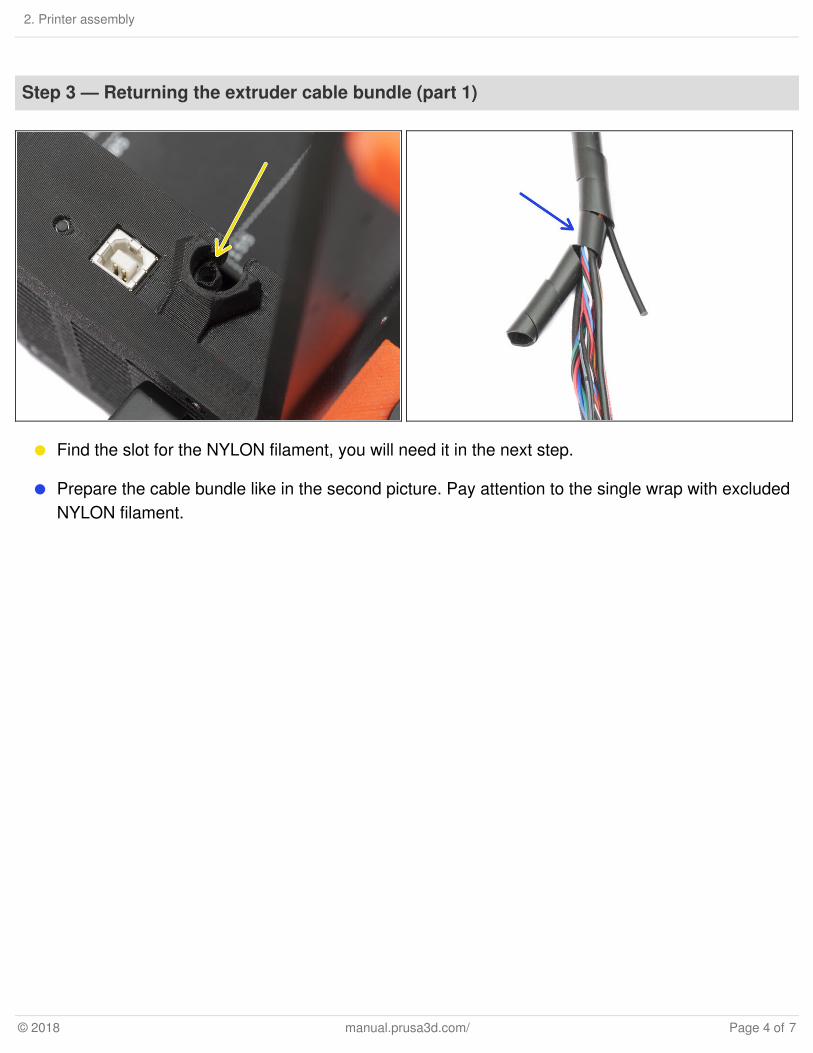
Find the slot for the NYLON filament, you will need it in the next step.
Prepare the cable bundle like in the second picture. Pay attention to the single wrap with excludedNYLON filament.
2. Printer assembly
© 2018 manual.prusa3d.com/ Page 4 of 7
Step 4 — Returning the extruder cable bundle (part 2)
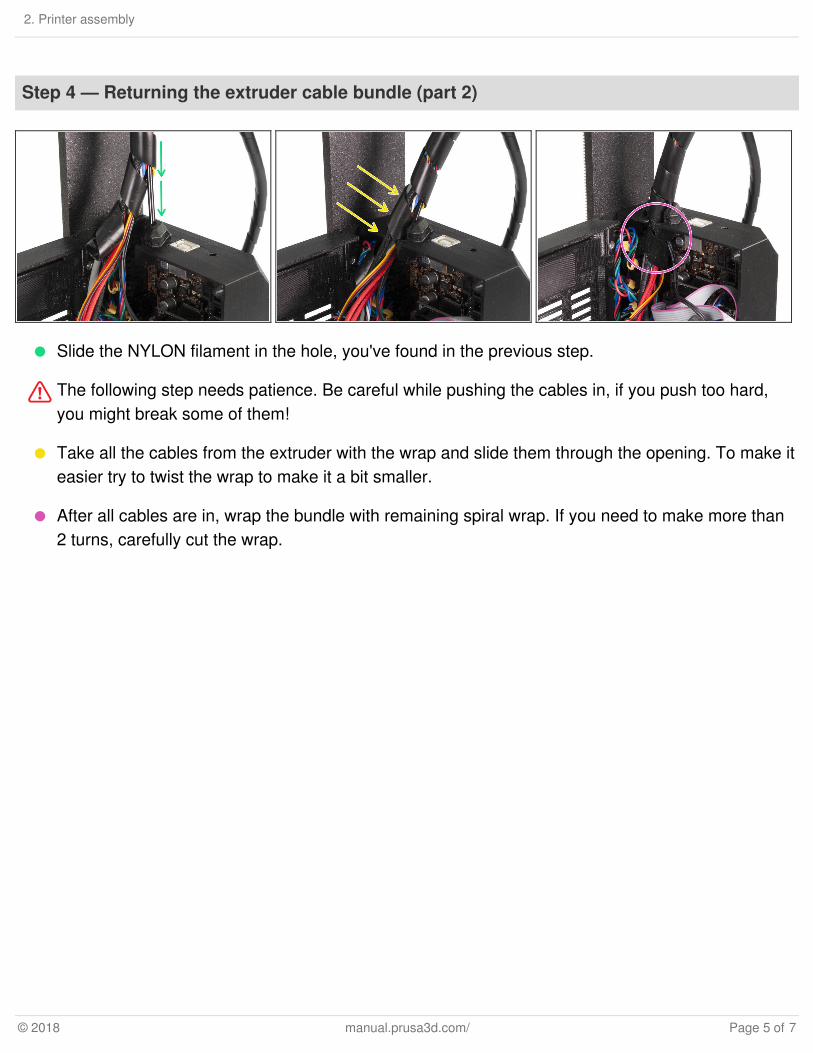
Slide the NYLON filament in the hole, you've found in the previous step.
The following step needs patience. Be careful while pushing the cables in, if you push too hard,you might break some of them!
Take all the cables from the extruder with the wrap and slide them through the opening. To make iteasier try to twist the wrap to make it a bit smaller.
After all cables are in, wrap the bundle with remaining spiral wrap. If you need to make more than2 turns, carefully cut the wrap.
2. Printer assembly
© 2018 manual.prusa3d.com/ Page 5 of 7
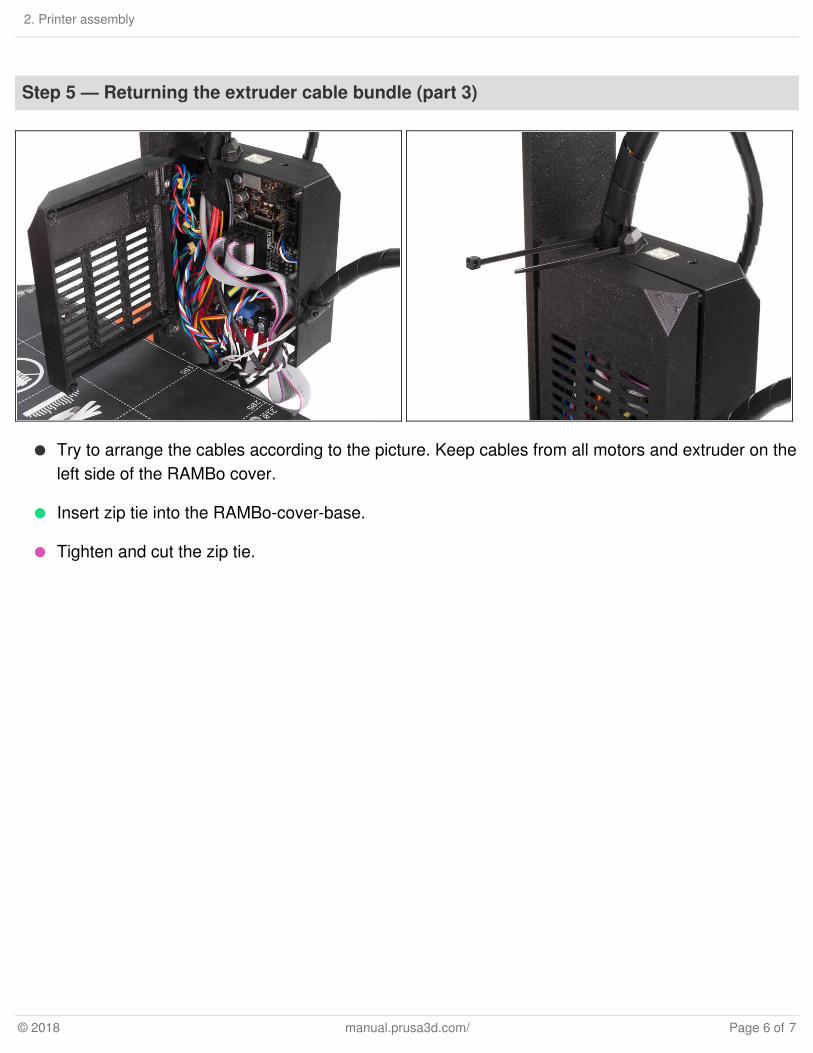
Step 5 — Returning the extruder cable bundle (part 3)
Try to arrange the cables according to the picture. Keep cables from all motors and extruder on theleft side of the RAMBo cover.
Insert zip tie into the RAMBo-cover-base.
Tighten and cut the zip tie.
2. Printer assembly
© 2018 manual.prusa3d.com/ Page 6 of 7
This document was last generated on 2018-03-16 07:00:03 AM.
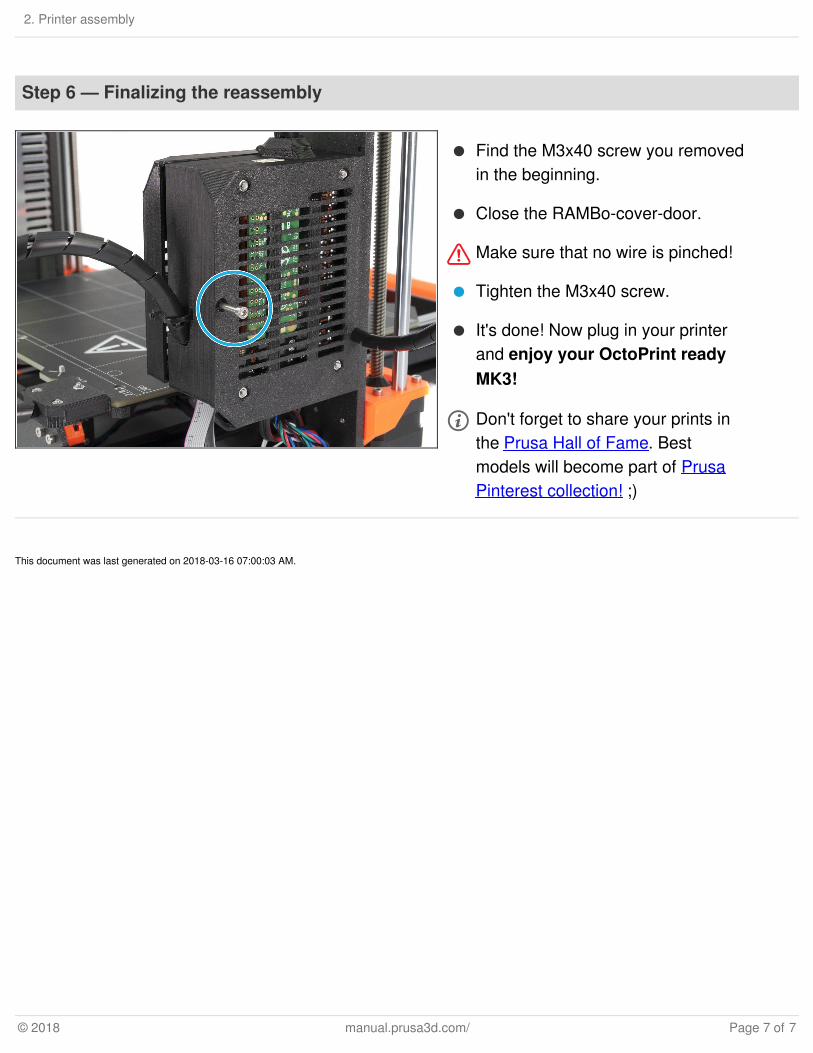
Step 6 — Finalizing the reassembly
Find the M3x40 screw you removedin the beginning.
Close the RAMBo-cover-door.
Make sure that no wire is pinched!
Tighten the M3x40 screw.
It's done! Now plug in your printerand enjoy your OctoPrint readyMK3!
Don't forget to share your prints inthe Prusa Hall of Fame. Bestmodels will become part of PrusaPinterest collection! ;)
2. Printer assembly
© 2018 manual.prusa3d.com/ Page 7 of 7