Embed Size (px)
Citation preview
1937 AJS Model 37/12
End of Document
I have been trying to find a pre-1945 bike for some time as I would like to ride in the post
Vintage (1931-1944) class in VMCC events. My ideal would have been an MAC Velocette as I
had one of these back in the 1970s and it was a cracking little bike. However, after casually
looking out for one for over 12 months nothing suitable had come to notice so I have
widened my horizons over the last 3 months or so. I was beginning to favour a WD
Matchless G3 as being a good alternative, especially as I am a member of the AJS/Matchless
Club but anything suitable always seemed to be sold before I even got to hear about it and
as is normal, the ones still available were frankly over-priced and not particularly appealing.
Then I spotted an ad on the Jampot website for an AJS model 37/12 and started
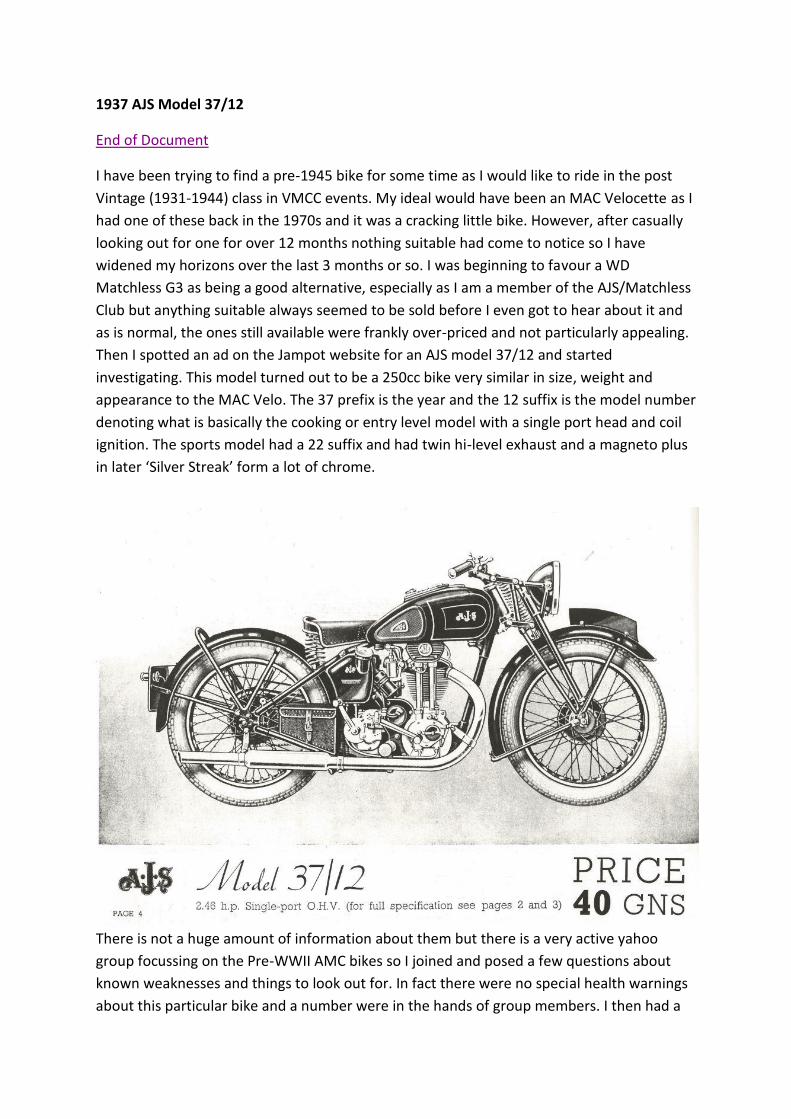
investigating. This model turned out to be a 250cc bike very similar in size, weight and
appearance to the MAC Velo. The 37 prefix is the year and the 12 suffix is the model number
denoting what is basically the cooking or entry level model with a single port head and coil
ignition. The sports model had a 22 suffix and had twin hi-level exhaust and a magneto plus
in later ‘Silver Streak’ form a lot of chrome.
There is not a huge amount of information about them but there is a very active yahoo
group focussing on the Pre-WWII AMC bikes so I joined and posed a few questions about
known weaknesses and things to look out for. In fact there were no special health warnings
about this particular bike and a number were in the hands of group members. I then had a
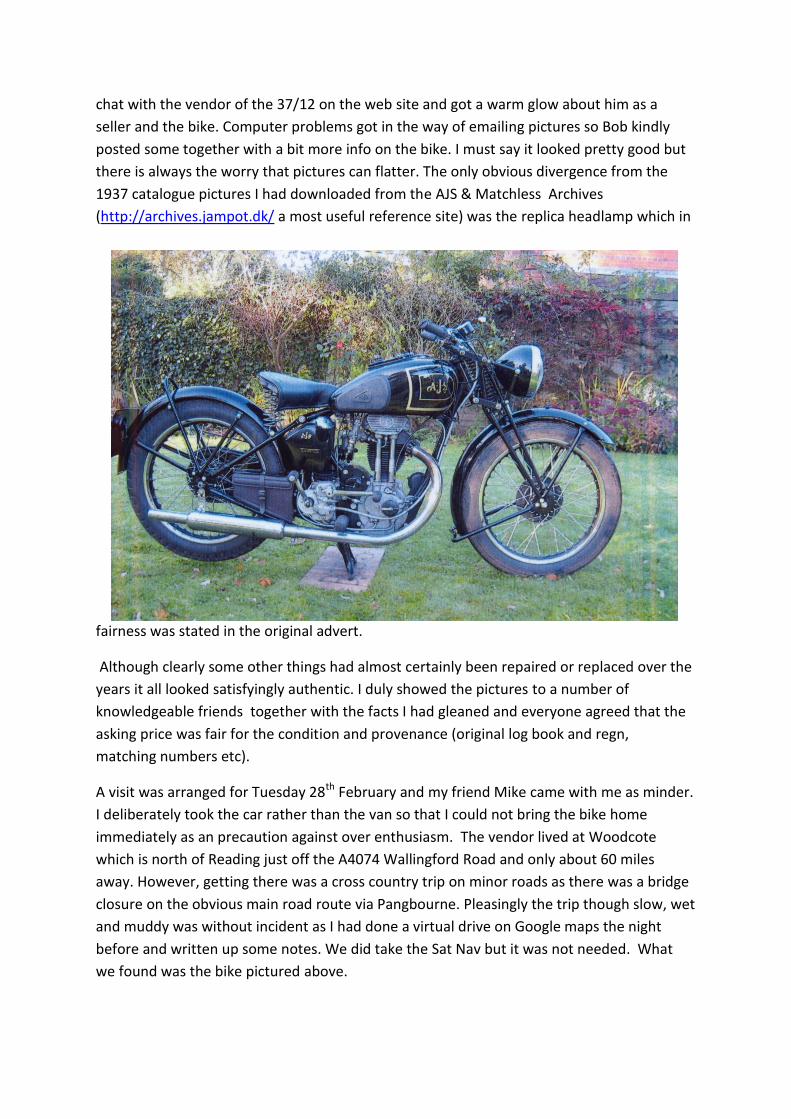
chat with the vendor of the 37/12 on the web site and got a warm glow about him as a
seller and the bike. Computer problems got in the way of emailing pictures so Bob kindly
posted some together with a bit more info on the bike. I must say it looked pretty good but
there is always the worry that pictures can flatter. The only obvious divergence from the
1937 catalogue pictures I had downloaded from the AJS & Matchless Archives
(http://archives.jampot.dk/ a most useful reference site) was the replica headlamp which in
fairness was stated in the original advert.
Although clearly some other things had almost certainly been repaired or replaced over the
years it all looked satisfyingly authentic. I duly showed the pictures to a number of
knowledgeable friends together with the facts I had gleaned and everyone agreed that the
asking price was fair for the condition and provenance (original log book and regn,
matching numbers etc).
A visit was arranged for Tuesday 28th February and my friend Mike came with me as minder.
I deliberately took the car rather than the van so that I could not bring the bike home
immediately as an precaution against over enthusiasm. The vendor lived at Woodcote
which is north of Reading just off the A4074 Wallingford Road and only about 60 miles
away. However, getting there was a cross country trip on minor roads as there was a bridge
closure on the obvious main road route via Pangbourne. Pleasingly the trip though slow, wet
and muddy was without incident as I had done a virtual drive on Google maps the night
before and written up some notes. We did take the Sat Nav but it was not needed. What
we found was the bike pictured above.
I must hasten to add that this is one of the pictures sent by Bob and between his poorly
printer and my scanner, it is not the best. In the flesh the bike is far superior in appearance,
most of the chrome is pristine and the paintwork of a high order. The tank was
professionally painted by JBS in Yeovil, the wheels have been rebuilt with new chrome rims
and stainless steel spokes. Bob was rather disparaging about the former as they are Italian
Radealli’s done by the previous owner but they looked fine to me with no rust and they
were done some time ago as Bob has owned the bike for at least 10 years. He bought it
already restored in memory of his first bike (a similar model) but was not happy with a lot of
the things that had been done so over the intervening years has gradually got it back to
what he considered original condition and sorted out a number of issues. In my judgement
he had made an excellent job and I was already smitten before even starting the engine.
The engine had been given a +40 rebore and the compression was so good that the de-
compressor was need to get it over tdc. A good tickle, full choke, ignition on and it caught
on the first kick but I was so surprised I let it die. Another brief tickle and it burst into life
easily second kick and soon settled to a steady tickover. Rather disappointingly, the exhaust
was quite smokey, more so that one might expect after a rebore however, it had been
standing for some time and it may well be the engine has wet sumped. I was trusted to take
the bike for a test ride which was essential to make sure it was comfortable for my 6ft
ample frame. I had expected trouble with the riding position as it does look a small bike but
in fact it was fine. I only rode it ½ mile or so to make sure I had a full set of gears a working
clutch and brakes. The latter were not really tested as the road was wet and slippery and I
did not want to risk a tumble but I think they will be fine. Two there things emerged when I
returned, the ammeter was not registering a charge and there was a small oil weep from
the de-compressor spindle. Bob was surprised about the charging which is obviously rather
critical given the coil ignition. The oil leak had obviously occurred before as he mentioned
that there was no seal for the spindle. Anyway I decided that none of these ‘features’ were
serious enough to make me walk away from the bike after a bit of haggling we agreed a
price fair to both parties. I left him with a deposit and agreed to pick the bike up the
following week. So much for my good intentions, maybe I should have taken the van and
saved some time and diesel!
Sunday 9th February 2014
I have been rather busy on so not had type to write up any notes since first creating this
diary. I collected the AJS on Tuesday 4th February together with a box of assorted bits and
the paperwork. It still looked as good as I remembered and was much admired by a friend
who helped me unload it when I got home. It went straight onto my work bench so that I
could investigate the problem areas I noted when I bought the bike. I had also sought advice
about some of these points via the [email protected] web site.
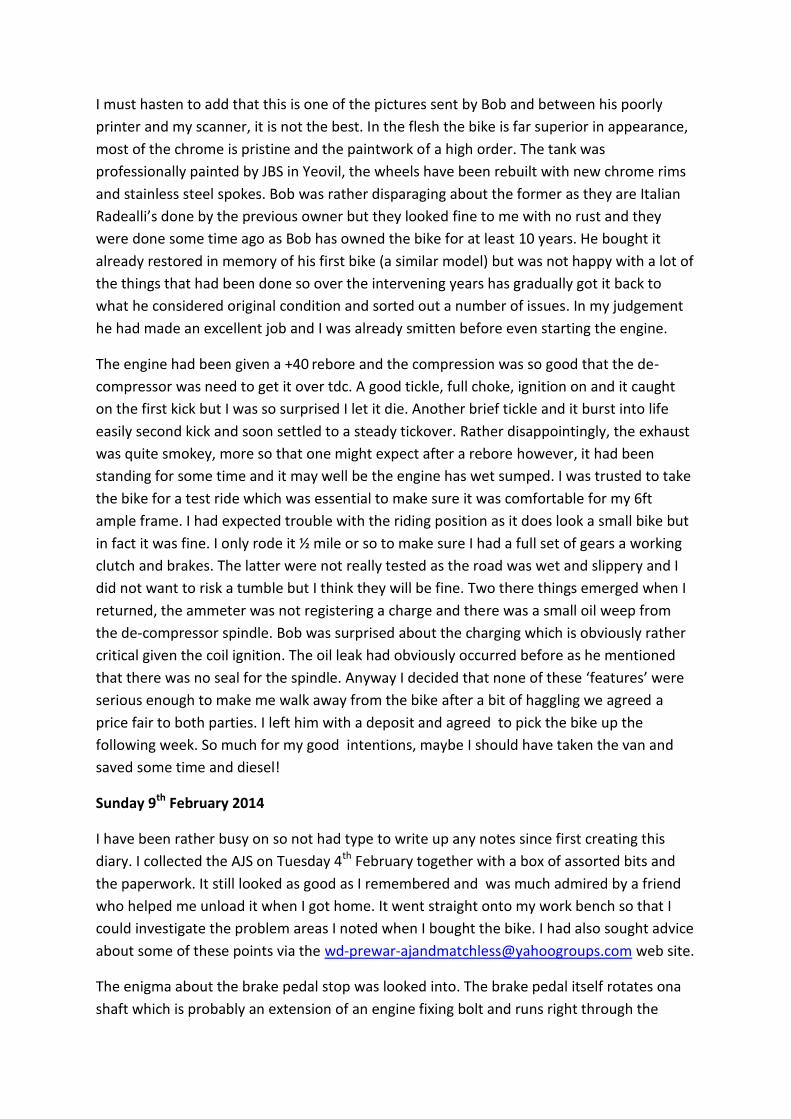
The enigma about the brake pedal stop was looked into. The brake pedal itself rotates ona
shaft which is probably an extension of an engine fixing bolt and runs right through the
chaincase. Mine has nothing to limit its
movement backwards except when it collides
with the dome of the clutch cover. A thick
rubber tube had been fitted which both
limited the travel and stopped the pedal
rubbing paint off the dome. My queries
elecited a variety or responses including one
which I thought initially the most sensible in
that one owner of this model had a stop
bracket welded to his chaincase. Seems most
likely however that this was a later mod
(bodge?) and not correct. For 1937 only the spares book does specify a piece of rubber to fit
on the brake pedal. No pictures so no one knows for sure the dimensions. It seems that
bizarrely in my view that there is no adjustment at the brake pedal end and the piece of
rubber specified is purely to stop paintwork damage should the pedal spring back to hard.
Adjust is apparently done at the brake drum end by shimming the brakes shoes so that very
little movement of the brake arm is needed to operate the brake. The position of the brake
pedal is then set effectively by adjusting the position of the brake a arm on its splines and
the brake rod length. The brake shoe springs seem to be the only thing pulling the brake off.
As the brake actually works ok I have left it as is for now and will investigate further if there
is a need or the wheel has to come out for some other reason
All the responses to my query about oil leakage from the decompressor shaft indicated that
this was not a common problem and the cause might lay elsewhere. Excessive crankcase
pressure caused by a breather problem was suggested and bearing in mind that the engine
was smoking a little more than one might expect after a rebore, this seemed feasible.
However, the vendor assured me that he had checked the breather when he rebuilt the
engine and replaced the diaphragm so perhaps less likely. Access to the breather requires
the entire drive side to be stripped. I decided to leave that as a last resort. One other area of
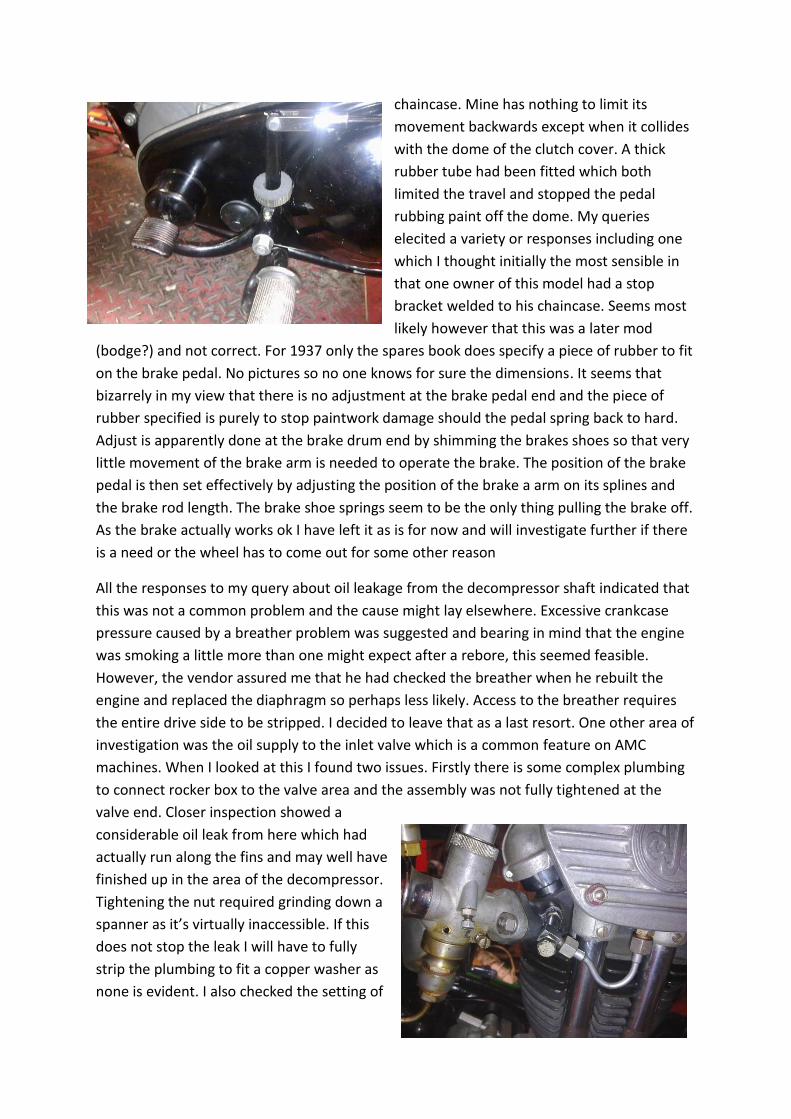
investigation was the oil supply to the inlet valve which is a common feature on AMC
machines. When I looked at this I found two issues. Firstly there is some complex plumbing
to connect rocker box to the valve area and the assembly was not fully tightened at the
valve end. Closer inspection showed a
considerable oil leak from here which had
actually run along the fins and may well have
finished up in the area of the decompressor.
Tightening the nut required grinding down a
spanner as it’s virtually inaccessible. If this
does not stop the leak I will have to fully
strip the plumbing to fit a copper washer as
none is evident. I also checked the setting of
the inlet oil feed valve and he may lie the cause of the smoking. The book states no more
than half a turn out from closed whereas mine was set to probably 1 ½ to 2 turns. I stripped
it out and the tapered screw etc all looked fine so it is now set to just under ½ a turn. Not
yet run the engine long enough to prove my diagnosis and cure but hopeful.
The third issue is proving the most challenging so far in that the dynamo obstinately refuses
to charge. By the way if all this sounds depressing I am not disheartened. The bike itself is
delightful and the quality of the work that has been done is very good, much better than I
would have achieved. What is missing is the final commissioning after a rebuild as the
vendor had only done about 12 miles when I bought it.
I have done extensive reading about dynamos and much consultation with experts. All the
tests which can be tried with the dynamo in situ have been done with no obvious fault
found. Although originally a 3 brush Miller DVR unit, it has been converted to 2 brush
operation with a V-Reg2 electronic regulator wired in. Al this work has been very well done
and conforms exactly to the instructions and revised wiring plans. I am pretty sure it’s not
the regulator because the usual test of connecting F & D terminals via a bulb to earth still
shows no output whatsoever even after flashing the field coil. The signs are pointing to a
failed armature as everything else including the brushes look perfect. I now have no option
but to remove the dynamo for bench testing but this requires at least a partial strip of the
primary drive side since the dynamo is driven by chain from the crankshaft and sits inside
plates between engine and gearbox.
Monday 10th February 2014
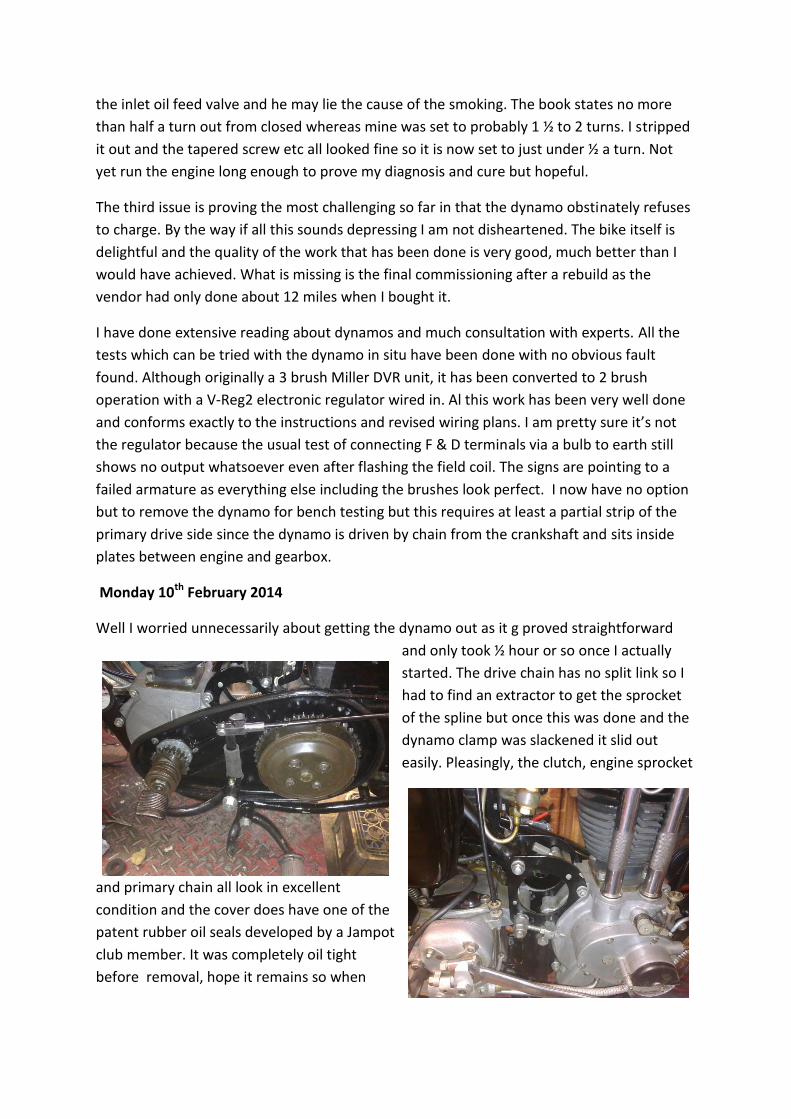
Well I worried unnecessarily about getting the dynamo out as it g proved straightforward
and only took ½ hour or so once I actually
started. The drive chain has no split link so I
had to find an extractor to get the sprocket
of the spline but once this was done and the
dynamo clamp was slackened it slid out
easily. Pleasingly, the clutch, engine sprocket
and primary chain all look in excellent
condition and the cover does have one of the
patent rubber oil seals developed by a Jampot
club member. It was completely oil tight
before removal, hope it remains so when
reassembled.
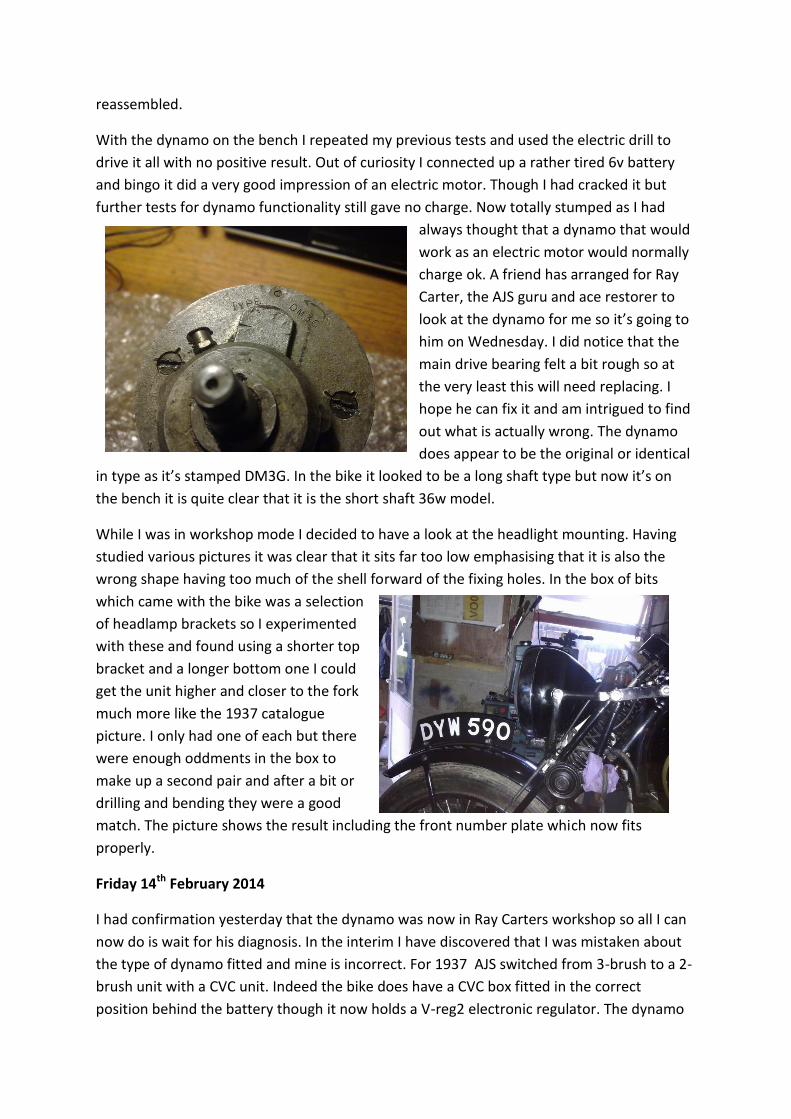
With the dynamo on the bench I repeated my previous tests and used the electric drill to
drive it all with no positive result. Out of curiosity I connected up a rather tired 6v battery
and bingo it did a very good impression of an electric motor. Though I had cracked it but
further tests for dynamo functionality still gave no charge. Now totally stumped as I had
always thought that a dynamo that would
work as an electric motor would normally
charge ok. A friend has arranged for Ray
Carter, the AJS guru and ace restorer to
look at the dynamo for me so it’s going to
him on Wednesday. I did notice that the
main drive bearing felt a bit rough so at
the very least this will need replacing. I
hope he can fix it and am intrigued to find
out what is actually wrong. The dynamo
does appear to be the original or identical
in type as it’s stamped DM3G. In the bike it looked to be a long shaft type but now it’s on
the bench it is quite clear that it is the short shaft 36w model.
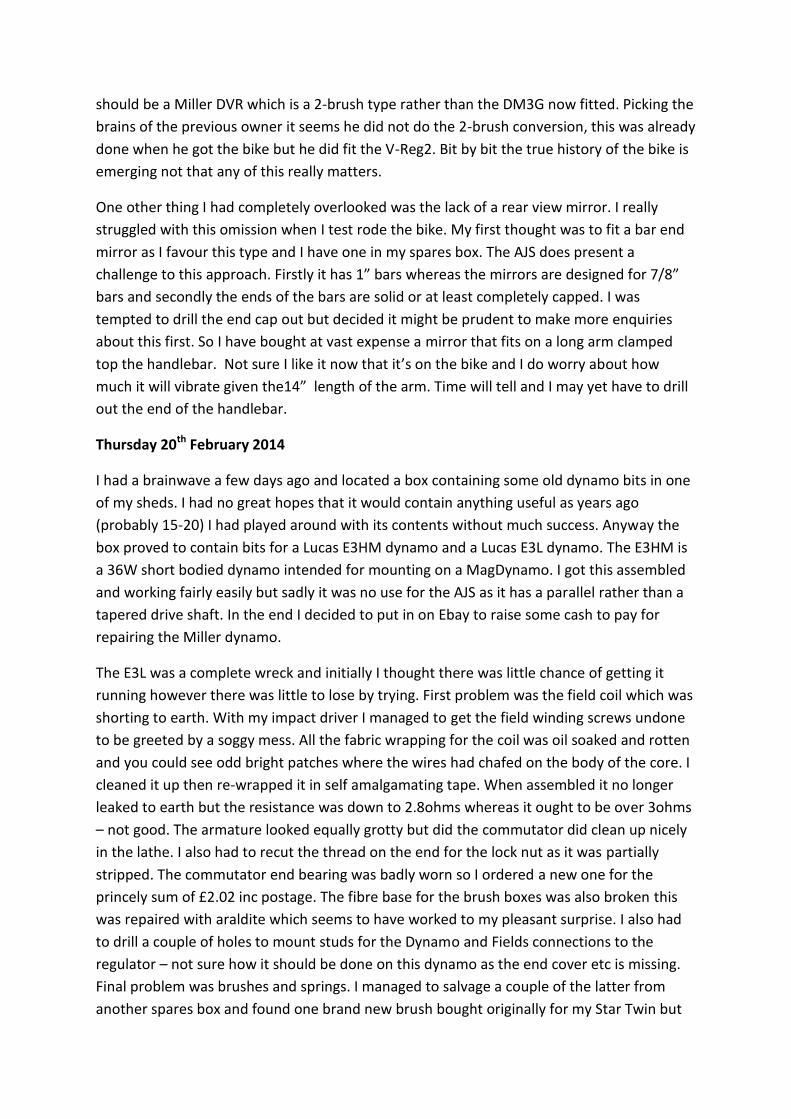
While I was in workshop mode I decided to have a look at the headlight mounting. Having
studied various pictures it was clear that it sits far too low emphasising that it is also the
wrong shape having too much of the shell forward of the fixing holes. In the box of bits
which came with the bike was a selection
of headlamp brackets so I experimented
with these and found using a shorter top
bracket and a longer bottom one I could
get the unit higher and closer to the fork
much more like the 1937 catalogue
picture. I only had one of each but there
were enough oddments in the box to
make up a second pair and after a bit or
drilling and bending they were a good
match. The picture shows the result including the front number plate which now fits
properly.
Friday 14th February 2014
I had confirmation yesterday that the dynamo was now in Ray Carters workshop so all I can
now do is wait for his diagnosis. In the interim I have discovered that I was mistaken about
the type of dynamo fitted and mine is incorrect. For 1937 AJS switched from 3-brush to a 2-
brush unit with a CVC unit. Indeed the bike does have a CVC box fitted in the correct
position behind the battery though it now holds a V-reg2 electronic regulator. The dynamo
should be a Miller DVR which is a 2-brush type rather than the DM3G now fitted. Picking the
brains of the previous owner it seems he did not do the 2-brush conversion, this was already
done when he got the bike but he did fit the V-Reg2. Bit by bit the true history of the bike is
emerging not that any of this really matters.
One other thing I had completely overlooked was the lack of a rear view mirror. I really
struggled with this omission when I test rode the bike. My first thought was to fit a bar end
mirror as I favour this type and I have one in my spares box. The AJS does present a
challenge to this approach. Firstly it has 1” bars whereas the mirrors are designed for 7/8”
bars and secondly the ends of the bars are solid or at least completely capped. I was
tempted to drill the end cap out but decided it might be prudent to make more enquiries
about this first. So I have bought at vast expense a mirror that fits on a long arm clamped
top the handlebar. Not sure I like it now that it’s on the bike and I do worry about how
much it will vibrate given the14” length of the arm. Time will tell and I may yet have to drill
out the end of the handlebar.
Thursday 20th February 2014
I had a brainwave a few days ago and located a box containing some old dynamo bits in one
of my sheds. I had no great hopes that it would contain anything useful as years ago
(probably 15-20) I had played around with its contents without much success. Anyway the
box proved to contain bits for a Lucas E3HM dynamo and a Lucas E3L dynamo. The E3HM is
a 36W short bodied dynamo intended for mounting on a MagDynamo. I got this assembled
and working fairly easily but sadly it was no use for the AJS as it has a parallel rather than a
tapered drive shaft. In the end I decided to put in on Ebay to raise some cash to pay for
repairing the Miller dynamo.
The E3L was a complete wreck and initially I thought there was little chance of getting it
running however there was little to lose by trying. First problem was the field coil which was
shorting to earth. With my impact driver I managed to get the field winding screws undone
to be greeted by a soggy mess. All the fabric wrapping for the coil was oil soaked and rotten
and you could see odd bright patches where the wires had chafed on the body of the core. I
cleaned it up then re-wrapped it in self amalgamating tape. When assembled it no longer
leaked to earth but the resistance was down to 2.8ohms whereas it ought to be over 3ohms
– not good. The armature looked equally grotty but did the commutator did clean up nicely
in the lathe. I also had to recut the thread on the end for the lock nut as it was partially
stripped. The commutator end bearing was badly worn so I ordered a new one for the
princely sum of £2.02 inc postage. The fibre base for the brush boxes was also broken this
was repaired with araldite which seems to have worked to my pleasant surprise. I also had
to drill a couple of holes to mount studs for the Dynamo and Fields connections to the
regulator – not sure how it should be done on this dynamo as the end cover etc is missing.
Final problem was brushes and springs. I managed to salvage a couple of the latter from
another spares box and found one brand new brush bought originally for my Star Twin but
never used. I cut down a pair of MZ brushes for the other side. Total Heath Robison but
against all the odds it performed as an electric motor when I connected a battery and after
some enthusiastic rotation by the electric drill it also managed to make a 12v bulb glow
quite well. I should add that all the trials and errors in this process meant it took nearly two
full days to get to that stage. During the process I had cause to talk to several people and
one of them gave me a fright when he told me that AJS/Matchless had to use short
dynamos post war as there was insufficient room for the longer E3L; he was not sure about
pre-war models. Needless to say I rushed down to the garage and offered up the dynamo to
its carrier – it fitted perfectly to my relief.
In the interim I had also sent the V-Reg2 regulator back to AO services. I did not think it had
any bearing on my Miller problems but for the sake of a few £s in postage it seemed a
sensible precaution. That came back today with a clean bill of health but a comment that it
was an old model made in 2005! This was a surprise as I had gained the impression from the
vendor that fitting of the electronic regulator was a fairly recent enhancement.
Anyway this afternoon I was able to fit the regulator and the dynamo to the bike and
reconnect the primary chain. I was very hopeful that I now had a working dynamo but
initially there was no evidence of it charging. I double checked all my connections but found
no fault, then ran the bulb test. This glowed nicely with the engine running so it had to be
something in the regulator circuit causing a problem. I wondered if it was a polarity issue so
flashed the field winding as recommended in the V-Reg2 fitting instructions. Whilst doing
this I felt that the current through the field winding was a bit weak so I made up a dedicated
earth wire for the dynamo. Not sure which did the trick but next time I ran the engine I
finally saw the ammeter move into the charge zone even with full lights on - success at last. I
have no proper end cover for the E3L (though the Miller one may fit when I get it back) so I
have made a temporary one out of baked bean can. Sounds dreadful but it does not look
that bad and will keep the worst of the weather out.
One other thing I noticed whilst doing this testing was that the exhaust is not smoking
nearly as badly as it did so I think cutting down the oil supply to the inlet valve has helped a
lot. The engine is also clearly running far too rich which I think accounts for quite a bit of the
remaining smoke. The richness is probably due to flooding as there was petrol dripping onto
the gearbox. I did remove the float bowl to check float and needle. Nothing obviously wrong
but I did some light grinding of needle to it’s seat.
I also felt that the primary chain was too tight so adjusted both chains. The rear appears to
be new and had no obvious tight spots. The primary chain on the other hand is probably due
for replacement. Tomorrow I should be able to complete the assembly and give the bike a
test ride.
Tuesday 25th February 2014
Weather and life in general stopped me riding the bike for a couple of days then I got
message to ring Ray Carter. He now has the dynamo charging correctly and apart for a
bearing nothing else needed replacing. The main problem was the commutator which had
become glazed. There was also an issue with one of the brush holders, not sure what but he
has fixed that too. He needed to confirm which direction of rotation (anti- clock) and which
polarity (-ve earth). This surprised him as apparently it is currently wired +ve earth. He will
call me in a few days when it’s ready for collection. Decided to defer the road test until the
Miller dynamo is back.
I have struggled a bit over the primary chain as it has an odd number of links and I have yet
to find a source. I do have a practically brand new chain of the correct size removed from
one of my MZs and I may try cutting this down to 66 links to see if I can get away with a
slightly longer chain. According to the spares book the 350 model uses a 66 link chain but
then it has a larger engine sprocket. Alternatively it’s the Shepton Mallet Autojumble in a
few days and there a couple of specialist chain suppliers I can speak to.
Wednesday 5th March 2014
Quite a rewarding weekend. On the Saturday I talked to the people at Sprockets Unlimited
and they were able to make me a 65 link chain by riveting in a half link so it only needs one
spring link. I also ran into Ray Carter and arranged to lick up the dynamo on the Sunday. On
Monday I was all set to finish the AJS and finally get a test ride. Fitting the dynamo was
quickly done and it was connected up using the rather neat special plug. Engine started first
kick and the ammeter stubbornly refused to show any sort of charge. To say I was
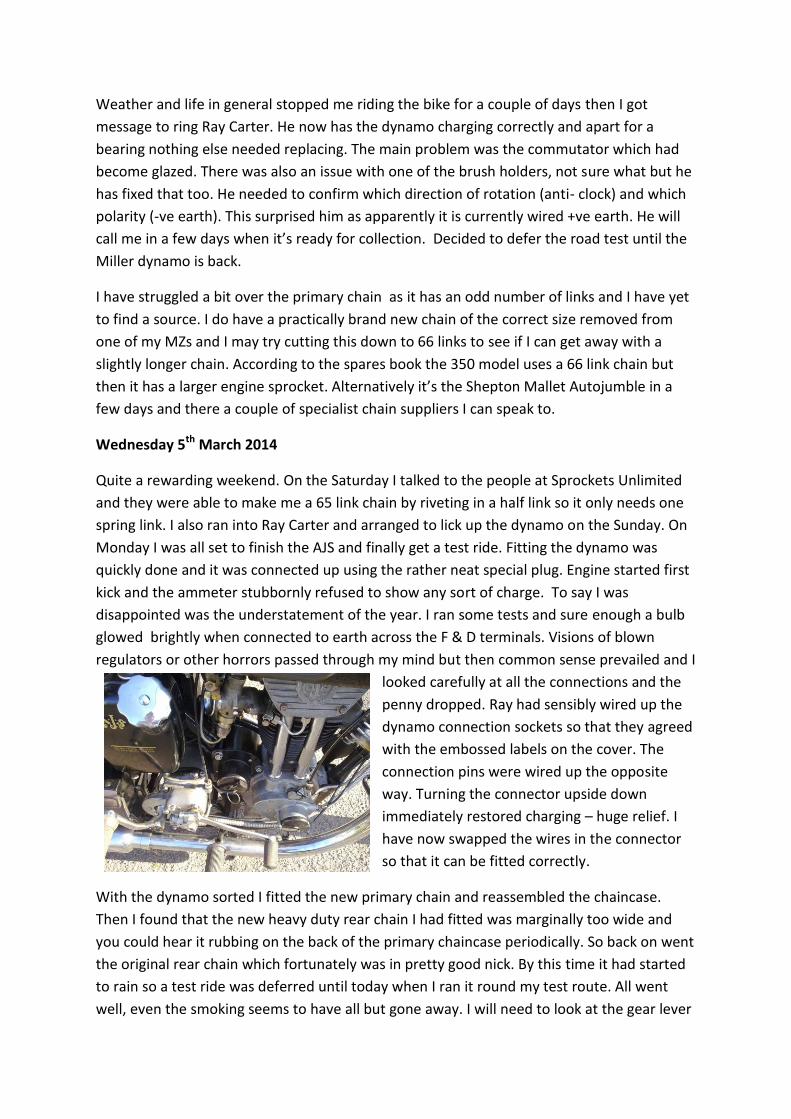
disappointed was the understatement of the year. I ran some tests and sure enough a bulb
glowed brightly when connected to earth across the F & D terminals. Visions of blown
regulators or other horrors passed through my mind but then common sense prevailed and I
looked carefully at all the connections and the
penny dropped. Ray had sensibly wired up the
dynamo connection sockets so that they agreed
with the embossed labels on the cover. The
connection pins were wired up the opposite
way. Turning the connector upside down
immediately restored charging – huge relief. I
have now swapped the wires in the connector
so that it can be fitted correctly.
With the dynamo sorted I fitted the new primary chain and reassembled the chaincase.
Then I found that the new heavy duty rear chain I had fitted was marginally too wide and
you could hear it rubbing on the back of the primary chaincase periodically. So back on went
the original rear chain which fortunately was in pretty good nick. By this time it had started
to rain so a test ride was deferred until today when I ran it round my test route. All went
well, even the smoking seems to have all but gone away. I will need to look at the gear lever
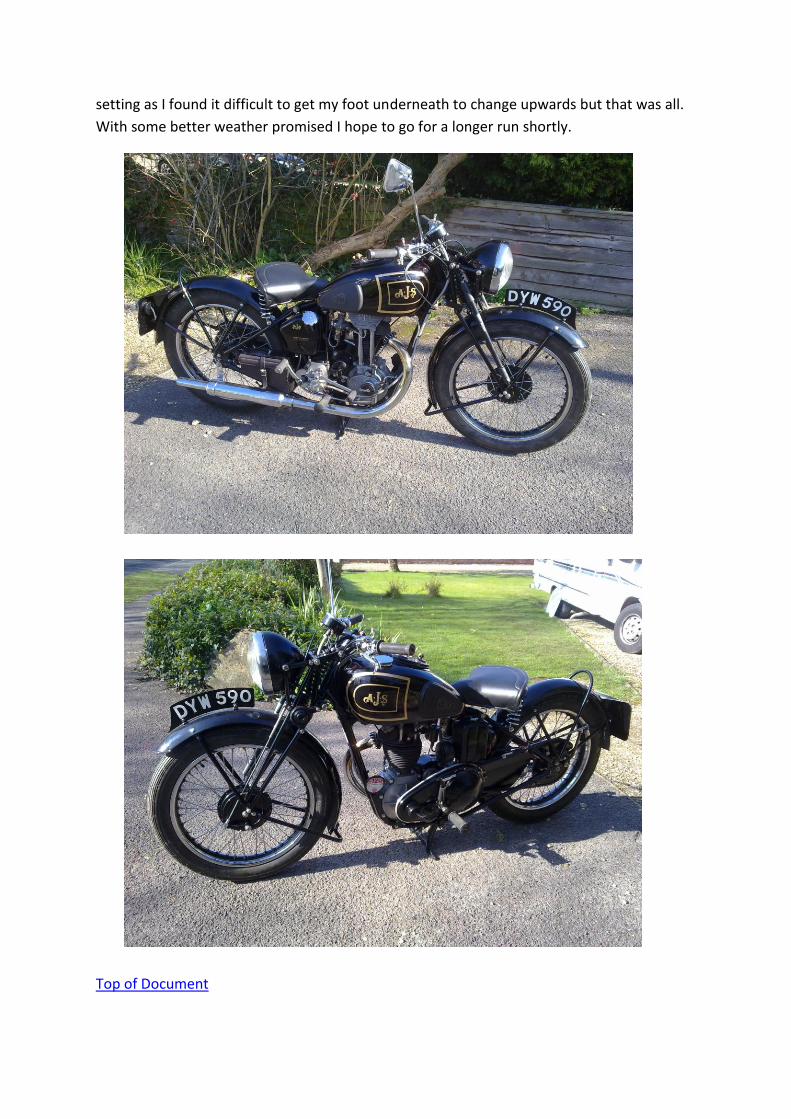
setting as I found it difficult to get my foot underneath to change upwards but that was all.
With some better weather promised I hope to go for a longer run shortly.
Top of Document