Embed Size (px)
Citation preview
TABLE OF CONTENTS
Page 1
Safety Precautions and Warnings.............................................. 2Introduction .................................................................................... 3
EZ-CHARGE √ Battery Conductance Testers ............................. 3EZ-CHARGE √ 100 Features ........................................................ 3EZ-CHARGE √ 200 Features ........................................................ 4Text Styles Used in this Manual .................................................... 4
Connecting the EZ-CHARGE √√√√√ ............................................................................................................................................................................................................................................................................................. 5Battery Test ..................................................................................... 6
Before You Start ............................................................................ 6EZ-CHARGE √ 100 ........................................................................ 6EZ-CHARGE √ 200 ........................................................................ 7
Voltmeter / Systems Tests ............................................................. 8EZ-CHARGE √ 100 ........................................................................ 8EZ-CHARGE √ 200 ........................................................................ 9Troubleshooting the Starting System ........................................... 9
Upgrading the EZ-CHARGE √√√√√ 100 ............................................. 11
Troubleshooting Test Problems ............................................... 12
Product Warranty Policy ............................................................. 13
Patents ........................................................................................... 15
Page 2
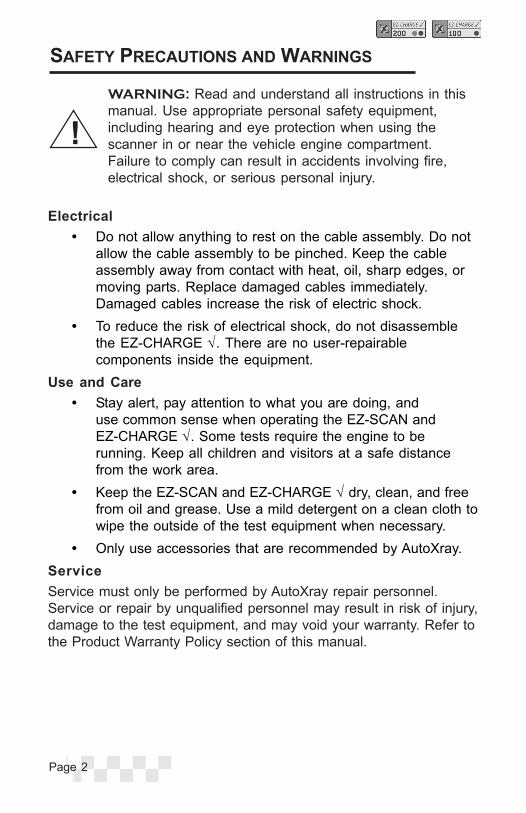
SAFETY PRECAUTIONS AND WARNINGS
Electrical• Do not allow anything to rest on the cable assembly. Do not
allow the cable assembly to be pinched. Keep the cableassembly away from contact with heat, oil, sharp edges, ormoving parts. Replace damaged cables immediately.Damaged cables increase the risk of electric shock.
• To reduce the risk of electrical shock, do not disassemblethe EZ-CHARGE √. There are no user-repairablecomponents inside the equipment.
Use and Care• Stay alert, pay attention to what you are doing, and
use common sense when operating the EZ-SCAN andEZ-CHARGE √. Some tests require the engine to berunning. Keep all children and visitors at a safe distancefrom the work area.
• Keep the EZ-SCAN and EZ-CHARGE √ dry, clean, and freefrom oil and grease. Use a mild detergent on a clean cloth towipe the outside of the test equipment when necessary.
• Only use accessories that are recommended by AutoXray.ServiceService must only be performed by AutoXray repair personnel.Service or repair by unqualified personnel may result in risk of injury,damage to the test equipment, and may void your warranty. Refer tothe Product Warranty Policy section of this manual.
WARNING: Read and understand all instructions in thismanual. Use appropriate personal safety equipment,including hearing and eye protection when using thescanner in or near the vehicle engine compartment.Failure to comply can result in accidents involving fire,electrical shock, or serious personal injury.
!

Page 3
INTRODUCTION
EZ-Charge√√√√√ Battery Conductance TestersThe EZ-CHARGE √ 100/200 Battery Conductance Tester is an add-on or accessory that enables your EZ-SCAN 3000–6000 to deter-mine the state of health of 12-volt SLI/starting batteries. Usingconductance technology, EZ-CHARGE √ can detect weak batteriesbefore they fail. EZ-CHARGE √ also functions as a voltmeter with arange of 0 to 19.99 volts.
The EZ-CHARGE √ is easy to setup and use, with a serial cable thatconnects to your EZ-SCAN and clamps that attach to the batteryposts.
EZ-CHARGE √√√√√ 100 Features• Tests batteries from 250 CCA – 850 CCA• Transmits to EZ-SCAN for display:
o Voltageo Battery condition (one of the following decisions):
GoodGood RechargeCharge & RetestReplace Battery
• Voltmeter mode:o 0 to 19.99 Vdc
Page 4
INTRODUCTION (CONT.)
EZ-CHARGE √√√√√ 200 Features• Tests batteries from 250 CCA to 850 CCA
o Battery rating systems:CCACADINEN
• Transmits to EZ-SCAN for display:o Voltageo CCAo Battery Condition (one of following decisions):
GoodGood RechargeCharge & RetestReplace BatteryBad Cell-Replace
• Voltmeter mode:o 0 to 19.99 Vdco low volts captureo high volts capture
Text Styles Used in this ManualPOWER
6–Utilities
NOTE:
Text in this font designates a button/key on thescanner.
Text in this font designates text displayed on thescanner screen.
The word NOTE in this font designates informationthat will help you while using the EZ-CHARGE √ andthe EZ-SCAN.
The EZ-SCAN will display arrows on the right side of the screen toindicate text above and/or below the current screen. Use the and arrow keys to view the text. Refer to the EZ-SCAN UsersManual for more information.
Page 5
CONNECTING THE EZ-CHARGE √√√√√
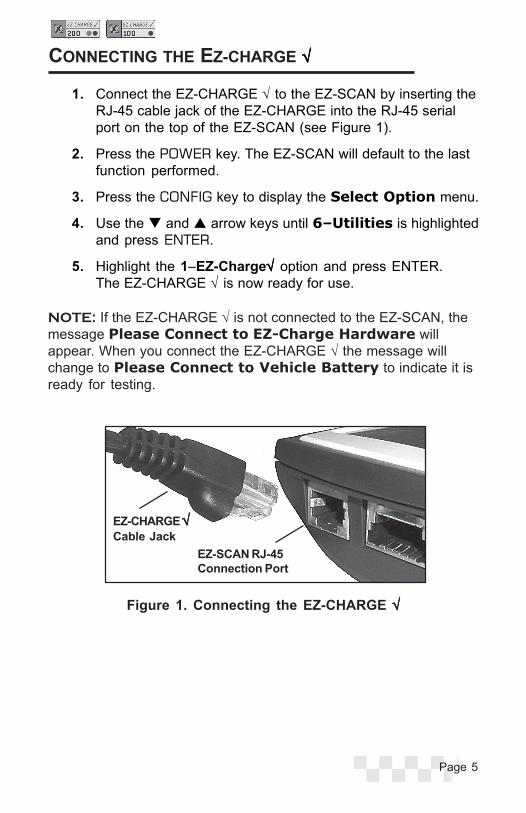
1. Connect the EZ-CHARGE √ to the EZ-SCAN by inserting theRJ-45 cable jack of the EZ-CHARGE into the RJ-45 serialport on the top of the EZ-SCAN (see Figure 1).
2. Press the POWER key. The EZ-SCAN will default to the lastfunction performed.
3. Press the CONFIG key to display the Select Option menu.
4. Use the and arrow keys until 6–Utilities is highlightedand press ENTER.
5. Highlight the 1–EZ-Charge√√√√√ option and press ENTER.The EZ-CHARGE √ is now ready for use.
NOTE: If the EZ-CHARGE √ is not connected to the EZ-SCAN, themessage Please Connect to EZ-Charge Hardware willappear. When you connect the EZ-CHARGE √ the message willchange to Please Connect to Vehicle Battery to indicate it isready for testing.
EZ-SCAN RJ-45Connection Port
EZ-CHARGE √√√√√Cable Jack
Figure 1. Connecting the EZ-CHARGE √√√√√
Page 6
BATTERY TEST
Before You StartTesting Out-of-Vehicle:Clean the battery posts or side terminals with a wire brush. Whentesting side-post batteries, install and tighten the lead terminal studadapters. Failure to properly install the stud adapters, or usingstud adapters that are dirty or worn, may result in false testresults. Do not use steel bolts.
Side terminal adapters are available at most auto parts stores.
Testing In-Vehicle:Turn off the vehicle and all accessory loads. Testing with theignition switch on or vehicle loads on may cause inaccuratereadings.
If the vehicle was running before testing, turn on the headlights for30 seconds to remove the battery’s surface charge. Let the batteryrest for 1 minute to recover before testing.
EZ-CHARGE √ √ √ √ √ 1001. The EZ-SCAN should display Please connect to vehicle
battery. If not, refer to “Connecting the EZ-Charge √” onpage 5.
2. Connect the tester clamps to the battery: red to the positive(+) terminal, black to the negative (–) terminal. Rock eachclamp back and forth to make a good connection.
3. Scroll to 1. Battery Test and press the ENTER key tomove to the Enter Rating screen.
4. Use the and arrow keys to scroll to the battery’s ratingin CCA. If you cannot find the rating on the battery, consultthe vehicle owner’s manual for the correct battery size, andtest against the OEM standard. The and arrow keysscroll in multiples of 5, and the and arrow keys scroll inmultiples of 50.
5. Press the ENTER key to begin the test.
Page 7
BATTERY TEST (CONT.)
6. Read the results. The EZ-CHARGE √ 100 will display thebattery’s voltage and condition:
Good Battery = Return to service.
Good-Recharge = Fully charge the battery and return toservice.
Charge & Retest = Fully charge the battery and retest.If the result after charging is Charge & Retest, replacethe battery.
Replace Battery = Battery has failed or is weak and maysoon fail. Replace the battery.
EZ-Charge√√√√√ 2001. The EZ-SCAN should display the Please connect to
vehicle battery message. If not, refer to “Connecting theEZ-Charge √” on page 5.
2. Connect the tester clamps to the battery: red to the positive(+) terminal, black to the negative (–) terminal. Rock eachclamp back and forth to make a good connection.
3. Scroll and highlight 1. Battery Test and press the ENTERkey to move to the Select Units screen.
4. The EZ-CHARGE √ 200 tests automotive starting batteriesrated in Cold Cranking Amps (CCA), Cranking Amps (CA),DIN (the rating system for German import cars), and EN(the rating system used for many European imports).
Rating System Ranges:
1. 250 – 850 CCA
2. 300 – 1000 CA
3. 140 – 550 DIN
4. 200 – 900 EN
Page 8
BATTERY TEST (CONT.)
Use the and arrow keys to select the rating system,and press the ENTER key to move to the Enter Ratingscreen.
5. Use the and arrow keys to scroll to the battery’s rating.If you cannot find the rating on the battery, consult thevehicle owner’s manual for the correct battery size, and testagainst the OEM standard. The and arrow keys scrollin multiples of 5, and the and arrow keys scroll inmultiples of 50.
6. Press the ENTER key to begin the test.
7. Read the results. The EZ-CHARGE √ 200 will display thebattery’s voltage, available power, and condition:
Good Battery = Return to service.
Good-Recharge = Fully charge the battery and return toservice.
Charge & Retest = Fully charge the battery and retest.If you get the same result after charging, replace the battery.
Replace Battery = Battery has failed or is weak and maysoon fail. Replace the battery.
Bad Cell-Replace = Battery has one or more bad cells.Replace the battery.
EZ-CHARGE √ √ √ √ √ 100The EZ-CHARGE √ 100 voltmeter function measures live voltagefrom 0 to 19.99 Vdc. To use the voltmeter function:
1. When the scanner displays Please connect to vehiclebattery, connect to the vehicle’s battery.
2. Select 2. V2. V2. V2. V2. Voltmeter oltmeter oltmeter oltmeter oltmeter from the EZ-CHARGE √ 100 mainmenu and press the ENTER key.
VOLTMETER / SYSTEMS TESTS

Page 9
VOLTMETER / SYSTEMS TESTS (CONT.)
EZ-CHARGE √ √ √ √ √ 200The EZ-CHARGE √ 200 voltmeter function displays live voltage. Inaddition, the EZ-CHARGE √ 200 displays the lowest capturedvoltage for starting system and highest captured voltage for thecharging system.
Starting system test:To test the starting system (the battery must be good and above12.4 volts):
1. When the scanner displays Please connect to vehiclebattery, connect to the vehicle’s battery.
2. Select 2. Voltmeter from the EZ-CHARGE √ 200 mainmenu, and press the ENTER key.
3. Start the vehicle.
4. Read the captured low voltage reading:
V > 9.6 = OK
V < 9.6 = problem detected. Refer to the owner’s manual orrepair guide for instructions.
Troubleshooting the Starting SystemWith the vehicle lights on:Try to start the engine. If the engine does not crank and the lightsdim heavily, check the connections to ensure the wiring is clean andin good condition. If wiring is in good condition, repair or replace thestarter.
If the engine does not crank and the lights go out, there is probablya poor connection. Check the connection to the battery and ground,and ensure they are clean and tight.
If the starter does not crank and the lights do not turn on, check foran open circuit and retest the battery to ensure it is good and fullycharged. Replace any defective wiring, and clean and tighten allwiring connections.
Page 10
VOLTMETER / SYSTEMS TESTS (CONT.)
With the vehicle lights off:Try to start the engine. If the engine cranks slowly but will not start,check all wiring to ensure it is in good condition. Make sure thecables from the starter to the battery are sized according to themanufacturer’s specifications. If the engine is operating properlyand the wiring is in good condition, repair or replace the starter.
If the engine cranks but does not start, check the ignition systemand fuel system for other problems.
If the engine does not crank and you hear a clicking noise, checkthe starter solenoid.
Charging system test:To test the charging system (the battery must be good and above12.4 volts)
1. When the scanner displays Please connect to vehiclebattery, connect to the vehicle’s battery.
2. Select 2. Voltmeter from the EZ-CHARGE √ 200 mainmenu and press the ENTER key.
3. Start the vehicle.
4. Observe the live voltage reading with the car running at idle.
5. Rev the engine at 2000 rpm for 5 seconds, and observe thehigh captured voltage reading. Compare your observationsto the ranges below:
13.3 < V < 15.5 = OK
V < 13.3 = charging problem detected. Refer to the owner’smanual or repair guide for instructions. Check connections,belts, and the alternator.
V > 15.5 = charging system problem. Check connections,belts, and the regulator.
Page 11
UPGRADING THE EZ-CHARGE √√√√√ 100
You can upgrade your EZ-CHARGE √ 100 to the functionality of theEZ-CHARGE √ 200. This upgrade is different from our scannerupgrades because of how the EZ-CHARGE operates. The upgradetakes place in your SCANNER, and the EZ-CHARGE √ 100 will onlyoperate as an EZ-Charge √ 200 when you use it with the upgradedscanner.
To upgrade your EZ-CHARGE √ 100 for a nominal charge, callAutoXray. One of our Customer Service Representatives will stepyou through the process (please visit our website or contactAutoXray for current prices). Before you call, please do the following:
1. Press CONFIG from the initial screen.
2. Use the or arrow key to display 3–User Upgrade,then press ENTER.
3. Write down the Serial Number for your scanner software,then press ENTER.
4. Use the or arrow key to display the EZ-Charge √√√√√application, then press ENTER.
5. Write down the Seed Number displayed on the screen.AutoXray will use the Seed Number is to generate a uniqueUpgrade Key for your scanner.
6. Call AutoXray at 800.593.9729 and tell the CustomerService Representative you want the EZ-Charge √ 200upgrade. AutoXray will ask for your software serial numberand seed number, then give you your Upgrade Key.
7. Use the or keys to enter the new Upgrade Key intoyour scanner, then press ENTER. The scanner will displaya System Activated screen.
8. Press ENTER or CONFIG to display the initial screen.
9. The scanner and EZ-Charge √ 100 will now haveEZ-Charge √ 200 functionality.
Page 12
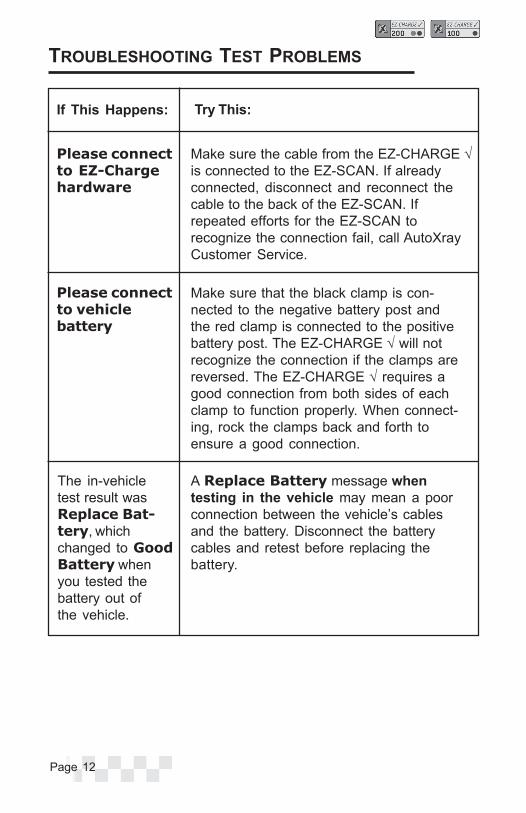
TROUBLESHOOTING TEST PROBLEMS
A Replace Battery message whentesting in the vehicle may mean a poorconnection between the vehicle’s cablesand the battery. Disconnect the batterycables and retest before replacing thebattery.
Please connectto EZ-Chargehardware
Make sure the cable from the EZ-CHARGE √is connected to the EZ-SCAN. If alreadyconnected, disconnect and reconnect thecable to the back of the EZ-SCAN. Ifrepeated efforts for the EZ-SCAN torecognize the connection fail, call AutoXrayCustomer Service.
Please connectto vehiclebattery
Make sure that the black clamp is con-nected to the negative battery post andthe red clamp is connected to the positivebattery post. The EZ-CHARGE √ will notrecognize the connection if the clamps arereversed. The EZ-CHARGE √ requires agood connection from both sides of eachclamp to function properly. When connect-ing, rock the clamps back and forth toensure a good connection.
The in-vehicletest result wasReplace Bat-tery, whichchanged to GoodBattery whenyou tested thebattery out ofthe vehicle.
Try This:If This Happens:
Page 13
PRODUCT WARRANTY POLICY
1. AutoXray warrants to its customers that, on the date theProducts are delivered, they shall be free from defects inmanufacture. Your receipt is your proof of purchase and will berequired to receive service under this warranty.
2. This warranty shall apply only to defects that appear within 365days, and which are reported to AutoXray within 455 days,following the date the Products are delivered.
3. New replacement Products are warranted as new.4. Reconditioned replacement Products and repaired Products
are warranted as new for the longer of the remainder of theoriginal warranty period or 90 days from the date of delivery ofthe repaired or replaced Product.
5. This warranty does not cover defects caused by abuse,mishandling, accident, improper installation or application, themalfunction of another component or part of any device inwhich the Products installed or with which the Productinterfaces, or extend to Products which have been modified orrepaired by anyone except AutoXray or its authorized servicerepresentative, or to a Product with respect to which the serialnumbers or identification marks have been altered or removed.
6. AutoXray makes no other warranties other than those expresslystated herein.
7. AutoXray’s customers’ exclusive remedy under this warranty isrepair or replacement at AutoXray’s option and such repair orreplacement shall satisfy AutoXray’s warranty obligation to itscustomers whether in contract, tort, negligence, strict liability orotherwise.
8. Prior to returning a Product for warranty adjustment, AutoXrayshall require a return authorization and will issue a returnauthorization number. The return authorization number shall beplaced conspicuously on the outer package-shipping label.Products returned to AutoXray shall be accompanied by theproof of purchase, a written description of the reasons forreturn, the circumstances under which the defect becameapparent and the date the defect occurred or, if not known, thedate the defect was discovered.

Page 14
PRODUCT WARRANTY POLICY (CONT.)
9. If a returned Product is found not to be defective, AutoXrayshall return the product and invoice for the costs of testing andreturn shipment.
10. If a returned Product is found to contain a defect which is notcovered by this warranty AutoXray shall provide a writtenquotation showing the estimated cost of repair or the price of areplacement. In the event instructions as to the disposition ofthe product are not received within 30 days from receipt ofsuch estimate or quotation, AutoXray shall return the productand invoice for the cost of testing and return shipment.
11. If a returned Product is found to be defective and such defectis covered by this warranty, AutoXray shall at its option and atno charge to the customer, with valid proof of purchase, repairor replace the Product. Following such repair or replacement,AutoXray shall return the Product at AutoXray’s expense.
Return for RepairIf it becomes necessary to send the EZ-CHARGE √ back to us forrepair, contact AutoXray at 480.804.1673, ask for an RMA number,then send the product and copy of proof of purchase to:
AutoXray1800 W. Broadway Rd., Bldg. 5
Tempe, AZ 85282

Page 15
PATENTS
The EZ-CHARGE √ 100 and 200 Battery Conductance Testers aremade in the U.S.A. by Midtronics, Inc. and are protected by one ormore of the following U.S. Patents: 6,586,941, 6,323,650; 6,316,914;6,304,087; 6,249,124; 6,163,156; 6,091,245; 6,051,976; 5,831,435;5,821,756; 5,757,192; 5,592,093; 5,585,728; 5,572,136; 4,912,416;4,881,038; 4,825,170; 4,816,768; 4,322,685; Canadian patents:1,280,164; 1,295,680; United Kingdom patents: 0,417,173;0,672,248; German patents: 689 23 281.0-08; 693 25 388.6; 93 21638.6; and other U.S. and Foreign patents issued and pending. Thisproduct may utilize technology exclusively licensed to Midtronics, Inc.by Johnson Controls, Inc. and/or Motorola, Inc.

P/N 168-983A 10/03 ©2003 Midtronics, Inc.