Embed Size (px)
Citation preview
New Riders - Debugging ASP.NET made by dotneter@teamfly
Debugging ASP.NET
Jonathan Goodyear
Brian Peek
Brad Fox
Publisher: Financial Times Prentice Hall
First Edition October 19, 2001
ISBN: 0-7357-1141-0, 376 pages
New Riders - Debugging ASP.NET made by dotneter@teamfly
Debugging ASP.NET
Copyright © 2002 by New Riders Publishing
FIRST EDITION: October, 2001
All rights reserved. No part of this book may be reproduced or transmitted in any form or by any means, electronic or mechanical, including photocopying, recording, or by any information storage and retrieval system, without written permission from the publisher, except for the inclusion of brief quotations in a review.
Library of Congress Catalog Card Number: 00-110030
06 05 04 03 02 7 6 5 4 3 2 1
Interpretation of the printing code: The rightmost double-digit number is the year of the book’s printing; the right-most single-digit number is the number of the book’s printing. For example, the printing code 02-1 shows that the first printing of the book occurred in 2002.
Printed in the United States of America
Trademarks
All terms mentioned in this book that are known to be trademarks or service marks have been appropriately capitalized. New Riders Publishing cannot attest to the accuracy of this information. Use of a term in this book should not be regarded as affecting the validity of any trademark or service mark.
Warning and Disclaimer
This book is designed to provide information about Debugging ASP.NET. Every effort has been made to make this book as complete and as accurate as possible, but no warranty or fitness is implied.
The information is provided on an as-is basis. The authors and New Riders Publishing shall have neither liability nor responsibility to any person or entity with respect to any loss or damages arising from the information contained in this book or from the use of the discs or programs that may accompany it.
New Riders - Debugging ASP.NET made by dotneter@teamfly
Credits
Publisher
David Dwyer
Associate Publisher
Stephanie Wall
Managing Editor
Kristy Knoop
Acquisitions Editor
Deborah Hittel-Shoaf
Development Editor
Chris Zahn
Product Marketing Manager
Stephanie Layton
Publicity Manager
Susan Nixon
Copy Editor
Krista Hansing
Indexer
Chris Morris
Manufacturing Coordinator
Jim Conway
Book Designer
Louisa Klucznik
Cover Designer
New Riders - Debugging ASP.NET made by dotneter@teamfly
Brainstorm Design, Inc.
Composition
Jeff Bredensteiner
To my beautiful, dedicated, and supportive wife, Joy. The only person who has ever left me speechless. Jonathan Goodyear
To Bunk, my dog—keep fighting. Brian Peek
To my Wonderful, Supportive and Beautiful wife Wendy, who has helped me become the man I am today and helped me achieve my goals in life. Thank you so much for being there for me, I know it was a difficult journey and you stood by me every step of the way. Thank you!
To my sons, Brandon and Travis, I love you guys very much!
And Finally, thank you Mom and Dad for your support and inspiration.
Brad Fox
New Riders - Debugging ASP.NET made by dotneter@teamfly
Debugging ASP.NET About the Authors
About the Technical Reviewers
Acknowledgments
Jonathan Goodyear
Brian Peek
Brad Fox
Tell Us What You Think
Introduction
Who Will Benefit from This Book?
Who Is This Book Not For?
Organization of This Book
Source Code and Errata
Conventions
I: ASP Debugging Basics
1. Conceptual Framework
Understanding Server-Side Events
New Language Options
Summary
2. Traditional Approaches to Debugging in ASP
Structure of Pre–ASP.NET Pages
Problems and Shortcomings
Old Strategies That Still Do the Job Well
An ASP Debug Object
Summary
3. Debugging Strategies
Tier Sandboxes
Divide and Conquer
Simple Before Complex
Turtle Makes the Wiser
Summary
4. Code Structure That Eases Debugging
Code Partitioning
Control-of-Flow Guidelines
New Riders - Debugging ASP.NET made by dotneter@teamfly
Structured Exception Handling
Global Exception Handling
Summary
II: ASP.NET Debugging Tools
5. Conditional Compiling
What Is Conditional Compiling?
Other Preprocessor Directives
Summary
6. Tracing
Configuration
Trace Output
Setting Trace Messages
Trace Viewer
Tracing via Components
Tips for Using Trace Information
Summary
7. Visual Studio .NET Debugging Environment
Introduction to Features
Attaching to Processes
Setting It All Up
Inline Debugging of ASP.NET Pages
Inline Debugging of Components
Remote Debugging
Summary
8. Leveraging the Windows 2000 Event Log
The Windows 2000 Event Log Defined
Web Applications Can Use the Event Log
The System.Diagnostics Event Log Interface
Custom Event Logs
Handling Different Types Of Events
Access Event Log Data via the Web
Summary
III: Debugging the New ASP.NET Features
9. Debugging Server-Side Controls
Creating the Project
Debugging the Control
Summary
New Riders - Debugging ASP.NET made by dotneter@teamfly
10. Debugging Data-Bound Controls
Data-Bound Controls
Debugging Templates
Namespace Issues
XML Binding
Summary
11. Debugging User Controls
User Control Basics
Adding Properties and Methods
Dynamic User Controls
Summary
12. Caching Issues and Debugging
Output Caching
The Caching API
Summary
IV: Debugging Related Technologies
13. Debugging Web Services
Web Services Stumbling Blocks
Error Messages
Problems Working with XMLSerializer
Working with Errors in SOAP
Error Returning Certain Types of Data
Working with Streams
Tools
Basic Web Services Debugging
Problems Deploying Your Web Service?
Summary
14. Debugging .NET Components and HttpHandlers
The Component
Interfaces
HttpHandlers
State-Management Issues
.NET Components Versus Registered COM Components
Summary
15. COM+ Issues
Role-Based Security
Component Services Microsoft Management Console

New Riders - Debugging ASP.NET made by dotneter@teamfly
Transaction Issues
Summary
16. Debugging ADO.NET
Understanding the System.Data Namespace
Catching SQL Errors
New Connection Components
Issues with the DataReader Class
Working with Transactions
Error Codes and How to Debug Them
Common Pitfalls
SQL ADO.NET Objects Versus OleDb ADO.NET Objects
Summary
A. Issues that Arise When Migrating from ASP to ASP.NET
Moving from ASP to ASP.NET
Moving from VBScript to Visual Basic
Opting for C#
Summary
New Riders - Debugging ASP.NET made by dotneter@teamfly
About the Authors
Jonathan Goodyear began his career as a software developer at Arthur Andersen after receiving a degree in accounting and information technology from Stetson University. He has also worked as a consultant for PricewaterhouseCoopers and as the Internet architect for the Home Shopping Network’s e-commerce presence (http://www.hsn.com). Presently, he works as an independent consultant through his consulting practice, ASPSoft, focusing on developing web applications with ASP.NET.
Jonathan is a contributing editor for Visual Studio Magazine (http://www.vbpj.com) and is a charter member of the Visual Studio 6 MCSD certification. He is also the founder and editor of angryCoder (http://www.angrycoder.com), the first eZine written completely in ASP.NET.
When not hunched over a keyboard, Jonathan likes to spend time going to theme parks with his family near his home in Orlando, Florida.
Brian Peek is a senior software developer with Rapid Application Developers, Inc. (http://www.rapiddevelopers.com/) located in Troy, New York. He specializes in developing n-tiered applications, web-based applications, wireless applications, and any other projects that happen to come along. Additionally, he is the owner and lead programmer of Ganksoft Entertainment (http://www.ganksoft.com/), a small video game–development company dedicated to producing high-quality games for video game consoles using only freely available tools and documentation. He holds a bachelor’s degree in computer science from Union College in Schenectady, New York, his hometown. When not coding for work or coding games that he wishes

New Riders - Debugging ASP.NET made by dotneter@teamfly
would be published commercially, he can often be found practicing magic, learning to play piano, or playing his latest favorite video game. He can be reached at [email protected] or [email protected].
Brad Fox started programming in BASIC at the age of 12. Since then, computers and technology have played an integral part in his life. Brad joined the Army right out of high school and served in the 82nd Airborne Division. Since then he has gone on to become a Microsoft Certified Solution Developer. Currently, Brad is CEO of Digital Intelligence, Inc., where he spends most of his time developing cutting-edge technology for the financial industry.
About the Technical Reviewers
These reviewers contributed their considerable hands-on expertise to the entire development process for Debugging ASP.NET. As the book was being written, these dedicated professionals reviewed all the material for technical content, organization, and flow. Their feedback was critical to ensuring that Debugging ASP.NET fits our reader’s need for the highest-quality technical information.
Diane Stottlemyer is presently an online teacher for Learning Tree, Capella University, Connected University, Franklin University, CalCampus, and ElementK. She enjoys teaching online and feels that her diverse background enables her to teach many different courses and add variety to them.
Diane feels that her biggest strength as an online teacher is her ability to present the student materials with life skills and to help her students understand the material so that they can process it and use it. Diane is also an adjunct professor for Mary Baldwin College,

New Riders - Debugging ASP.NET made by dotneter@teamfly
Piedmont Valley Community College, and James Sprunt Community College. She teaches several course on testing, management, programming, and advanced computer skills. She is an avid reader and keeps up on new technology, new software, and new hardware.
Diane is a professor of computer science and a Certified Software Test Engineer; she just completed her doctorate in computer science. She received her undergraduate degree from Indiana University and received masters and Ph.D. degrees in computer science from Lacrosse University. She believes that education is the door to future opportunities and that you are never too young or old to learn.
Diane’s first book, entitled Automated Web Testing Toolkit: Expert Methods for Testing and Managing Web Applications, will be released this month. She is excited about the book and feels that it will be a great addition to anyone’s library. She also just signed a contract for her second book on testing .NET applications.
Steve Platt has been around computers for the last 17 years; he got in through the back door after studying chemistry and chemical engineering with Pilkington Brothers, a well-known glass manufacturer. While writing some of their financial systems in CICS/COBOL and other obscure languages, such as Gener/OL and FOCUS, he rose from junior programmer to Senior Analyst/Programmer. Deciding that contracting was the way to go, he started a career that brought him into contact with quite a number of blue-chip companies: Shell Chemicals, American Express, Shell Oils, and Lloyds Bank. All these companies were mainframe users, but the projects were varied, including a huge data transfer from legacy systems to DB2, production support fire-fighting, and some data warehousing using Prism. Steve has spent the last few years in the Internet arena, working with Victoria Real (who created the UK’s BigBrother site), on Iceland online shopping and the shopping portal Ready2Shop using UNIX, Perl, Oracle 8i, and JavaScript. More recently, he joined RDF Consulting, a Brighton-based organization and Microsoft solution provider that specializes in the e-commerce needs of financial organizations such as Legal & General and Northern Rock. There, Steve uses his skills as a configuration/build manager and Oracle DBA.
New Riders - Debugging ASP.NET made by dotneter@teamfly
Steve has a wife and daughter, and he is interested in fitness and the martial arts. He is passionate about motorcycling and new technology, and he can be found on many an evening coding into the early hours. He would dearly love to emigrate to Australia.
Acknowledgments
We would all like to thank the following people at New Riders Publishing for their
tireless work towards making this book a reality.
• Acquisitions Editor: Karen Wachs
• Acquisitions Editor: Deborah Hittel-Shoaf
• Development Editor: Chris Zahn
• Managing Editor: Kristy Knoop
• Copy Editor: Krista Hansing
• Indexer: Chris Morris
• Compositor: Jeff Bredensteiner
• Technical Reviewers: Diane Stottlemeyer, Steve Platt
Jonathan Goodyear
Many people have helped lift me to where I am today. I would like to thank Darren
Jensen, Paula Stana, and John Wagner at Arthur Andersen for patiently mentoring
me while I was a development rookie. Without your help, I would have become an
employment casualty early in my career.
I would like to thank Robert Teixeira for filling in the gaps in my knowledge while I
was at PricewaterhouseCoopers. You have an amazing gift for distilling complex
concepts into understandable information.
From The Home Shopping Network, I would like to thank Nick Ruotolo for taking a
chance on a young, but ambitious, kid. I would also like to thank Ken McNamee for
lending me the server that I used to test this book’s code.
At Visual Studio Magazine (formerly Visual Basic Programmer’s Journal), I would
like to thank Susannah Pfalzer. With your help, my writing has improved tenfold. It
has been a pleasure to work with you and the rest of the VSM staff (particularly
Patrick Meader and Elden Nelson) over the past couple of years.
My co-authors, Brian Peek and Brad Fox, deserve a special thank-you for their help
in bringing my book idea to life. You guys stepped in and did a fantastic job.
New Riders - Debugging ASP.NET made by dotneter@teamfly
On a personal level, I would like to thank some of my lifelong friends for everything
that they have done for me throughout the years. They are Stephen Ferrando,
Patrick Tehan, Jamie Smith, James Rowbottom, and Damian Jee. You guys are the
best!
To my wife, Joy, thank you for your endless patience while I pursue my career
dreams. Without you, none of this would have been possible. I would like to thank
my 1-year-old son, CJ, for opening my eyes to the wonders of fatherhood. Lastly, I
would like to thank my sister-in-law, Cherie. Your relentless pursuit of your Olympic
dreams in gymnastics has been an inspiration to me.
Brian Peek
This book, and life in general, would not be possible without the help and support of
quite a few people. At the very top of that list would be Jonathan for giving me the
opportunity to co-author this book with him.
Thanks to my parents for providing me with daily encouragement while writing. A
thank you to Jennifer Trotts not only for coming back, but for making me cookies. I
missed you. Thank you to Mark Zaugg, a great friend who has guided me through
some tough times and who continues to be highly mellifluous (and Canadian). I
would like to thank Stacy Tamburrino for teaching me a great deal about myself,
and for many wonderful times and memories that I will always treasure. Thank you
to Matthew Kennedy for being a great friend and sharing my cynicism toward the
planet. I thank Arden Rauch for giving me confidence in my abilities at an early age.
Thanks to Bob Thayer for putting up with my anal retentiveness on graphic layouts.
A big thank-you to my grandparents for putting me through college.
And finally, a short hello and thank you to my friends that have supported me in my
endeavors: Adina Konheim, Jason Sawyer, Danette Slevinski, David Wallimann,
Robert Sharlet, Michael Kilcullen, Girish Bhatia, Chuck Snead, Justin Whiting, Clare
Mertz-Lee, Ed O’Brien, Jon Rodat, Dionne Ehrgood, Patricia Hoffman, Andy Lippitt,
and the rest of the RAD staff.
Brad Fox
Every time you read these things, they seem so cliché, but what can you do? I will
try to make mine interesting. First of all, I have to thank Jonathan Goodyear—yes,
the author of this book, for giving me the opportunity to co-author with him. This
has been a dream of mine for half my life, and he has helped me to accomplish it.
Thank you, Jonathan. J
New Riders - Debugging ASP.NET made by dotneter@teamfly
Next, I would like to thank David Waddleton for helping me with Chapter 13,
“Debugging Web Services.”
I would also like to thank Shannon McCoy for his support and the knowledge that I
was able suck from his brain. Not to mention, he’s the best friend anyone could have.
I love ya, buddy.
A few individuals at Microsoft that were instrumental in making this book a success.
These include Scott Guthrie, Rob Howard, Susan Warren, Shaykat Chaudhuri, and
Dmitry Robsman. Thanks to all of you for your help on this book.
Tell Us What You Think
As the reader of this book, you are the most important critic and commentator. We
value your opinion and want to know what we’re doing right, what we could do
better, what areas you’d like to see us publish in, and any other words of wisdom
you’re willing to pass our way.
As the Associate Publisher for New Riders Publishing, I welcome your comments.
You can fax, email, or write me directly to let me know what you did or didn’t like
about this book—as well as what we can do to make our books stronger.
Please note that I cannot help you with technical problems related to the topic of this
book, and that due to the high volume of mail I receive, I might not be able to reply
to every message.
When you write, please be sure to include this book’s title and author as well as your
name and phone or fax number. I will carefully review your comments and share
them with the author and editors who worked on the book.
Fax: 317-581-4663
Email: [email protected]
Mail:
Stephanie Wall
Associate Publisher
New Riders Publishing
201 West 103 rd Street
Indianapolis, IN 46290 USA
Introduction
Over the last year or so, an incredible amount of industry attention has been paid to
Microsoft’s new .NET Framework. It is the platform that will drive Microsoft’s
New Riders - Debugging ASP.NET made by dotneter@teamfly
technology direction for at least the next five years. With so much at stake,
developers have been clamoring to get their hands on anything and
everything .NET.
The web portion of the multidimensional .NET Framework is ASP.NET. ASP.NET is
the next generation of the Active Server Pages web-development platform, and it
represents a quantum leap forward with respect to its feature set and scalability.
With its newfound power, however, comes increased complexity.
This book is designed to address many of the problems and issues that developers
will most assuredly face as they begin developing web applications using ASP.NET.
Specifically, it introduces tried-and-true web-development strategies that reduce
the risk of bugs and also enable bugs to be tracked down more easily when they do
occur. This book also introduces the myriad new debugging tools that are available
in ASP.NET and demonstrates how to use them effectively. Finally, this book tackles
the issues and problems associated with each aspect of ASP.NET, showing potential
error messages and explaining how to fix their causes.
By no means is this book a troubleshooting compendium. There is simply no way to
account for all possible errors and bugs that can be encountered in an ASP.NET web
application. Instead, this book gives solid advice on how to build bug-free web
applications, gives you a firm understanding of the debugging tools that are at your
disposal, and explains how to handle some of the more common errors and bugs
that occur. When you finish this book, you should be confident enough to find and
eliminate any bug that you encounter in your ASP.NET web application.
Who Will Benefit from This Book?
The intended audience for this book is intermediate to experienced developers and
project managers. The persons responsible for establishing project coding
standards, mentoring junior-level developers, and debugging web applications will
get the most benefit from this book. The reader should be familiar with developing
ASP.NET web applications with either Visual Basic .NET or C# (all code examples are
provided in both languages). Some of the key skills that the reader will learn from
this book are listed here:
• How to write code that reduces the chance of bugs
• Solid strategies for debugging large web applications
• How to leverage the many debugging tools available in ASP.NET, such as
tracing, event logging, and conditional compiling
• How to track down bugs associated with specific parts of ASP.NET, such as
User Controls, caching, ADO.NET, and web services
• Some of the caveats and issues common to migrating traditional ASP web
applications to ASP.NET
New Riders - Debugging ASP.NET made by dotneter@teamfly
Who Is This Book Not For?
This book is not for junior-level developers or for developers who are not relatively
comfortable developing web applications with ASP.NET. It is not an ASP.NET tutorial;
many other books on the market accomplish this task very well. Likewise, this book
assumes that the reader is familiar with either Visual Basic .NET, C#, or both. The
reader will not be able to understand and use the code examples without this
knowledge.
Organization of This Book
The book parts and chapters are outlined in the next several sections.
Part I: ASP Debugging Basics
Chapter 1, “Conceptual Framework,” explains some of the new concepts introduced
with ASP.NET, such as server-side events, the ASP.NET page life cycle, and the new
language options available.
Chapter 2, “Traditional Approaches to Debugging in ASP,” covers some of the
approaches used to debug traditional ASP web applications. It highlights several of
the problems and shortcomings with the limited tools that were available.
Chapter 3, “Debugging Strategies,” outlines several plans of attack for debugging
ASP.NET web applications. This includes debugging application tiers individually and
distilling complex code into smaller, more manageable pieces.
Chapter 4, “Code Structure That Eases Debugging,” gives advice on how to build
code that is both less likely to contain bugs and easier to debug when bugs creep in.
Topics include code partitioning, control-of-flow guidelines, structured exception
handling, and global exception handling.
Part II: ASP.NET Debugging Tools
Chapter 5, “Conditional Compiling,” covers how to take advantage of function
attributes and preprocessor directives to dynamically add debugging code to your
web applications.
Chapter 6, “Tracing,” shows you how to use the new TraceContext object available
in ASP.NET and interpret its results. Trace configuration at both the page and the
application levels is covered, as is using the Trace Viewer utility.
New Riders - Debugging ASP.NET made by dotneter@teamfly
Chapter 7, “Visual Studio .NET Debugging Environment,” introduces all the powerful
debugging features packed into the Visual Studio .NET IDE. Some of the topics
covered include how to set breakpoints, the call stack, the watch window, inline
ASP.NET page debugging, and how to attach to processes.
Chapter 8, “Leveraging the Windows 2000 Event Log,” explains how to write data to
the Windows 2000 Event Log. Some of the things you will learn in this chapter
include how to create custom event logs, how to handle both expected and
unexpected events, and how to access the contents of the Windows 2000 Event Log
via the web.
Part III: Debugging the New ASP.NET Features
Chapter 9, “Debugging Server-Side Controls,” takes you through the process of
creating a custom server control, outlining many of the issues that you might
encounter. Practical advice and solutions for these issues are provided.
Chapter 10, “Debugging Data-Bound Controls,” takes a close look at some of the
common mistakes that can be made while using data-bound server controls.
DataGrid, DataList, and the XML data binding are a few of the topics covered.
Chapter 11, “Debugging User Controls,” covers many of the issues that you might
encounter while building user controls. The basics are covered, as are properties,
methods, and dynamic user control issues.
Chapter 12, “Caching Issues and Debugging,” delves into the types of issues that
crop up when leveraging caching in ASP.NET web applications. Highlights of this
chapter include cache dependencies, output caching, the caching API, expiration
callbacks, and declarative attributes.
Part IV: Debugging Related Technologies
Chapter 13, “Debugging Web Services,” uncovers and offers solutions for many of
the problems that you might encounter while building and implementing web
services. Several different error messages are discussed. Some of the other topics
covered are the XMLSerializer, SOAP, and UDDI.
Chapter 14, “Debugging .NET Components and HttpHandlers,” explains how to use
the StackTrace and TextWriterTraceLister objects to track down bugs in .NET
components and HttpHandlers. The chapter also discusses issues with interfaces
and state management.
New Riders - Debugging ASP.NET made by dotneter@teamfly
Chapter 15, “COM+ Issues,” covers the problems and issues that can occur when
setting up components to leverage COM+. It also covers some of the runtime
anomalies that might occur in the context of COM+.
Chapter 16, “Debugging ADO.NET,” helps you interpret ADO.NET error messages,
as well as track down bugs associated with each of the new ADO.NET objects.
Database permissions issues are also briefly discussed.
Appendix
Appendix A, “Issues That Arise When Migrating from ASP to ASP.NET”, is a collection
of issues that you are likely to run into while porting your traditional ASP web
applications to ASP.NET. The new declaration syntax for script blocks is discussed
along with many other useful topics, such as page declaratives, events, and cookies.
Source Code and Errata
All the source code provided in this book can be downloaded from
www.debuggingasp.net. Also available at the site are any corrections and updates
to the text. The errata will be updated as issues are discovered and corrected
Conventions
This book follows these typographical conventions:
• Listings, functions, variables, and other “computer language” are set in a
fixed-pitch font—for example, “you should note the addition of the
RUNAT="server" parameter added to each control.”
• Code Continuation characthers are inserted into code when a line is too
wide to fit into margins.
Part I: ASP Debugging Basics
ASP Debugging Basics
1 Conceptual Framework
2 Traditional Approaches to Debugging in ASP
3 Debugging Strategies
4 Code Structure that Eases Debugging
New Riders - Debugging ASP.NET made by dotneter@teamfly
Chapter 1. Conceptual Framework
ASP.NET IS THE NEXT STAGE IN THE Active Server Page evolutionary process. It
extends the existing ASP framework into a whole new realm of power. Now you can
use ASP in a true three-tier architecture. With ASP.NET, you will be able to harness
the power of a true programming language, such as Visual Basic .NET or C#, instead
of VBScript. Is ASP.NET easy to use? Yes. Is it the same as ASP? Not even close. But
do not fret. In this chapter, we discuss some of the new features of the ASP.NET
framework and show how it differs from the ASP framework that you currently know
and love—or at least know and use. First we focus on server-side events, and then
we discuss new language options for use with the .NET version of ASP.
Understanding Server-Side Events
Server-side events are one of the fundamental changes in the ASP.NET architecture,
compared to older versions of ASP. These server-side events provide for a
programming model that is very similar to that of a traditional event-model Visual
Basic application. The code for these events is generally stored in a separate file
called a code-behind file. This allows for separation between your client and server
code, making things much more organized and structured. The code-behind file
simply contains everything that used to be contained within the <%%> files in your
old ASP pages; however, it is strictly code without any HTML.
Now let’s see what events are available to you on the server and how you can exploit
them to your advantage.
Differences from Client-Side Events
The major difference between client-side events and server-side events, obviously,
is that server-side events are handled on the server. This adds a great degree of
flexibility and power to the existing ASP framework. It also provides for far more
structured code.
Client-side events are part of the DHTML standard. They can be scripted in either
JavaScript or VBScript, and they are embedded directly in the HTML of your page.
These events allow you to trap button clicks, tab out of text boxes, detect the
New Riders - Debugging ASP.NET made by dotneter@teamfly
presence of the mouse cursor over certain controls, and handle other events that
involve a user changing something on the client-side interface.
Server-side events enable you to respond to similar events, such as changing a text
box or clicking a button, but, obviously, these are handled on the server instead of
the client. Because a trip to the server is required to activate these events, only a
small subset of events is available. These are generally limited to “click-type” events
rather than “mouse-over” events. Imagine having to make a trip to the server every
time your mouse moved 1 pixel!
Types of Server-Side Events
The types of events available on the server are very basic. For example, you will be
able to respond to button clicks, text box changes, and drop-down box changes.
Take a look here at what one of these events looks like on the server. Listing 1.1
shows a very simple ASP page that contains a form with a text box and a Submit
button.
Listing 1.1 Simple ASP Page with a Form
<HTML>
<BODY>
<FORM ACTION="form.aspx" METHOD="POST" RUNAT="server">
<INPUT TYPE="text" ID="txtText" RUNAT="server">
<INPUT TYPE="submit" ID="btnSubmit" RUNAT="server">
</FORM>
</BODY>
</HTML>
You will notice that this looks like some plain old HTML. However, you should note
the addition of the RUNAT="server" parameter added to each control. This enables
you to trap the events on the server and respond to them appropriately.
Now take a look at a server-side event associated with both the text box and the
Submit button. Listing 1.2 shows this in C#.
Listing 1.2 Server-Side Events in C#
public void btnSubmit_ServerClick(sender As Object, e as EventArgs)
{
txtText.Value = "You clicked the Submit button!";
}

New Riders - Debugging ASP.NET made by dotneter@teamfly
protected void txtText_TextChanged(object sender, EventArgs e)
{
Response.Write("TextChanged: " + txtText.Value);
}
Listing 1.3 shows the same event examples in Visual Basic.
Listing 1.3 Server-Side Events in Visual Basic .NET
Private Sub btnSubmit_ServerClick (sender As Object, e as EventArgs)
txtText.Value = "You clicked the Submit button!"
End Sub
Sub txtText_TextChanged(sender Object, e As EventArgs)
Response.Write("TextChanged: " & txtText.Value)
End Sub
In each of these examples, two separate events are being handled on the server: a
Submit button being clicked and the value of a text box being changed. Each event
that is handled on the server takes the Object and EventArgs arguments. The
object is simply the object that sent you the event (for example, the button, the text
box, and so on). The EventArgs argument contains any event- or object-specific
arguments that are relevant to the object being acted upon.
ASP.NET Page Life Cycle
The life cycle of an ASP.NET page is similar to that of an ASP page. However, you can
hook into a few new events as well. Table 1.1 runs down the events of an ASP.NET
page.
Table 1.1. Events in the Life Cycle of an ASP.NET Page
Event Description
Page_Init This is the first event to be called in the process. Here you should
provide any initialization code required for instantiation of the
page.
Page_Load At this point, control view state is restored. You can now read and
update control properties.
Page_PreRender This event is raised before any page content is sent to the
browser.
Page_Unload This is the very last event to be raised.At this point, you should
clean up everything you have used, including closing connections
and dereferencing objects.
New Riders - Debugging ASP.NET made by dotneter@teamfly
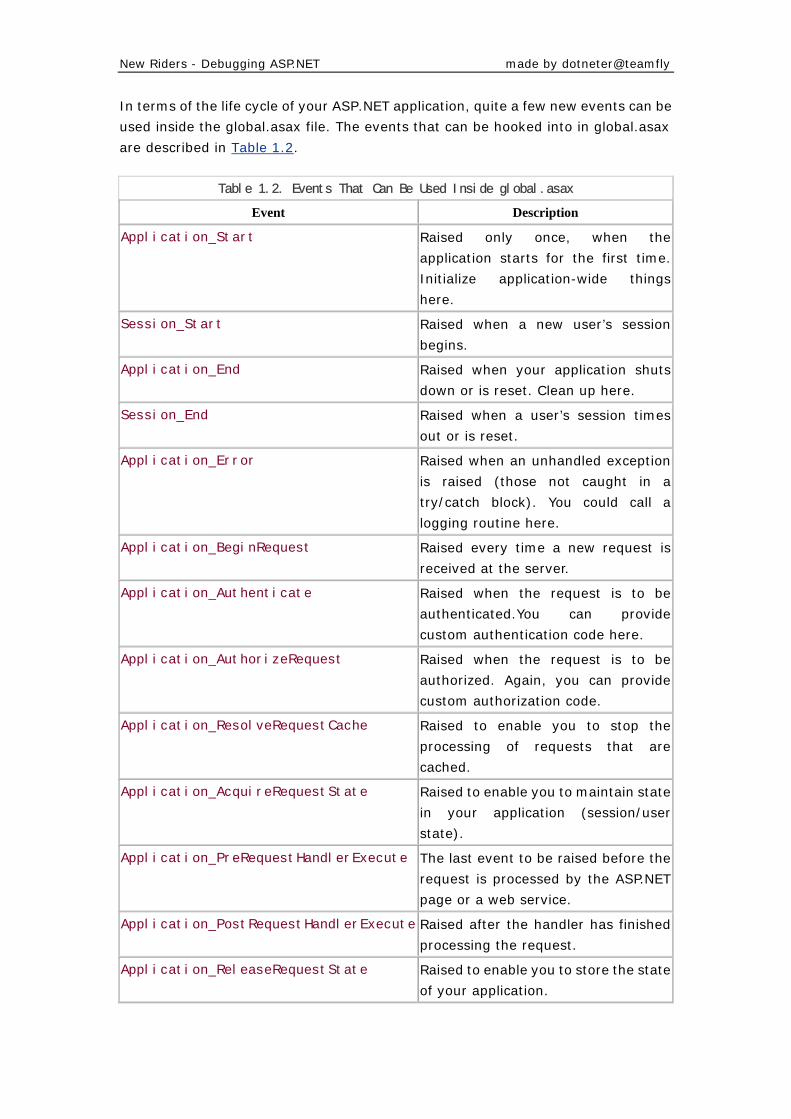
In terms of the life cycle of your ASP.NET application, quite a few new events can be
used inside the global.asax file. The events that can be hooked into in global.asax
are described in Table 1.2.
Table 1.2. Events That Can Be Used Inside global.asax
Event Description
Application_Start Raised only once, when the
application starts for the first time.
Initialize application-wide things
here.
Session_Start Raised when a new user’s session
begins.
Application_End Raised when your application shuts
down or is reset. Clean up here.
Session_End Raised when a user’s session times
out or is reset.
Application_Error Raised when an unhandled exception
is raised (those not caught in a
try/catch block). You could call a
logging routine here.
Application_BeginRequest Raised every time a new request is
received at the server.
Application_Authenticate Raised when the request is to be
authenticated.You can provide
custom authentication code here.
Application_AuthorizeRequest Raised when the request is to be
authorized. Again, you can provide
custom authorization code.
Application_ResolveRequestCache Raised to enable you to stop the
processing of requests that are
cached.
Application_AcquireRequestState Raised to enable you to maintain state
in your application (session/user
state).
Application_PreRequestHandlerExecute The last event to be raised before the
request is processed by the ASP.NET
page or a web service.
Application_PostRequestHandlerExecute Raised after the handler has finished
processing the request.
Application_ReleaseRequestState Raised to enable you to store the state
of your application.
New Riders - Debugging ASP.NET made by dotneter@teamfly
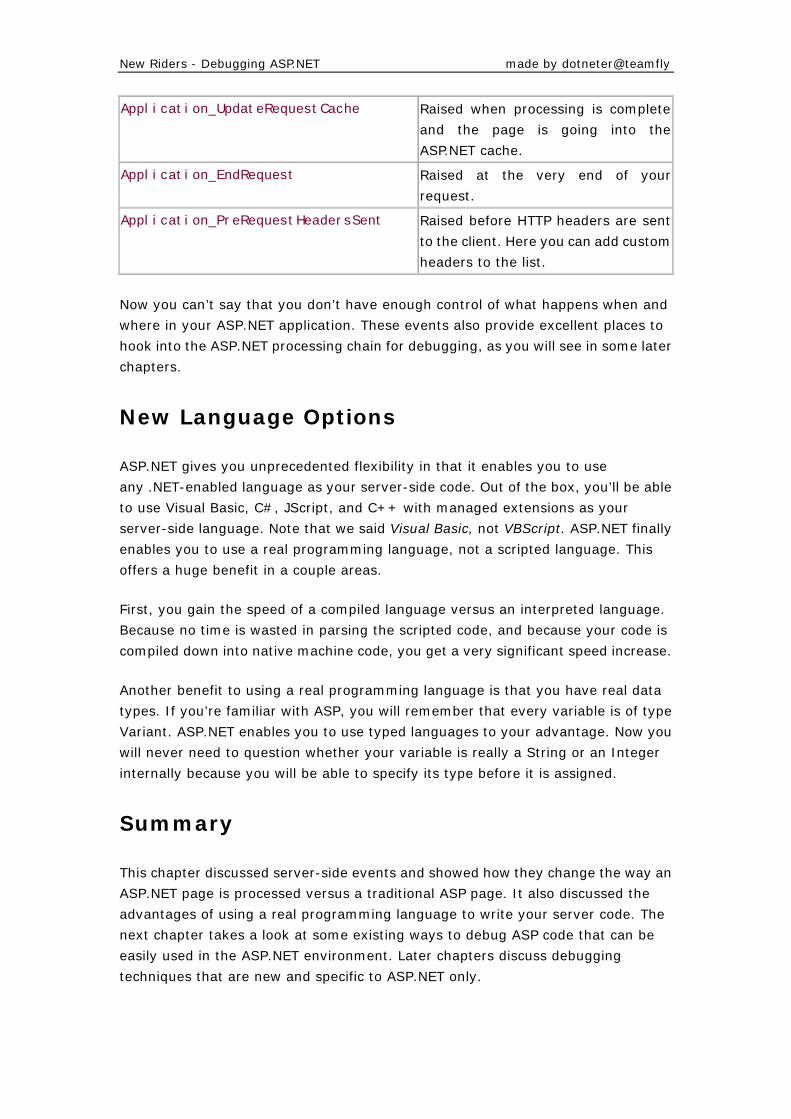
Application_UpdateRequestCache Raised when processing is complete
and the page is going into the
ASP.NET cache. Application_EndRequest Raised at the very end of your
request.
Application_PreRequestHeadersSent Raised before HTTP headers are sent
to the client. Here you can add custom
headers to the list.
Now you can’t say that you don’t have enough control of what happens when and
where in your ASP.NET application. These events also provide excellent places to
hook into the ASP.NET processing chain for debugging, as you will see in some later
chapters.
New Language Options
ASP.NET gives you unprecedented flexibility in that it enables you to use
any .NET-enabled language as your server-side code. Out of the box, you’ll be able
to use Visual Basic, C#, JScript, and C++ with managed extensions as your
server-side language. Note that we said Visual Basic, not VBScript. ASP.NET finally
enables you to use a real programming language, not a scripted language. This
offers a huge benefit in a couple areas.
First, you gain the speed of a compiled language versus an interpreted language.
Because no time is wasted in parsing the scripted code, and because your code is
compiled down into native machine code, you get a very significant speed increase.
Another benefit to using a real programming language is that you have real data
types. If you’re familiar with ASP, you will remember that every variable is of type
Variant. ASP.NET enables you to use typed languages to your advantage. Now you
will never need to question whether your variable is really a String or an Integer
internally because you will be able to specify its type before it is assigned.
Summary
This chapter discussed server-side events and showed how they change the way an
ASP.NET page is processed versus a traditional ASP page. It also discussed the
advantages of using a real programming language to write your server code. The
next chapter takes a look at some existing ways to debug ASP code that can be
easily used in the ASP.NET environment. Later chapters discuss debugging
techniques that are new and specific to ASP.NET only.
New Riders - Debugging ASP.NET made by dotneter@teamfly
Chapter 2. Traditional Approaches to
Debugging in ASP
IF YOU HAVE EVER USED A PREVIOUS version of ASP, you are already aware of the
nightmare that debugging a traditional ASP application can become. This chapter
explains some of the shortcomings of the original ASP technology, the potential
problems and pitfalls involved in debugging a typical ASP application, and a few
ways to overcome these obstacles. At the end of the chapter, you’ll find a debugging
object that can be used in tandem with a traditional ASP page to display a great deal
of useful information for tracking down those pesky errors in your ASP code.
Structure of Pre–ASP.NET Pages
As you will soon see, the structure of a page in previous versions of ASP is quite
different from that of an ASP.NET page. Pre–ASP.NET pages are severely lacking in
the structure department. Although there are a few ways to make your ASP code
slightly structured, several lines become blurred. This section talks about a few of
the common problems that developers run into when developing with previous
versions of ASP.
The Great Monolith
So how do you currently write ASP pages? Well, if you’re anything like us—and let’s
hope that you’re not, in some respects—your ASP pages have the structure of a
50-story skyscraper made out of Popsicle sticks. Now, don’t get us wrong: A certain
degree of structure can be attained with standard ASP programming, but it is not
the type of structure and organization that is obtained with a real programming
language. The fact is, there just isn’t any great way to write extremely structured
code in ASP like there is in Visual Basic or C#.
For example, if you have a series of “global” functions that are used throughout your
application, you probably shove them into an .asp file and use the #include file
directive to bring them into the rest of your .asp pages to avoid code repetition.
Although this might get the job done, you might not realize what is happening
behind the scenes with the script parser.
New Riders - Debugging ASP.NET made by dotneter@teamfly
By including pages in this manner, they simply get tacked on at the point where you
include them. This means that the entire included page is parsed and processed
even if only a single constant declaration, for example, is used out of it. Luckily,
because ASP.NET uses true, compiled languages, it gets you out of this bind.
Pasta Nightmare
You probably have heard the expression “spaghetti code,” which is code that lacks
structure and clear separation among the main elements. Traditional ASP code is
the epitome of spaghetti code. Code does not get much more tangled up in any
language quite like it does in ASP. The main reason for this is the lack of a distinct
separation between client-side presentation code and server-side business/logic
code.
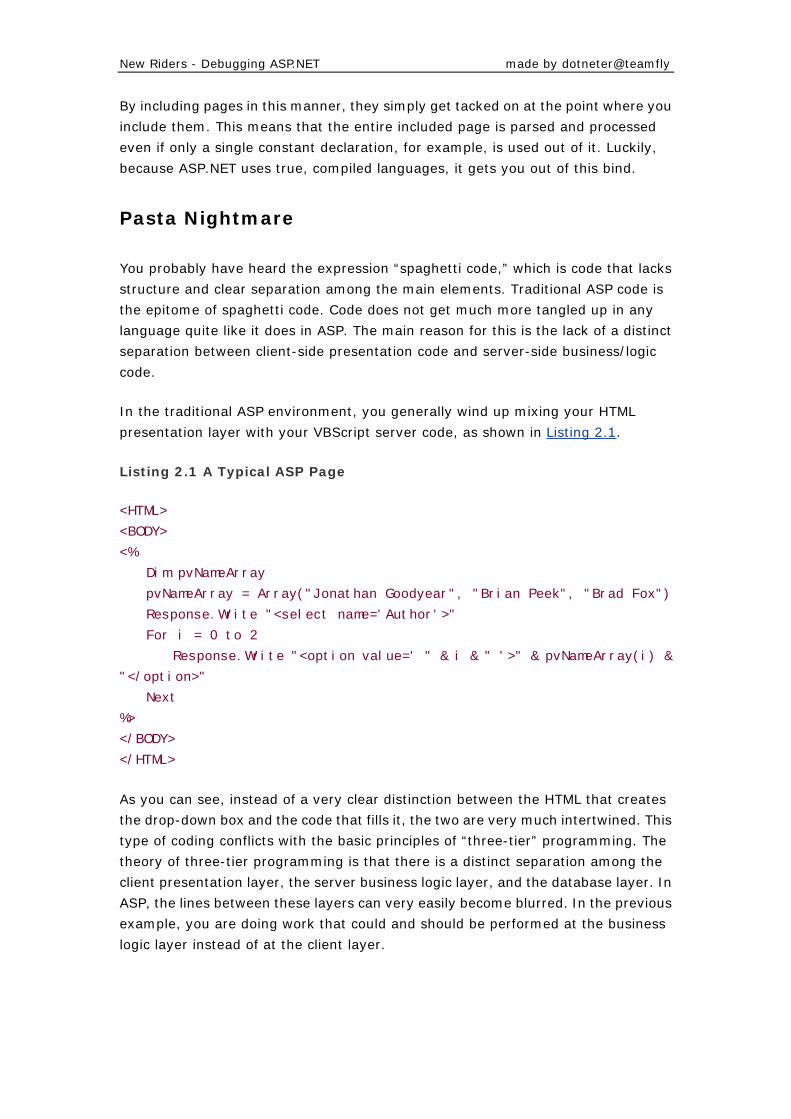
In the traditional ASP environment, you generally wind up mixing your HTML
presentation layer with your VBScript server code, as shown in Listing 2.1.
Listing 2.1 A Typical ASP Page
<HTML>
<BODY>
<%
Dim pvNameArray
pvNameArray = Array("Jonathan Goodyear", "Brian Peek", "Brad Fox")
Response.Write "<select name='Author'>"
For i = 0 to 2
Response.Write "<option value=' " & i & " '>" & pvNameArray(i) &
"</option>"
Next
%>
</BODY>
</HTML>
As you can see, instead of a very clear distinction between the HTML that creates
the drop-down box and the code that fills it, the two are very much intertwined. This
type of coding conflicts with the basic principles of “three-tier” programming. The
theory of three-tier programming is that there is a distinct separation among the
client presentation layer, the server business logic layer, and the database layer. In
ASP, the lines between these layers can very easily become blurred. In the previous
example, you are doing work that could and should be performed at the business
logic layer instead of at the client layer.
New Riders - Debugging ASP.NET made by dotneter@teamfly
The Inclusion Conclusion
Code reuse is a very important part of writing any type of application. No one wants
to rewrite the same code to perform the same function time and time again. Most
programming languages provide a way for developers to include libraries of
functions in their applications, saving them from having to reinvent the wheel every
time they need to do something simple. ASP allows for something similar, but it has
one very major flaw.
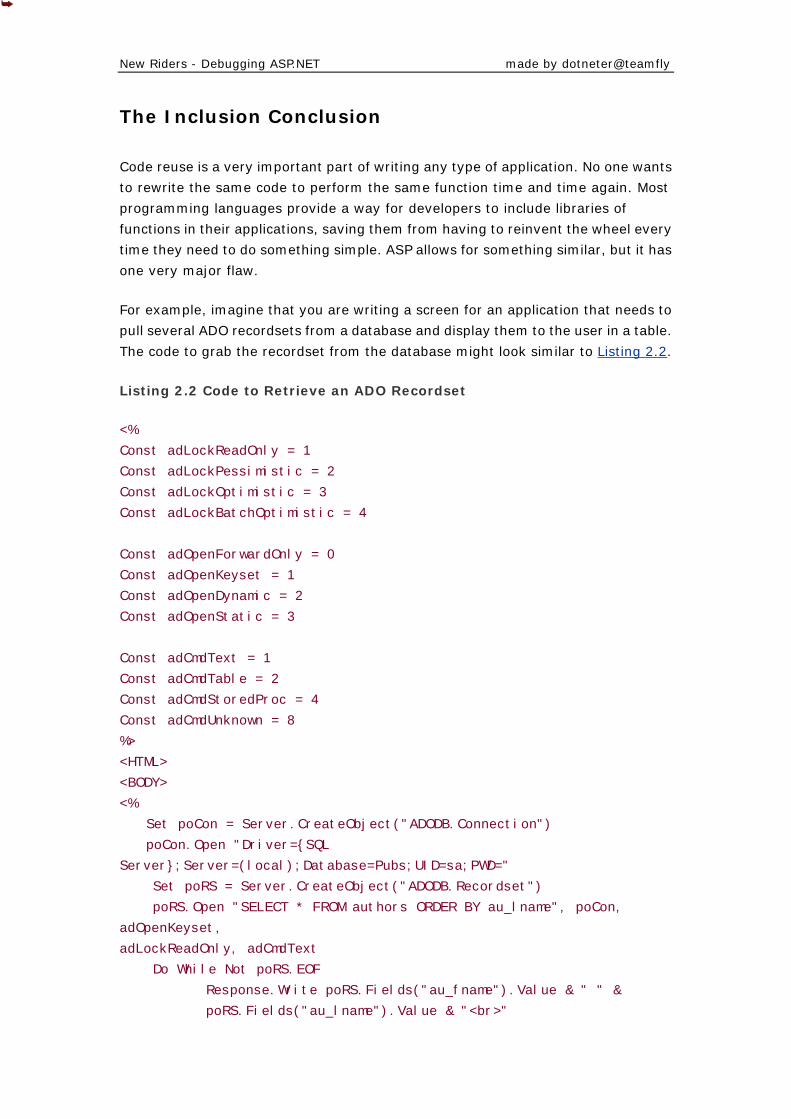
For example, imagine that you are writing a screen for an application that needs to
pull several ADO recordsets from a database and display them to the user in a table.
The code to grab the recordset from the database might look similar to Listing 2.2.
Listing 2.2 Code to Retrieve an ADO Recordset
<%
Const adLockReadOnly = 1
Const adLockPessimistic = 2
Const adLockOptimistic = 3
Const adLockBatchOptimistic = 4
Const adOpenForwardOnly = 0
Const adOpenKeyset = 1
Const adOpenDynamic = 2
Const adOpenStatic = 3
Const adCmdText = 1
Const adCmdTable = 2
Const adCmdStoredProc = 4
Const adCmdUnknown = 8
%>
<HTML>
<BODY>
<%
Set poCon = Server.CreateObject("ADODB.Connection")
poCon.Open "Driver={SQL
Server};Server=(local);Database=Pubs;UID=sa;PWD="
Set poRS = Server.CreateObject("ADODB.Recordset")
poRS.Open "SELECT * FROM authors ORDER BY au_lname", poCon,
adOpenKeyset,
adLockReadOnly, adCmdText
Do While Not poRS.EOF
Response.Write poRS.Fields("au_fname").Value & " " &
poRS.Fields("au_lname").Value & "<br>"
New Riders - Debugging ASP.NET made by dotneter@teamfly
poRS.MoveNext
Loop
%>
</BODY>
</HTML>
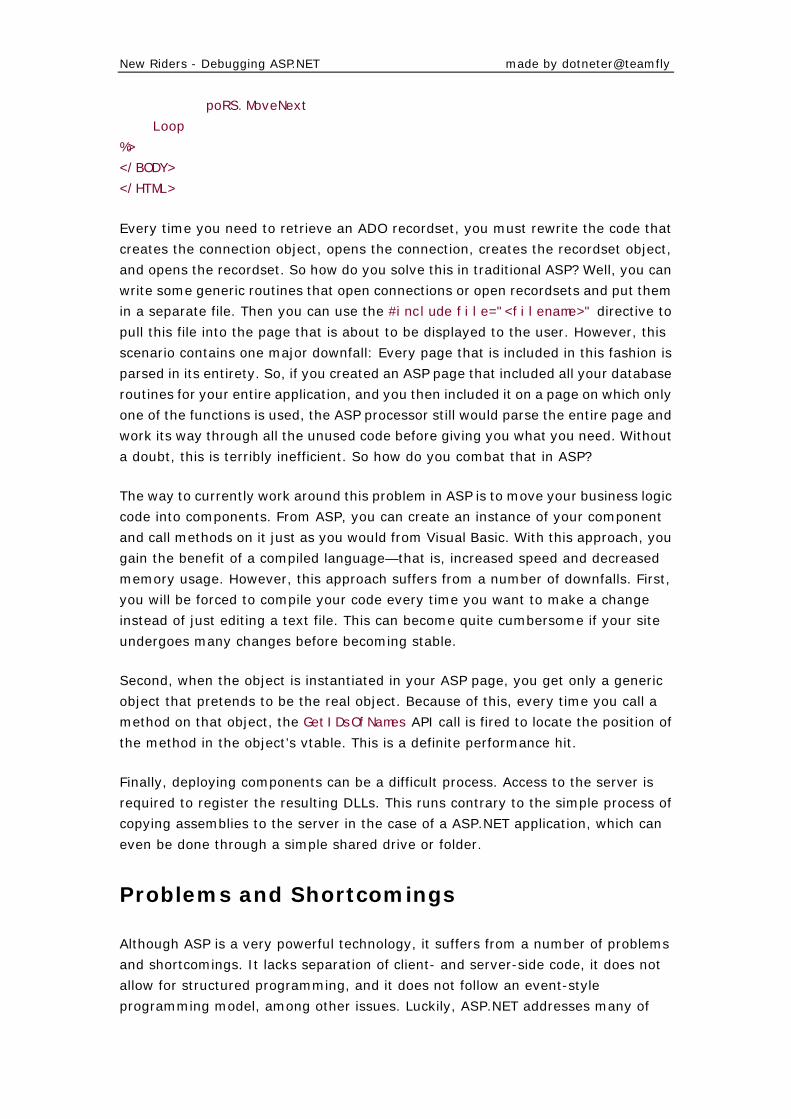
Every time you need to retrieve an ADO recordset, you must rewrite the code that
creates the connection object, opens the connection, creates the recordset object,
and opens the recordset. So how do you solve this in traditional ASP? Well, you can
write some generic routines that open connections or open recordsets and put them
in a separate file. Then you can use the #include file="<filename>" directive to
pull this file into the page that is about to be displayed to the user. However, this
scenario contains one major downfall: Every page that is included in this fashion is
parsed in its entirety. So, if you created an ASP page that included all your database
routines for your entire application, and you then included it on a page on which only
one of the functions is used, the ASP processor still would parse the entire page and
work its way through all the unused code before giving you what you need. Without
a doubt, this is terribly inefficient. So how do you combat that in ASP?
The way to currently work around this problem in ASP is to move your business logic
code into components. From ASP, you can create an instance of your component
and call methods on it just as you would from Visual Basic. With this approach, you
gain the benefit of a compiled language—that is, increased speed and decreased
memory usage. However, this approach suffers from a number of downfalls. First,
you will be forced to compile your code every time you want to make a change
instead of just editing a text file. This can become quite cumbersome if your site
undergoes many changes before becoming stable.
Second, when the object is instantiated in your ASP page, you get only a generic
object that pretends to be the real object. Because of this, every time you call a
method on that object, the GetIDsOfNames API call is fired to locate the position of
the method in the object’s vtable. This is a definite performance hit.
Finally, deploying components can be a difficult process. Access to the server is
required to register the resulting DLLs. This runs contrary to the simple process of
copying assemblies to the server in the case of a ASP.NET application, which can
even be done through a simple shared drive or folder.
Problems and Shortcomings
Although ASP is a very powerful technology, it suffers from a number of problems
and shortcomings. It lacks separation of client- and server-side code, it does not
allow for structured programming, and it does not follow an event-style
programming model, among other issues. Luckily, ASP.NET addresses many of
New Riders - Debugging ASP.NET made by dotneter@teamfly
these problems and turns ASP into an even more powerful and easy-to-use
technology for today’s high-powered web-based applications.
No Events
If you’re a Visual Basic programmer, you are quite familiar with event-based
programming. For example, if you drop a button on a form in Visual Basic, then
when a user clicks it, it generates a Click event that you can respond to and act on
appropriately. In ASP, this type of programming model is nonexistent, even though
the same types of events are taking place in your web page–based application. That
is, buttons are being clicked, users are entering and leaving fields, and so on. Why
shouldn’t you have the capability to answer these events in a similar manner? This
is one area in which ASP.NET really shines.
Includes Eat Up Memory
As discussed in the previous section,“includes” are a horribly inefficient way to do
something that is inherently very simple. As an ASP programmer, you should be
able to link a library of functions into the main application without a detrimental
performance hit. Most programming languages allow for dynamically or statically
linked libraries that contain commonly called functions directly to the application
only once, in the case of static linking, or that allow them to be called from an
external binary file in the scenario of dynamic linking.
An excellent example of a bloated include file is the ADOVBS.INC file provided by
Microsoft, which defines an ASP interface for ADO. This file is huge, and most people
will use only a few items out of the myriad of things it declares. Even though you
might use only those very few items, however, the entire page is parsed every
single time it is referenced.
In a real programming language, such as Visual Basic or C, you would compile
against a library containing pointers for the real versions of the functions in
precompiled DLLs. In this way, you are never wasting time accessing any portion of
the ADO library that you don’t explicitly request.
Scripted Language Versus Compiled Language
One of the major problems with ASP is that it is a scripted language rather than a
compiled language. This involves an enormous and severe performance hit, for a
number of reasons.

New Riders - Debugging ASP.NET made by dotneter@teamfly
First, the script parser needs to parse the entire page top to bottom before any of
the code can be executed. Second, when the code is parsed, it is not generated into
a native machine code that can be executed directly every time thereafter. This
process must be repeated every single time that the page is rendered, which is
obviously incredibly inefficient.
Old Strategies That Still Do the Job Well
Although a variety of new debugging features in the Visual Studio .NET IDE can be
used in debugging your ASP.NET applications, some old methods and tricks from
the days of ASP are still worthwhile.
Using the Response Object
Previous versions of ASP are built on the foundation of five objects: Response,
Request, Server, Application, and Session. The Response object is used to send
information from the server down to the client’s browser. The Write method of the
Response object can be used to dynamically write content to the client’s browser.
This is one of the easiest ways to debug standard ASP pages and is still applicable in
the new architecture.
The problem with this approach is that it isn’t very pretty. At the end of debugging
a long logic process, you will wind up with a pile of if/then statements and
Response.Write() calls littered throughout your .asp pages. This output can get
lost inside the HTML if it’s not placed properly. A better approach is to create a
specific debugging object that outputs important and pertinent information but
handles it in a much nicer and cleaner fashion.You will write an object like this later
in the chapter so that you can use it very easily in your ASP debugging procedures.
Using the Server Object
Internet Information Server (IIS) 5.0 included a new method on the Server object,
called GetLastError. This method returns an ASPError object that contains almost
everything you need to know about the error except how to correct it. Table 2.1
shows what properties are available on the ASPError object.
Table 2.1. Properties of the ASPError Object
ASP Code Error Code from IIS
Number COM error code
Source Source of line that caused error
Category Type of error (ASP, script, object)
New Riders - Debugging ASP.NET made by dotneter@teamfly
File ASP file where error occurred
Line Line number where error occurred
Column Column where error occurred
Description A text description of the error
ASPDescription Detailed description if error was ASP-related
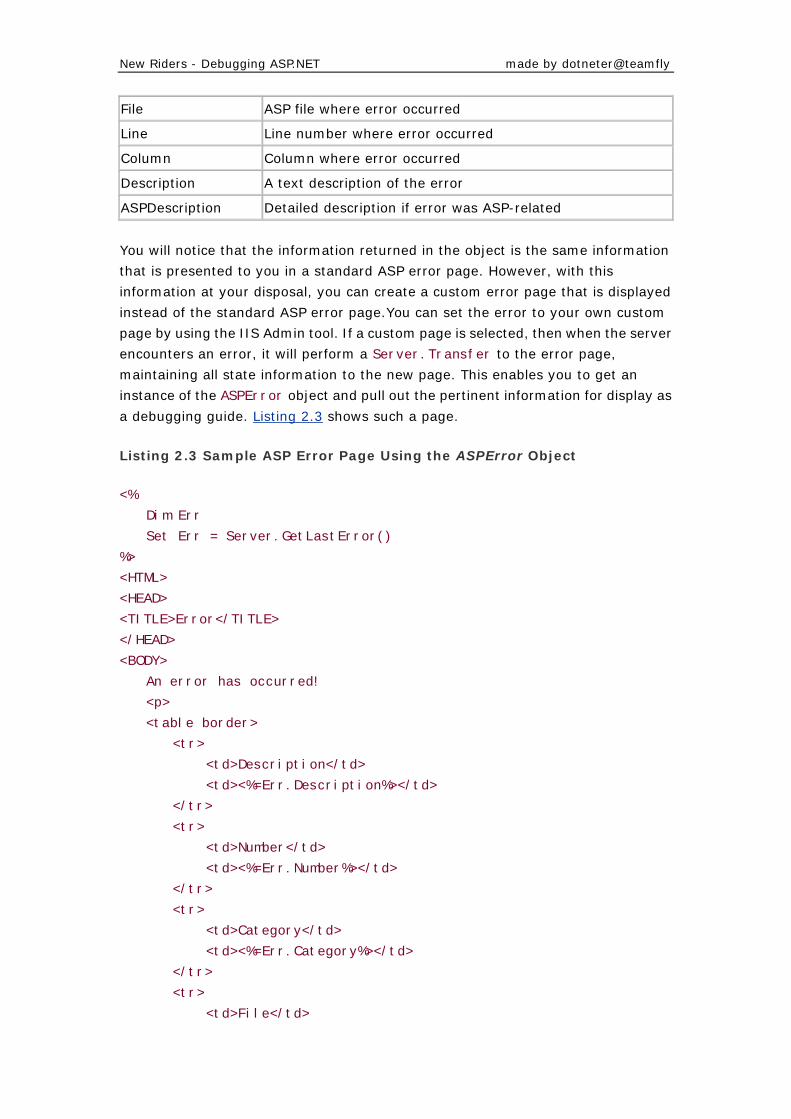
You will notice that the information returned in the object is the same information
that is presented to you in a standard ASP error page. However, with this
information at your disposal, you can create a custom error page that is displayed
instead of the standard ASP error page.You can set the error to your own custom
page by using the IIS Admin tool. If a custom page is selected, then when the server
encounters an error, it will perform a Server.Transfer to the error page,
maintaining all state information to the new page. This enables you to get an
instance of the ASPError object and pull out the pertinent information for display as
a debugging guide. Listing 2.3 shows such a page.
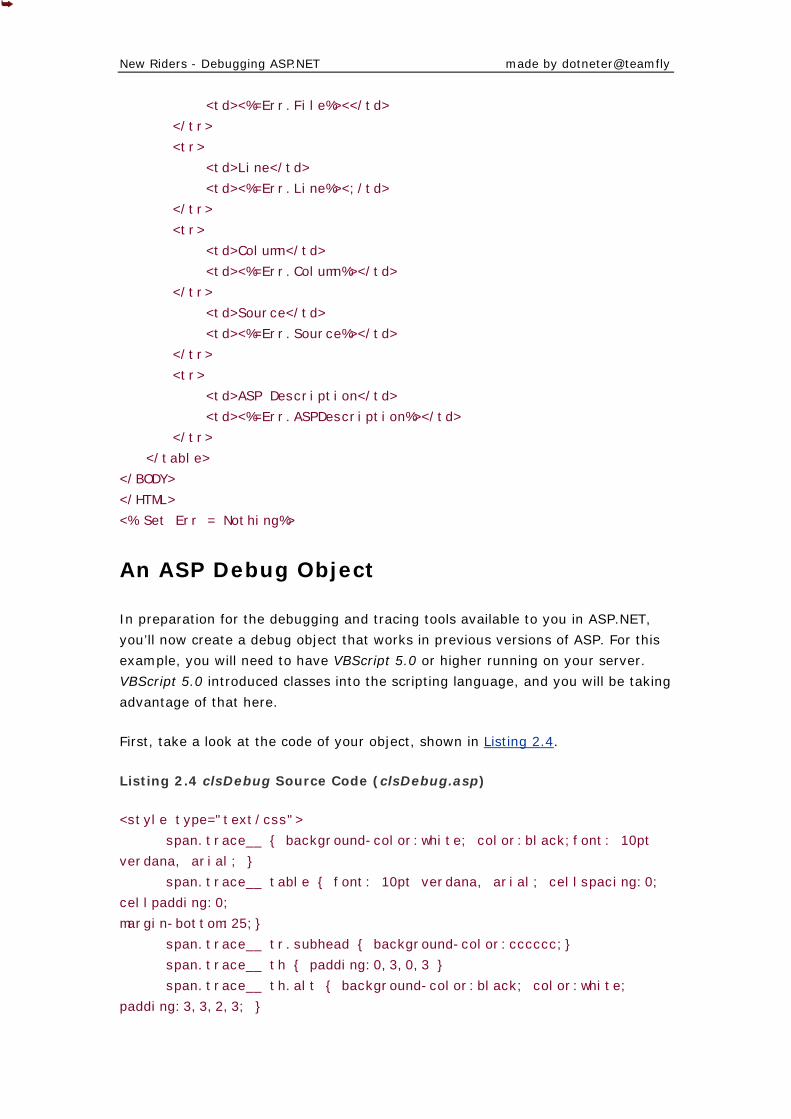
Listing 2.3 Sample ASP Error Page Using the ASPError Object
<%
Dim Err
Set Err = Server.GetLastError()
%>
<HTML>
<HEAD>
<TITLE>Error</TITLE>
</HEAD>
<BODY>
An error has occurred!
<p>
<table border>
<tr>
<td>Description</td>
<td><%=Err.Description%></td>
</tr>
<tr>
<td>Number</td>
<td><%=Err.Number%></td>
</tr>
<tr>
<td>Category</td>
<td><%=Err.Category%></td>
</tr>
<tr>
<td>File</td>
New Riders - Debugging ASP.NET made by dotneter@teamfly
<td><%=Err.File%><</td>
</tr>
<tr>
<td>Line</td>
<td><%=Err.Line%><;/td>
</tr>
<tr>
<td>Column</td>
<td><%=Err.Column%></td>
</tr>
<td>Source</td>
<td><%=Err.Source%></td>
</tr>
<tr>
<td>ASP Description</td>
<td><%=Err.ASPDescription%></td>
</tr>
</table>
</BODY>
</HTML>
<% Set Err = Nothing%>
An ASP Debug Object
In preparation for the debugging and tracing tools available to you in ASP.NET,
you’ll now create a debug object that works in previous versions of ASP. For this
example, you will need to have VBScript 5.0 or higher running on your server.
VBScript 5.0 introduced classes into the scripting language, and you will be taking
advantage of that here.
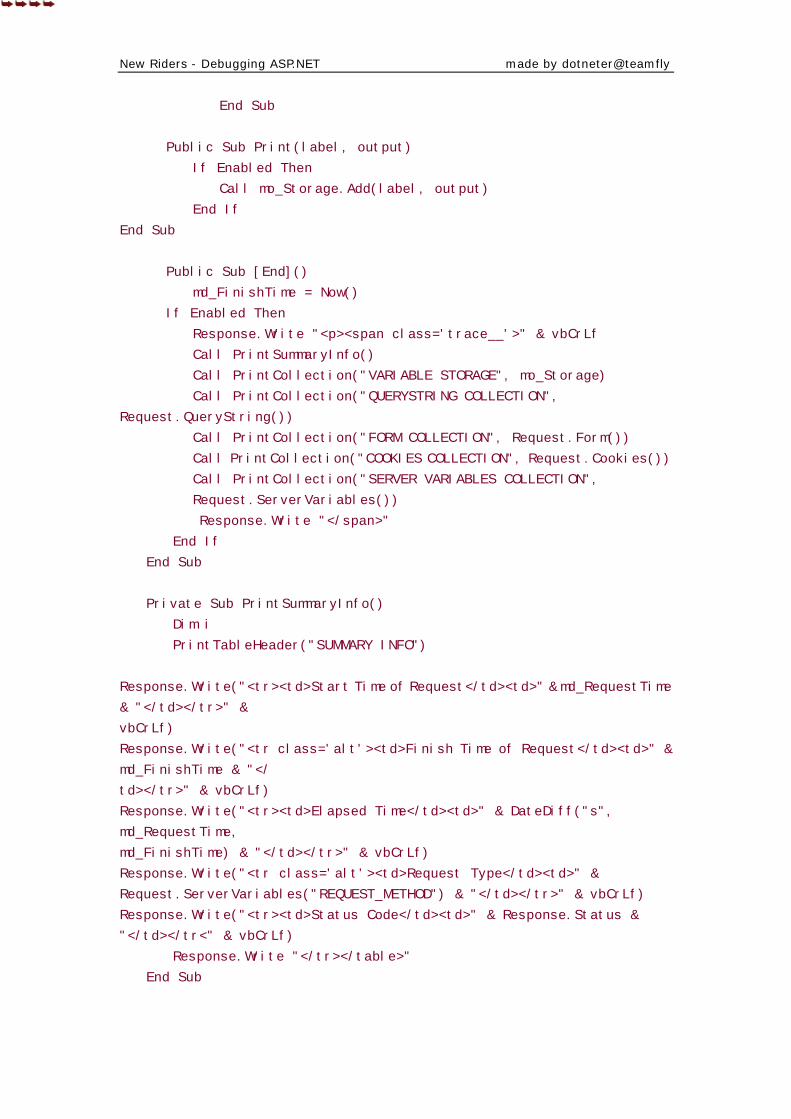
First, take a look at the code of your object, shown in Listing 2.4.
Listing 2.4 clsDebug Source Code (clsDebug.asp)
<style type="text/css">
span.trace__ { background-color:white; color:black;font: 10pt
verdana, arial; }
span.trace__ table { font: 10pt verdana, arial; cellspacing:0;
cellpadding:0;
margin-bottom:25;}
span.trace__ tr.subhead { background-color:cccccc;}
span.trace__ th { padding:0,3,0,3 }
span.trace__ th.alt { background-color:black; color:white;
padding:3,3,2,3; }

New Riders - Debugging ASP.NET made by dotneter@teamfly
span.trace__ td { padding:0,3,0,3 }
span.trace__ tr.alt { background-color:eeeeee }
span.trace__ h1 { font: 24pt verdana, arial; margin:0,0,0,0}
span.trace__ h2 { font: 18pt verdana, arial; margin:0,0,0,0}
span.trace__ h3 { font: 12pt verdana, arial; margin:0,0,0,0}
span.trace__ th a { color:darkblue; font: 8pt verdana, arial; }
span.trace__ a { color:darkblue;text-decoration:none }
span.trace__ a:hover
{ color:darkblue;text-decoration:underline; }
span.trace__ div.outer { width:90%; margin:15,15,15,15}
span.trace__ table.viewmenu td { background-color:006699;
color:white; padding:0,5,
0,5; }
span.trace__ table.viewmenu td.end { padding:0,0,0,0; }
span.trace__ table.viewmenu a {color:white; font: 8pt
verdana,arial; }
span.trace__ table.viewmenu a:hover {color:white; font: 8pt
verdana, arial; }
span.trace__ a.tinylink {color:darkblue; font: 8pt verdana, arial;
text-decoration:underline;}
span.trace__ a.link {color:darkblue; text-decoration:underline;}
span.trace__ div.buffer {padding-top:7; padding-bottom:17;}
span.trace__ .small { font: 8pt verdana, arial }
span.trace__ table td { padding-right:20 }
span.trace__ table td.nopad { padding-right:5 }
</style>
<%
Class clsDebug
Dim mb_Enabled
Dim md_RequestTime
Dim md_FinishTime
Dim mo_Storage
Public Default Property Get Enabled()
Enabled = mb_Enabled
End Property
Public Property Let Enabled(bNewValue)
mb_Enabled = bNewValue
End Property
Private Sub Class_Initialize()
md_RequestTime = Now()
Set mo_Storage =
Server.CreateObject("Scripting.Dictionary")
New Riders - Debugging ASP.NET made by dotneter@teamfly
End Sub
Public Sub Print(label, output)
If Enabled Then
Call mo_Storage.Add(label, output)
End If
End Sub
Public Sub [End]()
md_FinishTime = Now()
If Enabled Then
Response.Write "<p><span class='trace__'>" & vbCrLf
Call PrintSummaryInfo()
Call PrintCollection("VARIABLE STORAGE", mo_Storage)
Call PrintCollection("QUERYSTRING COLLECTION",
Request.QueryString())
Call PrintCollection("FORM COLLECTION", Request.Form())
Call PrintCollection("COOKIES COLLECTION", Request.Cookies())
Call PrintCollection("SERVER VARIABLES COLLECTION",
Request.ServerVariables())
Response.Write "</span>"
End If
End Sub
Private Sub PrintSummaryInfo()
Dim i
PrintTableHeader("SUMMARY INFO")
Response.Write("<tr><td>Start Time of Request</td><td>" & md_RequestTime
& "</td></tr>" &
vbCrLf)
Response.Write("<tr class='alt'><td>Finish Time of Request</td><td>" &
md_FinishTime & "</
td></tr>" & vbCrLf)
Response.Write("<tr><td>Elapsed Time</td><td>" & DateDiff("s",
md_RequestTime,
md_FinishTime) & "</td></tr>" & vbCrLf)
Response.Write("<tr class='alt'><td>Request Type</td><td>" &
Request.ServerVariables("REQUEST_METHOD") & "</td></tr>" & vbCrLf)
Response.Write("<tr><td>Status Code</td><td>" & Response.Status &
"</td></tr<" & vbCrLf)
Response.Write "</tr></table>"
End Sub
New Riders - Debugging ASP.NET made by dotneter@teamfly
Private Sub PrintCollection(Byval Name, ByVal Collection)
Dim vItem
Dim i
PrintTableHeader(Name)
For Each vItem In Collection
If i mod 2 = 0 Then
Response.Write("<tr>")
else
Response.Write("<tr class='alt'>")
end if
Response.Write("<td>" & vItem & "</td><td>" & Collection(vItem)
& ">/td></
tr>" & vbCrLf)
i = i + 1
Next
Response.Write "</tr></table>"
End Sub
Private Sub Class_Terminate()
Set mo_Storage = Nothing
End Sub
Private Sub PrintTableHeader(ByVal Name)
Response.Write "<table cellpadding='0' width='100%' cellspacing='0'>" &
vbCrLf
Response.Write "<tr><th class='alt' colspan='10' align='left'><h3><b>"
& Name & "</b></
h3></th></tr>" & vbCrLf
Response.Write "<tr class='subhead' align='left'><th
width='10%'>Name</th><th
width='10%'>Value</th></tr>" & vbcrlf
End Sub
End Class
%>
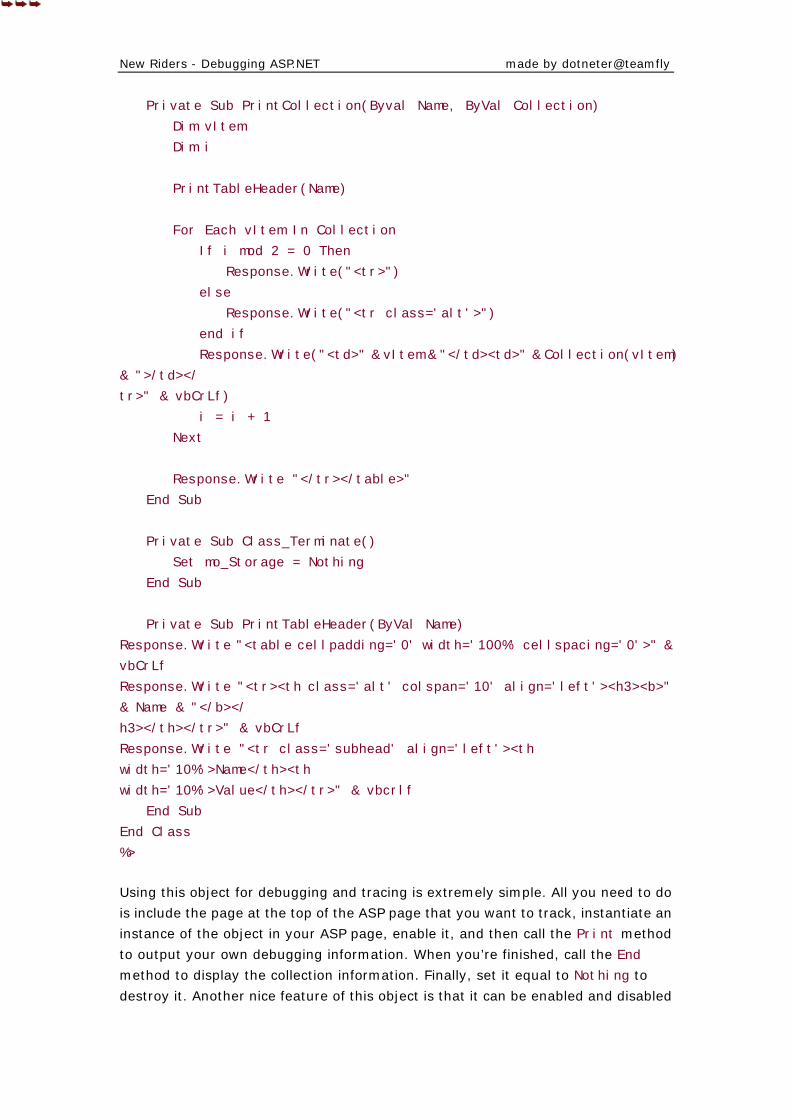
Using this object for debugging and tracing is extremely simple. All you need to do
is include the page at the top of the ASP page that you want to track, instantiate an
instance of the object in your ASP page, enable it, and then call the Print method
to output your own debugging information. When you’re finished, call the End
method to display the collection information. Finally, set it equal to Nothing to
destroy it. Another nice feature of this object is that it can be enabled and disabled
New Riders - Debugging ASP.NET made by dotneter@teamfly
at will. If you tossed in a few Debug.Print calls for testing and did not want them
output for a demo, for example, you could simply disable the debug object on that
page to stop the output from appearing instead of manually removing all the lines
that reference it.
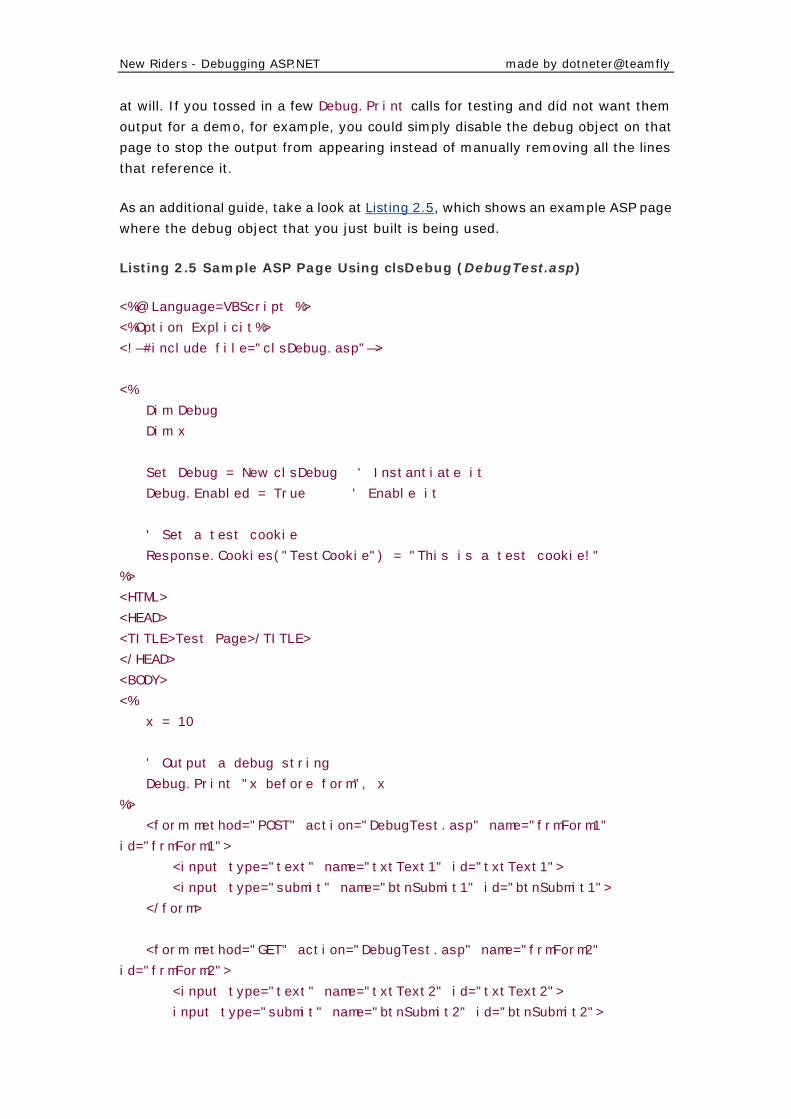
As an additional guide, take a look at Listing 2.5, which shows an example ASP page
where the debug object that you just built is being used.
Listing 2.5 Sample ASP Page Using clsDebug (DebugTest.asp)
<%@ Language=VBScript %>
<%Option Explicit%>
<!—#include file="clsDebug.asp"—>
<%
Dim Debug
Dim x
Set Debug = New clsDebug ' Instantiate it
Debug.Enabled = True ' Enable it
' Set a test cookie
Response.Cookies("TestCookie") = "This is a test cookie!"
%>
<HTML>
<HEAD>
<TITLE>Test Page>/TITLE>
</HEAD>
<BODY>
<%
x = 10
' Output a debug string
Debug.Print "x before form", x
%>
<form method="POST" action="DebugTest.asp" name="frmForm1"
id="frmForm1">
<input type="text" name="txtText1" id="txtText1">
<input type="submit" name="btnSubmit1" id="btnSubmit1">
</form>
<form method="GET" action="DebugTest.asp" name="frmForm2"
id="frmForm2">
<input type="text" name="txtText2" id="txtText2">
input type="submit" name="btnSubmit2" id="btnSubmit2">
New Riders - Debugging ASP.NET made by dotneter@teamfly
</form>
<%
x = 20
Debug.Print "x after form", x
' Close it all up
Debug.End
Set Debug = Nothing
%>
</BODY>
</HTML>
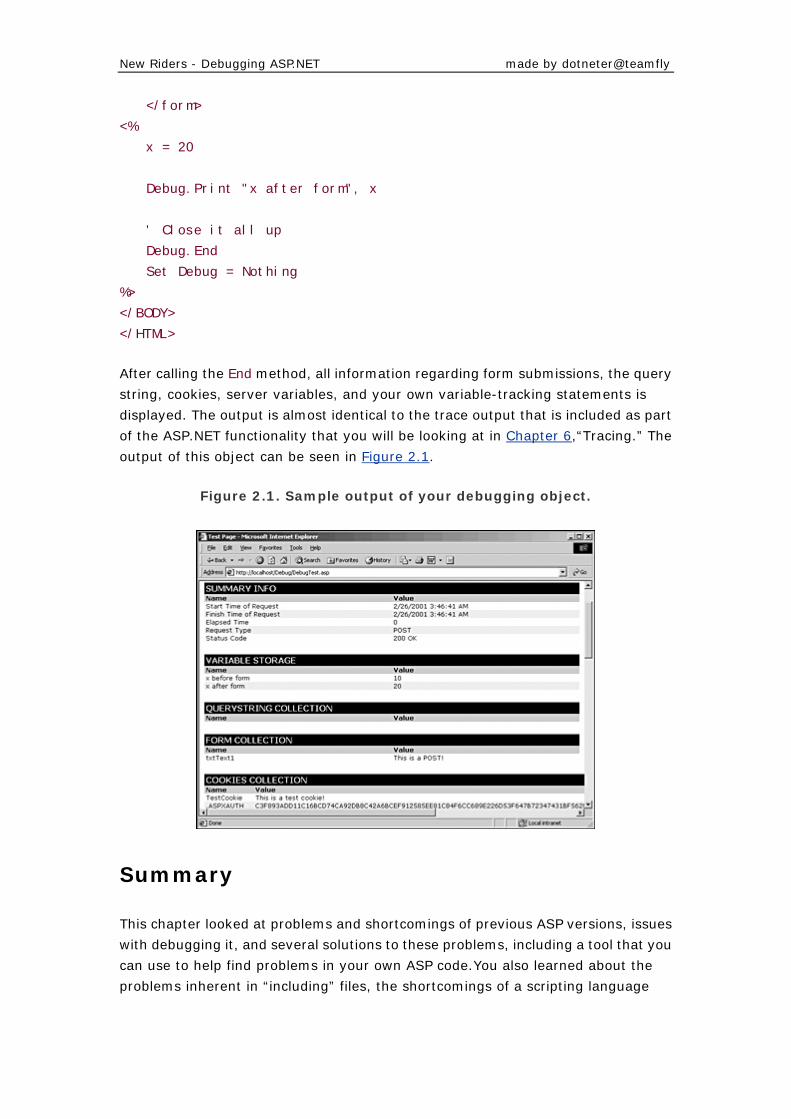
After calling the End method, all information regarding form submissions, the query
string, cookies, server variables, and your own variable-tracking statements is
displayed. The output is almost identical to the trace output that is included as part
of the ASP.NET functionality that you will be looking at in Chapter 6,“Tracing.” The
output of this object can be seen in Figure 2.1.
Figure 2.1. Sample output of your debugging object.
Summary
This chapter looked at problems and shortcomings of previous ASP versions, issues
with debugging it, and several solutions to these problems, including a tool that you
can use to help find problems in your own ASP code.You also learned about the
problems inherent in “including” files, the shortcomings of a scripting language
New Riders - Debugging ASP.NET made by dotneter@teamfly
versus a compiled language, and the lack of an event programming model in the
existing ASP framework.
The next chapter discusses some general strategies for debugging applications.
With this information in mind, you will be ready to tackle the brave new world of
ASP.NET debugging.
Chapter 3. Debugging Strategies
DEBUGGING WEB APPLICATIONS IS AN ART very much like warfare. Before
entering into a battle, you create a plan of attack and then execute it to defeat your
enemy. Few would consider such an engagement without a plan—thoughts of doing
so conjure up images of soldiers blindly running at the enemy and throwing
themselves into the path of gunfire.Yet, many developers attempt to engage in a
debugging battle without any such plan or method.
Debugging under these circumstances might consist of randomly attempting
different things, in vain hope that one of them (or a random combination of them)
will solve the problem. Although sometimes this works (hey, somebody wins the
lottery), it all too often leads to long, frustrating hours yielding little, if any,
meaningful progress. Even a slightly more intuitive approach, such as basing your
debugging efforts on past experiences, falls short of the ideal. This is because
working with newer technologies reduces the effectiveness of the experience factor.
We need more than a collection of memorized “fixes” to problems. We need a
complete process to track down and eliminate bugs in code.
In this chapter, we introduce some tried-and-true methods for debugging web
applications. These methods link together to form a complete approach to
narrowing and eliminating those hard-to-find problems. They all aim to reduce the
amount of time required to find bugs in code. The chapter is oriented more toward
overall methodology than technical implementation, so we will keep the examples
simple. We will demonstrate more complex examples of each of these methods, as
well as the overall approach, throughout the book as we go into more detail on
debugging specific parts of ASP.NET. We will be sure to mention which method or
methods we are using so that you can keep track of them. Note also that the
following methods are designed mostly to track down semantic errors. These are
runtime or logic errors. Syntax or compile-time errors will be discussed in the
context of each technology covered in the following chapters.

New Riders - Debugging ASP.NET made by dotneter@teamfly
Tier Sandboxes
The first question that must be answered to fix a bug is,“Where is it?” Most ASP.NET
web applications have three (or more) tiers to them, so finding a bug (particularly a
subtle one) in such a large system can at first appear to be a daunting task. The first
thing that you can do to get a better handle on the situation is break the system into
parts. Because web applications are typically broken into logical tiers already, it only
makes sense to use this as the first level of debugging segmentation. For the
purposes of this book, we assume a system containing three tiers: a data tier, a
business object tier, and a user interface (for example, web page) tier.You can then
test each tier and eliminate the ones that are not contributing to the problem. This
will leave the tier(s) that you need to concentrate more debugging effort on.
Data Tier
In the context of an ASP.NET web application, the data tier is usually represented by
a relational database, but it could also be represented by another data source, such
as an Exchange server or Directory Services. Regardless of the data source, to
eliminate the data tier from the list of suspects, you must determine three things.
The first is whether the data is set up properly in the data source. We can’t tell you
how many times we have been frustrated to the point at which we are
contemplating tossing the monitor out the window, only to discover that the data
was not set up properly or had been changed or removed by one of the other
developers on the team. The moral of the story is to establish one or more known
test scenarios and verify the data setup for each of the scenarios each time before
you run it.
The second thing that you must determine to verify that the data tier is not the
source of your problem is to make sure that you can connect to the data source.
How you do this is largely determined by the nature of your data source. As an
example, if you are connecting to an OLEDB data source, it helps to verify that your
connection string is properly formatted and that it contains valid server information
and security credentials. A good way to do this is to create what is known as a data
link file. To do this, right-click the desktop, select New, and then select Text
Document. Rename the new text file that is created to test.udl. During this process,
the warning prompt (shown in Figure 3.1) will be displayed.
Figure 3.1. Warning prompt displayed when changing filenames.

New Riders - Debugging ASP.NET made by dotneter@teamfly
Click Yes, or just press the Enter key. If you double-click the test.udl file that you
just created, the Data Link Properties dialog box is displayed. Select an appropriate
data source from the Provider tab, and fill in the connection information on the
Connection tab. The Connection tab for a SQL Server connection would look like the
one shown in Figure 3.2.
Figure 3.2. Dialog box used to set the properties of the data link file.
After you finish this, you can test whether a connection to the data source can be
achieved by clicking the Test Connection button. A failure at this level indicates that
you are unable to even talk to your data source, let alone exchange information with
it.
A Convenient Data Link File Feature
A nice feature about data link files is that after you create a connection string that works, you can open the file in Notepadand extract a perfectly formatted connection string to use in your ASP.NET code. If you are going to do this, however, be sure to check the Allow Saving Password check box on the Connection tab so that your password information is stored inthe data link file.
If a connection to the data source can be successfully achieved, then you can run
some tests on your data conversations to make sure that they are working properly.
As an example, you could execute a SQL Server 2000 stored procedure directly in
Query Analyzer with hard-coded parameters to determine whether the results
returned are what you expected. Be sure not to test your data conversations
through any data component layers such as ADO, ADO.NET, or custom data
extraction components because this adds an additional level of ambiguity to your
New Riders - Debugging ASP.NET made by dotneter@teamfly
test. Right now, you just want to determine whether the data tier is doing its job.
After you have checked the data tier, the business object tier is next.
Business Object Tier
The business object tier is the glue that holds the entire web application together.
Because of this, you must determine not only whether there are bugs internal to the
tier, but also whether there are bugs in the communication layers between it and
the other tiers in the web application. Luckily, making this multifaceted
determination is relatively straightforward.
The most common object used as a communication layer between the business
object tier and the data tier is ADO. Microsoft’s new .NET architecture comes with a
new version of this popular library, ADO.NET. We’ll go into more detail about
ADO.NET in later chapters in the book, and we’ll focus on debugging issues with it in
Chapter 16,“Debugging ADO.NET.” For now, you can use a simple test to see
whether ADO.NET is capable of connecting to your data source properly, as shown
in Listings 3.1 and 3.2.
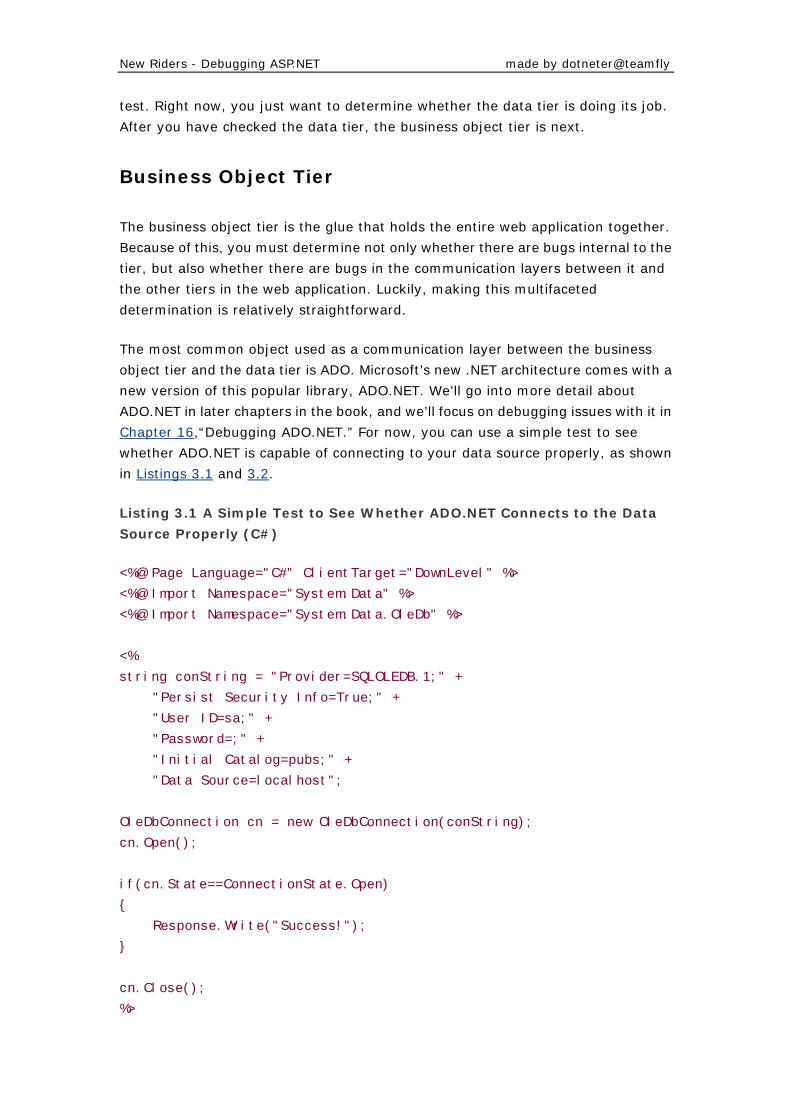
Listing 3.1 A Simple Test to See Whether ADO.NET Connects to the Data
Source Properly (C#)
<%@ Page Language="C#" ClientTarget="DownLevel" %>
<%@ Import Namespace="System.Data" %>
<%@ Import Namespace="System.Data.OleDb" %>
<%
string conString = "Provider=SQLOLEDB.1;" +
"Persist Security Info=True;" +
"User ID=sa;" +
"Password=;" +
"Initial Catalog=pubs;" +
"Data Source=localhost";
OleDbConnection cn = new OleDbConnection(conString);
cn.Open();
if(cn.State==ConnectionState.Open)
{
Response.Write("Success!");
}
cn.Close();
%>
New Riders - Debugging ASP.NET made by dotneter@teamfly
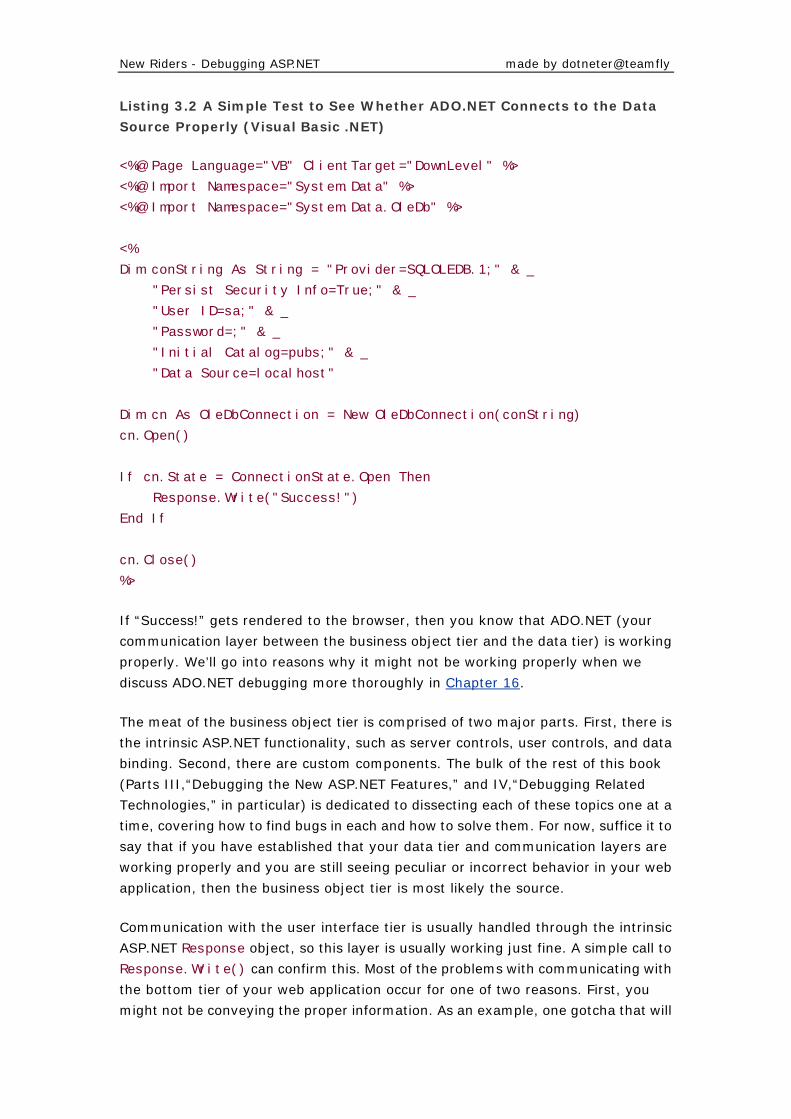
Listing 3.2 A Simple Test to See Whether ADO.NET Connects to the Data
Source Properly (Visual Basic .NET)
<%@ Page Language="VB" ClientTarget="DownLevel" %>
<%@ Import Namespace="System.Data" %>
<%@ Import Namespace="System.Data.OleDb" %>
<%
Dim conString As String = "Provider=SQLOLEDB.1;" & _
"Persist Security Info=True;" & _
"User ID=sa;" & _
"Password=;" & _
"Initial Catalog=pubs;" & _
"Data Source=localhost"
Dim cn As OleDbConnection = New OleDbConnection(conString)
cn.Open()
If cn.State = ConnectionState.Open Then
Response.Write("Success!")
End If
cn.Close()
%>
If “Success!” gets rendered to the browser, then you know that ADO.NET (your
communication layer between the business object tier and the data tier) is working
properly. We’ll go into reasons why it might not be working properly when we
discuss ADO.NET debugging more thoroughly in Chapter 16.
The meat of the business object tier is comprised of two major parts. First, there is
the intrinsic ASP.NET functionality, such as server controls, user controls, and data
binding. Second, there are custom components. The bulk of the rest of this book
(Parts III,“Debugging the New ASP.NET Features,” and IV,“Debugging Related
Technologies,” in particular) is dedicated to dissecting each of these topics one at a
time, covering how to find bugs in each and how to solve them. For now, suffice it to
say that if you have established that your data tier and communication layers are
working properly and you are still seeing peculiar or incorrect behavior in your web
application, then the business object tier is most likely the source.
Communication with the user interface tier is usually handled through the intrinsic
ASP.NET Response object, so this layer is usually working just fine. A simple call to
Response.Write() can confirm this. Most of the problems with communicating with
the bottom tier of your web application occur for one of two reasons. First, you
might not be conveying the proper information. As an example, one gotcha that will
New Riders - Debugging ASP.NET made by dotneter@teamfly
plague you in your development efforts (although it is easy to solve) occurs when
you forget to add the runat=server attribute to your ASP.NET server controls. This
causes server event handlers to fail, and the page cannot maintain state.
The second reason why you might have trouble communicating with the bottom tier
of your web application arises in the case of nonuser interface communication such
as web services. We will discuss the nuances of debugging web services in Chapter
13, “Debugging Web Services.”
User Interface Tier
Although this book focuses on server-side ASP.NET debugging, it is helpful to know
when you are dealing with a bug on the client side (user interface tier). As a general
rule, if you are prompted with an error dialog box similar to the one shown in Figure
3.3, then you have a problem with your client-side script.
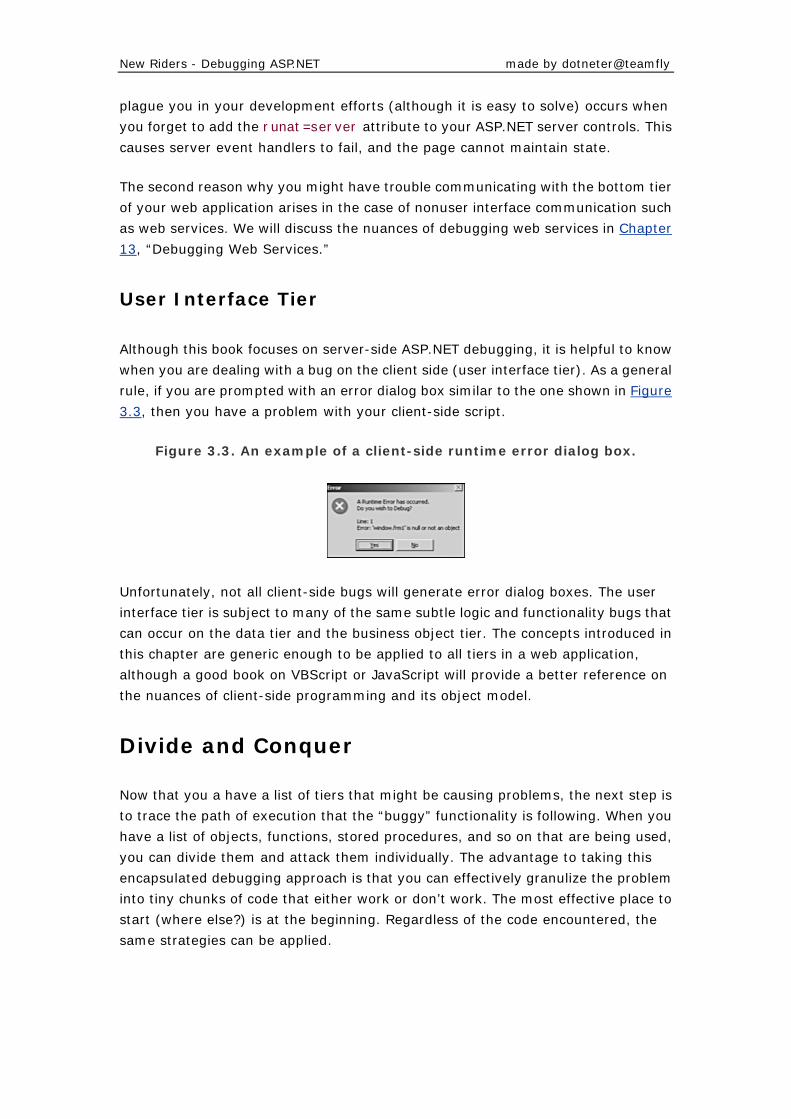
Figure 3.3. An example of a client-side runtime error dialog box.
Unfortunately, not all client-side bugs will generate error dialog boxes. The user
interface tier is subject to many of the same subtle logic and functionality bugs that
can occur on the data tier and the business object tier. The concepts introduced in
this chapter are generic enough to be applied to all tiers in a web application,
although a good book on VBScript or JavaScript will provide a better reference on
the nuances of client-side programming and its object model.
Divide and Conquer
Now that you a have a list of tiers that might be causing problems, the next step is
to trace the path of execution that the “buggy” functionality is following. When you
have a list of objects, functions, stored procedures, and so on that are being used,
you can divide them and attack them individually. The advantage to taking this
encapsulated debugging approach is that you can effectively granulize the problem
into tiny chunks of code that either work or don’t work. The most effective place to
start (where else?) is at the beginning. Regardless of the code encountered, the
same strategies can be applied.
New Riders - Debugging ASP.NET made by dotneter@teamfly
Logic Test
Before rushing in and making changes to a section of code, take a step back and
look at the big picture. What are you trying to accomplish with the code? A good way
to clarify this is to create a “mission statement” for the code segment. It sounds
cheesy, but it actually works well. Before you begin debugging, add this mission
statement as a comment at the top of the code segment. It makes you think about
what the code needs to get done, and it provides you with a reference to look back
on if the toils of developing and debugging give you a temporary case of vertigo.
Take care to state not only all the tasks that the code should accomplish, but also in
what order they are to be done.
Plan for Debugging from the Start
Ideally, you should create code mission statements at the initial development time as well so that you don’t forget what the code’s original purpose was when you return to debug it later.
Now compare the mission statement that you just created with what the code is
actually doing. Sometimes this is easier said than done. It sometimes helps to
traverse the code, line by line, adding comments about what the code is doing.
When you get done, you can compare the sum total of the line-level comments to
the mission statement at the top of the code. Not surprisingly, many problems can
be diagnosed right off the bat because a piece of logic was either omitted or included
in the wrong order. If your logic stands up to the test, though, don’t despair.You
have only just begun to fight.
Inputs and Outputs
Perfect logic doesn’t mean a hill of beans if you are working with incorrect data. The
old adage “Garbage in, garbage out” definitely applies here.You need to verify that
the data that is going into your code is correct, or else you cannot expect the results
to be what you want. A good place to start testing inputs is right in the beginning of
the code block that you are testing. Take a look at how the code in Listings 3.3 and
3.4 accomplishes this.
Listing 3.3 Validating the Input of a Method (C#)
<script language="C#" runat="server">
class foo
New Riders - Debugging ASP.NET made by dotneter@teamfly
{
public int CalcThis(int a, int b)
{
if(a < 7) throw new Exception("a=" + a. ToString() +
" is too small");
if(b > 2) throw new Exception("b=" + b. ToString() +
" is too big");
return(a + b);
}
}
</script>
Listing 3.4 Validating the Input of a Method (Visual Basic .NET)
<script language="VB" runat=="server">
Class foo
Public Function CalcThis(a as Integer, b as Integer) _
as Integer
If a < 7 Then Throw New Exception("a=" & CStr(a) & _
" is too small")
If b > 2 Then Throw New Exception("b=" & CStr(b) & _
" is too big")
CalcThis = (a + b)
End Function
End Class
</script>
Before any code has had a chance to modify the input parameters, you should run
checks to see if they fall within the valid bounds that you have specified. This
enables you to inspect them for accuracy. If the check fails, you can throw an
exception to the browser that gives you some helpful debugging information. If an
input parameter is of a complex data type (for example, an ADO.NET
OleDbDataReader), you might want to check one or more of its properties to verify
that it contains the proper data. If your procedure is more complex and modifies the
input parameters within the code, you might want to place these checkpoints in
more than one place to verify that they are being properly calculated.
The output to a function can be tested in a similar fashion.You can test the bounds
of the output values of your code and throw exceptions as appropriate. Listings 3.5
and 3.6 exemplify this sort of test.
Listing 3.5 Validating the Output of a Method (C#)
New Riders - Debugging ASP.NET made by dotneter@teamfly
<%@ Page Language="C#" ClientTarget="DownLevel" %>
<%
foo objFoo = new foo();
int a = 8;
int b = 2;
int c = 0;
c = objFoo.CalcThis(a,b);
if(c < 10) throw new Exception("c=" + c. ToString() +
" is too small.");
Response.Write(c. ToString());
%>
Listing 3.6 Validating the Output of a Method (Visual Basic .NET)
<%@ Page Language="VB" ClientTarget="DownLevel" %>
<%
Dim objFoo As New foo
Dim a As Integer = 8
Dim b As Integer = 2
Dim c As Integer = 0
c = objFoo.CalcThis(a,b)
If c < 10 Then Throw New Exception("c=" & CStr(c) & _
" is too small.")
Response.Write(CStr(c))
%>
Don’t worry if you are unfamiliar with using exceptions in this manner. We will be
covering them in detail in Chapter 4, “Code Structure That Eases Debugging.”They
are extremely useful for flagging data integrity issues with the data that goes into
and comes out of your processes.
Beyond the Basics
In Part II, “Debugging the New ASP.NET Features,” we will introducemore advanced tools and methods for handling debugging tasks.These tools are the Trace object, the Visual Studio RuntimeDebugging Environment, and the event log utility objects.
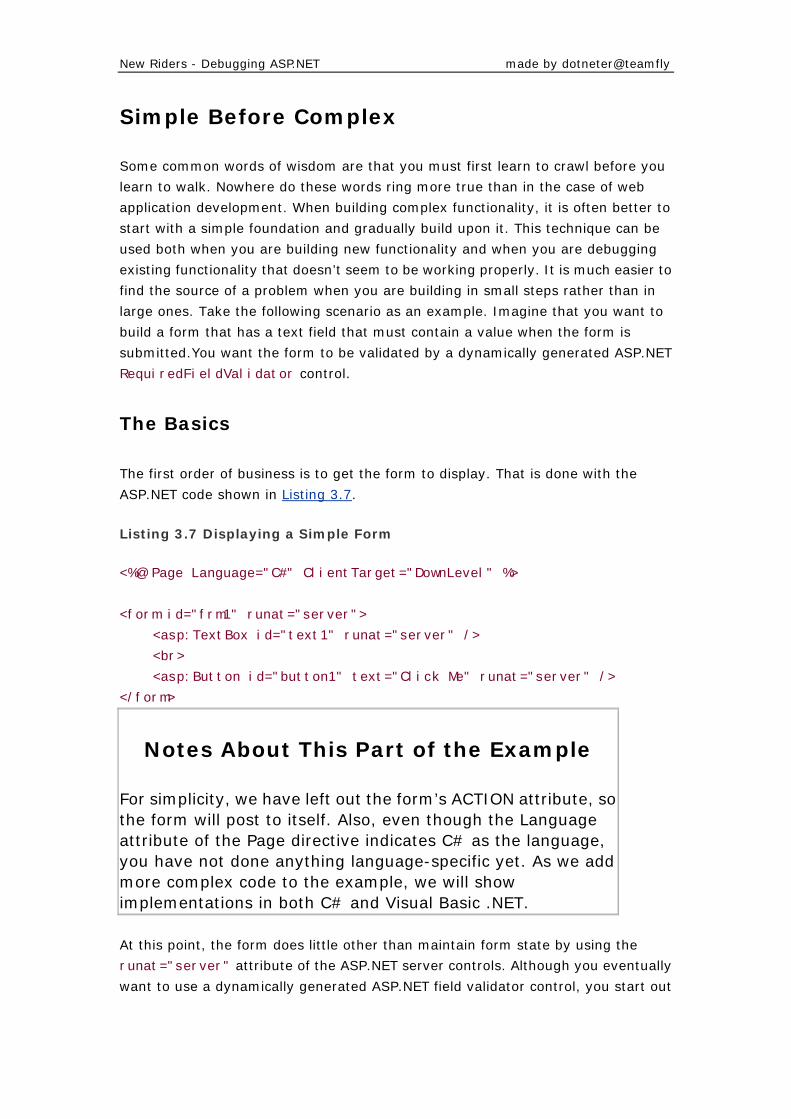
New Riders - Debugging ASP.NET made by dotneter@teamfly
Simple Before Complex
Some common words of wisdom are that you must first learn to crawl before you
learn to walk. Nowhere do these words ring more true than in the case of web
application development. When building complex functionality, it is often better to
start with a simple foundation and gradually build upon it. This technique can be
used both when you are building new functionality and when you are debugging
existing functionality that doesn’t seem to be working properly. It is much easier to
find the source of a problem when you are building in small steps rather than in
large ones. Take the following scenario as an example. Imagine that you want to
build a form that has a text field that must contain a value when the form is
submitted.You want the form to be validated by a dynamically generated ASP.NET
RequiredFieldValidator control.
The Basics
The first order of business is to get the form to display. That is done with the
ASP.NET code shown in Listing 3.7.
Listing 3.7 Displaying a Simple Form
<%@ Page Language="C#" ClientTarget="DownLevel" %>
<form id="frm1" runat="server">
<asp:TextBox id="text1" runat="server" />
<br>
<asp:Button id="button1" text="Click Me" runat="server" />
</form>
Notes About This Part of the Example
For simplicity, we have left out the form’s ACTION attribute, sothe form will post to itself. Also, even though the Language attribute of the Page directive indicates C# as the language, you have not done anything language-specific yet. As we add more complex code to the example, we will show implementations in both C# and Visual Basic .NET.
At this point, the form does little other than maintain form state by using the
runat="server" attribute of the ASP.NET server controls. Although you eventually
want to use a dynamically generated ASP.NET field validator control, you start out
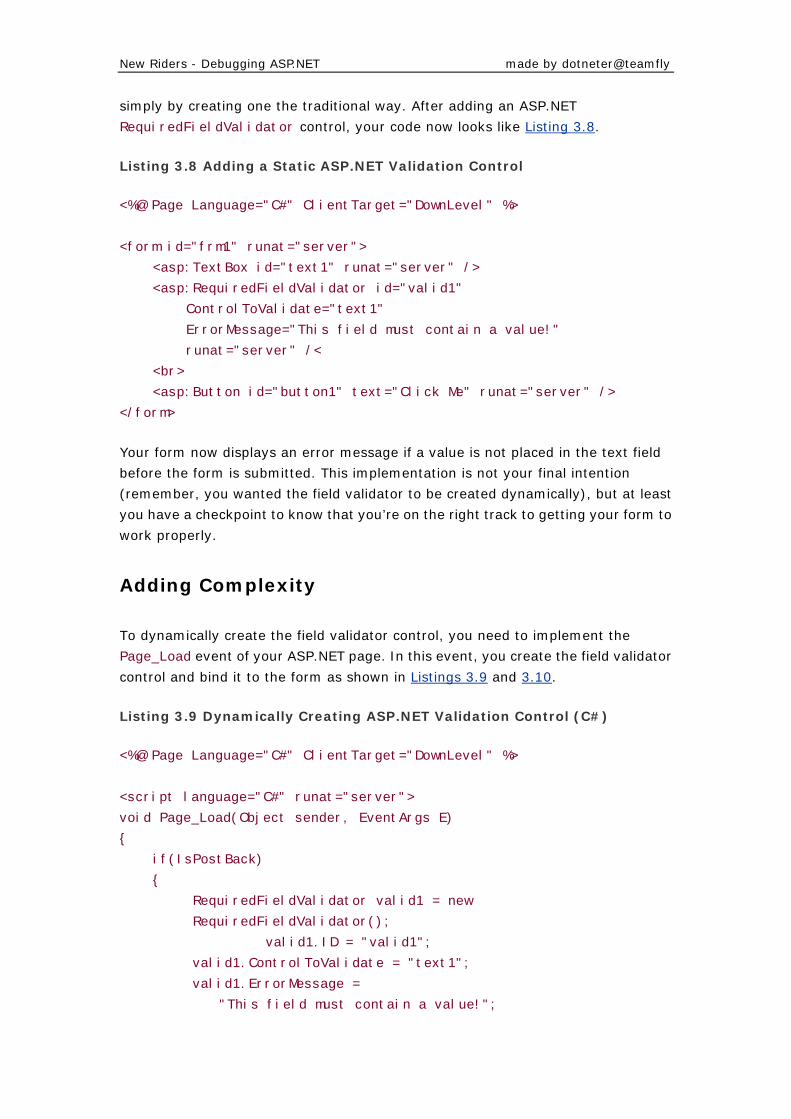
New Riders - Debugging ASP.NET made by dotneter@teamfly
simply by creating one the traditional way. After adding an ASP.NET
RequiredFieldValidator control, your code now looks like Listing 3.8.
Listing 3.8 Adding a Static ASP.NET Validation Control
<%@ Page Language="C#" ClientTarget="DownLevel" %>
<form id="frm1" runat="server">
<asp:TextBox id="text1" runat="server" />
<asp:RequiredFieldValidator id="valid1"
ControlToValidate="text1"
ErrorMessage="This field must contain a value!"
runat="server" /<
<br>
<asp:Button id="button1" text="Click Me" runat="server" />
</form>
Your form now displays an error message if a value is not placed in the text field
before the form is submitted. This implementation is not your final intention
(remember, you wanted the field validator to be created dynamically), but at least
you have a checkpoint to know that you’re on the right track to getting your form to
work properly.
Adding Complexity
To dynamically create the field validator control, you need to implement the
Page_Load event of your ASP.NET page. In this event, you create the field validator
control and bind it to the form as shown in Listings 3.9 and 3.10.
Listing 3.9 Dynamically Creating ASP.NET Validation Control (C#)
<%@ Page Language="C#" ClientTarget="DownLevel" %>
<script language="C#" runat="server">
void Page_Load(Object sender, EventArgs E)
{
if(IsPostBack)
{
RequiredFieldValidator valid1 = new
RequiredFieldValidator();
valid1.ID = "valid1";
valid1.ControlToValidate = "text1";
valid1.ErrorMessage =
"This field must contain a value!";
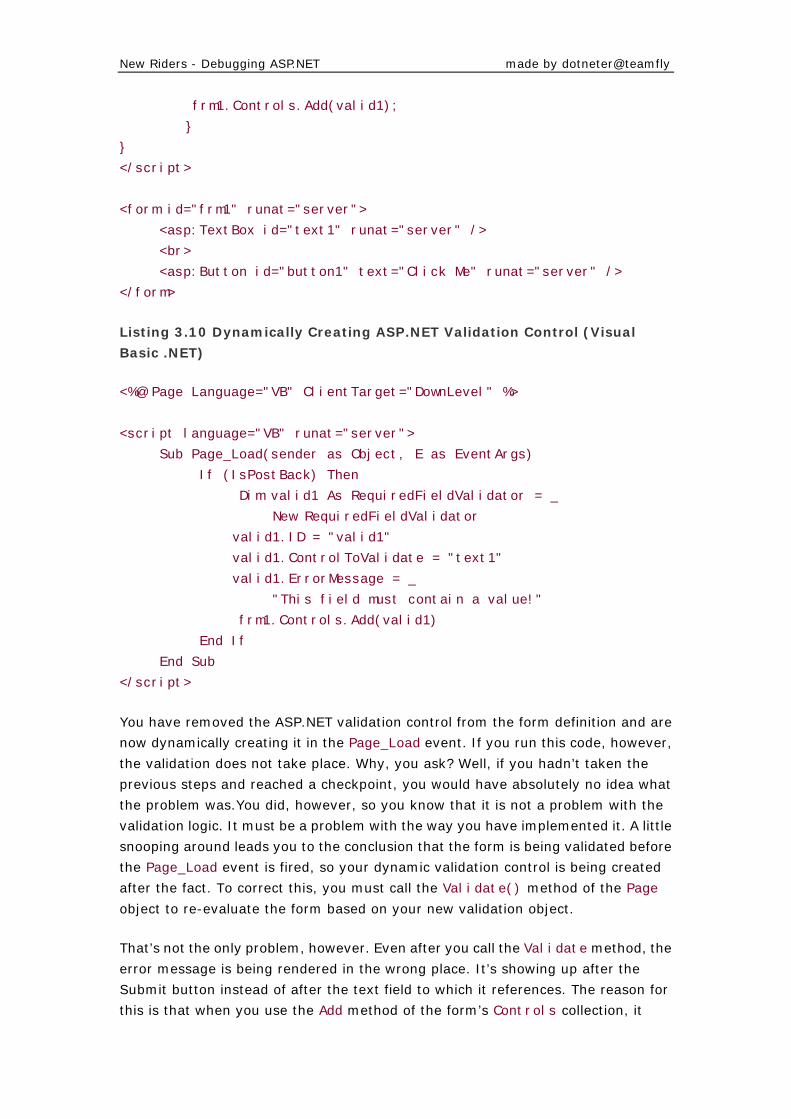
New Riders - Debugging ASP.NET made by dotneter@teamfly
frm1.Controls.Add(valid1);
}
}
</script>
<form id="frm1" runat="server">
<asp:TextBox id="text1" runat="server" />
<br>
<asp:Button id="button1" text="Click Me" runat="server" />
</form>
Listing 3.10 Dynamically Creating ASP.NET Validation Control (Visual
Basic .NET)
<%@ Page Language="VB" ClientTarget="DownLevel" %>
<script language="VB" runat="server">
Sub Page_Load(sender as Object, E as EventArgs)
If (IsPostBack) Then
Dim valid1 As RequiredFieldValidator = _
New RequiredFieldValidator
valid1.ID = "valid1"
valid1.ControlToValidate = "text1"
valid1.ErrorMessage = _
"This field must contain a value!"
frm1.Controls.Add(valid1)
End If
End Sub
</script>
You have removed the ASP.NET validation control from the form definition and are
now dynamically creating it in the Page_Load event. If you run this code, however,
the validation does not take place. Why, you ask? Well, if you hadn’t taken the
previous steps and reached a checkpoint, you would have absolutely no idea what
the problem was.You did, however, so you know that it is not a problem with the
validation logic. It must be a problem with the way you have implemented it. A little
snooping around leads you to the conclusion that the form is being validated before
the Page_Load event is fired, so your dynamic validation control is being created
after the fact. To correct this, you must call the Validate() method of the Page
object to re-evaluate the form based on your new validation object.
That’s not the only problem, however. Even after you call the Validate method, the
error message is being rendered in the wrong place. It’s showing up after the
Submit button instead of after the text field to which it references. The reason for
this is that when you use the Add method of the form’s Controls collection, it
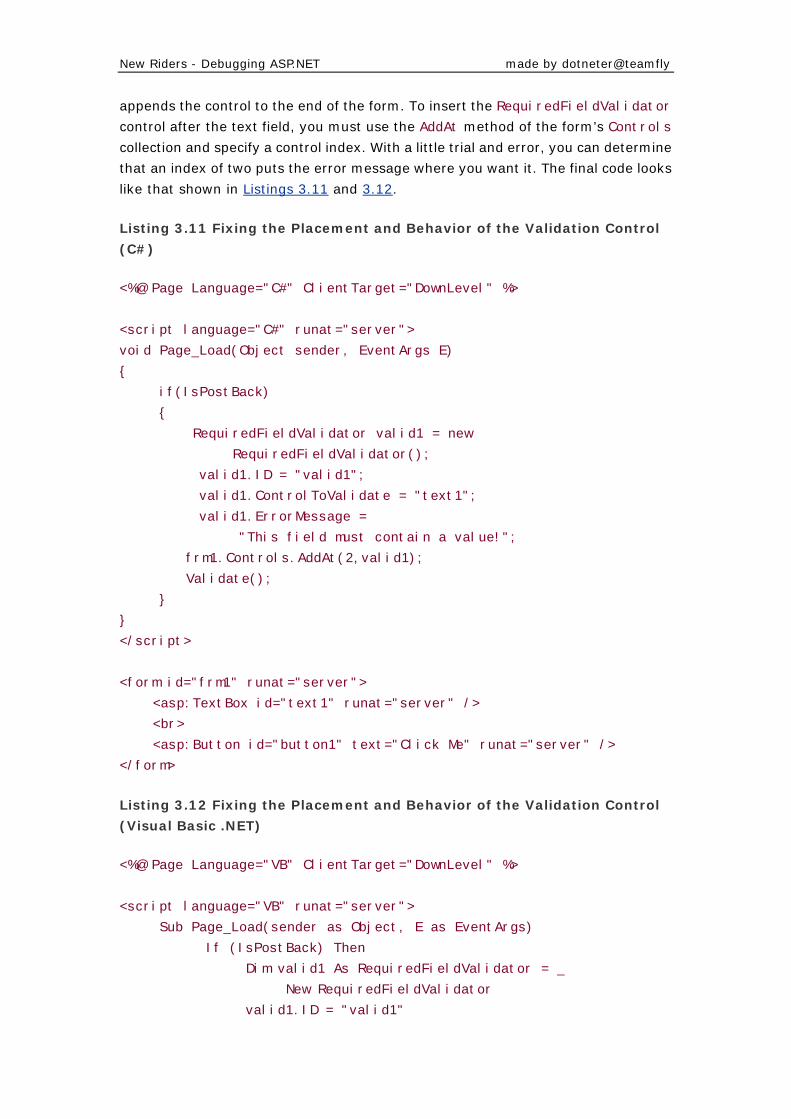
New Riders - Debugging ASP.NET made by dotneter@teamfly
appends the control to the end of the form. To insert the RequiredFieldValidator
control after the text field, you must use the AddAt method of the form’s Controls
collection and specify a control index. With a little trial and error, you can determine
that an index of two puts the error message where you want it. The final code looks
like that shown in Listings 3.11 and 3.12.
Listing 3.11 Fixing the Placement and Behavior of the Validation Control
(C#)
<%@ Page Language="C#" ClientTarget="DownLevel" %>
<script language="C#" runat="server">
void Page_Load(Object sender, EventArgs E)
{
if(IsPostBack)
{
RequiredFieldValidator valid1 = new
RequiredFieldValidator();
valid1.ID = "valid1";
valid1.ControlToValidate = "text1";
valid1.ErrorMessage =
"This field must contain a value!";
frm1.Controls.AddAt(2,valid1);
Validate();
}
}
</script>
<form id="frm1" runat="server">
<asp:TextBox id="text1" runat="server" />
<br>
<asp:Button id="button1" text="Click Me" runat="server" />
</form>
Listing 3.12 Fixing the Placement and Behavior of the Validation Control
(Visual Basic .NET)
<%@ Page Language="VB" ClientTarget="DownLevel" %>
<script language="VB" runat="server">
Sub Page_Load(sender as Object, E as EventArgs)
If (IsPostBack) Then
Dim valid1 As RequiredFieldValidator = _
New RequiredFieldValidator
valid1.ID = "valid1"
New Riders - Debugging ASP.NET made by dotneter@teamfly
valid1.ControlToValidate = "text1"
valid1.ErrorMessage = _
"This field must contain a value!"
frm1.Controls.AddAt(2,valid1)
Validate()
End If
End Sub
</script>
As you can see, starting out simple and gradually building complexity greatly
reduces the amount of time that it takes to troubleshoot problems because you
already know what parts definitely work.You can then dedicate your time to finding
the problems with the parts that you are not certain of.
Turtle Makes the Wiser
Just about everyone has heard the tale of the tortoise and the hare, and the lesson
to be learned from it. Many parallels exist between this timeless fable and the
debugging process. When trying to solve what appears to be an unsolvable bug, it
is hard to resist the temptation to quickly and randomly make changes with the
hope that you will stumble upon the solution by accident.
Although this method occasionally works, it has a few drawbacks. First, swapping
code and fiddling with application settings without any rhyme or reason is a colossal
waste of time when you consider the odds against hitting the magic combination.
Second, even if you do strike gold and fix the problem, it is unlikely that you will
understand or remember how you did it. In your moment of triumph, this might not
concern you much. However, most types of bugs can be tucked away for only so
long before they rear their ugly heads again. And when they do, you’ll be right back
at square one when it comes to fixing them.
Plan Carefully
When you encounter a bug that looks like it is going to take more than a trivial
amount of time to solve, you must make a plan of attack. Take a step back and ask
yourself,“What is the most likely cause of the bug?” Jot down some ideas, as well as
things you could add or change to test your theories. From these ideas, formulate a
set of logical steps to find the bug. All the concepts already introduced in this
chapter can be used to aid you in this effort.
New Riders - Debugging ASP.NET made by dotneter@teamfly
Proceed with Caution
Armed with a debugging plan, you can now begin making modifications to both code
and application settings. Be careful to make only one modification at a time. That
way, you will know what worked if the bug suddenly disappears (which has
happened to us on several occasions). Always document the modifications that you
make either in the code, in a separate file, or even on a sheet of paper. That way,
you can always take a few steps back before proceeding down a different route
without having to reload your code from your backup files (you did create backup
files before you started, didn’t you?).
The key to the whole process is patience. The most complex bugs usually require a
combination of changes to fix them, and there is always an element of luck involved
with choosing the right debugging route first. It’s definitely not all in the cards,
however, because your luck will most definitely improve with experience. (If only
our luck with poker could follow this same trend.) The best part is that if you stick to
your debugging plan, you will have a road map to fix the problem the next time it
occurs. If you get to the end of your plan before you resolve the bug, don’t give up.
Take another step back and follow the strategies outlined in this chapter again.
Perhaps you are not looking in the right place after all.
Summary
This chapter introduced some proven strategies for tracking down and eliminating
bugs in your code. These strategies, when applied together, form a solid debugging
foundation. First, you divide a web application into logical segments (tier sandboxes)
to narrow the problem scope and eliminate the tiers that are not contributing to the
problem. Second, you divide the code in each tier into functional units that you can
test individually for bugs. This is done through the logic test and by testing the
code’s input and output. This chapter also demonstrated how to break a complex
piece of code into its simplest form, gradually building in complexity while
continually verifying proper functionality. Finally, we discussed how to take a logical
and systematic approach to creating and executing a debugging plan, emphasizing
that results can be achieved faster by proceeding with caution.
In the next chapter, we introduce some guidelines for creating and structuring code
that makes debugging a much easier task.
New Riders - Debugging ASP.NET made by dotneter@teamfly
Chapter 4. Code Structure That Eases
Debugging
AS THE POPULAR SAYING GOES,“AN OUNCE of prevention is worth a pound of
cure.”This statement is quite true when it comes to software development,
especially for the Internet. If you take the time to plan and build your web
applications in a structured and organized way, you can accomplish two things. First,
you reduce the number of bugs that are introduced into your code (namely, the
ones caused when you complicate things to the point of absolute confusion). Second,
when you do encounter bugs in your code, you will be able to find and eliminate
them much more easily. This chapter is designed to help you create your code in an
organized fashion, as well as give you a foundation on which to debug your web
application after it is built.
Code Partitioning
ASP.NET offers better solutions for code partitioning than were offered with
traditional ASP. In traditional ASP, your primary options were to put your
partitioned code into include files, separate ASP files that you executed with
Server.Execute or business object components. The extra overhead of having
multiple copies of include files in memory (one for each file that uses it) made this
solution undesirable. Using Server.Execute was somewhat helpful, but you could
not pass the executed ASP file any additional query string parameters. Business
object components were the only good alternative in traditional ASP. With ASP.NET,
you can use include files (not recommended) and business object components, as
well as two new techniques to partition code: code-behind classes and user controls.
Code-Behind Classes
You can use a code-behind class as an effective way of separating client-side HTML
code from server-side event-processing code. Breaking up the code in this way
makes it easier to track down problems because you don’t have to sift through
user-interface code to get to the business logic code. Also, if the user-interface code
of your project is created by a different group of developers than your business logic
code is, using code-behind classes prevents one group from accidentally stepping
New Riders - Debugging ASP.NET made by dotneter@teamfly
on the code of the other group. Listings 4.1, 4.2, and 4.3 demonstrate how easy
code-behind classes are to implement.
Notes About the Code Partitioning
Example
The example in the “Code Partitioning” section of this chapterbuilds upon itself and uses the pubs database that comes standard with SQL Server 2000.
Listing 4.1 User-Interface Code for an Author Search
<%@ Language="C#" Inherits="AuthorSearch" Src="listing42.cs" %>
<form id="frm_search" method="post" runat="server">
Search for an author:<br>
Name:
<asp:TextBox id="txt_name" runat="server" />
<asp:Button id="btn_name" text="Search" onClick="btn_name_click"
runat="server" />
<br>
<asp:Label id="lbl_author" name="lbl_author" runat="server" />
</form>
Listing 4.2 Code-Behind Class to Handle User Input
using System;
using System.Web.UI;
using System.Web.UI.WebControls;
public class AuthorSearch : Page
{
public Label lbl_author;
public TextBox txt_name;
public void btn_name_click(Object sender, EventArgs e)
{
lbl_author. Text = "You are searching for "
+ txt_name. Text;
}
}
Listing 4.3 User-Interface Code for an Author Search
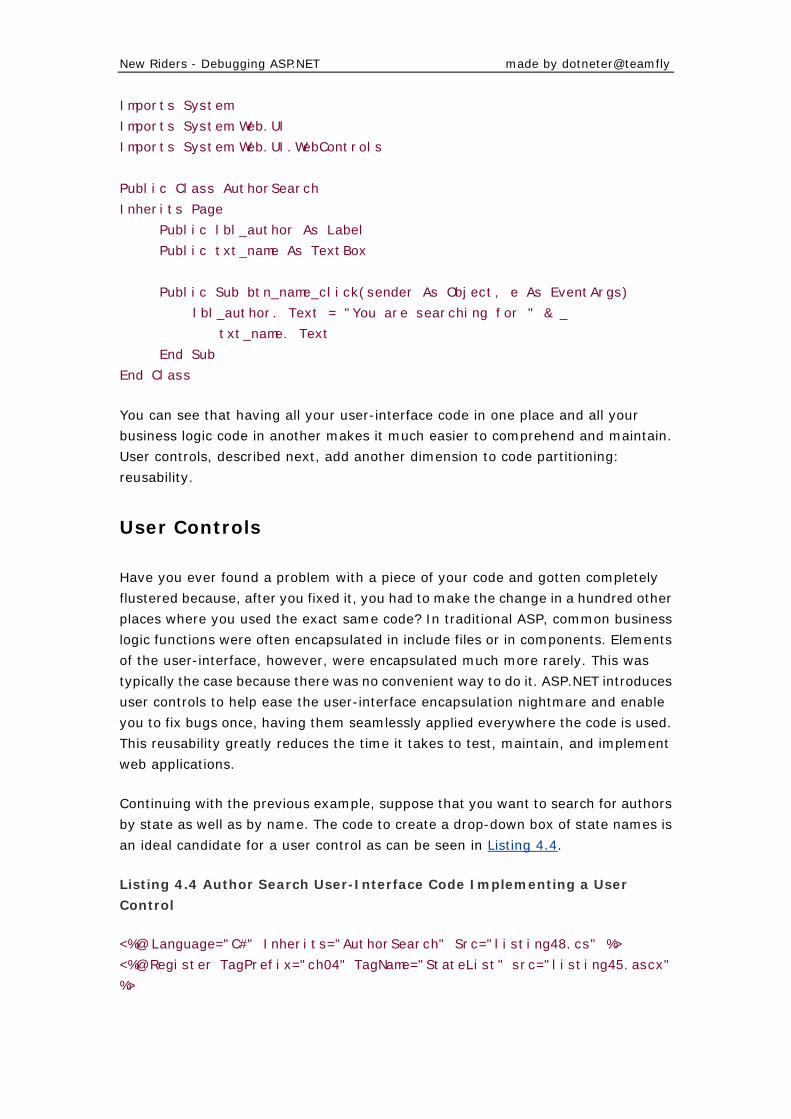
New Riders - Debugging ASP.NET made by dotneter@teamfly
Imports System
Imports System.Web.UI
Imports System.Web.UI.WebControls
Public Class AuthorSearch
Inherits Page
Public lbl_author As Label
Public txt_name As TextBox
Public Sub btn_name_click(sender As Object, e As EventArgs)
lbl_author. Text = "You are searching for " & _
txt_name. Text
End Sub
End Class
You can see that having all your user-interface code in one place and all your
business logic code in another makes it much easier to comprehend and maintain.
User controls, described next, add another dimension to code partitioning:
reusability.
User Controls
Have you ever found a problem with a piece of your code and gotten completely
flustered because, after you fixed it, you had to make the change in a hundred other
places where you used the exact same code? In traditional ASP, common business
logic functions were often encapsulated in include files or in components. Elements
of the user-interface, however, were encapsulated much more rarely. This was
typically the case because there was no convenient way to do it. ASP.NET introduces
user controls to help ease the user-interface encapsulation nightmare and enable
you to fix bugs once, having them seamlessly applied everywhere the code is used.
This reusability greatly reduces the time it takes to test, maintain, and implement
web applications.
Continuing with the previous example, suppose that you want to search for authors
by state as well as by name. The code to create a drop-down box of state names is
an ideal candidate for a user control as can be seen in Listing 4.4.
Listing 4.4 Author Search User-Interface Code Implementing a User
Control
<%@ Language="C#" Inherits="AuthorSearch" Src="listing48.cs" %>
<%@ Register TagPrefix="ch04" TagName="StateList" src="listing45.ascx"
%>
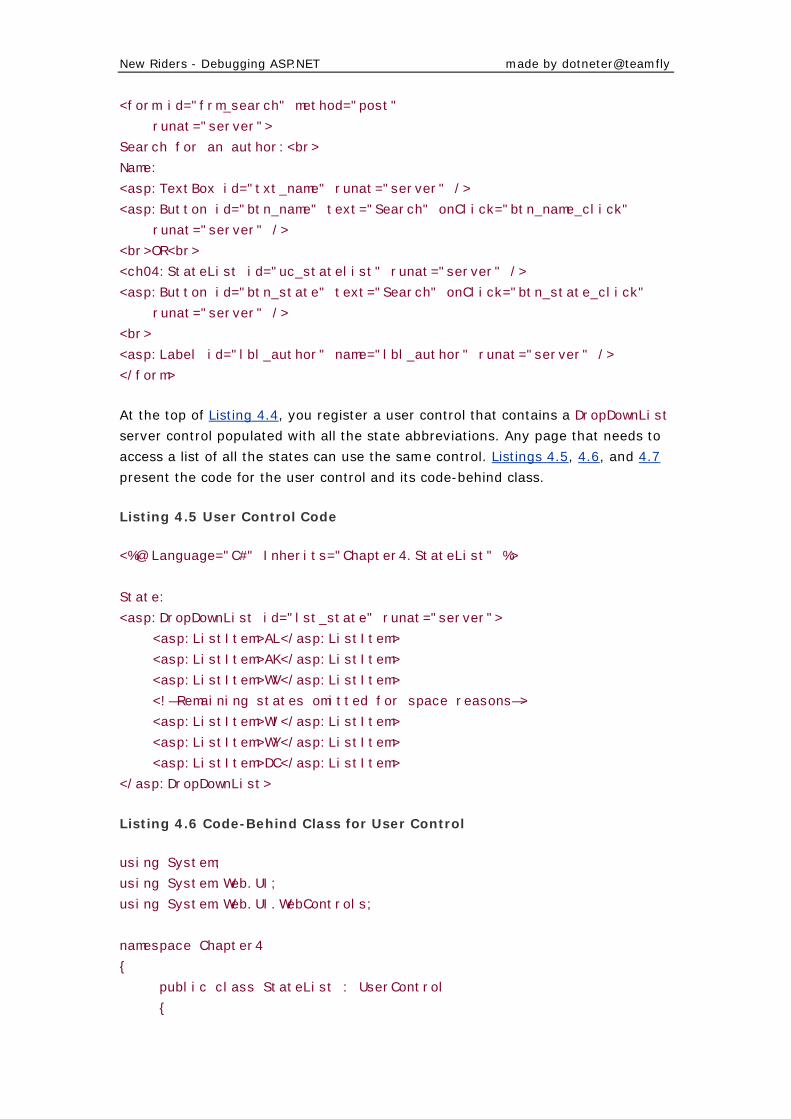
New Riders - Debugging ASP.NET made by dotneter@teamfly
<form id="frm_search" method="post"
runat="server">
Search for an author:<br>
Name:
<asp:TextBox id="txt_name" runat="server" />
<asp:Button id="btn_name" text="Search" onClick="btn_name_click"
runat="server" />
<br>OR<br>
<ch04:StateList id="uc_statelist" runat="server" />
<asp:Button id="btn_state" text="Search" onClick="btn_state_click"
runat="server" />
<br>
<asp:Label id="lbl_author" name="lbl_author" runat="server" />
</form>
At the top of Listing 4.4, you register a user control that contains a DropDownList
server control populated with all the state abbreviations. Any page that needs to
access a list of all the states can use the same control. Listings 4.5, 4.6, and 4.7
present the code for the user control and its code-behind class.
Listing 4.5 User Control Code
<%@ Language="C#" Inherits="Chapter4.StateList" %>
State:
<asp:DropDownList id="lst_state" runat="server">
<asp:ListItem>AL</asp:ListItem>
<asp:ListItem>AK</asp:ListItem>
<asp:ListItem>WV</asp:ListItem>
<!—Remaining states omitted for space reasons—>
<asp:ListItem>WI</asp:ListItem>
<asp:ListItem>WY</asp:ListItem>
<asp:ListItem>DC</asp:ListItem>
</asp:DropDownList>
Listing 4.6 Code-Behind Class for User Control
using System;
using System.Web.UI;
using System.Web.UI.WebControls;
namespace Chapter4
{
public class StateList : UserControl
{
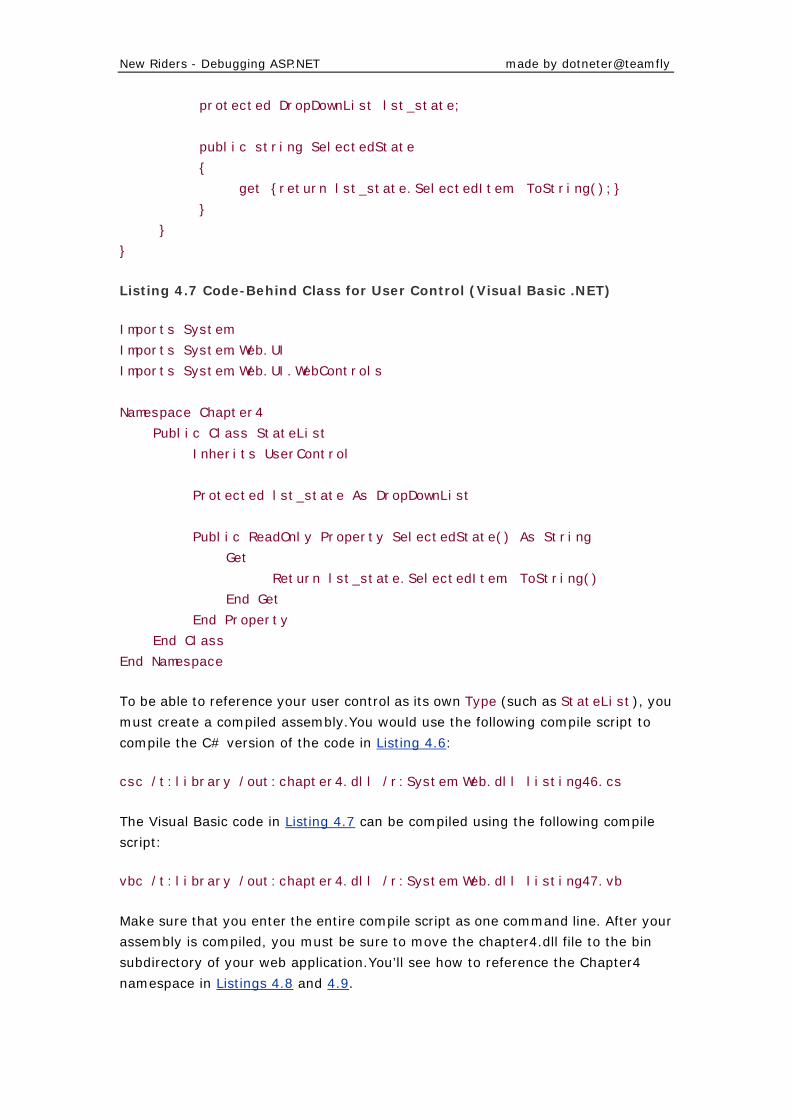
New Riders - Debugging ASP.NET made by dotneter@teamfly
protected DropDownList lst_state;
public string SelectedState
{
get {return lst_state.SelectedItem. ToString();}
}
}
}
Listing 4.7 Code-Behind Class for User Control (Visual Basic .NET)
Imports System
Imports System.Web.UI
Imports System.Web.UI.WebControls
Namespace Chapter4
Public Class StateList
Inherits UserControl
Protected lst_state As DropDownList
Public ReadOnly Property SelectedState() As String
Get
Return lst_state.SelectedItem. ToString()
End Get
End Property
End Class
End Namespace
To be able to reference your user control as its own Type (such as StateList), you
must create a compiled assembly.You would use the following compile script to
compile the C# version of the code in Listing 4.6:
csc /t:library /out:chapter4.dll /r:System.Web.dll listing46.cs
The Visual Basic code in Listing 4.7 can be compiled using the following compile
script:
vbc /t:library /out:chapter4.dll /r:System.Web.dll listing47.vb
Make sure that you enter the entire compile script as one command line. After your
assembly is compiled, you must be sure to move the chapter4.dll file to the bin
subdirectory of your web application.You’ll see how to reference the Chapter4
namespace in Listings 4.8 and 4.9.
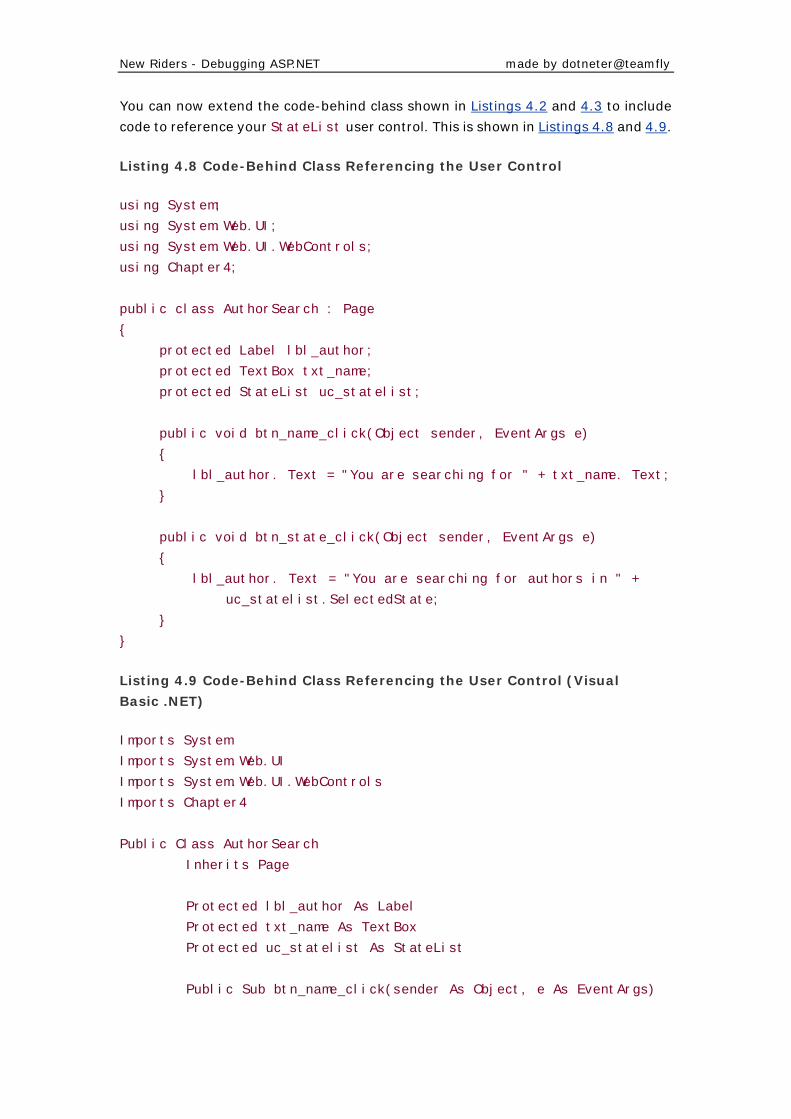
New Riders - Debugging ASP.NET made by dotneter@teamfly
You can now extend the code-behind class shown in Listings 4.2 and 4.3 to include
code to reference your StateList user control. This is shown in Listings 4.8 and 4.9.
Listing 4.8 Code-Behind Class Referencing the User Control
using System;
using System.Web.UI;
using System.Web.UI.WebControls;
using Chapter4;
public class AuthorSearch : Page
{
protected Label lbl_author;
protected TextBox txt_name;
protected StateList uc_statelist;
public void btn_name_click(Object sender, EventArgs e)
{
lbl_author. Text = "You are searching for " + txt_name. Text;
}
public void btn_state_click(Object sender, EventArgs e)
{
lbl_author. Text = "You are searching for authors in " +
uc_statelist.SelectedState;
}
}
Listing 4.9 Code-Behind Class Referencing the User Control (Visual
Basic .NET)
Imports System
Imports System.Web.UI
Imports System.Web.UI.WebControls
Imports Chapter4
Public Class AuthorSearch
Inherits Page
Protected lbl_author As Label
Protected txt_name As TextBox
Protected uc_statelist As StateList
Public Sub btn_name_click(sender As Object, e As EventArgs)
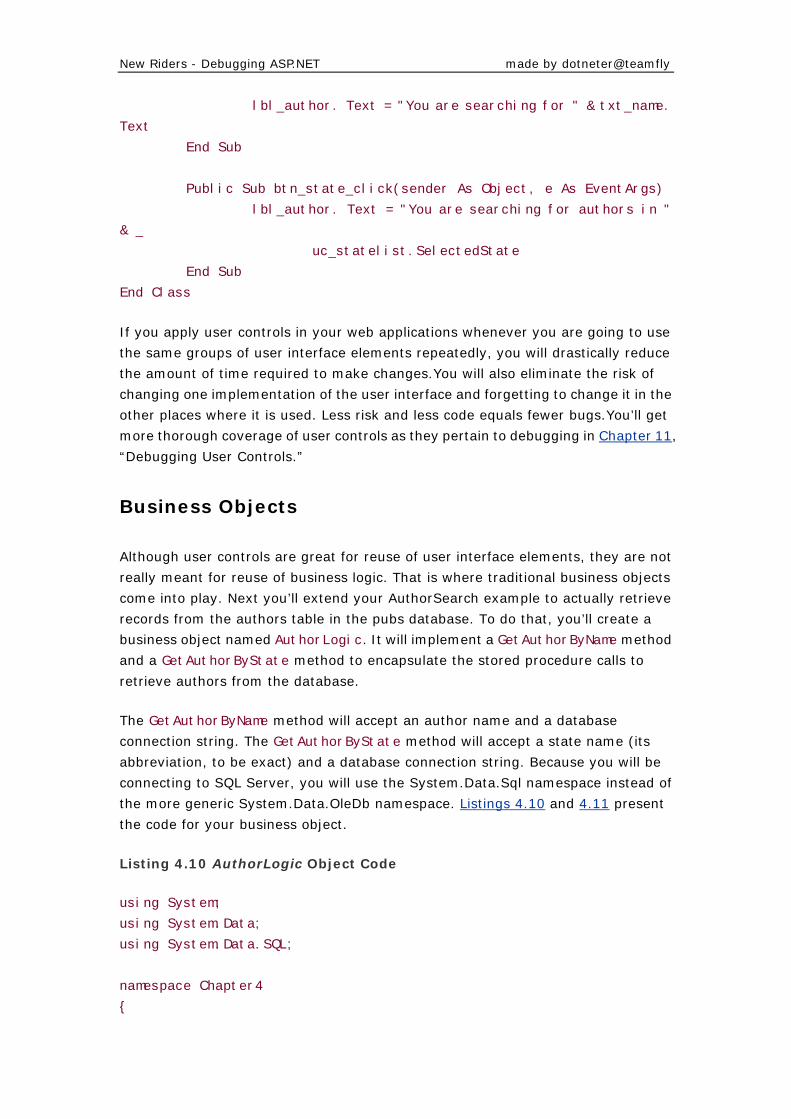
New Riders - Debugging ASP.NET made by dotneter@teamfly
lbl_author. Text = "You are searching for " & txt_name.
Text
End Sub
Public Sub btn_state_click(sender As Object, e As EventArgs)
lbl_author. Text = "You are searching for authors in "
& _
uc_statelist.SelectedState
End Sub
End Class
If you apply user controls in your web applications whenever you are going to use
the same groups of user interface elements repeatedly, you will drastically reduce
the amount of time required to make changes.You will also eliminate the risk of
changing one implementation of the user interface and forgetting to change it in the
other places where it is used. Less risk and less code equals fewer bugs.You’ll get
more thorough coverage of user controls as they pertain to debugging in Chapter 11,
“Debugging User Controls.”
Business Objects
Although user controls are great for reuse of user interface elements, they are not
really meant for reuse of business logic. That is where traditional business objects
come into play. Next you’ll extend your AuthorSearch example to actually retrieve
records from the authors table in the pubs database. To do that, you’ll create a
business object named AuthorLogic. It will implement a GetAuthorByName method
and a GetAuthorByState method to encapsulate the stored procedure calls to
retrieve authors from the database.
The GetAuthorByName method will accept an author name and a database
connection string. The GetAuthorByState method will accept a state name (its
abbreviation, to be exact) and a database connection string. Because you will be
connecting to SQL Server, you will use the System.Data.Sql namespace instead of
the more generic System.Data.OleDb namespace. Listings 4.10 and 4.11 present
the code for your business object.
Listing 4.10 AuthorLogic Object Code
using System;
using System.Data;
using System.Data.SQL;
namespace Chapter4
{

New Riders - Debugging ASP.NET made by dotneter@teamfly
public class AuthorLogic
{
public DataTable GetAuthorByName(string name, string connectString)
{
//construct stored procedure call
string sql = "sp_get_author_by_name ' " + name + " ' ";
//create a dataset to hold results
DataSet ds = new DataSet();
//create connection to database, open it, and retrieve results
SQLDataSetCommand cmd = new
SQLDataSetCommand(sql,connectString);
cmd.FillDataSet(ds, "DataTable");
//return only the DataTable that contains your results
return ds. Tables["DataTable"];
}
public DataTable GetAuthorByState(string state, string
connectString)
{
//construct stored procedure call
string sql = "sp_get_author_by_state ' " + state + " ' " ;
//create a dataset to hold results
DataSet ds = new DataSet();
//create connection to database, open it, and retrieve results
SQLDataSetCommand cmd = new
SQLDataSetCommand(sql,connectString);
cmd.FillDataSet(ds, "DataTable");
//return only the DataTable that contains your results
return ds. Tables["DataTable"];
}
}
}
Listing 4.11 AuthorLogic Object Code (Visual Basic .NET)
Imports System
Imports System.Data
Imports System.Data.SQL
Namespace Chapter4
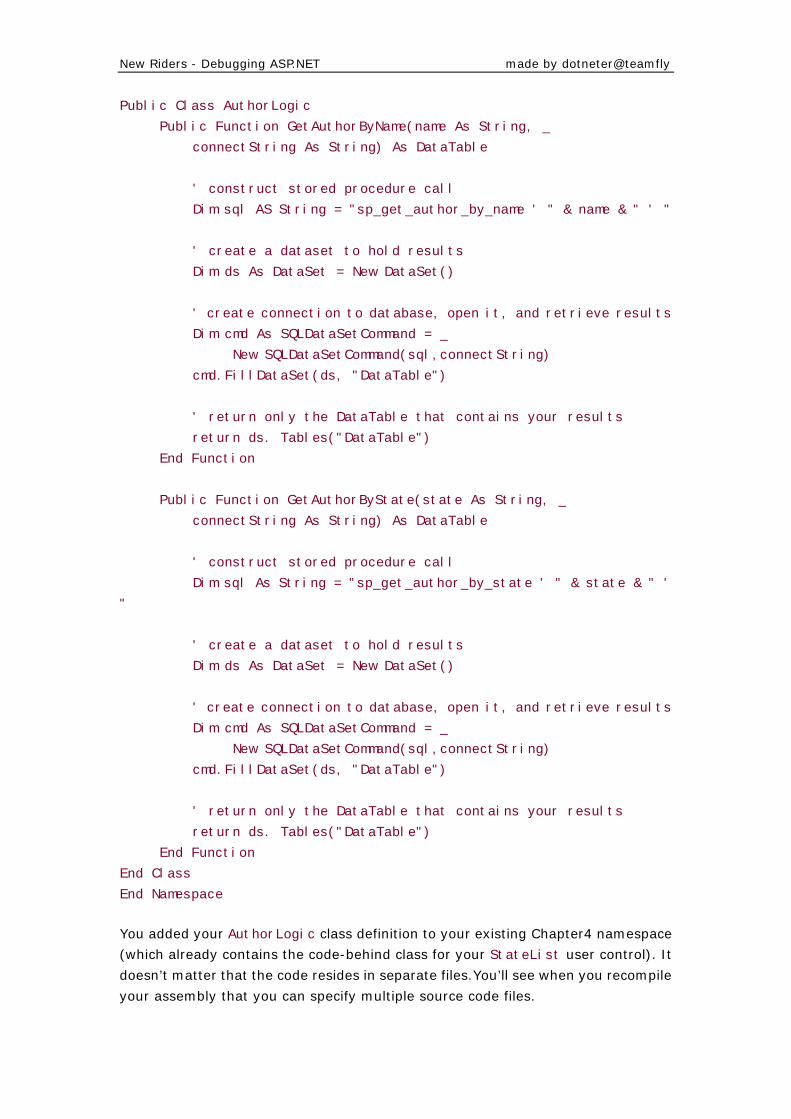
New Riders - Debugging ASP.NET made by dotneter@teamfly
Public Class AuthorLogic
Public Function GetAuthorByName(name As String, _
connectString As String) As DataTable
' construct stored procedure call
Dim sql AS String = "sp_get_author_by_name ' " & name & " ' "
' create a dataset to hold results
Dim ds As DataSet = New DataSet()
' create connection to database, open it, and retrieve results
Dim cmd As SQLDataSetCommand = _
New SQLDataSetCommand(sql,connectString)
cmd.FillDataSet(ds, "DataTable")
' return only the DataTable that contains your results
return ds. Tables("DataTable")
End Function
Public Function GetAuthorByState(state As String, _
connectString As String) As DataTable
' construct stored procedure call
Dim sql As String = "sp_get_author_by_state ' " & state & " '
"
' create a dataset to hold results
Dim ds As DataSet = New DataSet()
' create connection to database, open it, and retrieve results
Dim cmd As SQLDataSetCommand = _
New SQLDataSetCommand(sql,connectString)
cmd.FillDataSet(ds, "DataTable")
' return only the DataTable that contains your results
return ds. Tables("DataTable")
End Function
End Class
End Namespace
You added your AuthorLogic class definition to your existing Chapter4 namespace
(which already contains the code-behind class for your StateList user control). It
doesn’t matter that the code resides in separate files.You’ll see when you recompile
your assembly that you can specify multiple source code files.
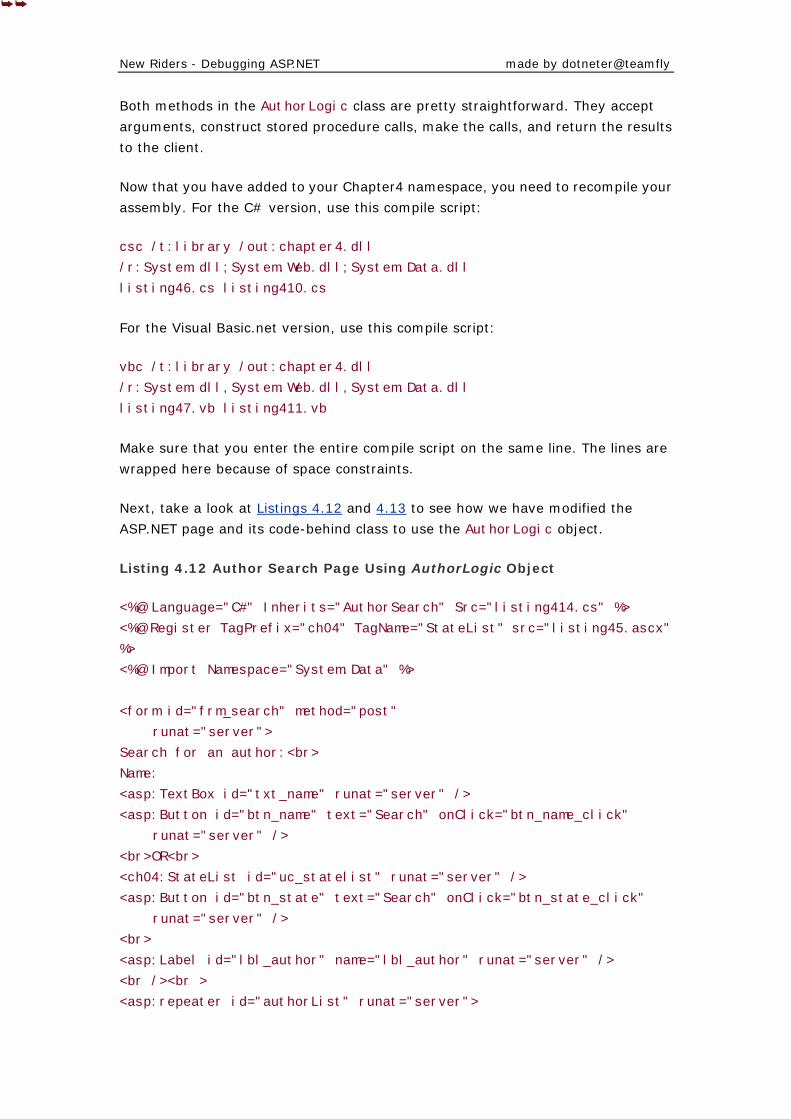
New Riders - Debugging ASP.NET made by dotneter@teamfly
Both methods in the AuthorLogic class are pretty straightforward. They accept
arguments, construct stored procedure calls, make the calls, and return the results
to the client.
Now that you have added to your Chapter4 namespace, you need to recompile your
assembly. For the C# version, use this compile script:
csc /t:library /out:chapter4.dll
/r:System.dll;System.Web.dll;System.Data.dll
listing46.cs listing410.cs
For the Visual Basic.net version, use this compile script:
vbc /t:library /out:chapter4.dll
/r:System.dll,System.Web.dll,System.Data.dll
listing47.vb listing411.vb
Make sure that you enter the entire compile script on the same line. The lines are
wrapped here because of space constraints.
Next, take a look at Listings 4.12 and 4.13 to see how we have modified the
ASP.NET page and its code-behind class to use the AuthorLogic object.
Listing 4.12 Author Search Page Using AuthorLogic Object
<%@ Language="C#" Inherits="AuthorSearch" Src="listing414.cs" %>
<%@ Register TagPrefix="ch04" TagName="StateList" src="listing45.ascx"
%>
<%@ Import Namespace="System.Data" %>
<form id="frm_search" method="post"
runat="server">
Search for an author:<br>
Name:
<asp:TextBox id="txt_name" runat="server" />
<asp:Button id="btn_name" text="Search" onClick="btn_name_click"
runat="server" />
<br>OR<br>
<ch04:StateList id="uc_statelist" runat="server" />
<asp:Button id="btn_state" text="Search" onClick="btn_state_click"
runat="server" />
<br>
<asp:Label id="lbl_author" name="lbl_author" runat="server" />
<br /><br >
<asp:repeater id="authorList" runat="server">

New Riders - Debugging ASP.NET made by dotneter@teamfly
<template name="ItemTemplate">
<%# ((DataRow)Container.DataItem)["au_fname"]. ToString() %>
<%# ((DataRow)Container.DataItem)["au_lname"]. ToString() %>
<br />
<%# ((DataRow)Container.DataItem)["address"]. ToString() %>
<br />
<%# ((DataRow)Container.DataItem)["city"]. ToString() %>,
<%# ((DataRow)Container.DataItem)["state"]. ToString() %>
<%# ((DataRow)Container.DataItem)["zip"]. ToString() %>
<hr />
</template>
</asp:repeater>
</form>
Listing 4.13 Author Search Page Using AuthorLogic Object (Visual
Basic .NET)
<%@ Language="VB" Inherits="AuthorSearch" Src="listing415.vb" %>
<%@ Register TagPrefix="ch04" TagName="StateList" src="listing45.ascx"
%>
<%@ Import Namespace="System.Data" %>
<form id="frm_search" method="post"
runat="server">
Search for an author:<br>
Name:
<asp:TextBox id="txt_name" runat="server" />
<asp:Button id="btn_name" text="Search" onClick="btn_name_click"
runat="server" />
<br>OR<br>
<ch04:StateList id="uc_statelist" runat="server" />
<asp:Button id="btn_state" text="Search" onClick="btn_state_click"
runat="server" />
<br>
<asp:Label id="lbl_author" name="lbl_author" runat="server" />
<br /><br >
<asp:repeater id="authorList" runat="server">
<template name="ItemTemplate">
<%# CType(Container.DataItem,System.Data.DataRow)("au_fname")
%>
<%# CType(Container.DataItem,System.Data.DataRow)("au_lname")
%>
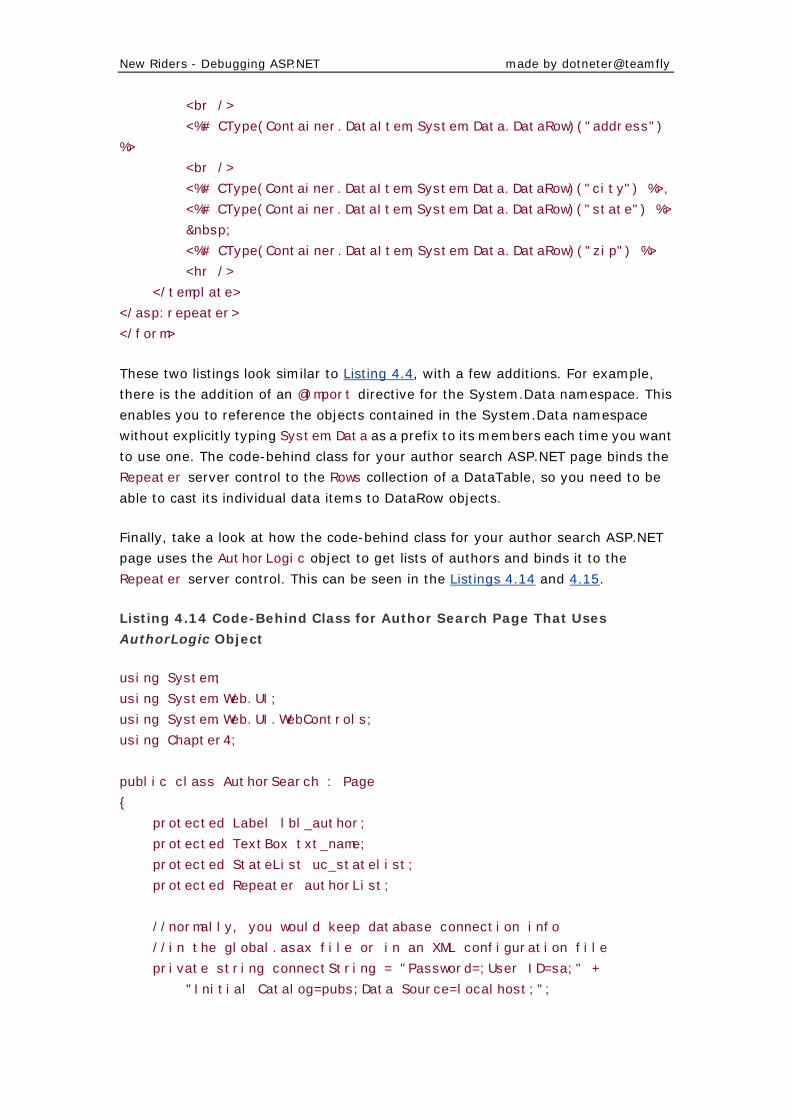
New Riders - Debugging ASP.NET made by dotneter@teamfly
<br />
<%# CType(Container.DataItem,System.Data.DataRow)("address")
%>
<br />
<%# CType(Container.DataItem,System.Data.DataRow)("city") %>,
<%# CType(Container.DataItem,System.Data.DataRow)("state") %>
<%# CType(Container.DataItem,System.Data.DataRow)("zip") %>
<hr />
</template>
</asp:repeater>
</form>
These two listings look similar to Listing 4.4, with a few additions. For example,
there is the addition of an @Import directive for the System.Data namespace. This
enables you to reference the objects contained in the System.Data namespace
without explicitly typing System.Data as a prefix to its members each time you want
to use one. The code-behind class for your author search ASP.NET page binds the
Repeater server control to the Rows collection of a DataTable, so you need to be
able to cast its individual data items to DataRow objects.
Finally, take a look at how the code-behind class for your author search ASP.NET
page uses the AuthorLogic object to get lists of authors and binds it to the
Repeater server control. This can be seen in the Listings 4.14 and 4.15.
Listing 4.14 Code-Behind Class for Author Search Page That Uses
AuthorLogic Object
using System;
using System.Web.UI;
using System.Web.UI.WebControls;
using Chapter4;
public class AuthorSearch : Page
{
protected Label lbl_author;
protected TextBox txt_name;
protected StateList uc_statelist;
protected Repeater authorList;
//normally, you would keep database connection info
//in the global.asax file or in an XML configuration file
private string connectString = "Password=;User ID=sa;" +
"Initial Catalog=pubs;Data Source=localhost;";
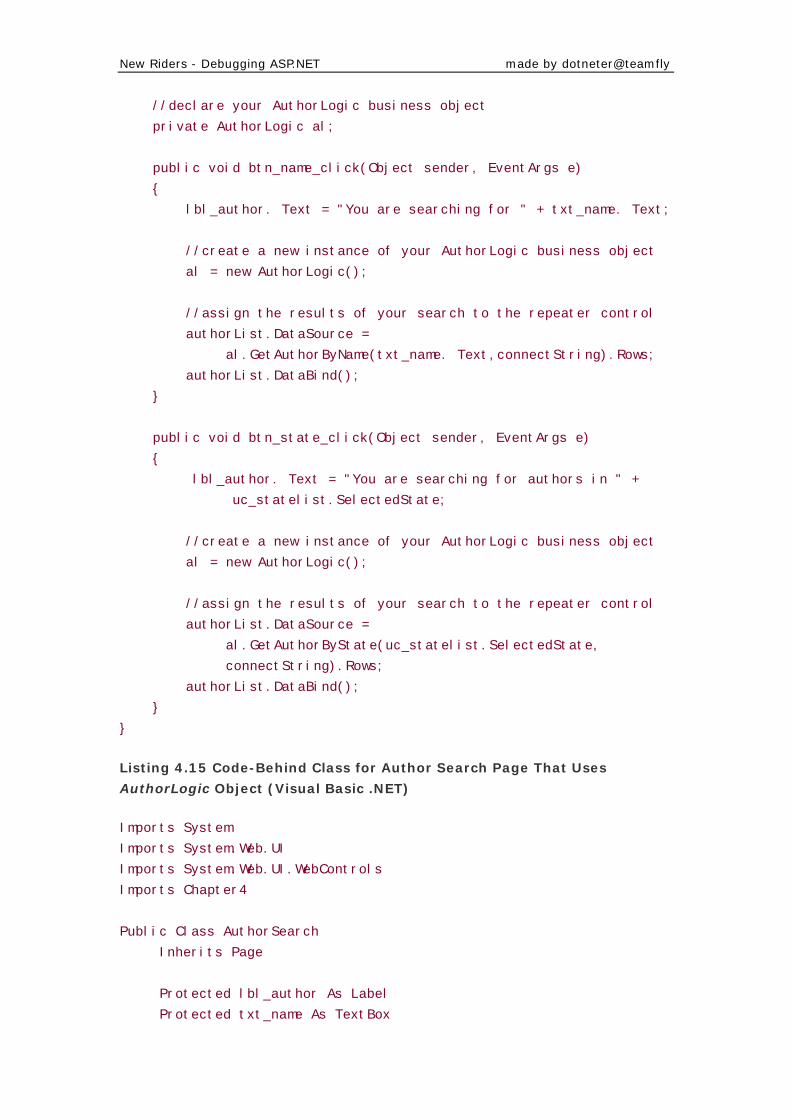
New Riders - Debugging ASP.NET made by dotneter@teamfly
//declare your AuthorLogic business object
private AuthorLogic al;
public void btn_name_click(Object sender, EventArgs e)
{
lbl_author. Text = "You are searching for " + txt_name. Text;
//create a new instance of your AuthorLogic business object
al = new AuthorLogic();
//assign the results of your search to the repeater control
authorList.DataSource =
al.GetAuthorByName(txt_name. Text,connectString).Rows;
authorList.DataBind();
}
public void btn_state_click(Object sender, EventArgs e)
{
lbl_author. Text = "You are searching for authors in " +
uc_statelist.SelectedState;
//create a new instance of your AuthorLogic business object
al = new AuthorLogic();
//assign the results of your search to the repeater control
authorList.DataSource =
al.GetAuthorByState(uc_statelist.SelectedState,
connectString).Rows;
authorList.DataBind();
}
}
Listing 4.15 Code-Behind Class for Author Search Page That Uses
AuthorLogic Object (Visual Basic .NET)
Imports System
Imports System.Web.UI
Imports System.Web.UI.WebControls
Imports Chapter4
Public Class AuthorSearch
Inherits Page
Protected lbl_author As Label
Protected txt_name As TextBox
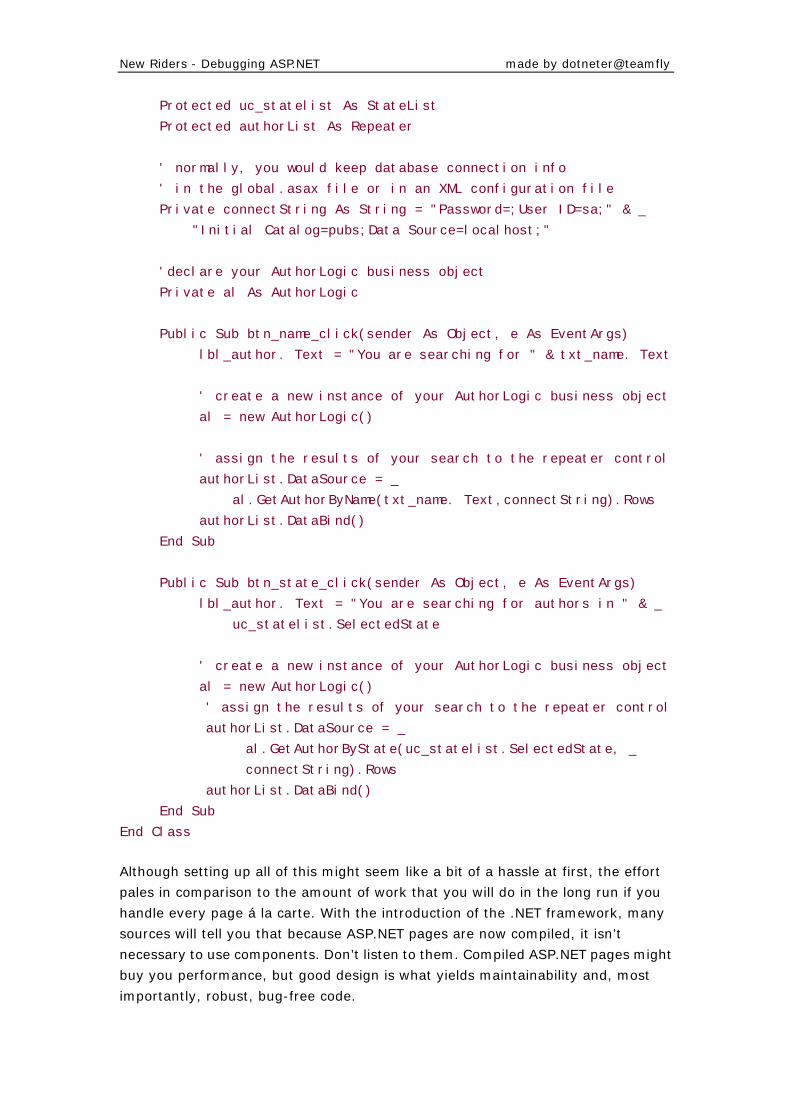
New Riders - Debugging ASP.NET made by dotneter@teamfly
Protected uc_statelist As StateList
Protected authorList As Repeater
' normally, you would keep database connection info
' in the global.asax file or in an XML configuration file
Private connectString As String = "Password=;User ID=sa;" & _
"Initial Catalog=pubs;Data Source=localhost;"
'declare your AuthorLogic business object
Private al As AuthorLogic
Public Sub btn_name_click(sender As Object, e As EventArgs)
lbl_author. Text = "You are searching for " & txt_name. Text
' create a new instance of your AuthorLogic business object
al = new AuthorLogic()
' assign the results of your search to the repeater control
authorList.DataSource = _
al.GetAuthorByName(txt_name. Text,connectString).Rows
authorList.DataBind()
End Sub
Public Sub btn_state_click(sender As Object, e As EventArgs)
lbl_author. Text = "You are searching for authors in " & _
uc_statelist.SelectedState
' create a new instance of your AuthorLogic business object
al = new AuthorLogic()
' assign the results of your search to the repeater control
authorList.DataSource = _
al.GetAuthorByState(uc_statelist.SelectedState, _
connectString).Rows
authorList.DataBind()
End Sub
End Class
Although setting up all of this might seem like a bit of a hassle at first, the effort
pales in comparison to the amount of work that you will do in the long run if you
handle every page á la carte. With the introduction of the .NET framework, many
sources will tell you that because ASP.NET pages are now compiled, it isn’t
necessary to use components. Don’t listen to them. Compiled ASP.NET pages might
buy you performance, but good design is what yields maintainability and, most
importantly, robust, bug-free code.
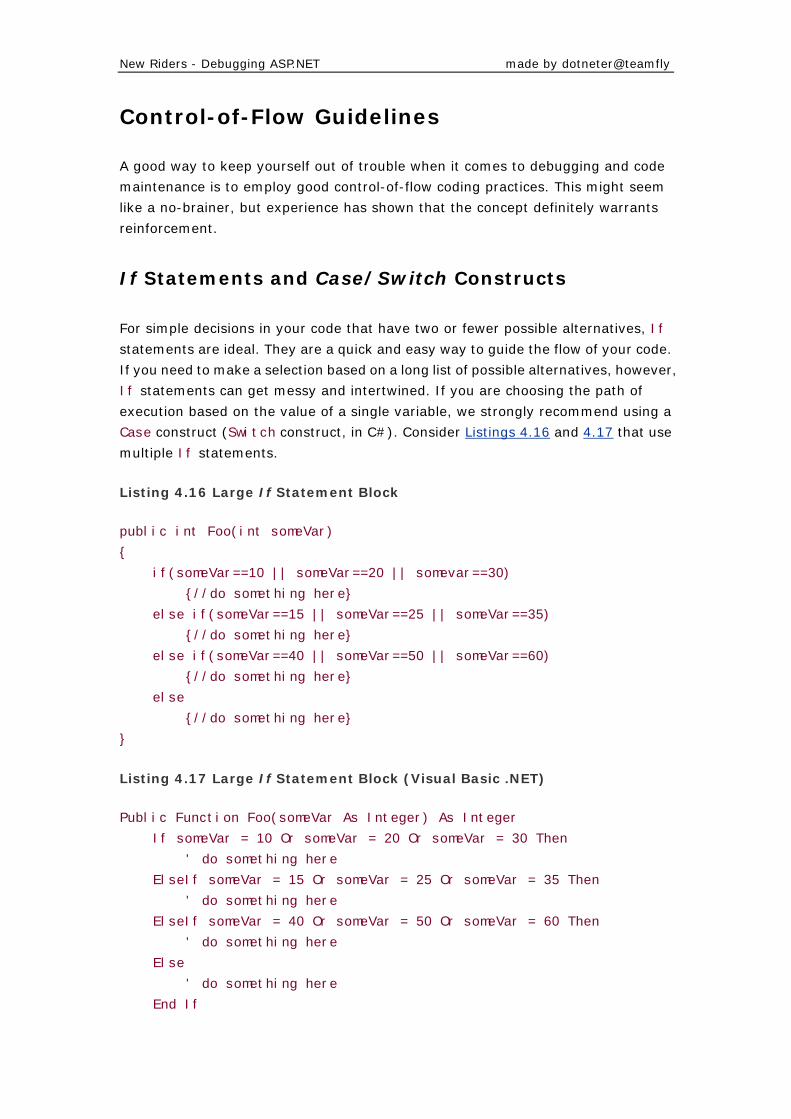
New Riders - Debugging ASP.NET made by dotneter@teamfly
Control-of-Flow Guidelines
A good way to keep yourself out of trouble when it comes to debugging and code
maintenance is to employ good control-of-flow coding practices. This might seem
like a no-brainer, but experience has shown that the concept definitely warrants
reinforcement.
If Statements and Case/Switch Constructs
For simple decisions in your code that have two or fewer possible alternatives, If
statements are ideal. They are a quick and easy way to guide the flow of your code.
If you need to make a selection based on a long list of possible alternatives, however,
If statements can get messy and intertwined. If you are choosing the path of
execution based on the value of a single variable, we strongly recommend using a
Case construct (Switch construct, in C#). Consider Listings 4.16 and 4.17 that use
multiple If statements.
Listing 4.16 Large If Statement Block
public int Foo(int someVar)
{
if(someVar==10 || someVar==20 || somevar==30)
{//do something here}
else if(someVar==15 || someVar==25 || someVar==35)
{//do something here}
else if(someVar==40 || someVar==50 || someVar==60)
{//do something here}
else
{//do something here}
}
Listing 4.17 Large If Statement Block (Visual Basic .NET)
Public Function Foo(someVar As Integer) As Integer
If someVar = 10 Or someVar = 20 Or someVar = 30 Then
' do something here
ElseIf someVar = 15 Or someVar = 25 Or someVar = 35 Then
' do something here
ElseIf someVar = 40 Or someVar = 50 Or someVar = 60 Then
' do something here
Else
' do something here
End If
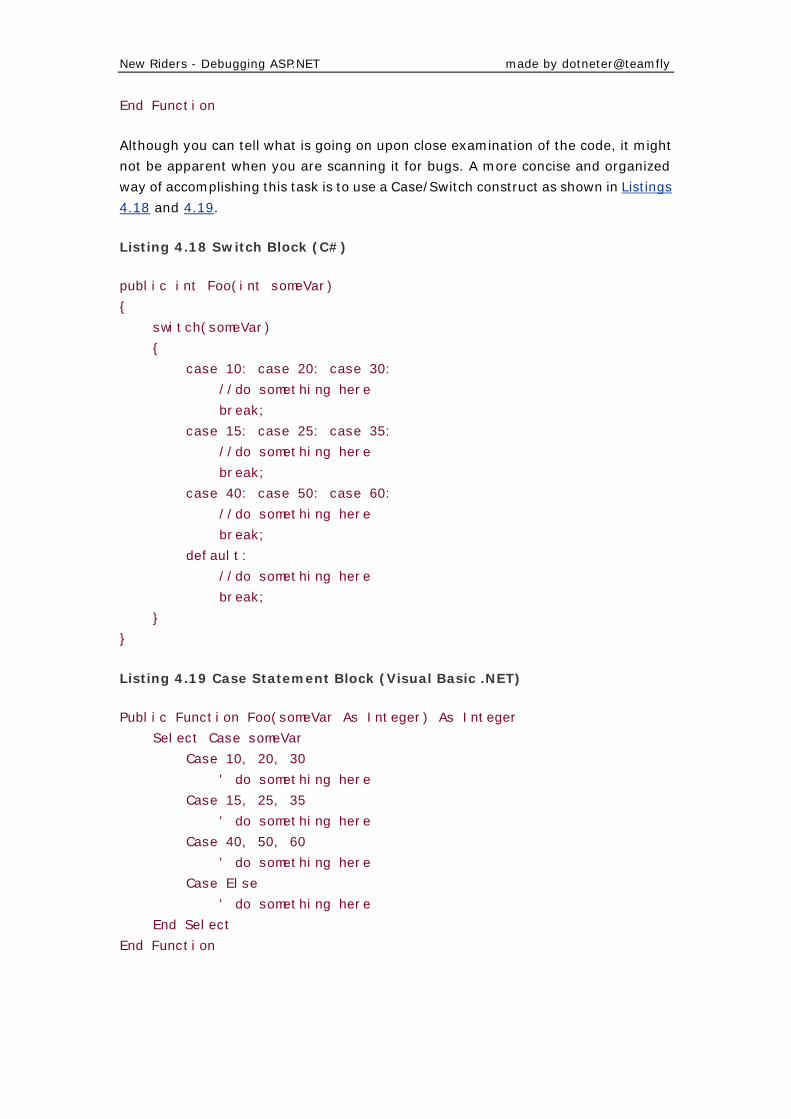
New Riders - Debugging ASP.NET made by dotneter@teamfly
End Function
Although you can tell what is going on upon close examination of the code, it might
not be apparent when you are scanning it for bugs. A more concise and organized
way of accomplishing this task is to use a Case/Switch construct as shown in Listings
4.18 and 4.19.
Listing 4.18 Switch Block (C#)
public int Foo(int someVar)
{
switch(someVar)
{
case 10: case 20: case 30:
//do something here
break;
case 15: case 25: case 35:
//do something here
break;
case 40: case 50: case 60:
//do something here
break;
default:
//do something here
break;
}
}
Listing 4.19 Case Statement Block (Visual Basic .NET)
Public Function Foo(someVar As Integer) As Integer
Select Case someVar
Case 10, 20, 30
' do something here
Case 15, 25, 35
' do something here
Case 40, 50, 60
' do something here
Case Else
' do something here
End Select
End Function
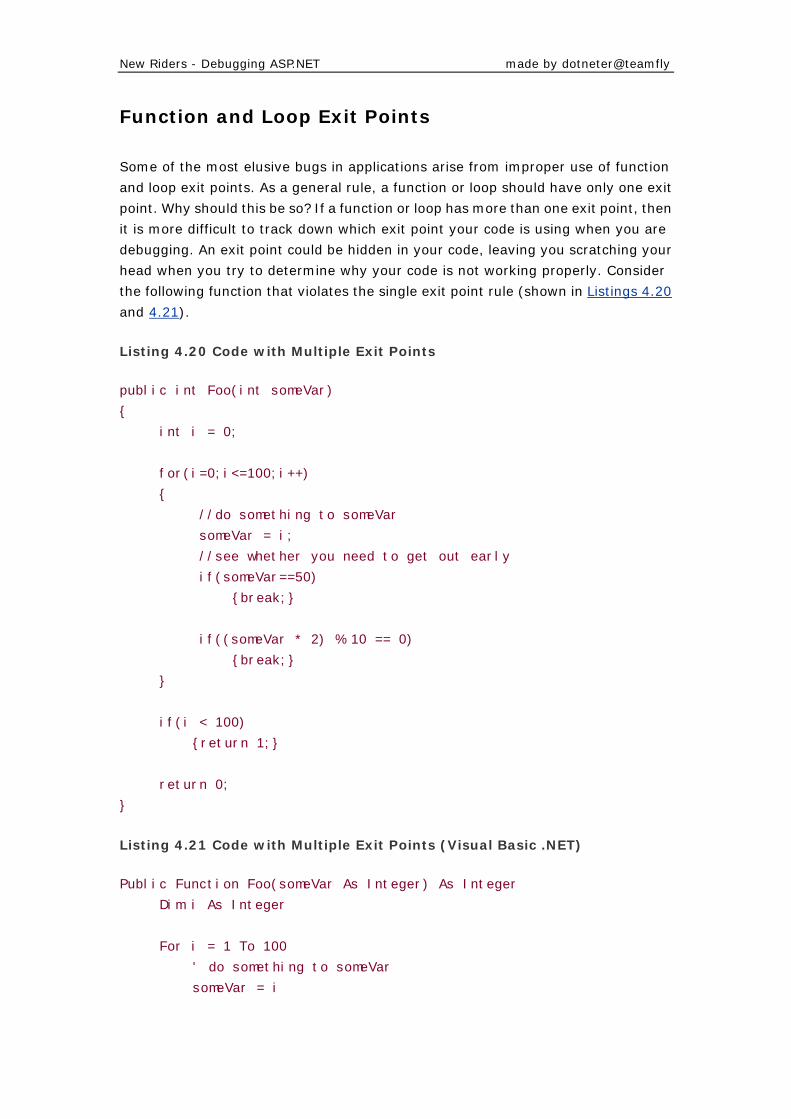
New Riders - Debugging ASP.NET made by dotneter@teamfly
Function and Loop Exit Points
Some of the most elusive bugs in applications arise from improper use of function
and loop exit points. As a general rule, a function or loop should have only one exit
point. Why should this be so? If a function or loop has more than one exit point, then
it is more difficult to track down which exit point your code is using when you are
debugging. An exit point could be hidden in your code, leaving you scratching your
head when you try to determine why your code is not working properly. Consider
the following function that violates the single exit point rule (shown in Listings 4.20
and 4.21).
Listing 4.20 Code with Multiple Exit Points
public int Foo(int someVar)
{
int i = 0;
for(i=0;i<=100;i++)
{
//do something to someVar
someVar = i;
//see whether you need to get out early
if(someVar==50)
{break;}
if((someVar * 2) % 10 == 0)
{break;}
}
if(i < 100)
{return 1;}
return 0;
}
Listing 4.21 Code with Multiple Exit Points (Visual Basic .NET)
Public Function Foo(someVar As Integer) As Integer
Dim i As Integer
For i = 1 To 100
' do something to someVar
someVar = i
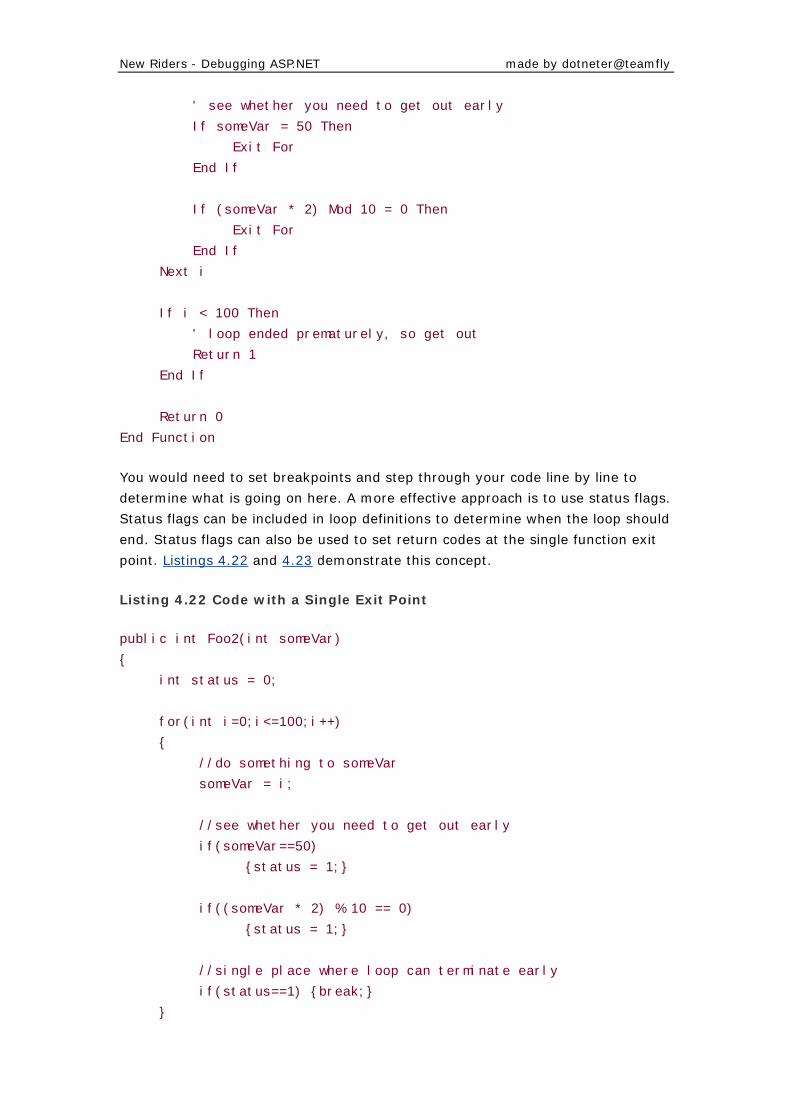
New Riders - Debugging ASP.NET made by dotneter@teamfly
' see whether you need to get out early
If someVar = 50 Then
Exit For
End If
If (someVar * 2) Mod 10 = 0 Then
Exit For
End If
Next i
If i < 100 Then
' loop ended prematurely, so get out
Return 1
End If
Return 0
End Function
You would need to set breakpoints and step through your code line by line to
determine what is going on here. A more effective approach is to use status flags.
Status flags can be included in loop definitions to determine when the loop should
end. Status flags can also be used to set return codes at the single function exit
point. Listings 4.22 and 4.23 demonstrate this concept.
Listing 4.22 Code with a Single Exit Point
public int Foo2(int someVar)
{
int status = 0;
for(int i=0;i<=100;i++)
{
//do something to someVar
someVar = i;
//see whether you need to get out early
if(someVar==50)
{status = 1;}
if((someVar * 2) % 10 == 0)
{status = 1;}
//single place where loop can terminate early
if(status==1) {break;}
}
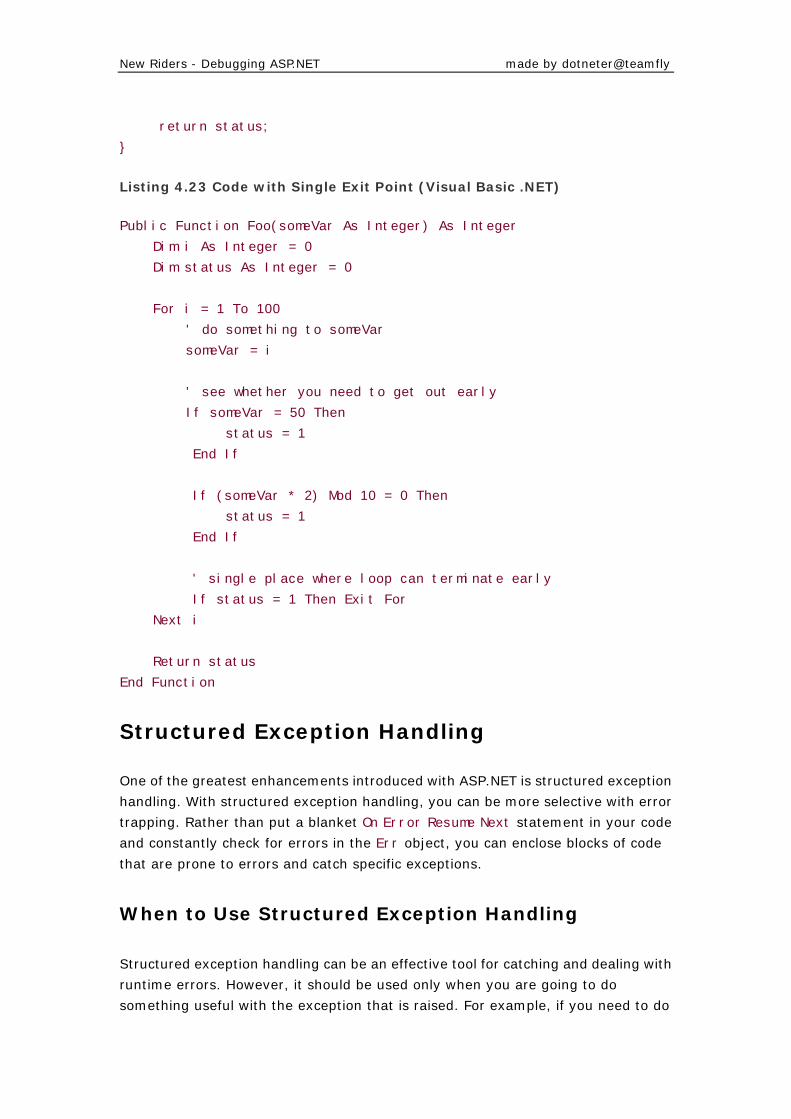
New Riders - Debugging ASP.NET made by dotneter@teamfly
return status;
}
Listing 4.23 Code with Single Exit Point (Visual Basic .NET)
Public Function Foo(someVar As Integer) As Integer
Dim i As Integer = 0
Dim status As Integer = 0
For i = 1 To 100
' do something to someVar
someVar = i
' see whether you need to get out early
If someVar = 50 Then
status = 1
End If
If (someVar * 2) Mod 10 = 0 Then
status = 1
End If
' single place where loop can terminate early
If status = 1 Then Exit For
Next i
Return status
End Function
Structured Exception Handling
One of the greatest enhancements introduced with ASP.NET is structured exception
handling. With structured exception handling, you can be more selective with error
trapping. Rather than put a blanket On Error Resume Next statement in your code
and constantly check for errors in the Err object, you can enclose blocks of code
that are prone to errors and catch specific exceptions.
When to Use Structured Exception Handling
Structured exception handling can be an effective tool for catching and dealing with
runtime errors. However, it should be used only when you are going to do
something useful with the exception that is raised. For example, if you need to do
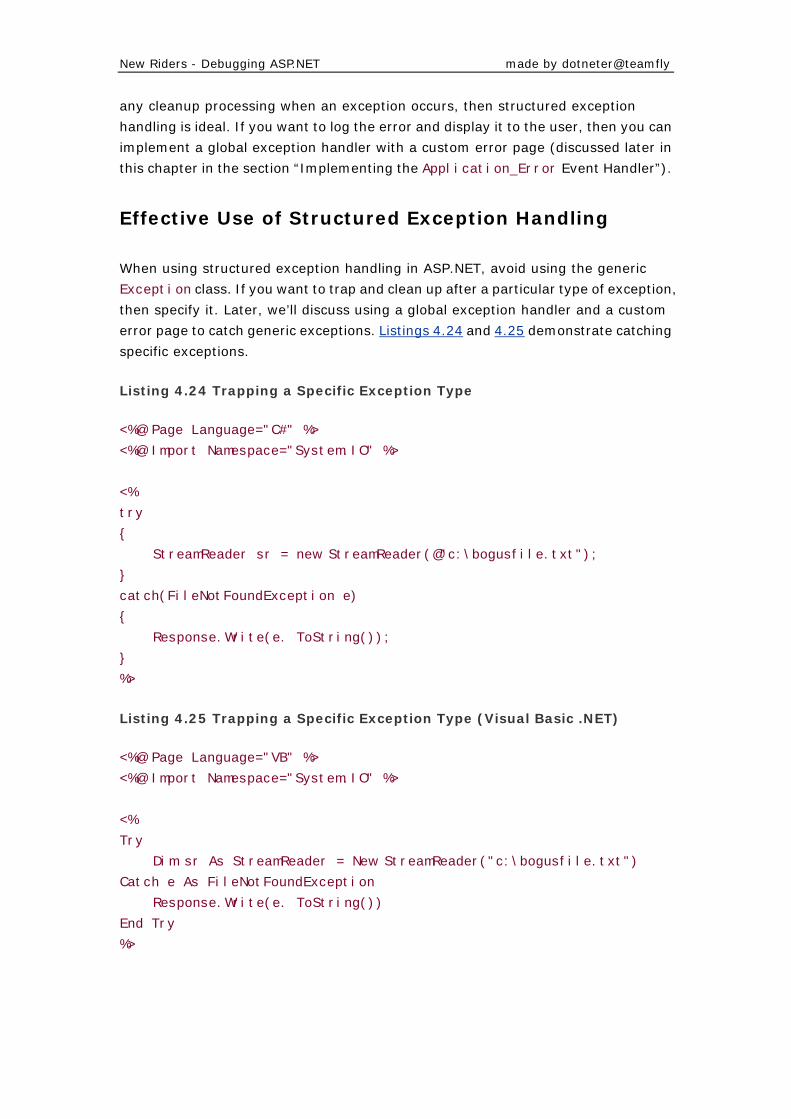
New Riders - Debugging ASP.NET made by dotneter@teamfly
any cleanup processing when an exception occurs, then structured exception
handling is ideal. If you want to log the error and display it to the user, then you can
implement a global exception handler with a custom error page (discussed later in
this chapter in the section “Implementing the Application_Error Event Handler”).
Effective Use of Structured Exception Handling
When using structured exception handling in ASP.NET, avoid using the generic
Exception class. If you want to trap and clean up after a particular type of exception,
then specify it. Later, we’ll discuss using a global exception handler and a custom
error page to catch generic exceptions. Listings 4.24 and 4.25 demonstrate catching
specific exceptions.
Listing 4.24 Trapping a Specific Exception Type
<%@ Page Language="C#" %>
<%@ Import Namespace="System.IO" %>
<%
try
{
StreamReader sr = new StreamReader(@"c:\bogusfile.txt");
}
catch(FileNotFoundException e)
{
Response.Write(e. ToString());
}
%>
Listing 4.25 Trapping a Specific Exception Type (Visual Basic .NET)
<%@ Page Language="VB" %>
<%@ Import Namespace="System.IO" %>
<%
Try
Dim sr As StreamReader = New StreamReader("c:\bogusfile.txt")
Catch e As FileNotFoundException
Response.Write(e. ToString())
End Try
%>
New Riders - Debugging ASP.NET made by dotneter@teamfly
Global Exception Handling
You can’t debug a problem if you don’t know that it exists. After you take your web
application live, you are no longer the only one who is using it (hopefully), so you
need an effective plan to track exceptions when they occur while others are surfing
your site. A great way to do this is to implement an exception handler at the
application level. This will allow you to consolidate the logging and notification parts
of your exception handling in one convenient place. As you’ll see from the code
examples that follow, your global exception handler can handle both specific
exceptions that you trap in your code and generic unhandled exceptions.
After your global exception handler has done its work, you’ll want to redirect the
users of your website to a friendly page that tells them that something has gone
wrong, and then provide them with customer support information as well as a link
back to your web application’s home page.
Implementing the Application_Error Event Handler
The HttpApplication class in the System. Web namespace implements an Error
event handler. This should not be confused with the HttpApplicationState class,
which contains the definition for the Application object that you use in a typical
ASP.NET page (see the .NET framework documentation for more detail on the
differences between these two classes).You can implement this event handler in the
global.asax file as shown in Listings 4.26 and 4.27.
Listing 4.26 Application_Error Event Handler
<%@ Application Language="C#" %>
<%@ Import Namespace="System.Diagnostics" %>
<script language="C#" runat="server">
void Application_Error(object sender, EventArgs e)
{
//get reference to the source of the exception chain
Exception ex = Server.GetLastError().GetBaseException();
//log the details of the exception and page state to the
//Windows 2000 Event Log
EventLog.WriteEntry("Test Web",
"MESSAGE: " + ex.Message +
"\nSOURCE: " + ex.Source +
"\nFORM: " + Request.Form. ToString() +
"\nTARGETSITE: " + ex. TargetSite +

New Riders - Debugging ASP.NET made by dotneter@teamfly
"\nQUERYSTRING: " + Request.QueryString. ToString() +
"\nSTACKTRACE: " + ex.StackTrace,
EventLogEntryType.Error);
//Insert optional email notification here. . .
}
</script>
Listing 4.27 Application_Error Event Handler (Visual Basic .NET)
<%@ Application Language="VB" %>
<%@ Import Namespace="System.Diagnostics" %>
<script language="VB" runat="server">
Sub Application_Error(sender As Object, e As EventArgs)
' get reference to the source of the exception chain
Dim ex As Exception = Server.GetLastError().GetBaseException()
' log the details of the exception and page state to the
' Windows 2000 Event Log
EventLog.WriteEntry("Test Web", _
"MESSAGE: " & ex.Message & _
"\nSOURCE: " & ex.Source & _
"\nFORM: " & Request.Form. ToString() & _
"\nQUERYSTRING: :" & Request.QueryString. ToString() & _
"\nTARGETSITE: " & ex. TargetSite & _
"\nSTACKTRACE: " & ex.StackTrace, _
EventLogEntryType.Error)
'Insert optional email notification here...
End Sub
</script>
First, you have to be sure to set a reference to the System.Diagnostics namespace.
You’ll use the EventLog class in this namespace to write exception details to the
Windows 2000 event log. Inside the Application_Error event handler, you declare
an Exception object and initialize it through a call to
Server.GetLastError().GetBaseException().
The GetLastError() method of the Server object simply returns a reference to a
generic HttpException. This is a wrapper that was placed around the original
exception when it was passed from your ASP.NET page to the Application_Error
event. To get access to the original exception, you need to call its
GetBaseException() method. This will yield the original exception information,
regardless of how many layers have been added to the exception tree.
New Riders - Debugging ASP.NET made by dotneter@teamfly
Next, you make a call to the WriteEntry() method of the EventLog class. There are
several overloaded signatures for this method.You can read more about how to
leverage the Windows 2000 event log in Chapter 8,“Leveraging the Windows 2000
Event Log.”The implementation that we chose to use here accepts three parameters.
The first parameter is the source of the error. It appears in the Source field of the
Windows 2000 event log viewer. The second parameter is the log data itself.You can
see that we have added a lot of information to help track down what caused the
exception, including the exception message, the exception source, the contents of
the Form collection, the contents of the QueryString collection, the name of the
method that generated the error (TargetSite), and a complete stack trace.
Note that the stack trace contains the name of the file that was the source of the
exception. However, it strips off the contents of the query string—hence the need to
specifically include it previously. The third and final parameter to the WriteEntry()
method is an enumeration of type EventLogEntryType. We chose to use the Error
element of the enumeration.
At the end of the event handler, we inserted a comment block where you can
optionally put code to email the exception information to your IT support staff.
Discussion of the different messaging paradigms in the .NET framework is beyond
the scope of this book.
After the Application_Error event has completed its work, it automatically
redirects the user of your web application to your custom error page (which you will
set up in the next section). Optionally, however, you can use the
Server.ClearError() method after you have logged the exception and redirect
your user using the Server.Execute() method, specifying the page that you want
to load in the user’s browser.
The code that you have just implemented will capture all unhandled exceptions that
occur in your web application. If you need to do some cleanup in the event of an
exception and you implement structured exception handling inside your ASP.NET
page, you can still leverage the global exception handler. Listings 4.28 and 4.29
present examples of how you would do it.
Listing 4.28 Throwing a Handled Exception
<%@ Page Language="C#" %>
<script language="C#" runat="server">
protected void button1_click(object sender, EventArgs e)
{
try
{
//do some complex stuff
New Riders - Debugging ASP.NET made by dotneter@teamfly
//generate your fictional exception
int x = 1;
int y = 0;
int z = x / y;
}
catch(DivideByZeroException ex)
{
//put cleanup code here
throw(ex);
}
}
</script>
<form runat="server">
<asp:button id="button1" onclick="button1_click"
text="click me" runat="server" />
</form>
Listing 4.29 Throwing a Handled Exception (Visual Basic .NET)
<%@ Page Language="VB" %>
<script language="VB" runat="server">
Protected Sub button1_click(sender As Object, e As EventArgs)
Try
' do some complex stuff
' generate your fictional exception
Dim x As Integer = 1
Dim y As Integer = 0
Dim z As Integer = x / y
Catch ex As DivideByZeroException
' put cleanup code here
Throw(ex)
End Try
End Sub
</script>
<form runat="server">
<asp:button id="button1" onclick="button1_click"
text="click me" runat="server" />
</form>

New Riders - Debugging ASP.NET made by dotneter@teamfly
The code in these listings defines a web form with a text box and a button. When you
click the button, it fires the button1_click event handler. In the event handler, you
would do processing as usual. For the purposes of this demonstration, however, you
intentionally generate a DivideByZeroException. This takes you to the catch block.
Here, you can perform any page-specific cleanup code before calling throw(ex) to
pass your exception to the global exception handler to be logged to the Windows
2000 event log.
When the global exception handler is finished logging the error, the
defaultredirect attribute that you set in your config.web file (discussed in the
next section) takes over, and you are redirected to the error.aspx page to display
your friendly message to the user of your web application.
Setting Up the Custom Error Page
The first step in setting up a custom error page is to modify your config.web file to
route the users of your web application to a friendly error page if an exception
occurs. It helps to boost users’ confidence in your site when it can recover gracefully
from the unexpected. Add the code in Listing 4.30 to the config.web file of your web
application.
Listing 4.30 Adding the <customerrors> Tag to Your Config.web File
<configuration>
<customerrors mode="On" defaultredirect="error.aspx" />
</configuration>
Note that your config.web file might already have a <customerrors> tag, so you
might only need to modify the existing one. The mode attribute of the
<customerrors> tag has three settings: On, Off, and RemoteOnly. If the mode is On,
users will always be redirected to the custom error page specified by the
defaultredirect attribute if an unhandled exception occurs. If the mode is Off,
the details of any exception that occurs will be shown to the user in the browser. The
RemoteOnly mode is a hybrid of the two other modes. If you are browsing your web
application while sitting at the web server itself, it behaves like the Off mode. All
other browsers of the site will get the behavior of the On mode. If no
defaultredirect attribute is set, a default ASP.NET “friendly, yet not so friendly”
message will be displayed to the user when exceptions occur.
Next, you need to build the custom error page (error.aspx) referenced in the
config.web file. This is just an ordinary ASP.NET page that includes helpful
information for the user of your web application if an error occurs. An extremely
simple example is the one in Listing 4.31.
New Riders - Debugging ASP.NET made by dotneter@teamfly
Listing 4.31 Simple Custom Error Page
<html>
<head>
<title>My web application: Error page</title>
</head>
<body>
An unexpected error occurred in the application. Please contact customer
service at (800)555-5555. Or, you can click <a href="home.aspx">here</a>
to go back to the homepage. Thank you for your patience.
</body>
</html>
Summary
This chapter covered a tremendous amount of ground. It started off with a
discussion of code partitioning and how it helps to reduce bugs that are caused by
failure to update repetitive code. The introduction of code-behind classes helps you
to better separate your user interface logic from your business logic. Leveraging
user controls enables you to reuse pieces of user interface code much more
efficiently than using include files in traditional ASP web applications. ASP.NET
continues to support and encourage the use of business objects to encapsulate
frequently used business logic in your web applications
Next, the chapter moved on to control-of-flow guidelines to help you prevent bugs
from happening in the first place. We covered how Switch and Case constructs are
often superior to multiple If statements. The importance of a single exit point to
both functions and loops was also stressed. This was followed with a discussion of
when and how to use structured exception handling in your ASP.NET web
applications.
We rounded out the chapter with a discussion on how to implement a global
exception handler to log both unhandled exceptions in your ASP.NET web
applications and handled exceptions that you still want to be logged. In this
discussion, you were introduced to the <customerrors> tag in the config.web file,
and you learned how it is used to specify a custom error page that the user will be
redirected to in the event of an error.
The next chapter discusses conditional compiling and shows how it enables you to
toggle between debug and production code quickly and easily.
New Riders - Debugging ASP.NET made by dotneter@teamfly
Part II: ASP.NET Debugging Tools
ASP.NET Debugging Tools
5 Conditional Compiling
6 Tracing
7 Visual Studio .NET Debugging Environment
8 Leveraging the Windows 2000 Event Log
Chapter 5. Conditional Compiling
CONDITIONAL COMPILING IS ARGUABLY ONE OF the greatest debugging tools
available to any programmer. This chapter discusses what conditional compiling is,
tells how it works, and shows what it can provide for you in terms of debugging your
ASP.NET applications.
What Is Conditional Compiling?
Conditional compiling is a very basic concept that enables you to do some pretty
powerful things. Basically, conditional compiling enables you to compile parts of
your code based on a certain condition defined at compile time. Generally, this is
used if you have a debugging function that you do not want to include in your
release build. Or, you might have a function that you want two versions of: one for
your debugging and one for a release. The debug version might be littered with
output statements or other code that would be too slow to execute in a release
environment. With conditional compiling, you could create two versions of the
function and flip the switch on which one should be compiled in your program,
depending on its environment.
In the .NET framework, there are two ways to accomplish this type of conditional
compilation. One method uses function attributes to tag the function as
conditionally compiled. The second method involves using preprocessing directives
to tell the compiler at compile time which functions to include and which functions to
remove.
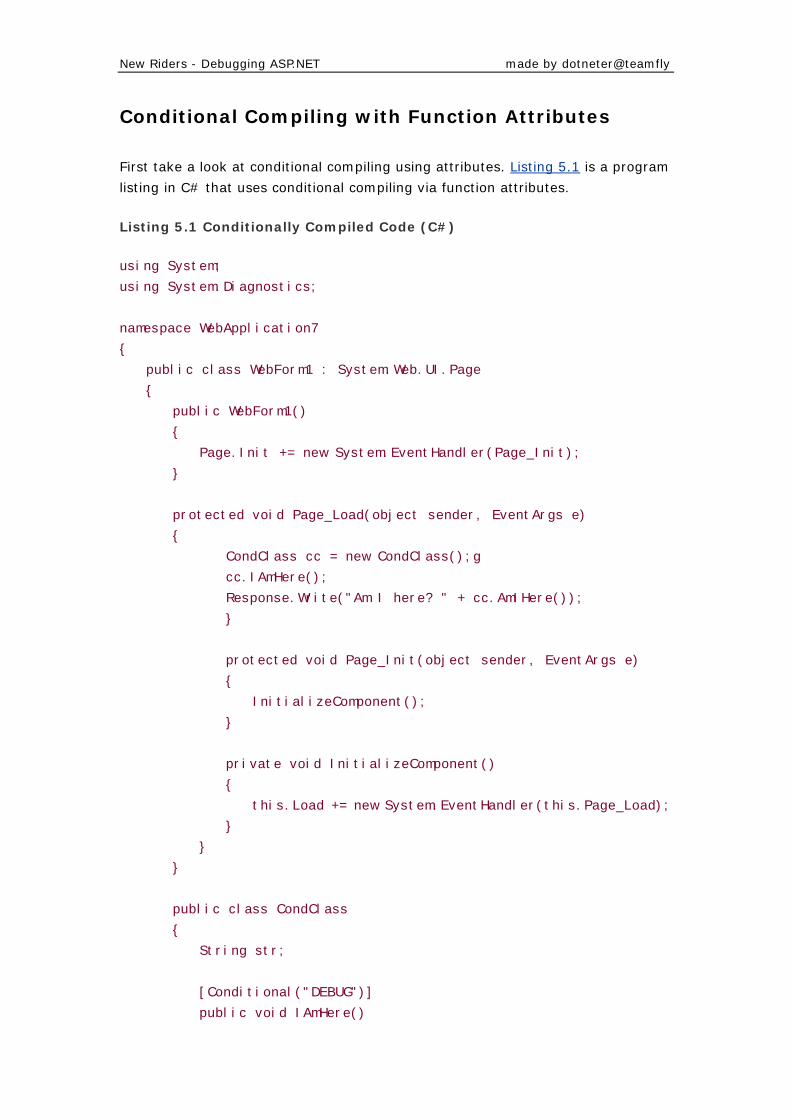
New Riders - Debugging ASP.NET made by dotneter@teamfly
Conditional Compiling with Function Attributes
First take a look at conditional compiling using attributes. Listing 5.1 is a program
listing in C# that uses conditional compiling via function attributes.
Listing 5.1 Conditionally Compiled Code (C#)
using System;
using System.Diagnostics;
namespace WebApplication7
{
public class WebForm1 : System.Web.UI.Page
{
public WebForm1()
{
Page.Init += new System.EventHandler(Page_Init);
}
protected void Page_Load(object sender, EventArgs e)
{
CondClass cc = new CondClass();g
cc.IAmHere();
Response.Write("Am I here? " + cc.AmIHere());
}
protected void Page_Init(object sender, EventArgs e)
{
InitializeComponent();
}
private void InitializeComponent()
{
this.Load += new System.EventHandler(this.Page_Load);
}
}
}
public class CondClass
{
String str;
[Conditional("DEBUG")]
public void IAmHere()

New Riders - Debugging ASP.NET made by dotneter@teamfly
{
str = "I am here!";
}
public String AmIHere()
{
return str;
}
}
Listing 5.2 is the same program written Visual Basic .NET.
Listing 5.2 Conditionally Compiled Code (Visual Basic .NET)
Imports System
Imports System.Diagnostics
Public Class WebForm1
Inherits System.Web.UI.Page
Dim WithEvents WebForm1 As System.Web.UI.Page
Sub New()
WebForm1 = Me
End Sub
Private Sub InitializeComponent()
End Sub
Protected Sub WebForm1_Load(ByVal Sender As System.Object, ByVal
e As
System.EventArgs)
Dim cc As CondClass = New CondClass()
cc.IAmHere()
Response.Write("Am I here? " + cc.AmIHere())
End Sub
Protected Sub WebForm1_Init(ByVal Sender As System.Object, ByVal
e As
System.EventArgs)
InitializeComponent()
End Sub
End Class

New Riders - Debugging ASP.NET made by dotneter@teamfly
Public Class CondClass
Dim str As String
<Conditional("DEBUG")>
Public Sub IAmHere()
str = "I am here!"
End Sub
Public Function AmIHere() As String
AmIHere = str
End Function
End Class
Now you’ll examine what is going on in these code snippets. The first thing that you
will need to do in either language is to “import” the System.Diagnostics namespaces.
In Visual Basic .NET, you use the Imports keyword; in C#, you use the using
keyword.
In each of these pieces of code, we have created a class named CondClass that
contains a string and two functions: IAmHere and AmIHere. Calling IAmHere sets the
string in the class to “I am here!”. Otherwise, that particular string is empty.You will
notice that, in both code snippets, the Conditional attribute is used with the
IAmHere function. Notice the different placement, depending on the language you
are using. The condition in which this function will be compiled is whether DEBUG is
defined in the project properties. In a debug build, this is always the case. In a
release build, this is never the case.
In the WebForm1_Load/Page_Load method, you will notice that an instance of your
CondClass object is instantiated, and then both the IAmHere and AmIHere methods
are called. Then a Response.Write is called to see if the string in the object has
been set by the call to IAmHere.
If you’re compiling in debug mode, the symbol DEBUG has been defined by the
default settings of the project, so the string will be set and the output will show “Am
I here? I am here!”. If you compile in release mode, you will see only the “Am I
here?” string—the IAmHere function will not be called because it has not been
compiled into the application due to the Conditional failing.
If you are compiling from the command line, you will need to define the DEBUG
symbol yourself. This can be done with the /d switch. In this case, it would look like
/d:DEBUG. Note that you can use any symbol that you choose instead of DEBUG.
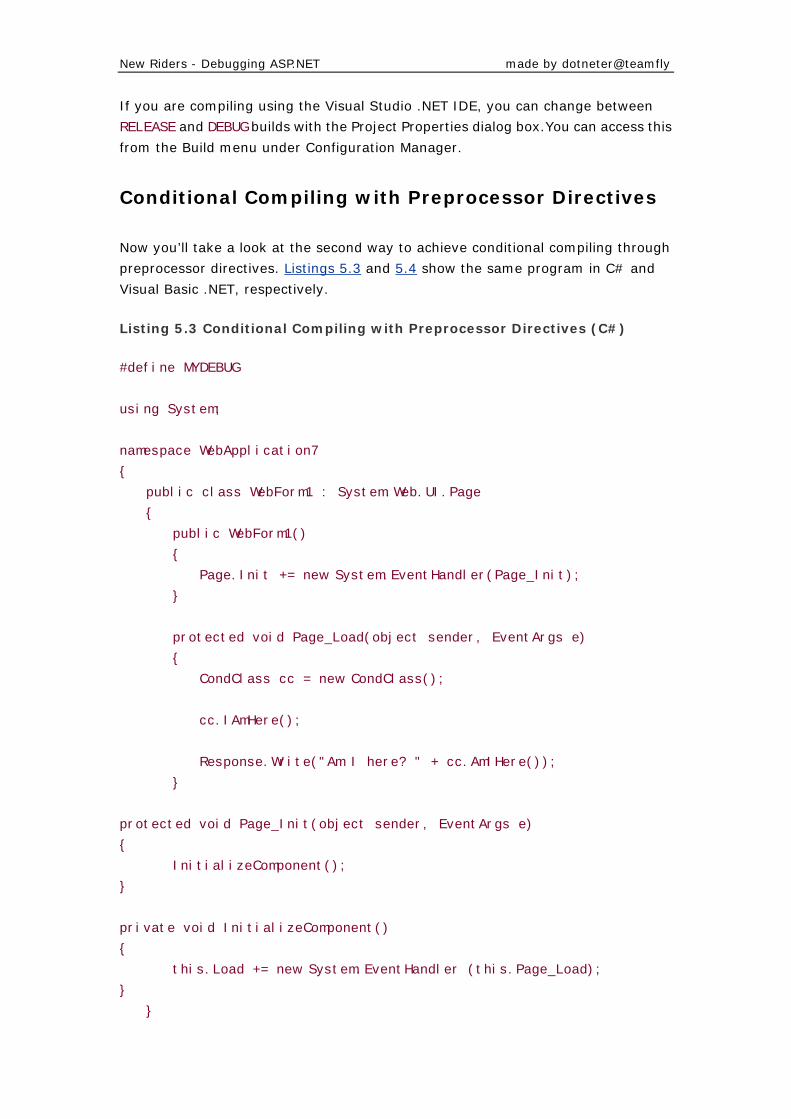
New Riders - Debugging ASP.NET made by dotneter@teamfly
If you are compiling using the Visual Studio .NET IDE, you can change between
RELEASE and DEBUG builds with the Project Properties dialog box.You can access this
from the Build menu under Configuration Manager.
Conditional Compiling with Preprocessor Directives
Now you’ll take a look at the second way to achieve conditional compiling through
preprocessor directives. Listings 5.3 and 5.4 show the same program in C# and
Visual Basic .NET, respectively.
Listing 5.3 Conditional Compiling with Preprocessor Directives (C#)
#define MYDEBUG
using System;
namespace WebApplication7
{
public class WebForm1 : System.Web.UI.Page
{
public WebForm1()
{
Page.Init += new System.EventHandler(Page_Init);
}
protected void Page_Load(object sender, EventArgs e)
{
CondClass cc = new CondClass();
cc.IAmHere();
Response.Write("Am I here? " + cc.AmIHere());
}
protected void Page_Init(object sender, EventArgs e)
{
InitializeComponent();
}
private void InitializeComponent()
{
this.Load += new System.EventHandler (this.Page_Load);
}
}
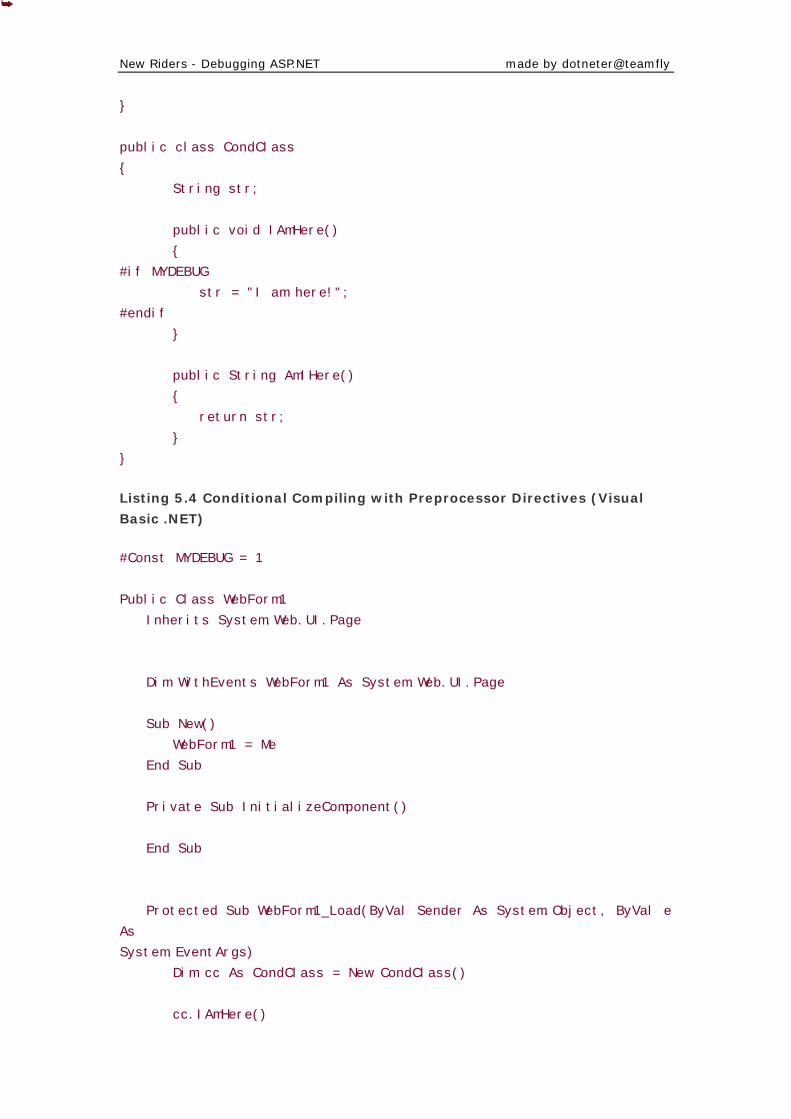
New Riders - Debugging ASP.NET made by dotneter@teamfly
}
public class CondClass
{
String str;
public void IAmHere()
{
#if MYDEBUG
str = "I am here!";
#endif
}
public String AmIHere()
{
return str;
}
}
Listing 5.4 Conditional Compiling with Preprocessor Directives (Visual
Basic .NET)
#Const MYDEBUG = 1
Public Class WebForm1
Inherits System.Web.UI.Page
Dim WithEvents WebForm1 As System.Web.UI.Page
Sub New()
WebForm1 = Me
End Sub
Private Sub InitializeComponent()
End Sub
Protected Sub WebForm1_Load(ByVal Sender As System.Object, ByVal e
As
System.EventArgs)
Dim cc As CondClass = New CondClass()
cc.IAmHere()
New Riders - Debugging ASP.NET made by dotneter@teamfly
Response.Write("Am I here? " + cc.AmIHere())
End Sub
Protected Sub WebForm1_Init(ByVal Sender As System.Object, ByVal e
As
System.EventArgs)
InitializeComponent()
End Sub
End Class
Public Class CondClass
Dim str As String
Public Sub IAmHere()
#If MYDEBUG Then
str = "I am here!"
#End If
End Sub
Public Function AmIHere() As String
AmIHere = str
End Function
End Class
The same class with the same functionality is provided. However, this version of the
code works a bit differently. First, we’ll discuss what preprocessor directives are.
Simply put, preprocessor directives are commands embedded in your code that are
interpreted by the compiler at compilation time and that will influence its behavior
as it compiles your code. In this instance, you are using the #If...Then...#End
If/#if...#endif and the #Const/#define directives.
#Const in Visual Basic .NET and #define in C# define conditional compiler
constants. These can be thought of as variable constants in either Visual Basic .NET
or C#, but these compiler constants are known to the compiler only. They cannot be
referenced in your program like a Visual Basic .NET or a C# variable constant. In
both versions, you will see that a constant known as MYDEBUG is defined using each
language’s method, as described. In Visual Basic .NET, the #Const declaration must
come before any namespace imports or any program code for it to be valid.You can
New Riders - Debugging ASP.NET made by dotneter@teamfly
see these used in the previous examples. In the Visual Basic .NET listing, the line
looks like #Const MYDEBUG. In the C# example, it is written as #define MYDEBUG.
These constants are used in conjunction with the #If...Then...#End If directives
in Visual Basic .NET and the #if...#endif directives in C#. In either case, these
tags are wrapped around the statements that you want to be included only if the
constant that you choose has been defined. In the previous sample, these tags were
put around the contents of the IAmHere function. If you keep the constant in place
at the top of your code, then the contents of what is in between the tags will be
compiled in, and you will get the “Am I here? I am here!” output. If you remove the
constant, the function’s internals will not be compiled in, and you will get only the
“Am I here?” output because the internal string in the class will not be set during the
IAmHere call. Listing 5.5 shows the appropriate lines in C#.
Listing 5.5 Usage of #if...#endif (C#)
public void IAmHere()
{
#if MYDEBUG
str = "I am here!";
#endif
}
Listing 5.6 demonstrates the same concept in Visual Basic .NET.
Listing 5.6 Usage of #If... Then...#End If (Visual Basic .NET)
Public Sub IAmHere()
#If MYDEBUG Then
str = "I am here!"
#End If
End Sub
If you are using C#, you may also use operators to test whether an item has been
defined.You can use the following operators to evaluate multiple symbols: ==
(equality), != (inequality), && (and), and | | (or).You can group symbols and
operators with parentheses.
Other Preprocessor Directives
A few other preprocessor directives are available in C# that are not found in Visual
Basic .NET. This section discusses these additional directives, tells how they work,
and shows what they can provide for you.
New Riders - Debugging ASP.NET made by dotneter@teamfly
#undef
#undef is the exact opposite of #define. It removes the definition of a preprocessor
constant. Listing 5.7 shows an example of how it is used.
Listing 5.7 Using #undef
#define MYDEBUG
public void MyFunction()
{
#if MYDEBUG
Response.Write("Hello");
#endif
#undef MYDEBUG
#if MYDEBUG
Response.Write("You won't see me!");
#endif
}
If you called the MyFunction function, you would get an output of Hello but not You
won't see me!. Because MYDEBUG has been defined, the first Response.Write will
be compiled in and executed. However, immediately afterward, the MYDEBUG symbol
is undefined, so the second #if check will fail; the second Response.Write will not
be compiled into the program and, therefore, will not be executed.
This can be useful if you need to temporarily remove a line or two inside a debugging
function.You could simply #undef the symbol for the lines that you want to execute
and then again #define the symbol where you want to restart the execution of the
function.
#warning and #error
#warning and #error are very similar, so they are demonstrated together here.
These two directives enable you to display a message to the user in the output
window as the program is compiling. This message can have either a warning status
or an error status. Listing 5.8 shows an example of each.
Listing 5.8 #warning and #error Example
#define MYDEBUG
New Riders - Debugging ASP.NET made by dotneter@teamfly
#if MYDEBUG && !DEBUG
#error Both MYDEBUG and RELEASE are defined!!
#elif MYDEBUG
#warning WARNING - MYDEBUG is defined!
#endif
In this example, if you were in a debug build with MYDEBUG defined, you would
simply see a warning telling you that MYDEBUG was defined while compiling your
program. This is just a handy hint. However, if you switched your build configuration
to a release build and built the program, you would get a compiler error with the text
stated because both MYDEBUG and RELEASE were defined and DEBUG was not. This
would be very useful to ensure that you do not compile any of your own debugging
code into your release application.
Summary
Conditional compiling is extremely easy to implement, with tremendously powerful
results. This chapter looked at two different ways to accomplish a similar task:
through preprocessor directives and via function attributes. The key difference here
is that by using the Conditional function attribute, the debug code is compiled into
the application; however, it is never executed. By using the preprocessor directives
of this section, the code is never compiled into the application—therefore, it could
never be executed.
Next, you looked at some other preprocessor compiler directives and how they can
provide additional information to aid you in debugging your ASP.NET applications.
By adding some conditional compiling to your code, you will be able to add a robust
debugging interface to your application and immediately remove it from the
production-level output at the proverbial flip of a switch.
In the next chapter, you will start to look at the built-in .NET tracing facilities and
how they can help you explore what is happening inside your application as it is
running, both in a debug and a production environment.
Chapter 6. Tracing
New Riders - Debugging ASP.NET made by dotneter@teamfly
ONE OF THE MOST COMMON WAYS to debug traditional ASP web applications is to
use trusty calls to Response.Write. This enables you to create checkpoints in your
code to view the contents of variables in the browser. This approach had several
drawbacks, however. The output created by calls to Response.Write appears
wherever the call is made in the code. It sometimes becomes a chore trying to
interpret your debugging information because it is strewn all over the page in the
browser. The formatting of your page is also affected.
When you are finished debugging your web application using calls to
Response.Write, you are then faced with the daunting task of stripping out all this
debug code. Because you are using the same type of code both to debug and to
create valid output, you must carefully scan each of your ASP pages to make sure
that you remove all the Response.Write calls that pertain to debugging. When your
ASP pages get to be hundreds of lines long, this can be a real pain.
To address this issue, ASP.NET implements the TraceContext class. The
TraceContext class solves all these issues and offers many more features. Let’s
take a look at some of the ways that the TraceContext class can help you debug
your ASP.NET web applications more effectively.
Configuration
To use tracing in your ASP.NET web application, you need to enable it. This can be
done at either the page level or the application level.
Page-Level Configuration
Enabling tracing at the page level entails adding the Trace attribute to the @Page
directive, like this:
<%@ Page Language="C#" Trace=="true" %%>
If the Trace attribute has a value of true, tracing information will be displayed at
the bottom of your ASP.NET page after the entire page has been rendered.
Alternatively, you can include the TraceMode attribute. The value that you assign to
this attribute determines the display order of the trace results. The possible values
are SortByTime and SortByCategory. SortByTime is the default if you do not
specify the TraceMode attribute.
New Riders - Debugging ASP.NET made by dotneter@teamfly
Application-Level Configuration
Several tracing options are available at the application level. These settings are
specified using the <trace> XML element in the <system.web> section of the
web.config file. The attributes available to you are shown in Table 6.1.
Table 6.1. Tracing Options
enabled Is true if tracing is enabled for the application; other– wise, is
false. The default is false.
pageOutput Is true if trace information should be displayed both on an
application’s pages and in the .axd trace utility; otherwise, is false.
The default is false. Note that pages that have tracing enabled on
them are not affected by this setting.
requestLimit Specifies the number of trace requests to store on the server. The
default is 10.
traceMode Indicates whether trace information should be displayed in the order
it was processed, SortByTime, or alphabetically by user-defined
category, SortByCategory. SortByTime is the default.
localOnly Is true if the trace viewer (trace.axd) is available only on the host
Web server; otherwise, is false. The default is true.
An example of a trace entry in the web.config file might look like Listing 6.1.
Listing 6.1 Application-Level Trace Configuration in the web.config File
<configuration>
<system.web>
<trace enabled="true" pageOutput="false" requestLimit="20"
traceMode="SortByTime" localOnly="true" />
</system.web>
</configuration>
Even though this example uses all the available attributes, none of them is required.
Also note that page-level configuration settings overrule application-level settings.
For instance, if tracing is disabled at the application level but is enabled at the page
level, trace information will still be displayed in the browser.
The requestLimit attribute sets a limit on how many page requests are kept in the
trace log. This prevents the logs from getting too large.
Setting the localOnly attribute to true enables you to view trace information if you
are logged into the server locally, but remote users will not see anything. That way,
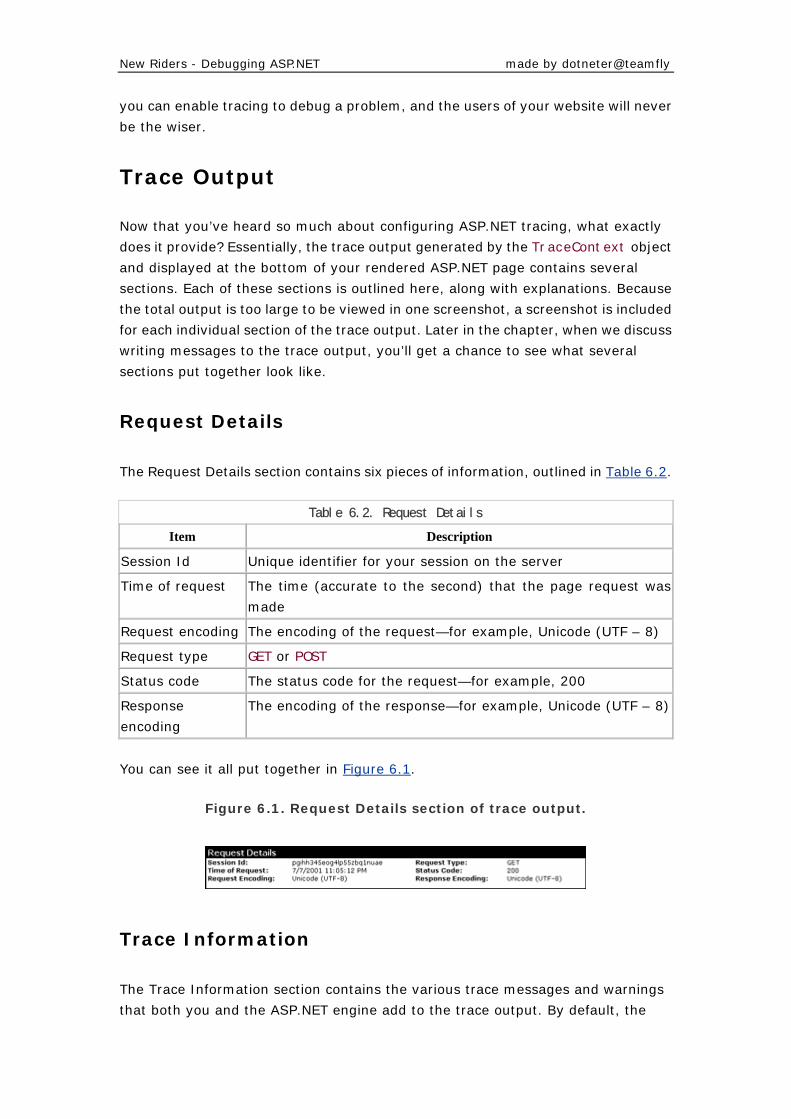
New Riders - Debugging ASP.NET made by dotneter@teamfly
you can enable tracing to debug a problem, and the users of your website will never
be the wiser.
Trace Output
Now that you’ve heard so much about configuring ASP.NET tracing, what exactly
does it provide? Essentially, the trace output generated by the TraceContext object
and displayed at the bottom of your rendered ASP.NET page contains several
sections. Each of these sections is outlined here, along with explanations. Because
the total output is too large to be viewed in one screenshot, a screenshot is included
for each individual section of the trace output. Later in the chapter, when we discuss
writing messages to the trace output, you’ll get a chance to see what several
sections put together look like.
Request Details
The Request Details section contains six pieces of information, outlined in Table 6.2.
Table 6.2. Request Details
Item Description
Session Id Unique identifier for your session on the server
Time of request The time (accurate to the second) that the page request was
made
Request encoding The encoding of the request—for example, Unicode (UTF – 8)
Request type GET or POST
Status code The status code for the request—for example, 200
Response
encoding The encoding of the response—for example, Unicode (UTF – 8)
You can see it all put together in Figure 6.1.
Figure 6.1. Request Details section of trace output.
Trace Information
The Trace Information section contains the various trace messages and warnings
that both you and the ASP.NET engine add to the trace output. By default, the
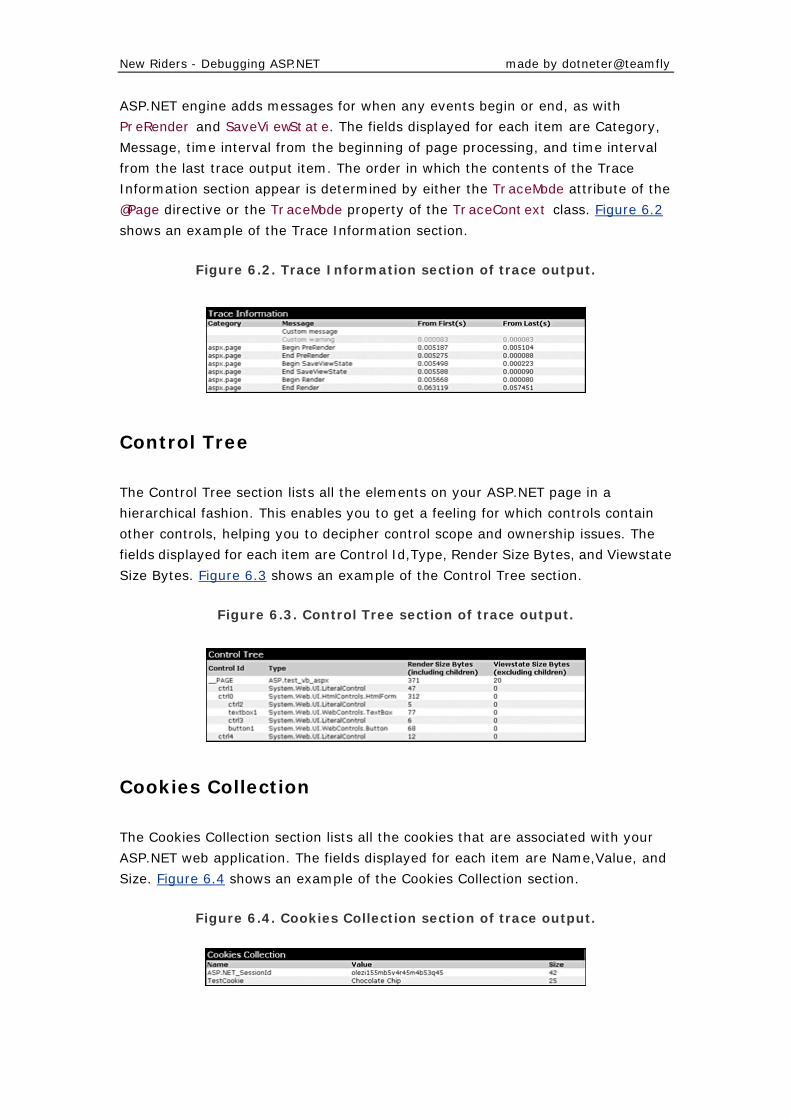
New Riders - Debugging ASP.NET made by dotneter@teamfly
ASP.NET engine adds messages for when any events begin or end, as with
PreRender and SaveViewState. The fields displayed for each item are Category,
Message, time interval from the beginning of page processing, and time interval
from the last trace output item. The order in which the contents of the Trace
Information section appear is determined by either the TraceMode attribute of the
@Page directive or the TraceMode property of the TraceContext class. Figure 6.2
shows an example of the Trace Information section.
Figure 6.2. Trace Information section of trace output.
Control Tree
The Control Tree section lists all the elements on your ASP.NET page in a
hierarchical fashion. This enables you to get a feeling for which controls contain
other controls, helping you to decipher control scope and ownership issues. The
fields displayed for each item are Control Id,Type, Render Size Bytes, and Viewstate
Size Bytes. Figure 6.3 shows an example of the Control Tree section.
Figure 6.3. Control Tree section of trace output.
Cookies Collection
The Cookies Collection section lists all the cookies that are associated with your
ASP.NET web application. The fields displayed for each item are Name,Value, and
Size. Figure 6.4 shows an example of the Cookies Collection section.
Figure 6.4. Cookies Collection section of trace output.
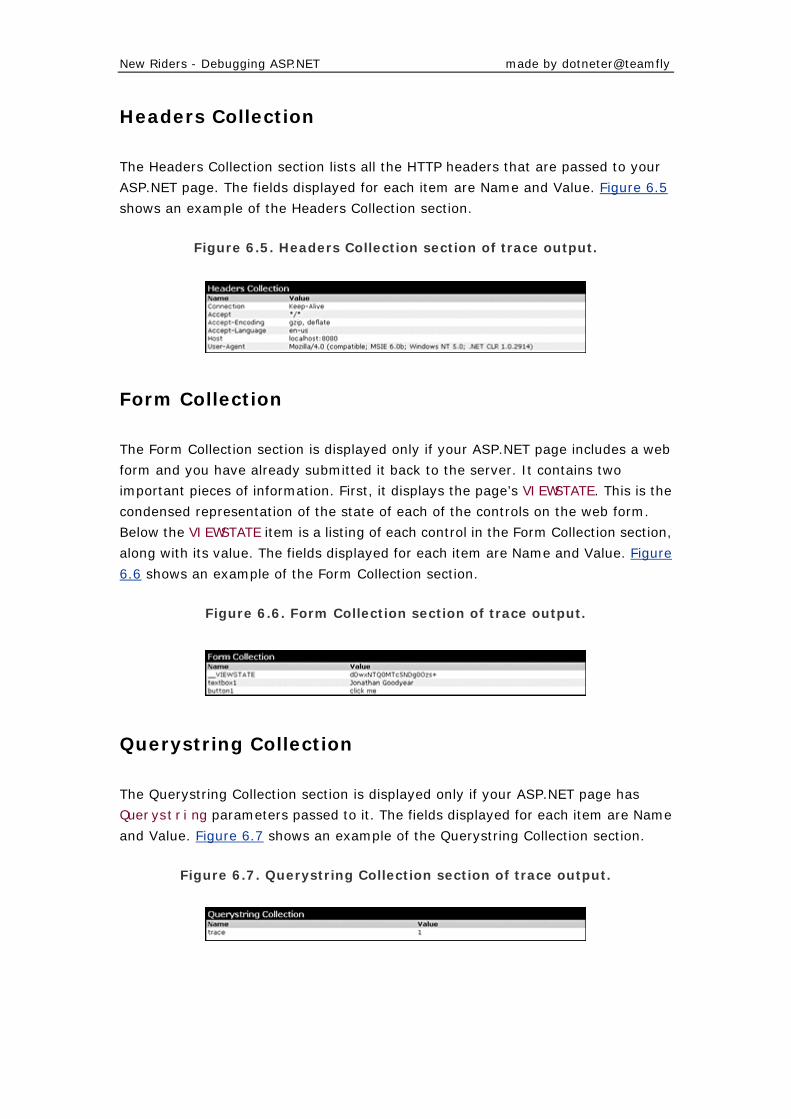
New Riders - Debugging ASP.NET made by dotneter@teamfly
Headers Collection
The Headers Collection section lists all the HTTP headers that are passed to your
ASP.NET page. The fields displayed for each item are Name and Value. Figure 6.5
shows an example of the Headers Collection section.
Figure 6.5. Headers Collection section of trace output.
Form Collection
The Form Collection section is displayed only if your ASP.NET page includes a web
form and you have already submitted it back to the server. It contains two
important pieces of information. First, it displays the page’s VIEWSTATE. This is the
condensed representation of the state of each of the controls on the web form.
Below the VIEWSTATE item is a listing of each control in the Form Collection section,
along with its value. The fields displayed for each item are Name and Value. Figure
6.6 shows an example of the Form Collection section.
Figure 6.6. Form Collection section of trace output.
Querystring Collection
The Querystring Collection section is displayed only if your ASP.NET page has
Querystring parameters passed to it. The fields displayed for each item are Name
and Value. Figure 6.7 shows an example of the Querystring Collection section.
Figure 6.7. Querystring Collection section of trace output.
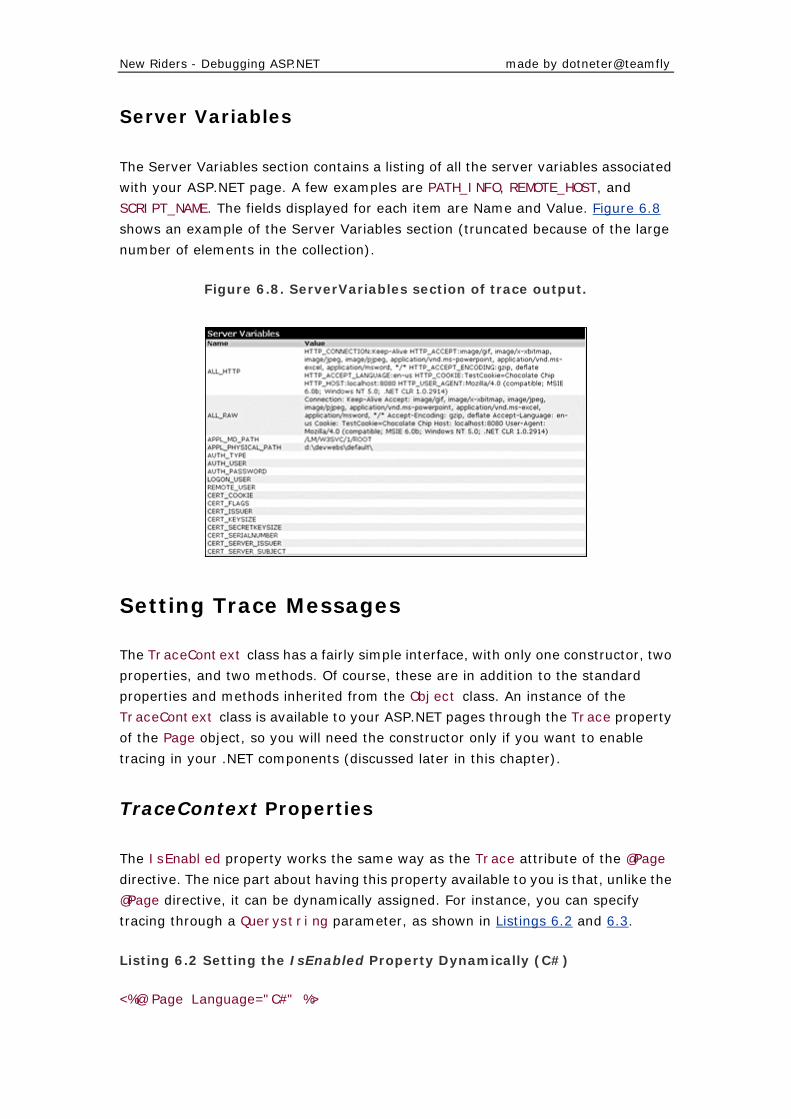
New Riders - Debugging ASP.NET made by dotneter@teamfly
Server Variables
The Server Variables section contains a listing of all the server variables associated
with your ASP.NET page. A few examples are PATH_INFO, REMOTE_HOST, and
SCRIPT_NAME. The fields displayed for each item are Name and Value. Figure 6.8
shows an example of the Server Variables section (truncated because of the large
number of elements in the collection).
Figure 6.8. ServerVariables section of trace output.
Setting Trace Messages
The TraceContext class has a fairly simple interface, with only one constructor, two
properties, and two methods. Of course, these are in addition to the standard
properties and methods inherited from the Object class. An instance of the
TraceContext class is available to your ASP.NET pages through the Trace property
of the Page object, so you will need the constructor only if you want to enable
tracing in your .NET components (discussed later in this chapter).
TraceContext Properties
The IsEnabled property works the same way as the Trace attribute of the @Page
directive. The nice part about having this property available to you is that, unlike the
@Page directive, it can be dynamically assigned. For instance, you can specify
tracing through a Querystring parameter, as shown in Listings 6.2 and 6.3.
Listing 6.2 Setting the IsEnabled Property Dynamically (C#)
<%@ Page Language="C#" %>

New Riders - Debugging ASP.NET made by dotneter@teamfly
<script language="C#" runat="server">
protected void Page_Load(object Sender, EventArgs e)
{
bool traceFlag = Request.QueryString["trace"] != null
? true : false;
Trace.IsEnabled = traceFlag;
}
</script>
Listing 6.3 Setting the IsEnabled Property Dynamically (Visual Basic .NET)
<%@ Page Language="Visual Basic" %>
<script language="Visual Basic" runat="server">
Protected Sub Page_Load(Sender As Object, e As EventArgs)
Dim traceFlag As Boolean = IIF(Request.QueryString("trace") _
<> Nothing, True, False)
Trace.IsEnabled = traceFlag
End Sub
</script>
These listings set the IsEnabled property of the Trace object dynamically, based on
the presence of the trace Querystring variable. Notice that no Trace attribute is
assigned to the @Page directive. It is interesting to note that even if you specify a
Trace attribute and set it to false, the IsEnabled property value still dictates
whether trace information was displayed to the page.
The real power of using the IsEnabled property is that when you set it to false, the
trace information not only isn’t displayed, but it also isn’t even compiled. This
means that you can leave your tracing code in your ASP.NET application when you
move it to production. As long as the IsEnabled property is set to false, you will
not suffer any performance penalty.
The TraceMode property works exactly like the TraceMode attribute of the @Page
directive. The same behaviors and advantages that apply to the IsEnabled property
also exist for the TraceMode property.
TraceContext Methods
Only one thing (besides their names) differentiates the two methods of the
TraceContext class, Write and Warn: The output generated by the Write method
is black, while the output generated by the Warn method is red. For this reason, we
will be discussing only the Write method. Just realize that everything said about the
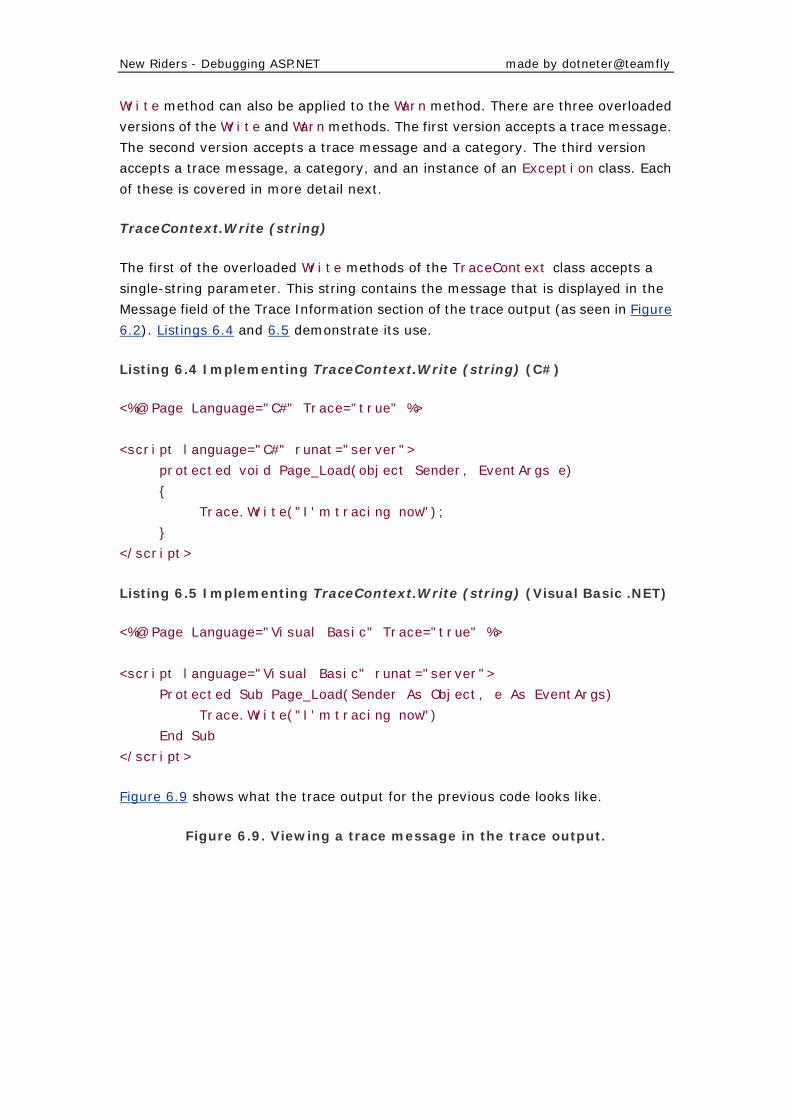
New Riders - Debugging ASP.NET made by dotneter@teamfly
Write method can also be applied to the Warn method. There are three overloaded
versions of the Write and Warn methods. The first version accepts a trace message.
The second version accepts a trace message and a category. The third version
accepts a trace message, a category, and an instance of an Exception class. Each
of these is covered in more detail next.
TraceContext.Write (string)
The first of the overloaded Write methods of the TraceContext class accepts a
single-string parameter. This string contains the message that is displayed in the
Message field of the Trace Information section of the trace output (as seen in Figure
6.2). Listings 6.4 and 6.5 demonstrate its use.
Listing 6.4 Implementing TraceContext.Write (string) (C#)
<%@ Page Language="C#" Trace="true" %>
<script language="C#" runat="server">
protected void Page_Load(object Sender, EventArgs e)
{
Trace.Write("I'm tracing now");
}
</script>
Listing 6.5 Implementing TraceContext.Write (string) (Visual Basic .NET)
<%@ Page Language="Visual Basic" Trace="true" %>
<script language="Visual Basic" runat="server">
Protected Sub Page_Load(Sender As Object, e As EventArgs)
Trace.Write("I'm tracing now")
End Sub
</script>
Figure 6.9 shows what the trace output for the previous code looks like.
Figure 6.9. Viewing a trace message in the trace output.
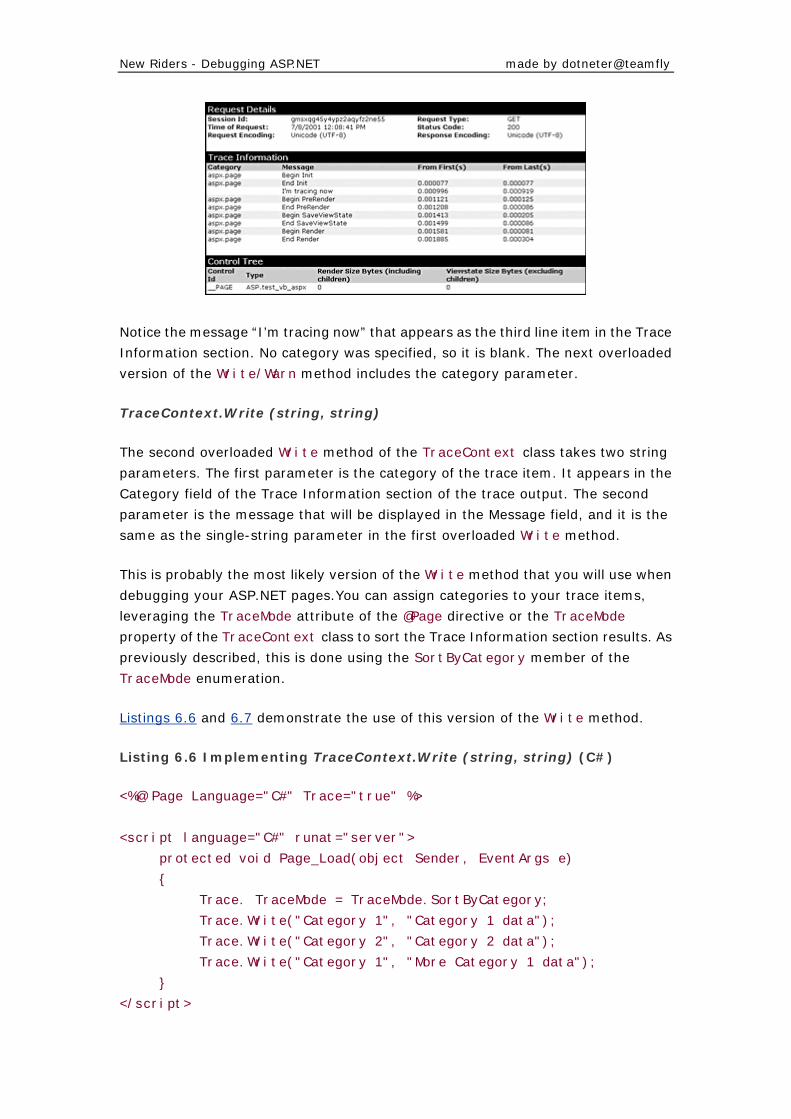
New Riders - Debugging ASP.NET made by dotneter@teamfly
Notice the message “I’m tracing now” that appears as the third line item in the Trace
Information section. No category was specified, so it is blank. The next overloaded
version of the Write/Warn method includes the category parameter.
TraceContext.Write (string, string)
The second overloaded Write method of the TraceContext class takes two string
parameters. The first parameter is the category of the trace item. It appears in the
Category field of the Trace Information section of the trace output. The second
parameter is the message that will be displayed in the Message field, and it is the
same as the single-string parameter in the first overloaded Write method.
This is probably the most likely version of the Write method that you will use when
debugging your ASP.NET pages.You can assign categories to your trace items,
leveraging the TraceMode attribute of the @Page directive or the TraceMode
property of the TraceContext class to sort the Trace Information section results. As
previously described, this is done using the SortByCategory member of the
TraceMode enumeration.
Listings 6.6 and 6.7 demonstrate the use of this version of the Write method.
Listing 6.6 Implementing TraceContext.Write (string, string) (C#)
<%@ Page Language="C#" Trace="true" %>
<script language="C#" runat="server">
protected void Page_Load(object Sender, EventArgs e)
{
Trace. TraceMode = TraceMode.SortByCategory;
Trace.Write("Category 1", "Category 1 data");
Trace.Write("Category 2", "Category 2 data");
Trace.Write("Category 1", "More Category 1 data");
}
</script>
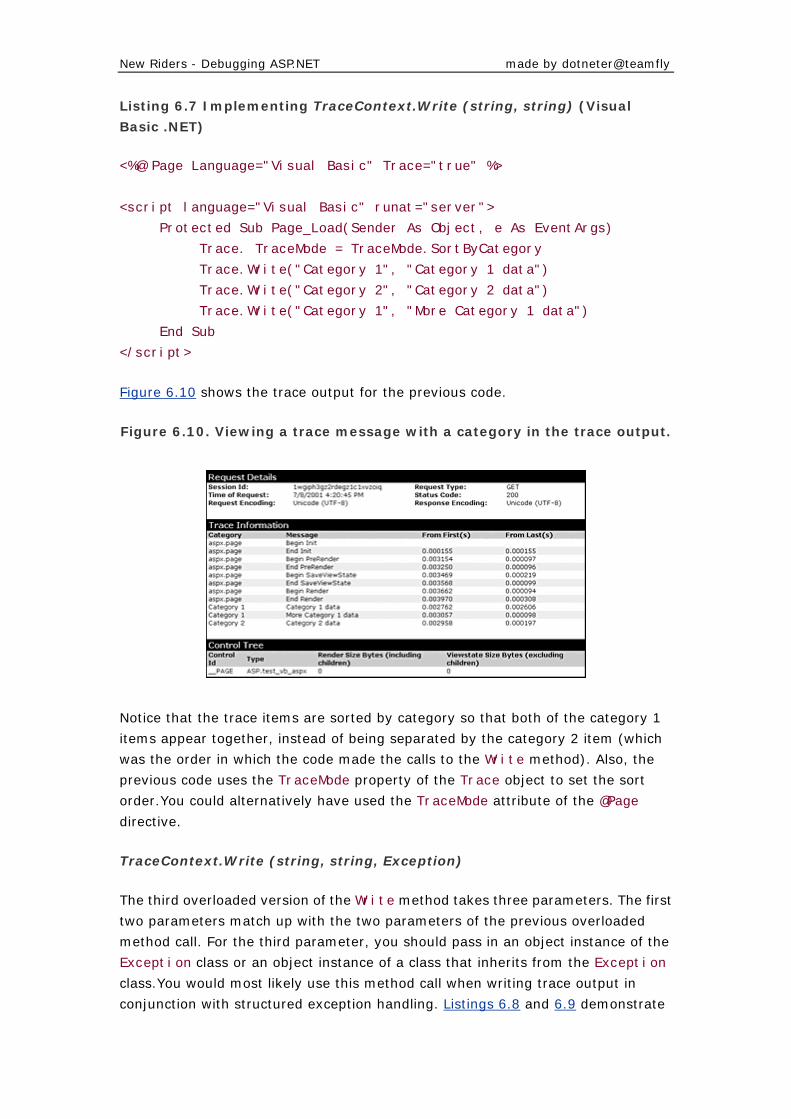
New Riders - Debugging ASP.NET made by dotneter@teamfly
Listing 6.7 Implementing TraceContext.Write (string, string) (Visual
Basic .NET)
<%@ Page Language="Visual Basic" Trace="true" %>
<script language="Visual Basic" runat="server">
Protected Sub Page_Load(Sender As Object, e As EventArgs)
Trace. TraceMode = TraceMode.SortByCategory
Trace.Write("Category 1", "Category 1 data")
Trace.Write("Category 2", "Category 2 data")
Trace.Write("Category 1", "More Category 1 data")
End Sub
</script>
Figure 6.10 shows the trace output for the previous code.
Figure 6.10. Viewing a trace message with a category in the trace output.
Notice that the trace items are sorted by category so that both of the category 1
items appear together, instead of being separated by the category 2 item (which
was the order in which the code made the calls to the Write method). Also, the
previous code uses the TraceMode property of the Trace object to set the sort
order.You could alternatively have used the TraceMode attribute of the @Page
directive.
TraceContext.Write (string, string, Exception)
The third overloaded version of the Write method takes three parameters. The first
two parameters match up with the two parameters of the previous overloaded
method call. For the third parameter, you should pass in an object instance of the
Exception class or an object instance of a class that inherits from the Exception
class.You would most likely use this method call when writing trace output in
conjunction with structured exception handling. Listings 6.8 and 6.9 demonstrate
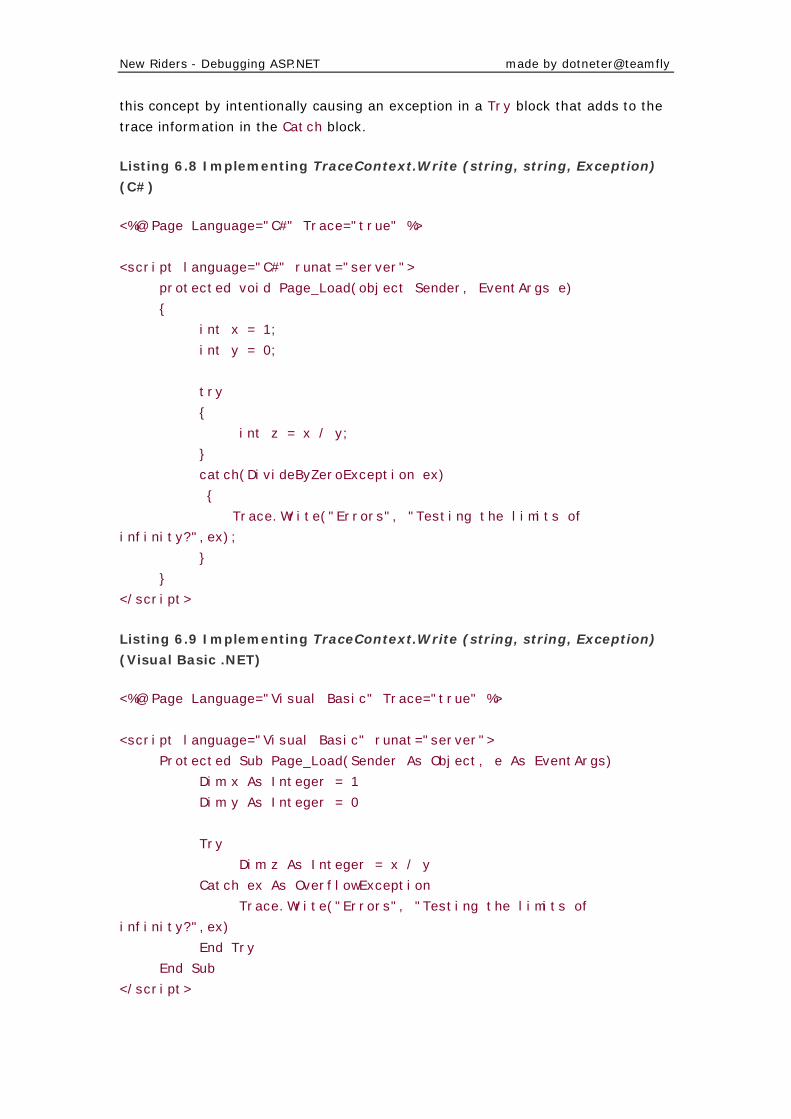
New Riders - Debugging ASP.NET made by dotneter@teamfly
this concept by intentionally causing an exception in a Try block that adds to the
trace information in the Catch block.
Listing 6.8 Implementing TraceContext.Write (string, string, Exception)
(C#)
<%@ Page Language="C#" Trace="true" %>
<script language="C#" runat="server">
protected void Page_Load(object Sender, EventArgs e)
{
int x = 1;
int y = 0;
try
{
int z = x / y;
}
catch(DivideByZeroException ex)
{
Trace.Write("Errors", "Testing the limits of
infinity?",ex);
}
}
</script>
Listing 6.9 Implementing TraceContext.Write (string, string, Exception)
(Visual Basic .NET)
<%@ Page Language="Visual Basic" Trace="true" %>
<script language="Visual Basic" runat="server">
Protected Sub Page_Load(Sender As Object, e As EventArgs)
Dim x As Integer = 1
Dim y As Integer = 0
Try
Dim z As Integer = x / y
Catch ex As OverflowException
Trace.Write("Errors", "Testing the limits of
infinity?",ex)
End Try
End Sub
</script>
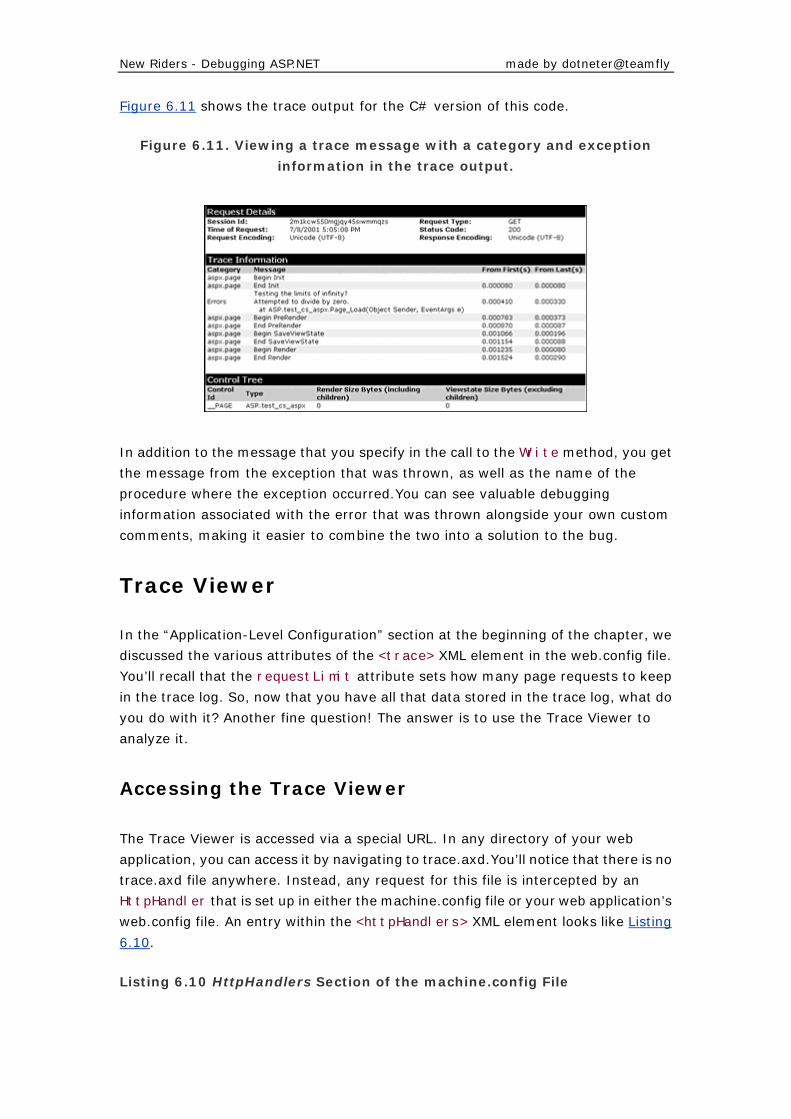
New Riders - Debugging ASP.NET made by dotneter@teamfly
Figure 6.11 shows the trace output for the C# version of this code.
Figure 6.11. Viewing a trace message with a category and exception
information in the trace output.
In addition to the message that you specify in the call to the Write method, you get
the message from the exception that was thrown, as well as the name of the
procedure where the exception occurred.You can see valuable debugging
information associated with the error that was thrown alongside your own custom
comments, making it easier to combine the two into a solution to the bug.
Trace Viewer
In the “Application-Level Configuration” section at the beginning of the chapter, we
discussed the various attributes of the <trace> XML element in the web.config file.
You’ll recall that the requestLimit attribute sets how many page requests to keep
in the trace log. So, now that you have all that data stored in the trace log, what do
you do with it? Another fine question! The answer is to use the Trace Viewer to
analyze it.
Accessing the Trace Viewer
The Trace Viewer is accessed via a special URL. In any directory of your web
application, you can access it by navigating to trace.axd.You’ll notice that there is no
trace.axd file anywhere. Instead, any request for this file is intercepted by an
HttpHandler that is set up in either the machine.config file or your web application’s
web.config file. An entry within the <httpHandlers> XML element looks like Listing
6.10.
Listing 6.10 HttpHandlers Section of the machine.config File
New Riders - Debugging ASP.NET made by dotneter@teamfly
<httpHandlers>
...other handler entries...
<add verb="*" path="trace.axd"
type="System.Web.Handlers. TraceHandler,
System.Web, Version=1.0.2411.0, Culture=neutral,
PublicKeyToken=b03f5f7f11d50a3a" />
...other handler entries...
</httpHandlers>
With this HttpHandler entry in place, all that is left to do to use the Trace Viewer is
make sure that the enabled attribute of the <trace> XML element in your
web.config file is set to true.
Using the Trace Viewer
The Trace Viewer uses a fairly simple interface, consisting of two different pages.
When you first navigate to the trace.axd file, you are presented with the Application
Trace screen. It contains a list of page requests for which trace information has been
tracked.
Three items are present in the header of this page. The first is a link to clear the
current trace log. Clicking this link resets tracing, clearing all page requests from the
screen. The second item in the header is the physical directory of the ASP.NET web
application. The third header item is a counter that tells you how many more
requests can be tracked before the requestLimit is reached. After that point, trace
information is not stored for anymore page requests until the trace information is
cleared by clicking the Clear Current Trace link.
The fields displayed for each page request on the Application Trace screen are No.,
Time of Request, File, Status Code, and Verb. In addition, a link next to each item in
the list shows the details for that specific page request. Figure 6.12 shows an
example of the Application Trace screen of the Trace Viewer.
Figure 6.12. Application Trace page of the TraceViewer.
When you click one of the View Details links on the Application Trace screen, you are
taken to the Request Details screen. On this page you will see is an exact
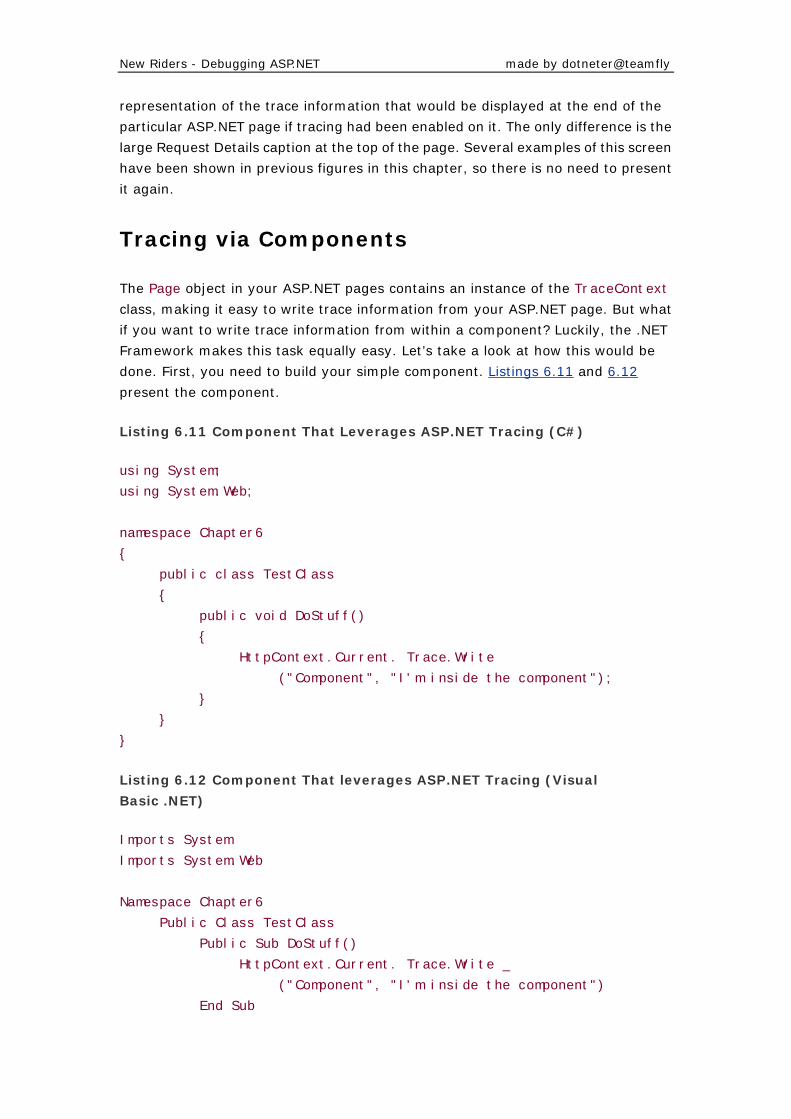
New Riders - Debugging ASP.NET made by dotneter@teamfly
representation of the trace information that would be displayed at the end of the
particular ASP.NET page if tracing had been enabled on it. The only difference is the
large Request Details caption at the top of the page. Several examples of this screen
have been shown in previous figures in this chapter, so there is no need to present
it again.
Tracing via Components
The Page object in your ASP.NET pages contains an instance of the TraceContext
class, making it easy to write trace information from your ASP.NET page. But what
if you want to write trace information from within a component? Luckily, the .NET
Framework makes this task equally easy. Let’s take a look at how this would be
done. First, you need to build your simple component. Listings 6.11 and 6.12
present the component.
Listing 6.11 Component That Leverages ASP.NET Tracing (C#)
using System;
using System.Web;
namespace Chapter6
{
public class TestClass
{
public void DoStuff()
{
HttpContext.Current. Trace.Write
("Component", "I'm inside the component");
}
}
}
Listing 6.12 Component That leverages ASP.NET Tracing (Visual
Basic .NET)
Imports System
Imports System.Web
Namespace Chapter6
Public Class TestClass
Public Sub DoStuff()
HttpContext.Current. Trace.Write _
("Component", "I'm inside the component")
End Sub
New Riders - Debugging ASP.NET made by dotneter@teamfly
End Class
End Namespace
Next, compile your component using one of the following compile scripts. The first is
for C#, and the second is for Visual Basic .NET.
csc /t:library /out:Chapter6.dll /r:System.Web.dll Chapter6.cs
or
vbc /t:library /out:Chapter6.dll /r:System.Web.dll Chapter6.vb
Finally, you can see that this works by using it in an ASP.NET page.
Listing 6.13 Using Trace-Enabled Component in an ASP.NET Page (C#)
<%@ Page Language="C#" Trace="true" %>
<%@ Import Namespace="Chapter6" %>
<script language="C#" runat="server">
protected void Page_Load(object Sender, EventArgs e)
{
TestClass tc = new TestClass();
tc.DoStuff();
}
</script>
Listing 6.14 Using Trace-Enabled Component in an ASP.NET Page (Visual
Basic .NET)
<%@ Page Language="Visual Basic" Trace="true" %>
<%@ Import Namespace="Chapter6" %>
<script language="Visual Basic" runat="server">
Protected Sub Page_Load(Sender As Object, e As EventArgs)
Dim tc As TestClass = New TestClass()
tc.DoStuff()
End Sub
</script>
When you run this code, you’ll get results like those shown in Figure 6.13.
Figure 6.13. Viewing trace information written to the trace output from
within a component.
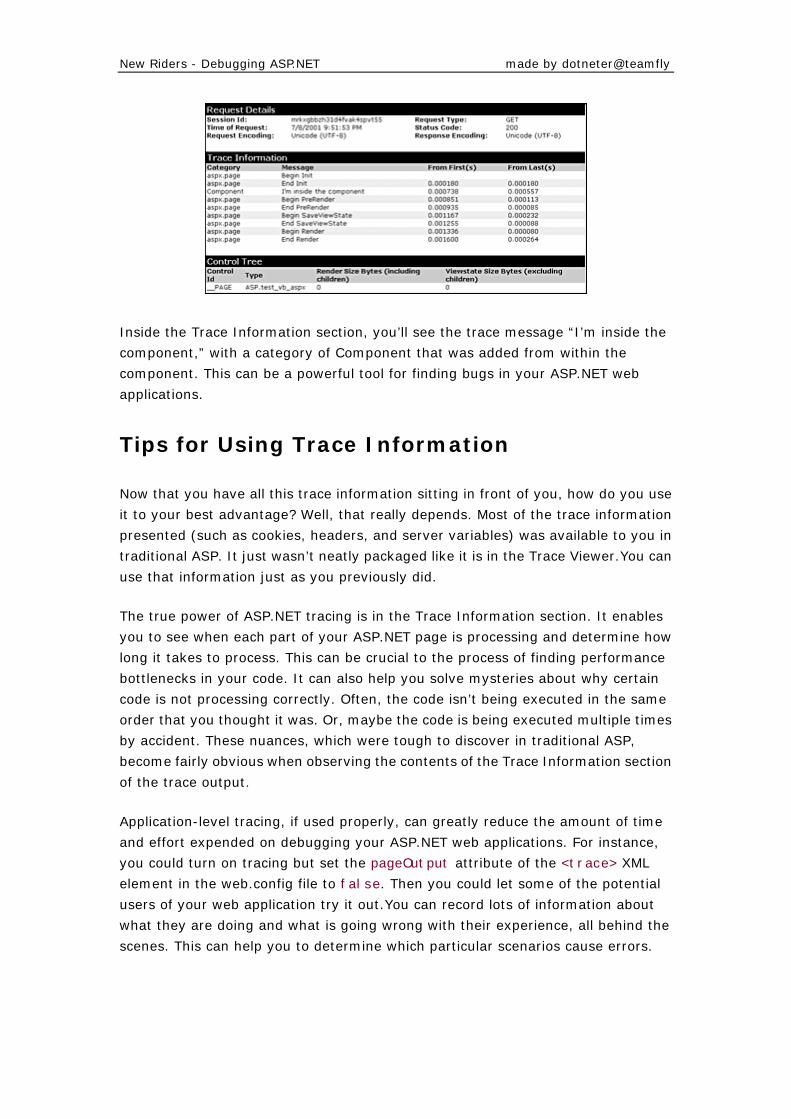
New Riders - Debugging ASP.NET made by dotneter@teamfly
Inside the Trace Information section, you’ll see the trace message “I’m inside the
component,” with a category of Component that was added from within the
component. This can be a powerful tool for finding bugs in your ASP.NET web
applications.
Tips for Using Trace Information
Now that you have all this trace information sitting in front of you, how do you use
it to your best advantage? Well, that really depends. Most of the trace information
presented (such as cookies, headers, and server variables) was available to you in
traditional ASP. It just wasn’t neatly packaged like it is in the Trace Viewer.You can
use that information just as you previously did.
The true power of ASP.NET tracing is in the Trace Information section. It enables
you to see when each part of your ASP.NET page is processing and determine how
long it takes to process. This can be crucial to the process of finding performance
bottlenecks in your code. It can also help you solve mysteries about why certain
code is not processing correctly. Often, the code isn’t being executed in the same
order that you thought it was. Or, maybe the code is being executed multiple times
by accident. These nuances, which were tough to discover in traditional ASP,
become fairly obvious when observing the contents of the Trace Information section
of the trace output.
Application-level tracing, if used properly, can greatly reduce the amount of time
and effort expended on debugging your ASP.NET web applications. For instance,
you could turn on tracing but set the pageOutput attribute of the <trace> XML
element in the web.config file to false. Then you could let some of the potential
users of your web application try it out.You can record lots of information about
what they are doing and what is going wrong with their experience, all behind the
scenes. This can help you to determine which particular scenarios cause errors.

New Riders - Debugging ASP.NET made by dotneter@teamfly
Summary
In this chapter, you took a detailed look at tracing in ASP.NET.You started by
learning how to configure tracing in ASP.NET, at both the page level and the
application level. This entailed adding attributes to the @Page directive and to the
web.config file.
Next, you learned about the different sections that are included in the trace output
at the page level. These include the Request Details,Trace Information, Control Tree,
Cookies Collection, Headers Collection, Form Collection, QueryString Collection, and
Server Variables Collection sections.
Following that, we discussed the primary player in the ASP.NET tracing process: the
TraceContext class.You learned about its two properties, IsEnabled and
TraceMode, and you learned how they can be used to control the trace output of
your ASP.NET pages through the TraceContext object instance in the Page class’s
Trace property.
The TraceContext class’s two methods, Write and Warn, were discussed next. Each
of the three overloaded Write methods was explained and was correlated to the
similar Warn method, which differs only in name and output appearance. We
deferred the discussion of the constructor to the section on tracing via components,
later in the chapter.
Then you learned how to both configure and use the Trace Viewer, as well as how it
is accessed via an HttpHandler that intercepts requests for the trace.axd file.
Tracing in an ASP.NET web application is not just limited to ASP.NET pages. We also
discussed how to leverage ASP.NET tracing from within components that your
ASP.NET pages call. The chapter wrapped up with a few tips and techniques for
utilizing ASP.NET tracing to its fullest potential.
In the next chapter, you’ll get a thorough introduction to debugger in the Visual
Studio .NET IDE.
New Riders - Debugging ASP.NET made by dotneter@teamfly
Chapter 7. Visual Studio .NET Debugging
Environment
THE ASP SCRIPT DEBUGGER THAT IS INTEGRATED with the new Visual Studio .NET IDE is, without a doubt, one of the greatest enhancements to debugging from the previous versions of ASP. Unlike trying to debug traditional ASP pages in Visual Interdev, this actually works right out of the box!
In this chapter, you will be looking at all the features available for debugging in the Visual Studio .NET IDE, how to use them, and where each one is applicable for the problem you might be trying to conquer. This will all be accomplished by building a project from scratch in the IDE, so we recommend creating the project on your own as it is done in this chapter.
Introduction to Features
Let’s start out by taking a look at the most important features of the Visual Studio .NET IDE debugger.You will take a detailed look at all of these as the chapter progresses. Many of these features have existed in the Visual Studio 6.0 IDEs ; however, not all were previously available when debugging traditional ASP pages in Visual InterDev.
Call Stack
The call stack enables you to display the list of functions currently called. As the name implies, this can be imagined simply as a stack. (As functions are called from within function, which, in turn, are called from within functions, a stack is created.) With the call stack viewer, you can look at this stack and jump forward and backward into the stack to debug at any point in the chain. Figure 7.1 shows the call stack in action.
Figure 7.1. The call stack window.
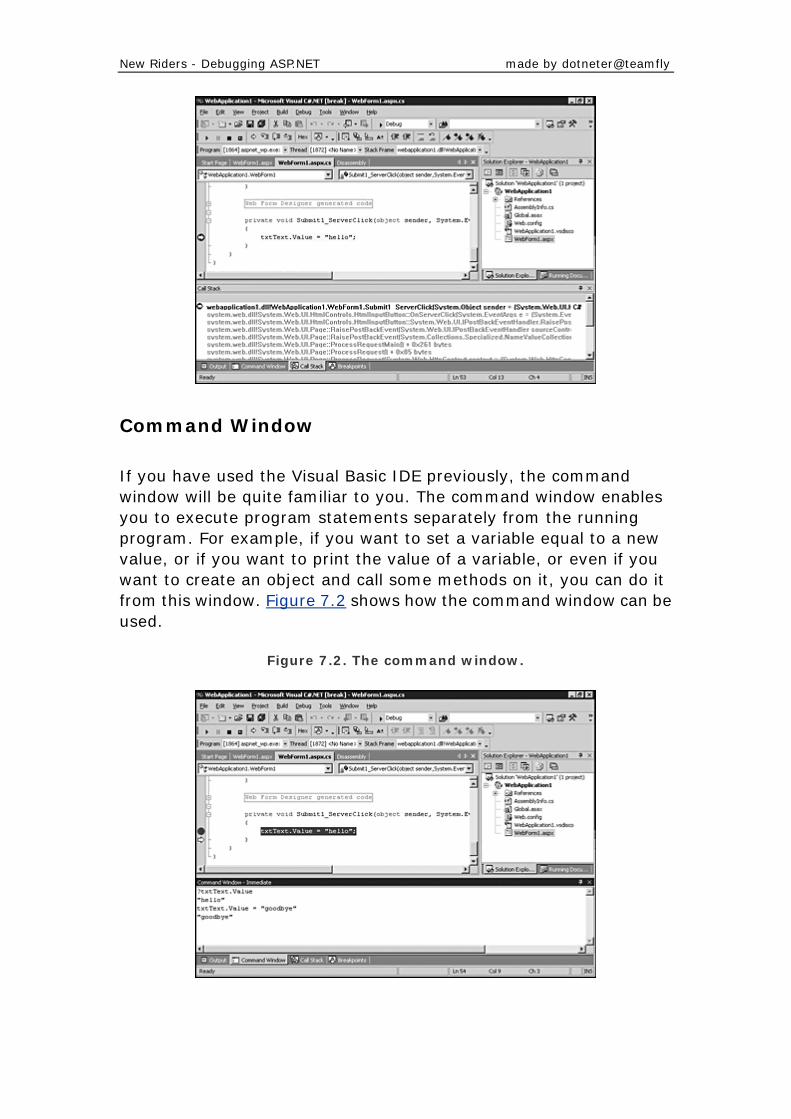
New Riders - Debugging ASP.NET made by dotneter@teamfly
Command Window
If you have used the Visual Basic IDE previously, the command window will be quite familiar to you. The command window enables you to execute program statements separately from the running program. For example, if you want to set a variable equal to a new value, or if you want to print the value of a variable, or even if you want to create an object and call some methods on it, you can do it from this window. Figure 7.2 shows how the command window can be used.
Figure 7.2. The command window.
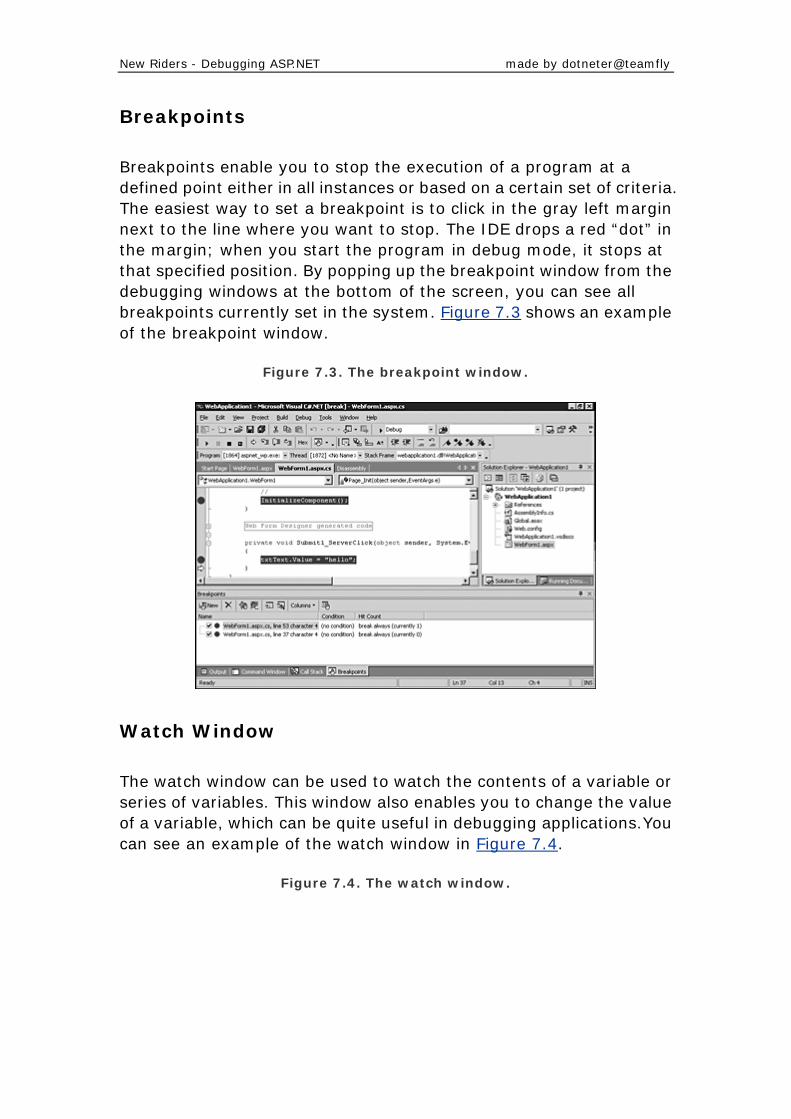
New Riders - Debugging ASP.NET made by dotneter@teamfly
Breakpoints
Breakpoints enable you to stop the execution of a program at a defined point either in all instances or based on a certain set of criteria. The easiest way to set a breakpoint is to click in the gray left margin next to the line where you want to stop. The IDE drops a red “dot” in the margin; when you start the program in debug mode, it stops at that specified position. By popping up the breakpoint window from the debugging windows at the bottom of the screen, you can see all breakpoints currently set in the system. Figure 7.3 shows an example of the breakpoint window.
Figure 7.3. The breakpoint window.
Watch Window
The watch window can be used to watch the contents of a variable or series of variables. This window also enables you to change the value of a variable, which can be quite useful in debugging applications.You can see an example of the watch window in Figure 7.4.
Figure 7.4. The watch window.
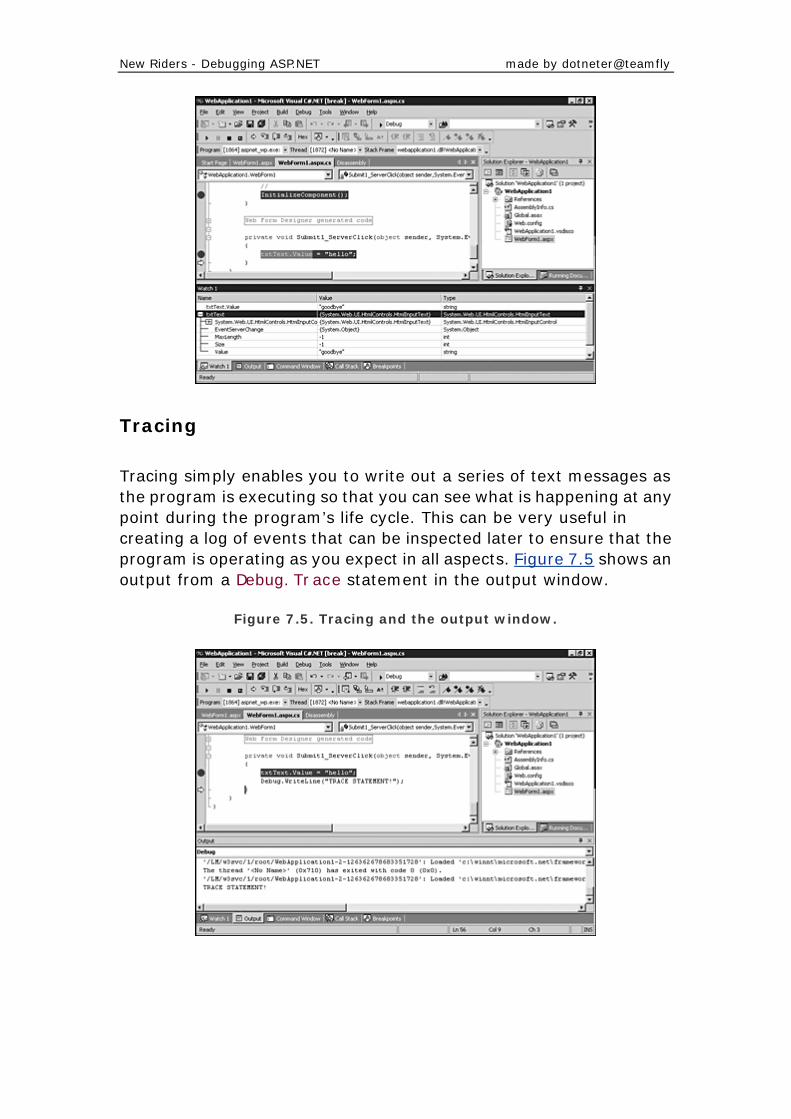
New Riders - Debugging ASP.NET made by dotneter@teamfly
Tracing
Tracing simply enables you to write out a series of text messages as the program is executing so that you can see what is happening at any point during the program’s life cycle. This can be very useful in creating a log of events that can be inspected later to ensure that the program is operating as you expect in all aspects. Figure 7.5 shows an output from a Debug.Trace statement in the output window.
Figure 7.5. Tracing and the output window.
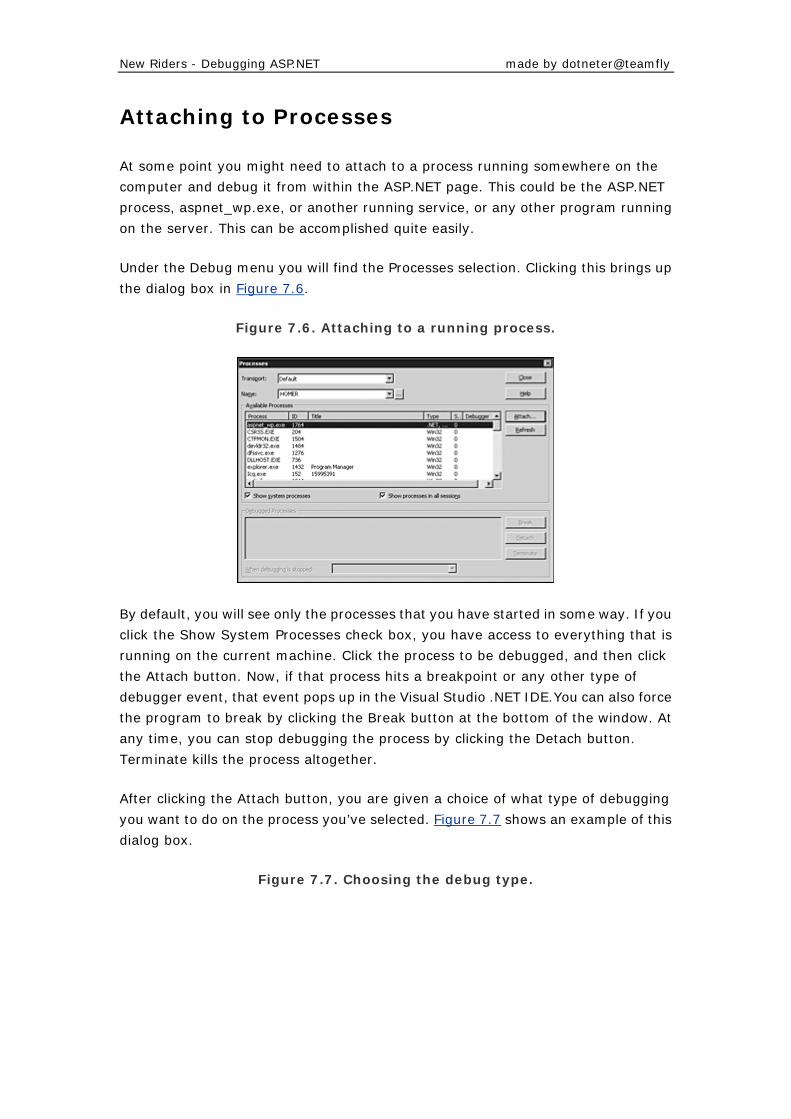
New Riders - Debugging ASP.NET made by dotneter@teamfly
Attaching to Processes
At some point you might need to attach to a process running somewhere on the
computer and debug it from within the ASP.NET page. This could be the ASP.NET
process, aspnet_wp.exe, or another running service, or any other program running
on the server. This can be accomplished quite easily.
Under the Debug menu you will find the Processes selection. Clicking this brings up
the dialog box in Figure 7.6.
Figure 7.6. Attaching to a running process.
By default, you will see only the processes that you have started in some way. If you
click the Show System Processes check box, you have access to everything that is
running on the current machine. Click the process to be debugged, and then click
the Attach button. Now, if that process hits a breakpoint or any other type of
debugger event, that event pops up in the Visual Studio .NET IDE.You can also force
the program to break by clicking the Break button at the bottom of the window. At
any time, you can stop debugging the process by clicking the Detach button.
Terminate kills the process altogether.
After clicking the Attach button, you are given a choice of what type of debugging
you want to do on the process you’ve selected. Figure 7.7 shows an example of this
dialog box.
Figure 7.7. Choosing the debug type.
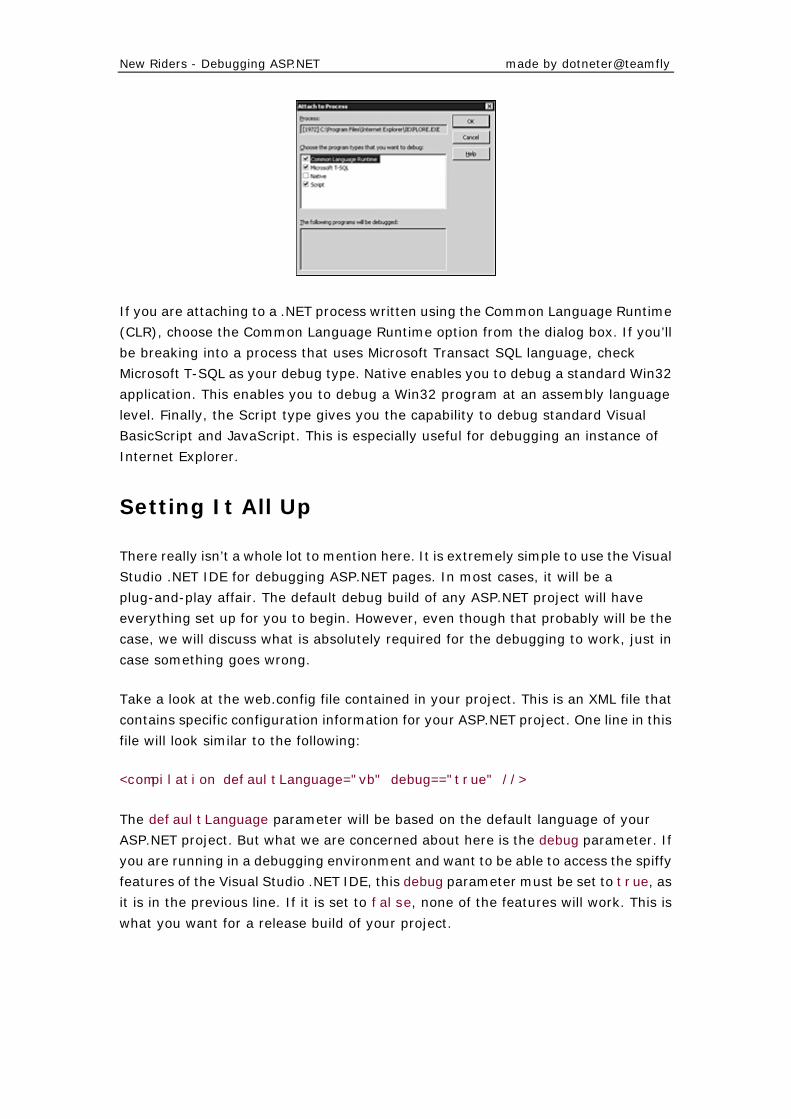
New Riders - Debugging ASP.NET made by dotneter@teamfly
If you are attaching to a .NET process written using the Common Language Runtime
(CLR), choose the Common Language Runtime option from the dialog box. If you’ll
be breaking into a process that uses Microsoft Transact SQL language, check
Microsoft T-SQL as your debug type. Native enables you to debug a standard Win32
application. This enables you to debug a Win32 program at an assembly language
level. Finally, the Script type gives you the capability to debug standard Visual
BasicScript and JavaScript. This is especially useful for debugging an instance of
Internet Explorer.
Setting It All Up
There really isn’t a whole lot to mention here. It is extremely simple to use the Visual
Studio .NET IDE for debugging ASP.NET pages. In most cases, it will be a
plug-and-play affair. The default debug build of any ASP.NET project will have
everything set up for you to begin. However, even though that probably will be the
case, we will discuss what is absolutely required for the debugging to work, just in
case something goes wrong.
Take a look at the web.config file contained in your project. This is an XML file that
contains specific configuration information for your ASP.NET project. One line in this
file will look similar to the following:
<compilation defaultLanguage="vb" debug=="true" //>
The defaultLanguage parameter will be based on the default language of your
ASP.NET project. But what we are concerned about here is the debug parameter. If
you are running in a debugging environment and want to be able to access the spiffy
features of the Visual Studio .NET IDE, this debug parameter must be set to true, as
it is in the previous line. If it is set to false, none of the features will work. This is
what you want for a release build of your project.
New Riders - Debugging ASP.NET made by dotneter@teamfly
Inline Debugging of ASP.NET Pages
This is so very easy—you’re going to be extremely happy about this. If you’ve ever
debugged a program using Visual Studio 6.0 (Visual Basic,Visual C++, and so on)
you will feel right at home with what you are about to learn about Visual Studio .NET.
Let’s discuss these great features using a sample project mentioned earlier in the
chapter. As usual, both Visual Basic .NET and C# versions of the code will be
provided for you to see.
This sample project will consist of an ASP.NET page and a Visual Basic .NET/C#
component so that you can see how easily the two interact and how they can be
debugged simultaneously. The project itself will simply ask the user for a valid email
address and then send a form letter to that address. Start out by creating the
project. We called ours Chap5Visual Basic for the Visual Basic .NET version and
Chap5CS for the C# version.
The first thing to do is create the ASP.NET page that the user will see. Listing 7.1
contains the main ASP.NET page that contains the input form on which the user can
enter the email address where the mail will be sent. Here the page name is left as
WebForm1, the default name provided when the project was created.
Listing 7.1 ASP.NET Page for Debugging Example
<%@ Page Language="vb" AutoEventWireup="false"
Codebehind="WebForm1.aspx.vb"
Inherits="Chap7VB.WebForm1"%>
<html>
<HEAD>
<title>Email Test Page</title>
</HEAD>
<body MS_POSITIONING="GridLayout">
<form id="Form1" method="post" runat="server">
Please enter the email address to send to:
<br>
<input type="text" id="txtEmail" runat="server"
NAME="txtEmail">
<br>
<input type="submit" id="btnSubmit" value="Send Email"
runat="server"
NAME="btnSubmit">
</form>
</body>
</html>
New Riders - Debugging ASP.NET made by dotneter@teamfly
This page would work in a Visual Basic .NET project. To have it work in a C# project,
change the first line to the following:
<%@ Page language="c#" Codebehind="WebForm1.aspx.cs"
AutoEventWireup="false"
Inherits="Chap7CS.WebForm1" %>
This is a very simple page. It consists of two elements: a text box for the email
address and a Submit button to send the form to the server. Now you will create the
server– side code for this project. It will be contained in two parts: First, you will
look at the code-behind file that is associated with this file. Here you will verify that
you have a valid email address. Second, you will create a Visual Basic .NET/C#
component that will actually send the email. Listing 7.2 contains the code-behind
file for the C# project, and Listing 7.3 contains the code-behind file for the Visual
Basic .NET project.
Listing 7.2 Listing for Debugging Example (C#)
using System;
namespace Chap7CS
{
public class WebForm1 : System.Web.UI.Page
{
protected System.Web.UI.HtmlControls.HtmlInputText txtEmail;
protected System.Web.UI.HtmlControls.HtmlInputButton btnSubmit;
public WebForm1()
{
Page.Init += new System.EventHandler(Page_Init);
}
private void Page_Init(object sender, EventArgs e)
{
InitializeComponent();
}
private void InitializeComponent()
{
this.btnSubmit.ServerClick += new
System.EventHandler(this.btnSubmit_ServerClick);
}
private void btnSubmit_ServerClick(object sender,
System.EventArgs e)
{

New Riders - Debugging ASP.NET made by dotneter@teamfly
if(txtEmail.Value.IndexOf("@") == -1 ||
txtEmail.Value.IndexOf(".") == -1)
Response.Write("The supplied email address is not valid.");
}
}
}
Listing 7.3 Listing for Debugging Example (Visual Basic .NET)
Public Class WebForm1
Inherits System.Web.UI.Page
Protected WithEvents txtEmail As
System.Web.UI.HtmlControls.HtmlInputText
Protected WithEvents btnSubmit As
System.Web.UI.HtmlControls.HtmlInputButton
Private Sub btnSubmit_ServerClick(ByVal sender As System.Object, ByVal
e As
System.EventArgs) Handles btnSubmit.ServerClick
If txtEmail.Value.IndexOf("@") = -1 Or _
txtEmail.Value.IndexOf(".") = -1 Then
Response.Write("The supplied email address is not valid.")
End If
End Sub
End Class
These examples are also extremely simple, but they demonstrate the features of
the Visual Studio .NET IDE quite effectively.
In this example, you are listening to the ServerClick event of the Submit button,
named btnSubmit. When the user clicks the Submit button, this event is fired. At
this point, you can inspect what is in the text box on the form. If it does not contain
an @ symbol or a., it cannot be a valid email address and you then report this back
to the user with a Response.Write of an error message.
Next you will look at how the previously mentioned debugging tools can aid you in
tracking down a problem in this simple page.
Setting a Breakpoint
Let’s start out by setting a breakpoint on the ServerClick event of the Submit
button. This is the btnSubmit_ServerClick function in either piece of code. To set
a breakpoint, simply move the mouse cursor to the gray left margin in the code
editor window, and click. This drops a red dot into the margin, signifying that a
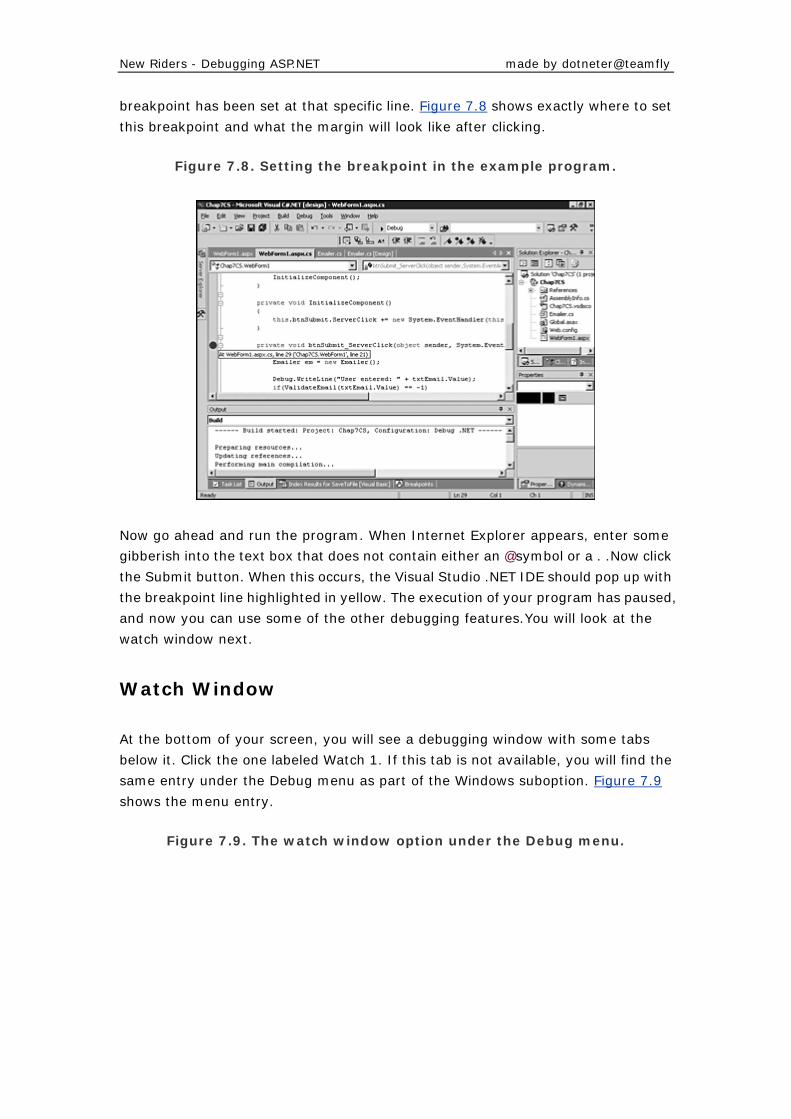
New Riders - Debugging ASP.NET made by dotneter@teamfly
breakpoint has been set at that specific line. Figure 7.8 shows exactly where to set
this breakpoint and what the margin will look like after clicking.
Figure 7.8. Setting the breakpoint in the example program.
Now go ahead and run the program. When Internet Explorer appears, enter some
gibberish into the text box that does not contain either an @ symbol or a . .Now click
the Submit button. When this occurs, the Visual Studio .NET IDE should pop up with
the breakpoint line highlighted in yellow. The execution of your program has paused,
and now you can use some of the other debugging features.You will look at the
watch window next.
Watch Window
At the bottom of your screen, you will see a debugging window with some tabs
below it. Click the one labeled Watch 1. If this tab is not available, you will find the
same entry under the Debug menu as part of the Windows suboption. Figure 7.9
shows the menu entry.
Figure 7.9. The watch window option under the Debug menu.
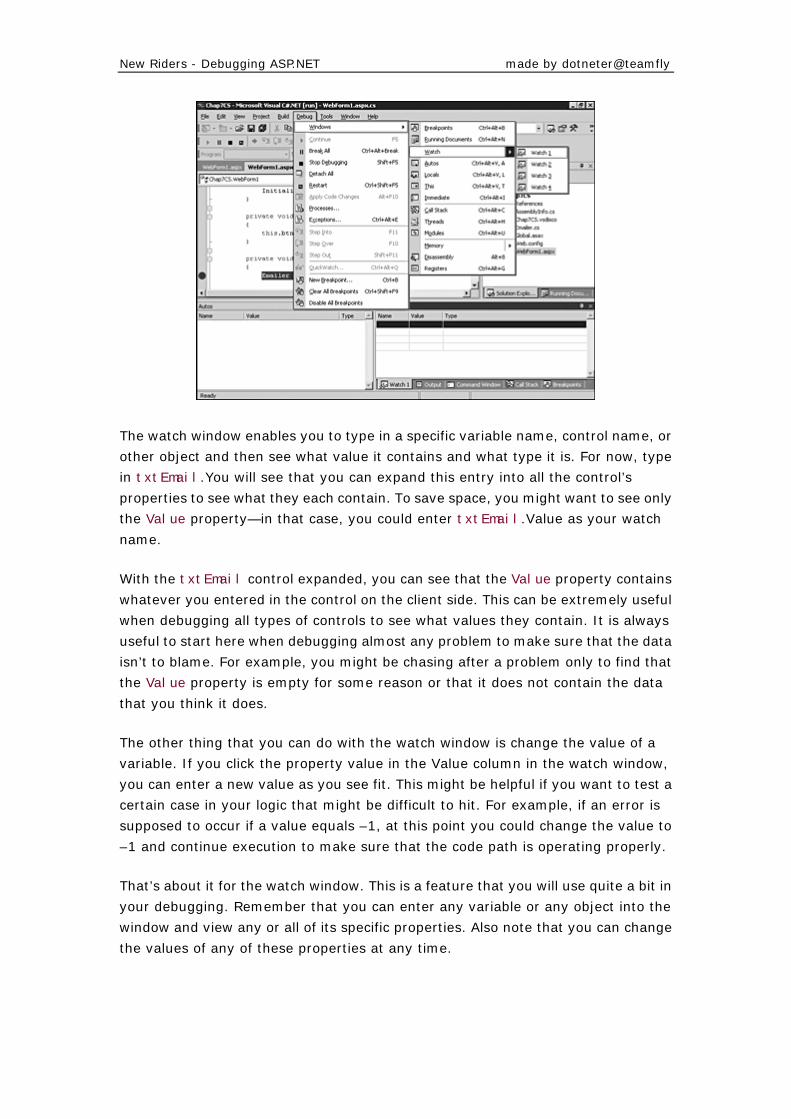
New Riders - Debugging ASP.NET made by dotneter@teamfly
The watch window enables you to type in a specific variable name, control name, or
other object and then see what value it contains and what type it is. For now, type
in txtEmail.You will see that you can expand this entry into all the control’s
properties to see what they each contain. To save space, you might want to see only
the Value property—in that case, you could enter txtEmail.Value as your watch
name.
With the txtEmail control expanded, you can see that the Value property contains
whatever you entered in the control on the client side. This can be extremely useful
when debugging all types of controls to see what values they contain. It is always
useful to start here when debugging almost any problem to make sure that the data
isn’t to blame. For example, you might be chasing after a problem only to find that
the Value property is empty for some reason or that it does not contain the data
that you think it does.
The other thing that you can do with the watch window is change the value of a
variable. If you click the property value in the Value column in the watch window,
you can enter a new value as you see fit. This might be helpful if you want to test a
certain case in your logic that might be difficult to hit. For example, if an error is
supposed to occur if a value equals –1, at this point you could change the value to
–1 and continue execution to make sure that the code path is operating properly.
That’s about it for the watch window. This is a feature that you will use quite a bit in
your debugging. Remember that you can enter any variable or any object into the
window and view any or all of its specific properties. Also note that you can change
the values of any of these properties at any time.
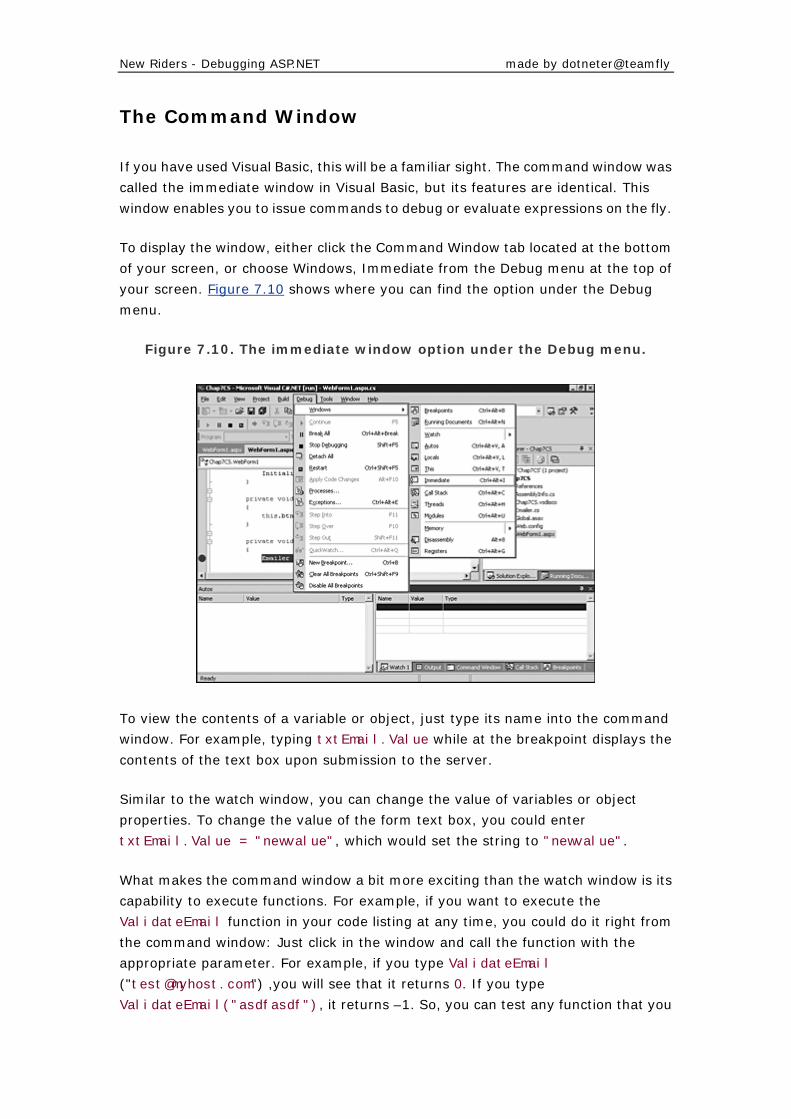
New Riders - Debugging ASP.NET made by dotneter@teamfly
The Command Window
If you have used Visual Basic, this will be a familiar sight. The command window was
called the immediate window in Visual Basic, but its features are identical. This
window enables you to issue commands to debug or evaluate expressions on the fly.
To display the window, either click the Command Window tab located at the bottom
of your screen, or choose Windows, Immediate from the Debug menu at the top of
your screen. Figure 7.10 shows where you can find the option under the Debug
menu.
Figure 7.10. The immediate window option under the Debug menu.
To view the contents of a variable or object, just type its name into the command
window. For example, typing txtEmail.Value while at the breakpoint displays the
contents of the text box upon submission to the server.
Similar to the watch window, you can change the value of variables or object
properties. To change the value of the form text box, you could enter
txtEmail.Value = "newvalue", which would set the string to "newvalue".
What makes the command window a bit more exciting than the watch window is its
capability to execute functions. For example, if you want to execute the
ValidateEmail function in your code listing at any time, you could do it right from
the command window: Just click in the window and call the function with the
appropriate parameter. For example, if you type ValidateEmail
("[email protected]") ,you will see that it returns 0. If you type
ValidateEmail("asdfasdf"), it returns –1. So, you can test any function that you
New Riders - Debugging ASP.NET made by dotneter@teamfly
write right here without having the executing program call it explicitly—a great
debugging aid.
Tracing
Tracing is a very simple method of debugging problems. Tracing can be used to print
text statements during the execution of your code. This can be used as a log to see
exactly what is happening at any point in your code. As you can see in the previous
examples, in the ServerClick function of the Submit button, you are calling
Debug.WriteLine with the value of the form’s text box. This call spits out the value
of the text box to the debug stream. The easiest place to see the debug stream is in
the output window at the bottom of the Visual Studio .NET IDE.
This window can be displayed by either clicking the Output tab or choosing Output
under the View menu and then choosing Other Windows. This window shows you all
the debug statements that you have inserted into your code, as well as anything
else that gets written to the debug stream by any other components that might be
associated with the running project. Keep this in mind if you see a flood of messages
that you didn’t write into your code.
Execution Control
Before we start talking about the call stack, let’s take a brief journey into the
execution control features of the debugger. These features enable you to control
exactly what is executed in your program—and in what order. They can also be used
to trace deeply into certain portions of the code or skip over them, if that level of
detail is unnecessary.
All these features can be found under the Debug menu at the top of your screen. All
are also associated with keyboard shortcuts that vary depending on how you have
configured Visual Studio .NET. The keyboard shortcuts are the easiest method of
using these features because they enable you to move through many lines of code
in a very quick fashion. We recommend learning the keyboard shortcuts and using
them while debugging your own code.
The three options are Step Into, Step Over, and Step Out. Step Into enables you to
step one level deeper into the code at the current point of execution or, at the very
least, move to the next statement. If you are about to call a function in your code,
using Step Into continues execution at the first line of the called function.
Step Over does the opposite of Step Into. If you are about to call a function, using
Step Over at this point does just that—it steps over execution of the function to the
very next line of the function that you are currently executing. Now keep in mind
New Riders - Debugging ASP.NET made by dotneter@teamfly
that this does not mean that it will not execute the function—it just will not allow you
to dig into it. It executes the function and moves on to the next line. This is quite
useful when you know that a function or block of code is working correctly and you
do not want to spend the time hitting every single line.
Step Out enables you to jump out of the current function that you are debugging
and go one level up. Again, similar to the Step Over feature, this does not skip the
execution of the remaining lines of code; they just execute behind your back, and
your debugging cursor moves to the next line in the previous function you were in.
So how do you know which function you were previously in? That leads to the next
debugging feature, the call stack.
Call Stack
The call stack shows the current function you are in and all functions that preceded
it. When you call a function from a function from a function from a function, you
have a call stack that is four levels deep, with the current function on the top. You
can view the call stack window by clicking the Call Stack tab at the bottom of your
screen or by choosing Call Stack from the Debug menu under Windows.
Continuing the previous example, stop execution again on the
btnSubmit_ServerClick function and then trace into the ValidateEmail function.
Now you have called a function from a function. Take a look at the call stack window.
The top two levels should show you the ValidateEmail function, followed by the
btnSubmit_ServerClick function. You will also see quite a few other functions that
are called by the ASP.NET system processes.
Now go ahead and double-click the btnSubmit_ServerClick function. A green
highlight appears over the point in the function that you currently are in. In this case,
the call to ValidateEmail is highlighted because this is the exact position that you
are currently at in that function.
This feature can be of use when you are debugging code that might not be all your
own. If you are many levels deep into a function stack, you might need to know
where you came from. By using this, you can trace back to the calling stack and see
exactly who called you and with what information. After you have traced back to the
call stack, you can use the watch window or the command window to inspect the
local variables from the previous functions. This can be handy when you want to find
where certain data values are coming from if they are wrong.
New Riders - Debugging ASP.NET made by dotneter@teamfly
Feature Summary
That about wraps up the baseline features of the Visual Studio .NET IDE. Next you
will look at how to add a C# or Visual Basic .NET component to your project and
debug that simultaneously with your ASP.NET pages. The process is extremely
stream-lined and quite seamless, as you will soon see.
Inline Debugging of Components
If you tried debugging Visual Basic components within an ASP page in the previous
version of Visual Studio, you will remember that it can be a pain to deal with.You
need the Visual Interdev IDE open for debugging the ASP page, and you need the
separate Visual Basic IDE open to debug the components at the same time.
The new Visual Studio .NET IDE makes this process remarkably simpler.You can add
the component to your ASP.NET project, and debugging of that component can be
done within the same IDE in sequence with your ASP.NET code. Let’s look at how
this is done. To do this, you will add a component to the previous project that
actually sends out the email to the address provided.
Adding the Component
You will now add the component to the ASP.NET application. Just right-click your
mouse on the project name (Chap5VB or Chap5CS, if you’ve named them what we
called them) and choose Add Component under the Add submenu. Here, choose
either a Visual Basic .NET component class or a C# component class, depending on
which type of project you are currently doing. Name the component Emailer, for lack
of a better name. Figure 7.11 shows the menu option to choose after right-clicking
the project name.
Figure 7.11. Adding a new component to the project.
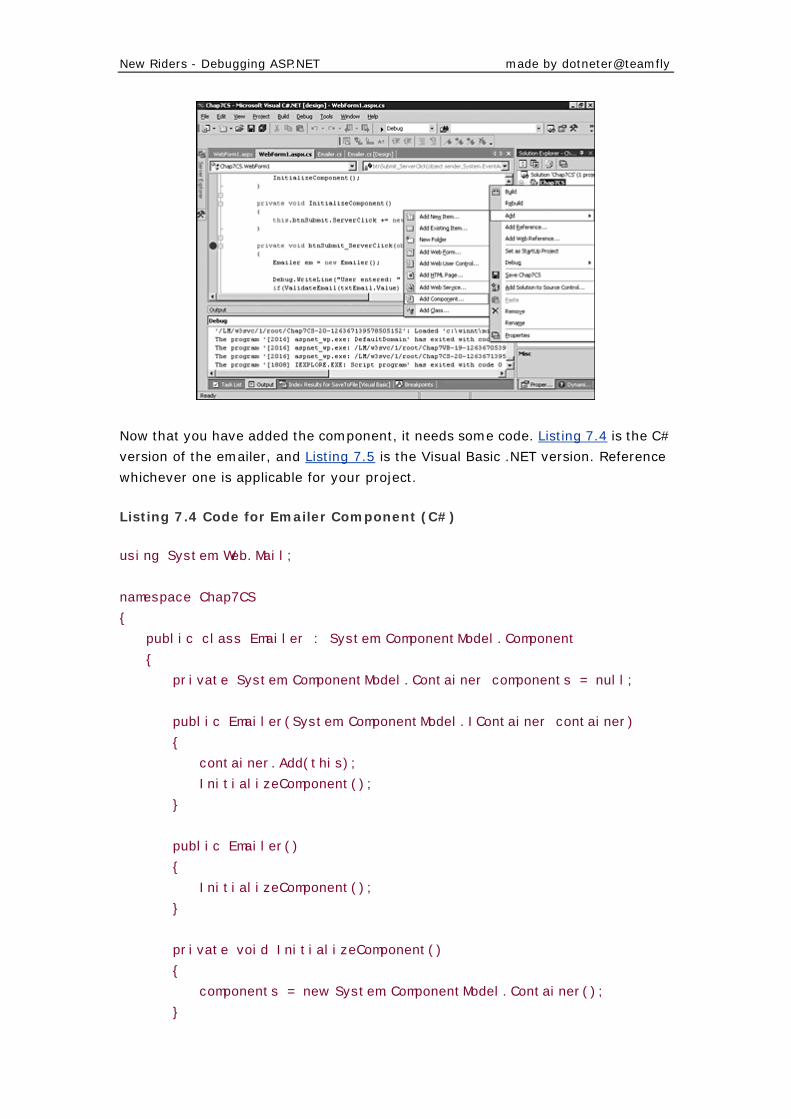
New Riders - Debugging ASP.NET made by dotneter@teamfly
Now that you have added the component, it needs some code. Listing 7.4 is the C#
version of the emailer, and Listing 7.5 is the Visual Basic .NET version. Reference
whichever one is applicable for your project.
Listing 7.4 Code for Emailer Component (C#)
using System.Web.Mail;
namespace Chap7CS
{
public class Emailer : System.ComponentModel.Component
{
private System.ComponentModel.Container components = null;
public Emailer(System.ComponentModel.IContainer container)
{
container.Add(this);
InitializeComponent();
}
public Emailer()
{
InitializeComponent();
}
private void InitializeComponent()
{
components = new System.ComponentModel.Container();
}
New Riders - Debugging ASP.NET made by dotneter@teamfly
public void SendFormEmail(string toAddr)
{
MailMessage mm = new MailMessage();
mm. To = toAddr;
mm.From = "[email protected]";
mm.Body = "This is a test message. Exciting, isn't it?";
mm.Subject = "Chapter 7 Test Message";
SmtpMail.SmtpServer = "smtp.domain.com";
SmtpMail.Send(mm);
}
}
}
Listing 7.5 Code for Emailer Component (Visual Basic .NET)
Imports System.Web.Mail
Public Class Emailer
Inherits System.ComponentModel.Component
Public Sub New(ByVal Container As System.ComponentModel.IContainer)
MyClass.New()
Container.Add(Me)
End Sub
Public Sub New()
MyBase.New()
InitializeComponent()
End Sub
Private components As System.ComponentModel.Container
<System.Diagnostics.DebuggerStepThrough()> Private Sub
InitializeComponent()
components = New System.ComponentModel.Container()
End Sub
Public Sub SendFormEmail(ByVal toAddr As String)
Dim mm As MailMessage = New MailMessage()
mm. To = toAddr
New Riders - Debugging ASP.NET made by dotneter@teamfly
mm.From = "[email protected]"
mm.Body = "This is a test message. Exciting, isn't it?"
mm.Subject = "Chapter 7 Test Message"
SmtpMail.SmtpServer = "smtp.domain.com"
SmtpMail.Send(mm)
End Sub
End Class
The code here is pretty simple. Each version contains a function called
SendFormEmail that takes the email address to send to as a parameter. Then you
use the MailMessage and SmtpMail objects from the System.Web.Mail assembly to
form the email message and send it out using a valid SMTP server. To get this to
work in your environment, be sure to replace the SmtpMail.SmtpServer value with
the SMTP server of your local network.
You will need to modify your btnSubmit_ServerClick function to create an
instance of this component and call the SendFormEmail method to make it happen.
Listing 7.6 gives the code for the modified btnSubmit_ServerClick in C#, and
Listing 7.7 gives the same code in Visual Basic .NET.
Listing 7.6 Modified Code for btnSubmit_ServerClick (C#)
private void btnSubmit_ServerClick(object sender, System.EventArgs e)
{
Emailer em = new Emailer();
Debug.WriteLine("User entered: " + txtEmail.Value);
if(ValidateEmail(txtEmail.Value) == -1)
Response.Write("The supplied email address is not valid.");
else
{
em.SendFormEmail(txtEmail.Value);
Response.Write("The email was sent successfully.");
}
}
Listing 7.7 Modified Code for btnSubmit_ServerClick (Visual Basic .NET)
Private Sub btnSubmit_ServerClick(ByVal sender As System.Object, ByVal
e As
System.EventArgs) Handles btnSubmit.ServerClick
Dim em As Emailer = New Emailer()
If txtEmail.Value.IndexOf("@") = -1 Or _
txtEmail.Value.IndexOf(".") = -1 Then

New Riders - Debugging ASP.NET made by dotneter@teamfly
Response.Write("The supplied email address is not valid.")
Else
em.SendFormEmail(txtEmail.Value)
Response.Write("The email was sent successfully.")
End If
End Sub
Debugging the Component
Now we get to the cool part. You can debug this component while you debug the
ASP.NET page and its respective code-behind file. To prove this, set a breakpoint on
the btnSubmit_ServerClick in the code-behind file and then start the program.
When Internet Explorer appears, enter a valid email address in the appropriate box,
and click the Submit button. Immediately, the breakpoint on the
btnSubmit_ServerClick function should fire and the program is paused on that line.
Now step to the point where the current function is about to call the
Emailer.SendFormEmail function. At this position, do a Step Into. You will see that
the source code to the Emailer component appears with the code pointer at the top
of the SendFormEmail function.
From here, you can use all the techniques mentioned earlier to inspect variables, set
trace statements, modify variable values, and so on. It couldn’t be easier! Say
goodbye to multiple programs being open simultaneously and other configuration
issues that make your life difficult.
Remote Debugging
Every time we have a discussion with someone regarding debugging ASP pages, we
always ask if that person has ever tried to set up ASP debugging on the local
machine. The response usually is “yes.” We then follow up with the question of if
that person has ever gotten it to work. The number who answer “yes” to that
question is much lower. Finally, we ask if that person has ever gotten ASP
debugging to work remotely. We have yet to find someone who has gotten it to work
properly and consistently.
With ASP.NET and Visual Studio .NET, that all changes. It finally works. And it
couldn’t possibly be easier to install, configure, and use.

New Riders - Debugging ASP.NET made by dotneter@teamfly
Installation
When you install Visual Studio .NET on your server, all you need to do is install both
Remote Debugging options listed under the Server Components option during the
install procedure.
Setup
To configure remote debugging, the only thing you need to do is place your user
account into the newly created Debugger Users group both on the client machine
and on the server machine. This can be done using the standard user configuration
tools that are part of whichever Windows operating system you are using.
Using It
This is the easiest part of all. To use the new remote debugging features, simply
create a project on your client computer that points to the project running on the
server. This can be done by choosing Open Project from the Web from the File menu.
Just type in the name of the server where the project resides, and you will be
presented with a list of projects currently residing on that server. Choose the
appropriate one.
If you are not connecting to an existing project, you can create a brand new project
on the server, and remote debugging will still take place.
Next, set a breakpoint on the line where you want to stop, or simply start the
application running. It will connect to the server and bring up an Internet Explorer
window, as usual. The big difference here is that the application is running entirely
on the server. When you hit your breakpoint, you are hitting it on the server, in the
server’s memory space. The same goes for components and anything else that you
might be debugging. Everything that can be debugged in Visual Studio .NET locally
can now be debugged remotely on any server where the remote debugging options
have been installed.
And that’s it! It’s almost completely automatic. I wish it was this easy in Visual
Studio 6.0 —it’s a huge time saver and a powerful tool.
Summary
In this chapter, you looked at many of the debugging features found in the new
Visual Studio .NET IDE. You should now be familiar with things such as the watch
New Riders - Debugging ASP.NET made by dotneter@teamfly
window, the command window, breakpoints, variable inspection, and variable
modification as applied both to debugging ASP.NET pages and Visual Basic .NET and
C# components.With these concepts in mind, you are prepared to start debugging
your own projects, and you are prepared for what is explained in the remainder of
this book.
In the next chapter, we discuss how you can use the Windows NT and Windows
2000 Event Log to aid in tracking down troublesome code in your projects.
Chapter 8. Leveraging the Windows 2000
Event Log
WHILE YOU ARE DEVELOPING A WEB APPLICATION, if something goes wrong and
you receive a page error, you get feedback right on the screen. You can then use
that information to track down the source of the error and fix it. After you put your
web application into production, however, you are not always there when a problem
occurs. Without a way to track these errors, they could go unnoticed for days or
even weeks. A great solution to this problem is to leverage the Windows 2000 Event
Log. This chapter explains what the Windows 2000 Event Log is and tells how to
implement it in your web applications. We’ll also define expected and unexpected
events, and tell how to handle both types. The chapter concludes with an exercise in
building a web-based event log viewer.
The Windows 2000 Event Log Defined
The Windows 2000 Event Log is the system by which Windows 2000 tracks events
that happen on the server. The event log tracks three types of events: security
events, system events, and application events. The last category, application
events, is what this chapter focuses on. The application event log is designed for
notifications concerning non–system-level applications on the server. Most often,
these are custom applications from third-party vendors.
New Riders - Debugging ASP.NET made by dotneter@teamfly
Web Applications Can Use the Event Log
Web applications can also leverage the application event log. Previous versions of
ASP did not offer an easy way to write information to the application event log—you
had to build a Visual Basic component that would enable this functionality. This,
coupled with the fact that there was no structured error handling in traditional ASP
applications, meant that you had to either use the On Error Resume Next statement
or direct all of your page errors to a centralized error page for processing—not very
elegant at all.
ASP.NET offers full support for manipulating the Windows 2000 Event Log. This
includes creating custom application logs that are specific to your web application.
This helps you stay organized if you are hosting multiple web applications on the
same server. The structured error handling that Microsoft’s .NET Framework
provides is ideal for capturing and logging application events. Global events also can
be used to capture error information if errors occur in your web application.
The System.Diagnostics Event Log Interface
The event log interface in the System.Diagnostics namespace is very
feature-complete; this namespace is the one discussed and used in all the code
examples in this chapter. Despite its extra features, the EventLog object in the
System.Diagnostics namespace is quite easy to manipulate and use. To write a
message to the Windows 2000 Event Log, simply call the static WriteEntry method
of the EventLog class as illustrated in Listings 8.1 and 8.2.
Listing 8.1 Writing to the Event Log Using the EventLog object in
System.Diagnostics (C#)
<%@ Page Language="C#" %>
<%@ Import Namespace="System.Diagnostics" %>
<%
EventLog.WriteEntry("EventTest",
"I'm a little teapot, short and stout.");
Response.Write("Done!");
%>
Listing 8.2 Writing to the Event Log Using the EventLog object in
System.Diagnostics (Visual Basic .NET)
<%@ Page Language="VB" %>
<%@ Import Namespace="System.Diagnostics" %>
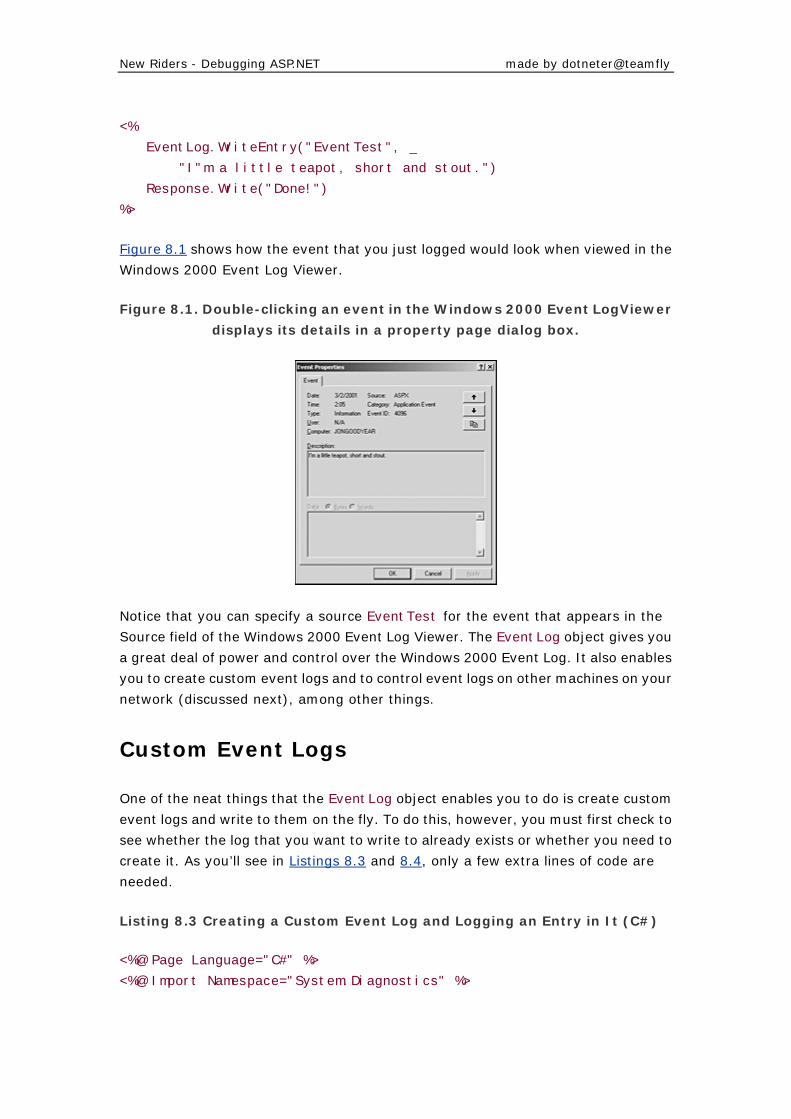
New Riders - Debugging ASP.NET made by dotneter@teamfly
<%
EventLog.WriteEntry("EventTest", _
"I"m a little teapot, short and stout.")
Response.Write("Done!")
%>
Figure 8.1 shows how the event that you just logged would look when viewed in the
Windows 2000 Event Log Viewer.
Figure 8.1. Double-clicking an event in the Windows 2000 Event LogViewer
displays its details in a property page dialog box.
Notice that you can specify a source EventTest for the event that appears in the
Source field of the Windows 2000 Event Log Viewer. The EventLog object gives you
a great deal of power and control over the Windows 2000 Event Log. It also enables
you to create custom event logs and to control event logs on other machines on your
network (discussed next), among other things.
Custom Event Logs
One of the neat things that the EventLog object enables you to do is create custom
event logs and write to them on the fly. To do this, however, you must first check to
see whether the log that you want to write to already exists or whether you need to
create it. As you’ll see in Listings 8.3 and 8.4, only a few extra lines of code are
needed.
Listing 8.3 Creating a Custom Event Log and Logging an Entry in It (C#)
<%@ Page Language="C#" %>
<%@ Import Namespace="System.Diagnostics" %>
New Riders - Debugging ASP.NET made by dotneter@teamfly
<%
EventLog el = new EventLog();
el.MachineName = "."; //local computer
el.Source = "Test Source";
el.Log = "Test Log";
if (!EventLog.SourceExists(el.Source))
{
//Event source doesn't exist, so create a new one
EventLog.CreateEventSource(el.Source,el.Log);
}
el.WriteEntry("Just look at me
now!",EventLogEntryType.Information,12);
el.Close();
Response.Write("Done!");
%>
Listing 8.4 Creating a Custom Event Log and Logging an Entry in It (Visual
Basic .NET)
<%@ Page Language="VB" %>
<%@ Import Namespace="System.Diagnostics" %>
<%
Dim el As EventLog = New EventLog()
el.MachineName = "." 'local computer
el.Source = "Test Source"
el.Log = "Test Log"
If Not EventLog.SourceExists(el.Source) Then
'Event source doesn't exist, so create a new one
EventLog.CreateEventSource(el.Source,el.Log)
End If
el.WriteEntry("Just look at me now!",EventLogEntryType.Information,
_
12
el.Close()
Response.Write("Done!")
%>
New Riders - Debugging ASP.NET made by dotneter@teamfly
You should note a few interesting things about the code just shown. First, contrary
to the previous examples so far, you actually create an instance of the EventLog
object here rather than using Static methods of the EventLog class. Next, you set a
few properties of the EventLog instance. You then feed the Source property of your
EventLog instance into the Static SourceExists method of the EventLog class. If a
Boolean false value is returned from the method (meaning that the source does
not exist in the Windows 2000 Event Log), then you can call the
CreateEventSource static method to create it. You then can call the WriteEntry
method of your EventLog instance to write an entry to your custom event log.
The WriteEntry method has several overloaded method signatures, but the one
that is used here takes three parameters. The first parameter is the actual message
that you want to write to your custom event log. The second parameter is a typed
Enum (short for enumeration). The possible values for the EventLogEntryType are
as follows:
Error
FailureAudit
Information
SuccessAudit
Warning
You should use the Error |value when something has definitely gone wrong with
your web application. Use the Information value when something happens in your
web application that might not be a problem but that you just want to know about
it. Use the Warning value when something bad is about to happen or when
something (or somebody) is trying to do something that is not supposed allowed.
The other two values, FailureAudit and SuccessAudit, are used for logging to the
security log and will not be discussed here.
The final parameter to the WriteEntry method is the event ID. This parameter is a
Short datatype and can contain any numerical value that you want to pass in. It is
just another way to logically separate unique event types. Remember that you
already specified the machine name, source, and log to for your EventLog object
instance, so these values take part in the WriteEntry method as well. A final
important thing to remember is that you must call the Close method of your
EventLog object to release the read and write memory handles to the event log.
Figure 8.2 shows the custom event log that you just created.
Figure 8.2. You can organize your debugging efforts by separating events
into different logs.
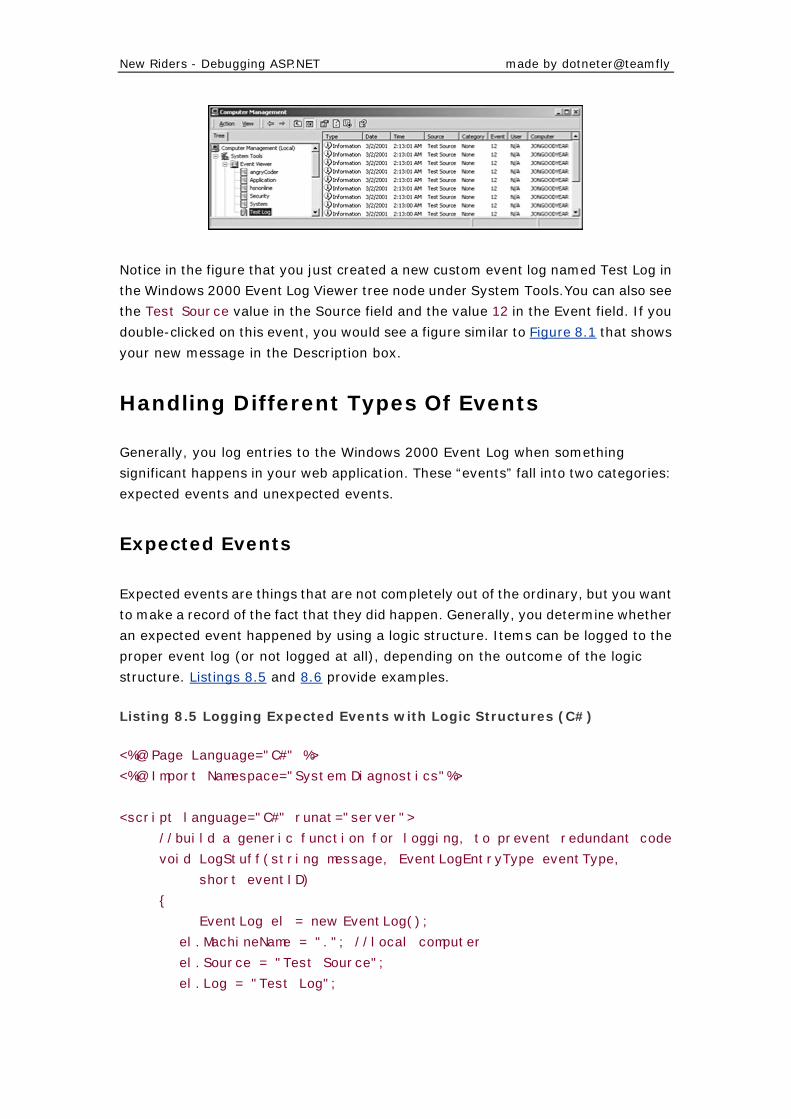
New Riders - Debugging ASP.NET made by dotneter@teamfly
Notice in the figure that you just created a new custom event log named Test Log in
the Windows 2000 Event Log Viewer tree node under System Tools.You can also see
the Test Source value in the Source field and the value 12 in the Event field. If you
double-clicked on this event, you would see a figure similar to Figure 8.1 that shows
your new message in the Description box.
Handling Different Types Of Events
Generally, you log entries to the Windows 2000 Event Log when something
significant happens in your web application. These “events” fall into two categories:
expected events and unexpected events.
Expected Events
Expected events are things that are not completely out of the ordinary, but you want
to make a record of the fact that they did happen. Generally, you determine whether
an expected event happened by using a logic structure. Items can be logged to the
proper event log (or not logged at all), depending on the outcome of the logic
structure. Listings 8.5 and 8.6 provide examples.
Listing 8.5 Logging Expected Events with Logic Structures (C#)
<%@ Page Language="C#" %>
<%@ Import Namespace="System.Diagnostics"%>
<script language="C#" runat="server">
//build a generic function for logging, to prevent redundant code
void LogStuff(string message, EventLogEntryType eventType,
short eventID)
{
EventLog el = new EventLog();
el.MachineName = "."; //local computer
el.Source = "Test Source";
el.Log = "Test Log";
New Riders - Debugging ASP.NET made by dotneter@teamfly
if (!EventLog.SourceExists(el.Source))
{
//Event source doesn't exist, so create a new one
EventLog.CreateEventSource(el.Source,el.Log);
}
el.WriteEntry(message,eventType,eventID);
el.Close();
}
</script>
<%
//grab the "second" portion of the time
int second = DateTime.Now.Second;
//write to a different log, depending on the value
if(second % 2 == 0)
{
LogStuff("The value is even: " + second. ToString(),
EventLogEntryType.Information, 1);
}
else if(second == 7)
{
LogStuff("Beware of superstitions: " + second. ToString(),
EventLogEntryType.Warning, 2);
}
else
{
LogStuff("The value is odd: " + second. ToString(),
EventLogEntryType.Information, 3);
}
Response.Write("Done!");
%>
Listing 8.6 Logging Expected Events with Logic Structures (Visual
Basic .NET)
<%@ Page Language="VB" %>
<%@ Import Namespace="System.Diagnostics" %>
<script language="VB" runat="server">
'build a generic function for logging, to prevent redundant code
Sub LogStuff(message As String, eventType As EventLogEntryType, _
eventID as Short)
New Riders - Debugging ASP.NET made by dotneter@teamfly
Dim el As EventLog = New EventLog()
el.MachineName = "." "local computer
el.Source = "Test Source"
el.Log = "Test Log"
If Not EventLog.SourceExists(el.Source) Then
‘Event source doesn't exist, so create a new one
EventLog.CreateEventSource(el.Source,el.Log)
End If
el.WriteEntry(message,eventType,eventID)
el.Close()
End Sub
</script>
<%
'grab the "second" portion of the time
Dim second As Integer = DateTime.Now.Second
'write to a different log, depending on the value
If second Mod 2 = 0 Then
LogStuff("The value is even: " & second. ToString(), _
EventLogEntryType.Information, 1)
ElseIf second = 7 Then
LogStuff("Beware of superstitions: " & second. ToString(), _
EventLogEntryType.Warning, 2)
Else
LogStuff("The value is odd: " & second. ToString(), _
EventLogEntryType.Information, 3)
End If
Response.Write("Done!")
%>
The example starts by defining a LogStuff function. Because several different types
of log entries can be made on the page, it makes sense to consolidate the logic into
a utility function. In your own web applications, you might also want to encapsulate
this logic into a lightweight utility component. For now, a utility function will suffice.
The example itself is not very complex. You retrieve the “second” portion of the
current time and write an entry to the custom event log based on the value that you
obtain. Notice that each call to LogStuff feeds in a different value for the event ID
(the last parameter). You can use the sorting capabilities of the Windows 2000
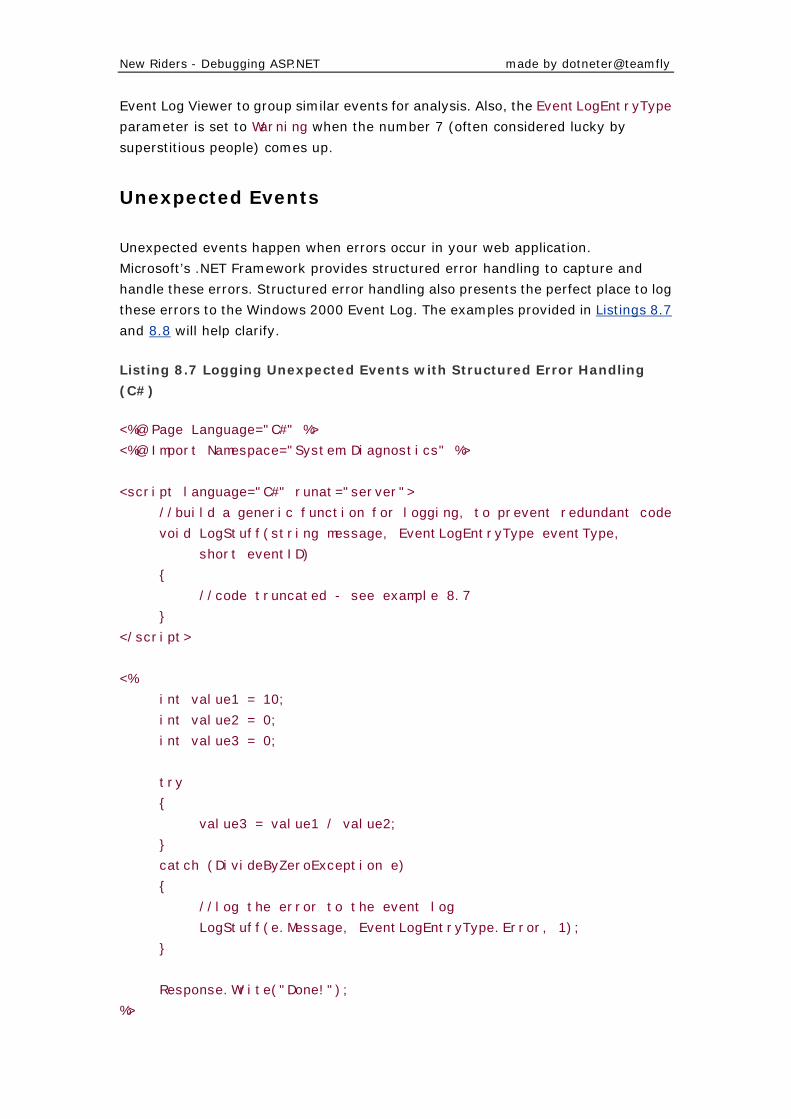
New Riders - Debugging ASP.NET made by dotneter@teamfly
Event Log Viewer to group similar events for analysis. Also, the EventLogEntryType
parameter is set to Warning when the number 7 (often considered lucky by
superstitious people) comes up.
Unexpected Events
Unexpected events happen when errors occur in your web application.
Microsoft’s .NET Framework provides structured error handling to capture and
handle these errors. Structured error handling also presents the perfect place to log
these errors to the Windows 2000 Event Log. The examples provided in Listings 8.7
and 8.8 will help clarify.
Listing 8.7 Logging Unexpected Events with Structured Error Handling
(C#)
<%@ Page Language="C#" %>
<%@ Import Namespace="System.Diagnostics" %>
<script language="C#" runat="server">
//build a generic function for logging, to prevent redundant code
void LogStuff(string message, EventLogEntryType eventType,
short eventID)
{
//code truncated - see example 8.7
}
</script>
<%
int value1 = 10;
int value2 = 0;
int value3 = 0;
try
{
value3 = value1 / value2;
}
catch (DivideByZeroException e)
{
//log the error to the event log
LogStuff(e.Message, EventLogEntryType.Error, 1);
}
Response.Write("Done!");
%>
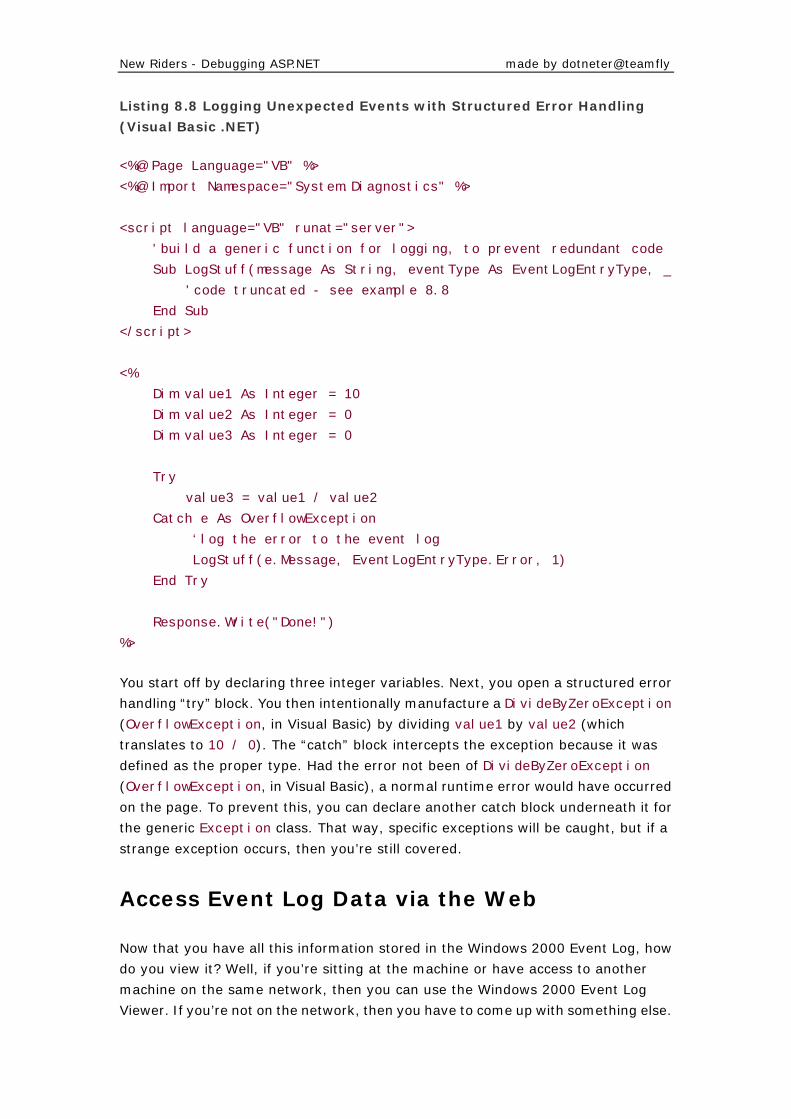
New Riders - Debugging ASP.NET made by dotneter@teamfly
Listing 8.8 Logging Unexpected Events with Structured Error Handling
(Visual Basic .NET)
<%@ Page Language="VB" %>
<%@ Import Namespace="System.Diagnostics" %>
<script language="VB" runat="server">
'build a generic function for logging, to prevent redundant code
Sub LogStuff(message As String, eventType As EventLogEntryType, _
'code truncated - see example 8.8
End Sub
</script>
<%
Dim value1 As Integer = 10
Dim value2 As Integer = 0
Dim value3 As Integer = 0
Try
value3 = value1 / value2
Catch e As OverflowException
‘log the error to the event log
LogStuff(e.Message, EventLogEntryType.Error, 1)
End Try
Response.Write("Done!")
%>
You start off by declaring three integer variables. Next, you open a structured error
handling “try” block. You then intentionally manufacture a DivideByZeroException
(OverflowException, in Visual Basic) by dividing value1 by value2 (which
translates to 10 / 0). The “catch” block intercepts the exception because it was
defined as the proper type. Had the error not been of DivideByZeroException
(OverflowException, in Visual Basic), a normal runtime error would have occurred
on the page. To prevent this, you can declare another catch block underneath it for
the generic Exception class. That way, specific exceptions will be caught, but if a
strange exception occurs, then you’re still covered.
Access Event Log Data via the Web
Now that you have all this information stored in the Windows 2000 Event Log, how
do you view it? Well, if you’re sitting at the machine or have access to another
machine on the same network, then you can use the Windows 2000 Event Log
Viewer. If you’re not on the network, then you have to come up with something else.
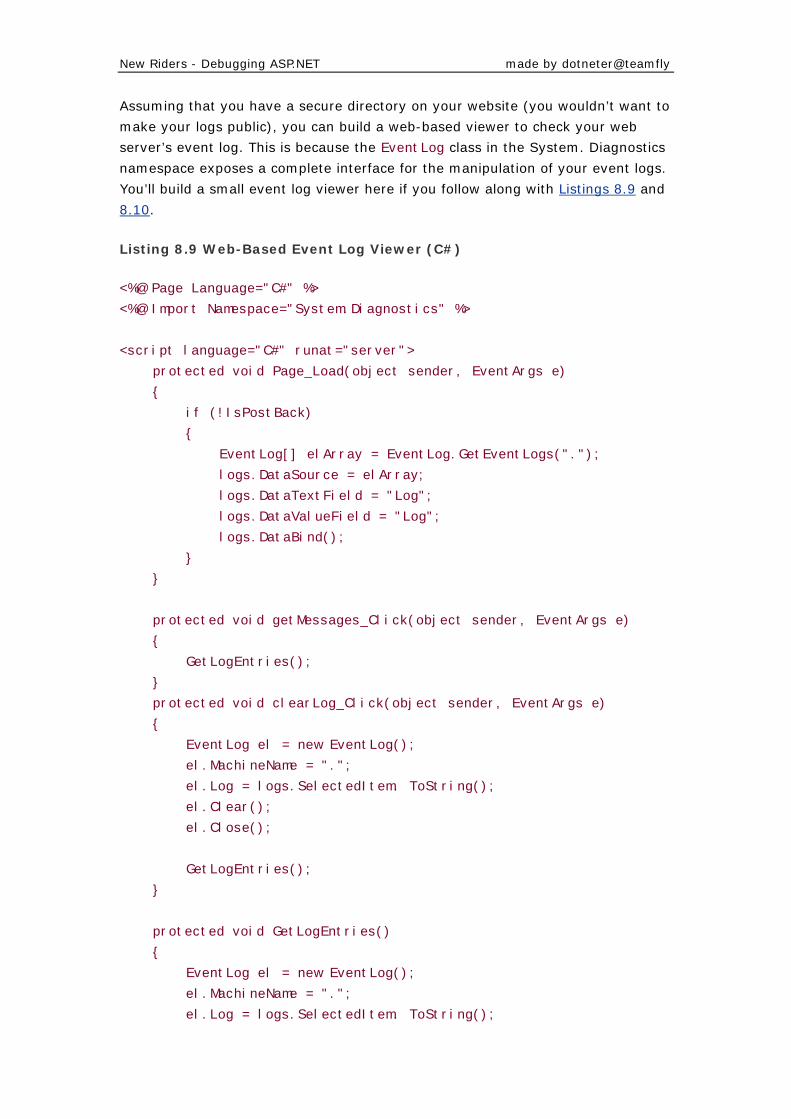
New Riders - Debugging ASP.NET made by dotneter@teamfly
Assuming that you have a secure directory on your website (you wouldn’t want to
make your logs public), you can build a web-based viewer to check your web
server’s event log. This is because the EventLog class in the System. Diagnostics
namespace exposes a complete interface for the manipulation of your event logs.
You’ll build a small event log viewer here if you follow along with Listings 8.9 and
8.10.
Listing 8.9 Web-Based Event Log Viewer (C#)
<%@ Page Language="C#" %>
<%@ Import Namespace="System.Diagnostics" %>
<script language="C#" runat="server">
protected void Page_Load(object sender, EventArgs e)
{
if (!IsPostBack)
{
EventLog[] elArray = EventLog.GetEventLogs(".");
logs.DataSource = elArray;
logs.DataTextField = "Log";
logs.DataValueField = "Log";
logs.DataBind();
}
}
protected void getMessages_Click(object sender, EventArgs e)
{
GetLogEntries();
}
protected void clearLog_Click(object sender, EventArgs e)
{
EventLog el = new EventLog();
el.MachineName = ".";
el.Log = logs.SelectedItem. ToString();
el.Clear();
el.Close();
GetLogEntries();
}
protected void GetLogEntries()
{
EventLog el = new EventLog();
el.MachineName = ".";
el.Log = logs.SelectedItem. ToString();
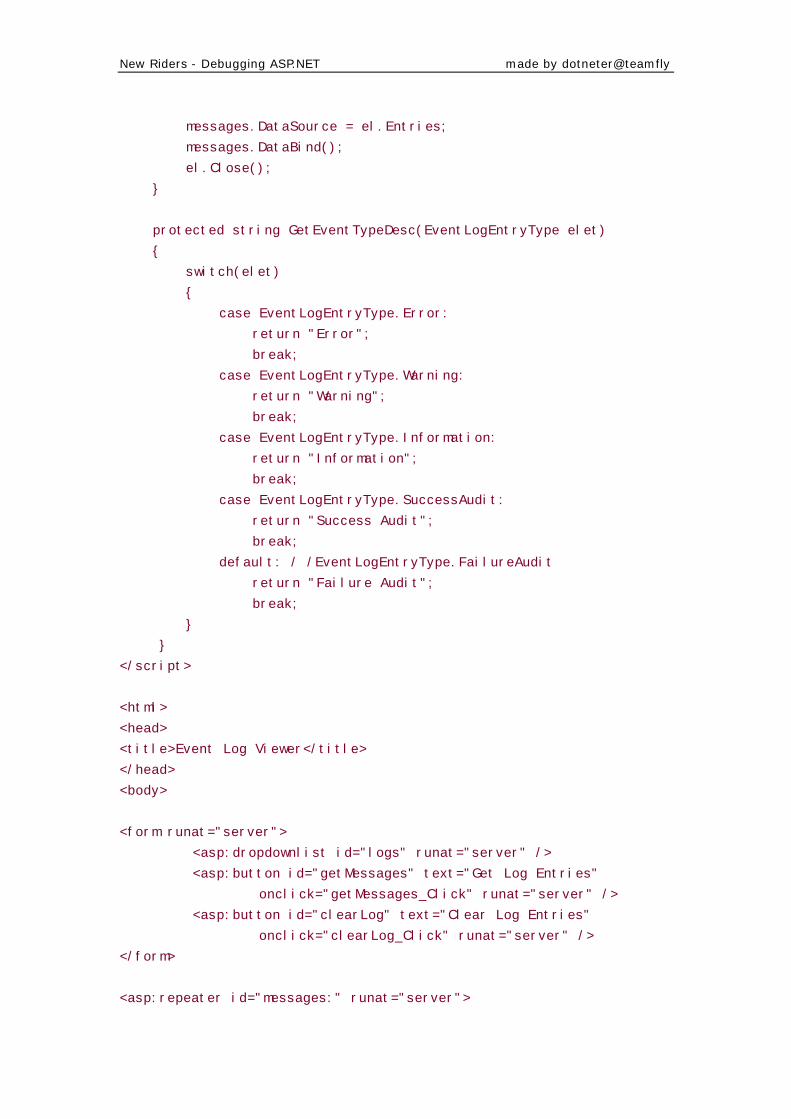
New Riders - Debugging ASP.NET made by dotneter@teamfly
messages.DataSource = el.Entries;
messages.DataBind();
el.Close();
}
protected string GetEventTypeDesc(EventLogEntryType elet)
{
switch(elet)
{
case EventLogEntryType.Error:
return "Error";
break;
case EventLogEntryType.Warning:
return "Warning";
break;
case EventLogEntryType.Information:
return "Information";
break;
case EventLogEntryType.SuccessAudit:
return "Success Audit";
break;
default: / /EventLogEntryType.FailureAudit
return "Failure Audit";
break;
}
}
</script>
<html>
<head>
<title>Event Log Viewer</title>
</head>
<body>
<form runat="server">
<asp:dropdownlist id="logs" runat="server" />
<asp:button id="getMessages" text="Get Log Entries"
onclick="getMessages_Click" runat="server" />
<asp:button id="clearLog" text="Clear Log Entries"
onclick="clearLog_Click" runat="server" />
</form>
<asp:repeater id="messages:" runat="server">
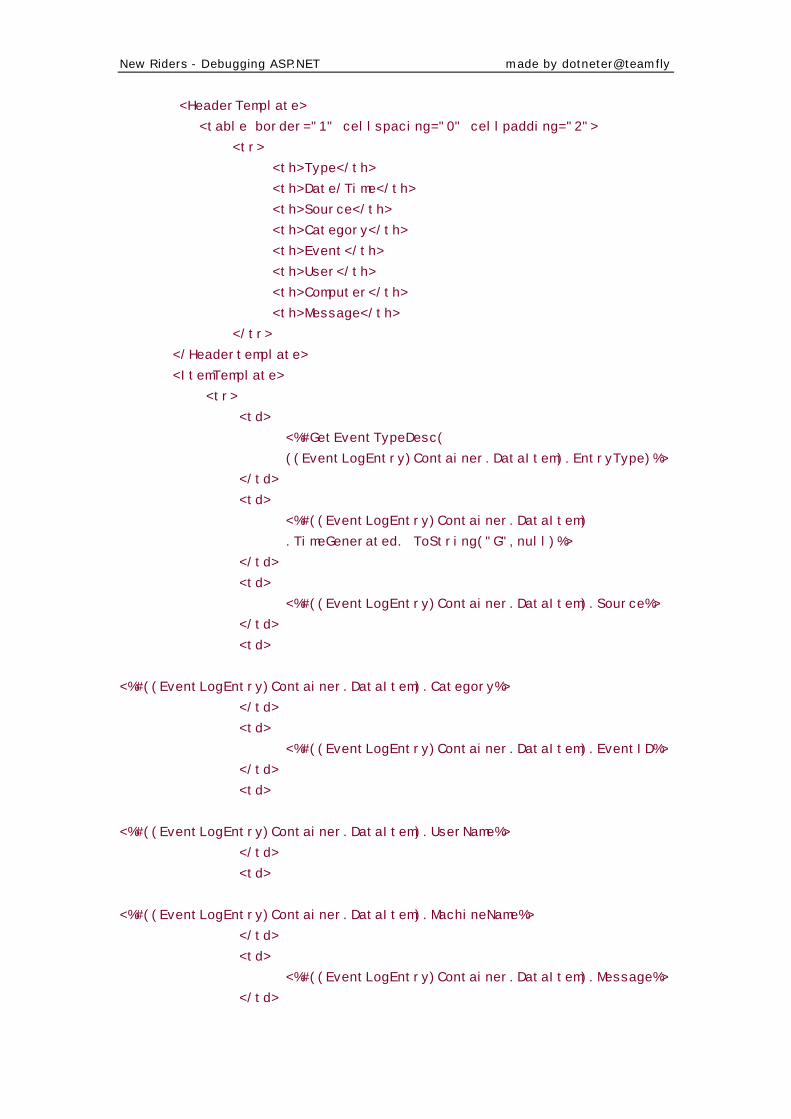
New Riders - Debugging ASP.NET made by dotneter@teamfly
<HeaderTemplate>
<table border="1" cellspacing="0" cellpadding="2">
<tr>
<th>Type</th>
<th>Date/Time</th>
<th>Source</th>
<th>Category</th>
<th>Event</th>
<th>User</th>
<th>Computer</th>
<th>Message</th>
</tr>
</Headertemplate>
<ItemTemplate>
<tr>
<td>
<%#GetEventTypeDesc(
((EventLogEntry)Container.DataItem).EntryType)%>
</td>
<td>
<%#((EventLogEntry)Container.DataItem)
.TimeGenerated. ToString("G",null)%>
</td>
<td>
<%#((EventLogEntry)Container.DataItem).Source%>
</td>
<td>
<%#((EventLogEntry)Container.DataItem).Category%>
</td>
<td>
<%#((EventLogEntry)Container.DataItem).EventID%>
</td>
<td>
<%#((EventLogEntry)Container.DataItem).UserName%>
</td>
<td>
<%#((EventLogEntry)Container.DataItem).MachineName%>
</td>
<td>
<%#((EventLogEntry)Container.DataItem).Message%>
</td>
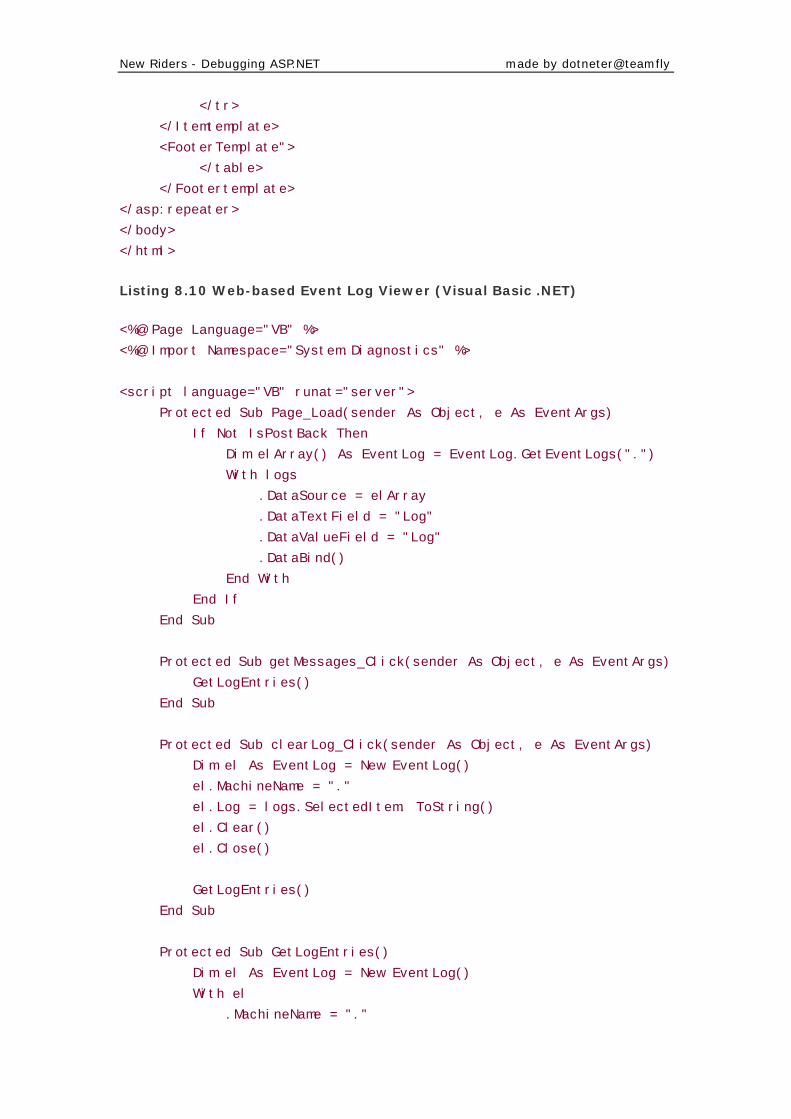
New Riders - Debugging ASP.NET made by dotneter@teamfly
</tr>
</Itemtemplate>
<FooterTemplate">
</table>
</Footertemplate>
</asp:repeater>
</body>
</html>
Listing 8.10 Web-based Event Log Viewer (Visual Basic .NET)
<%@ Page Language="VB" %>
<%@ Import Namespace="System.Diagnostics" %>
<script language="VB" runat="server">
Protected Sub Page_Load(sender As Object, e As EventArgs)
If Not IsPostBack Then
Dim elArray() As EventLog = EventLog.GetEventLogs(".")
With logs
.DataSource = elArray
.DataTextField = "Log"
.DataValueField = "Log"
.DataBind()
End With
End If
End Sub
Protected Sub getMessages_Click(sender As Object, e As EventArgs)
GetLogEntries()
End Sub
Protected Sub clearLog_Click(sender As Object, e As EventArgs)
Dim el As EventLog = New EventLog()
el.MachineName = "."
el.Log = logs.SelectedItem. ToString()
el.Clear()
el.Close()
GetLogEntries()
End Sub
Protected Sub GetLogEntries()
Dim el As EventLog = New EventLog()
With el
.MachineName = "."
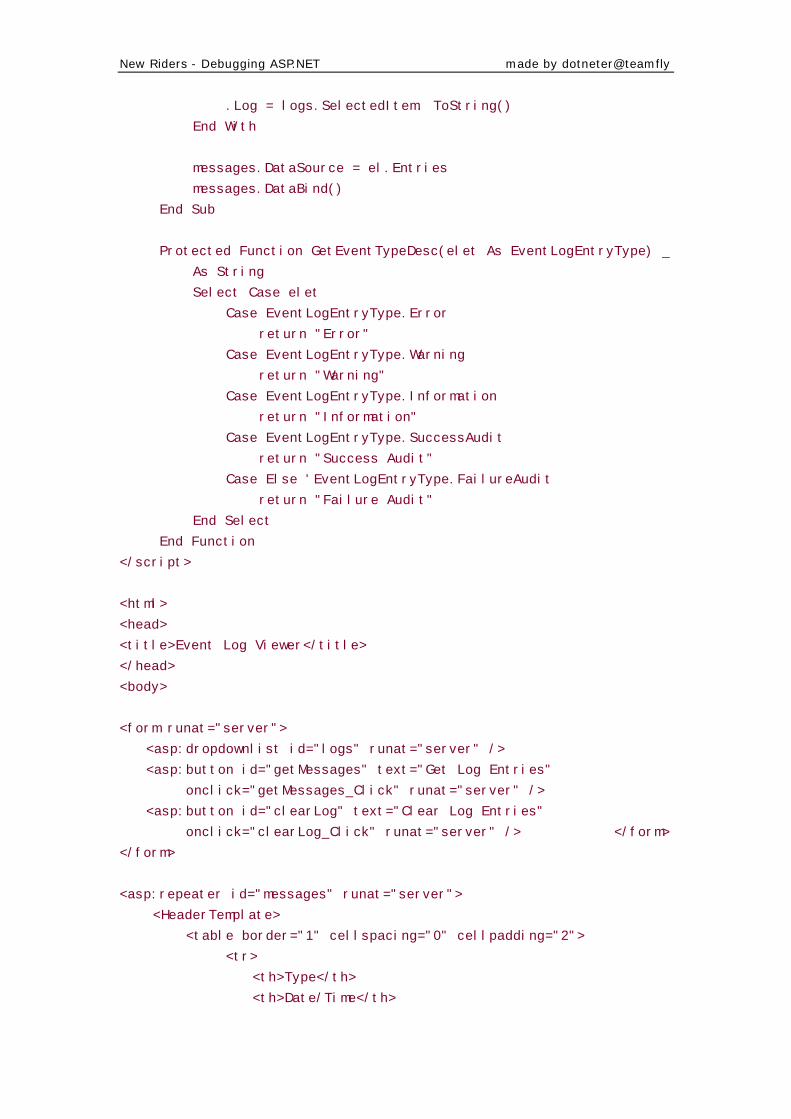
New Riders - Debugging ASP.NET made by dotneter@teamfly
.Log = logs.SelectedItem. ToString()
End With
messages.DataSource = el.Entries
messages.DataBind()
End Sub
Protected Function GetEventTypeDesc(elet As EventLogEntryType) _
As String
Select Case elet
Case EventLogEntryType.Error
return "Error"
Case EventLogEntryType.Warning
return "Warning"
Case EventLogEntryType.Information
return "Information"
Case EventLogEntryType.SuccessAudit
return "Success Audit"
Case Else 'EventLogEntryType.FailureAudit
return "Failure Audit"
End Select
End Function
</script>
<html>
<head>
<title>Event Log Viewer</title>
</head>
<body>
<form runat="server">
<asp:dropdownlist id="logs" runat="server" />
<asp:button id="getMessages" text="Get Log Entries"
onclick="getMessages_Click" runat="server" />
<asp:button id="clearLog" text="Clear Log Entries"
onclick="clearLog_Click" runat="server" /> </form>
</form>
<asp:repeater id="messages" runat="server">
<HeaderTemplate>
<table border="1" cellspacing="0" cellpadding="2">
<tr>
<th>Type</th>
<th>Date/Time</th>

New Riders - Debugging ASP.NET made by dotneter@teamfly
<th>Source</th>
<th>Category</th>
<th>>Event</th>
<th>User</th>
<th>Computer</th>
<th>Message</th>
</tr>
</Headertemplate>
<ItemTemplate>
<tr>
<td>
<%#GetEventTypeDesc(Container.DataItem.EntryType)%>
</td>
<td>
<%#Container.DataItem. TimeGenerated. ToString("G")%>
</td>
<td>
<%#Container.DataItem.Source%>
</td>
<td>
<%#Container.DataItem.Category%>
</td>
<td>
<%#Container.DataItem.EventID%>
</td>
<td>
<%#Container.DataItem.UserName%>
</td>
<td>
<%#Container.DataItem.MachineName%>
</td>
<td>
<%#Container.DataItem.Message%>
</td>
</tr>
</Itemtemplate>
<FooterTemplate>
</table>
</Footertemplate>
</asp:repeater>
</body>
</html>
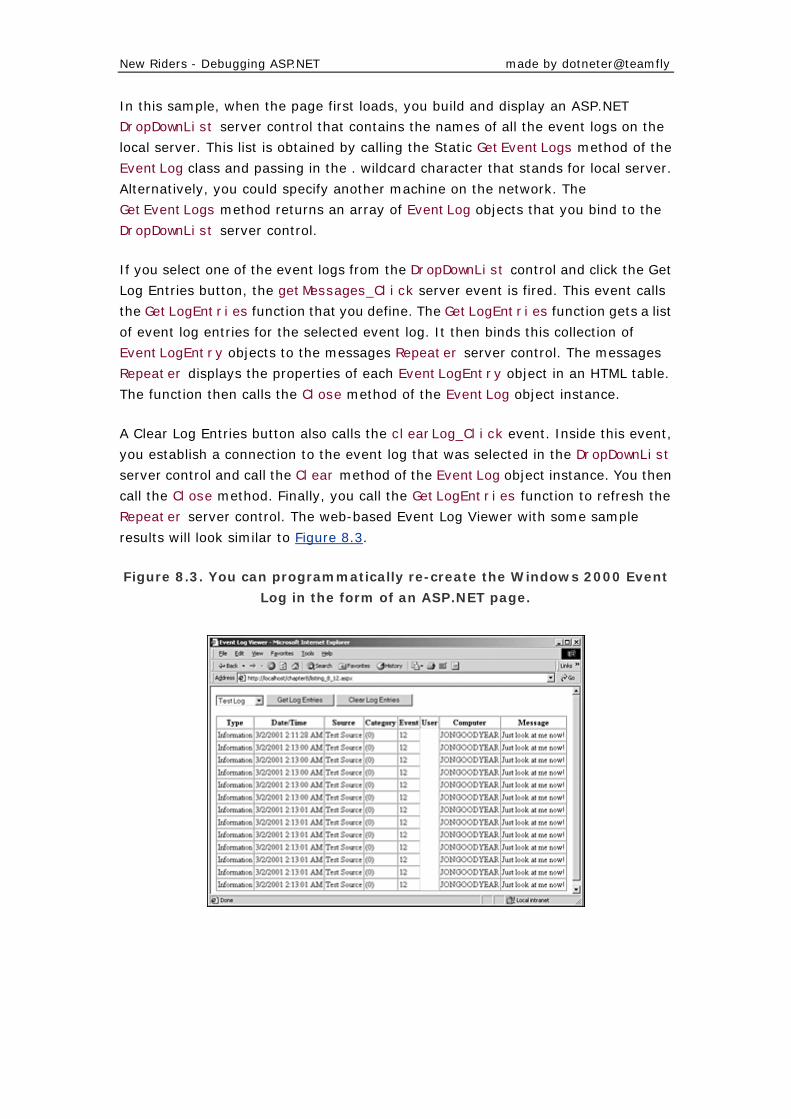
New Riders - Debugging ASP.NET made by dotneter@teamfly
In this sample, when the page first loads, you build and display an ASP.NET
DropDownList server control that contains the names of all the event logs on the
local server. This list is obtained by calling the Static GetEventLogs method of the
EventLog class and passing in the . wildcard character that stands for local server.
Alternatively, you could specify another machine on the network. The
GetEventLogs method returns an array of EventLog objects that you bind to the
DropDownList server control.
If you select one of the event logs from the DropDownList control and click the Get
Log Entries button, the getMessages_Click server event is fired. This event calls
the GetLogEntries function that you define. The GetLogEntries function gets a list
of event log entries for the selected event log. It then binds this collection of
EventLogEntry objects to the messages Repeater server control. The messages
Repeater displays the properties of each EventLogEntry object in an HTML table.
The function then calls the Close method of the EventLog object instance.
A Clear Log Entries button also calls the clearLog_Click event. Inside this event,
you establish a connection to the event log that was selected in the DropDownList
server control and call the Clear method of the EventLog object instance. You then
call the Close method. Finally, you call the GetLogEntries function to refresh the
Repeater server control. The web-based Event Log Viewer with some sample
results will look similar to Figure 8.3.
Figure 8.3. You can programmatically re-create the Windows 2000 Event
Log in the form of an ASP.NET page.
New Riders - Debugging ASP.NET made by dotneter@teamfly
Summary
In this chapter, you learned that Microsoft’s .NET Framework exposes an interface
for managing the Windows 2000 Event Log. This interface is located in the
System.Diagnostics namespace. The EventLog class in the System.Diagnostics
namespace offers a rich interface for both reading and writing to the Windows 2000
Event Log. This includes setting up custom event logs and manipulating all the
properties of an event.
You also learned that there are two different types of events: expected events and
unexpected events. Expected events are identified using logic structures and are
logged according to the rules outlining their importance. Unexpected events are
trapped and handled via structured error handling. Specific exceptions can be
trapped and logged, as can generic exceptions.
The chapter concluded by showing you how to build a web-based Event Log Viewer
that enables you to select an event log from a DropDownList server control and click
a button to display all the events in that event log. Another button clears all the log
entries from the selected event log in the DropDownList server control.
In the next chapter, you move on to Part III, “Debugging the New ASP.NET
Features,” and start off with a discussion on debugging ASP.NET server controls.
Part III: Debugging the New ASP.NET
Features
Part III Debugging the New ASP.NET Features
9 Debugging Server-Side Controls
10 Debugging Data-Bound Controls
11 Debugging User Controls
12 Caching Issues and Debugging
New Riders - Debugging ASP.NET made by dotneter@teamfly
9. Debugging Server-Side Controls
ASP.NET SERVER CONTROLS PROVIDE AN ENORMOUS amount of power to you as
a programmer in developing truly object-oriented web-based applications. In the
simplest terms, a server control is a control that is executed on the server and that
provides some type of output to the user. These generally are used to create
brandnew types of user-interface controls that are not currently available in
ASP.NET.
If you have been using ASP.NET, you will be familiar with the <asp:></asp> style
tags that have been introduced into the language. These tags that you insert into
your HTML page are really server-side controls that implement either a standard
HTML control or a custom control that is only part of ASP.NET, such as a data grid.
In the traditional ASP paradigm, this can be thought of as an include file that
contains the HTML or JavaScript required to implement a new type of control. Now,
however, you are actually building a real compiled component that is executed
entirely on the server.
This chapter focuses on creating a server-side ASP.NET control, including navigating
some common pitfalls in developing a control like this and properly debugging it
both as it is being written and after it has been completed. The demonstration
project used in this chapter is an extremely simple tab control.
Creating the Project
If you plan to follow along step by step with this chapter, we recommend following
some naming conventions to make compiling and debugging easier. As always, both
C# and Visual Basic .NET code will be provided for this project.
You’ll start by creating the project. First, create a standard ASP.NET application in
the language of your choice. Name it either Chapter9CS for C# or Chapter9VB for
Visual Basic .NET. Next, right-click the project name in the Solution window and
choose Add and then New Component. In the dialog box that appears, choose Web
Custom Control and name this component SimpleTabControl.cs or
SimpleTabControl.vb, depending on the language you have chosen for this
example.

New Riders - Debugging ASP.NET made by dotneter@teamfly
Now you can start coding the basic tab control framework. First, you will create the
very basic input and output routines of the tab control. Listing 9.1 contains the C#
version of the code, while Listing 9.2 contains the Visual Basic .NET version. Listings
9.3 and 9.4 contain the code of one of the ASP.NET pages that you will be using to
test the control for the C# and Visual Basic .NET projects, respectively. Finally,
Listing 9.5 is a listing of the code-behind file that will be used for the C# ASP.NET
pages, and Listing 9.6 contains the same code in Visual Basic .NET. You will want to
create three separate ASP.NET pages, each with the same code. The only difference
between the pages is having the proper code-behind file referenced from each page,
as well as having each code-behind file with a unique class in it. This will be
explained a bit more as we explain the example in the pages ahead.
Listing 9.1 Tab Control (C#—SimpleTabControl.cs)
using System;
using System.Web.UI;
namespace Chapter9CS
{
public class SimpleTabControl : System.Web.UI.WebControls.WebControl,
IPostBackEventHandler
{
private string[] aPages;
private string[] aNames;
public string CurPage
{
get { return (string)ViewState["curPage"]; }
set { ViewState["curPage"] = value; }
}
public string Names
{
get { return (string)ViewState["names"]; }
set { ViewState["names"] = value; aNames = value.Split("~");
ViewState["aNames"] = aNames; }
}
public string Pages
{
get { return (string)ViewState["pages"]; }
set { ViewState["pages"] = value; aPages = value.Split("~");
ViewState["aPages"] = aPages; }
}
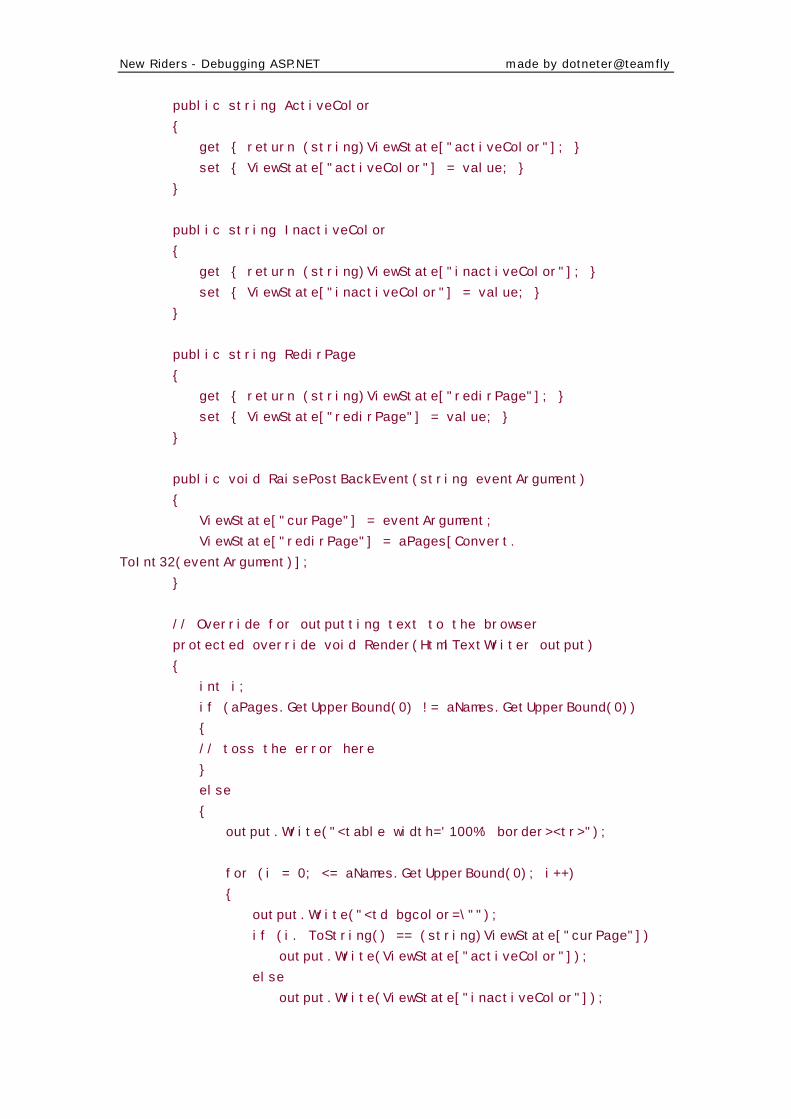
New Riders - Debugging ASP.NET made by dotneter@teamfly
public string ActiveColor
{
get { return (string)ViewState["activeColor"]; }
set { ViewState["activeColor"] = value; }
}
public string InactiveColor
{
get { return (string)ViewState["inactiveColor"]; }
set { ViewState["inactiveColor"] = value; }
}
public string RedirPage
{
get { return (string)ViewState["redirPage"]; }
set { ViewState["redirPage"] = value; }
}
public void RaisePostBackEvent(string eventArgument)
{
ViewState["curPage"] = eventArgument;
ViewState["redirPage"] = aPages[Convert.
ToInt32(eventArgument)];
}
// Override for outputting text to the browser
protected override void Render(HtmlTextWriter output)
{
int i;
if (aPages.GetUpperBound(0) != aNames.GetUpperBound(0))
{
// toss the error here
}
else
{
output.Write("<table width='100%' border><tr>");
for (i = 0; <= aNames.GetUpperBound(0); i++)
{
output.Write("<td bgcolor=\"");
if (i. ToString() == (string)ViewState["curPage"])
output.Write(ViewState["activeColor"]);
else
output.Write(ViewState["inactiveColor"]);
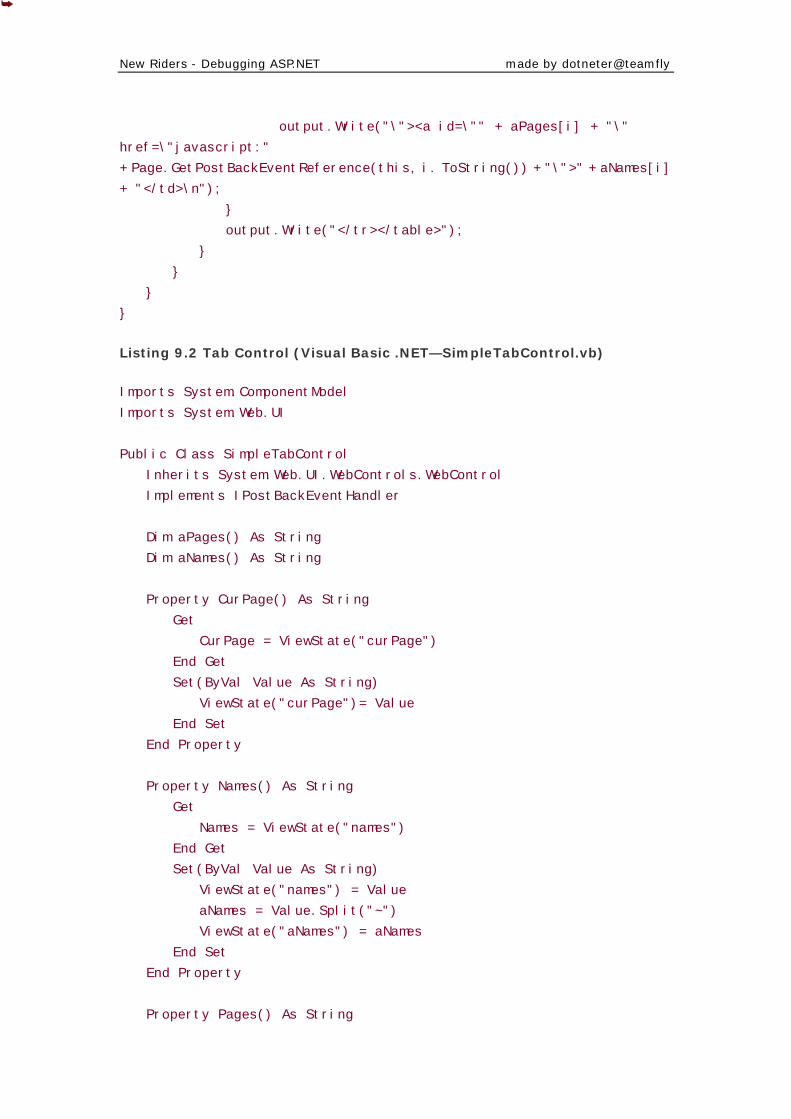
New Riders - Debugging ASP.NET made by dotneter@teamfly
output.Write("\"><a id=\"" + aPages[i] + "\"
href=\"javascript:"
+ Page.GetPostBackEventReference(this, i. ToString()) + "\">" + aNames[i]
+ "</td>\n");
}
output.Write("</tr></table>");
}
}
}
}
Listing 9.2 Tab Control (Visual Basic .NET—SimpleTabControl.vb)
Imports System.ComponentModel
Imports System.Web.UI
Public Class SimpleTabControl
Inherits System.Web.UI.WebControls.WebControl
Implements IPostBackEventHandler
Dim aPages() As String
Dim aNames() As String
Property CurPage() As String
Get
CurPage = ViewState("curPage")
End Get
Set(ByVal Value As String)
ViewState("curPage")= Value
End Set
End Property
Property Names() As String
Get
Names = ViewState("names")
End Get
Set(ByVal Value As String)
ViewState("names") = Value
aNames = Value.Split("~")
ViewState("aNames") = aNames
End Set
End Property
Property Pages() As String
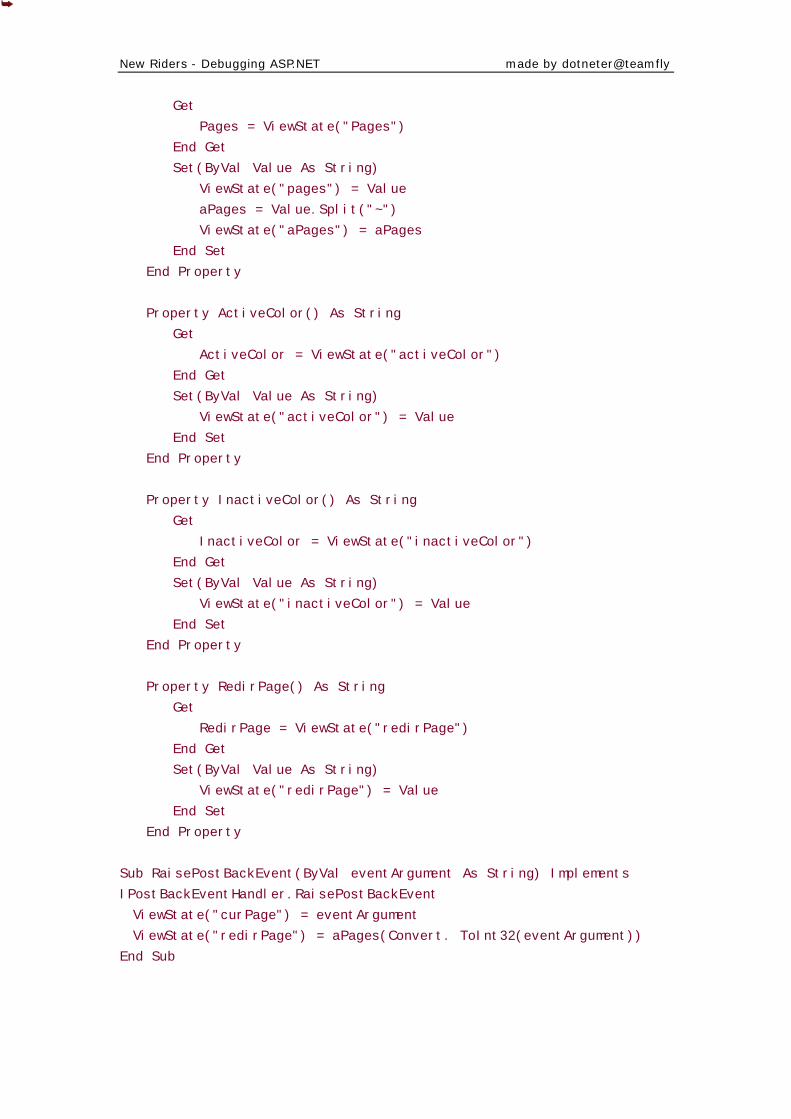
New Riders - Debugging ASP.NET made by dotneter@teamfly
Get
Pages = ViewState("Pages")
End Get
Set(ByVal Value As String)
ViewState("pages") = Value
aPages = Value.Split("~")
ViewState("aPages") = aPages
End Set
End Property
Property ActiveColor() As String
Get
ActiveColor = ViewState("activeColor")
End Get
Set(ByVal Value As String)
ViewState("activeColor") = Value
End Set
End Property
Property InactiveColor() As String
Get
InactiveColor = ViewState("inactiveColor")
End Get
Set(ByVal Value As String)
ViewState("inactiveColor") = Value
End Set
End Property
Property RedirPage() As String
Get
RedirPage = ViewState("redirPage")
End Get
Set(ByVal Value As String)
ViewState("redirPage") = Value
End Set
End Property
Sub RaisePostBackEvent(ByVal eventArgument As String) Implements
IPostBackEventHandler.RaisePostBackEvent
ViewState("curPage") = eventArgument
ViewState("redirPage") = aPages(Convert. ToInt32(eventArgument))
End Sub
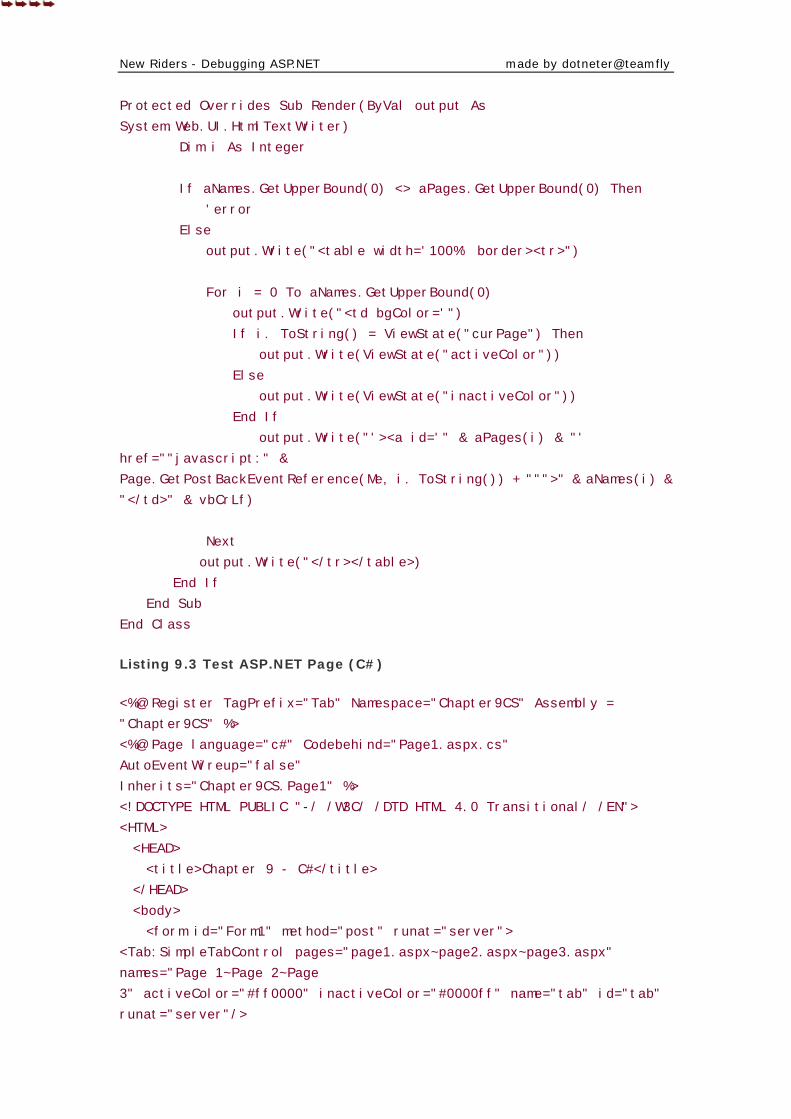
New Riders - Debugging ASP.NET made by dotneter@teamfly
Protected Overrides Sub Render(ByVal output As
System.Web.UI.HtmlTextWriter)
Dim i As Integer
If aNames.GetUpperBound(0) <> aPages.GetUpperBound(0) Then
'error
Else
output.Write("<table width='100%' border><tr>")
For i = 0 To aNames.GetUpperBound(0)
output.Write("<td bgColor='")
If i. ToString() = ViewState("curPage") Then
output.Write(ViewState("activeColor"))
Else
output.Write(ViewState("inactiveColor"))
End If
output.Write("'><a id='" & aPages(i) & "'
href=""javascript:" &
Page.GetPostBackEventReference(Me, i. ToString()) + """>" & aNames(i) &
"</td>" & vbCrLf)
Next
output.Write("</tr></table>)
End If
End Sub
End Class
Listing 9.3 Test ASP.NET Page (C#)
<%@ Register TagPrefix="Tab" Namespace="Chapter9CS" Assembly =
"Chapter9CS" %>
<%@ Page language="c#" Codebehind="Page1.aspx.cs"
AutoEventWireup="false"
Inherits="Chapter9CS.Page1" %>
<!DOCTYPE HTML PUBLIC "-/ /W3C/ /DTD HTML 4.0 Transitional/ /EN">
<HTML>
<HEAD>
<title>Chapter 9 - C#</title>
</HEAD>
<body>
<form id="Form1" method="post" runat="server">
<Tab:SimpleTabControl pages="page1.aspx~page2.aspx~page3.aspx"
names="Page 1~Page 2~Page
3" activeColor="#ff0000" inactiveColor="#0000ff" name="tab" id="tab"
runat="server"/>
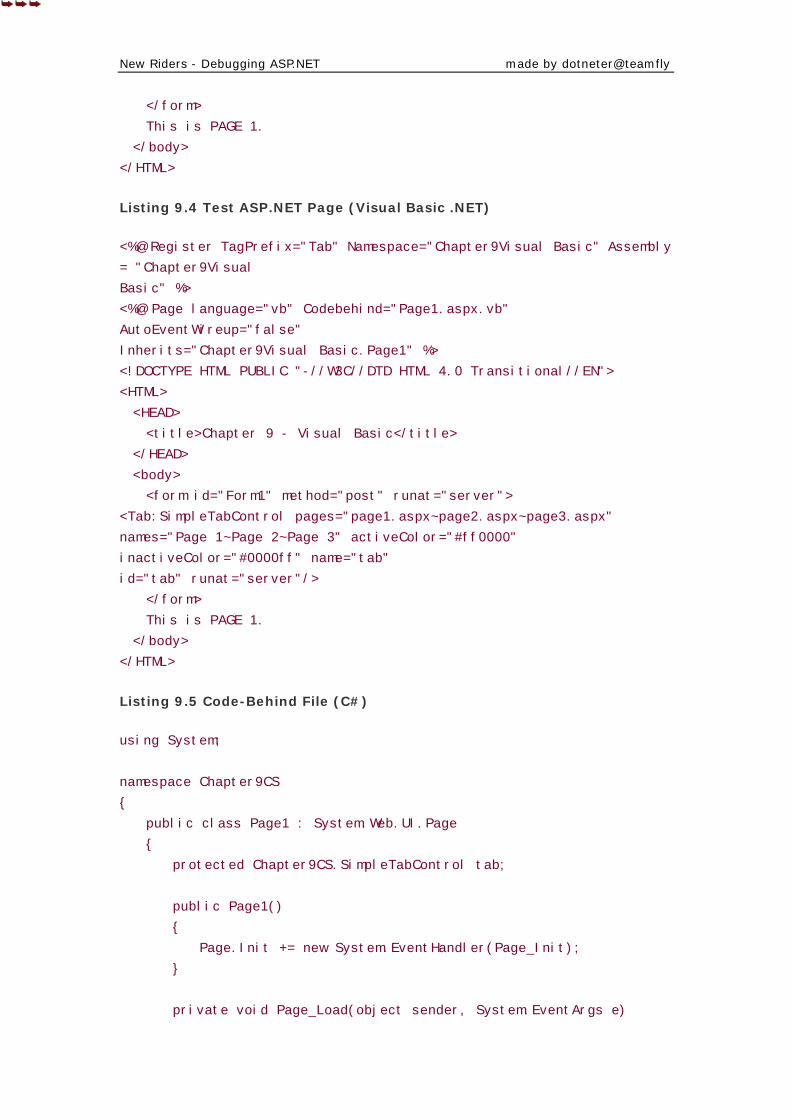
New Riders - Debugging ASP.NET made by dotneter@teamfly
</form>
This is PAGE 1.
</body>
</HTML>
Listing 9.4 Test ASP.NET Page (Visual Basic .NET)
<%@ Register TagPrefix="Tab" Namespace="Chapter9Visual Basic" Assembly
= "Chapter9Visual
Basic" %>
<%@ Page language="vb" Codebehind="Page1.aspx.vb"
AutoEventWireup="false"
Inherits="Chapter9Visual Basic.Page1" %>
<!DOCTYPE HTML PUBLIC "-//W3C//DTD HTML 4.0 Transitional//EN">
<HTML>
<HEAD>
<title>Chapter 9 - Visual Basic</title>
</HEAD>
<body>
<form id="Form1" method="post" runat="server">
<Tab:SimpleTabControl pages="page1.aspx~page2.aspx~page3.aspx"
names="Page 1~Page 2~Page 3" activeColor="#ff0000"
inactiveColor="#0000ff" name="tab"
id="tab" runat="server"/>
</form>
This is PAGE 1.
</body>
</HTML>
Listing 9.5 Code-Behind File (C#)
using System;
namespace Chapter9CS
{
public class Page1 : System.Web.UI.Page
{
protected Chapter9CS.SimpleTabControl tab;
public Page1()
{
Page.Init += new System.EventHandler(Page_Init);
}
private void Page_Load(object sender, System.EventArgs e)
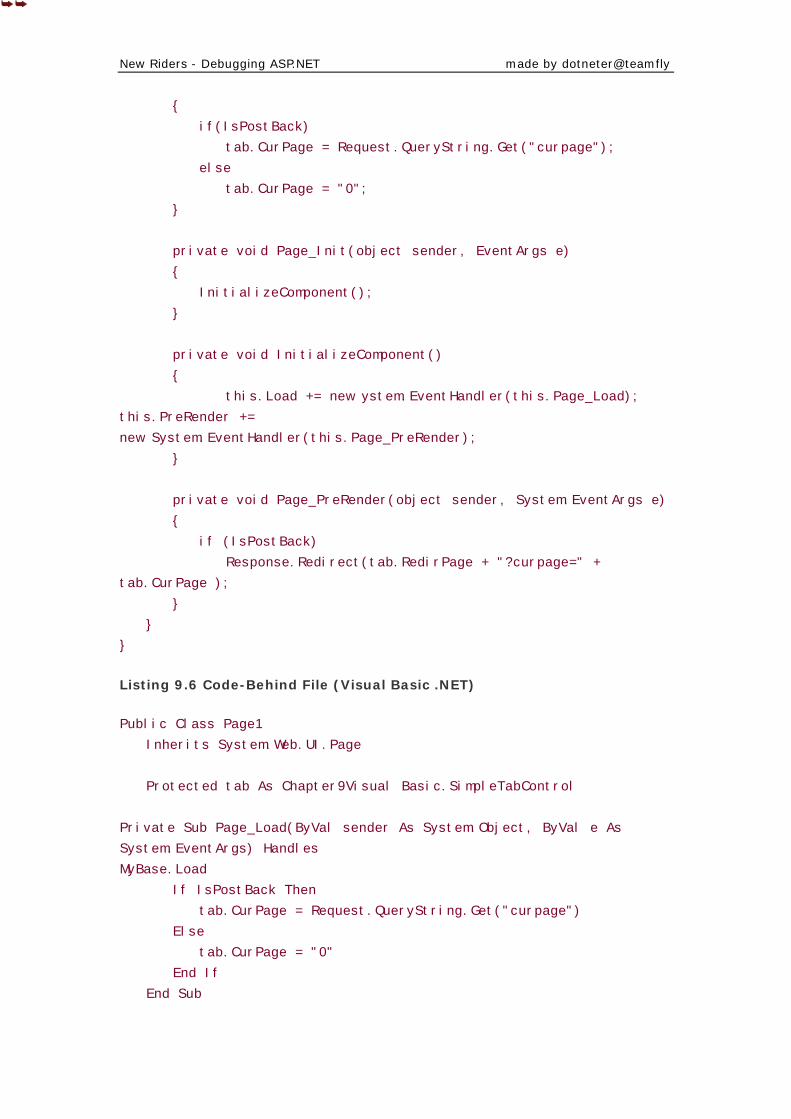
New Riders - Debugging ASP.NET made by dotneter@teamfly
{
if(IsPostBack)
tab.CurPage = Request.QueryString.Get("curpage");
else
tab.CurPage = "0";
}
private void Page_Init(object sender, EventArgs e)
{
InitializeComponent();
}
private void InitializeComponent()
{
this.Load += new ystem.EventHandler(this.Page_Load);
this.PreRender +=
new System.EventHandler(this.Page_PreRender);
}
private void Page_PreRender(object sender, System.EventArgs e)
{
if (IsPostBack)
Response.Redirect(tab.RedirPage + "?curpage=" +
tab.CurPage );
}
}
}
Listing 9.6 Code-Behind File (Visual Basic .NET)
Public Class Page1
Inherits System.Web.UI.Page
Protected tab As Chapter9Visual Basic.SimpleTabControl
Private Sub Page_Load(ByVal sender As System.Object, ByVal e As
System.EventArgs) Handles
MyBase.Load
If IsPostBack Then
tab.CurPage = Request.QueryString.Get("curpage")
Else
tab.CurPage = "0"
End If
End Sub
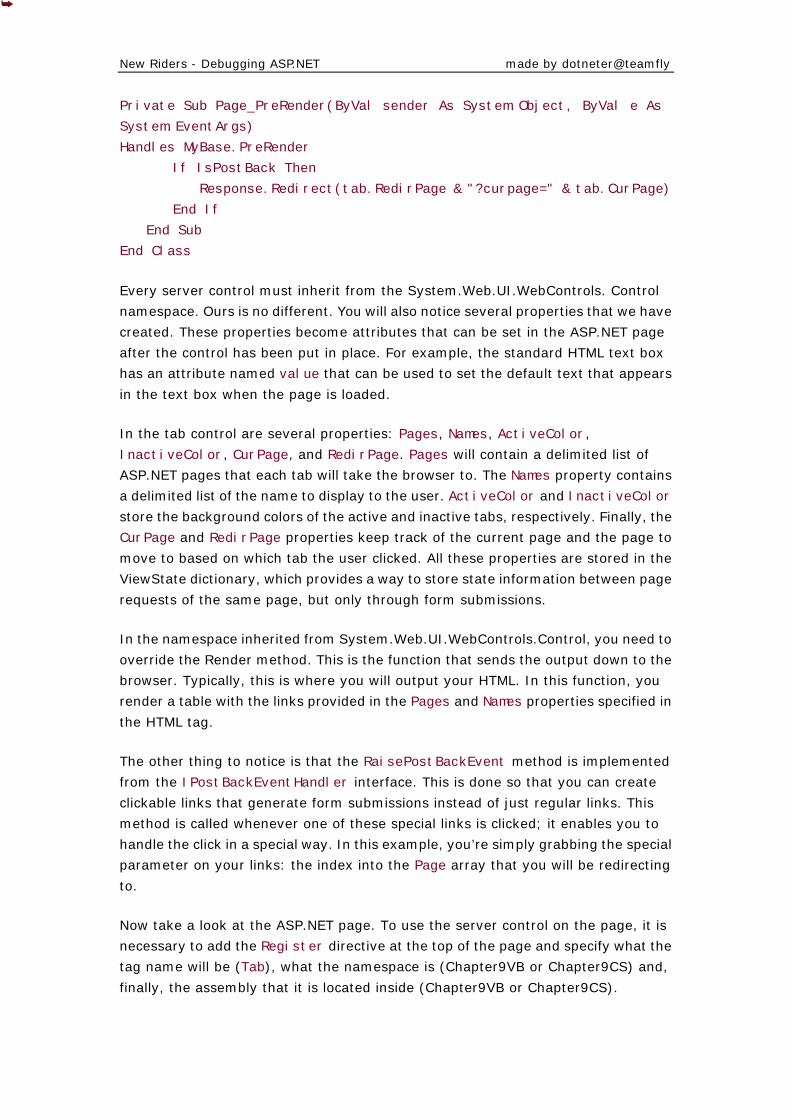
New Riders - Debugging ASP.NET made by dotneter@teamfly
Private Sub Page_PreRender(ByVal sender As System.Object, ByVal e As
System.EventArgs)
Handles MyBase.PreRender
If IsPostBack Then
Response.Redirect(tab.RedirPage & "?curpage=" & tab.CurPage)
End If
End Sub
End Class
Every server control must inherit from the System.Web.UI.WebControls. Control
namespace. Ours is no different. You will also notice several properties that we have
created. These properties become attributes that can be set in the ASP.NET page
after the control has been put in place. For example, the standard HTML text box
has an attribute named value that can be used to set the default text that appears
in the text box when the page is loaded.
In the tab control are several properties: Pages, Names, ActiveColor,
InactiveColor, CurPage, and RedirPage. Pages will contain a delimited list of
ASP.NET pages that each tab will take the browser to. The Names property contains
a delimited list of the name to display to the user. ActiveColor and InactiveColor
store the background colors of the active and inactive tabs, respectively. Finally, the
CurPage and RedirPage properties keep track of the current page and the page to
move to based on which tab the user clicked. All these properties are stored in the
ViewState dictionary, which provides a way to store state information between page
requests of the same page, but only through form submissions.
In the namespace inherited from System.Web.UI.WebControls.Control, you need to
override the Render method. This is the function that sends the output down to the
browser. Typically, this is where you will output your HTML. In this function, you
render a table with the links provided in the Pages and Names properties specified in
the HTML tag.
The other thing to notice is that the RaisePostBackEvent method is implemented
from the IPostBackEventHandler interface. This is done so that you can create
clickable links that generate form submissions instead of just regular links. This
method is called whenever one of these special links is clicked; it enables you to
handle the click in a special way. In this example, you’re simply grabbing the special
parameter on your links: the index into the Page array that you will be redirecting
to.
Now take a look at the ASP.NET page. To use the server control on the page, it is
necessary to add the Register directive at the top of the page and specify what the
tag name will be (Tab), what the namespace is (Chapter9VB or Chapter9CS) and,
finally, the assembly that it is located inside (Chapter9VB or Chapter9CS).
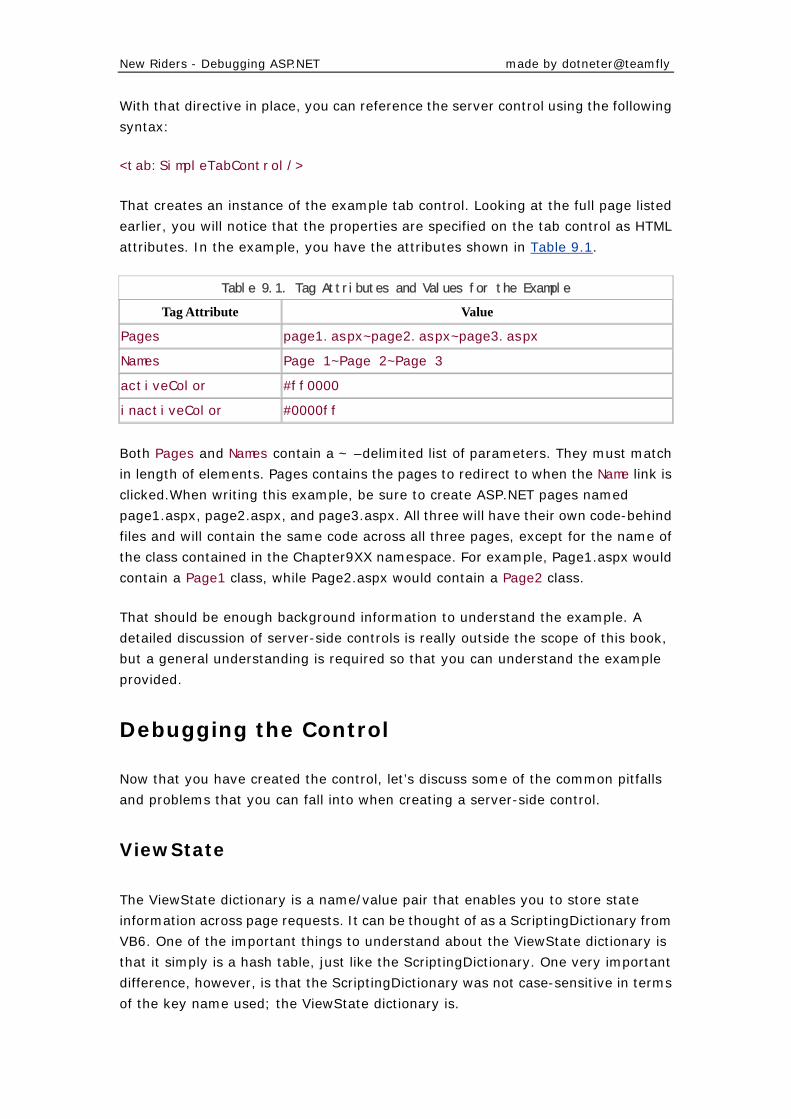
New Riders - Debugging ASP.NET made by dotneter@teamfly
With that directive in place, you can reference the server control using the following
syntax:
<tab:SimpleTabControl/>
That creates an instance of the example tab control. Looking at the full page listed
earlier, you will notice that the properties are specified on the tab control as HTML
attributes. In the example, you have the attributes shown in Table 9.1.
Table 9.1. Tag Attributes and Values for the Example
Tag Attribute Value
Pages page1.aspx~page2.aspx~page3.aspx
Names Page 1~Page 2~Page 3
activeColor #ff0000
inactiveColor #0000ff
Both Pages and Names contain a ~ –delimited list of parameters. They must match
in length of elements. Pages contains the pages to redirect to when the Name link is
clicked.When writing this example, be sure to create ASP.NET pages named
page1.aspx, page2.aspx, and page3.aspx. All three will have their own code-behind
files and will contain the same code across all three pages, except for the name of
the class contained in the Chapter9XX namespace. For example, Page1.aspx would
contain a Page1 class, while Page2.aspx would contain a Page2 class.
That should be enough background information to understand the example. A
detailed discussion of server-side controls is really outside the scope of this book,
but a general understanding is required so that you can understand the example
provided.
Debugging the Control
Now that you have created the control, let’s discuss some of the common pitfalls
and problems that you can fall into when creating a server-side control.
ViewState
The ViewState dictionary is a name/value pair that enables you to store state
information across page requests. It can be thought of as a ScriptingDictionary from
VB6. One of the important things to understand about the ViewState dictionary is
that it simply is a hash table, just like the ScriptingDictionary. One very important
difference, however, is that the ScriptingDictionary was not case-sensitive in terms
of the key name used; the ViewState dictionary is.
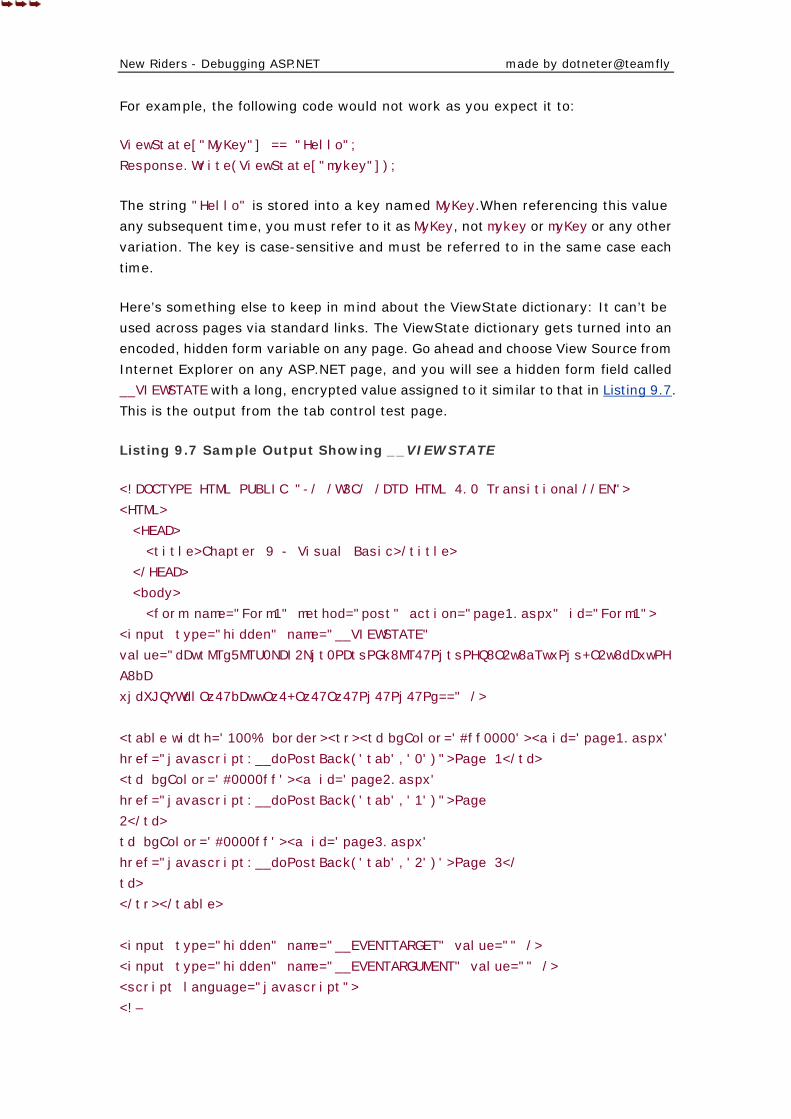
New Riders - Debugging ASP.NET made by dotneter@teamfly
For example, the following code would not work as you expect it to:
ViewState["MyKey"] == "Hello";
Response.Write(ViewState["mykey"]);
The string "Hello" is stored into a key named MyKey.When referencing this value
any subsequent time, you must refer to it as MyKey, not mykey or myKey or any other
variation. The key is case-sensitive and must be referred to in the same case each
time.
Here’s something else to keep in mind about the ViewState dictionary: It can’t be
used across pages via standard links. The ViewState dictionary gets turned into an
encoded, hidden form variable on any page. Go ahead and choose View Source from
Internet Explorer on any ASP.NET page, and you will see a hidden form field called
__VIEWSTATE with a long, encrypted value assigned to it similar to that in Listing 9.7.
This is the output from the tab control test page.
Listing 9.7 Sample Output Showing __VIEWSTATE
<!DOCTYPE HTML PUBLIC "-/ /W3C/ /DTD HTML 4.0 Transitional//EN">
<HTML>
<HEAD>
<title>Chapter 9 - Visual Basic>/title>
</HEAD>
<body>
<form name="Form1" method="post" action="page1.aspx" id="Form1">
<input type="hidden" name="__VIEWSTATE"
value="dDwtMTg5MTU0NDI2Njt0PDtsPGk8MT47PjtsPHQ8O2w8aTwxPjs+O2w8dDxwPH
A8bD
xjdXJQYWdlOz47bDwwOz4+Oz47Oz47Pj47Pj47Pg==" />
<table width='100%' border><tr><td bgColor='#ff0000'><a id='page1.aspx'
href="javascript:__doPostBack('tab','0')">Page 1</td>
<td bgColor='#0000ff'><a id='page2.aspx'
href="javascript:__doPostBack('tab','1')">Page
2</td>
td bgColor='#0000ff'><a id='page3.aspx'
href="javascript:__doPostBack('tab','2')'>Page 3</
td>
</tr></table>
<input type="hidden" name="__EVENTTARGET" value="" />
<input type="hidden" name="__EVENTARGUMENT" value="" />
<script language="javascript">
<!–
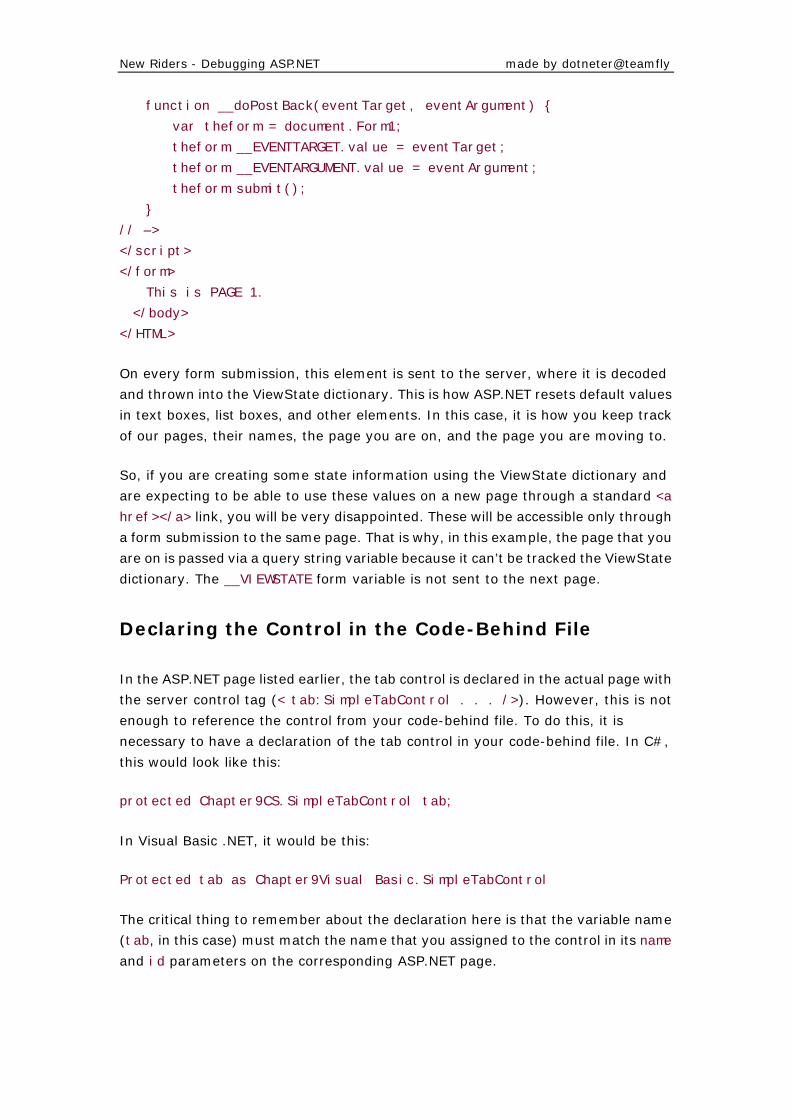
New Riders - Debugging ASP.NET made by dotneter@teamfly
function __doPostBack(eventTarget, eventArgument) {
var theform = document.Form1;
theform.__EVENTTARGET.value = eventTarget;
theform.__EVENTARGUMENT.value = eventArgument;
theform.submit();
}
// –>
</script>
</form>
This is PAGE 1.
</body>
</HTML>
On every form submission, this element is sent to the server, where it is decoded
and thrown into the ViewState dictionary. This is how ASP.NET resets default values
in text boxes, list boxes, and other elements. In this case, it is how you keep track
of our pages, their names, the page you are on, and the page you are moving to.
So, if you are creating some state information using the ViewState dictionary and
are expecting to be able to use these values on a new page through a standard <a
href></a> link, you will be very disappointed. These will be accessible only through
a form submission to the same page. That is why, in this example, the page that you
are on is passed via a query string variable because it can’t be tracked the ViewState
dictionary. The __VIEWSTATE form variable is not sent to the next page.
Declaring the Control in the Code-Behind File
In the ASP.NET page listed earlier, the tab control is declared in the actual page with
the server control tag (< tab:SimpleTabControl . . . />). However, this is not
enough to reference the control from your code-behind file. To do this, it is
necessary to have a declaration of the tab control in your code-behind file. In C#,
this would look like this:
protected Chapter9CS.SimpleTabControl tab;
In Visual Basic .NET, it would be this:
Protected tab as Chapter9Visual Basic.SimpleTabControl
The critical thing to remember about the declaration here is that the variable name
(tab, in this case) must match the name that you assigned to the control in its name
and id parameters on the corresponding ASP.NET page.
New Riders - Debugging ASP.NET made by dotneter@teamfly
If you do not remember to declare your controls in the code-behind file, you will not
be able to reference the tab control directly, and your code will either not compile or
not run as you had anticipated. Generally, you will see an error message similar to
the following when trying to build your application:
The type or namespace name 'tab' could not be found ((are you missing a
using
directive or an assembly reference?)
If you see a similar error in your future projects, be sure that you have added a
declaration of your control in your code-behind file.
Registration of Control on ASP.NET Page
At the top of any ASP.NET page that uses a server control, you must use the
Register directive to register that specific control for use in that page. This looks
like the following line:
<%@ Register TagPrefix="Tab" Namespace=="Chapter9CS"
Assembly=="Chapter9CS" %>
In this line, you need to specify the TagPrefix, which is the name that will be used
to reference the control. In the example, the name Tab is used, so when adding the
control to the page, you would write this:
<tab:SimpleTabControl . . . />
The other things to specify are the namespace that contains the control, as well as
the assembly where the control is located. If these are incorrect, your page will not
be displayed. Instead, you will see an error message because the ASP.NET parser
will not be capable of finding the control to include in the page. If you forget either
of these attributes, the parser will tell you which one is missing. Just add it in, as
appropriate, and your control should work fine on that specific page.
runat=server
As with all server-side controls, it is absolutely essential to include the
runat=server attribute on the control for it to work properly.We cannot stress
enough how important this is.We stress this so much simply because the error
message(s) that you will see state nothing about this being the problem.What you
will most likely see is a message regarding a reference to the control, or a property
or method on the control being null. The message will usually be the following:
Value null was found where an instance of an object was required.
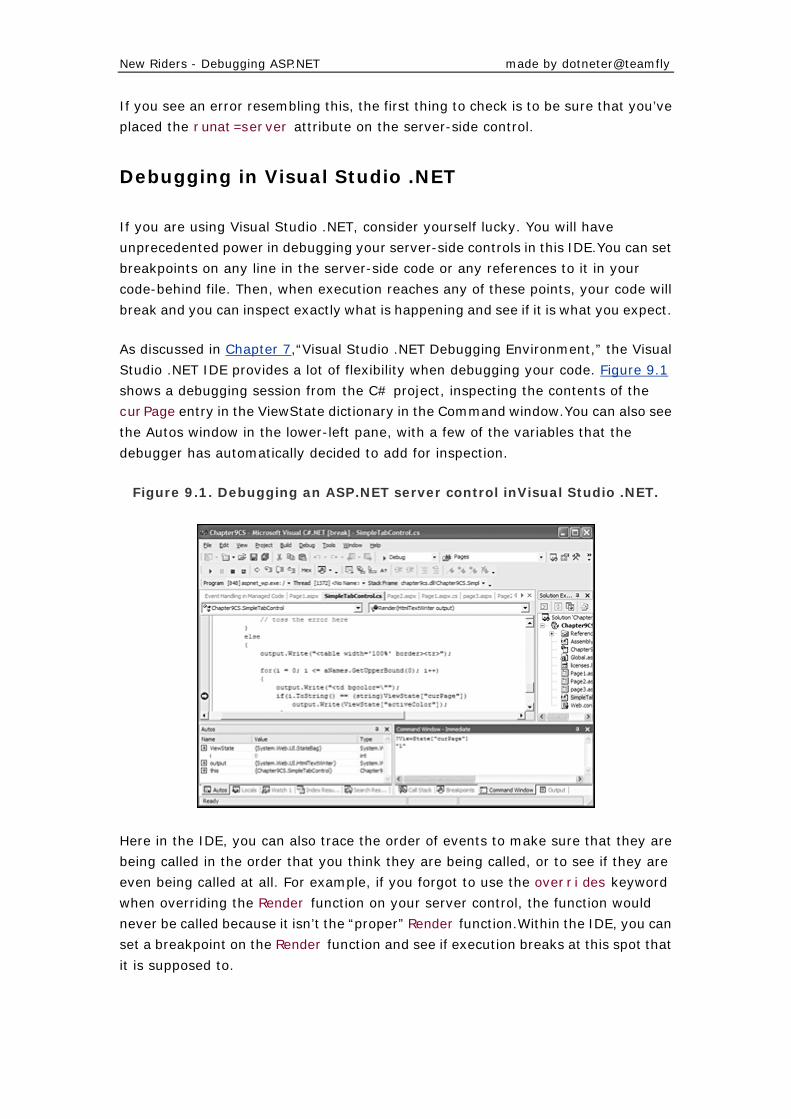
New Riders - Debugging ASP.NET made by dotneter@teamfly
If you see an error resembling this, the first thing to check is to be sure that you’ve
placed the runat=server attribute on the server-side control.
Debugging in Visual Studio .NET
If you are using Visual Studio .NET, consider yourself lucky. You will have
unprecedented power in debugging your server-side controls in this IDE.You can set
breakpoints on any line in the server-side code or any references to it in your
code-behind file. Then, when execution reaches any of these points, your code will
break and you can inspect exactly what is happening and see if it is what you expect.
As discussed in Chapter 7,“Visual Studio .NET Debugging Environment,” the Visual
Studio .NET IDE provides a lot of flexibility when debugging your code. Figure 9.1
shows a debugging session from the C# project, inspecting the contents of the
curPage entry in the ViewState dictionary in the Command window.You can also see
the Autos window in the lower-left pane, with a few of the variables that the
debugger has automatically decided to add for inspection.
Figure 9.1. Debugging an ASP.NET server control inVisual Studio .NET.
Here in the IDE, you can also trace the order of events to make sure that they are
being called in the order that you think they are being called, or to see if they are
even being called at all. For example, if you forgot to use the overrides keyword
when overriding the Render function on your server control, the function would
never be called because it isn’t the “proper” Render function.Within the IDE, you can
set a breakpoint on the Render function and see if execution breaks at this spot that
it is supposed to.
New Riders - Debugging ASP.NET made by dotneter@teamfly
Summary
This chapter discussed the issues that can arise when creating a server-side control
in ASP.NET. This includes looking at the most common problems that developers
can face when developing controls of this type.We also looked at solutions to these
problems and ways to avoid them from the start.
The next chapter takes a look at data-bound controls and some common strategies
for debugging them in the .NET environment.
Chapter 10. Debugging Data-Bound Controls
IN THIS CHAPTER,WE WILL LOOK AT the issues that surround debugging data
binding. Microsoft has included a list of new controls, such as the data grid and data
list controls. These controls have the capability to bind data elements or data
sources to them. This chapter looks at various areas such as templates, data grids,
and namespace issues.
Data-Bound Controls
You can bind data to a limited number of controls, but we will focus on some of the
more common controls, including the data grid, the data list, and a few others. Let’s
start out by taking a closer look at these data-bound controls and where you might
have problems.
The Data Grid Control
The data grid control is a great new addition to the tool box. This control enables you
to create a spreadsheet-like page of data and then manipulate the data as you need
to. Listings 10.1 and 10.2 show a simple data grid control in C# and Visual
Basic .NET. Then we’ll identify some areas where you might need to implement
some debugging techniques.
Listing 10.1 Simple Data Grid Control (C#)
private void Page_Load(object sender, System.EventArgs e)
New Riders - Debugging ASP.NET made by dotneter@teamfly
{
// Put user code to initialize the page here
SqlConnection conn = new
SqlConnection("server=(local);database=northwind;Trusted_Connection=y
es");
conn.Open();
SqlDataAdapter da = new SqlDataAdapter ("Select * from
products",conn);
DataSet ds = new DataSet();
da.Fill(ds,"products");
DataGrid1.AlternatingItemStyle.BackColor =
Color.AliceBlue;
DataGrid1.HeaderStyle.BackColor = Color.Beige;
DataGrid1.Font.Bold = true;
DataGrid1.DataSource = ds;
DataGrid1.DataBind();
conn.Close();
}
Listing 10.2 Simple Data Grid Control (Visual Basic .NET)
Private Sub Page_Load(ByVal sender As System.Object, ByVal e As
System.EventArgs) Handles MyBase.Load
Dim conn = New
SqlConnection("server=(local);database=northwind;Trusted_Connection=y
es")
conn.Open()
Dim da As SqlDataAdapter = New SqlDataAdapter()
da.SelectCommand = New SqlCommand("Select * from products", conn)
Dim ds = New DataSet()
da.Fill(ds, "products")
DataGrid1.AlternatingItemStyle.BackColor = Color.AliceBlue
DataGrid1.HeaderStyle.BackColor = Color.Beige
DataGrid1.Font.Bold = True
DataGrid1.DataSource = ds
DataGrid1.DataBind()
conn.Close()
This is a pretty simple example. It just makes a call to the database to get a list of
products and then displays them in the data grid.
New Riders - Debugging ASP.NET made by dotneter@teamfly
Data Grid Paging
When you start getting into some of the other capabilities of the data grid, you will
undoubtedly come across the paging feature that is built into the control. It is very
easy to run into problems if you are not familiar with the workings of the data grid
control. If you look at the following code line, you will see that it is very simple to
turn on the paging feature on the data grid control:
<asp:datagrid id=DataGrid1 runat="server"
AllowPaging=="True"></asp:datagrid>
If you try to use the code as it appears here, you will notice buttons for Next and
Previous at the bottom of the data grid, but they don’t seem to do anything.
A few things need to happen to really get the paging feature to work.You will also
need to implement the OnPageIndexChanged handler, as shown in this next
example:
<asp:datagrid id=DataGrid1 runat="server"
OnPageIndexChanged="GridChange" AllowPaging=="True"></asp:datagrid>
After you have changed the aspx code to include the OnPageIndexChanged attribute
to point to a handler function such as GridChange, you can add the required code to
handle the paging functionality. If you stop to look at what is happening here, you
are just telling the data grid to call the GridChange function when the
OnPageIndexChanged event is fired.You can put any additional code that you want
in the GridChange function, but for the paging feature to work, a few things need to
be done.
Take a look at what you need to do to make the paging feature work. Listings 10.3
and 10.4 show you how to implement the last piece of the data grid paging feature.
Listing 10.3 Grid Paging Event Handler (C#)
public void GridChange(Object sender, DataGridPageChangedEventArgs e)
{
// Set CurrentPageIndex to the page the user clicked.
DataGrid1.CurrentPageIndex = e.NewPageIndex;
SqlConnection conn = new
SqlConnection("server=(local);database=northwind;Trusted_Connection=y
es");
New Riders - Debugging ASP.NET made by dotneter@teamfly
conn.Open();
SqlDataAdapter da = new SqlDataAdapter("Select * from
products",conn);
DataSet ds = new DataSet();
da.Fill(ds, "products");
// Rebind the data.
DataGrid1.DataSource = ds;
DataGrid1.DataBind();
}
Listing 10.4 Grid Paging Event Handler (Visual Basic .NET)
Public Function GridChange(ByVal sender As Object, ByVal e As
DataGridPageChangedEventArgs)
' Set CurrentPageIndex to the page the user clicked.
DataGrid1.CurrentPageIndex = e.NewPageIndex
Dim conn As New
SqlConnection("server=(local);database=northwind;Trusted_Connection=y
es")
conn.Open()
Dim da As New SqlDataAdapter("Select * from products", conn)
Dim ds As New DataSet()
da.Fill(ds, "products")
' Rebind the data.
DataGrid1.DataSource = ds
DataGrid1.DataBind()
End Function
You might notice that the key piece to this involves assigning the NewPageIndex
value to the data grid’s CurrentPageIndex property. After you have done this, the
data grid will display only the set of data that resides on that new index page value.
You might come across the error shown in Figure 10.1 telling you that the function
you provided to handle the events is not accessible because of its protection level.
Don’t worry—this is a simple fix.
Figure 10.1. Protection-level compilation error listing.
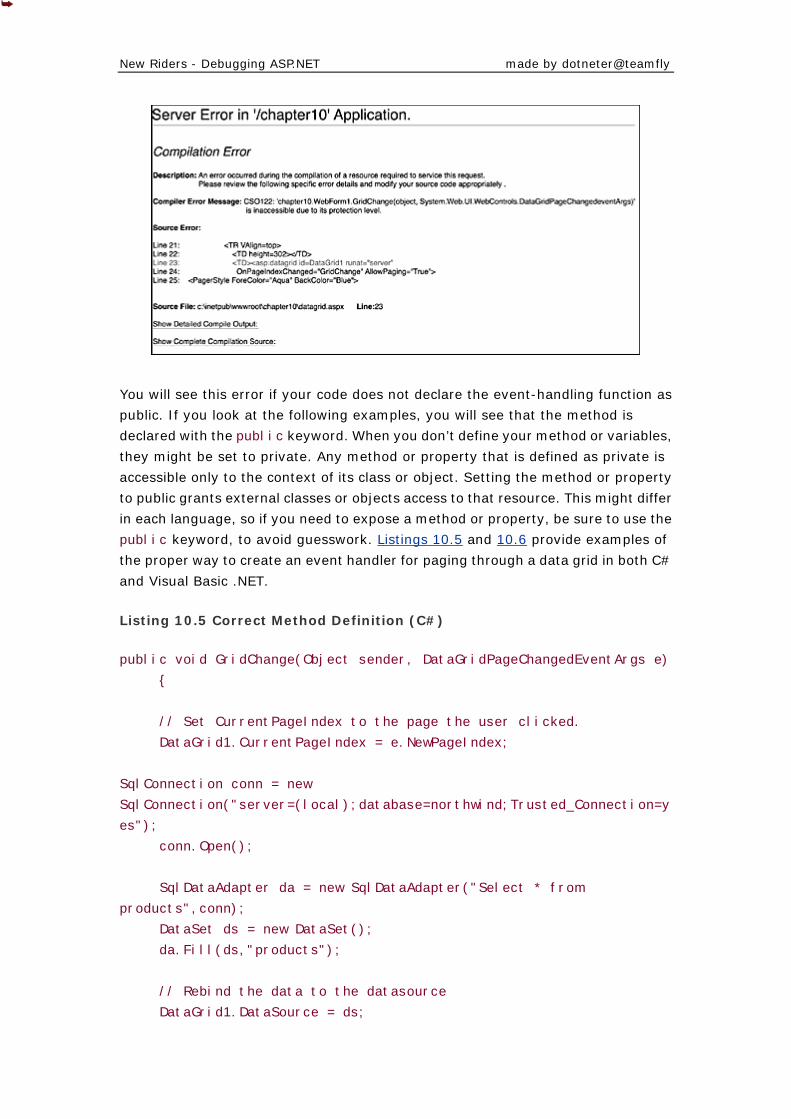
New Riders - Debugging ASP.NET made by dotneter@teamfly
You will see this error if your code does not declare the event-handling function as
public. If you look at the following examples, you will see that the method is
declared with the public keyword. When you don’t define your method or variables,
they might be set to private. Any method or property that is defined as private is
accessible only to the context of its class or object. Setting the method or property
to public grants external classes or objects access to that resource. This might differ
in each language, so if you need to expose a method or property, be sure to use the
public keyword, to avoid guesswork. Listings 10.5 and 10.6 provide examples of
the proper way to create an event handler for paging through a data grid in both C#
and Visual Basic .NET.
Listing 10.5 Correct Method Definition (C#)
public void GridChange(Object sender, DataGridPageChangedEventArgs e)
{
// Set CurrentPageIndex to the page the user clicked.
DataGrid1.CurrentPageIndex = e.NewPageIndex;
SqlConnection conn = new
SqlConnection("server=(local);database=northwind;Trusted_Connection=y
es");
conn.Open();
SqlDataAdapter da = new SqlDataAdapter("Select * from
products",conn);
DataSet ds = new DataSet();
da.Fill(ds,"products");
// Rebind the data to the datasource
DataGrid1.DataSource = ds;
New Riders - Debugging ASP.NET made by dotneter@teamfly
DataGrid1.DataBind();
}
Listing 10.6 Correct Method Definition (Visual Basic .NET)
Public Sub GridChange(ByVal sender As Object, ByVal e As
DataGridPageChangedEventArgs)
' Set CurrentPageIndex to the page the user clicked.
DataGrid1.CurrentPageIndex = e.NewPageIndex
Dim conn As New
SqlConnection("server=(local);database=northwind;Trusted_Connection=y
es")
conn.Open()
Dim da As New SqlDataAdapter("Select * from products", conn)
Dim ds As New DataSet()
da.Fill(ds, "products")
' Rebind the data.
DataGrid1.DataSource = ds
DataGrid1.DataBind()
End Sub
Debugging Templates
Templates provide a more flexible way of displaying the data. Most likely, if you will
be doing anything with data, you will probably be using templates to get the job
done. In this section, we look at some problem areas that you may stumble over and
how to work around them.
Working with Data List <ItemTemplate>
When you are working with templates you can easily run into problems that won’t be
caught by the compiler. This is because some aspx code is not validated or is
syntactically correct but, at run time, is not valid.When you understand the basics of
templates, though, they can be a very powerful tool in developing your site. So let’s
get started and take a look at some problems that you might run into.
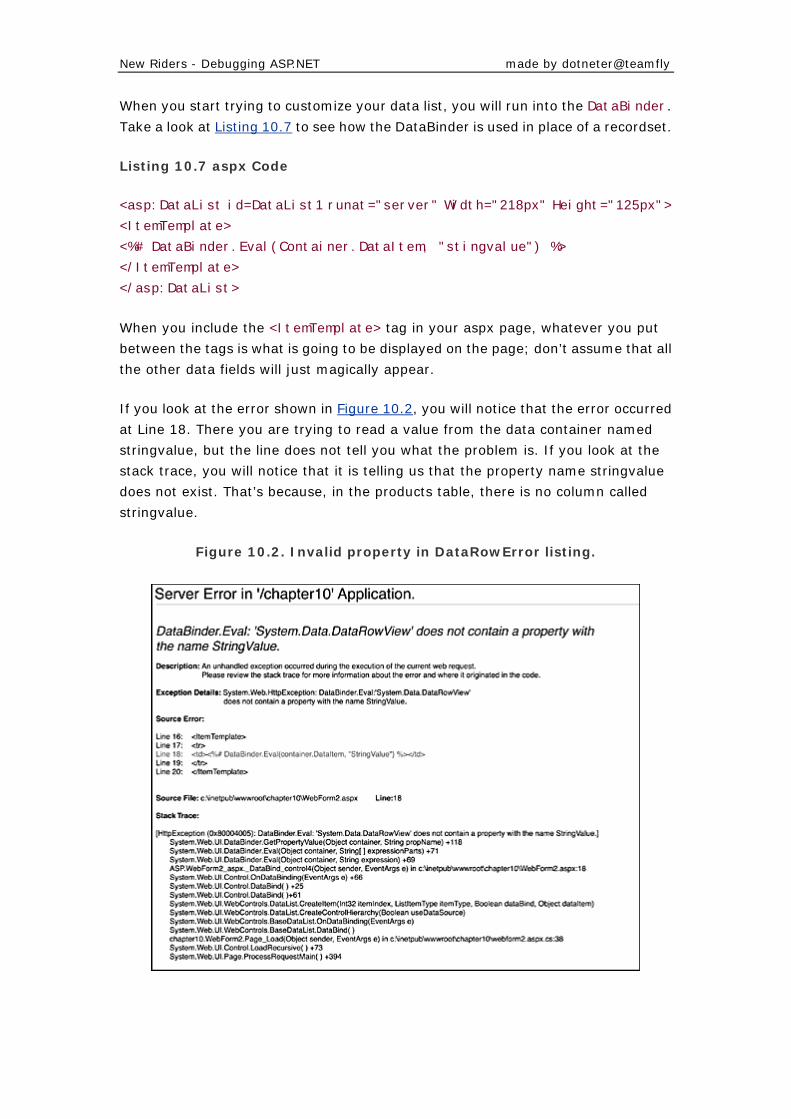
New Riders - Debugging ASP.NET made by dotneter@teamfly
When you start trying to customize your data list, you will run into the DataBinder.
Take a look at Listing 10.7 to see how the DataBinder is used in place of a recordset.
Listing 10.7 aspx Code
<asp:DataList id=DataList1 runat="server" Width="218px" Height="125px">
<ItemTemplate>
<%# DataBinder.Eval(Container.DataItem, "stingvalue") %>
</ItemTemplate>
</asp:DataList>
When you include the <ItemTemplate> tag in your aspx page, whatever you put
between the tags is what is going to be displayed on the page; don’t assume that all
the other data fields will just magically appear.
If you look at the error shown in Figure 10.2, you will notice that the error occurred
at Line 18. There you are trying to read a value from the data container named
stringvalue, but the line does not tell you what the problem is. If you look at the
stack trace, you will notice that it is telling us that the property name stringvalue
does not exist. That’s because, in the products table, there is no column called
stringvalue.
Figure 10.2. Invalid property in DataRowError listing.
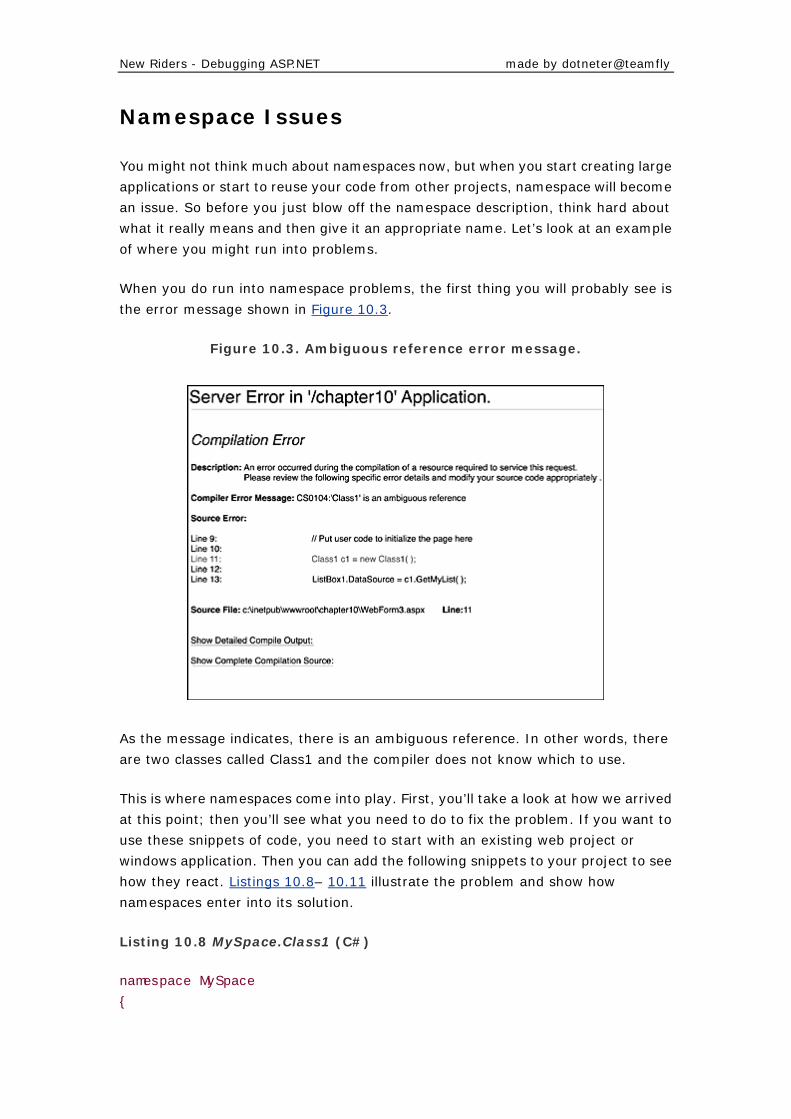
New Riders - Debugging ASP.NET made by dotneter@teamfly
Namespace Issues
You might not think much about namespaces now, but when you start creating large
applications or start to reuse your code from other projects, namespace will become
an issue. So before you just blow off the namespace description, think hard about
what it really means and then give it an appropriate name. Let’s look at an example
of where you might run into problems.
When you do run into namespace problems, the first thing you will probably see is
the error message shown in Figure 10.3.
Figure 10.3. Ambiguous reference error message.
As the message indicates, there is an ambiguous reference. In other words, there
are two classes called Class1 and the compiler does not know which to use.
This is where namespaces come into play. First, you’ll take a look at how we arrived
at this point; then you’ll see what you need to do to fix the problem. If you want to
use these snippets of code, you need to start with an existing web project or
windows application. Then you can add the following snippets to your project to see
how they react. Listings 10.8– 10.11 illustrate the problem and show how
namespaces enter into its solution.
Listing 10.8 MySpace.Class1 (C#)
namespace MySpace
{
New Riders - Debugging ASP.NET made by dotneter@teamfly
public class Class1
{
public Class1()
{
}
public string[] GetMyList()
{
string[] mylist = new string[4];
mylist[0]="cars";
mylist[1]="trucks";
mylist[2]="planes";
mylist[3]="boats";
return mylist;
}
}
}
Listing 10.9 MySpace.Class1 (Visual Basic .NET)
Namespace MySpace
Public Class Class1
Public Function GetMyList() As String()
Dim mylist As String()
mylist(0) = "cars"
mylist(1) = "trucks"
mylist(2) = "planes"
mylist(3) = "boats"
Return mylist
End Function
End Class
End Namespace
Listing 10.10 YourSpace.Class1 (C#)
namespace YourSpace
{
New Riders - Debugging ASP.NET made by dotneter@teamfly
public class Class1
{
public Class1()
{
}
public string[] GetMyList()
{
string[] mylist = new string[4];
mylist[0]="eggs";
mylist[1]="bacon";
mylist[2]="milk";
mylist[3]="bread";
return mylist;
}
}
}
Listing 10.11 YourSpace.Class1 (Visual Basic .NET)
Namespace YourSpace
Public Class Class1
Public Function GetMyList() As String()
Dim mylist As String()
mylist(0) = "cars"
mylist(1) = "trucks"
mylist(2) = "planes"
mylist(3) = "boats"
Return mylist
End Function
End Class
End Namespace
As you can see from these listings, both classes have the same name and the same
methods. The only thing that differentiates them is their namespace. Now take a
look at how we were trying to implement these classes in the web page (see Listing
10.12).
New Riders - Debugging ASP.NET made by dotneter@teamfly
Listing 10.12 aspx Code for Implementing the Classes (C#-Incorrect
Method)
<%@ Import Namespace="MySpace" %>
<%@ Import Namespace="YourSpace" %>
<script language="C#" runat=server>
private void Page_Load(object sender, System.EventArgs e)
{
// Put user code to initialize the page here
Class1 c1 = new Class1();//Ambiguous Reference
ListBox1.DataSource = c1.GetMyList();
ListBox1.DataSource = c1.GetMyList();
ListBox1.DataBind();
ListBox2.DataBind();
}
</script>
<HTML>
<HEAD>
</HEAD>
<body MS_POSITIONING="GridLayout">
<form id="WebForm3" method="post" runat="server">
<asp:ListBox id=ListBox1 runat="server"></asp:ListBox>
<asp:ListBox id=ListBox2 runat="server"></asp:ListBox>
</form>
</body>
</body>
</HTML>
As you can see, the namespaces have been included at the beginning of the file so
that the compiler can identify the classes. What you need to do is preface the class
with the namespace that it belongs to; then the compiler knows definitively what
you want to do. Take a look at the code in Listing 10.13 to see the correct
implementation for these classes.
Listing 10.13 aspx Code for Correct Implementation of the Classes
(C#-Correct Method)
New Riders - Debugging ASP.NET made by dotneter@teamfly
<%@ Import Namespace="MySpace" %>
<%@ Import Namespace="YourSpace" %>
<script language="C#" runat=server>
private void Page_Load(object sender, System.EventArgs e)
{
MySpace.Class1 c1 = new MySpace.Class1();
YourSpace.Class1 c2 = new YourSpace.Class1();
ListBox1.DataSource = c1.GetMyList();
ListBox1.DataSource = c2.GetMyList();
ListBox1.DataBind();
ListBox2.DataBind();
}
</script>
As you can see here, you need to identify which namespace you are using if there
are naming conflicts like those with Class1.
Next you take a look at XML bindings and some hurdles that you might run into.
XML Binding
XML is a fundamental part of the .NET architecture. If you look at how data is
handled in the Data namespace, you will see that it all revolves around XML. So if
you are not familiar with XML basics, pick up some reading material on XML, such as
Steve Holzner’s Inside XML (New Riders Publishing, 2001).
Figure 10.4 shows an example of a problem that you might run into. However, the
system does not throw an exception or give you any indication that there is a
problem.
Figure 10.4. aspx output.
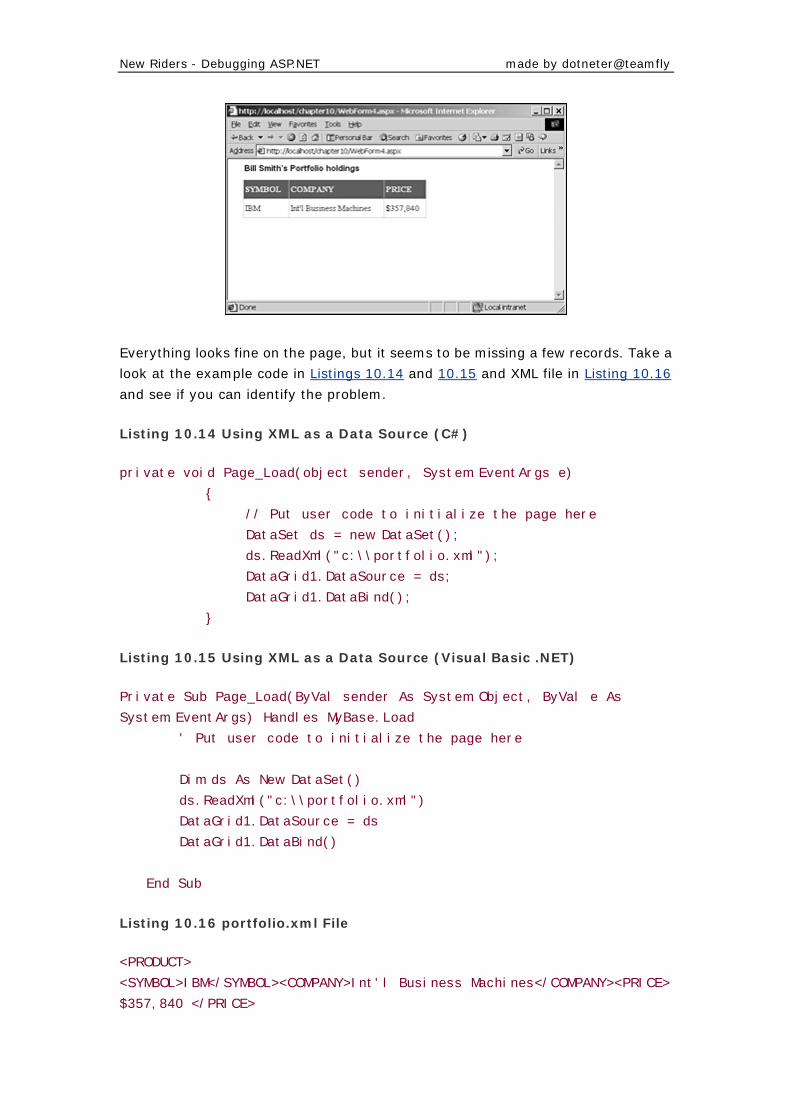
New Riders - Debugging ASP.NET made by dotneter@teamfly
Everything looks fine on the page, but it seems to be missing a few records. Take a
look at the example code in Listings 10.14 and 10.15 and XML file in Listing 10.16
and see if you can identify the problem.
Listing 10.14 Using XML as a Data Source (C#)
private void Page_Load(object sender, System.EventArgs e)
{
// Put user code to initialize the page here
DataSet ds = new DataSet();
ds.ReadXml("c:\\portfolio.xml");
DataGrid1.DataSource = ds;
DataGrid1.DataBind();
}
Listing 10.15 Using XML as a Data Source (Visual Basic .NET)
Private Sub Page_Load(ByVal sender As System.Object, ByVal e As
System.EventArgs) Handles MyBase.Load
' Put user code to initialize the page here
Dim ds As New DataSet()
ds.ReadXml("c:\\portfolio.xml")
DataGrid1.DataSource = ds
DataGrid1.DataBind()
End Sub
Listing 10.16 portfolio.xml File
<PRODUCT>
<SYMBOL>IBM</SYMBOL><COMPANY>Int'l Business Machines</COMPANY><PRICE>
$357,840 </PRICE>
New Riders - Debugging ASP.NET made by dotneter@teamfly
</PRODUCT>
<PRODUCT>
<SYMBOL>WEINX</SYMBOL> <COMPANY> AIM Weingarten Fund A</COMPANY><PRICE>>
$318,150</PRICE>
</PRODUCT>
<PRODUCT>
<SYMBOL>CSTGX</SYMBOL> <COMPANY> AIM Constellation Fund
A</COM
PANY><PRICE> $256,603</PRICE>
</PRODUCT>
<PRODUCT>
<SYMBOL>KGGAX</SYMBOL> <COMPANY> Kemper Aggressive Growth A
</COM
PANY><PRICE>$121,600</PRICE>
</PRODUCT>
<PRODUCT>
<SYMBOL>SONE</SYMBOL> <COMPANY>S1 Corporation
</COMPANY><PRICE>$111,960</PRICE>
</PRODUCT>
As you can see, it is very simple to load an XML file into a dataset and assign it to the
data grid’s data source property. Microsoft has done a nice job of implementing XML
and data-bound controls together.
At first sight, this may look well formed, but there is one small problem. You are
missing the root element! One way to make sure that your file is well formed is to
look at it with IE 5.x . If it can’t parse the file, it will tell you what the problem is.
Figure 10.5 shows what happens when we tried to look at the file with IE.
Figure 10.5. IE XML view.
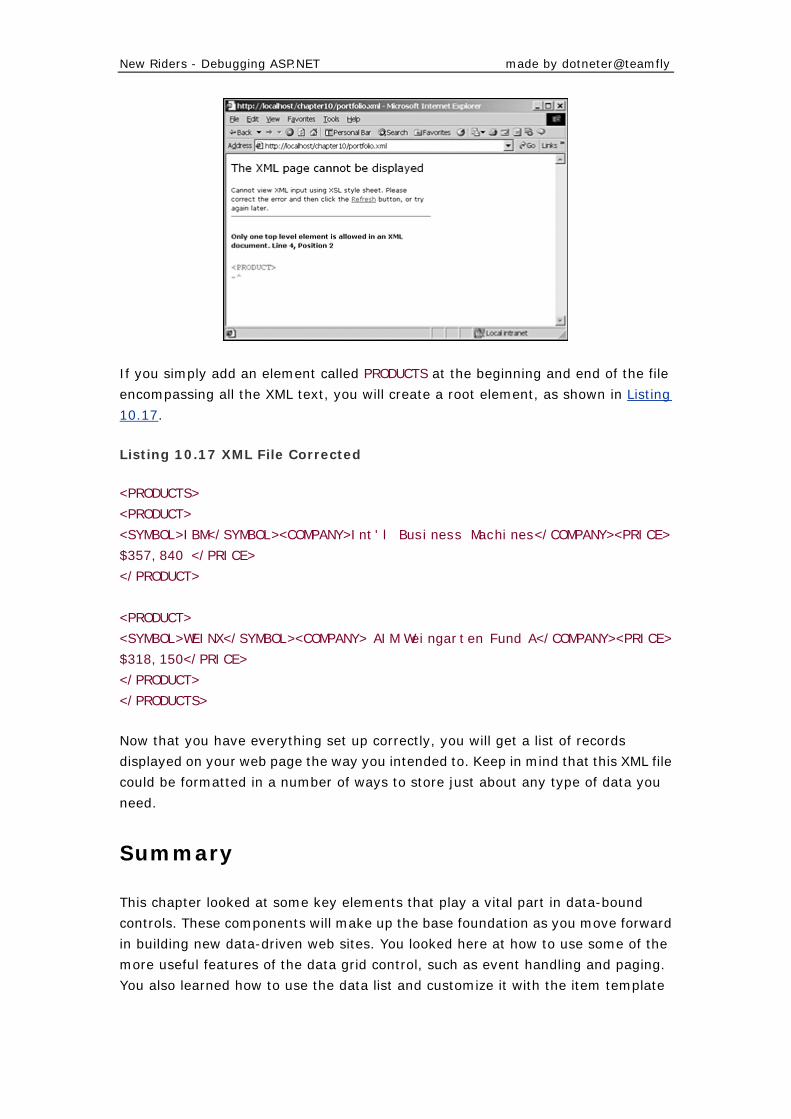
New Riders - Debugging ASP.NET made by dotneter@teamfly
If you simply add an element called PRODUCTS at the beginning and end of the file
encompassing all the XML text, you will create a root element, as shown in Listing
10.17.
Listing 10.17 XML File Corrected
<PRODUCTS>
<PRODUCT>
<SYMBOL>IBM</SYMBOL><COMPANY>Int'l Business Machines</COMPANY><PRICE>
$357,840 </PRICE>
</PRODUCT>
<PRODUCT>
<SYMBOL>WEINX</SYMBOL><COMPANY> AIM Weingarten Fund A</COMPANY><PRICE>
$318,150</PRICE>
</PRODUCT>
</PRODUCTS>
Now that you have everything set up correctly, you will get a list of records
displayed on your web page the way you intended to. Keep in mind that this XML file
could be formatted in a number of ways to store just about any type of data you
need.
Summary
This chapter looked at some key elements that play a vital part in data-bound
controls. These components will make up the base foundation as you move forward
in building new data-driven web sites. You looked here at how to use some of the
more useful features of the data grid control, such as event handling and paging.
You also learned how to use the data list and customize it with the item template

New Riders - Debugging ASP.NET made by dotneter@teamfly
tags. And don’t forget to use namespaces when you are using classes with the same
names. This will alleviate ambiguous names that will give you compiler errors.
Chapter 11. Debugging User Controls
IN PREVIOUS VERSIONS OF ASP, IF YOU wanted to encapsulate sections of user
interface code, you had limited options. You could use an include file, but there was
no way to customize each “instance” of the code section.You could package the user
interface code into a COM object and call one of its methods to display it, but that
meant that you had to recompile the COM object each time you wanted to make a
change. You could use a library of functions in script file includes, but this approach
wasted a lot of web server resources because, most of the time, your page uses only
a small subsection of the code in each include file.
In ASP.NET, User Controls solve this dilemma. User Controls are designed to give
you the best of all worlds: encapsulation, optimized memory usage, compiled code,
and the capability to make changes on the fly. With any aspect of programming,
however, difficulties can emerge; this chapter deals with these difficulties. To make
sure that we cover everything, the examples in this chapter follow the creation of a
User Control and an ASP.NET page that consumes it from start to finish. Along the
way, we’ll expose some of the nuances, technicalities, and omissions that crop up
with User Controls.
User Control Basics
To get started, let’s build a simple User Control, MyControl.ascx, and an ASP.NET
page that consumes it, MyPage.aspx.
MyControl
Most of the time, User Controls will contain dynamic elements, but that’s not always
the case. For instance, you might create a User Control to display copyright
information at the bottom of each page in your web application. Likewise, the User
Control MyControl will start off with just static content. Right now, you’ll be
concerned with the issues surrounding the basic plumbing of User Controls, as you
can see in Listing 11.1.
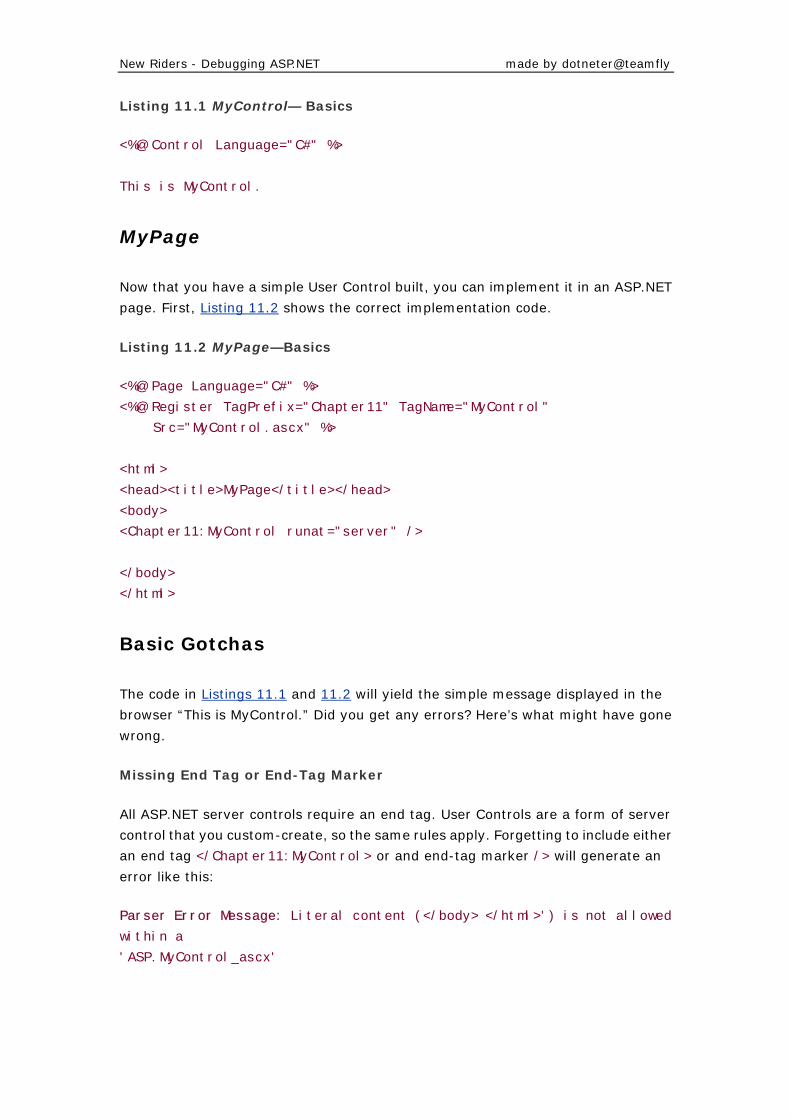
New Riders - Debugging ASP.NET made by dotneter@teamfly
Listing 11.1 MyControl— Basics
<%@ Control Language="C#" %>
This is MyControl.
MyPage
Now that you have a simple User Control built, you can implement it in an ASP.NET
page. First, Listing 11.2 shows the correct implementation code.
Listing 11.2 MyPage—Basics
<%@ Page Language="C#" %>
<%@ Register TagPrefix="Chapter11" TagName="MyControl"
Src="MyControl.ascx" %>
<html>
<head><title>MyPage</title></head>
<body>
<Chapter11:MyControl runat="server" />
</body>
</html>
Basic Gotchas
The code in Listings 11.1 and 11.2 will yield the simple message displayed in the
browser “This is MyControl.” Did you get any errors? Here’s what might have gone
wrong.
Missing End Tag or End-Tag Marker
All ASP.NET server controls require an end tag. User Controls are a form of server
control that you custom-create, so the same rules apply. Forgetting to include either
an end tag </Chapter11:MyControl> or and end-tag marker /> will generate an
error like this:
Parser Error Message: Literal content (</body> </html>') is not allowed
within a
'ASP.MyControl_ascx'
New Riders - Debugging ASP.NET made by dotneter@teamfly
Of course, the exact syntax of the error will vary, depending on what literal content
is present directly after your User Control reference. In this case, it was the
</body></html> HTML tags.
Missing Runat Attribute
What if your User Control doesn’t show up at all? This almost always means that that
you forgot to include the runat="server" attribute on your User Control. This is a
requirement, as it is with all other ASP.NET server controls. A quick way to verify
this is to right-click the screen in Internet Explorer and select View Source. You’ll
most likely see that your User Control tag was mistaken for plain-old HTML tags and
was sent directly to the browser. Without the runat attribute, the ASP.NET engine
does not know that it is supposed to do anything with it, so it completely ignores it.
Unknown Server Tag
Occasionally, you’ll get a message that doesn’t make any sense at first glance. For
instance, you might get this error:
Parser Error Message: Unknown server tag 'Chapter11:MyControl'.
It doesn’t seem to make any sense because that is the TagPrefix and TagName that
you specified. Or is it? Take another look at your @Register tag at the top of your
ASP.NET page. Odds are, you misspelled either the TagPrefix or the TagName
attribute. If the situation were reversed, it would have been easier to spot the issue
because the ASP.NET sourcecode surrounding the error is shown. If the error
resides in the @Register tag, the solution is not always so obvious.
Adding Properties and Methods
Now that you can debug the basic issues with User Controls, let’s add some
complexity. One of the nicest things about User Controls is that they can expose
properties, making their underlying content more dynamic. They can also expose
methods.
Although it’s not a requirement, it is good design practice to implement methods in
User Controls only when they are needed to influence the appearance of the content
of the User Control itself. Use code-behind methods of your ASP.NET page, .NET
components, or Web Services if you need more utilitarian functionality.
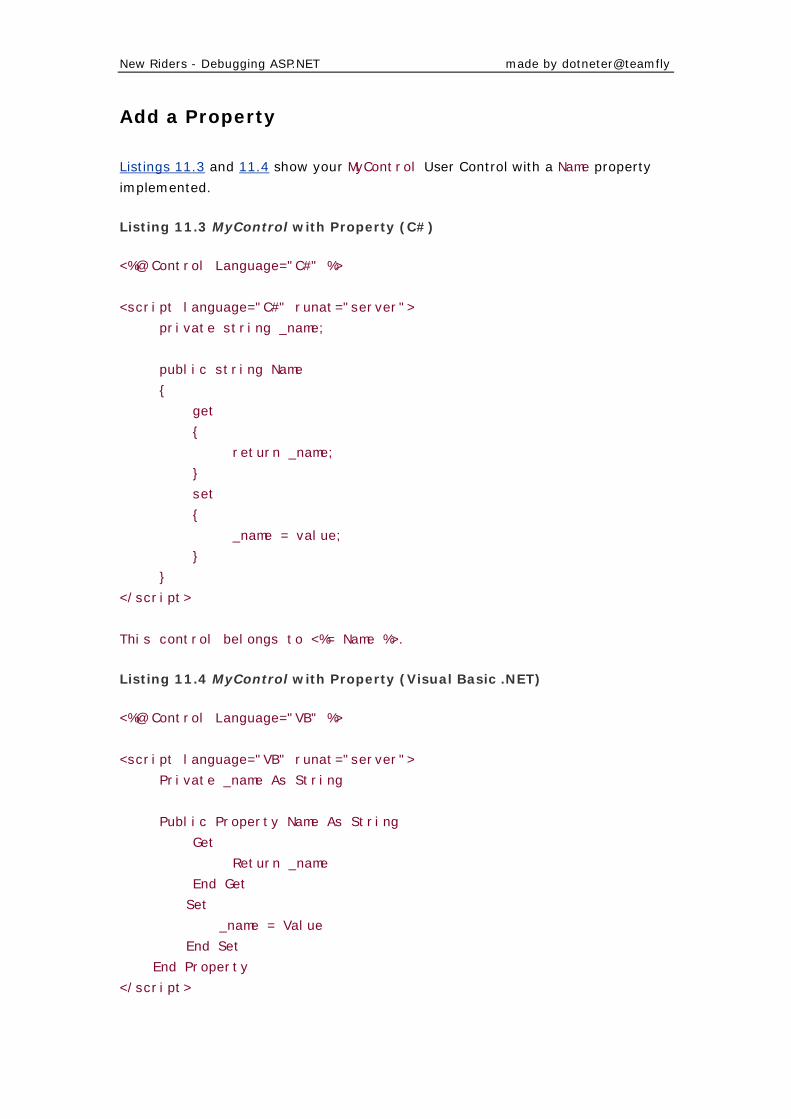
New Riders - Debugging ASP.NET made by dotneter@teamfly
Add a Property
Listings 11.3 and 11.4 show your MyControl User Control with a Name property
implemented.
Listing 11.3 MyControl with Property (C#)
<%@ Control Language="C#" %>
<script language="C#" runat="server">
private string _name;
public string Name
{
get
{
return _name;
}
set
{
_name = value;
}
}
</script>
This control belongs to <%= Name %>.
Listing 11.4 MyControl with Property (Visual Basic .NET)
<%@ Control Language="VB" %>
<script language="VB" runat="server">
Private _name As String
Public Property Name As String
Get
Return _name
End Get
Set
_name = Value
End Set
End Property
</script>
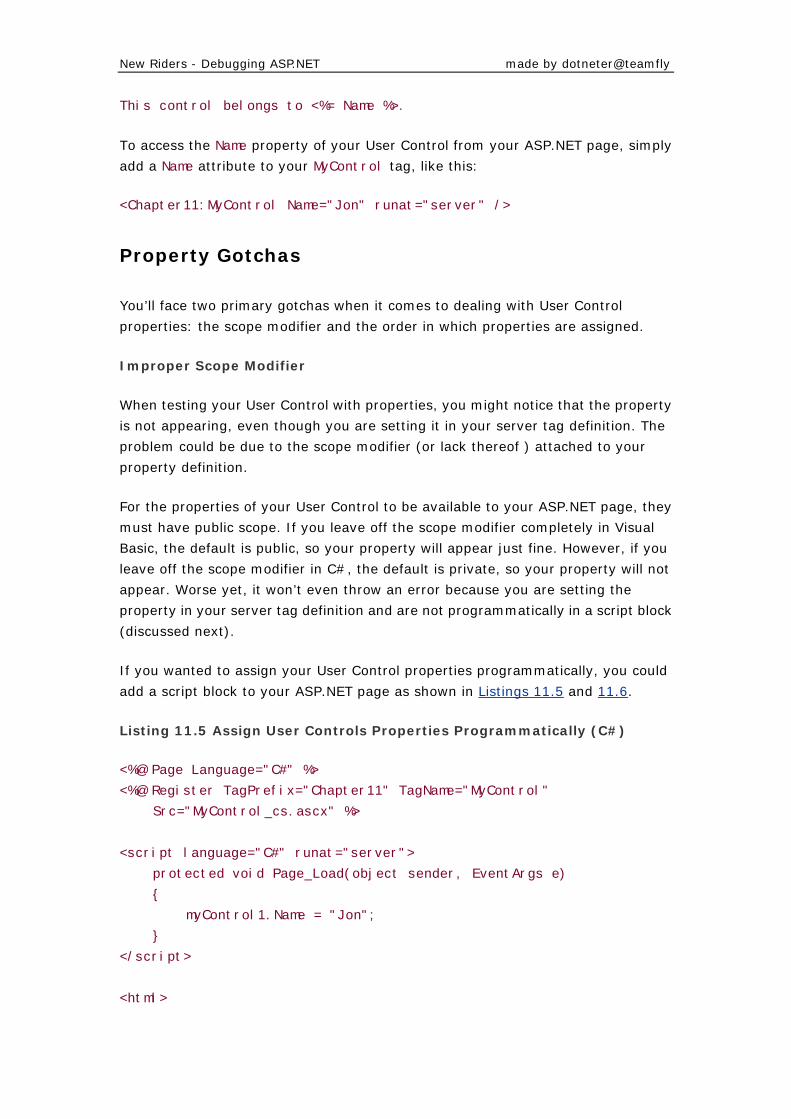
New Riders - Debugging ASP.NET made by dotneter@teamfly
This control belongs to <%= Name %>.
To access the Name property of your User Control from your ASP.NET page, simply
add a Name attribute to your MyControl tag, like this:
<Chapter11:MyControl Name="Jon" runat="server" />
Property Gotchas
You’ll face two primary gotchas when it comes to dealing with User Control
properties: the scope modifier and the order in which properties are assigned.
Improper Scope Modifier
When testing your User Control with properties, you might notice that the property
is not appearing, even though you are setting it in your server tag definition. The
problem could be due to the scope modifier (or lack thereof ) attached to your
property definition.
For the properties of your User Control to be available to your ASP.NET page, they
must have public scope. If you leave off the scope modifier completely in Visual
Basic, the default is public, so your property will appear just fine. However, if you
leave off the scope modifier in C#, the default is private, so your property will not
appear. Worse yet, it won’t even throw an error because you are setting the
property in your server tag definition and are not programmatically in a script block
(discussed next).
If you wanted to assign your User Control properties programmatically, you could
add a script block to your ASP.NET page as shown in Listings 11.5 and 11.6.
Listing 11.5 Assign User Controls Properties Programmatically (C#)
<%@ Page Language="C#" %>
<%@ Register TagPrefix="Chapter11" TagName="MyControl"
Src="MyControl_cs.ascx" %>
<script language="C#" runat="server">
protected void Page_Load(object sender, EventArgs e)
{
myControl1.Name = "Jon";
}
</script>
<html>
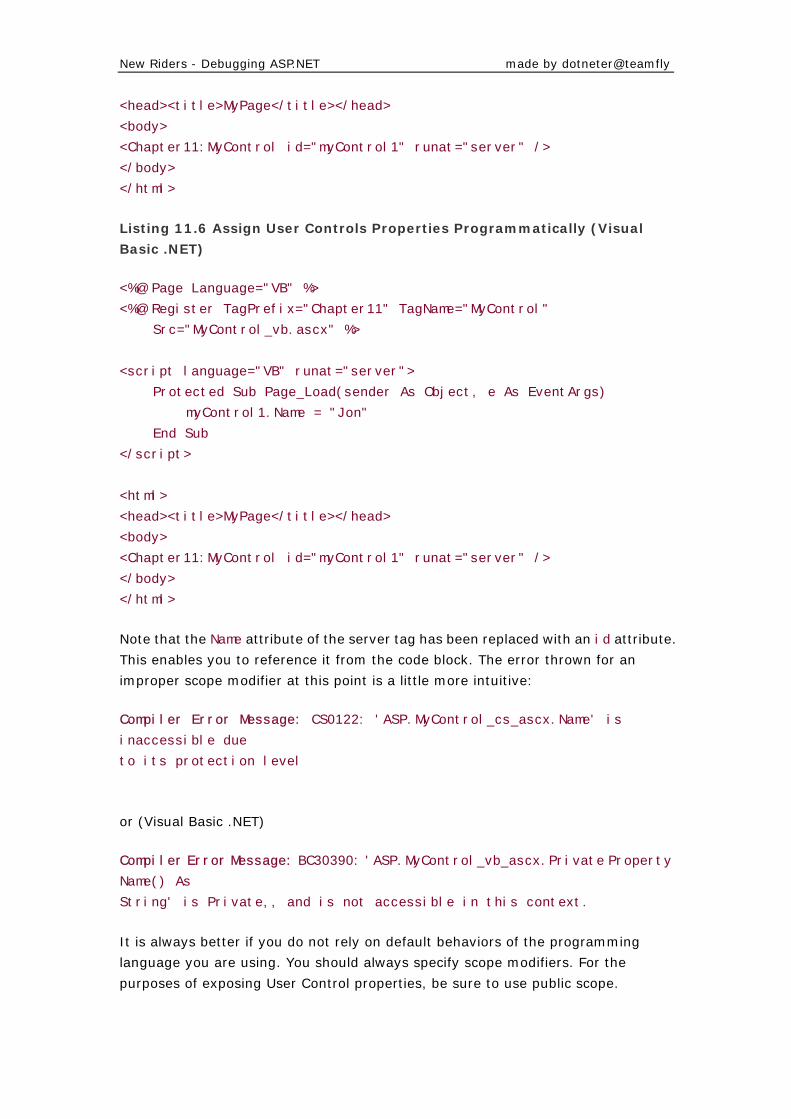
New Riders - Debugging ASP.NET made by dotneter@teamfly
<head><title>MyPage</title></head>
<body>
<Chapter11:MyControl id="myControl1" runat="server" />
</body>
</html>
Listing 11.6 Assign User Controls Properties Programmatically (Visual
Basic .NET)
<%@ Page Language="VB" %>
<%@ Register TagPrefix="Chapter11" TagName="MyControl"
Src="MyControl_vb.ascx" %>
<script language="VB" runat="server">
Protected Sub Page_Load(sender As Object, e As EventArgs)
myControl1.Name = "Jon"
End Sub
</script>
<html>
<head><title>MyPage</title></head>
<body>
<Chapter11:MyControl id="myControl1" runat="server" />
</body>
</html>
Note that the Name attribute of the server tag has been replaced with an id attribute.
This enables you to reference it from the code block. The error thrown for an
improper scope modifier at this point is a little more intuitive:
Compiler Error Message: CS0122: 'ASP.MyControl_cs_ascx.Name' is
inaccessible due
to its protection level
or (Visual Basic .NET)
Compiler Error Message: BC30390: 'ASP.MyControl_vb_ascx.Private Property
Name() As
String' is Private,, and is not accessible in this context.
It is always better if you do not rely on default behaviors of the programming
language you are using. You should always specify scope modifiers. For the
purposes of exposing User Control properties, be sure to use public scope.
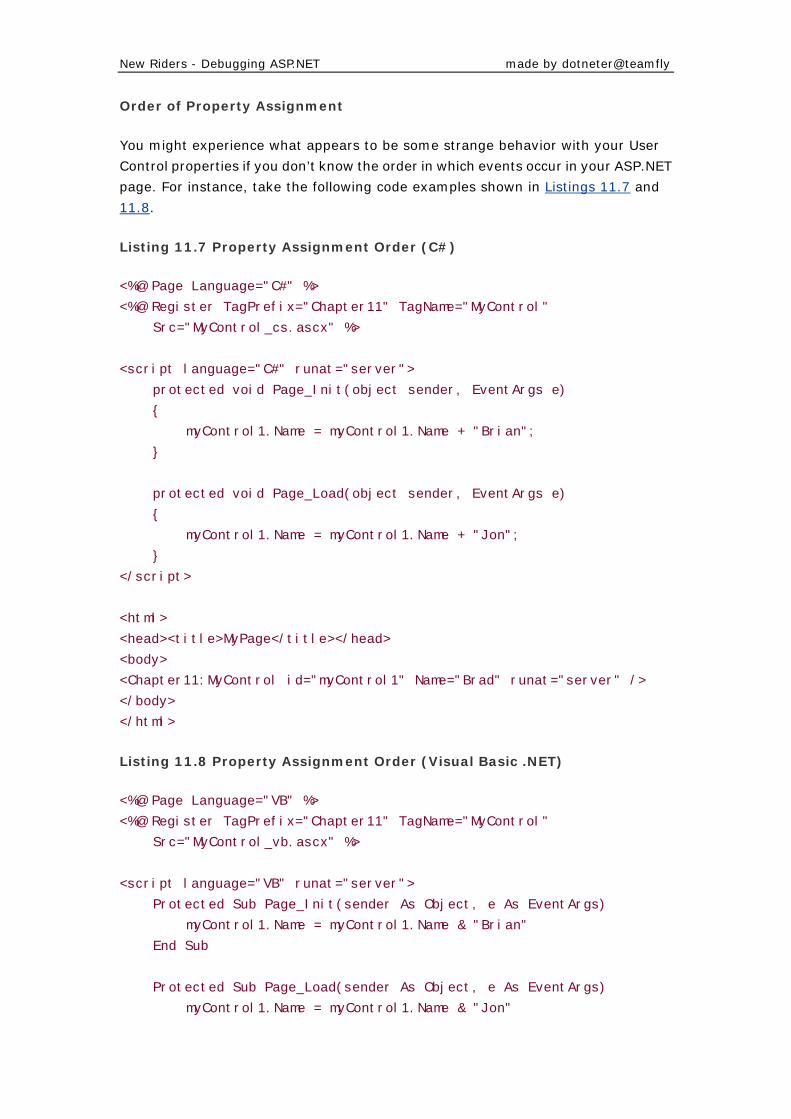
New Riders - Debugging ASP.NET made by dotneter@teamfly
Order of Property Assignment
You might experience what appears to be some strange behavior with your User
Control properties if you don’t know the order in which events occur in your ASP.NET
page. For instance, take the following code examples shown in Listings 11.7 and
11.8.
Listing 11.7 Property Assignment Order (C#)
<%@ Page Language="C#" %>
<%@ Register TagPrefix="Chapter11" TagName="MyControl"
Src="MyControl_cs.ascx" %>
<script language="C#" runat="server">
protected void Page_Init(object sender, EventArgs e)
{
myControl1.Name = myControl1.Name + "Brian";
}
protected void Page_Load(object sender, EventArgs e)
{
myControl1.Name = myControl1.Name + "Jon";
}
</script>
<html>
<head><title>MyPage</title></head>
<body>
<Chapter11:MyControl id="myControl1" Name="Brad" runat="server" />
</body>
</html>
Listing 11.8 Property Assignment Order (Visual Basic .NET)
<%@ Page Language="VB" %>
<%@ Register TagPrefix="Chapter11" TagName="MyControl"
Src="MyControl_vb.ascx" %>
<script language="VB" runat="server">
Protected Sub Page_Init(sender As Object, e As EventArgs)
myControl1.Name = myControl1.Name & "Brian"
End Sub
Protected Sub Page_Load(sender As Object, e As EventArgs)
myControl1.Name = myControl1.Name & "Jon"
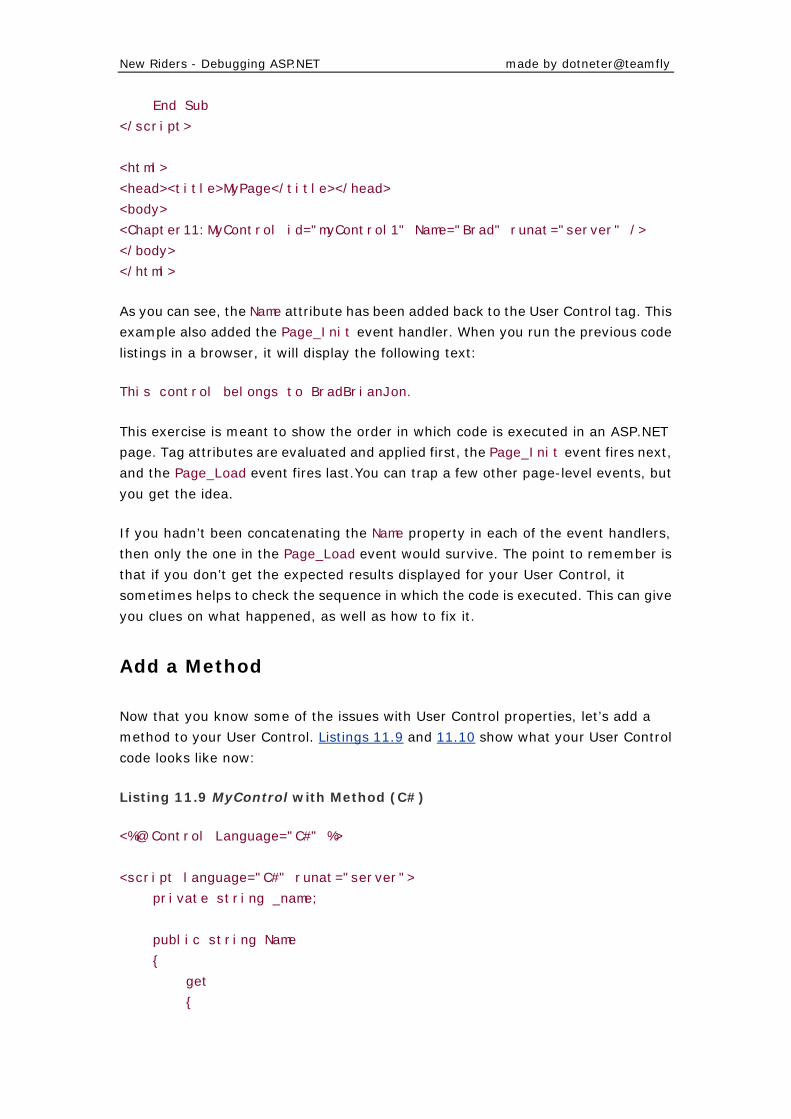
New Riders - Debugging ASP.NET made by dotneter@teamfly
End Sub
</script>
<html>
<head><title>MyPage</title></head>
<body>
<Chapter11:MyControl id="myControl1" Name="Brad" runat="server" />
</body>
</html>
As you can see, the Name attribute has been added back to the User Control tag. This
example also added the Page_Init event handler. When you run the previous code
listings in a browser, it will display the following text:
This control belongs to BradBrianJon.
This exercise is meant to show the order in which code is executed in an ASP.NET
page. Tag attributes are evaluated and applied first, the Page_Init event fires next,
and the Page_Load event fires last.You can trap a few other page-level events, but
you get the idea.
If you hadn’t been concatenating the Name property in each of the event handlers,
then only the one in the Page_Load event would survive. The point to remember is
that if you don’t get the expected results displayed for your User Control, it
sometimes helps to check the sequence in which the code is executed. This can give
you clues on what happened, as well as how to fix it.
Add a Method
Now that you know some of the issues with User Control properties, let’s add a
method to your User Control. Listings 11.9 and 11.10 show what your User Control
code looks like now:
Listing 11.9 MyControl with Method (C#)
<%@ Control Language="C#" %>
<script language="C#" runat="server">
private string _name;
public string Name
{
get
{
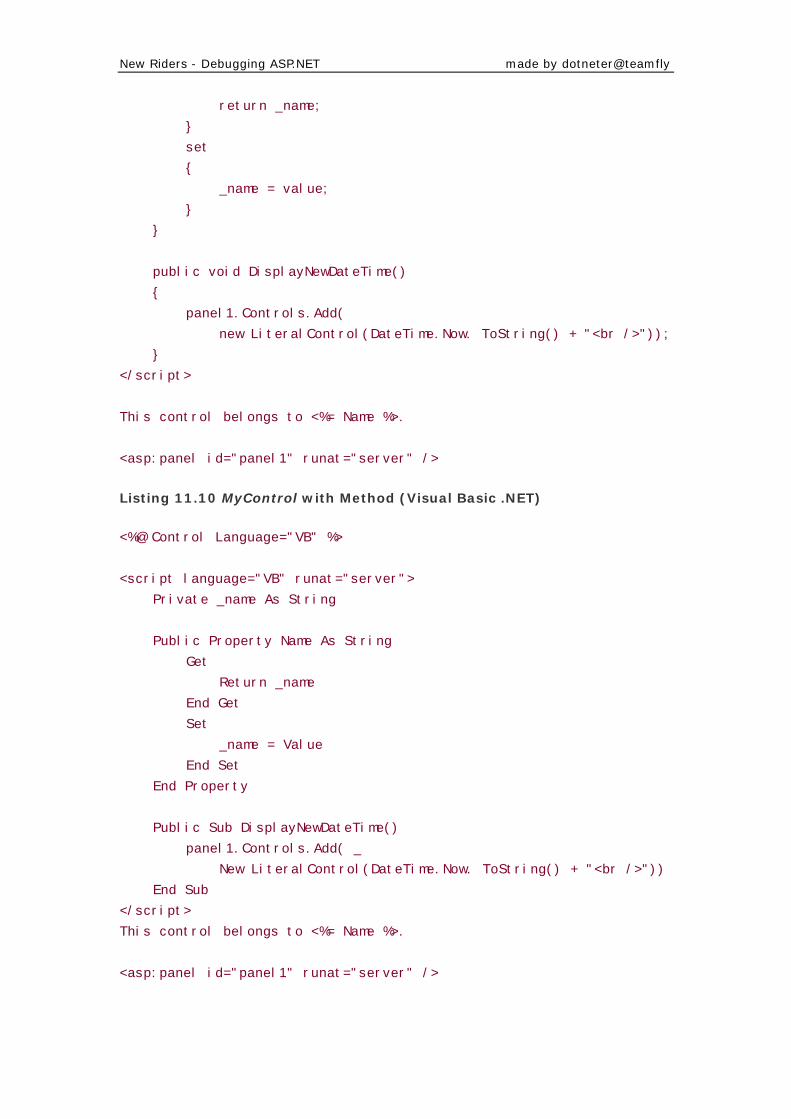
New Riders - Debugging ASP.NET made by dotneter@teamfly
return _name;
}
set
{
_name = value;
}
}
public void DisplayNewDateTime()
{
panel1.Controls.Add(
new LiteralControl(DateTime.Now. ToString() + "<br />"));
}
</script>
This control belongs to <%= Name %>.
<asp:panel id="panel1" runat="server" />
Listing 11.10 MyControl with Method (Visual Basic .NET)
<%@ Control Language="VB" %>
<script language="VB" runat="server">
Private _name As String
Public Property Name As String
Get
Return _name
End Get
Set
_name = Value
End Set
End Property
Public Sub DisplayNewDateTime()
panel1.Controls.Add( _
New LiteralControl(DateTime.Now. ToString() + "<br />"))
End Sub
</script>
This control belongs to <%= Name %>.
<asp:panel id="panel1" runat="server" />
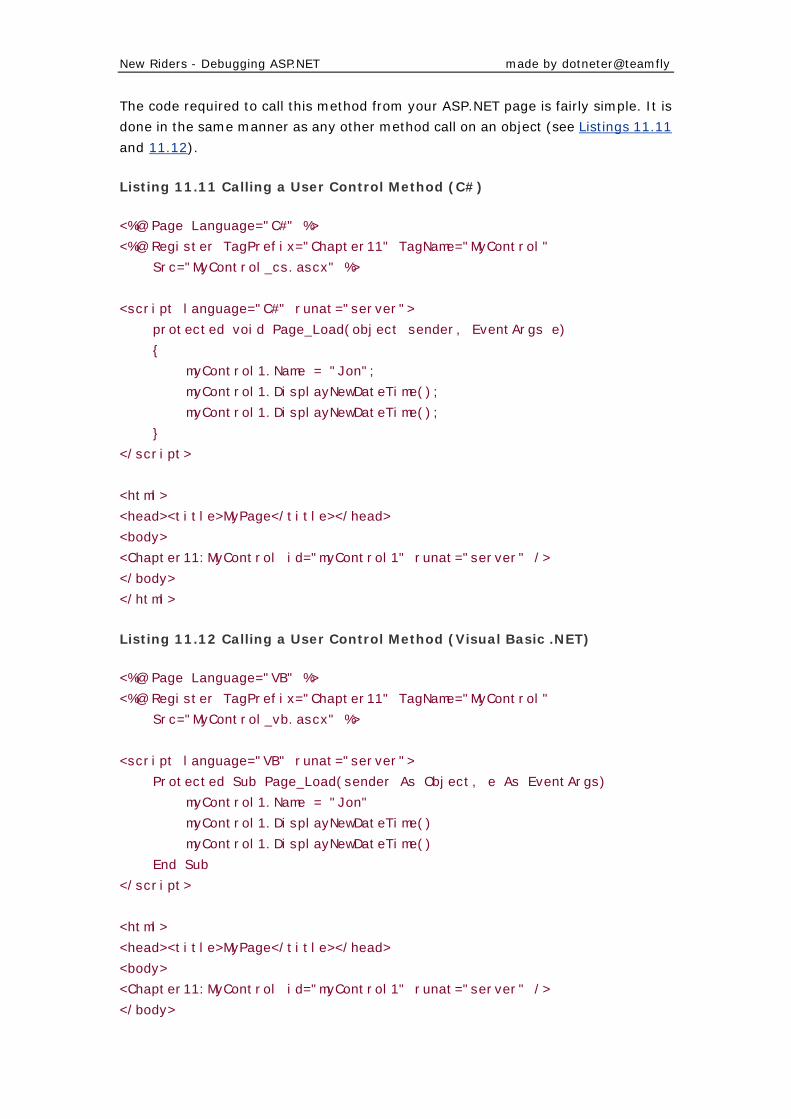
New Riders - Debugging ASP.NET made by dotneter@teamfly
The code required to call this method from your ASP.NET page is fairly simple. It is
done in the same manner as any other method call on an object (see Listings 11.11
and 11.12).
Listing 11.11 Calling a User Control Method (C#)
<%@ Page Language="C#" %>
<%@ Register TagPrefix="Chapter11" TagName="MyControl"
Src="MyControl_cs.ascx" %>
<script language="C#" runat="server">
protected void Page_Load(object sender, EventArgs e)
{
myControl1.Name = "Jon";
myControl1.DisplayNewDateTime();
myControl1.DisplayNewDateTime();
}
</script>
<html>
<head><title>MyPage</title></head>
<body>
<Chapter11:MyControl id="myControl1" runat="server" />
</body>
</html>
Listing 11.12 Calling a User Control Method (Visual Basic .NET)
<%@ Page Language="VB" %>
<%@ Register TagPrefix="Chapter11" TagName="MyControl"
Src="MyControl_vb.ascx" %>
<script language="VB" runat="server">
Protected Sub Page_Load(sender As Object, e As EventArgs)
myControl1.Name = "Jon"
myControl1.DisplayNewDateTime()
myControl1.DisplayNewDateTime()
End Sub
</script>
<html>
<head><title>MyPage</title></head>
<body>
<Chapter11:MyControl id="myControl1" runat="server" />
</body>
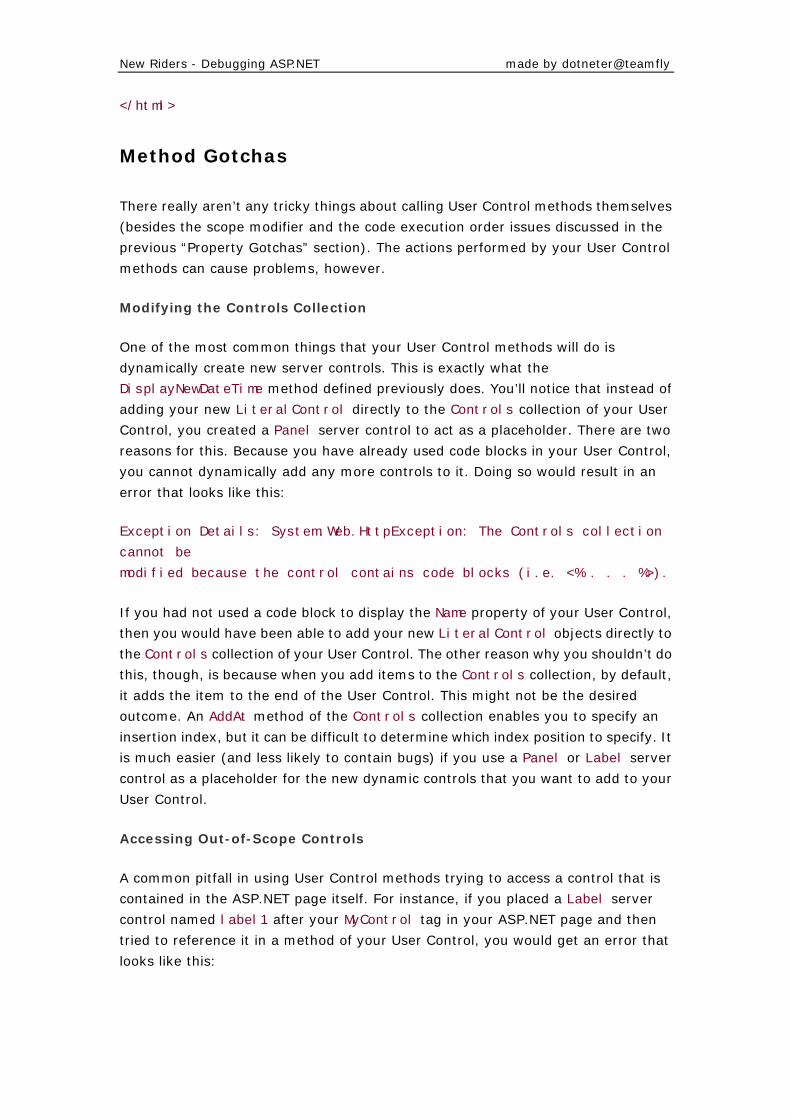
New Riders - Debugging ASP.NET made by dotneter@teamfly
</html>
Method Gotchas
There really aren’t any tricky things about calling User Control methods themselves
(besides the scope modifier and the code execution order issues discussed in the
previous “Property Gotchas” section). The actions performed by your User Control
methods can cause problems, however.
Modifying the Controls Collection
One of the most common things that your User Control methods will do is
dynamically create new server controls. This is exactly what the
DisplayNewDateTime method defined previously does. You’ll notice that instead of
adding your new LiteralControl directly to the Controls collection of your User
Control, you created a Panel server control to act as a placeholder. There are two
reasons for this. Because you have already used code blocks in your User Control,
you cannot dynamically add any more controls to it. Doing so would result in an
error that looks like this:
Exception Details: System.Web.HttpException: The Controls collection
cannot be
modified because the control contains code blocks (i.e. <% . . . %>).
If you had not used a code block to display the Name property of your User Control,
then you would have been able to add your new LiteralControl objects directly to
the Controls collection of your User Control. The other reason why you shouldn’t do
this, though, is because when you add items to the Controls collection, by default,
it adds the item to the end of the User Control. This might not be the desired
outcome. An AddAt method of the Controls collection enables you to specify an
insertion index, but it can be difficult to determine which index position to specify. It
is much easier (and less likely to contain bugs) if you use a Panel or Label server
control as a placeholder for the new dynamic controls that you want to add to your
User Control.
Accessing Out-of-Scope Controls
A common pitfall in using User Control methods trying to access a control that is
contained in the ASP.NET page itself. For instance, if you placed a Label server
control named label1 after your MyControl tag in your ASP.NET page and then
tried to reference it in a method of your User Control, you would get an error that
looks like this:
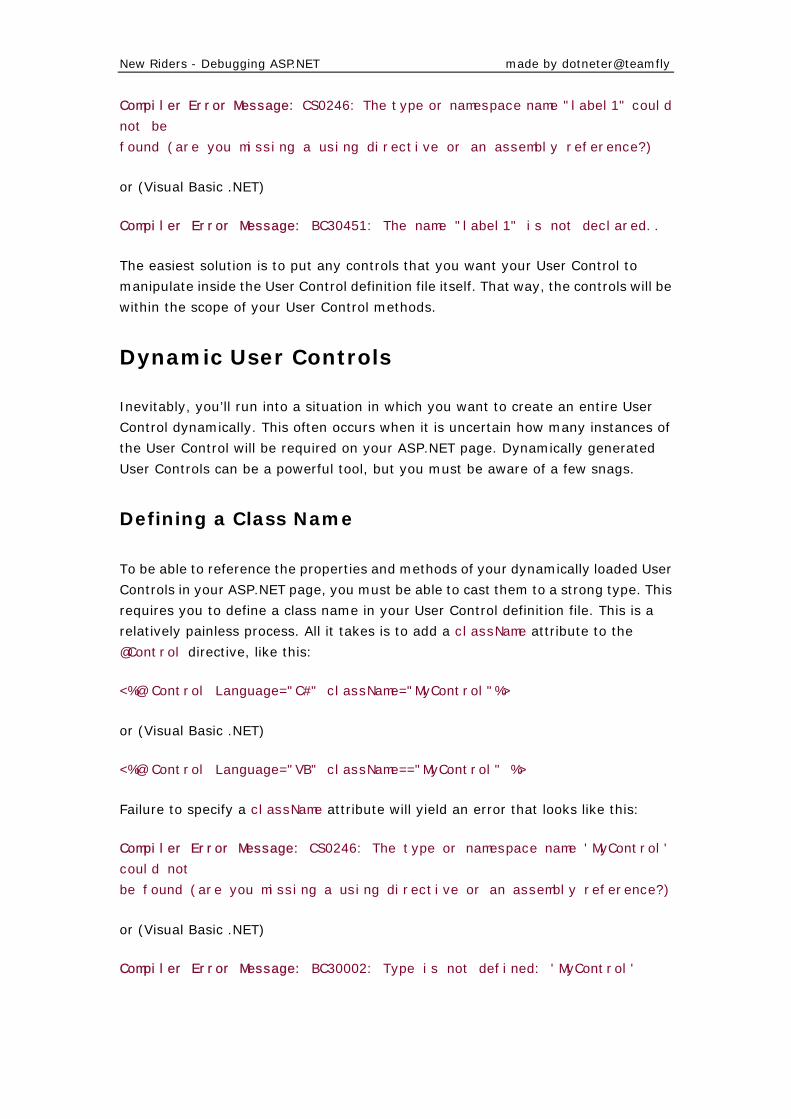
New Riders - Debugging ASP.NET made by dotneter@teamfly
Compiler Error Message: CS0246: The type or namespace name "label1" could
not be
found (are you missing a using directive or an assembly reference?)
or (Visual Basic .NET)
Compiler Error Message: BC30451: The name "label1" is not declared..
The easiest solution is to put any controls that you want your User Control to
manipulate inside the User Control definition file itself. That way, the controls will be
within the scope of your User Control methods.
Dynamic User Controls
Inevitably, you’ll run into a situation in which you want to create an entire User
Control dynamically. This often occurs when it is uncertain how many instances of
the User Control will be required on your ASP.NET page. Dynamically generated
User Controls can be a powerful tool, but you must be aware of a few snags.
Defining a Class Name
To be able to reference the properties and methods of your dynamically loaded User
Controls in your ASP.NET page, you must be able to cast them to a strong type. This
requires you to define a class name in your User Control definition file. This is a
relatively painless process. All it takes is to add a className attribute to the
@Control directive, like this:
<%@ Control Language="C#" className="MyControl"%>
or (Visual Basic .NET)
<%@ Control Language="VB" className=="MyControl" %>
Failure to specify a className attribute will yield an error that looks like this:
Compiler Error Message: CS0246: The type or namespace name 'MyControl'
could not
be found (are you missing a using directive or an assembly reference?)
or (Visual Basic .NET)
Compiler Error Message: BC30002: Type is not defined: 'MyControl'
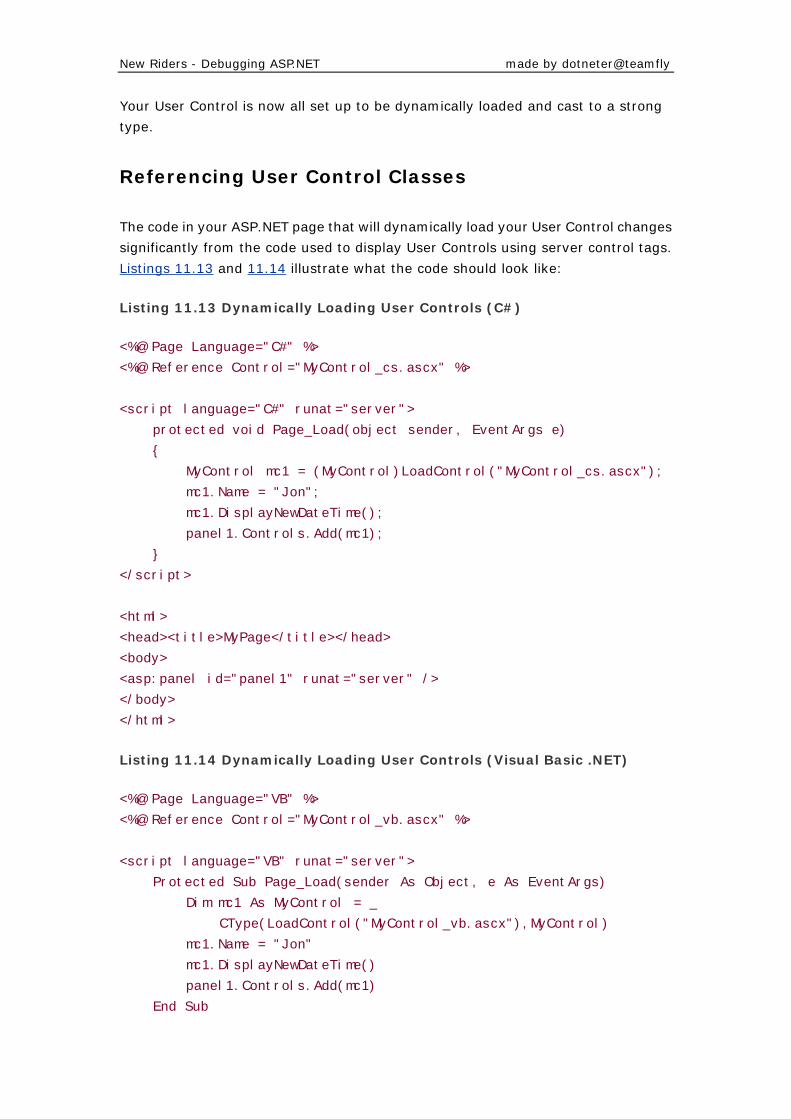
New Riders - Debugging ASP.NET made by dotneter@teamfly
Your User Control is now all set up to be dynamically loaded and cast to a strong
type.
Referencing User Control Classes
The code in your ASP.NET page that will dynamically load your User Control changes
significantly from the code used to display User Controls using server control tags.
Listings 11.13 and 11.14 illustrate what the code should look like:
Listing 11.13 Dynamically Loading User Controls (C#)
<%@ Page Language="C#" %>
<%@ Reference Control="MyControl_cs.ascx" %>
<script language="C#" runat="server">
protected void Page_Load(object sender, EventArgs e)
{
MyControl mc1 = (MyControl)LoadControl("MyControl_cs.ascx");
mc1.Name = "Jon";
mc1.DisplayNewDateTime();
panel1.Controls.Add(mc1);
}
</script>
<html>
<head><title>MyPage</title></head>
<body>
<asp:panel id="panel1" runat="server" />
</body>
</html>
Listing 11.14 Dynamically Loading User Controls (Visual Basic .NET)
<%@ Page Language="VB" %>
<%@ Reference Control="MyControl_vb.ascx" %>
<script language="VB" runat="server">
Protected Sub Page_Load(sender As Object, e As EventArgs)
Dim mc1 As MyControl = _
CType(LoadControl("MyControl_vb.ascx"),MyControl)
mc1.Name = "Jon"
mc1.DisplayNewDateTime()
panel1.Controls.Add(mc1)
End Sub
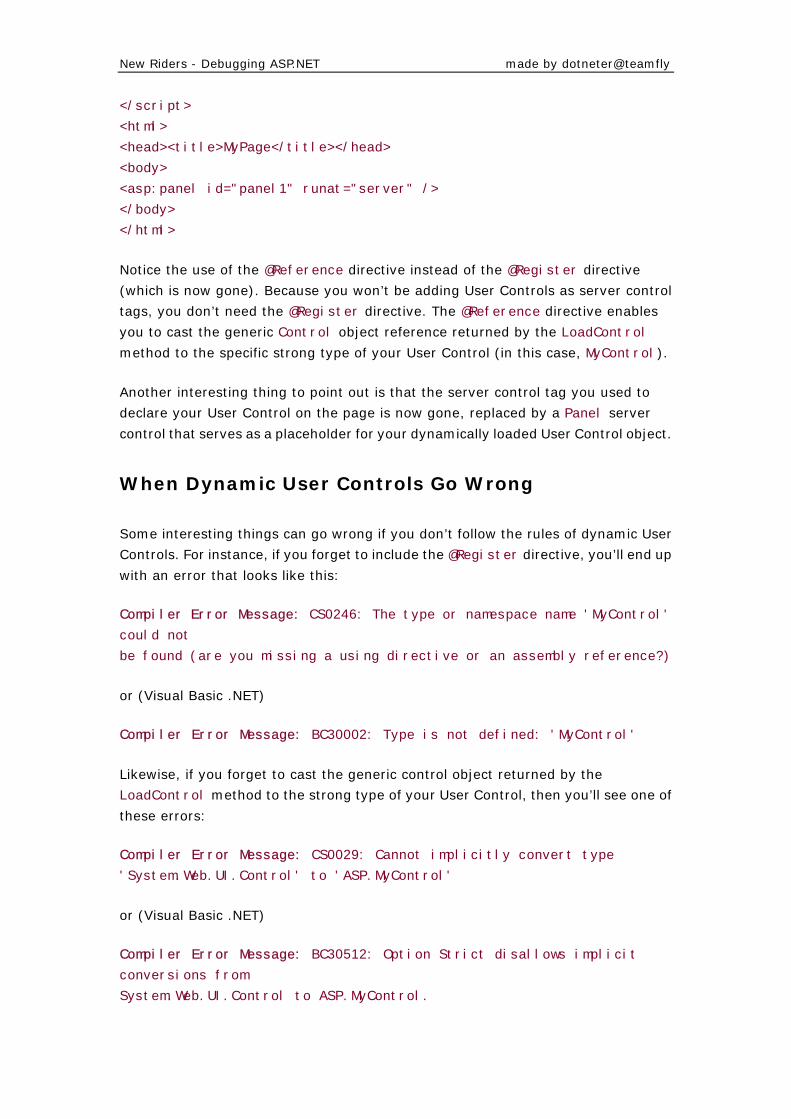
New Riders - Debugging ASP.NET made by dotneter@teamfly
</script>
<html>
<head><title>MyPage</title></head>
<body>
<asp:panel id="panel1" runat="server" />
</body>
</html>
Notice the use of the @Reference directive instead of the @Register directive
(which is now gone). Because you won’t be adding User Controls as server control
tags, you don’t need the @Register directive. The @Reference directive enables
you to cast the generic Control object reference returned by the LoadControl
method to the specific strong type of your User Control (in this case, MyControl).
Another interesting thing to point out is that the server control tag you used to
declare your User Control on the page is now gone, replaced by a Panel server
control that serves as a placeholder for your dynamically loaded User Control object.
When Dynamic User Controls Go Wrong
Some interesting things can go wrong if you don’t follow the rules of dynamic User
Controls. For instance, if you forget to include the @Register directive, you’ll end up
with an error that looks like this:
Compiler Error Message: CS0246: The type or namespace name 'MyControl'
could not
be found (are you missing a using directive or an assembly reference?)
or (Visual Basic .NET)
Compiler Error Message: BC30002: Type is not defined: 'MyControl'
Likewise, if you forget to cast the generic control object returned by the
LoadControl method to the strong type of your User Control, then you’ll see one of
these errors:
Compiler Error Message: CS0029: Cannot implicitly convert type
'System.Web.UI.Control' to 'ASP.MyControl'
or (Visual Basic .NET)
Compiler Error Message: BC30512: Option Strict disallows implicit
conversions from
System.Web.UI.Control to ASP.MyControl.
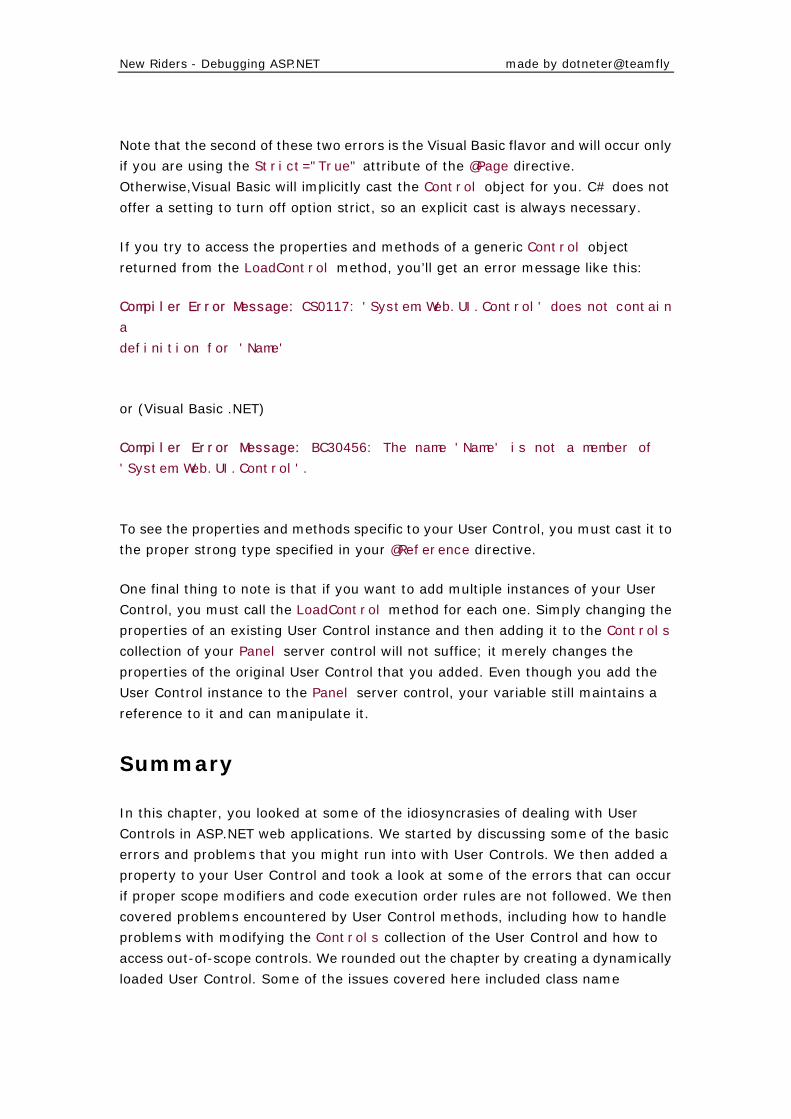
New Riders - Debugging ASP.NET made by dotneter@teamfly
Note that the second of these two errors is the Visual Basic flavor and will occur only
if you are using the Strict="True" attribute of the @Page directive.
Otherwise,Visual Basic will implicitly cast the Control object for you. C# does not
offer a setting to turn off option strict, so an explicit cast is always necessary.
If you try to access the properties and methods of a generic Control object
returned from the LoadControl method, you’ll get an error message like this:
Compiler Error Message: CS0117: 'System.Web.UI.Control' does not contain
a
definition for 'Name'
or (Visual Basic .NET)
Compiler Error Message: BC30456: The name 'Name' is not a member of
'System.Web.UI.Control'.
To see the properties and methods specific to your User Control, you must cast it to
the proper strong type specified in your @Reference directive.
One final thing to note is that if you want to add multiple instances of your User
Control, you must call the LoadControl method for each one. Simply changing the
properties of an existing User Control instance and then adding it to the Controls
collection of your Panel server control will not suffice; it merely changes the
properties of the original User Control that you added. Even though you add the
User Control instance to the Panel server control, your variable still maintains a
reference to it and can manipulate it.
Summary
In this chapter, you looked at some of the idiosyncrasies of dealing with User
Controls in ASP.NET web applications. We started by discussing some of the basic
errors and problems that you might run into with User Controls. We then added a
property to your User Control and took a look at some of the errors that can occur
if proper scope modifiers and code execution order rules are not followed. We then
covered problems encountered by User Control methods, including how to handle
problems with modifying the Controls collection of the User Control and how to
access out-of-scope controls. We rounded out the chapter by creating a dynamically
loaded User Control. Some of the issues covered here included class name
New Riders - Debugging ASP.NET made by dotneter@teamfly
declaration, User Control references, and explicit strong type casting to custom User
Control types.
The next chapter discusses caching issues that you might encounter while
debugging your web applications.
Chapter 12. Caching Issues and Debugging
ONE OF THE MOST IMPORTANT NEW FEATURES that ASP.NET makes available is a
fairly extensive caching engine. This removes the need for “home-grown” caching
solutions that often contain memory leaks. ASP.NET’s caching capabilities are
integrated at the ISAPI level, so they are much better equipped to handle cached
resources.
Although caching in ASP.NET is relatively easy to implement, there are a few
intricacies and “gotchas” that we’d like to cover. One of the things that might not be
so obvious is that, by nature, caching can make debugging your web application
particularly troublesome. For instance, if your web application contains a bug that
displays the wrong content on a page, that content could end up trapped in cache.
At that point, you would be forced to make a change to the underlying ASP.NET
page or user control so that it would refresh itself. That’s not a very elegant solution
at all. There is a better way to handle this issue, using a validation callback, which
we’ll discuss a bit later.
Let’s take a look at a few techniques for how to deal with both output caching and
the Caching API.
Output Caching
The easiest way to implement caching in your ASP.NET web applications is through
directives at either the page or the user control level. Unfortunately, this method is
also the most limiting and frustrating to work with.
New Riders - Debugging ASP.NET made by dotneter@teamfly
@OutputCache Directive
The basis for output caching at both the page and the user control level is the
@OutputCache directive. Although you can use many different possible attributes (a
few of which you’ll see in a bit), two are mandatory: Duration and
VaryByParam.VaryByControl can be substituted for VaryByParam in user controls,
however.
Duration Attribute
The Duration attribute is fairly straightforward, but you must realize that the
number it accepts is the number of “seconds” that you want your content to be
cached for. Accidentally specifying a value of 10, for instance, would cache your
data only for 10 seconds instead of 10 minutes (which is what you might expect).
If you forget to specify the Duration attribute, you’ll get an error like this:
Parser Error Message: The directive is missing a 'duration' attribute.
VaryByParam Attribute
Misuse of the VaryByParam attribute can lead to some strange behavior by your
ASP.NET page. This is the second mandatory attribute of the @OutputCache
directive. Failure to include it will yield an error message like this:
Parser Error Message: The directive is missing a ‘VaryByParam’ attribute,,
which should
be set to "none", "*", or a list of name/value pairs.
If you specify none as a value for this attribute, you must be aware that the same
cached page will be served up for all requests for that page. For instance, if you
intended to cache product information pages on your web application, and set the
VaryByParam attribute to none, then the first product that was requested would be
served up for all subsequent requests, regardless of any changes that were made to
the query string. The following two page requests would both return the data for the
product with an ID = 10 :
http://www.yourdomain.com/product.aspx?ID=10
http://www.yourdomain.com/product.aspx?ID=20
You might choose to fix this anomaly by specifying a value of * for the VaryByParam
attribute. Although this might appear to solve the problem, what happens if you are
passing information on the query string that is personal to the current user—say,
New Riders - Debugging ASP.NET made by dotneter@teamfly
perhaps a user ID? You would then get a cached version for each user that browsed
each product. Take the following two page requests:
http://www.yourdomain.com/product.aspx?ID=10&user=1234
http://www.yourdomain.com/product.aspx?ID=10&user=5678
You would want both of these requests to be served up from the same item in cache.
This is where you would want to specify exactly which QueryString parameters you
want the cache to key off. In this case, it would be the ID parameter only.
It is useful to note that, in the scenario just discussed, you would likely want to place
your @OutputCache directive in a user control that contains your product-rendering
code so that the user QueryString parameter could be used by other sections of
the page to personalize the output. Then, only the product information itself would
be served up from cache.
If you need to specify more than one QueryString parameter as a caching key,
make sure that you use a semicolon as the delimiter instead of a comma. The value
ID, user would be interpreted as one QueryString parameter, thereby causing the
wrong caching behavior. The tricky part is that no errors are generated when you
make this mistake. Instead, use ID; user.
VaryByCustom Attribute
When using the VaryByCustom attribute to customize the key used to store your
page or user control in cache, you must remember to override the
GetVaryByCustomString method in your web application’s global.asax file. No
errors will be generated if you forget to do this, but your custom parameter will not
take part in the cache key.
VaryByHeader Attribute
The most common error that you will run into with the VaryByHeader attribute
occurs if you try to use it in the @OutputCache directive of a user control. This is not
allowed and will generate an error like this:
Parser Error Message: The 'VaryByHeader' attribute is not supported by
the 'OutputCache'
directive..
Use the VaryByHeader attribute only at the page level.
New Riders - Debugging ASP.NET made by dotneter@teamfly
Manipulation of Cached User Controls
If you implement the @OutputCache directive in a user control, you cannot
manipulate its properties externally. Dynamically assigning the properties of a user
control in one of the page’s events (such as Page_Load) works only if a copy does
not already exist in the fragment cache. Subsequent attempts to dynamically
modify one of the properties of a user control that has output caching enabled will
generate an error like this:
Exception Details: System.NullReferenceException: Value null was found
where an instance
of an object was required.
As you can see, this error message isn’t very intuitive. To be safe, always set the
properties of a cached user control in the Page_Load event inside the user control
itself. The exception to this is when you want to use declarative attributes;
specifying attributes in the user control tag itself is permitted. An example might
look like this:
<chapter12:MyControl UserName="Jon" runat="server" //>
Validation Callbacks
Remember the issue mentioned at the beginning of the chapter, pertaining to data
being trapped in the output cache? Here is where we’ll put that issue to rest. Here
you’ll wire up a validation callback so that each time the page is requested from the
cache, you’ll get a chance to establish whether the cached item is still good. You’ll do
this by checking for the existence of a password QueryString parameter. Take a
look at the code in Listings 12.1 and 12.2, which demonstrate the technique.
Listing 12.1 Invalidating the Output Cache Through a Validation Callback
(C#)
<%@ Page Language="C#" %>
<%@ OutputCache Duration="10000" VaryByParam="none" %>
<script language="C#" runat="server">
protected void MyHttpCacheValidateHandler(HttpContext context,
object data, ref HttpValidationStatus validationStatus)
{
//initialize the password variable
string password = "";
New Riders - Debugging ASP.NET made by dotneter@teamfly
//set the password variable if the user specified the
//"password" QueryString parameter
if(context.Request.QueryString["password"]!=null)
{
password =
(string)context.Request.QueryString["password"];
}
//if a password was specified, then determine if it is
//correct. If it is, then evict the page from the cache.
//If the password is incorrect or wasn't
//specified, then validate the cached page
switch(password)
{
case "mypassword":
validationStatus = HttpValidationStatus.Invalid;
break;
default:
validationStatus = HttpValidationStatus.Valid;
break;
}
}
protected void Page_Load(Object sender, EventArgs e)
{
//create an instance of the HttpCacheValidateHandler
//delegate so that we can wire up the validation callback
HttpCacheValidateHandler myHandler =
new
HttpCacheValidateHandler(MyHttpCacheValidateHandler);
//wire up the callback
Response.Cache.AddValidationCallback(myHandler, null);
//by displaying the current date and time on the screen,
//we can see when the cache is being invalidated
label1. Text = DateTime.Now. ToString();
}
</script>
<html>
<head>
<title>Validation Callback</title>
</head>
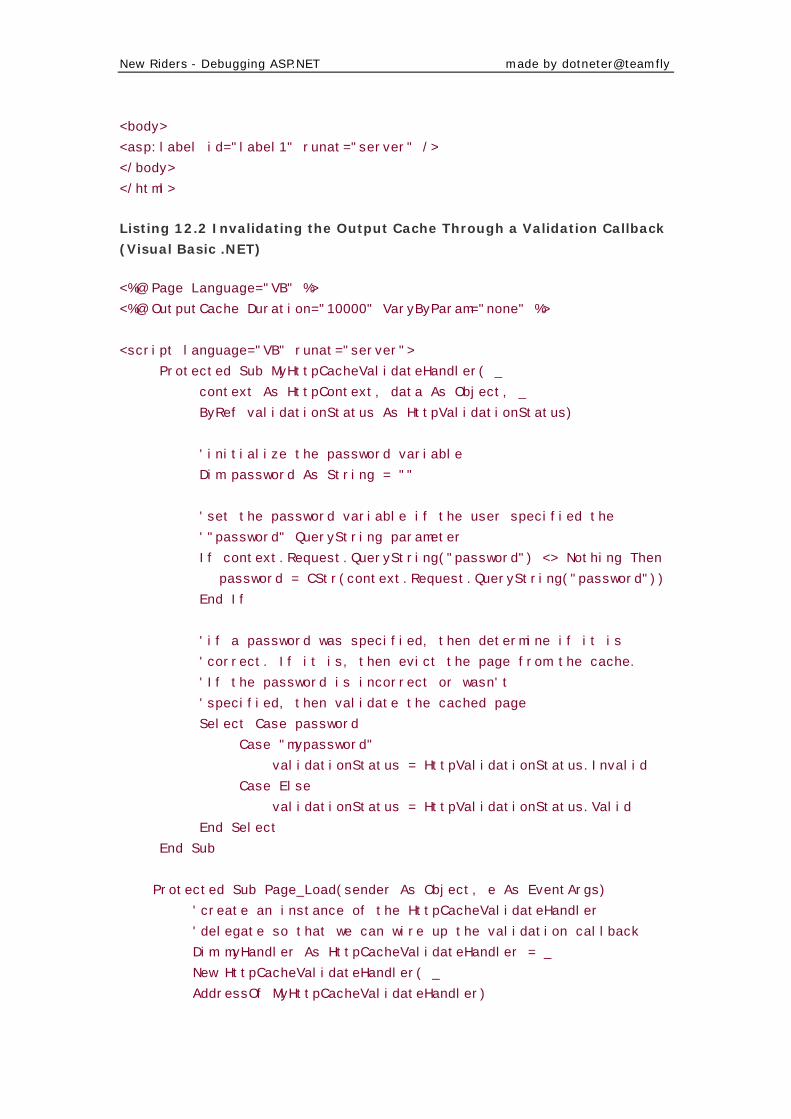
New Riders - Debugging ASP.NET made by dotneter@teamfly
<body>
<asp:label id="label1" runat="server" />
</body>
</html>
Listing 12.2 Invalidating the Output Cache Through a Validation Callback
(Visual Basic .NET)
<%@ Page Language="VB" %>
<%@ OutputCache Duration="10000" VaryByParam="none" %>
<script language="VB" runat="server">
Protected Sub MyHttpCacheValidateHandler( _
context As HttpContext, data As Object, _
ByRef validationStatus As HttpValidationStatus)
'initialize the password variable
Dim password As String = ""
'set the password variable if the user specified the
'"password" QueryString parameter
If context.Request.QueryString("password") <> Nothing Then
password = CStr(context.Request.QueryString("password"))
End If
'if a password was specified, then determine if it is
'correct. If it is, then evict the page from the cache.
'If the password is incorrect or wasn't
'specified, then validate the cached page
Select Case password
Case "mypassword"
validationStatus = HttpValidationStatus.Invalid
Case Else
validationStatus = HttpValidationStatus.Valid
End Select
End Sub
Protected Sub Page_Load(sender As Object, e As EventArgs)
'create an instance of the HttpCacheValidateHandler
'delegate so that we can wire up the validation callback
Dim myHandler As HttpCacheValidateHandler = _
New HttpCacheValidateHandler( _
AddressOf MyHttpCacheValidateHandler)
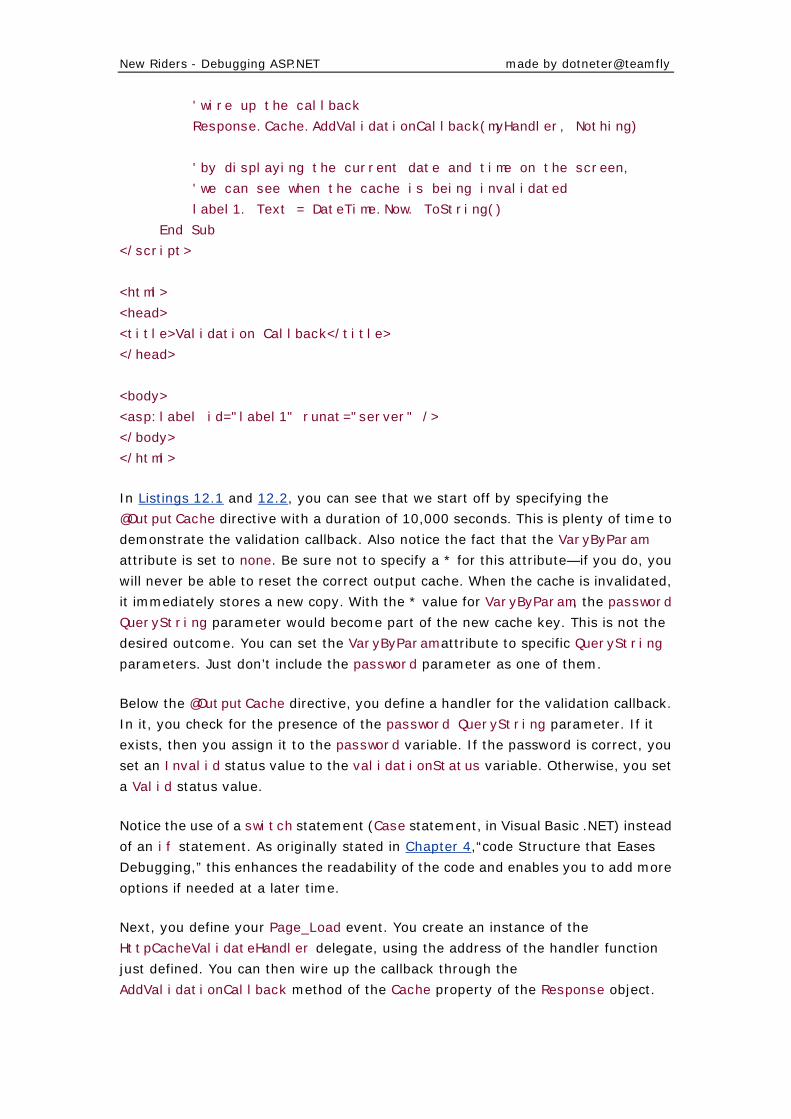
New Riders - Debugging ASP.NET made by dotneter@teamfly
'wire up the callback
Response.Cache.AddValidationCallback(myHandler, Nothing)
'by displaying the current date and time on the screen,
'we can see when the cache is being invalidated
label1. Text = DateTime.Now. ToString()
End Sub
</script>
<html>
<head>
<title>Validation Callback</title>
</head>
<body>
<asp:label id="label1" runat="server" />
</body>
</html>
In Listings 12.1 and 12.2, you can see that we start off by specifying the
@OutputCache directive with a duration of 10,000 seconds. This is plenty of time to
demonstrate the validation callback. Also notice the fact that the VaryByParam
attribute is set to none. Be sure not to specify a * for this attribute—if you do, you
will never be able to reset the correct output cache. When the cache is invalidated,
it immediately stores a new copy. With the * value for VaryByParam, the password
QueryString parameter would become part of the new cache key. This is not the
desired outcome. You can set the VaryByParam attribute to specific QueryString
parameters. Just don’t include the password parameter as one of them.
Below the @OutputCache directive, you define a handler for the validation callback.
In it, you check for the presence of the password QueryString parameter. If it
exists, then you assign it to the password variable. If the password is correct, you
set an Invalid status value to the validationStatus variable. Otherwise, you set
a Valid status value.
Notice the use of a switch statement (Case statement, in Visual Basic .NET) instead
of an if statement. As originally stated in Chapter 4,“code Structure that Eases
Debugging,” this enhances the readability of the code and enables you to add more
options if needed at a later time.
Next, you define your Page_Load event. You create an instance of the
HttpCacheValidateHandler delegate, using the address of the handler function
just defined. You can then wire up the callback through the
AddValidationCallback method of the Cache property of the Response object.
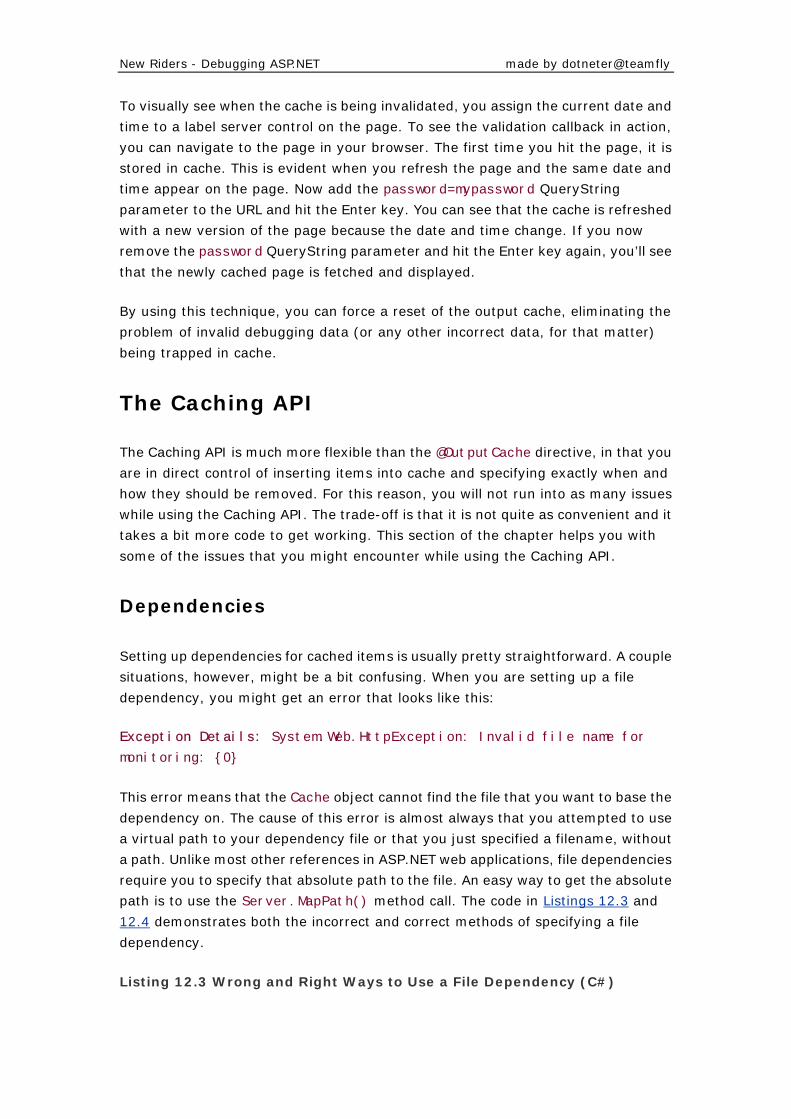
New Riders - Debugging ASP.NET made by dotneter@teamfly
To visually see when the cache is being invalidated, you assign the current date and
time to a label server control on the page. To see the validation callback in action,
you can navigate to the page in your browser. The first time you hit the page, it is
stored in cache. This is evident when you refresh the page and the same date and
time appear on the page. Now add the password=mypassword QueryString
parameter to the URL and hit the Enter key. You can see that the cache is refreshed
with a new version of the page because the date and time change. If you now
remove the password QueryString parameter and hit the Enter key again, you’ll see
that the newly cached page is fetched and displayed.
By using this technique, you can force a reset of the output cache, eliminating the
problem of invalid debugging data (or any other incorrect data, for that matter)
being trapped in cache.
The Caching API
The Caching API is much more flexible than the @OutputCache directive, in that you
are in direct control of inserting items into cache and specifying exactly when and
how they should be removed. For this reason, you will not run into as many issues
while using the Caching API. The trade-off is that it is not quite as convenient and it
takes a bit more code to get working. This section of the chapter helps you with
some of the issues that you might encounter while using the Caching API.
Dependencies
Setting up dependencies for cached items is usually pretty straightforward. A couple
situations, however, might be a bit confusing. When you are setting up a file
dependency, you might get an error that looks like this:
Exception Details: System.Web.HttpException: Invalid file name for
monitoring: {0}
This error means that the Cache object cannot find the file that you want to base the
dependency on. The cause of this error is almost always that you attempted to use
a virtual path to your dependency file or that you just specified a filename, without
a path. Unlike most other references in ASP.NET web applications, file dependencies
require you to specify that absolute path to the file. An easy way to get the absolute
path is to use the Server.MapPath() method call. The code in Listings 12.3 and
12.4 demonstrates both the incorrect and correct methods of specifying a file
dependency.
Listing 12.3 Wrong and Right Ways to Use a File Dependency (C#)
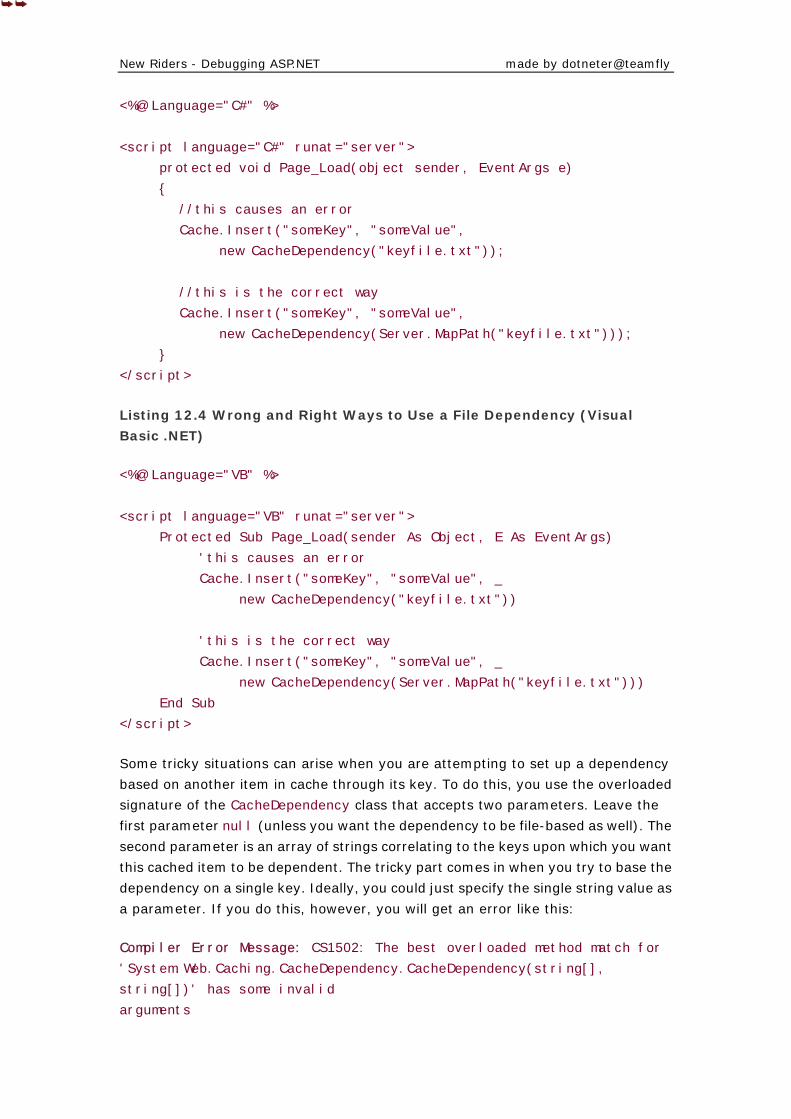
New Riders - Debugging ASP.NET made by dotneter@teamfly
<%@ Language="C#" %>
<script language="C#" runat="server">
protected void Page_Load(object sender, EventArgs e)
{
//this causes an error
Cache.Insert("someKey", "someValue",
new CacheDependency("keyfile.txt"));
//this is the correct way
Cache.Insert("someKey", "someValue",
new CacheDependency(Server.MapPath("keyfile.txt")));
}
</script>
Listing 12.4 Wrong and Right Ways to Use a File Dependency (Visual
Basic .NET)
<%@ Language="VB" %>
<script language="VB" runat="server">
Protected Sub Page_Load(sender As Object, E As EventArgs)
'this causes an error
Cache.Insert("someKey", "someValue", _
new CacheDependency("keyfile.txt"))
'this is the correct way
Cache.Insert("someKey", "someValue", _
new CacheDependency(Server.MapPath("keyfile.txt")))
End Sub
</script>
Some tricky situations can arise when you are attempting to set up a dependency
based on another item in cache through its key. To do this, you use the overloaded
signature of the CacheDependency class that accepts two parameters. Leave the
first parameter null (unless you want the dependency to be file-based as well). The
second parameter is an array of strings correlating to the keys upon which you want
this cached item to be dependent. The tricky part comes in when you try to base the
dependency on a single key. Ideally, you could just specify the single string value as
a parameter. If you do this, however, you will get an error like this:
Compiler Error Message: CS1502: The best overloaded method match for
'System.Web.Caching.CacheDependency.CacheDependency(string[],
string[])' has some invalid
arguments
New Riders - Debugging ASP.NET made by dotneter@teamfly
or (Visual Basic .NET)
Compiler Error Message: BC30311: A value of type 'String' cannot be
converted to
'1-dimensional Array of String'.
Even though you are specifying only a single cache key as a dependency, it must still
be in an array. Listings 12.5 and 12.6 provide examples of both incorrect and
correct ways to handle a single-cache key dependency:
Listing 12.5 Wrong and Right Ways to Use a Single-Cache Key Dependency
(C#)
<%@ Language="C#" %>
<script language="C#" runat="server">
protected void Page_Load(object sender, EventArgs e)
{
//this causes an error
Cache.Insert("someKey", "someValue",
new CacheDependency(null, "depKey"));
//this is the correct way
string[] dependency = {"depKey"};
Cache.Insert("someKey", "someValue",
new CacheDependency(null, dependency));
}
</script>
Listing 12.6 Wrong and Right Ways to Use a Single-Cache Key Dependency
(Visual Basic .NET)
<%@ Language="VB" %>
<script language="VB" runat="server">
Protected Sub Page_Load(sender As Object, E As EventArgs)
'this causes an error
Cache.Insert("someKey", "someValue", _
new CacheDependency(Nothing, "depKey"))
'this is the correct way
Dim dependency As String() = {"depKey"}
Cache.Insert("someKey", "someValue", _
New Riders - Debugging ASP.NET made by dotneter@teamfly
new CacheDependency(Nothing, dependency))
End Sub
</script>
A final point about dependencies that might cause you problems is that the Cache
object enables you to set up a dependency on a cache key that does not exist. This
means that the item that you are trying to insert into the cache is immediately
invalidated. One suggestion to avoid that situation is to check for the existence of an
item in the cache before you use it as a dependency for another item. Interestingly,
if you set up a file-based dependency based on a file that doesn’t exist, the item IS
is inserted into the cache and can be referenced later.
Date and Time Expirations
Two of the overloaded signatures of the Insert method of the Cache class, as well
as one signature of the Add method, enable you to specify an absolute expiration
date/time for the cached item or a sliding expiration time. The key word to note in
the previous sentence is or. If you attempt to specify both at the same time, you will
get the following error message:
Exception Details: System.ArgumentException: absoluteExpiration must be
DateTime.MaxValue
or slidingExpiration must be timeSpan.Zero.
The error message tells you to use DateTime.MaxValue or TimeSpan.Zero so that
only an absolute expiration or a sliding expiration is implemented. As an alternative,
the Cache.NoAbsoluteExpiration constant can be used, which is equivalent to
DateTime.MaxValue, and the Cache.NoSlidingExpiration constant can be used,
which is equivalent to TimeSpan.Zero.
Retrieving Cached Items
Because all items returned from the cache are of the Object type, you must cast it
to the appropriate type before assigning it, like this:
string someValue = Cache["someValue"]. ToString(); //C#
or
Dim someValue As String = Cache("someValue"). ToString() 'VB
If you do not cast it to the proper type and you are not assigning the item from
Cache to a variable of the Object type, you will get an error like this:
New Riders - Debugging ASP.NET made by dotneter@teamfly
Compiler Error Message: CS0029: Cannot implicitly convert type 'object'
to 'string'
If you attempt to retrieve an item from the cache using a key that doesn’t exist, it
does not generate an error. Instead, it returns a null reference (Nothing, in Visual
Basic .NET). If this is the case, then when you attempt to cast it to the proper type
(as you just saw), you will get an error like this:
Exception Details: System.NullReferenceException: Value null was found
where an instance
of an object was required.
To get around this, always verify that the item that you want to retrieve from the
cache exists. The following code demonstrates this:
//C#
if(Cache[“someValue”] !!= null)
{
someValue = Cache[“someValue”]. ToString();
}
or
'Visual Basic .NET
If Cache("someValue") <> Nothing Then
someValue = Cache("someValue"). ToString()
End If
Removing Cached Items
You can run into trouble if you attempt to remove an item from the cache using an
invalid key. This might happen more often than you think because you can never tell
when a resource that the cached item is dependent on changes, thereby evicting it
from the cache. Normally, the return value of the Remove method of the Cache class
is the item that was removed from the cache. If the key is invalid, however, the
return value is null (Nothing, in Visual Basic .NET). Therefore, if you plan to use
the item that you are removing from the cache, you should verify that it exists first,
using the same method demonstrated previously.
Summary
In this chapter, we covered some of the more common problems that you will
encounter while leveraging caching in your web applications. We started with a look
New Riders - Debugging ASP.NET made by dotneter@teamfly
at output caching, using the @OutputCache directive at both the page and user
control levels. Problems associated with several of its attributes were discussed. We
also covered the error generated by manipulating an output cached user control.
Next, you learned how to use validation callbacks to manually evict a page from the
output cache. This capability is key to being able to effectively debug web
applications without having to worry about incorrect data being trapped in cache. It
is also a useful feature that enables you to manually refresh an incorrect page that
is in production.
Issues related to the Caching API were discussed next. Specifically, you learned
about the intricacies of both file- and key-based dependencies, as well as date and
time expirations, and errors associated with retrieving and removing items from the
cache.
The next chapter discusses Web Services in the context of debugging your ASP.NET
web applications.
Part IV: Debugging Related Technologies
Part IV Debugging Related Technologies
13 Debugging Web Services
14 Debugging .NET Components and HttpHandlers
15 COM+ Issues
16 Debugging ADO.NET
Chapter 13. Debugging Web Services
WEB SERVICES PROVIDE AN AMAZING NEW STRIDE forward in distributed
architecture. These new capabilities enable developers to extend the reach of web
applications. They give you the capability to reach any web server. But what about
debugging a Web Service?
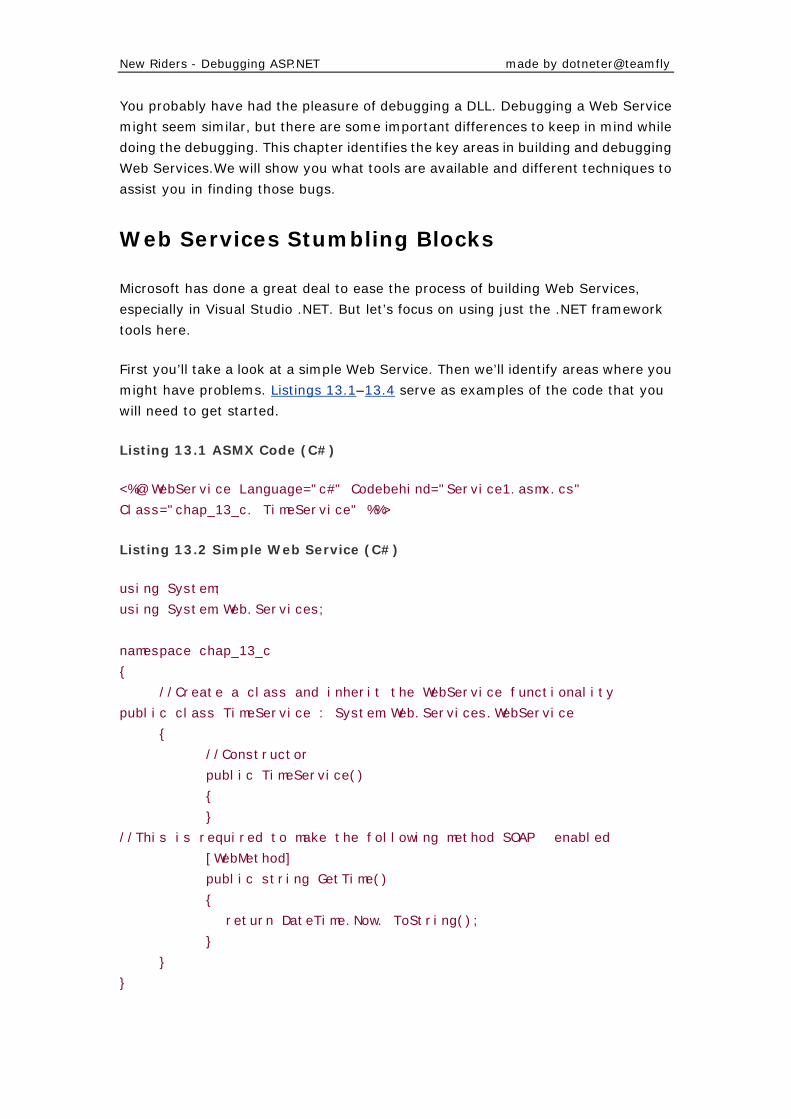
New Riders - Debugging ASP.NET made by dotneter@teamfly
You probably have had the pleasure of debugging a DLL. Debugging a Web Service
might seem similar, but there are some important differences to keep in mind while
doing the debugging. This chapter identifies the key areas in building and debugging
Web Services.We will show you what tools are available and different techniques to
assist you in finding those bugs.
Web Services Stumbling Blocks
Microsoft has done a great deal to ease the process of building Web Services,
especially in Visual Studio .NET. But let’s focus on using just the .NET framework
tools here.
First you’ll take a look at a simple Web Service. Then we’ll identify areas where you
might have problems. Listings 13.1–13.4 serve as examples of the code that you
will need to get started.
Listing 13.1 ASMX Code (C#)
<%@ WebService Language="c#" Codebehind="Service1.asmx.cs"
Class="chap_13_c. TimeService" %%>
Listing 13.2 Simple Web Service (C#)
using System;
using System.Web.Services;
namespace chap_13_c
{
//Create a class and inherit the WebService functionality
public class TimeService : System.Web.Services.WebService
{
//Constructor
public TimeService()
{
}
//This is required to make the following method SOAP enabled
[WebMethod]
public string GetTime()
{
return DateTime.Now. ToString();
}
}
}
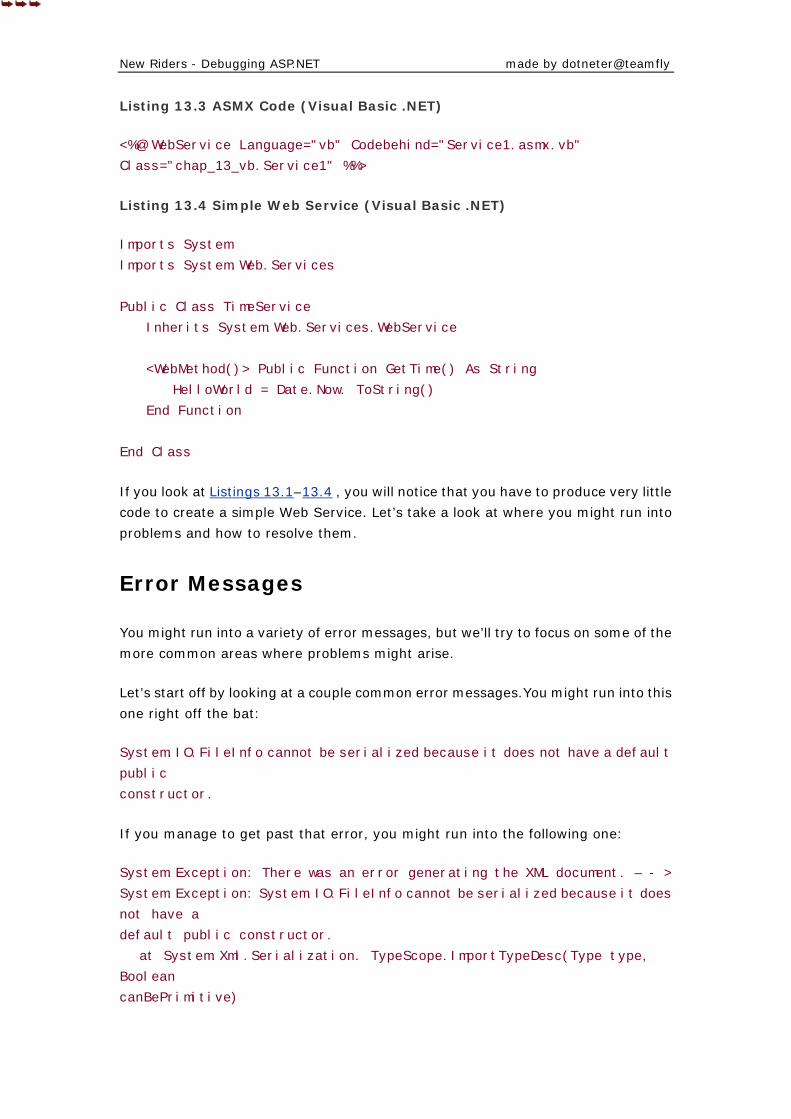
New Riders - Debugging ASP.NET made by dotneter@teamfly
Listing 13.3 ASMX Code (Visual Basic .NET)
<%@ WebService Language="vb" Codebehind="Service1.asmx.vb"
Class="chap_13_vb.Service1" %%>
Listing 13.4 Simple Web Service (Visual Basic .NET)
Imports System
Imports System.Web.Services
Public Class TimeService
Inherits System.Web.Services.WebService
<WebMethod()> Public Function GetTime() As String
HelloWorld = Date.Now. ToString()
End Function
End Class
If you look at Listings 13.1–13.4 , you will notice that you have to produce very little
code to create a simple Web Service. Let’s take a look at where you might run into
problems and how to resolve them.
Error Messages
You might run into a variety of error messages, but we’ll try to focus on some of the
more common areas where problems might arise.
Let’s start off by looking at a couple common error messages.You might run into this
one right off the bat:
System.IO.FileInfo cannot be serialized because it does not have a default
public
constructor.
If you manage to get past that error, you might run into the following one:
System.Exception: There was an error generating the XML document. – - >
System.Exception: System.IO.FileInfo cannot be serialized because it does
not have a
default public constructor.
at System.Xml.Serialization. TypeScope.ImportTypeDesc(Type type,
Boolean
canBePrimitive)
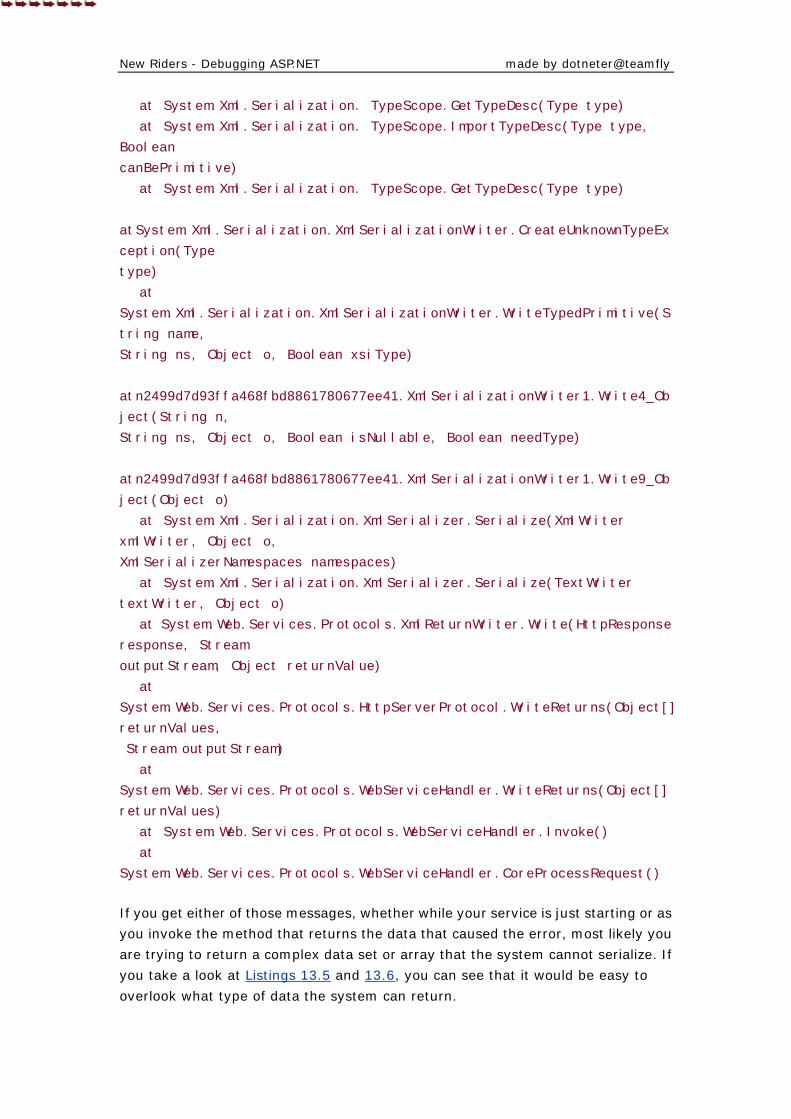
New Riders - Debugging ASP.NET made by dotneter@teamfly
at System.Xml.Serialization. TypeScope.GetTypeDesc(Type type)
at System.Xml.Serialization. TypeScope.ImportTypeDesc(Type type,
Boolean
canBePrimitive)
at System.Xml.Serialization. TypeScope.GetTypeDesc(Type type)
atSystem.Xml.Serialization.XmlSerializationWriter.CreateUnknownTypeEx
ception(Type
type)
at
System.Xml.Serialization.XmlSerializationWriter.WriteTypedPrimitive(S
tring name,
String ns, Object o, Boolean xsiType)
atn2499d7d93ffa468fbd8861780677ee41.XmlSerializationWriter1.Write4_Ob
ject(String n,
String ns, Object o, Boolean isNullable, Boolean needType)
atn2499d7d93ffa468fbd8861780677ee41.XmlSerializationWriter1.Write9_Ob
ject(Object o)
at System.Xml.Serialization.XmlSerializer.Serialize(XmlWriter
xmlWriter, Object o,
XmlSerializerNamespaces namespaces)
at System.Xml.Serialization.XmlSerializer.Serialize(TextWriter
textWriter, Object o)
at System.Web.Services.Protocols.XmlReturnWriter.Write(HttpResponse
response, Stream
outputStream, Object returnValue)
at
System.Web.Services.Protocols.HttpServerProtocol.WriteReturns(Object[]
returnValues,
Stream outputStream)
at
System.Web.Services.Protocols.WebServiceHandler.WriteReturns(Object[]
returnValues)
at System.Web.Services.Protocols.WebServiceHandler.Invoke()
at
System.Web.Services.Protocols.WebServiceHandler.CoreProcessRequest()
If you get either of those messages, whether while your service is just starting or as
you invoke the method that returns the data that caused the error, most likely you
are trying to return a complex data set or array that the system cannot serialize. If
you take a look at Listings 13.5 and 13.6, you can see that it would be easy to
overlook what type of data the system can return.
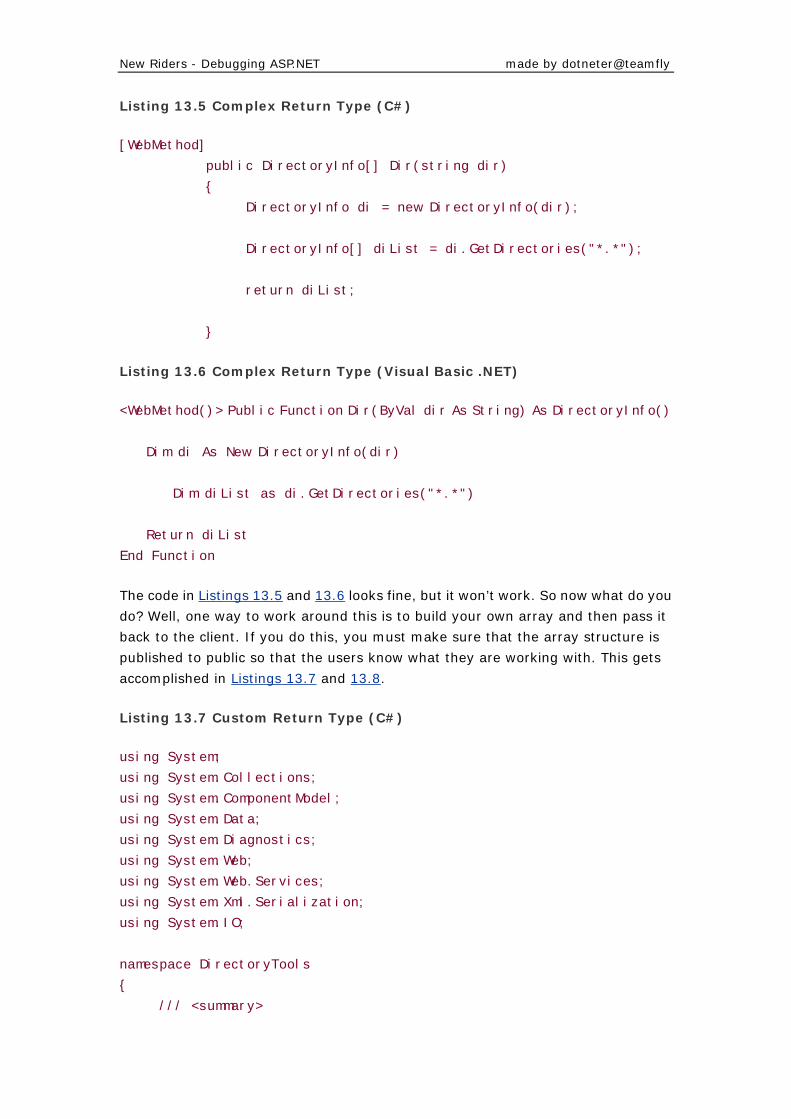
New Riders - Debugging ASP.NET made by dotneter@teamfly
Listing 13.5 Complex Return Type (C#)
[WebMethod]
public DirectoryInfo[] Dir(string dir)
{
DirectoryInfo di = new DirectoryInfo(dir);
DirectoryInfo[] diList = di.GetDirectories("*.*");
return diList;
}
Listing 13.6 Complex Return Type (Visual Basic .NET)
<WebMethod()> Public Function Dir(ByVal dir As String) As DirectoryInfo()
Dim di As New DirectoryInfo(dir)
Dim diList as di.GetDirectories("*.*")
Return diList
End Function
The code in Listings 13.5 and 13.6 looks fine, but it won’t work. So now what do you
do? Well, one way to work around this is to build your own array and then pass it
back to the client. If you do this, you must make sure that the array structure is
published to public so that the users know what they are working with. This gets
accomplished in Listings 13.7 and 13.8.
Listing 13.7 Custom Return Type (C#)
using System;
using System.Collections;
using System.ComponentModel;
using System.Data;
using System.Diagnostics;
using System.Web;
using System.Web.Services;
using System.Xml.Serialization;
using System.IO;
namespace DirectoryTools
{
/// <summary>
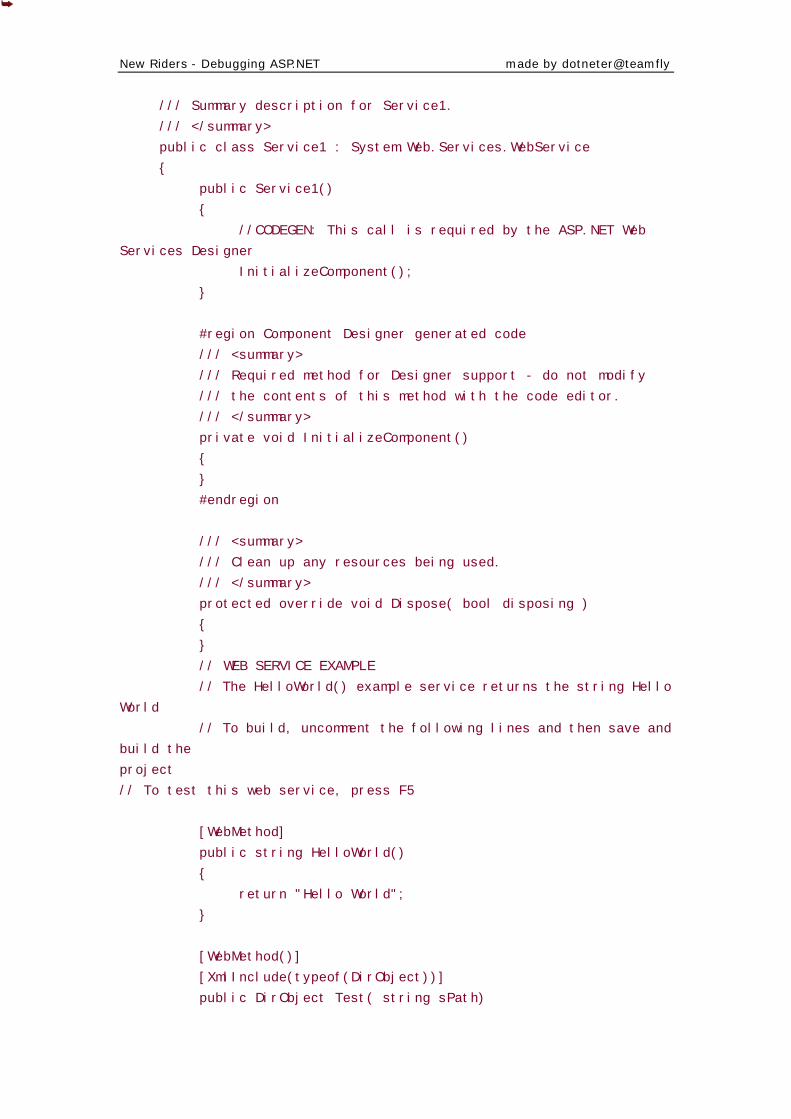
New Riders - Debugging ASP.NET made by dotneter@teamfly
/// Summary description for Service1.
/// </summary>
public class Service1 : System.Web.Services.WebService
{
public Service1()
{
//CODEGEN: This call is required by the ASP.NET Web
Services Designer
InitializeComponent();
}
#region Component Designer generated code
/// <summary>
/// Required method for Designer support - do not modify
/// the contents of this method with the code editor.
/// </summary>
private void InitializeComponent()
{
}
#endregion
/// <summary>
/// Clean up any resources being used.
/// </summary>
protected override void Dispose( bool disposing )
{
}
// WEB SERVICE EXAMPLE
// The HelloWorld() example service returns the string Hello
World
// To build, uncomment the following lines and then save and
build the
project
// To test this web service, press F5
[WebMethod]
public string HelloWorld()
{
return "Hello World";
}
[WebMethod()]
[XmlInclude(typeof(DirObject))]
public DirObject Test( string sPath)
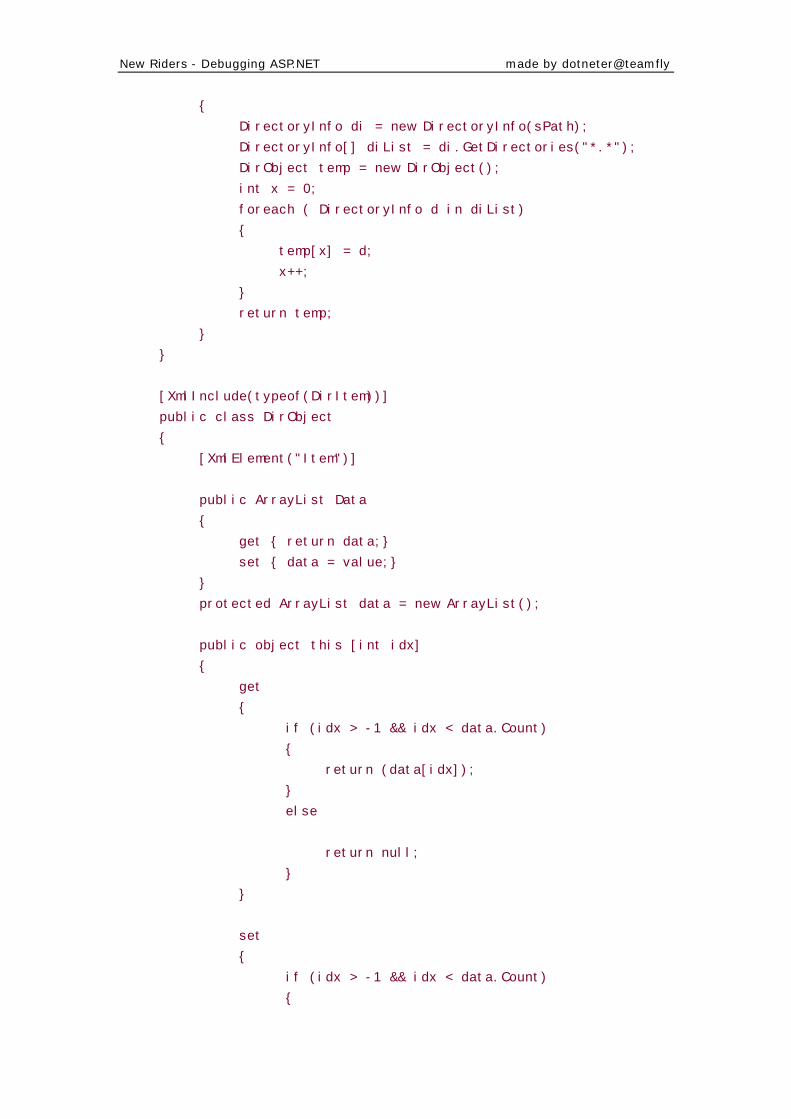
New Riders - Debugging ASP.NET made by dotneter@teamfly
{
DirectoryInfo di = new DirectoryInfo(sPath);
DirectoryInfo[] diList = di.GetDirectories("*.*");
DirObject temp = new DirObject();
int x = 0;
foreach ( DirectoryInfo d in diList)
{
temp[x] = d;
x++;
}
return temp;
}
}
[XmlInclude(typeof(DirItem))]
public class DirObject
{
[XmlElement("Item")]
public ArrayList Data
{
get { return data;}
set { data = value;}
}
protected ArrayList data = new ArrayList();
public object this [int idx]
{
get
{
if (idx > -1 && idx < data.Count)
{
return (data[idx]);
}
else
return null;
}
}
set
{
if (idx > -1 && idx < data.Count)
{
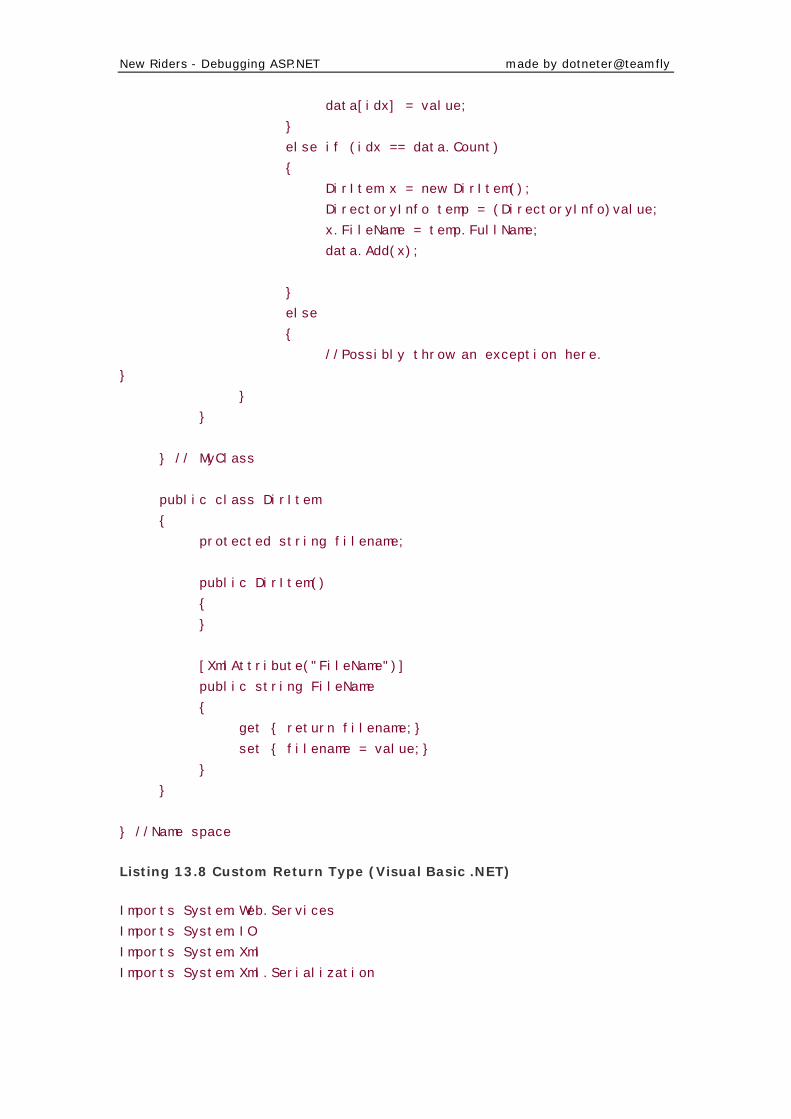
New Riders - Debugging ASP.NET made by dotneter@teamfly
data[idx] = value;
}
else if (idx == data.Count)
{
DirItem x = new DirItem();
DirectoryInfo temp = (DirectoryInfo)value;
x.FileName = temp.FullName;
data.Add(x);
}
else
{
//Possibly throw an exception here.
}
}
}
} // MyClass
public class DirItem
{
protected string filename;
public DirItem()
{
}
[XmlAttribute("FileName")]
public string FileName
{
get { return filename;}
set { filename = value;}
}
}
} //Name space
Listing 13.8 Custom Return Type (Visual Basic .NET)
Imports System.Web.Services
Imports System.IO
Imports System.Xml
Imports System.Xml.Serialization
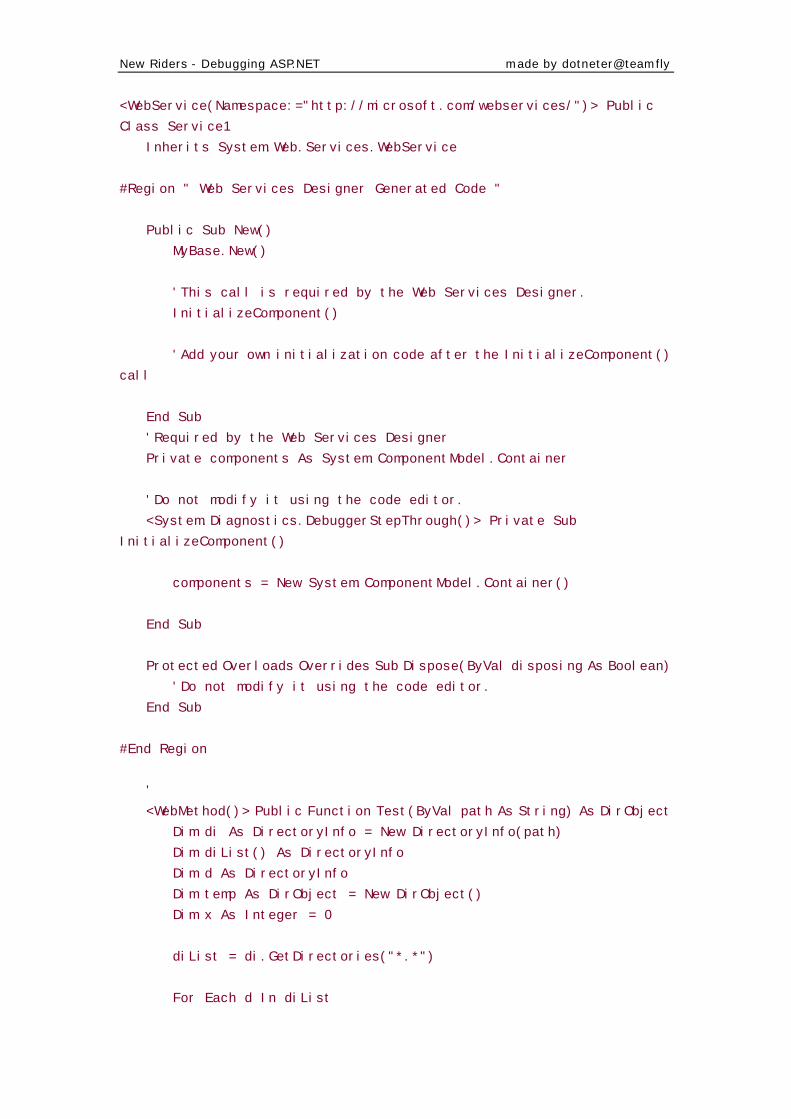
New Riders - Debugging ASP.NET made by dotneter@teamfly
<WebService(Namespace:="http://microsoft.com/webservices/")> Public
Class Service1
Inherits System.Web.Services.WebService
#Region " Web Services Designer Generated Code "
Public Sub New()
MyBase.New()
'This call is required by the Web Services Designer.
InitializeComponent()
'Add your own initialization code after the InitializeComponent()
call
End Sub
'Required by the Web Services Designer
Private components As System.ComponentModel.Container
'Do not modify it using the code editor.
<System.Diagnostics.DebuggerStepThrough()> Private Sub
InitializeComponent()
components = New System.ComponentModel.Container()
End Sub
Protected Overloads Overrides Sub Dispose(ByVal disposing As Boolean)
'Do not modify it using the code editor.
End Sub
#End Region
'
<WebMethod()> Public Function Test(ByVal path As String) As DirObject
Dim di As DirectoryInfo = New DirectoryInfo(path)
Dim diList() As DirectoryInfo
Dim d As DirectoryInfo
Dim temp As DirObject = New DirObject()
Dim x As Integer = 0
diList = di.GetDirectories("*.*")
For Each d In diList
New Riders - Debugging ASP.NET made by dotneter@teamfly
temp(x) = d
x = x + 1
Next
Return temp
End Function
<XmlInclude(GetType(DirItem)), XmlRoot("Root")> Public Class
DirObject
Private pdata As ArrayList = New ArrayList()
<XmlElement("Item")> Public Property Data() As ArrayList
Get
Return pdata
End Get
Set(ByVal Value As ArrayList)
pdata = Value
End Set
End Property
Default Public Property base(ByVal idx As Integer) As Object
Get
If (idx > -1 And idx < Data.Count) Then
Return pdata(idx)
Else
Return Nothing
End If
End Get
Set(ByVal Value As Object)
If (idx > -1 And idx < pdata.Count) Then
pdata(idx) = Value
ElseIf (idx = pdata.Count) Then
Dim x As DirItem = New DirItem()
Dim temp As DirectoryInfo
temp = CType(Value, DirectoryInfo)
New Riders - Debugging ASP.NET made by dotneter@teamfly
x.FileName = temp.FullName
x.LastAccessDate = temp.LastAccessTime
pdata.Add(x)
Else
'Possibly throw an exception here.
End If
End Set
End Property
End Class
Public Class DirItem
Private pfilename As String
Private pLastAccessDate As Date
Sub DirItem()
End Sub
<XmlElement("FileName")> Public Property FileName() As String
Get
Return pfilename
End Get
Set(ByVal Value As String)
pfilename = Value
End Set
End Property
<XmlElement("LastAccessDate")> Public Property LastAccessDate() As
Date
Get
Return pLastAccessDate
End Get
Set(ByVal Value As Date)
pLastAccessDate = Value
End Set
End Property

New Riders - Debugging ASP.NET made by dotneter@teamfly
End Class
End Class
In Listings 13.7 and 13.8, you will notice a few new elements that you might not
have seen before: <XmlAttribute> and <XmlInclude>. These additional features
define the output when this class is serialized. This is a great way to rename
elements in the XML structure to something more meaningful.
Problems Working with XMLSerializer
You just saw one way to pass back data, but you might say that it involves a bit of
work; there must be a simpler way to do it. Why not use the XMLSerializer class
to generate the returning data in an XML valid format? Well, if you try this, you
might get the following error message:
System.Exception: There was an error reflecting
'System.IO.DirectoryInfo'. –->
System.Exception: System.IO.DirectoryInfo cannot be serialized because
it does not have a
default public constructor.
at System.Xml.Serialization. TypeScope.ImportTypeDesc(Type type,
Boolean
canBePrimitive)
at System.Xml.Serialization. TypeScope.GetTypeDesc(Type type)
at System.Xml.Serialization.ModelScope.GetTypeModel(Type type)
at
System.Xml.Serialization.XmlReflectionImporter.ImportTypeMapping(Type
type,
XmlRootAttribute root, String defaultNamespace)
at
System.Xml.Serialization.XmlReflectionImporter.ImportTypeMapping(Type
type,
XmlRootAttribute root, String defaultNamespace)
at System.Xml.Serialization.XmlSerializer..ctor(Type type)
at chapter13_c.Service1.Dir(String dir) in c:\documents and
settings\brad\vswebcache\digital-laptop\chapter13_c\service1.asmx.cs:
line 110
Let’s look at the line of code where the error occurred and see why this is happening.
Listings 13.9 and 13.10 provide a fix.
Listing 13.9 Fix for the XMLSerializer problem (C#)
New Riders - Debugging ASP.NET made by dotneter@teamfly
[WebMethod]
public Object[] Dir(string dir)
{
XmlSerializer serializer = new
XmlSerializer(typeof(DirectoryInfo));
Return serializer;
}
Listing 13.10 Fix for the XMLSerializer problem (Visual Basic .NET)
<WebMethod()> Public Function Dir(ByVal dirname As String) As Object()
Dim serializer = new XmlSerializer(typeof(DirectoryInfo))
Return serializer
End Function
The XmlSerializer cannot serialize the structure into XML. That is why you must
define the different classes to mimic the DirectoryInfo object.
Working with Errors in SOAP
While working with Web Services, you eventually will need to handle errors in a
more constructive way. The question is, how do you want to handle the errors that
pop up? The following error message is an example of what you would see if you did
not have any mechanism for handling errors:
System.IndexOutOfRangeException: Exception of type
System.IndexOutOfRangeException was
thrown.
at chap_13_c. TimeService.ErrorString() in
c:\inetpub\wwwroot\chap_13_c\service1.asmx.cs:line 38
This error message is typical of what you would see if your Web Service ran into an
error. To keep this from happening, Listings 13.11 and 13.12 show a simple
example to catch the error and return it inside the contents of the SOAP message.
Listing 13.11 WebMethod Error (C#)
[WebMethod]
public object ReturnErrorString()
{
// Catch the error then return it inside a SOAP message.
string[] sret = new string[3];
New Riders - Debugging ASP.NET made by dotneter@teamfly
try
{
sret[0] = "one";
sret[1] = "two";
sret[3] = "three";//Error
}
catch(Exception e)
{
sret[0] = e.Message;
}
return sret;
}
Listing 13.12 WebMethod Error (Visual Basic .NET)
<WebMethod()> Public Function ErrorStringCatch() As String()
' Catch the error then return it inside a SOAP message.Dim sret(3) As
String
Try
sret(0) = "Hello"
sret(1) = "Bye"
sret(13) = "Testing" 'This will generate an error
Catch e As Exception
sret(0) = e.Message
End Try
ErrorStringCatch = sret
End Function
If you look closely at the code in Listings 13.11 and 13.12, you will notice that we
intentionally added a runtime error while adding the third item to the array.
Now when you run into an error, it will be returned inside the SOAP message. This
is one way to approach handling errors and sending them back to the client, but this
is not the preferred method for doing so. Instead, one of two things should be done.
First, you cannot catch the exception that will send it back to the client to handle.
Second, you can identify what the problem is inside the catch and try to resolve the
problem or throw another exception that will be sent back to the client. This gives
you the capability to identify the error inside your Web Service client and deal with
New Riders - Debugging ASP.NET made by dotneter@teamfly
it there. Otherwise, if you just returned the error message inside the array, you
would need to check the first item of the array and try to identify whether it is an
error message. If you did this, the return message might look something like Listing
13.13.
Listing 13.13 SOAP Return Values
<?xml version="1.0" encoding="utf-8" ?>
<Object n1:type="ArrayOfString"Listing 13.12
xmlns:n1="http://www.w3.org/2001/
XMLSchema-instance" xmlns="Debugginmain.asp.NET_webservices">
<string>Exception of type System.IndexOutOfRangeException was
thrown.</string>
<string>Bye</string>
<string>xmlns:xsd="http://www.w3.org/2001/XMLSchema" n1:nil="true"
/>
</Object>
What if you are working only with numbers? Then how do you go about sending back
error messages? If you look at Listings 13.14 and 13.15, you will see that you can
use the try-catch method and then rethrow the error.
Listing 13.14 Throw Exception (C#)
[WebMethod]
public object ReturnErrorString()
{
// Catch the error then return it inside a SOAP message.
string[] sret = new string[3];
try
{
sret[0] = "one";
sret[1] = "two";
sret[3] = "three";//Error
}
catch(Exception e)
{
Throw(e);//Return the exception to the client
}
return sret;
}
Listing 13.15 Throw Exception (Visual Basic .NET)

New Riders - Debugging ASP.NET made by dotneter@teamfly
<WebMethod()> Public Function ErrorStringCatch() As String()
' Catch the error then return it inside a SOAP message.Dim sret(3) As
String
Try
sret(0) = "Hello"
sret(1) = "Bye"
sret(13) = "Testing" 'This will generate an error
Catch e As Exception
Throw(e) 'Return the exception to the client
End Try
ErrorStringCatch = sret
End Function
If you look at the Catch statement, the Throw method is being called to pass the
error on to the client. By adding this line of code, you change the behavior of the
Web Service dramatically. A simple change in one line of code can make a world of
difference when it comes to debugging. Don’t forget that you need to use the
try-catch statement on the client side as well, to be able to handle the exception
being passed back by the server. To show how the client should be implemented,
take a look at the code in Listings 13.16 and 13.17.
Listing 13.16 The try-catch Statement on the Client Side (C#)
private void Button2_Click(object sender, System.EventArgs e)
{
try
{
localhost.Service1 s = new localhost.Service1();
s. ErrorStringCatch ();
}
catch(Exception ex)
{
TextBox1. Text = ex.Message;
}
}
New Riders - Debugging ASP.NET made by dotneter@teamfly
Listing 13.17 The try-catch Statement on the Client Side (Visual
Basic .NET)
Private Sub Button1_Click(ByVal sender As System.Object, ByVal e As
System.EventArgs)
Handles Button1.Click
Try
localhost.Service1(s = New localhost.Service1())
s.ErrorStringCatch()
catch(Exception ex)
TextBox1. Text = ex.Message
End Try
End Sub
In Listings 13.16 and 13.17, the user clicks the button to invoke the method of the
Web Service. If there is an error on the server side, the Web Service passes back the
error information, and it can be received in the catch statement.When an error does
get caught, it is displayed in the text box that is on the page.
Error Returning Certain Types of Data
One of the errors we ran into was simple because we were not paying attention to
the details of the code. The code compiled fine—we’re not sure whether it was a
compiler issue or, as a software developer would say, it is a problem “as designed,”
meaning that this is the way it is supposed to be. Take a look at the following error
message and see if you can identify why we received this message:
System.Exception: There was an error generating the XML document. –->
System.Exception:
The type System.Object[] may not be used in this context..
at
System.Xml.Serialization.XmlSerializationWriter.WriteTypedPrimitive(S
tring
name, String ns, Object o, Boolean xsiType)
atn2499d7d93ffa468fbd8861780677ee41.XmlSerializationWriter1.Write1_Ob
ject(String n,
String ns, Object o, Boolean isNullable, Boolean needType)
atn2499d7d93ffa468fbd8861780677ee41.XmlSerializationWriter1.Write3_Ob
ject(Object o)
New Riders - Debugging ASP.NET made by dotneter@teamfly
at System.Xml.Serialization.XmlSerializer.Serialize(XmlWriter
xmlWriter, Object o,
XmlSerializerNamespaces namespaces)
at System.Xml.Serialization.XmlSerializer.Serialize(TextWriter
textWriter, Object o)
at System.Web.Services.Protocols.XmlReturnWriter.Write(HttpResponse
response, Stream
outputStream, Object returnValue)
at
System.Web.Services.Protocols.HttpServerProtocol.WriteReturns(Object[]
returnValues,
Stream outputStream)
at
System.Web.Services.Protocols.WebServiceHandler.WriteReturns(Object[]
returnValues)
at System.Web.Services.Protocols.WebServiceHandler.Invoke()
at
System.Web.Services.Protocols.WebServiceHandler.CoreProcessRequest()
This message contains a lot of repetitive information here, but it also has some very
specific bits that narrow down where the problem is coming from.You’ll notice that
Object and Serialize are used several times. Now you know from the error
message at the beginning that the problem originates with the System.Object class.
Passing simple types back and forth is very simple to do. Now you are taking the
next step to passing arrays in Web Services.When working with any sort of array,
you must make sure to define your WebMethod as returning an array, not just a
single value or object.
Listings 13.18–13.21 give some examples of problems that you might run into when
returning array’s of objects.
Listing 13.18 Code with Error (C#)
[WebMethod]
public object ErrorStringCatch()// Missing [] from object
Listing 13.19 Correct Syntax (C#)
[WebMethod]
public object[] ErrorStringCatch()
Listing 13.20 Code with Error (Visual Basic .NET)
<WebMethod()> Public Function ErrorStringCatch() As Object

New Riders - Debugging ASP.NET made by dotneter@teamfly
Listing 13.21 Correct Syntax (Visual Basic .NET)
<WebMethod()> Public Function ErrorStringCatch() As Object()
This might seem like a trivial item, but don’t forget that most errors that you will run
into probably are simple errors that you overlooked.
Working with Streams
While playing around with Web Services, you might have experimented with
different types of data that could be returned by a Web Service. If you tried to do
some basic functions such as getting a directory listing or finding out some
information on a file, you might have run into some problems.
Listings 13.22 and 13.23 give a simple example of how you might attempt to pass
back a FileStream object.
Listing 13.22 GetFile WebMethod (C#)
[WebMethod]
public FileStream GetFile()
{
FileStream fs = new FileStream("c:\\winnt\\greenstone.bmp",
FileMode.Open);
byte[] buf;// = new byte[fs.Length];
buf = new Byte[fs.Length];
fs.Read(buf,0,(int)fs.Length);
return fs;
}
Listing 13.23 GetFile WebMethod (Visual Basic .NET)
<WebMethod()>public function GetFile() as FileStream
FileStream fs = new FileStream("c:\\winnt\\greenstone.bmp",
FileMode.Open);
Dim buf() as byte();// = new byte[fs.Length];
buf = new Byte(fs.Length);
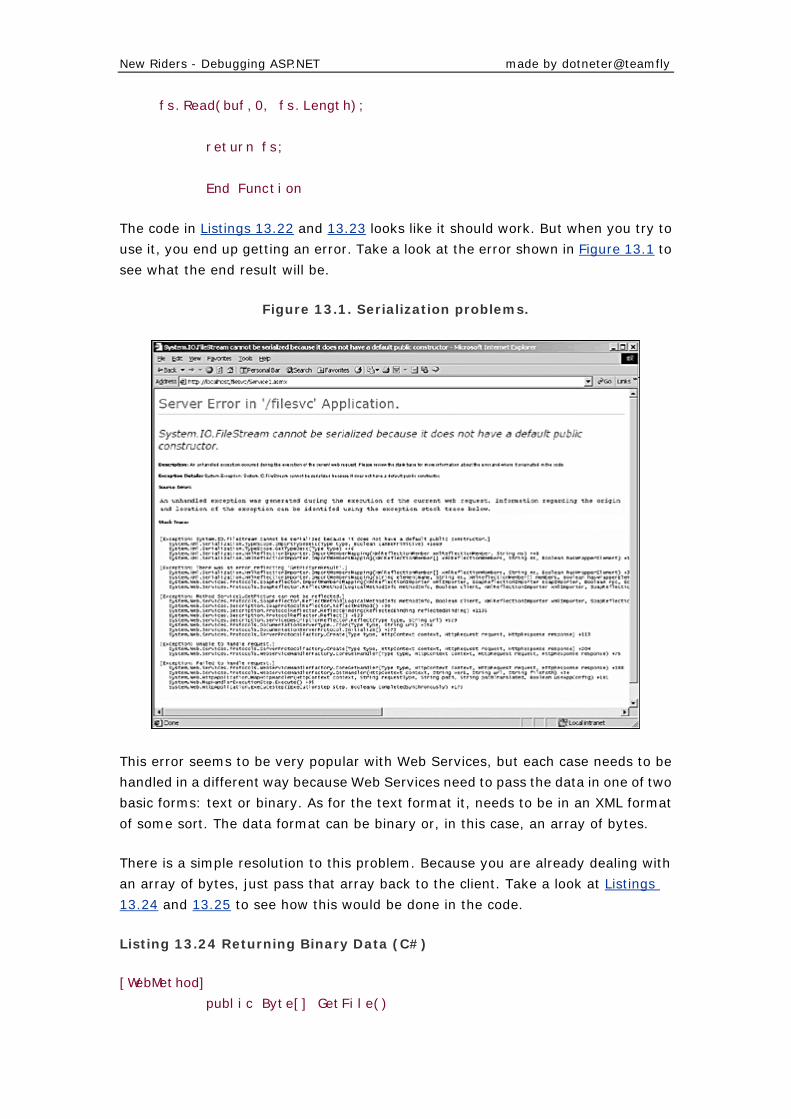
New Riders - Debugging ASP.NET made by dotneter@teamfly
fs.Read(buf,0, fs.Length);
return fs;
End Function
The code in Listings 13.22 and 13.23 looks like it should work. But when you try to
use it, you end up getting an error. Take a look at the error shown in Figure 13.1 to
see what the end result will be.
Figure 13.1. Serialization problems.
This error seems to be very popular with Web Services, but each case needs to be
handled in a different way because Web Services need to pass the data in one of two
basic forms: text or binary. As for the text format it, needs to be in an XML format
of some sort. The data format can be binary or, in this case, an array of bytes.
There is a simple resolution to this problem. Because you are already dealing with
an array of bytes, just pass that array back to the client. Take a look at Listings
13.24 and 13.25 to see how this would be done in the code.
Listing 13.24 Returning Binary Data (C#)
[WebMethod]
public Byte[] GetFile()
New Riders - Debugging ASP.NET made by dotneter@teamfly
{
FileStream fs = new
FileStream("c:\\winnt\\greenstone.bmp",
FileMode.Open);
byte[] buf;
buf = new Byte[fs.Length];
br.Read(buf,0,(int)fs.Length);
fs.Close();
return buf;
}
Listing 13.25 Returning Binary Data (Visual Basic .NET)
<WebMethod()>public Function GetFile() as Byte()
FileStream fs = new FileStream("c:\\winnt\\greenstone.bmp",
FileMode.Open)
Dim buf as byte()
buf = new Byte(fs.Length)
br.Read(buf,0,fs.Length)
fs.Close()
return buf;
End Function
With a simple change to the way the method returns the data, the problem is solved.
As you can see, you simply need to change the return type of the method to an array
of bytes. Not all your problems will be this simple though.
If you start playing around with the writing of the array of bytes, you might run into
the error message shown in Figure 13.2, as we did.
Figure 13.2. Writing to a binary file.
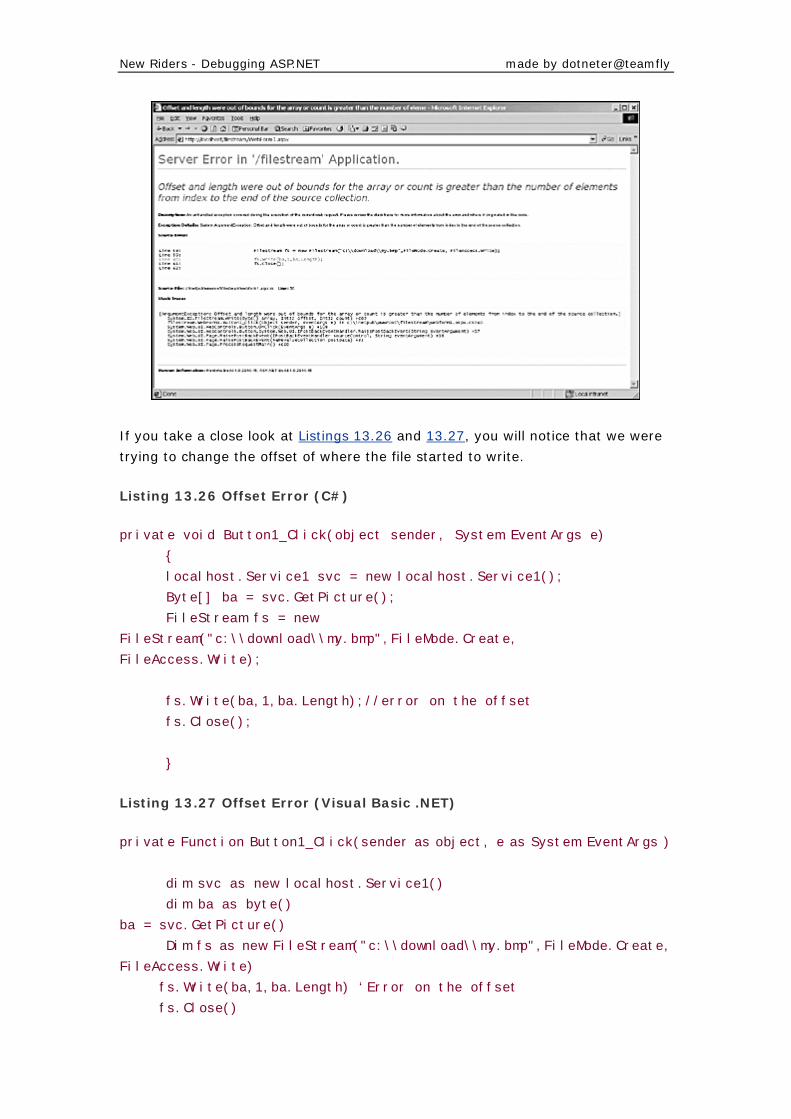
New Riders - Debugging ASP.NET made by dotneter@teamfly
If you take a close look at Listings 13.26 and 13.27, you will notice that we were
trying to change the offset of where the file started to write.
Listing 13.26 Offset Error (C#)
private void Button1_Click(object sender, System.EventArgs e)
{
localhost.Service1 svc = new localhost.Service1();
Byte[] ba = svc.GetPicture();
FileStream fs = new
FileStream("c:\\download\\my.bmp",FileMode.Create,
FileAccess.Write);
fs.Write(ba,1,ba.Length);//error on the offset
fs.Close();
}
Listing 13.27 Offset Error (Visual Basic .NET)
private Function Button1_Click(sender as object, e as System.EventArgs )
dim svc as new localhost.Service1()
dim ba as byte()
ba = svc.GetPicture()
Dim fs as new FileStream("c:\\download\\my.bmp",FileMode.Create,
FileAccess.Write)
fs.Write(ba,1,ba.Length) ‘Error on the offset
fs.Close()
New Riders - Debugging ASP.NET made by dotneter@teamfly
end Function
Tools
Microsoft has provided some additional tools to simplify the process of consuming or
building client applications for Web Services. If you are using Visual Studio .NET,
some of these tools won’t be necessary to use because Visual Studio .NET has most
of these command-line tools built into the IDE.
What Should I Use—WSDL.exe or SoapSuds.exe?
If you are having problems using the WSDL.exe tool to generate a proxy class for
you, try using the Soapsuds.exe program. Because SOAP and remoting are basically
the same thing, the Soapsuds tool also can generate the source code to
communicate with the Web Service.
Soapsuds.exe
The Soapsuds tool helps you compile client applications that communicate with Web
Services using a technique called remoting. Soapsuds.exe performs the following
functions:
• It creates XML schemas describing services exposed in a common language
runtime assembly.
• It creates runtime assemblies to access services described by XML schemas.
A schema definition can be a local file, or it can be dynamically downloaded
from the Internet.
WSDL.exe
The Web Services Description Language tool generates code for ASP.NET Web
Services and Web Service clients from WSDL contract files, XSD schemas,
and .discomap discovery documents.
Web Service Descriptor Language
The WSDL file provides you with all the necessary interface information to consume
a Web Service. One problem that you might run into is that there are different
versions of WSDL floating around. So far, the latest version is WSDL 1.1 , but we’ll
take a look here at how these differences can affect your client’s communication
with the Web Service.

New Riders - Debugging ASP.NET made by dotneter@teamfly
Many sites on the web promote Web Services, but if you try to run the WSDL.exe
tool to generate a proxy stub for yourself, it might give you one of many errors. This
is because there are several versions of WSDL or SDL or even SDC. The WSDL tool
is designed to work with wsdl 1.1. If you try to use the WSDL.exe tool on a WSDL file
and it gives you an error, that is probably because the files versions are different.
Errors While Using WSDL.exe
One of the most common problems that you might run into involves trying to
generate the proxy code for a remote Web Service. Because this is an evolving
technology, people are building Web Services and putting them on the web as fast
as they can make them. This is great in some cases because this provides
developers with many consumable resources. But, on the flip side, the technology
and standards for SOAP are evolving just as fast. As soon as you get a new Web
Service out there, a newer version of the standard might have been released. So
now there is the issue of different formats (SDC, SDL,WSDL-1.0/1.1) floating
around on the web.
Universal Discovery Descriptor Interface (UDDI)
You will start to run into the Universal Discovery Descriptor Interface (UDDI) more
often. This is yet another new standard being developed for SOAP-enabled users to
find and use other SOAP-enabled users—or, more likely, businesses. The best way
to look at UDDI is as the Yellow Pages for Web Services.
Basic Web Services Debugging
As with any program, you can use some common methods, no matter what type of
environment you are in. The most basic of these involves logging all your debugging
information to a file that can be reviewed later. Because the Web Service has very
little interaction with the user interface, this is one approach to take. The other
approach is to build your own exception class that you can customize. Then,
whenever an error occurs ,you can throw your custom exception.
Common SOAP Errors
You might encounter this common error:
The underlying connection was closed: Unable to connect to the remote
server."
New Riders - Debugging ASP.NET made by dotneter@teamfly
This is typically the result of problems on the network, not necessarily in your code.
But don’t rule out your code—have someone else look at it to see if you have
overlooked something. A second pair of eyes is always beneficial.
Another error is the SoapException error, which looks like this:
The request reached the server machine, but was not processed successfully.
If you run into this one, you might be wondering, what wasn’t processed
successfully? Why didn’t it tell me what wasn’t processed? If you are using the
standard exception class to handle errors, you could be missing out on some
important information provide by the SoapException class. Let’s take a closer look
at this class in the next section.
Getting the Most Out of SoapException
Up to this point, you have looked at various problems that might arise and learned
how to work around them. But one of the key elements of debugging Web Services
is the SoapException class. Not only does the class handle exceptions that were
thrown, but, within the properties of the exception, there are some very useful
pieces of data that can help to identify what the problem is.
Take a look at Listings 13.28 and 13.29 to see how you can use the SoapException
class to catch errors.
Listing 13.28 Using SoapException (C#)
private void Button2_Click(object sender, System.EventArgs e)
{
try
{
localhost.Service1 s = new localhost.Service1();
s.HelloWorld(2);//This will throw an exception
}
catch(SoapException ex)
{
//Display the main message
TextBox2. Text = ex.Message;
//Get any additional detailed information
System.Xml.XmlNode xn = ex.Detail;
New Riders - Debugging ASP.NET made by dotneter@teamfly
//How many Attributes are there
TextBox3. Text = xn.Attributes.Count. ToString();
//The name of the app or object that caused the
problem
TextBox4. Text = ex.Source;
//Display the piece of code that caused the problem
TextBox5. Text = ex.Actor;
//Get the type of SOAP fault code
System.Xml.XmlQualifiedName qn = ex.Code;
//Get the XML qualified name
TextBox6. Text = qn.Name;
//Get the XML namespace
TextBox7. Text = qn.Namespace;
//Get the method that throws the exception
System.Reflection.MethodBase r = ex. TargetSite;
System. Type st = r.DeclaringType;
//Get the assembly name where the exception came
from
TextBox8. Text = st.AssemblyQualifiedName;
}
}
Listing 13.29 Using SoapException (Visual Basic .NET)
Private Sub Button2_Click(ByVal sender As Object, ByVal e As
System.EventArgs)
Try
localhost.Service1(s = New localhost.Service1())
s.HelloWorld(2) 'This will throw an exception

New Riders - Debugging ASP.NET made by dotneter@teamfly
catch(SoapException ex)
'Display the main message
TextBox2. Text = ex.Message
'Get any additional detailed information
System.Xml.XmlNode(xn = ex.Detail)
'How many Attributes are there
TextBox3. Text = xn.Attributes.Count. ToString()
The name of the app or object that caused the problem TextBox4.
Text =
ex.Source
'Display the piece of code that caused the problem TextBox5. Text
= ex.Actor
'Get the type of SOAP fault code
Dim qn As System.Xml.XmlQualifiedName
qn = ex.Code
'Get the XML qualified name
TextBox6. Text = qn.Name
'Get the XML namespace
TextBox7. Text = qn.Namespace
'Get the method that throws the exception
Dim r As System.Reflection.MethodBase
r = ex. TargetSite
Dim st As System. Type
st = r.DeclaringType
'Get the assembly name where the exection came from TextBox8.
Text =
st.AssemblyQualifiedName
End Try
End Sub
New Riders - Debugging ASP.NET made by dotneter@teamfly
Listings 13.28 and 13.29 demonstrate how to extract the additional elements that
are part of the SoapException class. These additional properties could help you
identify the problem, either directly or indirectly.
Problems Deploying Your Web Service?
When you are ready to deploy your Web Service, there is not very much that you
need to do. But you still might run into some problems. After you have developed
you Web Service, copy all the files and subdirectories to the server that the service
will be hosted on. One of the first things that you should check is that the .NET
framework is installed on the server where you are deploying your Web Service. If
it is not on that server, your Web Service will not work.
Summary
Web Services are an exciting new development in the distributed application space.
As you can see, creating a Web Service can be very simple, but as soon as you start
to push the limits of the technology, you need to roll up your sleeves and do the rest
of the work. This becomes more apparent when you start trying to return complex
structures of data such as FileStreams and DirectoryInfo objects. Many
components can be serialized into XML, but that’s not true for everything yet. You
have to admit that Microsoft has done a good job so far, though. If you really look
at the amount of work that must have been put into .NET to make all of this work,
it is really astonishing.
In Chapter 14 we move on into debugging of the .NET components.
Chapter 14. Debugging .NET Components and
HttpHandlers
COMPONENTS ARE THE HEART OF THE .NET framework. Sooner or later you will
need to create a component to accomplish a unique task. But how do you debug a
component? Let’s take a look at some techniques that you can use and some
common pitfalls that you might run into.
New Riders - Debugging ASP.NET made by dotneter@teamfly
The Component
You’ll start by creating a simple component with a method that returns the date.
This is the minimal amount of code to create a basic component in the .NET
framework. As you look at the listings that follow, take notice of which class was
inherited, and keep your eyes open for areas in the code that use the Container
class; this plays an important role in a component. Also take a closer look at the
ComponentModel namespace—this will give you a better idea of the core pieces that
make up a component, not just a class (See Listings 14.1 and 14.2).
Listing 14.1 Basic Component (C#)
using System;
using System.ComponentModel;
using System.Collections;
using System.Diagnostics;
namespace WebProject1
{
/// <summary>
/// Summary description for DateStuff.
/// </summary>
public class DateStuff : System.ComponentModel.Component
{
/// <summary>
/// Required designer variable.
/// </summary>
private System.ComponentModel.Container components = null;
public DateStuff(System.ComponentModel.IContainer container)
{
/// <summary>
/// Required for Windows.Forms Class Composition Designer
support
/// </summary>
container.Add(this);
InitializeComponent();
//
// TODO: Add any constructor code after InitializeComponent call
//
}
public DateStuff()

New Riders - Debugging ASP.NET made by dotneter@teamfly
{
/// <summary>
/// Required for Windows.Forms Class Composition Designer
support
/// </summary>
InitializeComponent();
// TODO: Add any constructor code after InitializeComponent call
}
/// <summary>
/// Required method for Designer support - do not modify
/// the contents of this method with the code editor.
/// </summary>
private void InitializeComponent()
{
components = new System.ComponentModel.Container();
}
public string GetToday()
{
return DateTime.Now. ToString();
}
}
}
Listing 14.2 Basic Component (Visual Basic .NET)
Public Class getdate
Inherits System.ComponentModel.Component
Public Overloads Sub New(Container As
System.ComponentModel.IContainer)
MyClass.New()
'Required for Windows.Forms Class Composition Designer support
Container.Add(me)
End Sub
Public Overloads Sub New()
MyBase.New()
'This call is required by the Component Designer.
InitializeComponent()
New Riders - Debugging ASP.NET made by dotneter@teamfly
'Add any initialization after the InitializeComponent() call
End Sub
'Required by the Component Designer
Private components As System.ComponentModel.Container
'NOTE: The following procedure is required by the Component Designer
'It can be modified using the Component Designer.
'Do not modify it using the code editor.
<System.Diagnostics.DebuggerStepThrough()> Private Sub
InitializeComponent()
components = New System.ComponentModel.Container()
End Sub
Public Function GetDate() As String
GetDate = DateTime.Now
End Function
End Class
Added in this component is a simple method to return today’s date and time in a
string. It’s not much, but it’s a start for now.
You can use several different classes in the System.Diagnostic namespace,
including Stacktrace, Tracing, the gui-debugger, Debug, and Debugger. Let’s
take a look at how you can use these classes to help track down bugs.
If you are working on the server in which the component is running, then you can
use the Debugger class. The Debugger class enables you to see whether your
process is attached to an existing debugger. If your process is already attached to
an instance of a debugger, then there is no need for you to start a new instance; just
use the existing one. Otherwise, start a new instance of the debugger and then step
through your code using that instance. Next you’ll look at how you can use this in
your code. Here is a sample of how to check whether the process is already attached
to a debugger. If it is not, then you can start the debugger and begin stepping
through the process (See Listings 14.3 and 14.4).
Listing 14.3 Check for Existing Debugger (C#)
//Check to see if this process is attached to a debugger
if (Debugger.IsAttached()== False)
{
//Check if debugger started successfully
New Riders - Debugging ASP.NET made by dotneter@teamfly
if (Debugger.Launch() == True)
{
//The debugger was started successfully
}
else
{
//There was a problem launching the debugger
}
}
else
{
//the process is currently attached to a debugger
}
Listing 14.4 Check for Existing Debugger (Visual Basic .NET)
Dim db As New Debugger()
'Check if this process is attached to a debugger
If Not db.IsAttached Then
'Now start a new debugger instance for this process
If db.Launch Then
'The debugger was successfully started
Else if
'There was an error launching the debugger
End If
Else
'The debugger is already attached to this process
End If
Another very useful class is StackTrace, which enables you to look at the stack
frame by frame, or by each step that has been executed. Now two different
StackTrace components can be used. System.Diagnostic.StackTrace can be
used only if an exception is thrown. If you want to look at the stack before an
exception is thrown or just to see what is going on, then you need to use the
System.Environment.StackTrace method. This method returns a string that
represents the stack. If you need more information, you can use the Stack Trace
class in the System.Diagnostic namespace because it enables you to dig deeper into
New Riders - Debugging ASP.NET made by dotneter@teamfly
the stack. The Environment class has some great features that you can use to look
at the system’s environment before an exception occurs.
Next we’ll cover a few more features that are useful in debugging. Listings 14.5 and
14.6 provide a couple of simple examples of how you can implement this into your
code.
Listing 14.5 Stack Trace Dump (C#)
Using System;
string stackdump;
stackdump = Environment.StackTrace;
Response.Write(stackdump);
Listing 14.6 Stack Trace Dump (Visual Basic .NET)
Imports System
Dim stackdump As String
stackdump = Environment.StackTrace()
Response.Write(stackdump)
Now if an exception is thrown, you will probably want to use the
System.Diagnostics.StackTrace class. This class works differently than the
Environment Class: you get the StackTrace and then navigate through the stack
frame by frame. Take a look at Listings 14.7 and 14.8 to see how to accomplish this.
Listing 14.7 Get Each Stack Frame (C#)
try
{
int a=0;
int b=1;
int c;
c = b/a;
Response.Write (c);
}
catch(Exception ex)
{
StackFrame sf;
int i;
StackTrace st = new StackTrace();
for (i = 1; i <st.FrameCount;i++)
{
sf = st.GetFrame(i);
New Riders - Debugging ASP.NET made by dotneter@teamfly
Response.Write (sf);
Response.Write ("<BR>");
}
}
Listing 14.8 Get Each Stack Frame (Visual Basic .NET)
Try
Dim a = 0
Dim b = 1
Dim c As Integer
c = b / a
Catch
Dim sf as StackFrame
Dim I as integer
Dim st = new StackTrace()
for i = 1 to st.FrameCount
sf = st.GetFrame(i)
Response.Write (sf)
Response.Write ("<BR>")
Next
End Try
Several specific pieces of information can be extracted through the
System.Diagnostic.StackTrace class by exposing a frame of the stack and
information such as the filename, method, line number, offset, and several other
bits of information.
One particular piece of information that you can extract is the method that your
process is currently in. As you jump from function to function, you can keep tabs on
what is being executed. Listings 14.9 and 14.10 both show examples of how this
could be used.
Listing 14.9 Stack Frame GetMethod (C#)
private void Page_Load(object sender, System.EventArgs e)
{
// Put user code to initialize the page here
StackFrame sf = new StackFrame();
Response.Write(sf.GetMethod());
Response.Write("<BR>");
New Riders - Debugging ASP.NET made by dotneter@teamfly
Method2();
}
private void Method2()
{
StackFrame sf = new StackFrame();
Response.Write(sf.GetMethod());
}
Listing 14.10 Stack Frame GetMethod (Visual Basic .NET)
Private sub Page_Load(ByVal sender As System.Object, ByVal e As
System.EventArgs)
' Put user code to initialize the page here
Dim sf as new StackFrame()
Response.Write(sf.GetMethod())
Response.Write("<BR>")
Method2()
end sub
private sub Method2()
Dim sf as new StackFrame()
Response.Write(sf.GetMethod())
end sub
Here’s the output you would see from both listings:
Void Page_Load(System.Object, System.EventArgs)
Void Method2()
As you can see, as the system steps from one function to another, you can keep tabs
on what the process is doing. The previous example shows this in the Page_Load
method of the aspx page, but it doesn’t have to stop there; you can use the
functionality in components, services, or Windows applications. Because
StackTrace and StackFrame are part of the System.Diagnostics namespace, these
tools can be used pretty much anywhere you need them.
A good example of where to use a stack trace is inside your component. Let’s say
that you created a component, and whenever you tried to instantiate it, the
component throws an exception. Now because the constructor does quite a bit of
work, it could be having problems in several places. Let’s take a look at Listing 14.11,
which shows a scenario in which the stack trace would come in handy.
Listing 14.11 Pseudocode Example (C#)
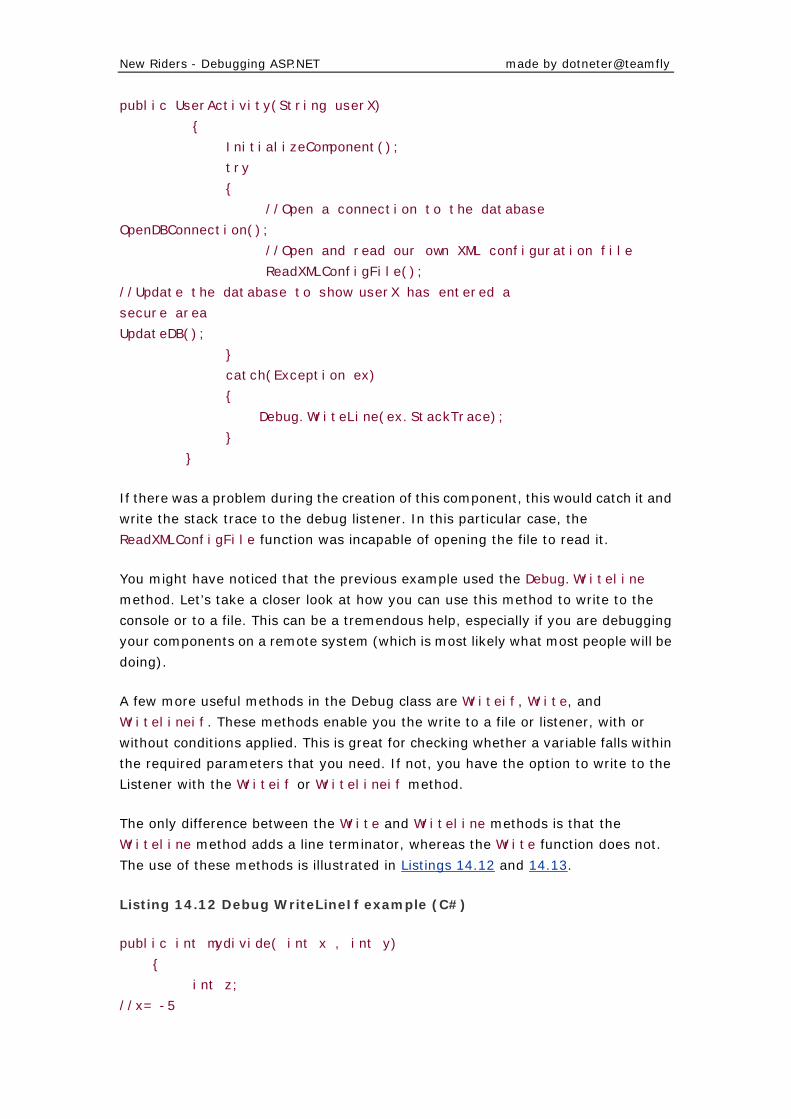
New Riders - Debugging ASP.NET made by dotneter@teamfly
public UserActivity(String userX)
{
InitializeComponent();
try
{
//Open a connection to the database
OpenDBConnection();
//Open and read our own XML configuration file
ReadXMLConfigFile();
//Update the database to show userX has entered a
secure area
UpdateDB();
}
catch(Exception ex)
{
Debug.WriteLine(ex.StackTrace);
}
}
If there was a problem during the creation of this component, this would catch it and
write the stack trace to the debug listener. In this particular case, the
ReadXMLConfigFile function was incapable of opening the file to read it.
You might have noticed that the previous example used the Debug.Writeline
method. Let’s take a closer look at how you can use this method to write to the
console or to a file. This can be a tremendous help, especially if you are debugging
your components on a remote system (which is most likely what most people will be
doing).
A few more useful methods in the Debug class are Writeif, Write, and
Writelineif. These methods enable you the write to a file or listener, with or
without conditions applied. This is great for checking whether a variable falls within
the required parameters that you need. If not, you have the option to write to the
Listener with the Writeif or Writelineif method.
The only difference between the Write and Writeline methods is that the
Writeline method adds a line terminator, whereas the Write function does not.
The use of these methods is illustrated in Listings 14.12 and 14.13.
Listing 14.12 Debug WriteLineIf example (C#)
public int mydivide( int x , int y)
{
int z;
//x= -5
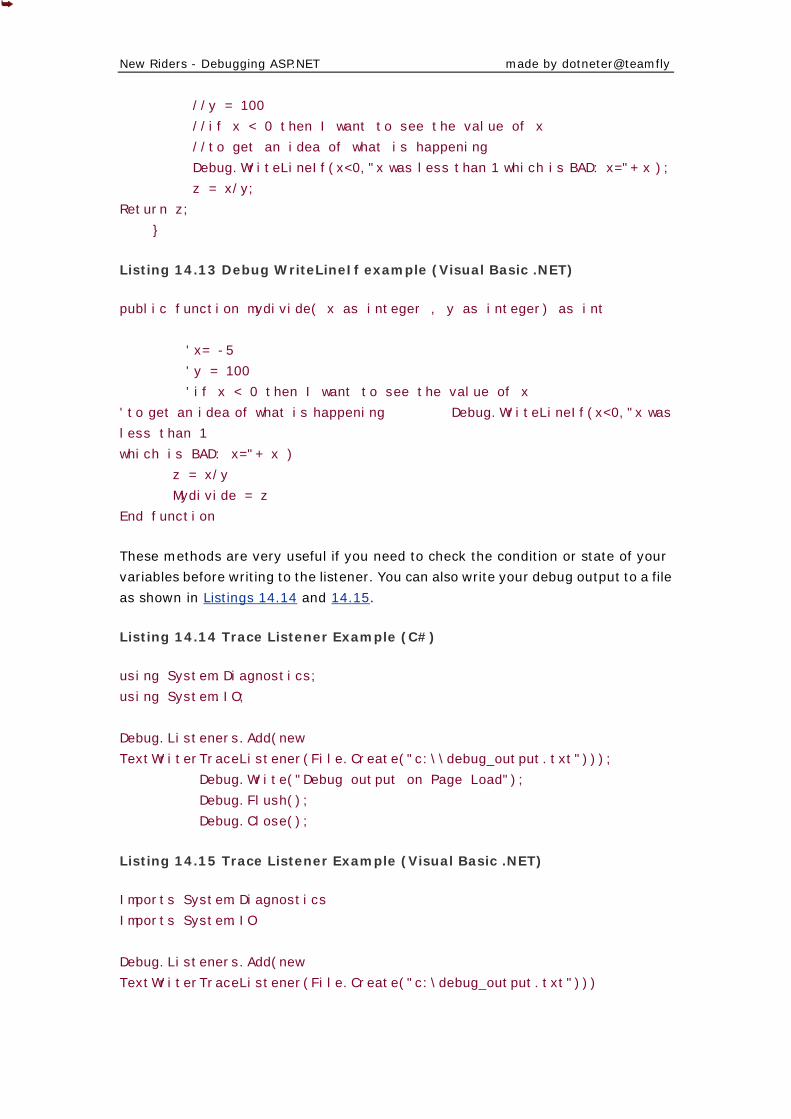
New Riders - Debugging ASP.NET made by dotneter@teamfly
//y = 100
//if x < 0 then I want to see the value of x
//to get an idea of what is happening
Debug.WriteLineIf(x<0,"x was less than 1 which is BAD: x="+ x );
z = x/y;
Return z;
}
Listing 14.13 Debug WriteLineIf example (Visual Basic .NET)
public function mydivide( x as integer , y as integer) as int
'x= -5
'y = 100
'if x < 0 then I want to see the value of x
'to get an idea of what is happening Debug.WriteLineIf(x<0,"x was
less than 1
which is BAD: x="+ x )
z = x/y
Mydivide = z
End function
These methods are very useful if you need to check the condition or state of your
variables before writing to the listener. You can also write your debug output to a file
as shown in Listings 14.14 and 14.15.
Listing 14.14 Trace Listener Example (C#)
using System.Diagnostics;
using System.IO;
Debug.Listeners.Add(new
TextWriterTraceListener(File.Create("c:\\debug_output.txt")));
Debug.Write("Debug output on Page Load");
Debug.Flush();
Debug.Close();
Listing 14.15 Trace Listener Example (Visual Basic .NET)
Imports System.Diagnostics
Imports System.IO
Debug.Listeners.Add(new
TextWriterTraceListener(File.Create("c:\debug_output.txt")))
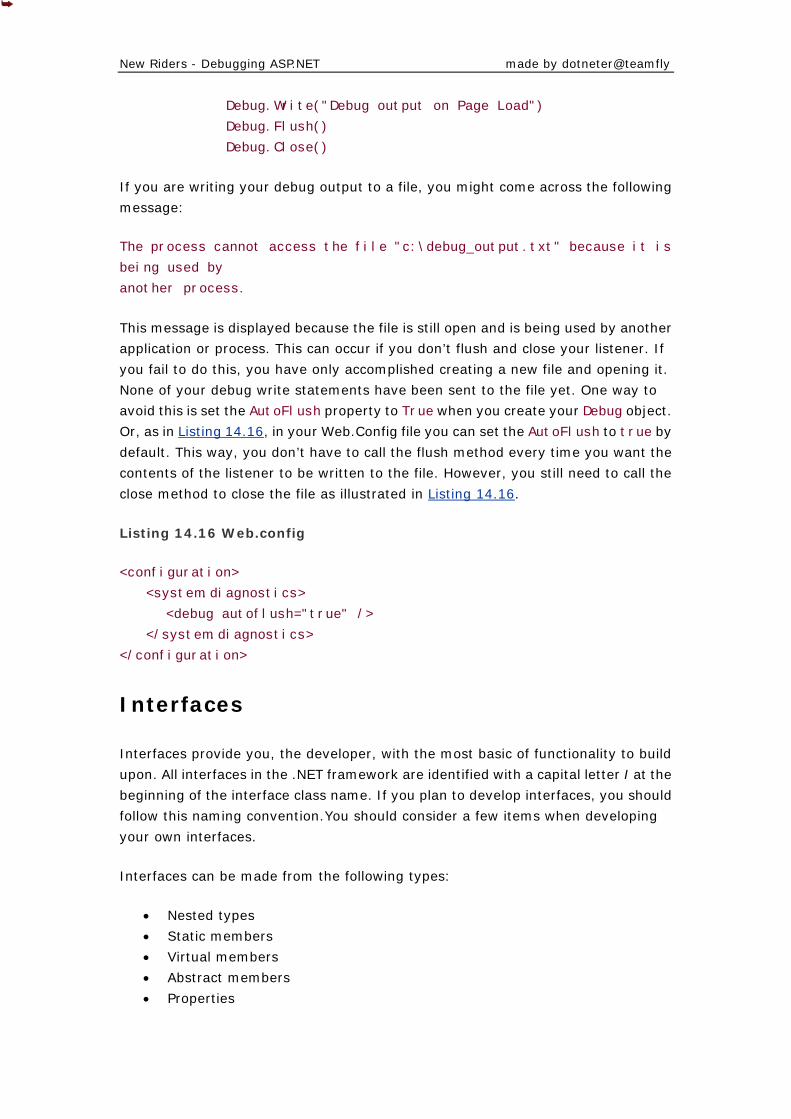
New Riders - Debugging ASP.NET made by dotneter@teamfly
Debug.Write("Debug output on Page Load")
Debug.Flush()
Debug.Close()
If you are writing your debug output to a file, you might come across the following
message:
The process cannot access the file "c:\debug_output.txt" because it is
being used by
another process.
This message is displayed because the file is still open and is being used by another
application or process. This can occur if you don’t flush and close your listener. If
you fail to do this, you have only accomplished creating a new file and opening it.
None of your debug write statements have been sent to the file yet. One way to
avoid this is set the AutoFlush property to True when you create your Debug object.
Or, as in Listing 14.16, in your Web.Config file you can set the AutoFlush to true by
default. This way, you don’t have to call the flush method every time you want the
contents of the listener to be written to the file. However, you still need to call the
close method to close the file as illustrated in Listing 14.16.
Listing 14.16 Web.config
<configuration>
<system.diagnostics>
<debug autoflush="true" />
</system.diagnostics>
</configuration>
Interfaces
Interfaces provide you, the developer, with the most basic of functionality to build
upon. All interfaces in the .NET framework are identified with a capital letter I at the
beginning of the interface class name. If you plan to develop interfaces, you should
follow this naming convention.You should consider a few items when developing
your own interfaces.
Interfaces can be made from the following types:
• Nested types
• Static members
• Virtual members
• Abstract members
• Properties
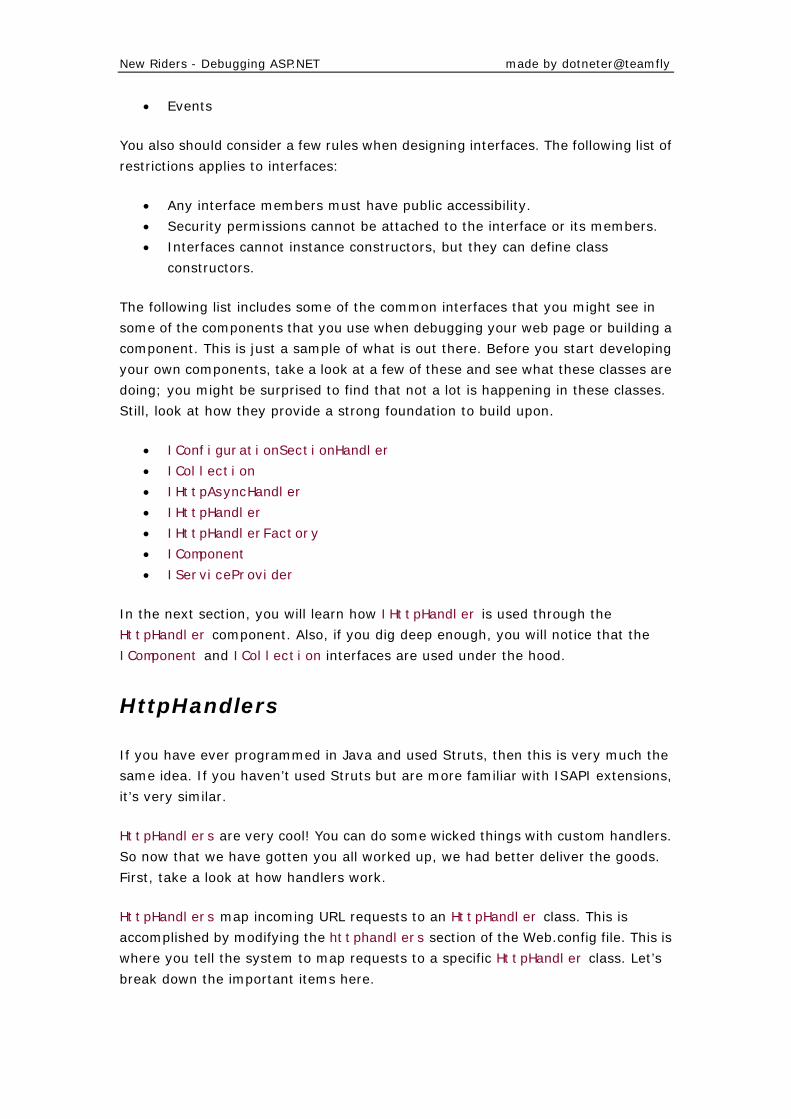
New Riders - Debugging ASP.NET made by dotneter@teamfly
• Events
You also should consider a few rules when designing interfaces. The following list of
restrictions applies to interfaces:
• Any interface members must have public accessibility.
• Security permissions cannot be attached to the interface or its members.
• Interfaces cannot instance constructors, but they can define class
constructors.
The following list includes some of the common interfaces that you might see in
some of the components that you use when debugging your web page or building a
component. This is just a sample of what is out there. Before you start developing
your own components, take a look at a few of these and see what these classes are
doing; you might be surprised to find that not a lot is happening in these classes.
Still, look at how they provide a strong foundation to build upon.
• IConfigurationSectionHandler
• ICollection
• IHttpAsyncHandler
• IHttpHandler
• IHttpHandlerFactory
• IComponent
• IServiceProvider
In the next section, you will learn how IHttpHandler is used through the
HttpHandler component. Also, if you dig deep enough, you will notice that the
IComponent and ICollection interfaces are used under the hood.
HttpHandlers
If you have ever programmed in Java and used Struts, then this is very much the
same idea. If you haven’t used Struts but are more familiar with ISAPI extensions,
it’s very similar.
HttpHandlers are very cool! You can do some wicked things with custom handlers.
So now that we have gotten you all worked up, we had better deliver the goods.
First, take a look at how handlers work.
HttpHandlers map incoming URL requests to an HttpHandler class. This is
accomplished by modifying the httphandlers section of the Web.config file. This is
where you tell the system to map requests to a specific HttpHandler class. Let’s
break down the important items here.

New Riders - Debugging ASP.NET made by dotneter@teamfly
First, you should identify the parts of the HttpHandler section. Three subtags exist
under the HttpHandler section: Add, Remove, and Clear. Table 14.1 provides a
description of each subtag.
Table 14.1. Subtags in the HttpHandler Section
Subtag Description
<add> Specifies verb/path mapping to an IHttpHandler or
IHttpHandlerFactory class.
<remove> Removes a verb/path mapping to an IHttpHandler class. The <remove>
directive must exactly match the verb/path combination of a previous
<add> directive. Wildcards are not supported.
<clear> Removes all IHttpHandler mappings currently configured or inherited by
the specified Web.config file.
With the <add> and <remove> subtags, you can affect specific HttpHandlers. If you
just want to remove all handlers, use the <clear> subtag.
Now you can take a closer look at what you need to do to implement your own
HttpHandler class. First, you need to add a line to the Web.config file to tell it what
to do when it receives a request and which HttpHandler to use. You’ll look at using
the <add> subtag to accomplish this first step.
The verb identifies if it is a Post or Get, using * for both.
Verb: verb list (“GET,POST,?”)
The path tells the system what specific page or type of page to map the
HttpHandler to. This is great because it gives you the capability to map a different
HttpHandler for every page, if needed. The potential for this is huge if you step
back and look at the big picture. Pay attention to how you configure the path. If you
set it up to ?.aspx, remember that it will intercept all requests for aspx pages.
Path: path/wildcard
The next item that needs to be identified is the type. This is where the namespace
and class that will be used to handle the request are defined. This is the final item
needed to tell the server what component will handle this request.
Type: [Namespace].[Class],[Assembly name]
Listing 14.17 shows what the actual web.config file would look like if you mapped all
requests for the MyHandle.aspx page.
Listing 14.17 <httphandlers> section in Web.Config
New Riders - Debugging ASP.NET made by dotneter@teamfly
<configuration>
<httphandlers>
<add verb="*" path="MyHandler.aspx" type="MyHttpHandler.MyHandler,
MyHandler" />
</httphandlers>
</configuration>
This is a great feature for creating custom HttpHandlers to intercept specific types
of requests and then handle each request with special functionality. This is also an
ideal feature for debugging, using filters, and completing a number of other tasks.
Let’s look at how a request to MyHandler.aspx is intercepted and handled (see
Listings 14.18 and 14.19).
Listing 14.18 Simple HttpHandler class C#
using System;
using System.Web;
namespace MyHttpHandler
{
public class MyHandler: IHttpHandler
{
public void ProcessRequest(HttpContext context)
{
context.Response.Write("My HttpHandler");
}
public bool IsReusable
{
get { return true; }
}
}
}
Listing 14.19 Simple HttpHandler class Visual Basic .NET
Imports System
Imports System.Web
Namespace MyHttpHandler
Public Class MyHandler
Implements IHttpHandler
' Override the ProcessRequest method.
New Riders - Debugging ASP.NET made by dotneter@teamfly
Public Sub ProcessRequest(context As HttpContext) _
Implements IHttpHandler.ProcessRequest
context.Response.Write("My HttpHandler")
End Sub
' Override the IsReusable property.
Public ReadOnly Property IsReusable() As Boolean _
Implements IHttpHandler.IsReusable
Get
Return True
End Get
End Property
End Class
End Namespace
Notice that the ProcessRequest method is the point at which you intercept the
requests being made to MyHandler.aspx. If you are looking for that page, it doesn’t
exist. It is a fictitious page; you could create a complete website without one single
aspx, html, htm, asp, or any other physical page. You would just have virtual pages,
in a manner of speaking.
The other item of importance is the HttpContext that is passed in. This gives you
access to all the server components— Request, Response, Session, and Server.
With access to these components, you can do anything in an HttpHandler that you
could do on an aspx page.
State-Management Issues
State management is an important issue whenever you are designing large-scale
websites. Most system designs tend to shy away from maintaining any state on their
websites because of the complexities involved when scaling out. Let’s take a look at
the issues that seem to come up repeatedly.
What Are the Issues?
Scalability is a common issue when designing websites. You can use ASP session
state on a web farm in a number of ways. Many companies use routers that use
sticky IP, to make sure that each request from a user is routed to the right server
New Riders - Debugging ASP.NET made by dotneter@teamfly
and to ensure that session information can be maintained. This seems like a costly
method to be able to maintain session state.
The current limitations with ASP session state revolve around three areas:
• Host dependence
• Scalability limitations
• Cookie dependence
To use session state, a user must return to the same host or computer where the
information is maintained because this information is maintained in memory and is
directly related to the process that it is running.
This brings up the next point: scalability limitations. If the session state is
maintained in memory, how can you scale up to handle more traffic? You could
always throw more hardware at it, but for how long and at what cost? The preferred
method is to use a server farm and some sort of load-balancing appliance, such as
Big 5 or Cisco’s Load Director. With this type of setup, the load-balancing appliance
will distribute the request to the servers with the least amount of load. Just by
adding one server, you can cut the load on your website in half. Not only have you
decreased the load, but you also now have fault tolerance designed into your
architecture.
Now we get to the cookies issue. Without cookies enabled, session states are very
difficult to implement. This is not necessarily such a terrible problem, but it’s one
that should be addressed.
ASP.NET Session State
Let’s look at the three issues identified previously in the light of ASP.NET’s solution.
Microsoft has solved these problems in ASP.NET by separating the session state into
two different modes: in-process and out-of-process. In-process is the old method of
state management, and out-of-process is new to .NET.
Why is Microsoft telling you that session variables are okay to use in a scalable
architecture? With Microsoft’s new .NET Framework, you can use session states in a
server farm. How is this possible? Microsoft has added alternative
session-management solutions. In addition to the existing session-state
management, two more ways exist to manage session data. Now you can store the
user’s session data in memory on a shared server, and you can store the
information in SQL server 7.x or 2000 as well. Take a look at where all this is
configured. In the Web.Config file, you will have a section that looks similar to
Listing 14.20.
New Riders - Debugging ASP.NET made by dotneter@teamfly
Listing 14.20 Web.config
<configuration>
<system.web>
<sessionState
mode="SqlServer"
stateConnectionString="tcpip=127.0.0.1:42424"
sqlConnectionString="data source=127.0.0.1;user
id=sstate;password="
cookieless="false"
timeout="20"
/>
</system.web>
</configuration>
If you look at the sessionState section in this listing, you will notice that the web
server has been set up to maintain session information in a SQL server database.
(One thing to keep in mind when using the SqlServer mode is that you shouldn’t use
the system administrator account.) Next, you’ll take a more detailed look at the
parameters that are used in the Session State section.
Session State Section Parameters
Looking at all the parameters used in the session-state section will help you to
identify some of the additional features that have been added to the .NET
framework. Table 14.2 lists all the available attributes and parameters for the
Session State section.
Table 14.2. Session State Attributes
Attribute Option Description
mode Specifies where to store the session state.
Off Indicates that session state is not enabled.
Inproc Indicates that session state is stored locally.
StateServer Indicates that session state is stored on a
remote server.
SqlServer Indicates that session state is stored on a SQL
server.
cookieless Specifies whether sessions without cookies
should be used to identify client sessions.
true Indicates that sessions without cookies
should be used.
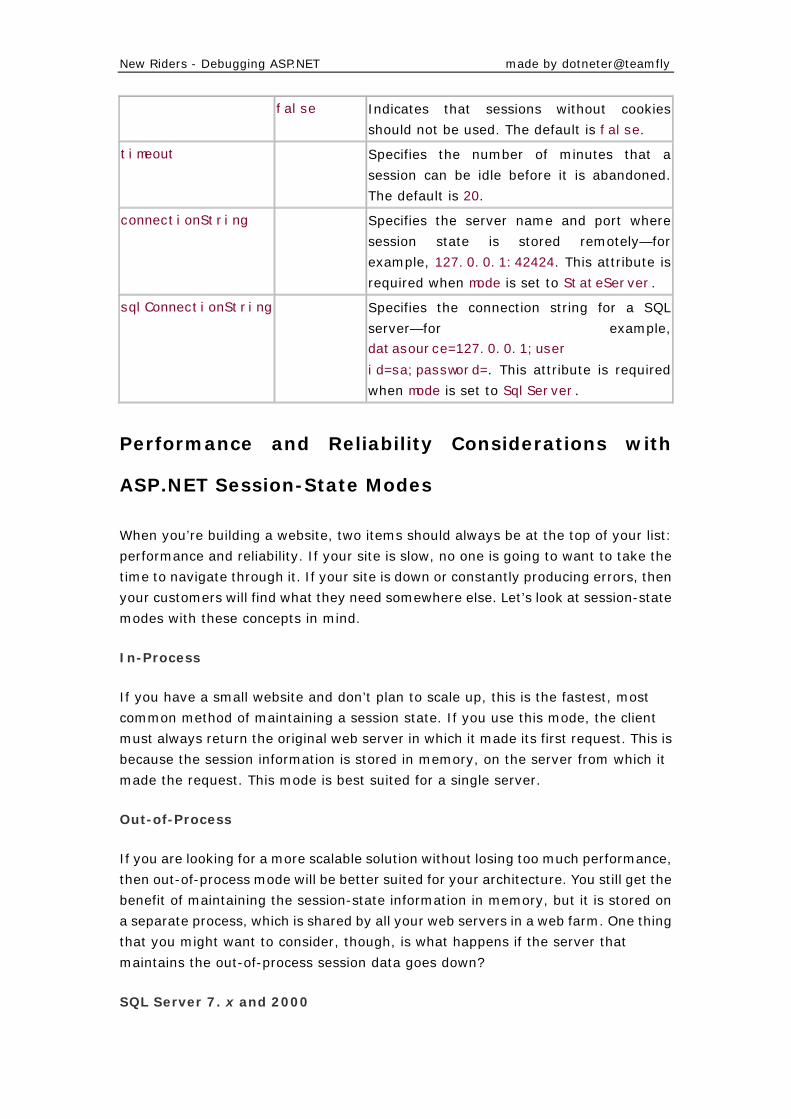
New Riders - Debugging ASP.NET made by dotneter@teamfly
false Indicates that sessions without cookies
should not be used. The default is false.
timeout Specifies the number of minutes that a
session can be idle before it is abandoned.
The default is 20.
connectionString Specifies the server name and port where
session state is stored remotely—for
example, 127.0.0.1:42424. This attribute is
required when mode is set to StateServer.
sqlConnectionString Specifies the connection string for a SQL
server—for example,
datasource=127.0.0.1;user
id=sa;password=. This attribute is required
when mode is set to SqlServer.
Performance and Reliability Considerations with
ASP.NET Session-State Modes
When you’re building a website, two items should always be at the top of your list:
performance and reliability. If your site is slow, no one is going to want to take the
time to navigate through it. If your site is down or constantly producing errors, then
your customers will find what they need somewhere else. Let’s look at session-state
modes with these concepts in mind.
In-Process
If you have a small website and don’t plan to scale up, this is the fastest, most
common method of maintaining a session state. If you use this mode, the client
must always return the original web server in which it made its first request. This is
because the session information is stored in memory, on the server from which it
made the request. This mode is best suited for a single server.
Out-of-Process
If you are looking for a more scalable solution without losing too much performance,
then out-of-process mode will be better suited for your architecture. You still get the
benefit of maintaining the session-state information in memory, but it is stored on
a separate process, which is shared by all your web servers in a web farm. One thing
that you might want to consider, though, is what happens if the server that
maintains the out-of-process session data goes down?
SQL Server 7. x and 2000
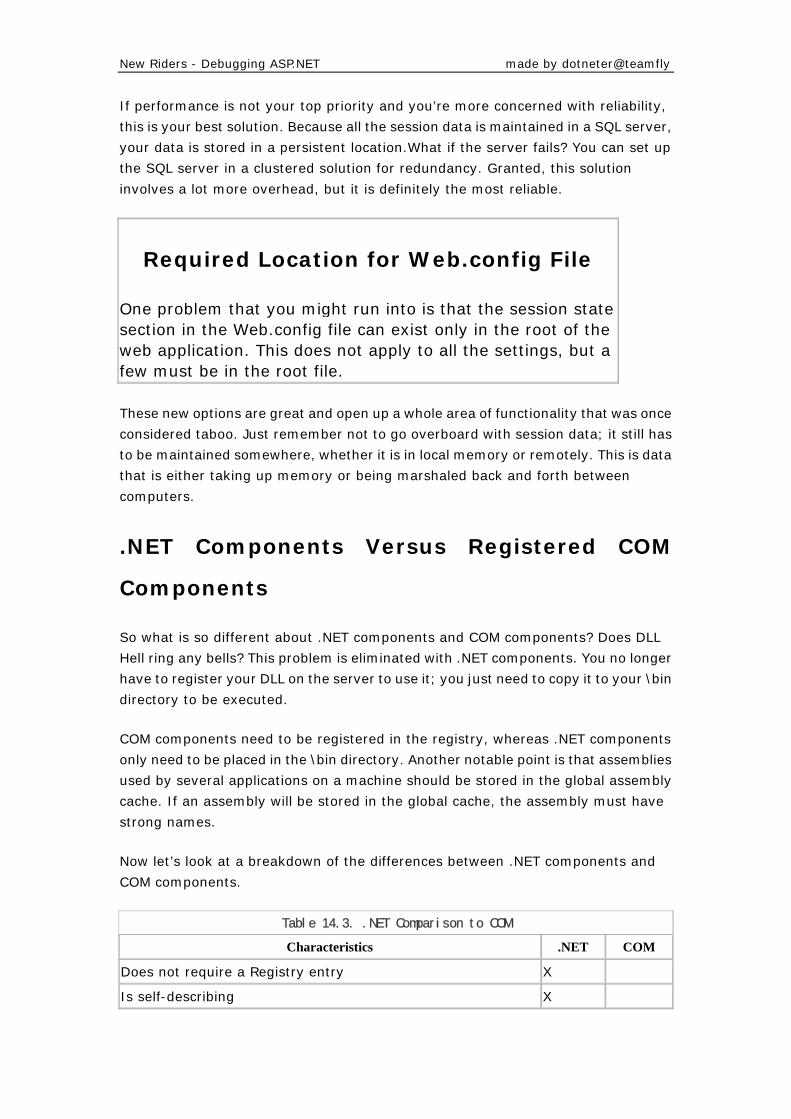
New Riders - Debugging ASP.NET made by dotneter@teamfly
If performance is not your top priority and you’re more concerned with reliability,
this is your best solution. Because all the session data is maintained in a SQL server,
your data is stored in a persistent location.What if the server fails? You can set up
the SQL server in a clustered solution for redundancy. Granted, this solution
involves a lot more overhead, but it is definitely the most reliable.
Required Location for Web.config File
One problem that you might run into is that the session state section in the Web.config file can exist only in the root of the web application. This does not apply to all the settings, but a few must be in the root file.
These new options are great and open up a whole area of functionality that was once
considered taboo. Just remember not to go overboard with session data; it still has
to be maintained somewhere, whether it is in local memory or remotely. This is data
that is either taking up memory or being marshaled back and forth between
computers.
.NET Components Versus Registered COM
Components
So what is so different about .NET components and COM components? Does DLL
Hell ring any bells? This problem is eliminated with .NET components. You no longer
have to register your DLL on the server to use it; you just need to copy it to your \bin
directory to be executed.
COM components need to be registered in the registry, whereas .NET components
only need to be placed in the \bin directory. Another notable point is that assemblies
used by several applications on a machine should be stored in the global assembly
cache. If an assembly will be stored in the global cache, the assembly must have
strong names.
Now let’s look at a breakdown of the differences between .NET components and
COM components.
Table 14.3. .NET Comparison to COM
Characteristics .NET COM
Does not require a Registry entry X
Is self-describing X
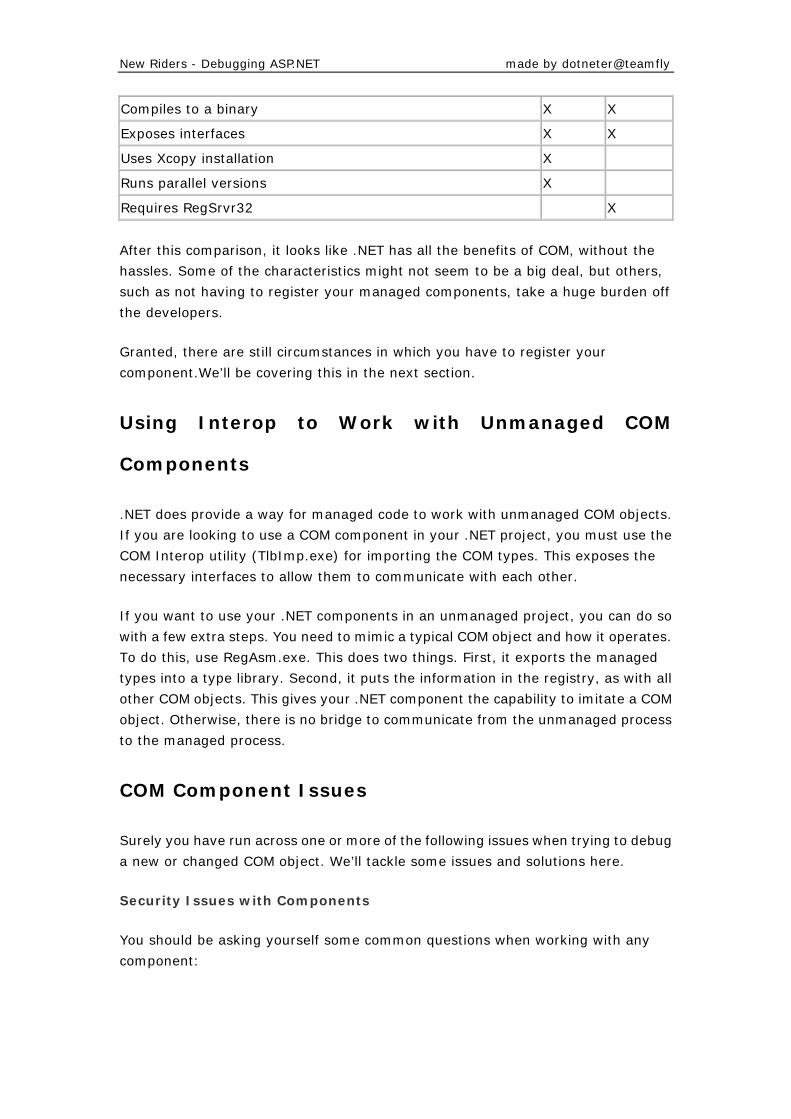
New Riders - Debugging ASP.NET made by dotneter@teamfly
Compiles to a binary X X
Exposes interfaces X X
Uses Xcopy installation X
Runs parallel versions X
Requires RegSrvr32 X
After this comparison, it looks like .NET has all the benefits of COM, without the
hassles. Some of the characteristics might not seem to be a big deal, but others,
such as not having to register your managed components, take a huge burden off
the developers.
Granted, there are still circumstances in which you have to register your
component.We’ll be covering this in the next section.
Using Interop to Work with Unmanaged COM
Components
.NET does provide a way for managed code to work with unmanaged COM objects.
If you are looking to use a COM component in your .NET project, you must use the
COM Interop utility (TlbImp.exe) for importing the COM types. This exposes the
necessary interfaces to allow them to communicate with each other.
If you want to use your .NET components in an unmanaged project, you can do so
with a few extra steps. You need to mimic a typical COM object and how it operates.
To do this, use RegAsm.exe. This does two things. First, it exports the managed
types into a type library. Second, it puts the information in the registry, as with all
other COM objects. This gives your .NET component the capability to imitate a COM
object. Otherwise, there is no bridge to communicate from the unmanaged process
to the managed process.
COM Component Issues
Surely you have run across one or more of the following issues when trying to debug
a new or changed COM object. We’ll tackle some issues and solutions here.
Security Issues with Components
You should be asking yourself some common questions when working with any
component:
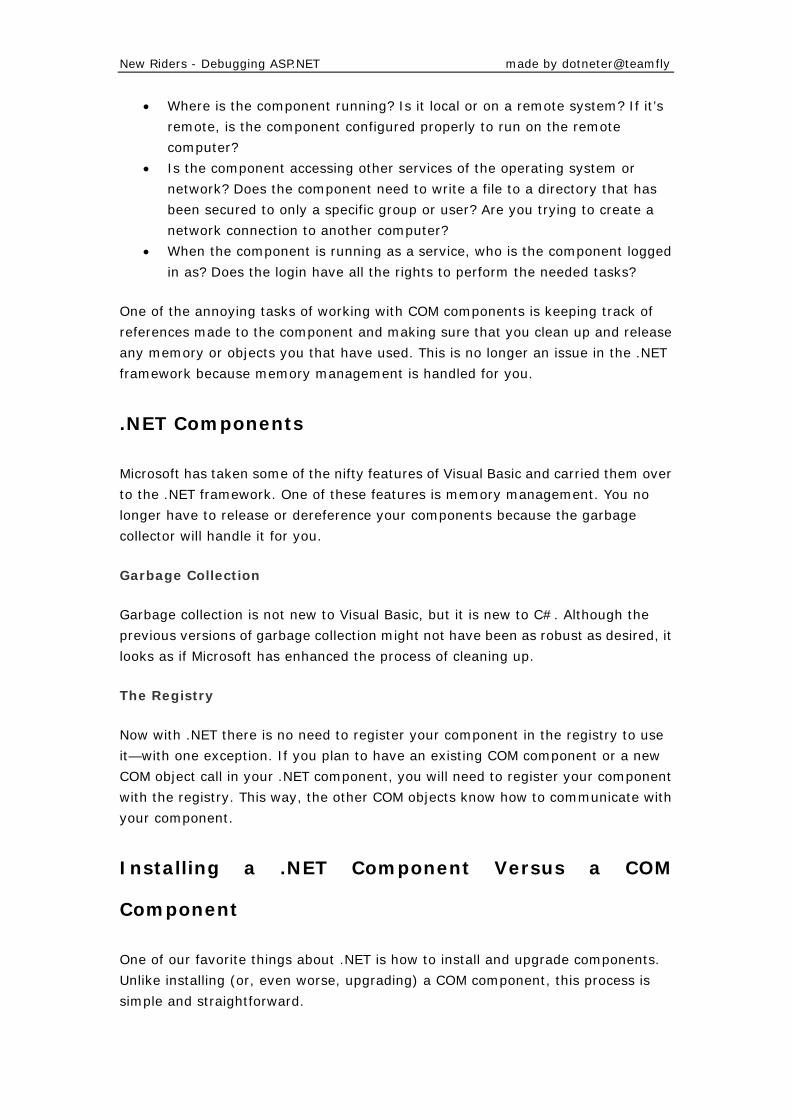
New Riders - Debugging ASP.NET made by dotneter@teamfly
• Where is the component running? Is it local or on a remote system? If it’s
remote, is the component configured properly to run on the remote
computer?
• Is the component accessing other services of the operating system or
network? Does the component need to write a file to a directory that has
been secured to only a specific group or user? Are you trying to create a
network connection to another computer?
• When the component is running as a service, who is the component logged
in as? Does the login have all the rights to perform the needed tasks?
One of the annoying tasks of working with COM components is keeping track of
references made to the component and making sure that you clean up and release
any memory or objects you that have used. This is no longer an issue in the .NET
framework because memory management is handled for you.
.NET Components
Microsoft has taken some of the nifty features of Visual Basic and carried them over
to the .NET framework. One of these features is memory management. You no
longer have to release or dereference your components because the garbage
collector will handle it for you.
Garbage Collection
Garbage collection is not new to Visual Basic, but it is new to C#. Although the
previous versions of garbage collection might not have been as robust as desired, it
looks as if Microsoft has enhanced the process of cleaning up.
The Registry
Now with .NET there is no need to register your component in the registry to use
it—with one exception. If you plan to have an existing COM component or a new
COM object call in your .NET component, you will need to register your component
with the registry. This way, the other COM objects know how to communicate with
your component.
Installing a .NET Component Versus a COM
Component
One of our favorite things about .NET is how to install and upgrade components.
Unlike installing (or, even worse, upgrading) a COM component, this process is
simple and straightforward.
New Riders - Debugging ASP.NET made by dotneter@teamfly
So How Do You Install a New .NET Component?
You no longer need to use Regsrv32.exe for .NET components, but you still need to
use it for COM components. The only thing that you need to do to install a new or
updated version of your .NET component is use Xcopy.exe or your preferred method
of copying a file from one location to another. .NET components are self-describing;
when a component is running, it makes a copy of itself. Thus, you can copy right
over the old version without having to deal with the file being locked by another user
because it is in use at the time.
Uninstalling Components
Typical problems with COM components have to do with upgrading them. This
involves deregistering the COM object and then deleting it to replace it with the new
version. To do this, the COM object typically needs to be deregistered and removed
from memory. To do this, you’ll end up restarting the web service or computer,
depending on what the COM object is being used by.
Another annoying issue is that you must execute this on the computer on which the
component is installed. This usually means that you have to be logged onto the
system or must be using some sort of remote-control software.
Well, you can kiss all these problems goodbye. Microsoft has finally given you a way
to get around these problems. Now the only thing that needs to be done is to copy
the new component to your \bin directory, essentially overwriting the old
component (assuming that one already exists) and replacing it with the new
one.Wow! That wasn’t very hard. Because the system will detect that the
component is newer, it will release the old copy and load the new version into
memory. Presto, change-o—now your system is running with your new component.
No need to deregister the old component and register the new one. It couldn’t be
easier.
One thing to keep in mind is that this technique applies to managed components
only. If your component is using the Interop namespace because it needs to
simulate a COM object, then you will still have to register your component in the
registry as you would any COM component.
Summary
Microsoft has built many cool new features into the .NET framework to help
developers. In this chapter, you learned how using components can help in cleaning
up your garbage when you are finished with a component. You also learned how the
stack trace classes can help you determine where a bug could be coming from, no
matter addressed the additional features for state management in .NET and showed
New Riders - Debugging ASP.NET made by dotneter@teamfly
how how deep in the code it might be buried. Two more important sections in this
chapter managed components are self-describing, which saves developers from
having to register them in the registry.
We covered a lot of ground in this chapter, and it is up to you to take it to the next
level. Use some of these examples to get a jump-start on debugging your
components. Remember, the majority of component issues revolve around
containment and cleanup; just keep this in mind when you are developing your
component.
Chapter 15. COM+ Issues
MICROSOFT HAS CONTINUED TO ENHANCE THIS COMPONENT software technology.
First there was OLE, then it evolved to COM, and now there’s COM+. So much of
Microsoft’s platform has been built on these technologies that you always have
needed to interact with some sort of COM or COM+ component. Now Microsoft is
evolving again, and this time the technology is called .NET. Because the .NET
framework is new, there needs to be a bridge to COM+ functionality. This bridging
brings its own set of issues, and we’ll look at those issues in this chapter.
Role-Based Security
Security roles can be supported at the method, class, assembly, and interface levels.
As you start to implement different levels of security, you will start to see the power
of role-based security. Often in the development process, people look for ways to
reuse components. One way to accomplish this is to use the same components but
restrict access to portions of the information based on what role the users are in.
As an example, roles would be useful in an application used by stockbrokers. The
application might restrict the type of transaction being processed, depending on
whether the user is a stockbroker or a manager. Stockbrokers might have
authorization to purchase only 1,000 shares of stock, whereas the managers might
have an unlimited amount available to them.
Role-based security also can be used when an application requires multiple actions
to complete the process. One example is a purchasing system that enables a
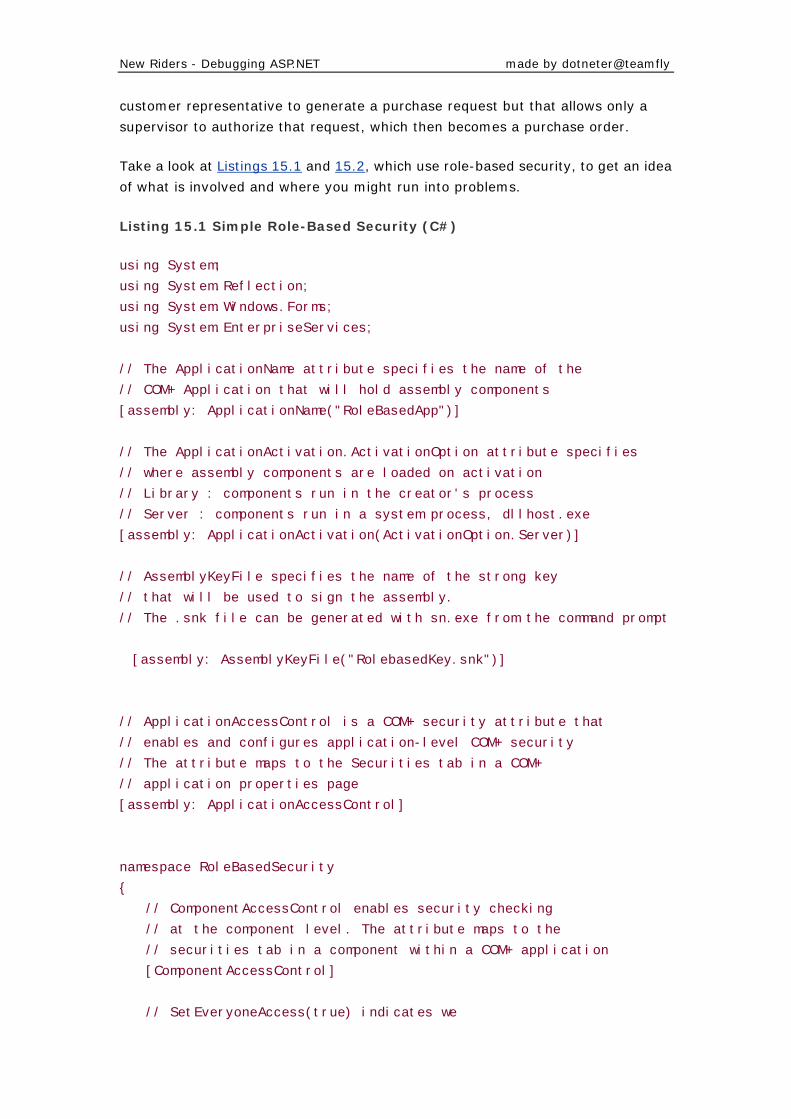
New Riders - Debugging ASP.NET made by dotneter@teamfly
customer representative to generate a purchase request but that allows only a
supervisor to authorize that request, which then becomes a purchase order.
Take a look at Listings 15.1 and 15.2, which use role-based security, to get an idea
of what is involved and where you might run into problems.
Listing 15.1 Simple Role-Based Security (C#)
using System;
using System.Reflection;
using System.Windows.Forms;
using System.EnterpriseServices;
// The ApplicationName attribute specifies the name of the
// COM+ Application that will hold assembly components
[assembly: ApplicationName("RoleBasedApp")]
// The ApplicationActivation.ActivationOption attribute specifies
// where assembly components are loaded on activation
// Library : components run in the creator's process
// Server : components run in a system process, dllhost.exe
[assembly: ApplicationActivation(ActivationOption.Server)]
// AssemblyKeyFile specifies the name of the strong key
// that will be used to sign the assembly.
// The .snk file can be generated with sn.exe from the command prompt
[assembly: AssemblyKeyFile("RolebasedKey.snk")]
// ApplicationAccessControl is a COM+ security attribute that
// enables and configures application-level COM+ security
// The attribute maps to the Securities tab in a COM+
// application properties page
[assembly: ApplicationAccessControl]
namespace RoleBasedSecurity
{
// ComponentAccessControl enables security checking
// at the component level. The attribute maps to the
// securities tab in a component within a COM+ application
[ComponentAccessControl]
// SetEveryoneAccess(true) indicates we
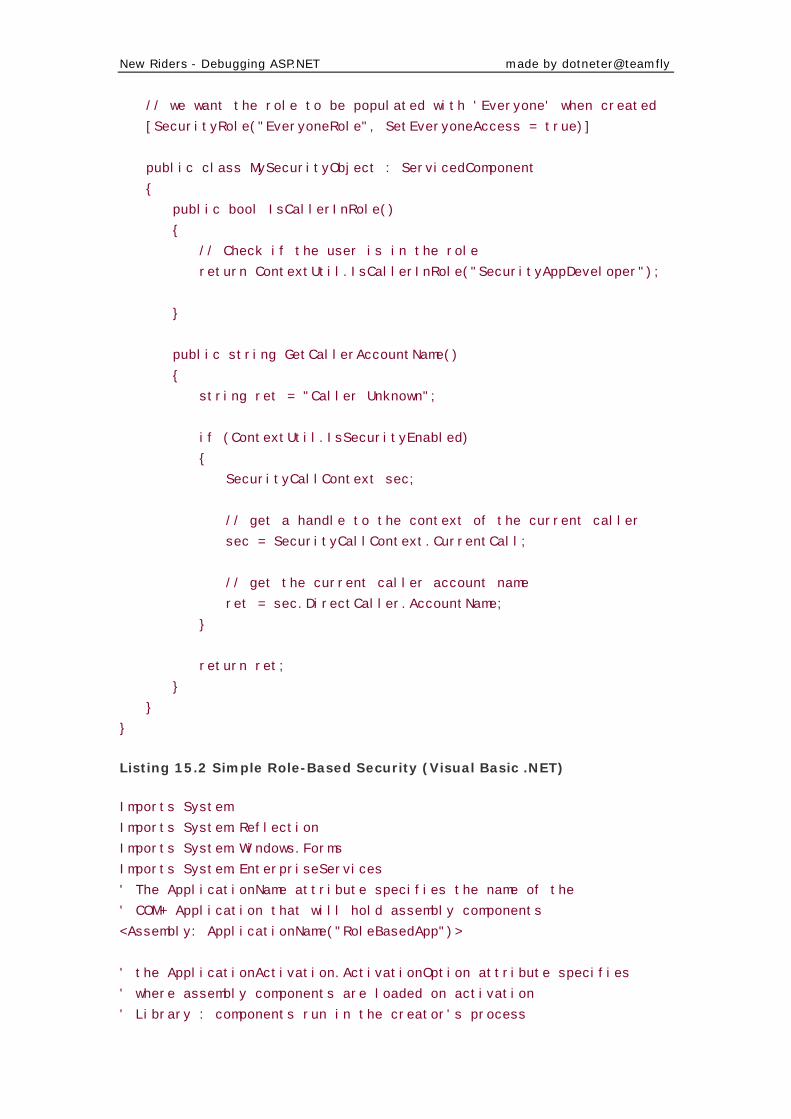
New Riders - Debugging ASP.NET made by dotneter@teamfly
// we want the role to be populated with 'Everyone' when created
[SecurityRole("EveryoneRole", SetEveryoneAccess = true)]
public class MySecurityObject : ServicedComponent
{
public bool IsCallerInRole()
{
// Check if the user is in the role
return ContextUtil.IsCallerInRole("SecurityAppDeveloper");
}
public string GetCallerAccountName()
{
string ret = "Caller Unknown";
if (ContextUtil.IsSecurityEnabled)
{
SecurityCallContext sec;
// get a handle to the context of the current caller
sec = SecurityCallContext.CurrentCall;
// get the current caller account name
ret = sec.DirectCaller.AccountName;
}
return ret;
}
}
}
Listing 15.2 Simple Role-Based Security (Visual Basic .NET)
Imports System
Imports System.Reflection
Imports System.Windows.Forms
Imports System.EnterpriseServices
' The ApplicationName attribute specifies the name of the
' COM+ Application that will hold assembly components
<Assembly: ApplicationName("RoleBasedApp")>
' the ApplicationActivation.ActivationOption attribute specifies
' where assembly components are loaded on activation
' Library : components run in the creator's process
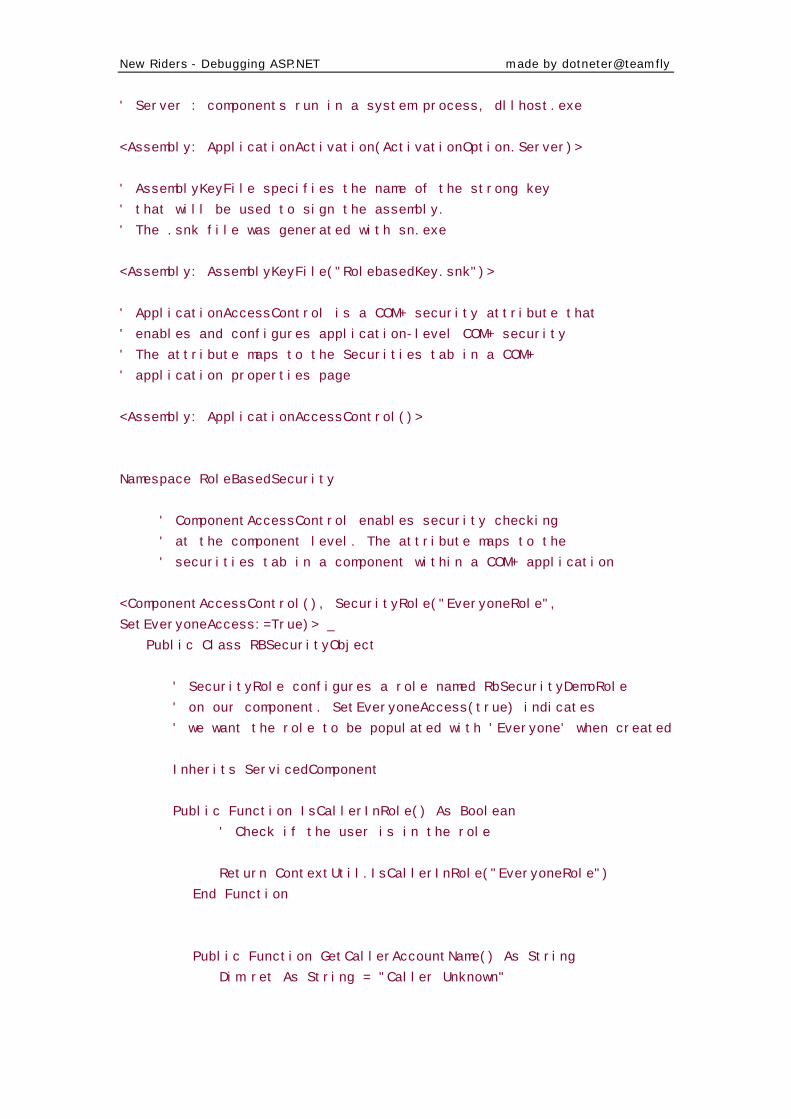
New Riders - Debugging ASP.NET made by dotneter@teamfly
' Server : components run in a system process, dllhost.exe
<Assembly: ApplicationActivation(ActivationOption.Server)>
' AssemblyKeyFile specifies the name of the strong key
' that will be used to sign the assembly.
' The .snk file was generated with sn.exe
<Assembly: AssemblyKeyFile("RolebasedKey.snk")>
' ApplicationAccessControl is a COM+ security attribute that
' enables and configures application-level COM+ security
' The attribute maps to the Securities tab in a COM+
' application properties page
<Assembly: ApplicationAccessControl()>
Namespace RoleBasedSecurity
' ComponentAccessControl enables security checking
' at the component level. The attribute maps to the
' securities tab in a component within a COM+ application
<ComponentAccessControl(), SecurityRole("EveryoneRole",
SetEveryoneAccess:=True)> _
Public Class RBSecurityObject
' SecurityRole configures a role named RbSecurityDemoRole
' on our component. SetEveryoneAccess(true) indicates
' we want the role to be populated with 'Everyone' when created
Inherits ServicedComponent
Public Function IsCallerInRole() As Boolean
' Check if the user is in the role
Return ContextUtil.IsCallerInRole("EveryoneRole")
End Function
Public Function GetCallerAccountName() As String
Dim ret As String = "Caller Unknown"
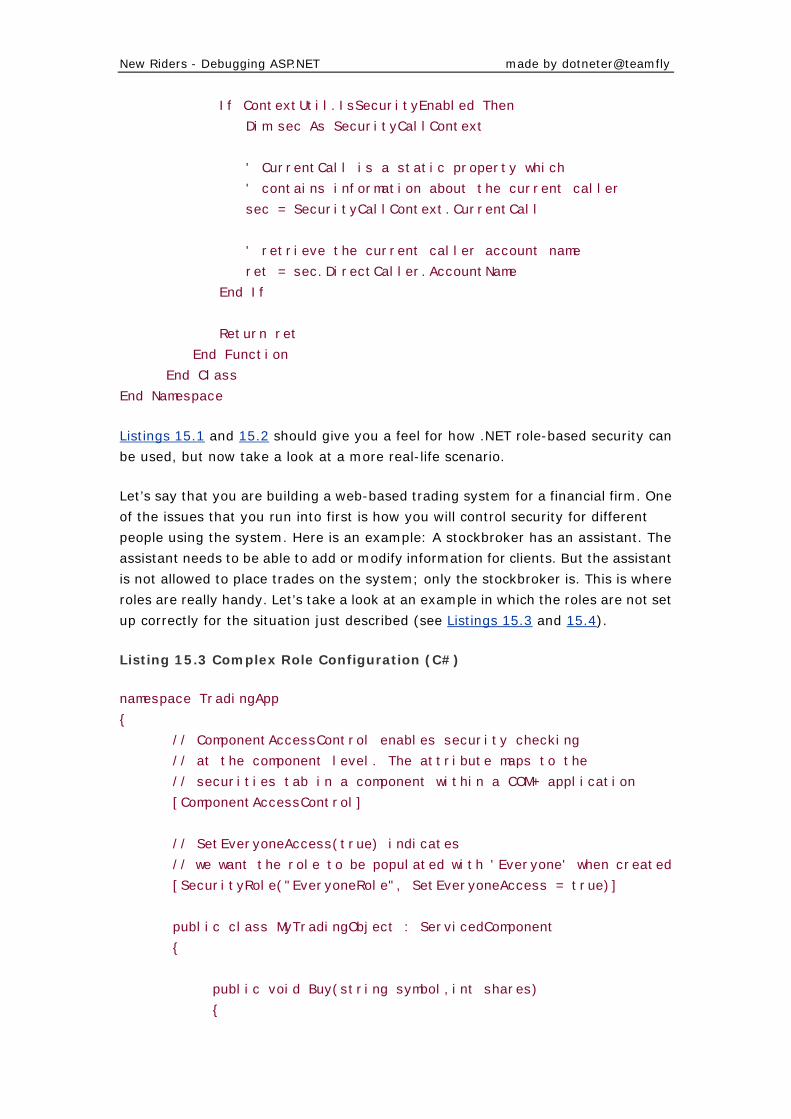
New Riders - Debugging ASP.NET made by dotneter@teamfly
If ContextUtil.IsSecurityEnabled Then
Dim sec As SecurityCallContext
' CurrentCall is a static property which
' contains information about the current caller
sec = SecurityCallContext.CurrentCall
' retrieve the current caller account name
ret = sec.DirectCaller.AccountName
End If
Return ret
End Function
End Class
End Namespace
Listings 15.1 and 15.2 should give you a feel for how .NET role-based security can
be used, but now take a look at a more real-life scenario.
Let’s say that you are building a web-based trading system for a financial firm. One
of the issues that you run into first is how you will control security for different
people using the system. Here is an example: A stockbroker has an assistant. The
assistant needs to be able to add or modify information for clients. But the assistant
is not allowed to place trades on the system; only the stockbroker is. This is where
roles are really handy. Let’s take a look at an example in which the roles are not set
up correctly for the situation just described (see Listings 15.3 and 15.4).
Listing 15.3 Complex Role Configuration (C#)
namespace TradingApp
{
// ComponentAccessControl enables security checking
// at the component level. The attribute maps to the
// securities tab in a component within a COM+ application
[ComponentAccessControl]
// SetEveryoneAccess(true) indicates
// we want the role to be populated with 'Everyone' when created
[SecurityRole("EveryoneRole", SetEveryoneAccess = true)]
public class MyTradingObject : ServicedComponent
{
public void Buy(string symbol,int shares)
{
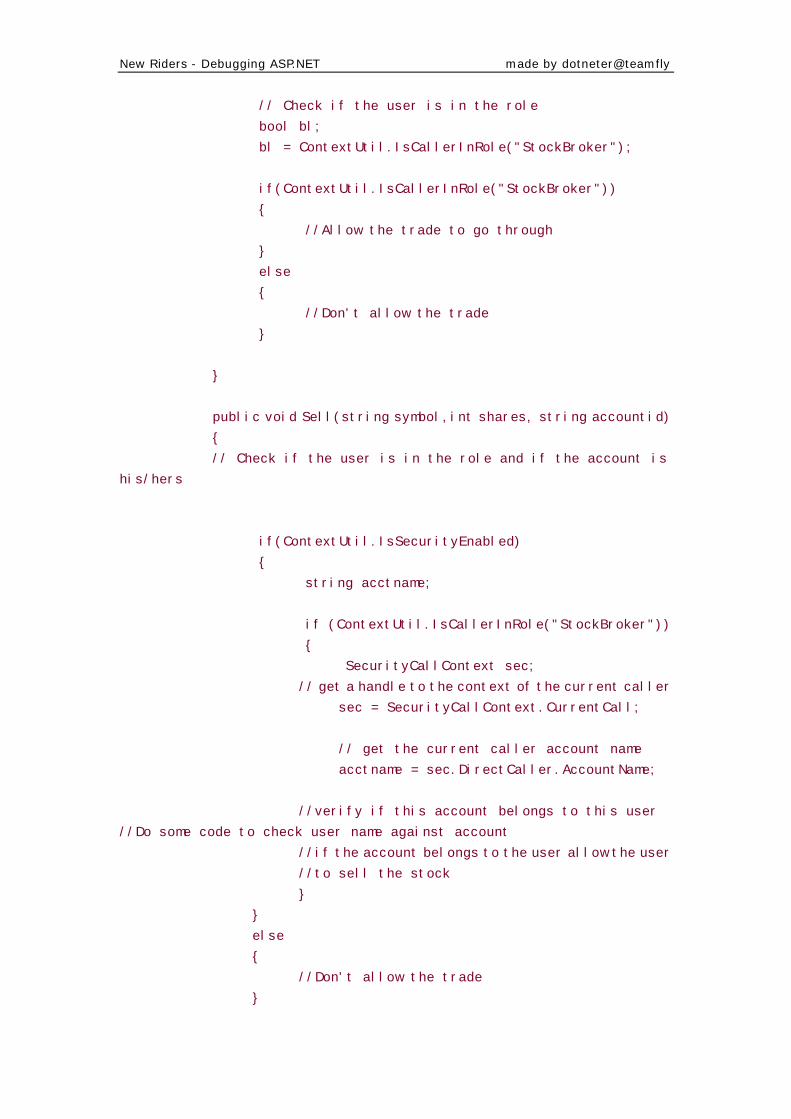
New Riders - Debugging ASP.NET made by dotneter@teamfly
// Check if the user is in the role
bool bl;
bl = ContextUtil.IsCallerInRole("StockBroker");
if(ContextUtil.IsCallerInRole("StockBroker"))
{
//Allow the trade to go through
}
else
{
//Don't allow the trade
}
}
public void Sell(string symbol,int shares, string accountid)
{
// Check if the user is in the role and if the account is
his/hers
if(ContextUtil.IsSecurityEnabled)
{
string acctname;
if (ContextUtil.IsCallerInRole("StockBroker"))
{
SecurityCallContext sec;
// get a handle to the context of the current caller
sec = SecurityCallContext.CurrentCall;
// get the current caller account name
acctname = sec.DirectCaller.AccountName;
//verify if this account belongs to this user
//Do some code to check user name against account
//if the account belongs to the user allow the user
//to sell the stock
}
}
else
{
//Don't allow the trade
}
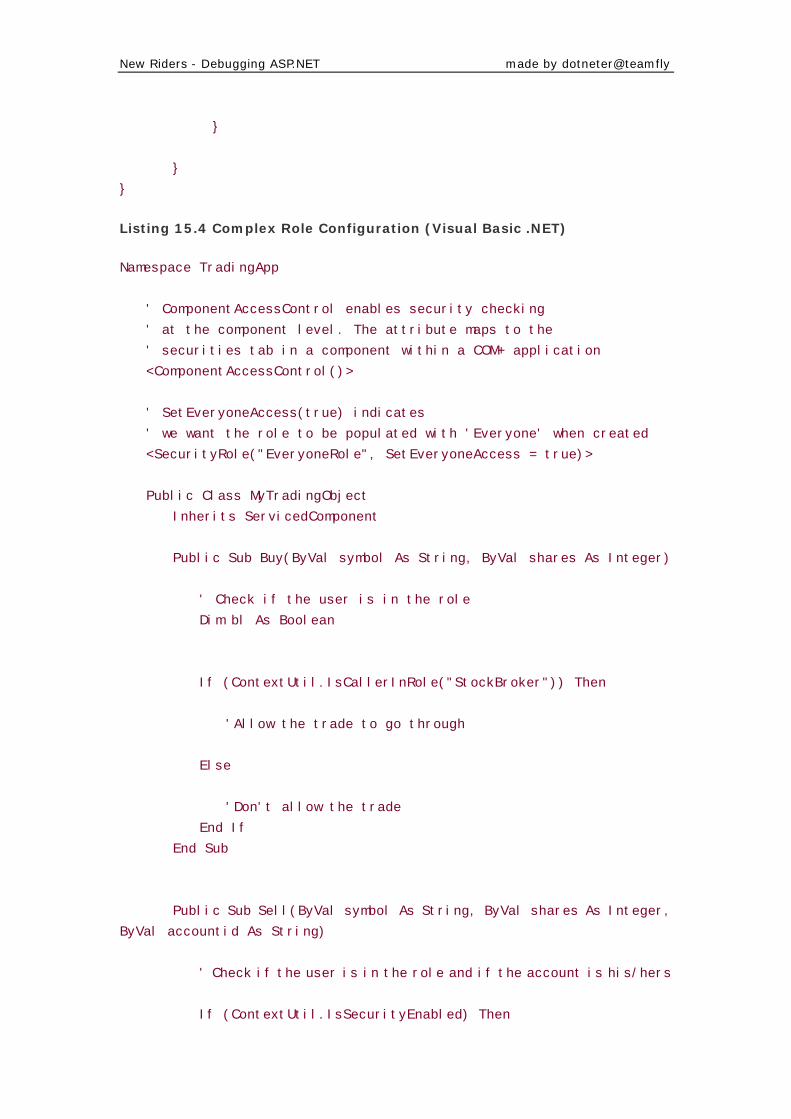
New Riders - Debugging ASP.NET made by dotneter@teamfly
}
}
}
Listing 15.4 Complex Role Configuration (Visual Basic .NET)
Namespace TradingApp
' ComponentAccessControl enables security checking
' at the component level. The attribute maps to the
' securities tab in a component within a COM+ application
<ComponentAccessControl()>
' SetEveryoneAccess(true) indicates
' we want the role to be populated with 'Everyone' when created
<SecurityRole("EveryoneRole", SetEveryoneAccess = true)>
Public Class MyTradingObject
Inherits ServicedComponent
Public Sub Buy(ByVal symbol As String, ByVal shares As Integer)
' Check if the user is in the role
Dim bl As Boolean
If (ContextUtil.IsCallerInRole("StockBroker")) Then
'Allow the trade to go through
Else
'Don't allow the trade
End If
End Sub
Public Sub Sell(ByVal symbol As String, ByVal shares As Integer,
ByVal accountid As String)
' Check if the user is in the role and if the account is his/hers
If (ContextUtil.IsSecurityEnabled) Then
New Riders - Debugging ASP.NET made by dotneter@teamfly
Dim acctname As String
If (ContextUtil.IsCallerInRole("StockBroker")) Then
Dim sec As SecurityCallContext
' get a handle to the context of the current caller
sec = SecurityCallContext.CurrentCall()
' get the current caller account name
acctname = sec.DirectCaller.AccountName
'verify if this account belongs to this user
'Do some code to check user name against account
'if the account belongs to the user allow the user
'to sell the stock
Else
'Don't allow the trade
End If
End If
End Sub
End Class
End Namespace
You’ll notice that these listings have implemented multiple levels of security based
on which role the user is in. This gives you more of a granular approach to applying
security to the components, which is great. Now let’s take a look at where all these
information and configuration settings are maintained and controlled.
Component Services Microsoft Management
Console
The Component Services Microsoft Management Console provides you with a way to
monitor and manage your components and their properties. Figure 15.1 shows
where the different roles can be managed for each component. For the TradingApp,
we have defined two roles that the user will fall under.
Figure 15.1. Component services roles for TradingApp.
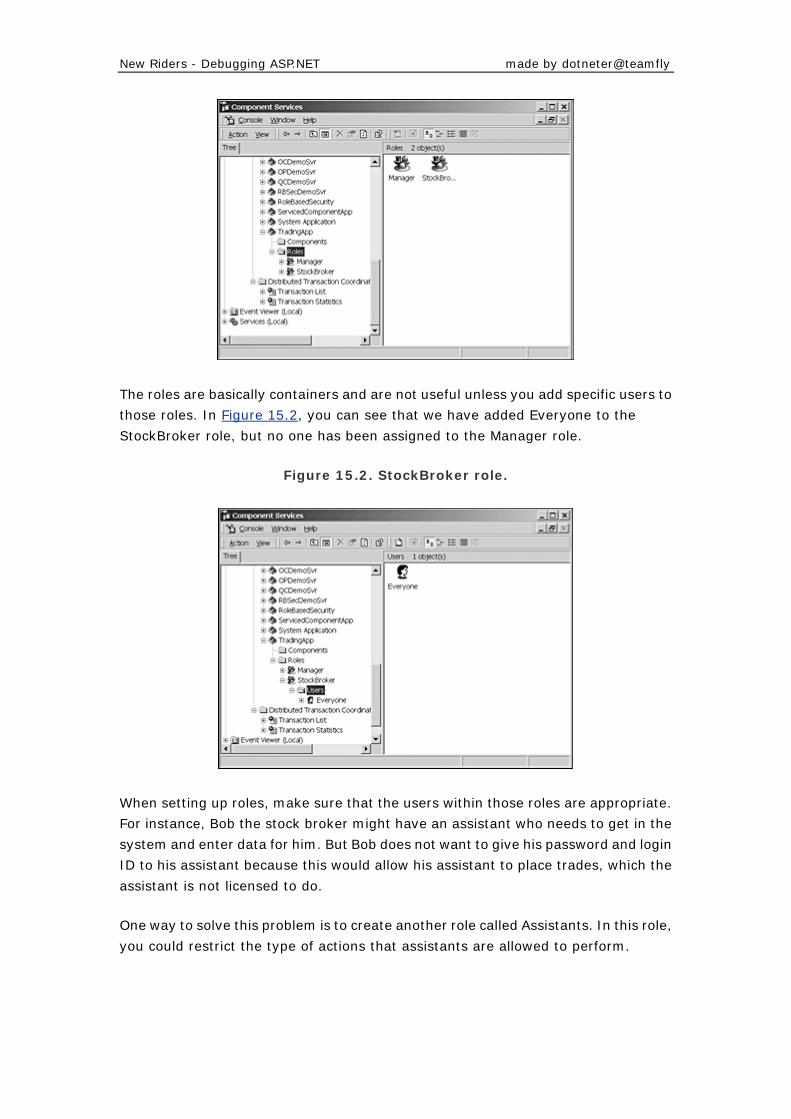
New Riders - Debugging ASP.NET made by dotneter@teamfly
The roles are basically containers and are not useful unless you add specific users to
those roles. In Figure 15.2, you can see that we have added Everyone to the
StockBroker role, but no one has been assigned to the Manager role.
Figure 15.2. StockBroker role.
When setting up roles, make sure that the users within those roles are appropriate.
For instance, Bob the stock broker might have an assistant who needs to get in the
system and enter data for him. But Bob does not want to give his password and login
ID to his assistant because this would allow his assistant to place trades, which the
assistant is not licensed to do.
One way to solve this problem is to create another role called Assistants. In this role,
you could restrict the type of actions that assistants are allowed to perform.
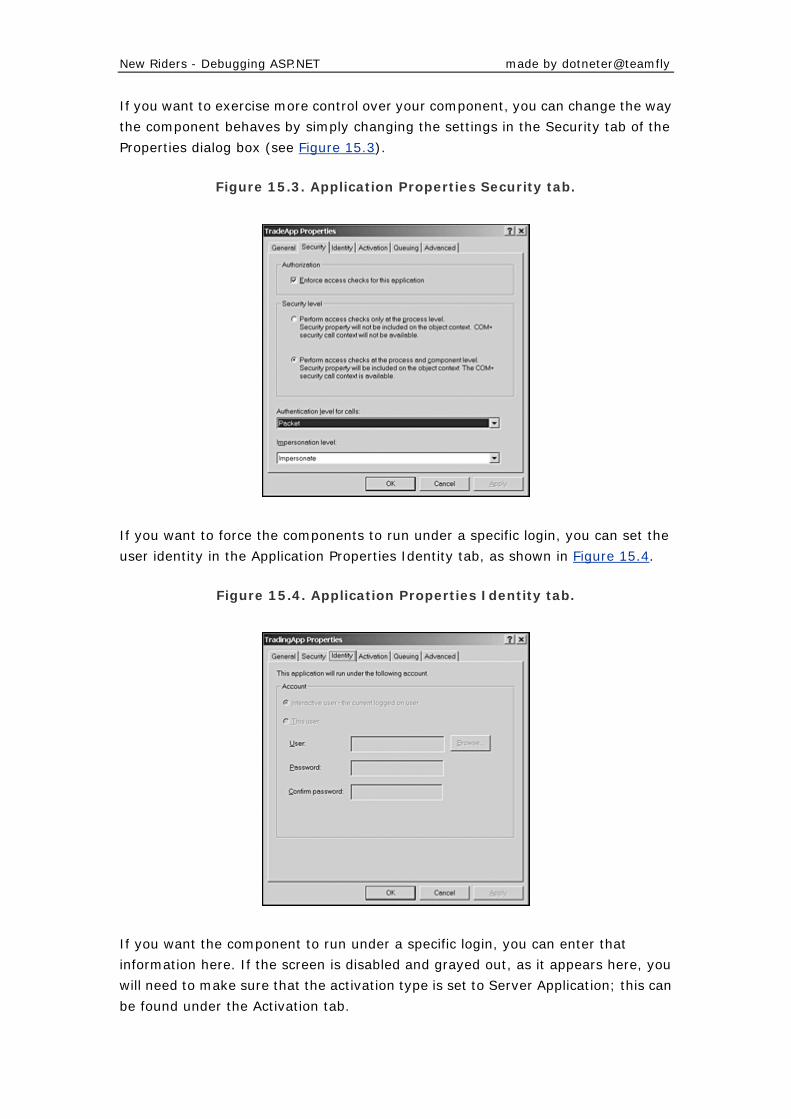
New Riders - Debugging ASP.NET made by dotneter@teamfly
If you want to exercise more control over your component, you can change the way
the component behaves by simply changing the settings in the Security tab of the
Properties dialog box (see Figure 15.3).
Figure 15.3. Application Properties Security tab.
If you want to force the components to run under a specific login, you can set the
user identity in the Application Properties Identity tab, as shown in Figure 15.4.
Figure 15.4. Application Properties Identity tab.
If you want the component to run under a specific login, you can enter that
information here. If the screen is disabled and grayed out, as it appears here, you
will need to make sure that the activation type is set to Server Application; this can
be found under the Activation tab.
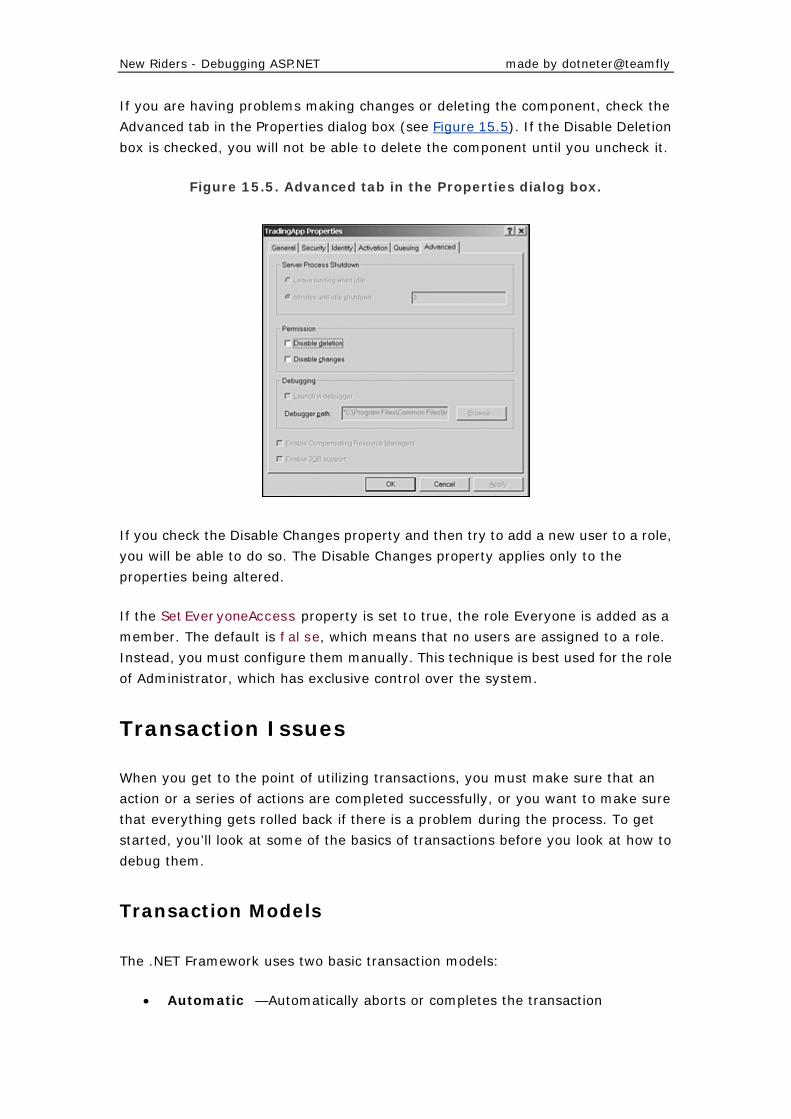
New Riders - Debugging ASP.NET made by dotneter@teamfly
If you are having problems making changes or deleting the component, check the
Advanced tab in the Properties dialog box (see Figure 15.5). If the Disable Deletion
box is checked, you will not be able to delete the component until you uncheck it.
Figure 15.5. Advanced tab in the Properties dialog box.
If you check the Disable Changes property and then try to add a new user to a role,
you will be able to do so. The Disable Changes property applies only to the
properties being altered.
If the SetEveryoneAccess property is set to true, the role Everyone is added as a
member. The default is false, which means that no users are assigned to a role.
Instead, you must configure them manually. This technique is best used for the role
of Administrator, which has exclusive control over the system.
Transaction Issues
When you get to the point of utilizing transactions, you must make sure that an
action or a series of actions are completed successfully, or you want to make sure
that everything gets rolled back if there is a problem during the process. To get
started, you’ll look at some of the basics of transactions before you look at how to
debug them.
Transaction Models
The .NET Framework uses two basic transaction models:
• Automatic —Automatically aborts or completes the transaction
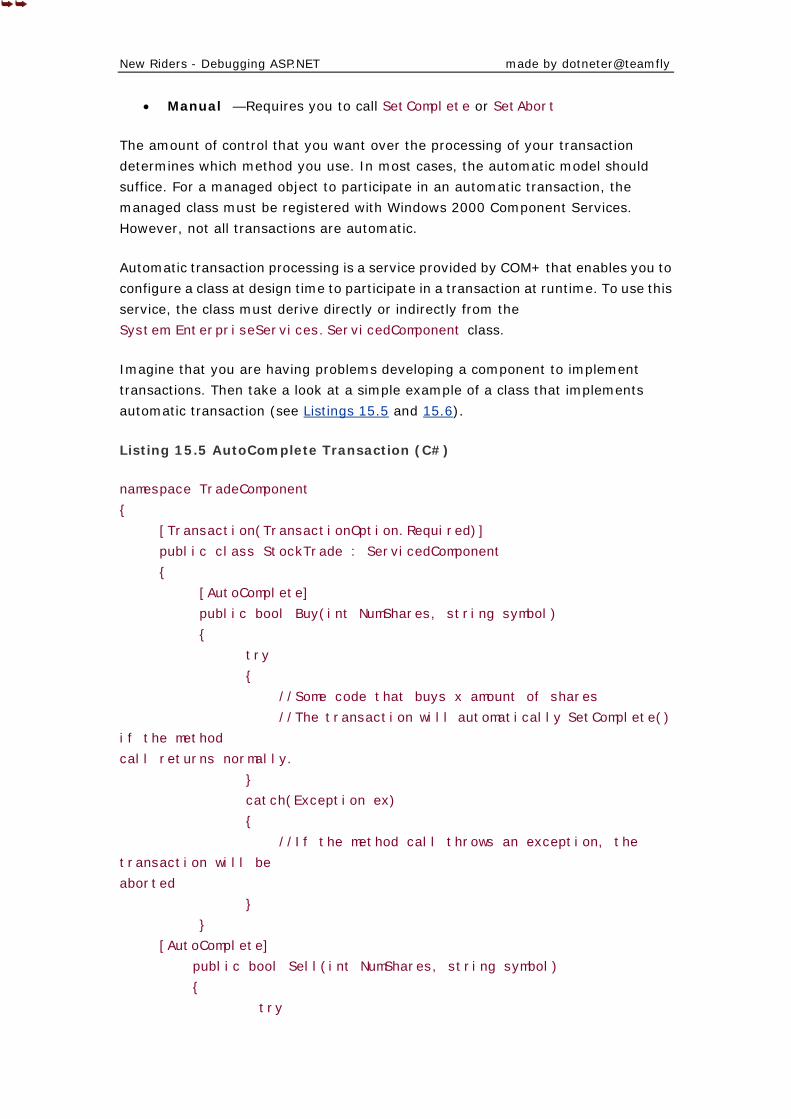
New Riders - Debugging ASP.NET made by dotneter@teamfly
• Manual —Requires you to call SetComplete or SetAbort
The amount of control that you want over the processing of your transaction
determines which method you use. In most cases, the automatic model should
suffice. For a managed object to participate in an automatic transaction, the
managed class must be registered with Windows 2000 Component Services.
However, not all transactions are automatic.
Automatic transaction processing is a service provided by COM+ that enables you to
configure a class at design time to participate in a transaction at runtime. To use this
service, the class must derive directly or indirectly from the
System.EnterpriseServices.ServicedComponent class.
Imagine that you are having problems developing a component to implement
transactions. Then take a look at a simple example of a class that implements
automatic transaction (see Listings 15.5 and 15.6).
Listing 15.5 AutoComplete Transaction (C#)
namespace TradeComponent
{
[Transaction(TransactionOption.Required)]
public class StockTrade : ServicedComponent
{
[AutoComplete]
public bool Buy(int NumShares, string symbol)
{
try
{
//Some code that buys x amount of shares
//The transaction will automatically SetComplete()
if the method
call returns normally.
}
catch(Exception ex)
{
//If the method call throws an exception, the
transaction will be
aborted
}
}
[AutoComplete]
public bool Sell(int NumShares, string symbol)
{
try

New Riders - Debugging ASP.NET made by dotneter@teamfly
{
//Code that Sells x amount of shares
//The transaction will automatically
SetComplete() if the
method call returns normally.
}
catch(Exception ex)
{
//If the method call throws an exception, the
transaction will
be aborted
}
}
}
Listing 15.6 AutoComplete Transaction (Visual Basic .NET)
Imports System.EnterpriseServices
Namespace TradeComponent
<Transaction(TransactionOption.Required)>
Public Class StockTrade
Inherits ServicedComponent
Public Function <AutoComplete()> Buy(ByVal NumShares As Integer, ByVal
symbol As String)
As Boolean
'Some code that buys x amount of shares
'The transaction will automatically SetComplete() if the
method call
returns normally.
'If the method call throws an exception, the transaction
will be aborted
End Function
Public Function <AutoComplete()> Sell(ByVal NumShares As Integer,
ByVal symbol As
String) As Boolean
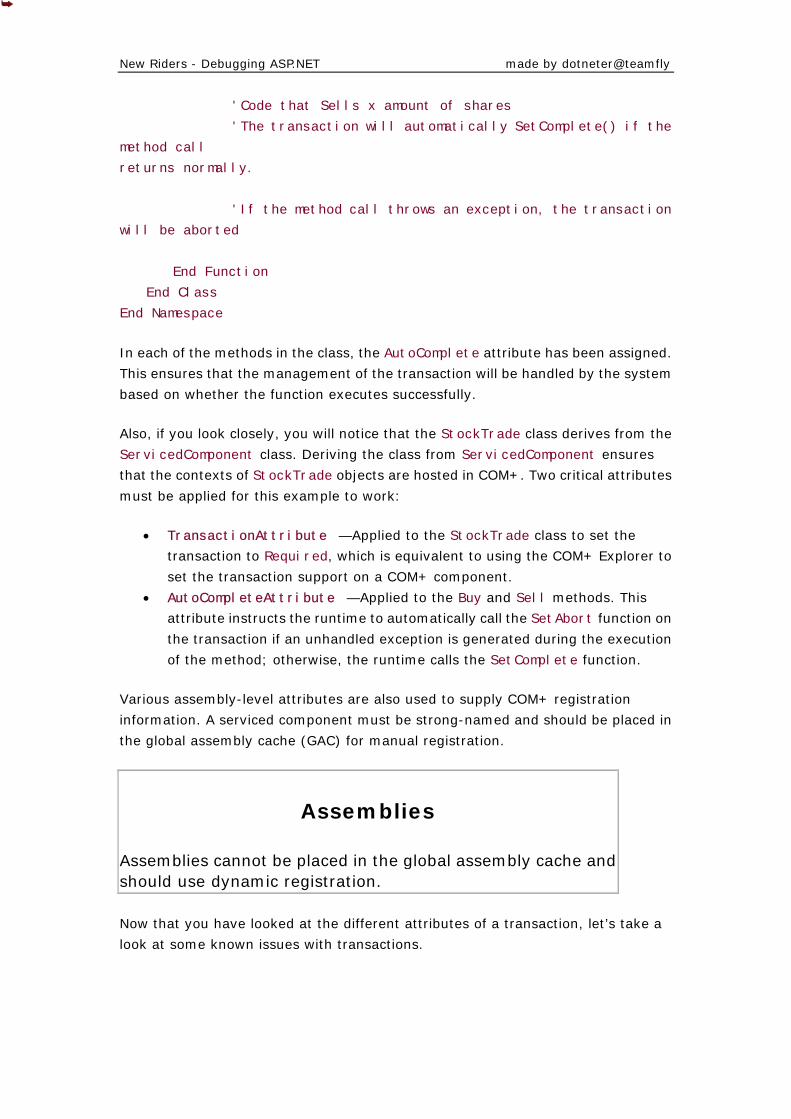
New Riders - Debugging ASP.NET made by dotneter@teamfly
'Code that Sells x amount of shares
'The transaction will automatically SetComplete() if the
method call
returns normally.
'If the method call throws an exception, the transaction
will be aborted
End Function
End Class
End Namespace
In each of the methods in the class, the AutoComplete attribute has been assigned.
This ensures that the management of the transaction will be handled by the system
based on whether the function executes successfully.
Also, if you look closely, you will notice that the StockTrade class derives from the
ServicedComponent class. Deriving the class from ServicedComponent ensures
that the contexts of StockTrade objects are hosted in COM+. Two critical attributes
must be applied for this example to work:
• TransactionAttribute —Applied to the StockTrade class to set the
transaction to Required, which is equivalent to using the COM+ Explorer to
set the transaction support on a COM+ component.
• AutoCompleteAttribute —Applied to the Buy and Sell methods. This
attribute instructs the runtime to automatically call the SetAbort function on
the transaction if an unhandled exception is generated during the execution
of the method; otherwise, the runtime calls the SetComplete function.
Various assembly-level attributes are also used to supply COM+ registration
information. A serviced component must be strong-named and should be placed in
the global assembly cache (GAC) for manual registration.
Assemblies
Assemblies cannot be placed in the global assembly cache andshould use dynamic registration.
Now that you have looked at the different attributes of a transaction, let’s take a
look at some known issues with transactions.

New Riders - Debugging ASP.NET made by dotneter@teamfly
Known Issues with Microsoft Transaction Server
Components
Microsoft has made some changes in the ASP.NET security model. If you have
existing Microsoft Transaction Server components that you plan to use with
ASP.NET applications, you might need to change the security access permissions.
One of the common exceptions seen when calling an MTS component without the
necessary security permissions is,“Permission denied.” If you are running into this,
you might want to try the following steps to resolve the problem:
1. In Component Services, bring up the Properties dialog box for the MTS
application.
2. Select the Identity tab, and change the account under which the component
runs to that of a new local machine account, created solely for this purpose.
3. Run the utility Dcomcnfg.exe.
4. Select the Default Security tab.
5. Under Default Access Permissions, click Edit Default and add the user
created in Step 2.
6. Restart IIS to ensure that the changes are recognized.
Going through all these steps should solve your permission problem.
Strong-Named Assemblies
Are you having problems getting your component to work? If so, have you
implemented strong-named assemblies? You might have overlooked this
requirement. Even though you can build and register your component as a COM
object, you might not be able to use it.
To create a strong-named key, use this code:
[C#]
sn -k TradeComponent.snk
After you have generated a key, you can then reference it in your code to create a
strong-named assembly.Without a key, you will not be able to generate the
strong-named assembly.
Listings 15.7 and 15.8 illustrate how to properly implement the attributes to make
your component a strong-named component.
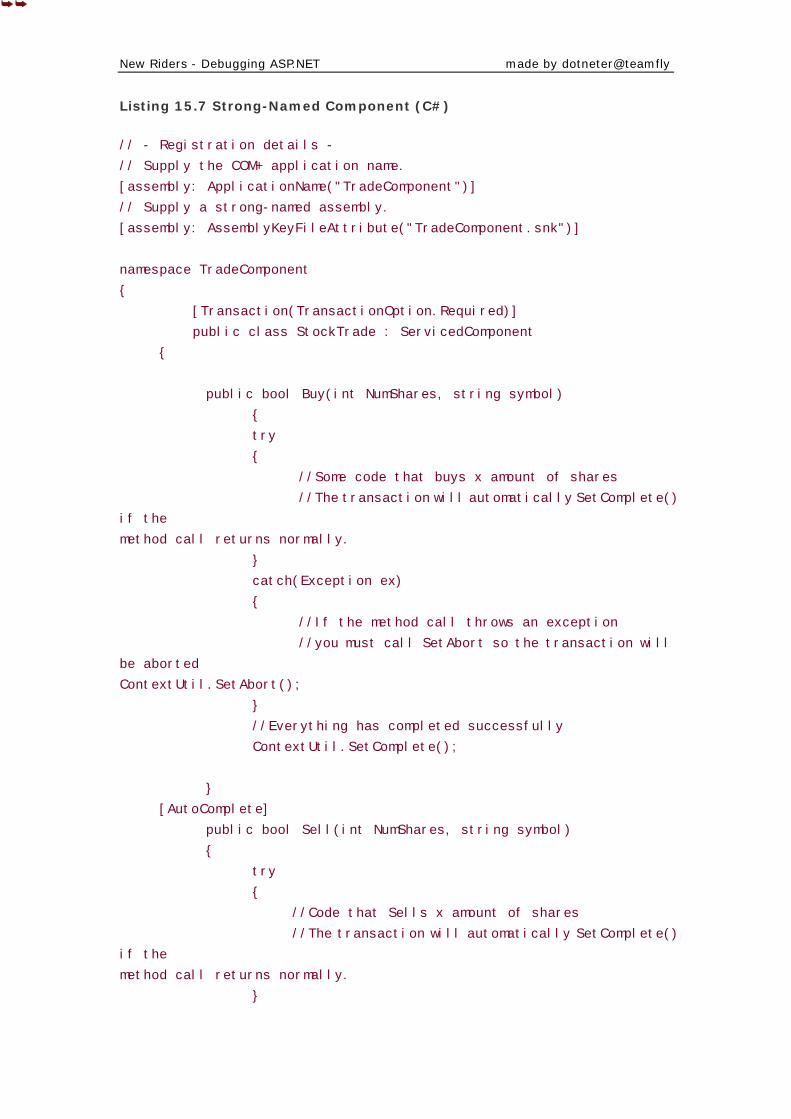
New Riders - Debugging ASP.NET made by dotneter@teamfly
Listing 15.7 Strong-Named Component (C#)
// - Registration details -
// Supply the COM+ application name.
[assembly: ApplicationName("TradeComponent")]
// Supply a strong-named assembly.
[assembly: AssemblyKeyFileAttribute("TradeComponent.snk")]
namespace TradeComponent
{
[Transaction(TransactionOption.Required)]
public class StockTrade : ServicedComponent
{
public bool Buy(int NumShares, string symbol)
{
try
{
//Some code that buys x amount of shares
//The transaction will automatically SetComplete()
if the
method call returns normally.
}
catch(Exception ex)
{
//If the method call throws an exception
//you must call SetAbort so the transaction will
be aborted
ContextUtil.SetAbort();
}
//Everything has completed successfully
ContextUtil.SetComplete();
}
[AutoComplete]
public bool Sell(int NumShares, string symbol)
{
try
{
//Code that Sells x amount of shares
//The transaction will automatically SetComplete()
if the
method call returns normally.
}
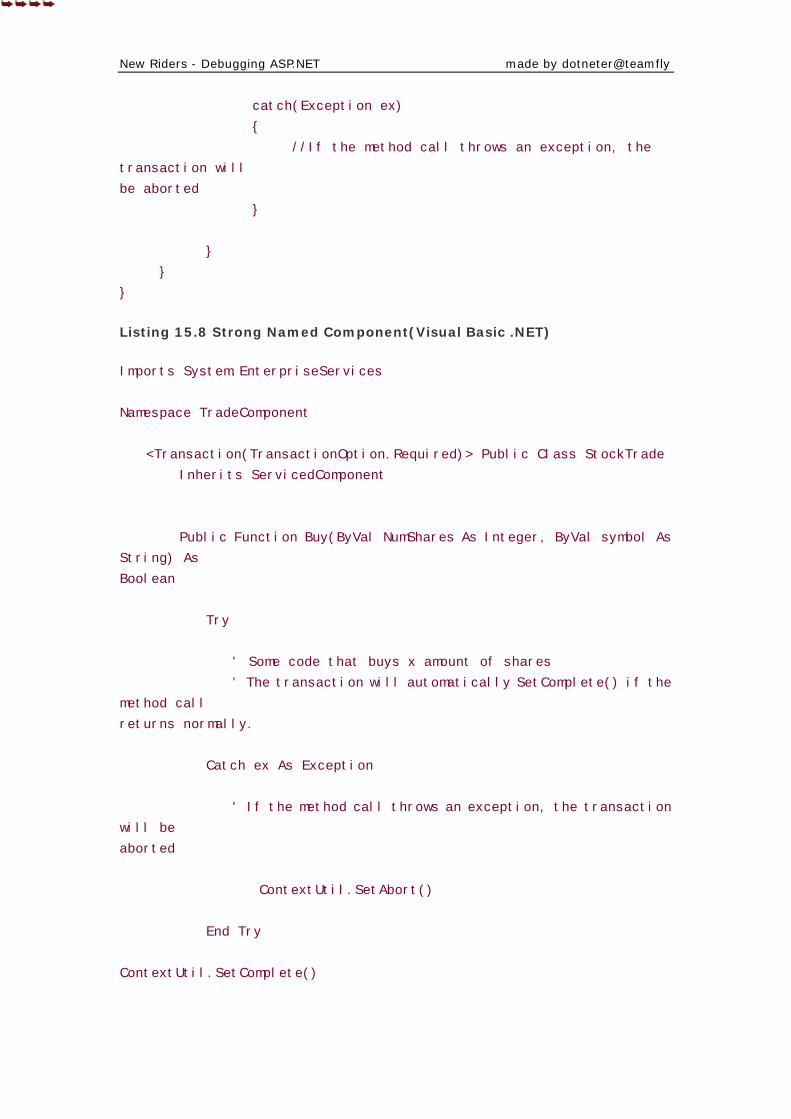
New Riders - Debugging ASP.NET made by dotneter@teamfly
catch(Exception ex)
{
//If the method call throws an exception, the
transaction will
be aborted
}
}
}
}
Listing 15.8 Strong Named Component(Visual Basic .NET)
Imports System.EnterpriseServices
Namespace TradeComponent
<Transaction(TransactionOption.Required)> Public Class StockTrade
Inherits ServicedComponent
Public Function Buy(ByVal NumShares As Integer, ByVal symbol As
String) As
Boolean
Try
' Some code that buys x amount of shares
' The transaction will automatically SetComplete() if the
method call
returns normally.
Catch ex As Exception
' If the method call throws an exception, the transaction
will be
aborted
ContextUtil.SetAbort()
End Try
ContextUtil.SetComplete()
New Riders - Debugging ASP.NET made by dotneter@teamfly
End Function
Public Function Sell(ByVal NumShares As Integer, ByVal symbol As
String) As
Boolean
Try
' Code that Sells x amount of shares
' The transaction will automatically SetComplete() if the
method call
returns normally.
Catch ex As Exception
'If the method call throws an exception, the transaction
will be aborted
ContextUtil.SetAbort()
End Try
ContextUtil.SetComplete()
End Function
End Class
End Namespace
If you look at the method definitions in these listings, you will notice that the
AutoComplete attribute is missing but that the Transaction attribute is still on the
Class definition.
Now if you are trying to call the SetComplete or SetAbort methods on the
transaction object, the examples above (Listings 15.7 and 15.8) shows how this can
be accomplished.
After you have built your component, you probably will want to make sure that it is
being executed as you intended it to. To accomplish this, you will need some sort of
monitoring program to monitor transactions. The next section looks at how to
monitor transactions.
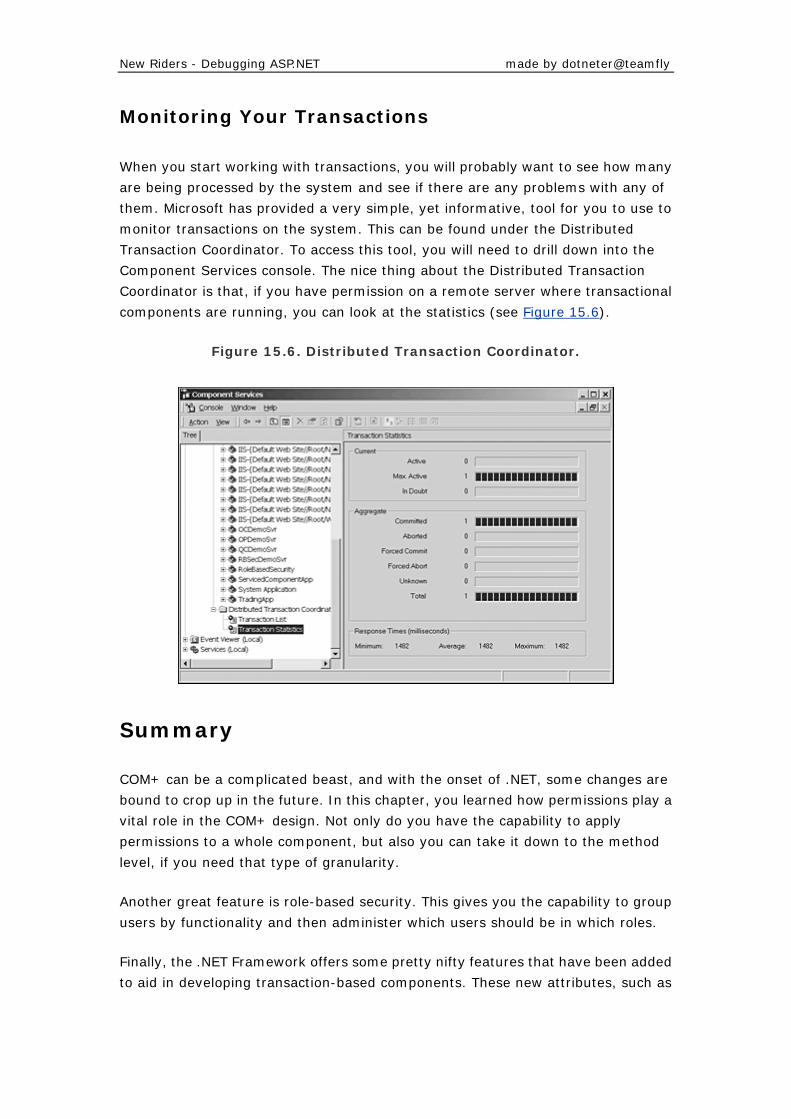
New Riders - Debugging ASP.NET made by dotneter@teamfly
Monitoring Your Transactions
When you start working with transactions, you will probably want to see how many
are being processed by the system and see if there are any problems with any of
them. Microsoft has provided a very simple, yet informative, tool for you to use to
monitor transactions on the system. This can be found under the Distributed
Transaction Coordinator. To access this tool, you will need to drill down into the
Component Services console. The nice thing about the Distributed Transaction
Coordinator is that, if you have permission on a remote server where transactional
components are running, you can look at the statistics (see Figure 15.6).
Figure 15.6. Distributed Transaction Coordinator.
Summary
COM+ can be a complicated beast, and with the onset of .NET, some changes are
bound to crop up in the future. In this chapter, you learned how permissions play a
vital role in the COM+ design. Not only do you have the capability to apply
permissions to a whole component, but also you can take it down to the method
level, if you need that type of granularity.
Another great feature is role-based security. This gives you the capability to group
users by functionality and then administer which users should be in which roles.
Finally, the .NET Framework offers some pretty nifty features that have been added
to aid in developing transaction-based components. These new attributes, such as
New Riders - Debugging ASP.NET made by dotneter@teamfly
AutoComplete, are great for identifying which methods you want to take care of
themselves.
To wind up our look at debugging aspects of the of .NET framework, we turn to
ADO.NET in Chapter 16,“Debugging ADO.NET.”
Chapter 16. Debugging ADO.NET
SO WHAT IS SO DIFFERENT ABOUT ADO.NET that we need to devote a whole chapter of this book to it? Well that’s what we were thinking when we started to write this chapter. But as we dug deeper under the hood, we really began to realize the importance of this chapter. It all became very clear to us—and by the end of this chapter, it will be clear to you, too.
Let’s first take a look at the differences between the old ADO and the new ADO.NET features. Table 16.1 presents these differences. This should help you identify some of the changes up front.
Table 16.1. Differences Between ADO and ADO.NET
Feature Old ADO New ADO.NET
Memory-resident
data representation Uses the RecordSet
object. Uses the DataSet object, which
can contain one or more tables
represented by DataTable objects.
Relationships
among multiple
tables
Requires the use of a JOIN
query to return data from
tables in a RecordSet
Supports the DataRelation object
to associate rows in one
DataTable object with rows in
another DataTable object.
Data visitation Scans RecordSet rows
sequentially. Uses a navigation paradigm for
nonsequential access to rows in a
table. Follows relationships to
navigate from rows in one table to
corresponding rows in another
table.
Disconnected
access Available through a
RecordSet, but supports
connected access,
Communicates to a database with
standardized calls to the
DataAdapter object, which
New Riders - Debugging ASP.NET made by dotneter@teamfly
represented by the
Connection object. You
communicate to a
database by using the OLE
DB providers.
communicates to an OLE DB
provider, or directly to SQL Server.
Programmability Uses the Connection
object to transmit
commands to address
underlying data structure
of a data source.
Uses the strongly typed
programming characteristic of
XML. Data is self-describing
because names for code items
correspond to the “real-world”
problem solved by the code.
Underlying data constructs such as
tables and rows do not appear,
making code easier to read and
write.
Sharing of
disconnected data
between tiers or
components
Uses COM marshalling to
transmit a disconnected
record set. This supports
only those datatypes
defined by the COM
standard. Requires type
conversions, which
demand system
resources.
Transmits a DataSet as XML. The
XML format places no restrictions
datatypes and requires no type
conversions.
Transmission of
data through
firewalls
Is problematic because
firewalls typically are
configured to prevent
system-level requests
such as COM marshalling.
Supported because ADO.NET
DataSet objects use XML, which
can pass through firewalls.
Scalability Database locks and active
database connections long
durations contend for
limited database
resources.
Disconnected access to database
for data without retaining
database locks or active database
connections for lengthy periods
limits contention for limited
database resources.
Understanding the System.Data Namespace
When accessing data, there are two distinct ways to retrieve information. The two entry points for data access are as follows:
• SqlClient • OleDb
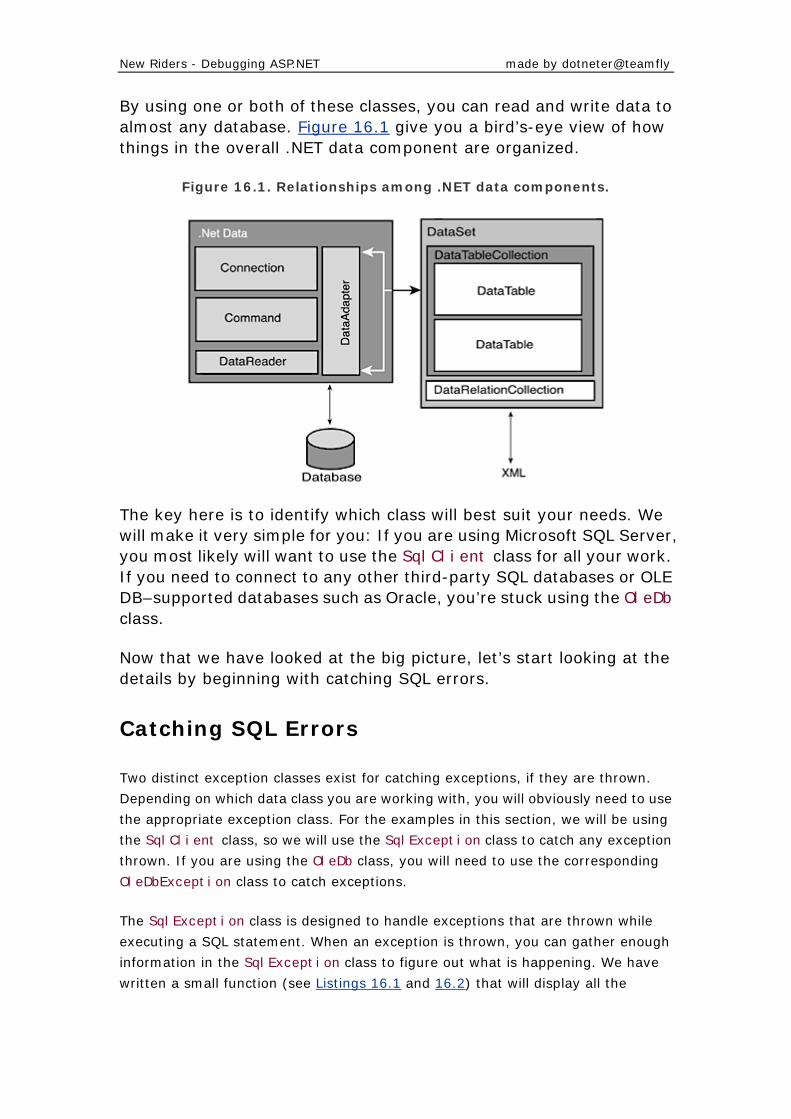
New Riders - Debugging ASP.NET made by dotneter@teamfly
By using one or both of these classes, you can read and write data to almost any database. Figure 16.1 give you a bird’s-eye view of how things in the overall .NET data component are organized.
Figure 16.1. Relationships among .NET data components.
The key here is to identify which class will best suit your needs. We will make it very simple for you: If you are using Microsoft SQL Server, you most likely will want to use the SqlClient class for all your work. If you need to connect to any other third-party SQL databases or OLE DB–supported databases such as Oracle, you’re stuck using the OleDb class.
Now that we have looked at the big picture, let’s start looking at the details by beginning with catching SQL errors.
Catching SQL Errors
Two distinct exception classes exist for catching exceptions, if they are thrown.
Depending on which data class you are working with, you will obviously need to use
the appropriate exception class. For the examples in this section, we will be using
the SqlClient class, so we will use the SqlException class to catch any exception
thrown. If you are using the OleDb class, you will need to use the corresponding
OleDbException class to catch exceptions.
The SqlException class is designed to handle exceptions that are thrown while
executing a SQL statement. When an exception is thrown, you can gather enough
information in the SqlException class to figure out what is happening. We have
written a small function (see Listings 16.1 and 16.2) that will display all the
New Riders - Debugging ASP.NET made by dotneter@teamfly
properties of the SqlException class when an exception is thrown. This gives you a
good idea of what is happening when the error occurs.
This function was written to return a string that is formatted with some HTML tags
to display on a web page. If you want to use it in a different context, such as writing
to a file, you can just change the nl (short for “new line”) to a carriage return and
line feed, if you prefer.
You might find that this function will be more helpful during more complicated SQL
errors. Most of the time, you will find the error that you get will be the result of a
simple spelling mistake.
This code shown in Listings 16.1 and 16.2 is a simple function that you can include
in your program. If you are having problems debugging a SQL problem, this code
might shed more light on the situation. The main purpose of this function is to serve
as an additional utility to help you debug SQL problems.
Listing 16.1 GetSqlExceptionDump Function (C#)
private string GetSqlExceptionDump(SqlException Ex)
{ string sDump;
string nl = "<br>";
sDump = "";
sDump = "Class: " + Ex.Class + nl +
"Errors: " + Ex.Errors + nl +
"Help Link: " + Ex.HelpLink + nl +
"InnerException: " + Ex.InnerException + nl +
"Line#: " + Ex.LineNumber + nl+
"Message: " + Ex.Message + nl+
"Procedure: " + Ex.Procedure + nl+
"Server: " + Ex.Server + nl+
"Source: " + Ex.Source + nl+
"Stack Trace: " + Ex.StackTrace + nl+
"State: " + Ex.State + nl+
"Target site: " + Ex. TargetSite + nl;
return sDump;
}
Listing 16.2 GetSqlExceptionDump Function (Visual Basic .NET)
private Function GetSqlExceptionDump(Ex as SqlException ) as string
dim sDump as String
dim nl = "<br>"
New Riders - Debugging ASP.NET made by dotneter@teamfly
sDump = ""
sDump = "Class: " + Ex.Class + nl & _
"Errors: " + Ex.Errors + nl & _
"Help Link: " + Ex.HelpLink + nl & _
"InnerException: " + Ex.InnerException + nl & _
"Line#: " + Ex.LineNumber + nl & _
"Message: " + Ex.Message + nl & _
"Procedure: " + Ex.Procedure + nl & _
"Server: " + Ex.Server + nl & _
"Source: " + Ex.Source + nl & _
"Stack Trace: " + Ex.StackTrace + nl & _
"State: " + Ex.State + nl & _
"Target site: " + Ex. TargetSite + nl
GetSqlExceptionDump = sDump
End Function
Let’s take a look at what happens when an error occurs during the execution of a
web page. Listings 16.3 and 16.4 present a small sample of code to connect to the
database and select a few rows of data.What could go wrong with that?
Listing 16.3 Sample Code to Connect to the Database (C#)
try
{
SqlConnection nwindConn = new SqlConnection("Data
Source=localhost;Integrated
Security=SSPI;Initial Catalog=northwind");
nwindConn.Open();
SqlCommand myCommand = new SqlCommand("SELECT dCategoryID, CategoryName
FROM Categories",
nwindConn);
SqlDataReader myReader = myCommand.ExecuteReader();//'This command will
trigger an error
while (myReader.Read())
Response.Write("<br>" + myReader.GetValue(1));
myReader.Close();
nwindConn.Close();
New Riders - Debugging ASP.NET made by dotneter@teamfly
}
catch (SqlException Ex)
{
Response.Write(GetSqlExceptionDump(Ex));
}
Listing 16.4 Sample Code to Connect to the Database (Visual Basic .NET)
Try
Dim nwindConn = new SqlConnection("Data Source=localhost; Integrated
Security=SSPI;Initial Catalog=northwind")
nwindConn.Open()
Dim myCommand = new SqlCommand("SELECT dCategoryID, CategoryName FROM
Categories",
nwindConn)
Dim myReader = myCommand.ExecuteReader()'This command will trigger an
error
Do while (myReader.Read())
Response.Write("<br>" + myReader.GetValue(1))
myReader.Close()
nwindConn.Close()
loop
catch Ex as SqlException
Response.Write(GetSqlExceptionDump(Ex))
End Try
Everything seems to look okay. Looking at the code in Listings 16.3 and 16.4, you
probably don’t see anything wrong. That’s because syntactically it is correct—but
what about runtime errors? That’s what we are really talking about. Those can be
the most difficult errors to track down and debug.
Now that you have an example to work with, let’s see what happens if this code is
executed. Look at the output shown in Listing 16.5.
Listing 16.5 Sample Output of GetSqlExceptionDump
Class:16
Errors:System.Data.SqlClient.SqlErrorCollection
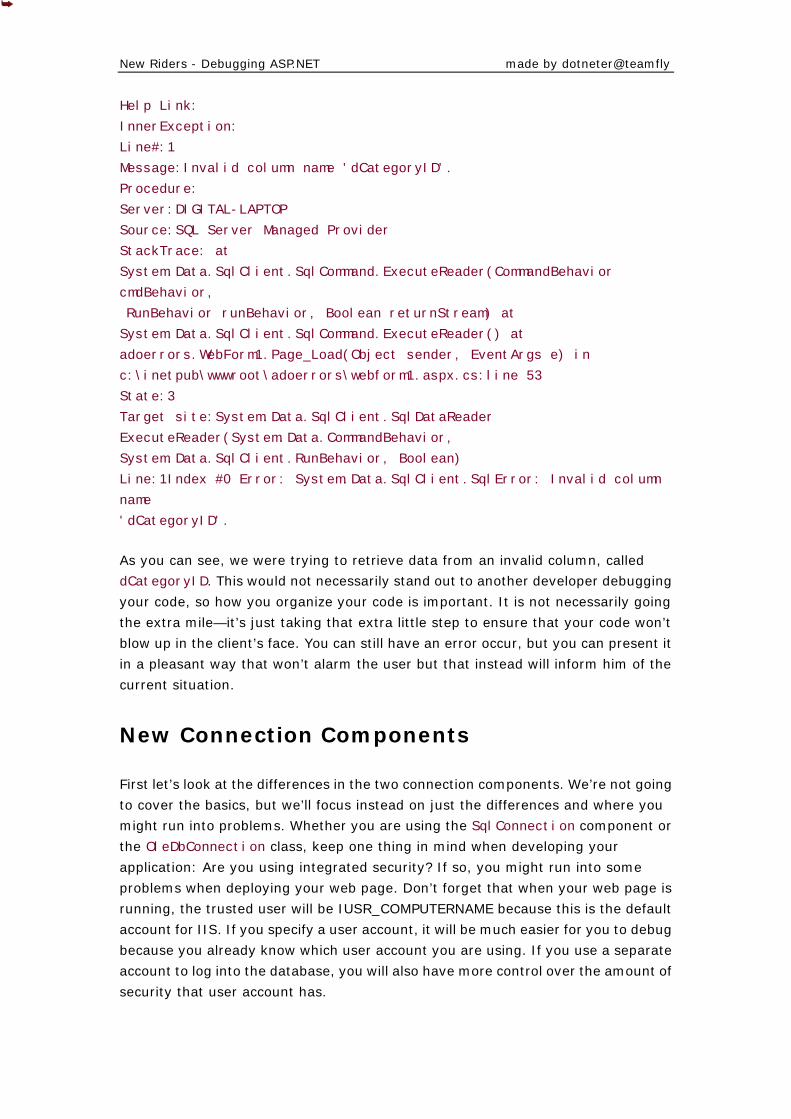
New Riders - Debugging ASP.NET made by dotneter@teamfly
Help Link:
InnerException:
Line#:1
Message:Invalid column name 'dCategoryID'.
Procedure:
Server:DIGITAL-LAPTOP
Source:SQL Server Managed Provider
StackTrace: at
System.Data.SqlClient.SqlCommand.ExecuteReader(CommandBehavior
cmdBehavior,
RunBehavior runBehavior, Boolean returnStream) at
System.Data.SqlClient.SqlCommand.ExecuteReader() at
adoerrors.WebForm1.Page_Load(Object sender, EventArgs e) in
c:\inetpub\wwwroot\adoerrors\webform1.aspx.cs:line 53
State:3
Target site:System.Data.SqlClient.SqlDataReader
ExecuteReader(System.Data.CommandBehavior,
System.Data.SqlClient.RunBehavior, Boolean)
Line:1Index #0 Error: System.Data.SqlClient.SqlError: Invalid column
name
'dCategoryID'.
As you can see, we were trying to retrieve data from an invalid column, called
dCategoryID. This would not necessarily stand out to another developer debugging
your code, so how you organize your code is important. It is not necessarily going
the extra mile—it’s just taking that extra little step to ensure that your code won’t
blow up in the client’s face. You can still have an error occur, but you can present it
in a pleasant way that won’t alarm the user but that instead will inform him of the
current situation.
New Connection Components
First let’s look at the differences in the two connection components. We’re not going
to cover the basics, but we’ll focus instead on just the differences and where you
might run into problems. Whether you are using the SqlConnection component or
the OleDbConnection class, keep one thing in mind when developing your
application: Are you using integrated security? If so, you might run into some
problems when deploying your web page. Don’t forget that when your web page is
running, the trusted user will be IUSR_COMPUTERNAME because this is the default
account for IIS. If you specify a user account, it will be much easier for you to debug
because you already know which user account you are using. If you use a separate
account to log into the database, you will also have more control over the amount of
security that user account has.
New Riders - Debugging ASP.NET made by dotneter@teamfly
SqlClient.SqlConnection
This component was designed to be used specifically with Microsoft SQL Server and
nothing else. One of the benefits that you get by using it is speed. SqlClient uses
its own protocol to communicate with SQL Server. This eliminates the overhead and
layers of OleDbConnection. Keep that in mind if you want to accomplish any specific
task related to SQL Server, such as use a remote server.
One of the features available on SqlConnection that you don’t have in
OleDbConnection is the Packetsize property. This can be very useful if you need to
adjust the size of the network packets being sent. This is not something that you
would typically change, but if you were sending large amounts of text or even
images, you might want to increase the packet size. On the flip side, let’s say that
you are developing a wireless site that will use very small chunks of data; you might
want to adjust the packet size to a more efficient size because the default value is
8192 bytes. You might not think that this is that important, but when your web site
starts to scale up and your traffic increases, attention to details like this will start to
add up and make a big difference.
If you are having a problem connecting to SQL Server 6.5 , that is because the
SQLClient namespace does not support it; it supports only SQL Server 7.0 and
higher. You will need to use the OleDb namespace to connect to earlier versions of
SQL Server.
OleDb.OleDbConnection
One of the first problems you might run into is trying to use a data source name
(DSN). This option is no longer supported in the .NET Framework, so if you want to
transition your code over to .NET, keep in mind that you will have to replace all your
connection strings that contain DSN.
If you compare the OleDbConnection string to its counterpart, it is almost identical,
except for a few noticeable modifications in the use of keywords and properties. The
major difference between the two is that the OleDbConnection component is
designed to be backward compatible and to work with all databases that have an
OLE DB driver. The following list contains these exceptions:
• You must use the Provider keyword.
• The URL keyword is not supported.
• The Remote Provider keyword is not supported.
• The Remote Server keyword is not supported.
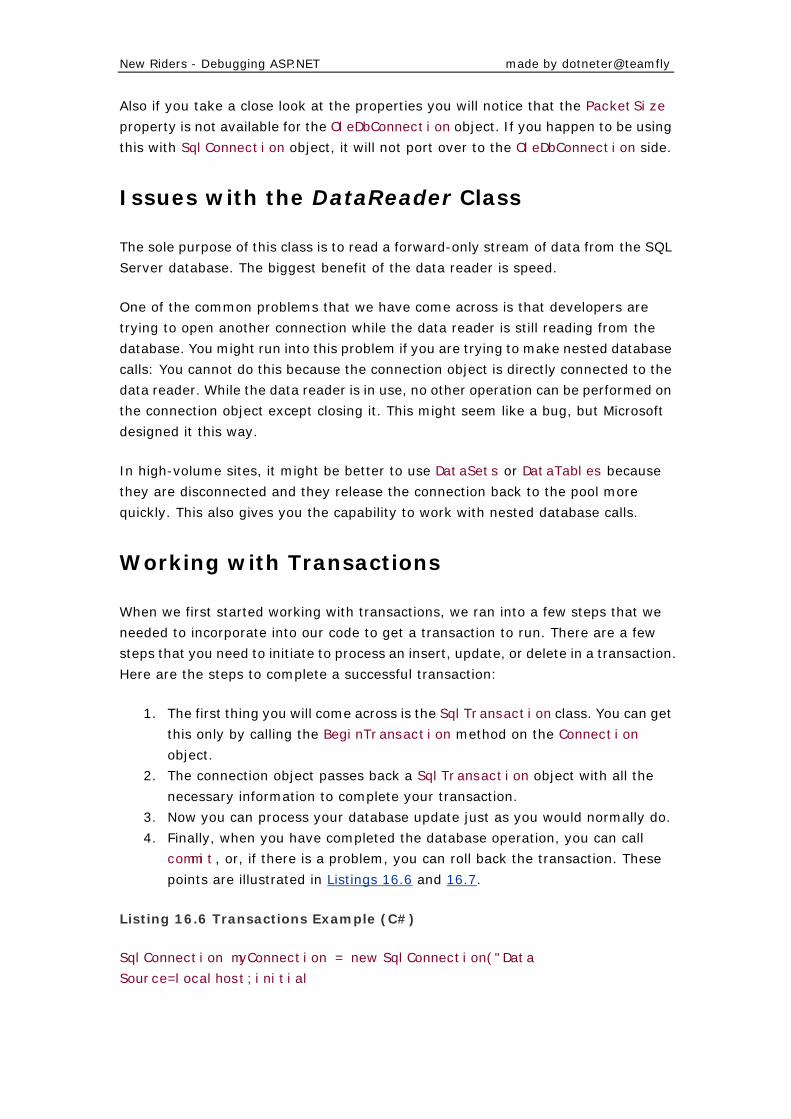
New Riders - Debugging ASP.NET made by dotneter@teamfly
Also if you take a close look at the properties you will notice that the PacketSize
property is not available for the OleDbConnection object. If you happen to be using
this with SqlConnection object, it will not port over to the OleDbConnection side.
Issues with the DataReader Class
The sole purpose of this class is to read a forward-only stream of data from the SQL
Server database. The biggest benefit of the data reader is speed.
One of the common problems that we have come across is that developers are
trying to open another connection while the data reader is still reading from the
database. You might run into this problem if you are trying to make nested database
calls: You cannot do this because the connection object is directly connected to the
data reader. While the data reader is in use, no other operation can be performed on
the connection object except closing it. This might seem like a bug, but Microsoft
designed it this way.
In high-volume sites, it might be better to use DataSets or DataTables because
they are disconnected and they release the connection back to the pool more
quickly. This also gives you the capability to work with nested database calls.
Working with Transactions
When we first started working with transactions, we ran into a few steps that we
needed to incorporate into our code to get a transaction to run. There are a few
steps that you need to initiate to process an insert, update, or delete in a transaction.
Here are the steps to complete a successful transaction:
1. The first thing you will come across is the SqlTransaction class. You can get
this only by calling the BeginTransaction method on the Connection
object.
2. The connection object passes back a SqlTransaction object with all the
necessary information to complete your transaction.
3. Now you can process your database update just as you would normally do.
4. Finally, when you have completed the database operation, you can call
commit, or, if there is a problem, you can roll back the transaction. These
points are illustrated in Listings 16.6 and 16.7.
Listing 16.6 Transactions Example (C#)
SqlConnection myConnection = new SqlConnection("Data
Source=localhost;initial
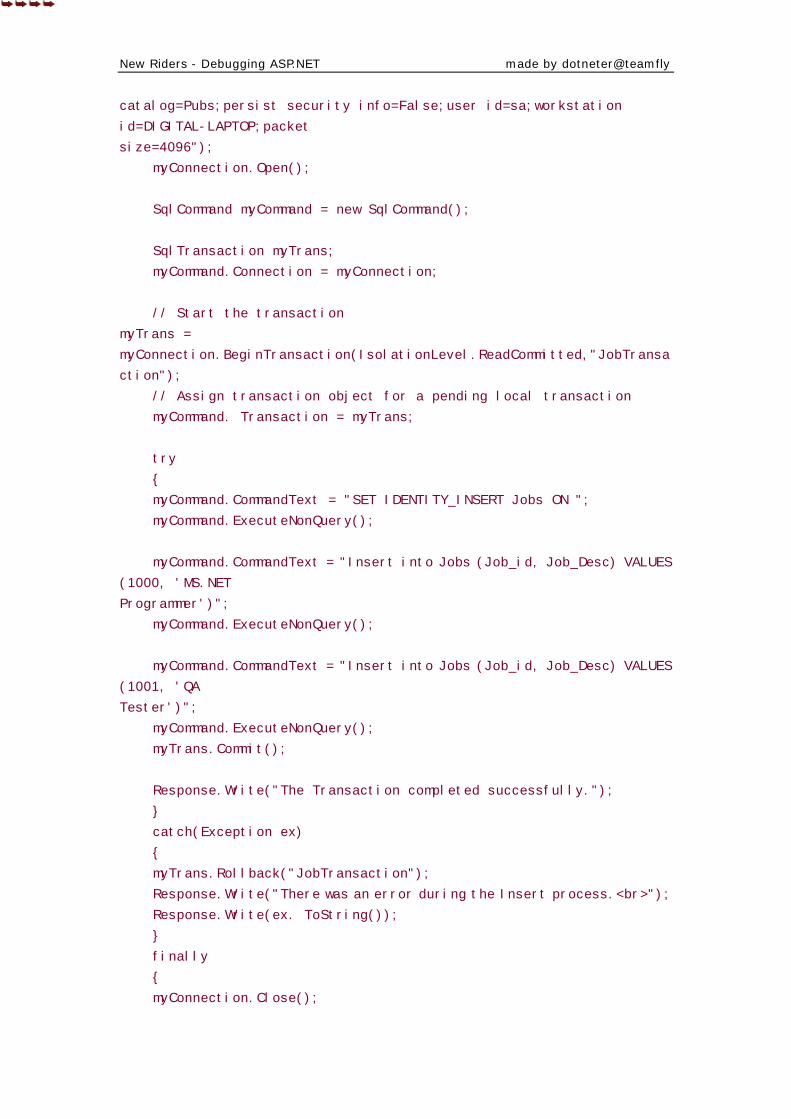
New Riders - Debugging ASP.NET made by dotneter@teamfly
catalog=Pubs;persist security info=False;user id=sa;workstation
id=DIGITAL-LAPTOP;packet
size=4096");
myConnection.Open();
SqlCommand myCommand = new SqlCommand();
SqlTransaction myTrans;
myCommand.Connection = myConnection;
// Start the transaction
myTrans =
myConnection.BeginTransaction(IsolationLevel.ReadCommitted,"JobTransa
ction");
// Assign transaction object for a pending local transaction
myCommand. Transaction = myTrans;
try
{
myCommand.CommandText = "SET IDENTITY_INSERT Jobs ON ";
myCommand.ExecuteNonQuery();
myCommand.CommandText = "Insert into Jobs (Job_id, Job_Desc) VALUES
(1000, 'MS.NET
Programmer')";
myCommand.ExecuteNonQuery();
myCommand.CommandText = "Insert into Jobs (Job_id, Job_Desc) VALUES
(1001, 'QA
Tester')";
myCommand.ExecuteNonQuery();
myTrans.Commit();
Response.Write("The Transaction completed successfully.");
}
catch(Exception ex)
{
myTrans.Rollback("JobTransaction");
Response.Write("There was an error during the Insert process.<br>");
Response.Write(ex. ToString());
}
finally
{
myConnection.Close();
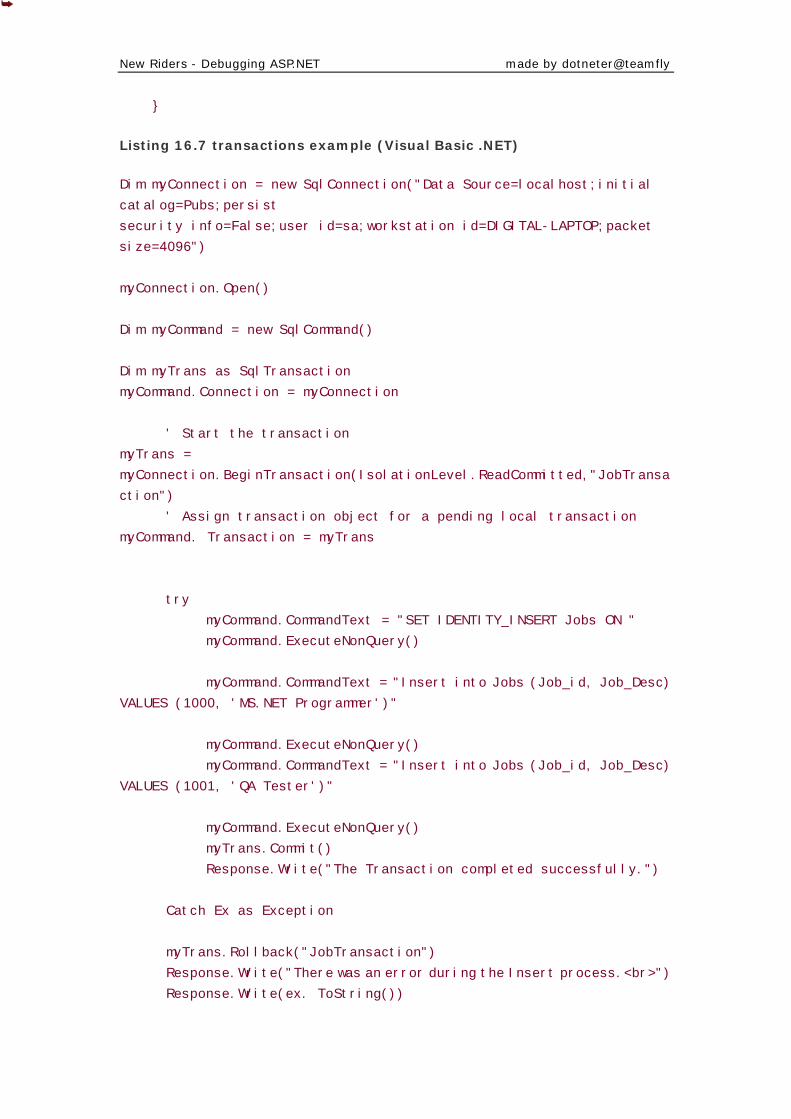
New Riders - Debugging ASP.NET made by dotneter@teamfly
}
Listing 16.7 transactions example (Visual Basic .NET)
Dim myConnection = new SqlConnection("Data Source=localhost;initial
catalog=Pubs;persist
security info=False;user id=sa;workstation id=DIGITAL-LAPTOP;packet
size=4096")
myConnection.Open()
Dim myCommand = new SqlCommand()
Dim myTrans as SqlTransaction
myCommand.Connection = myConnection
' Start the transaction
myTrans =
myConnection.BeginTransaction(IsolationLevel.ReadCommitted,"JobTransa
ction")
' Assign transaction object for a pending local transaction
myCommand. Transaction = myTrans
try
myCommand.CommandText = "SET IDENTITY_INSERT Jobs ON "
myCommand.ExecuteNonQuery()
myCommand.CommandText = "Insert into Jobs (Job_id, Job_Desc)
VALUES (1000, 'MS.NET Programmer')"
myCommand.ExecuteNonQuery()
myCommand.CommandText = "Insert into Jobs (Job_id, Job_Desc)
VALUES (1001, 'QA Tester')"
myCommand.ExecuteNonQuery()
myTrans.Commit()
Response.Write("The Transaction completed successfully.")
Catch Ex as Exception
myTrans.Rollback("JobTransaction")
Response.Write("There was an error during the Insert process.<br>")
Response.Write(ex. ToString())
New Riders - Debugging ASP.NET made by dotneter@teamfly
finally
myConnection.Close()
end try
You might notice a few things in these examples. First, you might be wondering
about the statement "SET IDENTITY_INSERT Jobs ON". We did this because the
job_id field is an Identity field and because we already have a unique identity; we
needed to make sure that the unique identity stayed in sync throughout the
database. We must use the "SET IDENTITY_INSERT" statement to accomplish this;
otherwise, it will throw an exception.
Error Codes and How to Debug Them
In the .NET Framework, error handling has been completely revamped. There is
such an enormous amount of errors to cover that you could dedicate a whole book
to just this subject. Instead, we have tried to focus on the more common areas
where you might run into problems and explain the errors that you will probably
encounter.
Access Denied
One of the most common errors could be this one:
Access Denied: [DBNETLIB][ConnectionOpen (Connect()).]SQL Server does
not exist or access
denied.
You are trying to connect to a database, and you get this error message. This
message seems vague: Is it a security issue or a networking issue? You would think
they could have figured this out by now and identify whether it is one or the other.
Well, you know that the database exists, and you have all the proper permissions to
use it. So what’s wrong? Here are the steps you should take to debug this problem:
1. ping the server you are trying to connect to. This will help you identify if
there is a network problem.
2. Verify that the login ID and password are valid by logging in through a
different source.
3. Make sure that the initial catalog or database is spelled correctly.
4. Make sure that the server name and IP address are correct.
New Riders - Debugging ASP.NET made by dotneter@teamfly
Let’s take a close look at the connection string. Microsoft has been meddling quite a
lot with the ADO portion of .NET, so you need to pay extra attention to details here.
Table 16.2 gives you a list of acceptable keywords.
Table 16.2. Acceptable Keywords
Keyword Explanation
Data Source The hostname, computer name, or network
address of the SQL Server
ServerAddressAddrNetwork
Address
User ID The SQL Server login account
Initial Catalog The name of the database
Password The SQL Server password
Pwd
Here are a couple of examples of what a basic connection string could look like:
SqlConnection ("server=digital-laptop;uid=sa;pwd=;database=northwind)
SqlConnection("Data Source=localhost; Integrated Security=SSPI;Initial
Catalog=northwind")
SELECT Permission Denied
Another common error is exemplified here:
SELECT permission denied on object 'Product', database 'Northwind', owner
'dbo'.
This error is typically easy to fix. In this case, we were trying to perform a SELECT
statement on the product table with the different account. If you take a look at
Listings 16.8 and 16.9, you will notice that we’re trying to connect to the database
with a user named testuser, not system administrator. Because the system
administrator account has privileges to do anything that the owner wants, there are
really no restrictions. This causes serious problems if you try to change the user
connecting to the database.
One of the first things you should do when setting up a new database-driven web
site is create a SQL user account for your web site and not use the system
administrator account. This way you can control what that user has access to right
from the beginning, and you will avoid major headaches if you try to switch the user
account that is logging into the database.

New Riders - Debugging ASP.NET made by dotneter@teamfly
Listing 16.8 Connecting to the Database (C#)
SqlConnection Conn = new SqlConnection();
Conn.ConnectionString = "server=digital-world;initial catalog =
northwind;user id=
testuser; pwd=password";
Conn.Open();
DataSet ds = new DataSet();
Listing 16.9 Connecting to the Database (Visual Basic .NET)
Dim Conn as SqlConnection = new SqlConnection()
Conn.ConnectionString = "server=digital-world;initial catalog =
northwind;user id=
testuser; pwd=password"
Conn.Open()
Dim ds as DataSet = new DataSet()
Dim dr as SqlDataAdapter = new SqlDataAdapter("Select * from
product",Conn)
To see who has permissions on the product table, you will need to do the following
steps:
1. Open the SQL Enterprise Manager.
2. Select the Northwind database.
3. Expand the tables.
4. Right-click the Product table.
5. Select Permissions.
If you take a look at Figure 16.2, you will notice that there are no permissions set for
any user. What you need to do is check the testuser SELECT column and save the
changes. Then everything will work fine.
Figure 16.2. SQL Enterprise Manager table permissions.
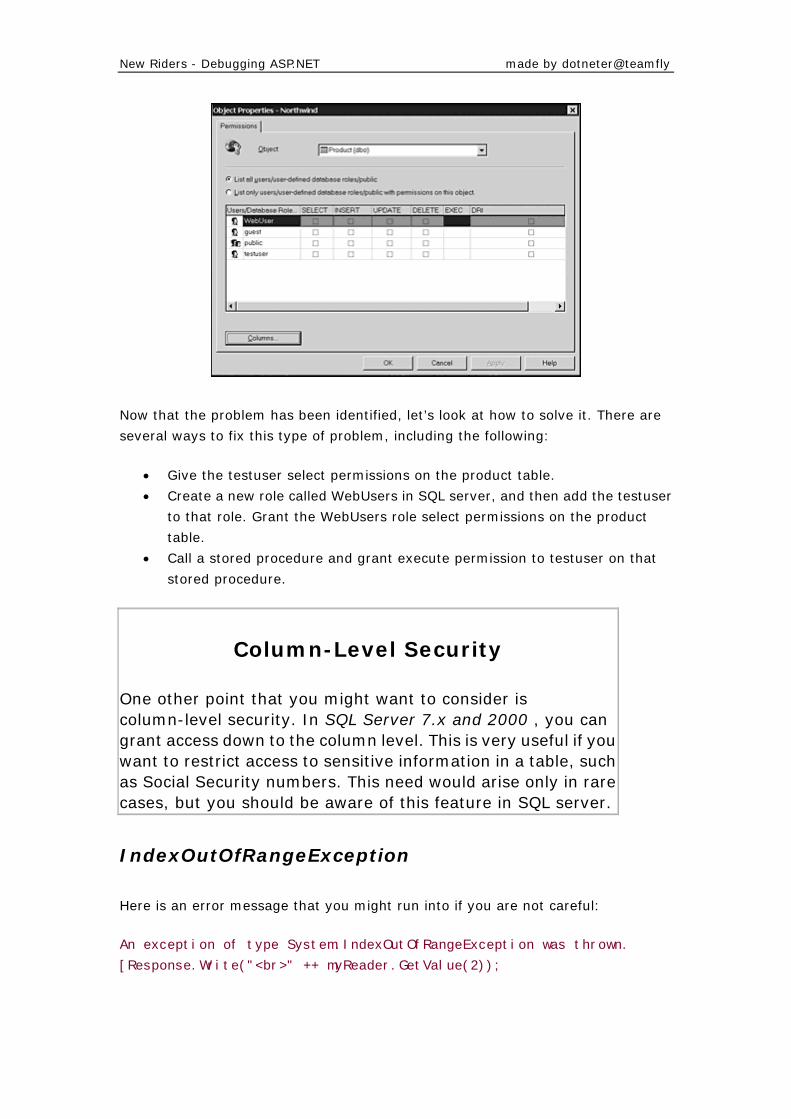
New Riders - Debugging ASP.NET made by dotneter@teamfly
Now that the problem has been identified, let’s look at how to solve it. There are
several ways to fix this type of problem, including the following:
• Give the testuser select permissions on the product table.
• Create a new role called WebUsers in SQL server, and then add the testuser
to that role. Grant the WebUsers role select permissions on the product
table.
• Call a stored procedure and grant execute permission to testuser on that
stored procedure.
Column-Level Security
One other point that you might want to consider is column-level security. In SQL Server 7.x and 2000 , you can grant access down to the column level. This is very useful if youwant to restrict access to sensitive information in a table, suchas Social Security numbers. This need would arise only in rarecases, but you should be aware of this feature in SQL server.
IndexOutOfRangeException
Here is an error message that you might run into if you are not careful:
An exception of type System.IndexOutOfRangeException was thrown.
[Response.Write("<br>" ++ myReader.GetValue(2));

New Riders - Debugging ASP.NET made by dotneter@teamfly
This is a prime example of stepping outside the boundaries of an array. So how can
you prevent this from happening? Let’s take a look at your options for this situation.
If you will use the GetValue method to retrieve the data from a field, you can use
the fieldcount property to identify how many fields were returned. Using that
value, you can initiate a loop to iterate through the fields and read them. This is
exemplified in Listings 16.10 and 16.11.
Listing 16.10 Reading Values from the SqlDataReader (C#)
SqlConnection nwindConn = new SqlConnection("Data Source=localhost;
Integrated Security=SSPI;Initial Catalog=northwind");
nwindConn.Open();
SqlCommand myCommand2 = new SqlCommand("SELECT CategoryID,
CategoryName FROM
Categories", nwindConn);
SqlDataReader myReader = myCommand2.ExecuteReader();
int i;
while (myReader.Read())
for (i=0;i<myReader.FieldCount;i++)
{
Response.Write("<br>" + myReader.GetValue(i));
}
myReader.Close();
nwindConn.Close();
Listing 16.11 Reading Values from the SqlDataReader (Visual Basic .NET)
Dim nwindConn = New SqlConnection("Data Source=localhost; Integrated
Security=SSPI;Initial Catalog=northwind")
nwindConn.Open()
Dim myCommand2 = New SqlCommand("SELECT CategoryID, CategoryName
FROM
Categories", nwindConn)
Dim dsCustomer = New DataSet()
Dim myReader = myCommand2.ExecuteReader()
Dim i As Int32
While myReader.Read()
For i = 0 To myReader.FieldCount
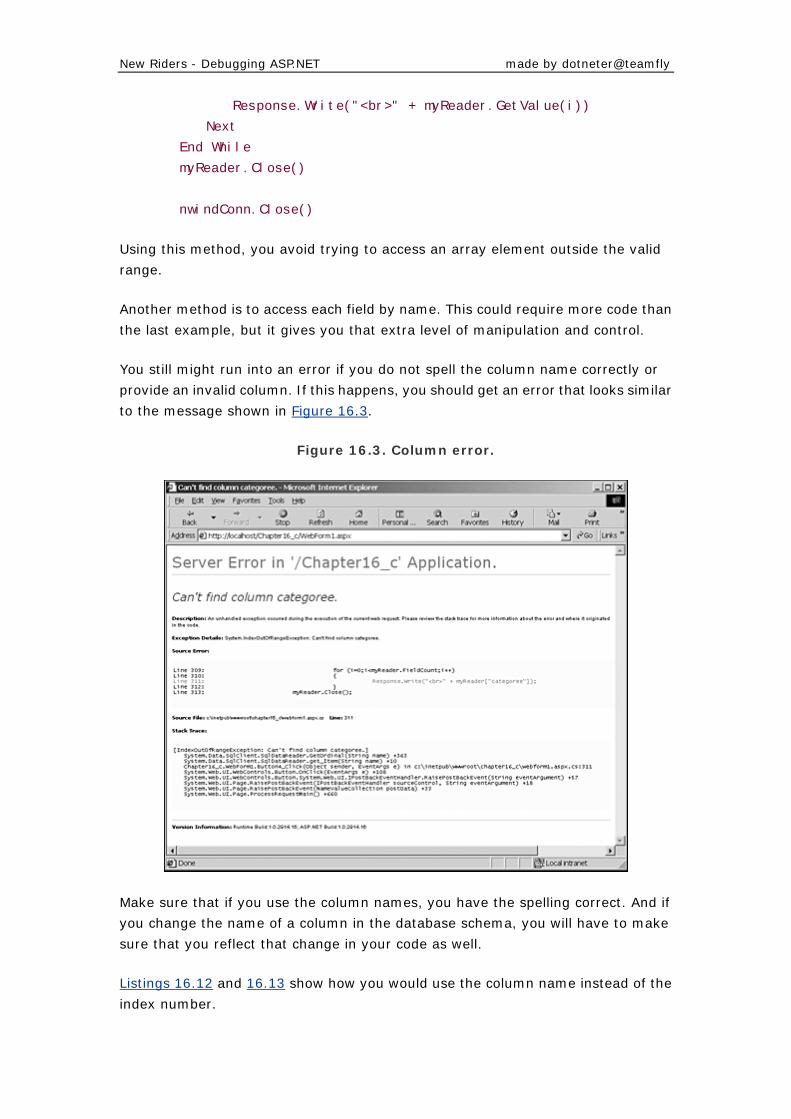
New Riders - Debugging ASP.NET made by dotneter@teamfly
Response.Write("<br>" + myReader.GetValue(i))
Next
End While
myReader.Close()
nwindConn.Close()
Using this method, you avoid trying to access an array element outside the valid
range.
Another method is to access each field by name. This could require more code than
the last example, but it gives you that extra level of manipulation and control.
You still might run into an error if you do not spell the column name correctly or
provide an invalid column. If this happens, you should get an error that looks similar
to the message shown in Figure 16.3.
Figure 16.3. Column error.
Make sure that if you use the column names, you have the spelling correct. And if
you change the name of a column in the database schema, you will have to make
sure that you reflect that change in your code as well.
Listings 16.12 and 16.13 show how you would use the column name instead of the
index number.
New Riders - Debugging ASP.NET made by dotneter@teamfly
Listing 16.12 Accessing Data by Column Name (C#)
While (myReader.Read())
{
Response.Write(myReader["CategoryID"]. ToString());
Response.Write(myReader["CategoryName"]. ToString());
Response.Write("<br>");
}
Listing 16.13 Accessing Data by Column Name (Visual Basic .NET)
Do While myReader.Read()
Response.Write(myReader("CategoryID"). ToString())
Response.Write(myReader("CategoryName"). ToString())
Response.Write("<br>")
Loop
Invalid Data Source
You can assign a data source to your data control in a couple different ways. This
section focuses on just working with the data grid control. While we were working
with data grids, we were amazed at how flexible the data source property was. You
can pass it a dataset or various types of lists or collections.
When setting up a data grid, you can define the data source property in the aspx
code, but you don’t have to. You can also set that value in the code behind the aspx
page.
If you are working in Visual Studio .NET, you can drag and drop command objects,
connection objects, and even datasets. But you need to assign the data source to
your data grid. This opens up the possibilities of assigning an incorrect data source
if you are not familiar with the process.
If you look at the following code, you will see that it is trying to assign the
sqlcommand1 object as the data source.
<asp:DataGrid id="Datagrid2" style='Z-INDEX: 101; LEFT: 25px; POSITION:
absolute;
TOP: 59px" runat="server" DataSource="<%# sqlCommand1 %>"</asp:DataGrid>
Because the data source is looking for a dataset or a list object, you would need to
create a dataset and assign that to the DataSource property. Another option is to
set the data source in the code behind the page where you do all the database work
and initialize your page components. This enables you to add additional debugging
New Riders - Debugging ASP.NET made by dotneter@teamfly
code, such as writing to a debug listener or a file to help you with any problems that
you might run across. Listings 16.14 and 16.15 illustrate that you make the call to
the database during the load process and then bind the results to the data grid.
Listing 16.14 Setting the data source from behind the aspx page(C#)
private void Page_Load(object sender, System.EventArgs e)
{
SqlConnection Conn = new SqlConnection();
Conn.ConnectionString = "server=localhost;initial catalog =
northwind;user id= sa; pwd=";
Conn.Open();
DataSet ds2 = new DataSet();
SqlDataAdapter dA2 = new SqlDataAdapter("Select * from
products",Conn);
//Populate the dataset
dA2.Fill(ds2,"Products");
DataGrid1.AllowSorting=true;
DataGrid1.BackColor = System.Drawing.Color.AliceBlue;
//Create the association between the data grid and the dataset
DataGrid1.DataSource = ds2;
DataGrid1.DataBind();
//Make sure to close the connection and free unused resources
Conn.Close();
}
Listing 16.15 Setting the data source from behind the aspx page (Visual
Basic .NET)
Private Sub Page_Load(sender as object, e as System.EventArgs)
Dim Conn = new SqlConnection()
Conn.ConnectionString = "server=localhost;initial catalog
=northwind;user id= sa;
pwd="
Conn.Open()
Dim ds2 = new DataSet()
Dim dA2 = new SqlDataAdapter("Select * from products",Conn)
dA2.Fill(ds2)
DataGrid1.AllowSorting=true
DataGrid1.BackColor = System.Drawing.Color.AliceBlue

New Riders - Debugging ASP.NET made by dotneter@teamfly
DataGrid1.DataSource = ds2
DataGrid1.DataBind()
Conn.Close()
End Sub
No Data in the Data Grid
What if your data does not show up in your data grid and you don’t get any error
messages?
If this is the case, you might want to look at your code and make sure that you are
using the DataBind method after you set your data source. The DataBind method
initiates a sequence of events that binds the control and all its child controls to the
specified data source. This is illustrated in Listings 16.16–16.18.
Listing 16.16 Databind method (aspx)
<%@ Page language="c#" Codebehind="WebForm1.aspx.cs"
AutoEventWireup="false" Inherits="adoconnection.WebForm1" %>
<HTML>
<HEAD>
<!DOCTYPE HTML PUBLIC "-//W3C//DTD HTML 4.0 Transitional//EN" >
</HEAD>
<body MS_POSITIONING="GridLayout">
<form id="WebForm1" method="post" runat="server">
asp:DataGrid id=DataGrid1 style="Z-INDEX: 101; LEFT: 25px; POSITION:
absolute; TOP: 59px" runat="server">"></asp:DataGrid>
</form>
</body>
</HTML>
Listing 16.17 Databind method (C#)
private void Page_Load(object sender, System.EventArgs e)
{
// Put user code to initialize the page here
SqlConnection Conn = new SqlConnection();
Conn.ConnectionString = "server=localhost;initial catalog =
northwind;user id= sa; pwd=";
New Riders - Debugging ASP.NET made by dotneter@teamfly
Conn.Open();
DataSet ds = new DataSet();
SqlDataAdapter dA = new SqlDataAdapter("Select * from
products",Conn);
dA.Fill(ds,"Products");
DataGrid1.AllowSorting=true;
DataGrid1.BackColor = System.Drawing.Color.AliceBlue;
DataGrid1.DataSource = ds;
DataGrid1.DataBind();
Conn.Close();
}
Listing 16.18 Databind method (Visual Basic .NET)
private void Page_Load(object sender, System.EventArgs e)
' Put user code to initialize the page here
Dim Conn = new SqlConnection()
Conn.ConnectionString = "server=localhost;initial catalog =
northwind;user id= sa;
pwd="
' Open the connection
Conn.Open()
'Create a new dataset to hold the records
Dim ds = new DataSet()
Dim dA = new SqlDataAdapter("Select * from products",Conn)
'Populate the dataset by using the dataAdapters Fill method
dA.Fill(ds,"Products")
DataGrid1.AllowSorting=true
DataGrid1.BackColor = System.Drawing.Color.AliceBlue
DataGrid1.DataSource = ds
DataGrid1.DataBind()
Conn.Close()
This applies only to aspx pages, not windows within windows applications.
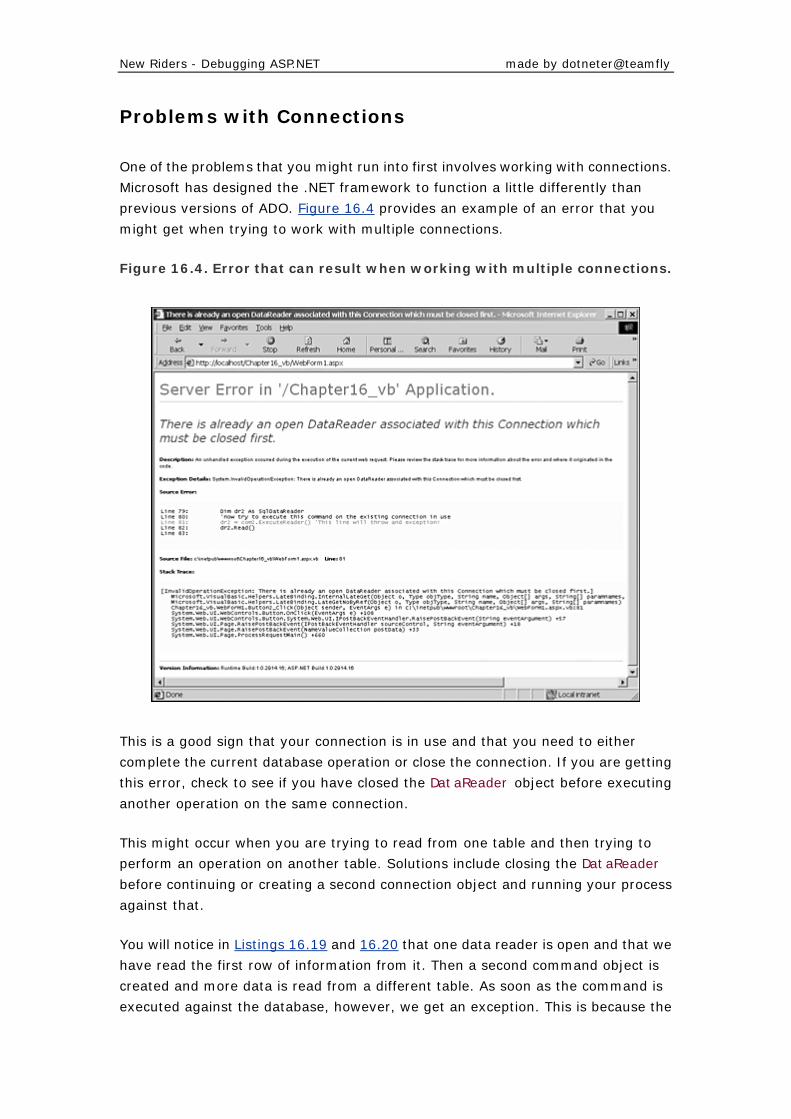
New Riders - Debugging ASP.NET made by dotneter@teamfly
Problems with Connections
One of the problems that you might run into first involves working with connections.
Microsoft has designed the .NET framework to function a little differently than
previous versions of ADO. Figure 16.4 provides an example of an error that you
might get when trying to work with multiple connections.
Figure 16.4. Error that can result when working with multiple connections.
This is a good sign that your connection is in use and that you need to either
complete the current database operation or close the connection. If you are getting
this error, check to see if you have closed the DataReader object before executing
another operation on the same connection.
This might occur when you are trying to read from one table and then trying to
perform an operation on another table. Solutions include closing the DataReader
before continuing or creating a second connection object and running your process
against that.
You will notice in Listings 16.19 and 16.20 that one data reader is open and that we
have read the first row of information from it. Then a second command object is
created and more data is read from a different table. As soon as the command is
executed against the database, however, we get an exception. This is because the
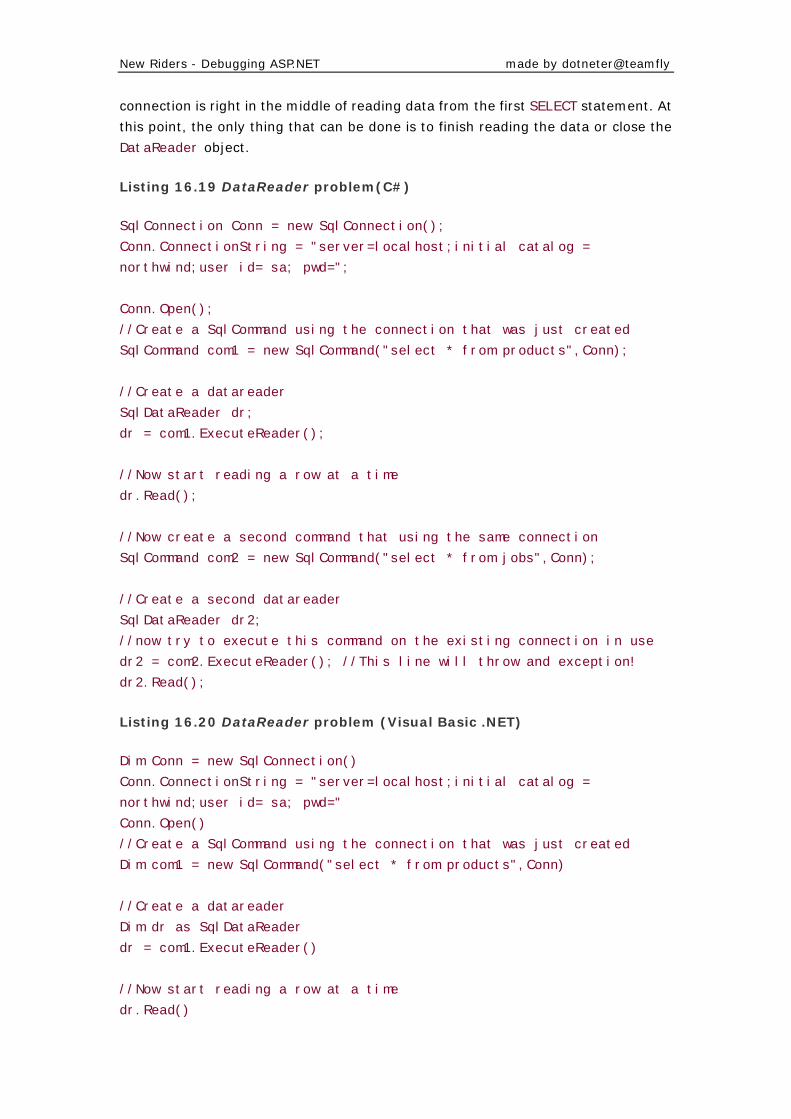
New Riders - Debugging ASP.NET made by dotneter@teamfly
connection is right in the middle of reading data from the first SELECT statement. At
this point, the only thing that can be done is to finish reading the data or close the
DataReader object.
Listing 16.19 DataReader problem(C#)
SqlConnection Conn = new SqlConnection();
Conn.ConnectionString = "server=localhost;initial catalog =
northwind;user id= sa; pwd=";
Conn.Open();
//Create a SqlCommand using the connection that was just created
SqlCommand com1 = new SqlCommand("select * from products",Conn);
//Create a datareader
SqlDataReader dr;
dr = com1.ExecuteReader();
//Now start reading a row at a time
dr.Read();
//Now create a second command that using the same connection
SqlCommand com2 = new SqlCommand("select * from jobs",Conn);
//Create a second datareader
SqlDataReader dr2;
//now try to execute this command on the existing connection in use
dr2 = com2.ExecuteReader(); //This line will throw and exception!
dr2.Read();
Listing 16.20 DataReader problem (Visual Basic .NET)
Dim Conn = new SqlConnection()
Conn.ConnectionString = "server=localhost;initial catalog =
northwind;user id= sa; pwd="
Conn.Open()
//Create a SqlCommand using the connection that was just created
Dim com1 = new SqlCommand("select * from products",Conn)
//Create a datareader
Dim dr as SqlDataReader
dr = com1.ExecuteReader()
//Now start reading a row at a time
dr.Read()

New Riders - Debugging ASP.NET made by dotneter@teamfly
//Now create a second command that using the same connection
Dim com2 = new SqlCommand("select * from Orders",Conn)
//Create a second datareader
Dim dr2 as SqlDataReader
//now try to execute this command on the existing connection in use
dr2 = com2.ExecuteReader() //This line will throw and exception!
dr2.Read()
If you need to persist the data to work with it, you will need to pull it into a dataset
or some other form. That way you can keep it in memory while you make another
connection to the database.
Common Pitfalls
This section looks at some common issues that you might encounter when
developing and tells how to work around them.
Working with Multiple Connections and Using
Connection Pooling
Connection pooling is built into the .NET Framework. If you create all your
connections with the same connection string, the system automatically pools the
connections for you. But if the connection strings differ, you will get a new
nonpooled connection. Keep this in mind when you are developing. If you create
connections all over your code and they all point to the same location, keep a global
connection string around so that you don’t start creating unmeaningful database
connections and wasting resources. A good place to store your connection string
would be in the Web.Config file under a custom section called appsettings.
Listings 16.21 and 16.22 illustrate when a new connection will be made and when an
existing connection will be used or pooled.
Listing 16.21 Connection Pooling (C#)
SqlConnection conn = new SqlConnection();
conn.ConnectionString = "Integrated Security=SSPI;Initial
Catalog=Store";
conn.Open(); // Pool 1 is created.
SqlConnection conn = new SqlConnection();
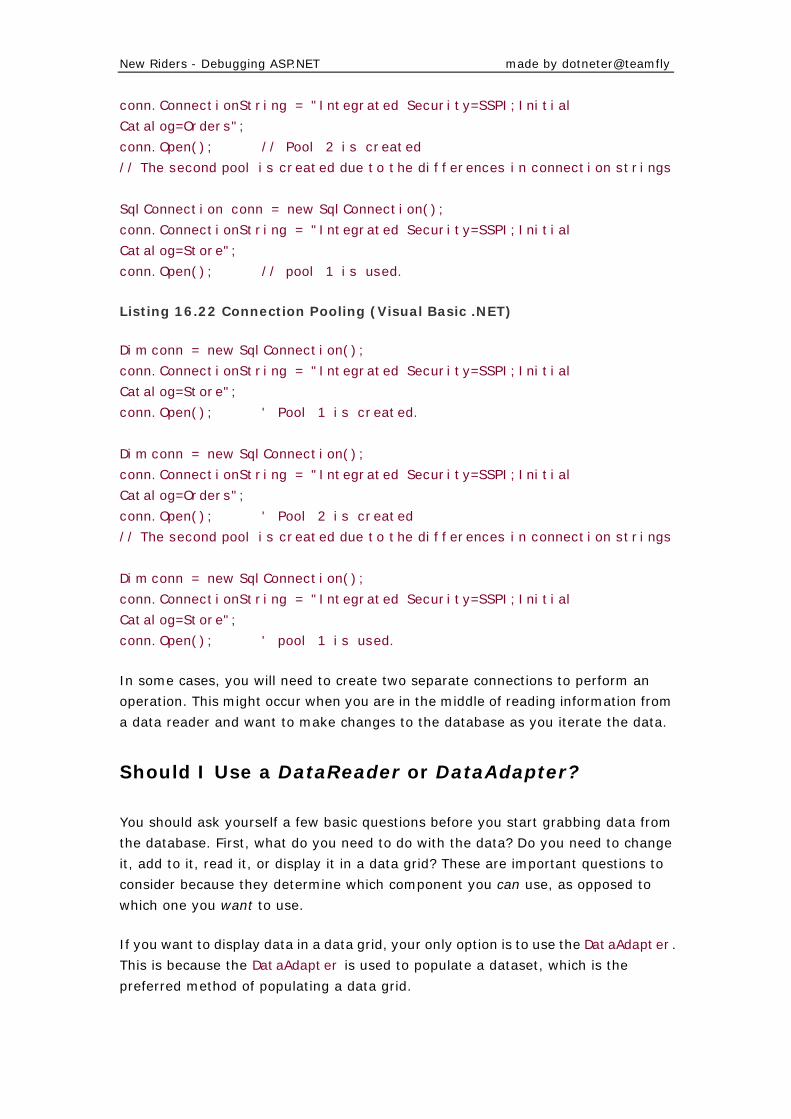
New Riders - Debugging ASP.NET made by dotneter@teamfly
conn.ConnectionString = "Integrated Security=SSPI;Initial
Catalog=Orders";
conn.Open(); // Pool 2 is created
// The second pool is created due to the differences in connection strings
SqlConnection conn = new SqlConnection();
conn.ConnectionString = "Integrated Security=SSPI;Initial
Catalog=Store";
conn.Open(); // pool 1 is used.
Listing 16.22 Connection Pooling (Visual Basic .NET)
Dim conn = new SqlConnection();
conn.ConnectionString = "Integrated Security=SSPI;Initial
Catalog=Store";
conn.Open(); ' Pool 1 is created.
Dim conn = new SqlConnection();
conn.ConnectionString = "Integrated Security=SSPI;Initial
Catalog=Orders";
conn.Open(); ' Pool 2 is created
// The second pool is created due to the differences in connection strings
Dim conn = new SqlConnection();
conn.ConnectionString = "Integrated Security=SSPI;Initial
Catalog=Store";
conn.Open(); ' pool 1 is used.
In some cases, you will need to create two separate connections to perform an
operation. This might occur when you are in the middle of reading information from
a data reader and want to make changes to the database as you iterate the data.
Should I Use a DataReader or DataAdapter?
You should ask yourself a few basic questions before you start grabbing data from
the database. First, what do you need to do with the data? Do you need to change
it, add to it, read it, or display it in a data grid? These are important questions to
consider because they determine which component you can use, as opposed to
which one you want to use.
If you want to display data in a data grid, your only option is to use the DataAdapter.
This is because the DataAdapter is used to populate a dataset, which is the
preferred method of populating a data grid.
New Riders - Debugging ASP.NET made by dotneter@teamfly
If you just need to read the data row by row, then, by all means, use a DataReader
object. Also note that this is a forward, read-only mechanism; if you want to edit
data as you are navigating through the rows, you won’t be able to. The DataReader
is strictly for reading data—hence, the name DataReader.
How Many Times Do You Really Need to Talk to the
Database?
So what is the big deal about calling the database a bazillion times? You don’t see
any impact while developing it. And some of the stress testing seemed to be fine, so
it must be okay to do.
In my experience, the number of trips that you make to the database can have a
significant impact on the performance—not to mention the scalability—of your web
site. It doesn’t matter if it is a very small amount of data that is being retrieved from
the database; if it is in a high-traffic page, it can—and usually will—come back to
bite you later.
Let’s say that you have a web store, and you sell books. On the front page, you want
to rotate books from a preselected group of books on sale. Currently all the
information that you need is contained in a database. So you figure that you will just
query the database every time someone requests the page. But what happens when
you start to receive a lot of hits on your web site? I have seen this happen literally
overnight! The next day traffic doubles and continues to climb day by day. These are
the situations that you thought you saw only in TV commercials. But they are real,
trust me!
If you stop to look at this situation, you might be only rotating 30 different books. So,
after the 30th time to the database, you start doing redundant work. One solution is
to keep on the web server an XML file of the books that are currently on sale. Then
your server only needs to look on its own hard drive to retrieve the data that it needs.
Now just write some custom code behind the web page to do the rotating and
reading the data from the XML file.
If you are worried about new books going on sale and having to update the XML file,
don’t worry. On MS SQL Server, you can use a trigger or schedule a task to check for
new books on sale. If there are new items, the system can export the results to an
XML file, and, presto—your web page automatically picks up the new XML file.
This is just one creative way to accomplish this task, but there are many other ways
to accomplish the same thing. Just bear in mind the following suggestions:
• Keep it simple.

New Riders - Debugging ASP.NET made by dotneter@teamfly
• Persist common data elements in memory or to a local file.
• Keep the number of trips to the database minimal.
• Keep the number of connection to a minimum.
Keep these points in mind when you are developing your web site, and think
through what you are trying to accomplish. As much as you might want to jump in
and start coding, it is always beneficial to have a plan can be called in a few different
ways without using the parameter components. Here we focus on the issues with
the command object and parameter collections, though.We could never understand
why people used the parameter object to add parameters to their query when they
could simply format a text string to do the same thing and use less code to
accomplish the task. So what is the benefit of using parameters? Let’s take a look at
the type of problems you might run into and how to avoid them.
Using Parameters with SqlCommand
When using parameters with SqlCommand, the names of the parameters must match
the names of the parameter placeholders in the stored procedure. The SQL
Server .NET Data Provider treats these as named parameters and searches for the
matching parameter placeholders.
The SQLCommand class does not support the question mark (?) placeholder for
passing parameters to a SQL statement or a stored procedure call. If you
accidentally use the question mark, you will probably get the error shown in Figure
16.5.
Figure 16.5. Error generated by use of a question mark.
New Riders - Debugging ASP.NET made by dotneter@teamfly
In this case, named parameters must be used. Take a look at Listings 16.22 and
16.23 to see how you would properly implement a parameter using the SqlCommand
class.
Listing 16.22 Implementing a Parameter Using the SqlCommand Class
(C#)
SqlConnection conn = new SqlConnection("server=(local);database=north-
wind;Trusted_Connection=yes");
conn.Open();
//Build the Command using a named parameter
SqlCommand myCommand2 = new SqlCommand("SELECT CategoryID, CategoryName
FROM
Categories where CategoryID > @param1", conn);
//Add the parameter and value to the command object
myCommand2.Parameters.Add("@param1",3);
SqlDataReader myReader = myCommand2.ExecuteReader();
Listing 16.23 Implementing a Parameter Using the SqlCommand Class
(Visual Basic .NET)
Dim conn = New
SqlConnection("server=(local);database=northwind;Trusted_Connection=y
es")
conn.Open()
'Build the Command using a named parameter
Dim myCommand2 = New SqlCommand("SELECT CategoryID, CategoryName FROM
Categories where CategoryID > @param1", conn)
'Add the parameter and value to the command object
myCommand2.Parameters.Add("@param1", 3)
Dim myReader = myCommand2.ExecuteReader()
In these listings, you will notice that when we created SqlCommand, we included a
named parameter called @param1. The next line of code added the parameter value
to the command statement by adding it to the parameter collection and specifying
the parameter name and value that should replace it. Just remember that the
OleDBCommand object does not operate the same way. Let’s take a look at the
differences in the next section.
Using Parameters with OleDbCommand
New Riders - Debugging ASP.NET made by dotneter@teamfly
When using parameters with OleDbCommand, the names of the parameters added to
OleDbParameterCollection must match the names of the parameter in the stored
procedure. The OLE DB .NET Data Provider treats these as named parameters and
searches for the matching parameter marker.
The OLE DB .NET Data Provider does not support named parameters for passing
parameters to a SQL statement or a stored procedure called by a command object.
In this case, the question mark (?) placeholder must be used. Take a look at the
following example:
SELECT * FROM Products WHERE ProductID = ? and price = ?
It is important that the order in which parameter objects are added to the
ParametersCollection must directly correspond to the position of the question
marks in the SQL statement. Unlike the SqlCommand object, in which the parameters
have names associated with them, you don’t have that option here.
SQL ADO.NET Objects Versus OleDb ADO.NET
Objects
So what is the big difference? And why are there two different components to
manipulate data?
The biggest difference is not apparent on the outside. It is inside where the
differences are tremendous. If you look at how the two components differ,
SQLClient is native to .NET and MS SQL Server. It communicates to SQL using its
own protocol. This enables it to work more quickly and to avoid having to use the
ODBC layer or OleDB to communicate to legacy database drivers.
When debugging, you need to keep in mind the difference between the two
namespaces. Even though most of the features look and act alike, you might run
into some problems. For instance, the connection strings differ slightly; if you are
working with parameters, you need to make sure that you are formatting the string
correctly.
When connecting to a Microsoft SQL Server database, you might want to increase
your overall performance by using SqlDataAdapter along with its associated
SqlCommand and SqlConnection.
New Riders - Debugging ASP.NET made by dotneter@teamfly
Data Connection Performance Note
If you are concerned about performance, keep in mind the typeof connection you will be using. When you are developing a database component, you might think about keeping it flexibleenough to work on— say, with Oracle and SQL Server. To getthe best performance, you could detect which database you are using and then use the classes that best suit your needs. This would fall under more of a commercial software product feature, but that is one bit of information to think about.
Summary
Let’s take a look at what we have covered so far. First we looked at some of the new
features Microsoft has added and showed where you might stumble in your
transition to .NET. Next we dug into how the system used the SQLException class to
handle errors that are thrown by the system. This is a very powerful tool for
debugging, so get used to using it in your code.
Then the chapter moved into possible problems that you might run into with the
SQLConnection class and showed how to avoid common mistakes. We also covered
some typical error messages and how to fix the errors that they represent.
Remember, those data grid controls are a powerful tool, so take advantage of them
to do as much work for you as possible.
Appendix A. Issues that Arise When Migrating
from ASP to ASP.NET
SO NOW THAT YOU HAVE DECIDED TO start writing all your web-based applications
in ASP.NET, you must be wondering what issues you will encounter while migrating
from ASP to ASP.NET. Unfortunately, this can be a lengthy list, depending on the
situation you are in. If you are porting an existing application to the ASP.NET
framework, a variety of changes will need to be made to your existing VBScript code.

New Riders - Debugging ASP.NET made by dotneter@teamfly
However, of you are starting a project from scratch, you will need to remember only
the language and logic changes that are now in the Visual Basic language.
In the next few sections, we discuss the syntactical changes that have been made to
Visual Basic. We will also take a look at C# and why you might want to use it for your
server-side programming language.
Keep in mind that this is not an exhaustive list of changes between the two versions.
This appendix attempts to look at only features that existed in the previous version
that have been migrated to the new version. Features in .NET that were not in a
previous version will not be discussed here.
Moving from ASP to ASP.NET
Although ASP.NET is based on the ASP technology, a lot of the fundamentals have
changed. Here we explore some of the basic changes that you will encounter when
migrating from ASP to ASP.NET.
<%%> Versus <script>
In ASP, all server-side code is written between <% and %> tags. This tells the ASP
interpreter that everything between the two tags is program code and should be
executed on the server.
In ASP.NET, the rules have changed a bit. Now, all variable and function
declarations are placed between <script> and </script> tags, while
implementation logic is contained in between the <% and %> tags. Listing A.1
shows an example ASP page, and Listing A.2 and Listing A.3 show the same page
written in ASP.NET, using Visual Basic .NET and C#, respectively.
Listing A.1 ASP Page (C#)
<%
Sub MyFunction(psString)
If psString <> "" then
Response.Write psString
End If
End Sub
MyFunction Request.Form("txtText")
%>
<html>
New Riders - Debugging ASP.NET made by dotneter@teamfly
<body>
<form action="test.asp" method="POST">
<input type="text" name="txtText">
<input type="submit">
</form>
</body>
</html>
Listing A.2 ASP.NET Page (Visual Basic .NET)
<%@ Page Language="vb"%>
<script language="vb" runat="server">
Sub MyFunction(psString as String)
If psString <> "" then
Response.Write(psString)
End If
End Sub
</script>
<%
MyFunction(Request.Form.Get("txtText"))
%>
<html>
<body>
<form action="test.aspx" method="POST">
<input type="text" name="txtText">
<input type="submit">
</form>
</body>
</html>
Listing A.3 ASP.NET Page (C#)
<%@ Page Language="c#"%>
<script language="c#" runat="server">
void MyFunction(String psString)
{
if(psString != "")
Response.Write(psString);
}
</script>
<%
MyFunction(Request.Form.Get("txtText"));
%>
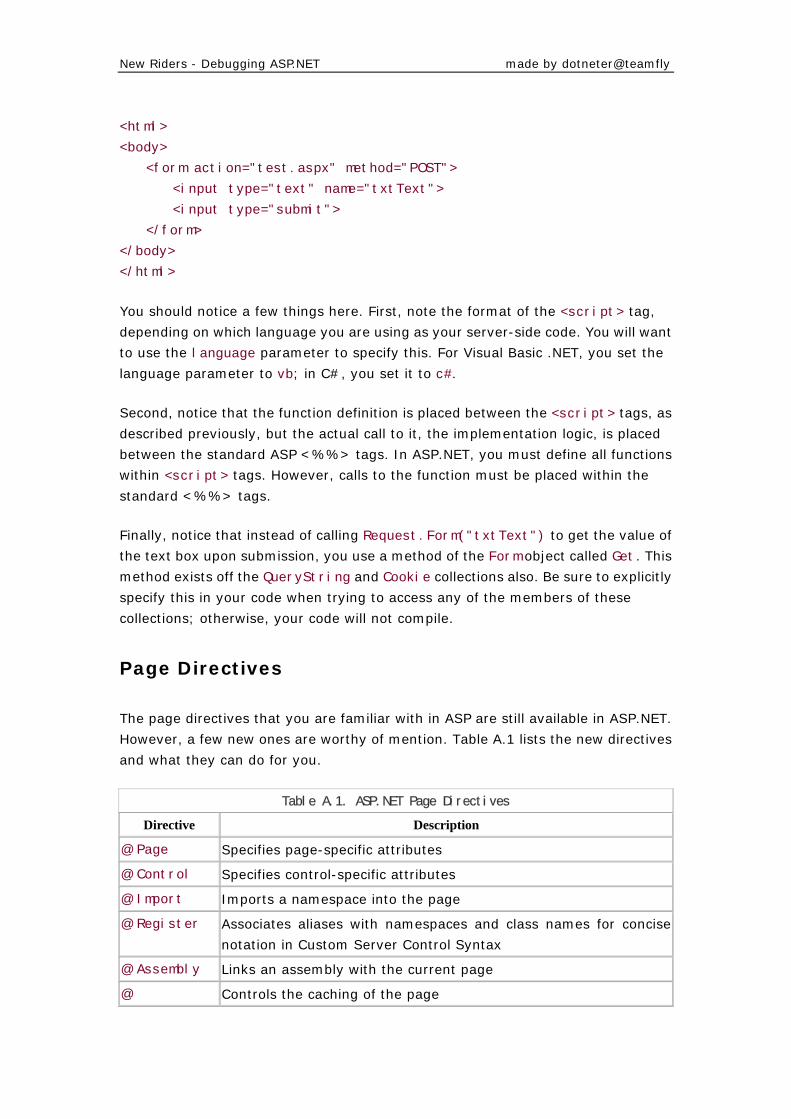
New Riders - Debugging ASP.NET made by dotneter@teamfly
<html>
<body>
<form action="test.aspx" method="POST">
<input type="text" name="txtText">
<input type="submit">
</form>
</body>
</html>
You should notice a few things here. First, note the format of the <script> tag,
depending on which language you are using as your server-side code. You will want
to use the language parameter to specify this. For Visual Basic .NET, you set the
language parameter to vb; in C#, you set it to c#.
Second, notice that the function definition is placed between the <script> tags, as
described previously, but the actual call to it, the implementation logic, is placed
between the standard ASP <%%> tags. In ASP.NET, you must define all functions
within <script> tags. However, calls to the function must be placed within the
standard <%%> tags.
Finally, notice that instead of calling Request.Form("txtText") to get the value of
the text box upon submission, you use a method of the Form object called Get. This
method exists off the QueryString and Cookie collections also. Be sure to explicitly
specify this in your code when trying to access any of the members of these
collections; otherwise, your code will not compile.
Page Directives
The page directives that you are familiar with in ASP are still available in ASP.NET.
However, a few new ones are worthy of mention. Table A.1 lists the new directives
and what they can do for you.
Table A.1. ASP.NET Page Directives
Directive Description
@ Page Specifies page-specific attributes
@ Control Specifies control-specific attributes
@ Import Imports a namespace into the page
@ Register Associates aliases with namespaces and class names for concise
notation in Custom Server Control Syntax
@ Assembly Links an assembly with the current page
@ Controls the caching of the page
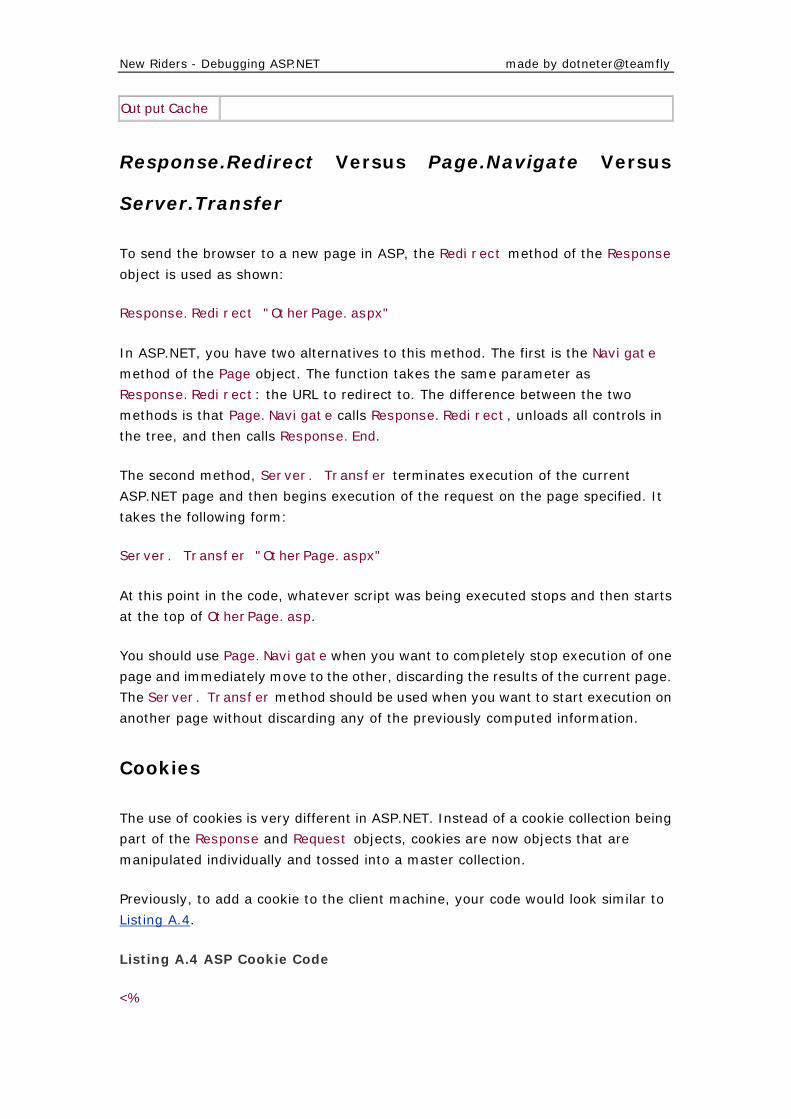
New Riders - Debugging ASP.NET made by dotneter@teamfly
OutputCache
Response.Redirect Versus Page.Navigate Versus
Server.Transfer
To send the browser to a new page in ASP, the Redirect method of the Response
object is used as shown:
Response.Redirect "OtherPage.aspx"
In ASP.NET, you have two alternatives to this method. The first is the Navigate
method of the Page object. The function takes the same parameter as
Response.Redirect: the URL to redirect to. The difference between the two
methods is that Page.Navigate calls Response.Redirect, unloads all controls in
the tree, and then calls Response.End.
The second method, Server. Transfer terminates execution of the current
ASP.NET page and then begins execution of the request on the page specified. It
takes the following form:
Server. Transfer "OtherPage.aspx"
At this point in the code, whatever script was being executed stops and then starts
at the top of OtherPage.asp.
You should use Page.Navigate when you want to completely stop execution of one
page and immediately move to the other, discarding the results of the current page.
The Server. Transfer method should be used when you want to start execution on
another page without discarding any of the previously computed information.
Cookies
The use of cookies is very different in ASP.NET. Instead of a cookie collection being
part of the Response and Request objects, cookies are now objects that are
manipulated individually and tossed into a master collection.
Previously, to add a cookie to the client machine, your code would look similar to
Listing A.4.
Listing A.4 ASP Cookie Code
<%
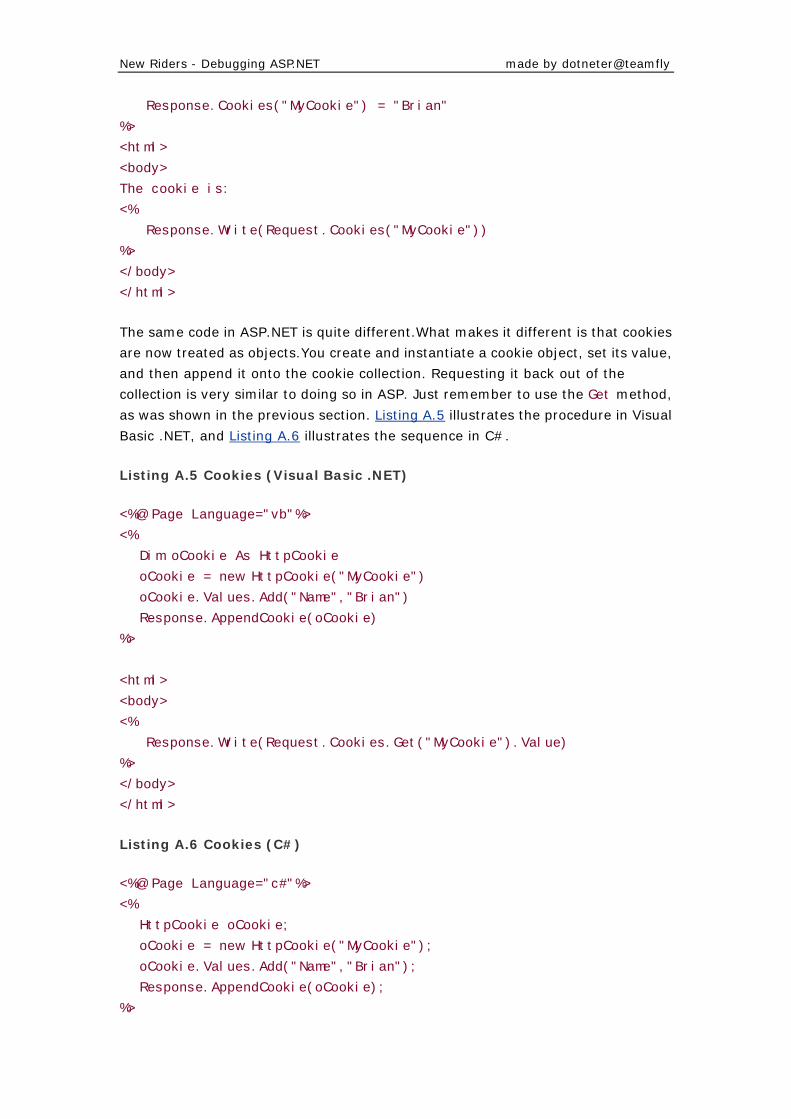
New Riders - Debugging ASP.NET made by dotneter@teamfly
Response.Cookies("MyCookie") = "Brian"
%>
<html>
<body>
The cookie is:
<%
Response.Write(Request.Cookies("MyCookie"))
%>
</body>
</html>
The same code in ASP.NET is quite different.What makes it different is that cookies
are now treated as objects.You create and instantiate a cookie object, set its value,
and then append it onto the cookie collection. Requesting it back out of the
collection is very similar to doing so in ASP. Just remember to use the Get method,
as was shown in the previous section. Listing A.5 illustrates the procedure in Visual
Basic .NET, and Listing A.6 illustrates the sequence in C#.
Listing A.5 Cookies (Visual Basic .NET)
<%@ Page Language="vb"%>
<%
Dim oCookie As HttpCookie
oCookie = new HttpCookie("MyCookie")
oCookie.Values.Add("Name","Brian")
Response.AppendCookie(oCookie)
%>
<html>
<body>
<%
Response.Write(Request.Cookies.Get("MyCookie").Value)
%>
</body>
</html>
Listing A.6 Cookies (C#)
<%@ Page Language="c#"%>
<%
HttpCookie oCookie;
oCookie = new HttpCookie("MyCookie");
oCookie.Values.Add("Name","Brian");
Response.AppendCookie(oCookie);
%>
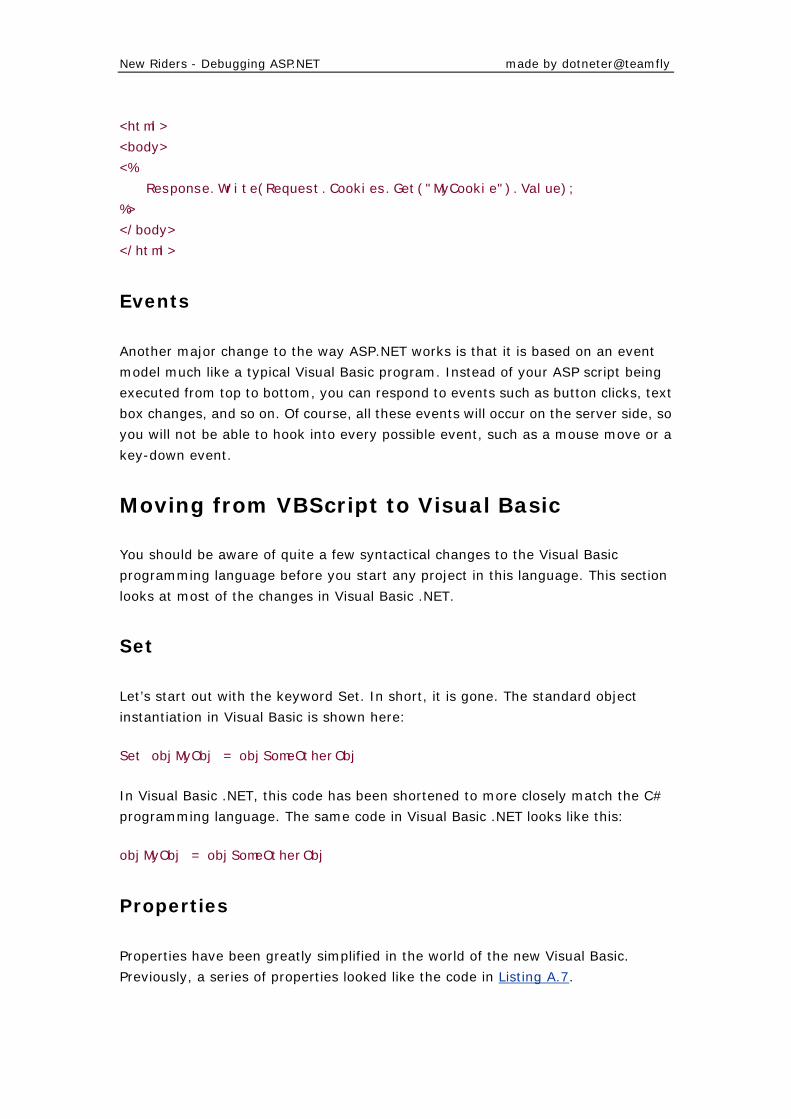
New Riders - Debugging ASP.NET made by dotneter@teamfly
<html>
<body>
<%
Response.Write(Request.Cookies.Get("MyCookie").Value);
%>
</body>
</html>
Events
Another major change to the way ASP.NET works is that it is based on an event
model much like a typical Visual Basic program. Instead of your ASP script being
executed from top to bottom, you can respond to events such as button clicks, text
box changes, and so on. Of course, all these events will occur on the server side, so
you will not be able to hook into every possible event, such as a mouse move or a
key-down event.
Moving from VBScript to Visual Basic
You should be aware of quite a few syntactical changes to the Visual Basic
programming language before you start any project in this language. This section
looks at most of the changes in Visual Basic .NET.
Set
Let’s start out with the keyword Set. In short, it is gone. The standard object
instantiation in Visual Basic is shown here:
Set objMyObj = objSomeOtherObj
In Visual Basic .NET, this code has been shortened to more closely match the C#
programming language. The same code in Visual Basic .NET looks like this:
objMyObj = objSomeOtherObj
Properties
Properties have been greatly simplified in the world of the new Visual Basic.
Previously, a series of properties looked like the code in Listing A.7.
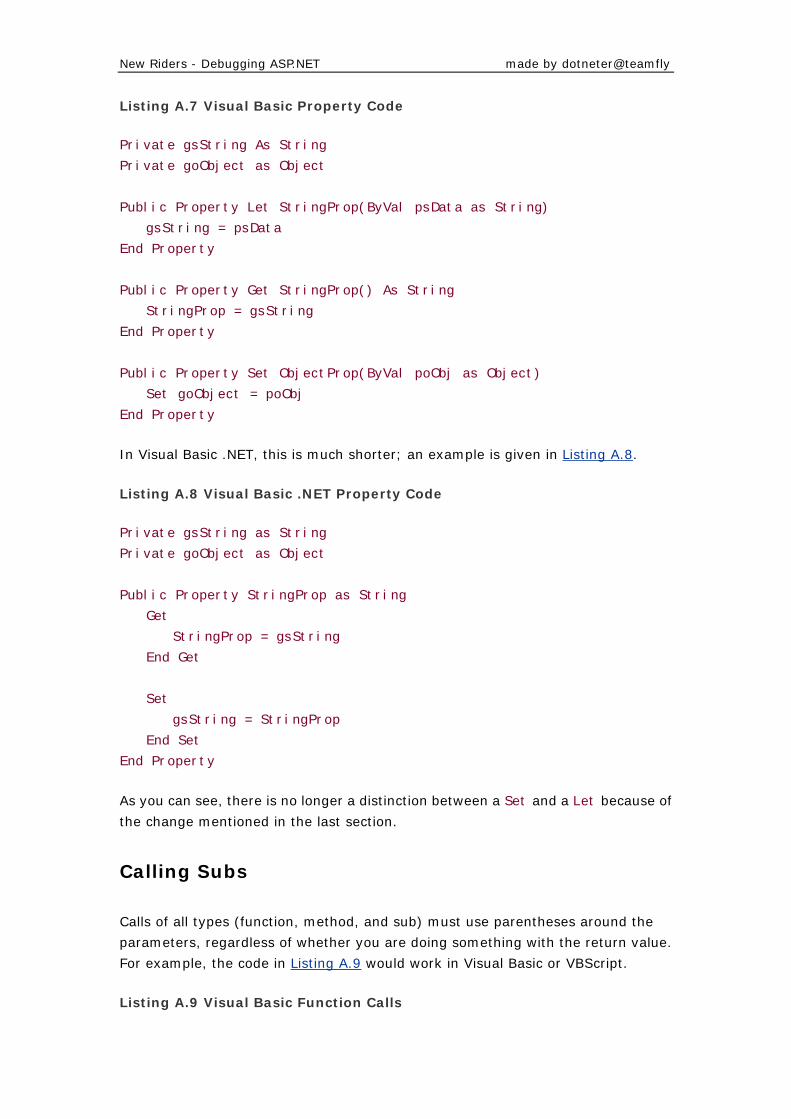
New Riders - Debugging ASP.NET made by dotneter@teamfly
Listing A.7 Visual Basic Property Code
Private gsString As String
Private goObject as Object
Public Property Let StringProp(ByVal psData as String)
gsString = psData
End Property
Public Property Get StringProp() As String
StringProp = gsString
End Property
Public Property Set ObjectProp(ByVal poObj as Object)
Set goObject = poObj
End Property
In Visual Basic .NET, this is much shorter; an example is given in Listing A.8.
Listing A.8 Visual Basic .NET Property Code
Private gsString as String
Private goObject as Object
Public Property StringProp as String
Get
StringProp = gsString
End Get
Set
gsString = StringProp
End Set
End Property
As you can see, there is no longer a distinction between a Set and a Let because of
the change mentioned in the last section.
Calling Subs
Calls of all types (function, method, and sub) must use parentheses around the
parameters, regardless of whether you are doing something with the return value.
For example, the code in Listing A.9 would work in Visual Basic or VBScript.
Listing A.9 Visual Basic Function Calls
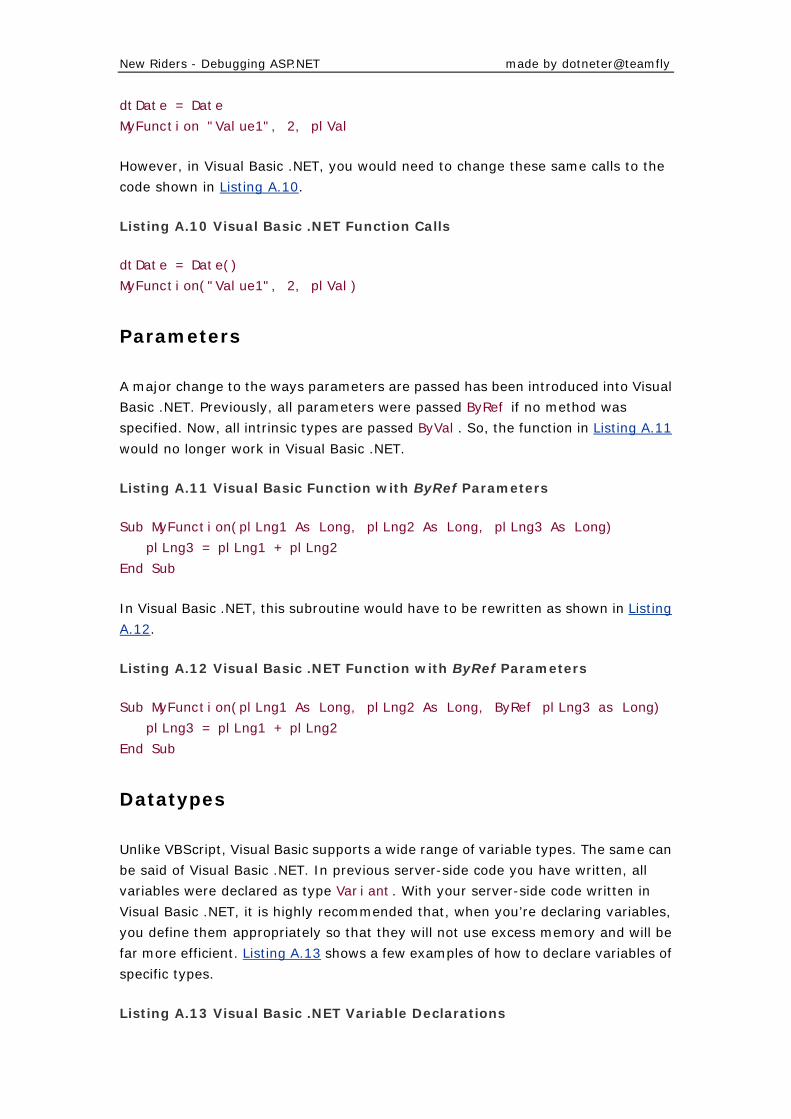
New Riders - Debugging ASP.NET made by dotneter@teamfly
dtDate = Date
MyFunction "Value1", 2, plVal
However, in Visual Basic .NET, you would need to change these same calls to the
code shown in Listing A.10.
Listing A.10 Visual Basic .NET Function Calls
dtDate = Date()
MyFunction("Value1", 2, plVal)
Parameters
A major change to the ways parameters are passed has been introduced into Visual
Basic .NET. Previously, all parameters were passed ByRef if no method was
specified. Now, all intrinsic types are passed ByVal. So, the function in Listing A.11
would no longer work in Visual Basic .NET.
Listing A.11 Visual Basic Function with ByRef Parameters
Sub MyFunction(plLng1 As Long, plLng2 As Long, plLng3 As Long)
plLng3 = plLng1 + plLng2
End Sub
In Visual Basic .NET, this subroutine would have to be rewritten as shown in Listing
A.12.
Listing A.12 Visual Basic .NET Function with ByRef Parameters
Sub MyFunction(plLng1 As Long, plLng2 As Long, ByRef plLng3 as Long)
plLng3 = plLng1 + plLng2
End Sub
Datatypes
Unlike VBScript, Visual Basic supports a wide range of variable types. The same can
be said of Visual Basic .NET. In previous server-side code you have written, all
variables were declared as type Variant. With your server-side code written in
Visual Basic .NET, it is highly recommended that, when you’re declaring variables,
you define them appropriately so that they will not use excess memory and will be
far more efficient. Listing A.13 shows a few examples of how to declare variables of
specific types.
Listing A.13 Visual Basic .NET Variable Declarations
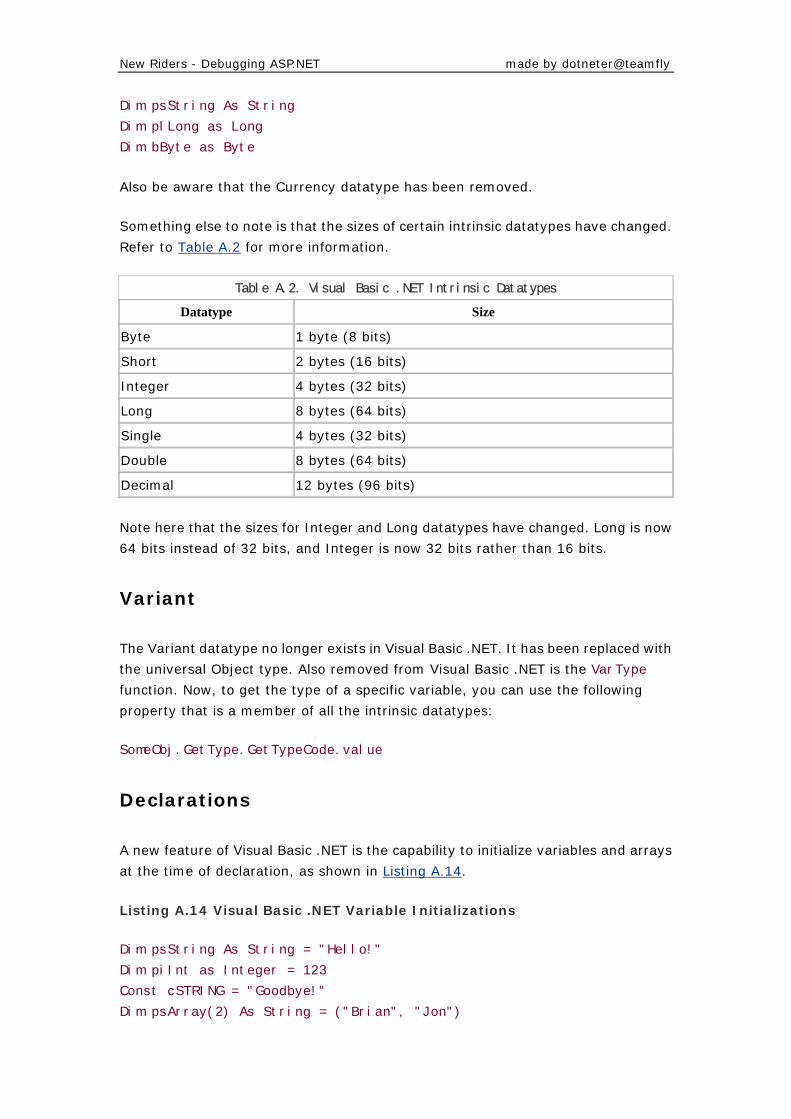
New Riders - Debugging ASP.NET made by dotneter@teamfly
Dim psString As String
Dim plLong as Long
Dim bByte as Byte
Also be aware that the Currency datatype has been removed.
Something else to note is that the sizes of certain intrinsic datatypes have changed.
Refer to Table A.2 for more information.
Table A.2. Visual Basic .NET Intrinsic Datatypes
Datatype Size
Byte 1 byte (8 bits)
Short 2 bytes (16 bits)
Integer 4 bytes (32 bits)
Long 8 bytes (64 bits)
Single 4 bytes (32 bits)
Double 8 bytes (64 bits)
Decimal 12 bytes (96 bits)
Note here that the sizes for Integer and Long datatypes have changed. Long is now
64 bits instead of 32 bits, and Integer is now 32 bits rather than 16 bits.
Variant
The Variant datatype no longer exists in Visual Basic .NET. It has been replaced with
the universal Object type. Also removed from Visual Basic .NET is the VarType
function. Now, to get the type of a specific variable, you can use the following
property that is a member of all the intrinsic datatypes:
SomeObj.GetType.GetTypeCode.value
Declarations
A new feature of Visual Basic .NET is the capability to initialize variables and arrays
at the time of declaration, as shown in Listing A.14.
Listing A.14 Visual Basic .NET Variable Initializations
Dim psString As String = "Hello!"
Dim piInt as Integer = 123
Const cSTRING = "Goodbye!"
Dim psArray(2) As String = ("Brian", "Jon")
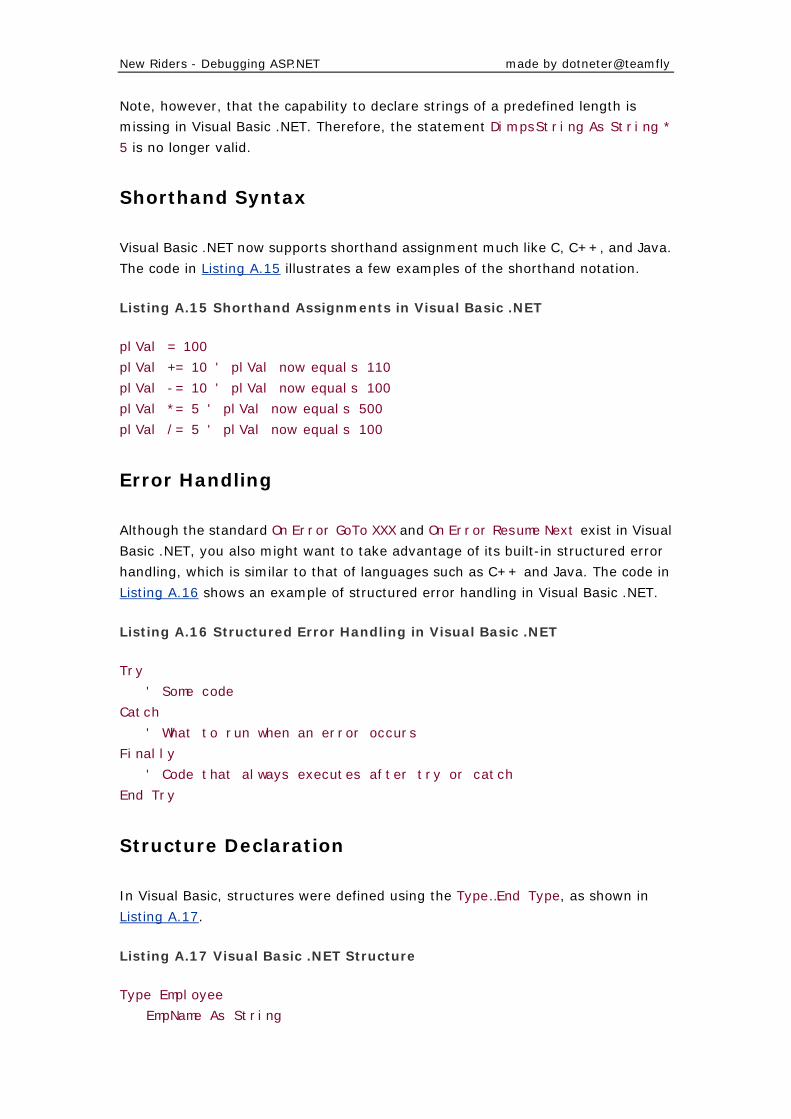
New Riders - Debugging ASP.NET made by dotneter@teamfly
Note, however, that the capability to declare strings of a predefined length is
missing in Visual Basic .NET. Therefore, the statement Dim psString As String *
5 is no longer valid.
Shorthand Syntax
Visual Basic .NET now supports shorthand assignment much like C, C++, and Java.
The code in Listing A.15 illustrates a few examples of the shorthand notation.
Listing A.15 Shorthand Assignments in Visual Basic .NET
plVal = 100
plVal += 10 ' plVal now equals 110
plVal -= 10 ' plVal now equals 100
plVal *= 5 ' plVal now equals 500
plVal /= 5 ' plVal now equals 100
Error Handling
Although the standard On Error GoTo XXX and On Error Resume Next exist in Visual
Basic .NET, you also might want to take advantage of its built-in structured error
handling, which is similar to that of languages such as C++ and Java. The code in
Listing A.16 shows an example of structured error handling in Visual Basic .NET.
Listing A.16 Structured Error Handling in Visual Basic .NET
Try
' Some code
Catch
' What to run when an error occurs
Finally
' Code that always executes after try or catch
End Try
Structure Declaration
In Visual Basic, structures were defined using the Type…End Type, as shown in
Listing A.17.
Listing A.17 Visual Basic .NET Structure
Type Employee
EmpName As String
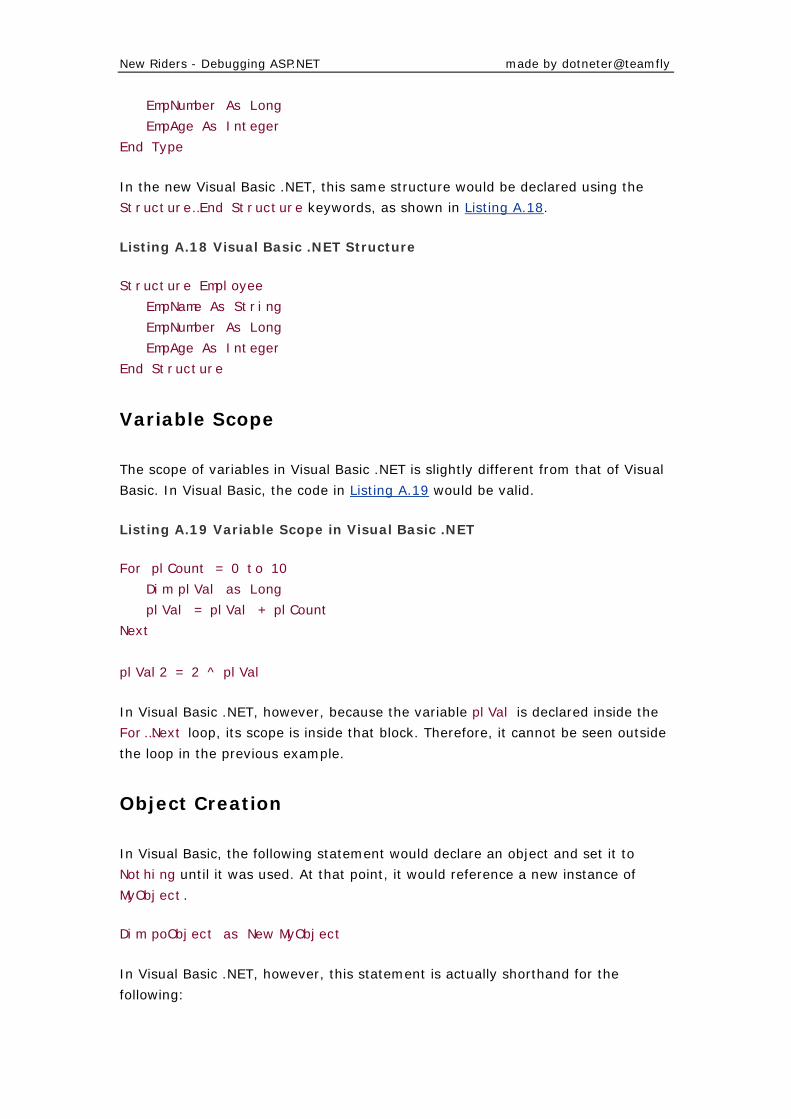
New Riders - Debugging ASP.NET made by dotneter@teamfly
EmpNumber As Long
EmpAge As Integer
End Type
In the new Visual Basic .NET, this same structure would be declared using the
Structure…End Structure keywords, as shown in Listing A.18.
Listing A.18 Visual Basic .NET Structure
Structure Employee
EmpName As String
EmpNumber As Long
EmpAge As Integer
End Structure
Variable Scope
The scope of variables in Visual Basic .NET is slightly different from that of Visual
Basic. In Visual Basic, the code in Listing A.19 would be valid.
Listing A.19 Variable Scope in Visual Basic .NET
For plCount = 0 to 10
Dim plVal as Long
plVal = plVal + plCount
Next
plVal2 = 2 ^ plVal
In Visual Basic .NET, however, because the variable plVal is declared inside the
For…Next loop, its scope is inside that block. Therefore, it cannot be seen outside
the loop in the previous example.
Object Creation
In Visual Basic, the following statement would declare an object and set it to
Nothing until it was used. At that point, it would reference a new instance of
MyObject.
Dim poObject as New MyObject
In Visual Basic .NET, however, this statement is actually shorthand for the
following:
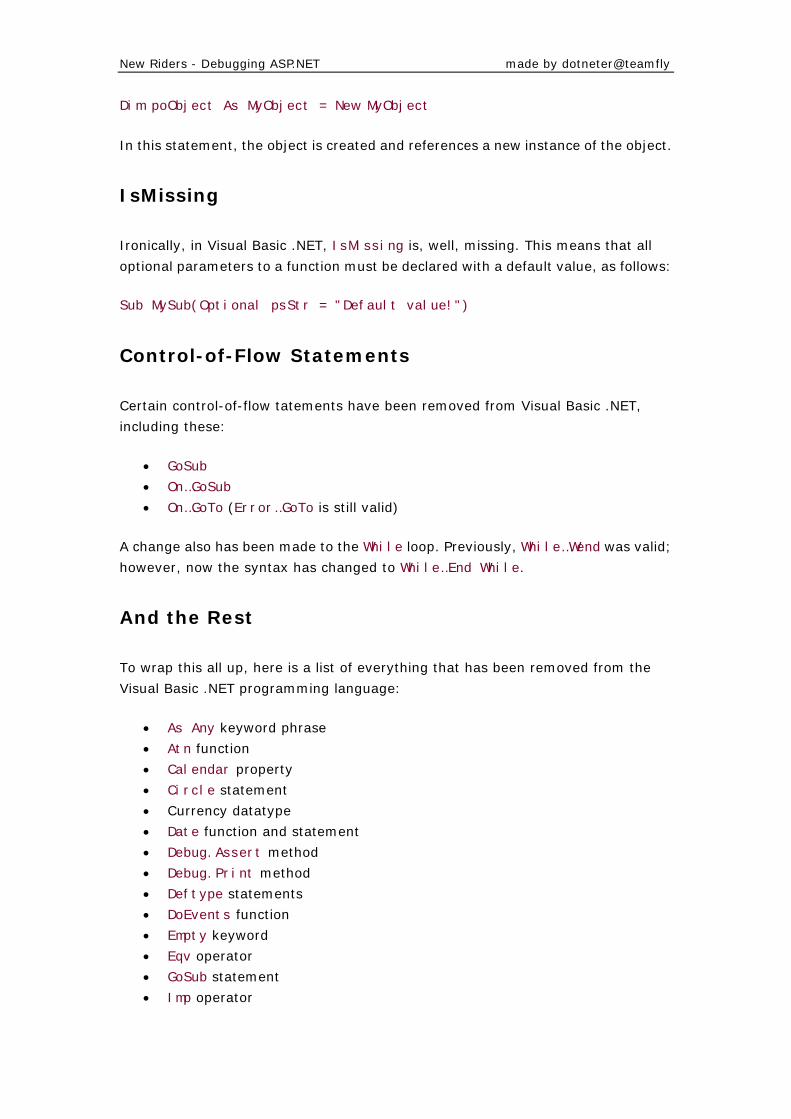
New Riders - Debugging ASP.NET made by dotneter@teamfly
Dim poObject As MyObject = New MyObject
In this statement, the object is created and references a new instance of the object.
IsMissing
Ironically, in Visual Basic .NET, IsMissing is, well, missing. This means that all
optional parameters to a function must be declared with a default value, as follows:
Sub MySub(Optional psStr = "Default value!")
Control-of-Flow Statements
Certain control-of-flow tatements have been removed from Visual Basic .NET,
including these:
• GoSub
• On…GoSub
• On…GoTo (Error…GoTo is still valid)
A change also has been made to the While loop. Previously, While…Wend was valid;
however, now the syntax has changed to While…End While.
And the Rest
To wrap this all up, here is a list of everything that has been removed from the
Visual Basic .NET programming language:
• As Any keyword phrase
• Atn function
• Calendar property
• Circle statement
• Currency datatype
• Date function and statement
• Debug.Assert method
• Debug.Print method
• Deftype statements
• DoEvents function
• Empty keyword
• Eqv operator
• GoSub statement
• Imp operator
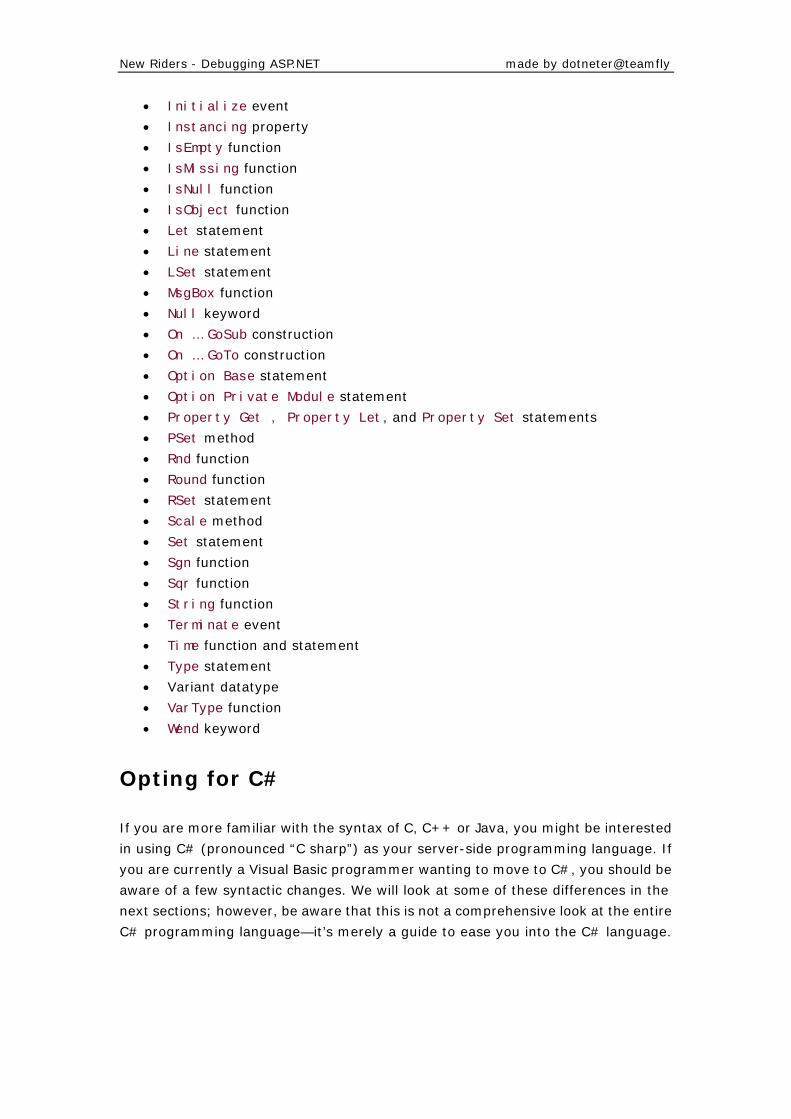
New Riders - Debugging ASP.NET made by dotneter@teamfly
• Initialize event
• Instancing property
• IsEmpty function
• IsMissing function
• IsNull function
• IsObject function
• Let statement
• Line statement
• LSet statement
• MsgBox function
• Null keyword
• On … GoSub construction
• On … GoTo construction
• Option Base statement
• Option Private Module statement
• Property Get , Property Let, and Property Set statements
• PSet method
• Rnd function
• Round function
• RSet statement
• Scale method
• Set statement
• Sgn function
• Sqr function
• String function
• Terminate event
• Time function and statement
• Type statement
• Variant datatype
• VarType function
• Wend keyword
Opting for C#
If you are more familiar with the syntax of C, C++ or Java, you might be interested
in using C# (pronounced “C sharp”) as your server-side programming language. If
you are currently a Visual Basic programmer wanting to move to C#, you should be
aware of a few syntactic changes. We will look at some of these differences in the
next sections; however, be aware that this is not a comprehensive look at the entire
C# programming language—it’s merely a guide to ease you into the C# language.
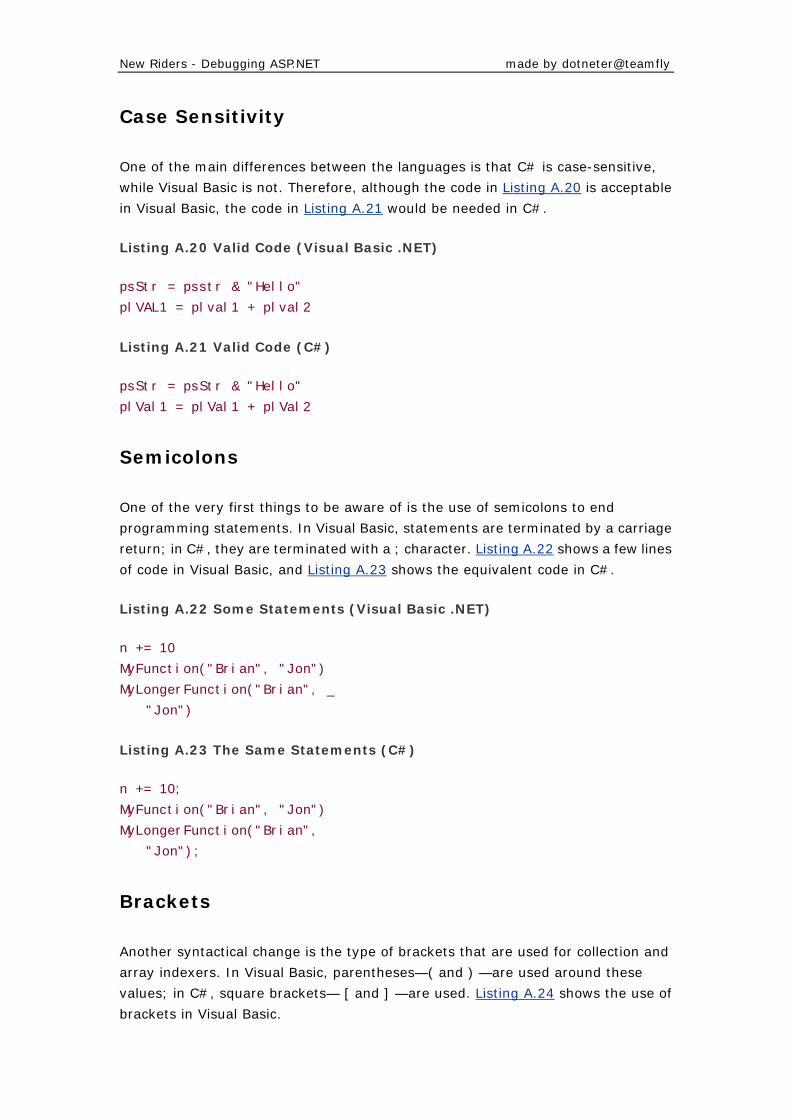
New Riders - Debugging ASP.NET made by dotneter@teamfly
Case Sensitivity
One of the main differences between the languages is that C# is case-sensitive,
while Visual Basic is not. Therefore, although the code in Listing A.20 is acceptable
in Visual Basic, the code in Listing A.21 would be needed in C#.
Listing A.20 Valid Code (Visual Basic .NET)
psStr = psstr & "Hello"
plVAL1 = plval1 + plval2
Listing A.21 Valid Code (C#)
psStr = psStr & "Hello"
plVal1 = plVal1 + plVal2
Semicolons
One of the very first things to be aware of is the use of semicolons to end
programming statements. In Visual Basic, statements are terminated by a carriage
return; in C#, they are terminated with a ; character. Listing A.22 shows a few lines
of code in Visual Basic, and Listing A.23 shows the equivalent code in C#.
Listing A.22 Some Statements (Visual Basic .NET)
n += 10
MyFunction("Brian", "Jon")
MyLongerFunction("Brian", _
"Jon")
Listing A.23 The Same Statements (C#)
n += 10;
MyFunction("Brian", "Jon")
MyLongerFunction("Brian",
"Jon");
Brackets
Another syntactical change is the type of brackets that are used for collection and
array indexers. In Visual Basic, parentheses—( and ) —are used around these
values; in C#, square brackets— [ and ] —are used. Listing A.24 shows the use of
brackets in Visual Basic.
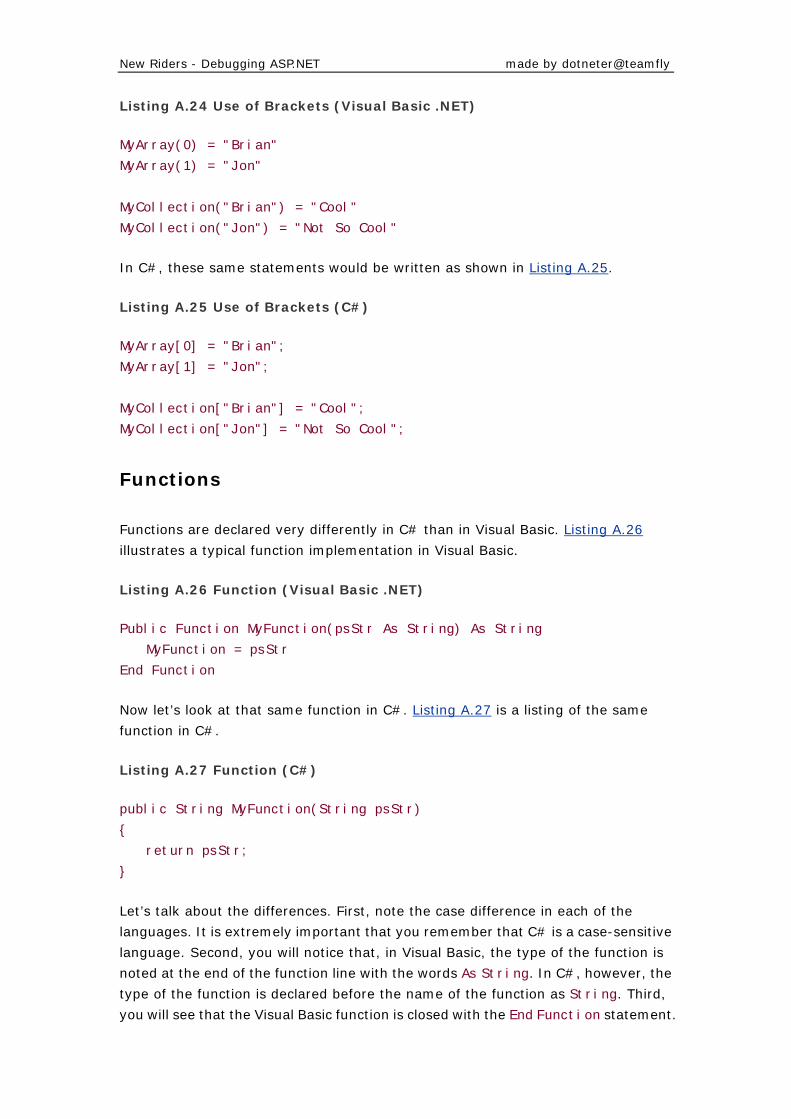
New Riders - Debugging ASP.NET made by dotneter@teamfly
Listing A.24 Use of Brackets (Visual Basic .NET)
MyArray(0) = "Brian"
MyArray(1) = "Jon"
MyCollection("Brian") = "Cool"
MyCollection("Jon") = "Not So Cool"
In C#, these same statements would be written as shown in Listing A.25.
Listing A.25 Use of Brackets (C#)
MyArray[0] = "Brian";
MyArray[1] = "Jon";
MyCollection["Brian"] = "Cool";
MyCollection["Jon"] = "Not So Cool";
Functions
Functions are declared very differently in C# than in Visual Basic. Listing A.26
illustrates a typical function implementation in Visual Basic.
Listing A.26 Function (Visual Basic .NET)
Public Function MyFunction(psStr As String) As String
MyFunction = psStr
End Function
Now let’s look at that same function in C#. Listing A.27 is a listing of the same
function in C#.
Listing A.27 Function (C#)
public String MyFunction(String psStr)
{
return psStr;
}
Let’s talk about the differences. First, note the case difference in each of the
languages. It is extremely important that you remember that C# is a case-sensitive
language. Second, you will notice that, in Visual Basic, the type of the function is
noted at the end of the function line with the words As String. In C#, however, the
type of the function is declared before the name of the function as String. Third,
you will see that the Visual Basic function is closed with the End Function statement.
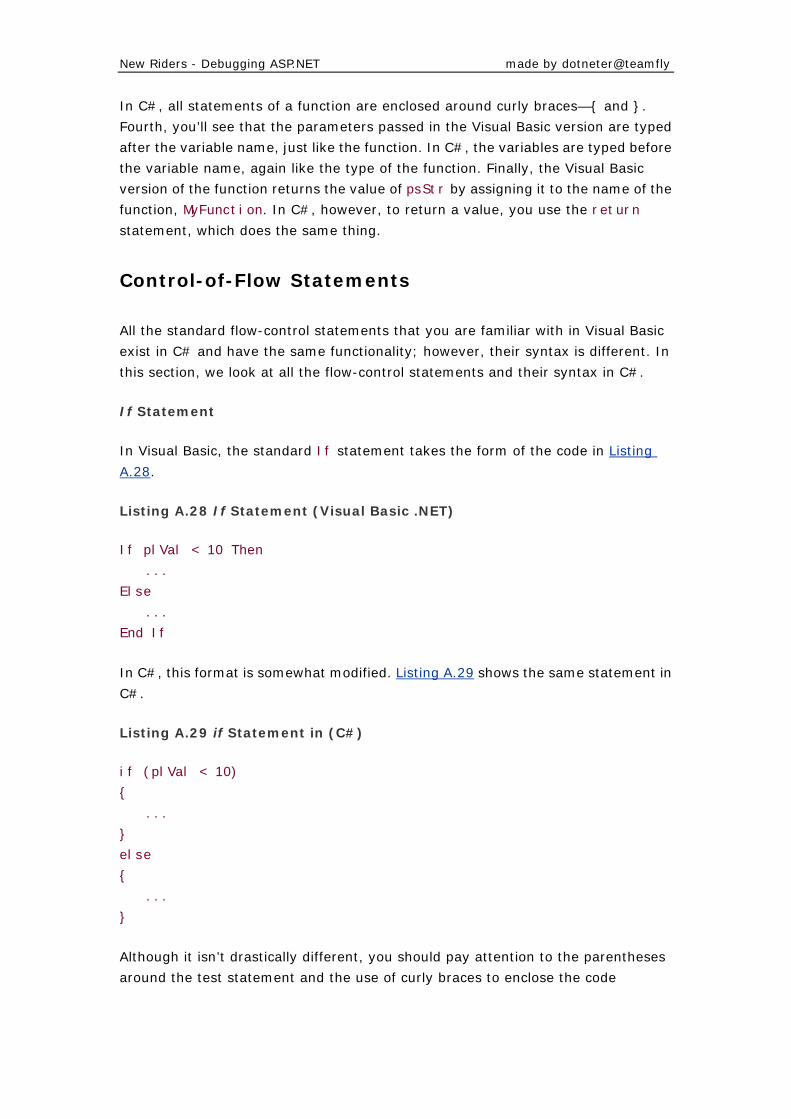
New Riders - Debugging ASP.NET made by dotneter@teamfly
In C#, all statements of a function are enclosed around curly braces—{ and }.
Fourth, you’ll see that the parameters passed in the Visual Basic version are typed
after the variable name, just like the function. In C#, the variables are typed before
the variable name, again like the type of the function. Finally, the Visual Basic
version of the function returns the value of psStr by assigning it to the name of the
function, MyFunction. In C#, however, to return a value, you use the return
statement, which does the same thing.
Control-of-Flow Statements
All the standard flow-control statements that you are familiar with in Visual Basic
exist in C# and have the same functionality; however, their syntax is different. In
this section, we look at all the flow-control statements and their syntax in C#.
If Statement
In Visual Basic, the standard If statement takes the form of the code in Listing
A.28.
Listing A.28 If Statement (Visual Basic .NET)
If plVal < 10 Then
...
Else
...
End If
In C#, this format is somewhat modified. Listing A.29 shows the same statement in
C#.
Listing A.29 if Statement in (C#)
if (plVal < 10)
{
...
}
else
{
...
}
Although it isn’t drastically different, you should pay attention to the parentheses
around the test statement and the use of curly braces to enclose the code
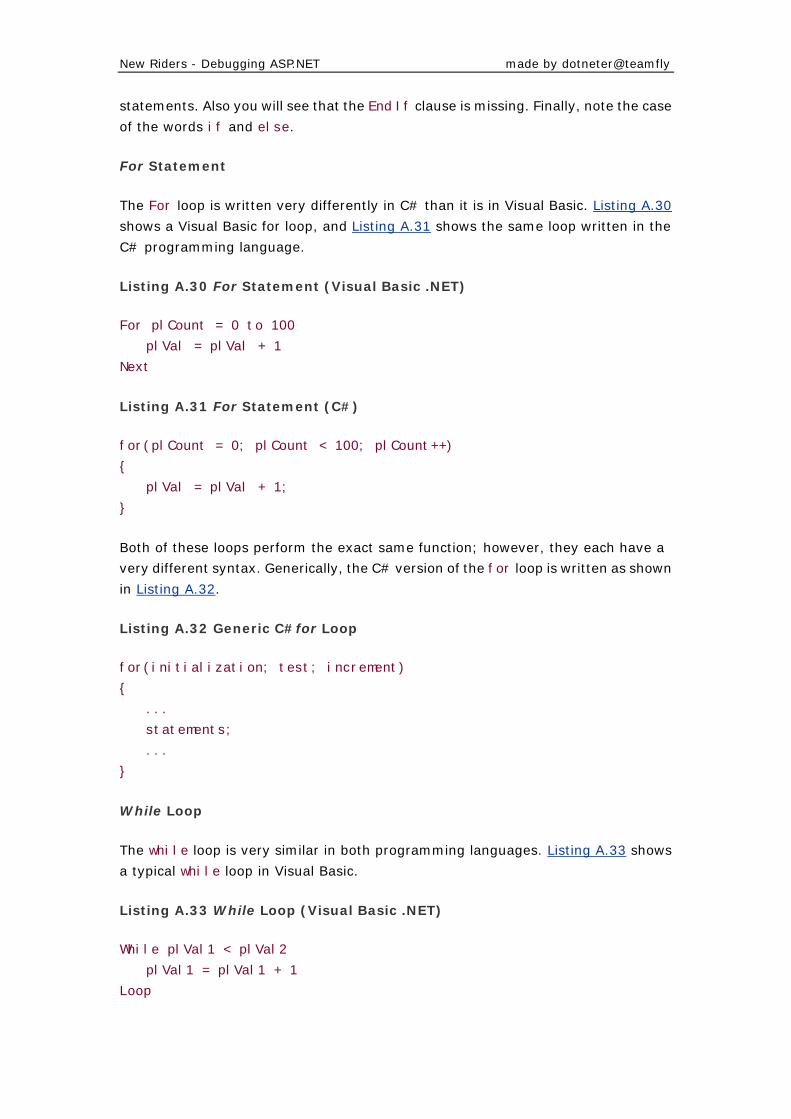
New Riders - Debugging ASP.NET made by dotneter@teamfly
statements. Also you will see that the End If clause is missing. Finally, note the case
of the words if and else.
For Statement
The For loop is written very differently in C# than it is in Visual Basic. Listing A.30
shows a Visual Basic for loop, and Listing A.31 shows the same loop written in the
C# programming language.
Listing A.30 For Statement (Visual Basic .NET)
For plCount = 0 to 100
plVal = plVal + 1
Next
Listing A.31 For Statement (C#)
for(plCount = 0; plCount < 100; plCount++)
{
plVal = plVal + 1;
}
Both of these loops perform the exact same function; however, they each have a
very different syntax. Generically, the C# version of the for loop is written as shown
in Listing A.32.
Listing A.32 Generic C#for Loop
for(initialization; test; increment)
{
...
statements;
...
}
While Loop
The while loop is very similar in both programming languages. Listing A.33 shows
a typical while loop in Visual Basic.
Listing A.33 While Loop (Visual Basic .NET)
While plVal1 < plVal2
plVal1 = plVal1 + 1
Loop
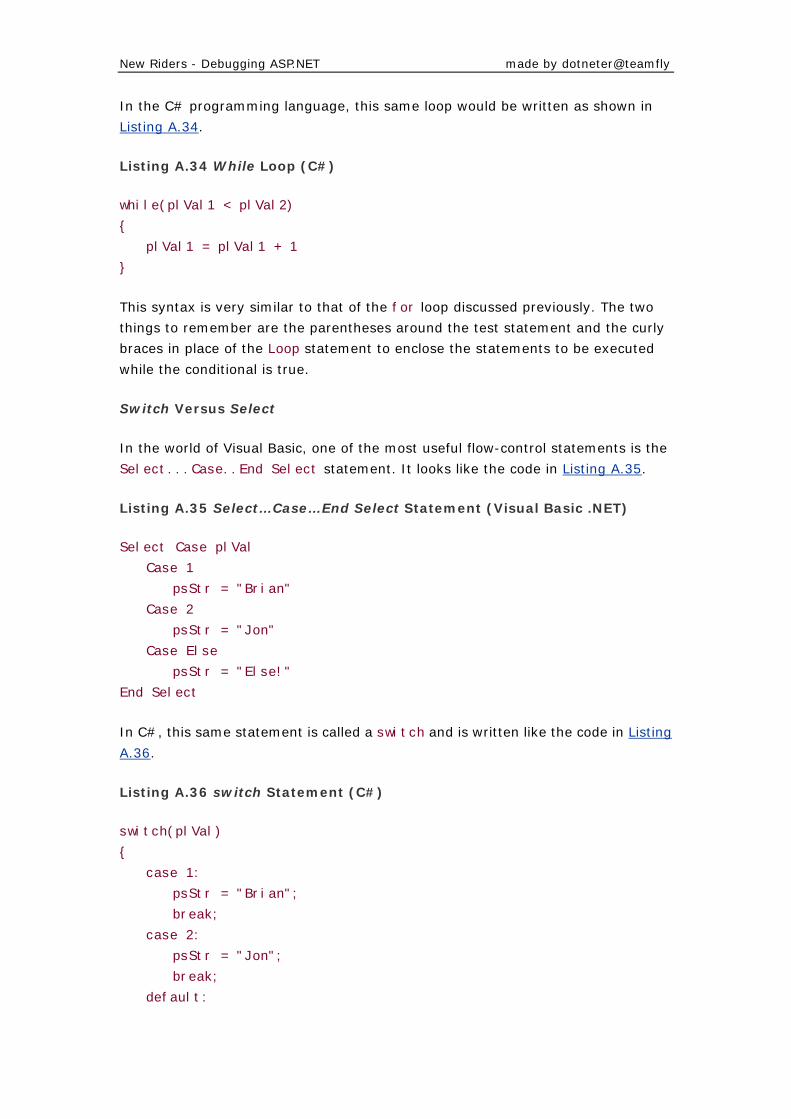
New Riders - Debugging ASP.NET made by dotneter@teamfly
In the C# programming language, this same loop would be written as shown in
Listing A.34.
Listing A.34 While Loop (C#)
while(plVal1 < plVal2)
{
plVal1 = plVal1 + 1
}
This syntax is very similar to that of the for loop discussed previously. The two
things to remember are the parentheses around the test statement and the curly
braces in place of the Loop statement to enclose the statements to be executed
while the conditional is true.
Switch Versus Select
In the world of Visual Basic, one of the most useful flow-control statements is the
Select...Case..End Select statement. It looks like the code in Listing A.35.
Listing A.35 Select…Case…End Select Statement (Visual Basic .NET)
Select Case plVal
Case 1
psStr = "Brian"
Case 2
psStr = "Jon"
Case Else
psStr = "Else!"
End Select
In C#, this same statement is called a switch and is written like the code in Listing
A.36.
Listing A.36 switch Statement (C#)
switch(plVal)
{
case 1:
psStr = "Brian";
break;
case 2:
psStr = "Jon";
break;
default:
New Riders - Debugging ASP.NET made by dotneter@teamfly
psStr = "Default!";
break;
}
Summary
This appendix looked at the ways in which the Visual Basic programming language
has changed from the language that you know and love, for better or worse. It also
discussed some of the very basic syntactical changes that exist between the Visual
Basic and C# programming languages. With this information, you will be prepared
to convert any existing Visual Basic code to Visual Basic .NET—or even potentially
into the C# programming language. You will also be ready to start writing Visual
Basic .NET or C# code from scratch without having to battle with the new syntax
changes inherent in both languages. This will certainly help you when you’re trying
to figure out why your new programs aren’t compiling properly.

![Licensing MotorcycleRiders’ Handbookironbrothersmc.com/motors/[Riders' book]/Riders' handbook.pdf · MotorcycleRiders’ Handbook. Motorcycle Riders’ Handbook Learner Approved](https://img.pdfslide.us/doc/110x75/5a7801147f8b9ad22a8e985c/licensing-motorcycleriders-ha-riders-bookriders-handbookpdf-motorcycleriders.jpg)


![Debugging with gdb · Debugging Data Race Conditions: Section 12.2 [Data Race Detection], page 171. Debugging OpenMP*: Section 12.4 [OpenMP* Debugging], page 177. Extended recording](https://img.pdfslide.us/doc/110x75/5f0b5c707e708231d4302334/debugging-with-gdb-debugging-data-race-conditions-section-122-data-race-detection.jpg)